Icon

Process New Client Inquiries

Learn how to manage new client inquiries, claim leads in the shared inbox, log them in Intelliflo Office, and track opportunities.

By Elliot

This guide walks you through processing new client inquiries from the shared inbox to logging them in Intelliflo Office (IO). The goal is to ensure all incoming leads are claimed, categorized, and accurately tracked as opportunities until closure.

This process applies to administrative staff and advisors handling inbound inquiries. It should be used immediately when a new lead enters the shared 'Enquiries At' inbox.

Claim the Inquiry

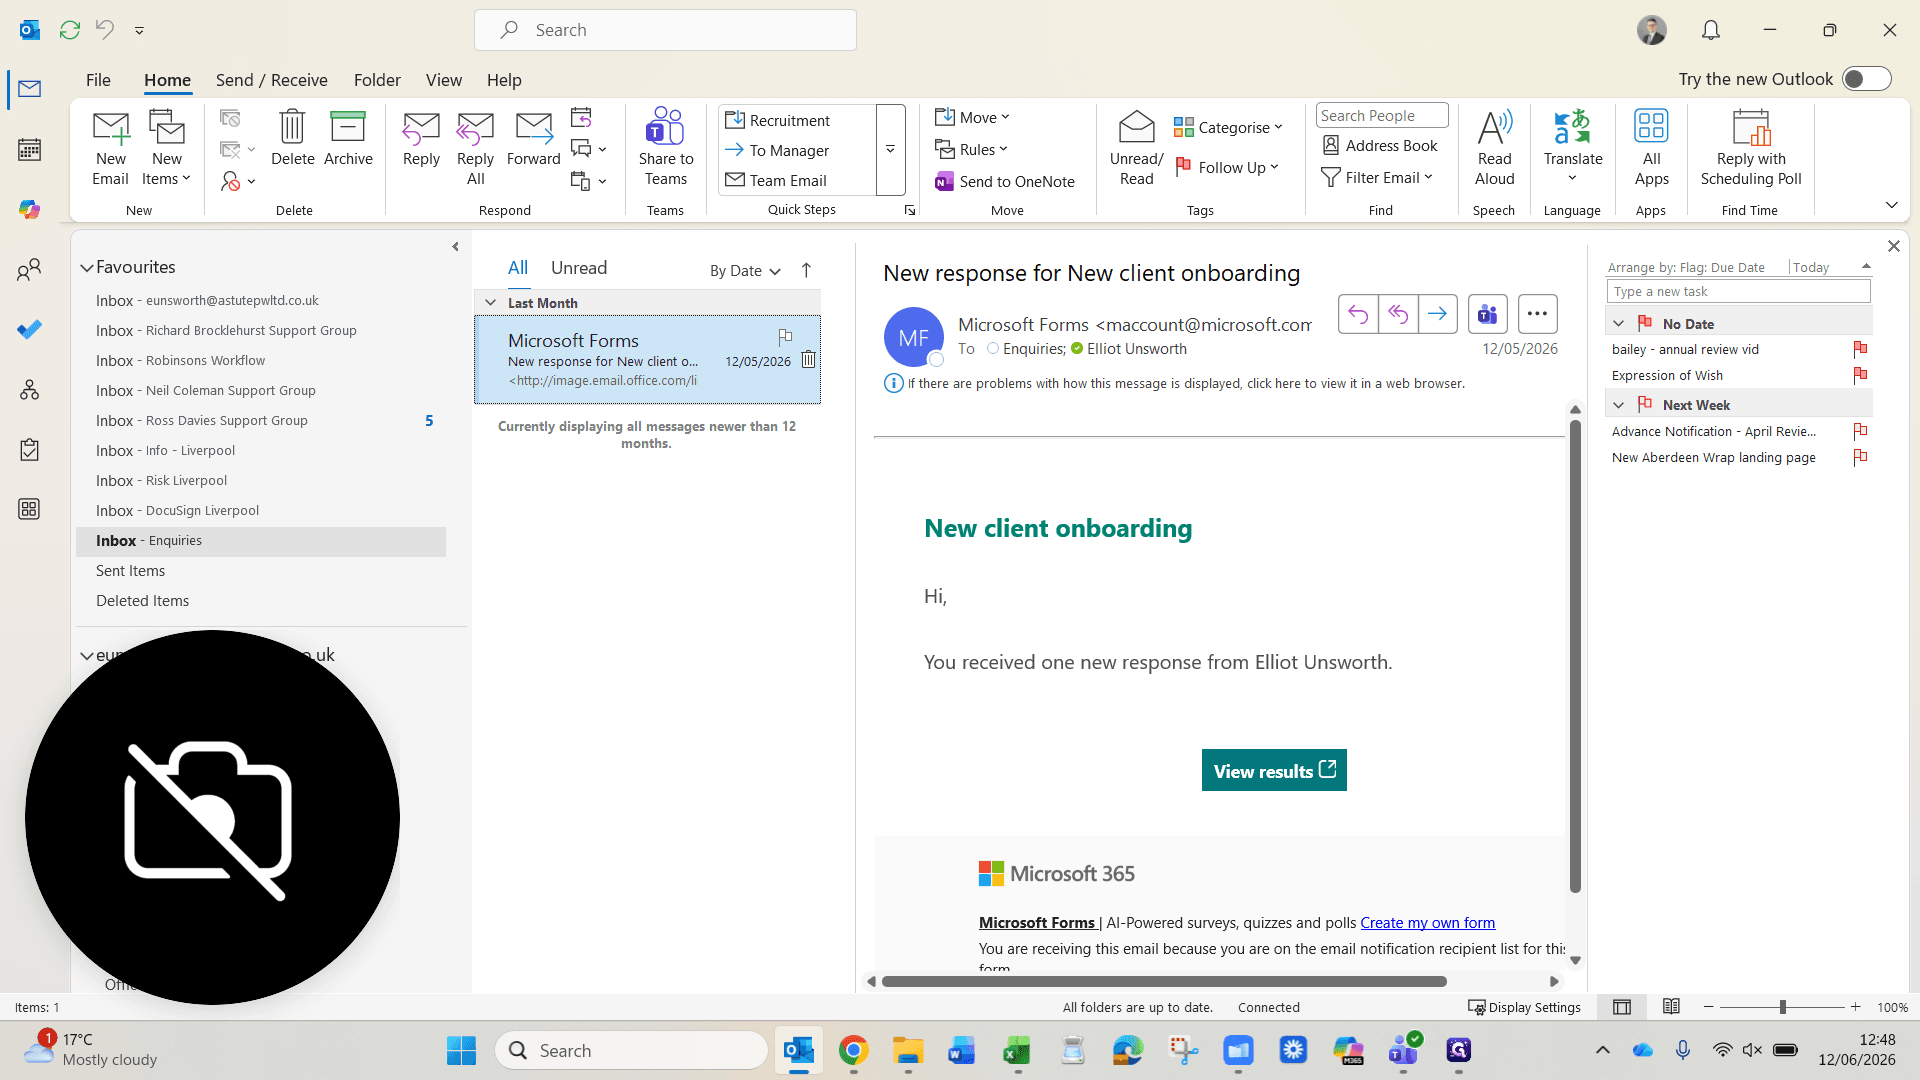
Inquiries arrive electronically from various channels into the "Enquiries At" group inbox.
1
Right-click the new inquiry email and select a category to assign it to yourself.
Step #1: Right-click the new inquiry email and select a category to assign it to yourself.

Log the Client in Intelliflo Office (IO)

Once claimed, hop into IO to create the client record.
2
Click Add Client in the left-hand menu.
Step #2: Click Add Client in the left-hand menu.
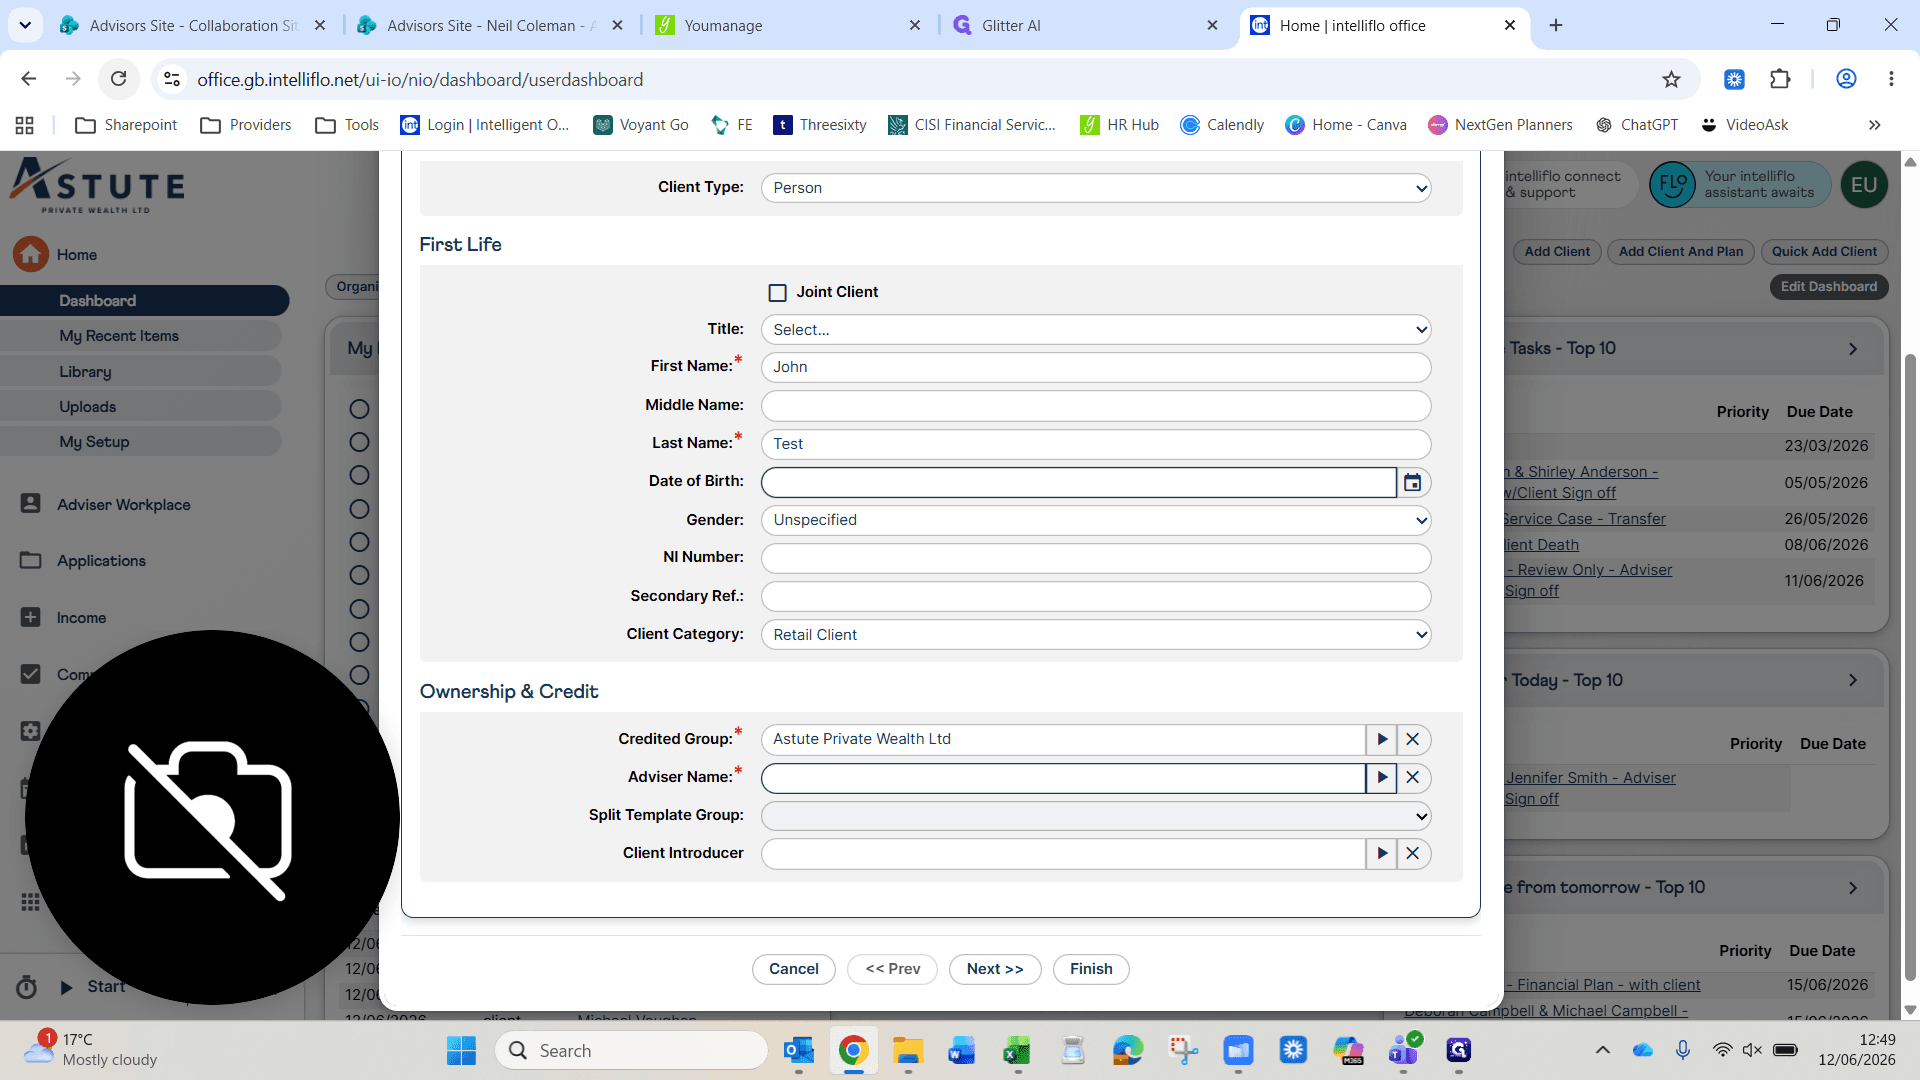
3
Enter the client's name and other requested personal details.
4
Click Next to proceed.
Step #4: Click Next to proceed.
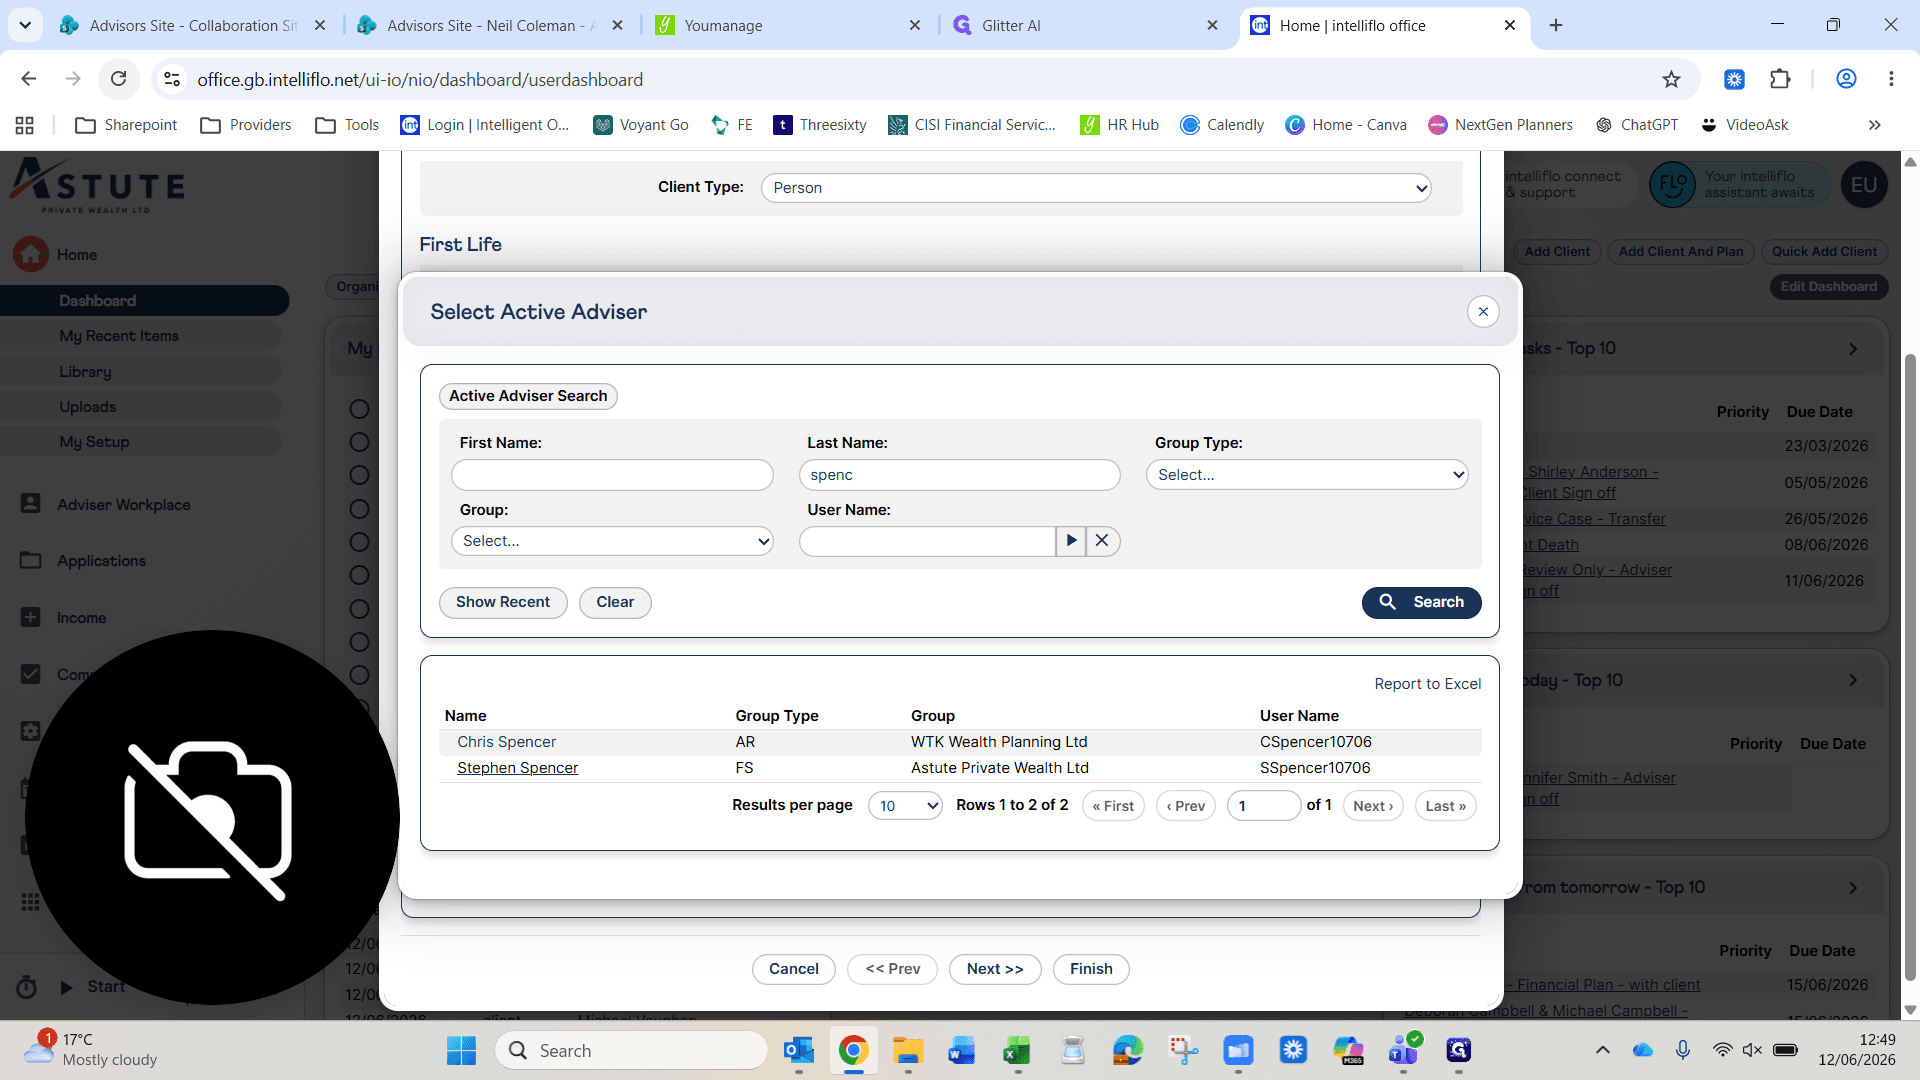
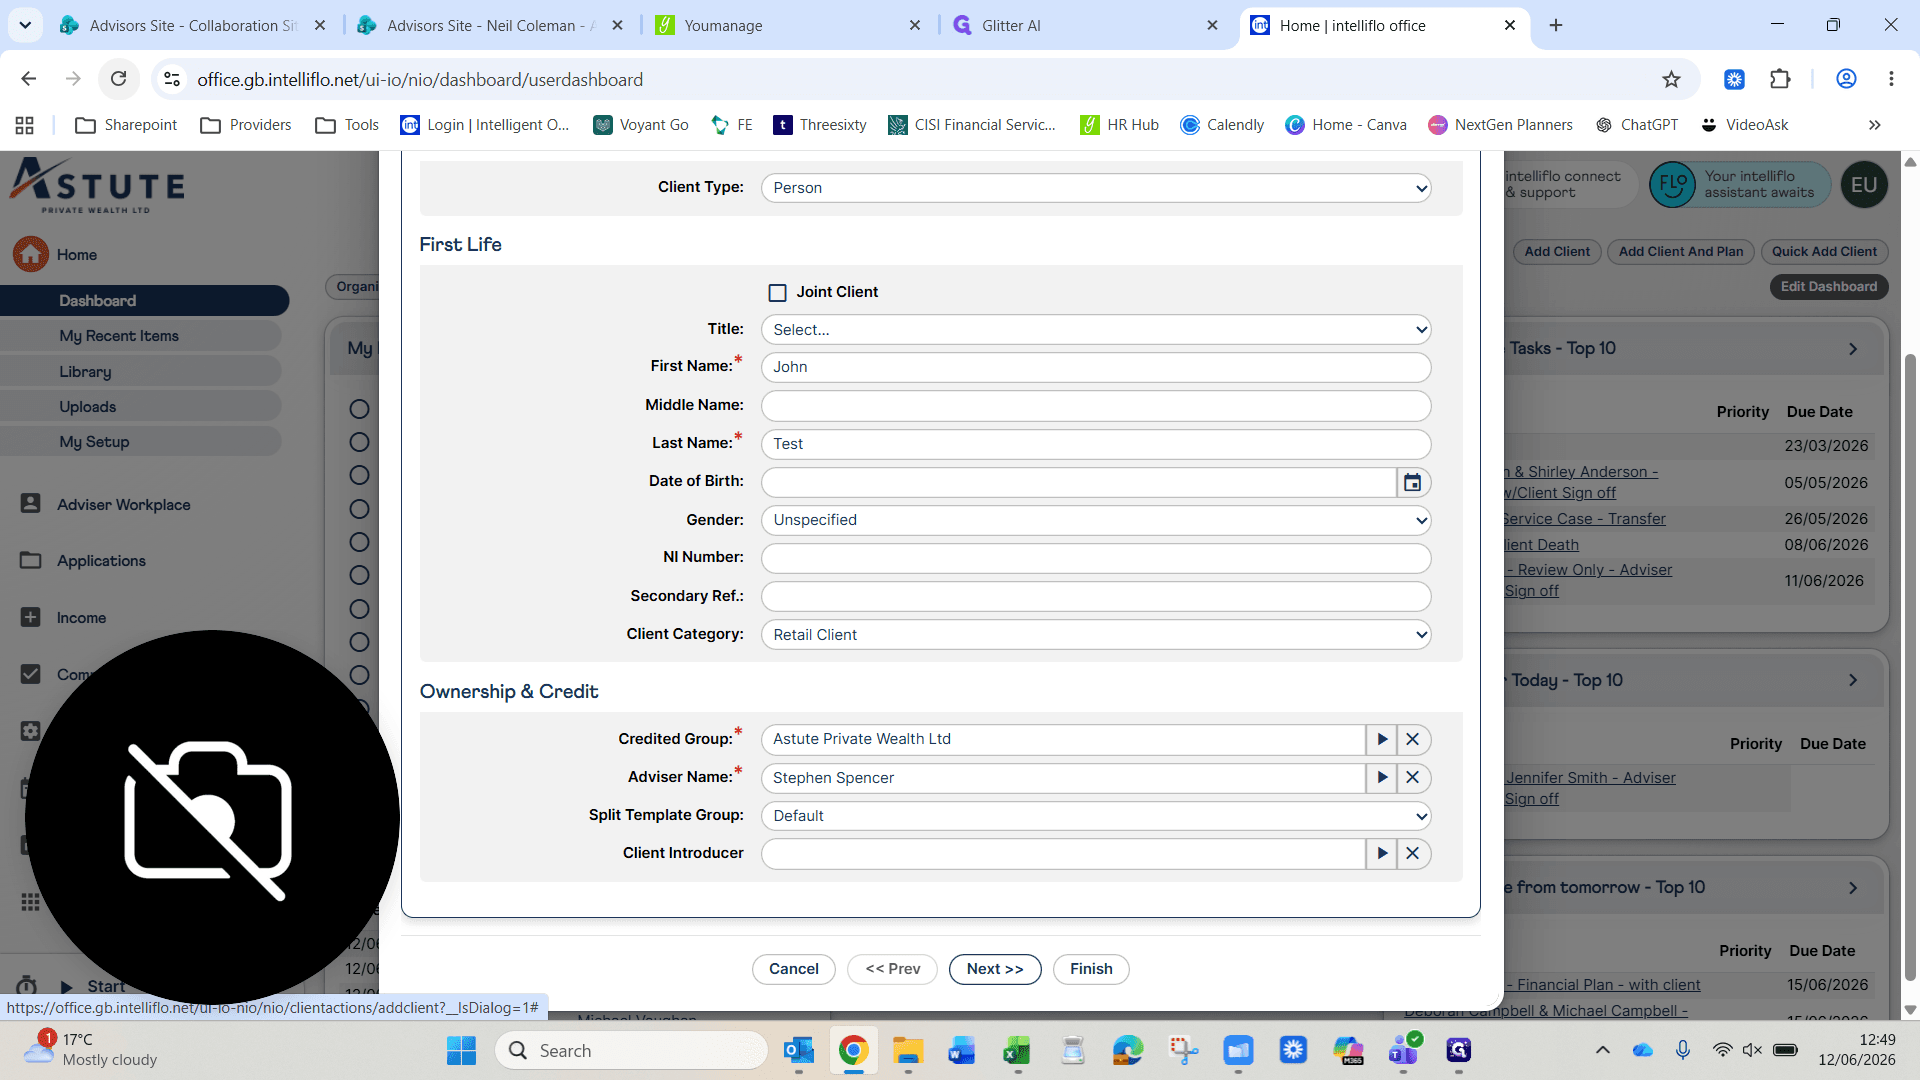
5
Search for and select the appropriate adviser for this client.
Step #5: Search for and select the appropriate adviser for this client.
6
Click Next to move to the duplicate check.
Step #6: Click Next to move to the duplicate check.
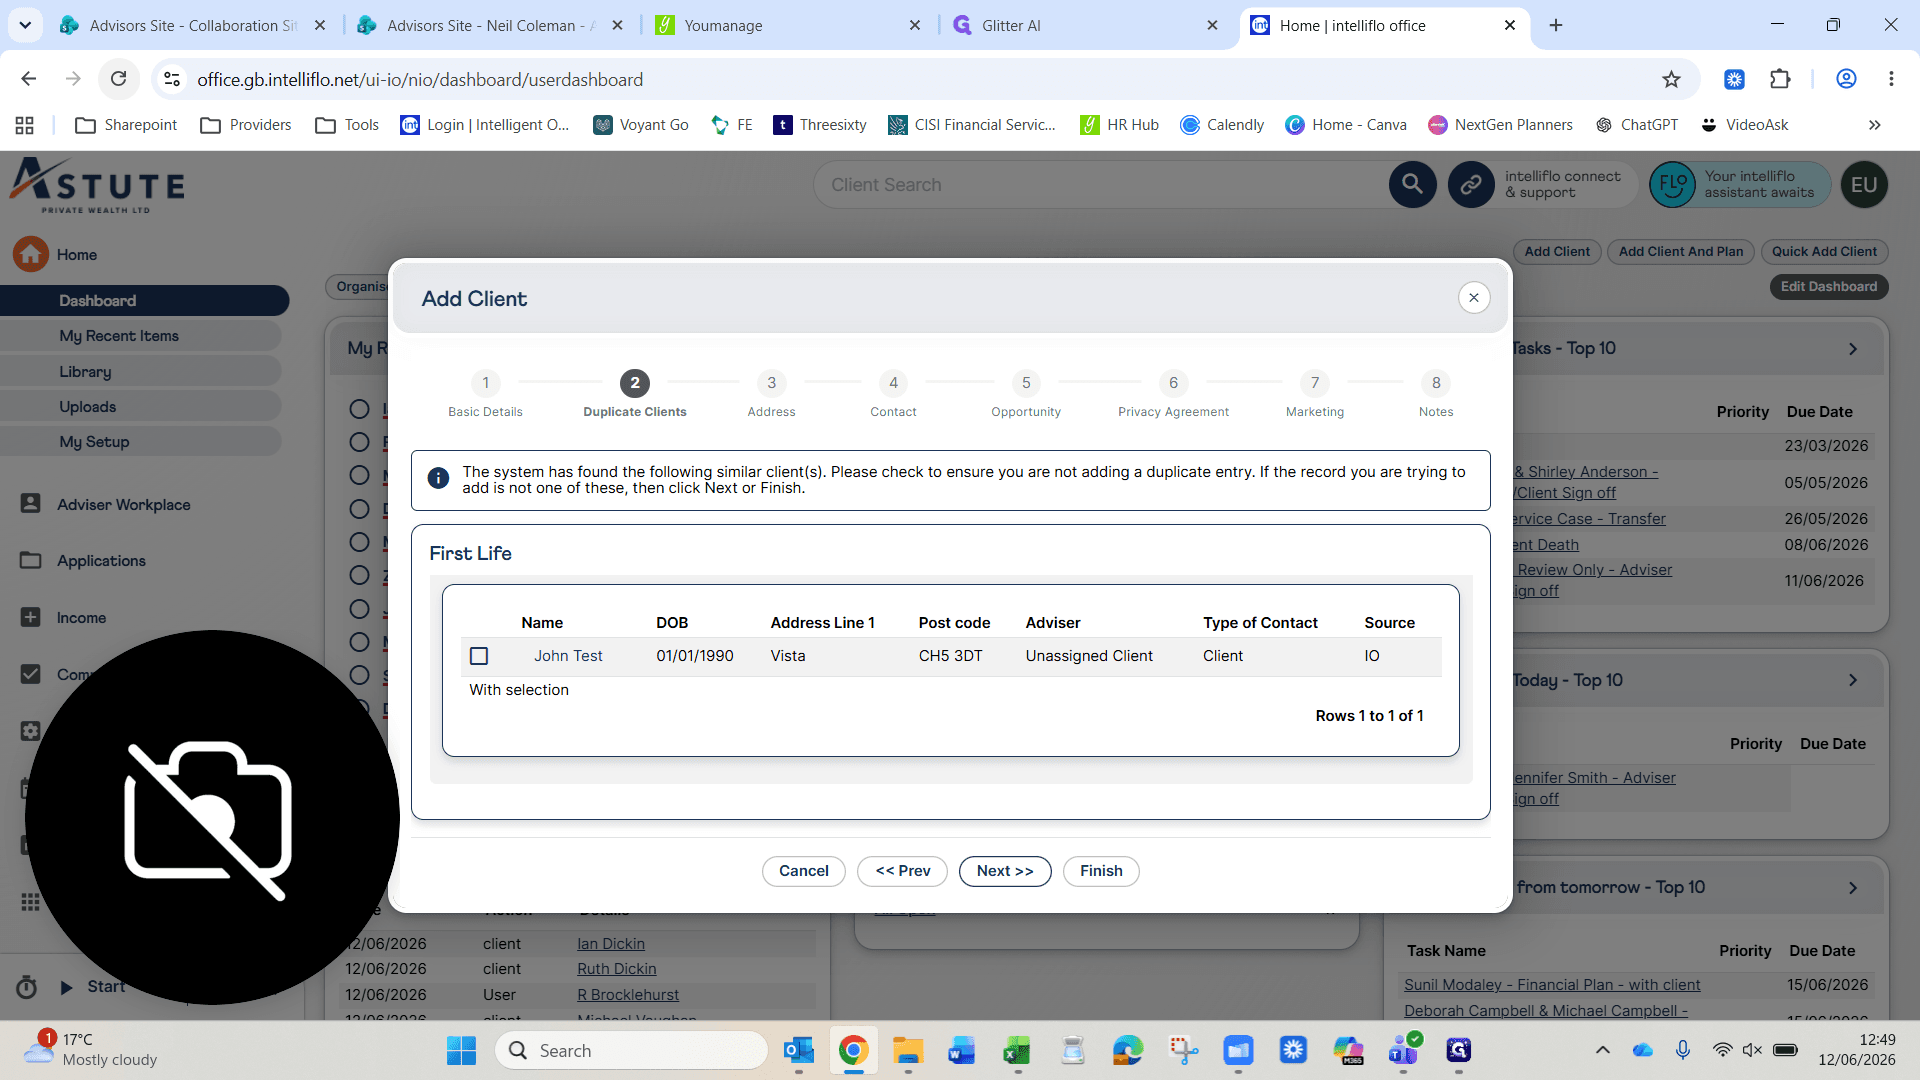
7
Click Next to bypass the duplicate check if none exist.
Step #7: Click Next to bypass the duplicate check if none exist.
8
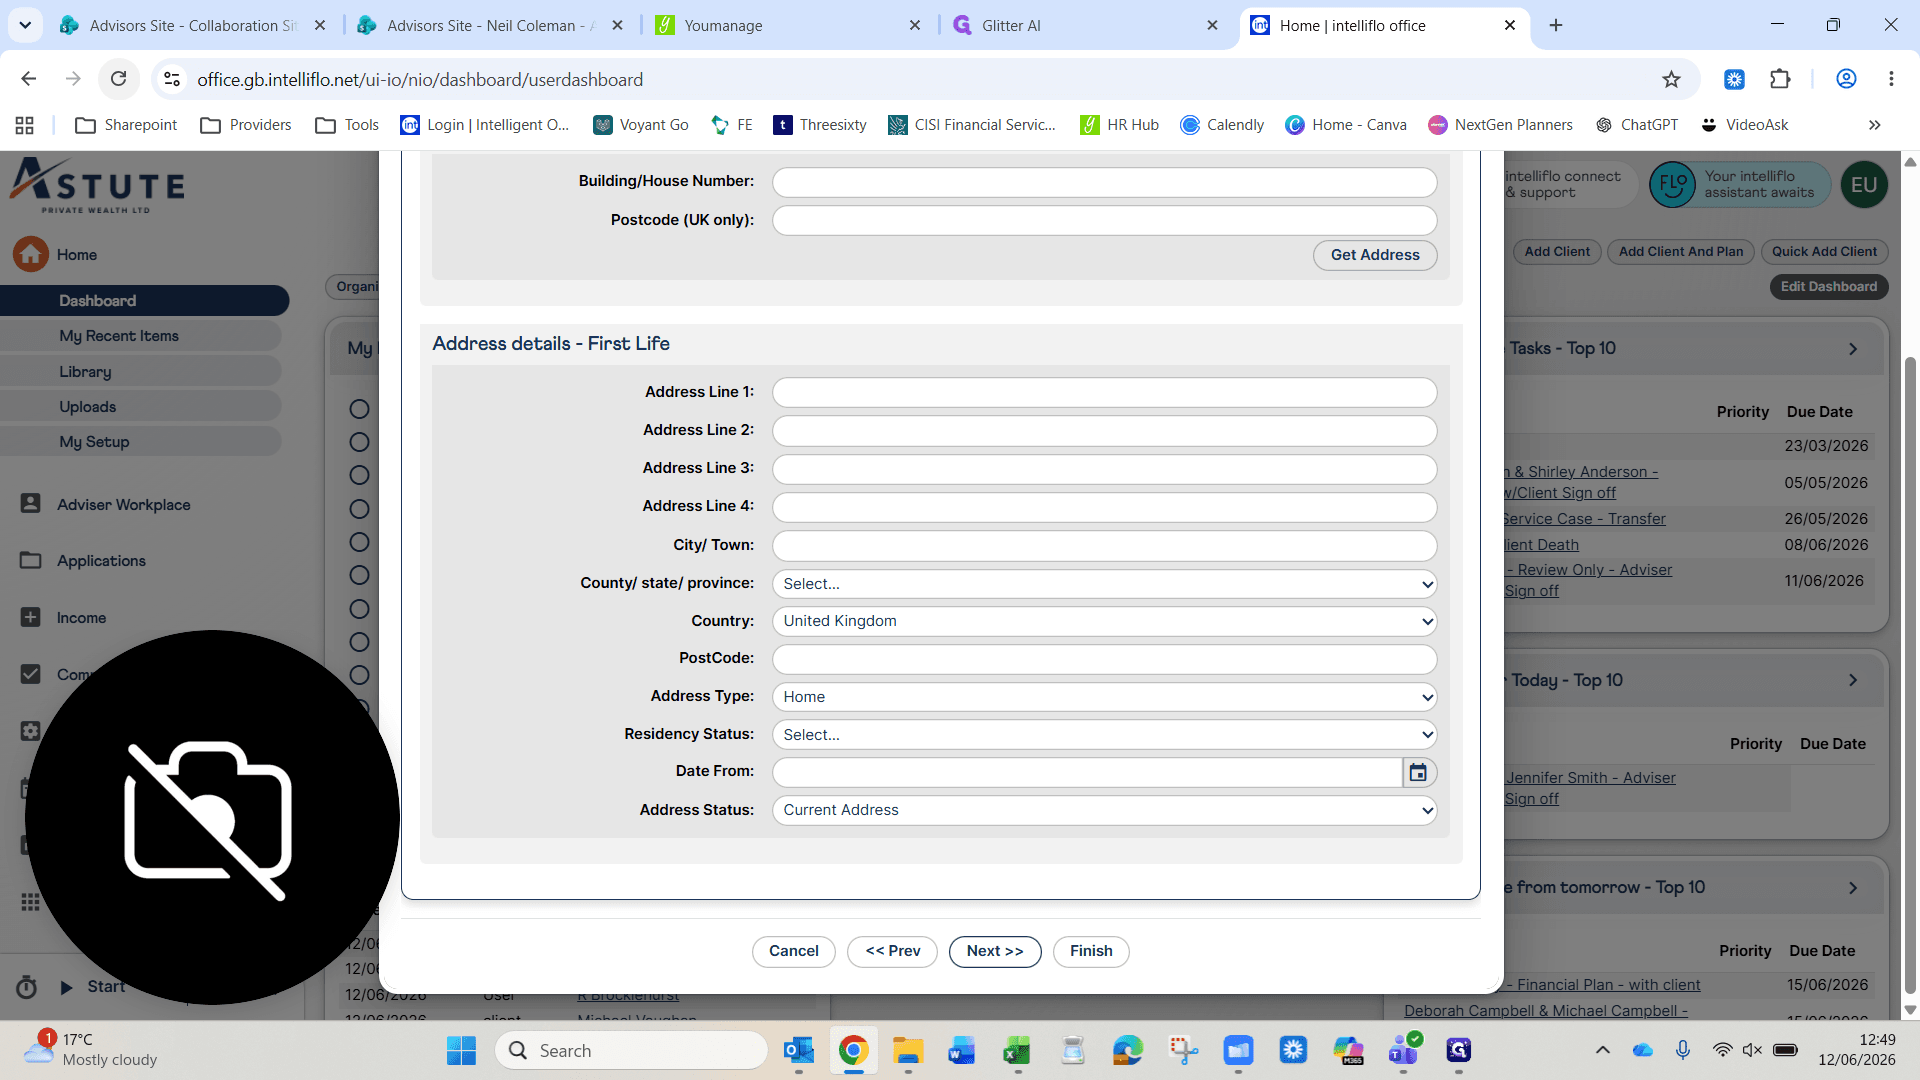
Click Next after confirming the address details.
Step #8: Click Next after confirming the address details.
9
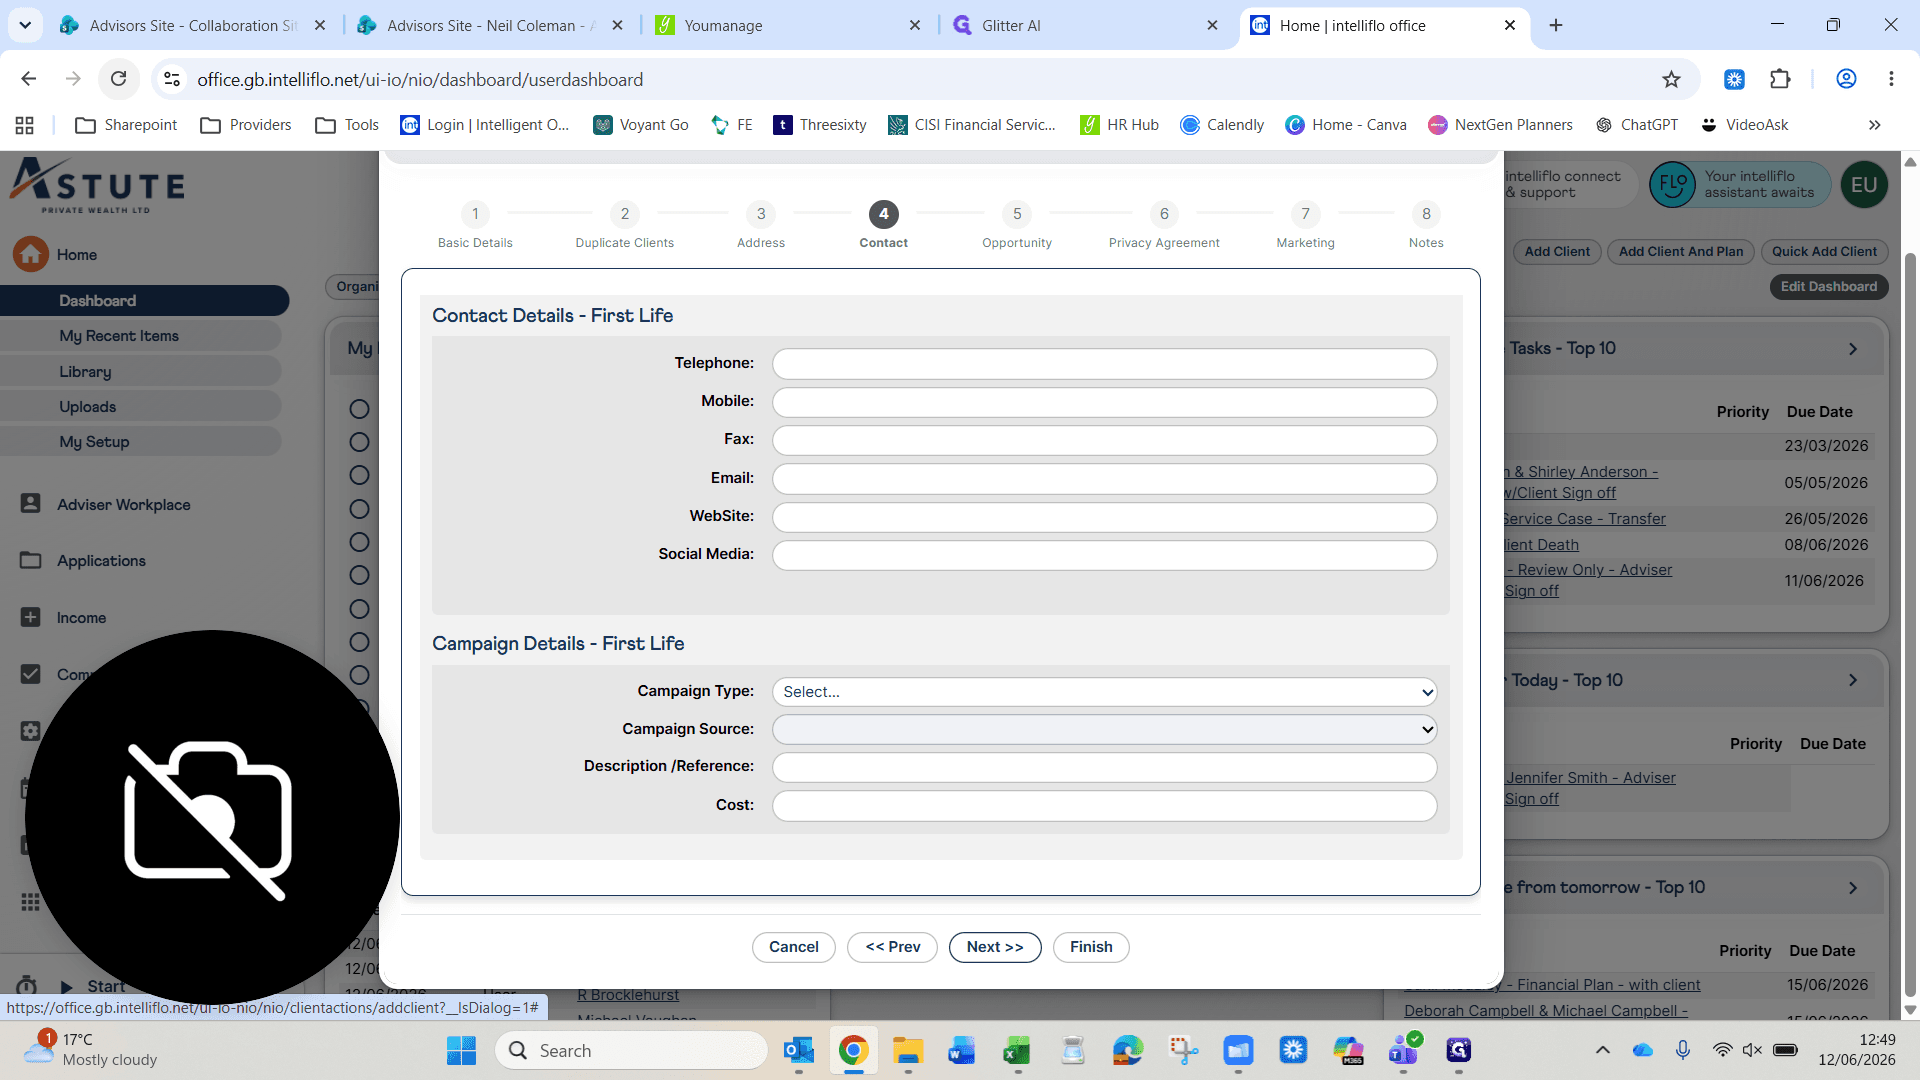
Click Next once any known contact details have been populated.
Step #9: Click Next once any known contact details have been populated.

Create the Opportunity

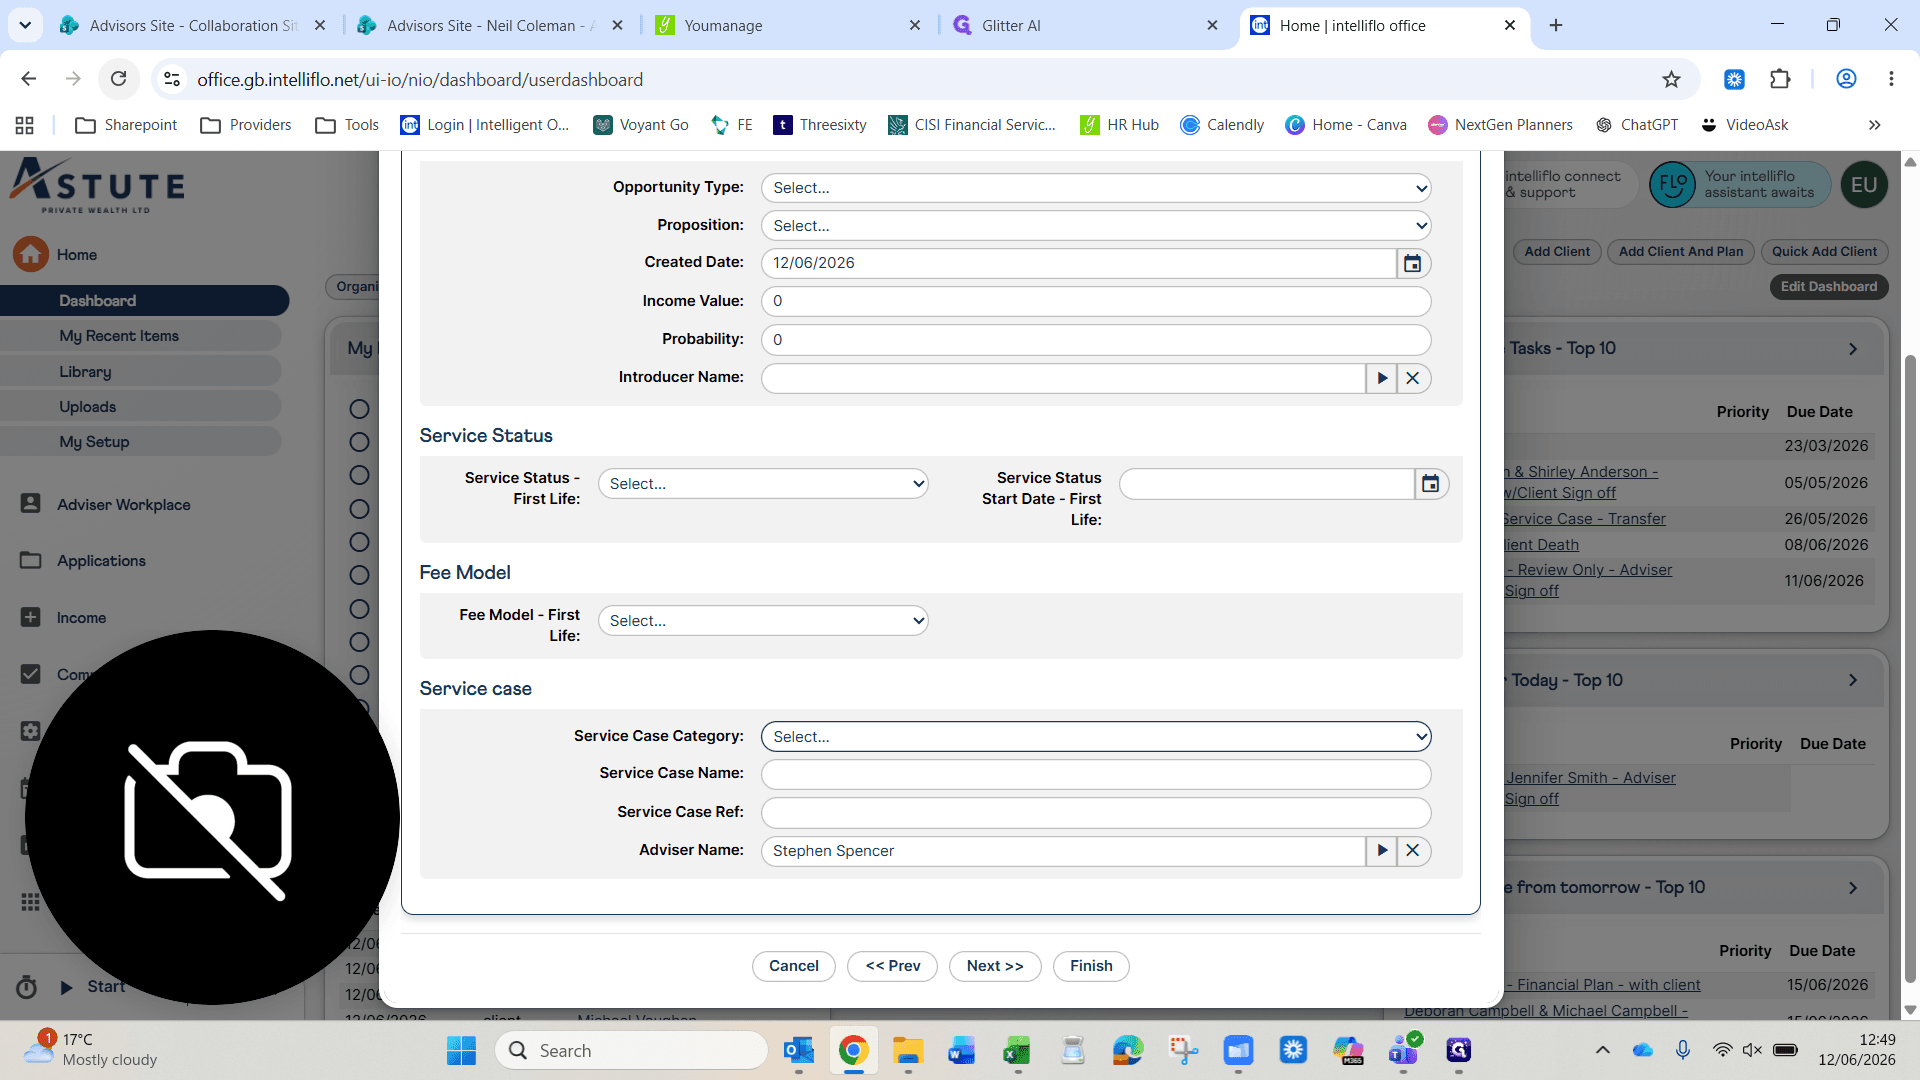
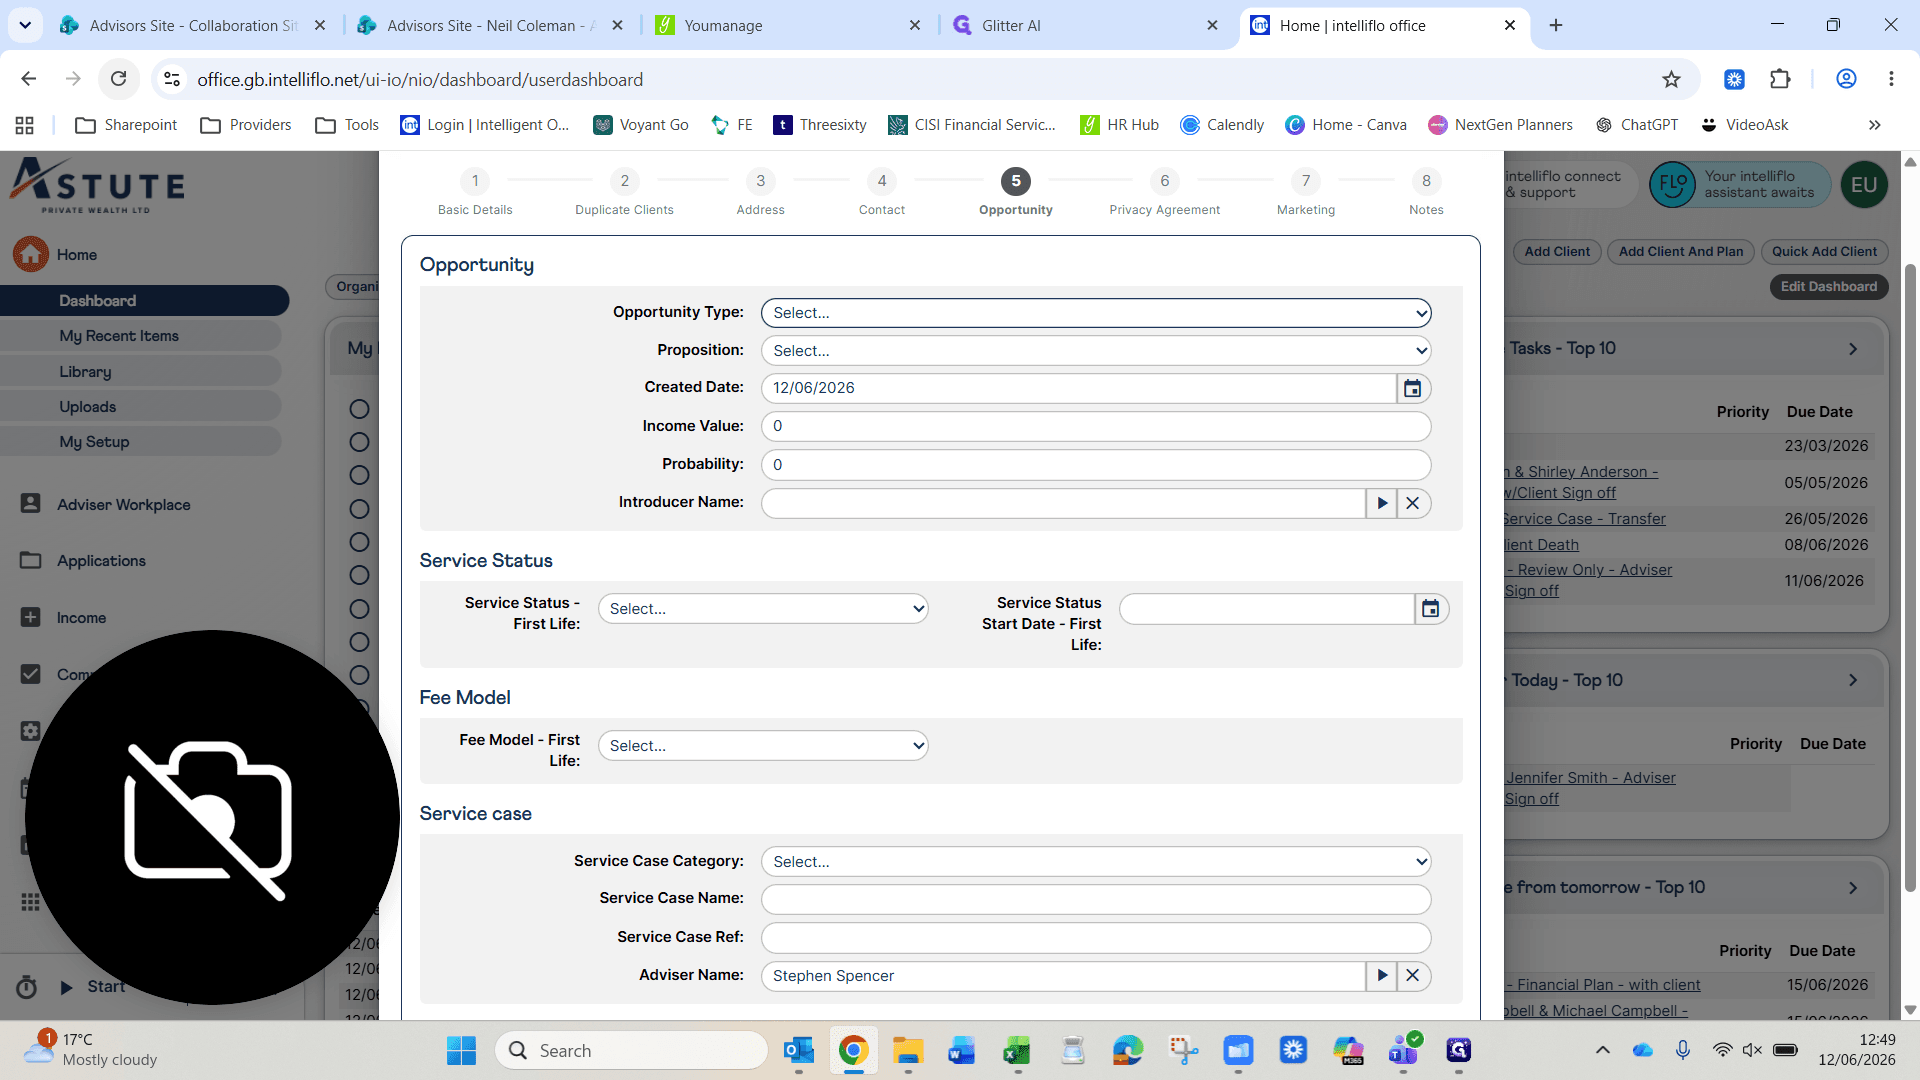
Add an opportunity against the new client record based on the advice they need.
10
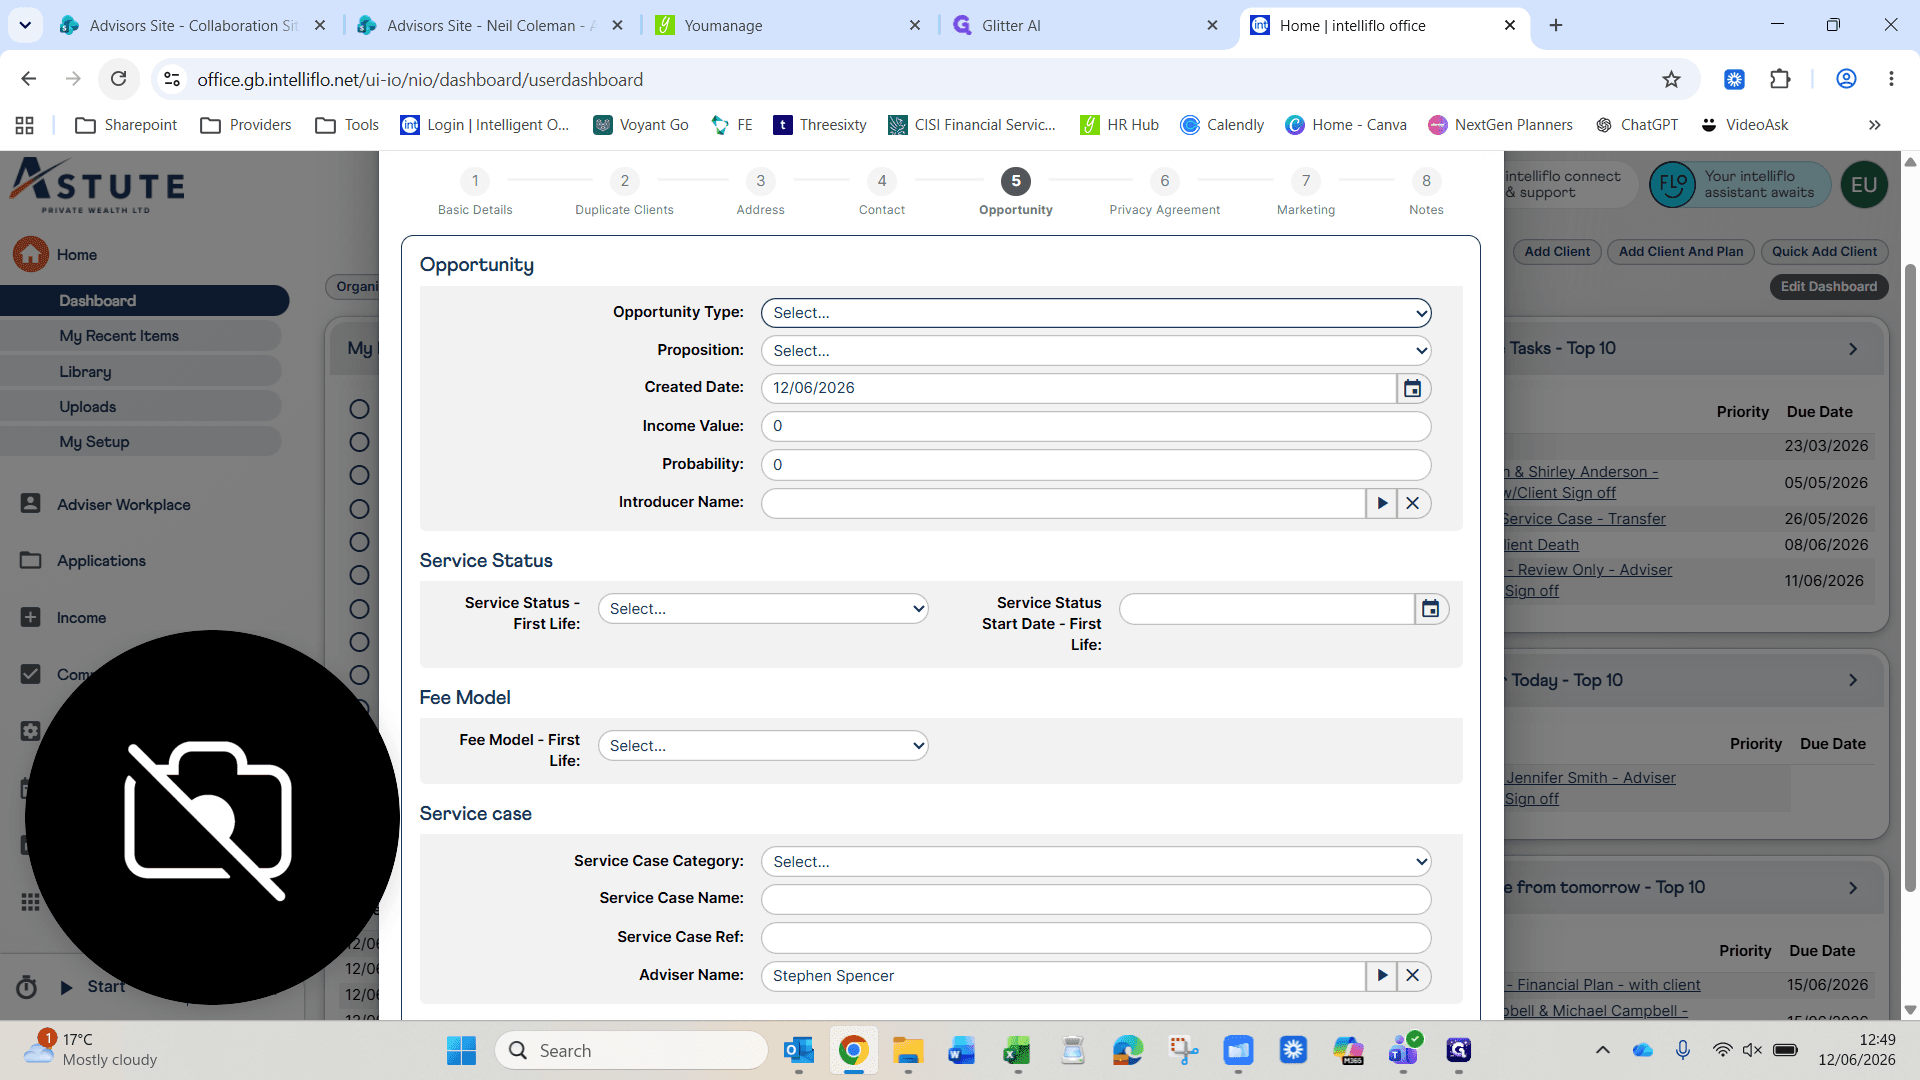
Select the Opportunity Type.
Step #10: Select the Opportunity Type.
11
Select the Adviser Name handling the case.
Step #11: Select the Adviser Name handling the case.
12
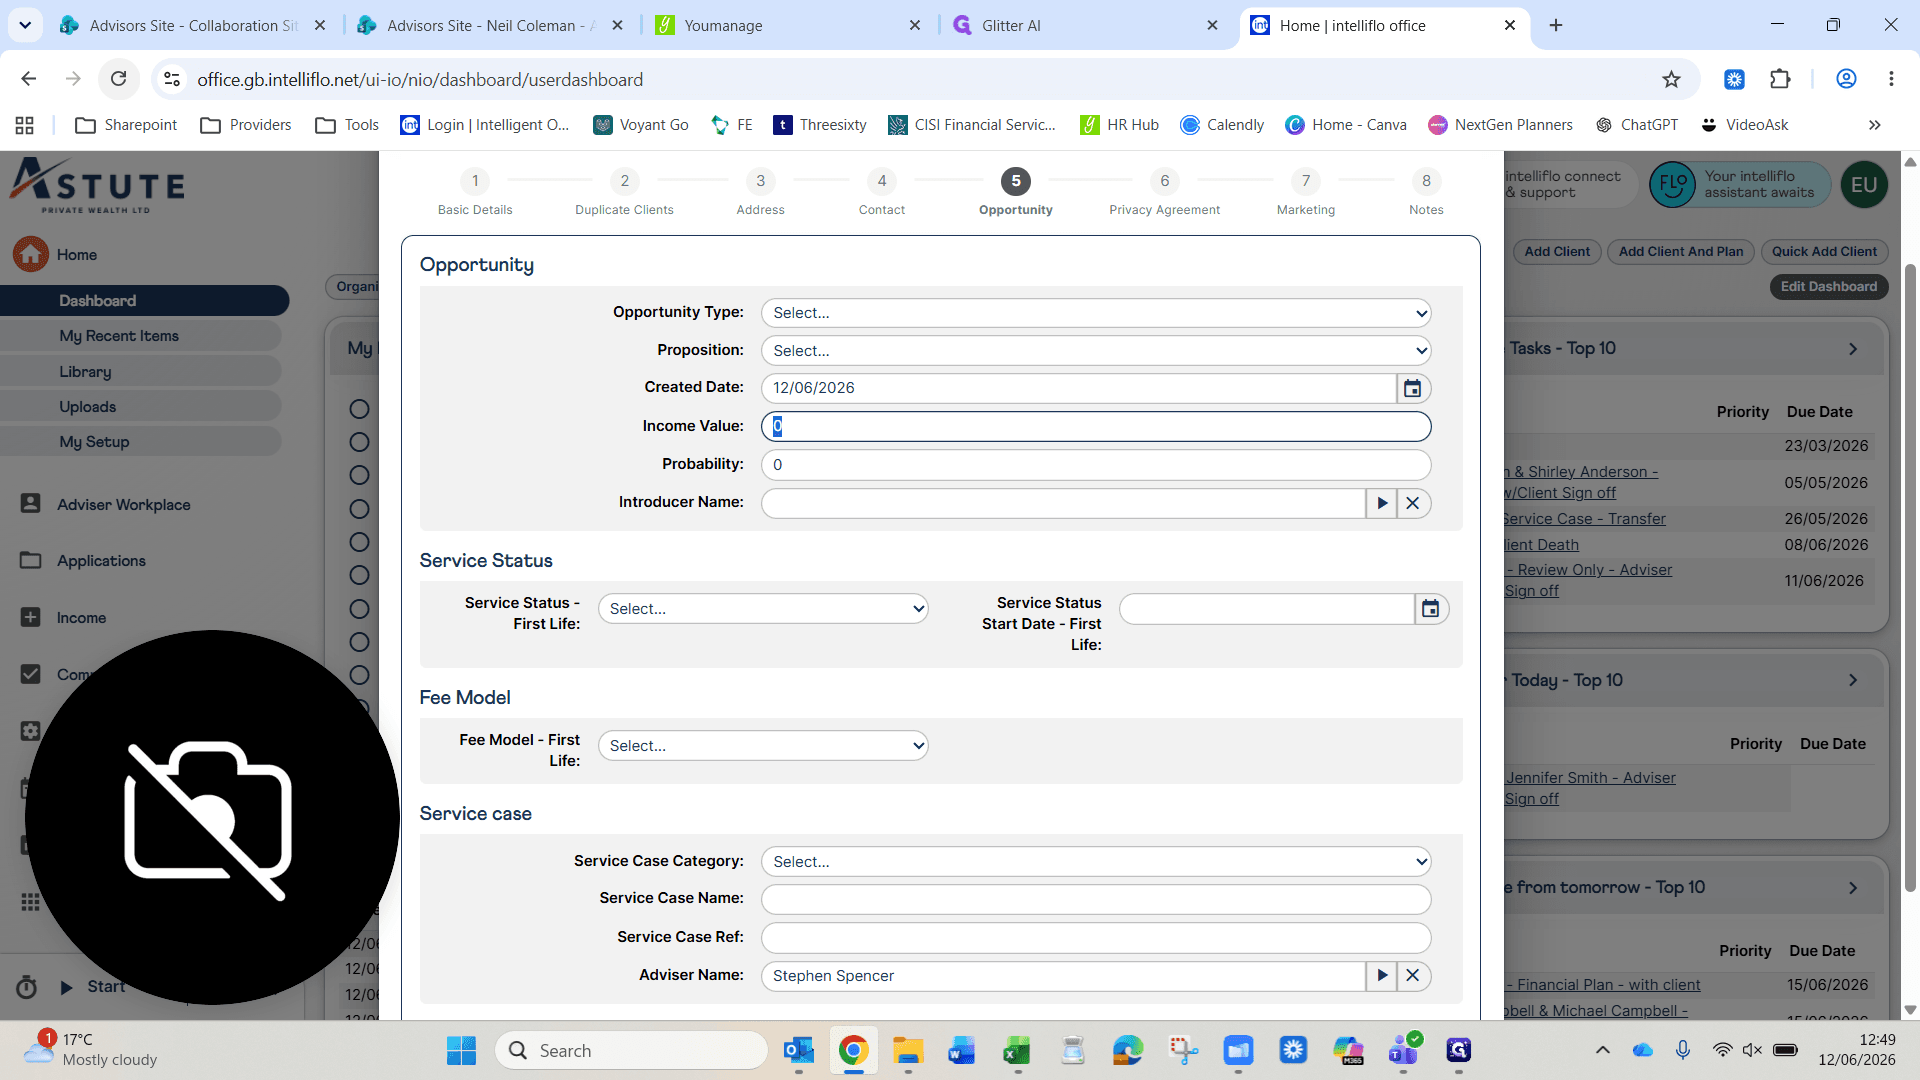
Enter a rough estimate in the Income Value field.
Step #12: Enter a rough estimate in the Income Value field.
13
Click Finish to save the new opportunity.
Step #13: Click Finish to save the new opportunity.

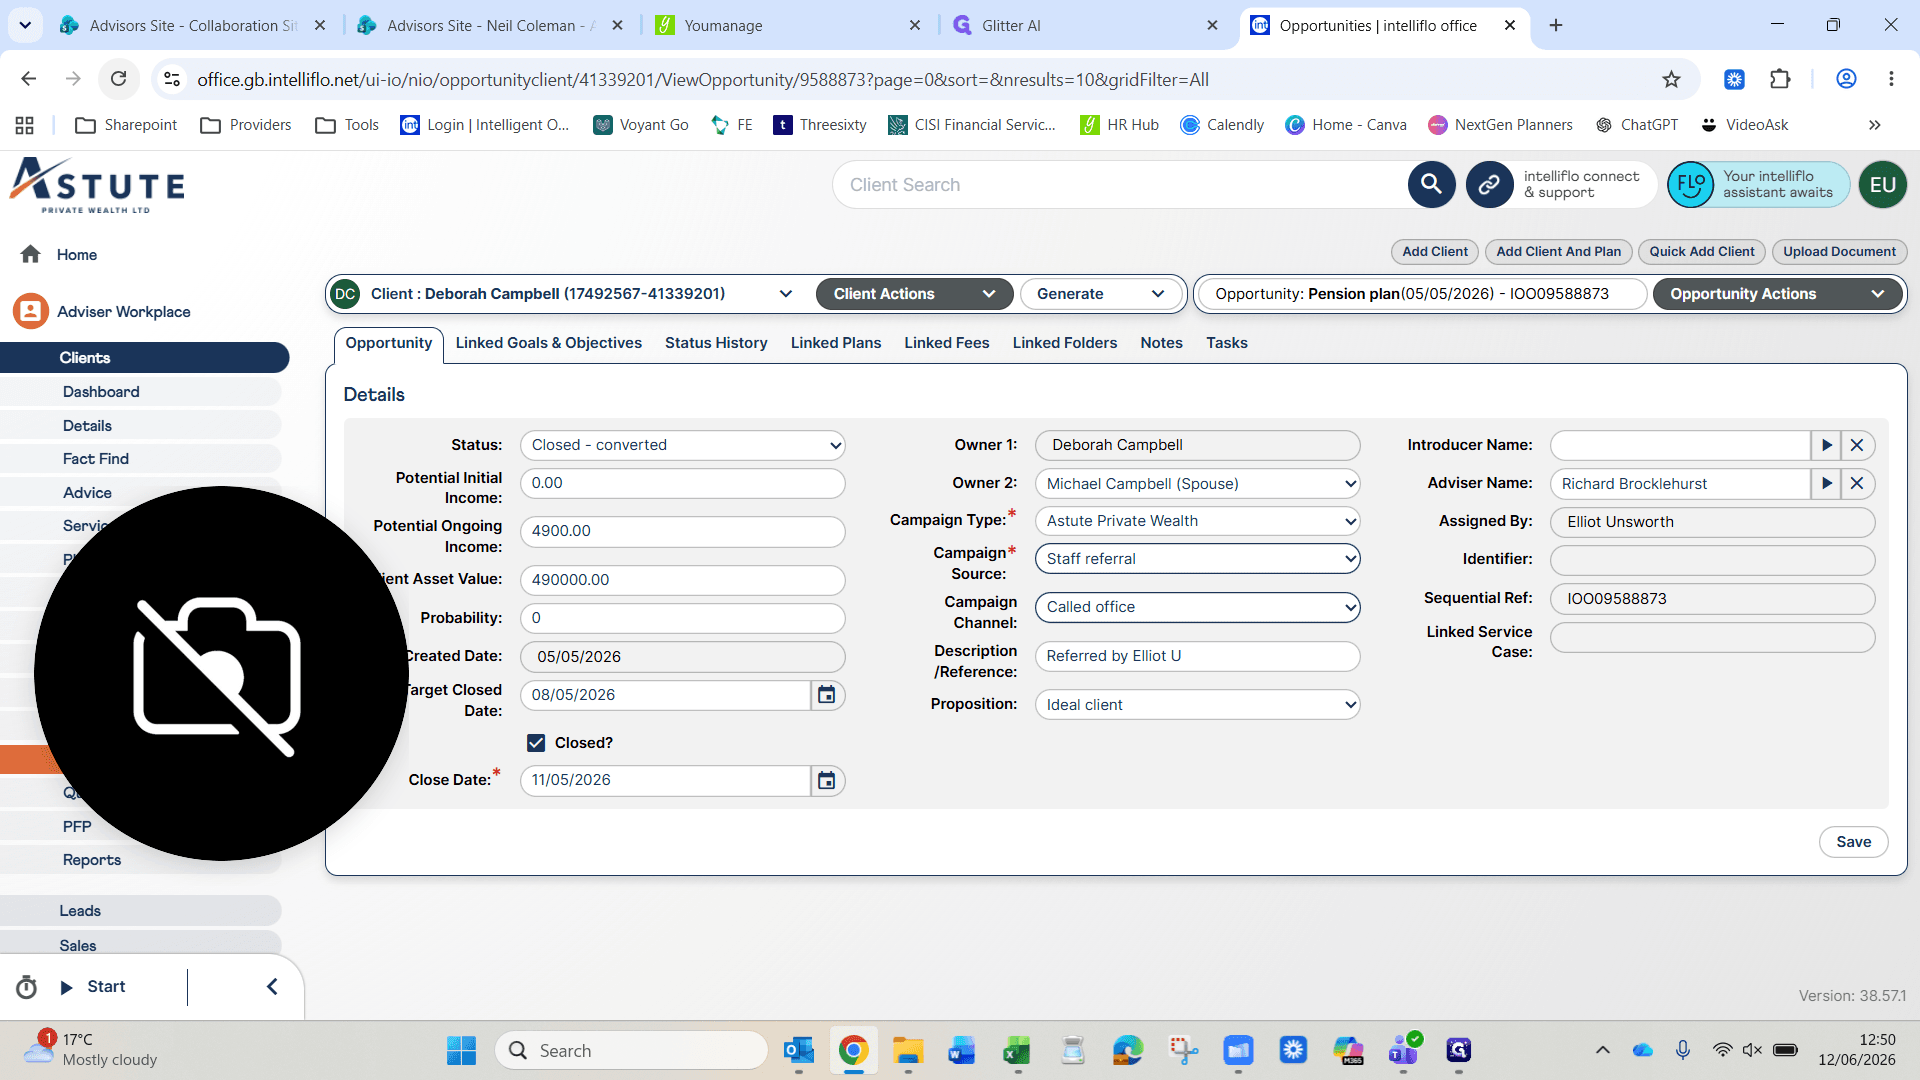
Add Campaign Data and Close Date

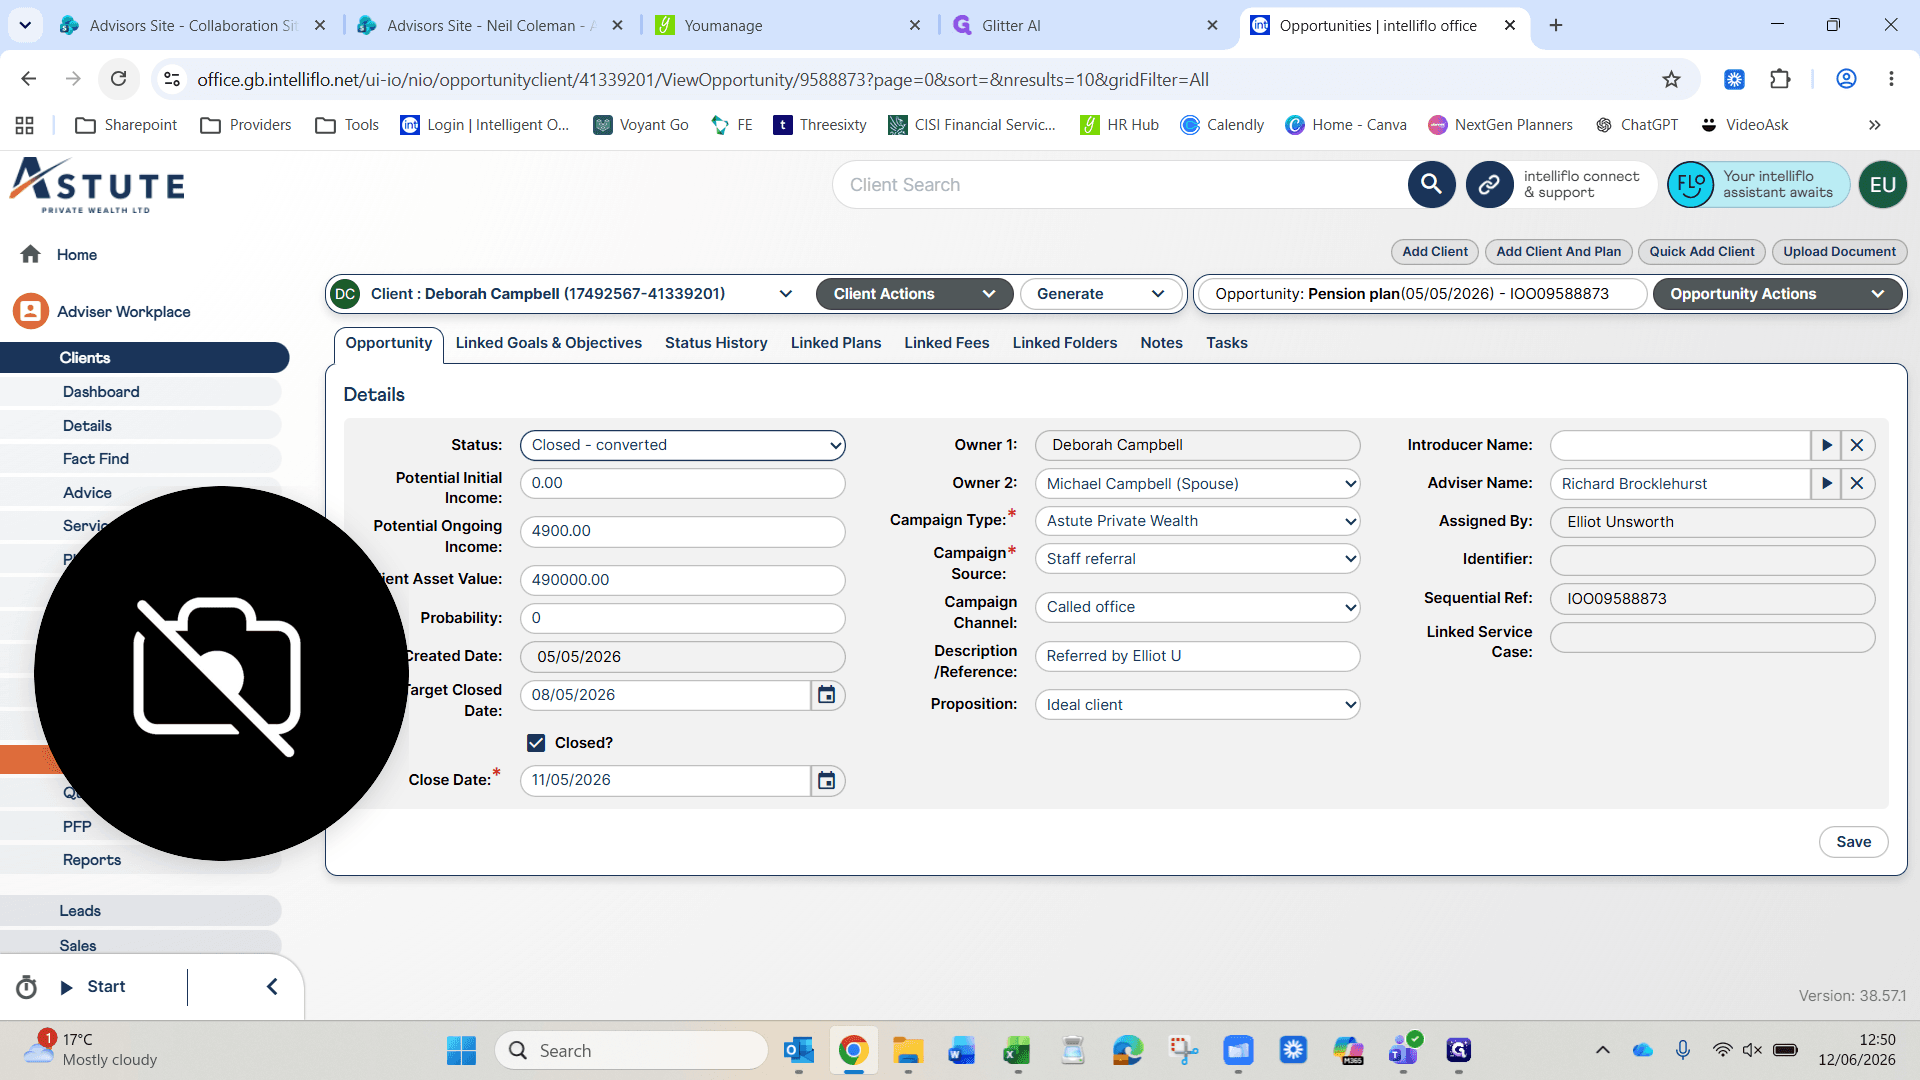
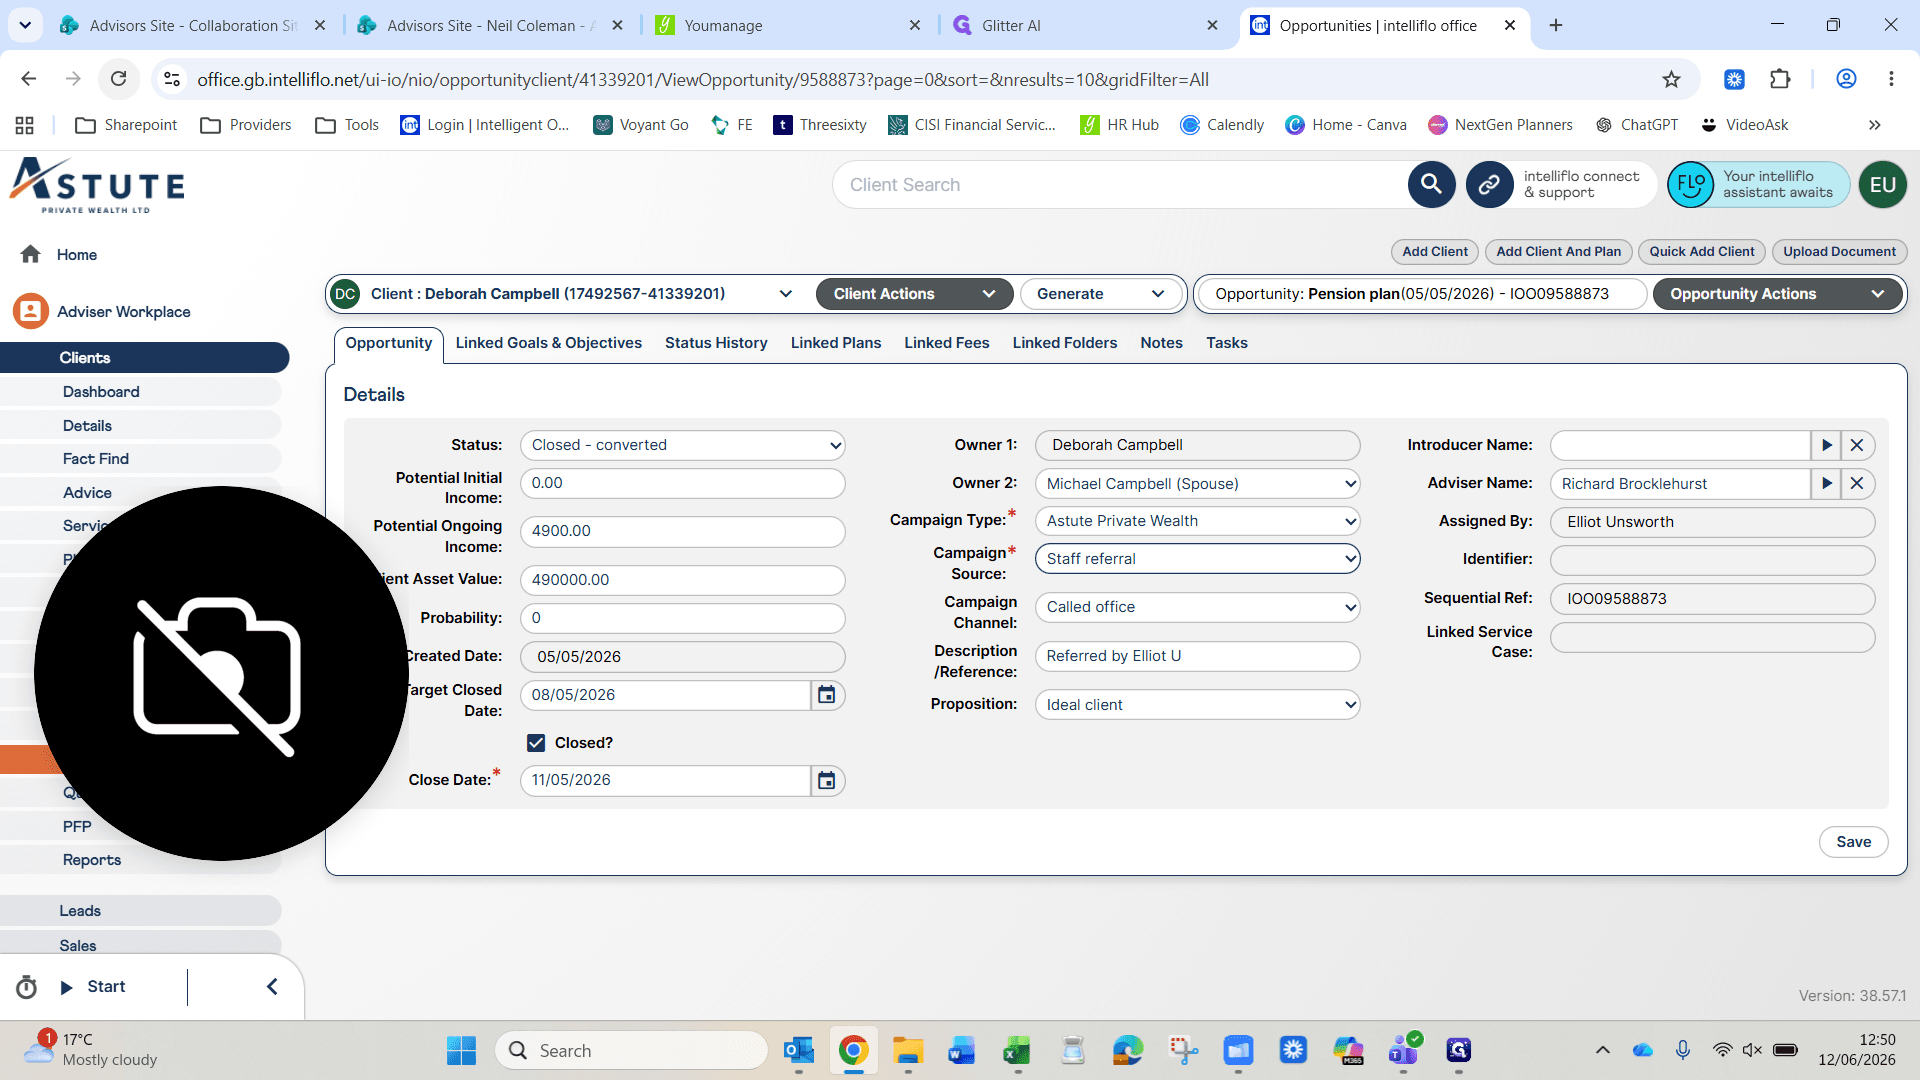
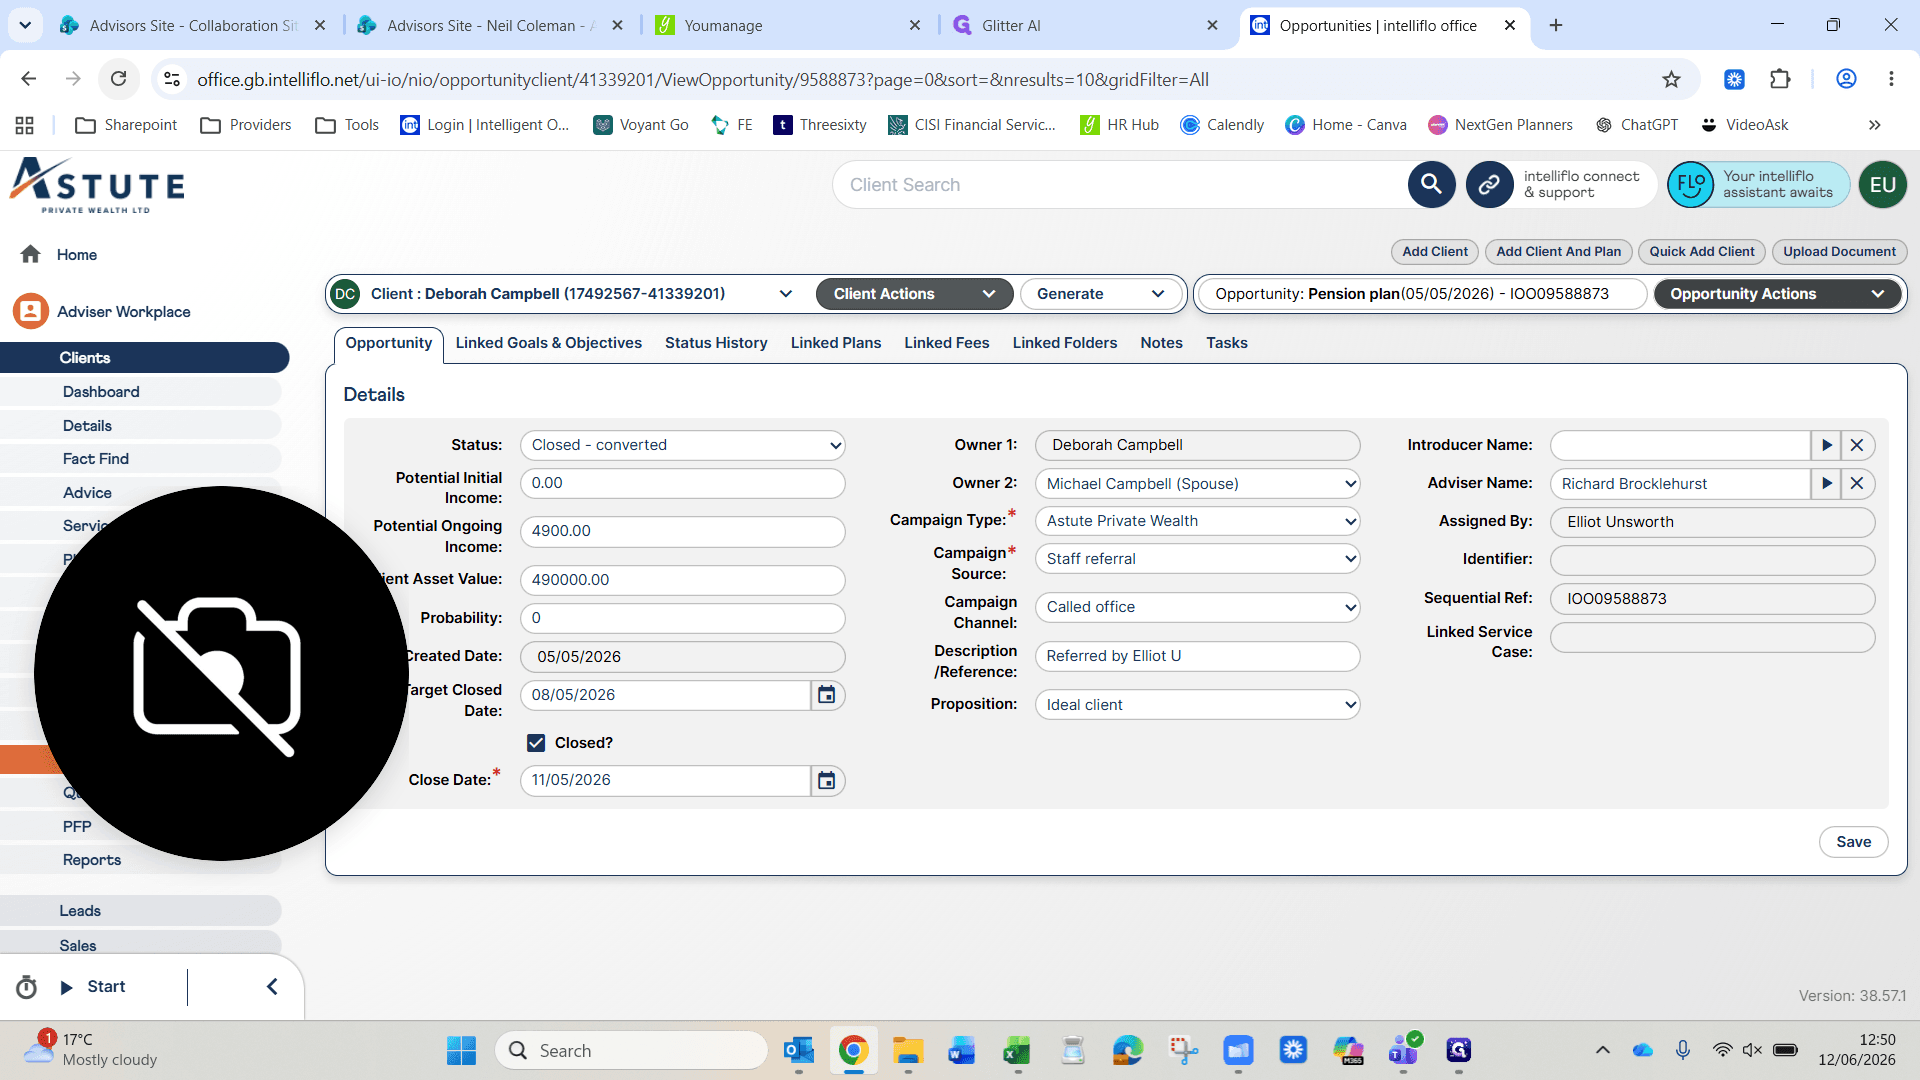
The campaign source (where the client came from) and campaign channel (how they contacted us) are critical for management information (MI) reporting.
14
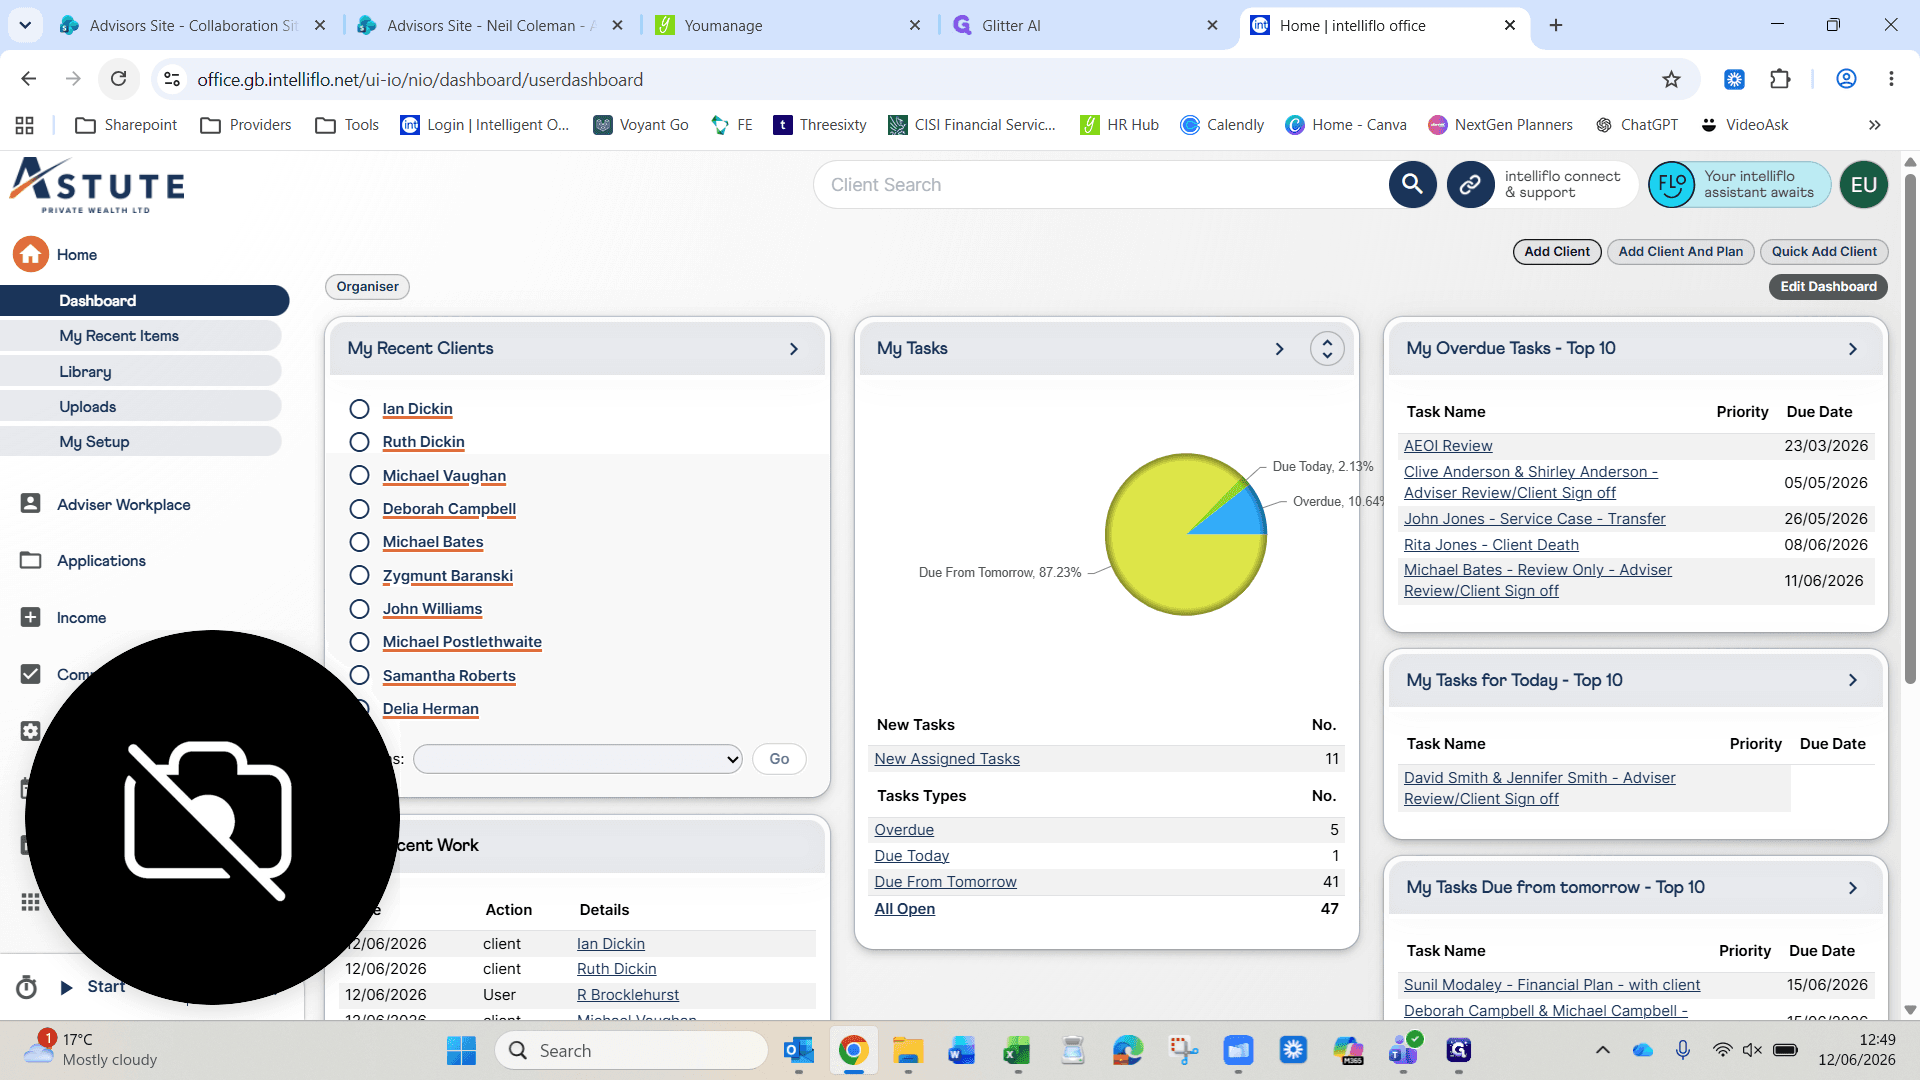
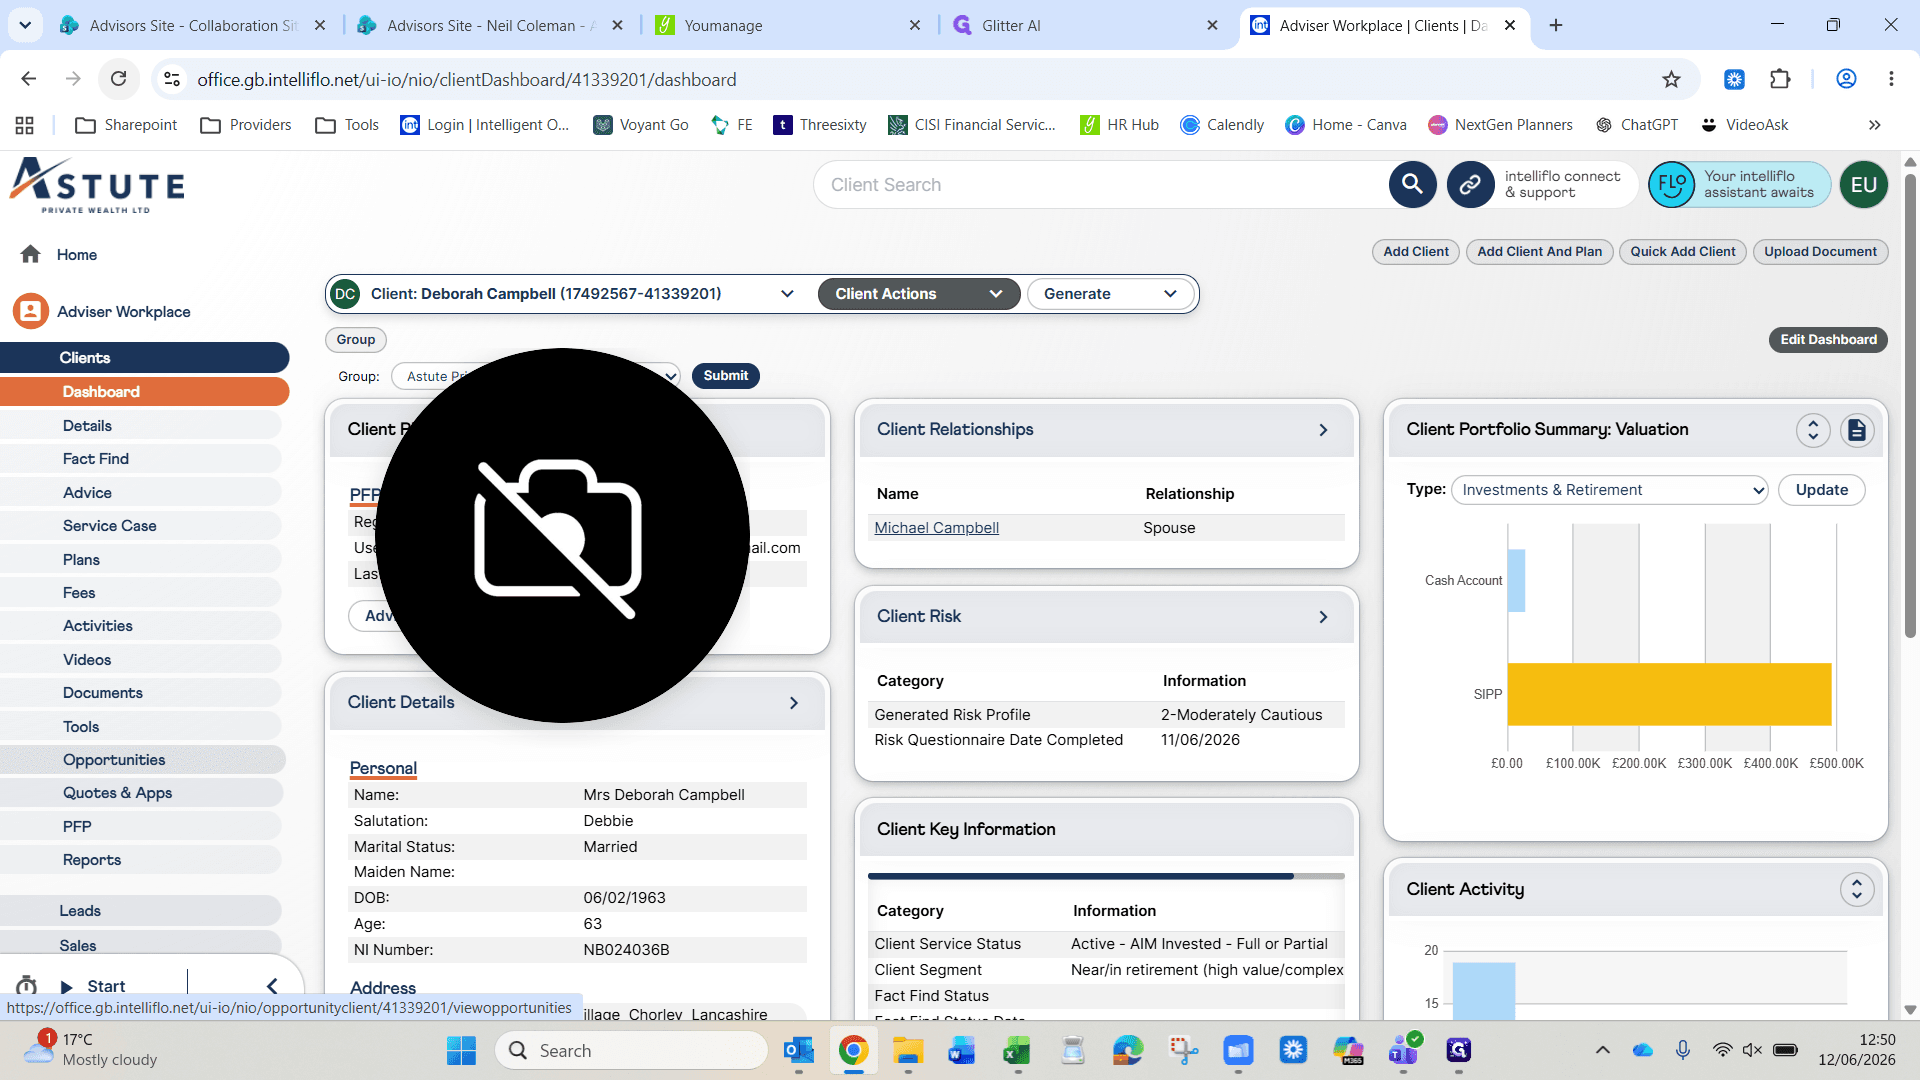
Click Opportunities on the left menu of the client profile.
Step #14: Click Opportunities on the left menu of the client profile.
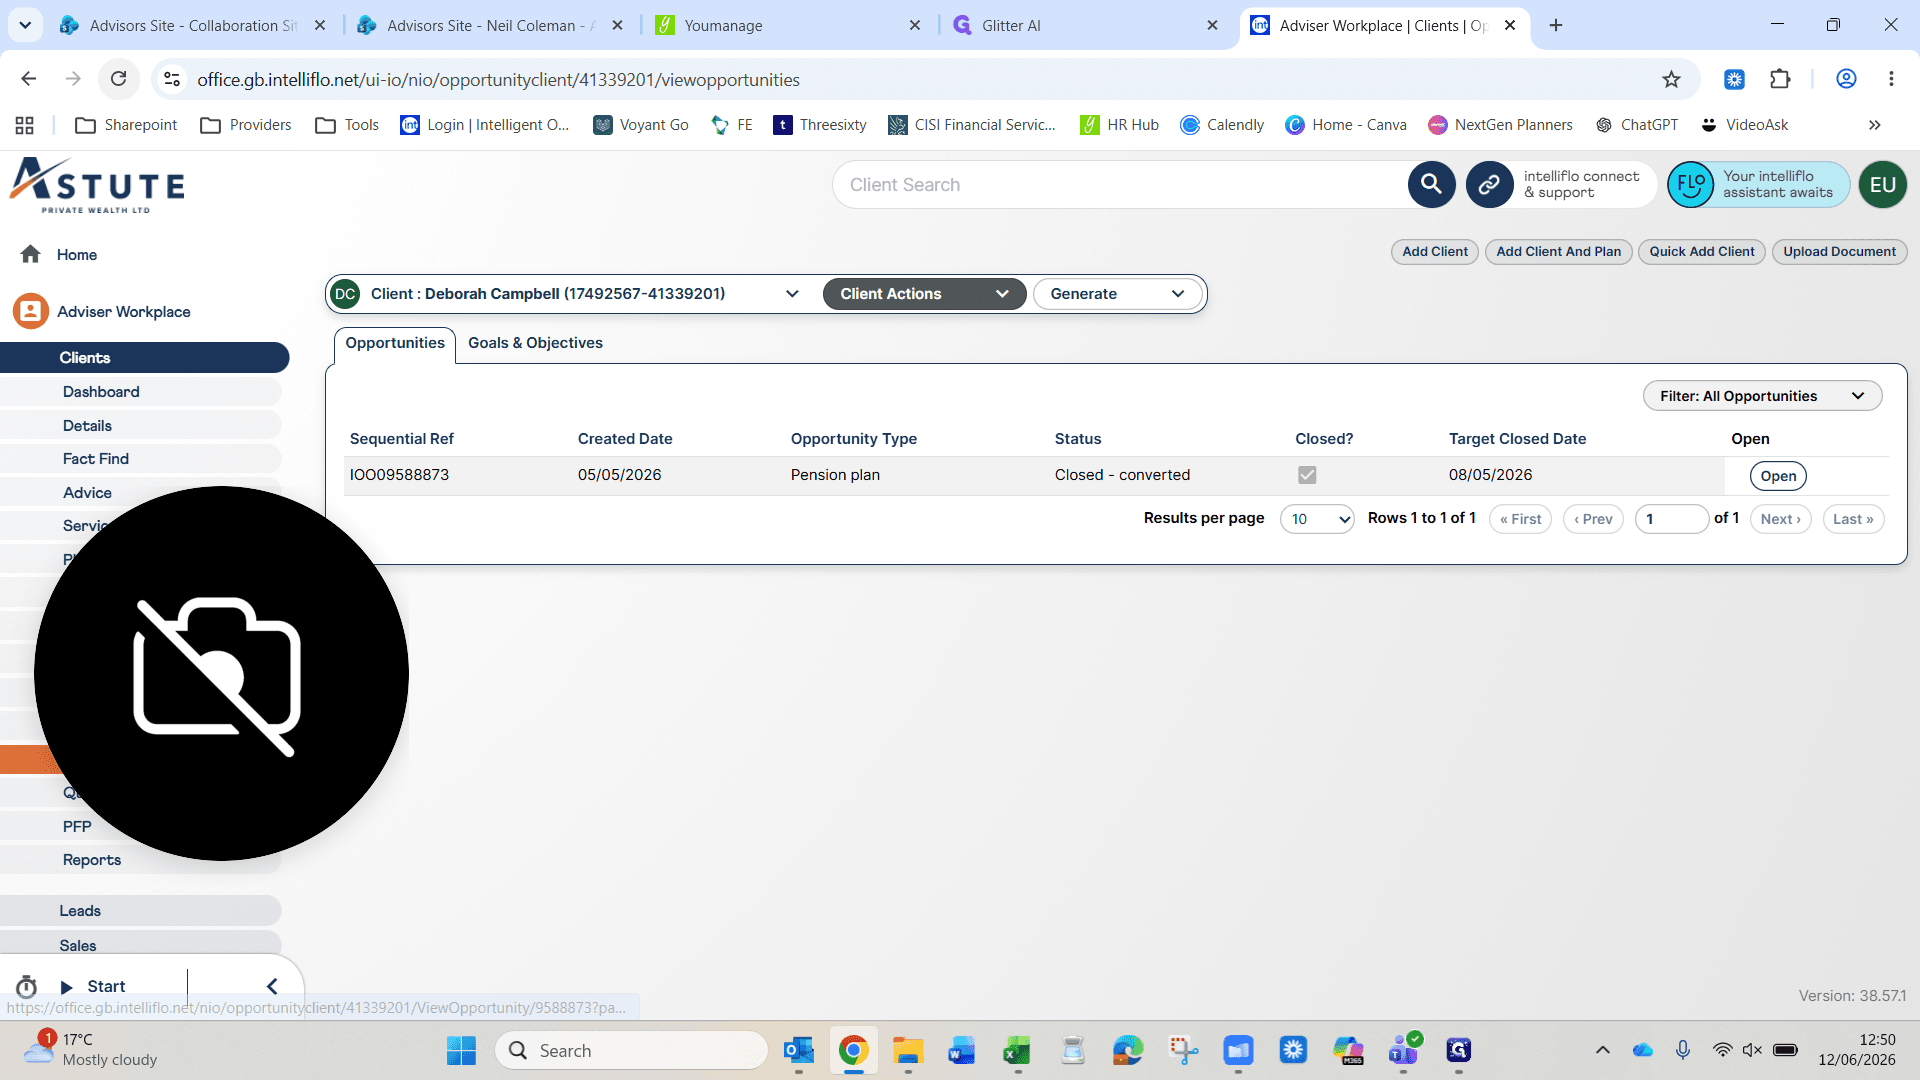
15
Click Open on the opportunity you just created.
Step #15: Click Open on the opportunity you just created.
16
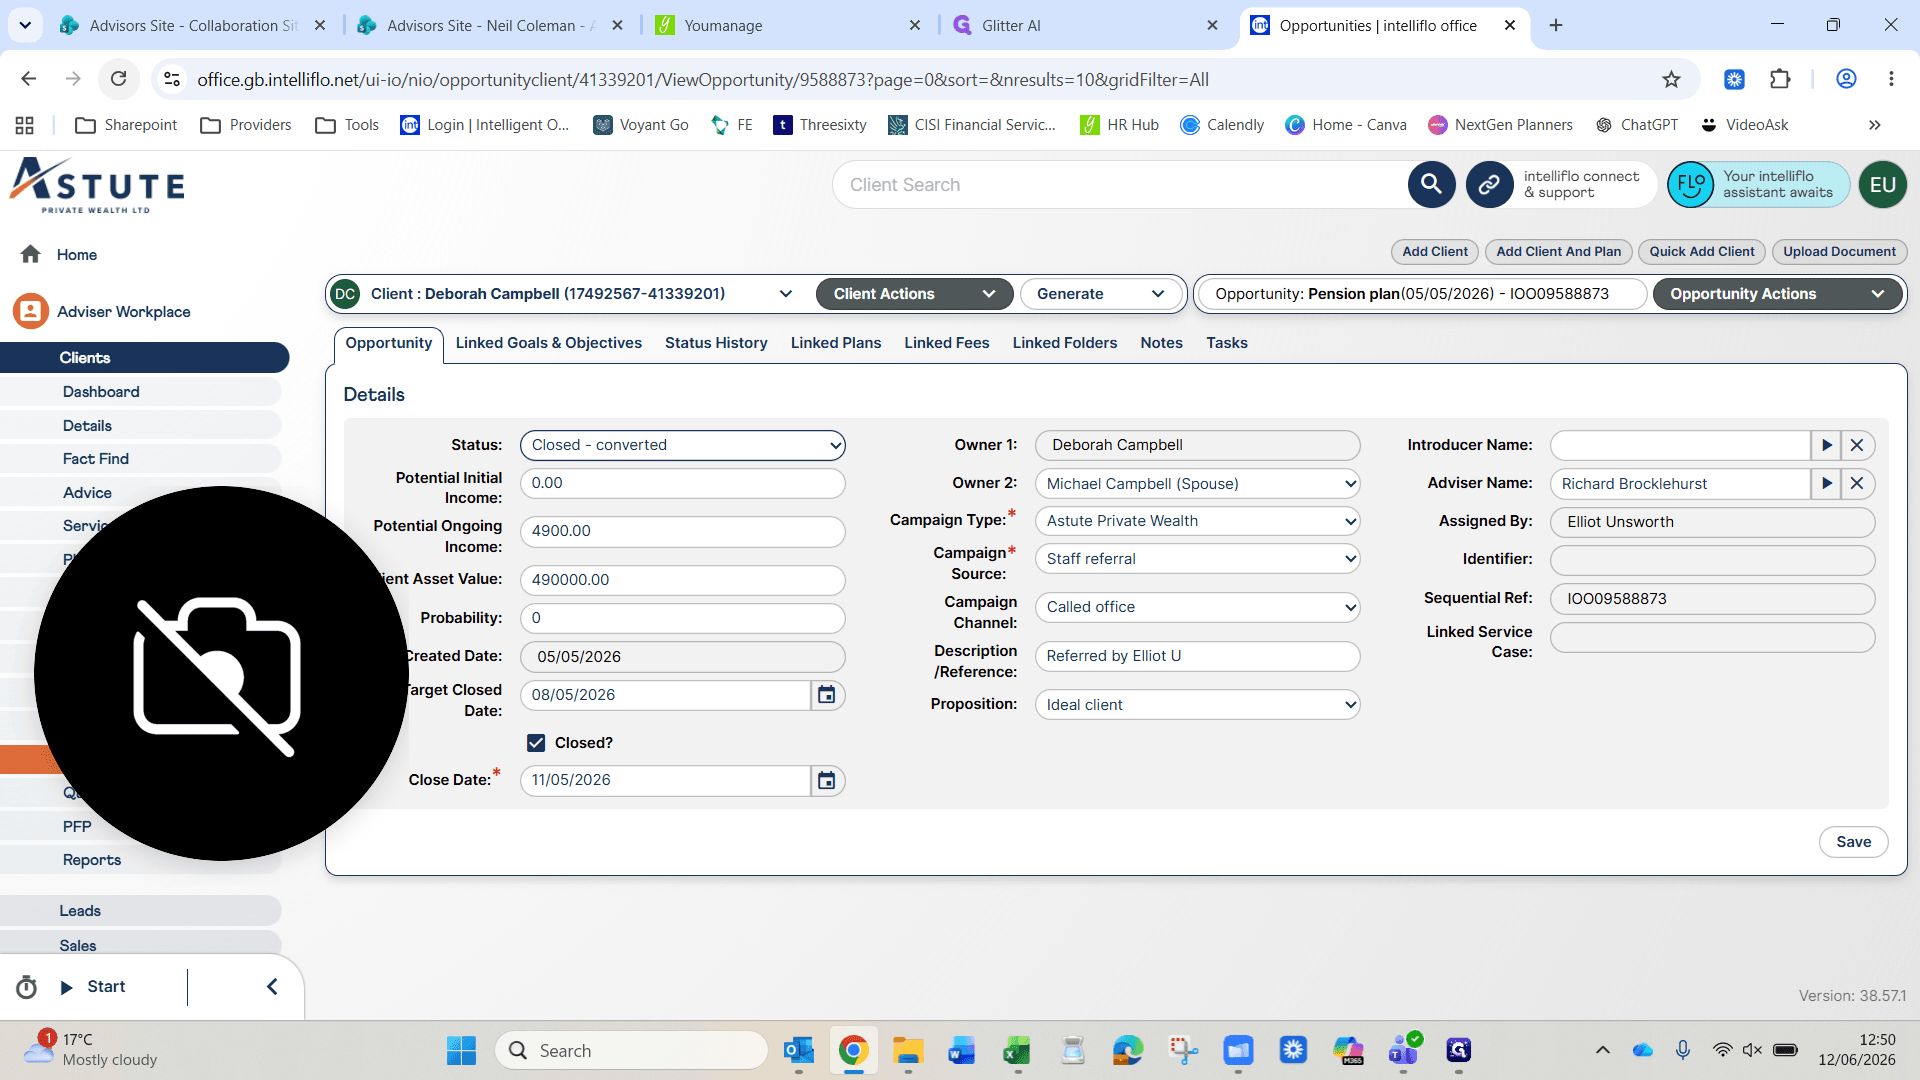
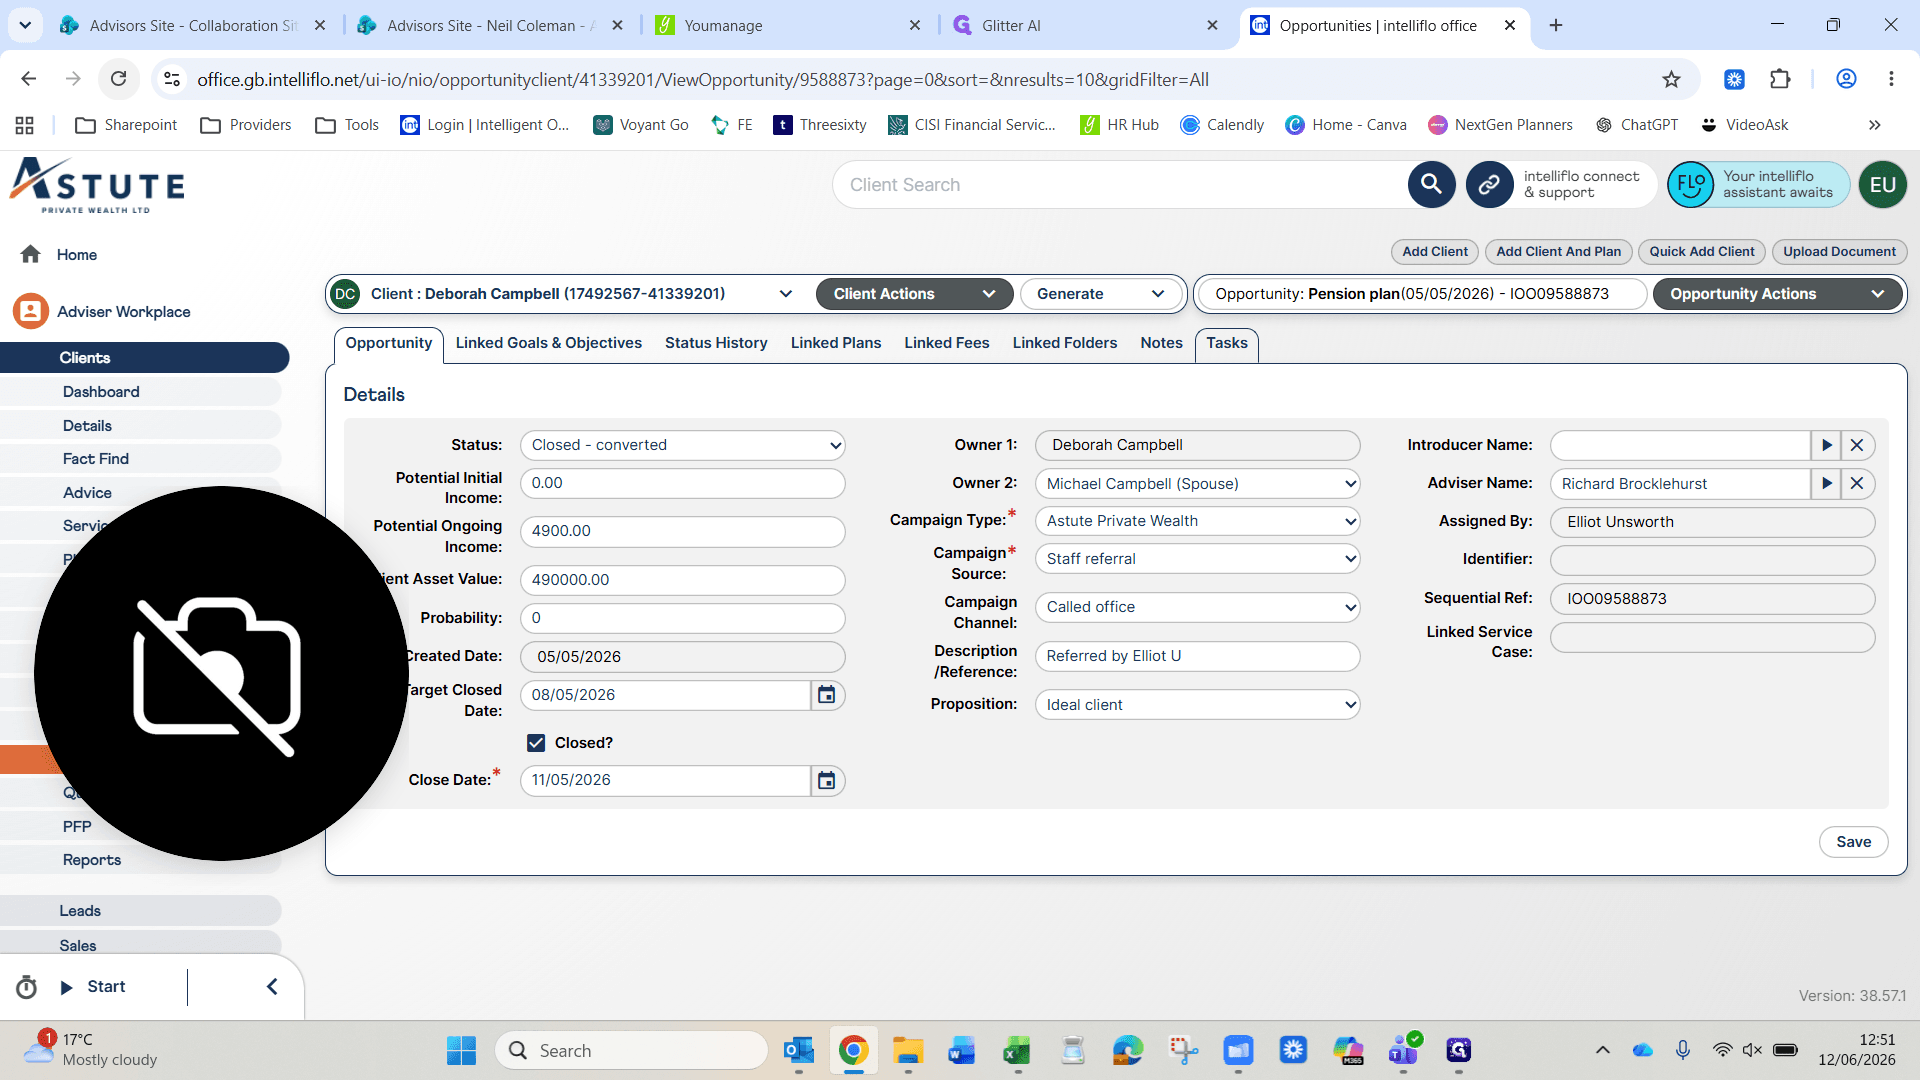
Update the Campaign source to indicate how they know Astute exists.
Step #16: Update the Campaign source to indicate how they know Astute exists.
17
Update the Campaign channel to reflect their contact method.
Step #17: Update the Campaign channel to reflect their contact method.
18
Set the Close Date to exactly one month from today.
Step #18: Set the Close Date to exactly one month from today.
19
Click Save.
Step #19: Click Save.

Track with an Opportunity Task

Create an actionable checklist to drive the onboarding process.
20
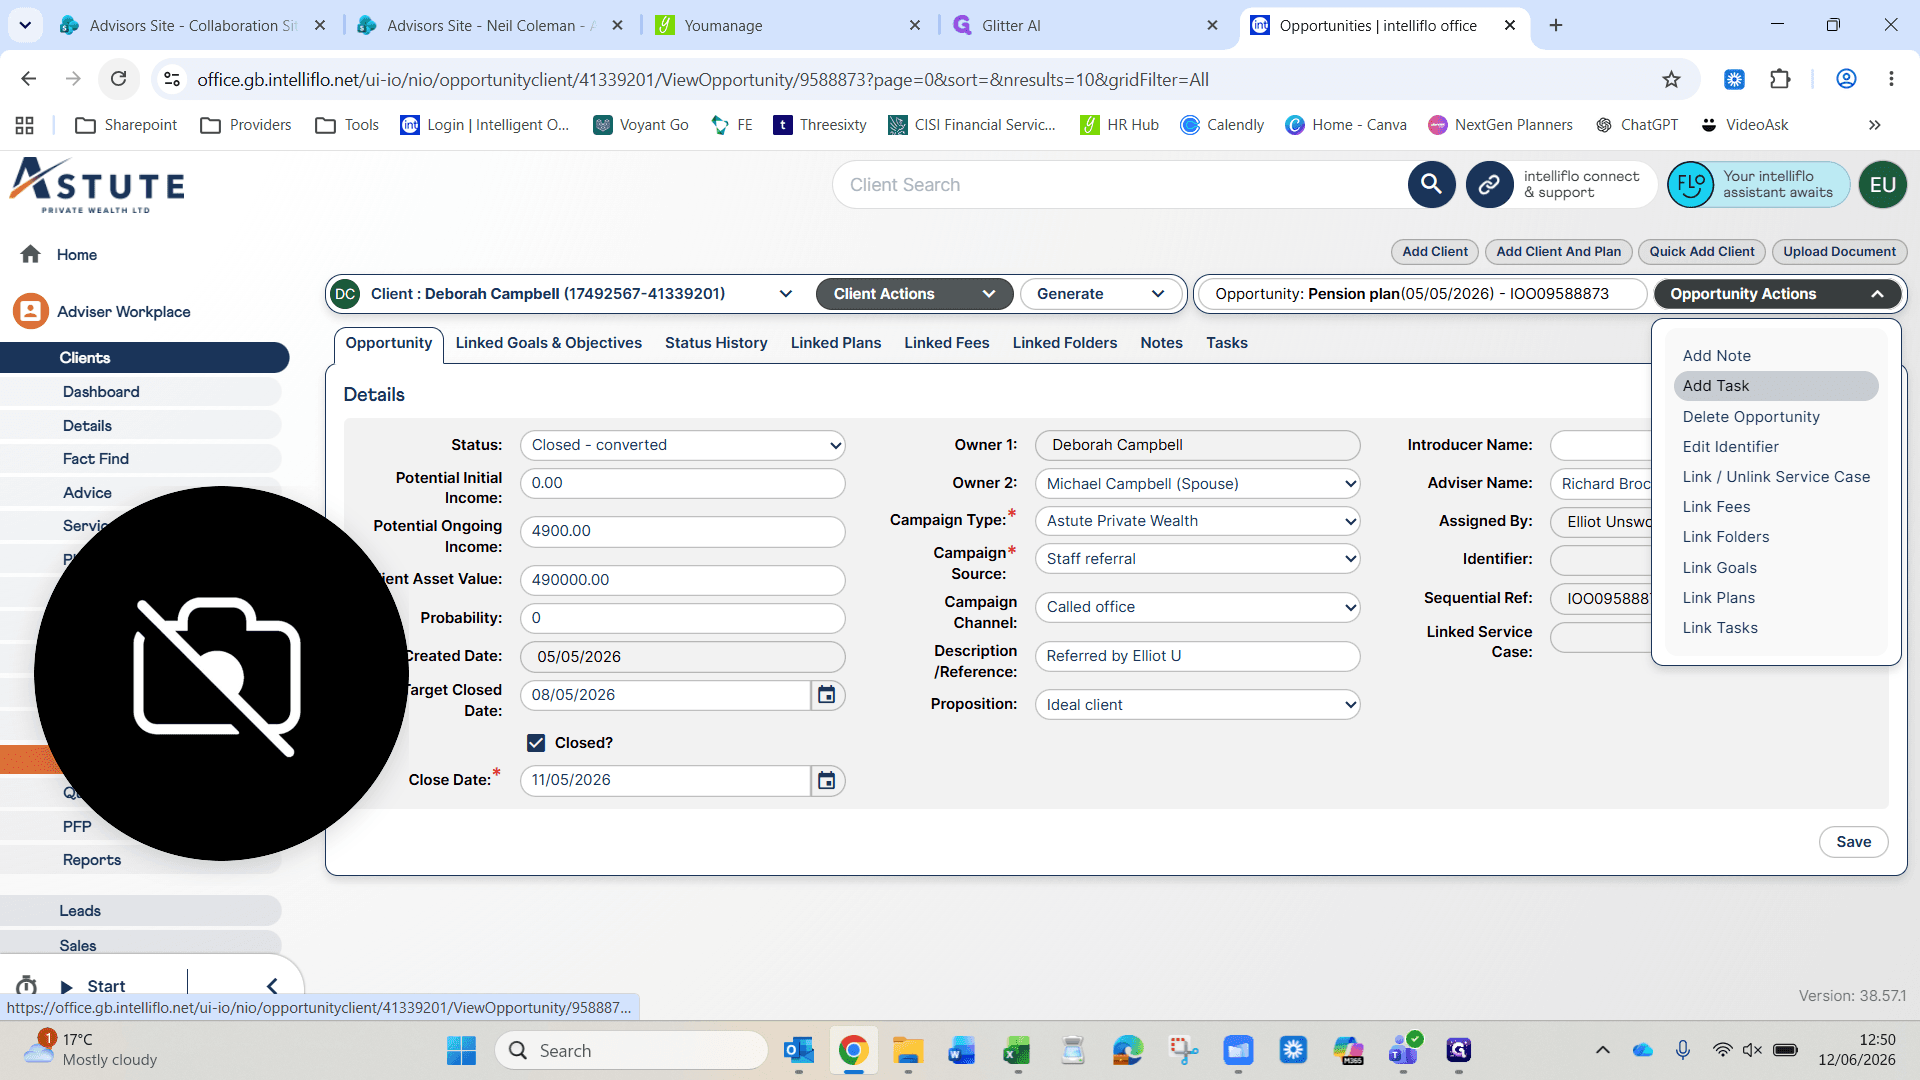
Click Opportunity Actions in the top-right corner.
Step #20: Click Opportunity Actions in the top-right corner.
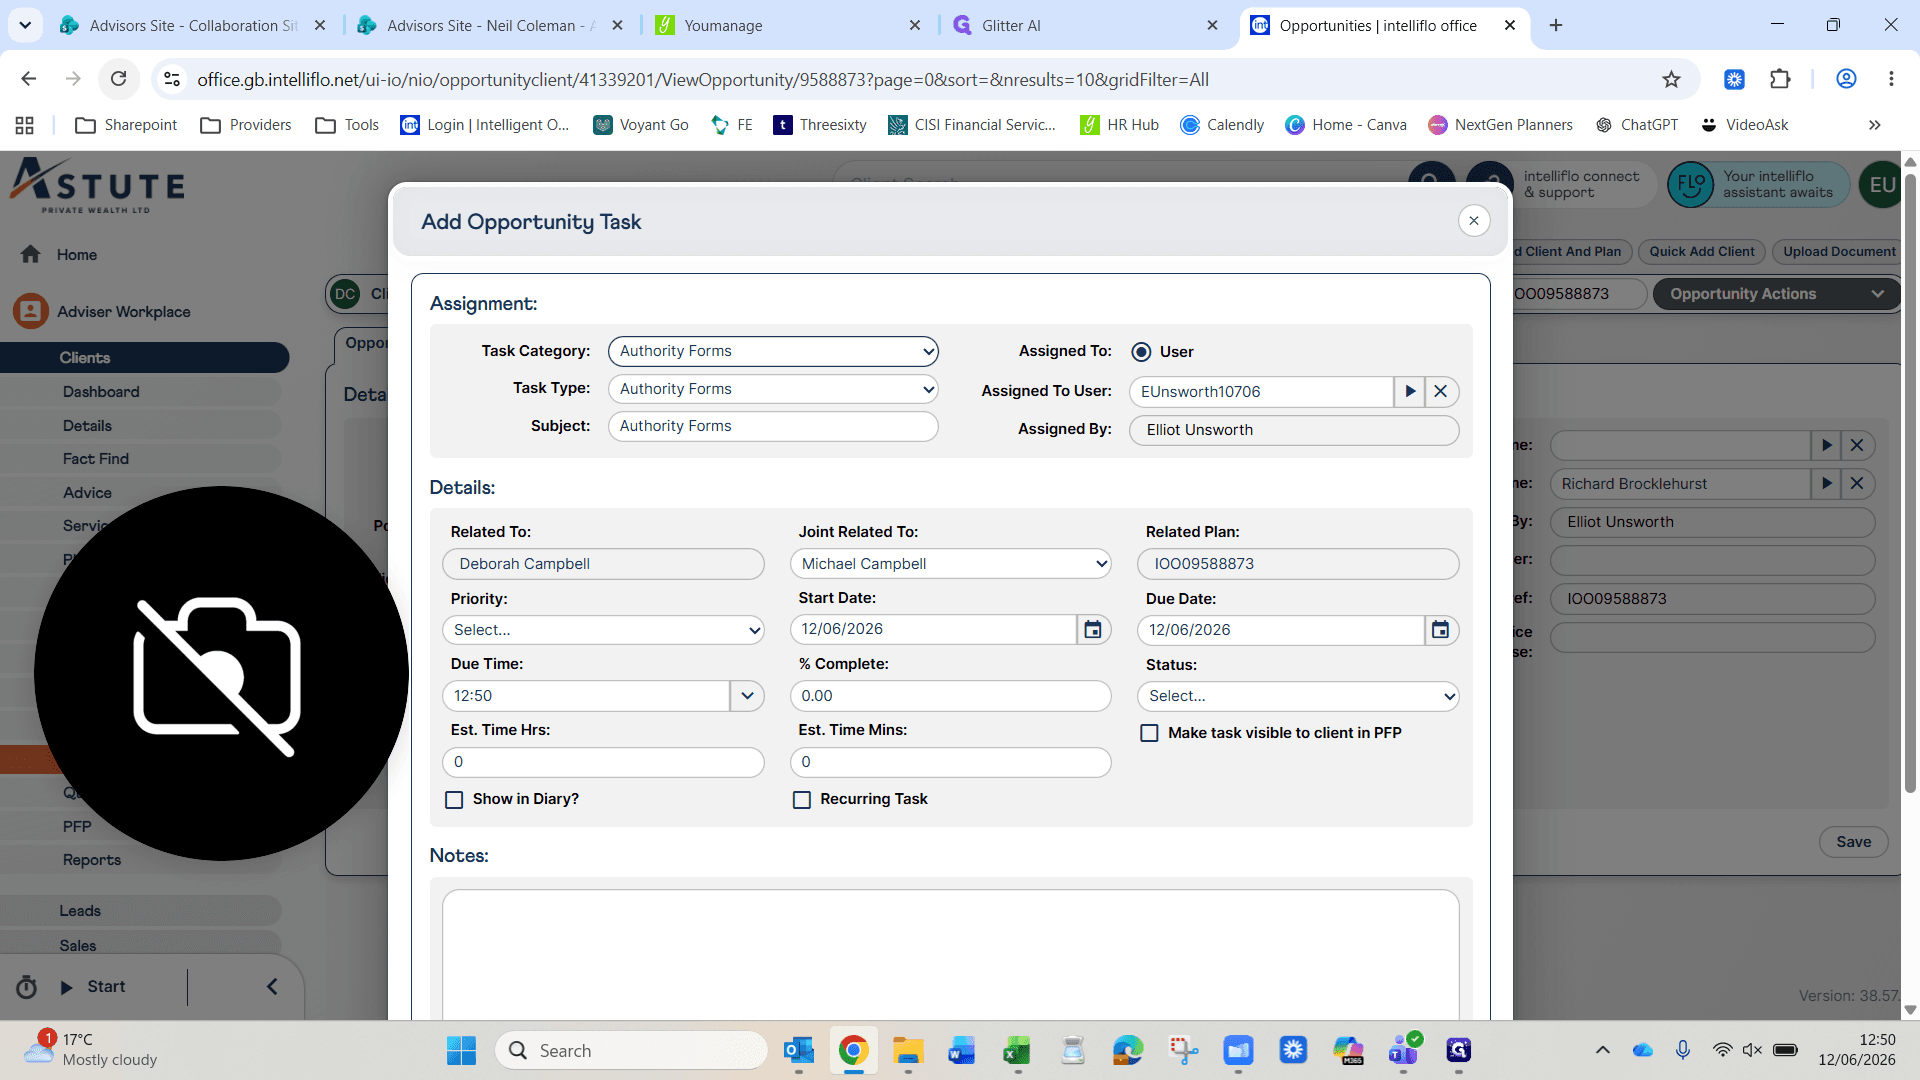
21
Select Add Task.
Step #21: Select Add Task.
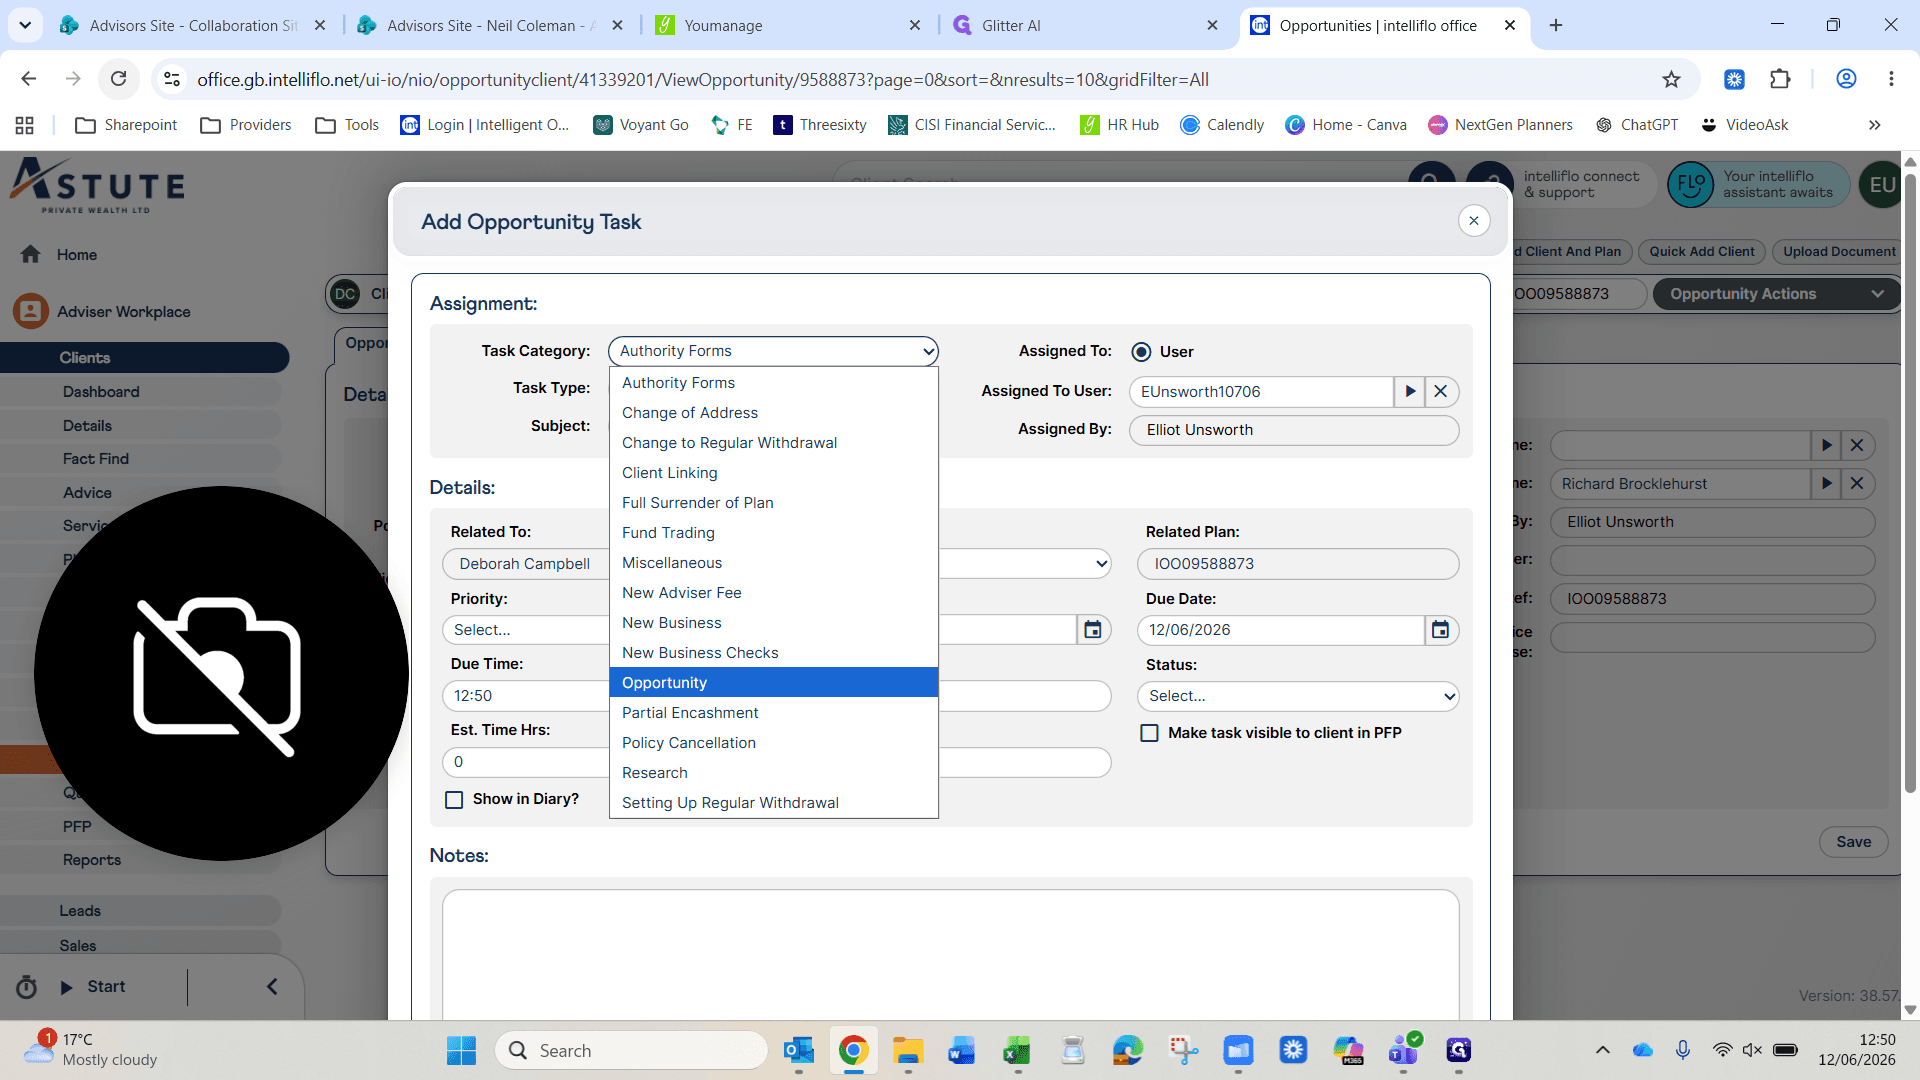
22
Open the Task Category dropdown menu.
Step #22: Open the Task Category dropdown menu.
23
Select Opportunity to auto-generate the workflow checklist.
Step #23: Select Opportunity to auto-generate the workflow checklist.
24
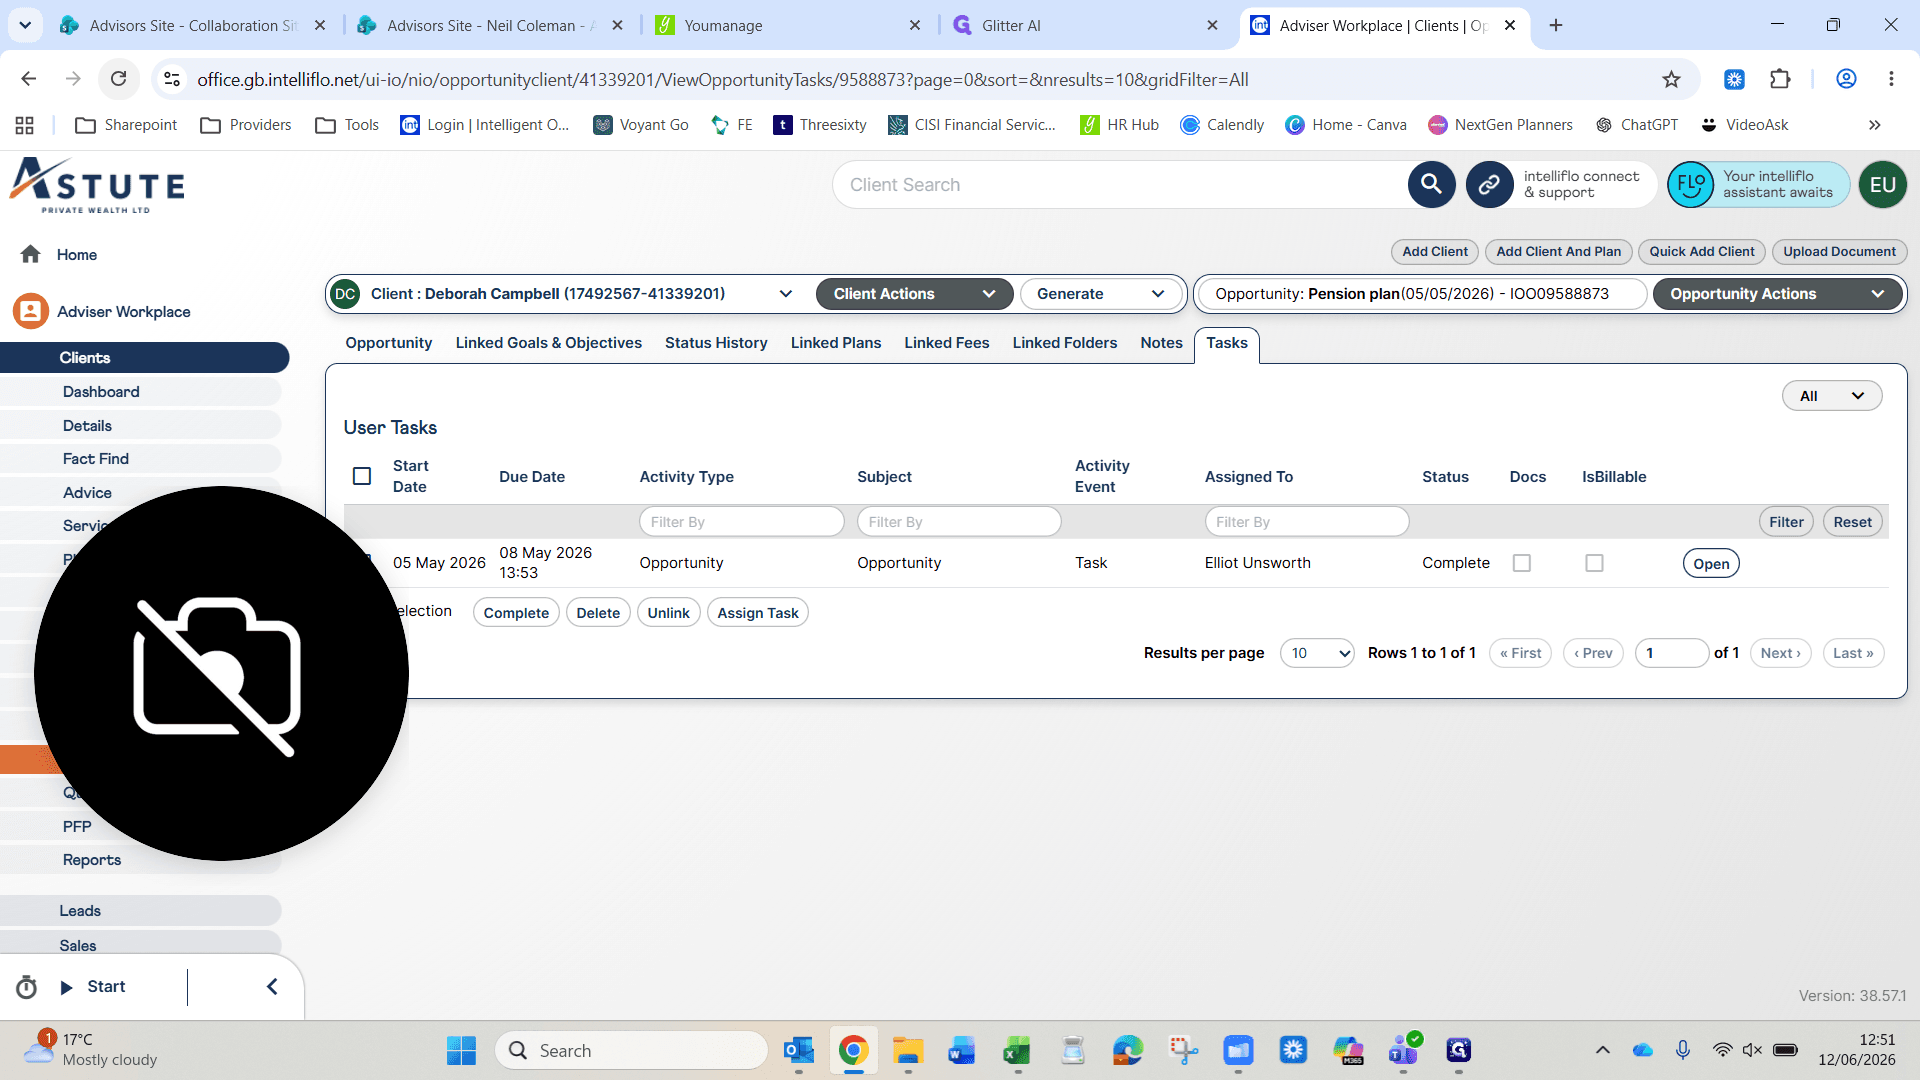
Click Tasks on the left menu to view the newly created checklist.
Step #24: Click Tasks on the left menu to view the newly created checklist.
25
Click Open to access and check off individual task items.
Step #25: Click Open to access and check off individual task items.

The generated task outlines the standard onboarding process:

  • Qualify the lead and refer it to the adviser.

  • Gather vulnerability details.

  • Optionally issue a welcome communication via Brevo.

  • Follow up with the adviser to determine the outcome.

Opportunity Statuses

As the lead progresses, update the opportunity status to reflect the current state of the engagement:

Status

Description

New

A newly logged opportunity that has not yet been processed.

Referred to Advisor

The inquiry is qualified and handed over for advice.

Meeting Scheduled

The prospect has booked an initial consultation.

Closed - Converted

The prospect successfully onboarded as a new client.

Closed - Not Taken Up

The prospect chose not to proceed.

Q: Who is responsible for managing the opportunity?

A: Whoever initially claims the inquiry in the group inbox will oversee the opportunity all the way through to closure.

Q: How is the target close date determined?

A: You should set the target close date to exactly one month from the date the opportunity is created.

Term

Definition

Intelliflo Office (IO)

A client management and financial planning software platform used to log prospects.

Campaign source

The origin of the lead, indicating how the prospect discovered the company.

Campaign channel

The specific method the prospect used to make initial contact.

Brevo

A marketing tool used to send automated welcome communications to new prospects.