Icon

How to Process Purchase Orders and Issue Invoices in Dynamics GP

Learn how to process incoming purchase orders, verify order minimums, enter line items, calculate freight, and issue invoices in Microsoft Dynamics GP.

By Amy Chen

Processing purchase orders and issuing invoices in Microsoft Dynamics GP requires verifying order minimums, selecting the correct shipping warehouse, tracking the order, and calculating freight before sending the final invoice.

Recap:

- Standard orders: Create invoice, check for PO# or leave blank if customer does not provide. Send inv to customer.
- Shopify orders: Create invoice using the Shopify order# and add PO if they provide. No need to send INV for these. For Canadian orders, download inv for downstairs
- Coupa orders: Create invoice, enter their PO# in PO info. Send invoice in Coupa, not GP

1. Verify the Purchase Order
1
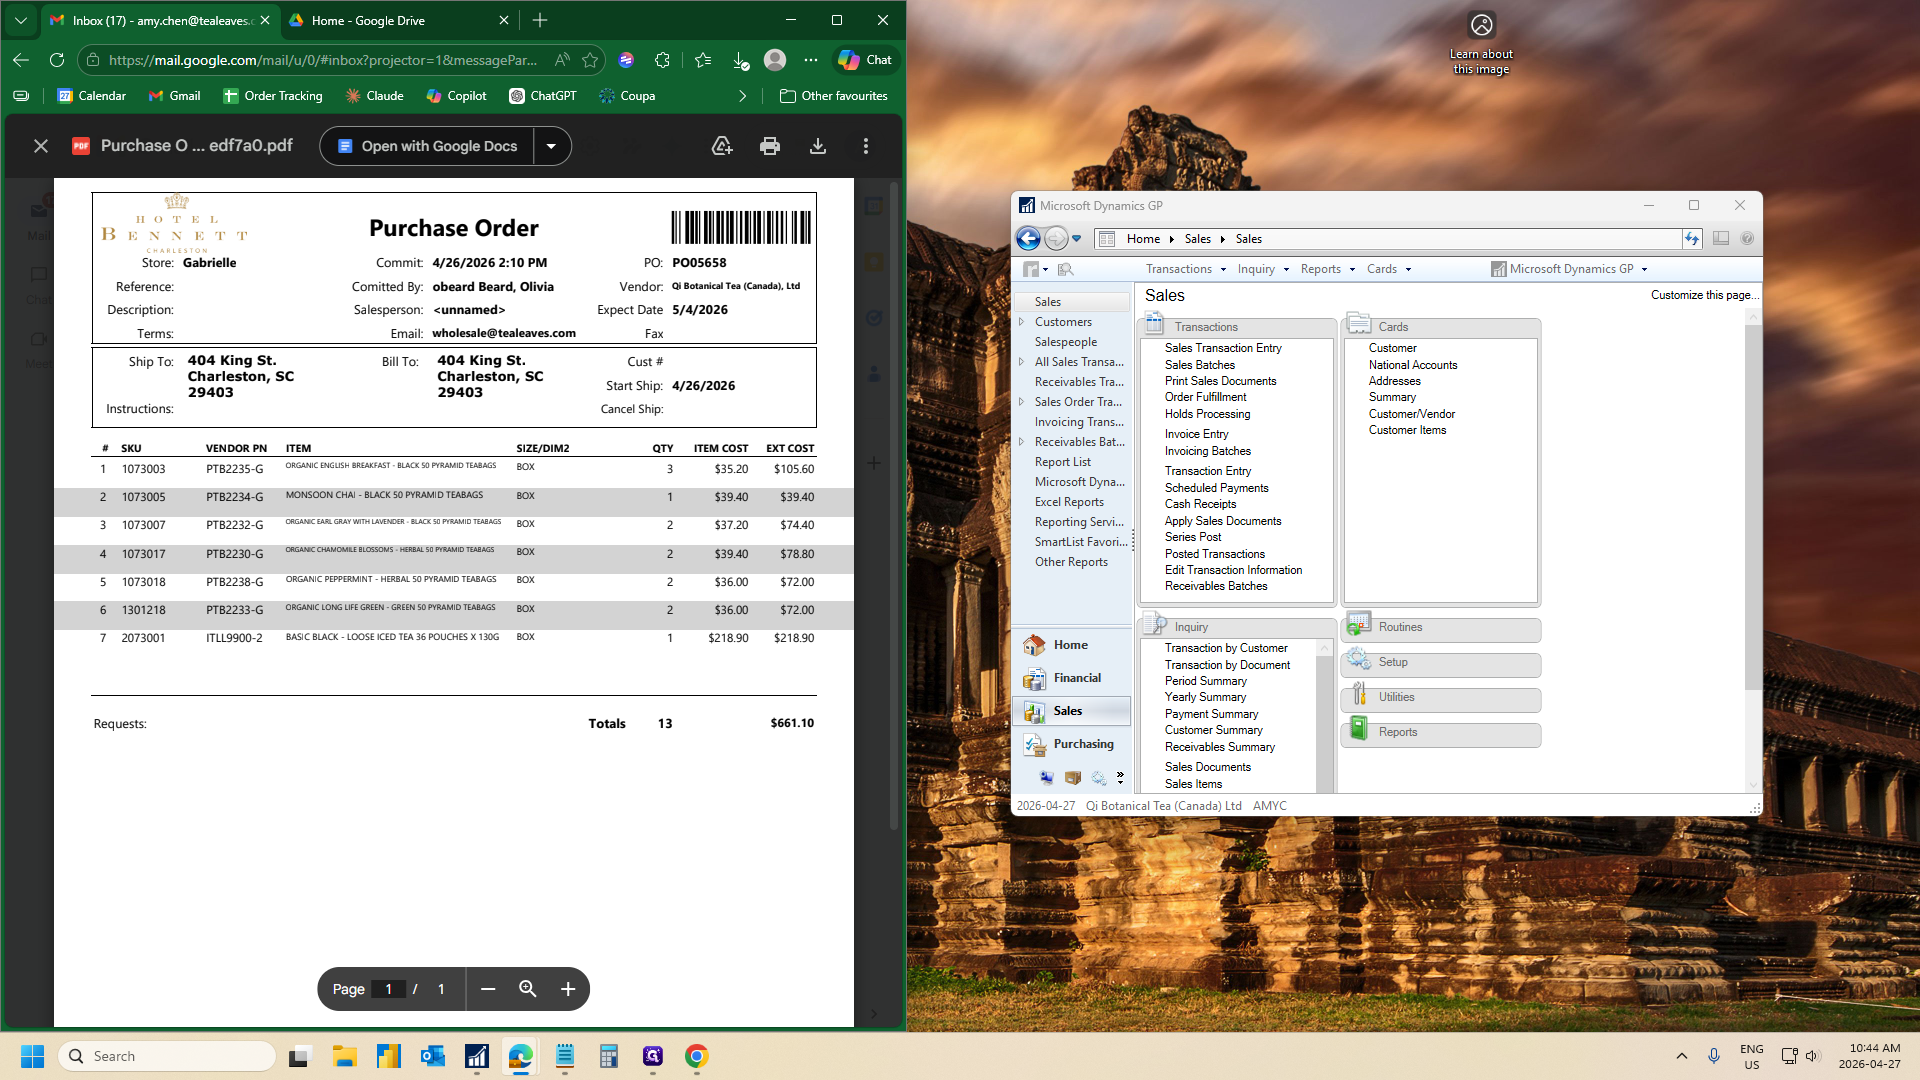
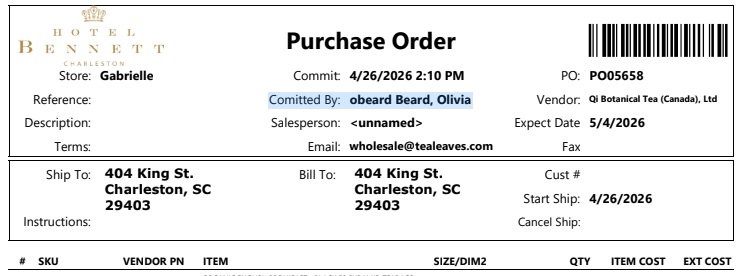
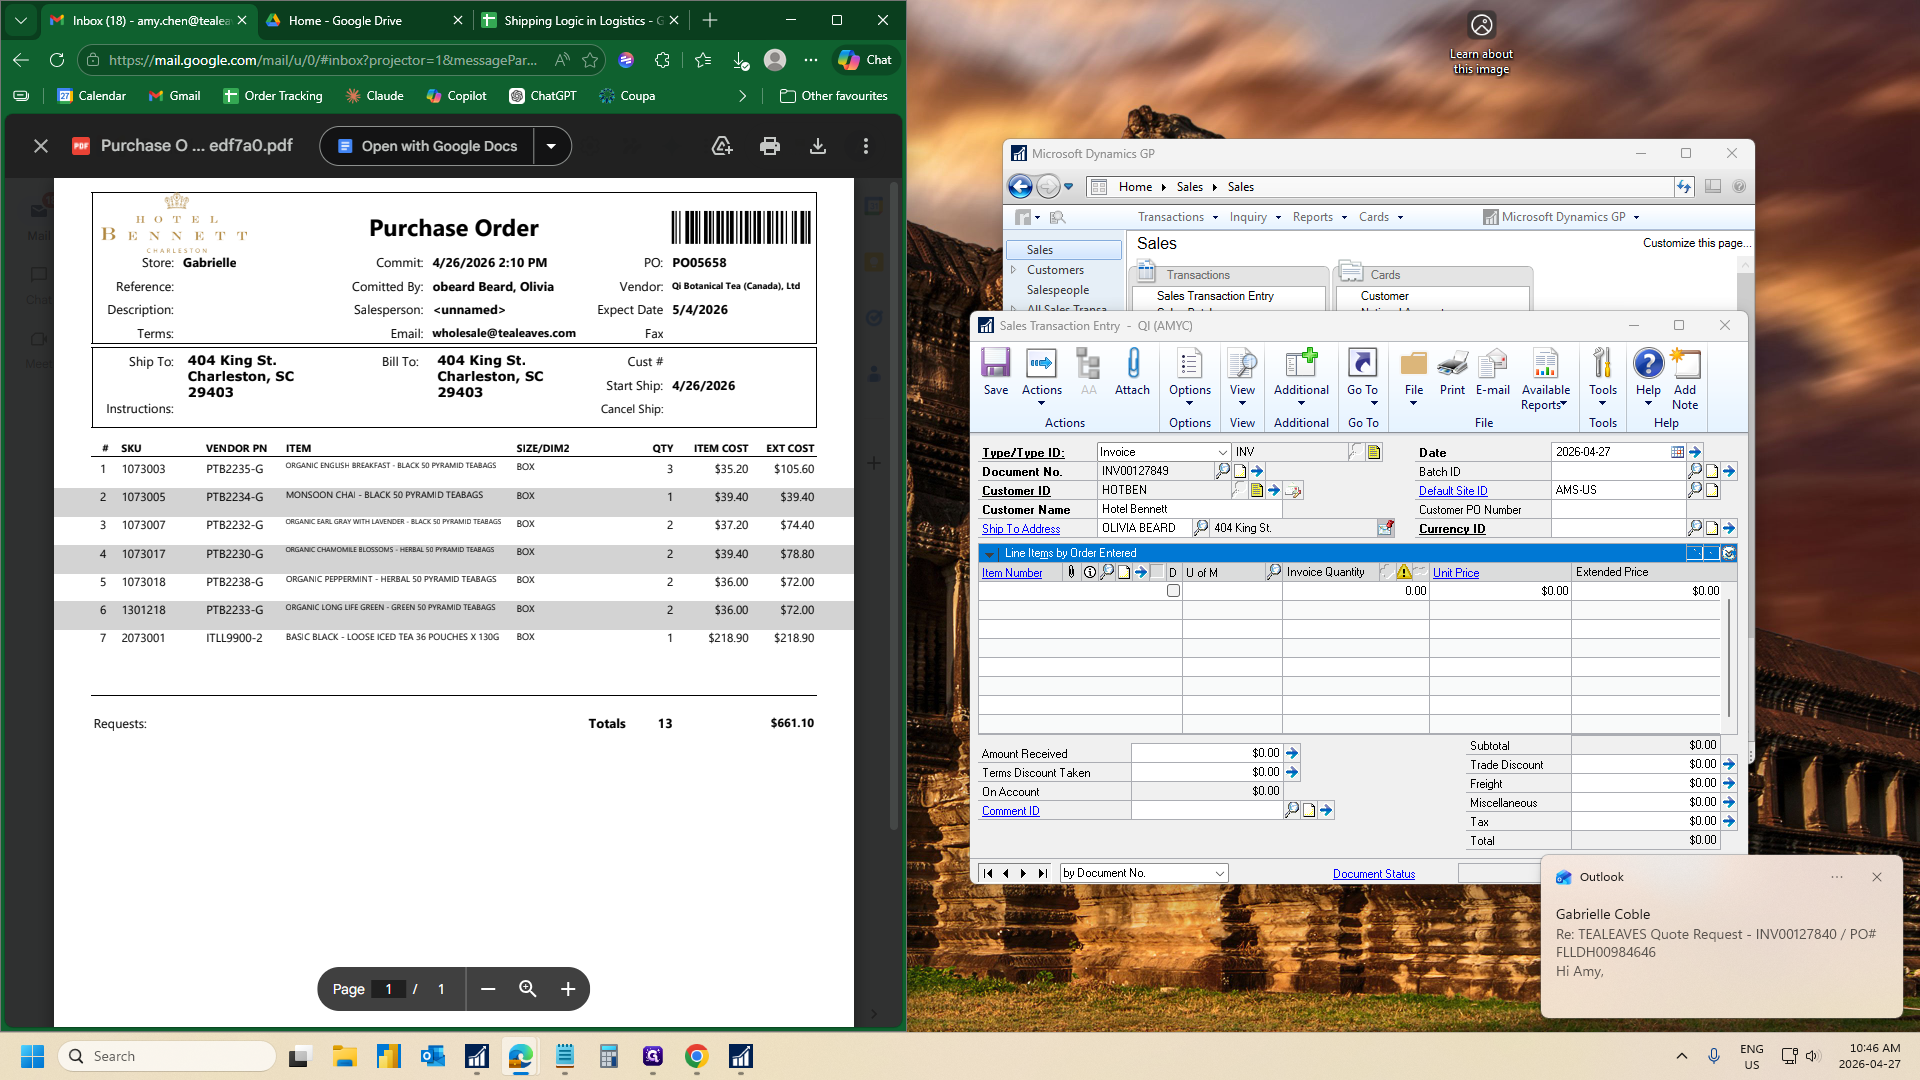
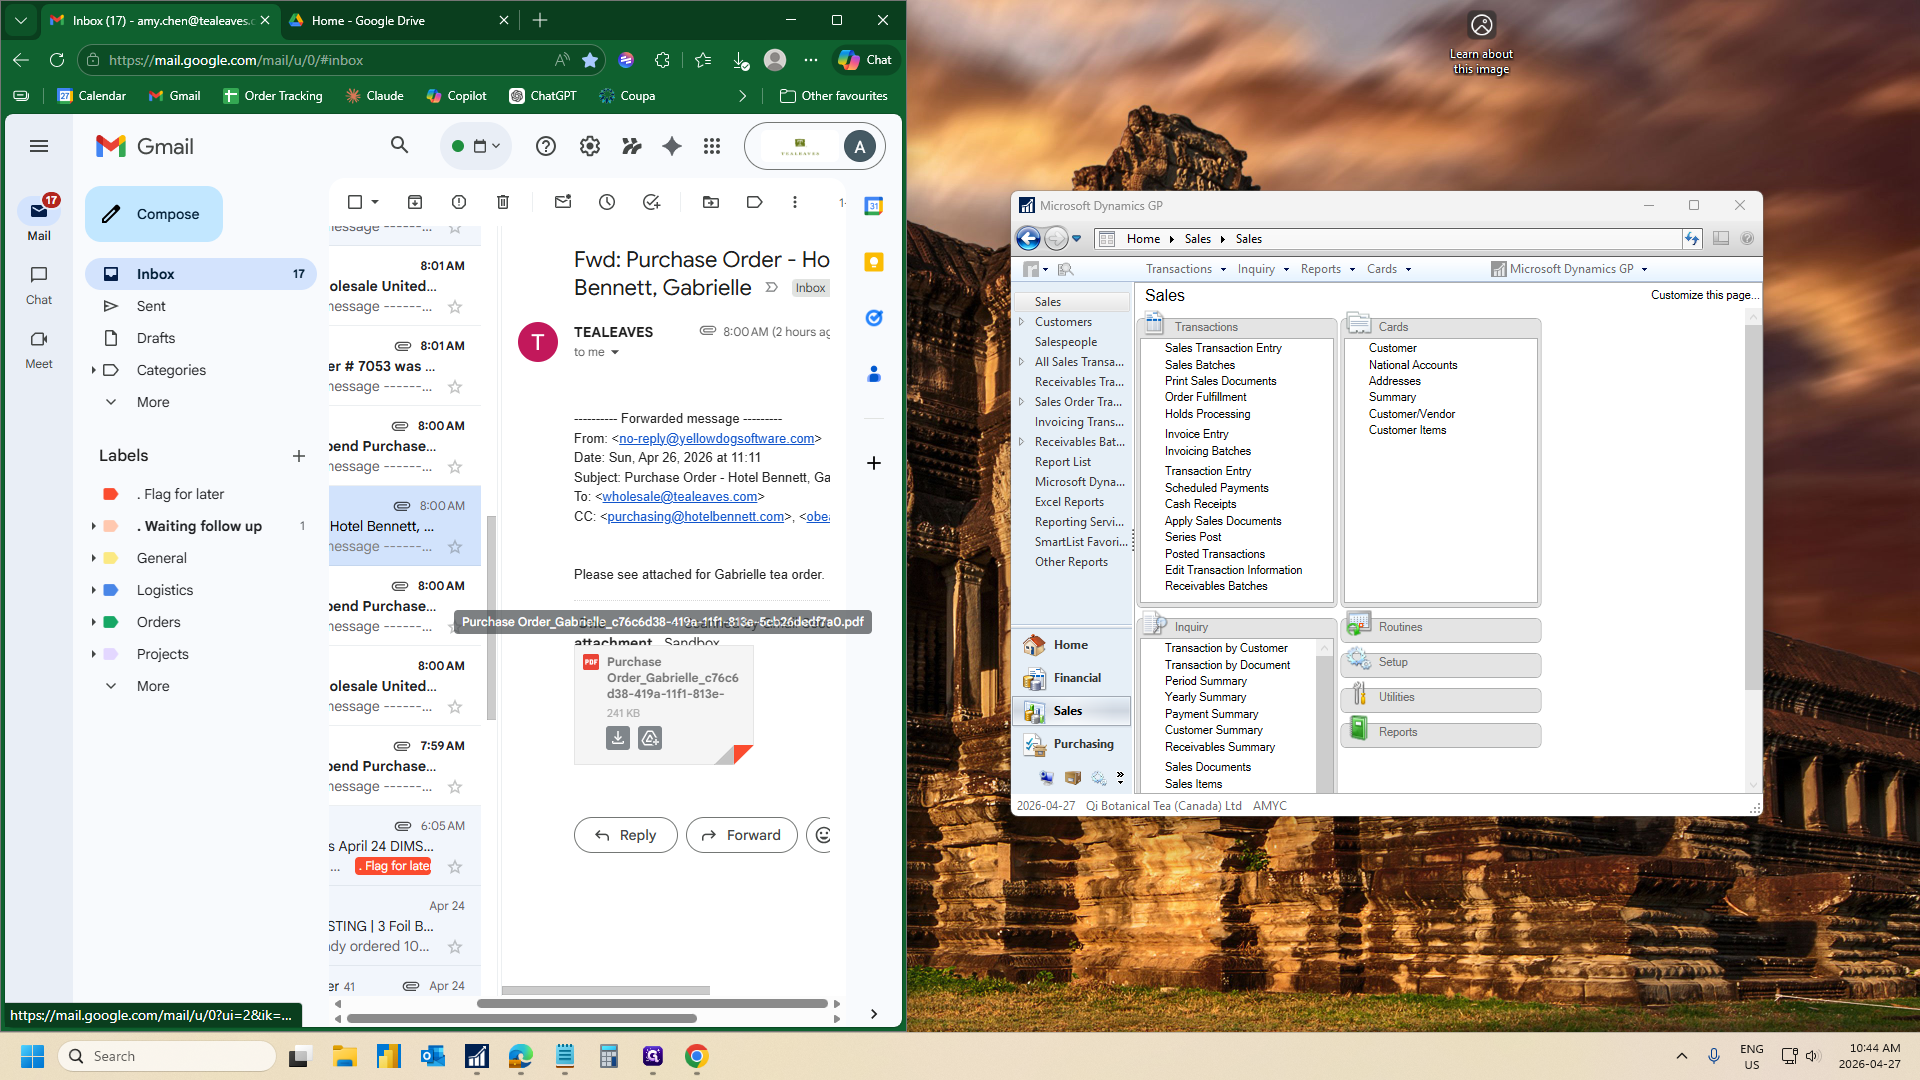
Open the purchase order email and click the PDF attachment.
Step #1: Open the purchase order email and click the PDF attachment.

2
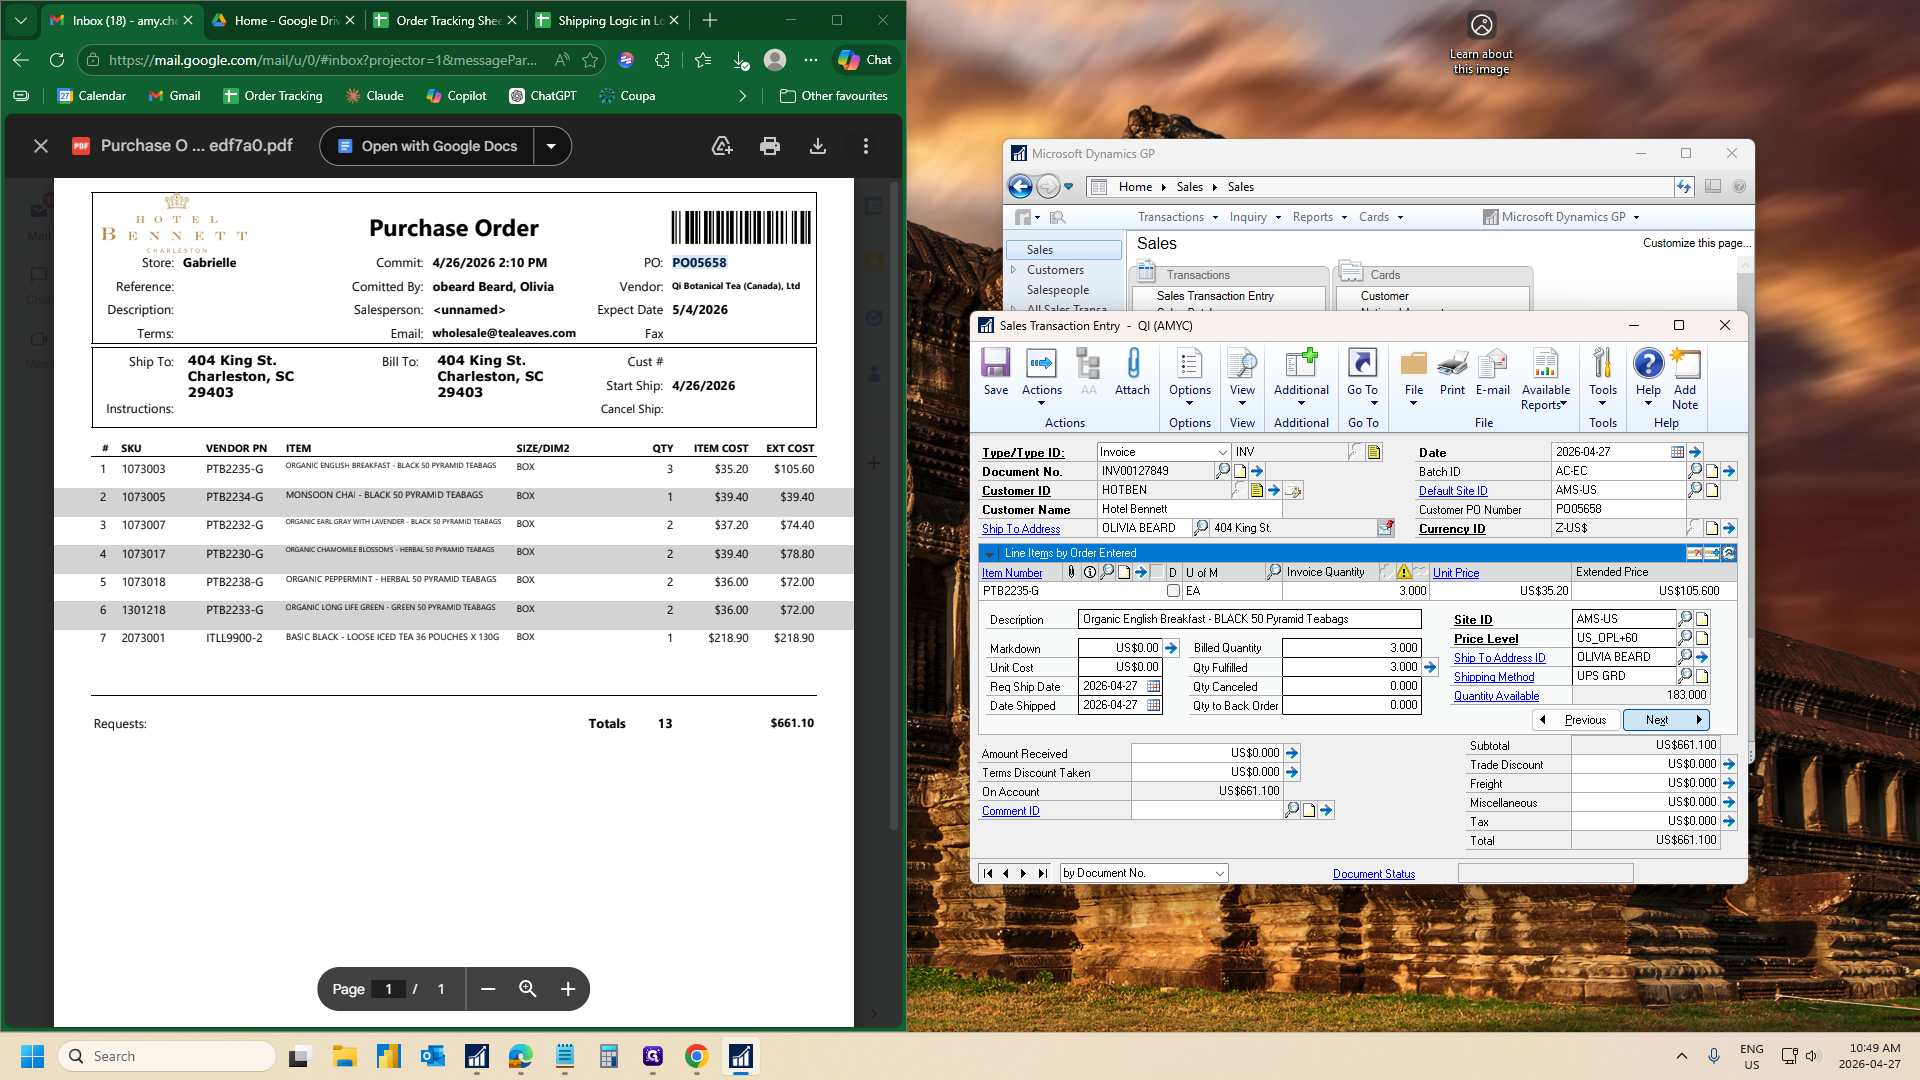
Check the order total to ensure it meets the minimum order quantity (MOQ) of $200. If it does not, send our templated email response.
Step #2: Check the order total to ensure it meets the minimum order quantity (MOQ) of $200. If it does not, send our templated email response.

2. Create the Sales Transaction

3
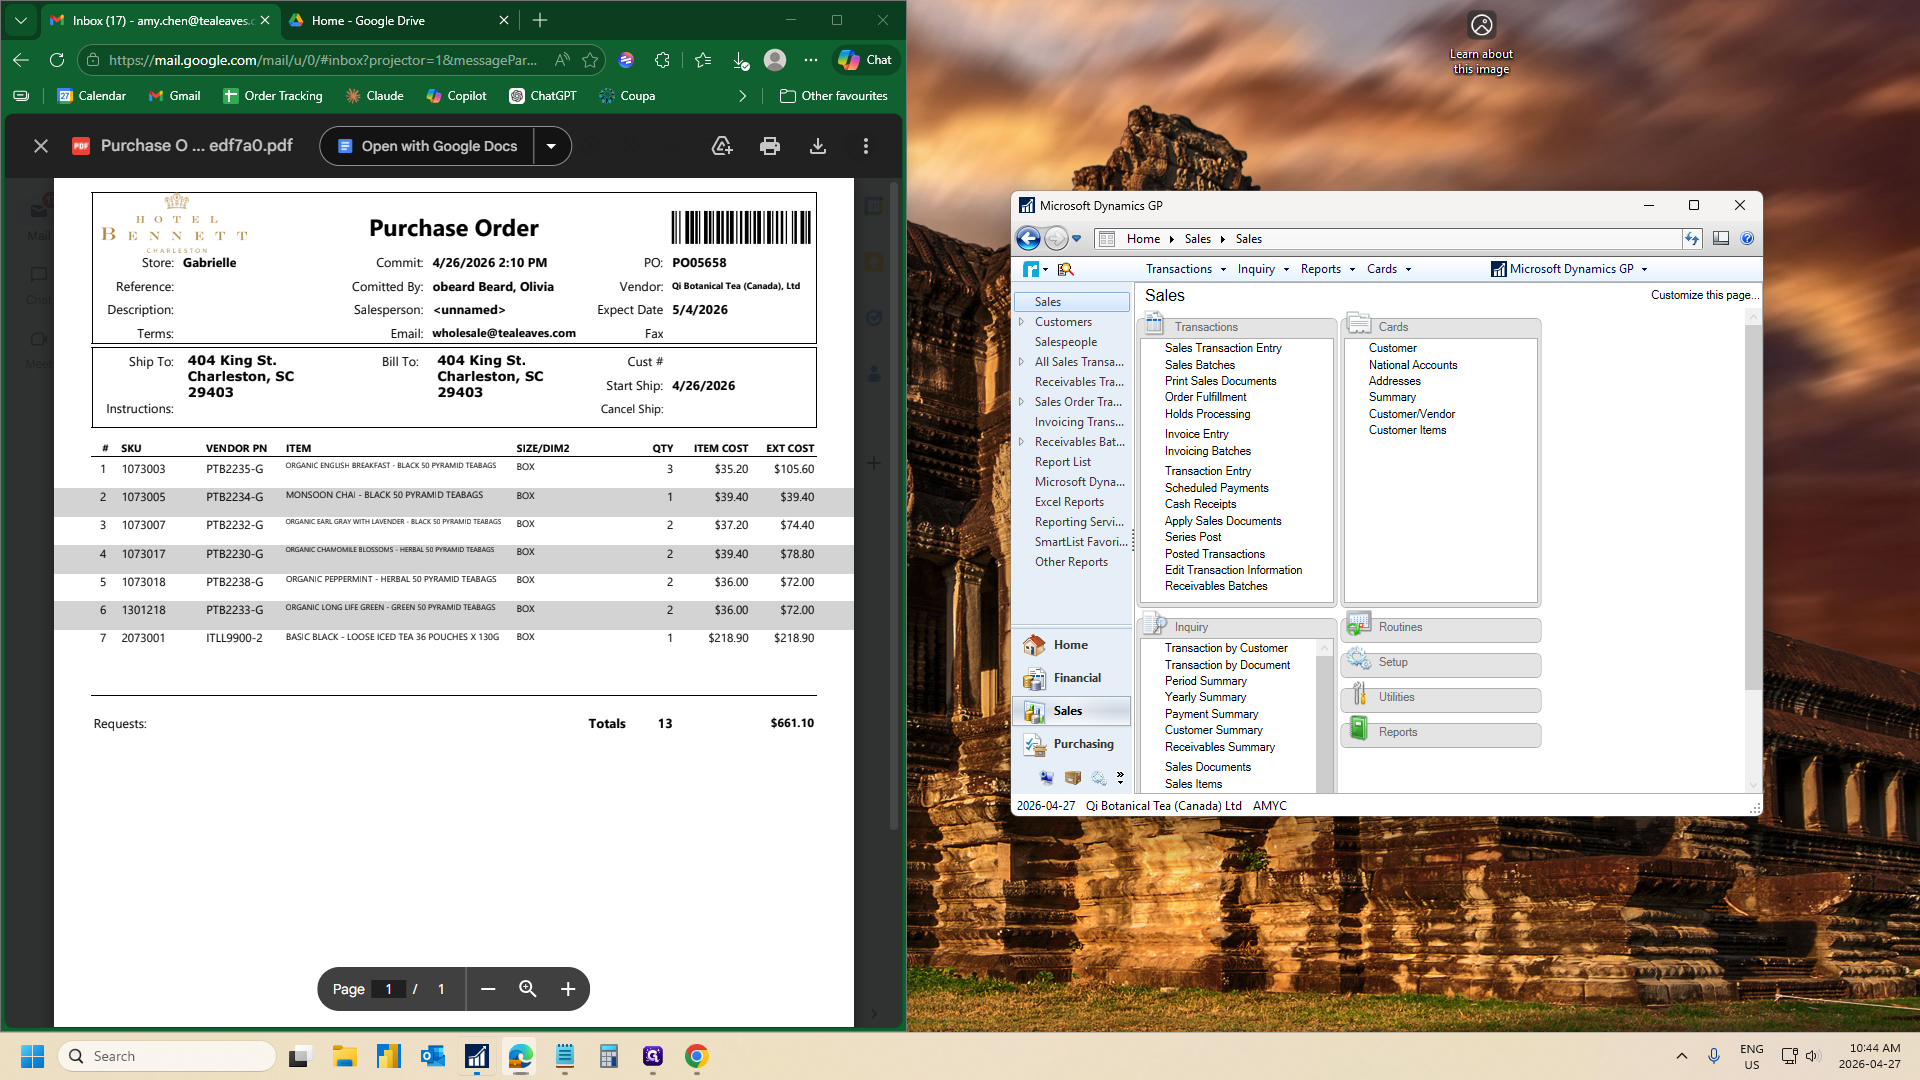
Open GP and navigate to Sales in the navigation pane.
Step #3: Open GP and navigate to Sales in the navigation pane.
4
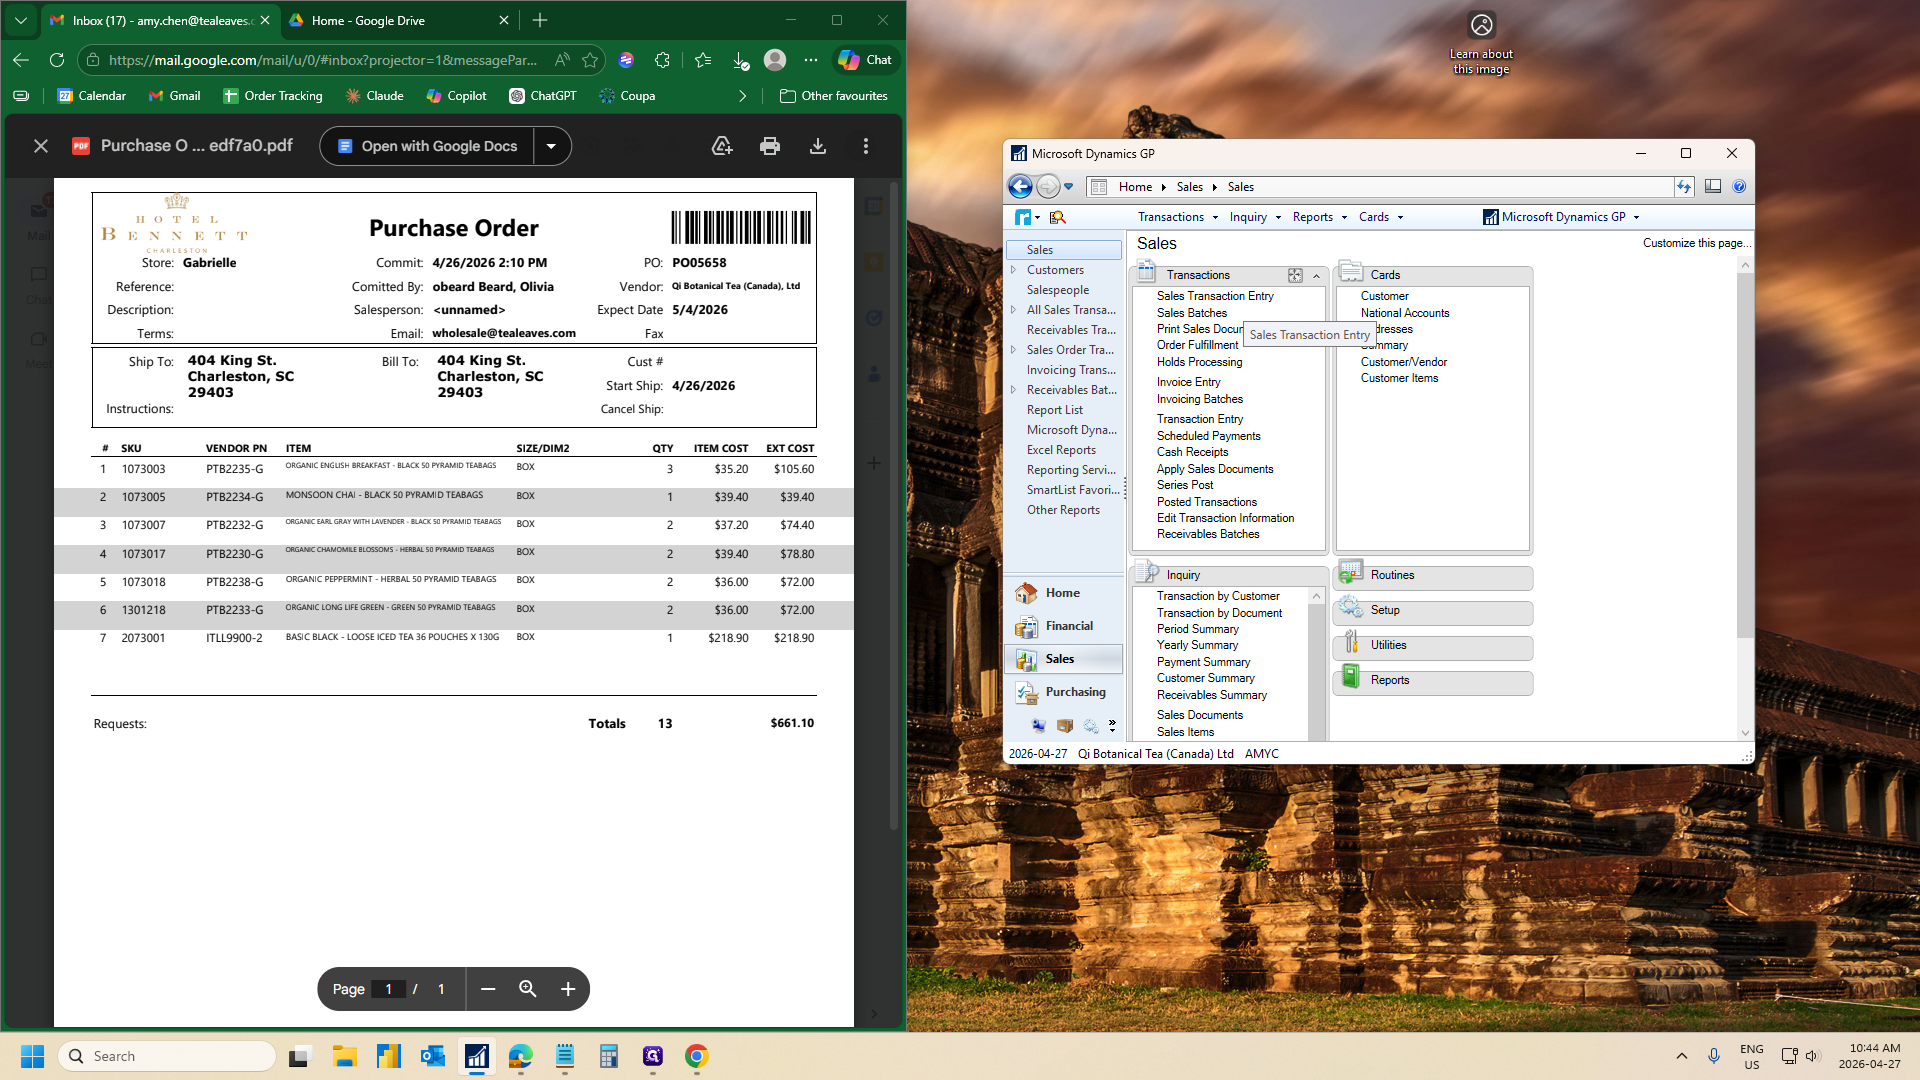
Under Transactions, click Sales Transaction Entry.
Step #4: Under Transactions, click Sales Transaction Entry.
5
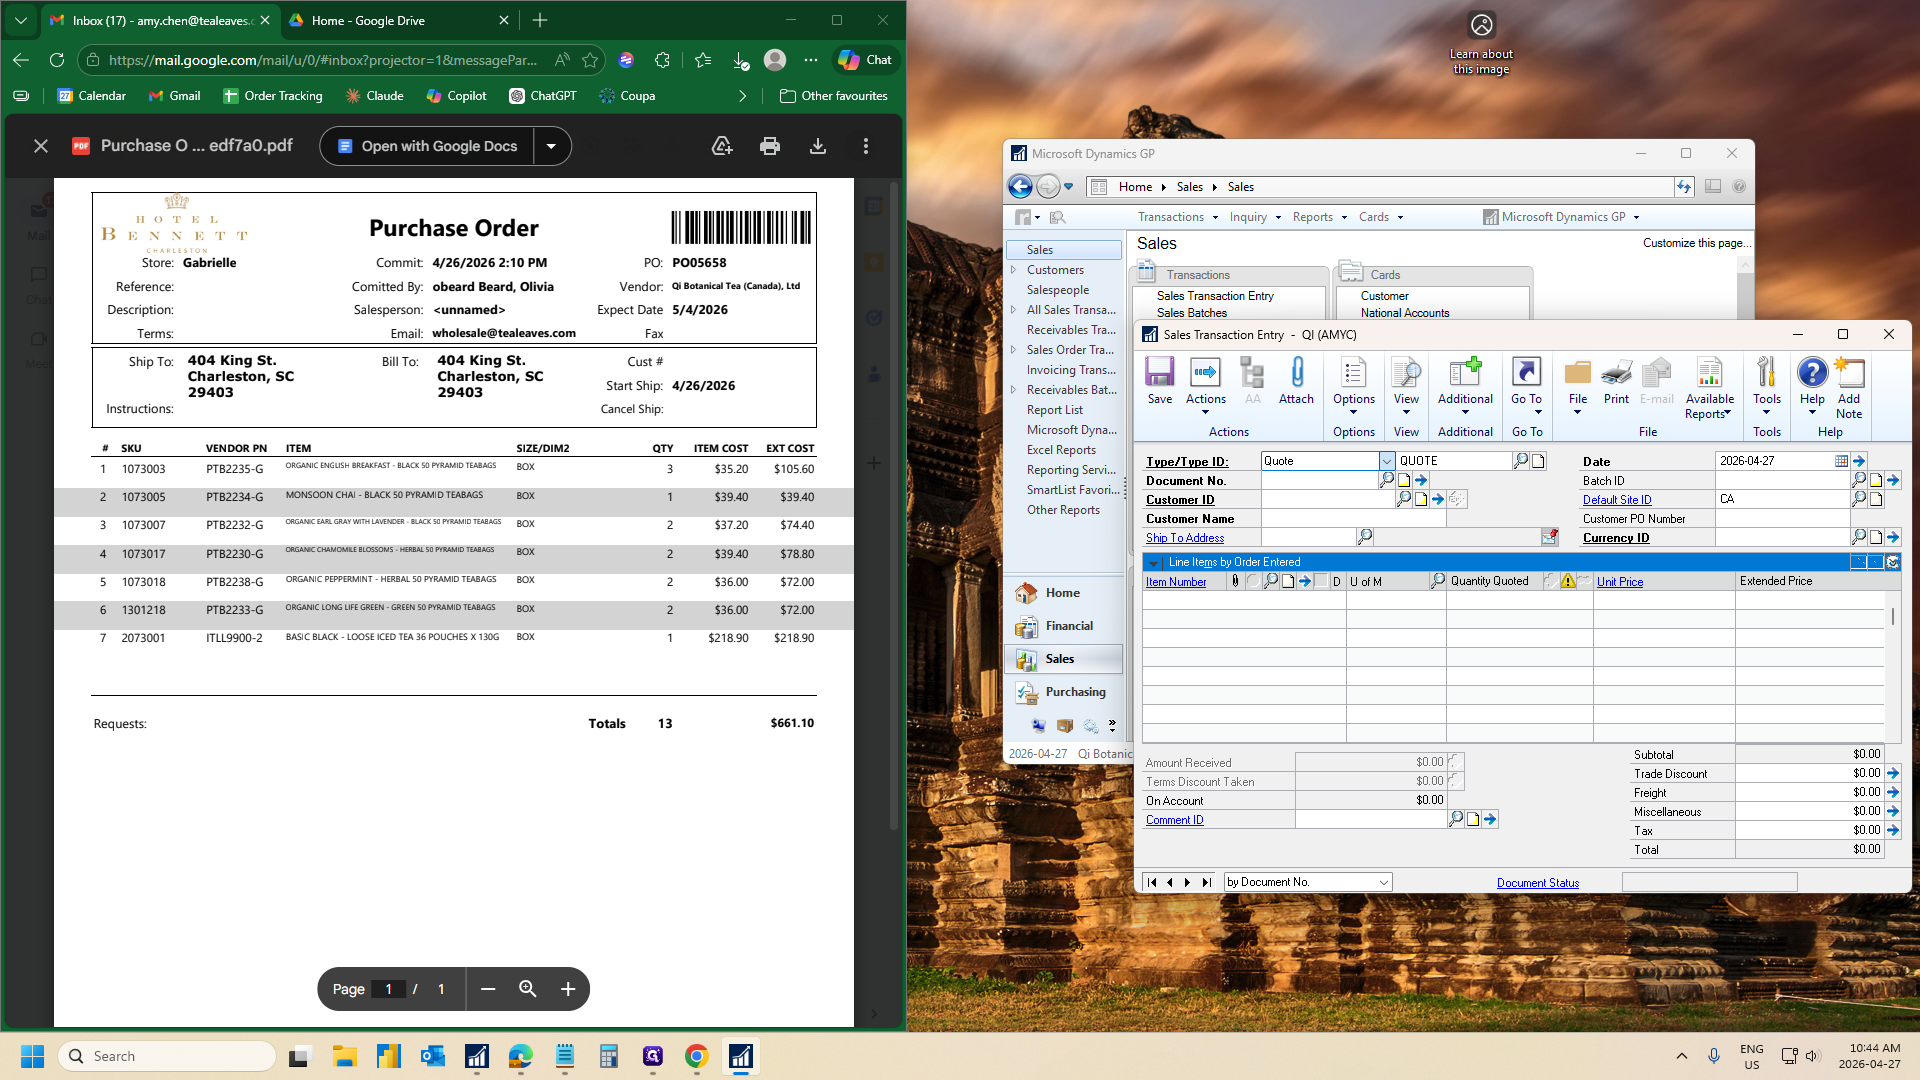
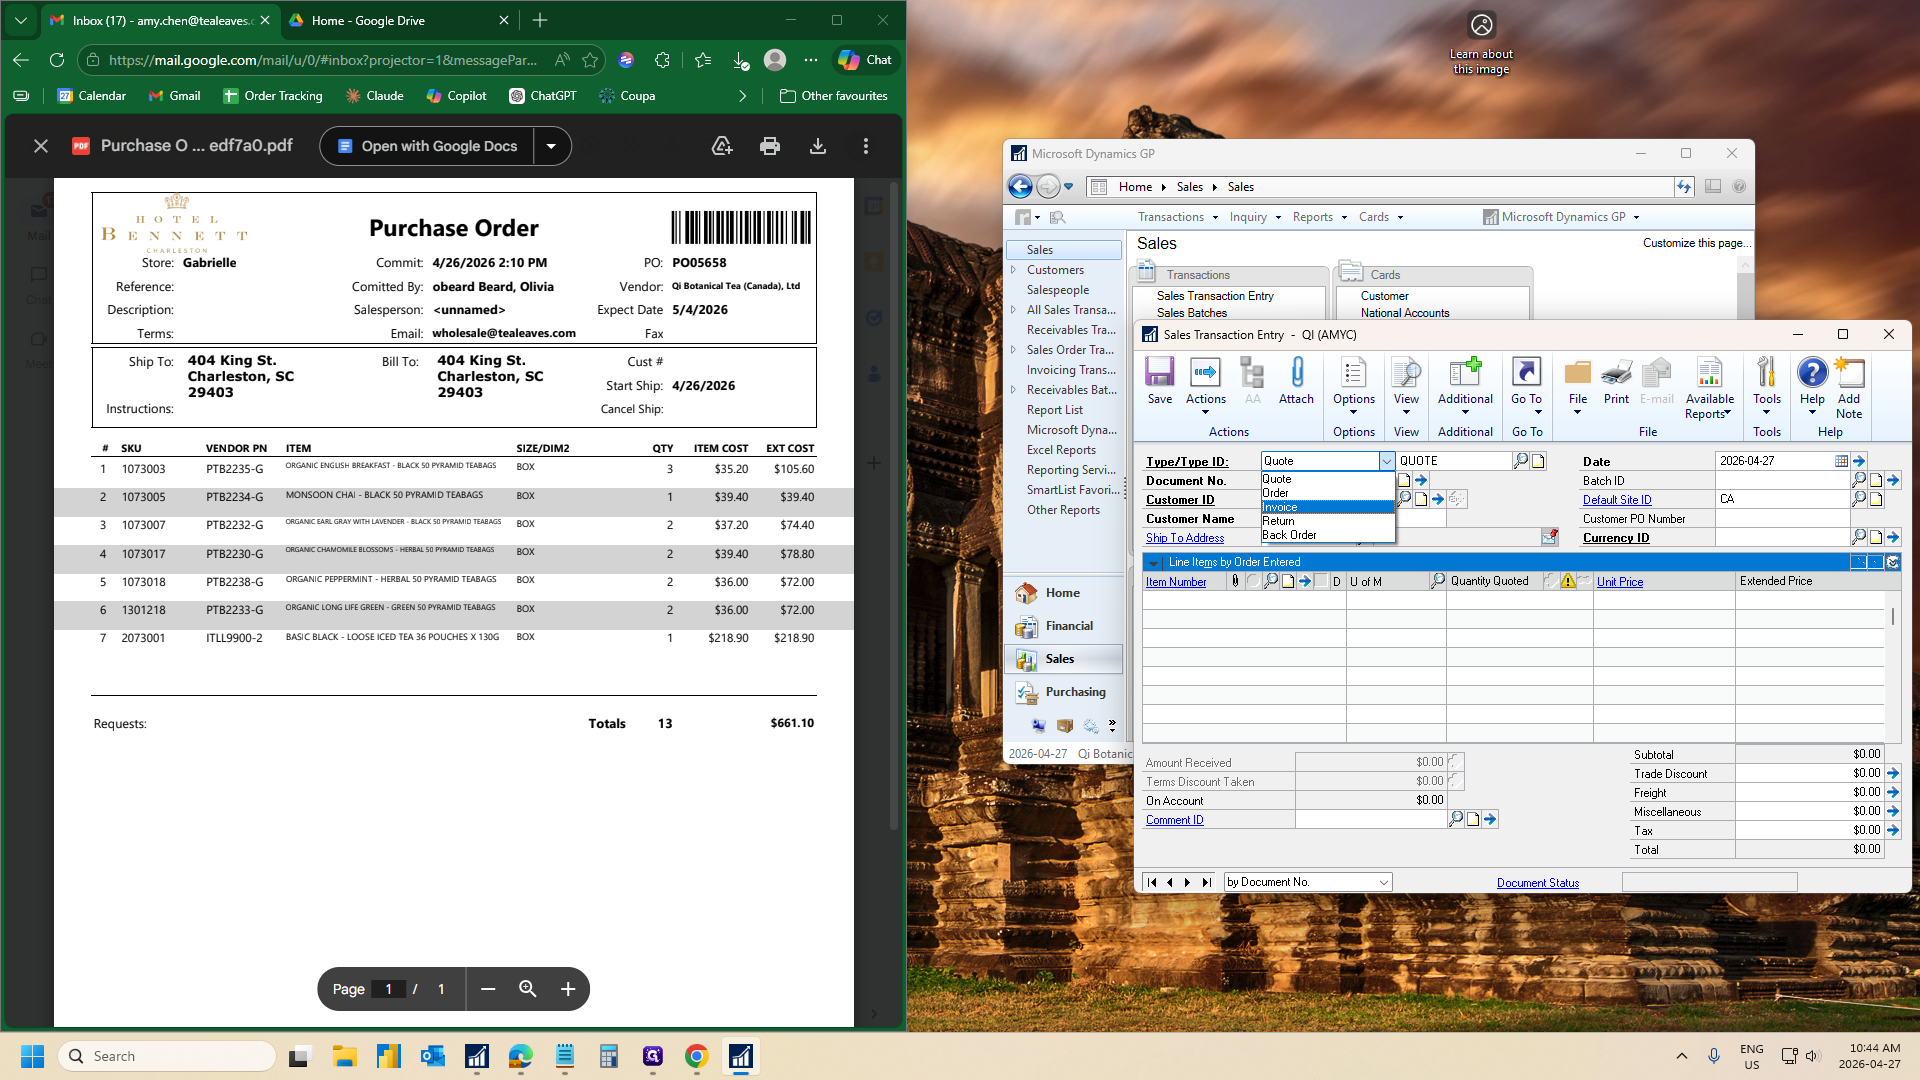
Click the Type ID dropdown menu.
Step #5: Click the Type ID dropdown menu.
6
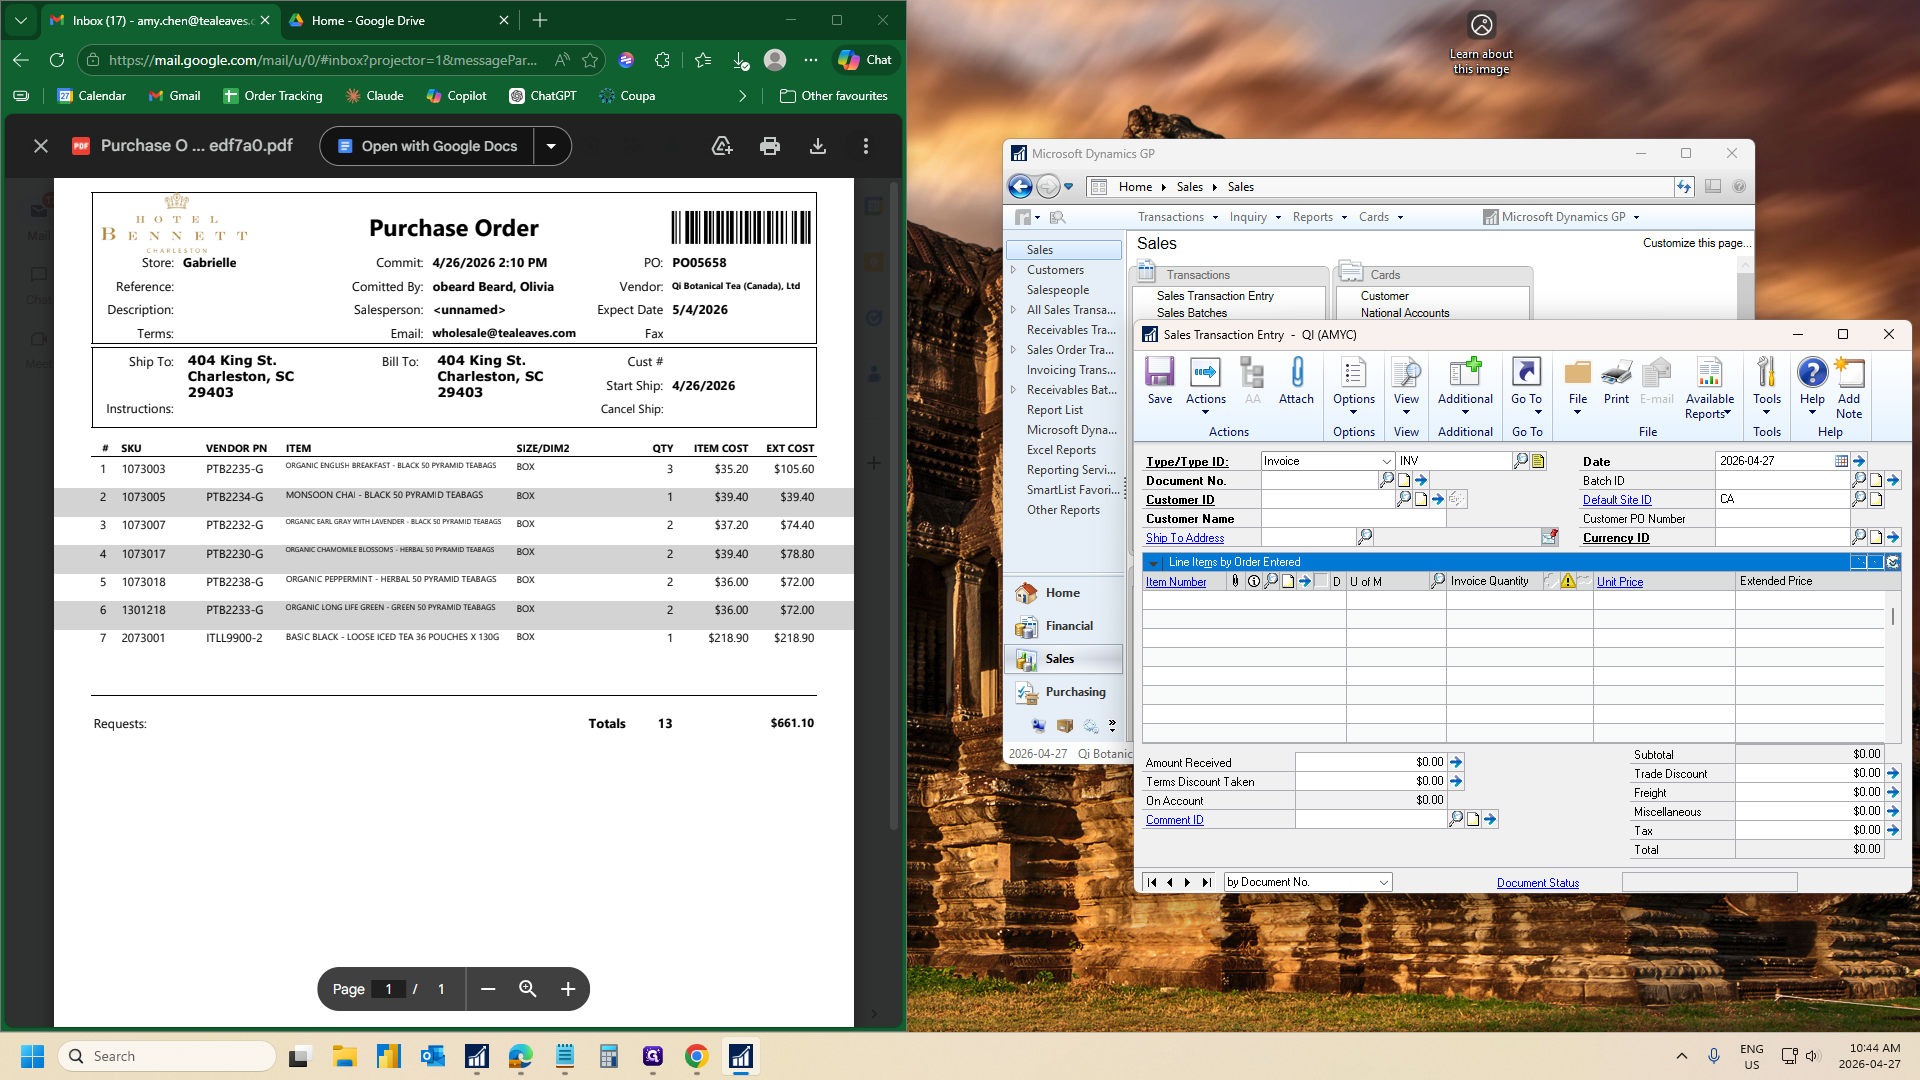
Select Invoice.
Step #6: Select Invoice.
7
Click the Document Number field to auto-generate an invoice number, then press Tab to lock it it.
Step #7: Click the Document Number field to auto-generate an invoice number, then press Tab to lock it it.

3. Create Sales Invoice Header - Customer Information

8
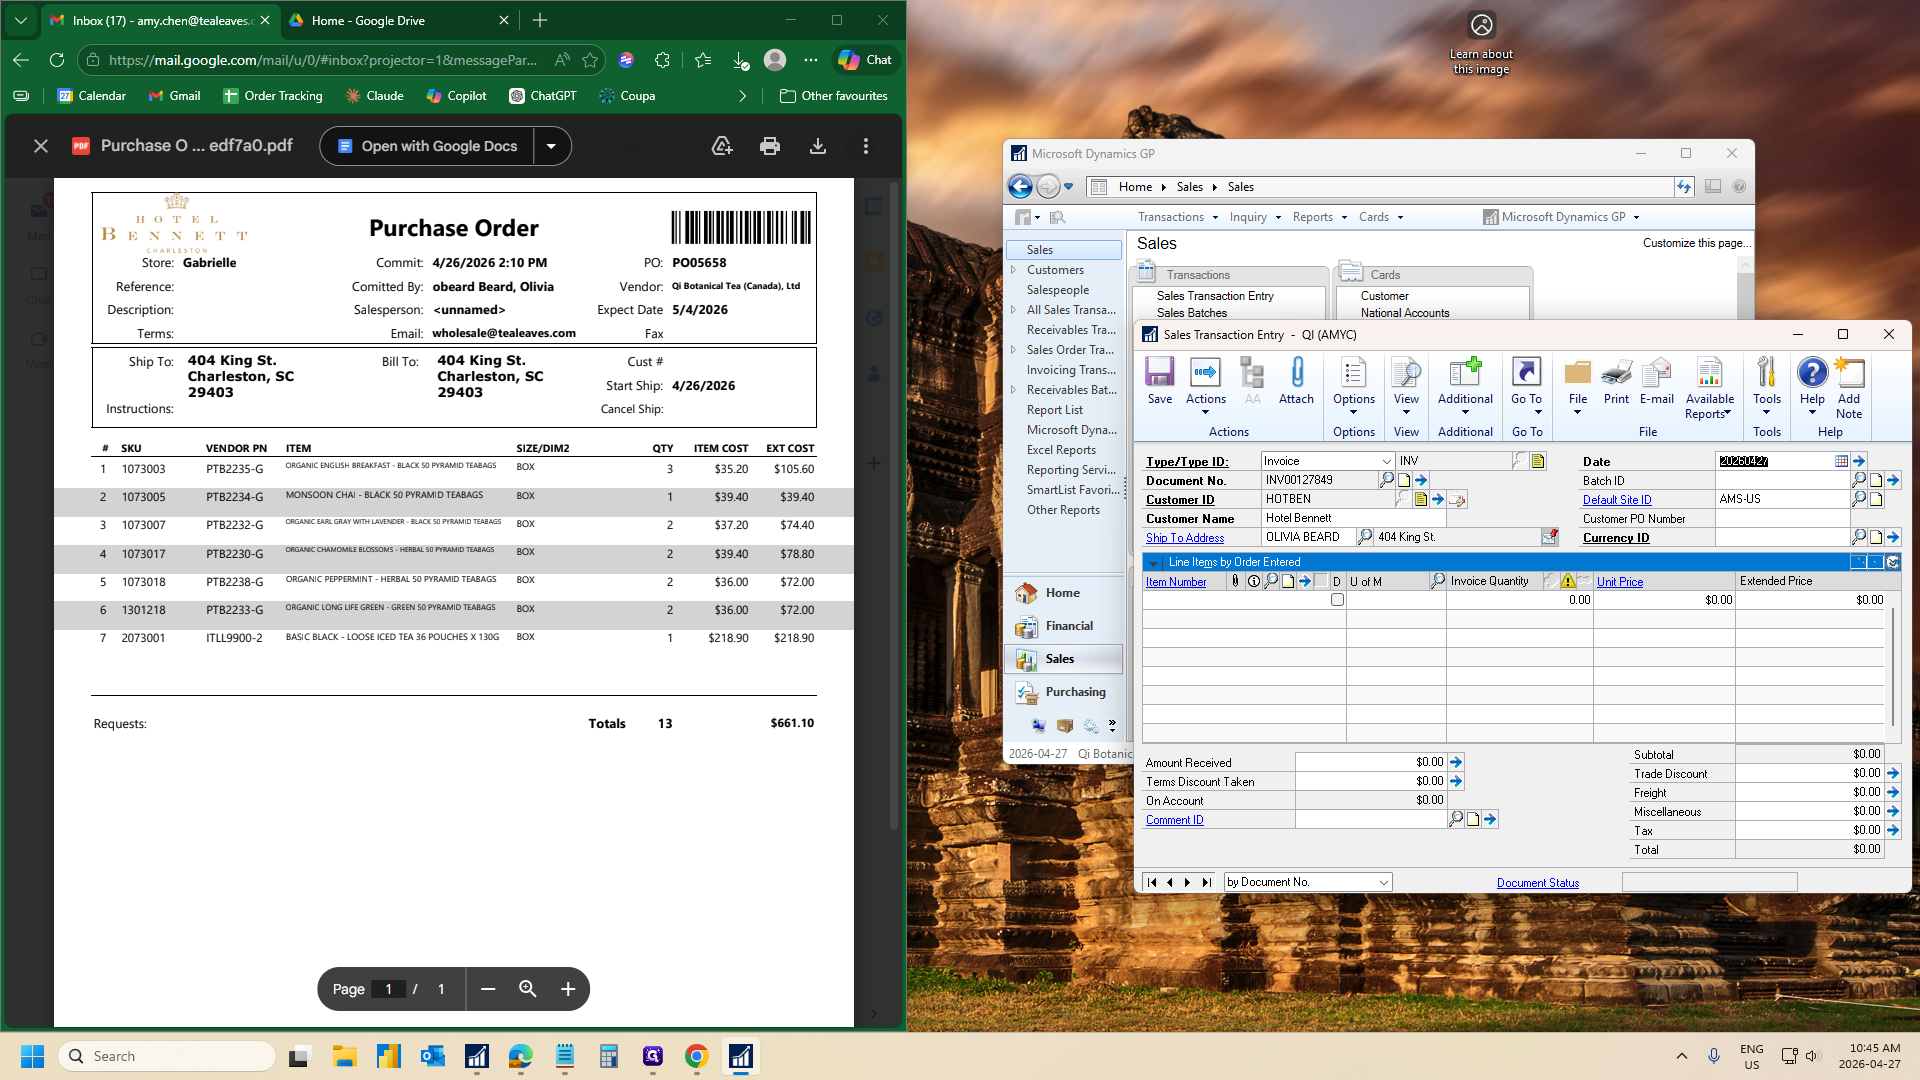
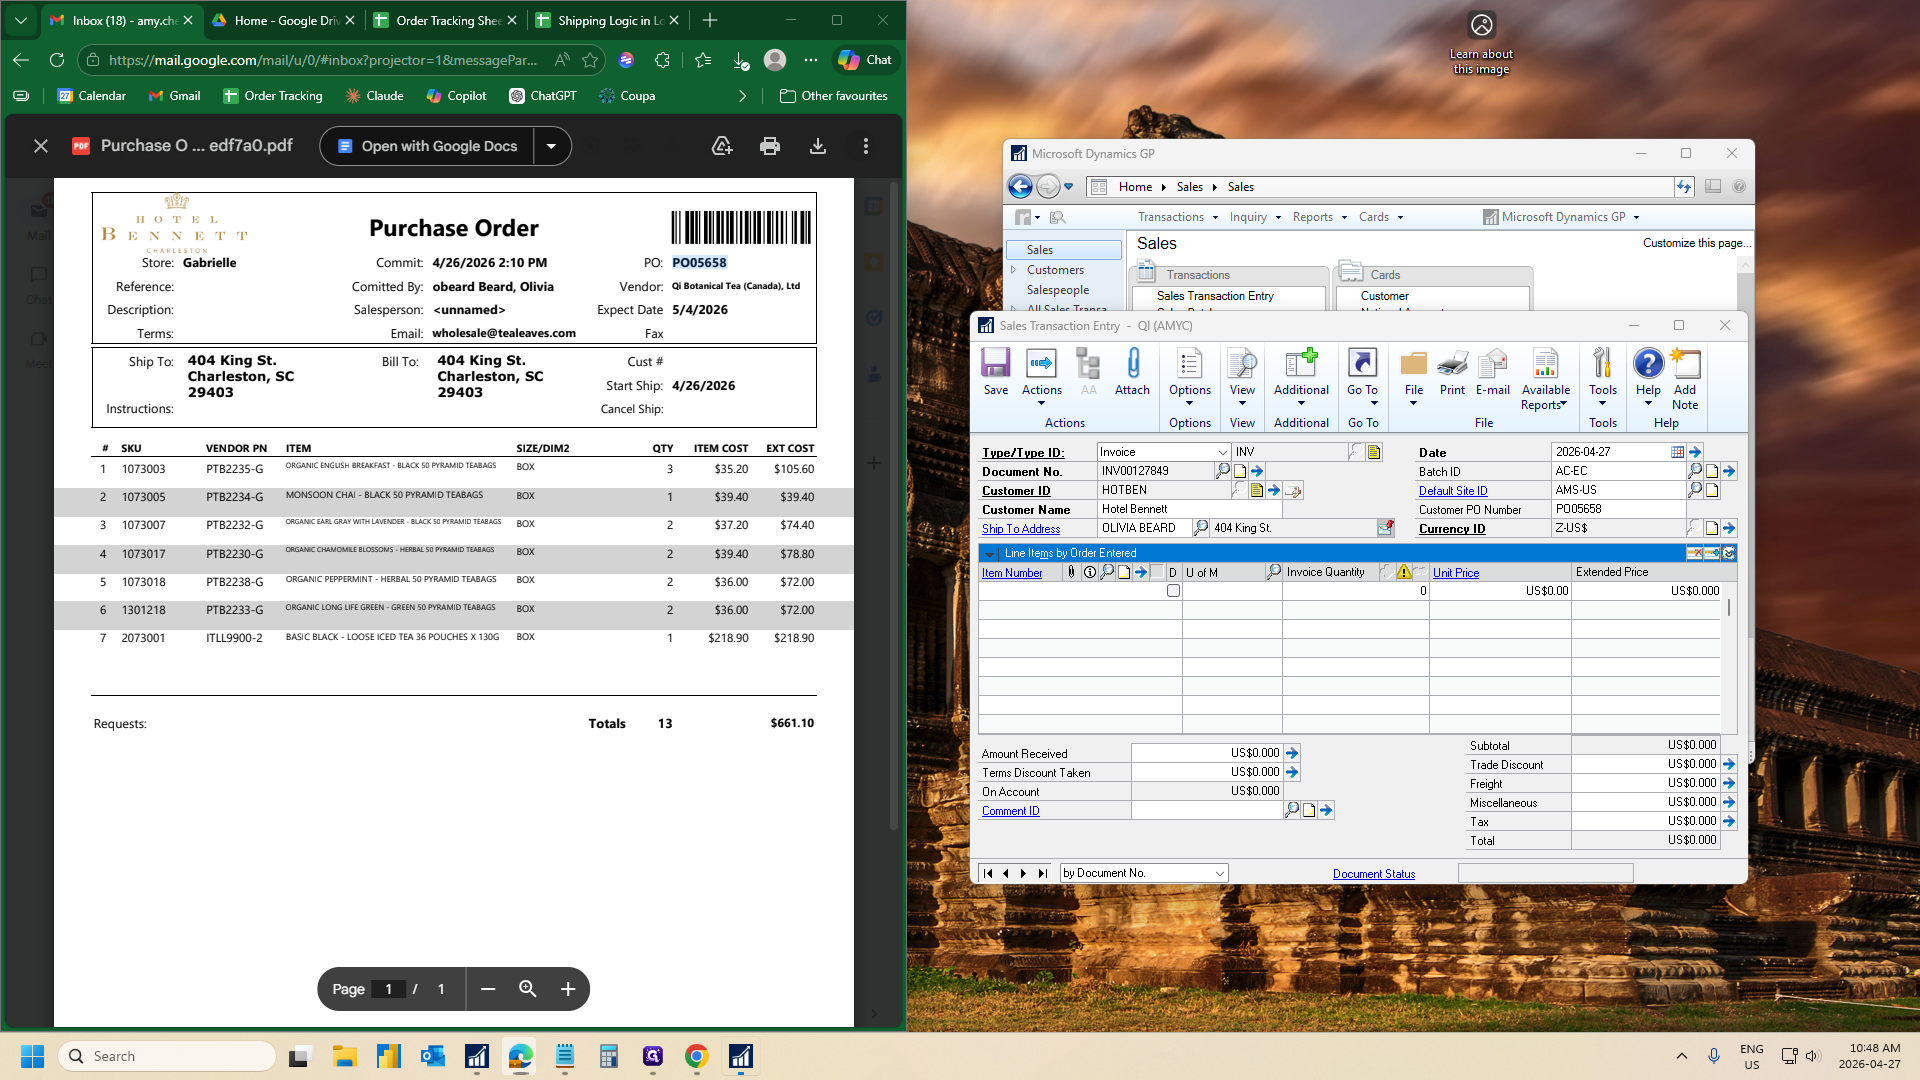
Type the Customer ID short form (usually the first three letters of the first word and the first three letters of the second word, e.g., HOTBEN for Hotel Bennett). If you don't know the short form, click the magnifying glass to search for the customer.
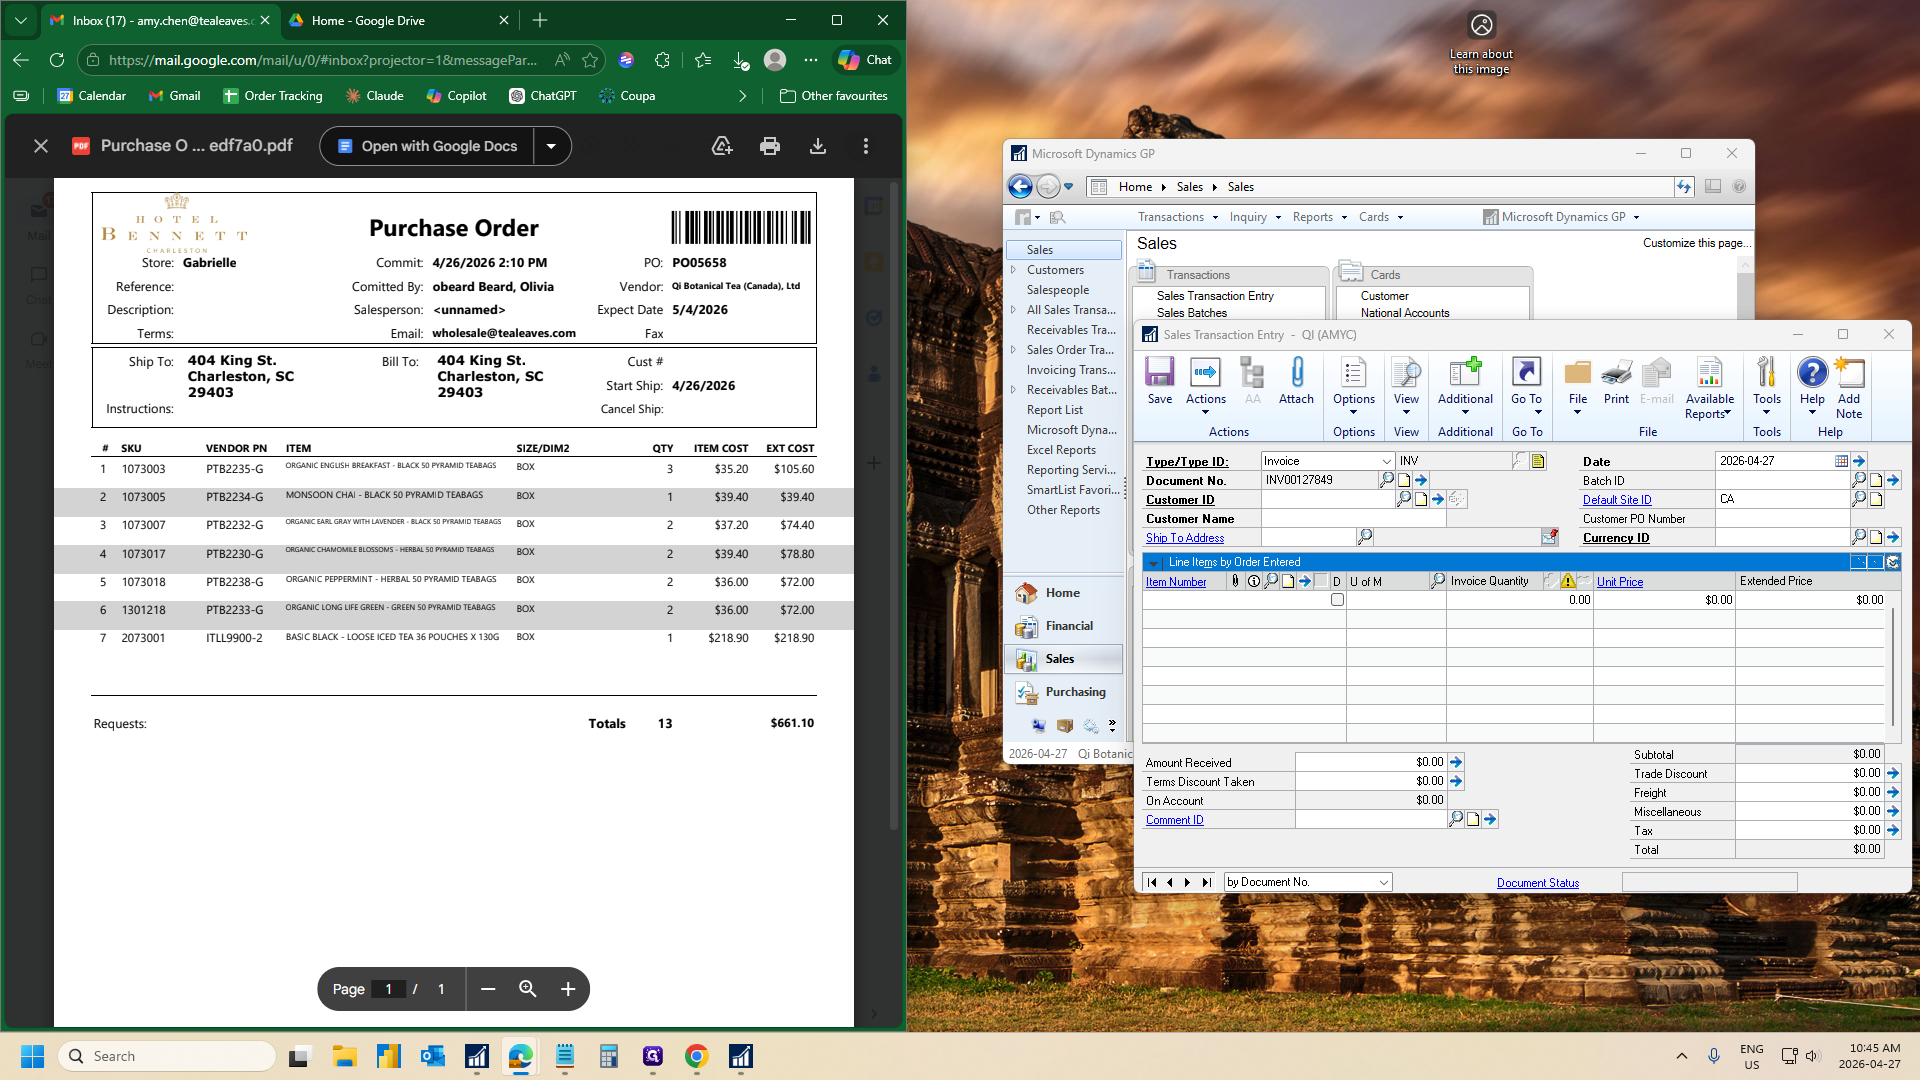
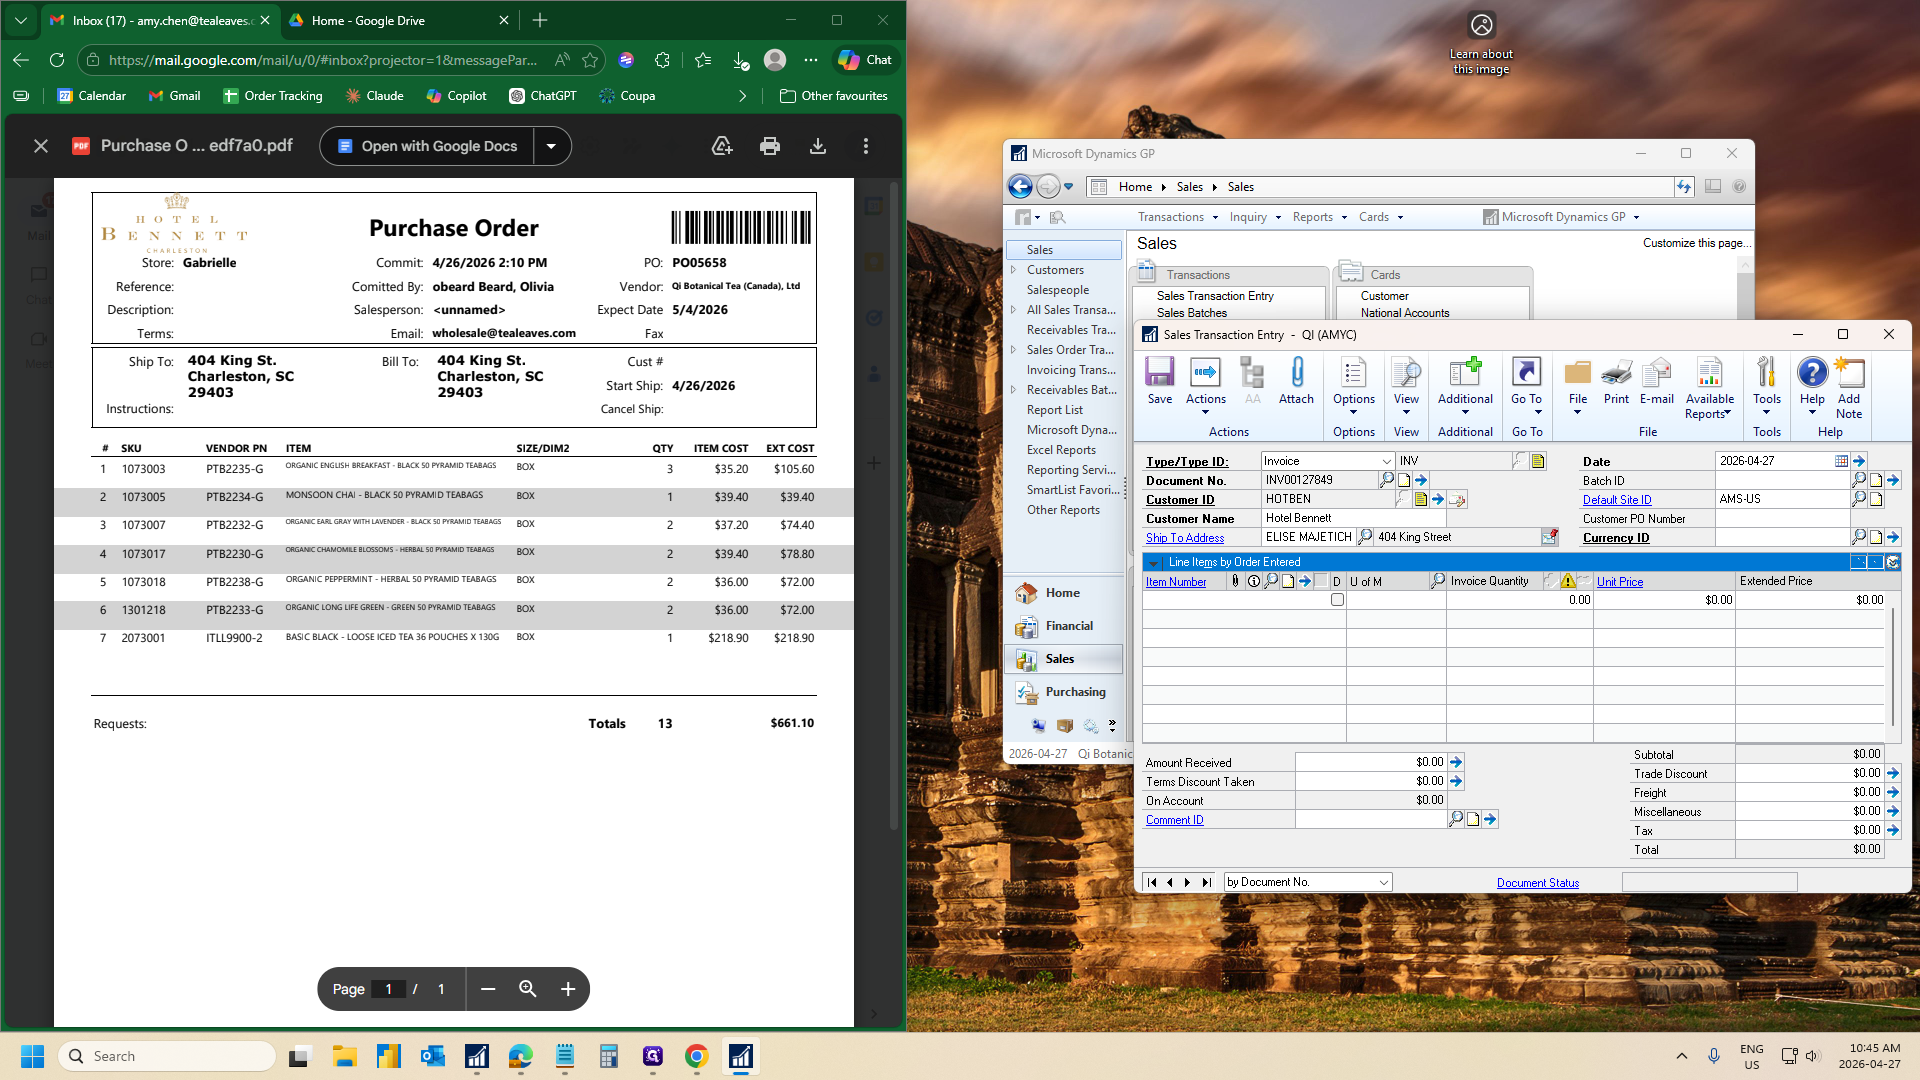
Step #8: Type the Customer ID short form (usually the first three letters of the first word and the first three letters of the second word, e.g., HOTBEN for Hotel Bennett). If you don't know the short form, click the magnifying glass to search for the customer.
9
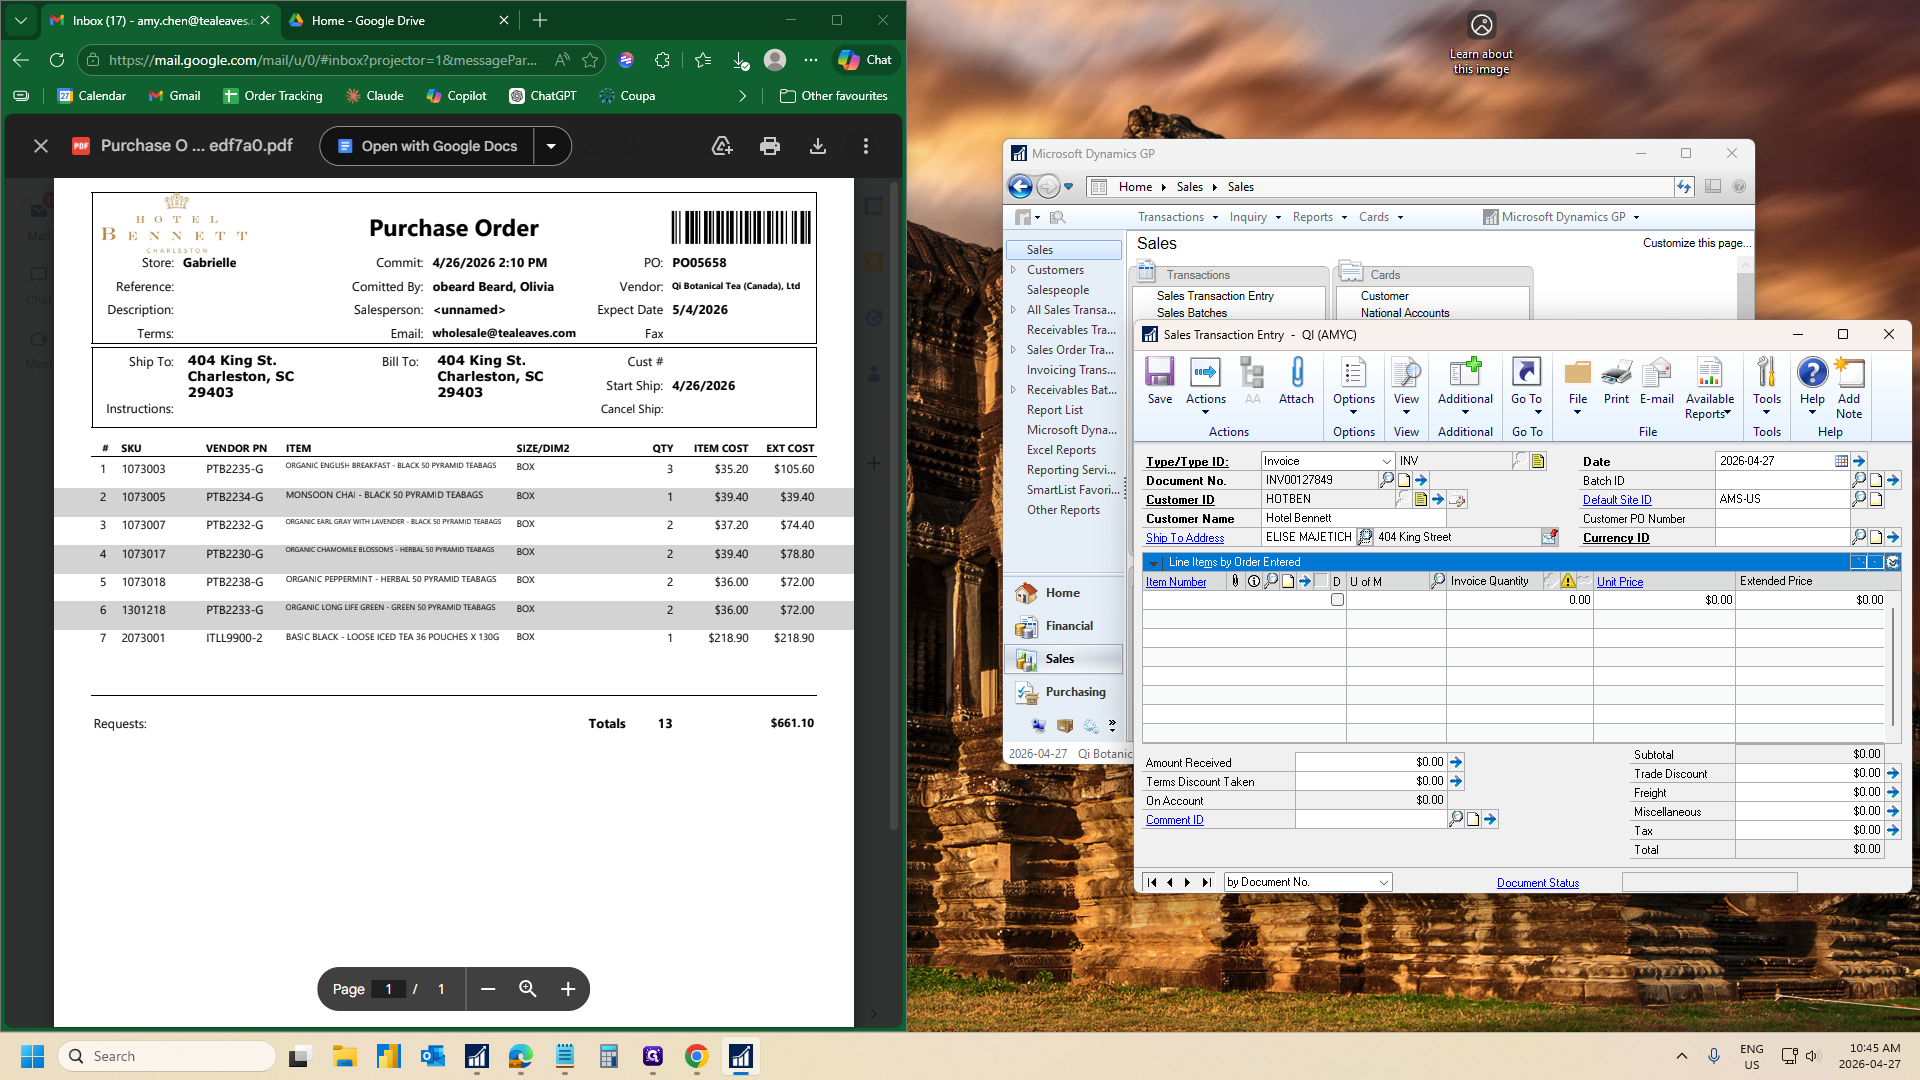
Press Tab to lock in the Customer ID.
10
Verify that the Customer Name matches the purchase order. (i.e., Hotel Bennett is the correct customer, as some hotels have similar names)
Step #10: Verify that the Customer Name matches the purchase order. (i.e., Hotel Bennett is the correct customer, as some hotels have similar names)
11
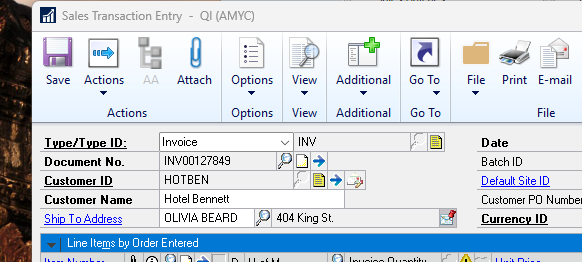
Check the Ship To address. If it does not match, click the magnifying glass to search for the correct address.
Step #11: Check the Ship To address. If it does not match, click the magnifying glass to search for the correct address.
12
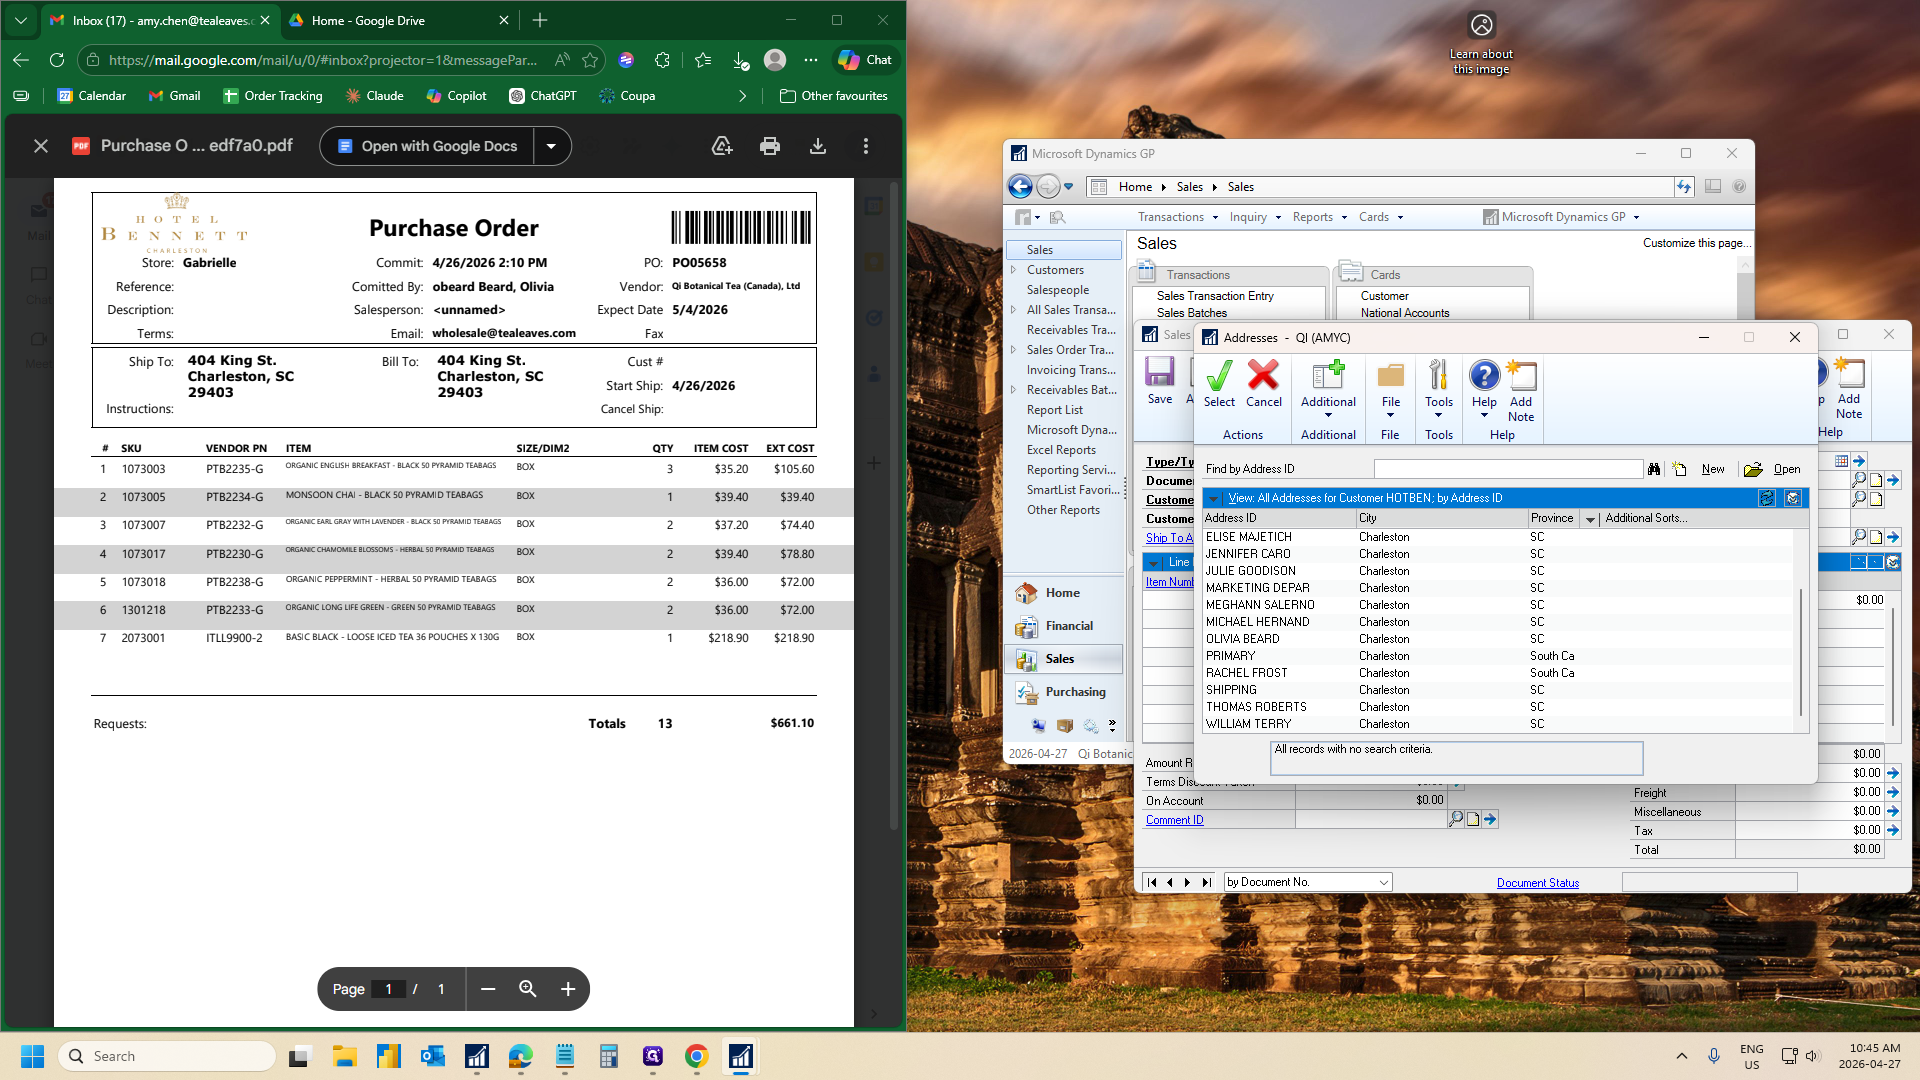
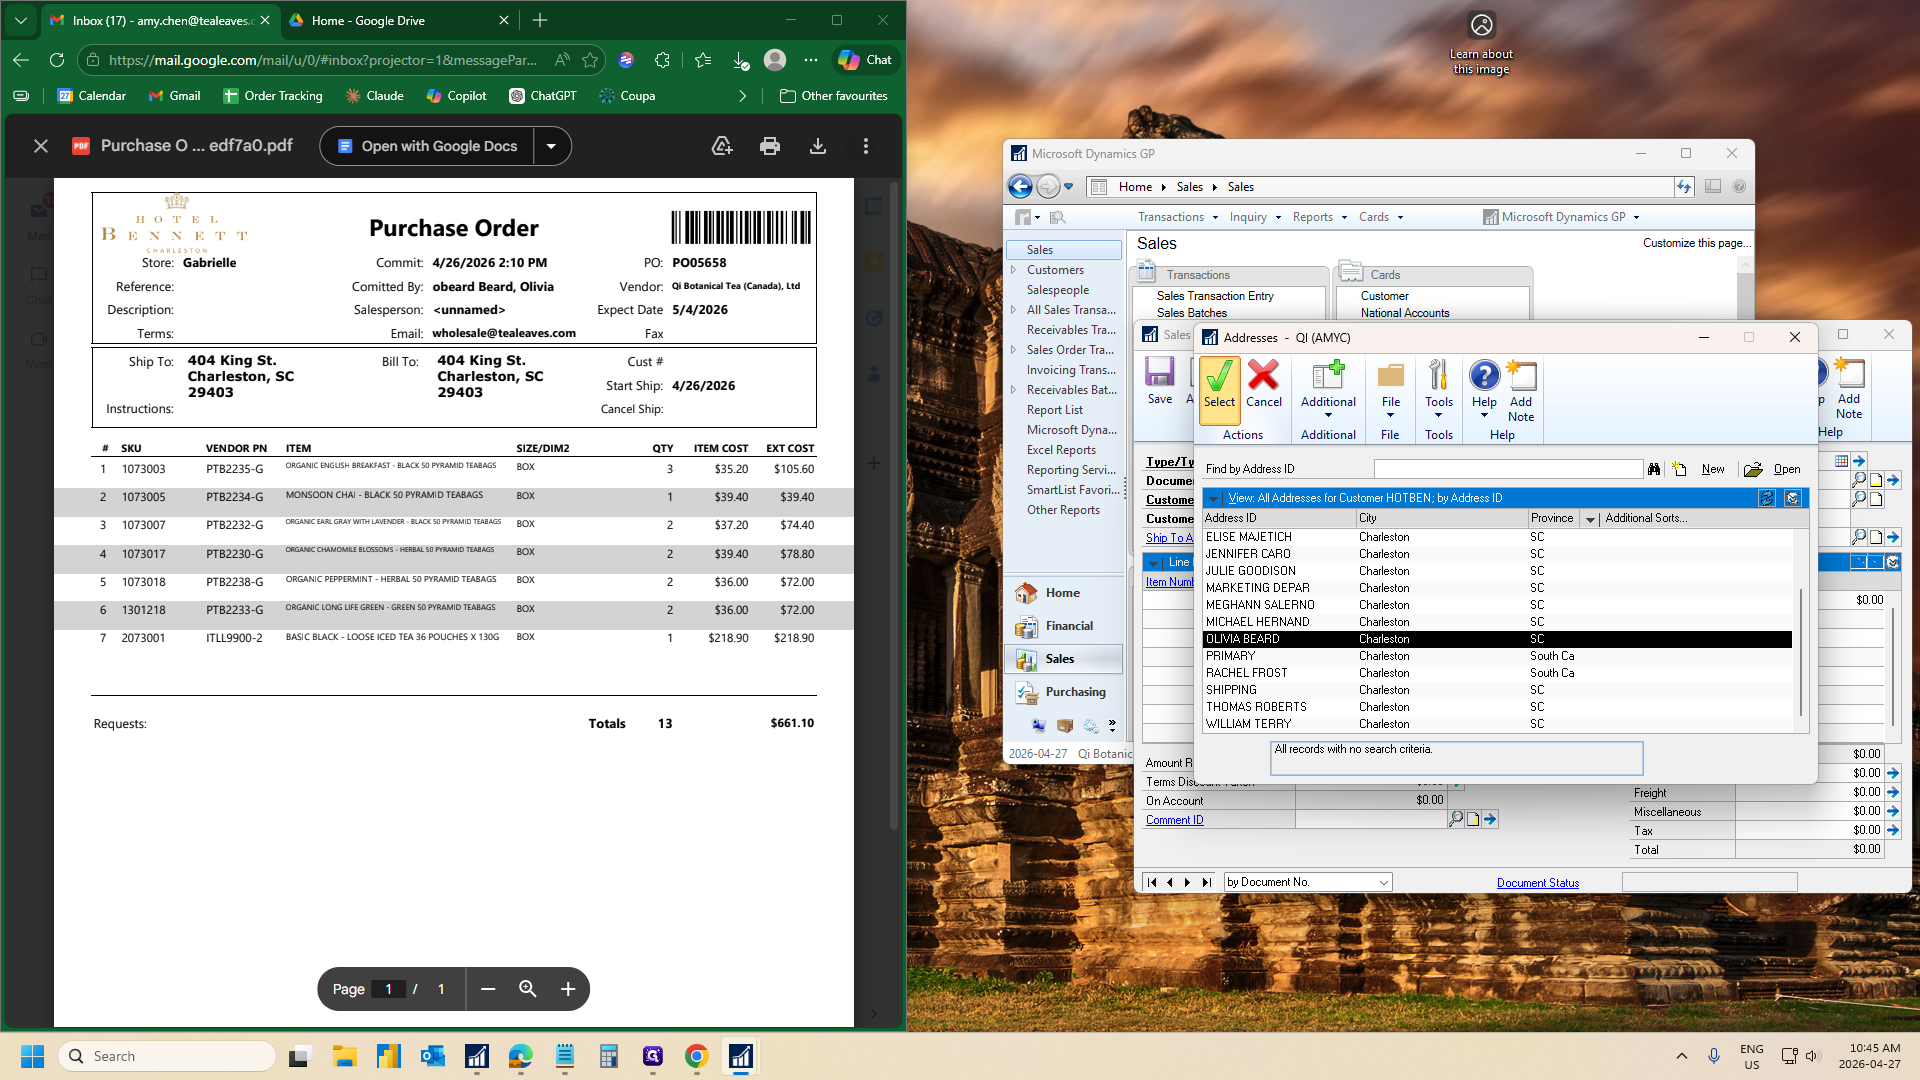
Here, the address should be Olivia Beard or Gabrielle, not Elise Majetich
Step #12: Here, the address should be Olivia Beard or Gabrielle, not Elise Majetich
13
Locate the correct address from the lookup window.
Step #13: Locate the correct address from the lookup window.
14
Click Select.
Step #14: Click Select.
15
Click SHIP TO ADDRESS (blue) to open the customer address window.
Step #15: Click SHIP TO ADDRESS (blue) to open the customer address window.
16
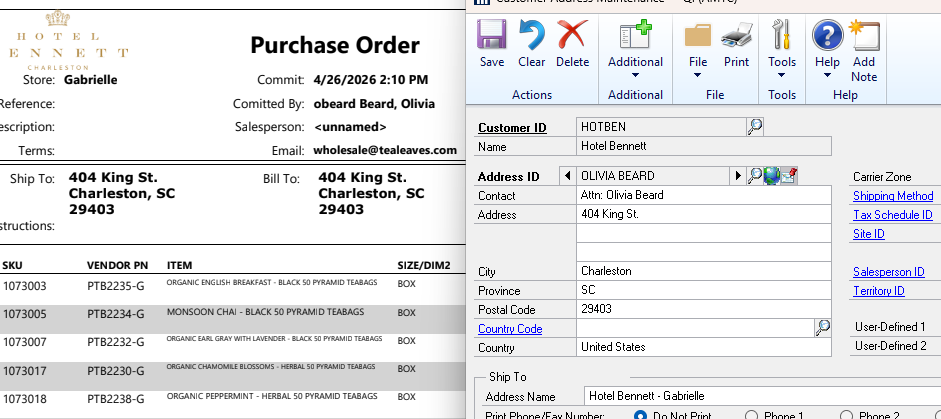
Compare that shipping details match with PO.
Step #16: Compare that shipping details match with PO.
17
Ensure the document date is set to today's date.
Step #17: Ensure the document date is set to today's date.

4. Create Sales Invoice Header - Warehouse

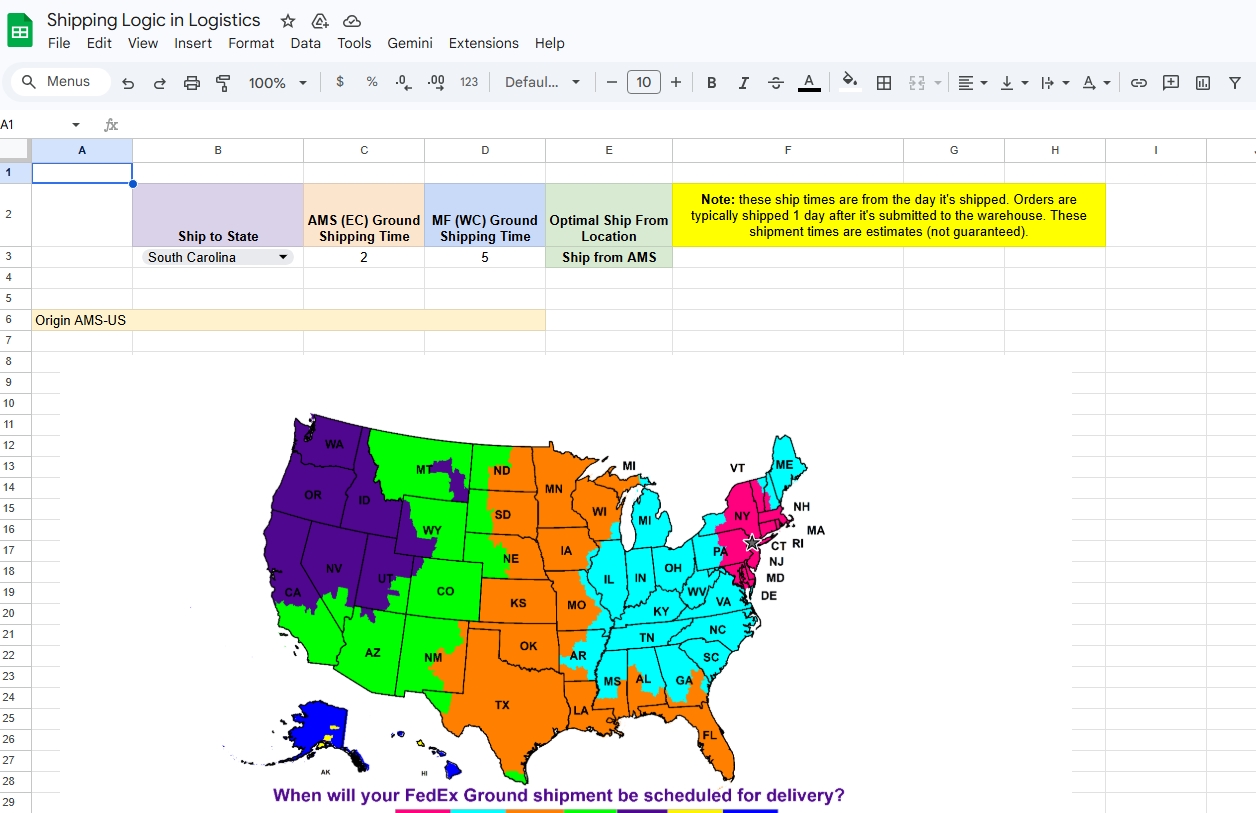
You need to assign the correct warehouse to the Batch ID.
18
Open the Shipping Logic and Logistics sheet in Google Drive.
Step #18: Open the Shipping Logic and Logistics sheet in Google Drive.
19
Check the destination state on the purchase order (e.g., SC for South Carolina).
Step #19: Check the destination state on the purchase order (e.g., SC for South Carolina).
20
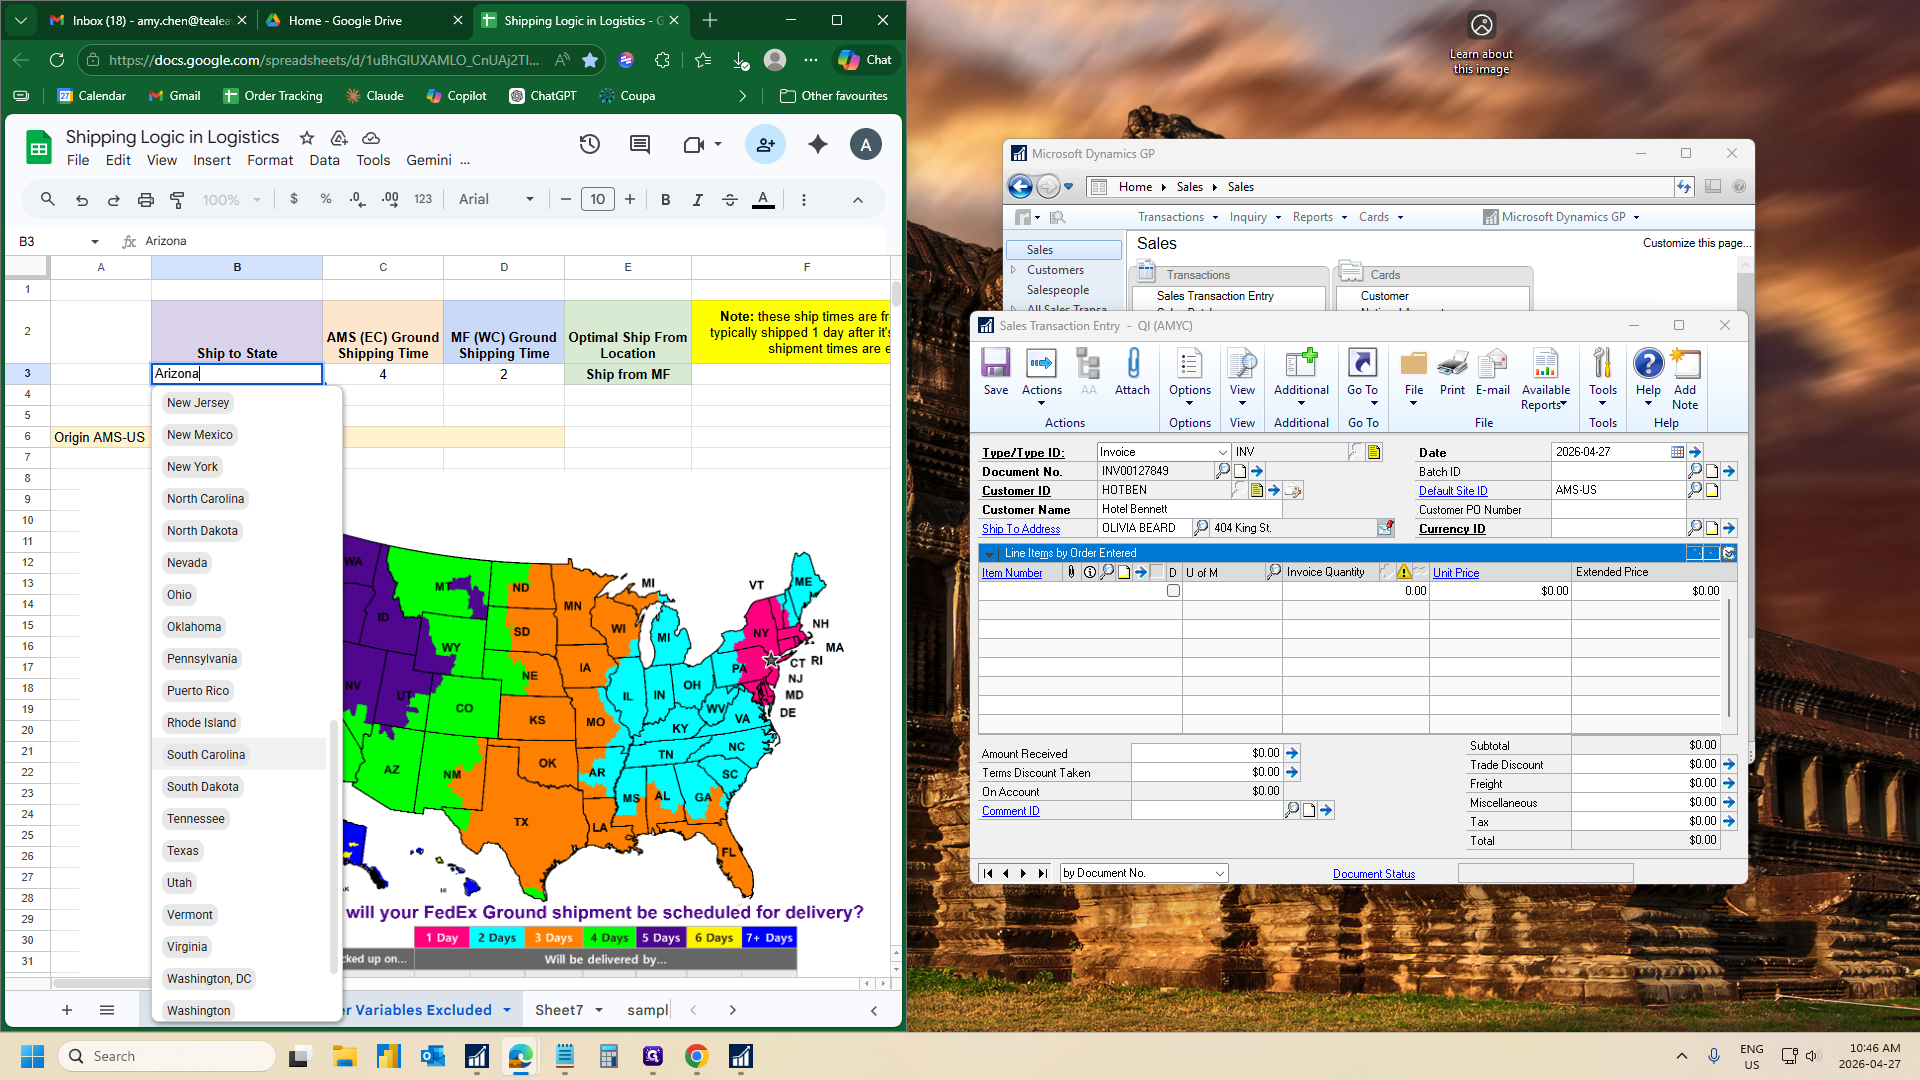
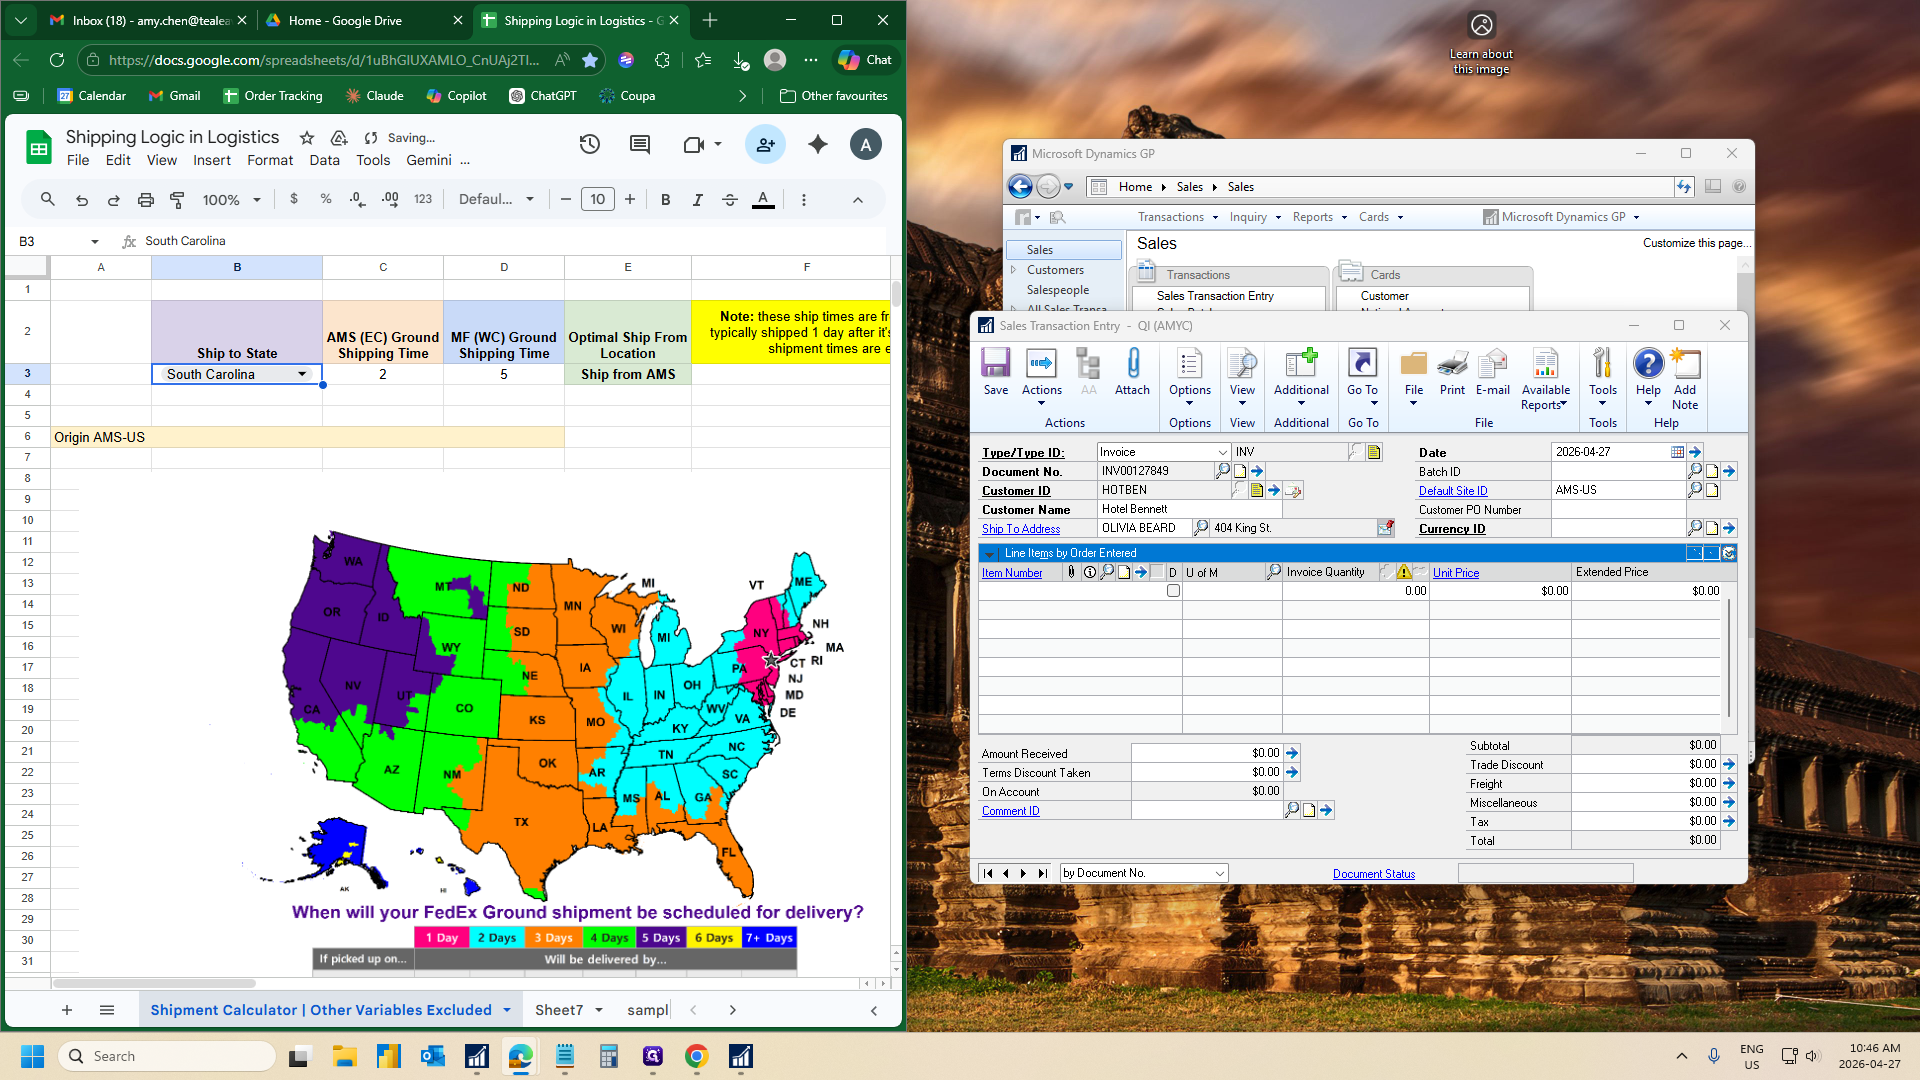
In the Logistics sheet, select the destination state from the Ship to State dropdown.
Step #20: In the Logistics sheet, select the destination state from the Ship to State dropdown.
21
Note the assigned shipping warehouse (e.g., Ship from AMS or East Coast).
Step #21: Note the assigned shipping warehouse (e.g., Ship from AMS or East Coast).
22
Return to Dynamics GP and click into the Batch ID field.  Type your initials followed by a dash and the warehouse code, then press Tab.

Naming convention: your initials - warehouse initials (EC = east coast, Click = One Click, CA = Vancouver)
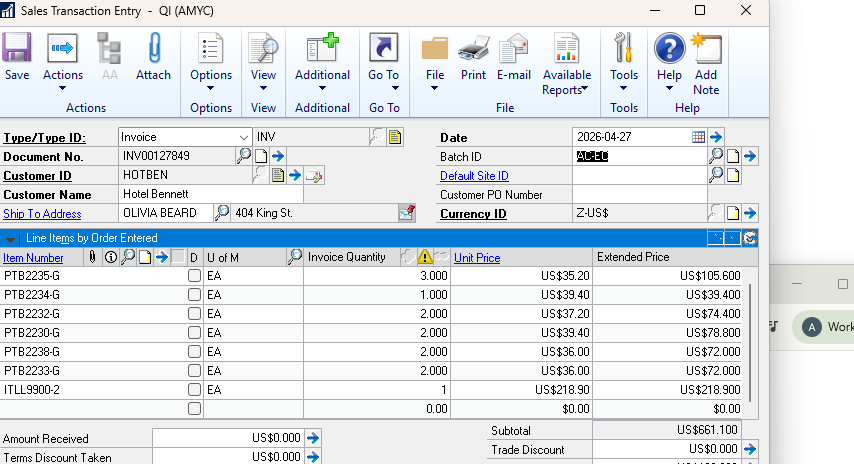
Step #22: Return to Dynamics GP and click into the Batch ID field.  Type your initials followed by a dash and the warehouse code, then press Tab. Naming convention: your initials - warehouse initials (EC = east coast, Click = One Click, CA = Vancouver)
23
Note: your batches reset after you post them in the morning, therefore the first order you make with each batch will prompt you if you would like to create it.

If this is your first order of the day for this batch, click Add when prompted.
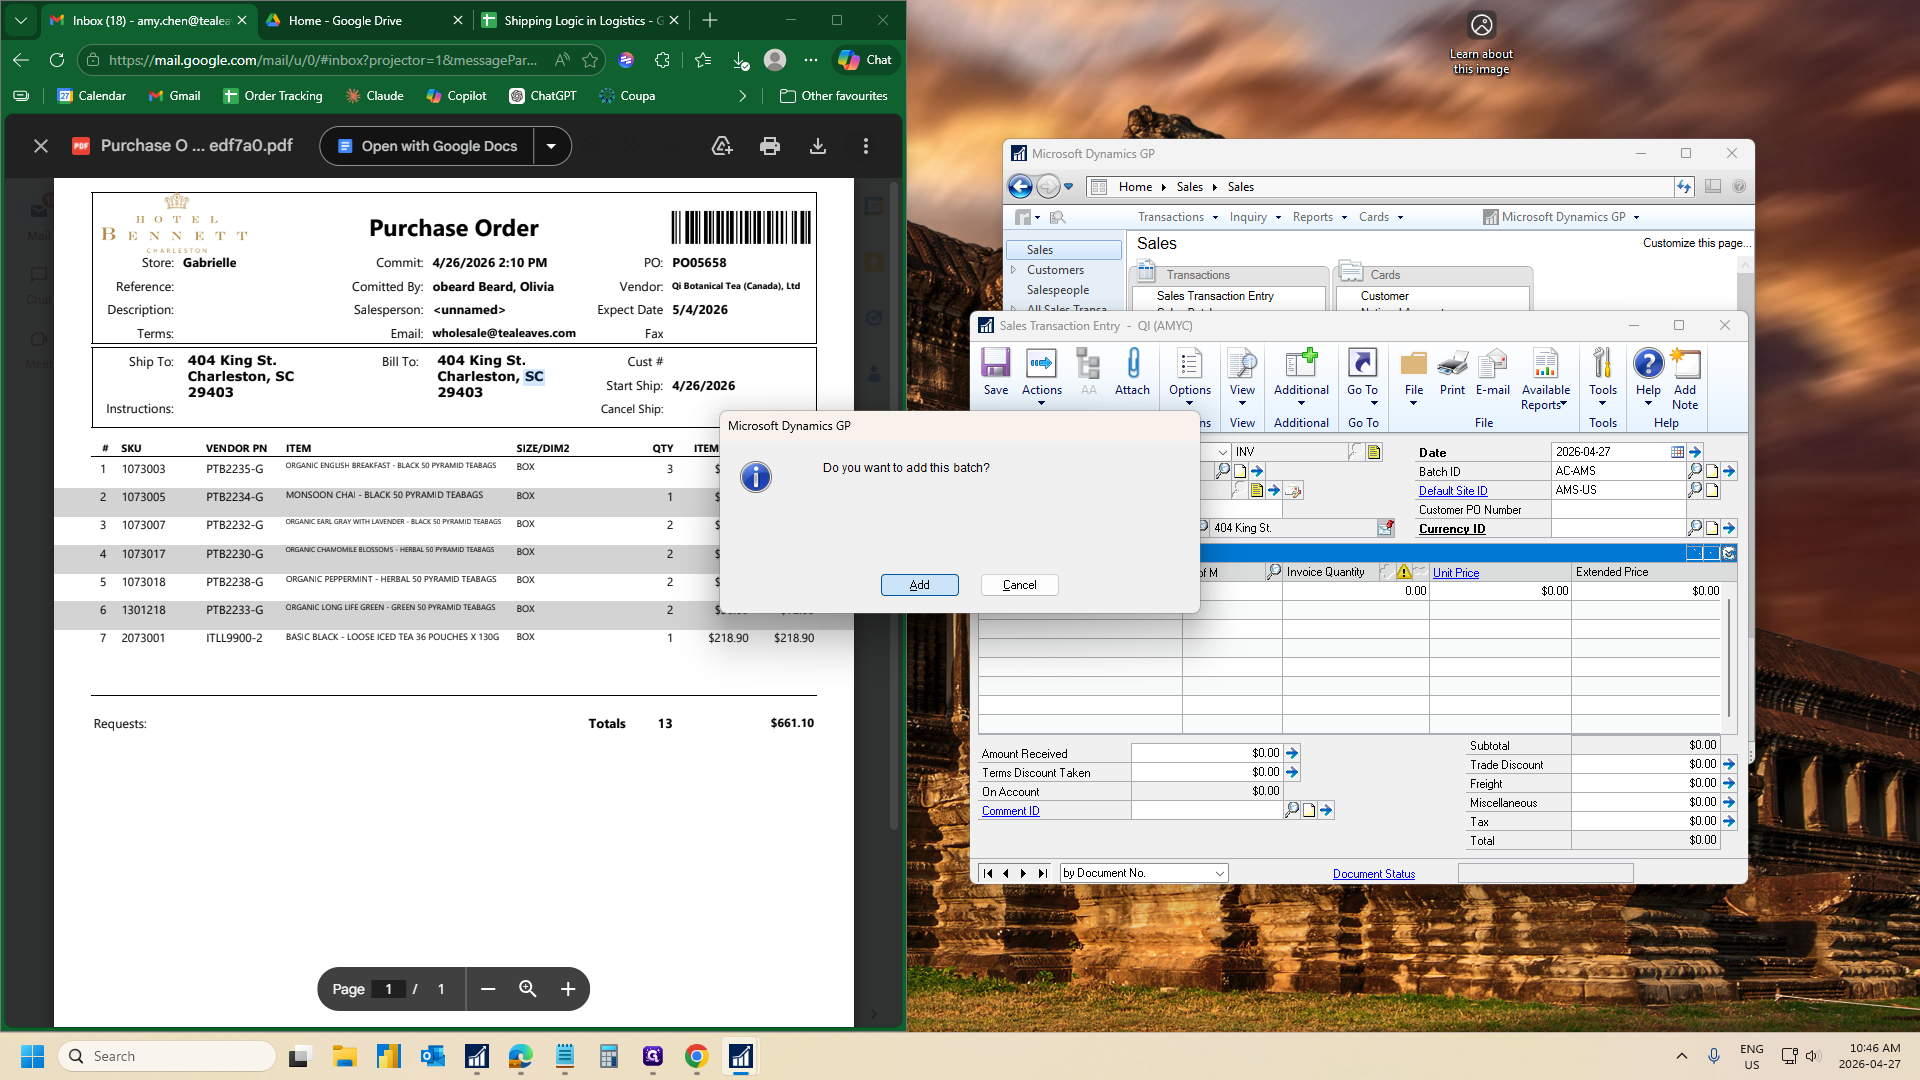
Step #23: Note: your batches reset after you post them in the morning, therefore the first order you make with each batch will prompt you if you would like to create it.If this is your first order of the day for this batch, click Add when prompted.
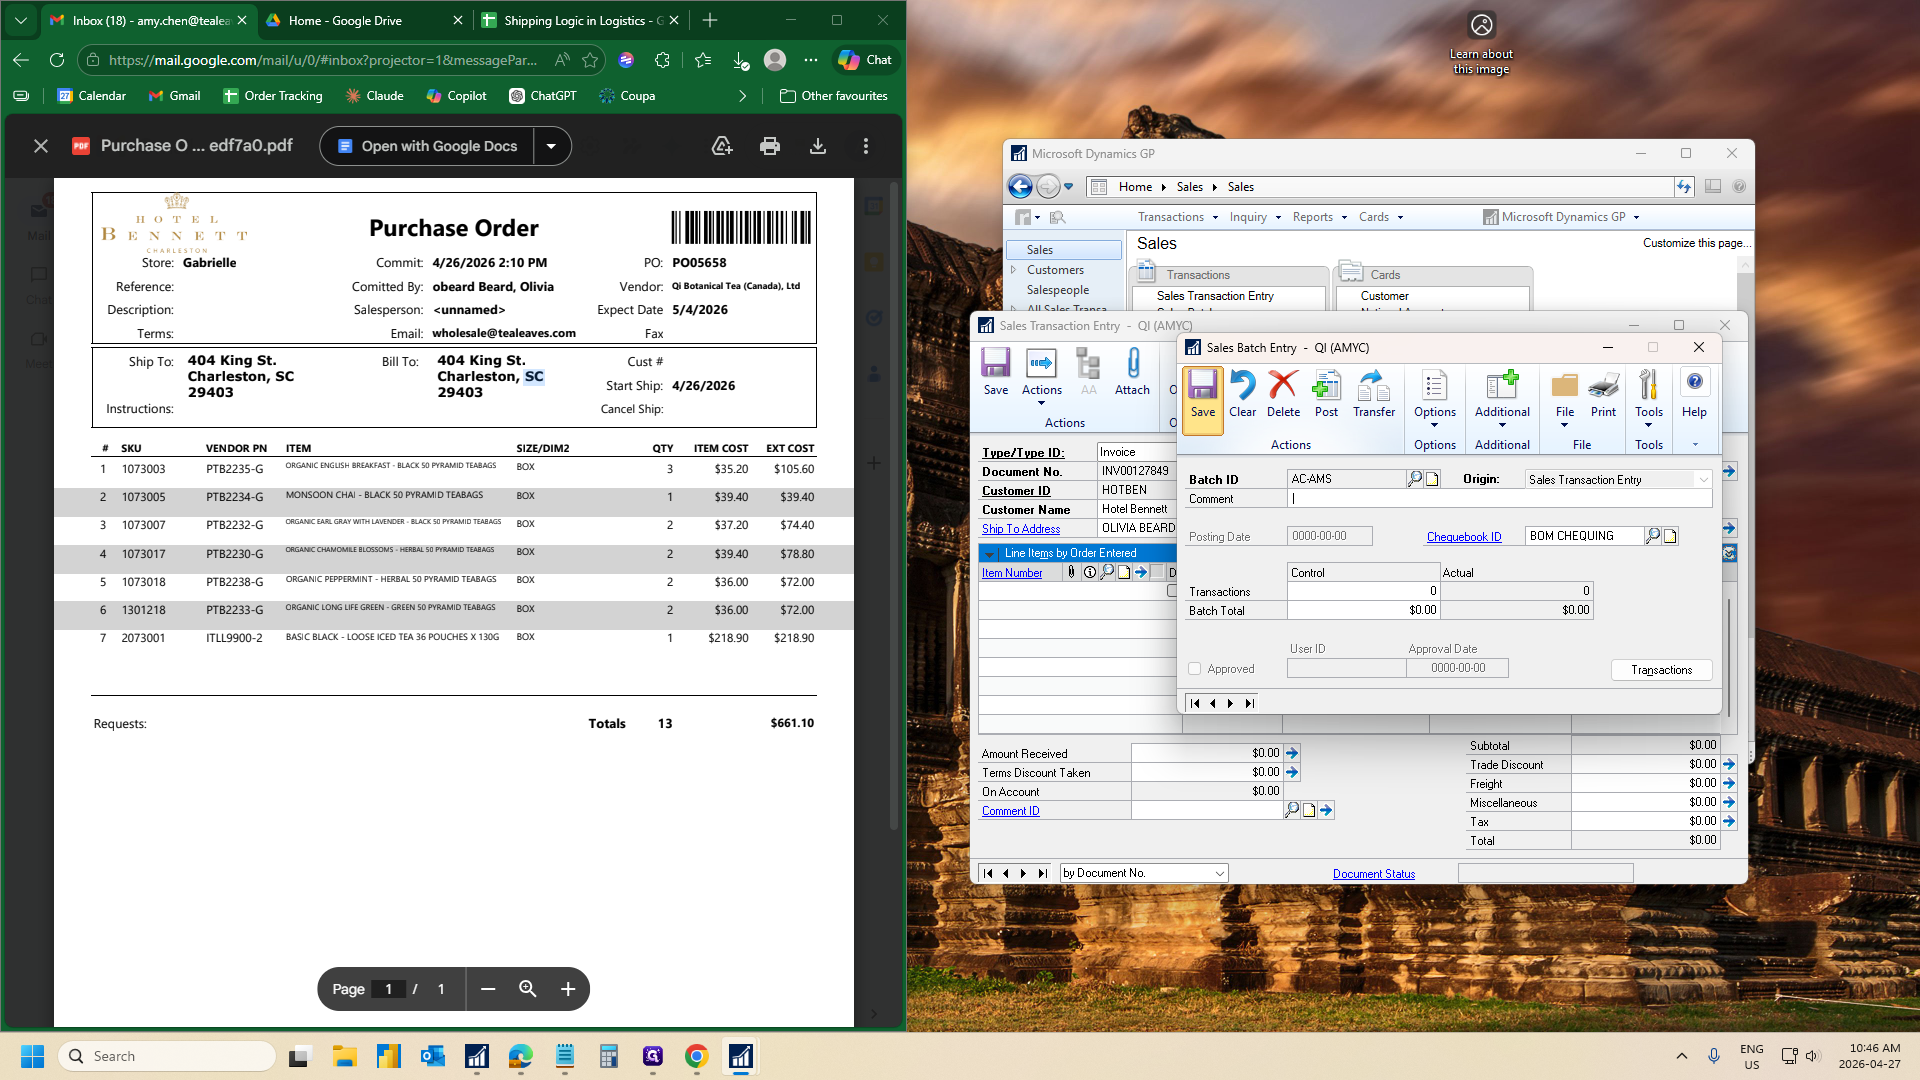
24
Click Save.
Step #24: Click Save.

5. Complete the Header Details

25
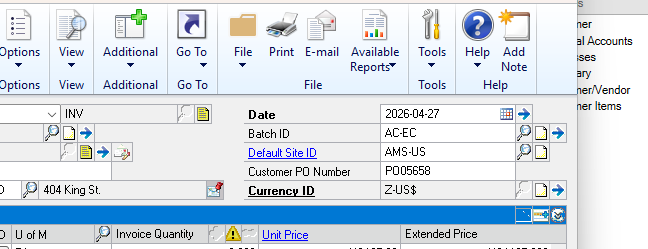
Press Tab to go to the next line. The Default Site ID should automatically populate.

This should auto-populate according to where the client is located and is set when the client profile is created. However, always double check because if the default site was not set properly, it will choose randomly. Choose the closest warehouse to the client using the previous shipping logic.

AMS-US = EC
Click = WC
CA = Canada
SPEED = Retail US
26
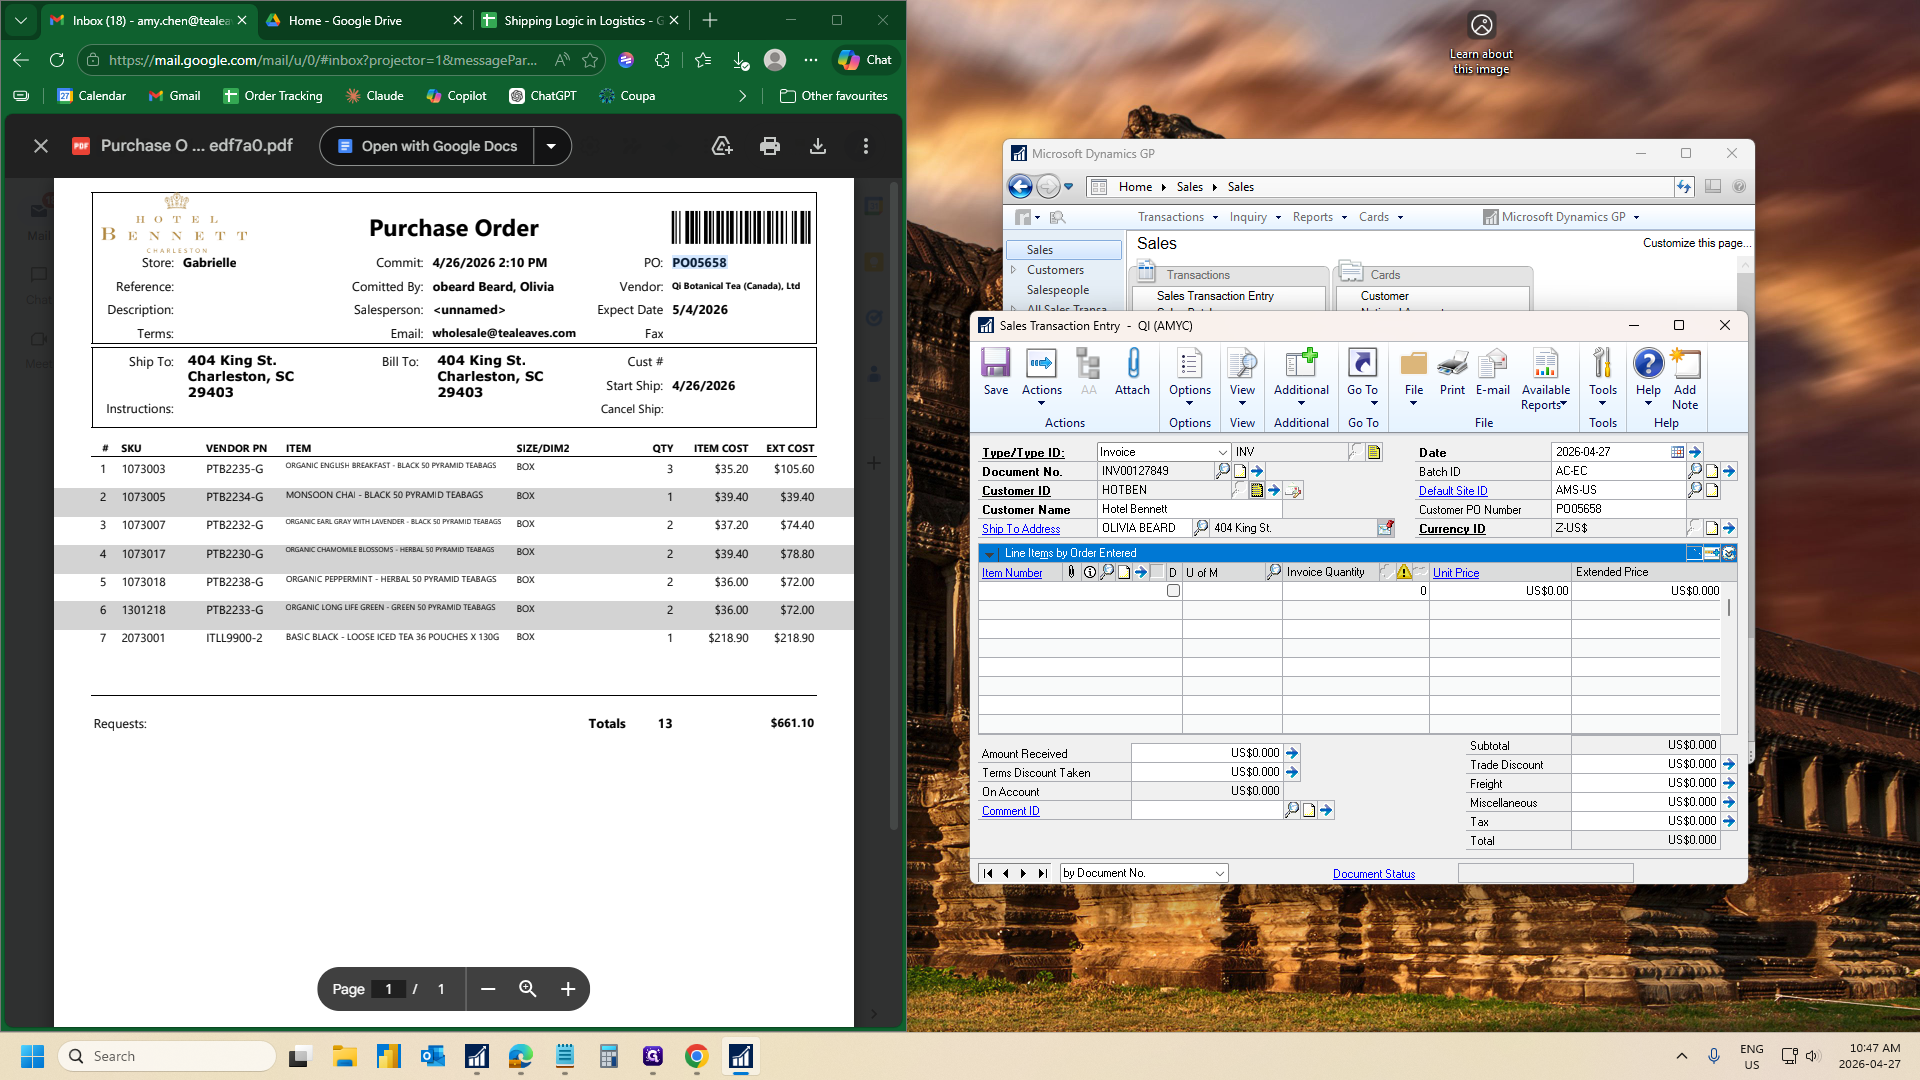
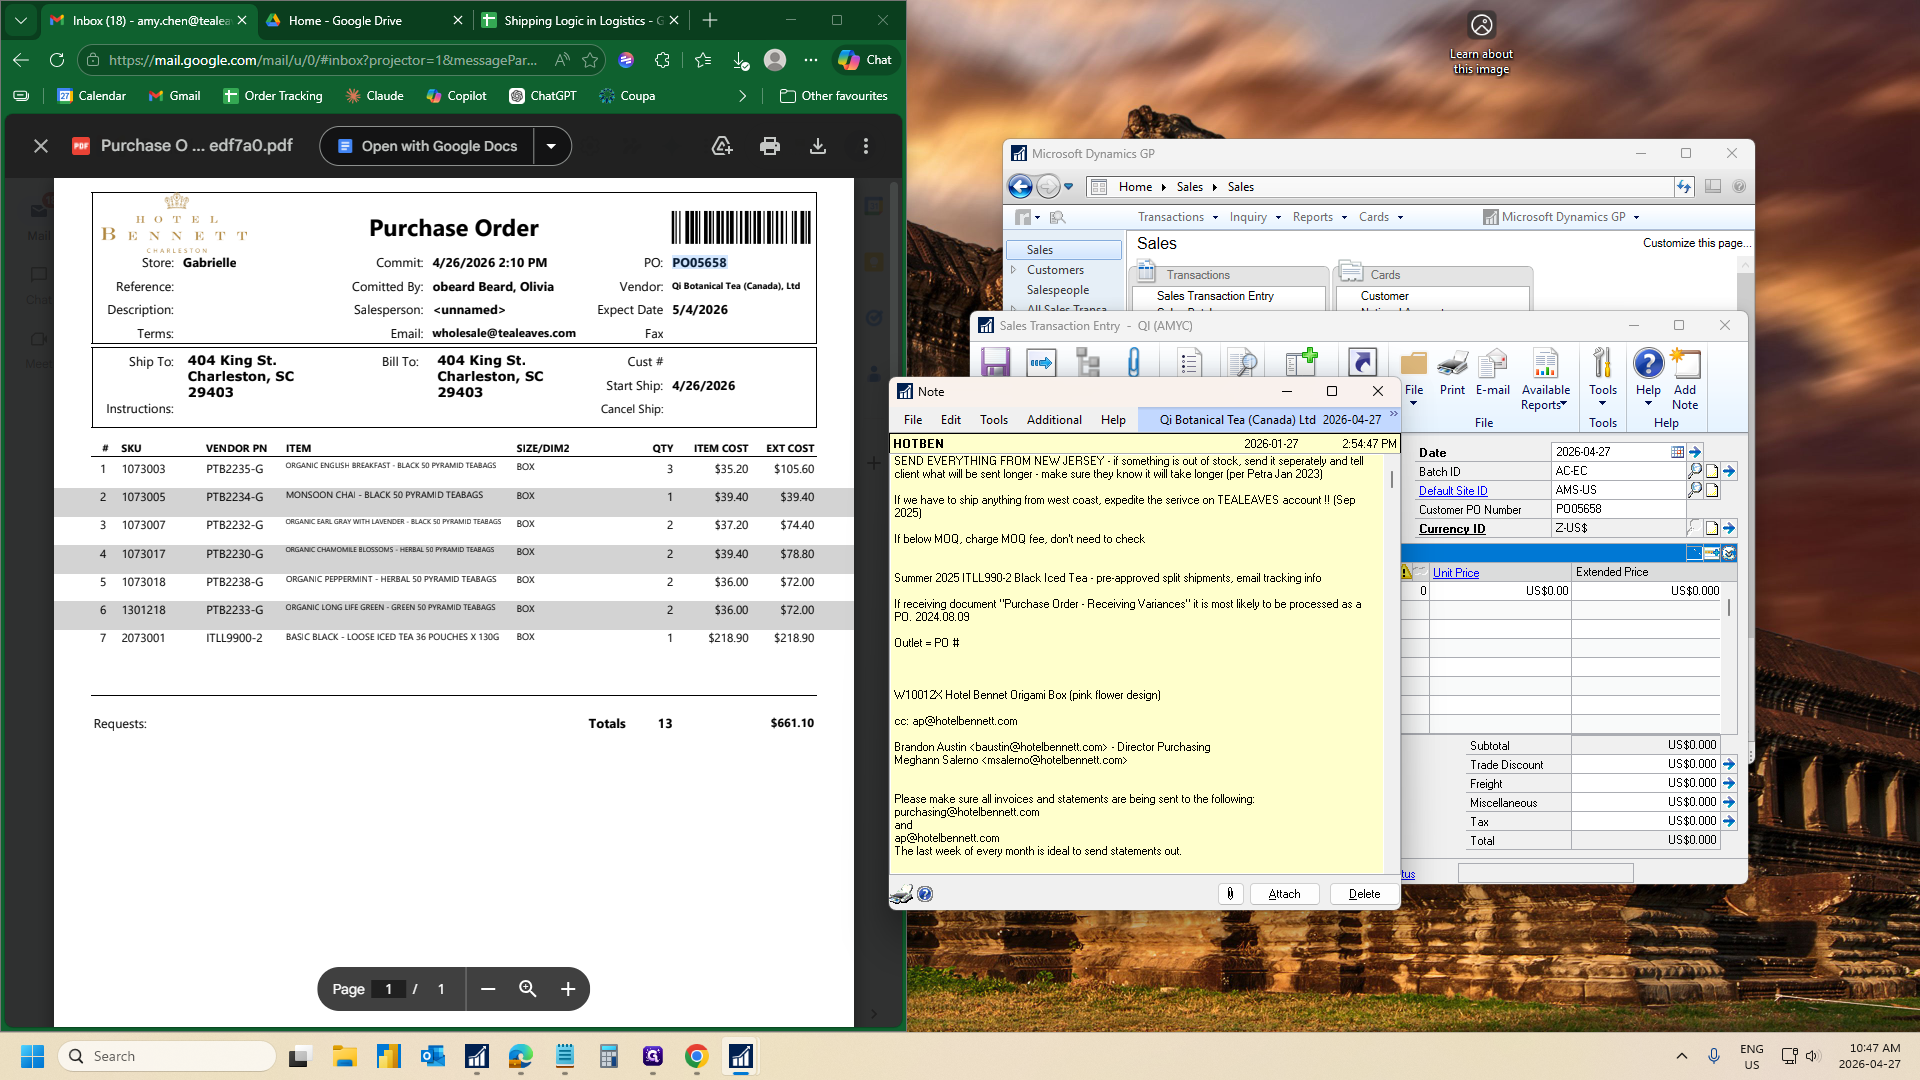
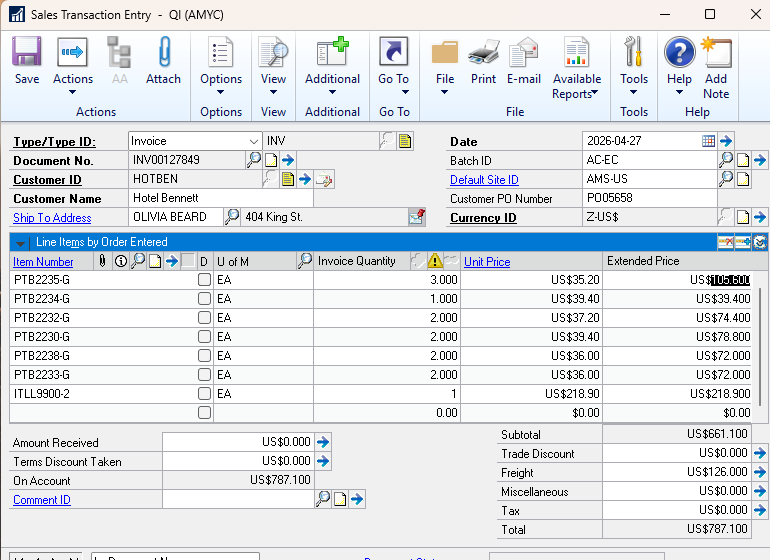
Get the PO number from the purchase order PDF and enter into the Customer PO Number field.
Step #26: Get the PO number from the purchase order PDF and enter into the Customer PO Number field.
27
Press Tab twice to lock in the header details.
28
Click the Notes icon.
Step #28: Click the Notes icon.
29
Read the notes section for special instructions (e.g., expediting from a different warehouse, shipping on their own account, special samples requests, etc.).
Step #29: Read the notes section for special instructions (e.g., expediting from a different warehouse, shipping on their own account, special samples requests, etc.).

6. Put Order in our Tracking Sheet
30
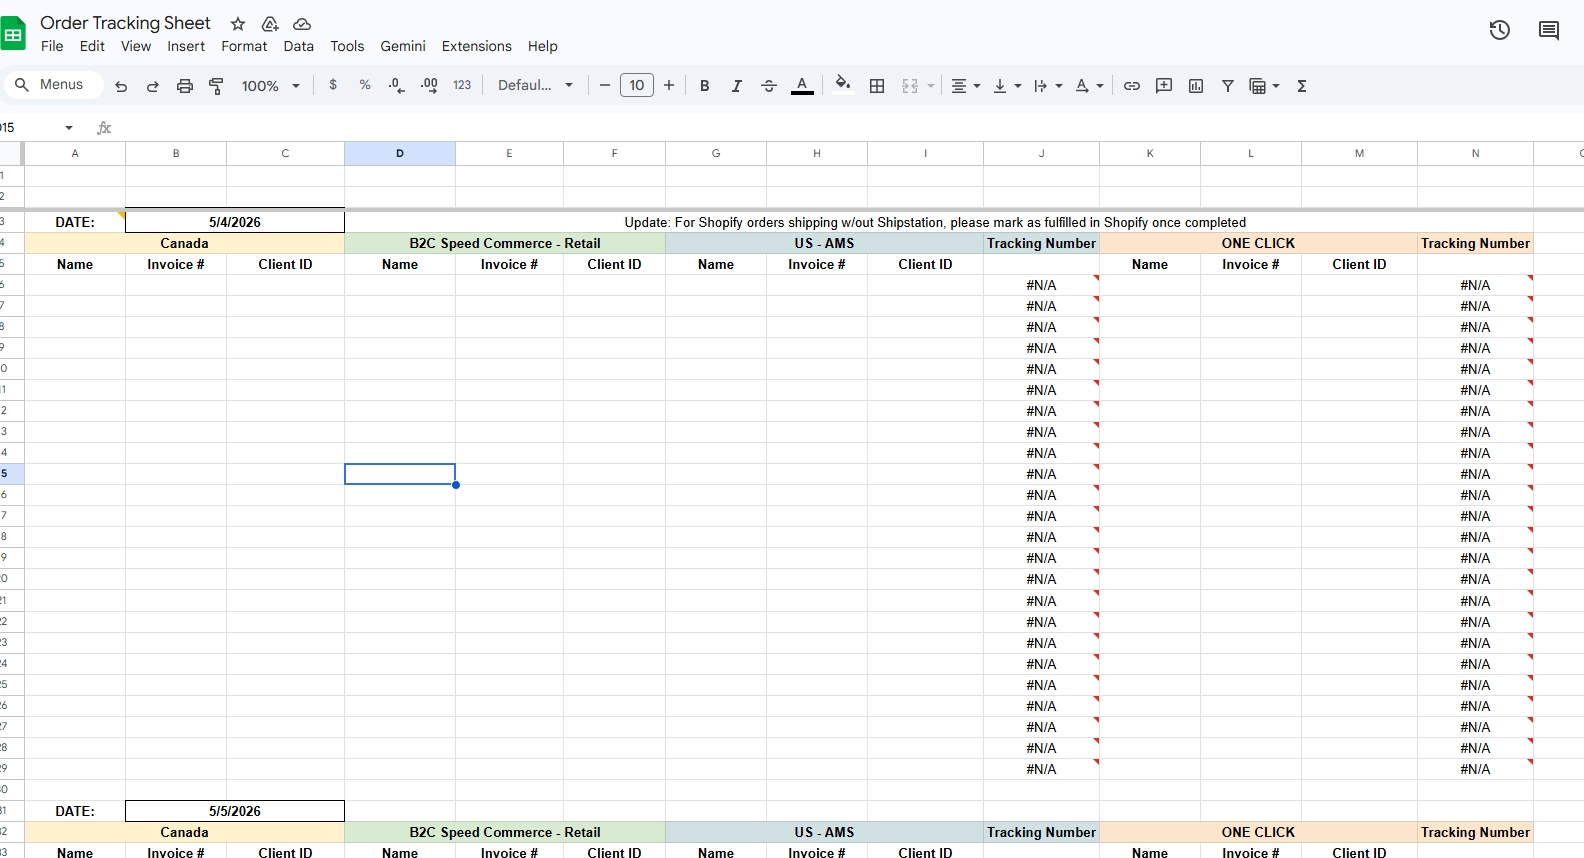
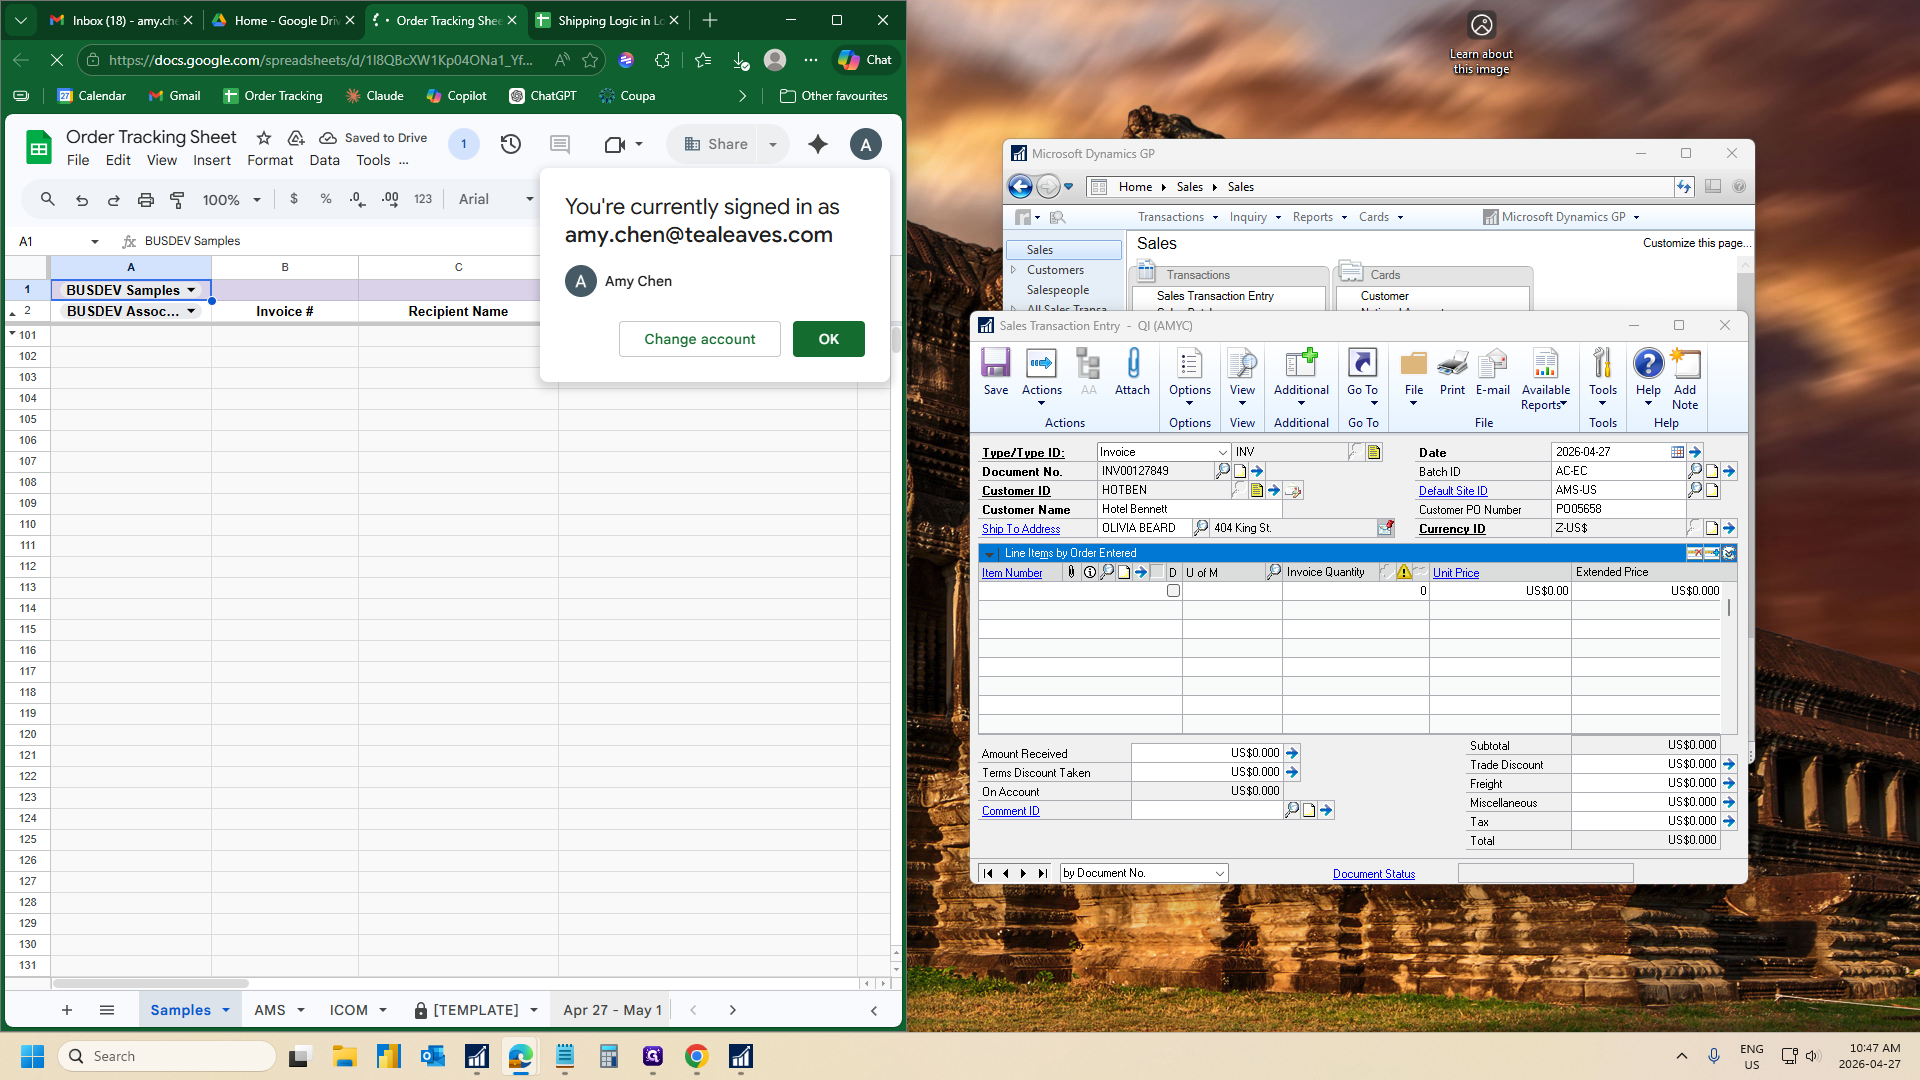
Open the Order Tracking Sheet in Google Drive.
Step #30: Open the Order Tracking Sheet in Google Drive.
31
Navigate to the tab for the current week.
Step #31: Navigate to the tab for the current week.
32
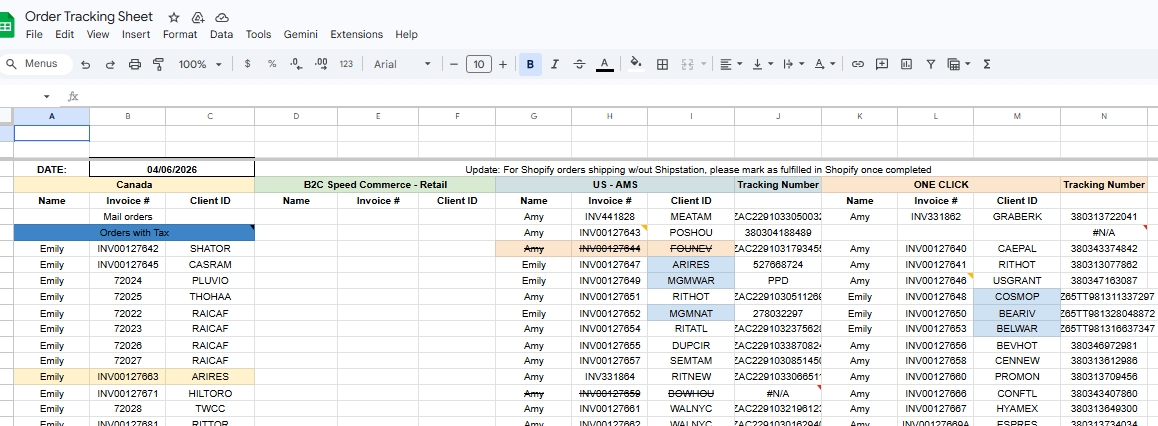
Locate the column for the correct warehouse (e.g., CA or Speed or AMS or One Click).
Step #32: Locate the column for the correct warehouse (e.g., CA or Speed or AMS or One Click).
33
In a new row, enter your name, the invoice number, and the customer ID short form.

7. Enter Line Items

34
Return to Dynamics GP and click the first row under the Item Number column in the line items grid.
Step #34: Return to Dynamics GP and click the first row under the Item Number column in the line items grid.
35
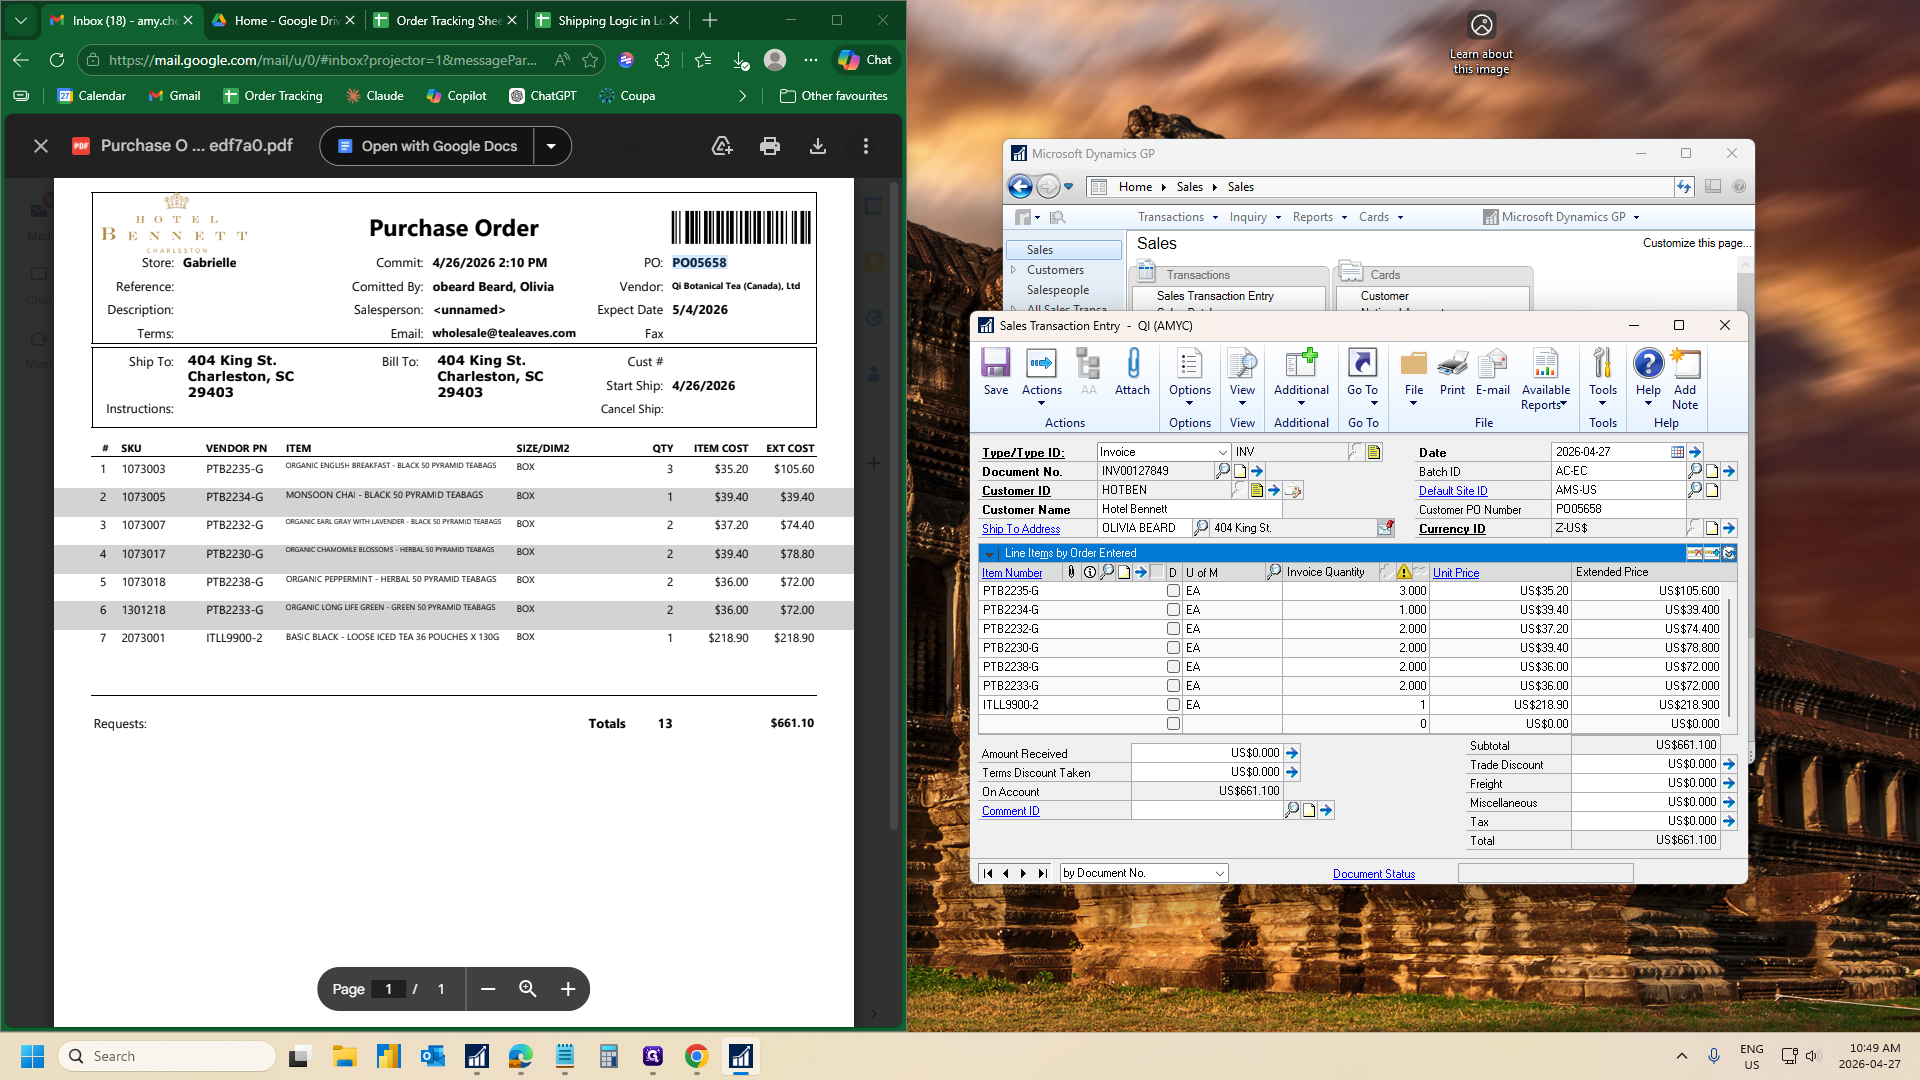
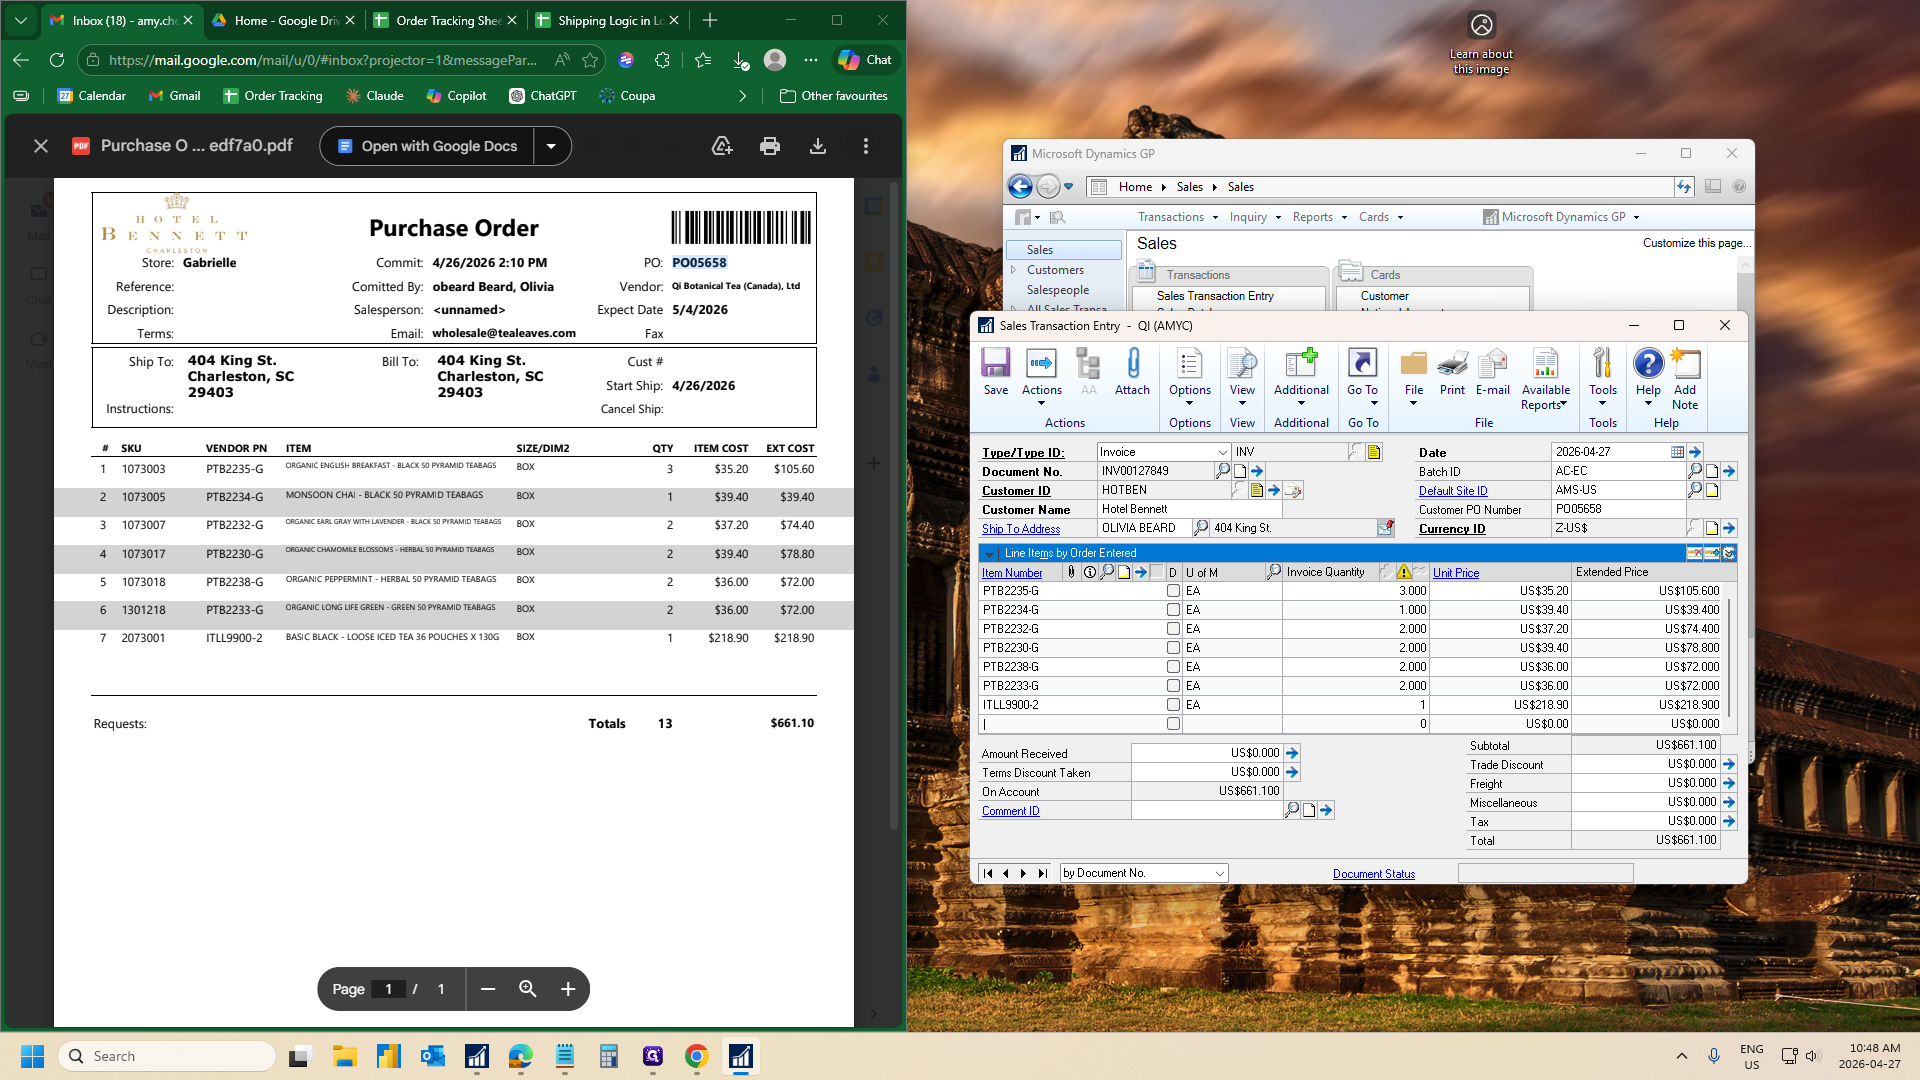
Enter the SKU from the purchase order, press Tab, enter the quantity, and verify the unit and extended price. Repeat this for all items on the PO.
Step #35: Enter the SKU from the purchase order, press Tab, enter the quantity, and verify the unit and extended price. Repeat this for all items on the PO.

Item Number:

  • Option 1 = enter the SKU if you know it and then tab.

  • Option 2 = if you don’t know the SKU, type in the item description and tab. A pop-up will appear and you can refine your search and select the item you want
36
Once all lines have been entered, compare the order subtotal in GP to the PO subtotal to ensure they match perfectly.
Step #36: Once all lines have been entered, compare the order subtotal in GP to the PO subtotal to ensure they match perfectly.
37
Next, click the down arrow next to the first row to expand the item details.
Step #37: Next, click the down arrow next to the first row to expand the item details.
38
Check that the product description matches the PO. Use the Next arrow to cycle through and verify the remaining line items.
Step #38: Check that the product description matches the PO. Use the Next arrow to cycle through and verify the remaining line items.

8. Calculate and Apply Freight Cost
39
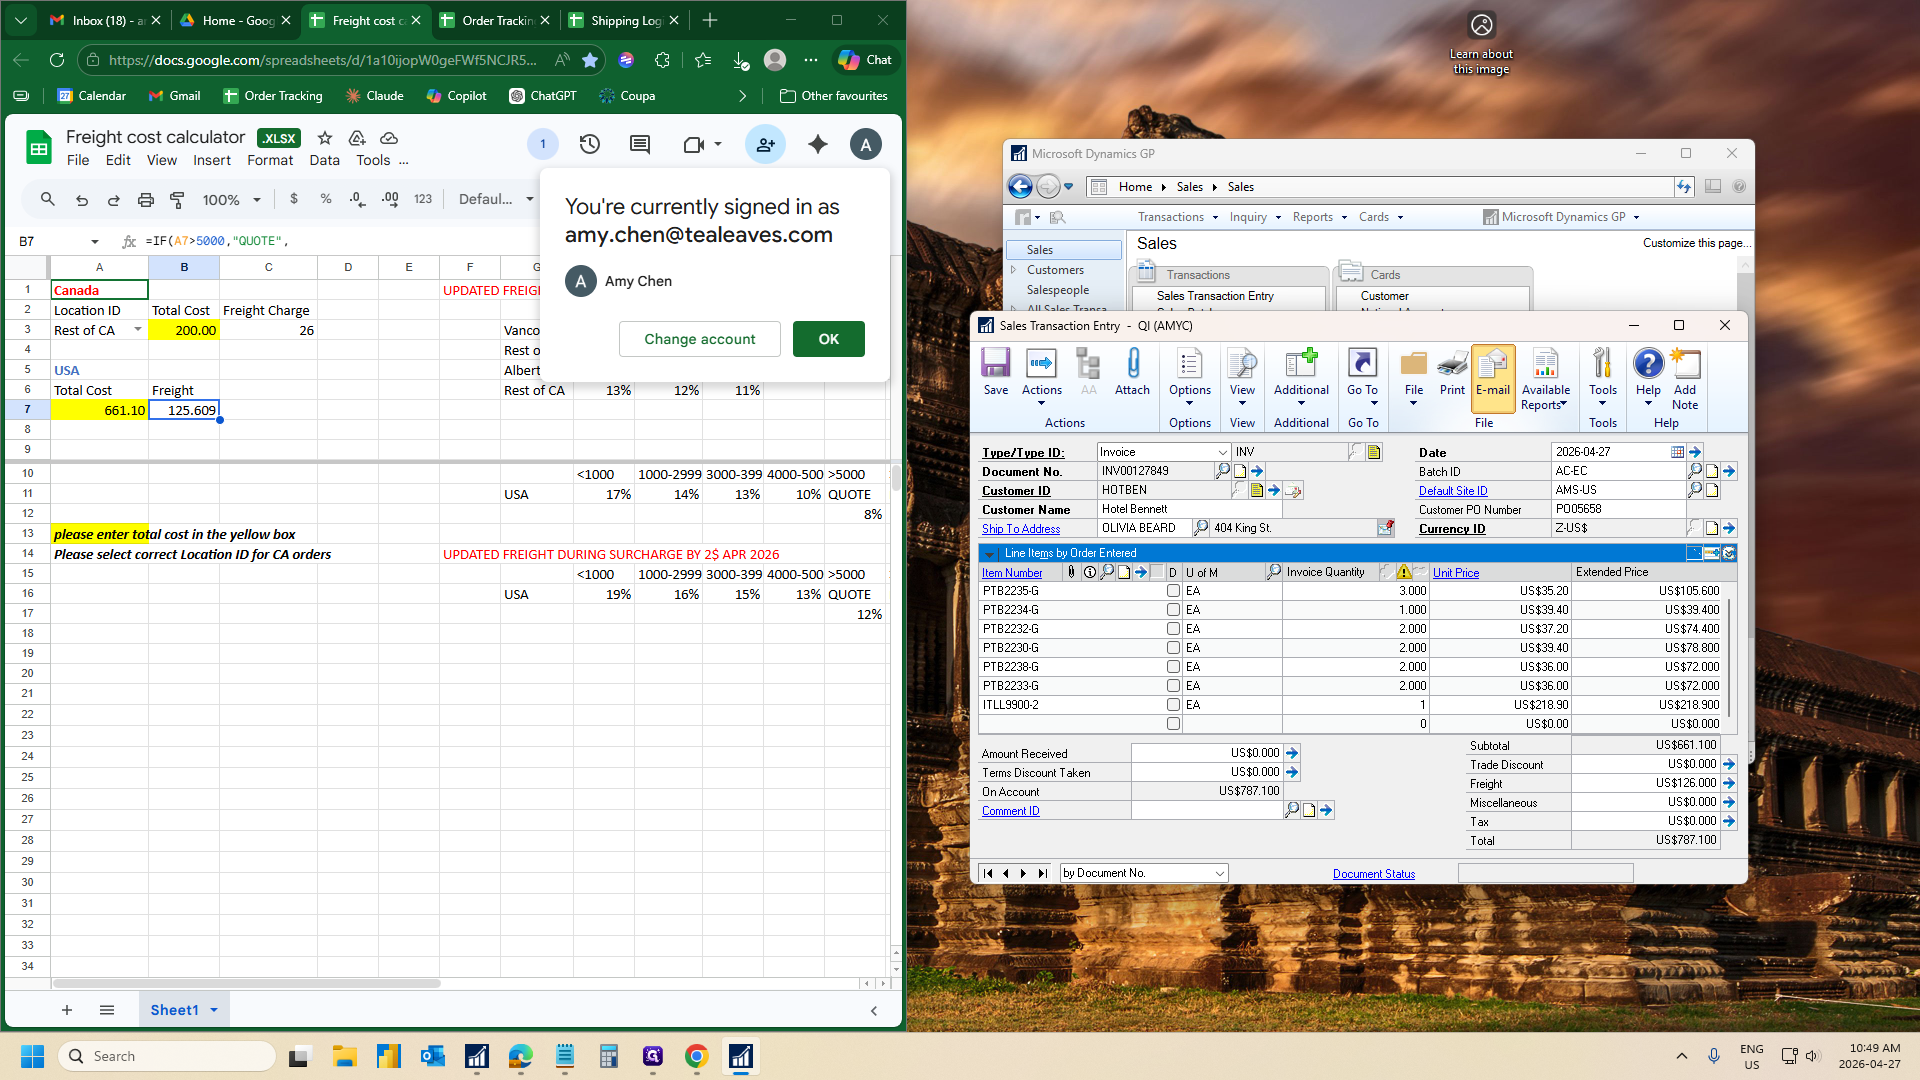
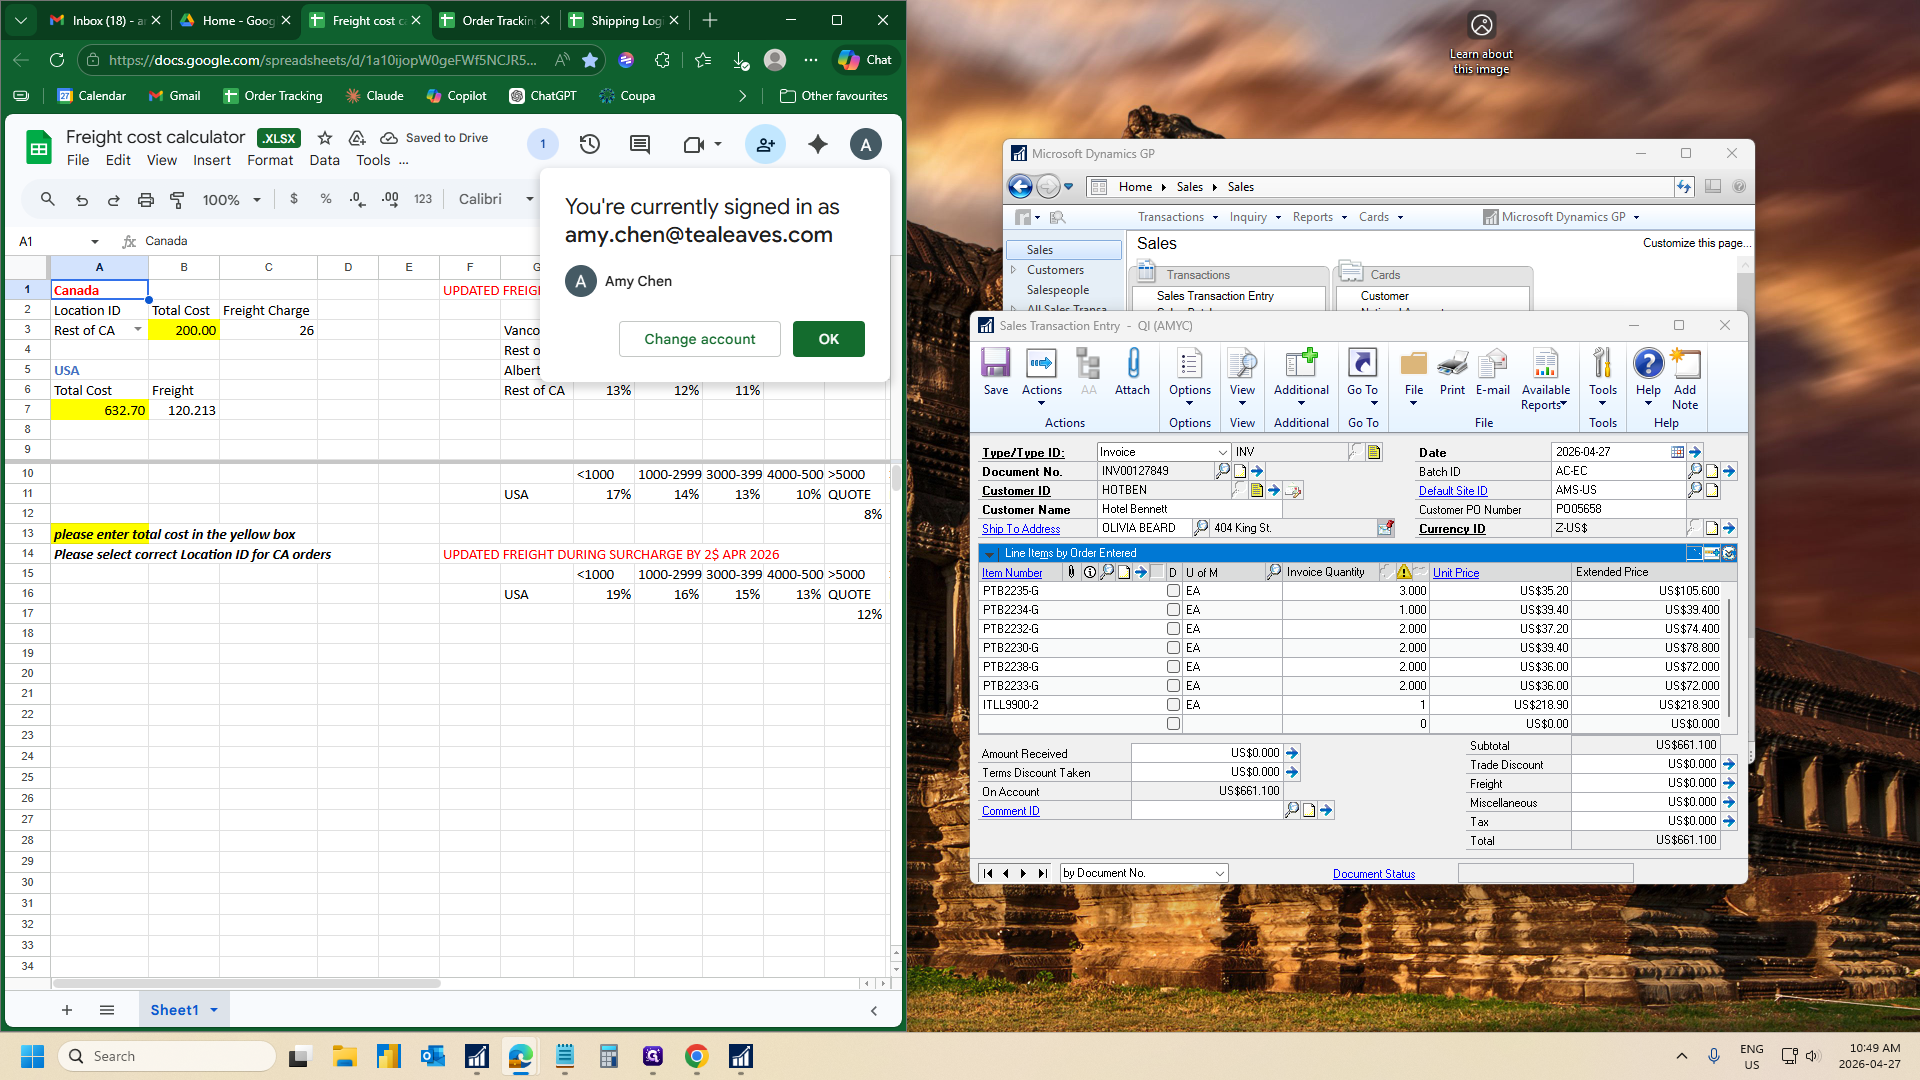
Open the Freight Cost Calculator worksheet in Google Drive. Enter the order subtotal into the calculator
Step #39: Open the Freight Cost Calculator worksheet in Google Drive. Enter the order subtotal into the calculator
40
Take the resulting freight amount and round it to the nearest whole dollar.
41
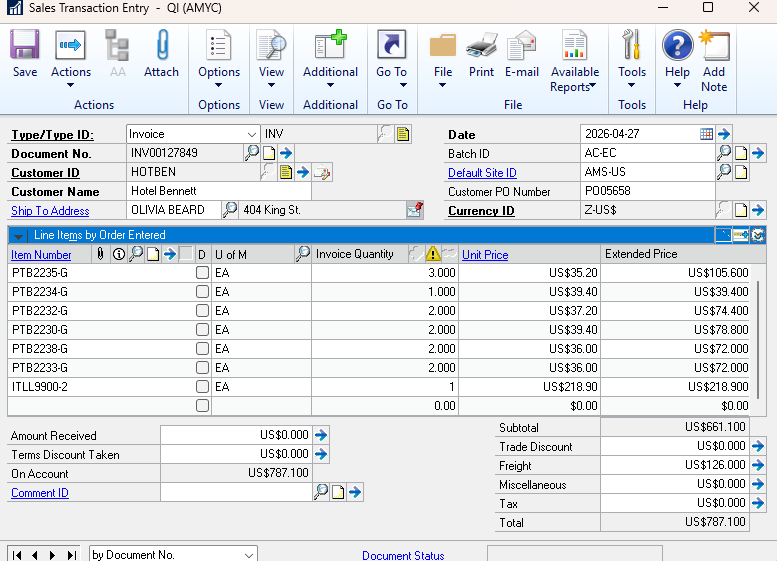
Back in Dynamics GP, enter the rounded freight cost into the Freight field.
42
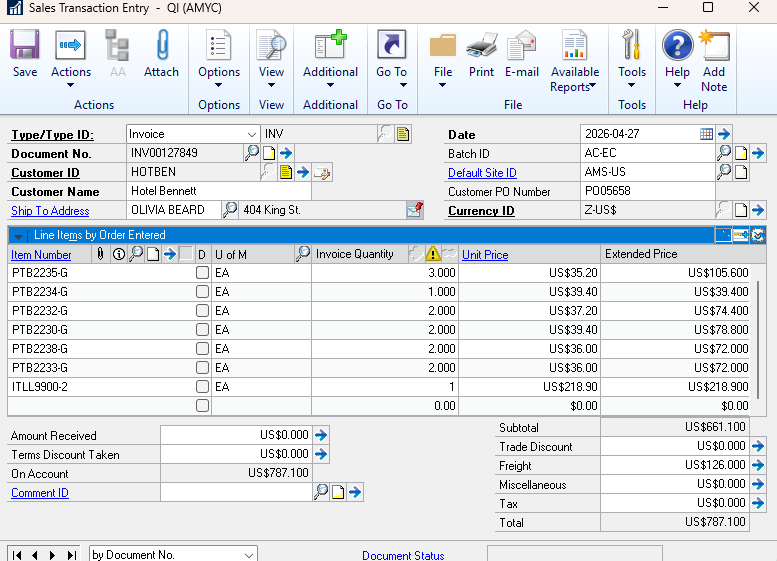
Tab through to lock in the freight. The order total should update.
Step #42: Tab through to lock in the freight. The order total should update.

9. Email Invoice

43
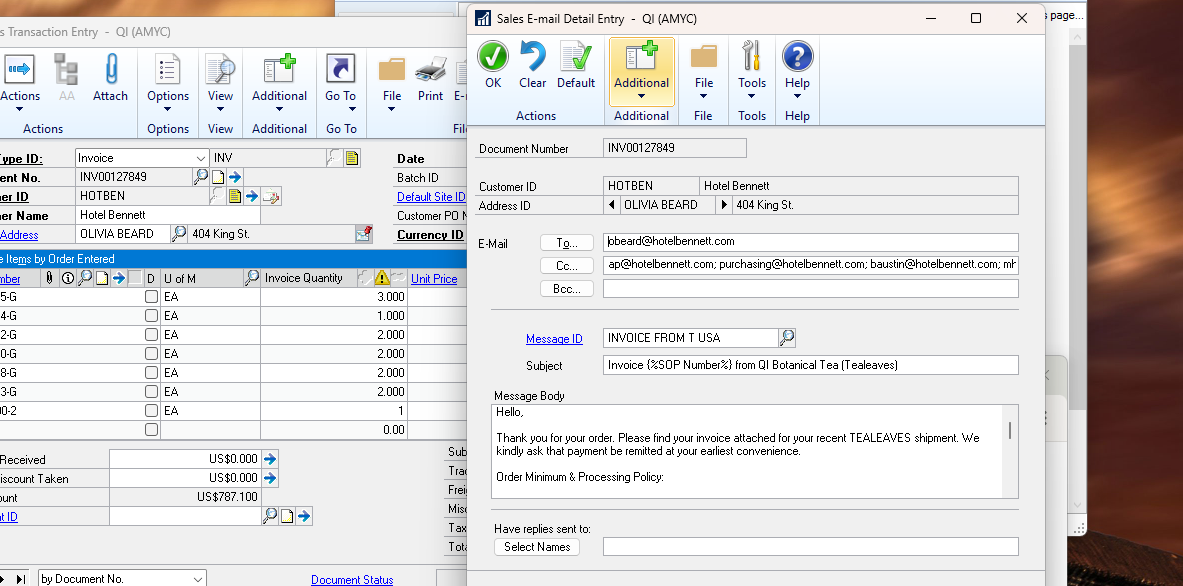
Click the Email Detail Entry button next to the Customer ID
Step #43: Click the Email Detail Entry button next to the Customer ID
44
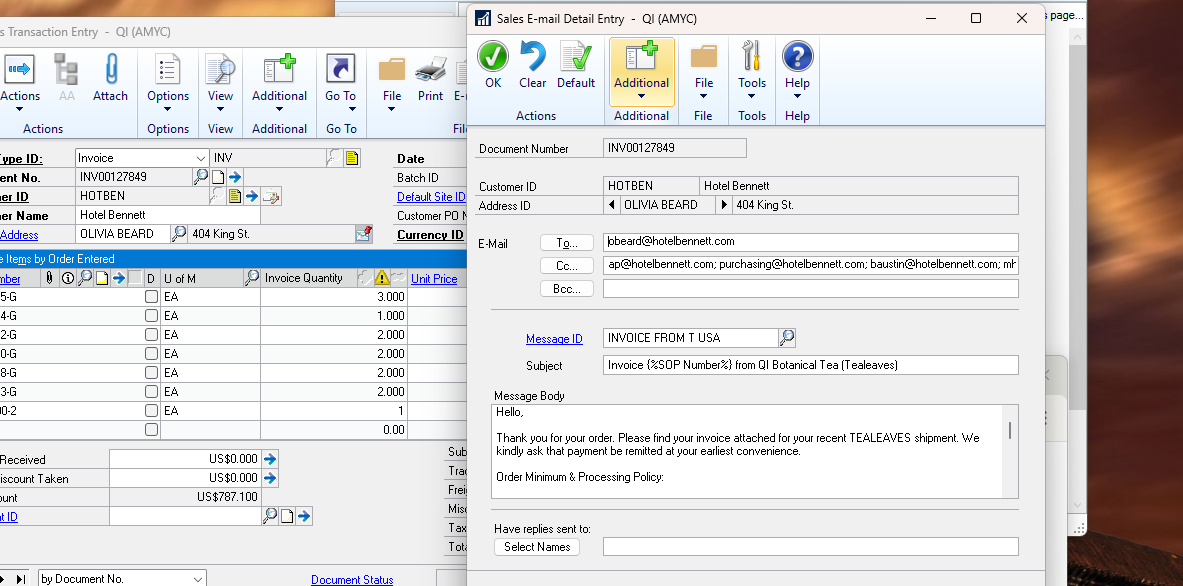
Click through until you have the right purchaser.
Step #44: Click through until you have the right purchaser.
45
Press Ok
Step #45: Press Ok
46
Click the Email button in the top menu.
Step #46: Click the Email button in the top menu.
47
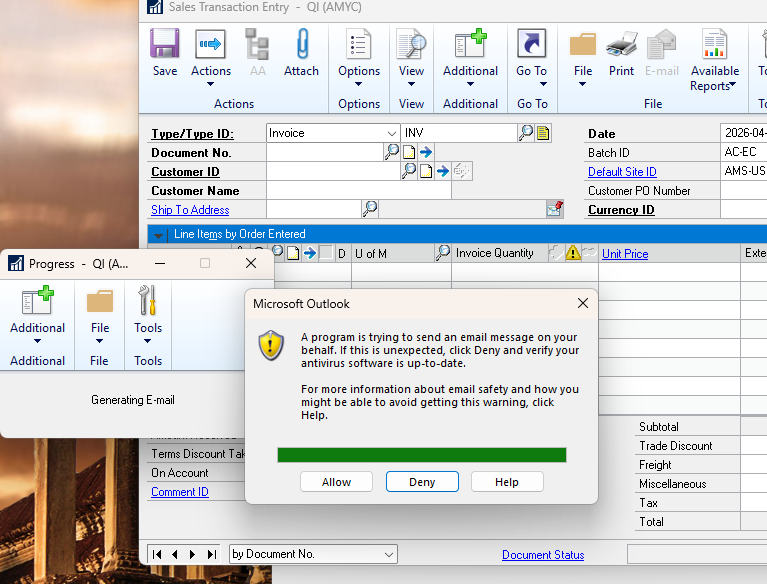
Click SAVE to save the transaction, and then wait for the Outlook Popup to show up. Press Allow to send the invoice email.
Step #47: Click SAVE to save the transaction, and then wait for the Outlook Popup to show up. Press Allow to send the invoice email.
How to Process Purchase Orders and Issue Invoices in Dynamics GP