
How to Recharge a Declined Booking Payment and Send a Receipt
Learn how to successfully process a payment for a booking after a customer updates their declined credit card, and send a correct receipt via our CRM.
By Yuliya Polyukhovych
This guide explains how to process a booking payment after a customer updates a previously declined credit card. Completing this ensures the payment is successfully captured and the customer receives an accurate receipt for their records.
This workflow applies to billing administrators or customer support representatives handling payment failures. Use it when a customer has updated their payment information following an initial card decline due to insufficient funds or other issues.
Locate the Declined Booking
1
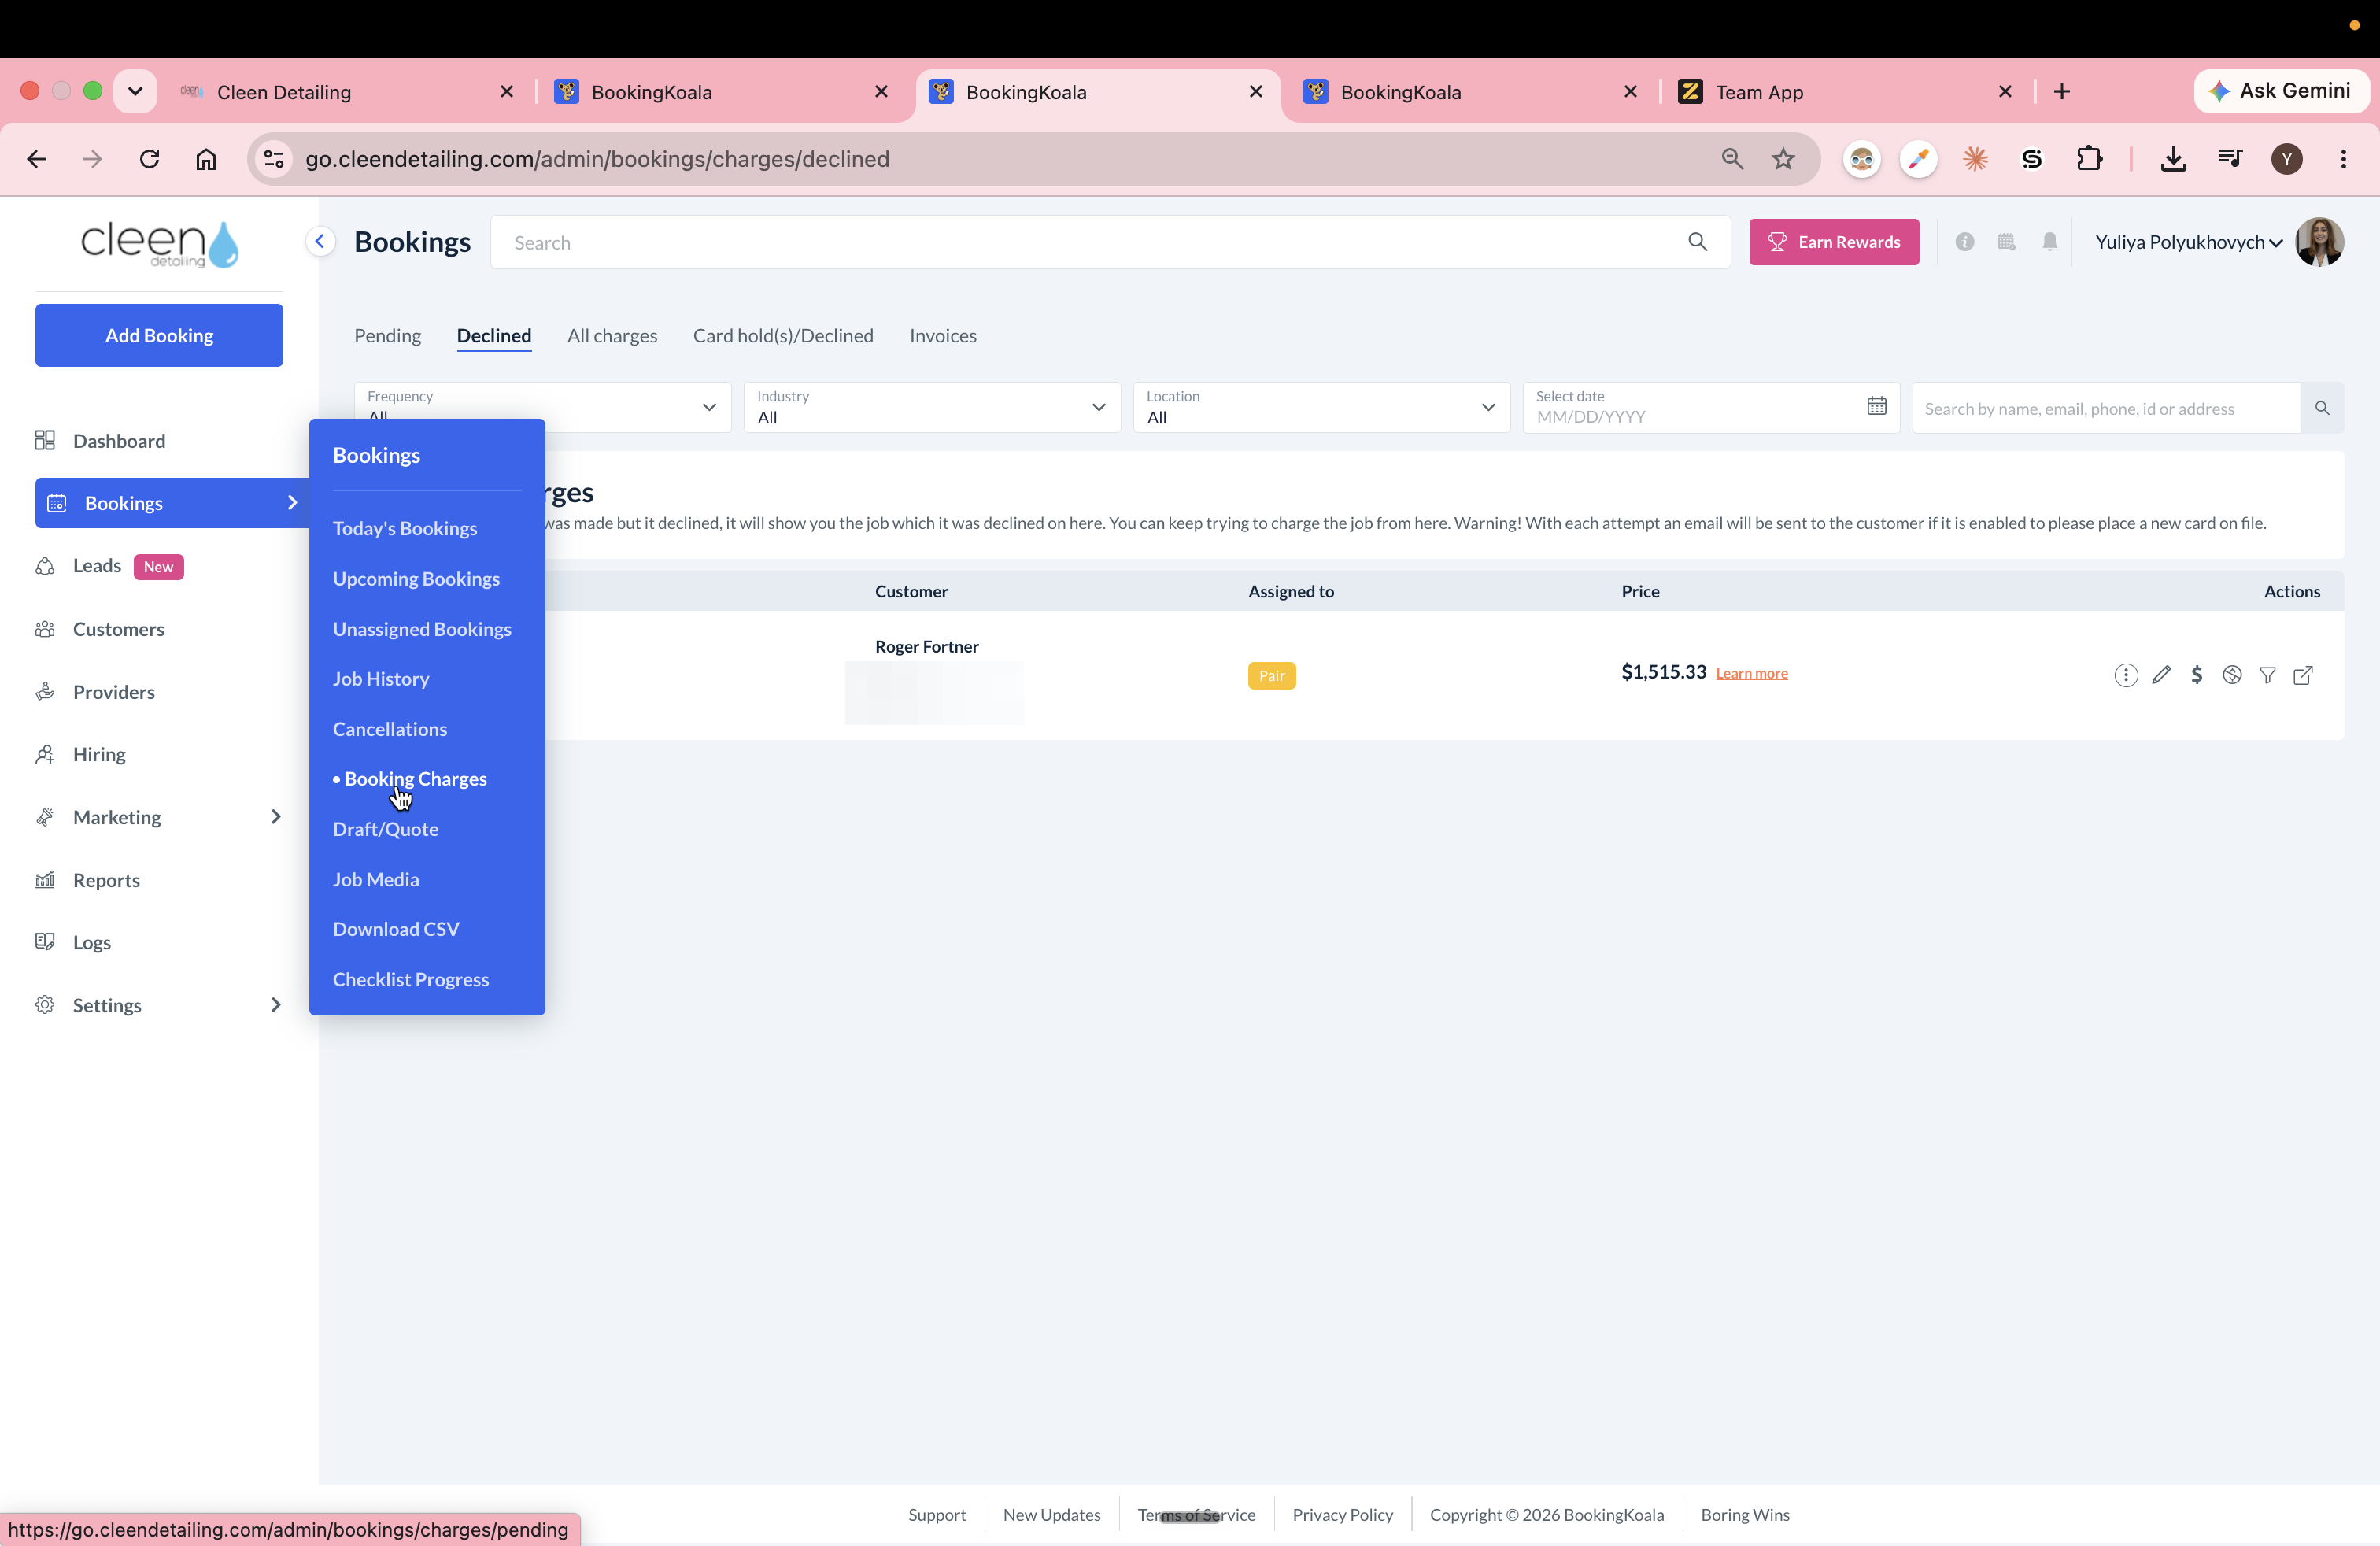
Click Booking Charges in the left navigation panel.
2
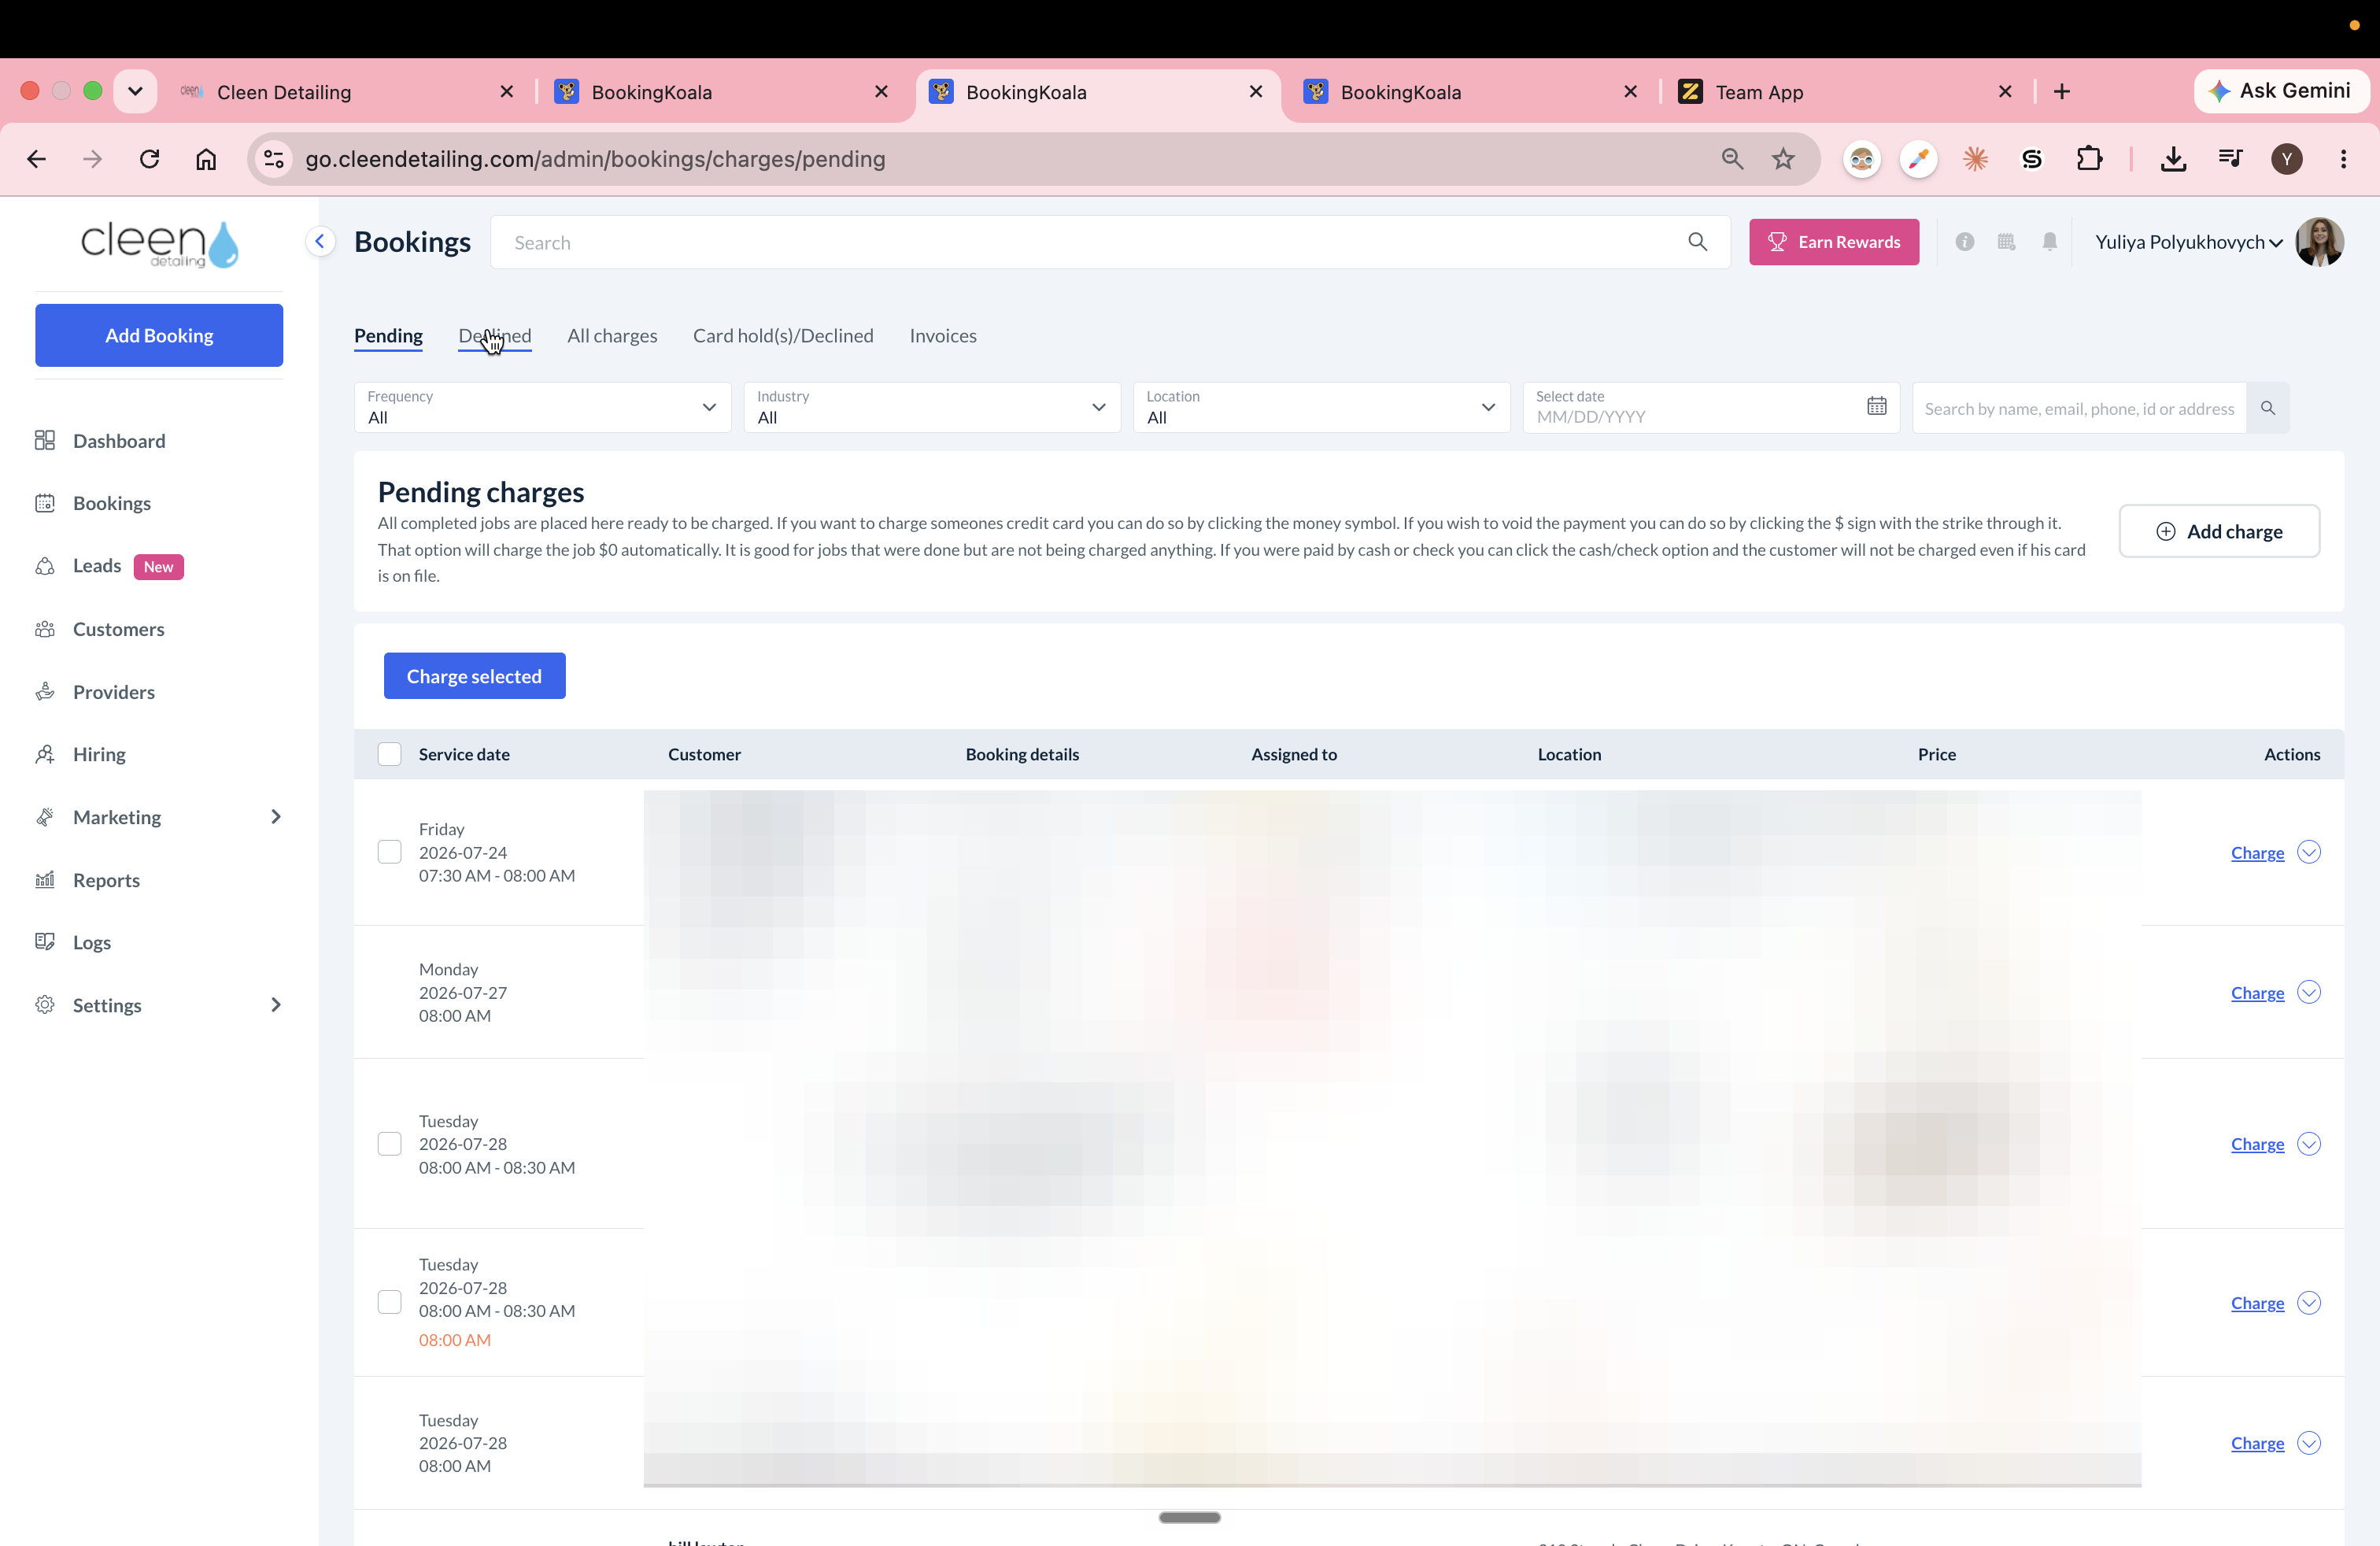
Select the Declined tab to view all failed transactions.
3
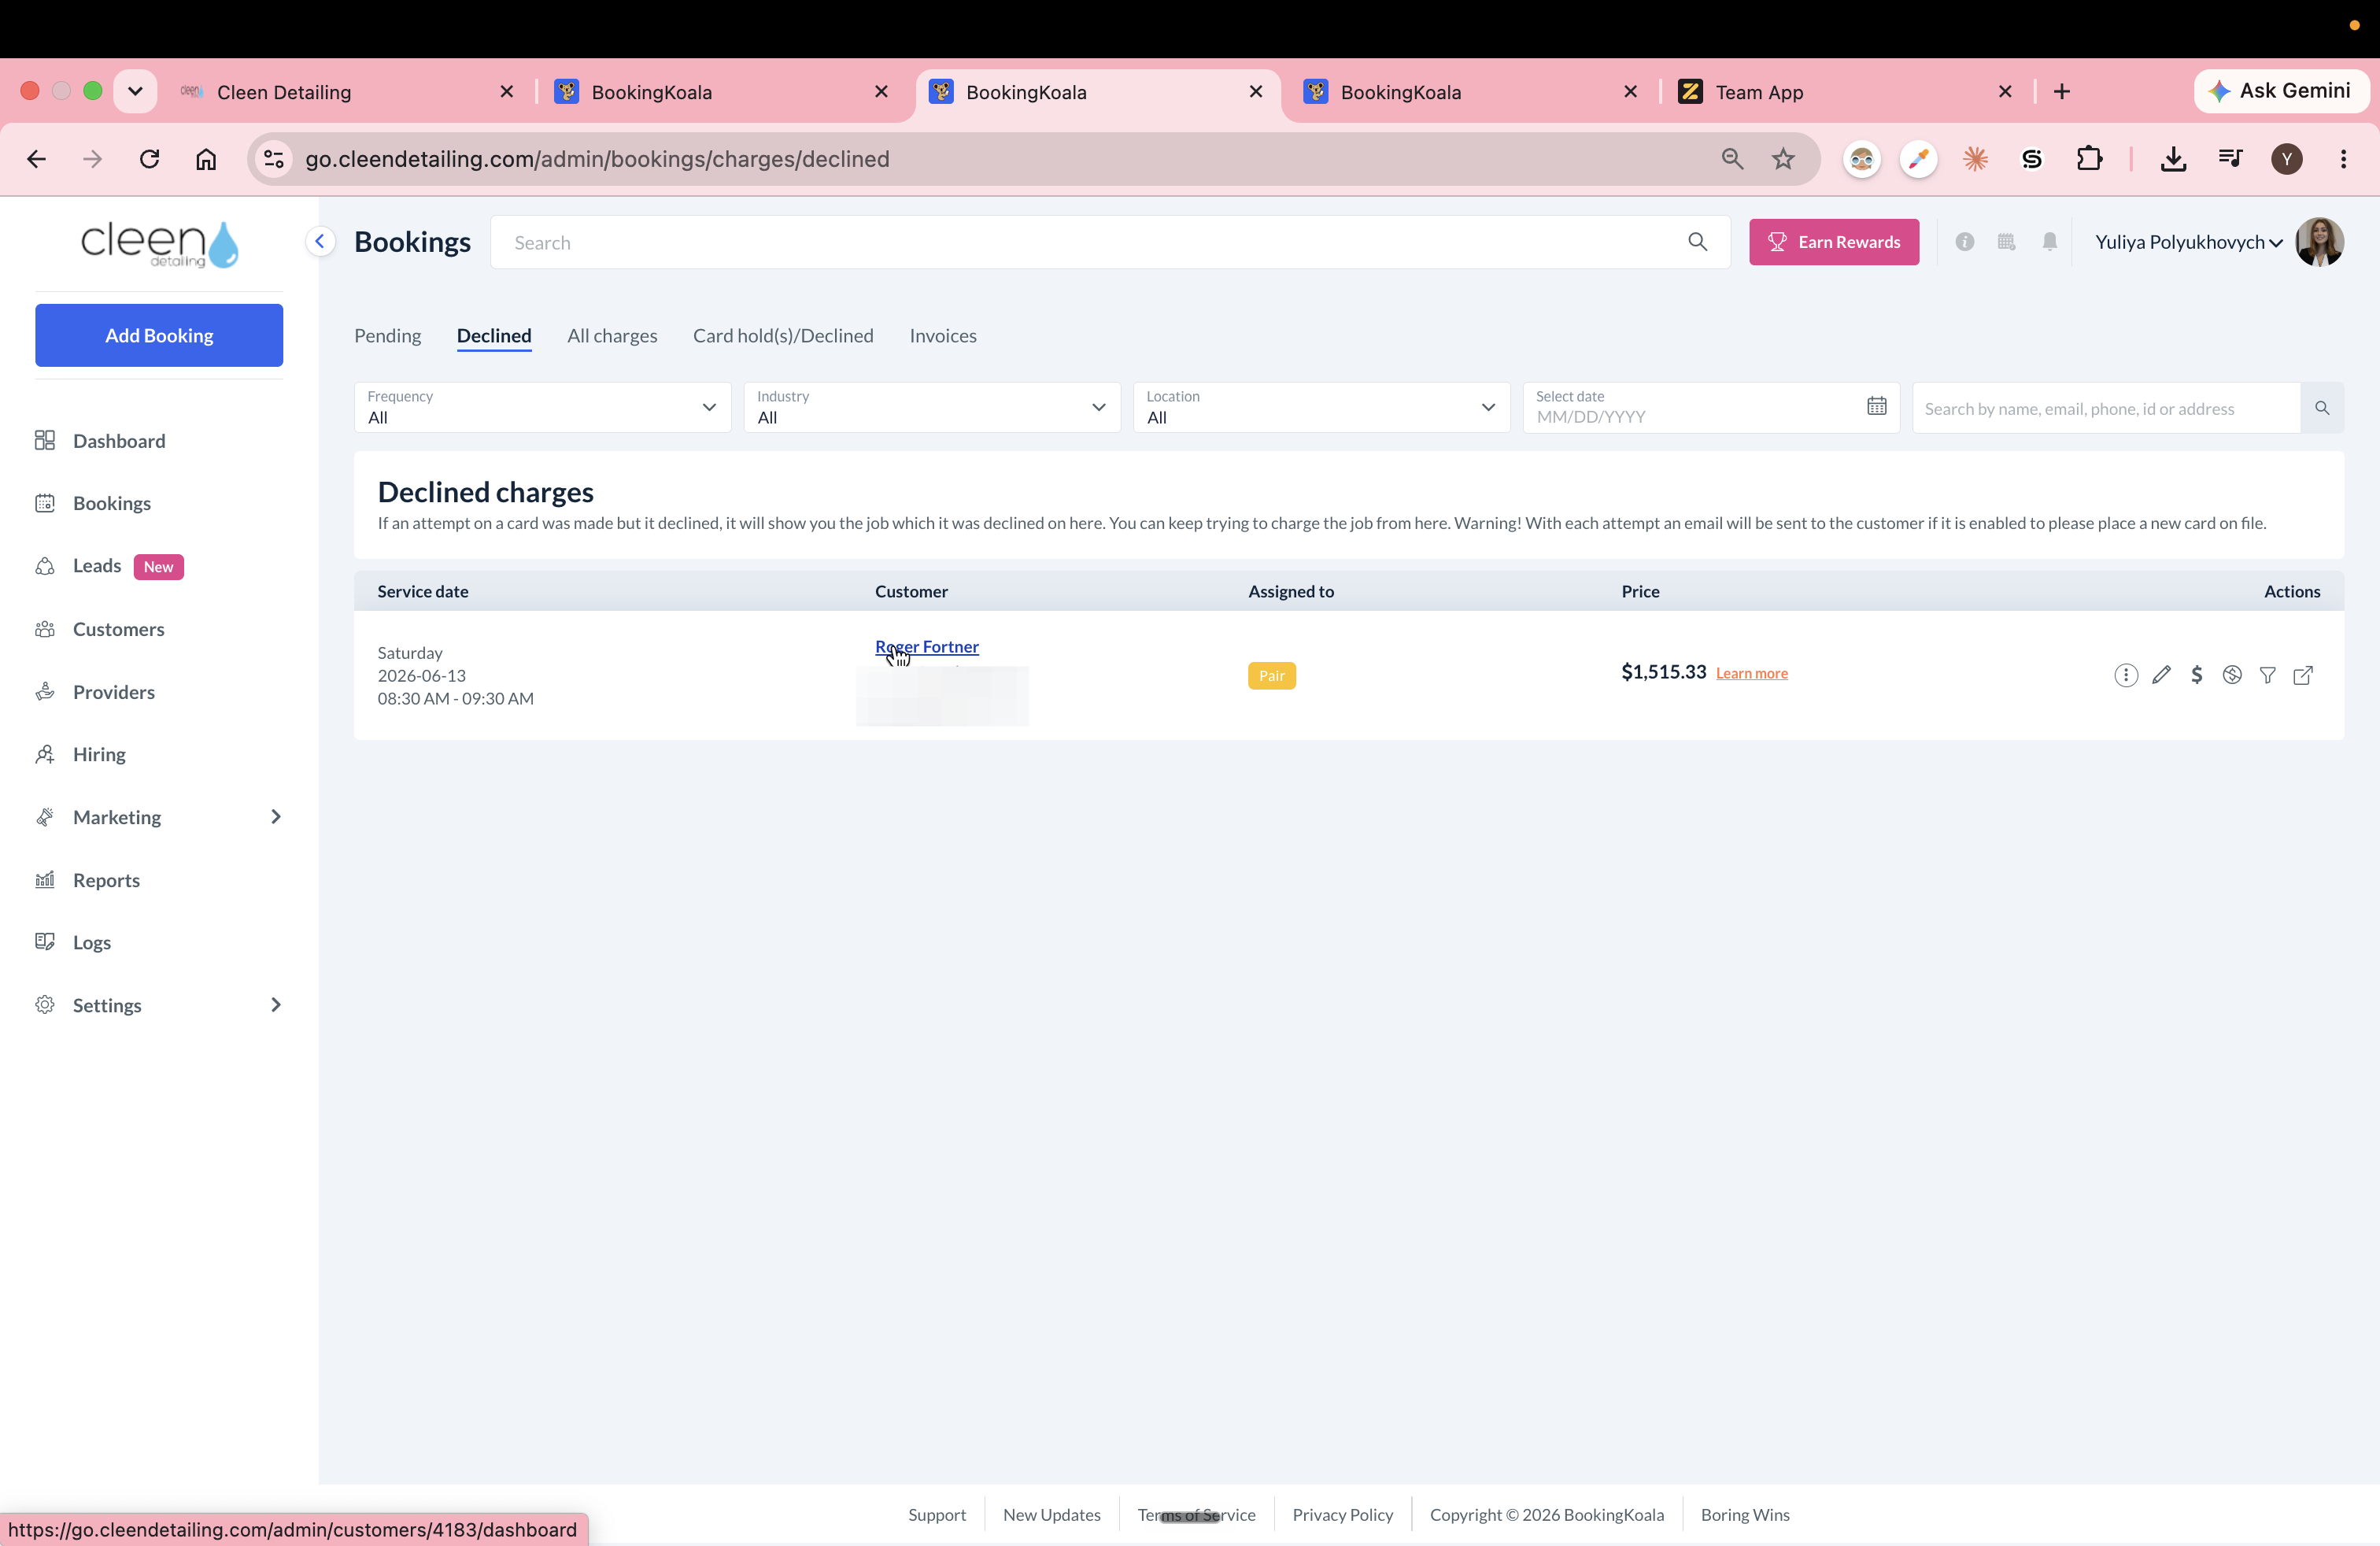
Click on the customer's name in the declined payments table.
4
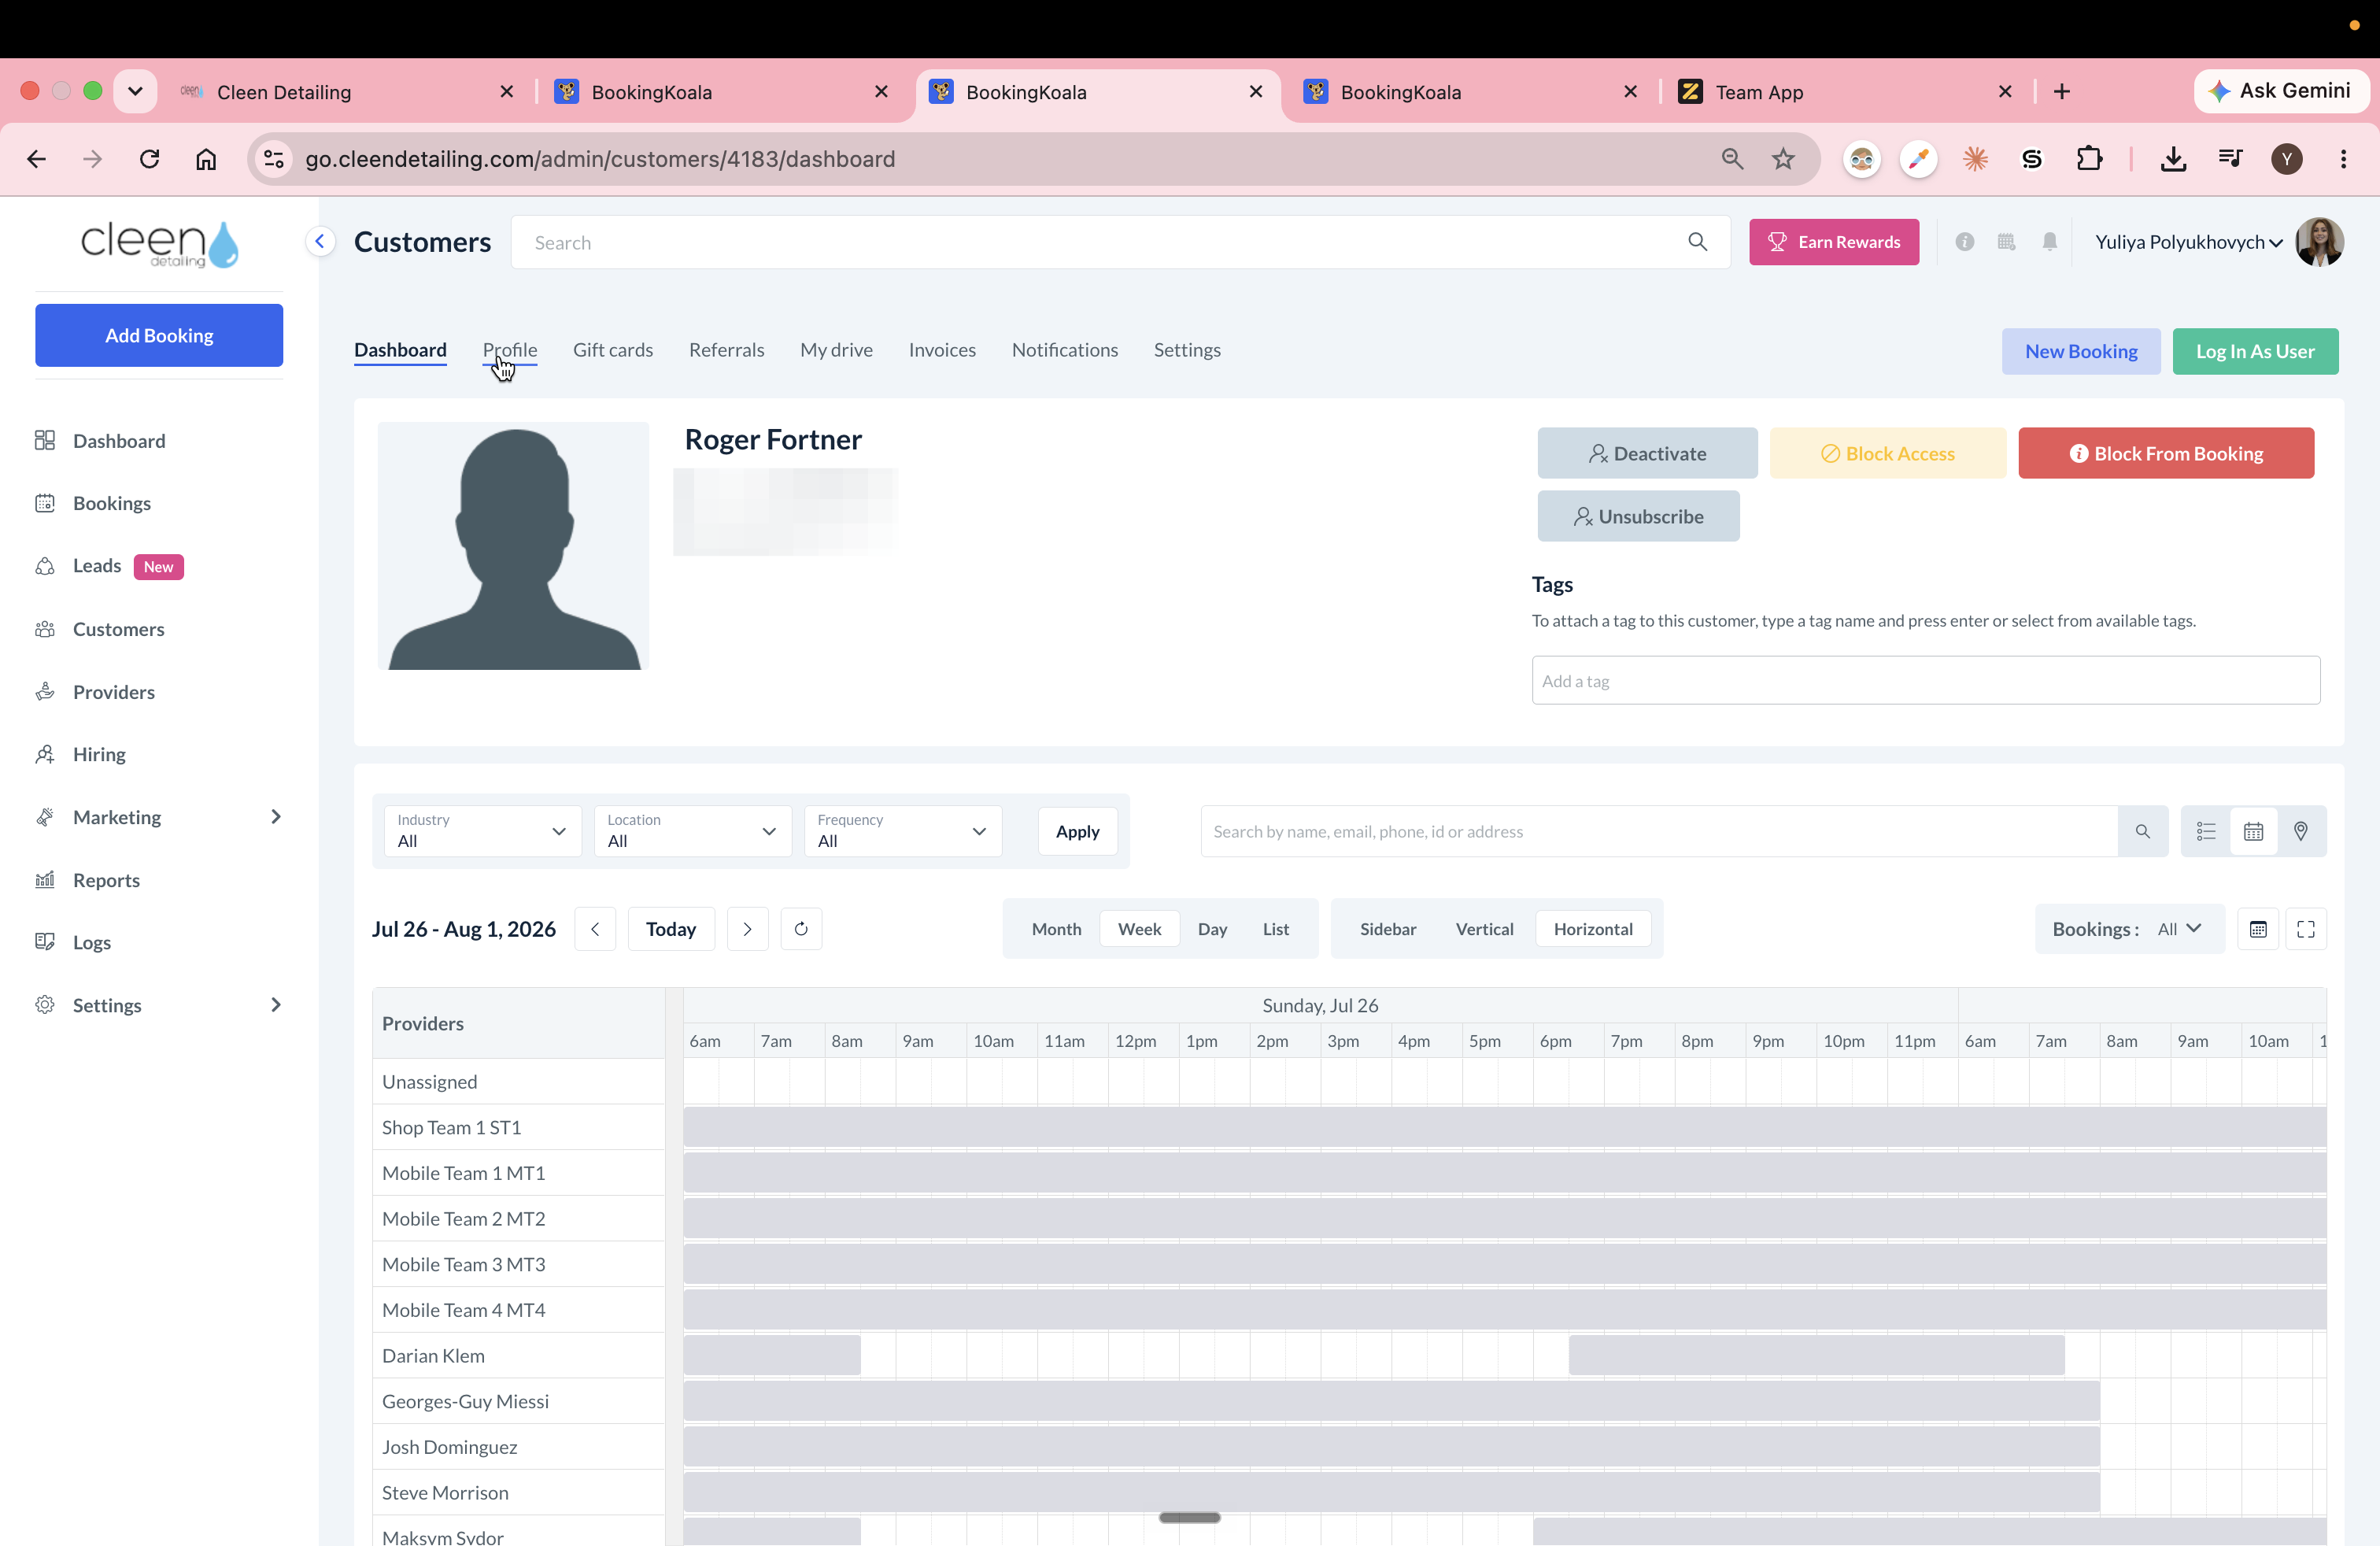
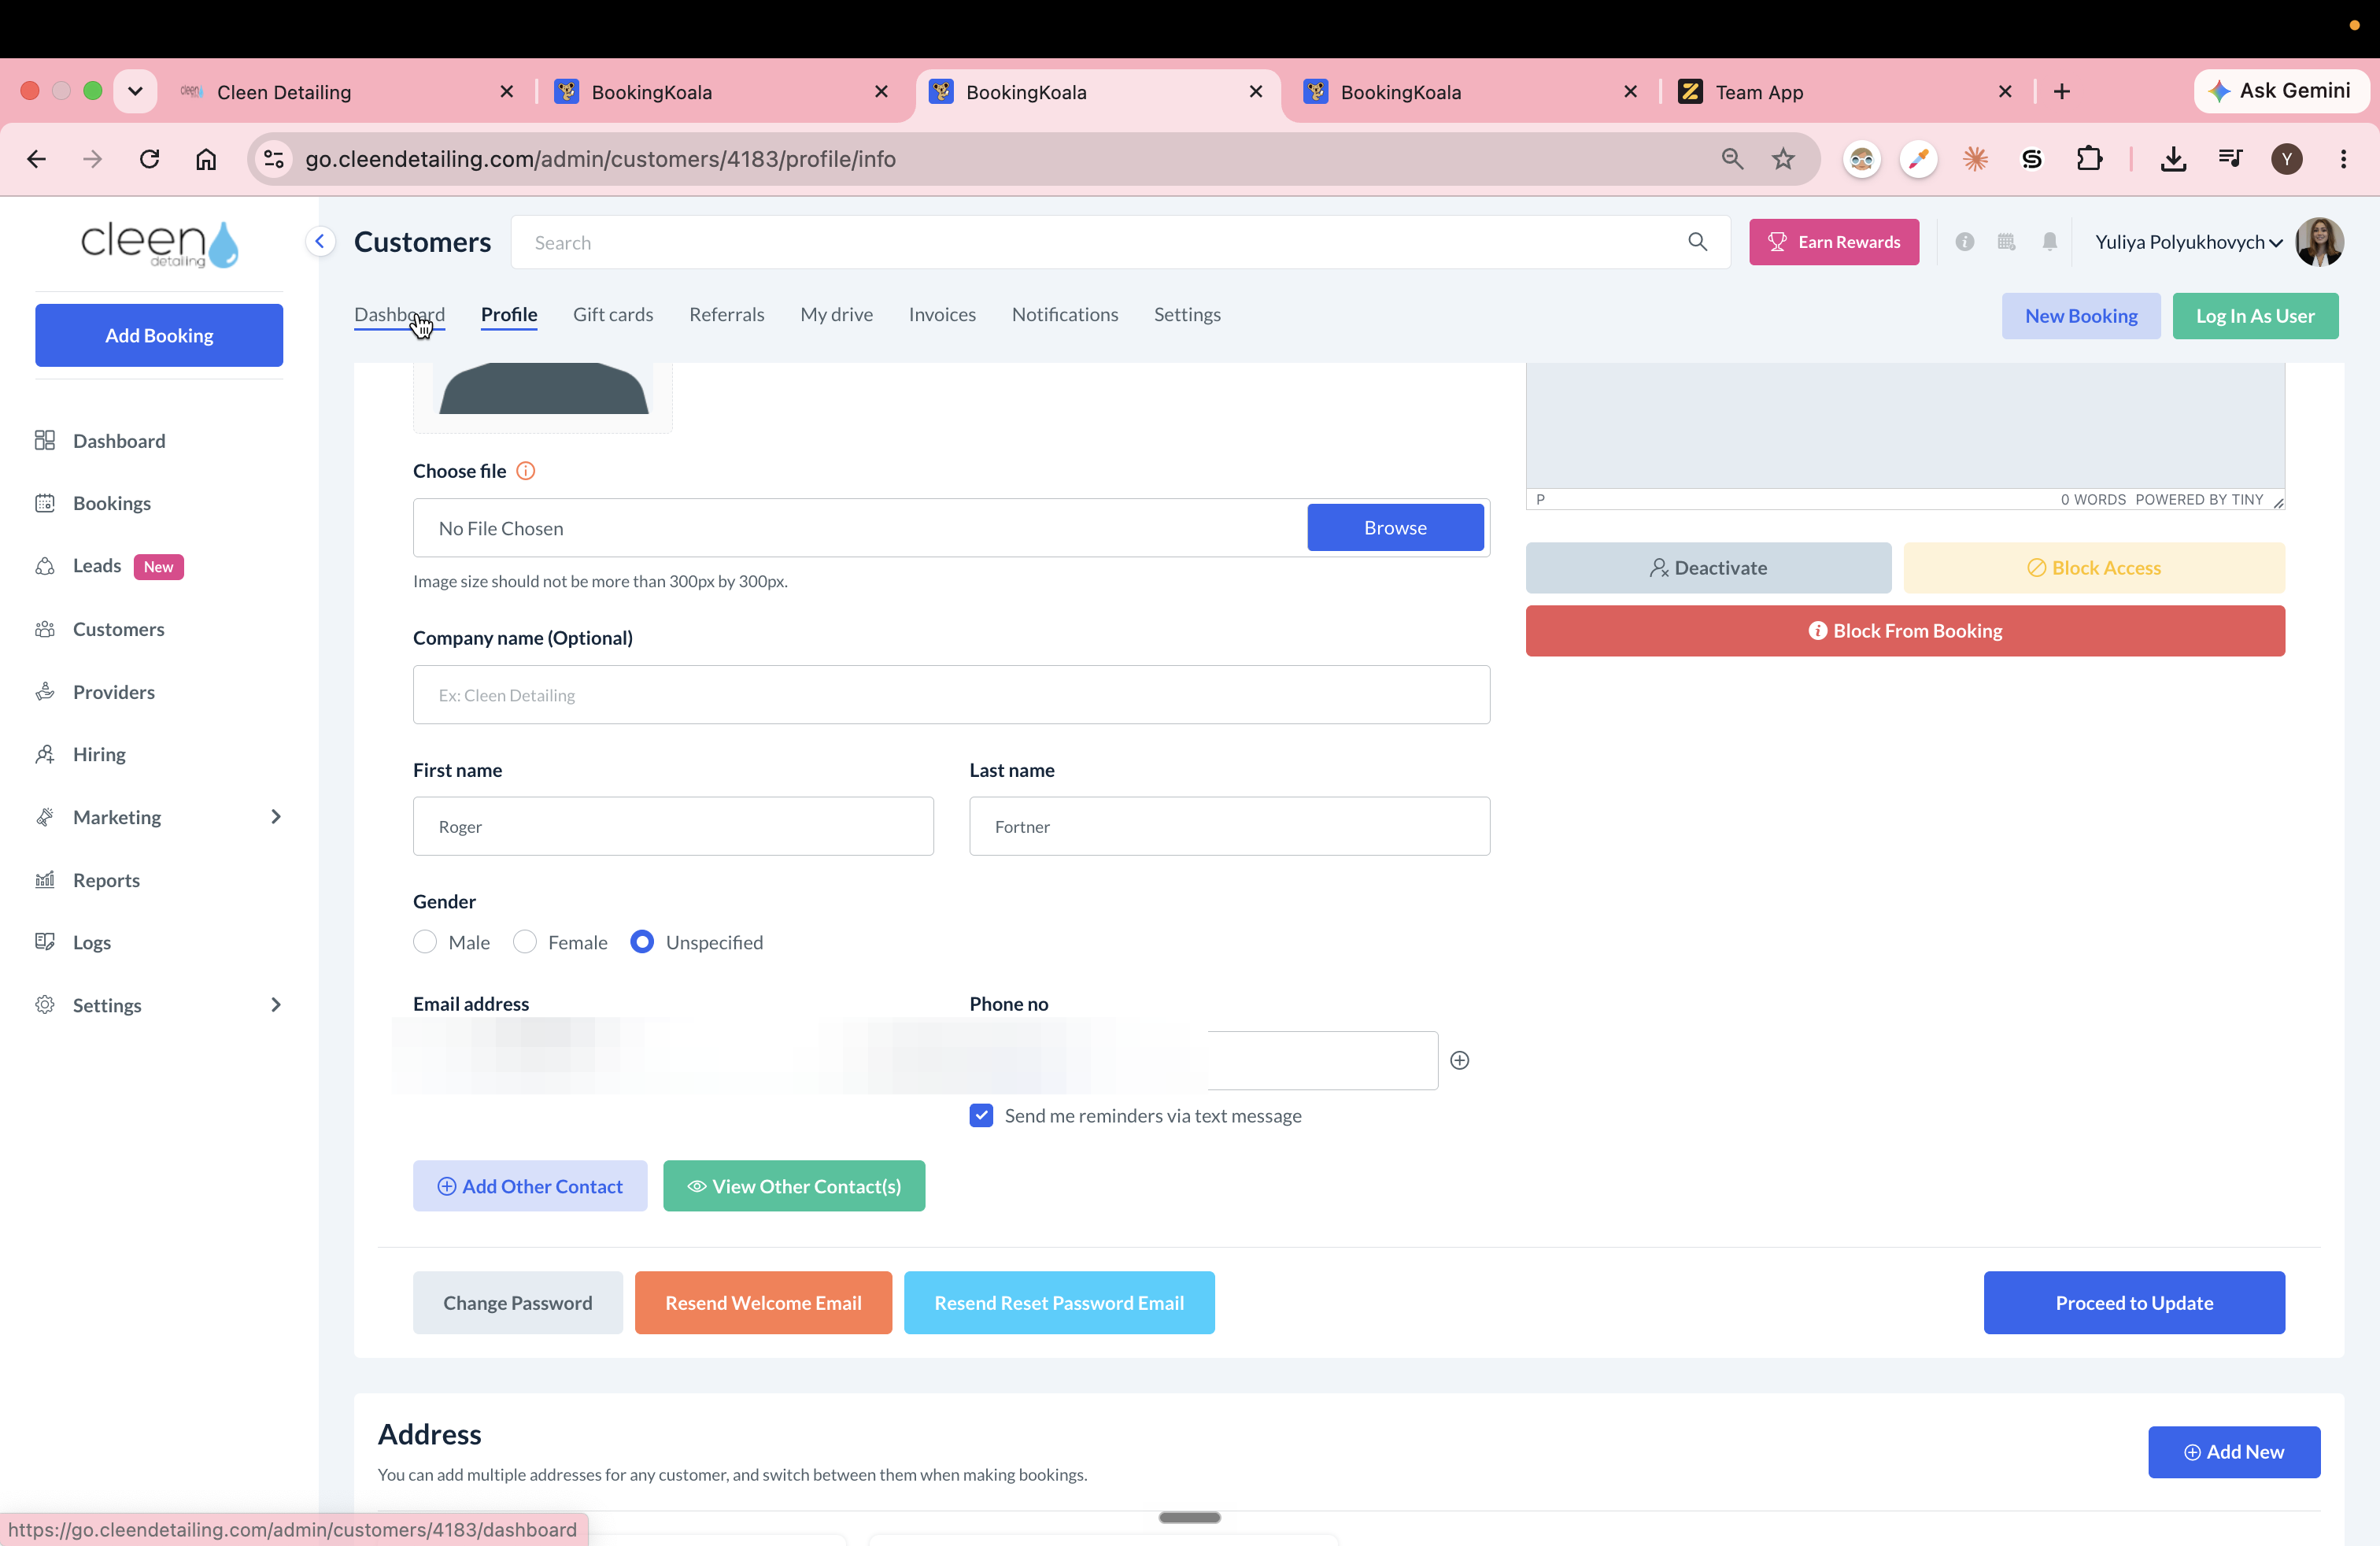
Navigate to the customer's Profile to view their account details. Scroll down to check the last four digits of the latest updated Card of File
5
Go back to their last unpaid booking. Click the Dashboard tab.
6
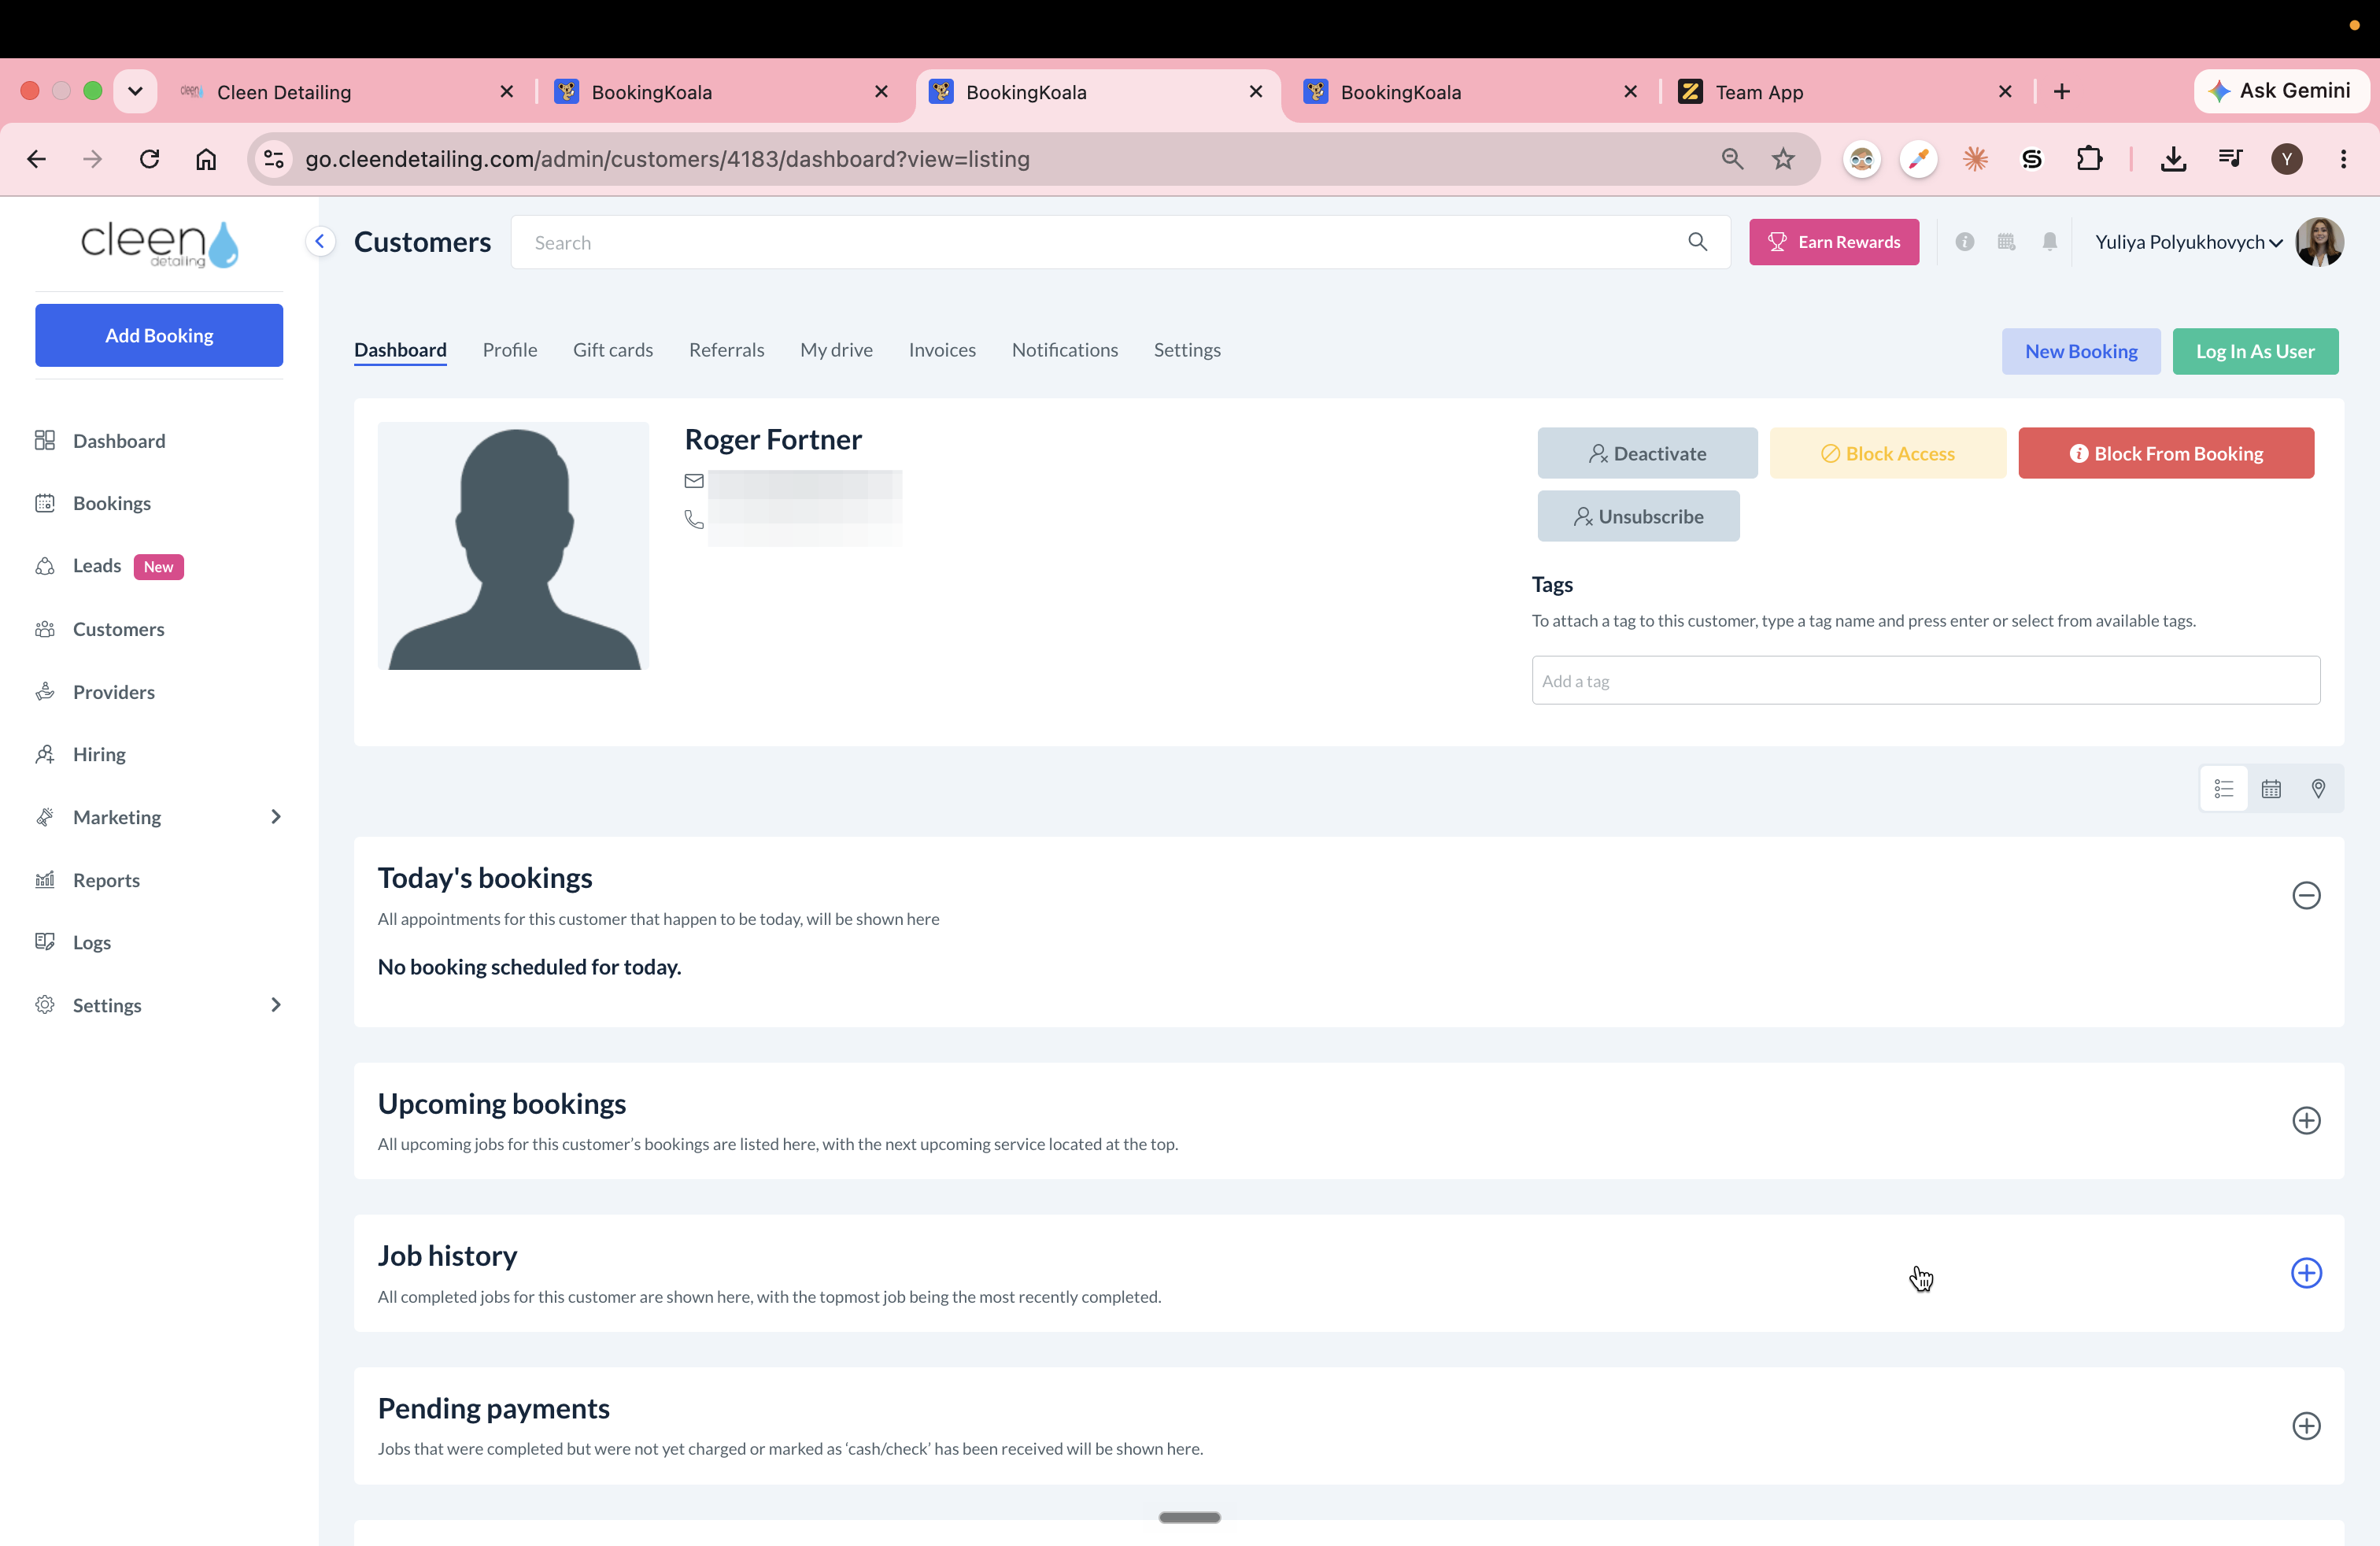
Expand the most recent unpaid booking in the Job History section.
7
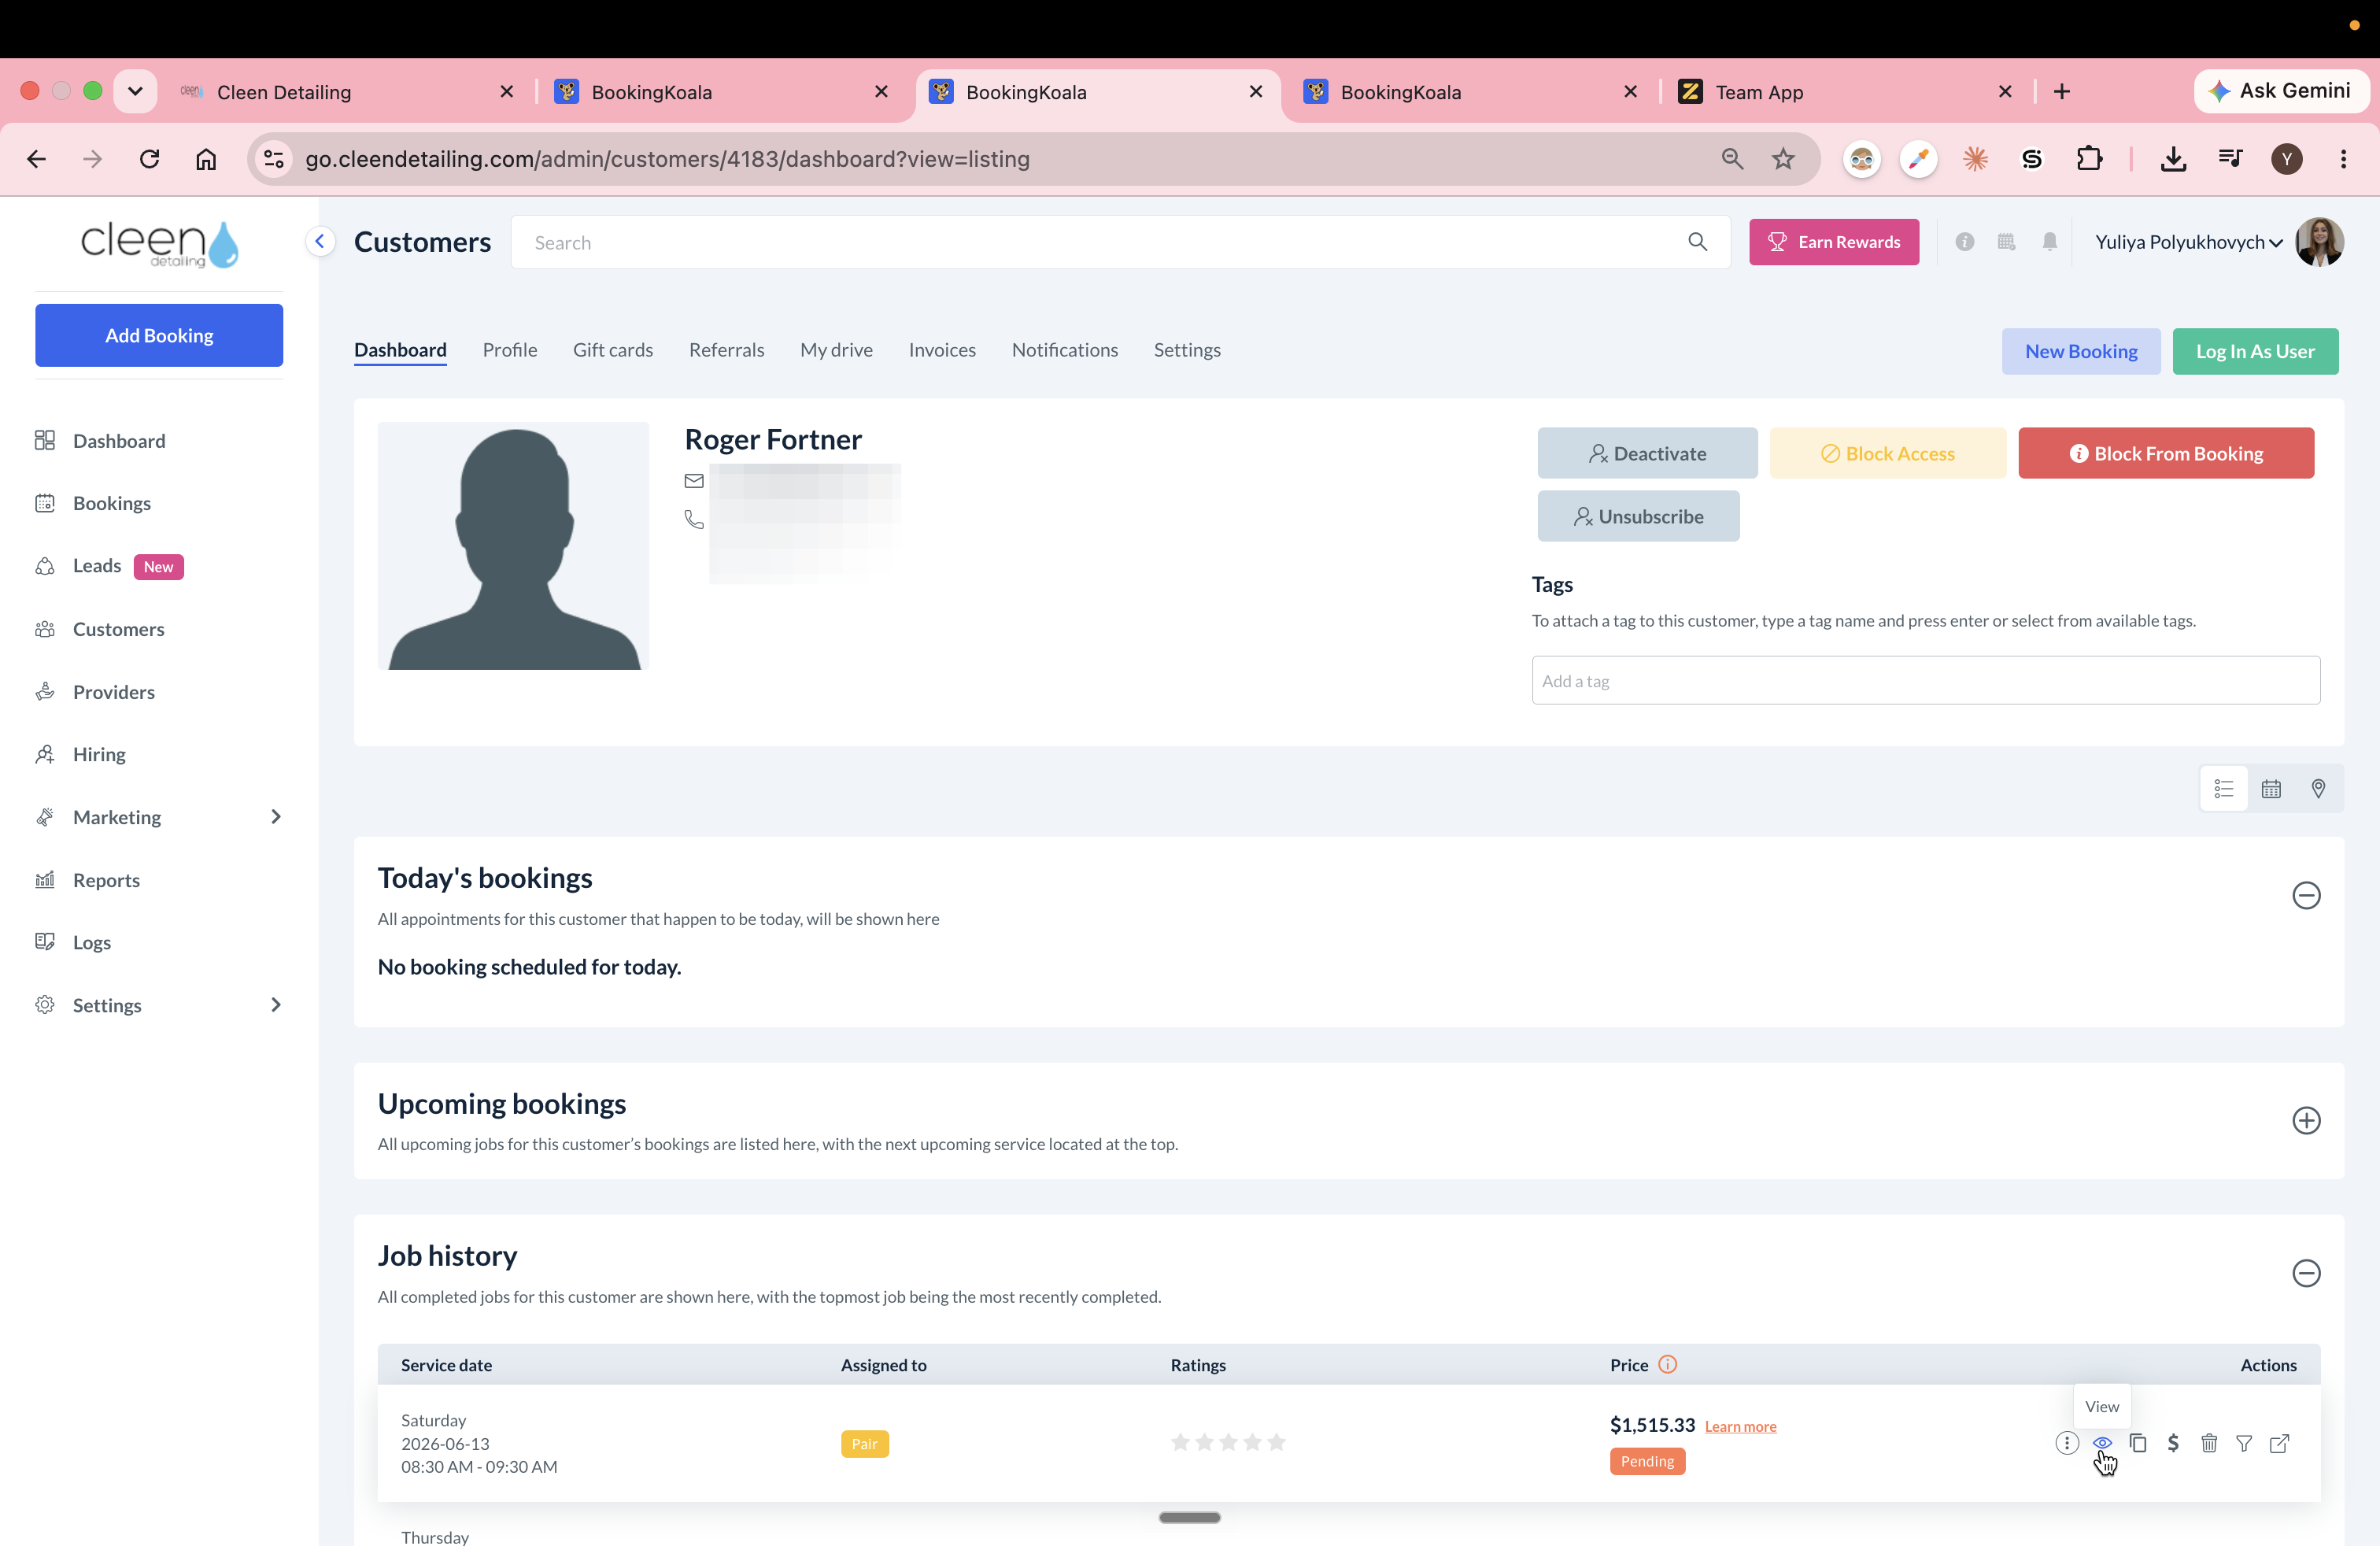
Click the View icon next to the job to open the booking details.
Process the Payment
8
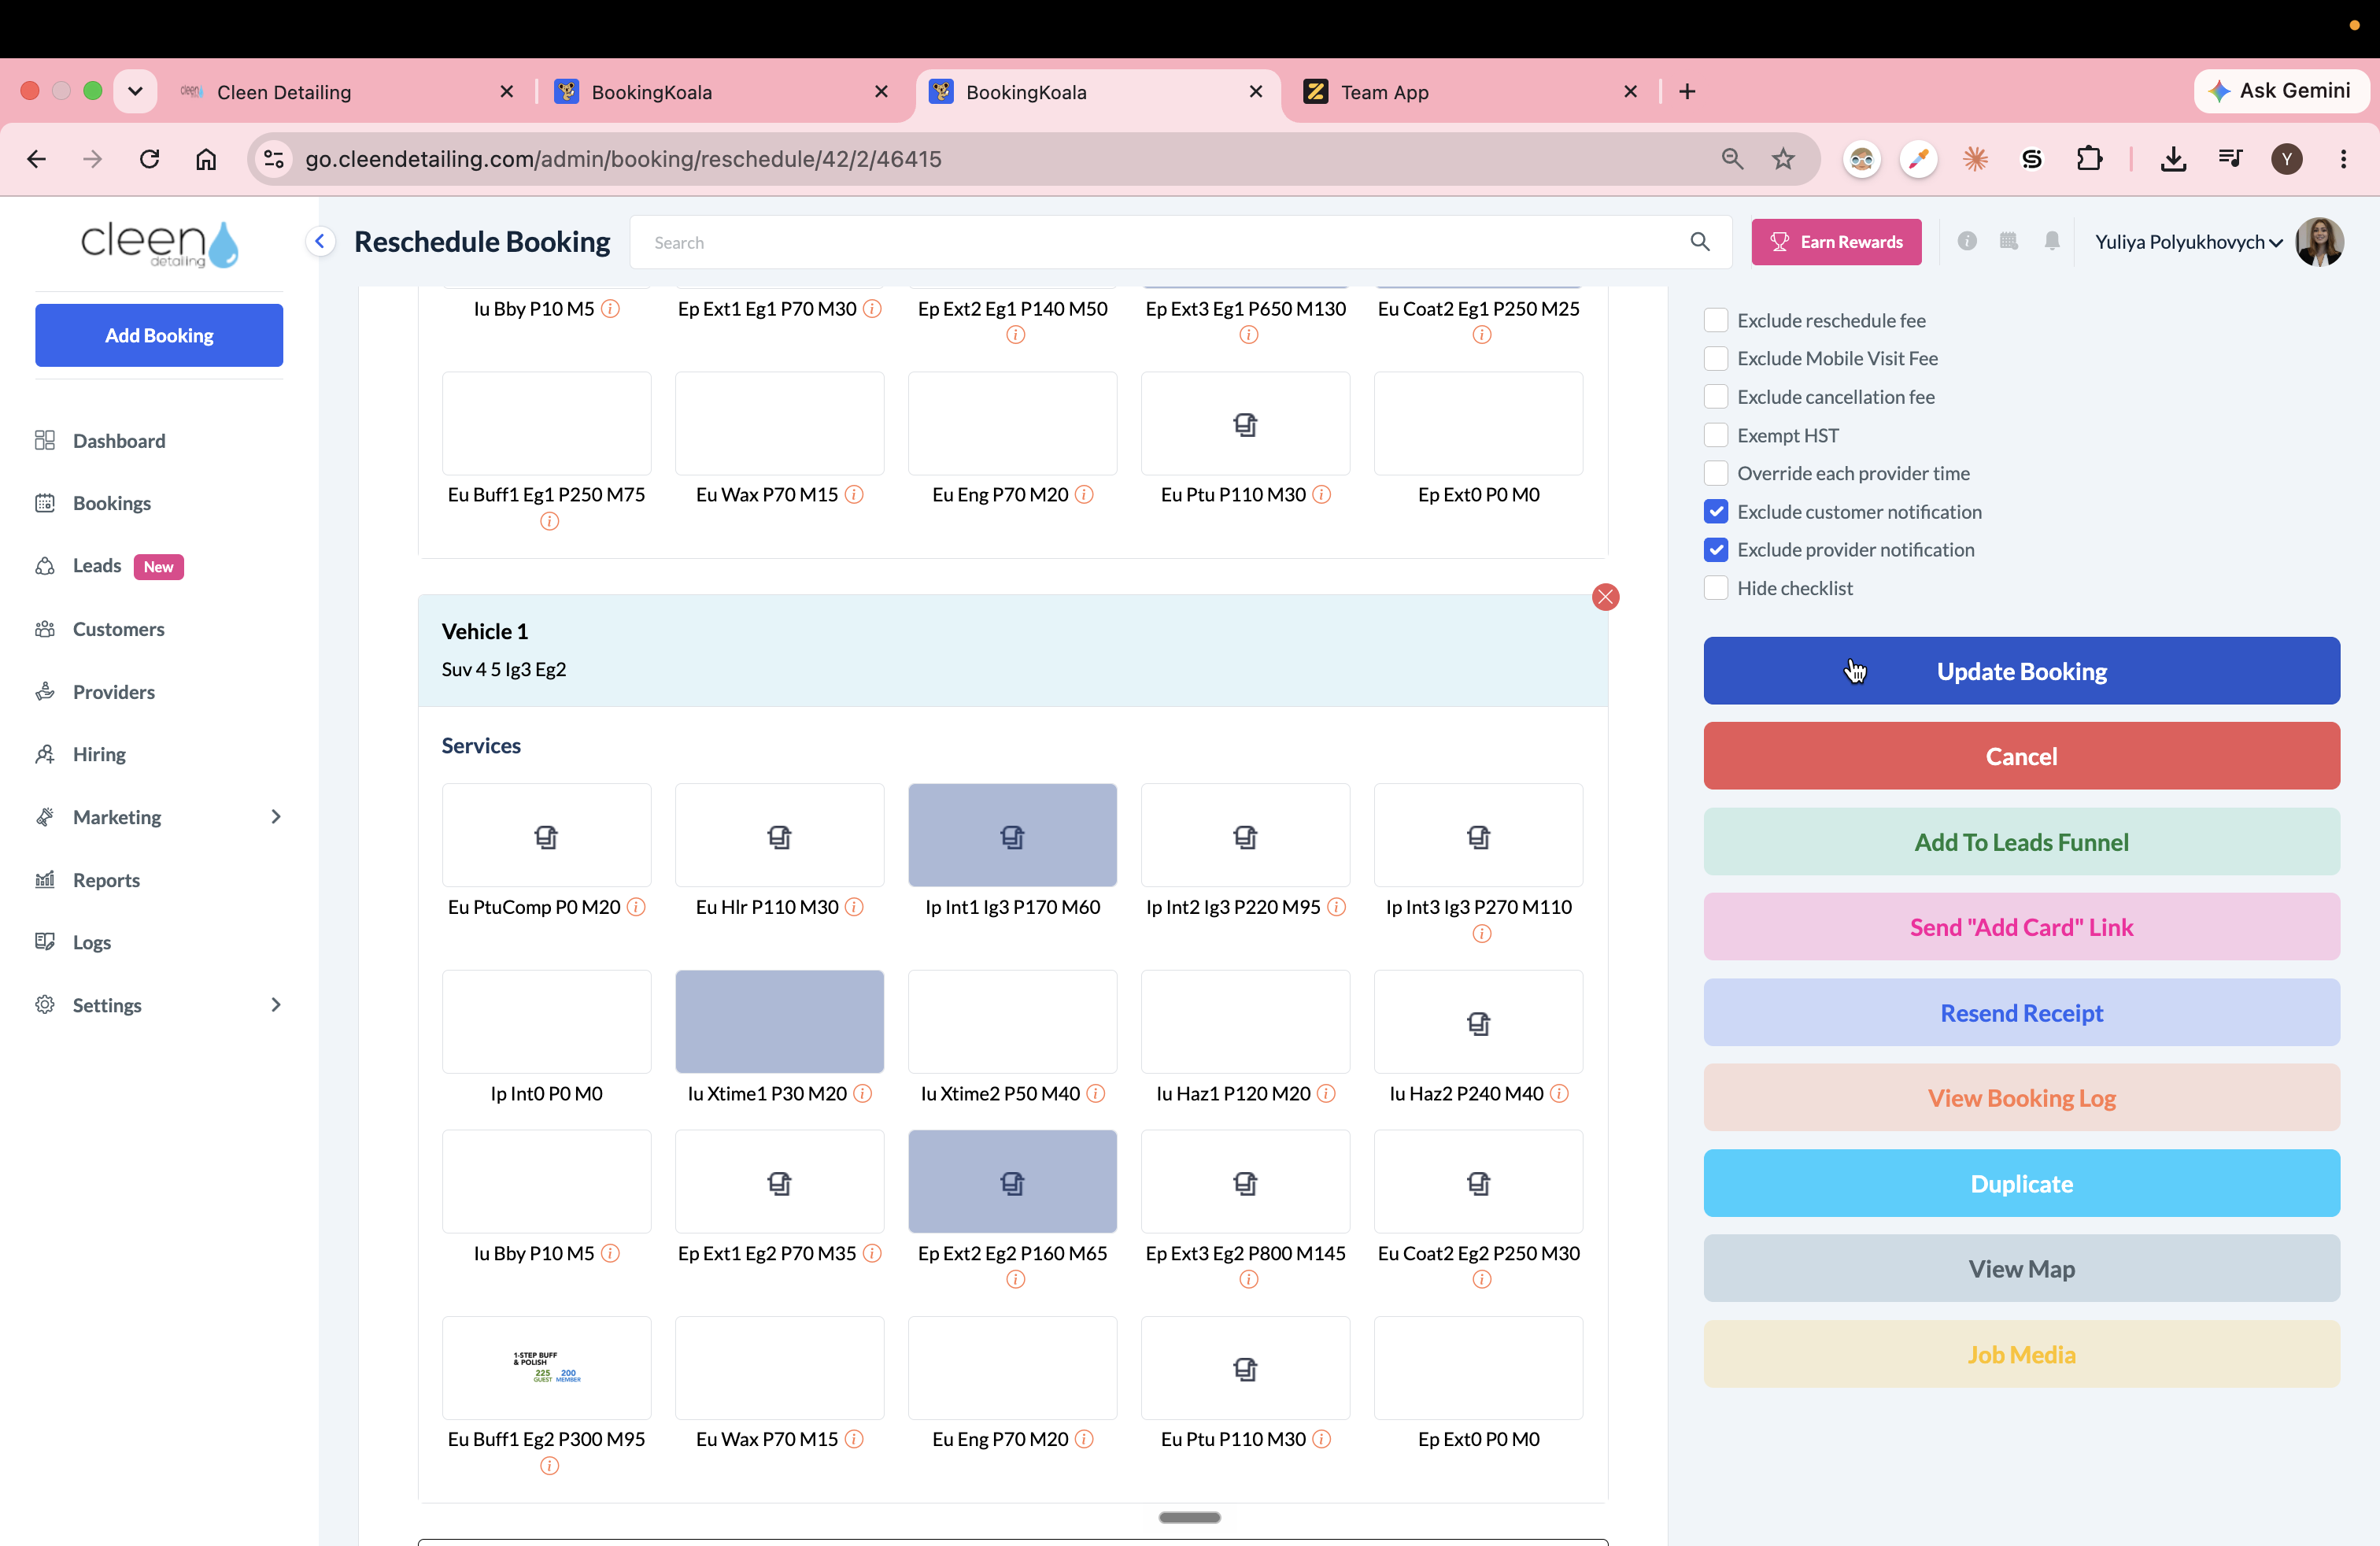
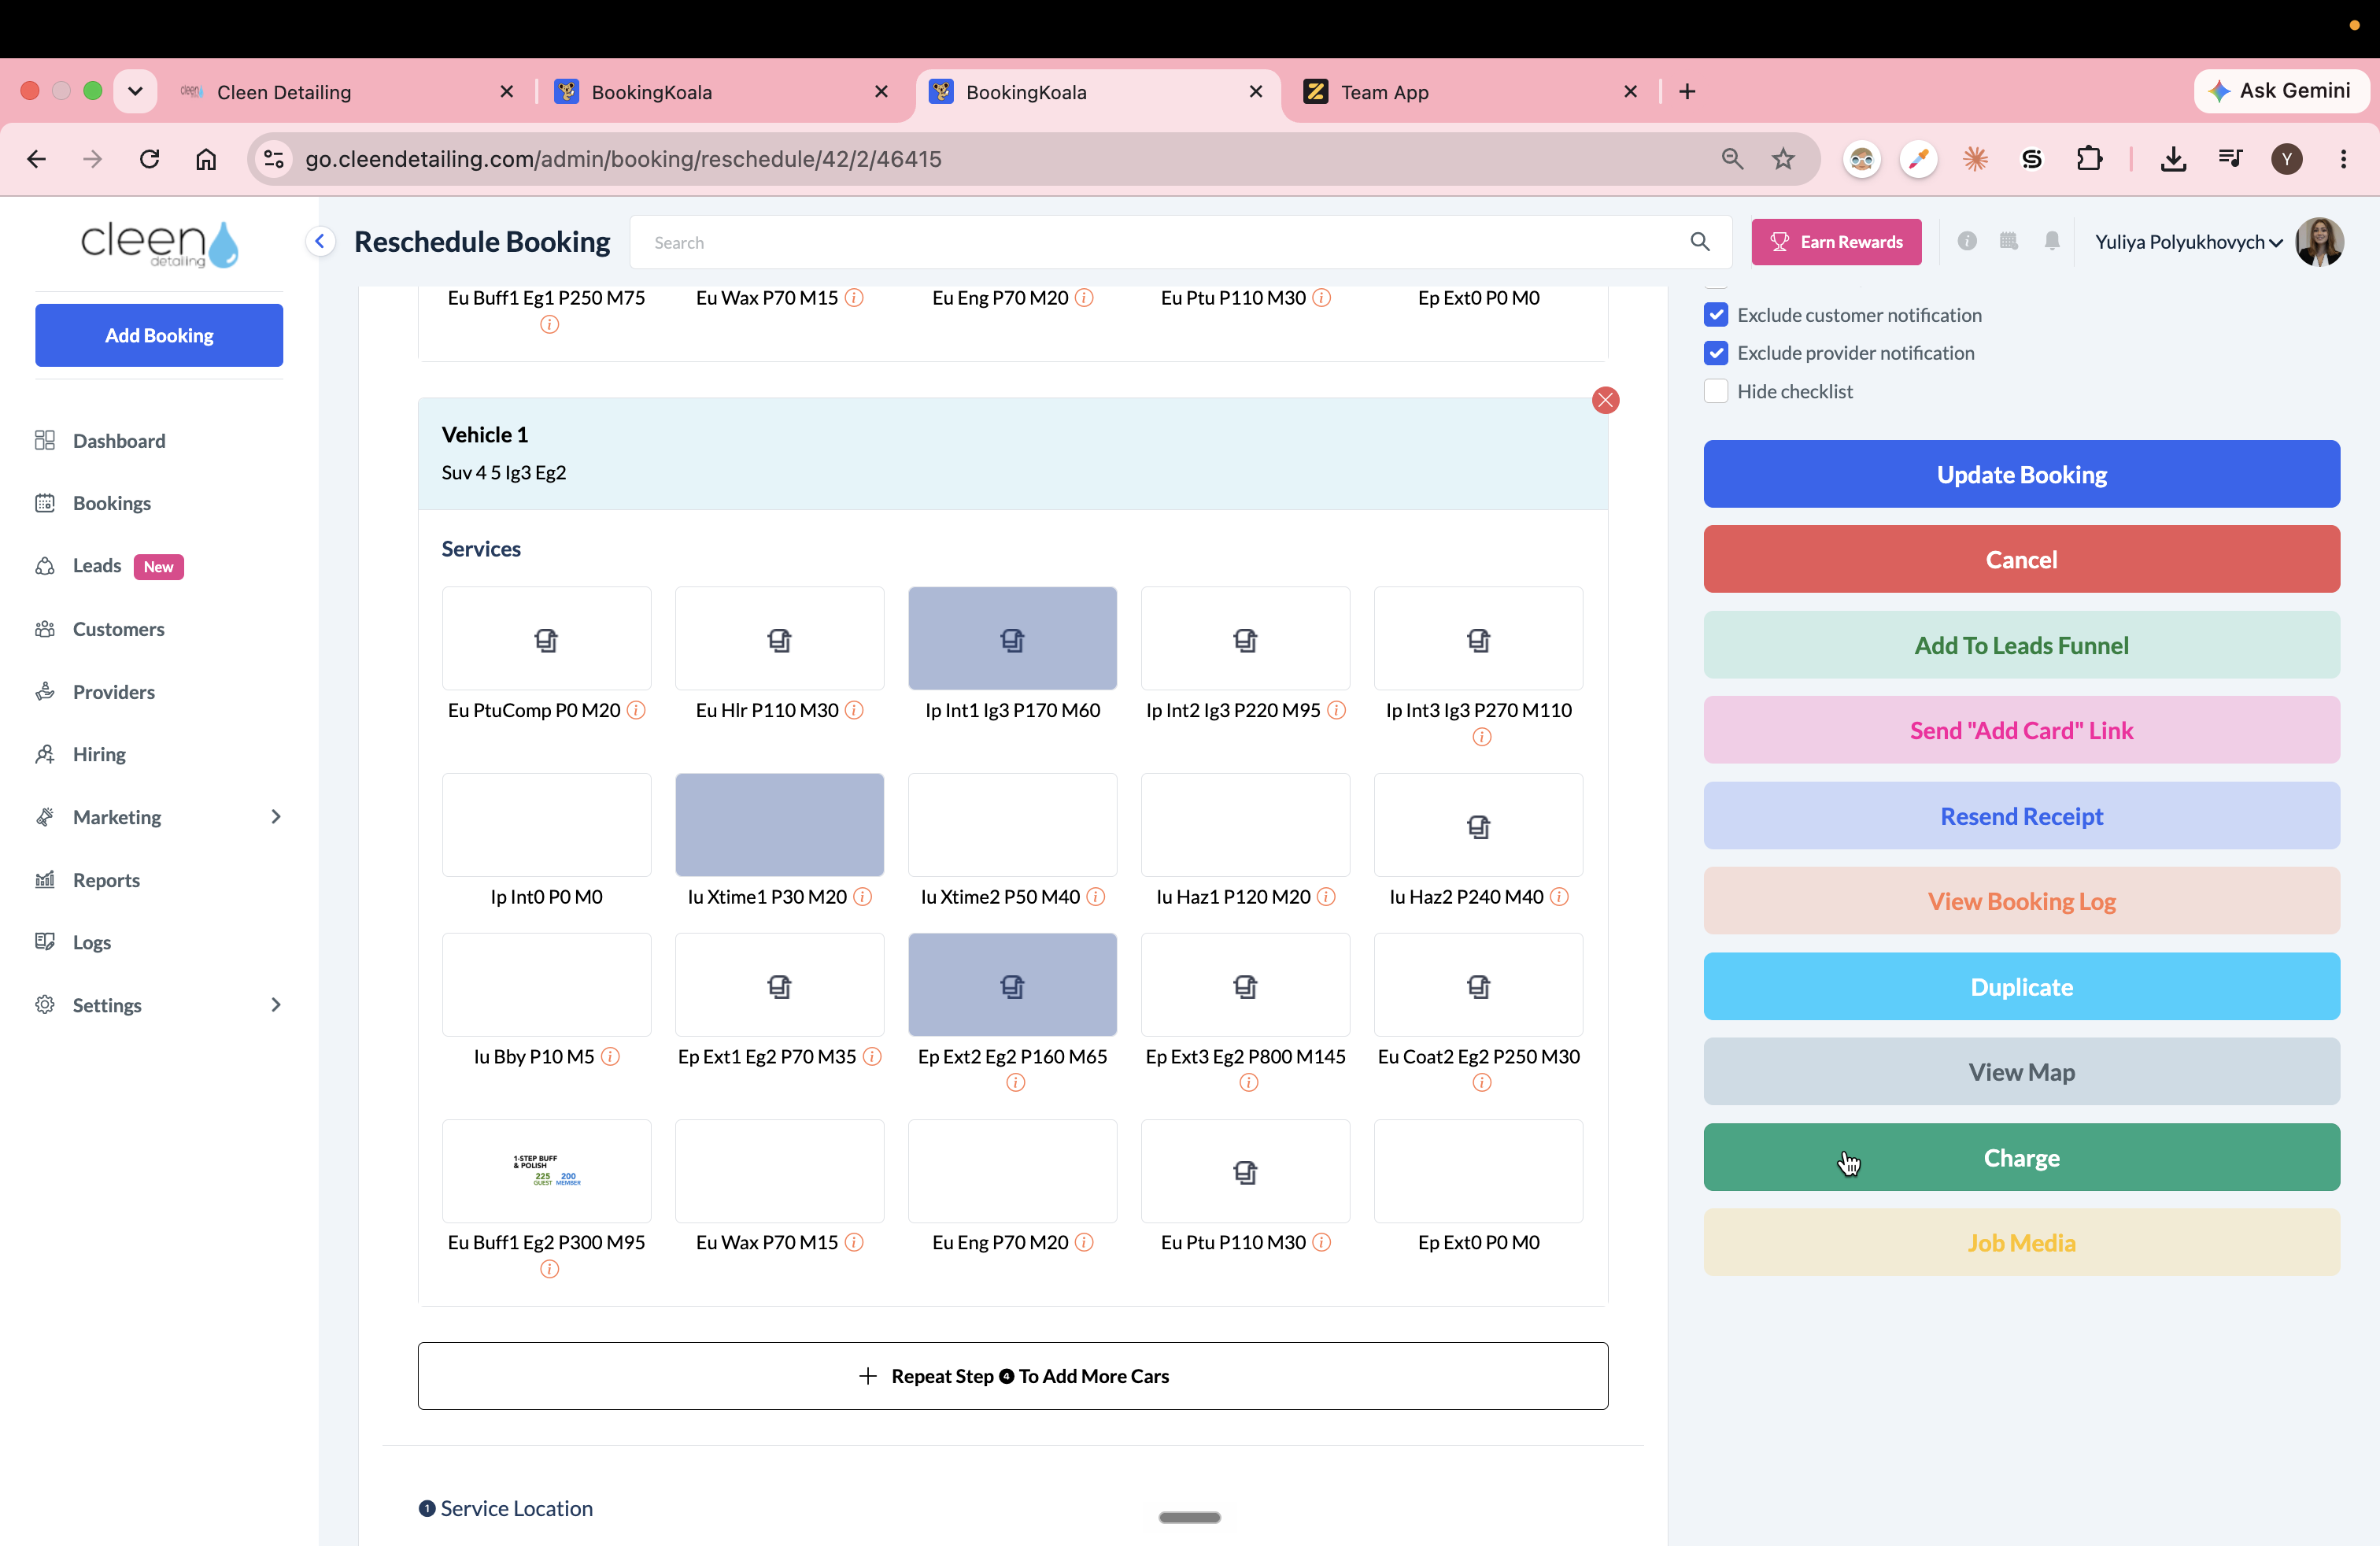
Click the Update Booking button to make the booking ready to be charged. -> The "Charge" Green Button will appear in the right-hand sidebar.
9
Click the Charge button in the right-hand sidebar.
10
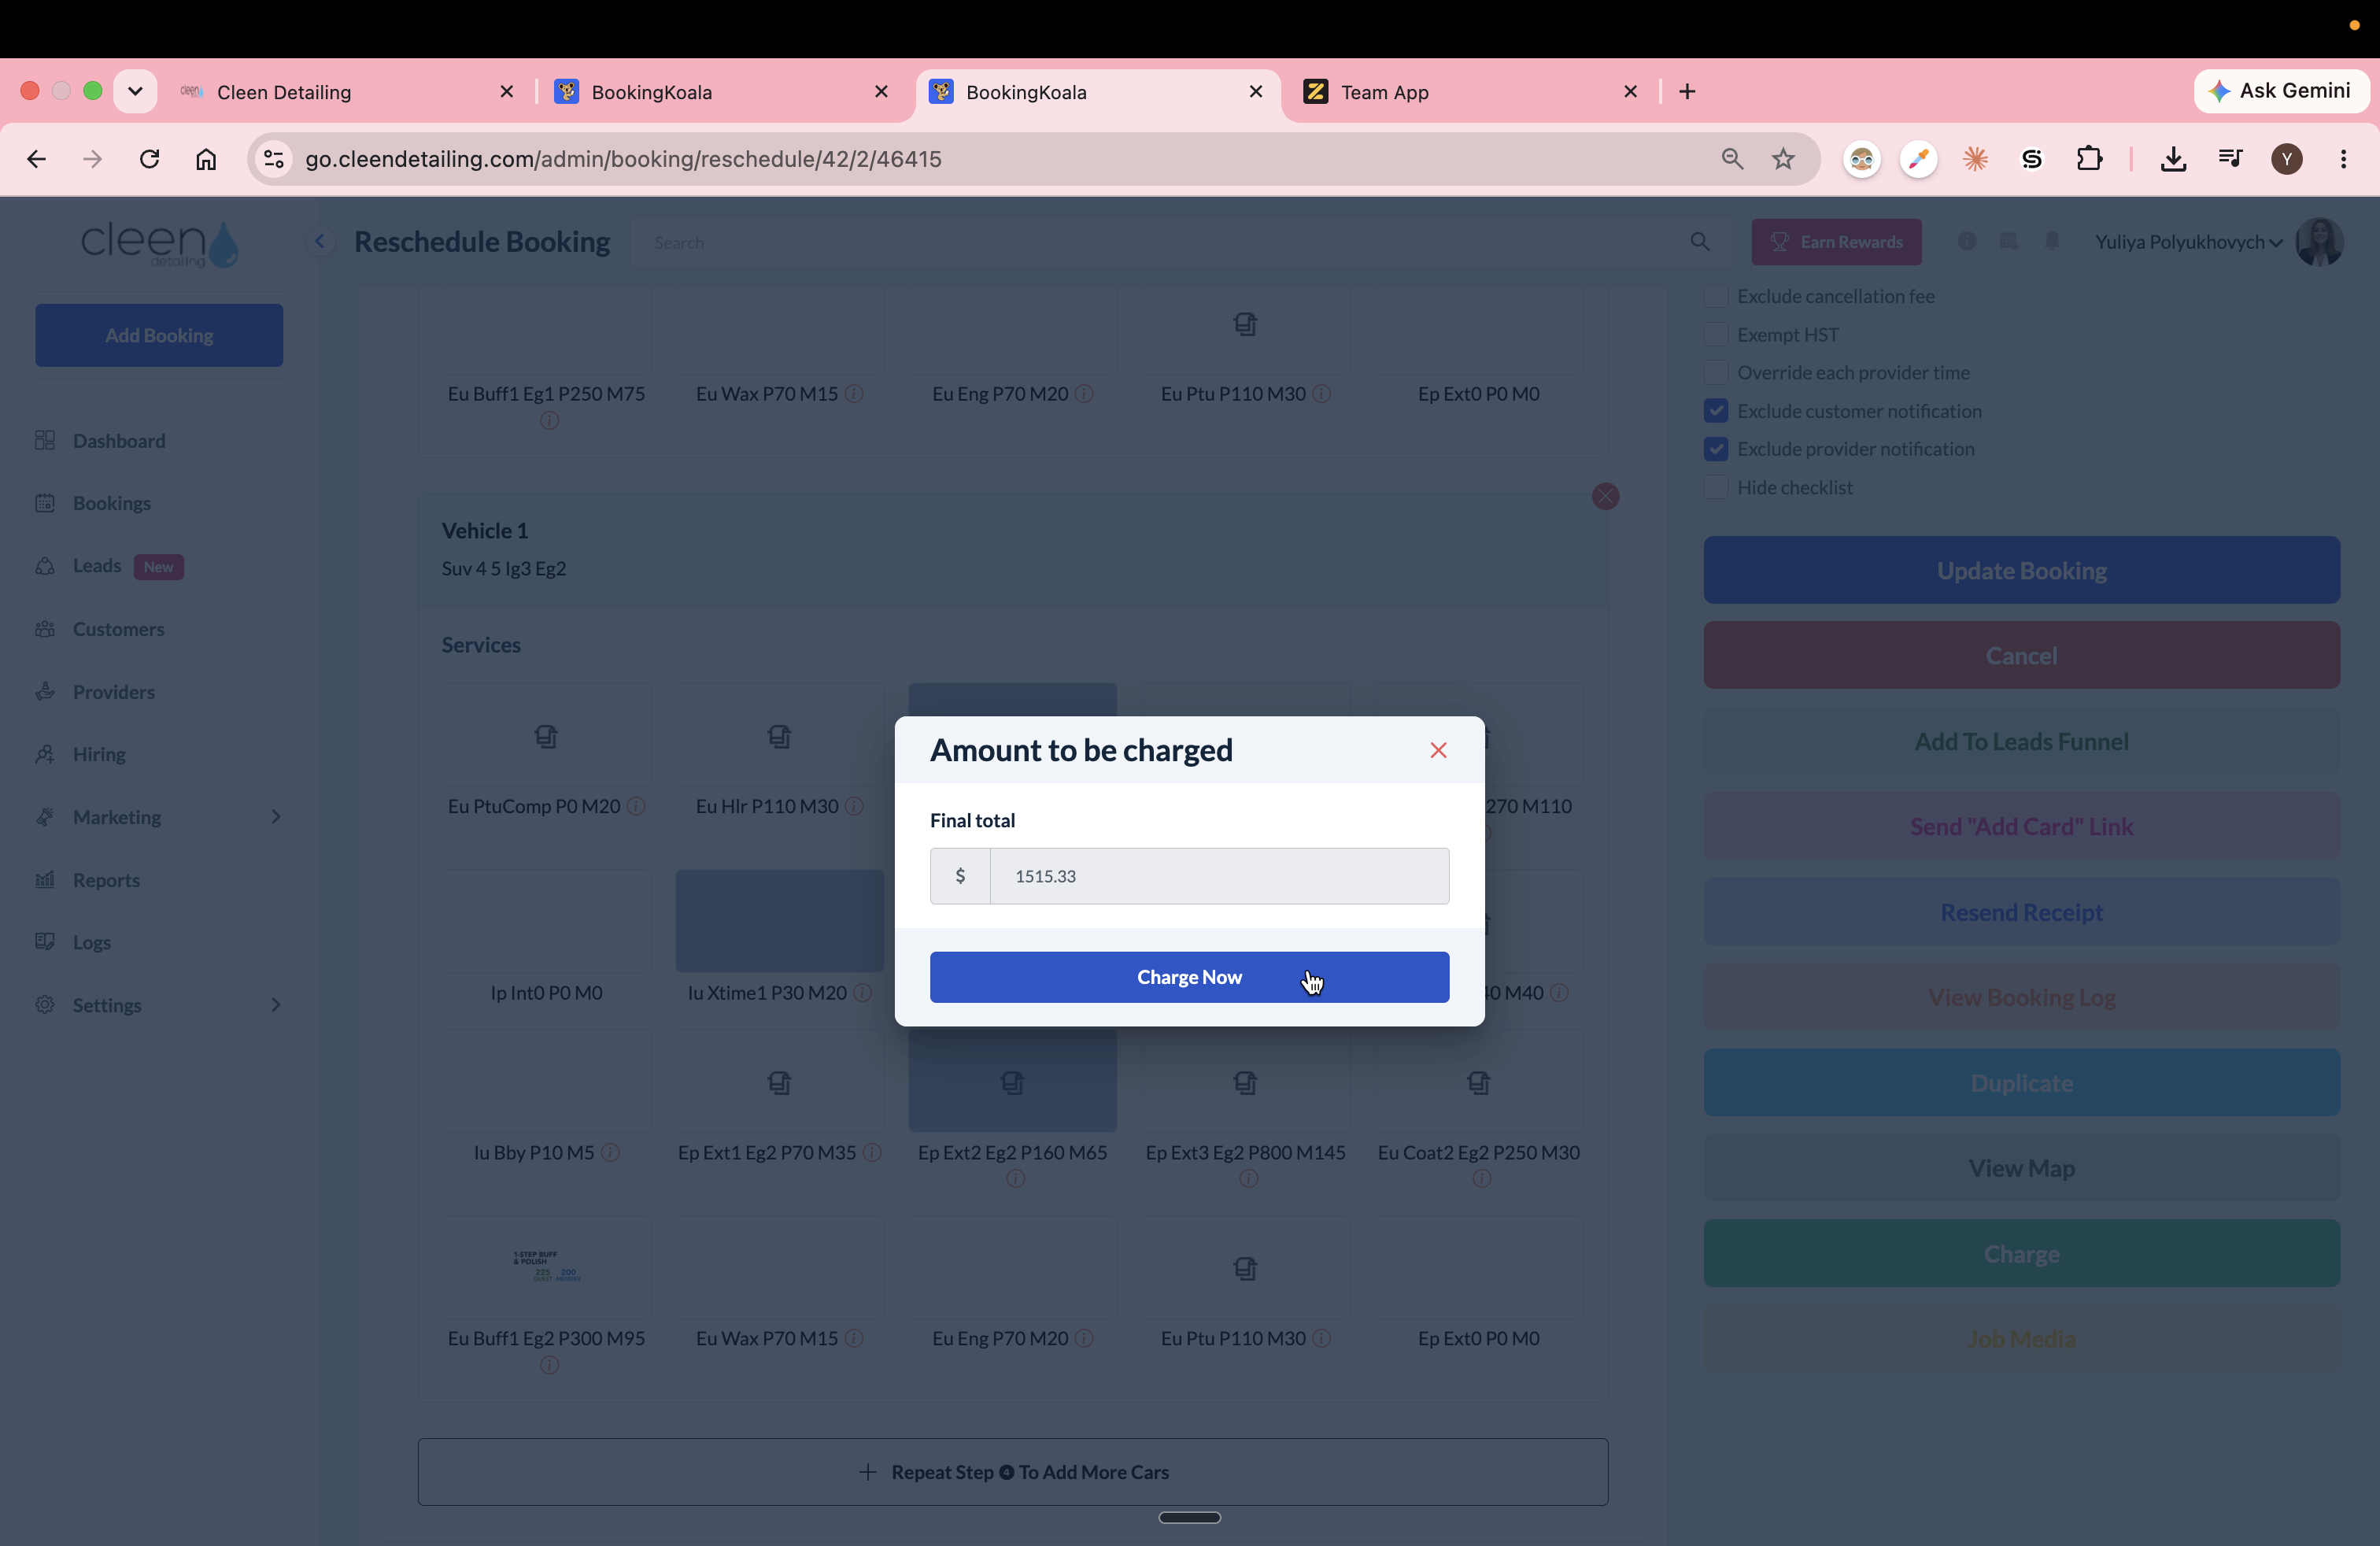
Click Charge Now to process the payment.
Generate and Send the Receipt
11
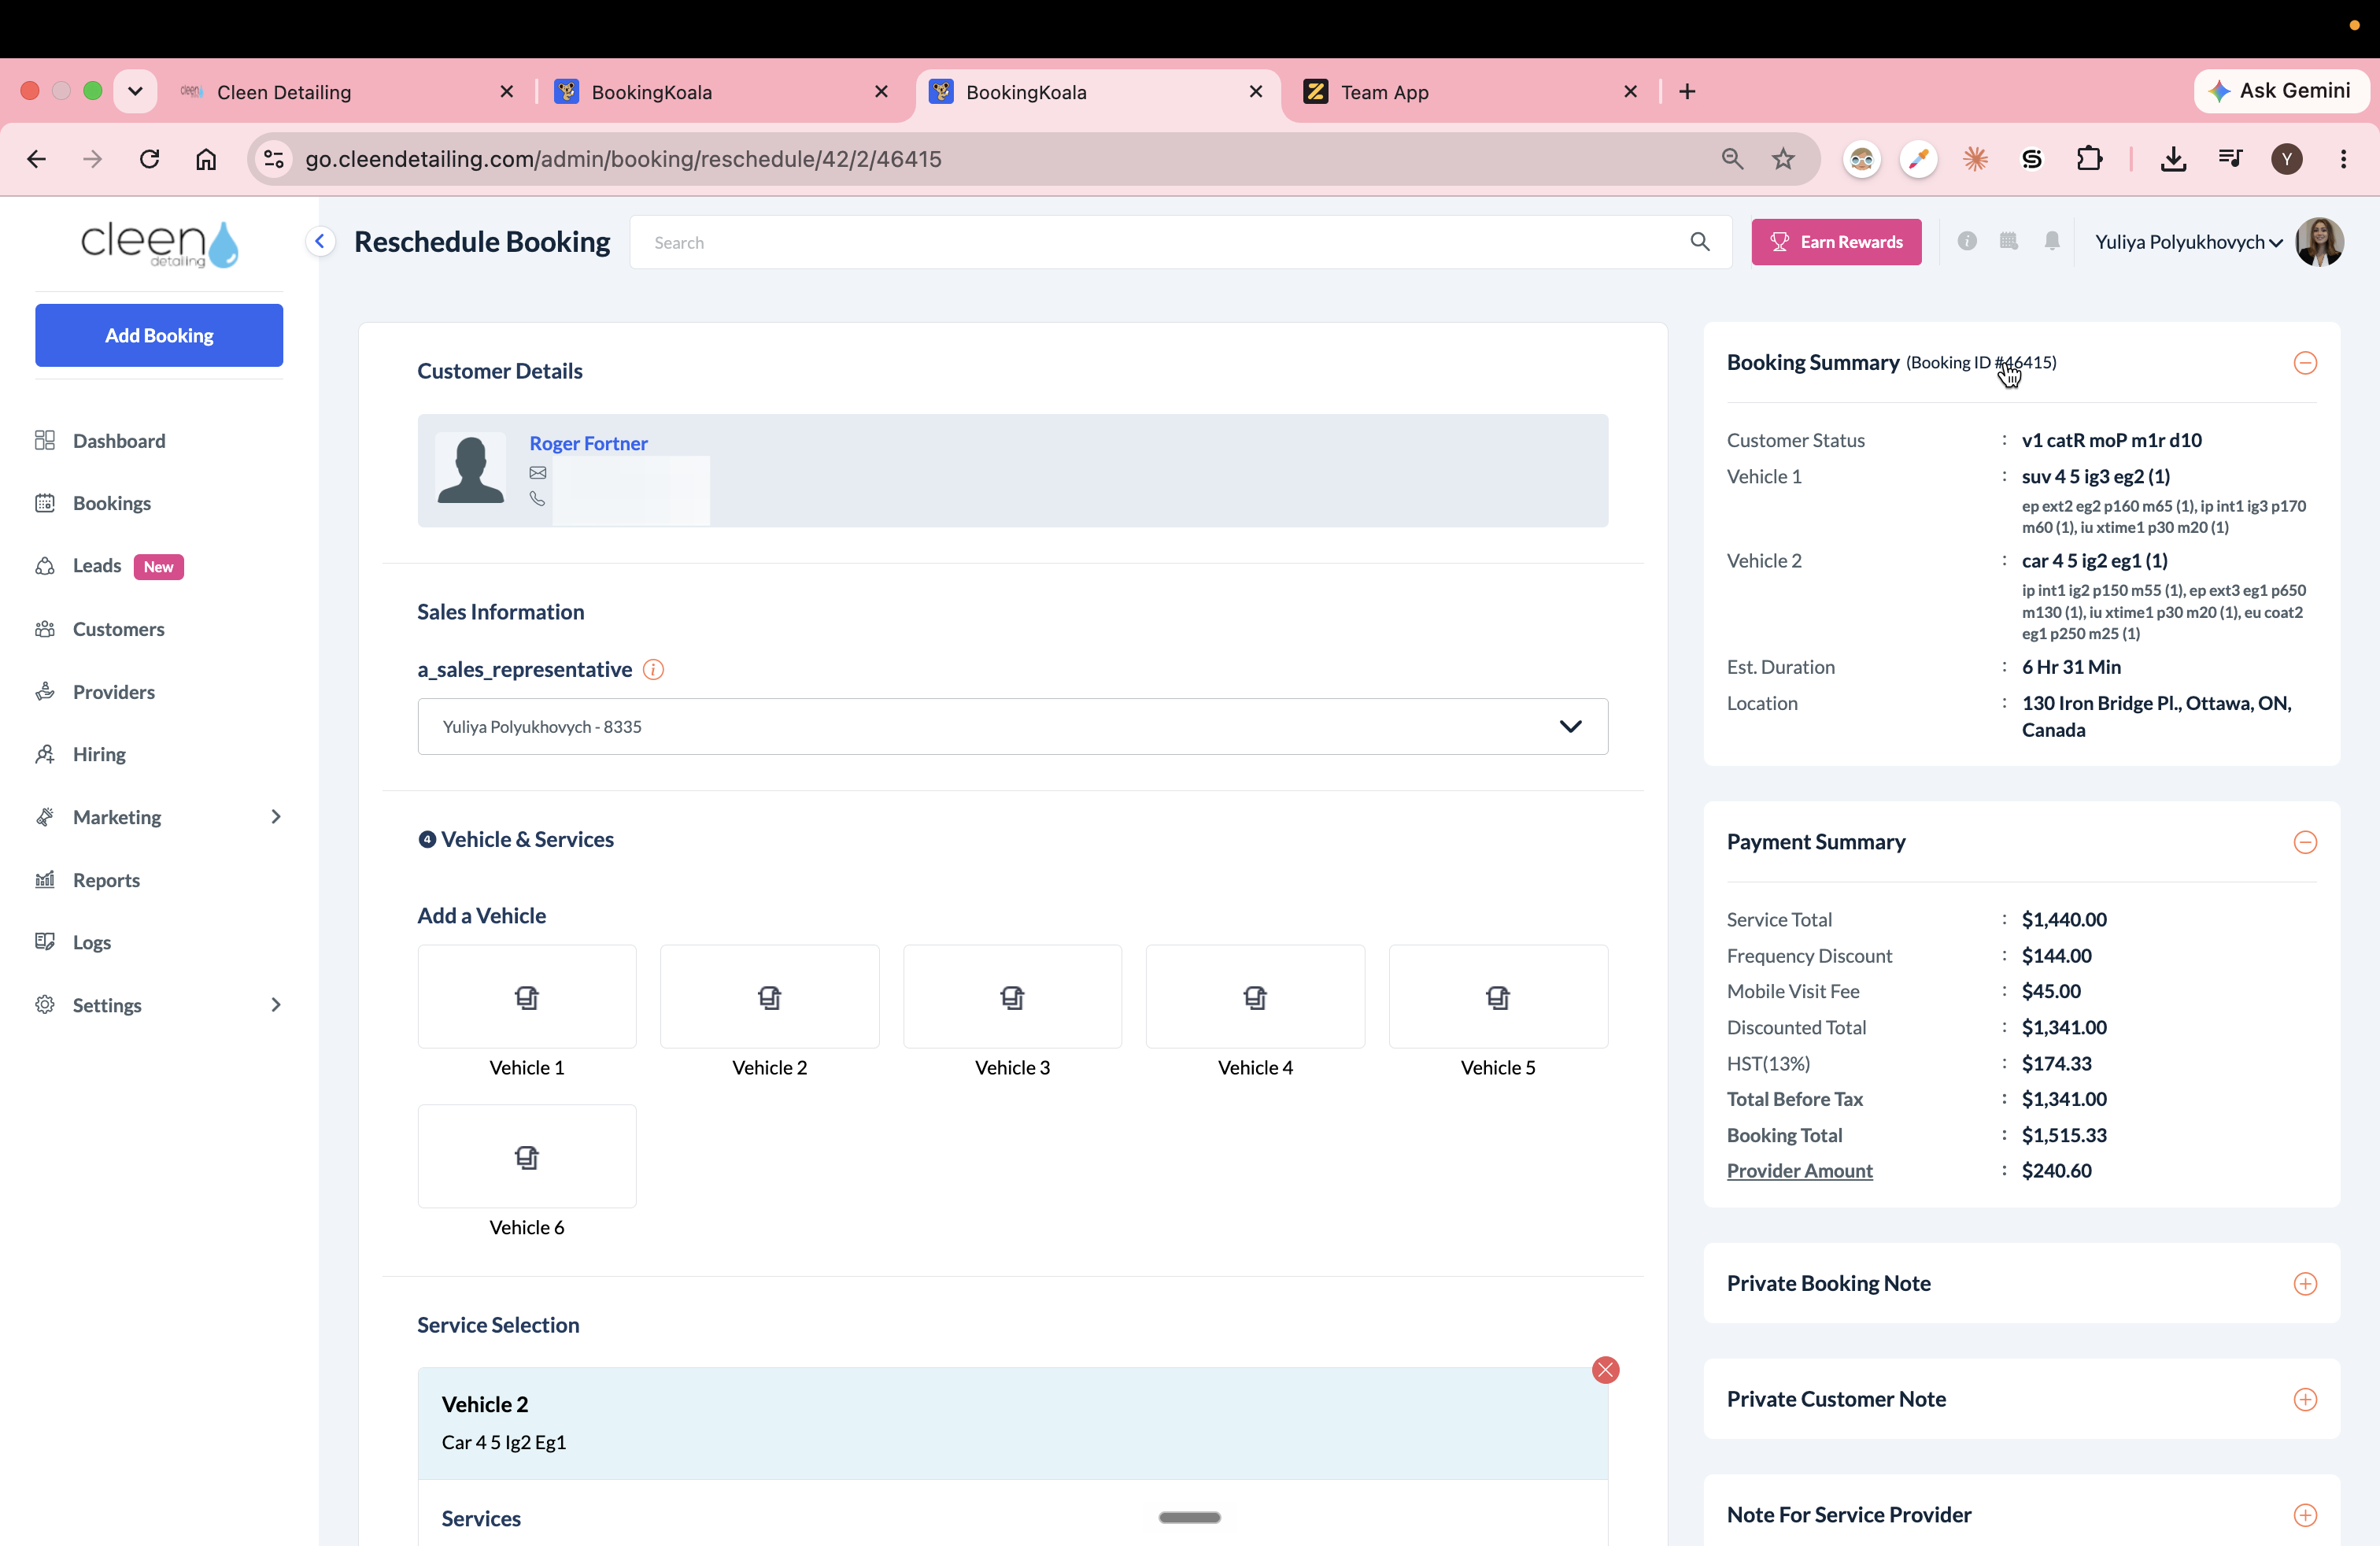
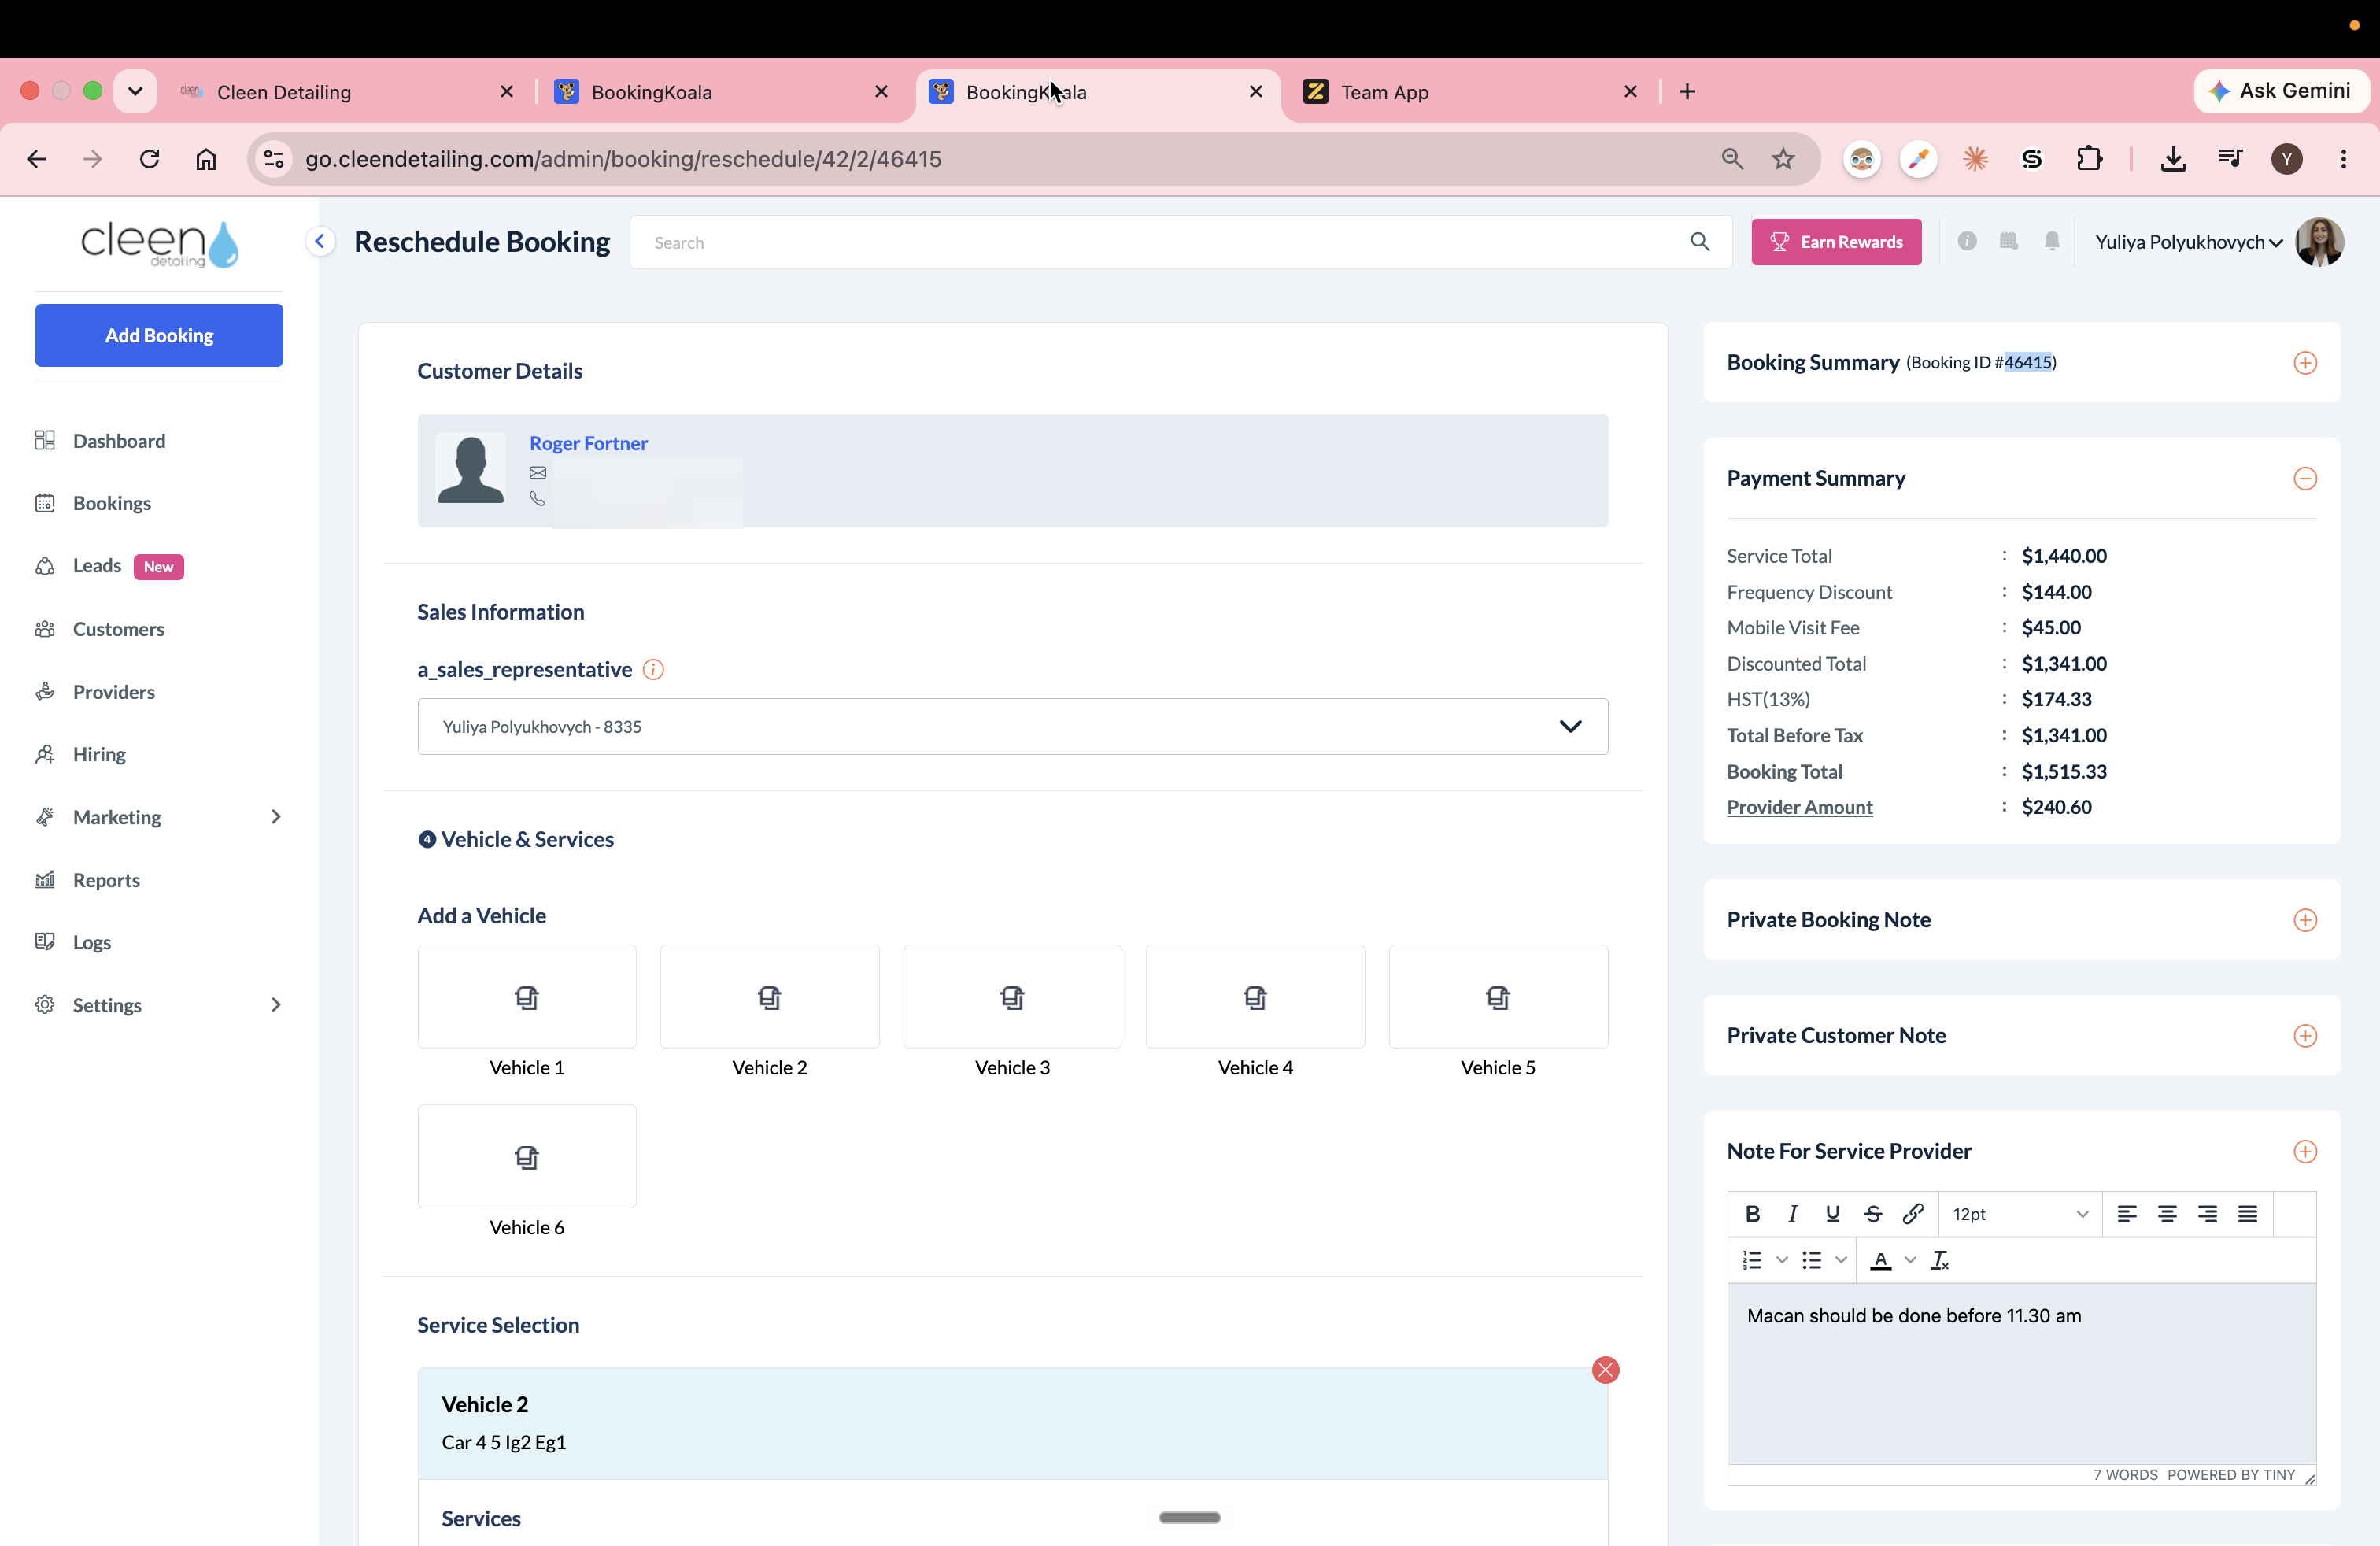
Locate and copy the Booking ID from the Booking Summary.
12
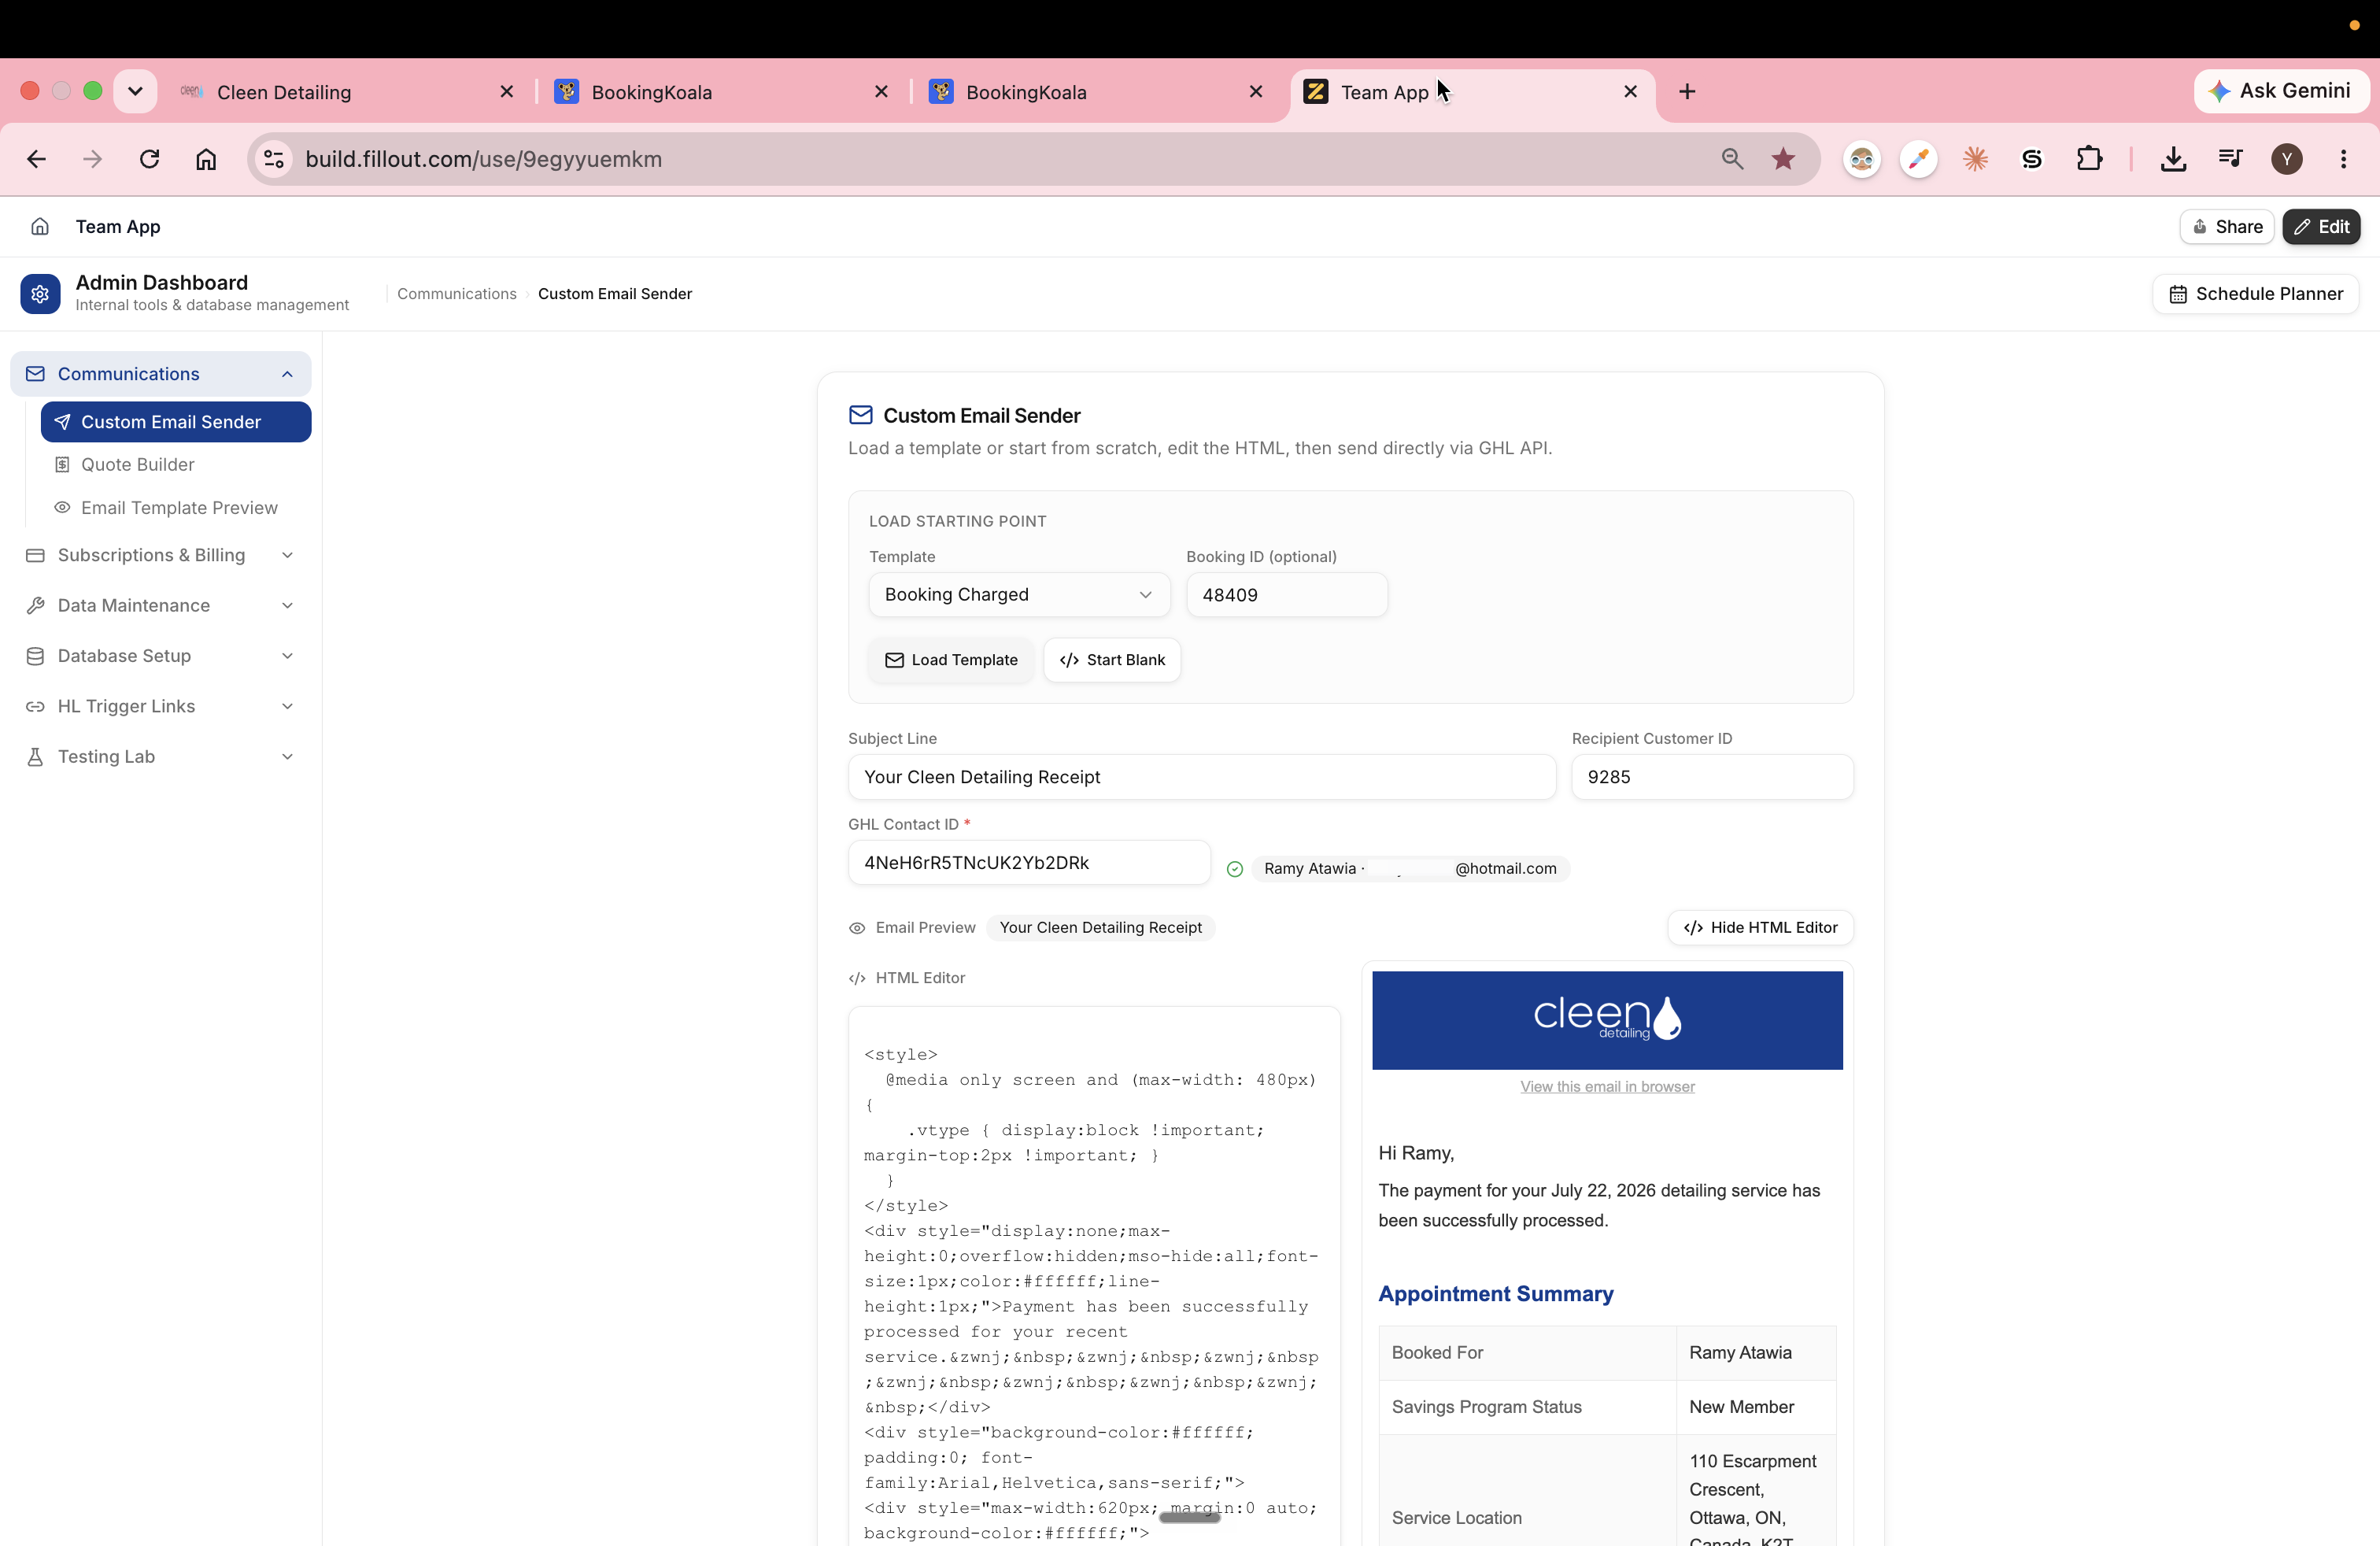
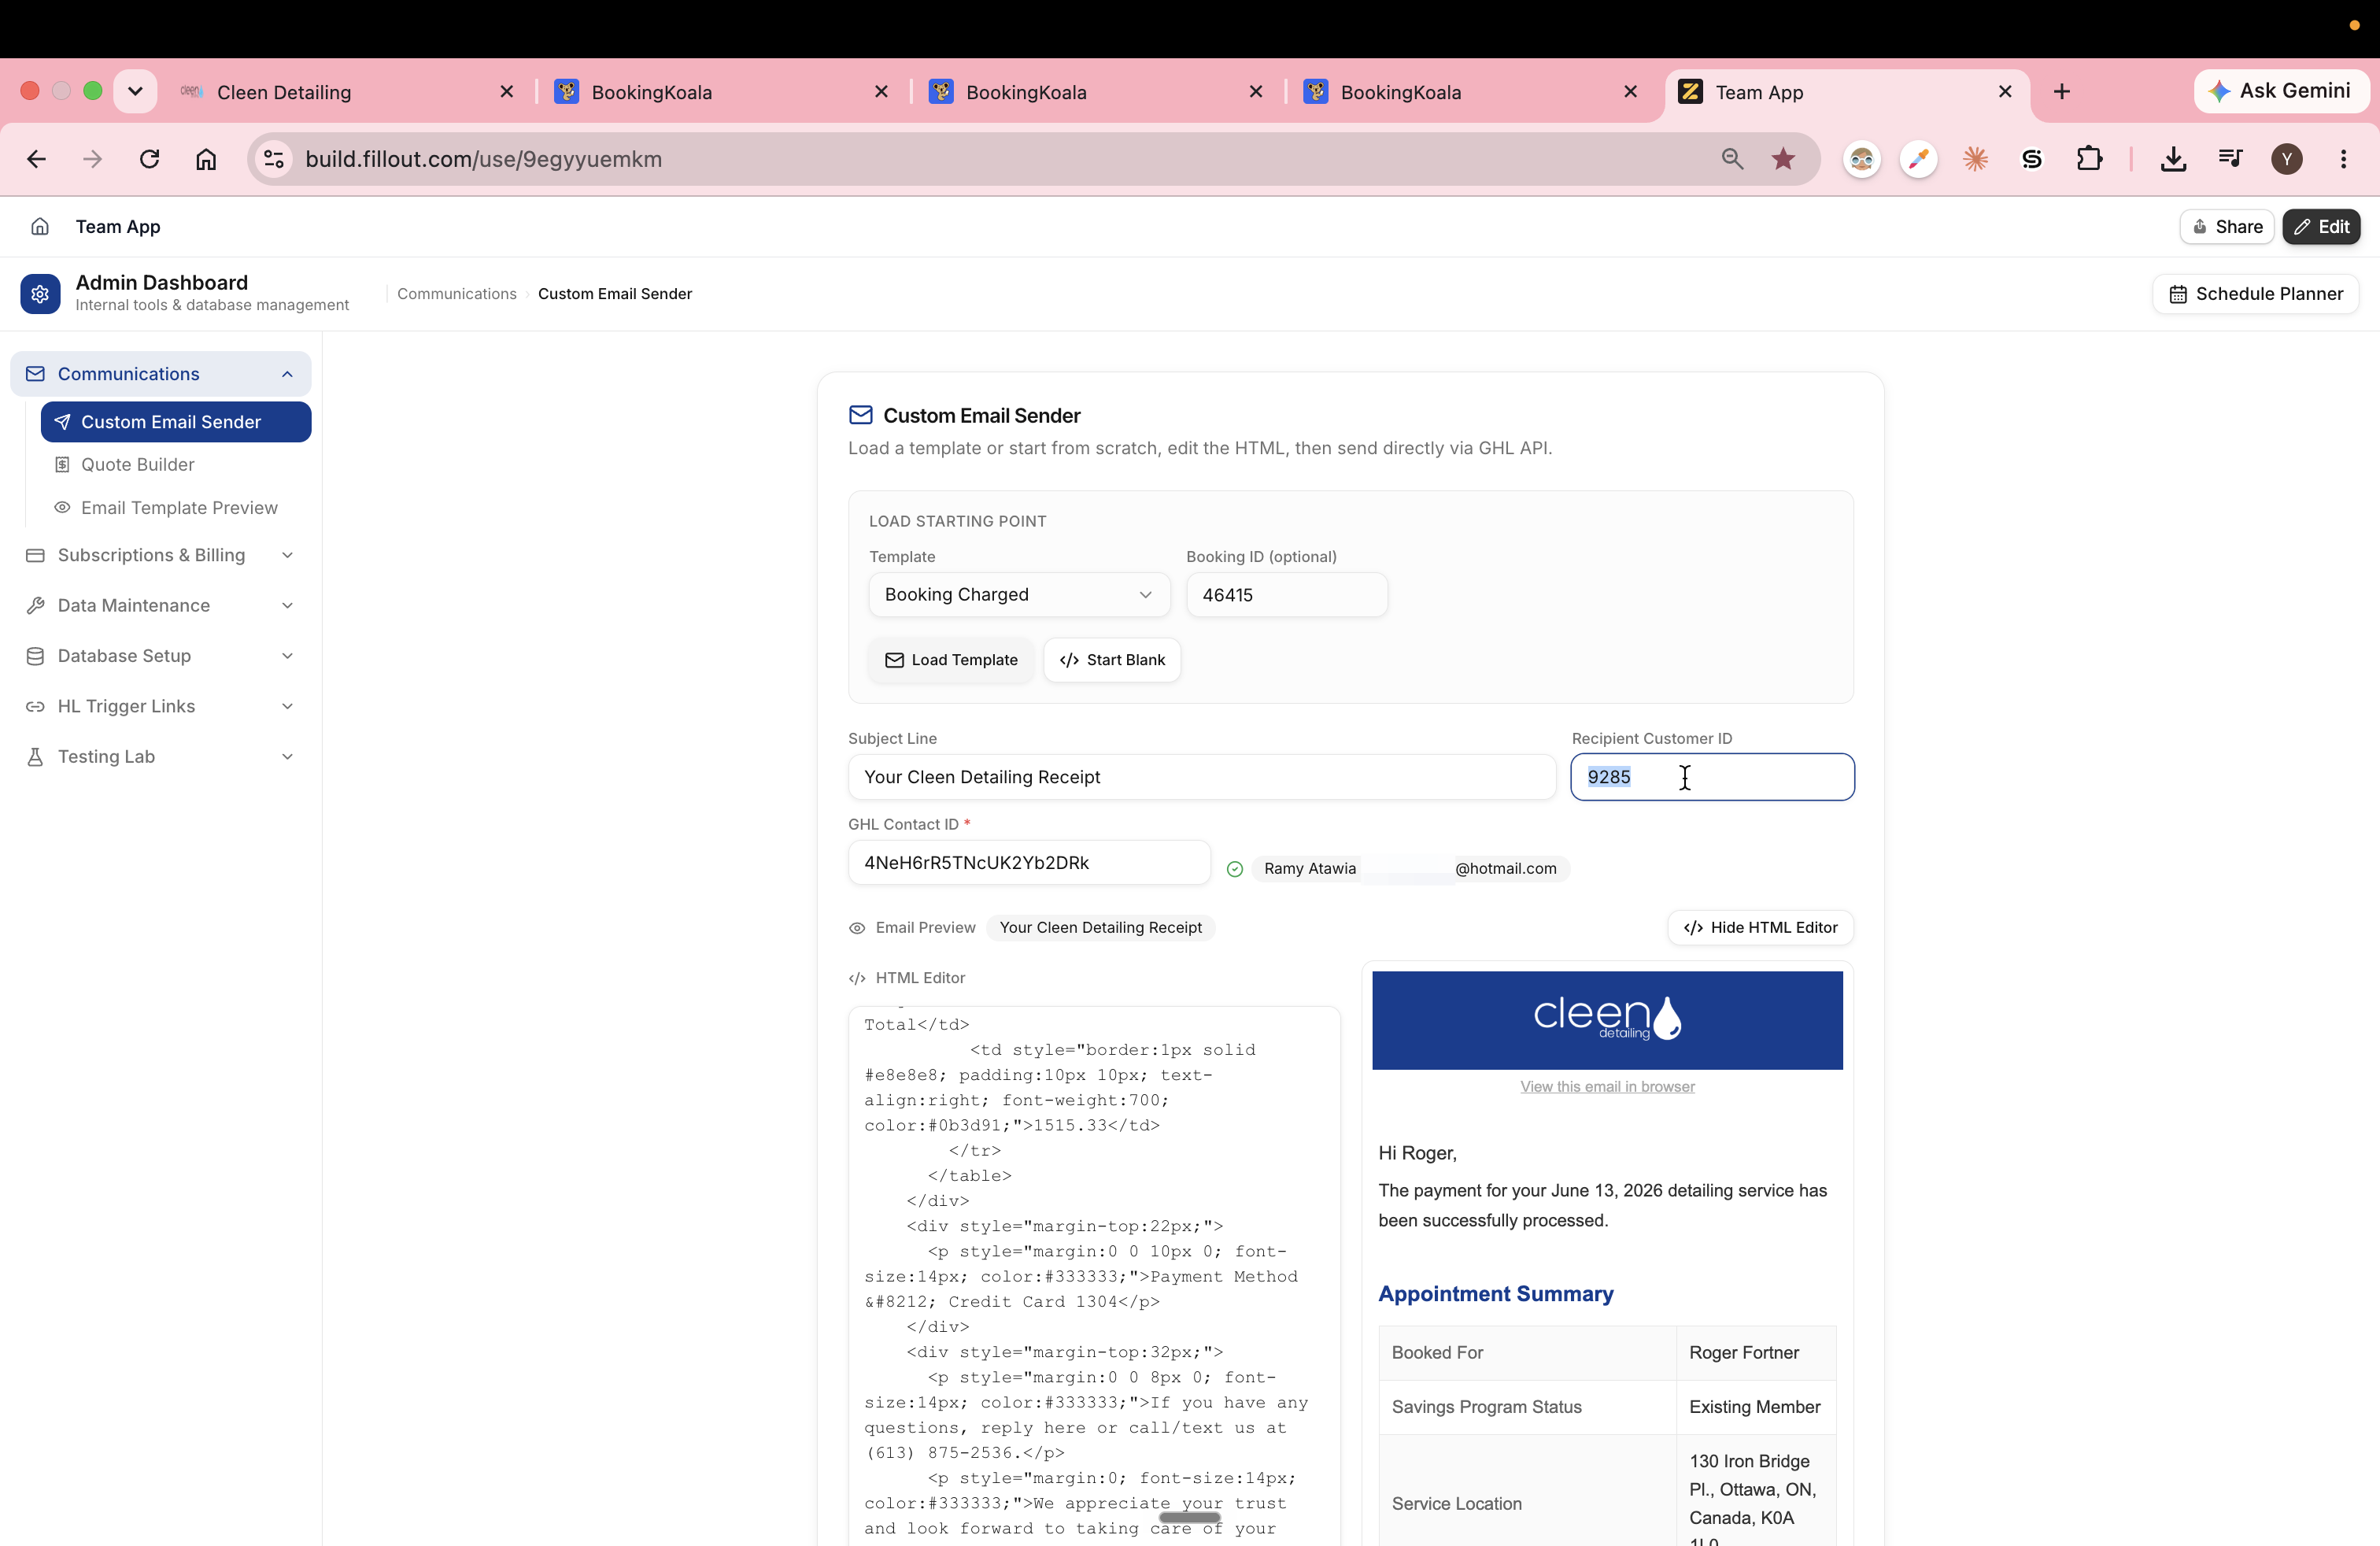
Open your custom email sender interface (e.g., Zite Team App).
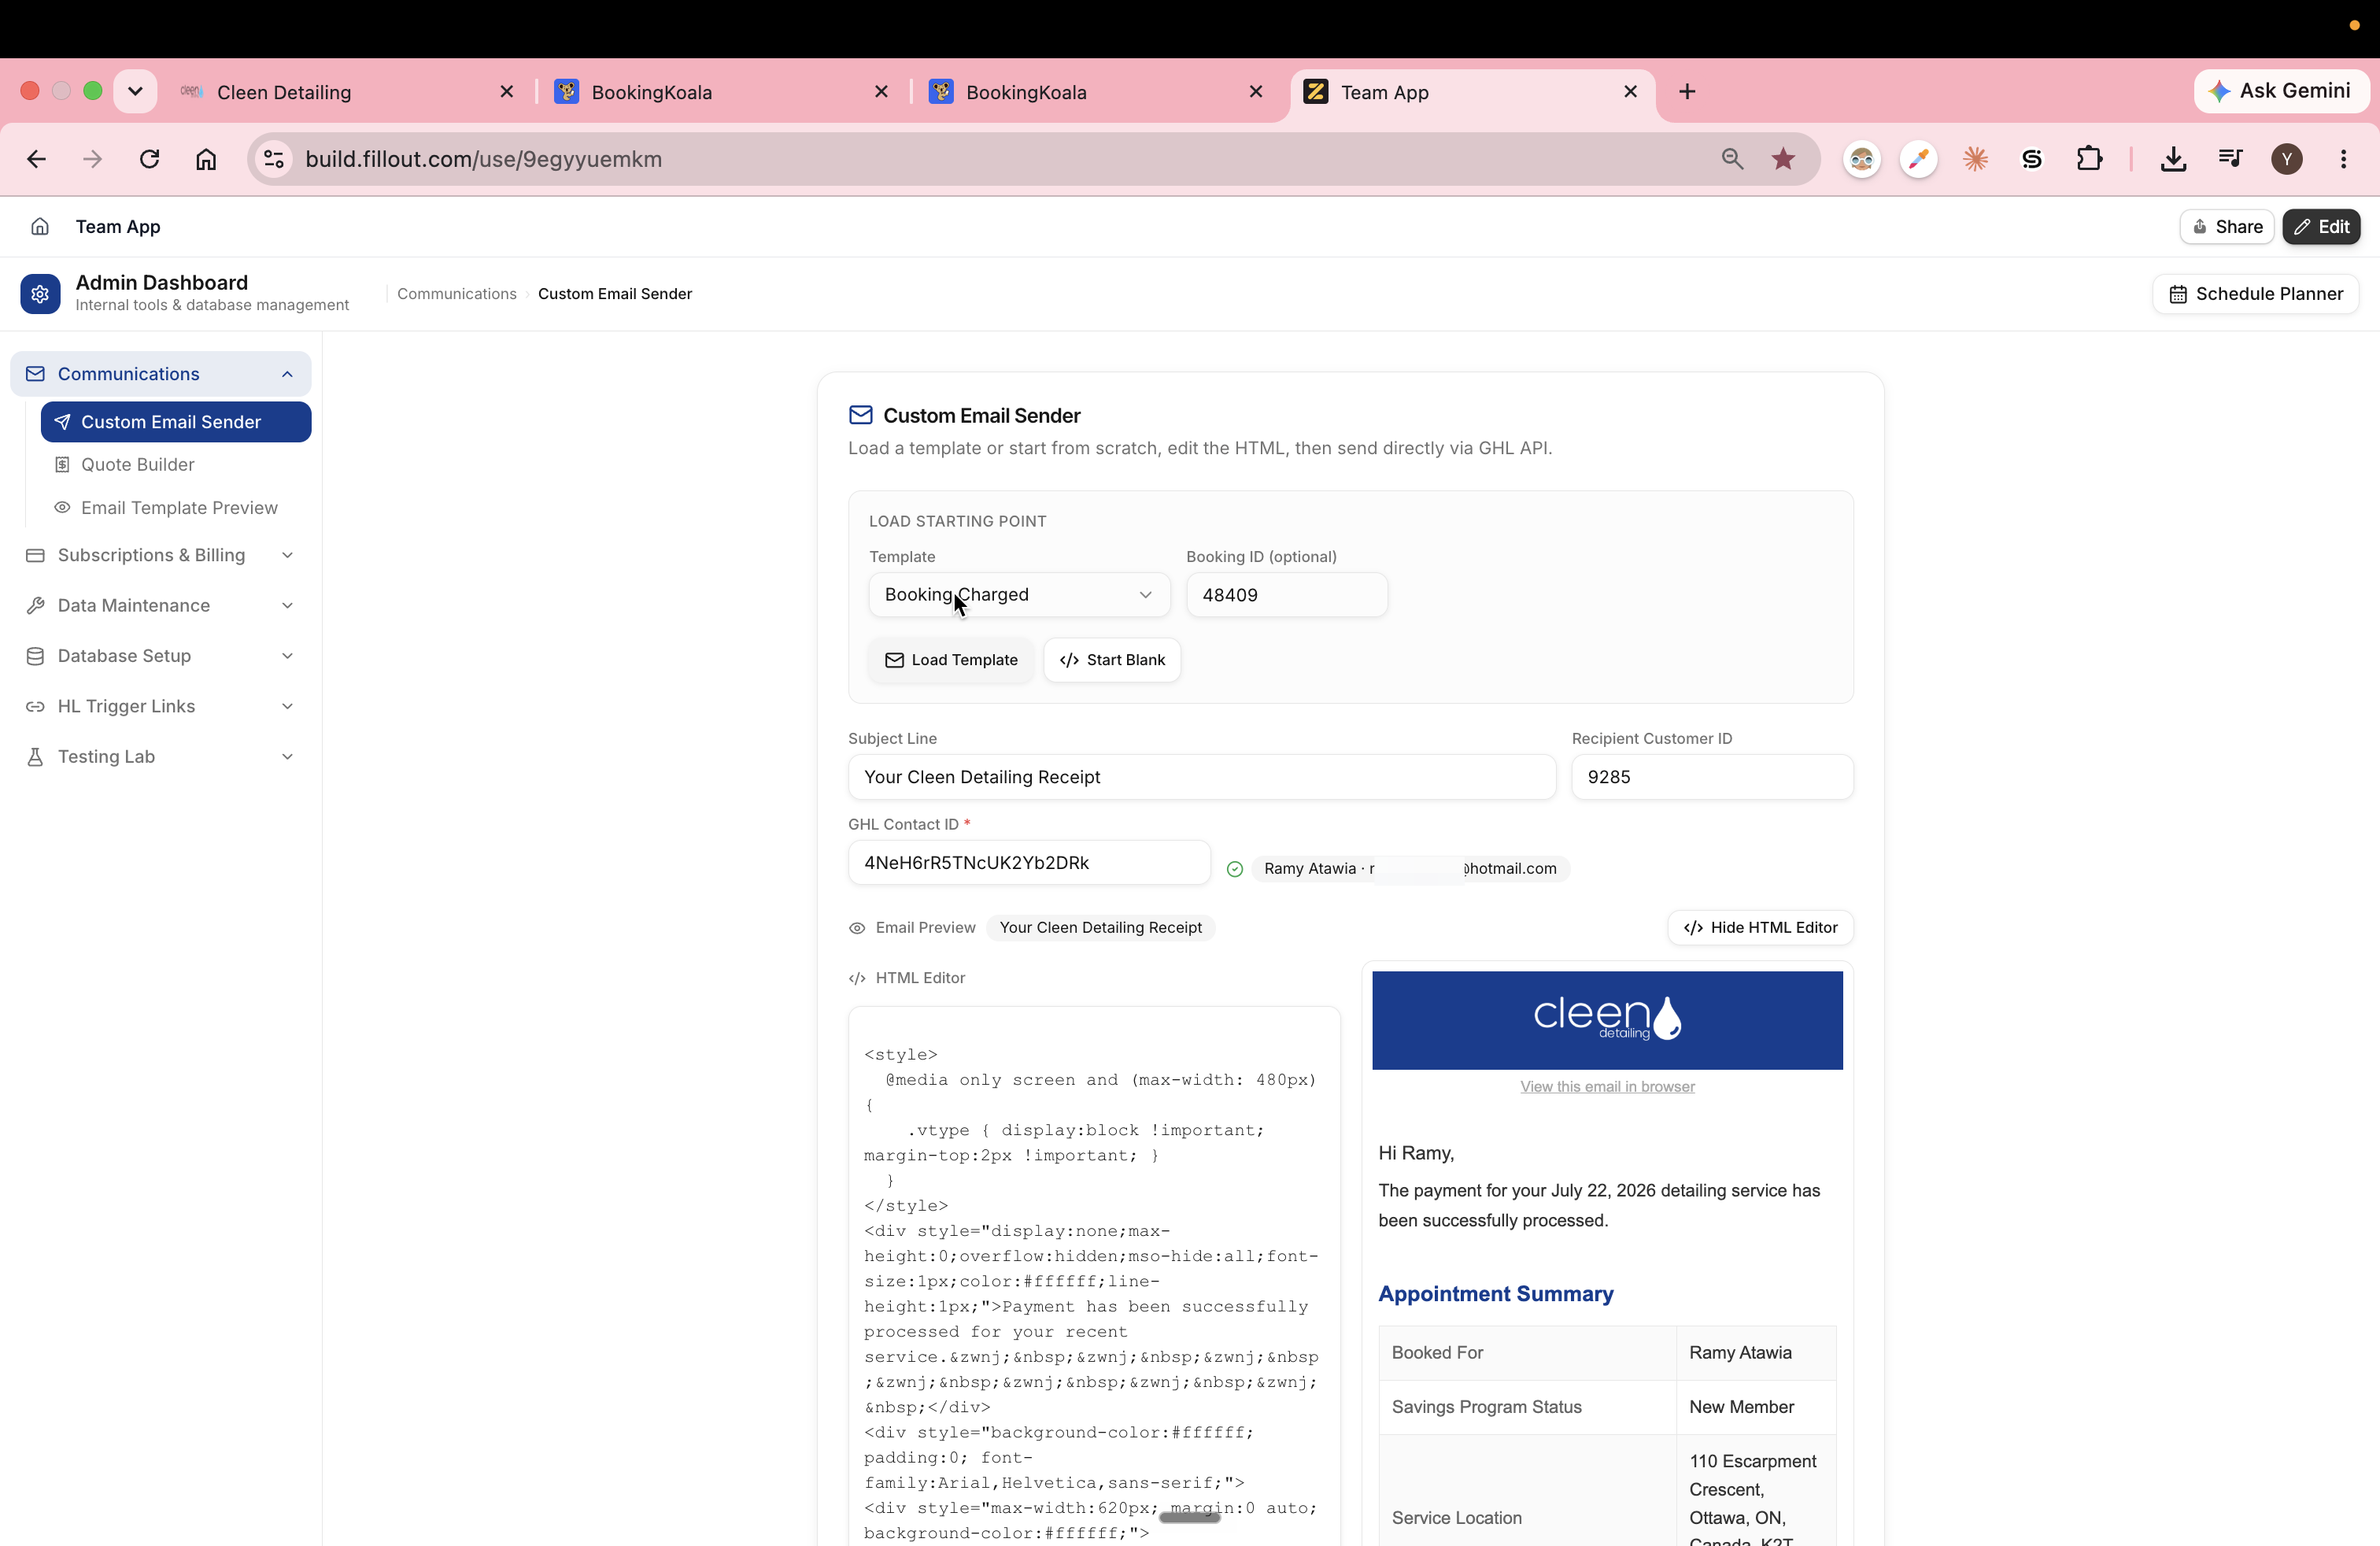
13
Select Booking Charged from the template dropdown menu.
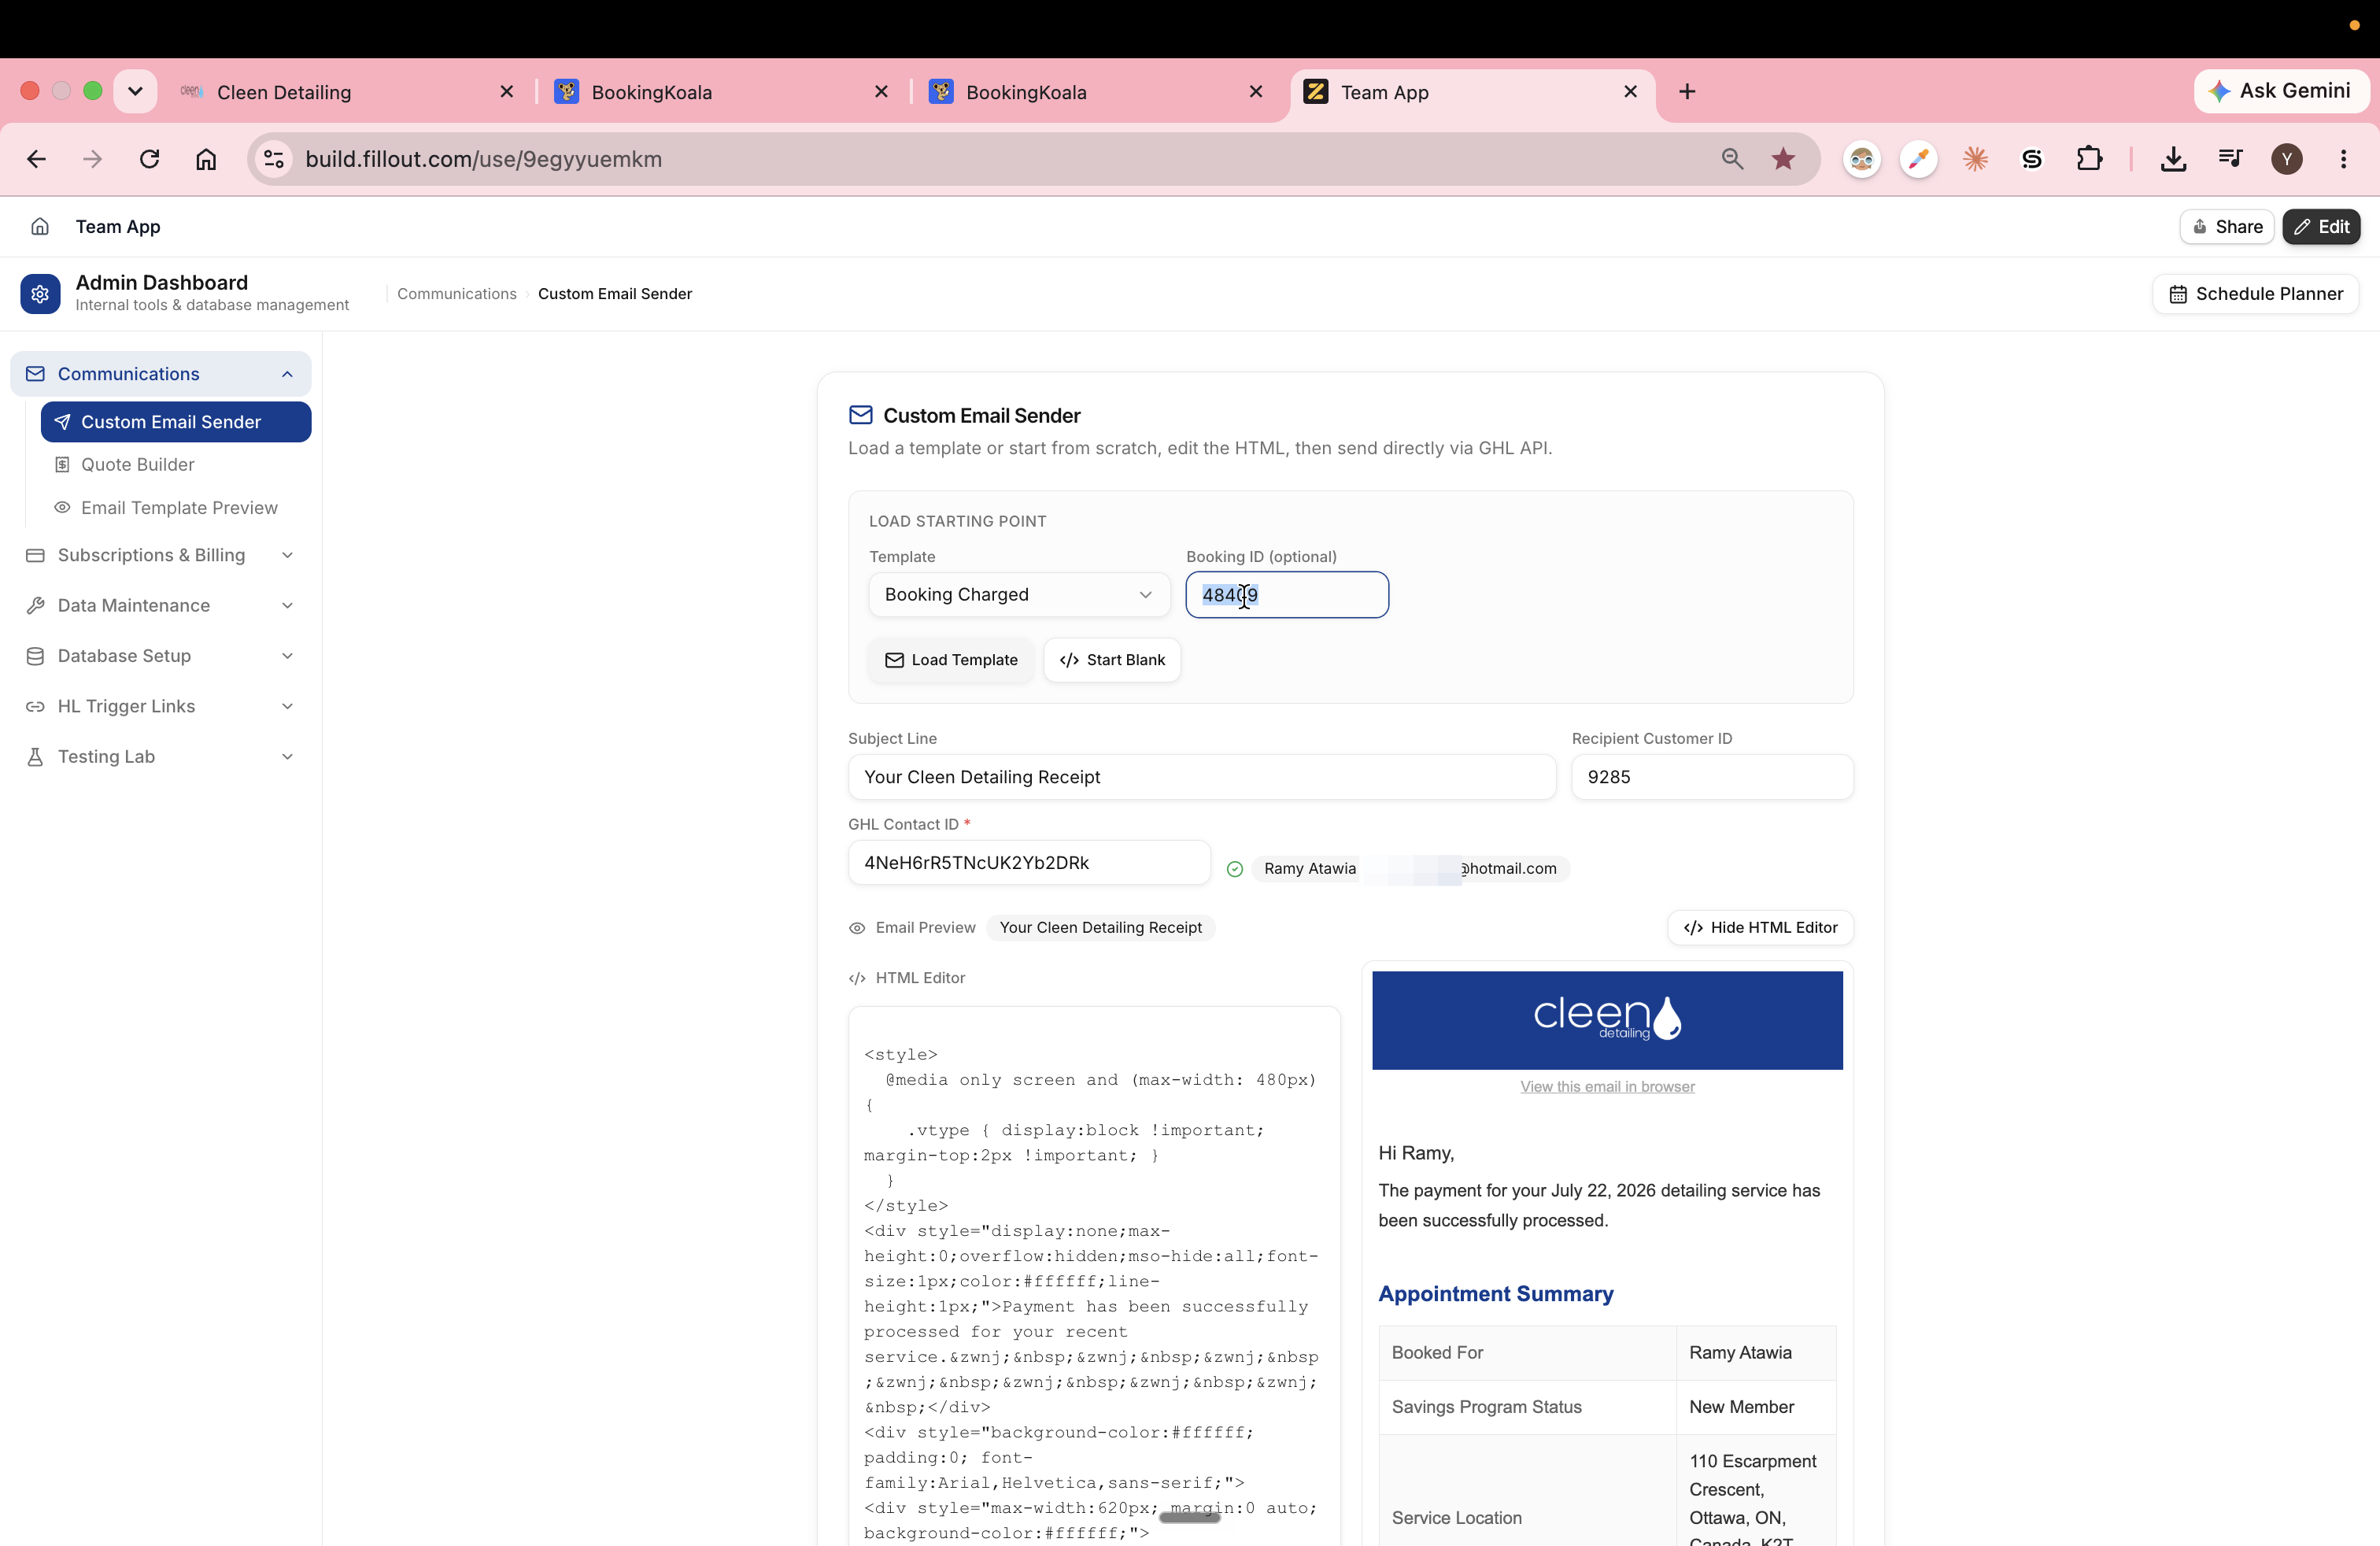
14
Paste the copied Booking ID into the Booking ID input field.
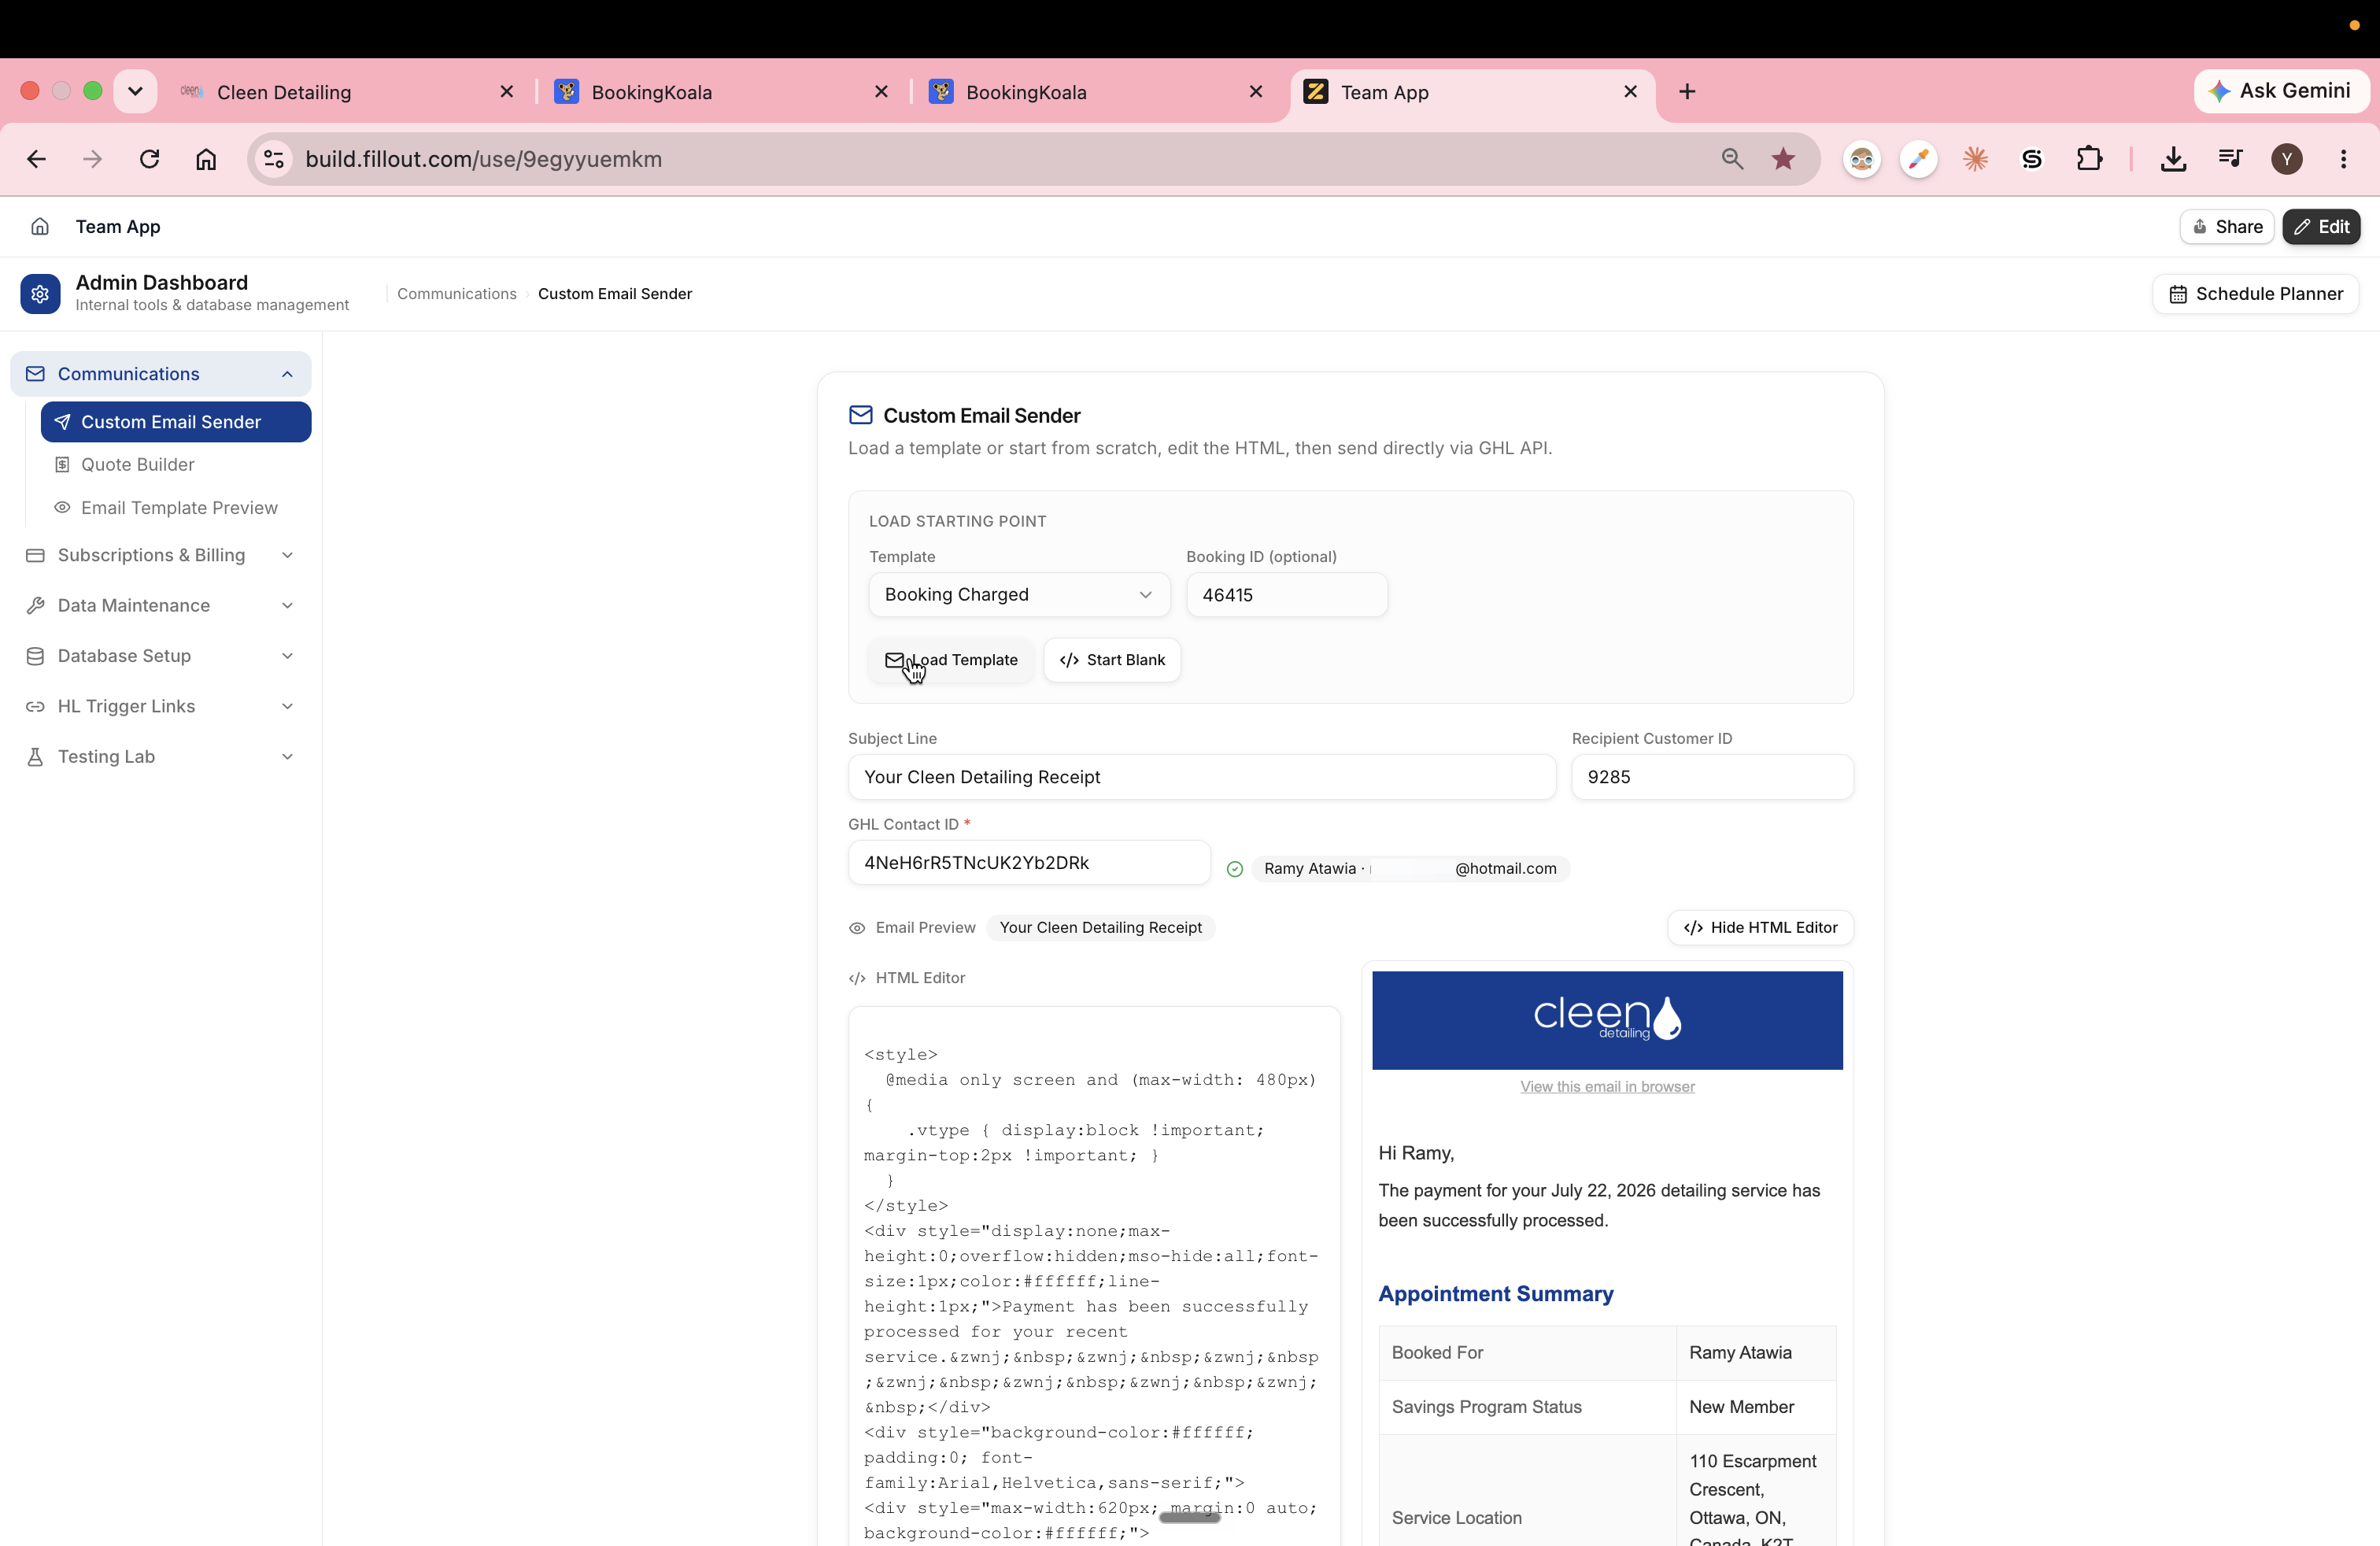
15
Click Load Template to generate the receipt preview.
16
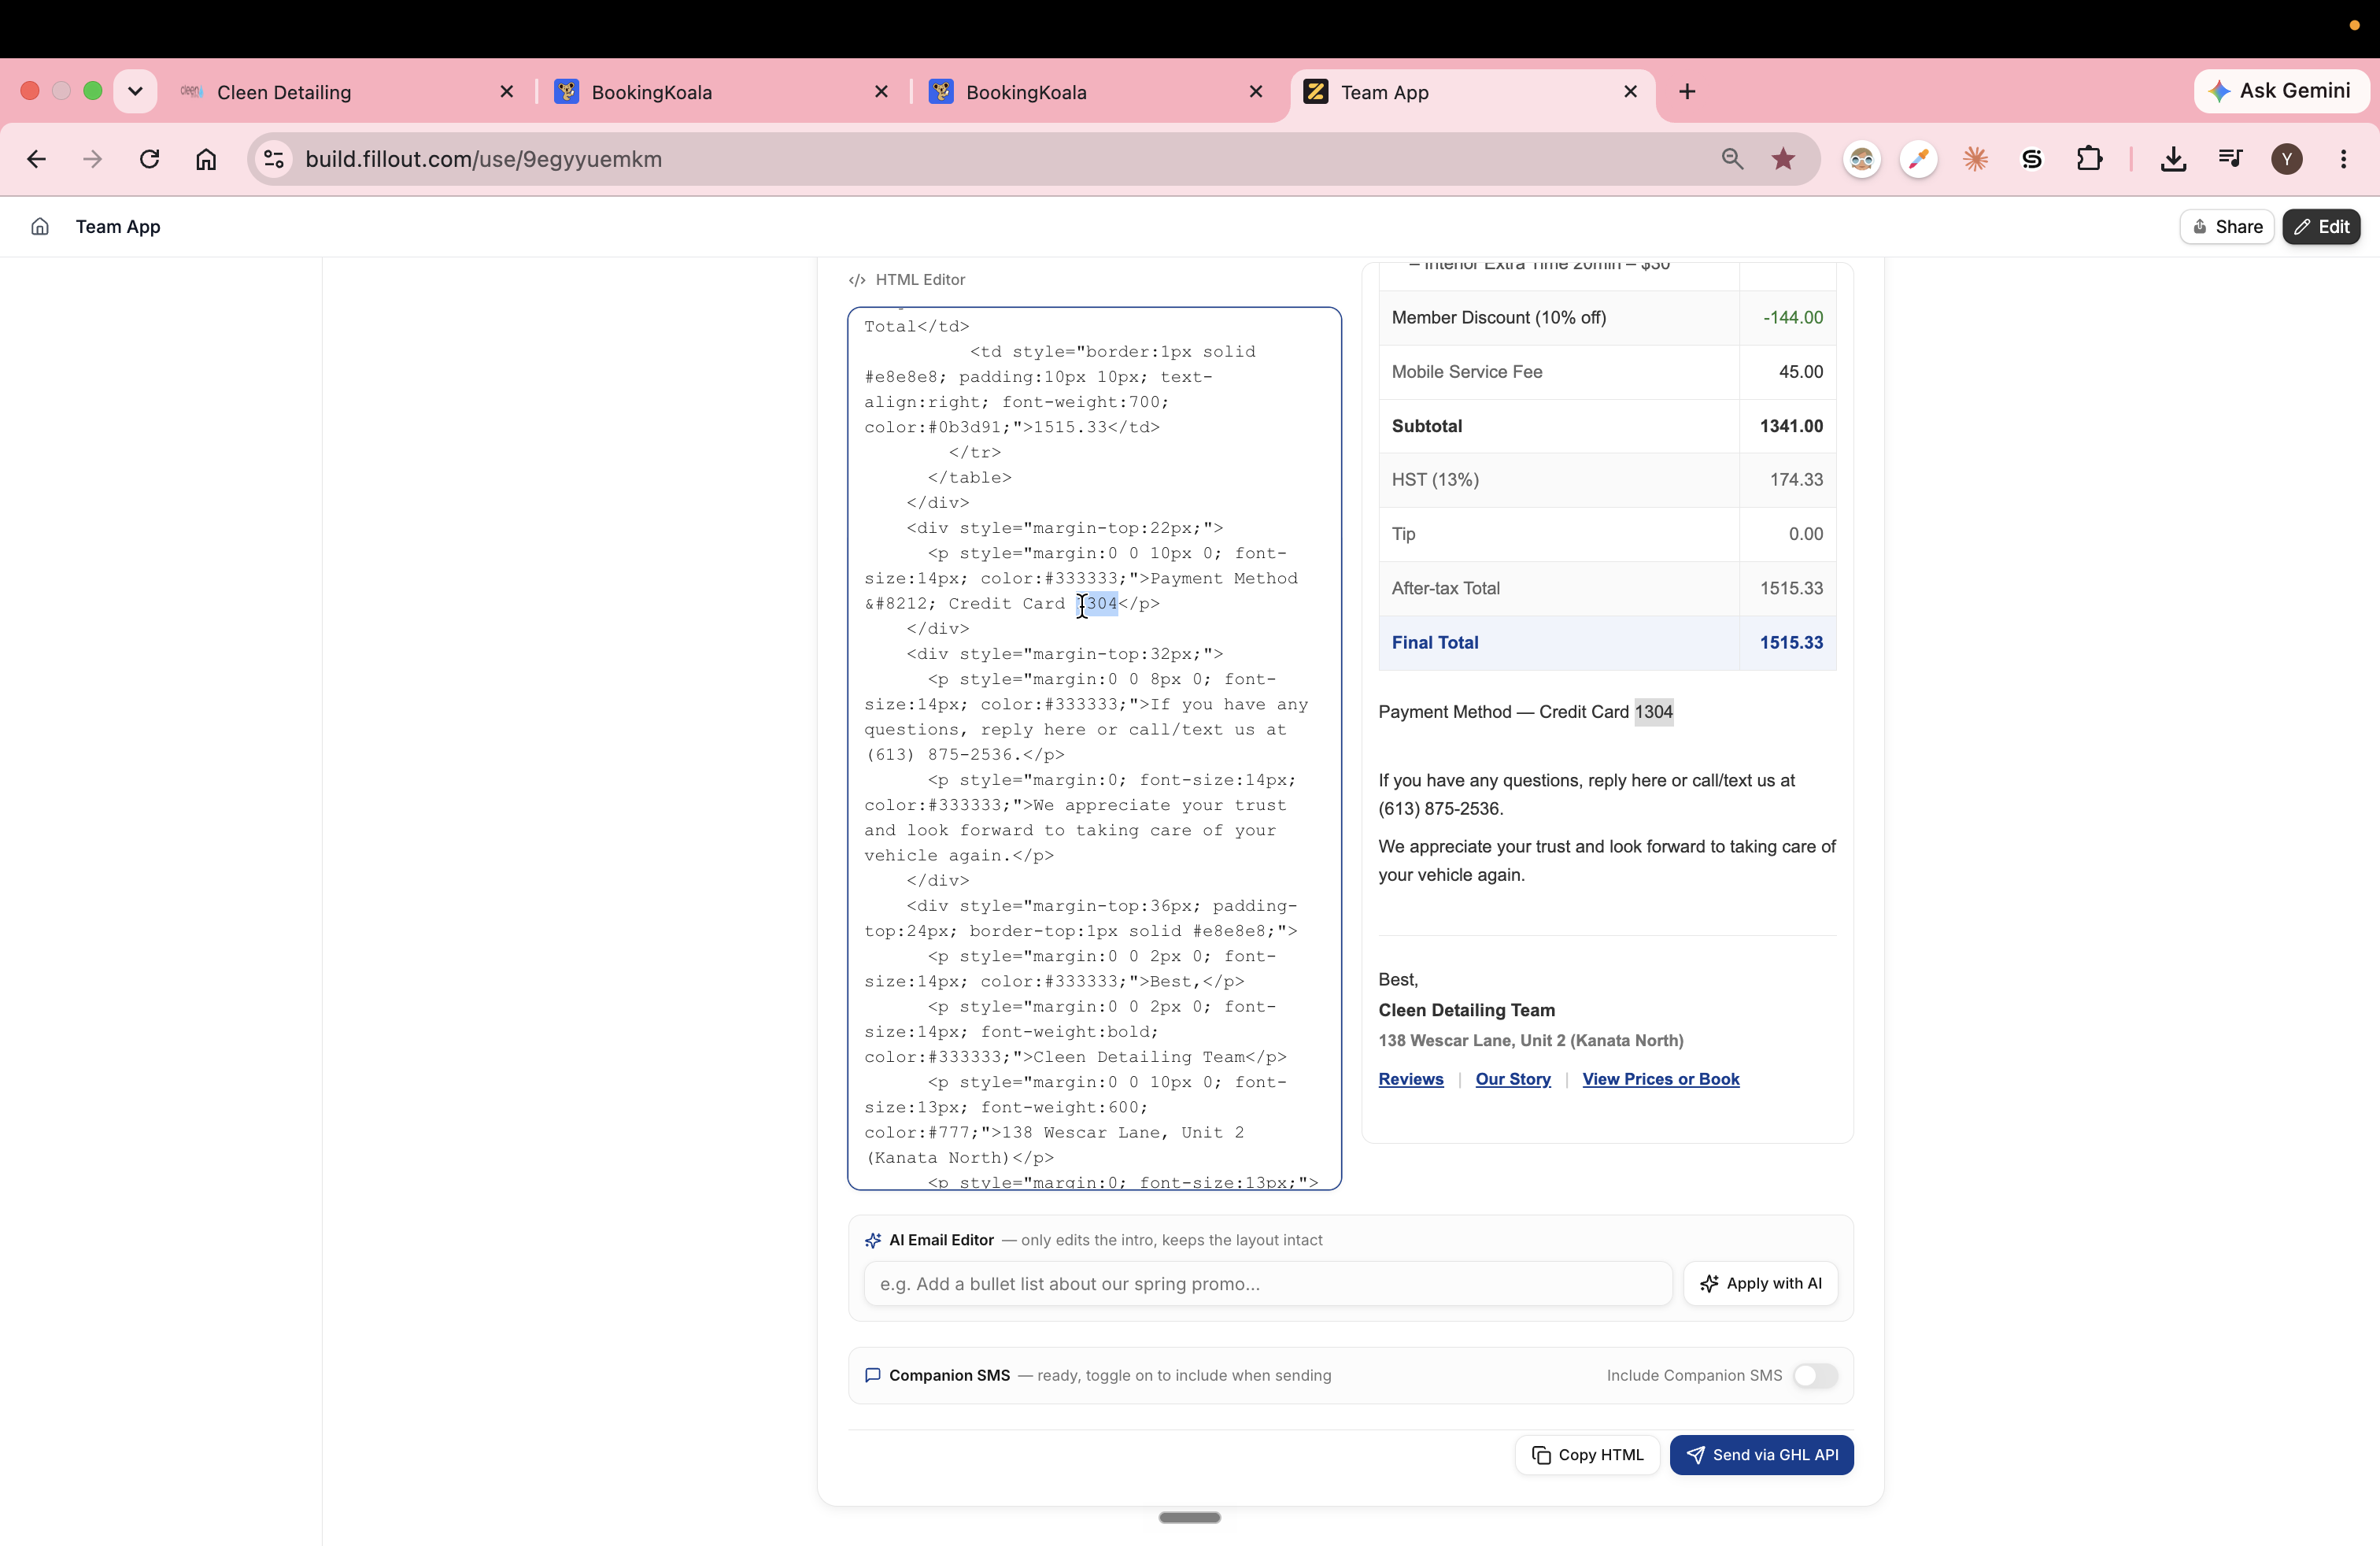
Review the live preview to verify that the credit card last four digits match the successfully processed card.
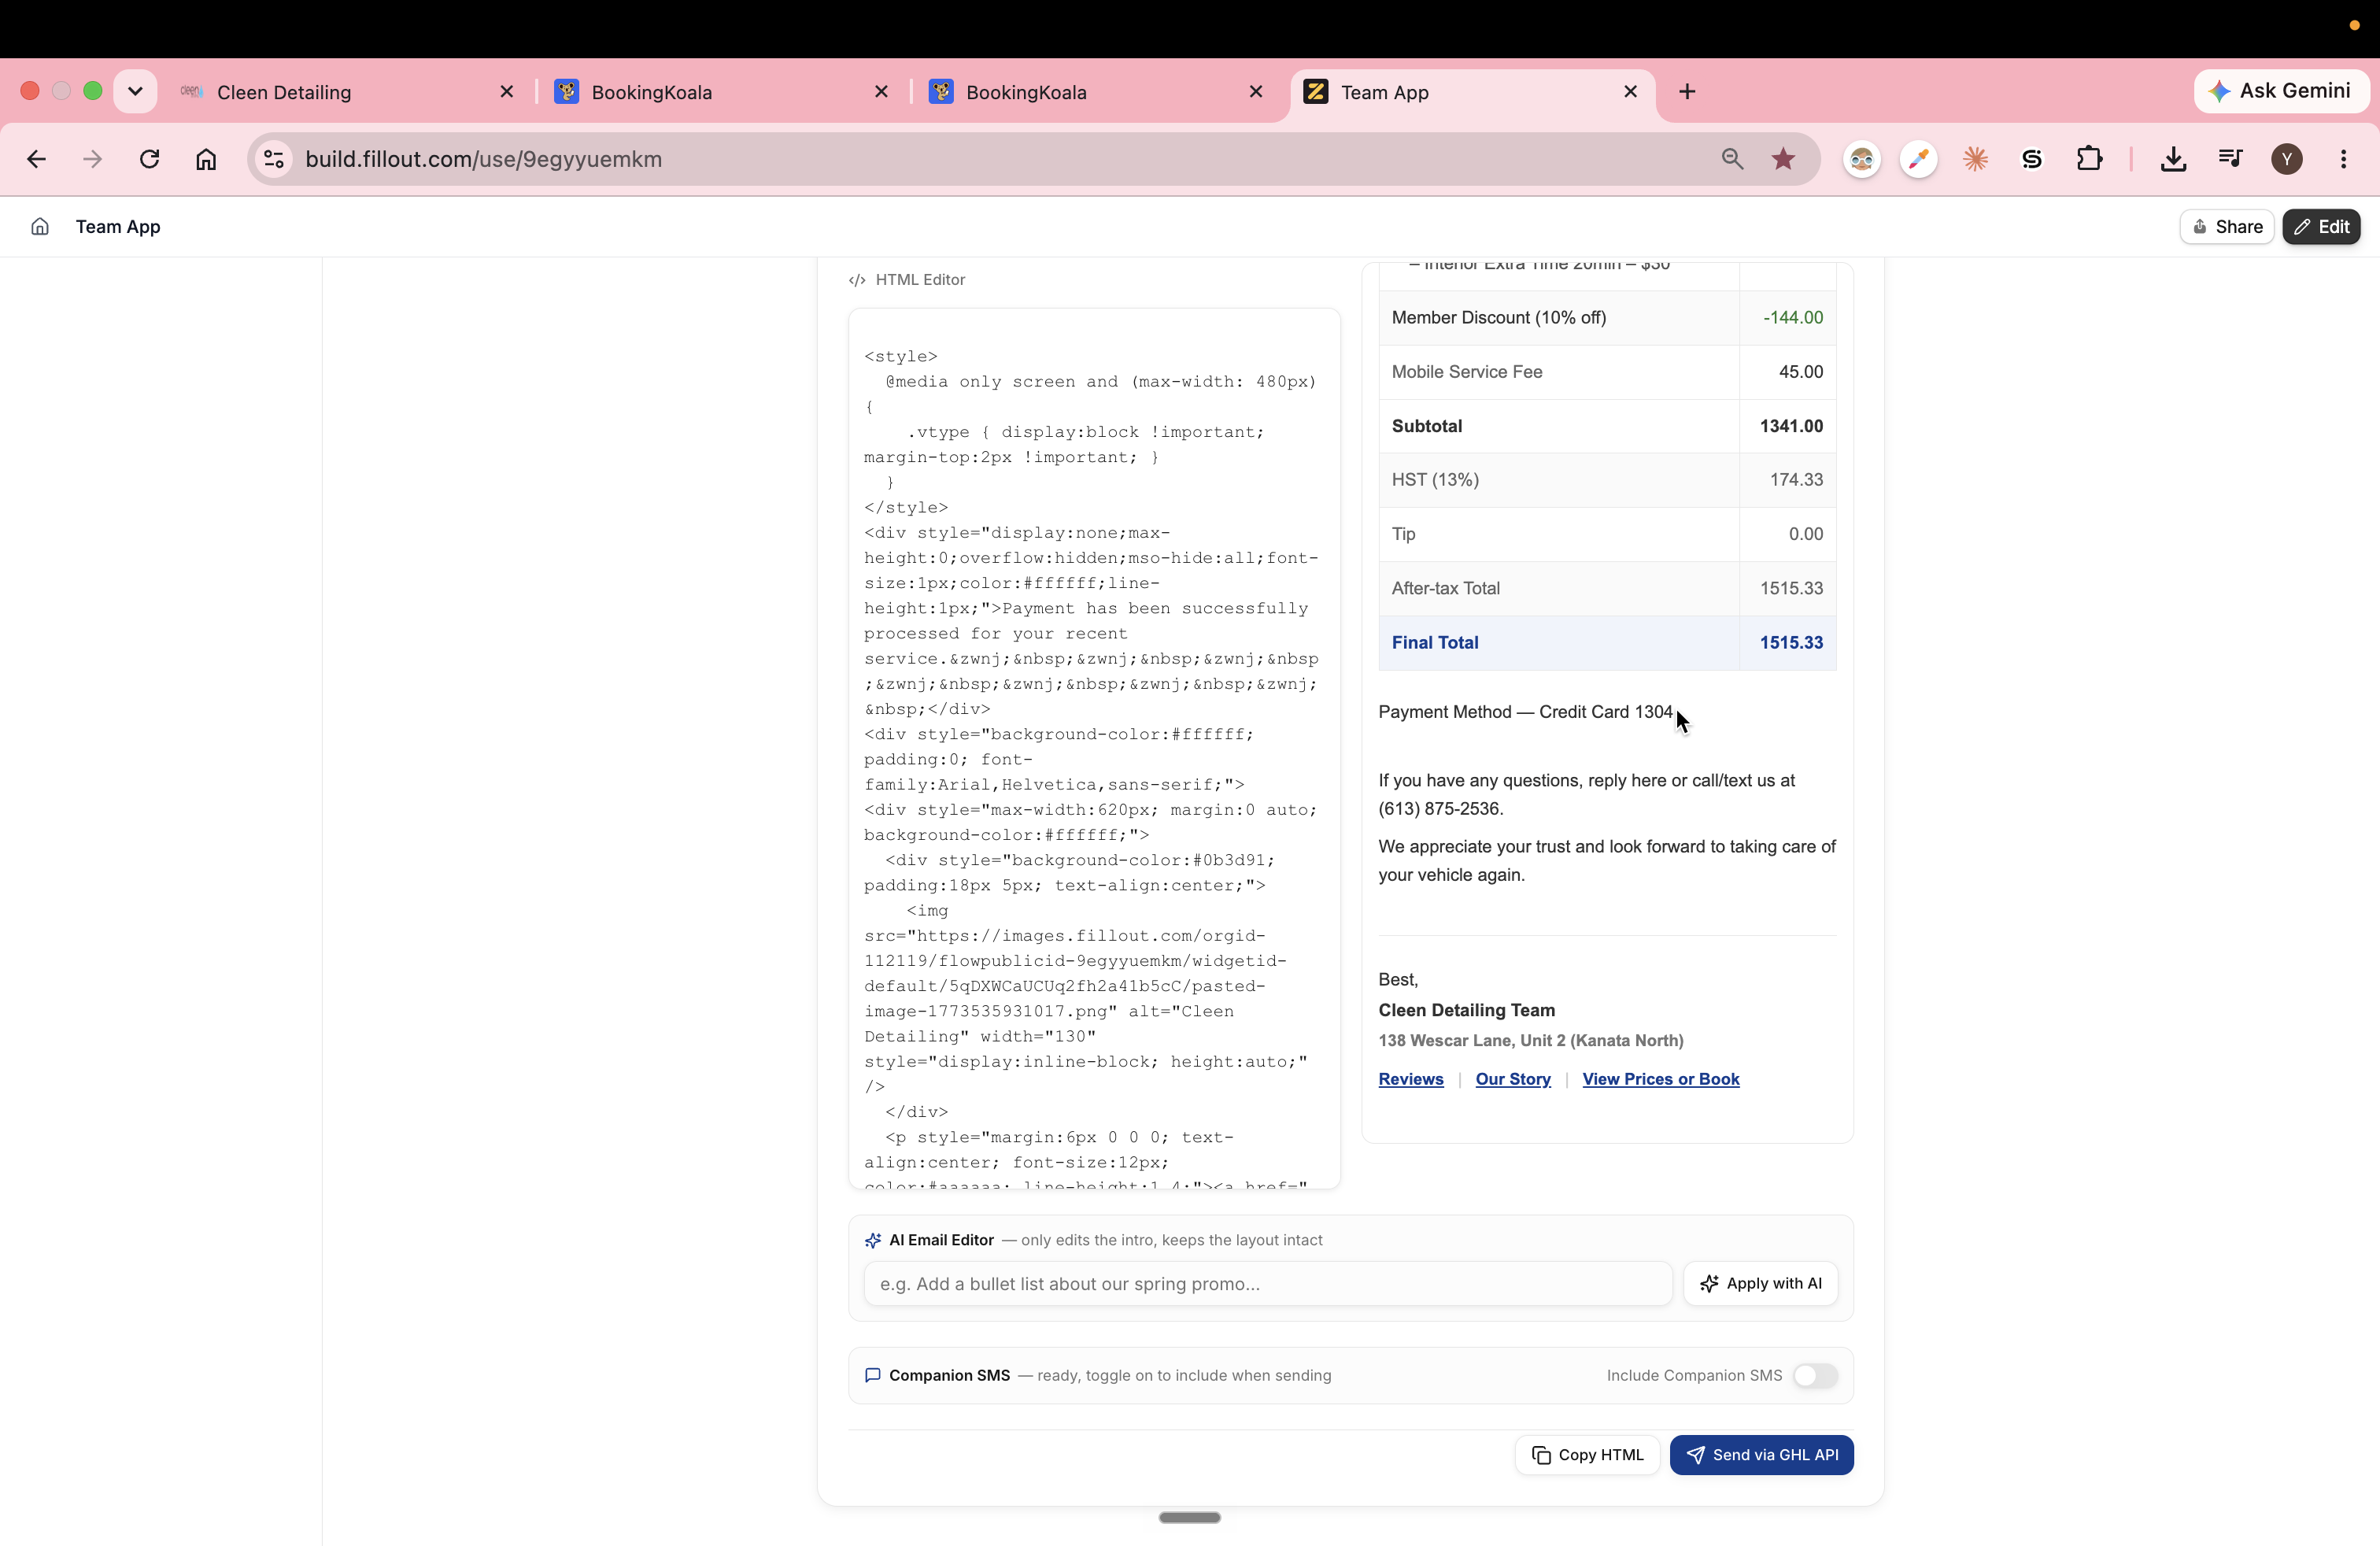
17
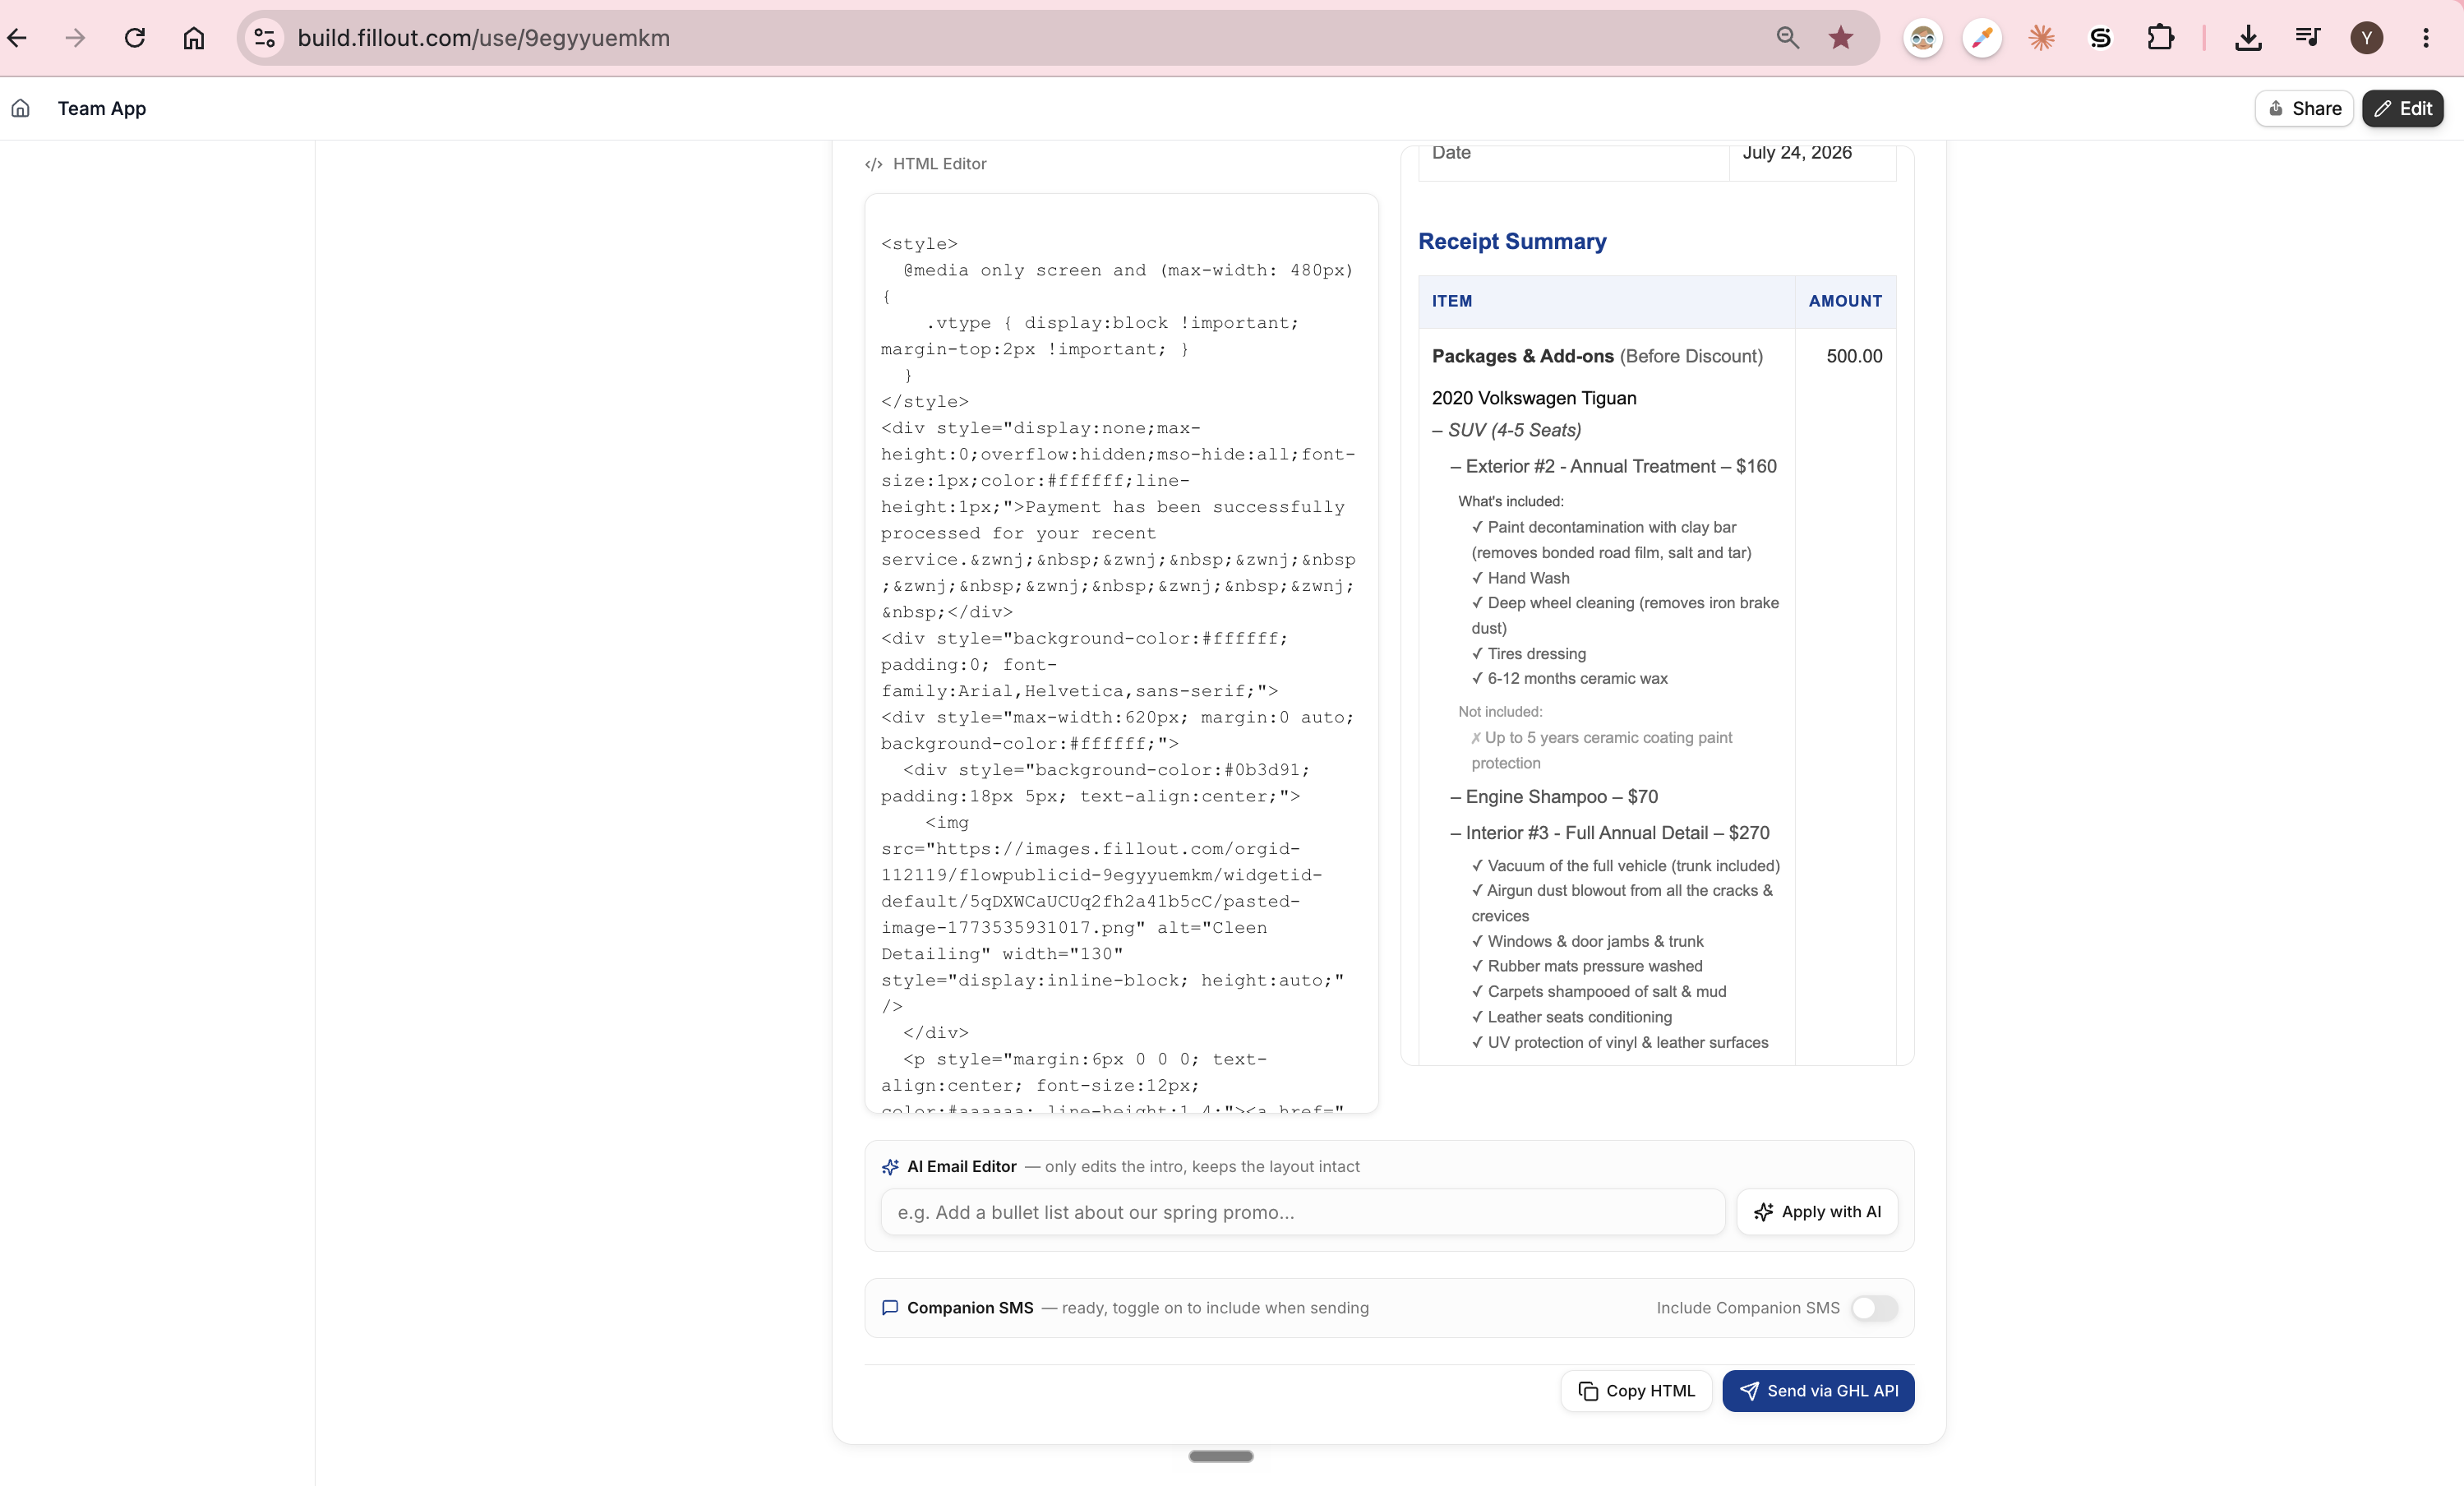
If the digits are incorrect, manually update the numbers in the HTML editor panel so the receipt reflects the correct payment method.
18
Return to the BookingKoala dashboard and click on the customer's name.
19
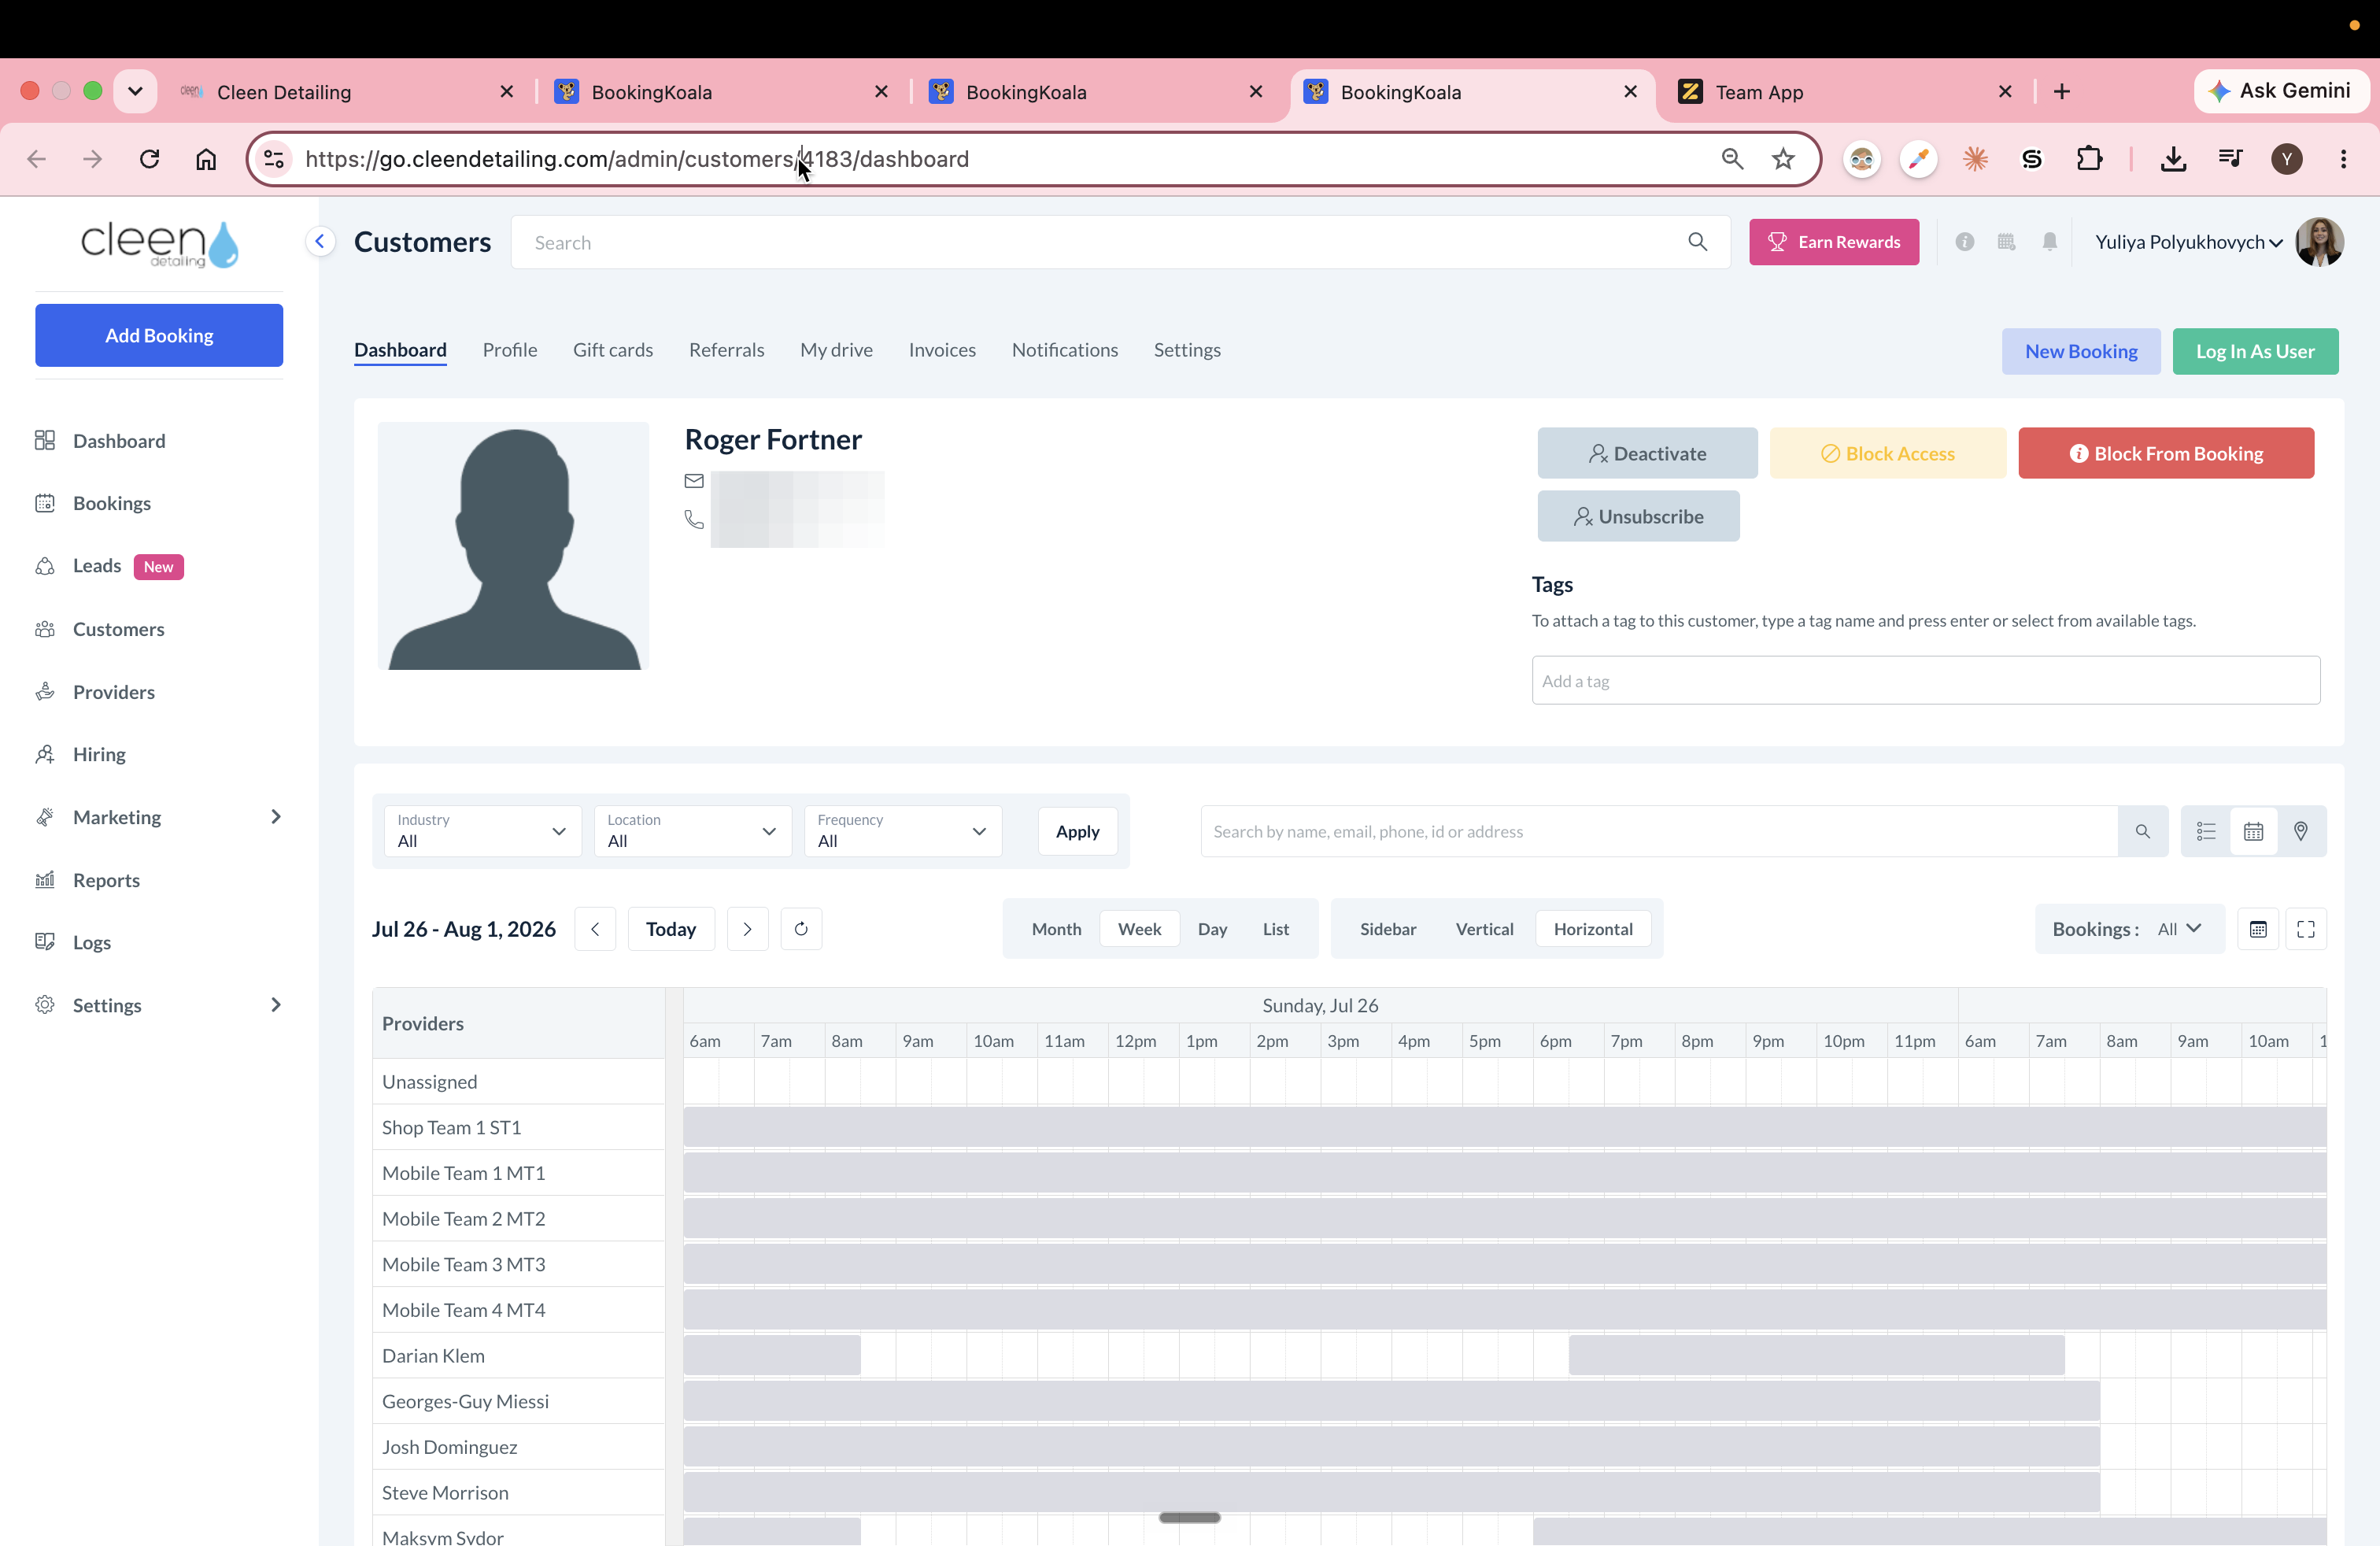
Look at the browser's address bar and copy the four-digit customer ID found in the URL.
20
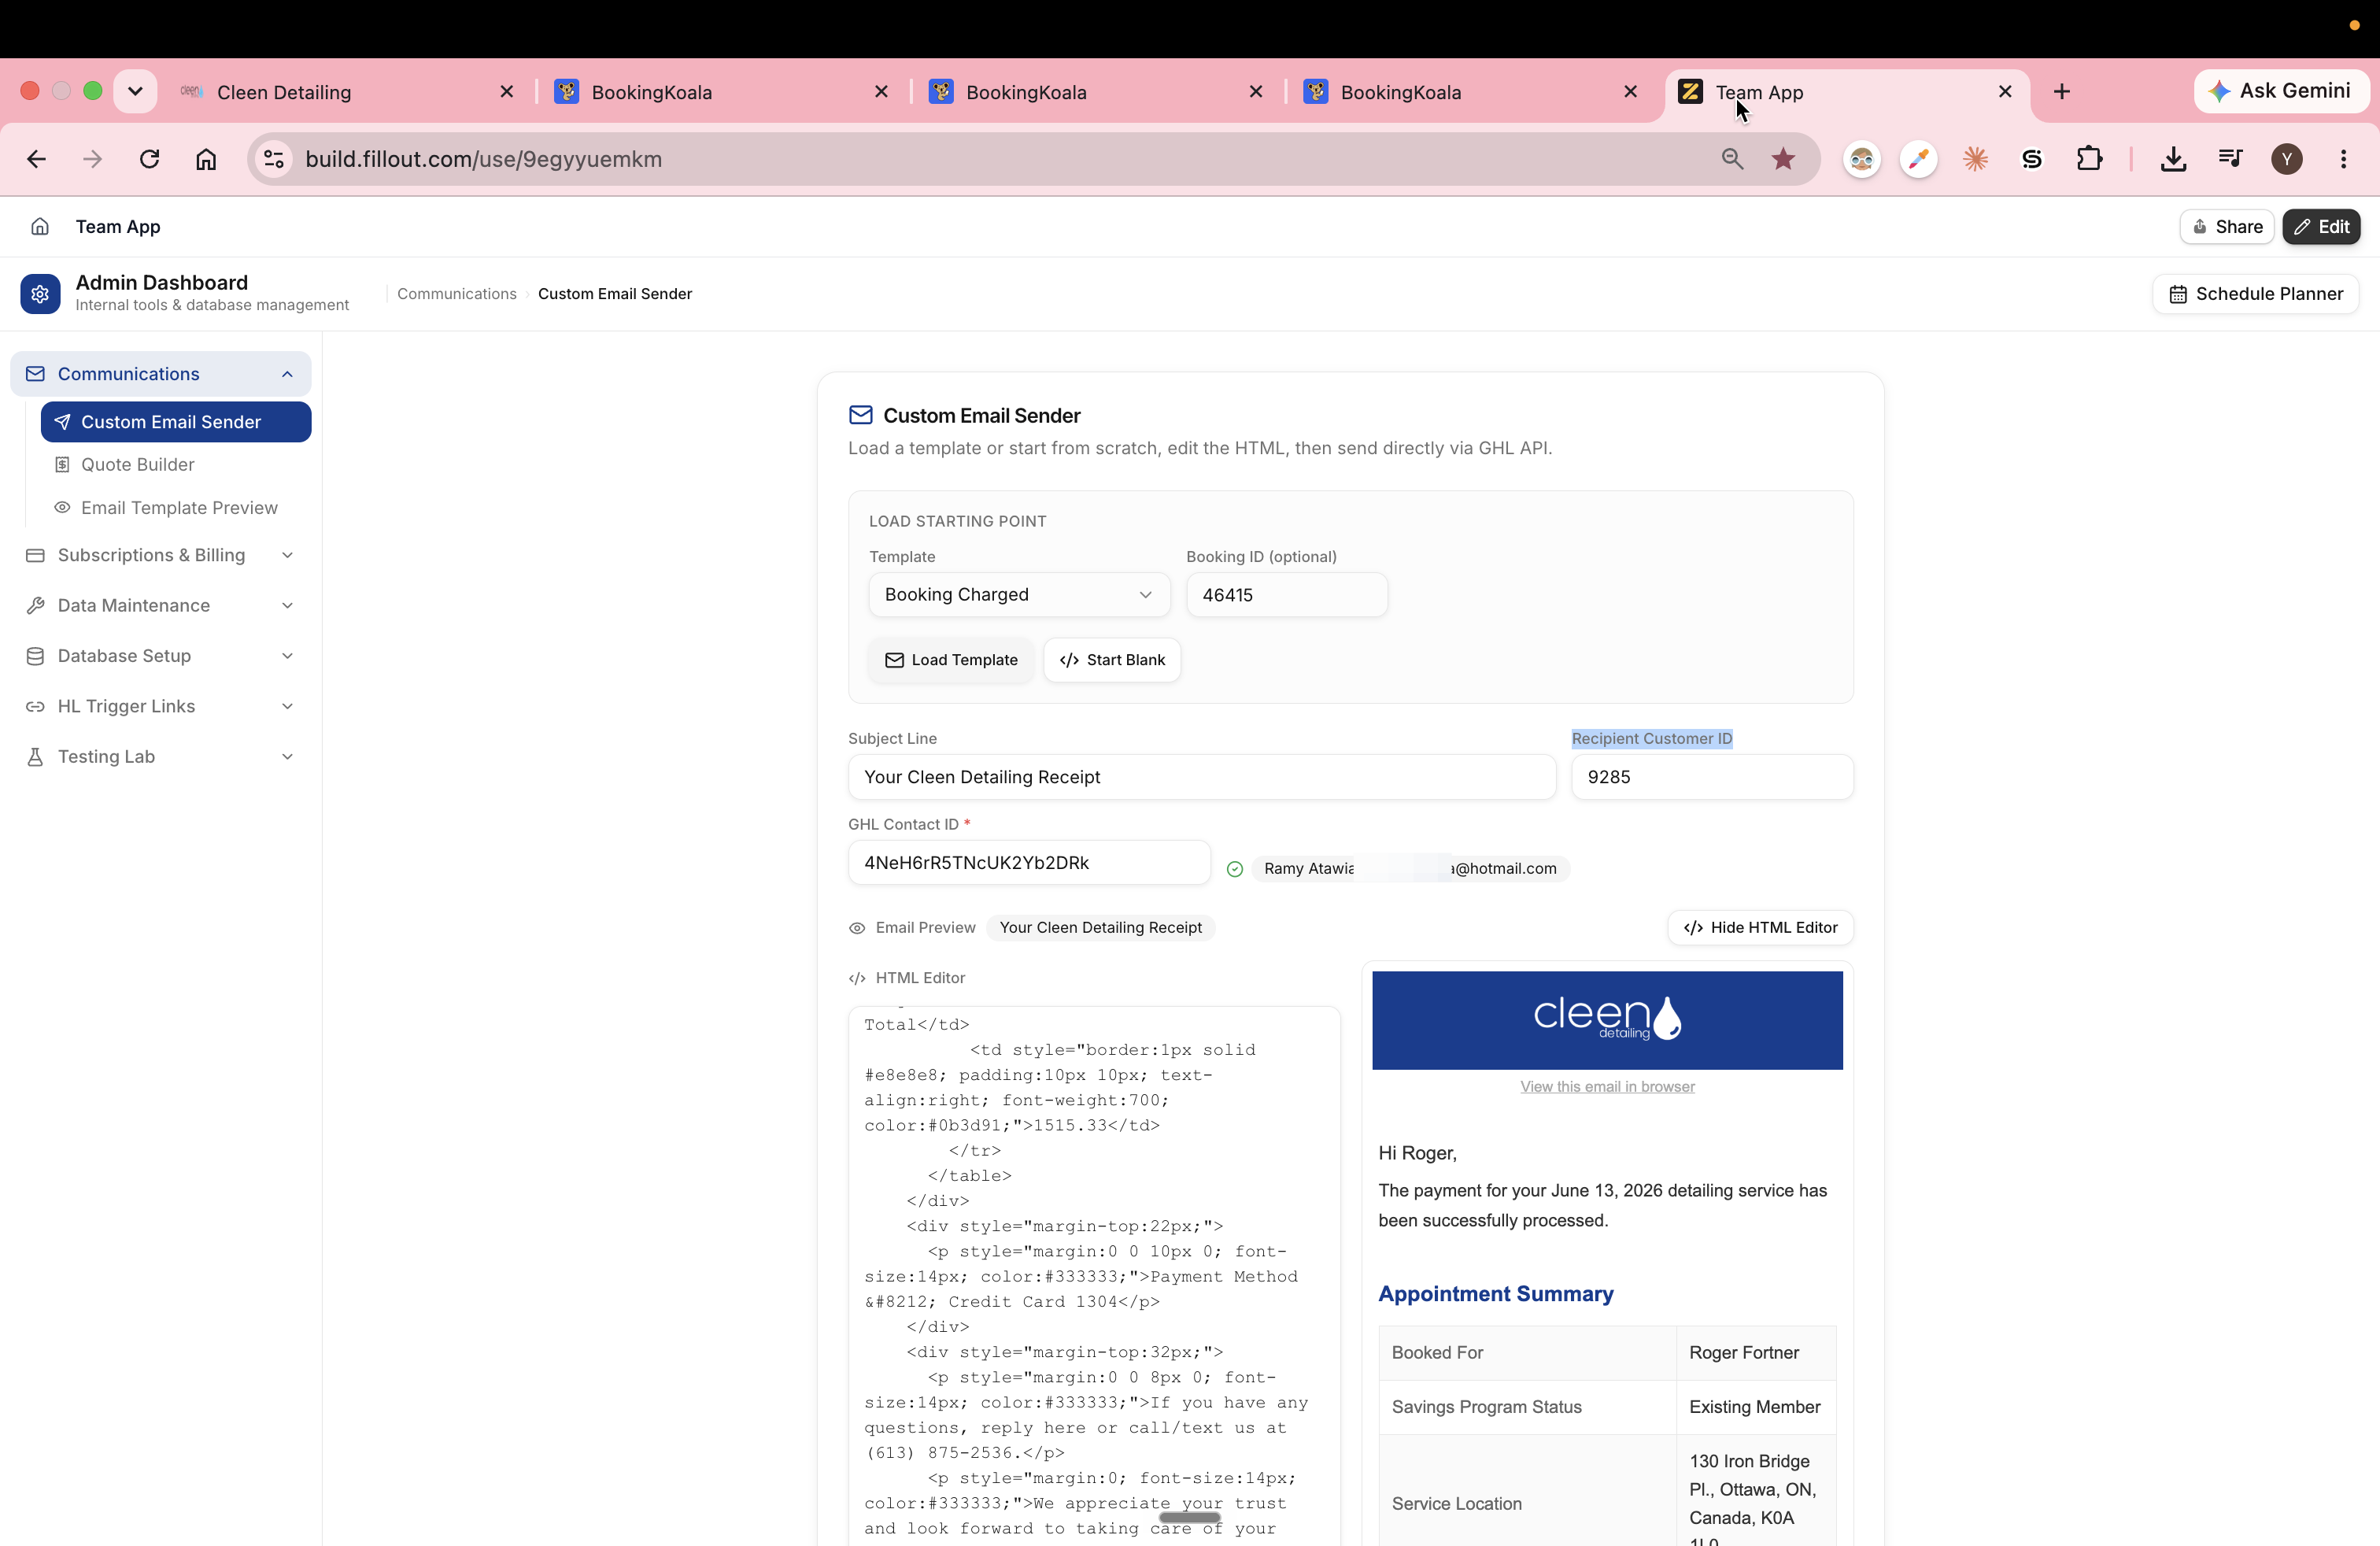
Return to the Team App Custom Email Sender tab.
21
Paste the copied four digits into the Recipient Customer ID field.
22
Click Send via GHL API to dispatch the official email receipt to the customer's inbox.
Q: What should I do if the final charge is declined again?
A: If the card has insufficient funds and declines again, do not send a receipt.
Q: How do I find the correct Recipient Customer ID to send the receipt?
A: Open the customer's dashboard in BookingKoala and look at the browser's URL address bar. The four-digit number listed after /customers/ is the Customer ID.