
How to Reconcile Authorize.net Settlements and Bank Deposits
Learn how to download settlement reports from Authorize.net, update your Excel payment tracker, and reconcile merchant batches with your business bank deposits.
By Helen Hill
Made with Glitter AI
Reconciling your payment gateway settlements with your actual bank deposits is a critical process for keeping your business accounting accurate. This guide covers how to export settlement reports from Authorize.net, ingest them into your Excel payment tracker, and verify them against bank deposits.
1. Export Settlement Reports from Authorize.net
1
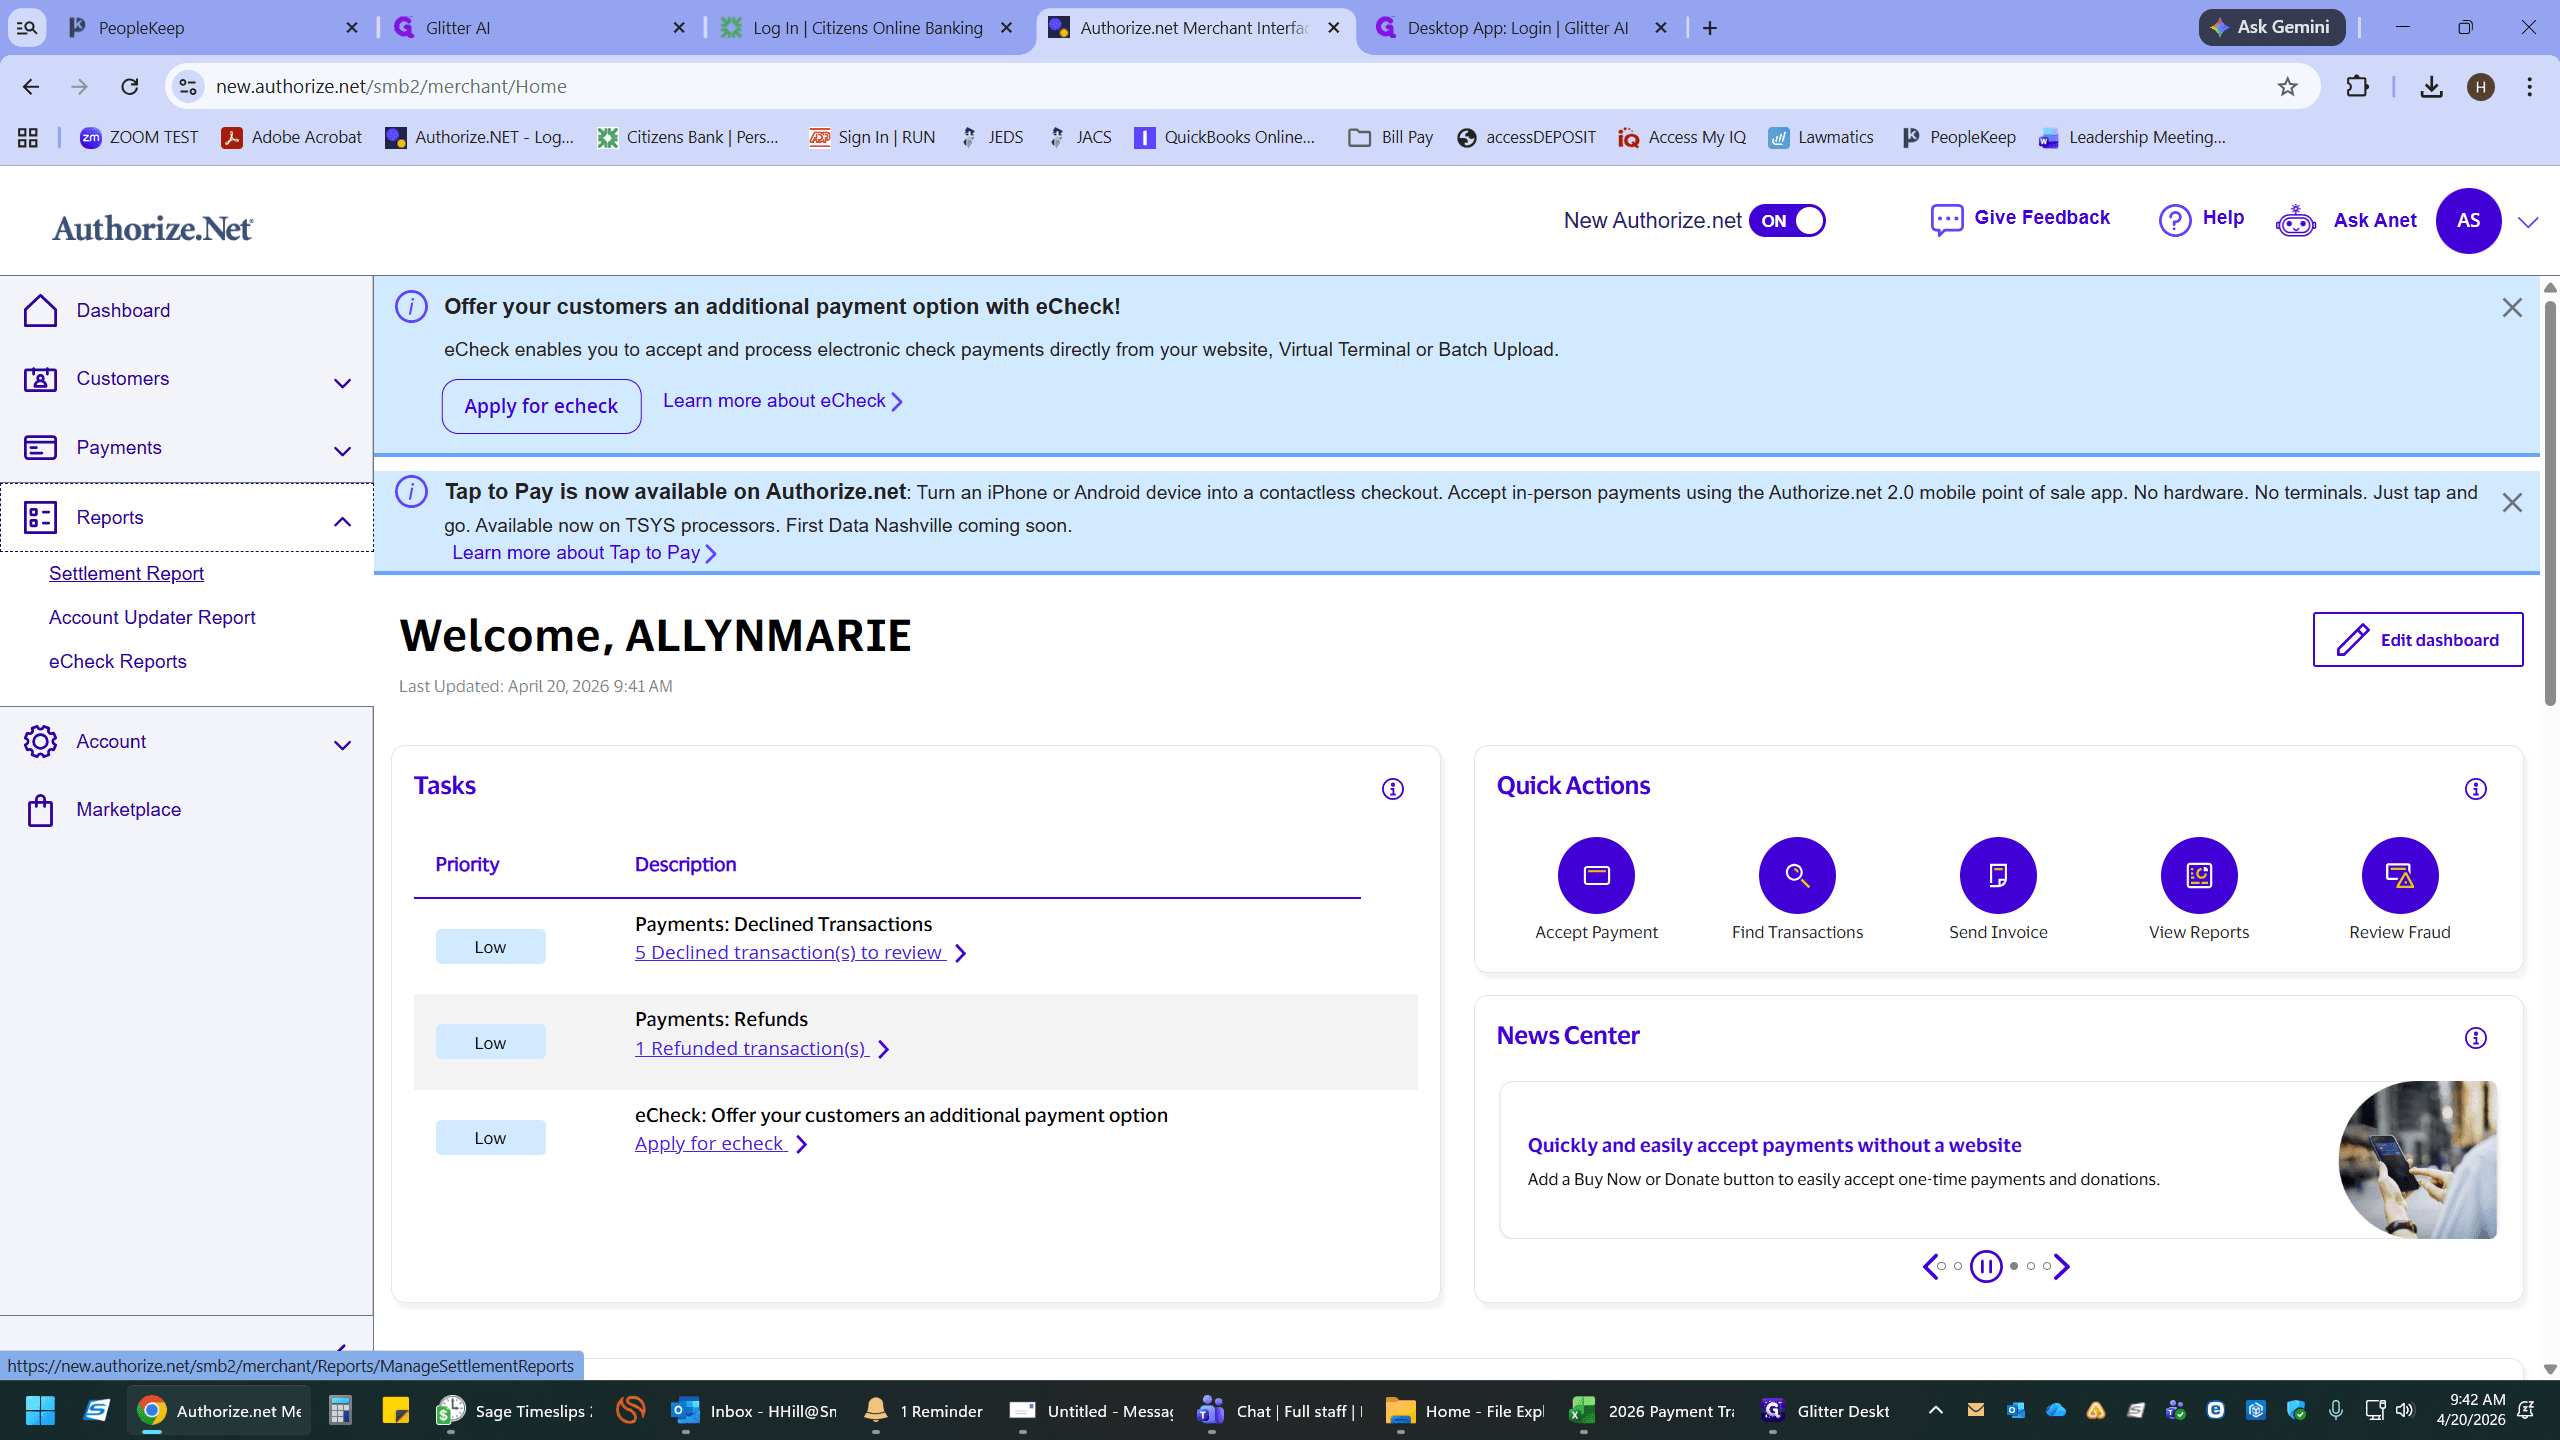
In your Authorize.net merchant dashboard, click Settlement Report in the left sidebar.
2
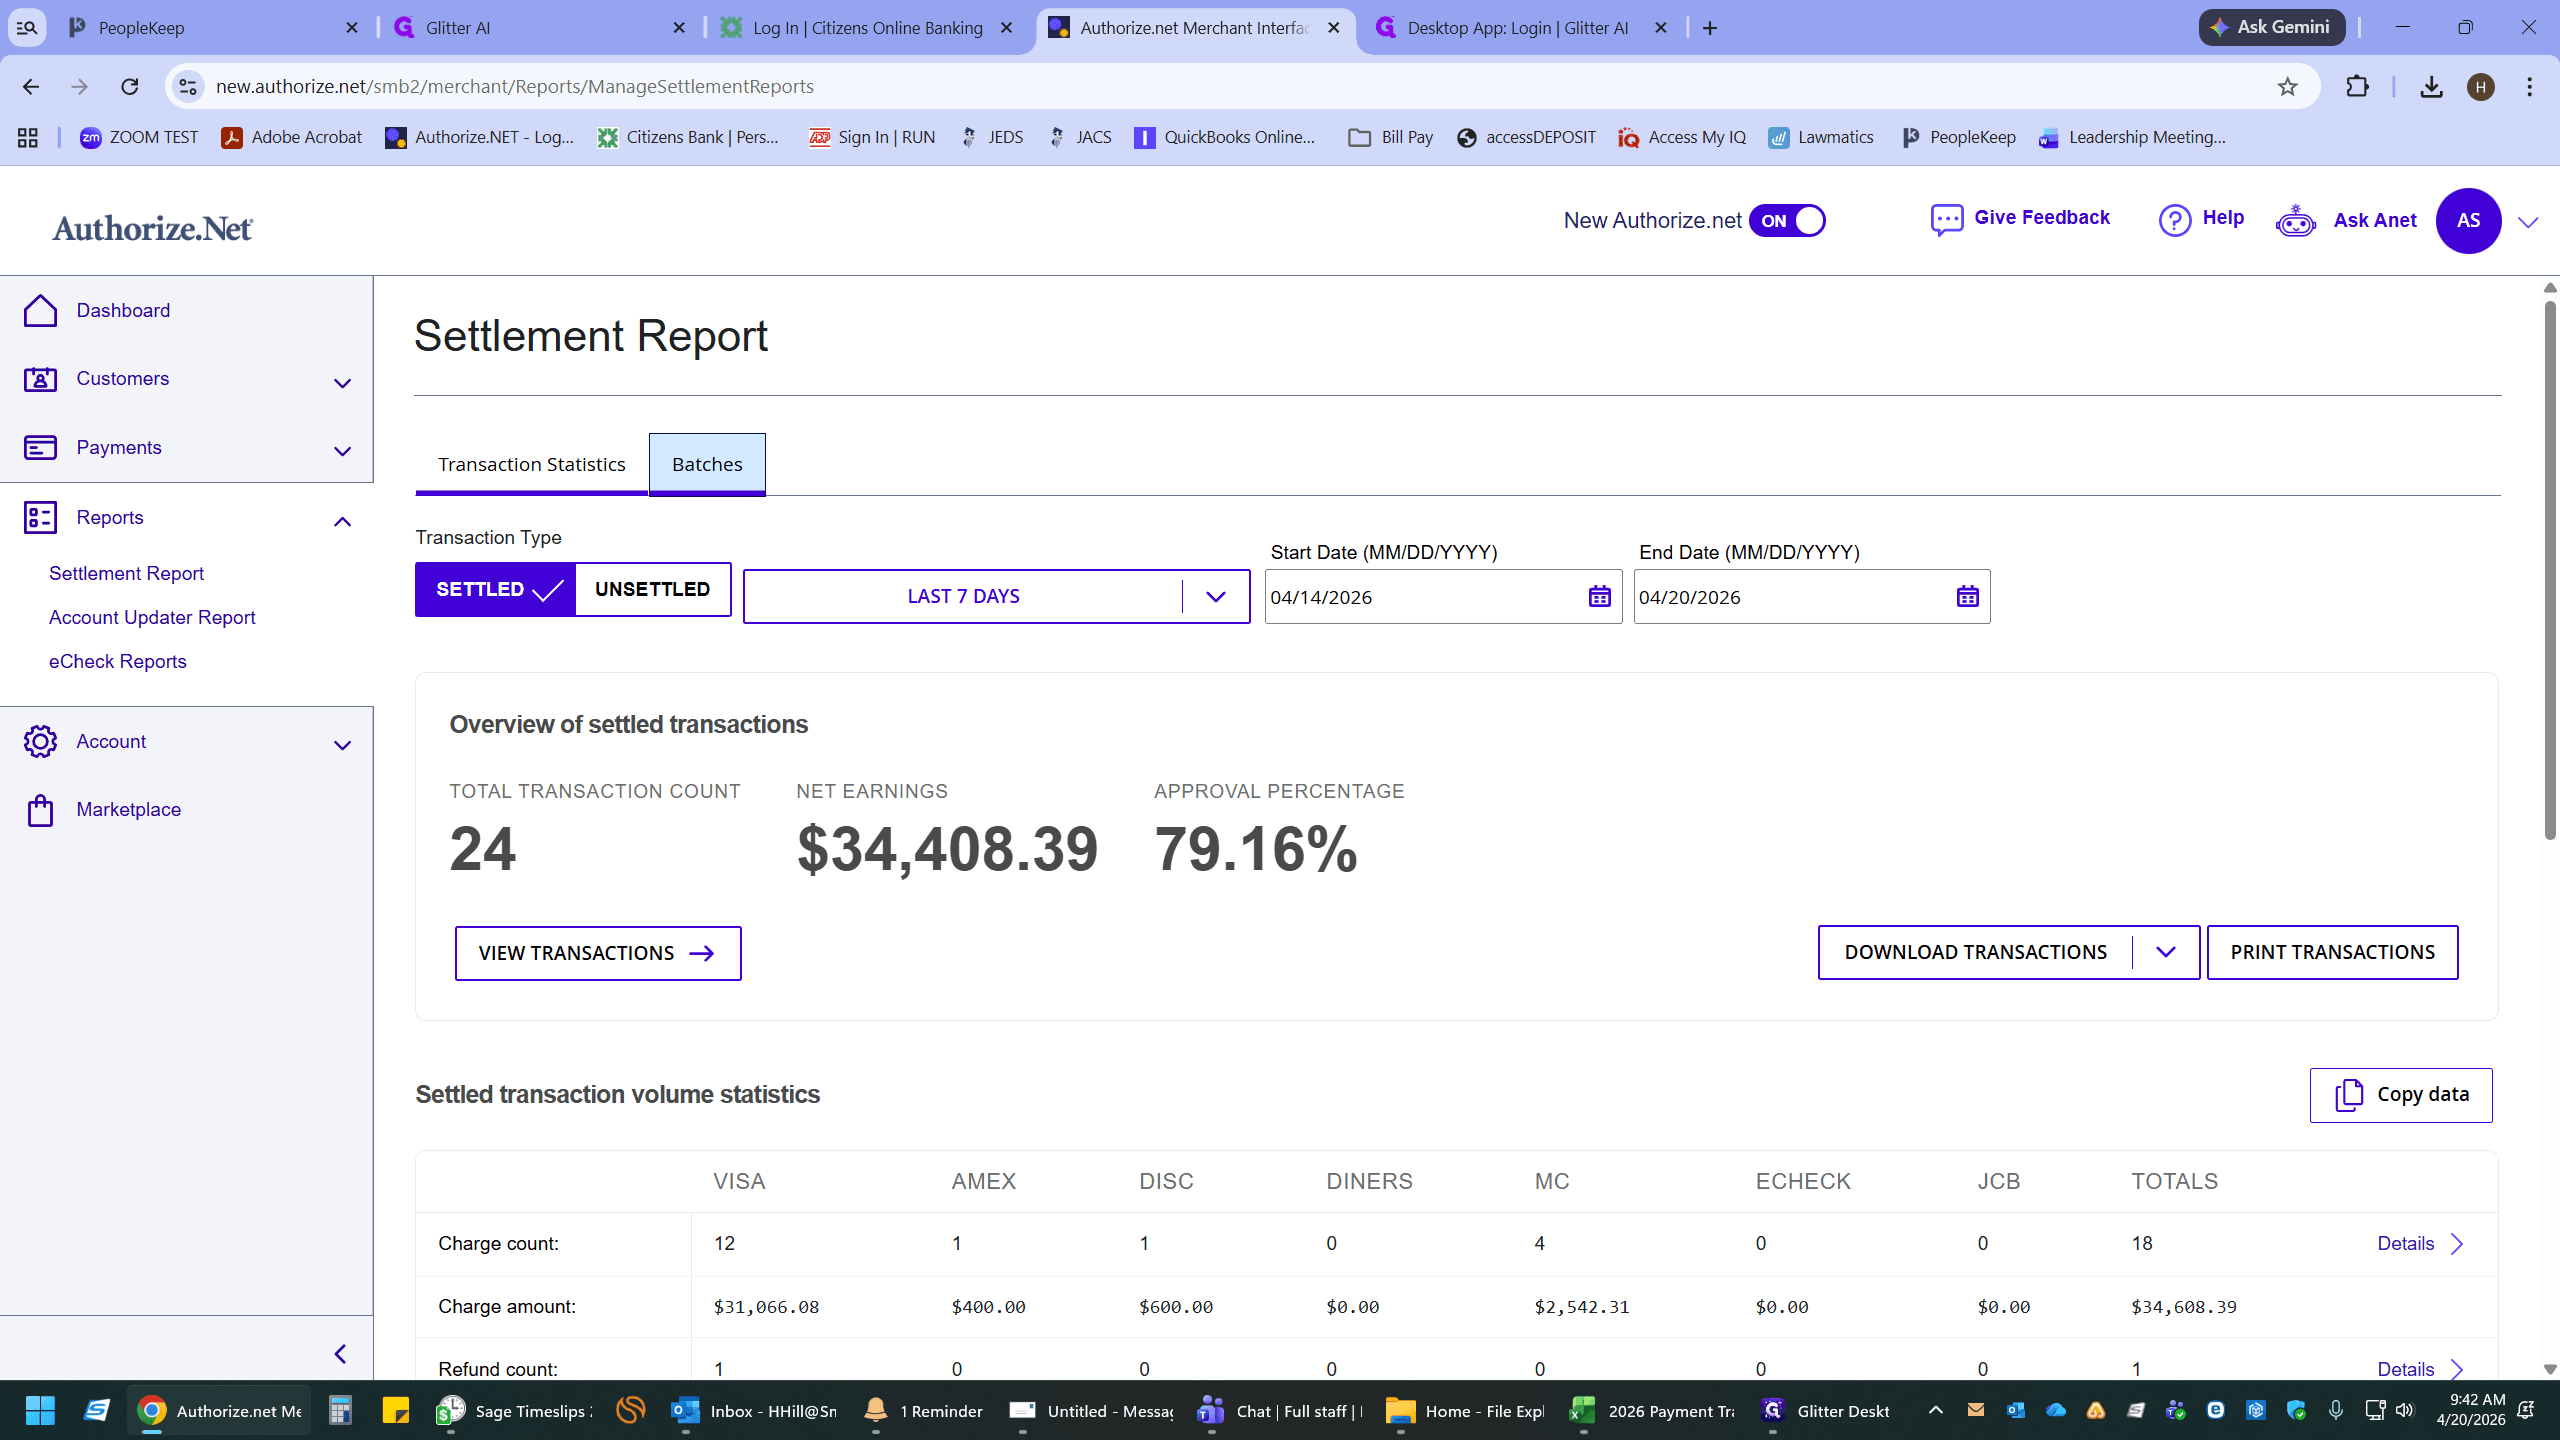
Click on the Batches tab.
3
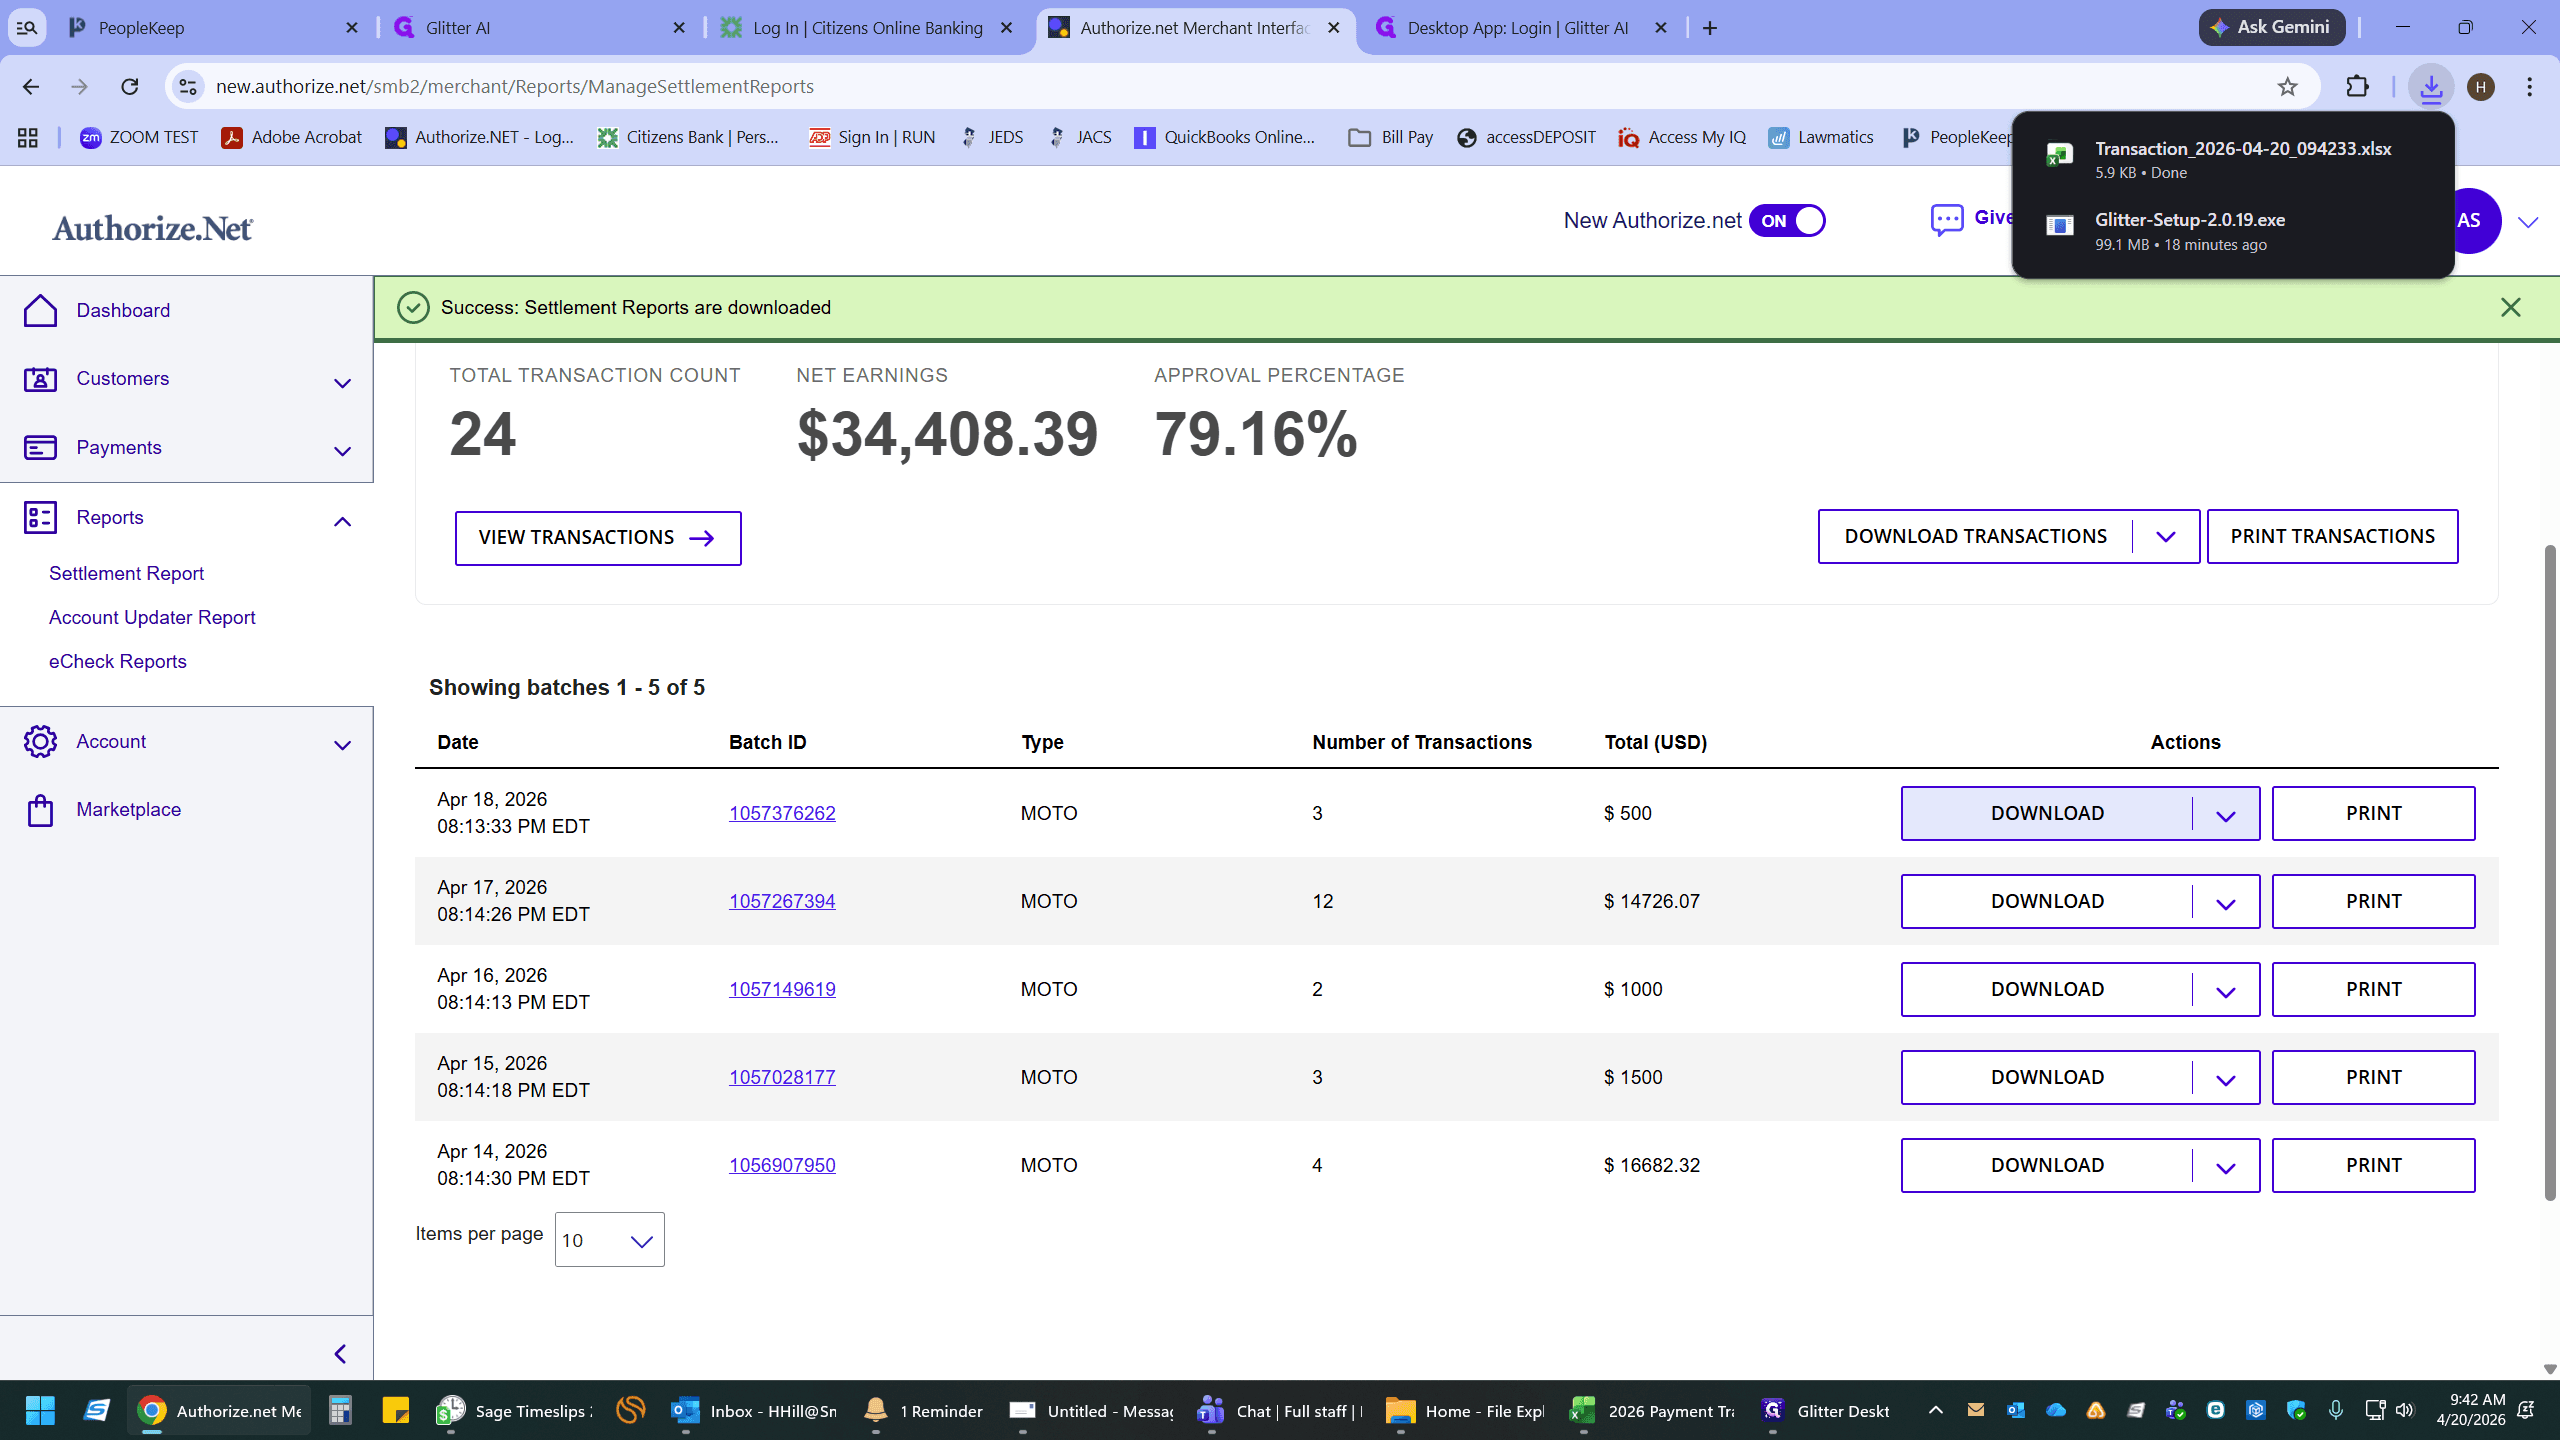
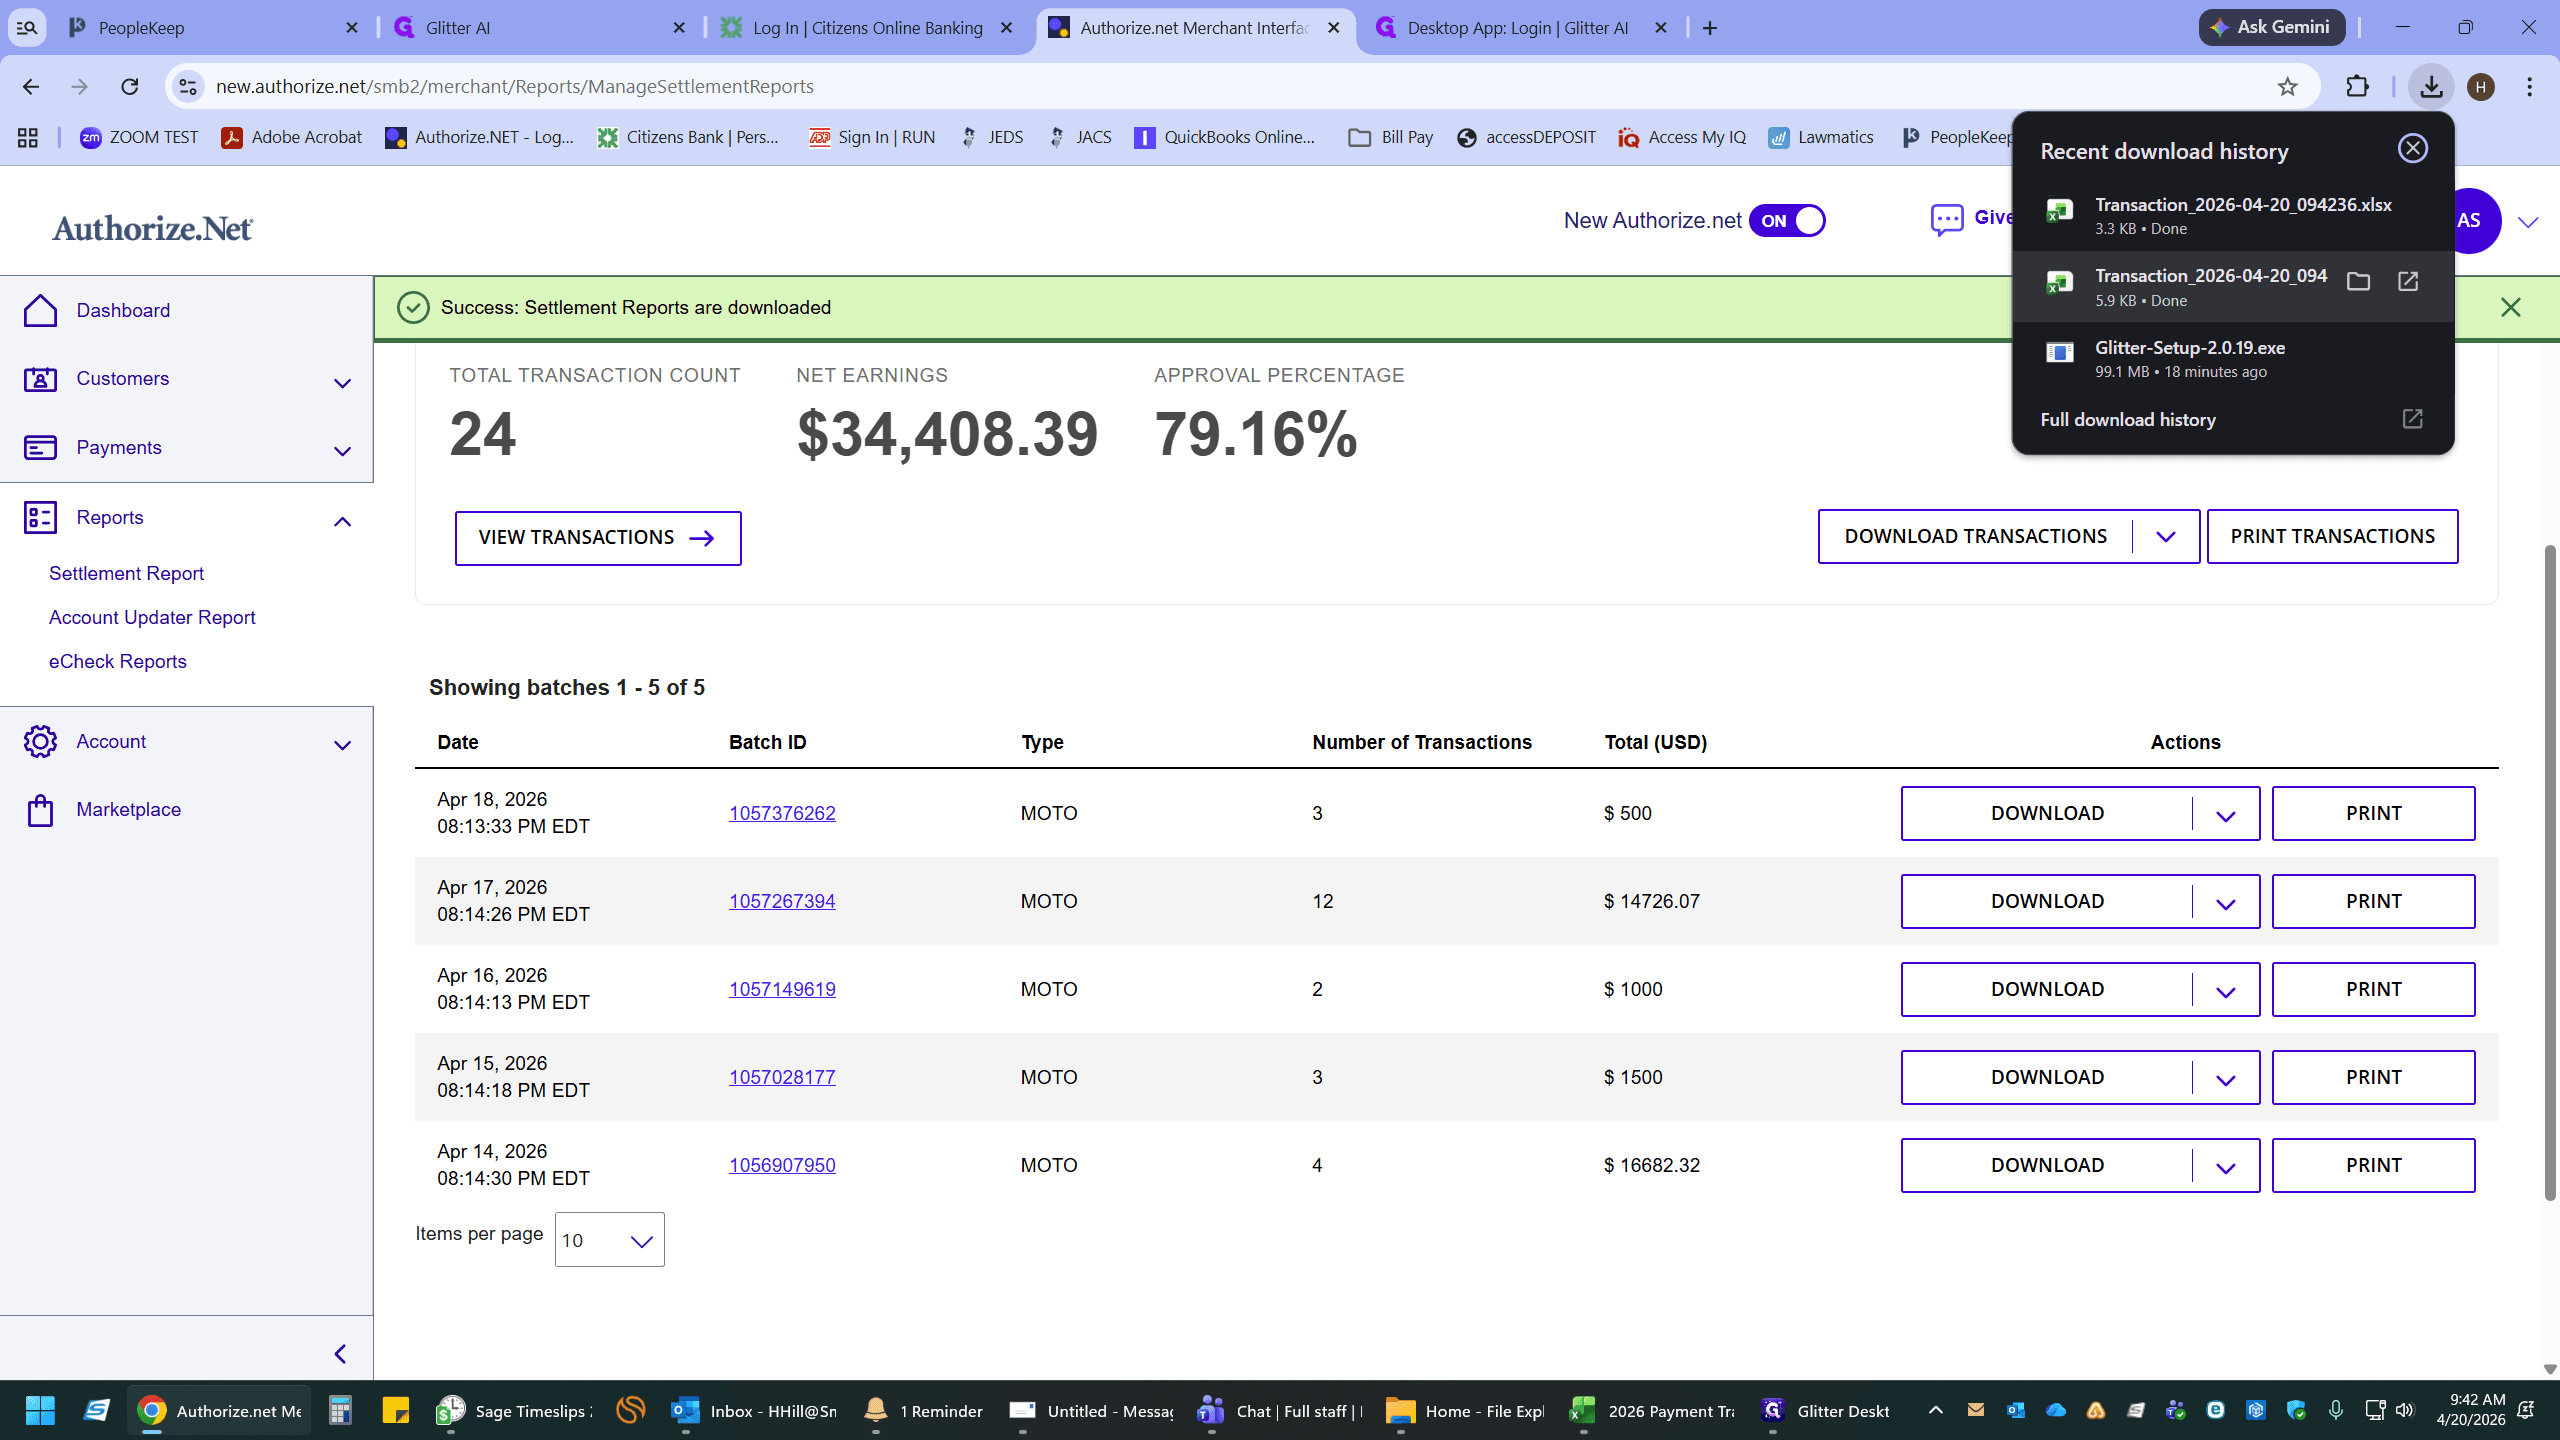
Locate the recent transaction batch you want to reconcile and click the DOWNLOAD button.
4
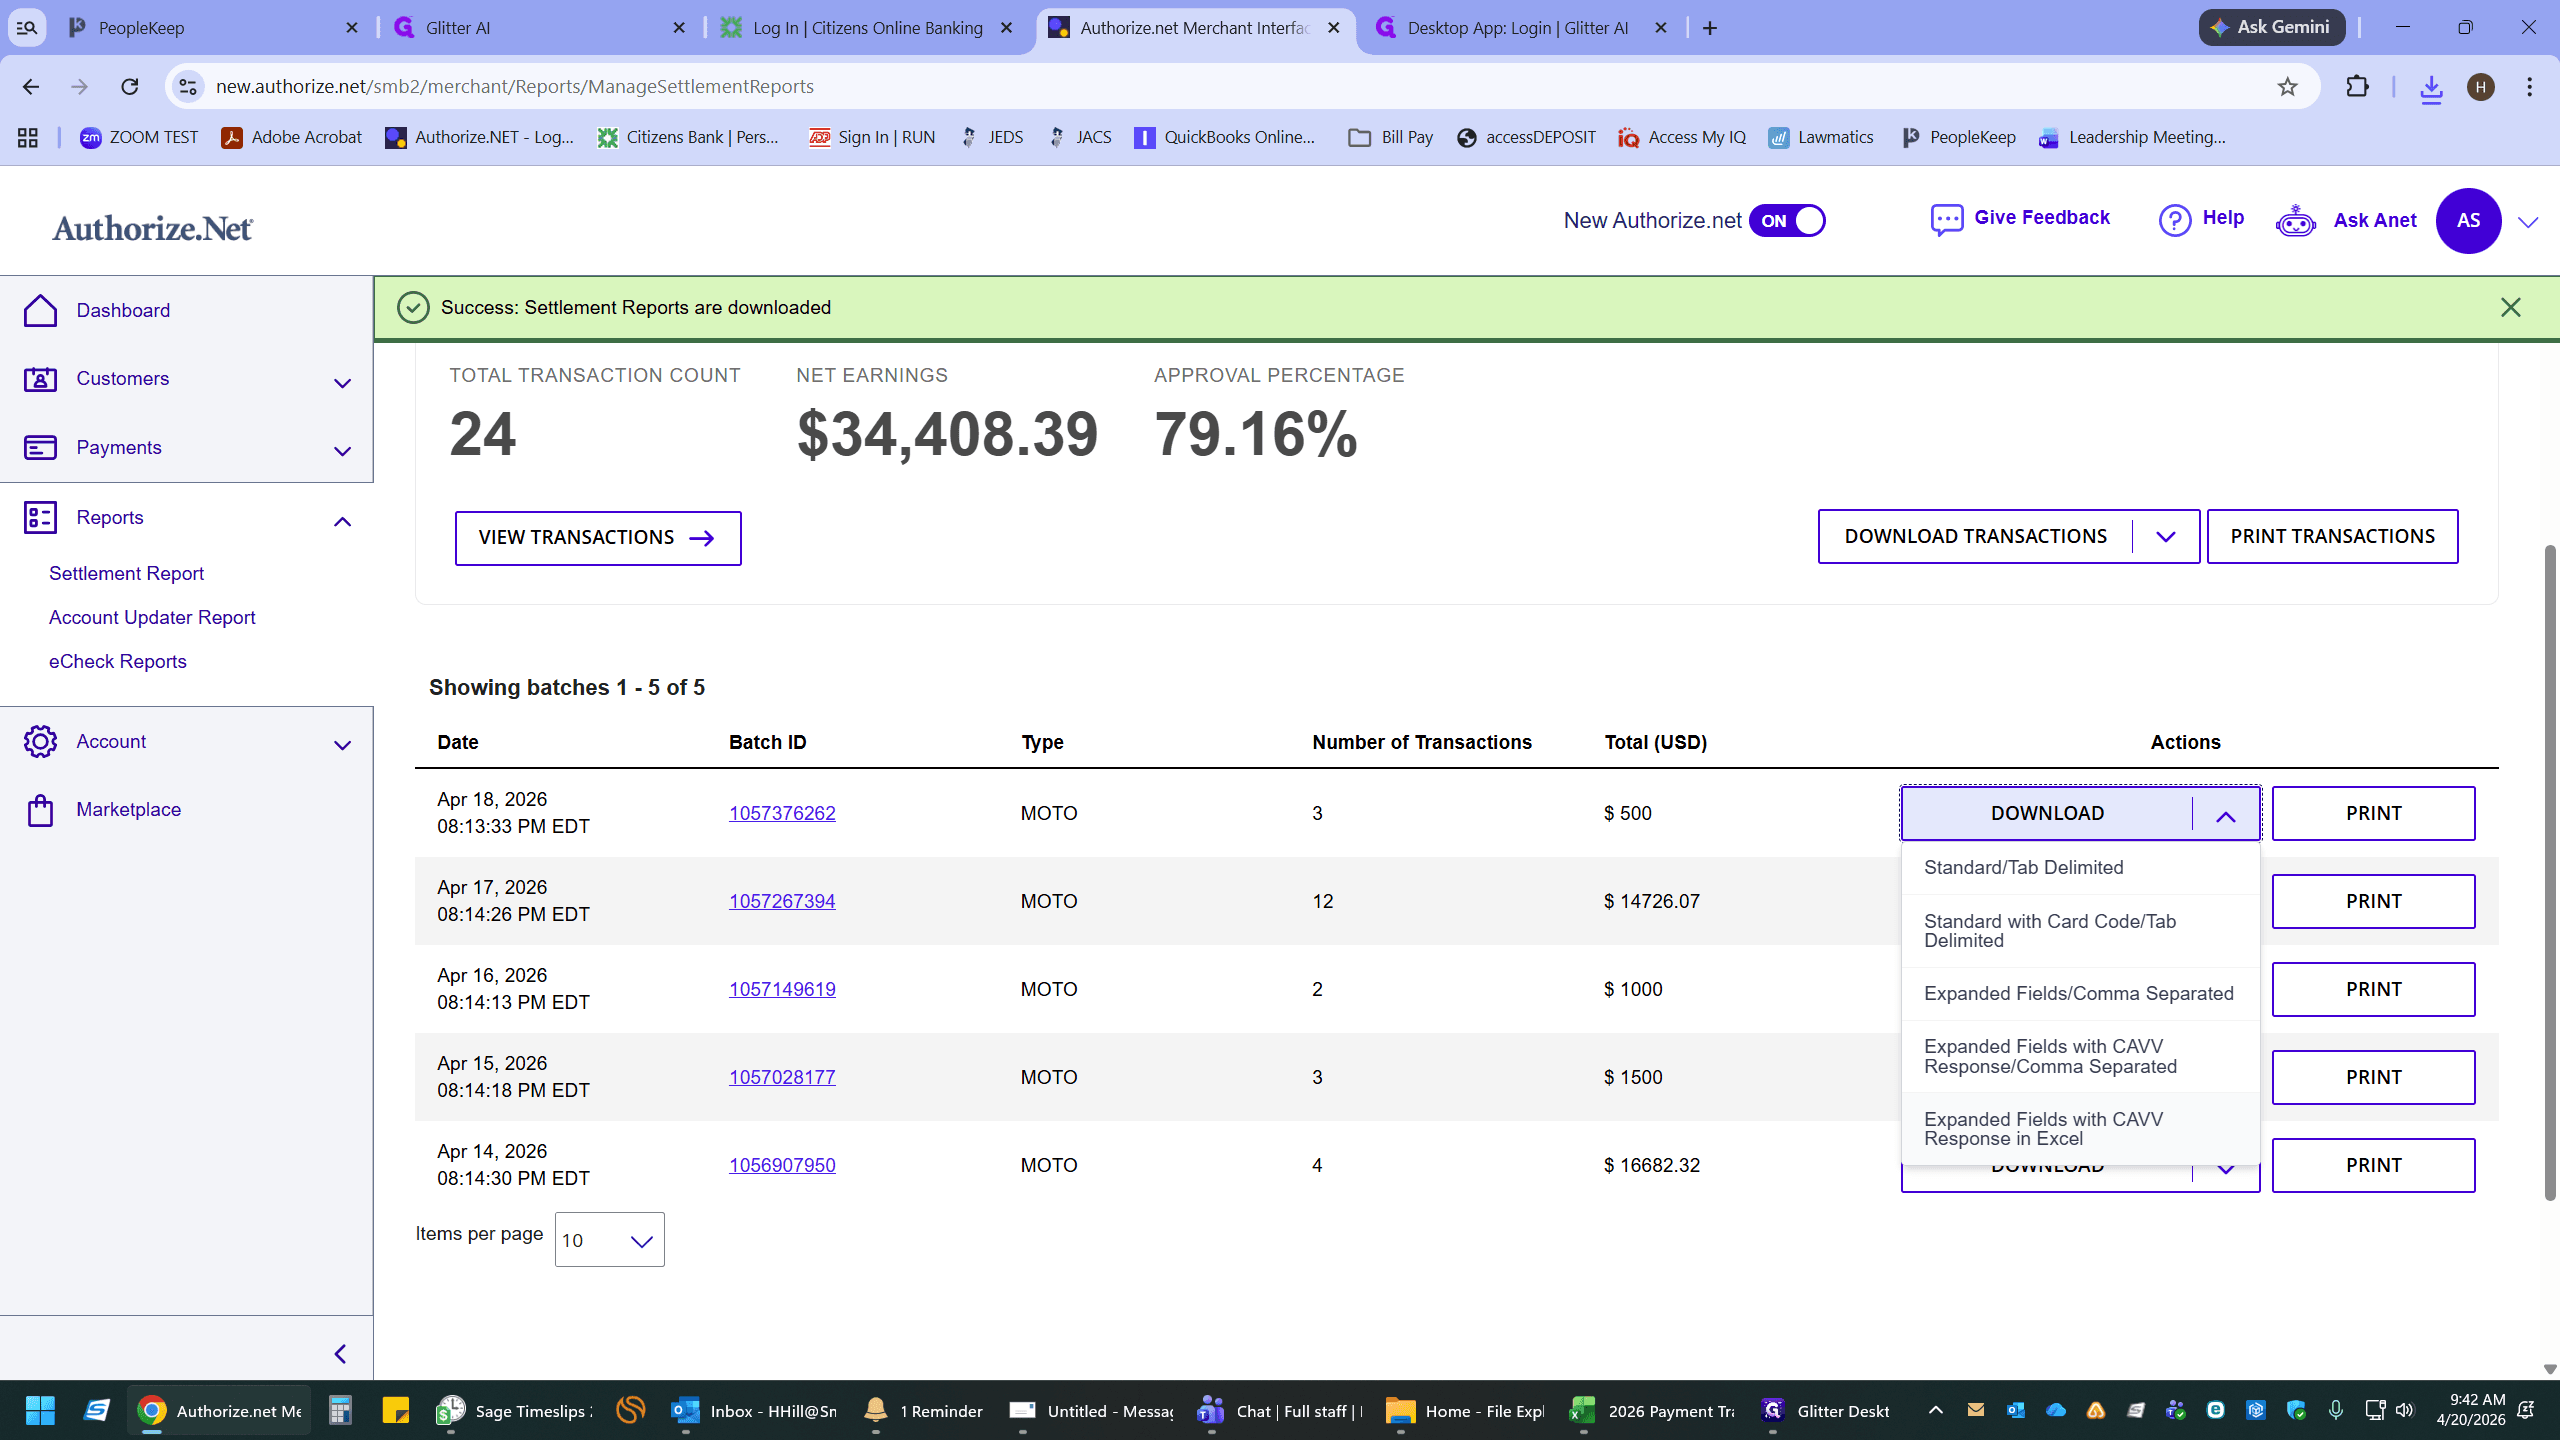
Select Response in Excel from the dropdown menu.
5
Open the downloaded Excel file from your browser's download manager.
6
If prompted by Excel's Protected View, ignore Enable Editing at the top of the spreadsheet. Highlight the relevant transaction data (such as transaction IDs and amounts) and press
Ctrl + C to copy.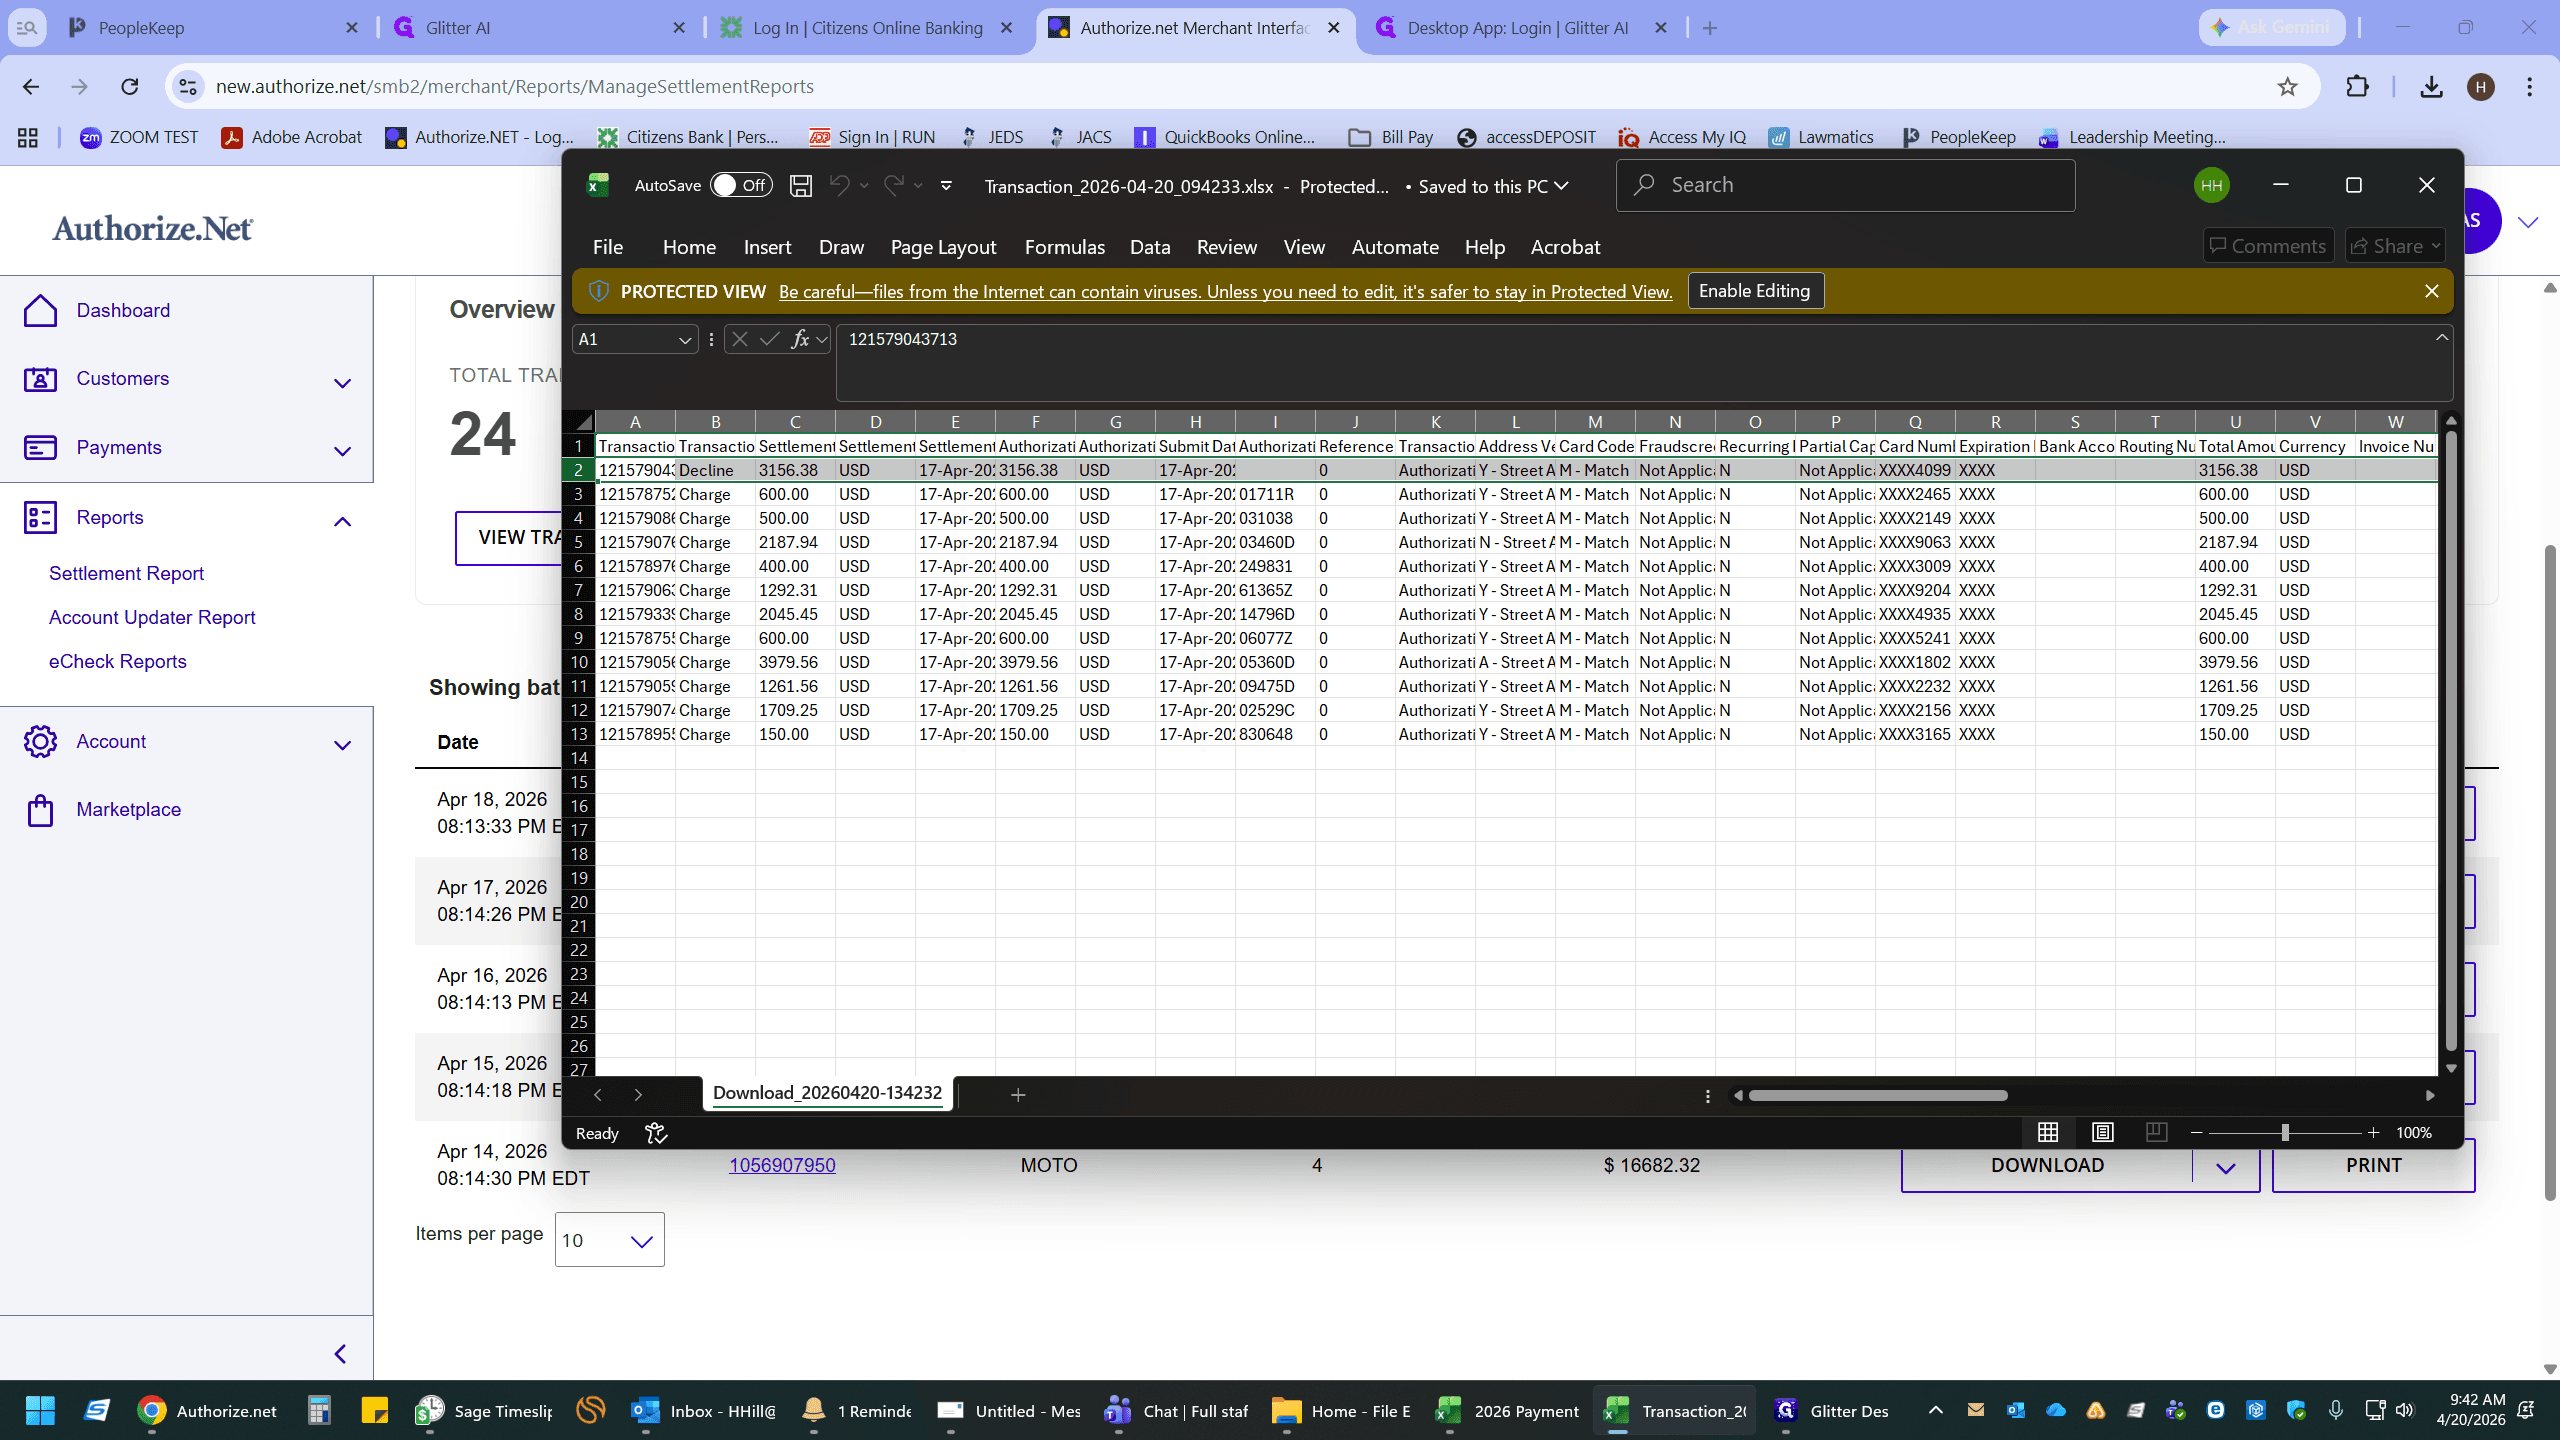
2. Update Your Excel Payment Tracker
7
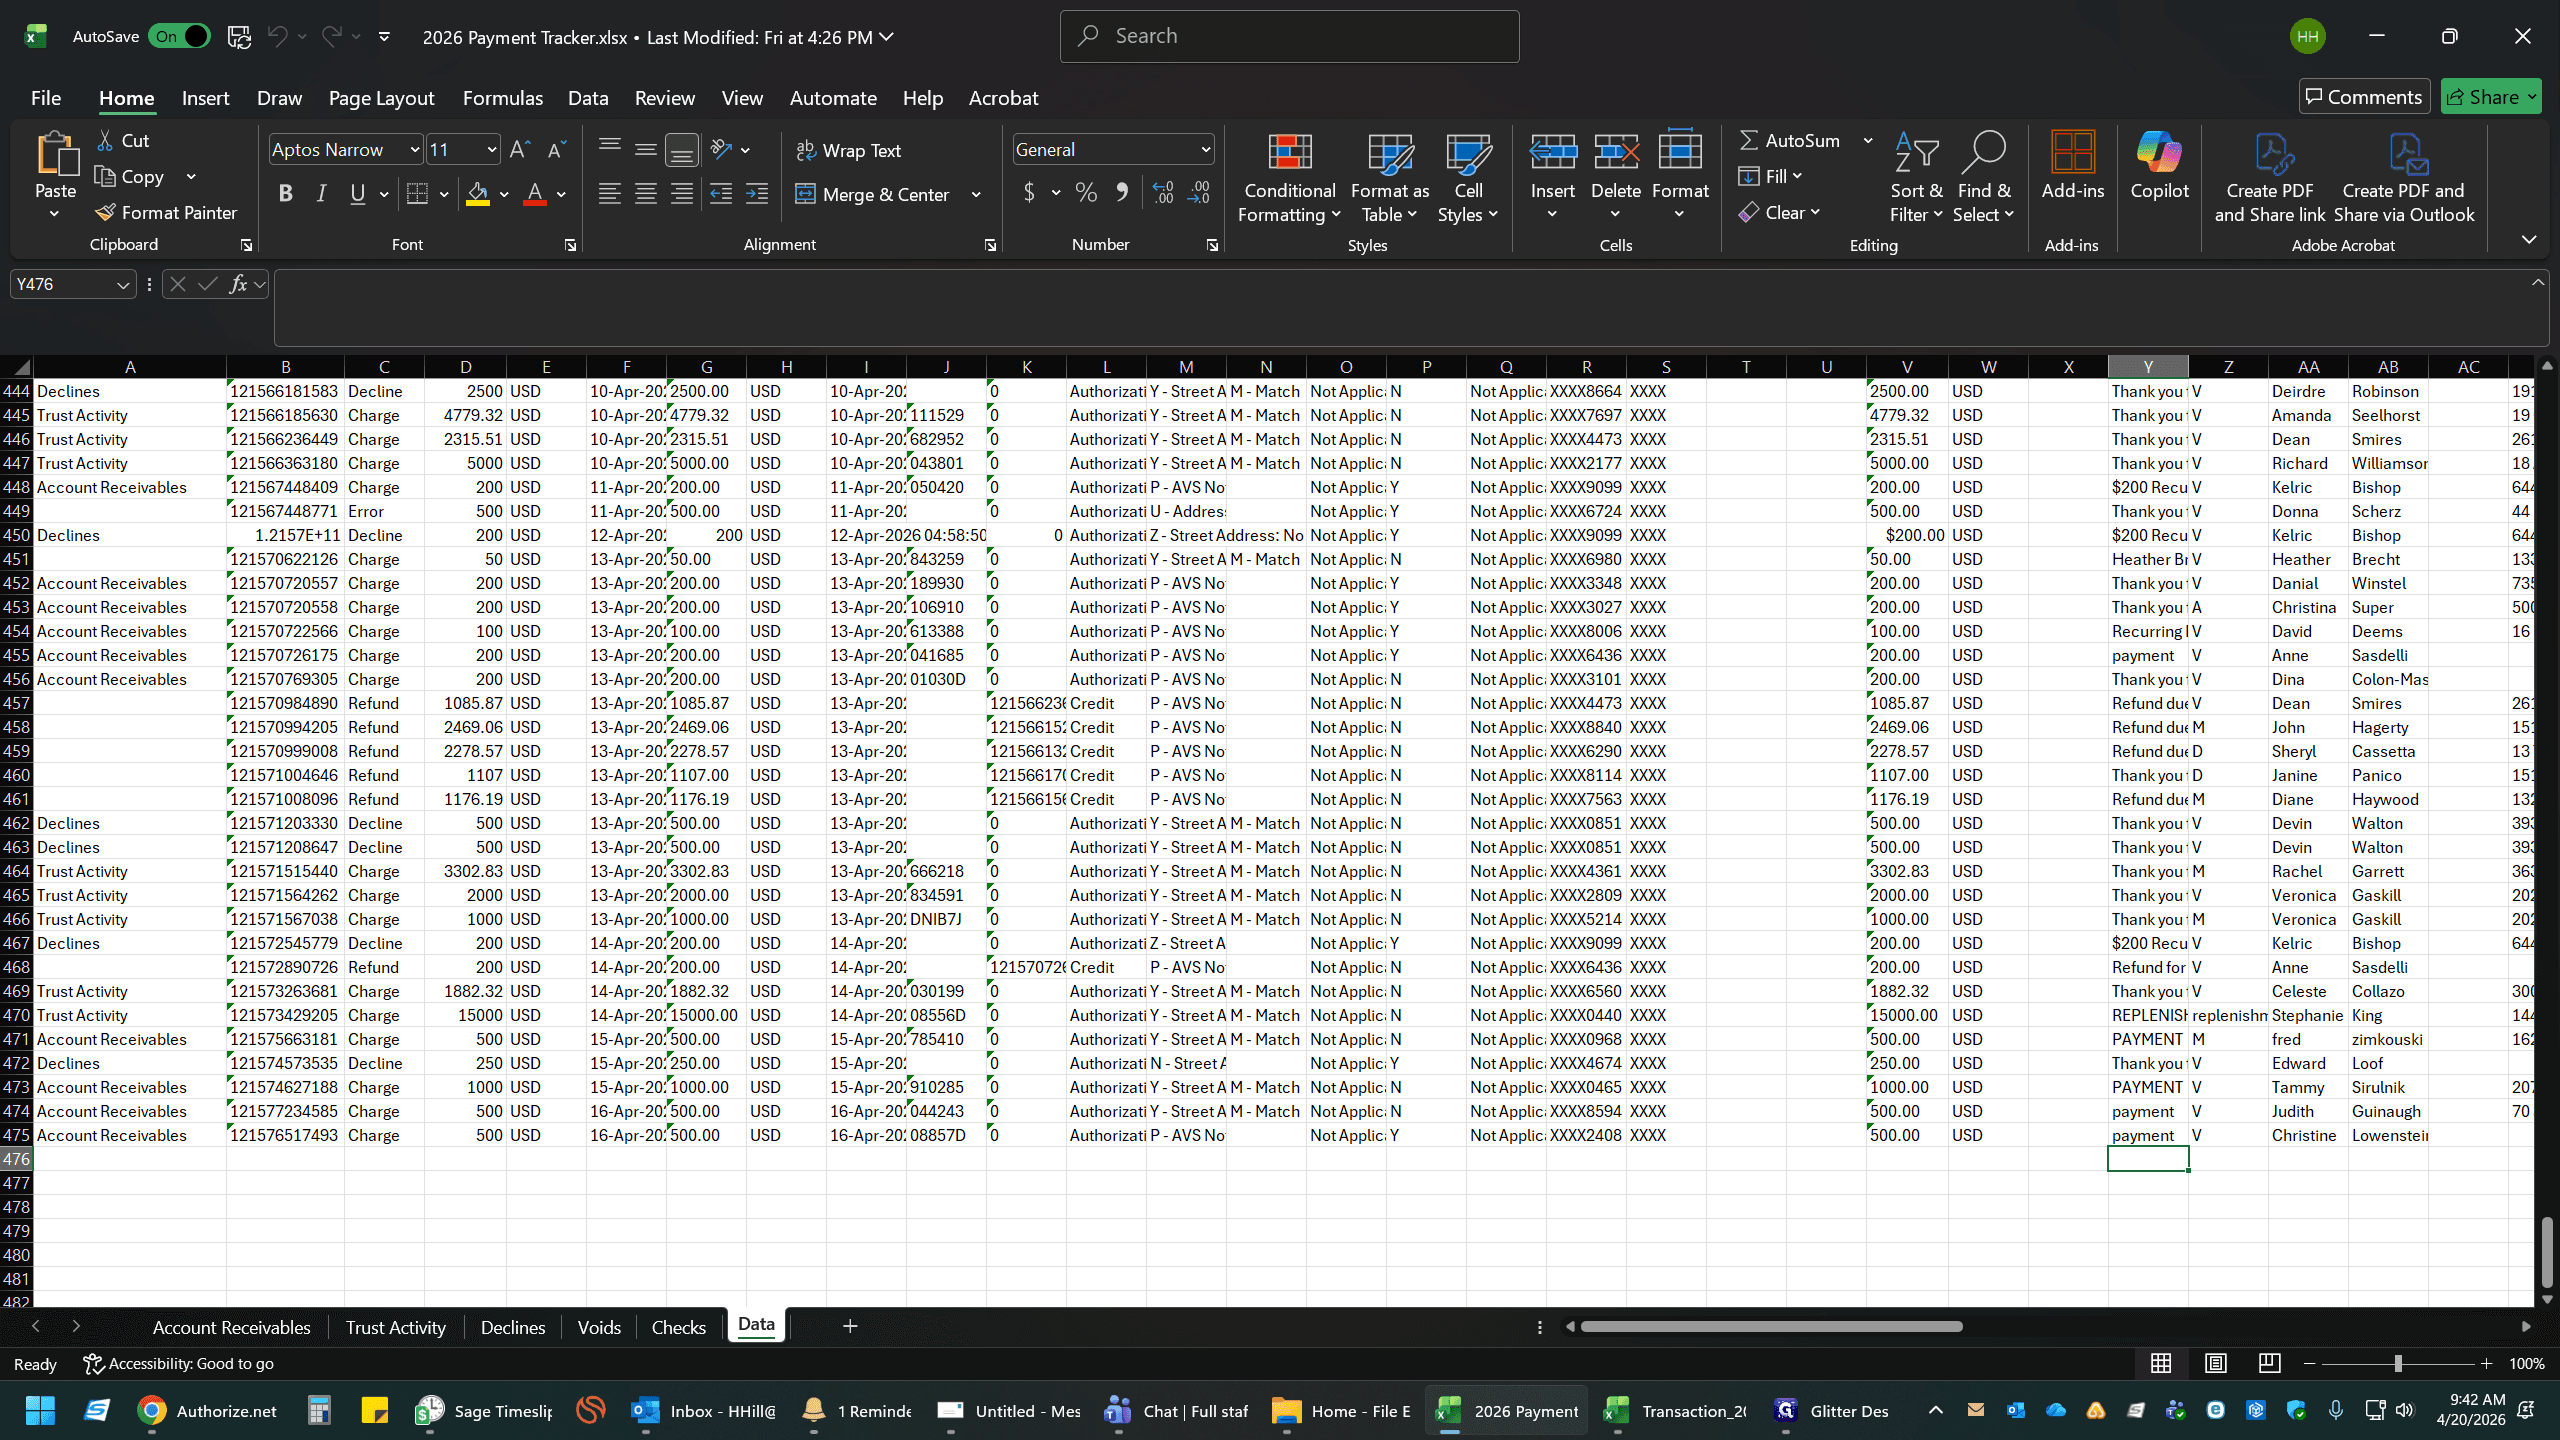
Open your main Payment Tracker spreadsheet and navigate to your Data tab.
8
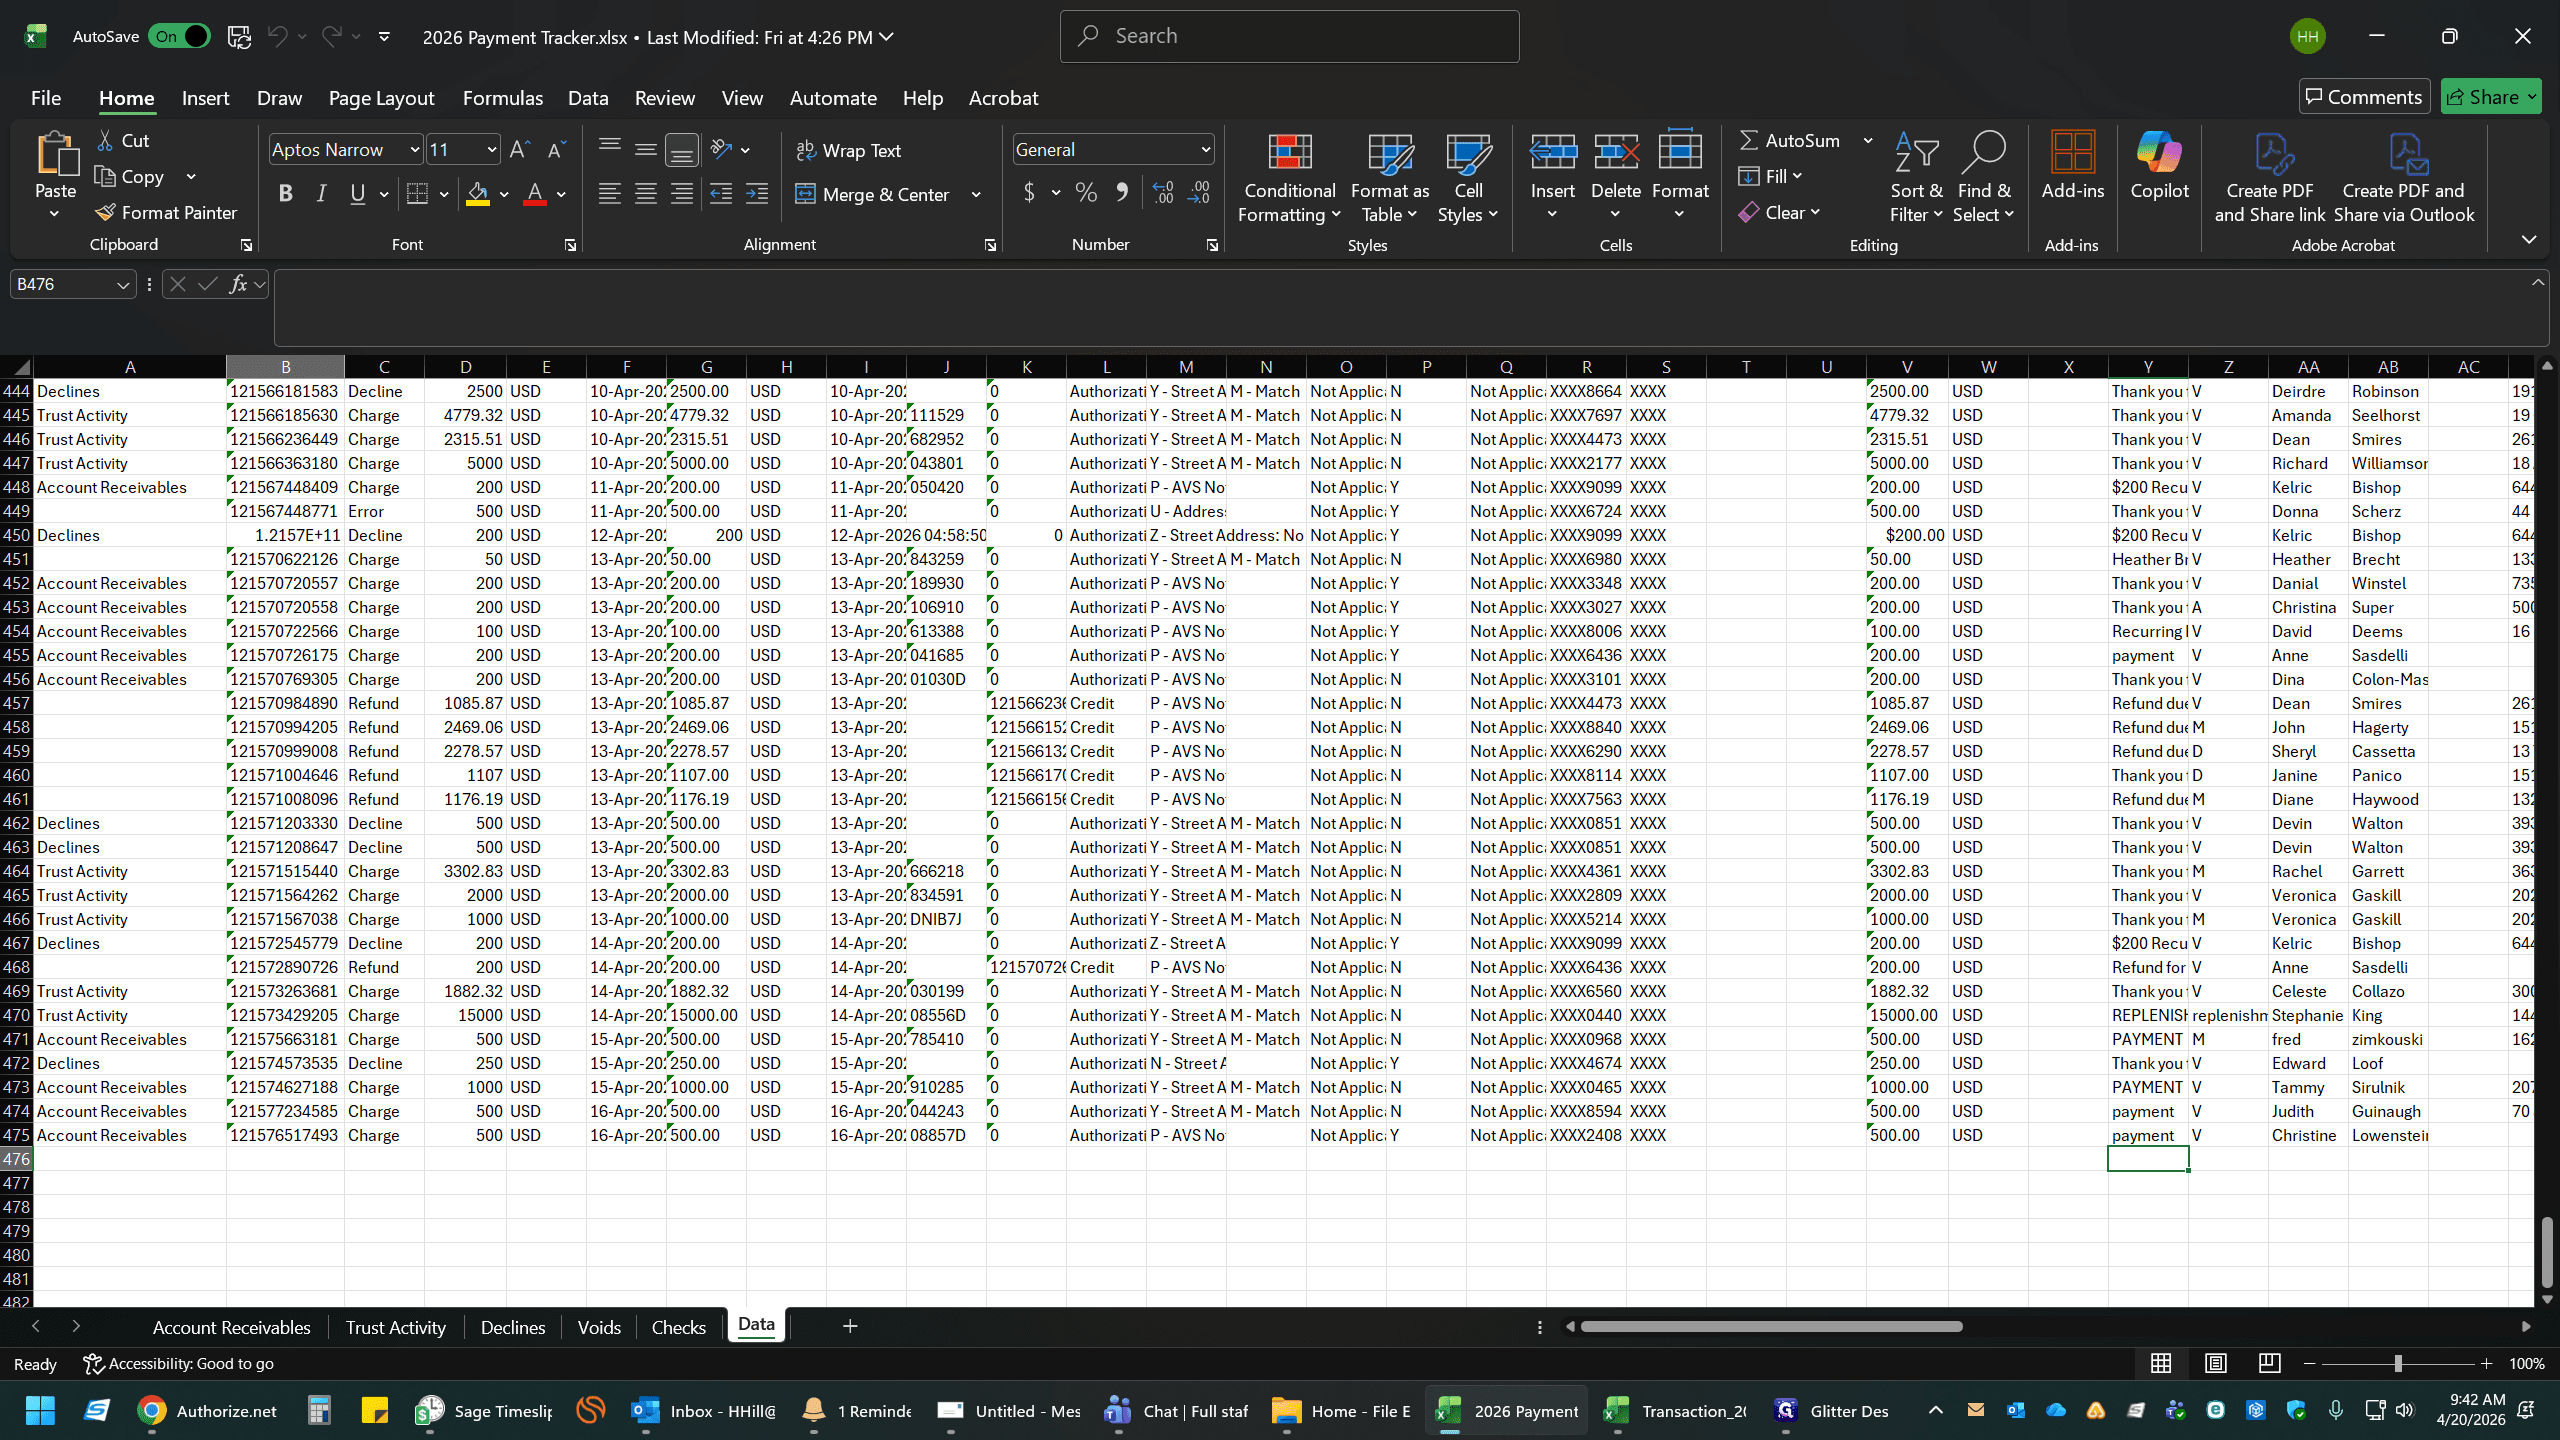
Select the first empty row at the bottom of your data table.
9
Press
Ctrl + V to paste the transaction data.10
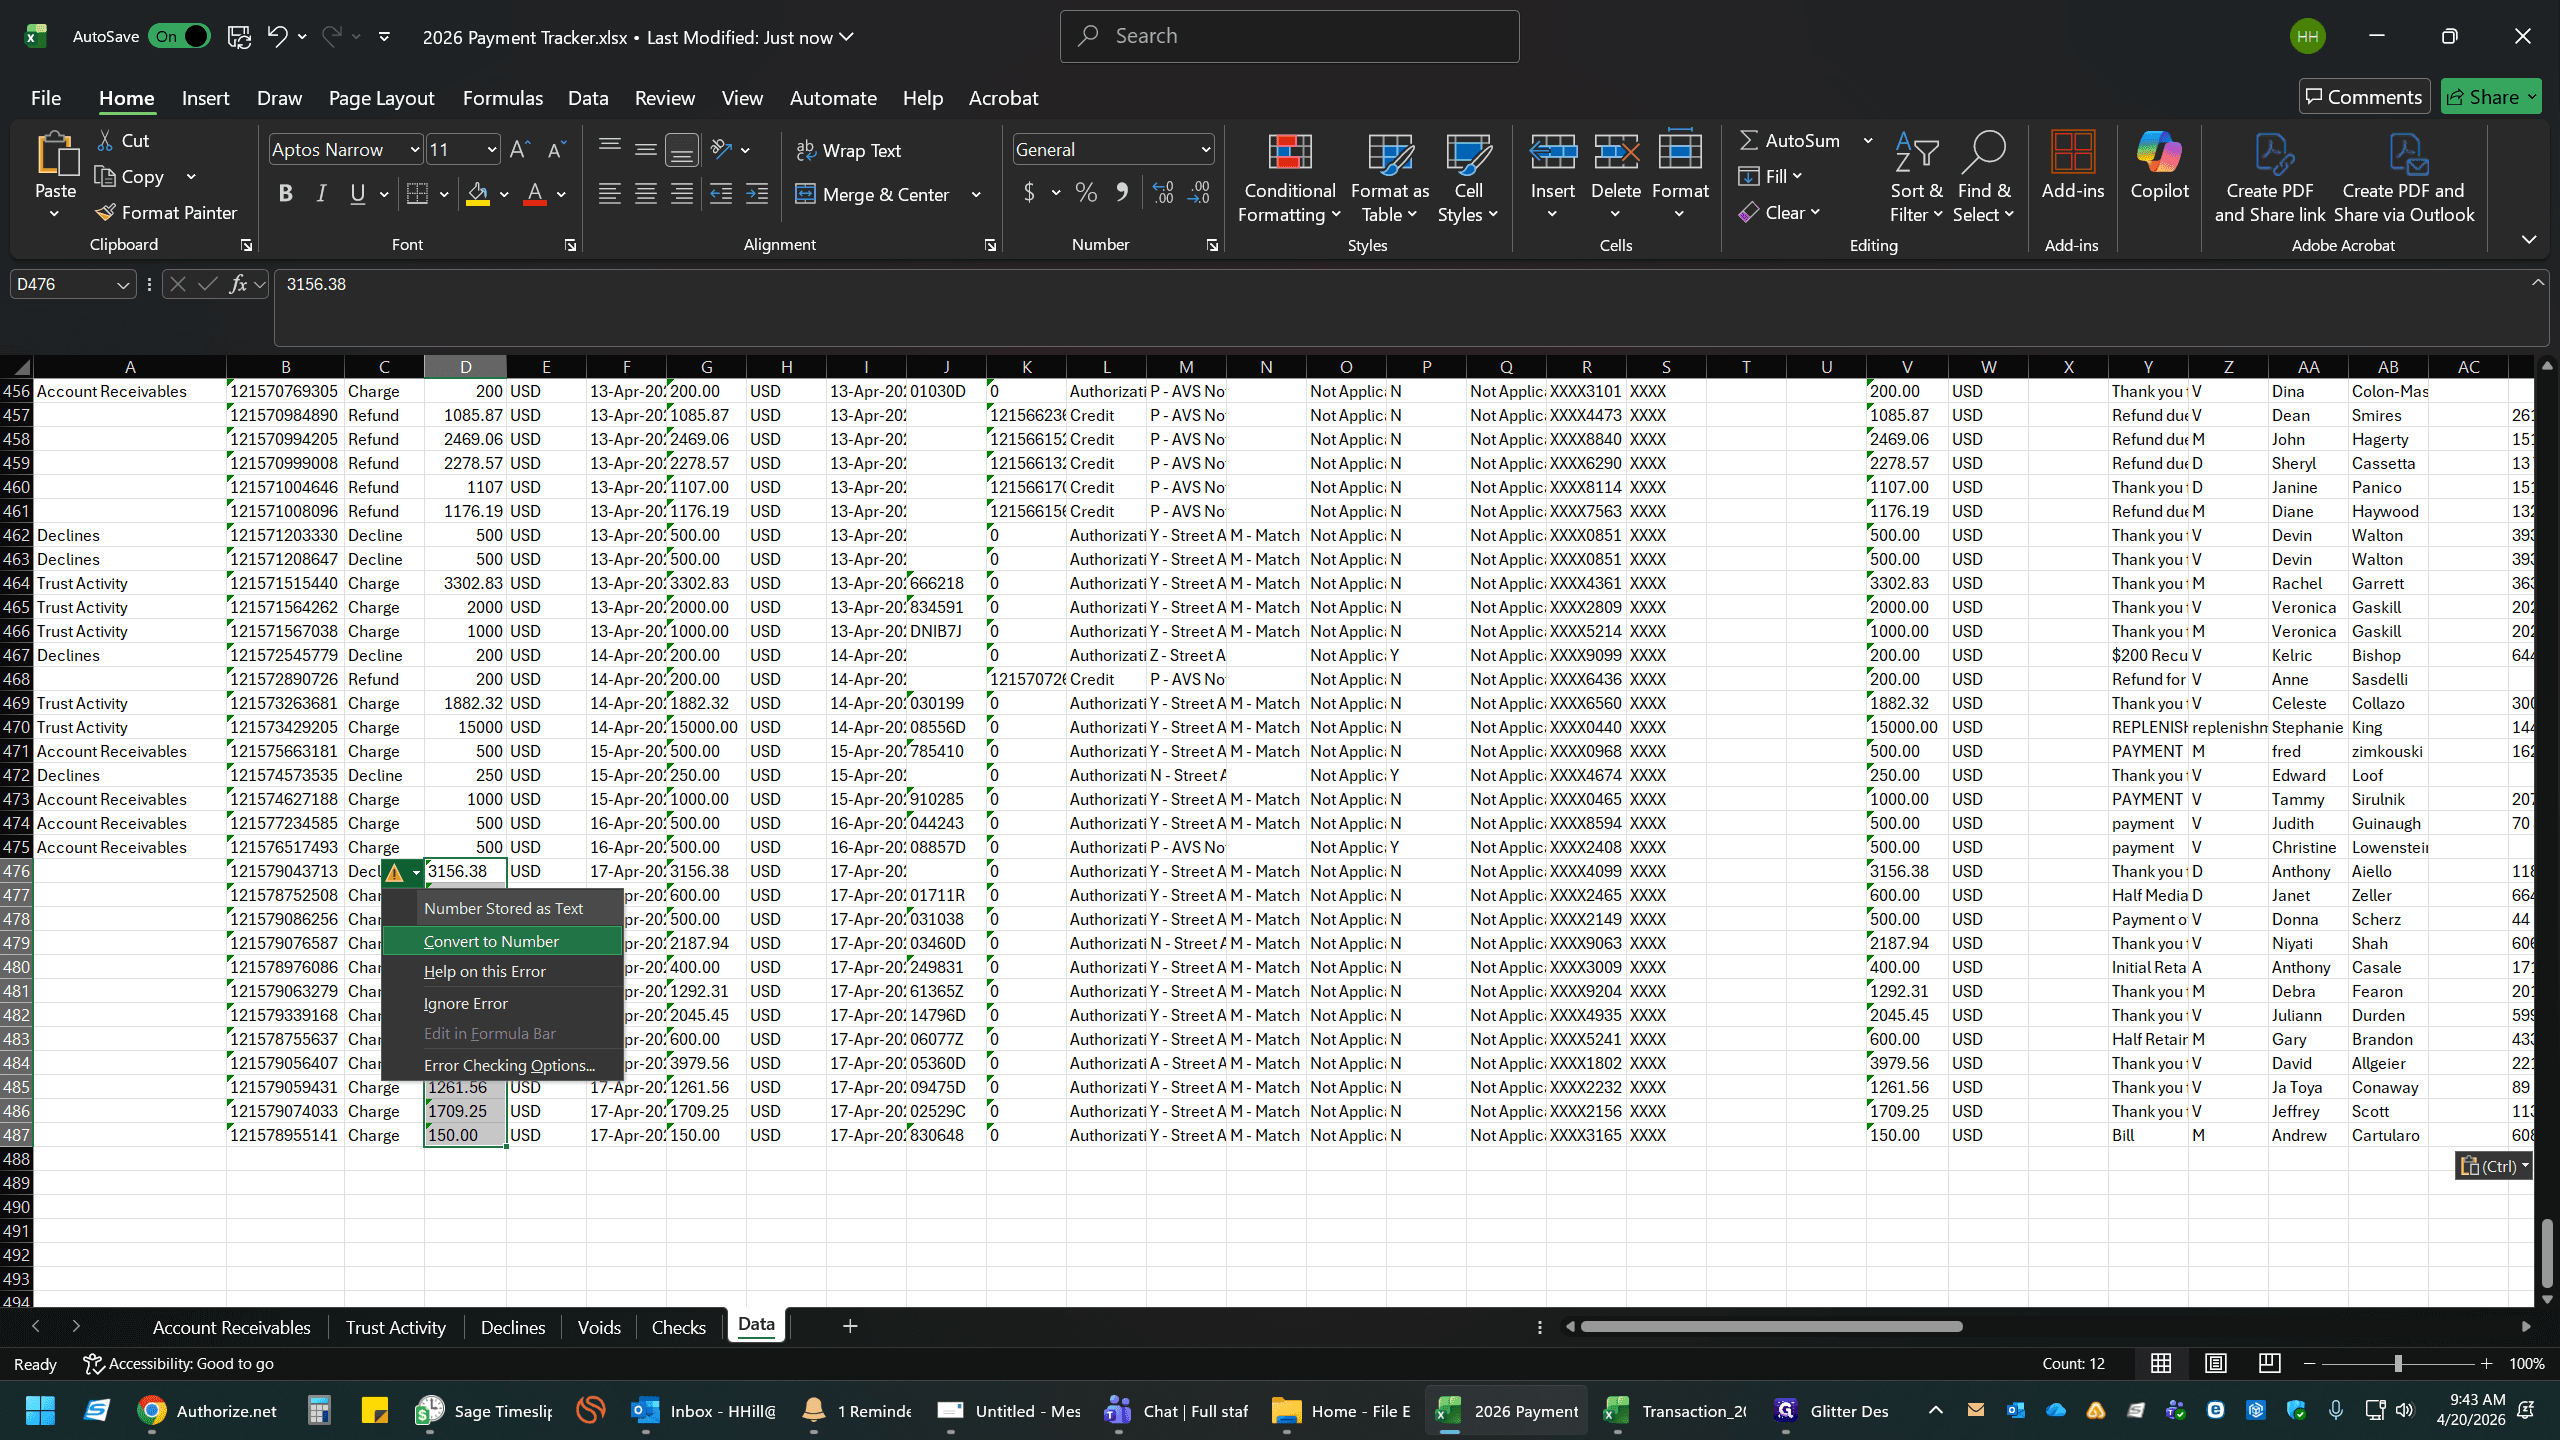
If you see a green error indicator indicating a number stored as text, click the yellow warning icon and select Convert to Number.
11
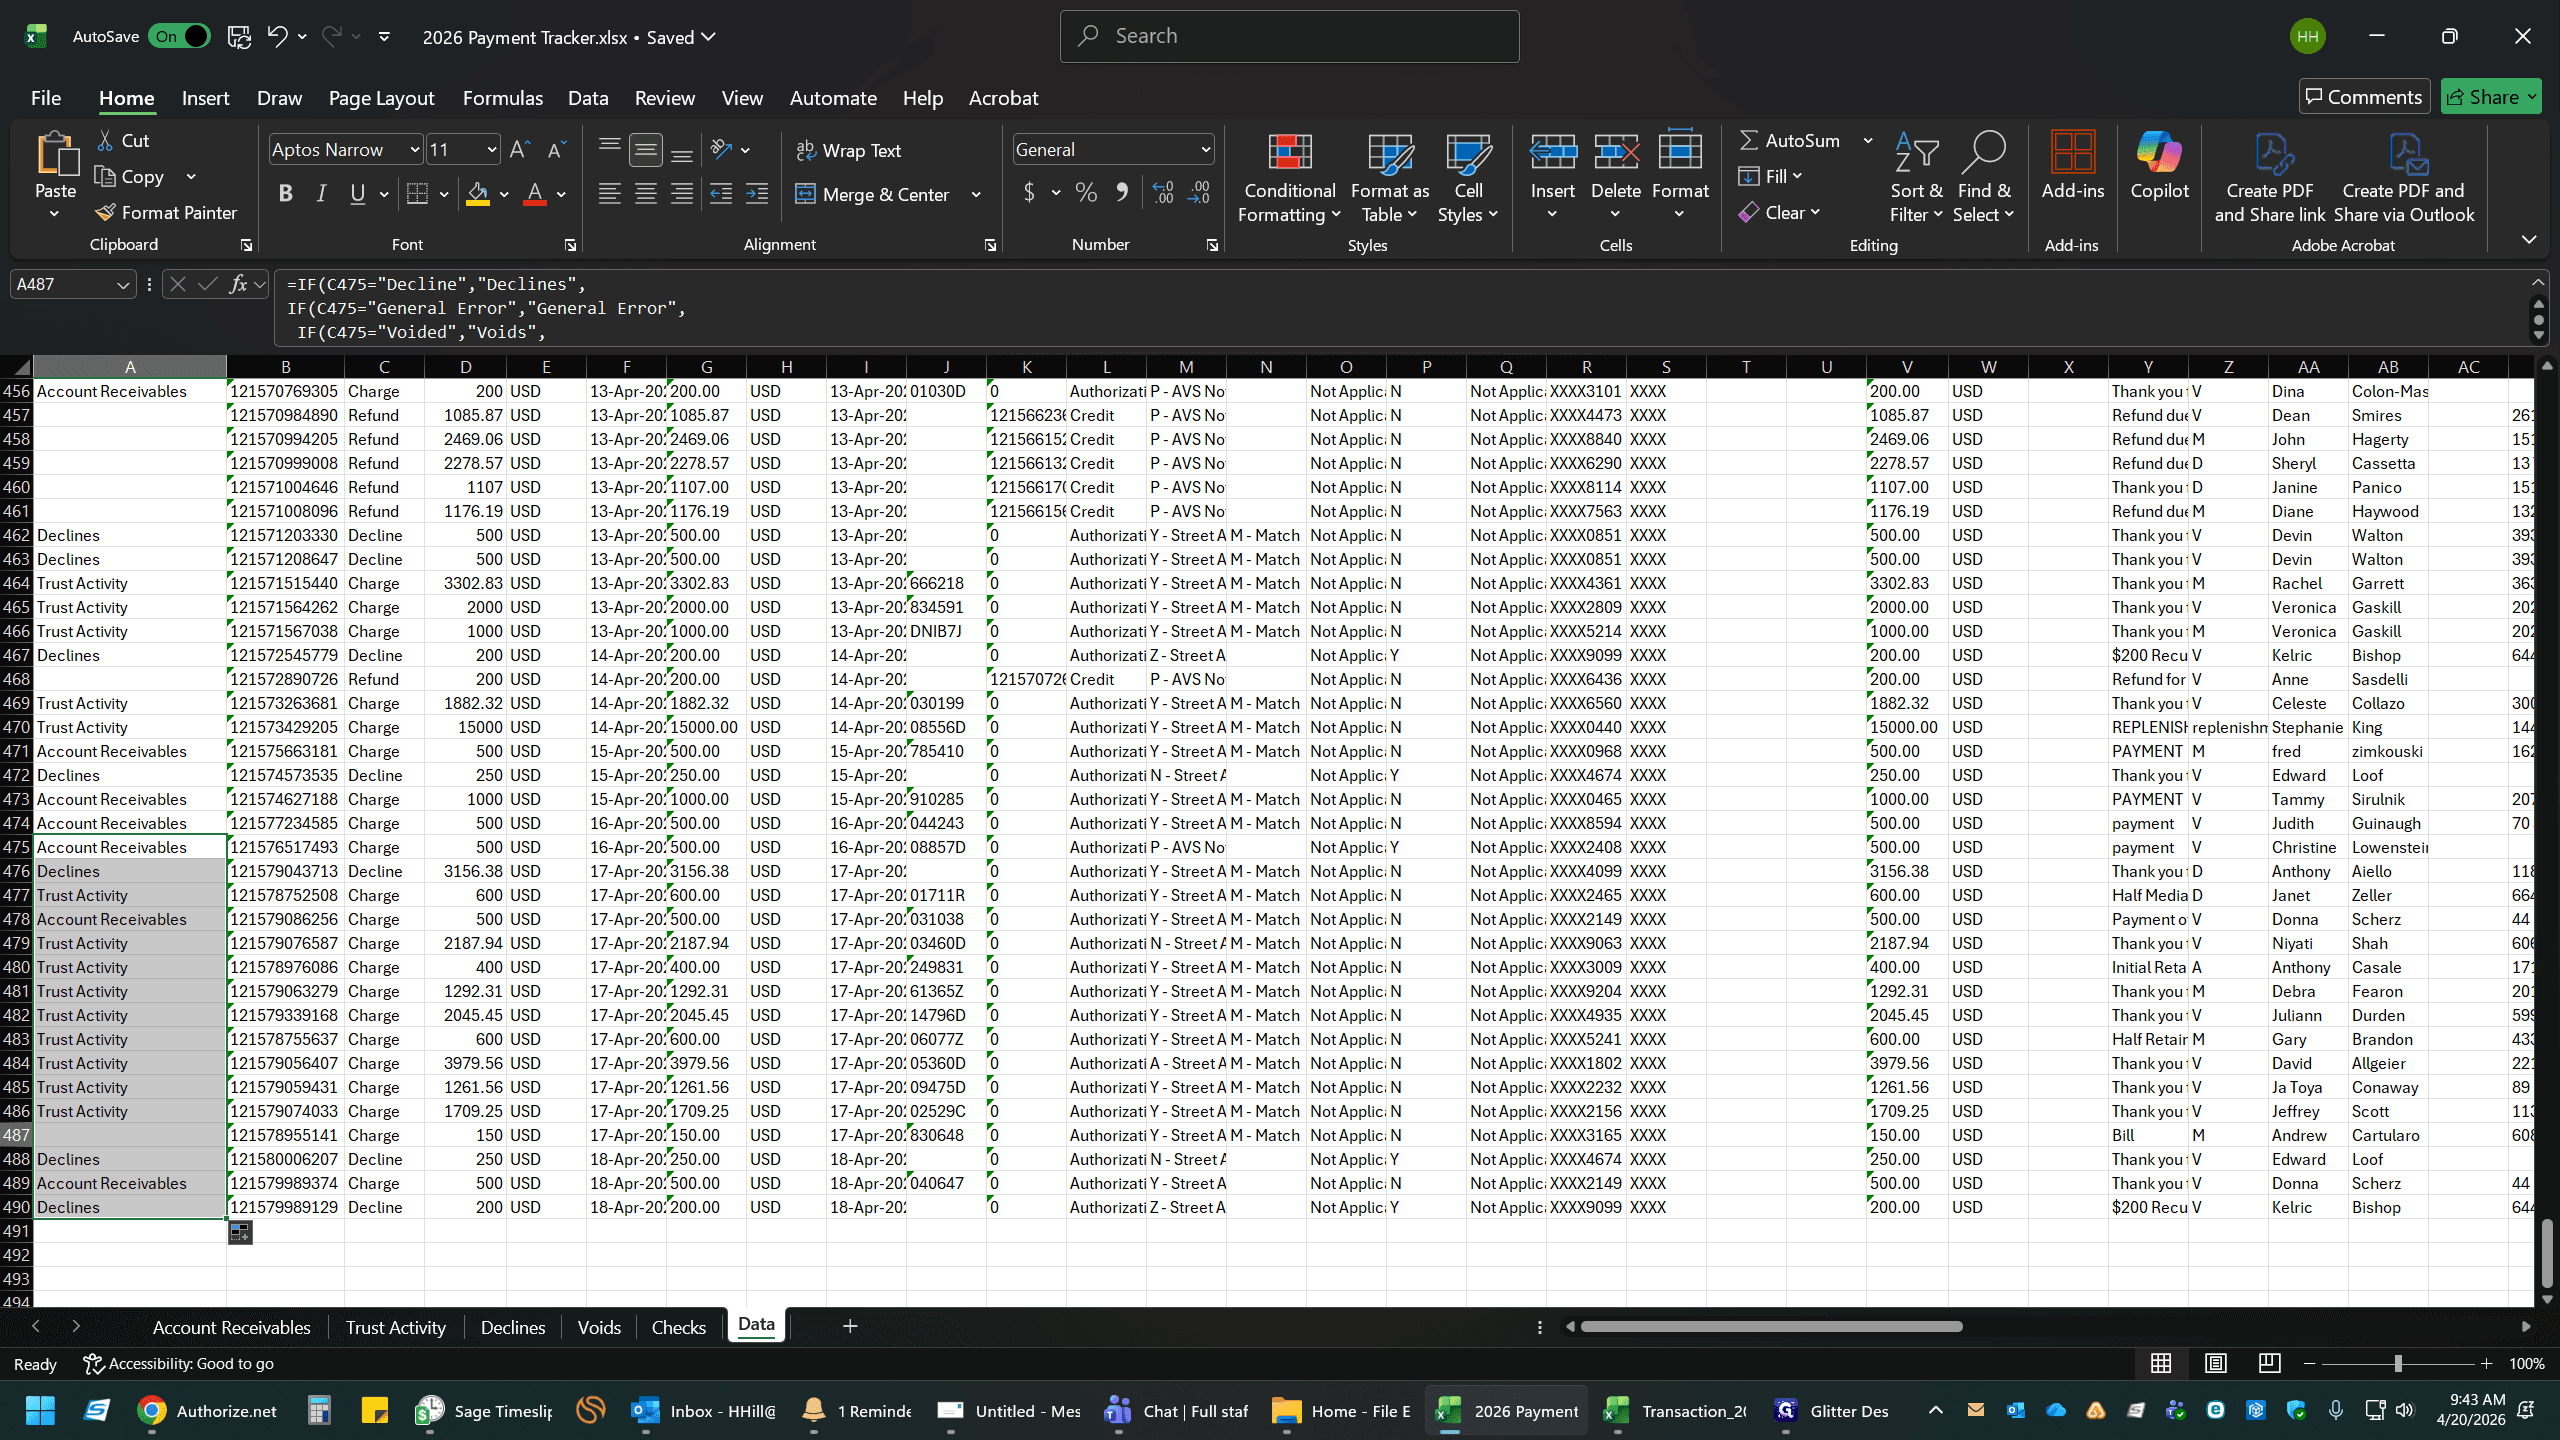
Click and drag the formula in Column A to populate categories. If blank, like in Row 487 below, update the corresponding cell in Column X to populate (use payment if Accounts Receivable or replenishment if Trust Activity).
3. Reconcile with Bank Deposits
12
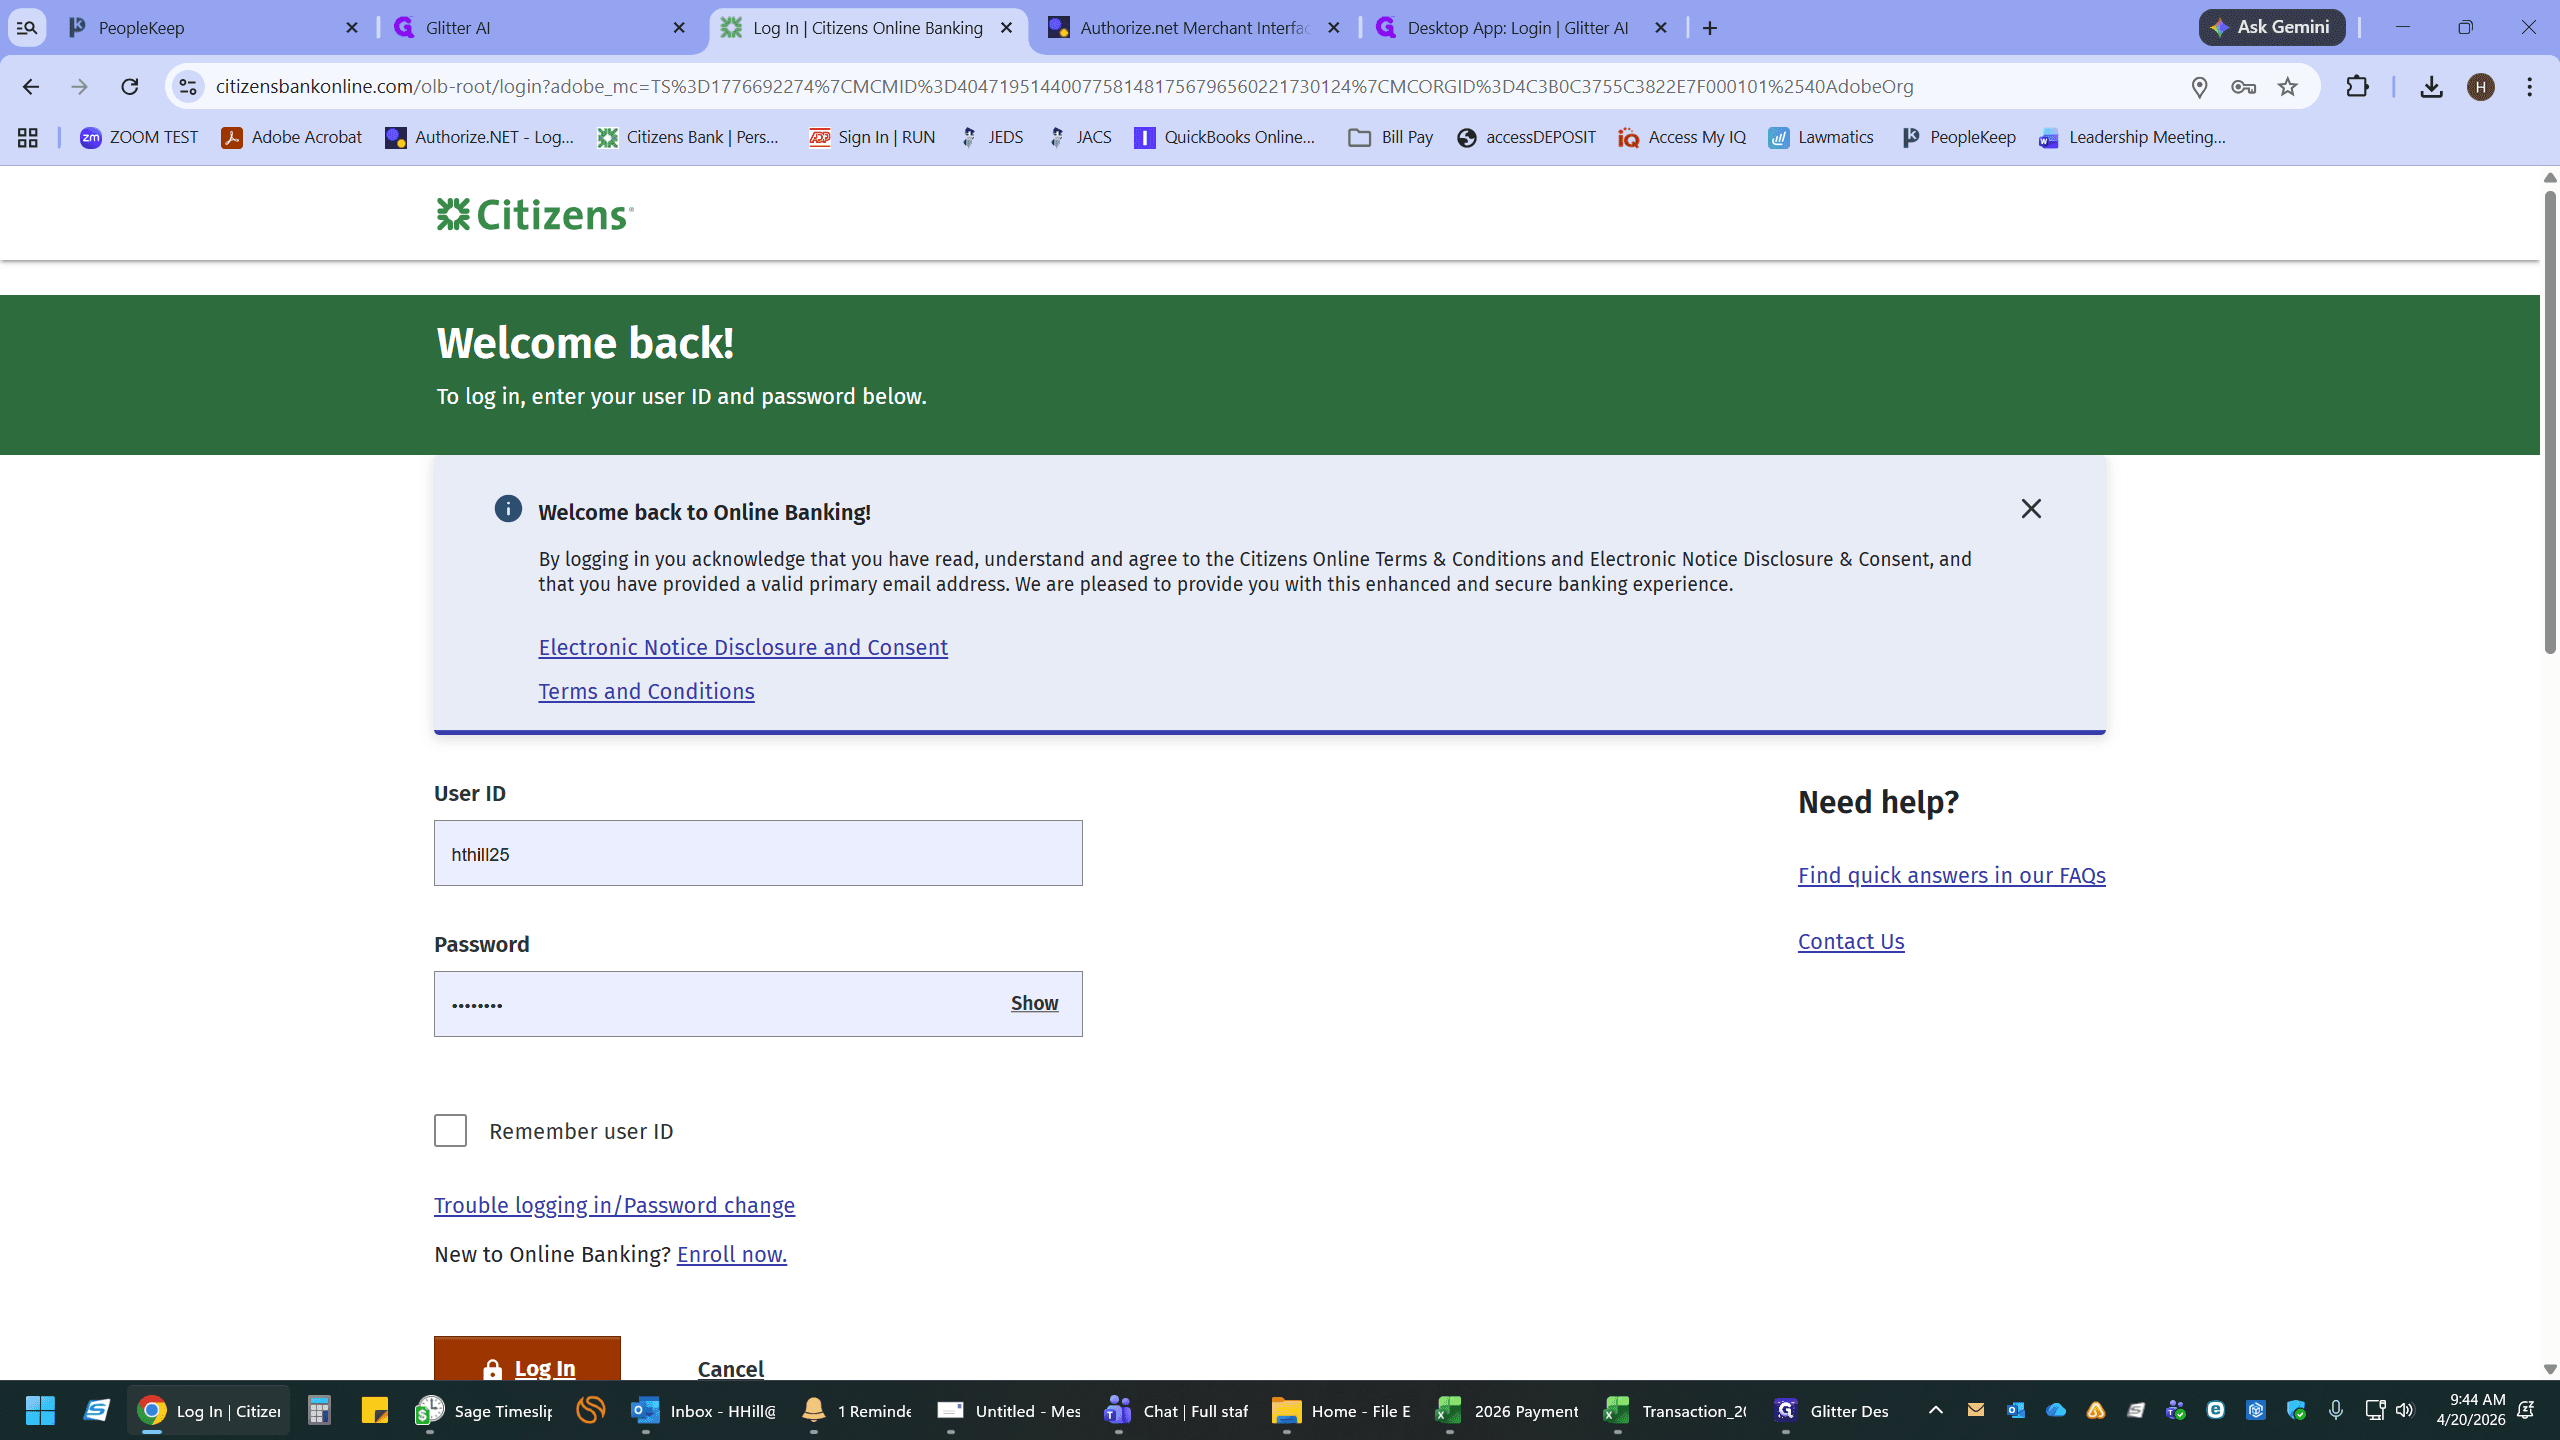
Log into your business banking portal (e.g., Citizens Bank) to review your recent statements.
13
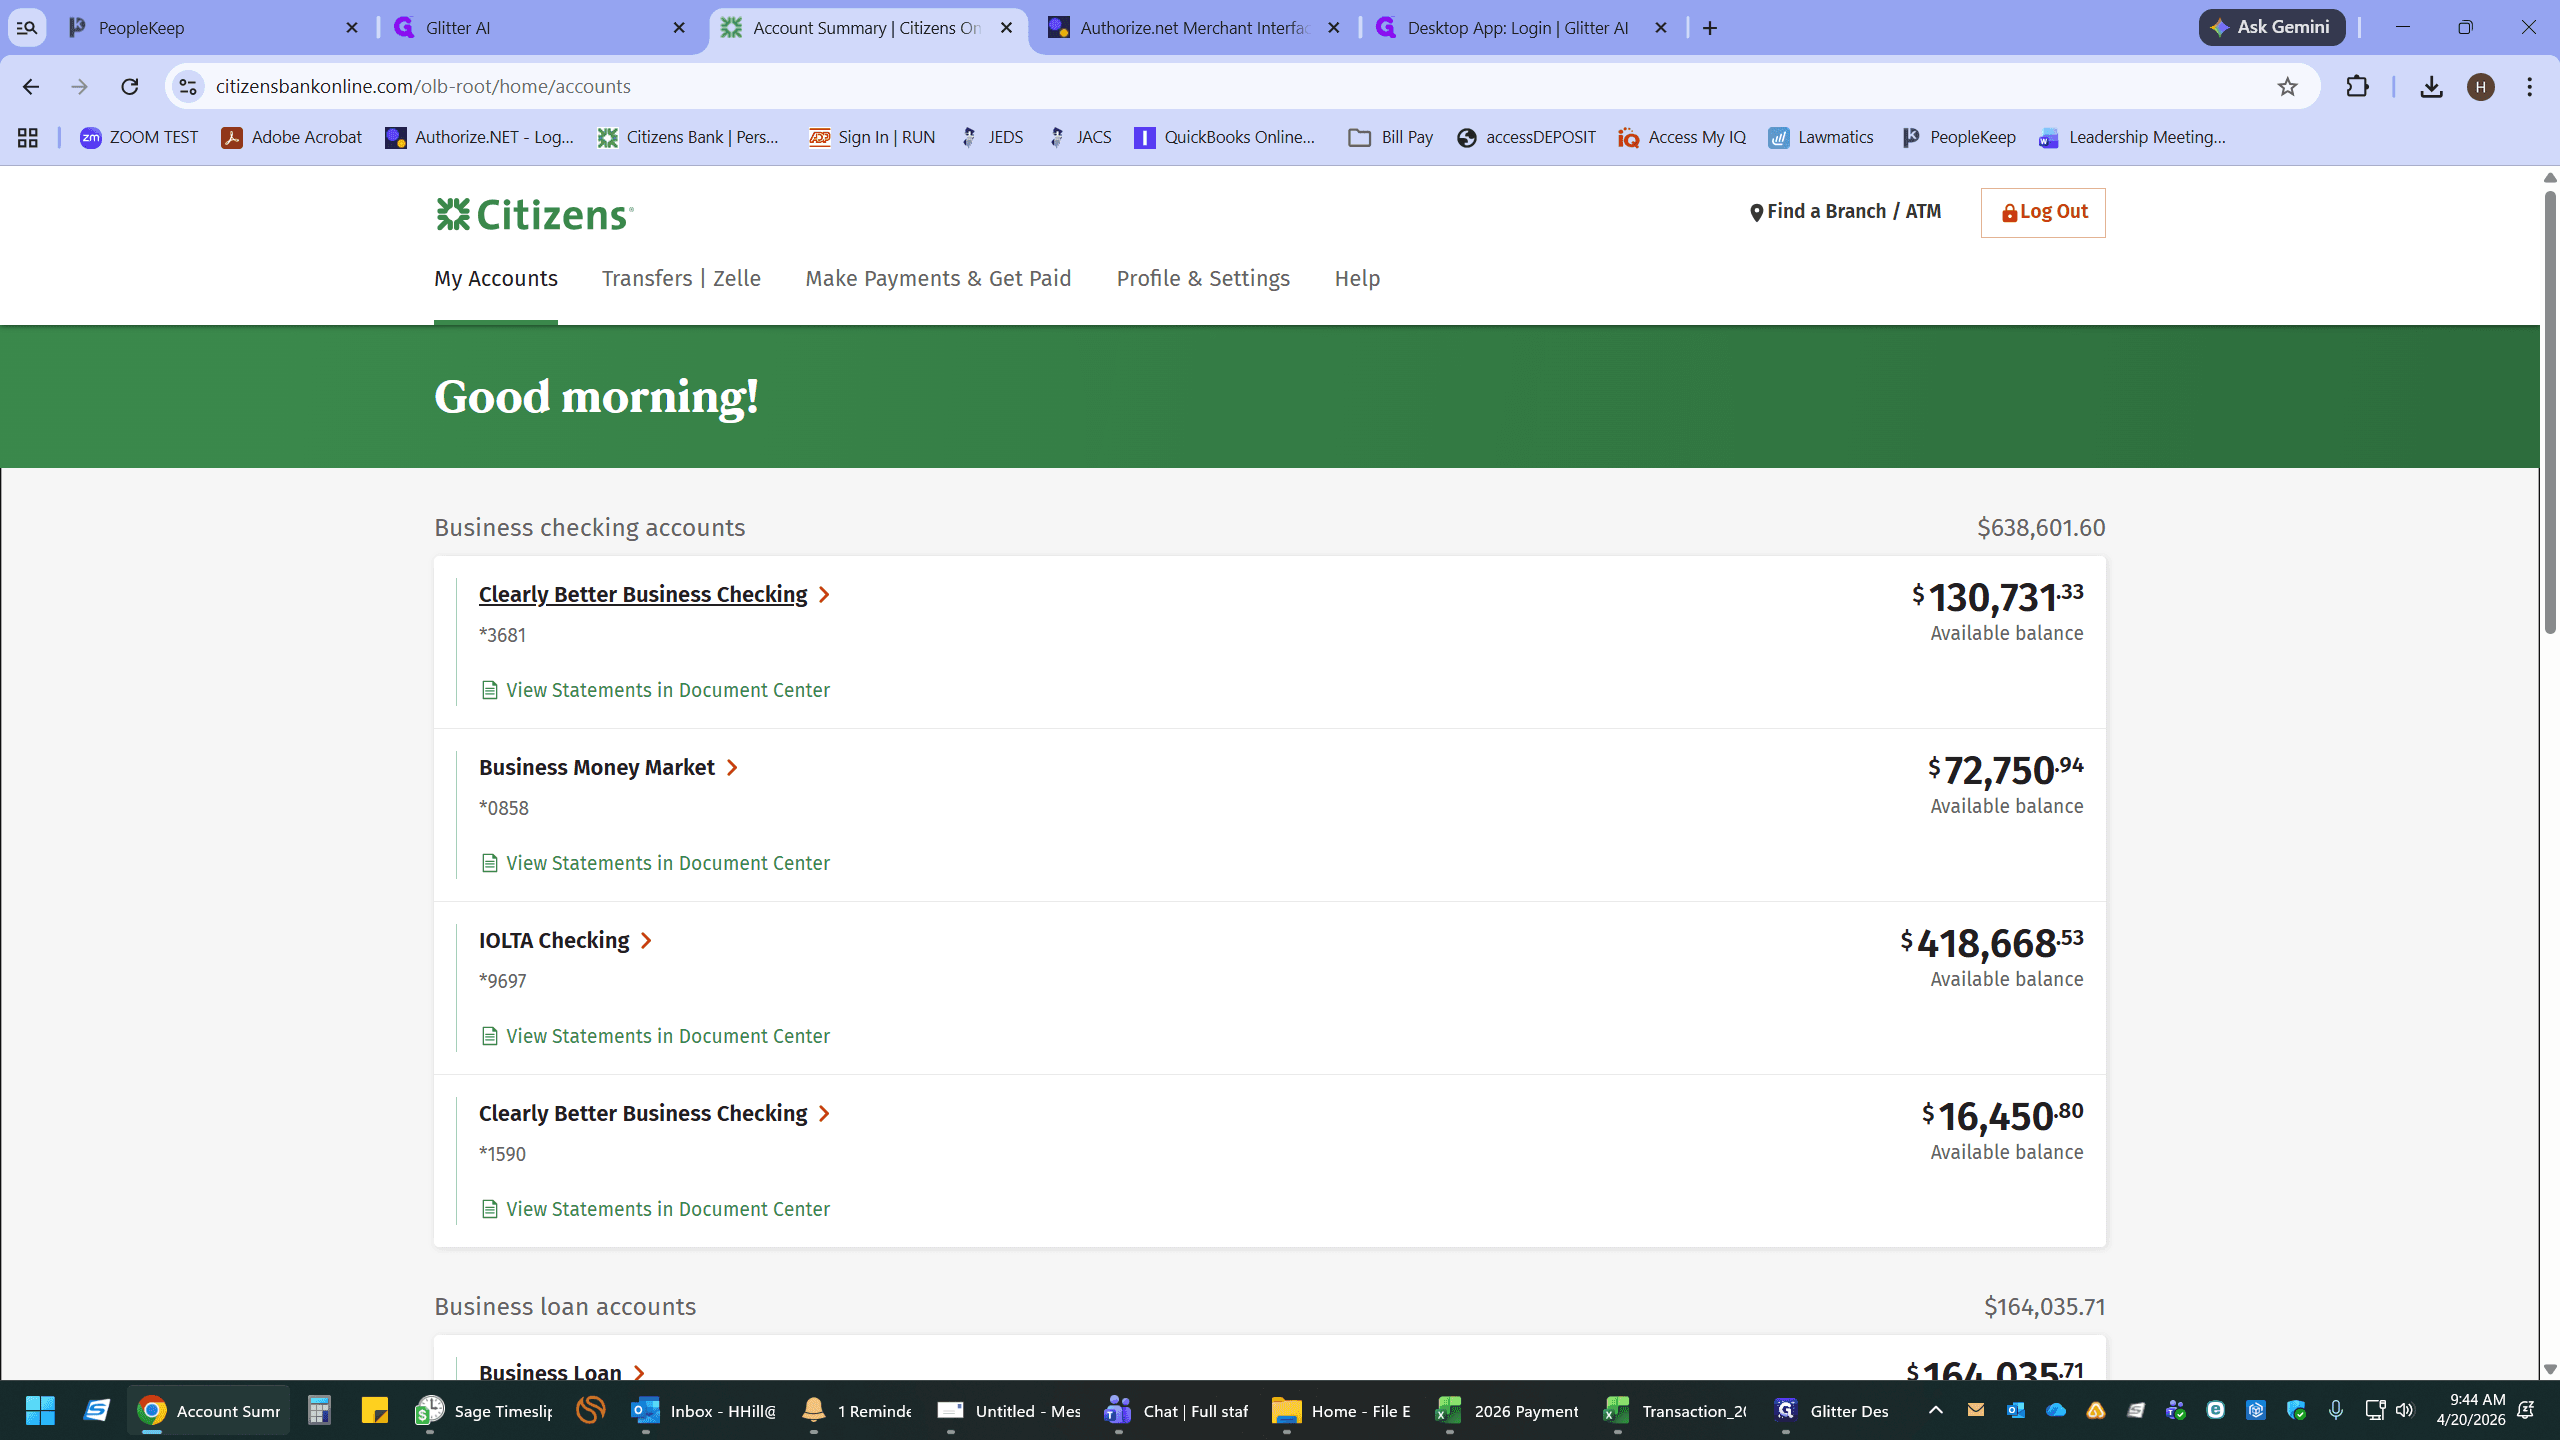
Navigate to your business checking account.
14
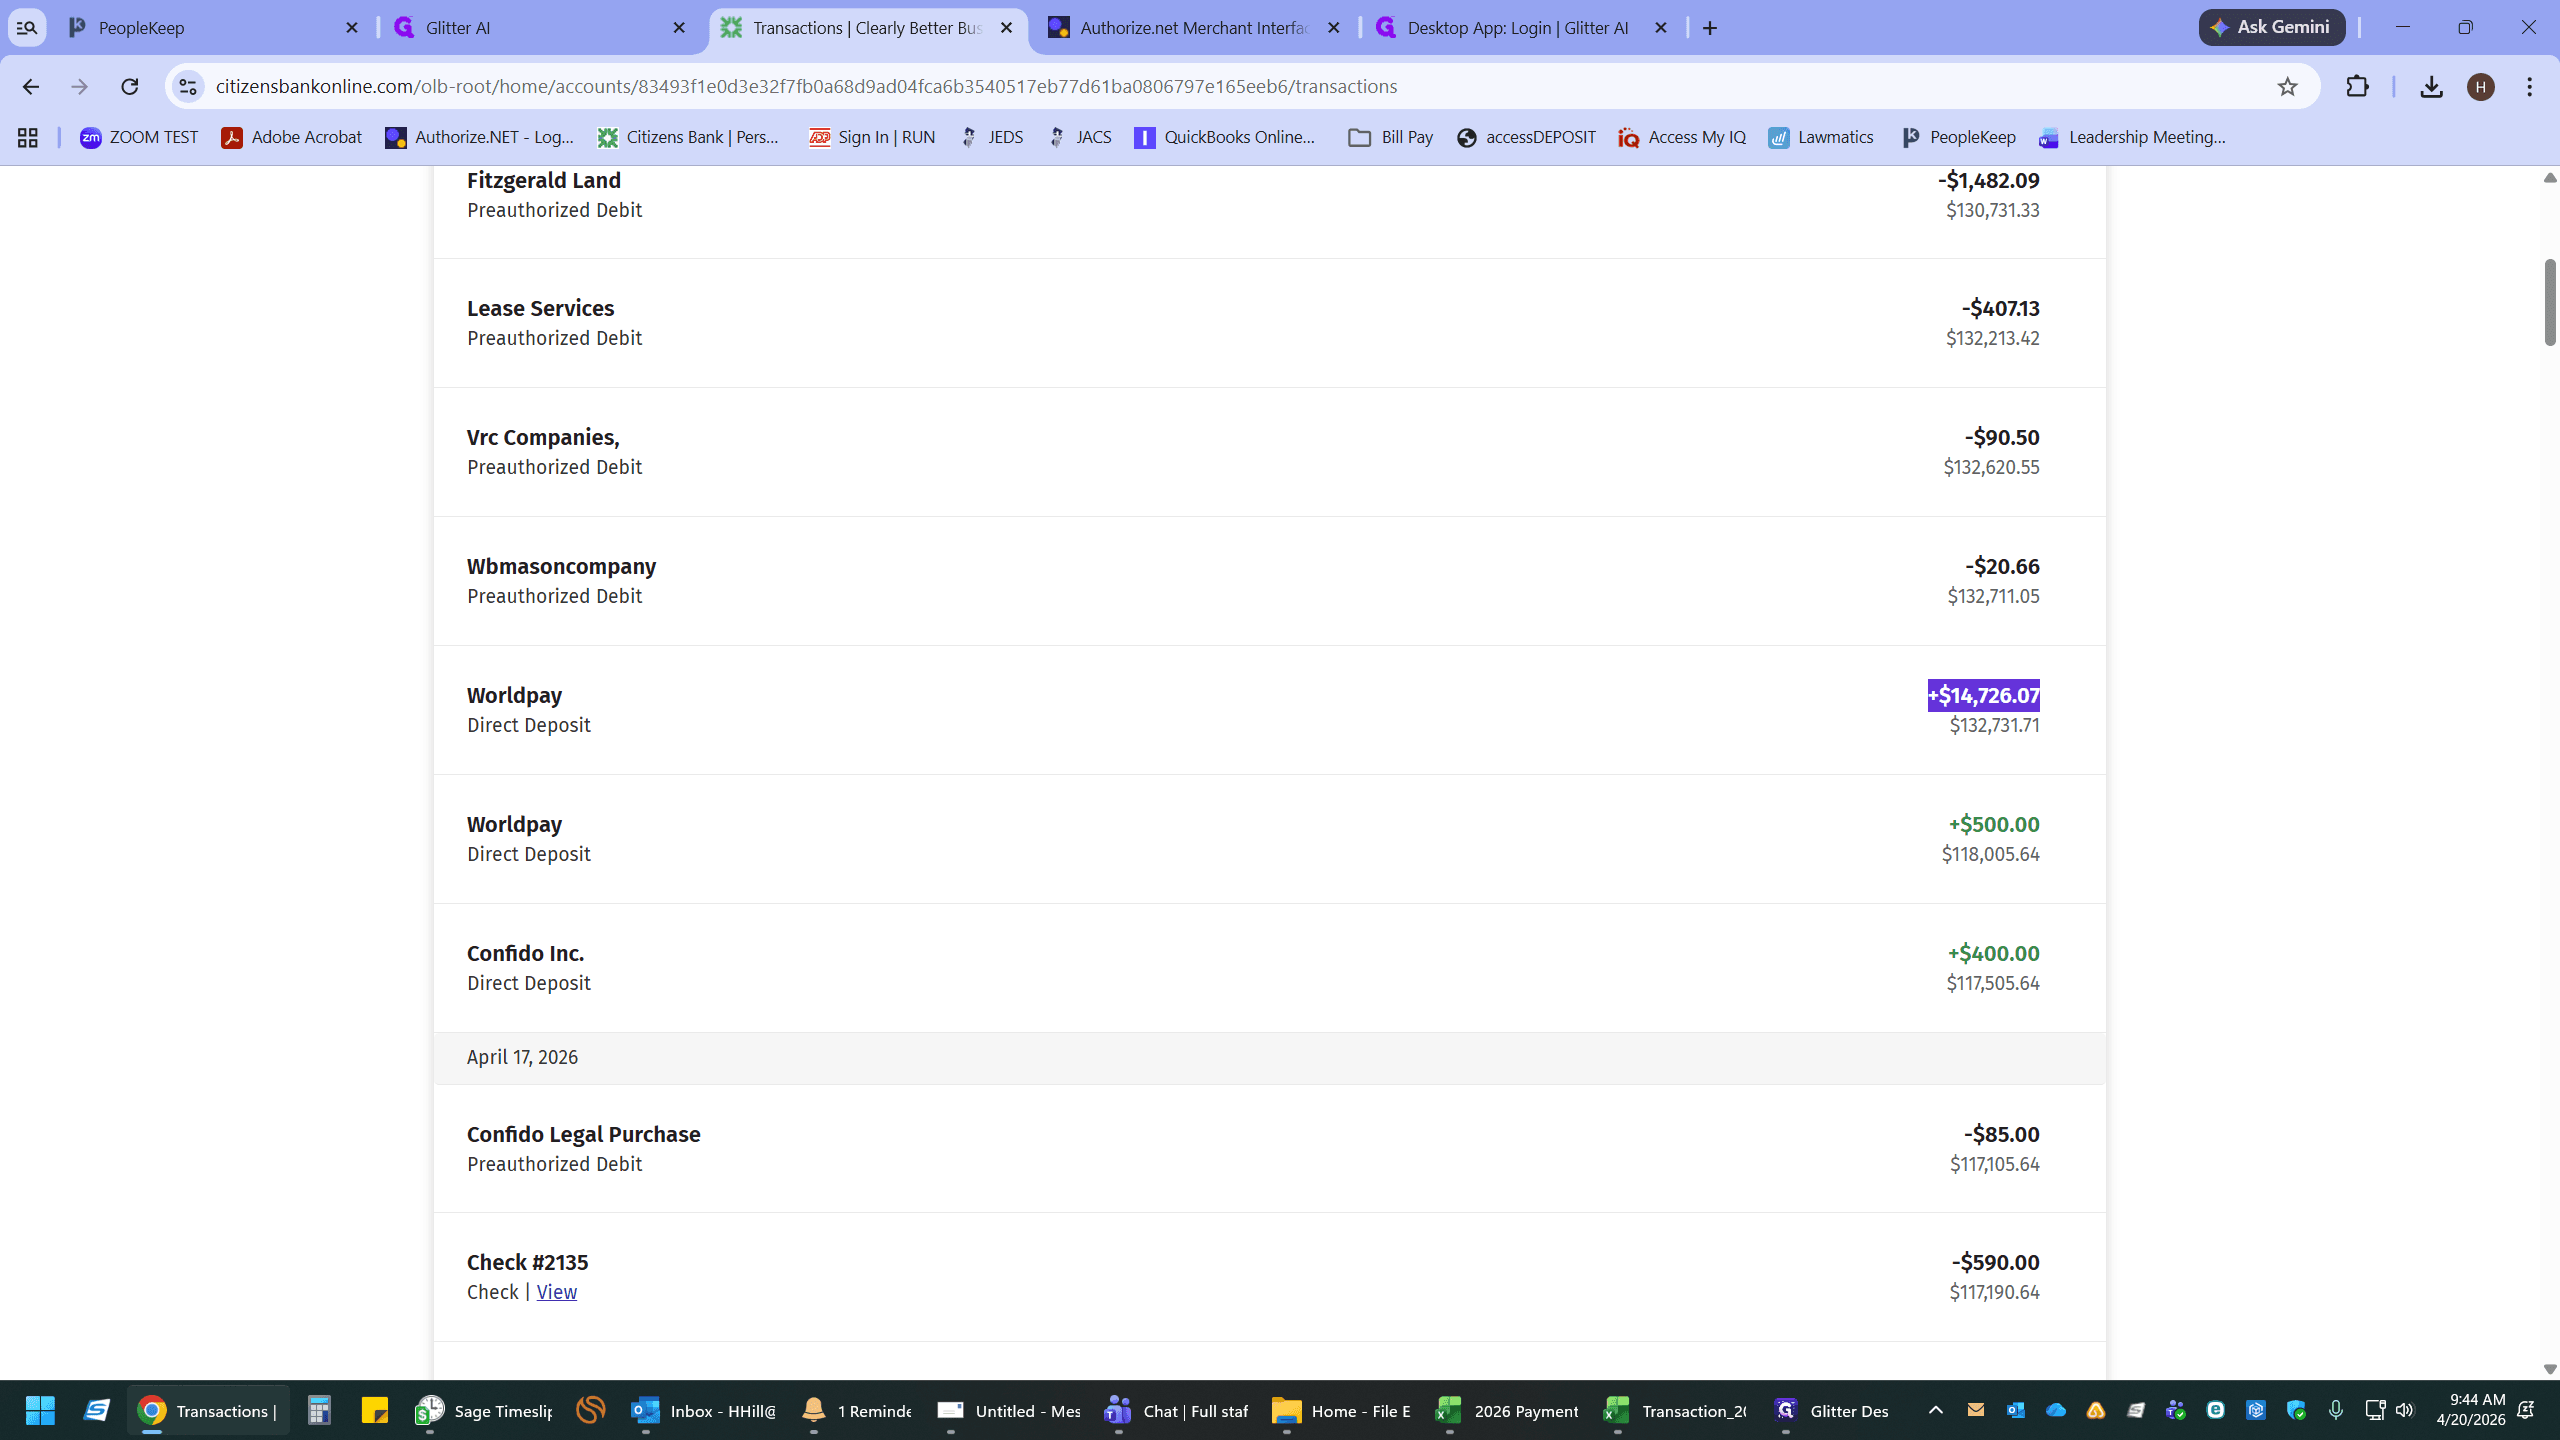
Locate the lump-sum deposit corresponding to your merchant settlement (often labeled under Worldpay or Authorize.net).
15
Highlight the deposit amount and press
Ctrl + C to copy.16
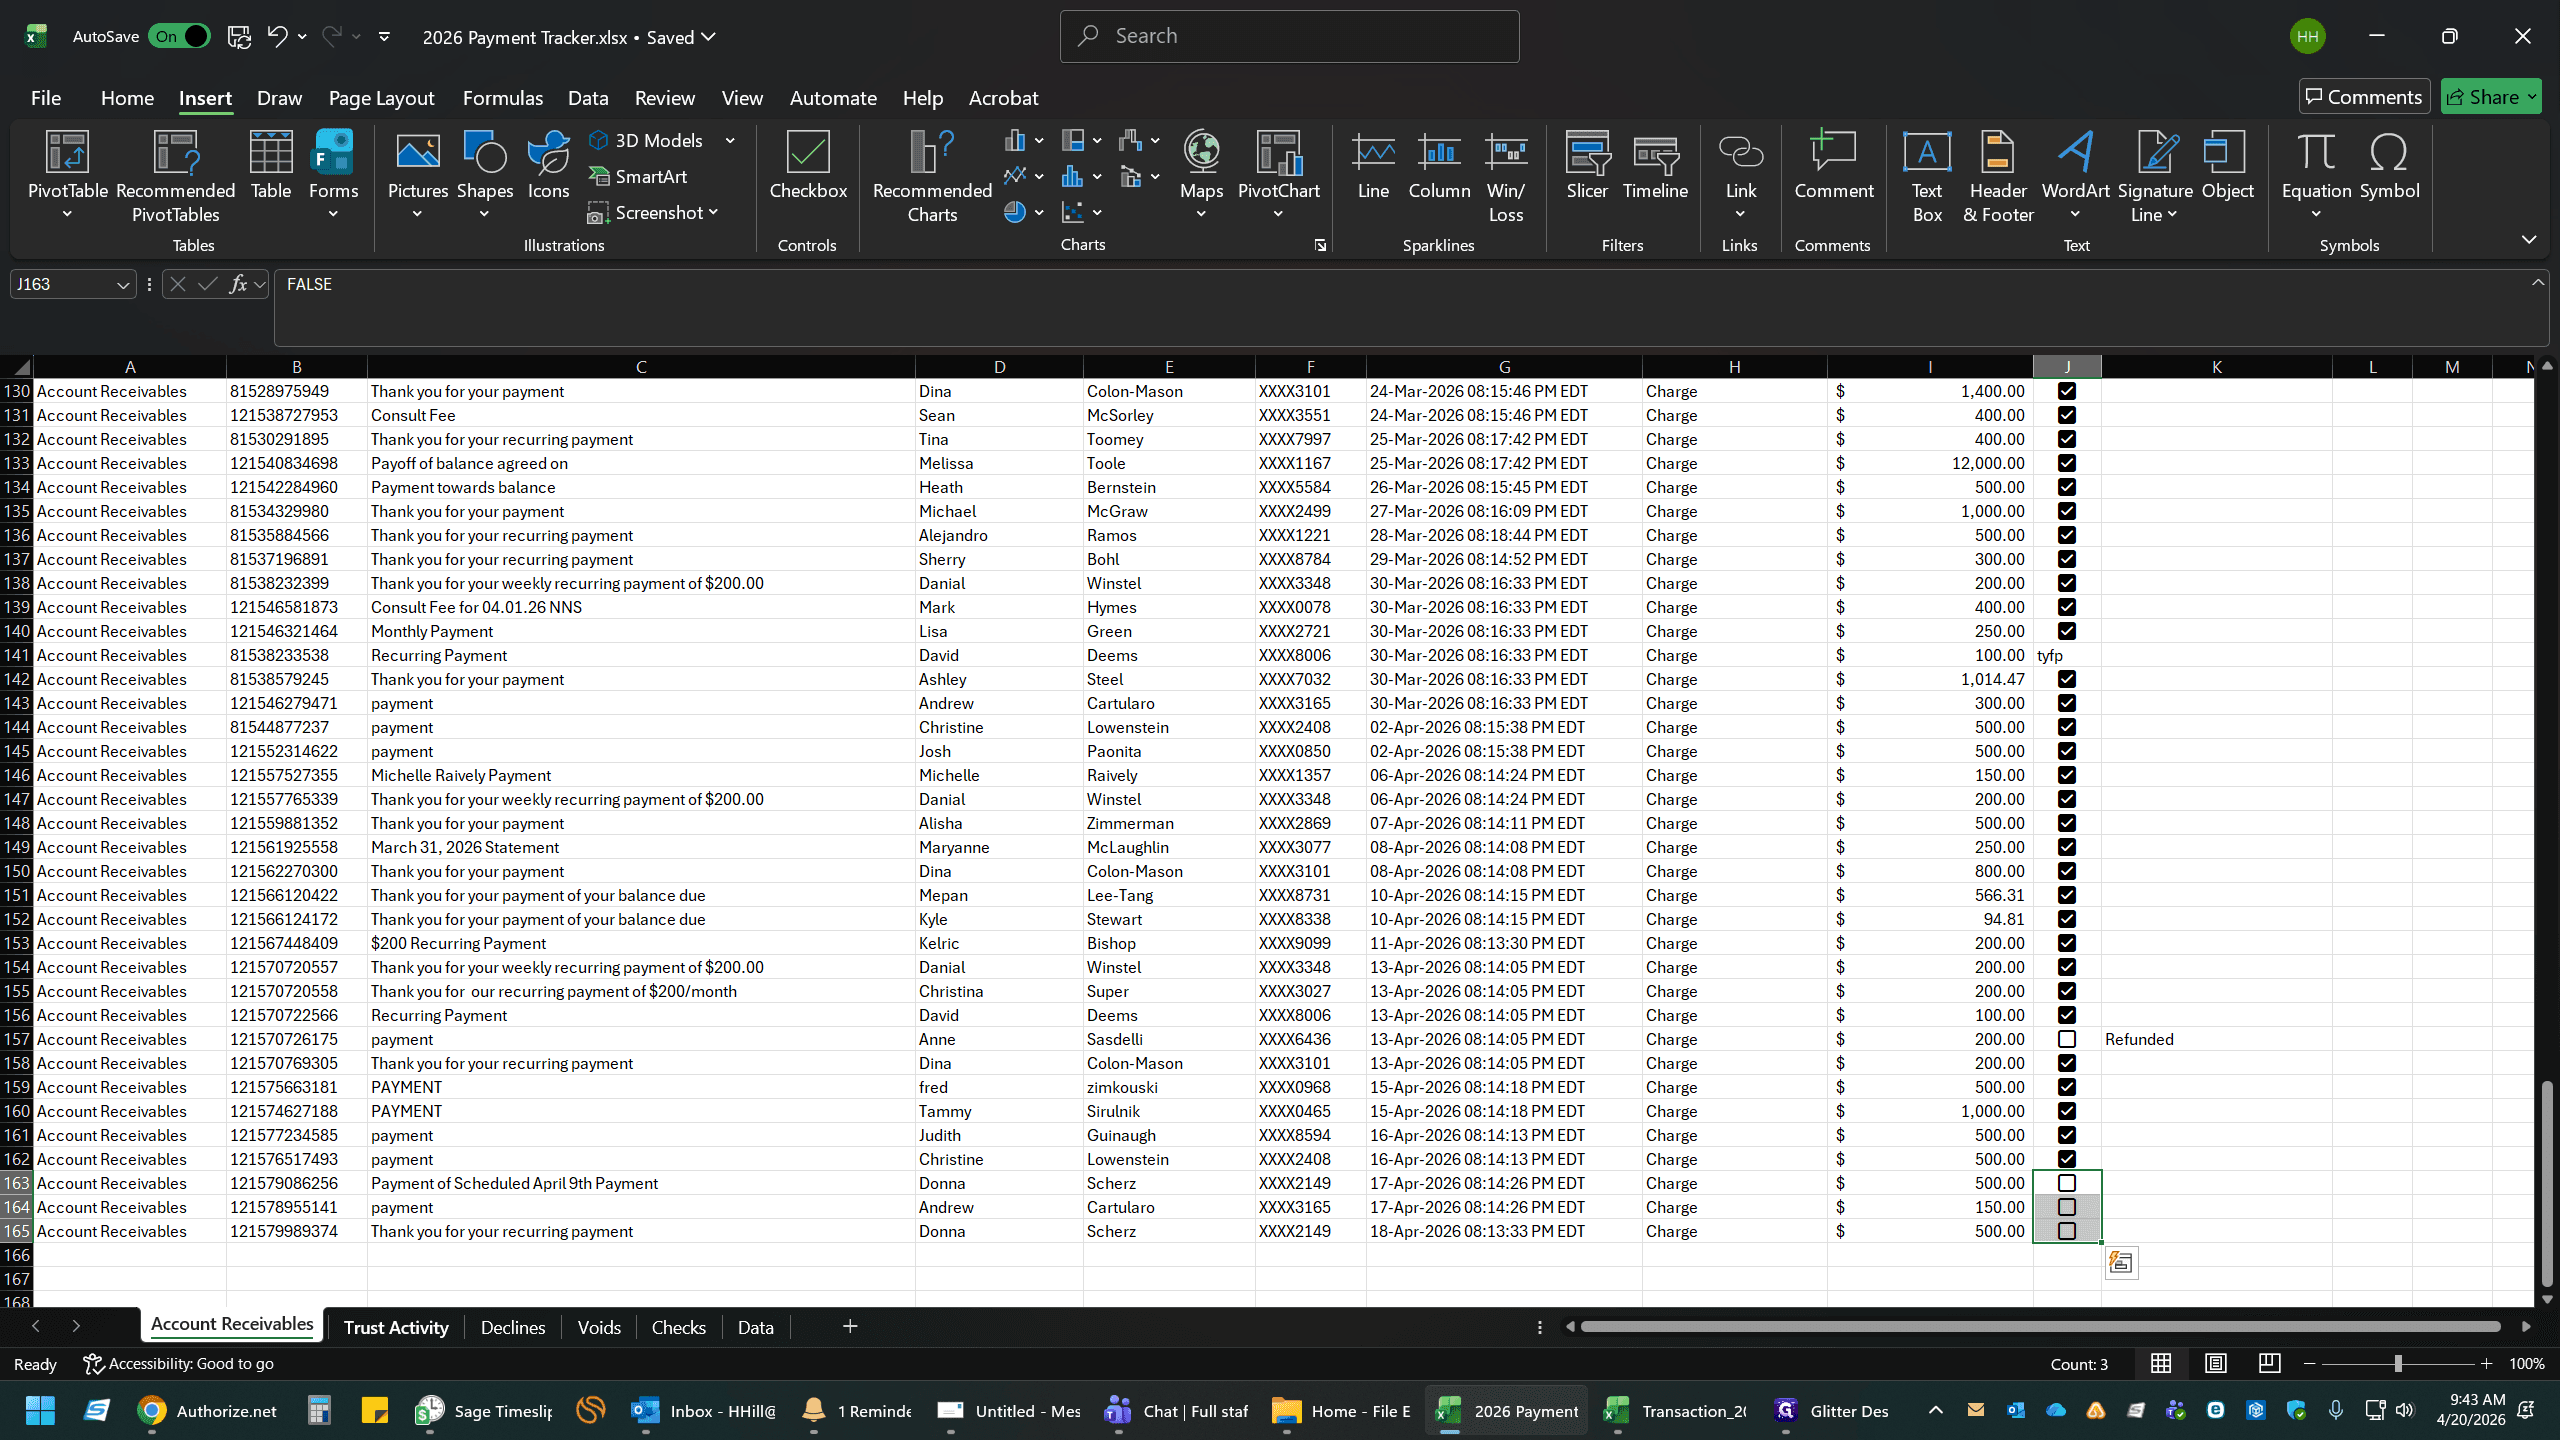
Return to your Payment Tracker spreadsheet and open the Trust Activity tab (or wherever you reconcile individual payments to lump sums).
17
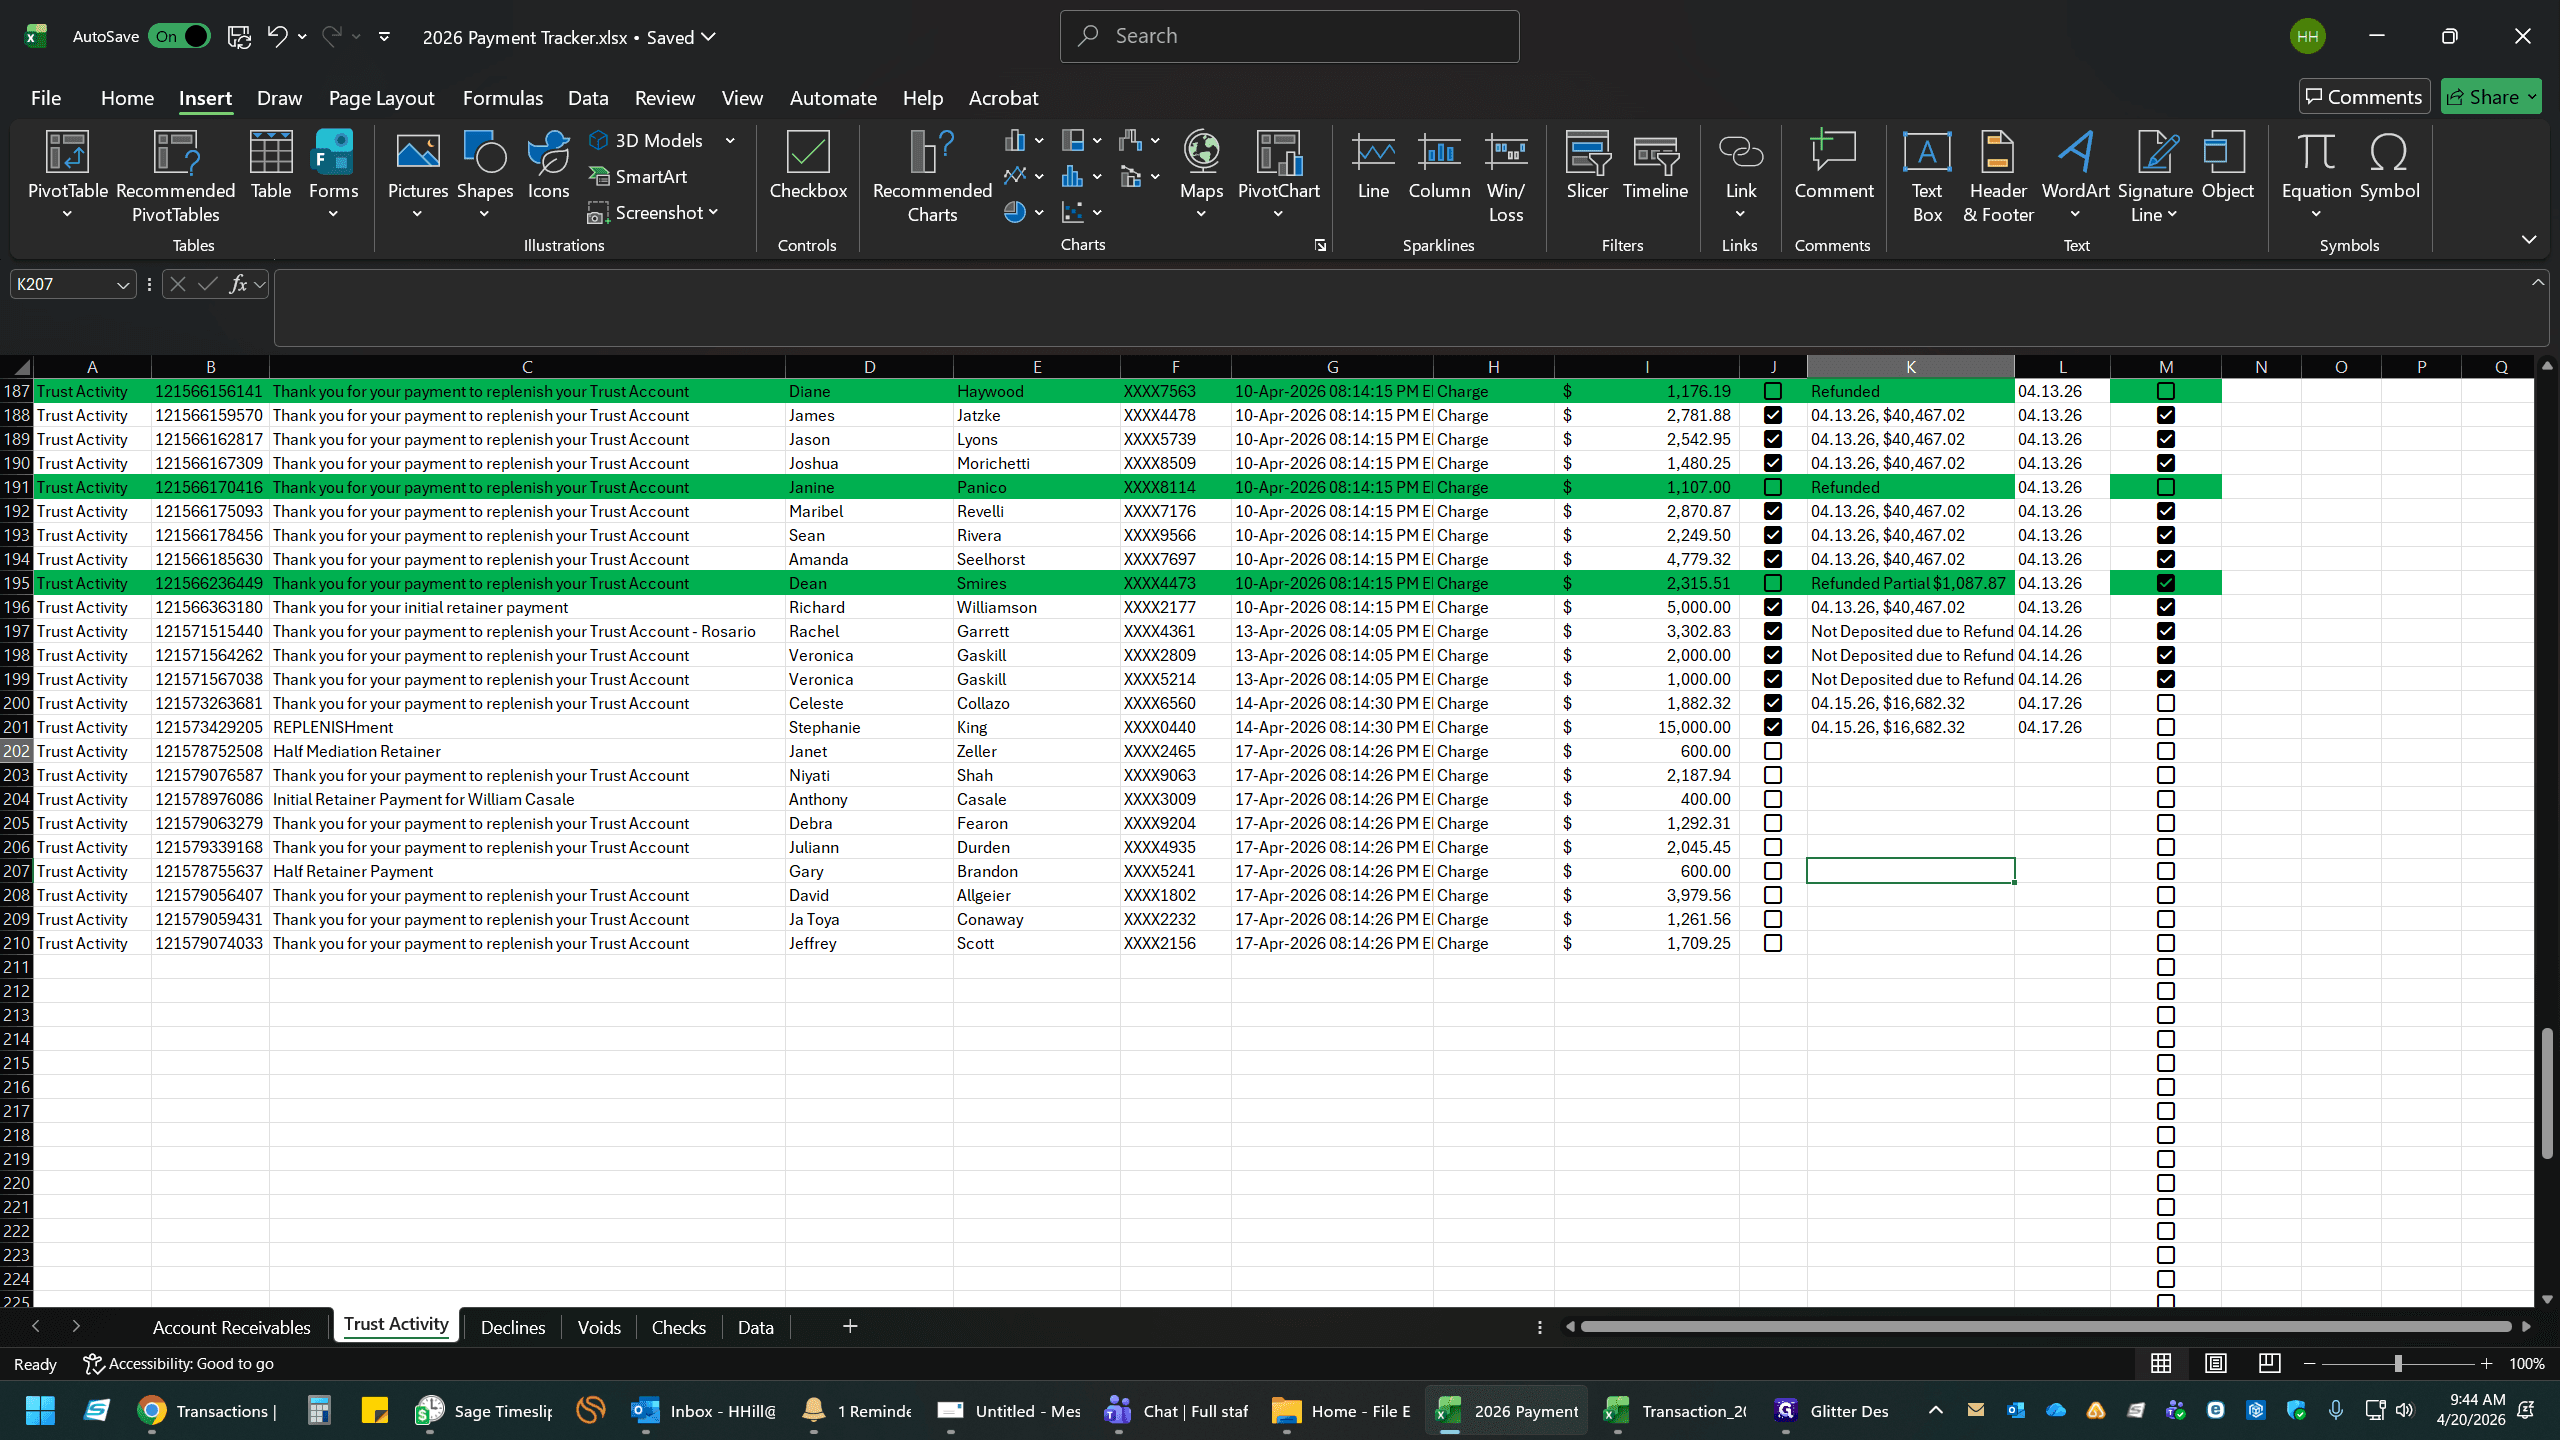
Select the cell next to the transactions that make up that batch.
18
Type in the date of the bank deposit.
19
Press
Ctrl + V to paste the deposit amount alongside the date.20
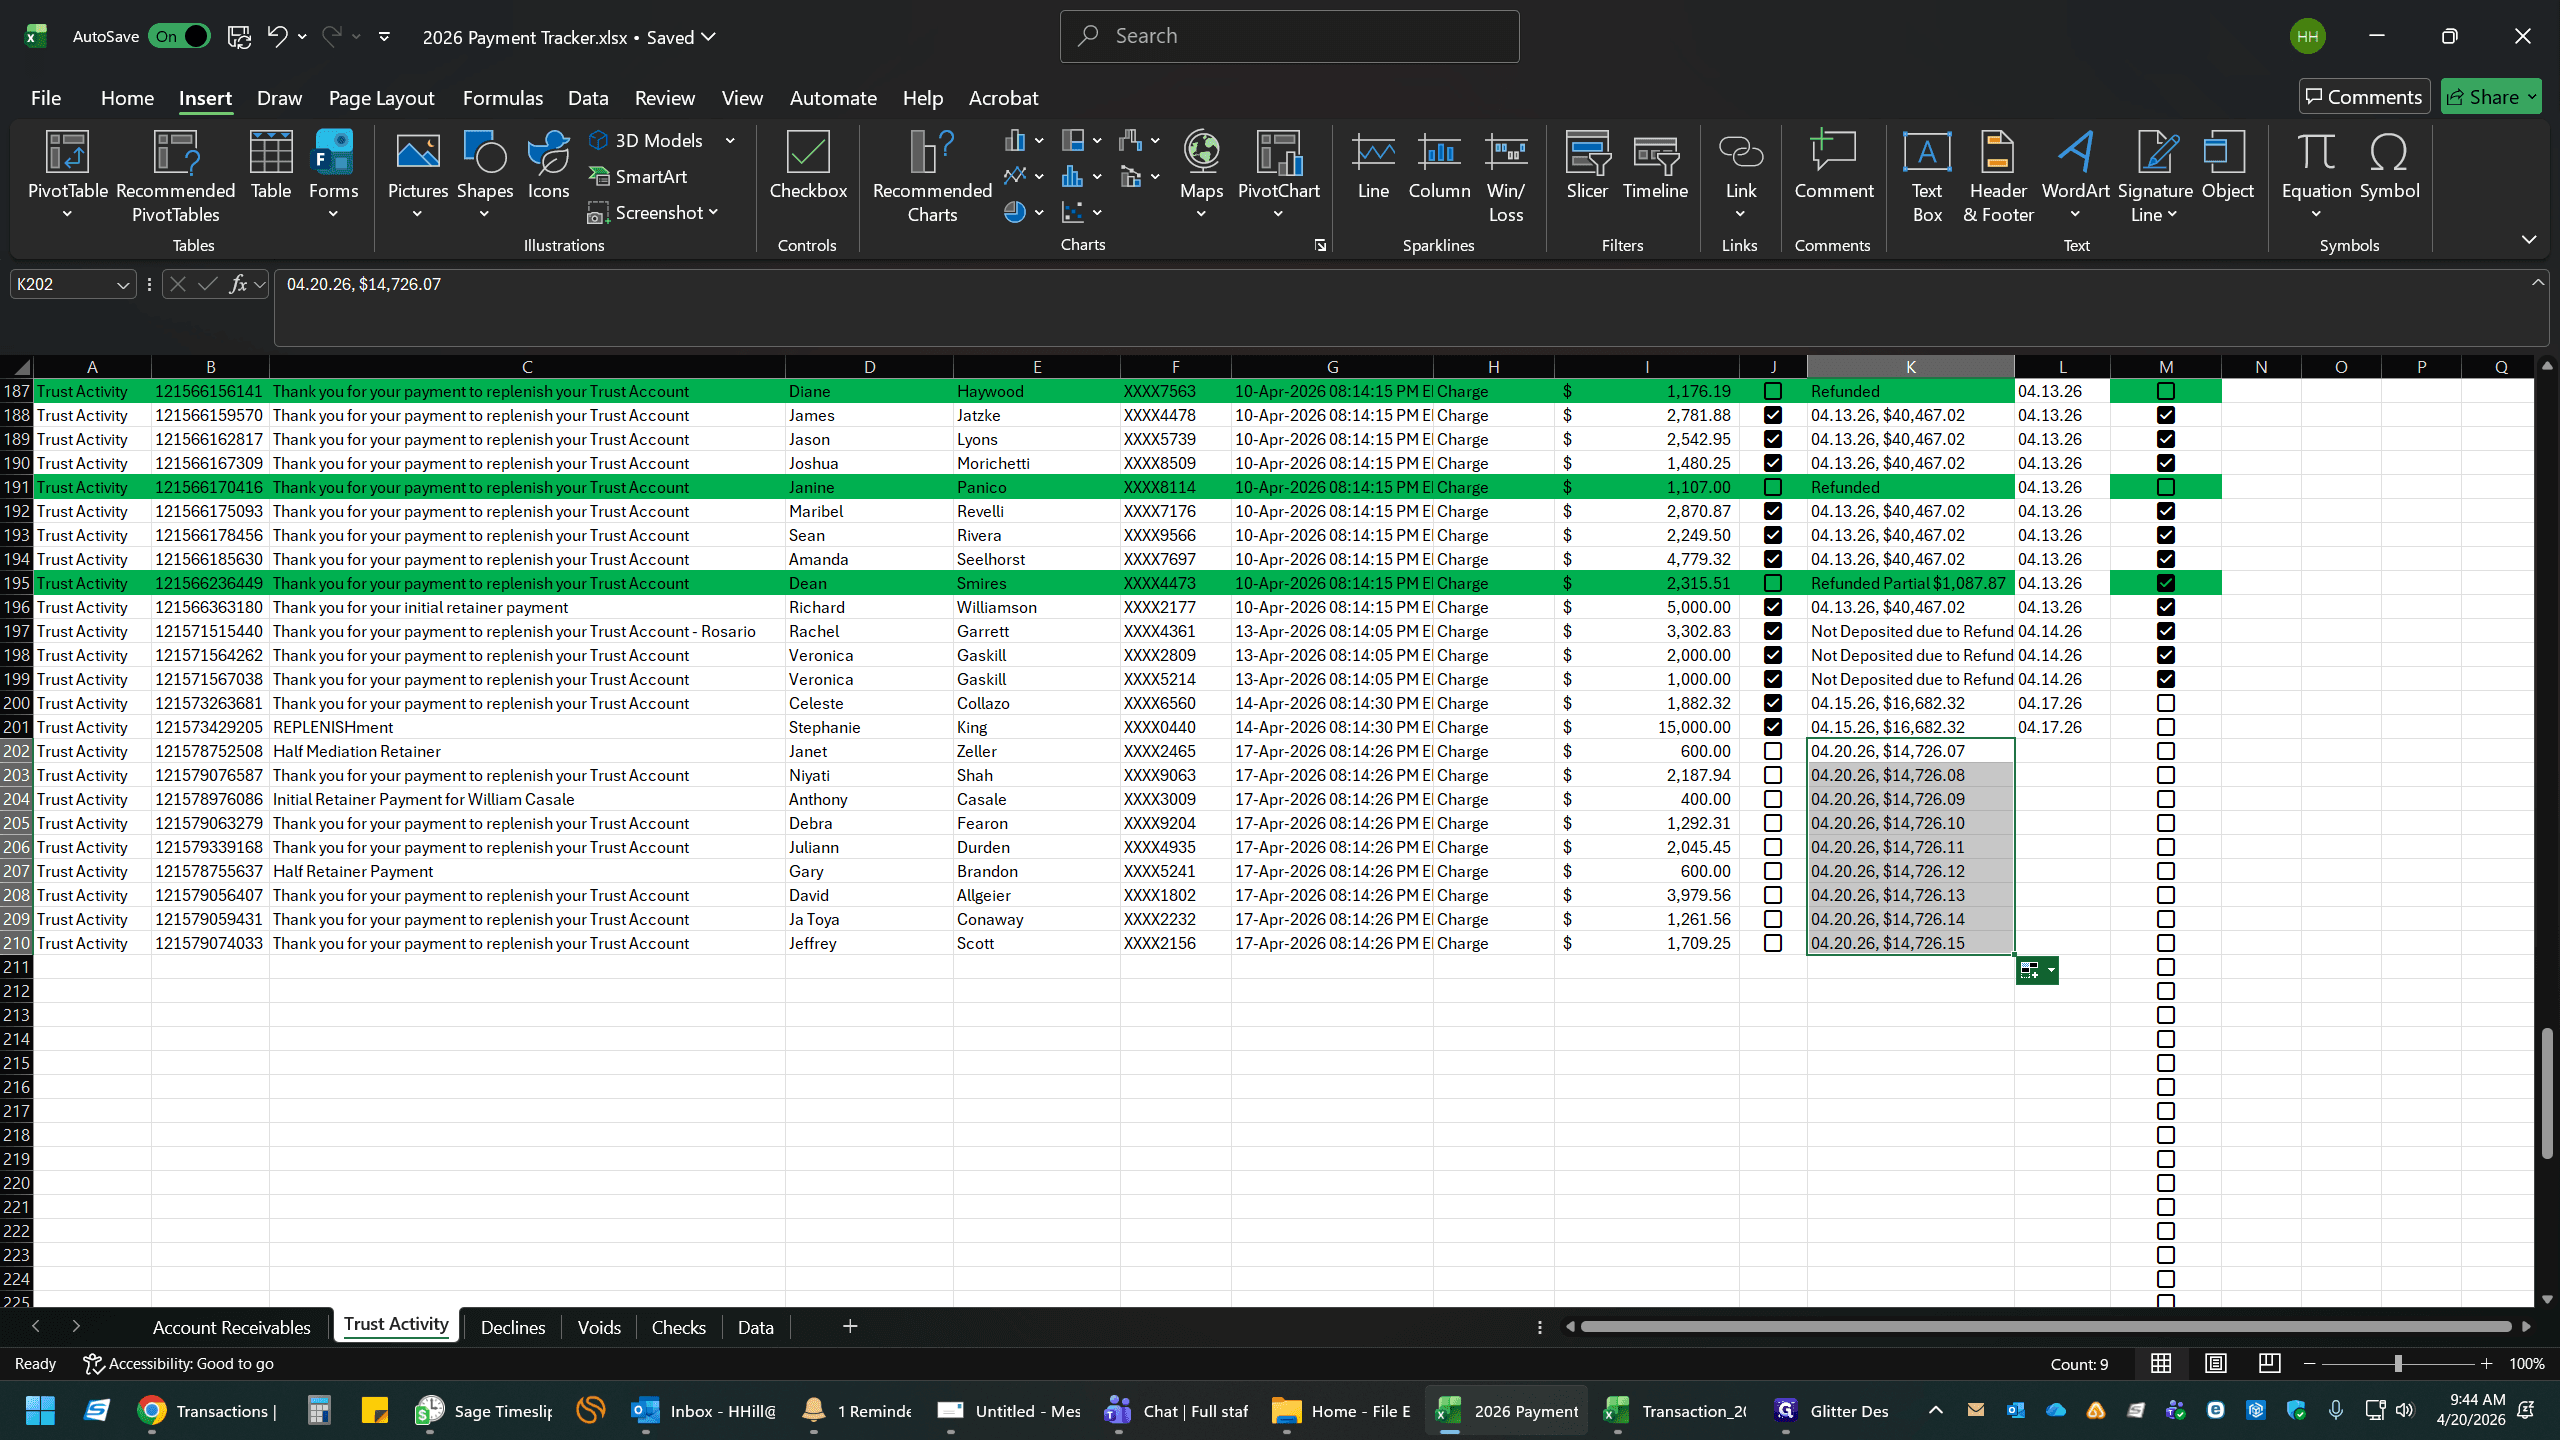
Drag the Auto Fill handle (the small square at the bottom-right corner of the cell) down across all rows that belong to this deposit batch.
21
To ensure the date isn't incremented automatically, click the Auto Fill Options menu and select Copy Cells.
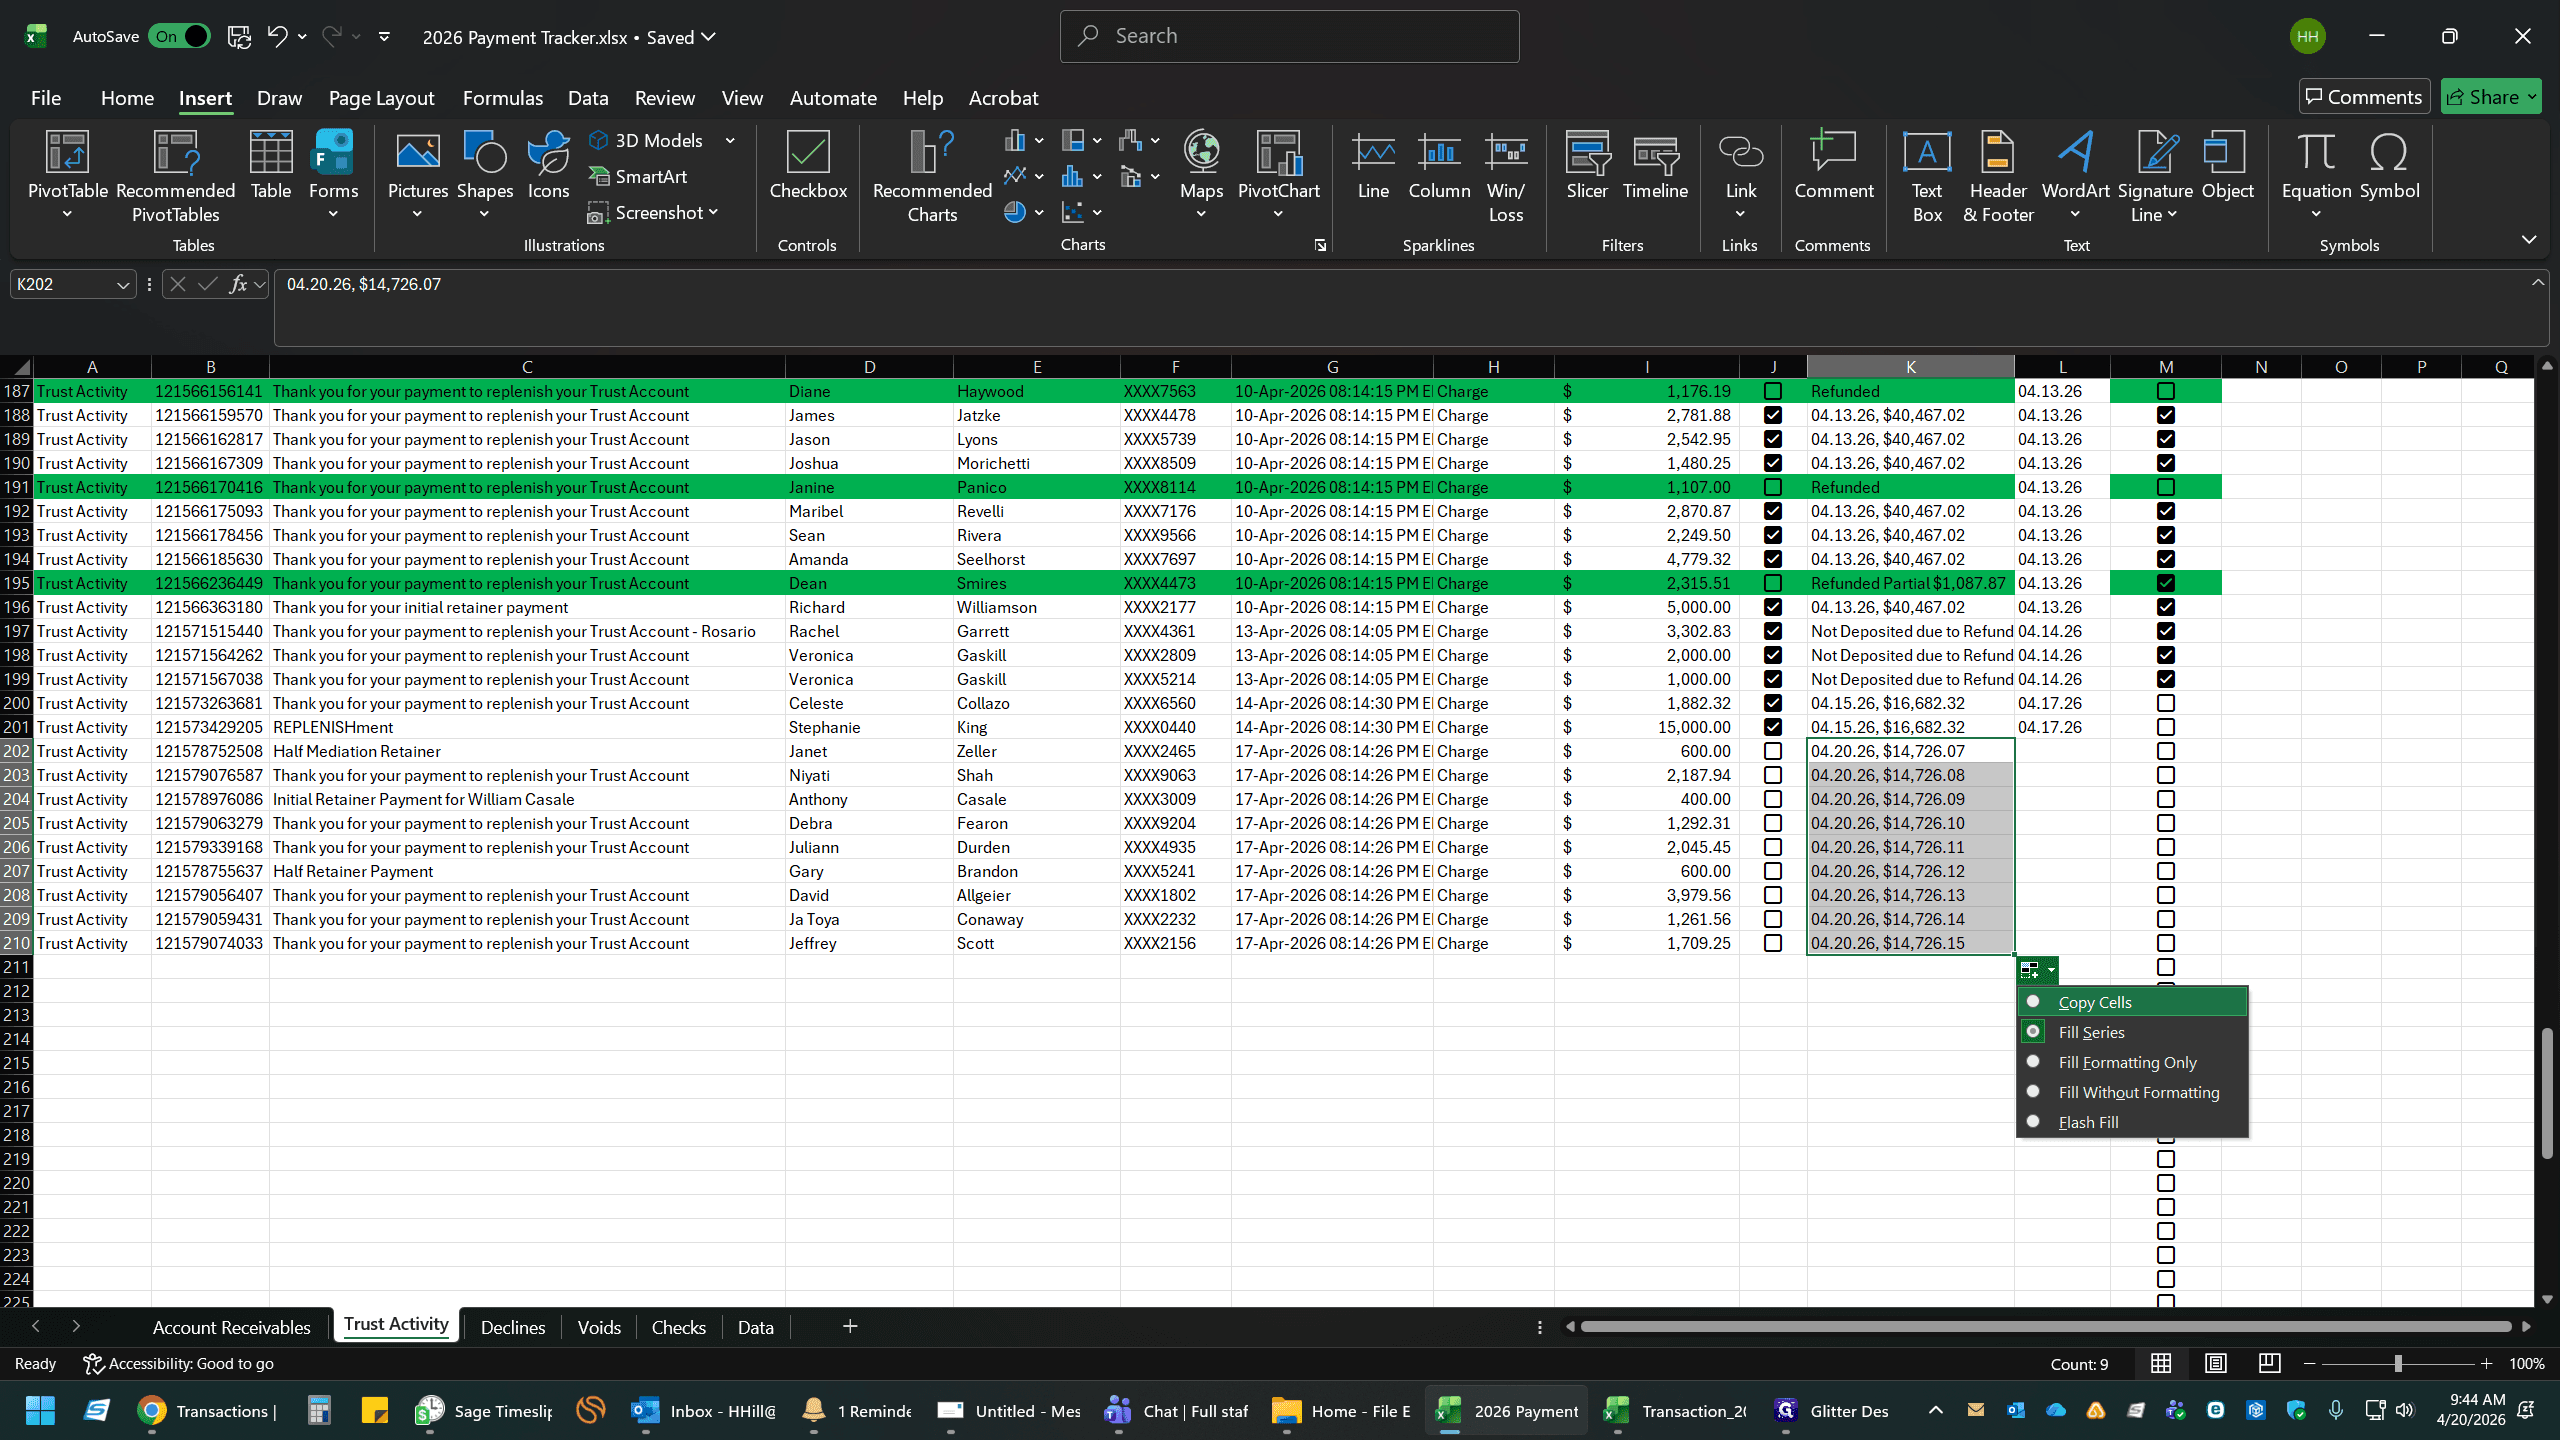
22
Add both Trust Activity (Funds Transaction) and Accounts Receivable Transactions to the appropriate client accounts in Timeslips. Check off each in Column J as you complete the task.