Icon

How to Register VELUX Skylight Products

Learn how to manually register your VELUX skylight products, manage warranties, and set up your homeowner portal account.

By Will Milford

This guide explains how to manually register your VELUX skylight products in the homeowner portal. Completing this process ensures your products are correctly tracked and securely activates your skylight system warranties.

This workflow is designed for homeowners who have recently had VELUX skylights installed. You should complete this registration right after installation to secure your warranty coverage and begin managing your products.

Initiate Registration
1
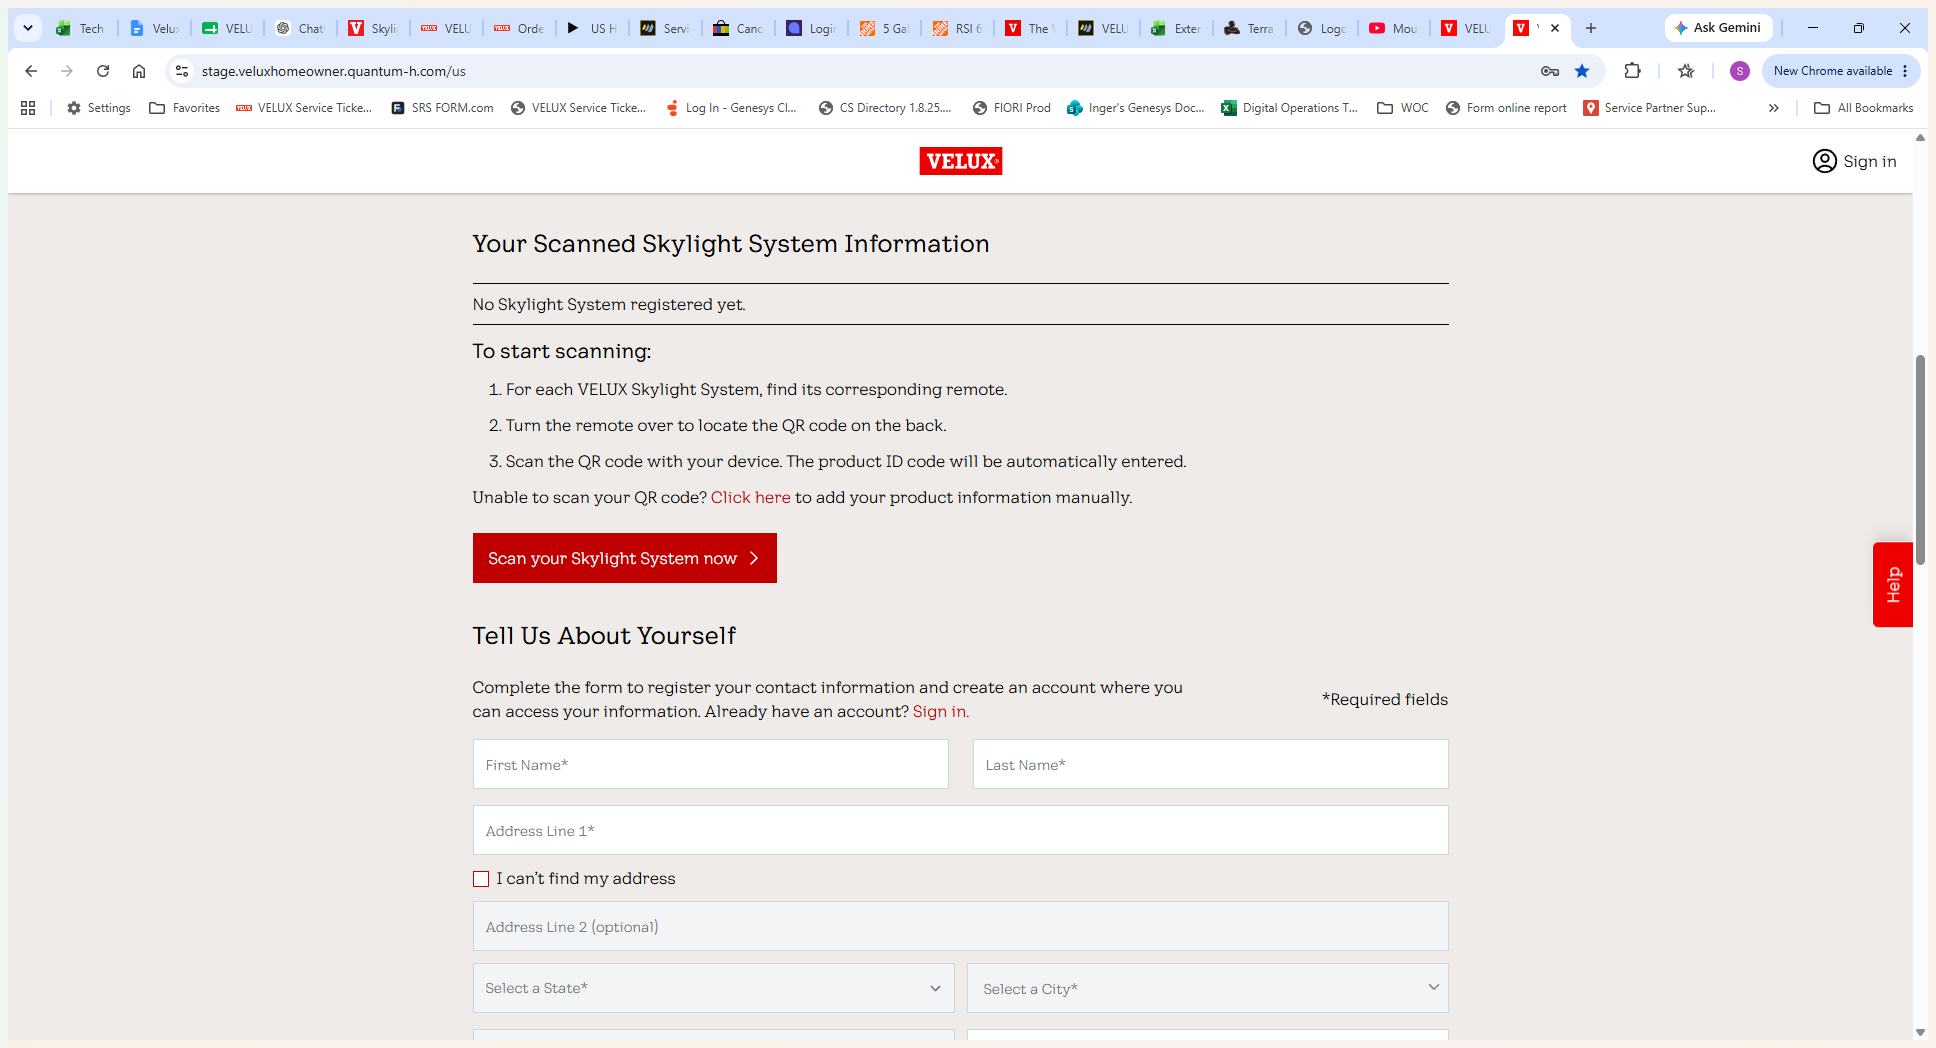
Click Scan your Skylight System now to begin the registration process.
Step #1: Click Scan your Skylight System now to begin the registration process.
2
Click the manual entry link to open the product code modal.
Step #2: Click the manual entry link to open the product code modal.
3
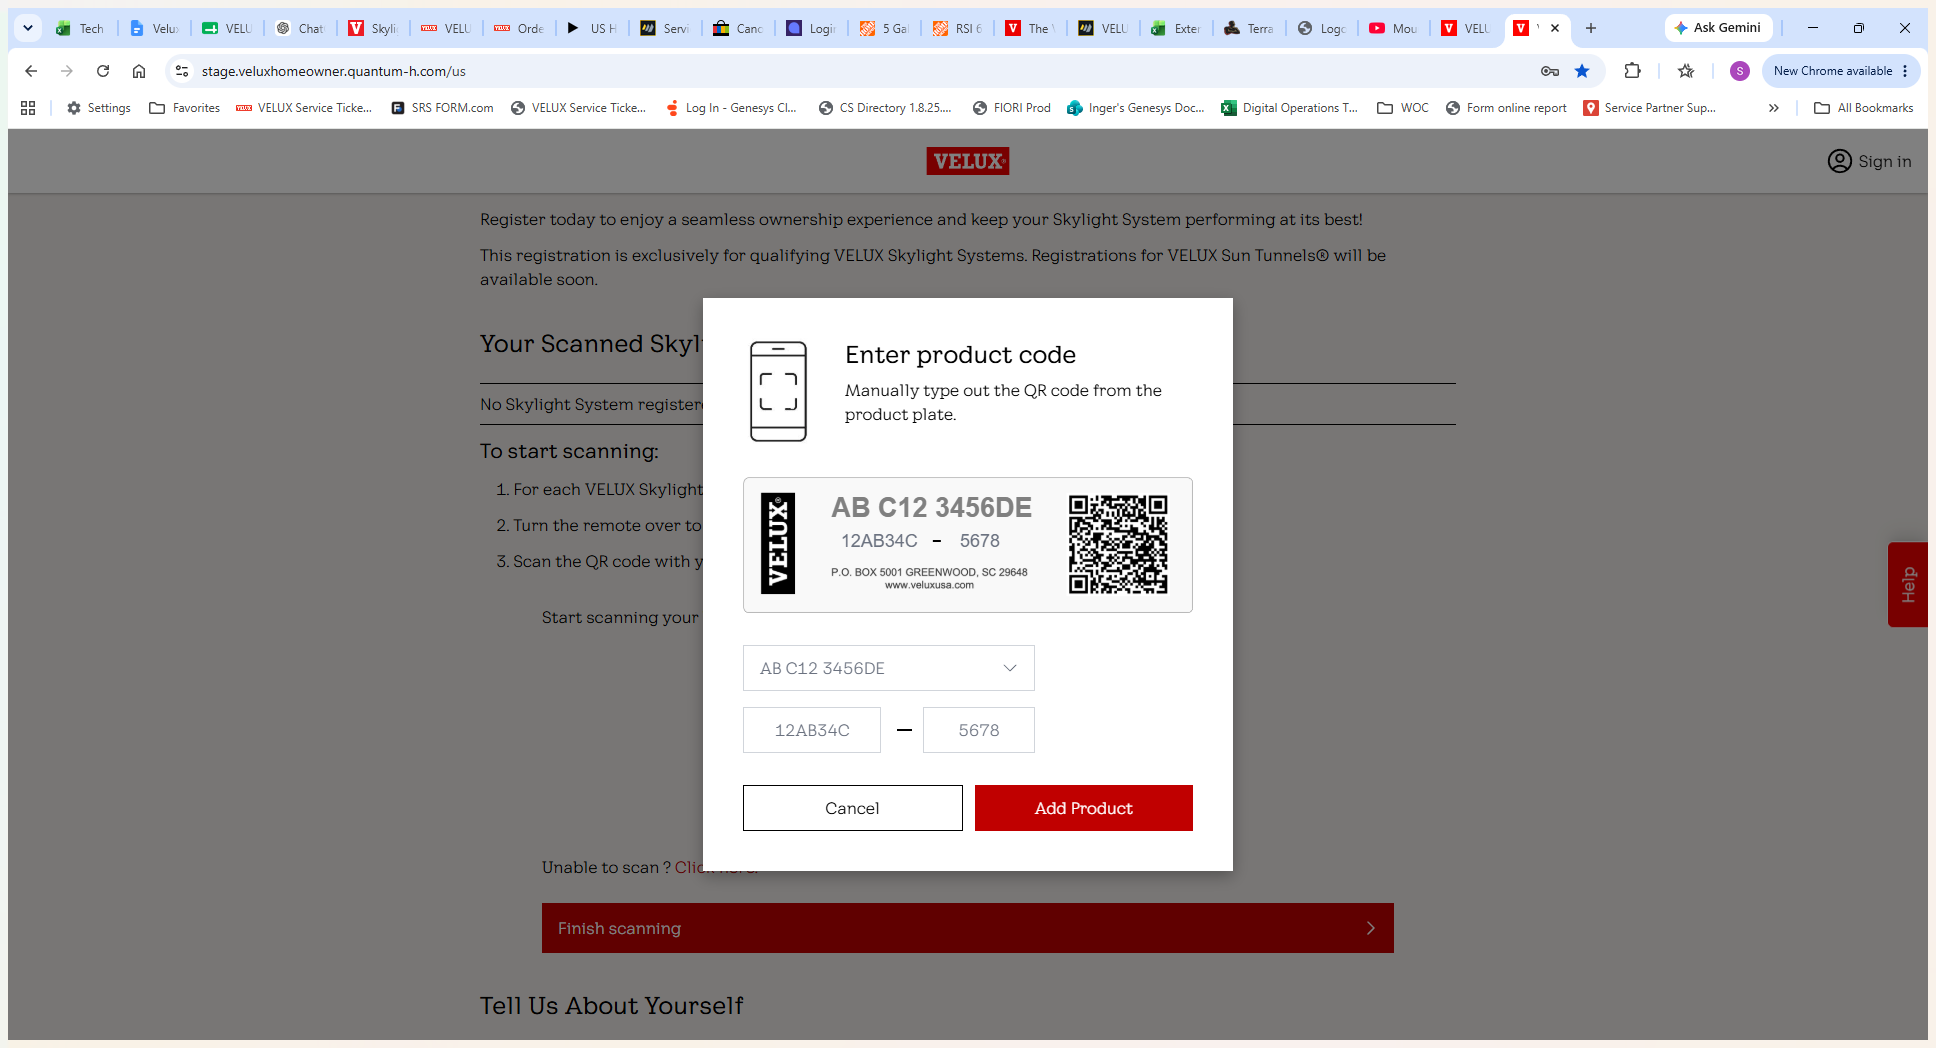
Type your specific product code (e.g., FCM 2246 2004SD 01BT05A TEST) into the text field.
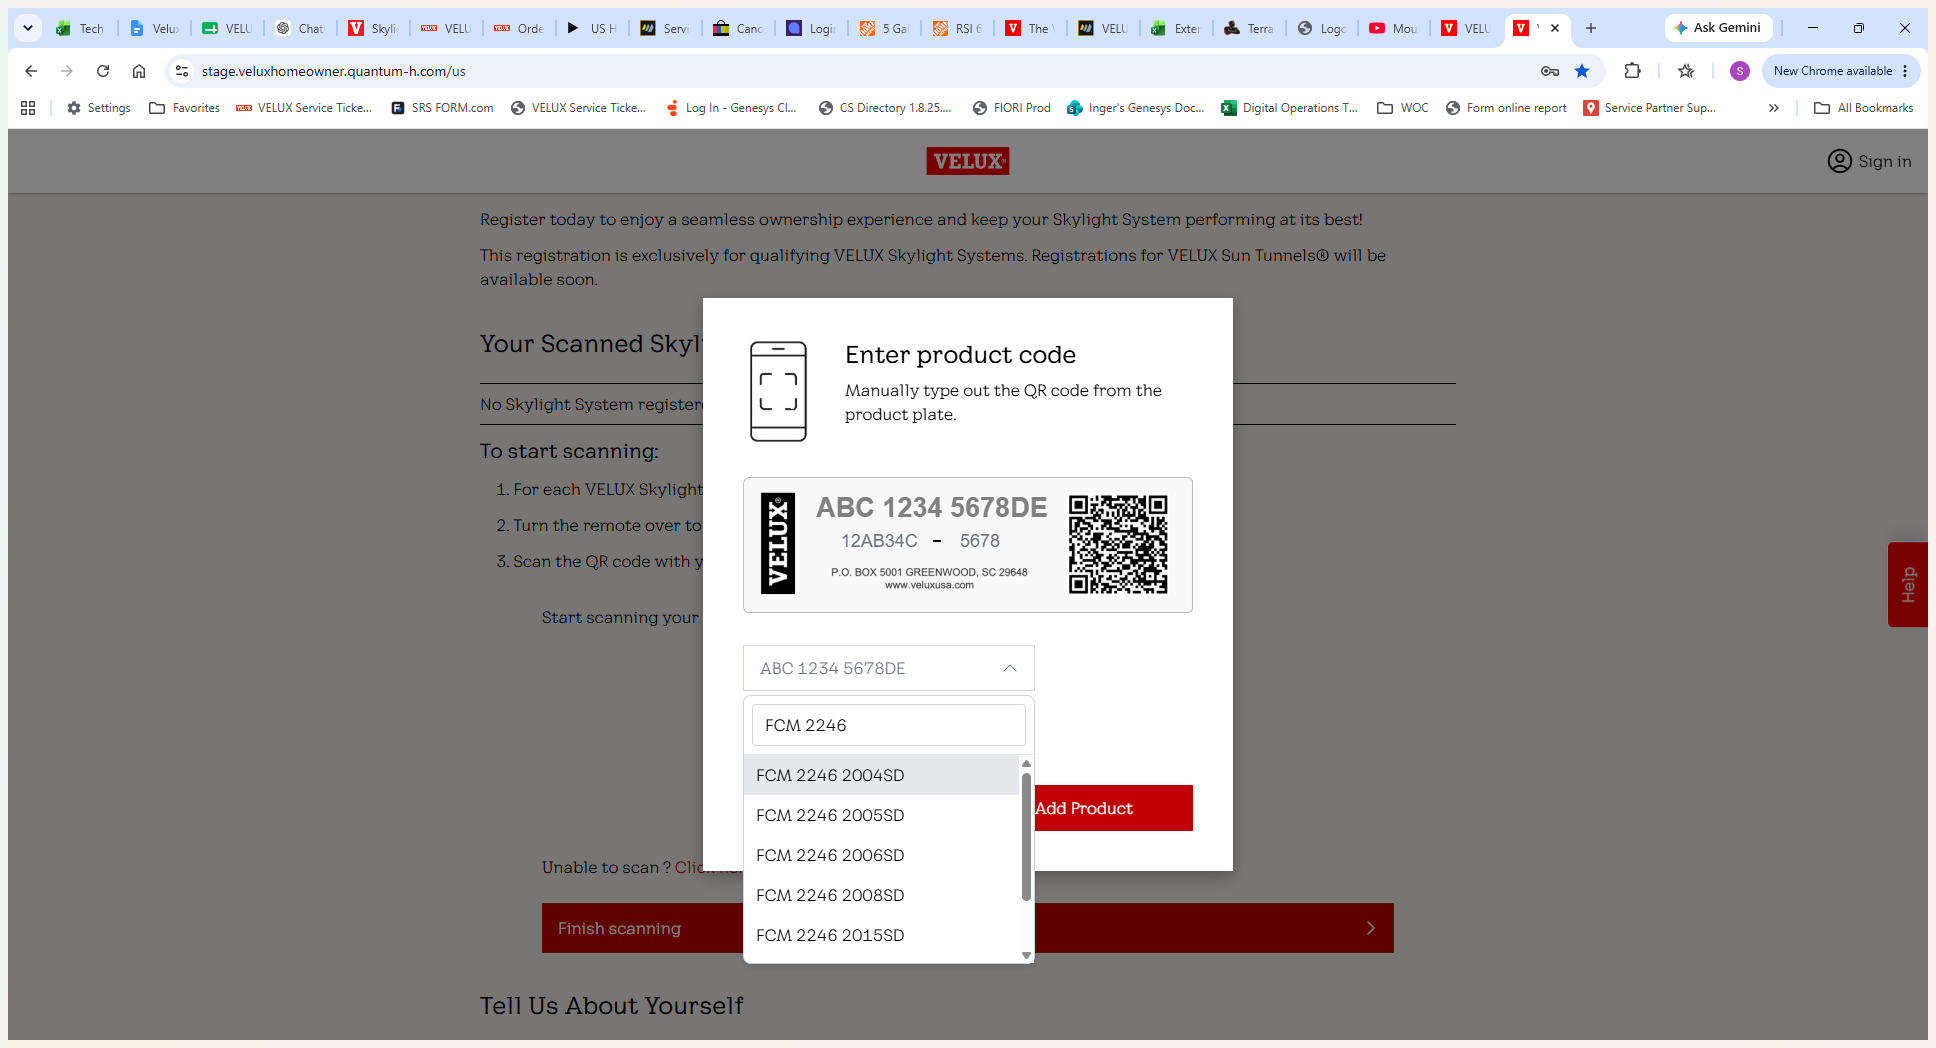
Step #3: Type your specific product code (e.g., FCM 2246 2004SD 01BT05A TEST) into the text field.
4
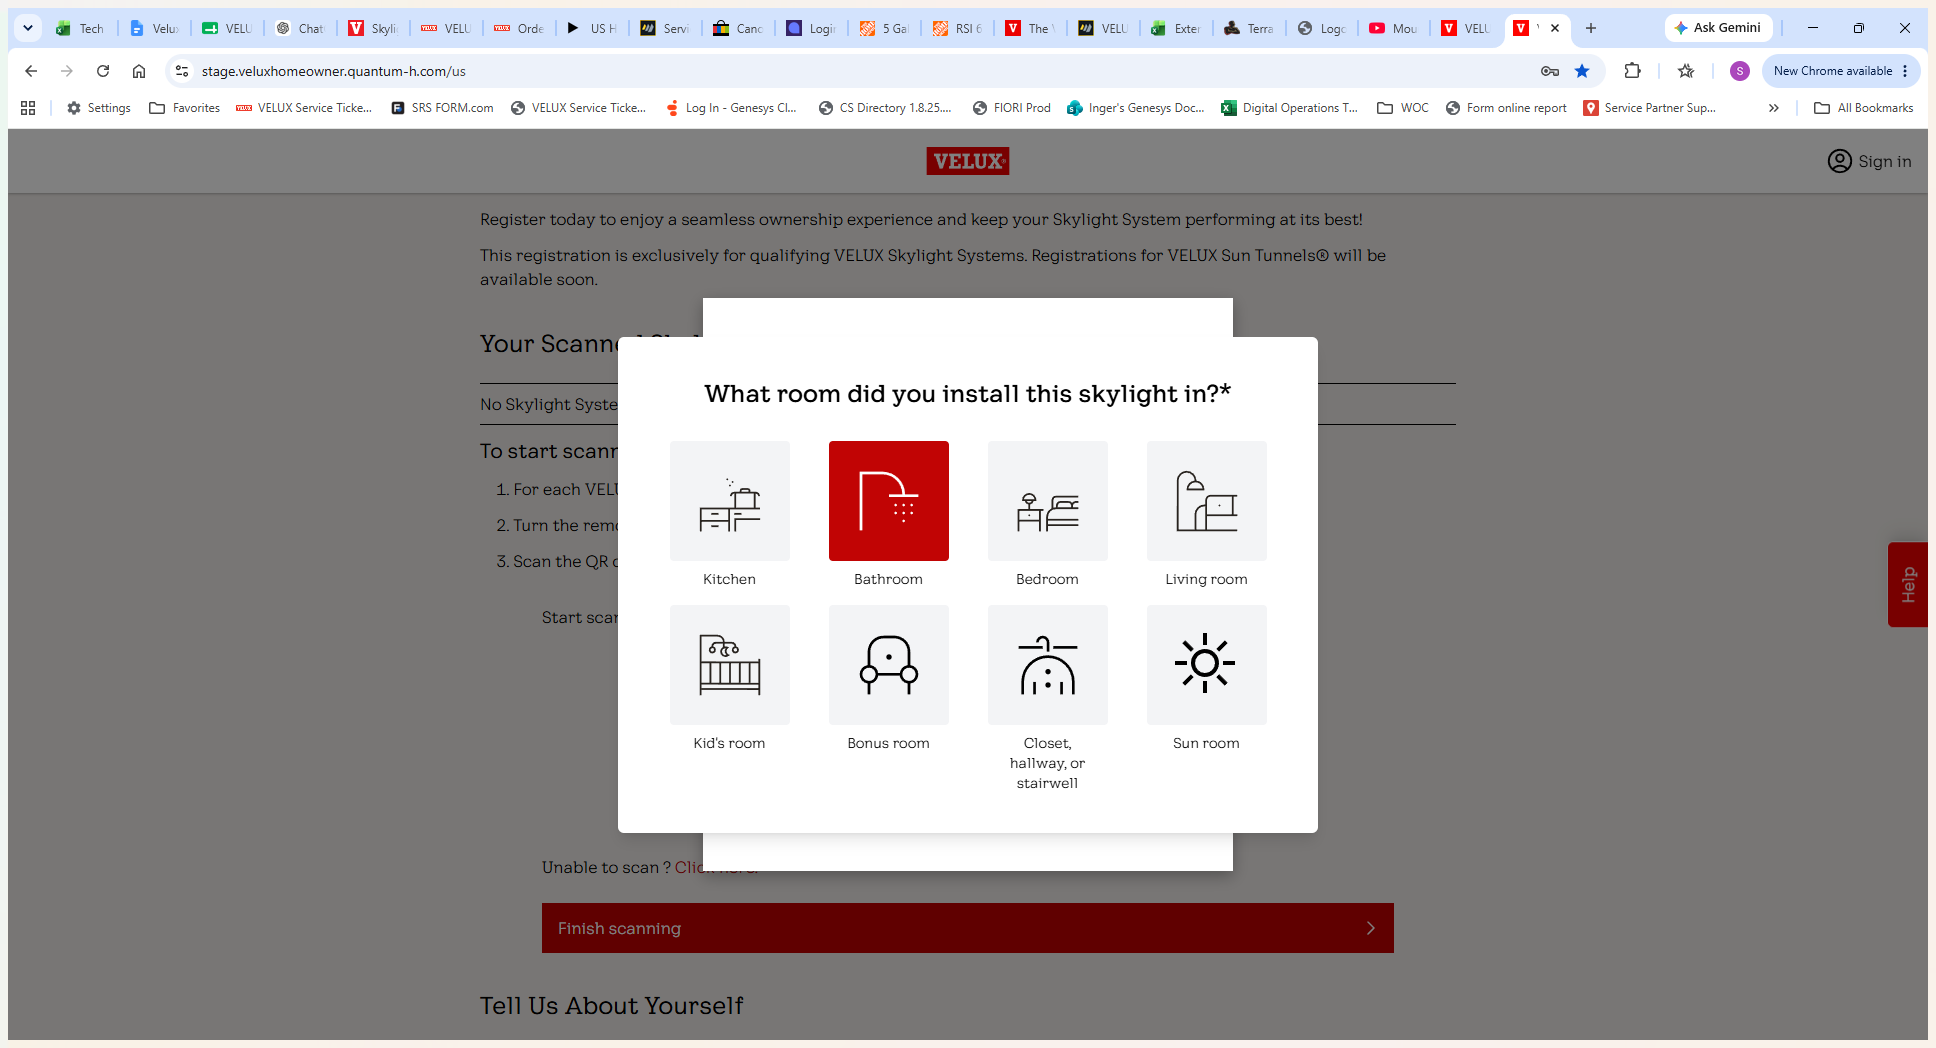
Select the room where the skylight is installed (e.g., Bathroom) from the icon grid.
Step #4: Select the room where the skylight is installed (e.g., Bathroom) from the icon grid.
5
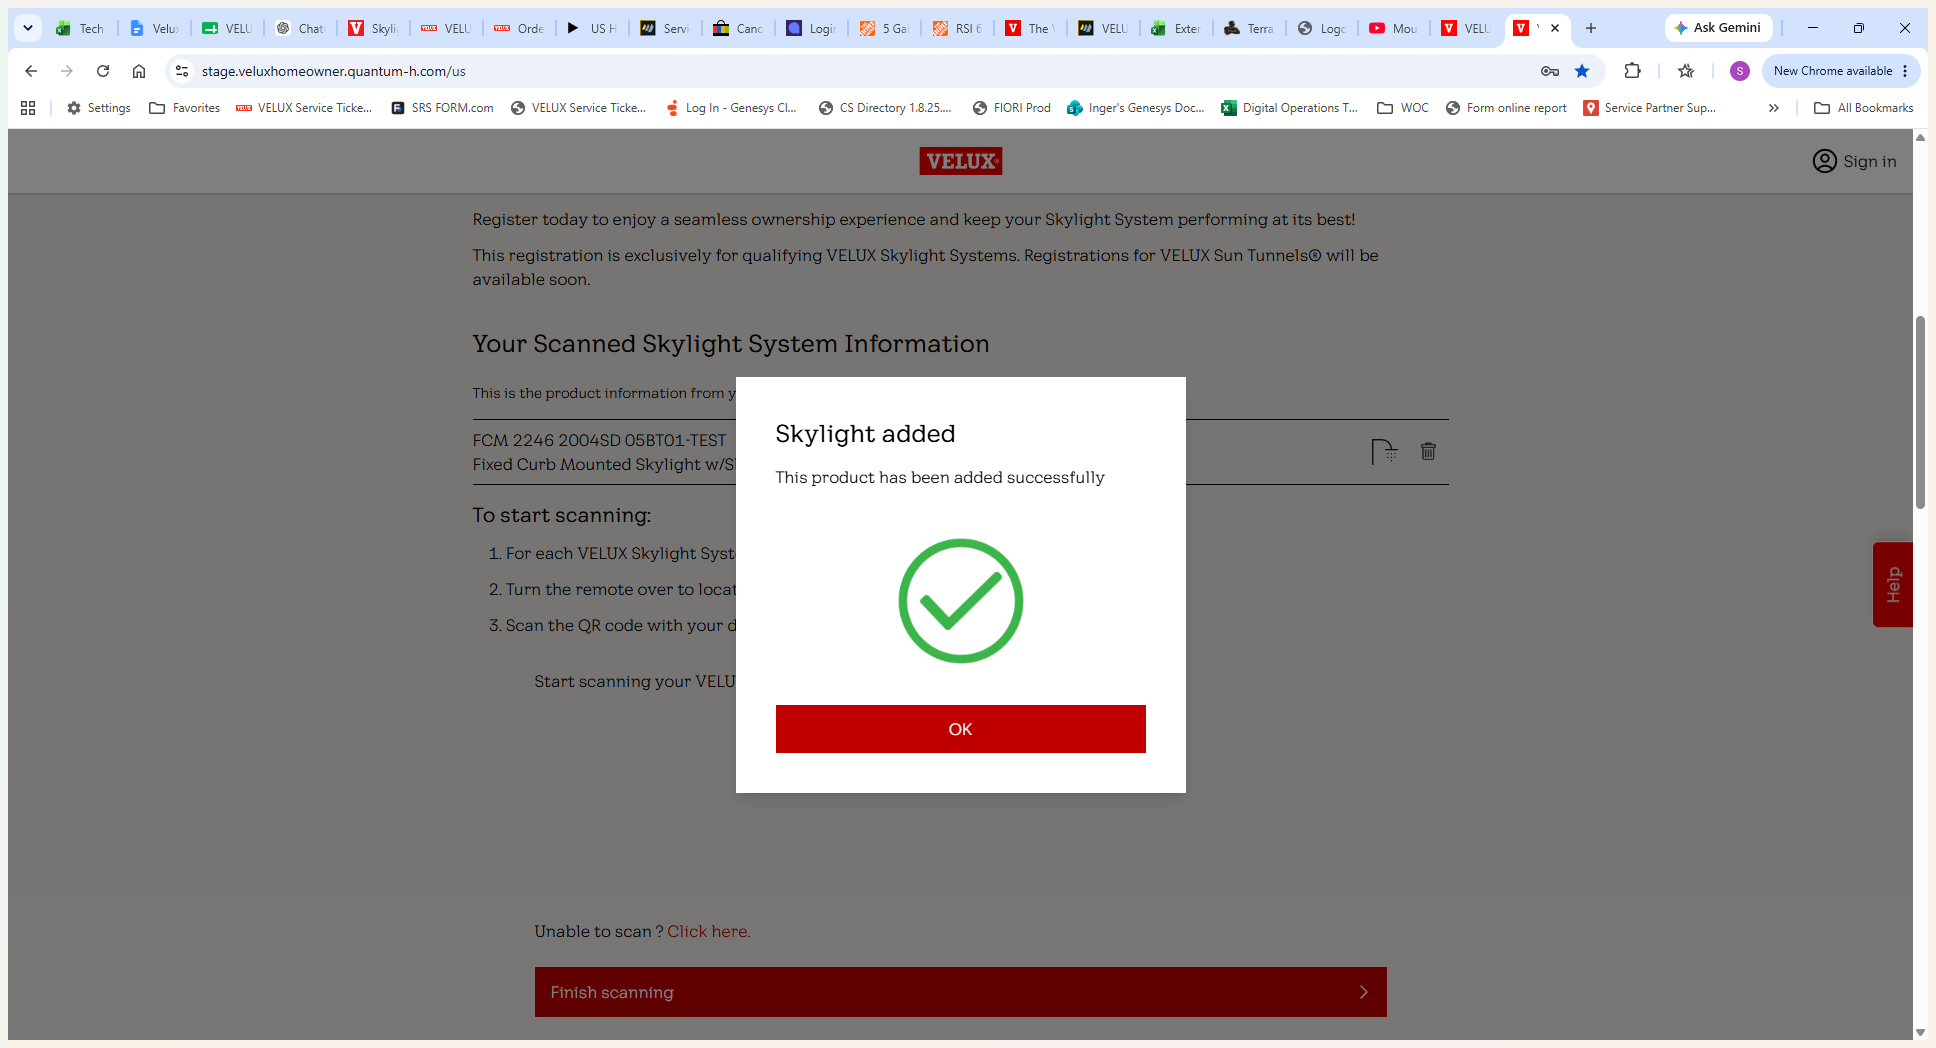
Click OK on the success confirmation.
Step #5: Click OK on the success confirmation.

Add Additional Products (Optional)

If you have multiple skylights, you can add all of them before finalizing your registration.
6
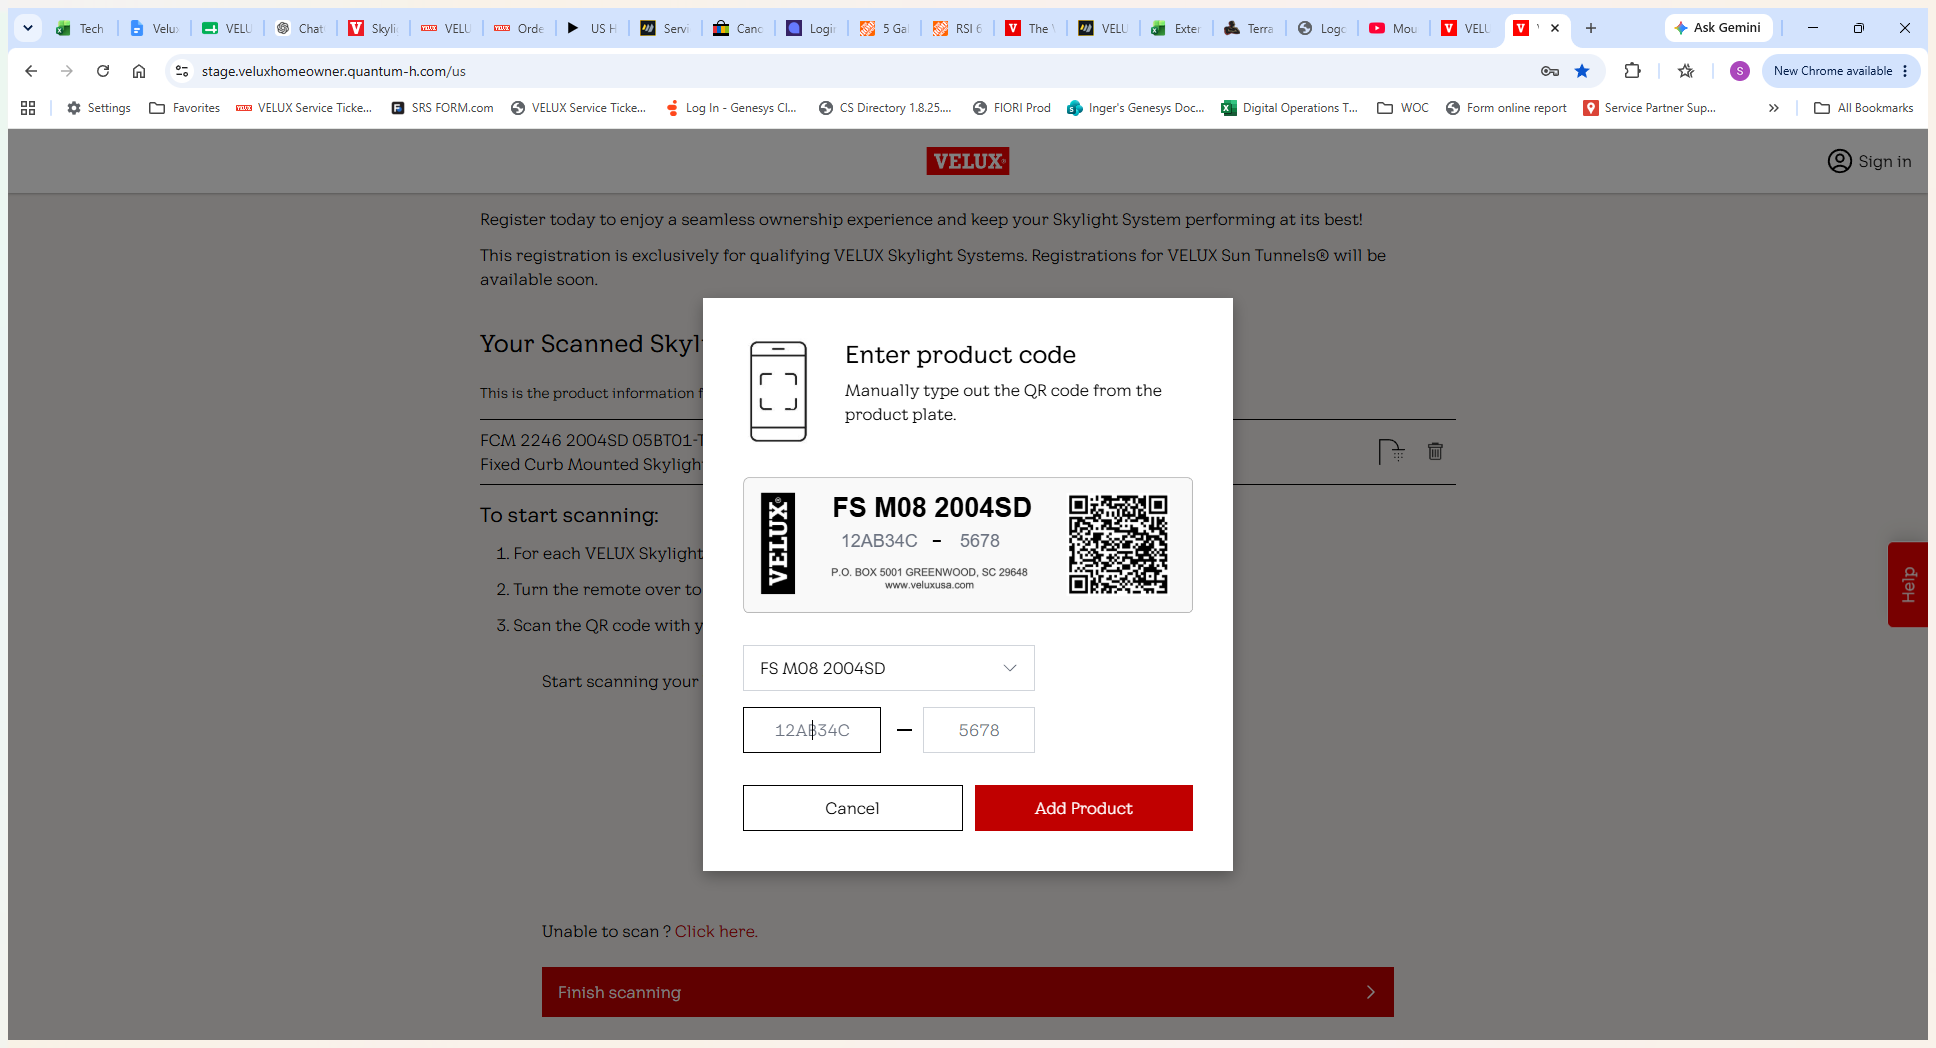
Enter the new product code and click Add Product.
Step #6: Enter the new product code and click Add Product.
7
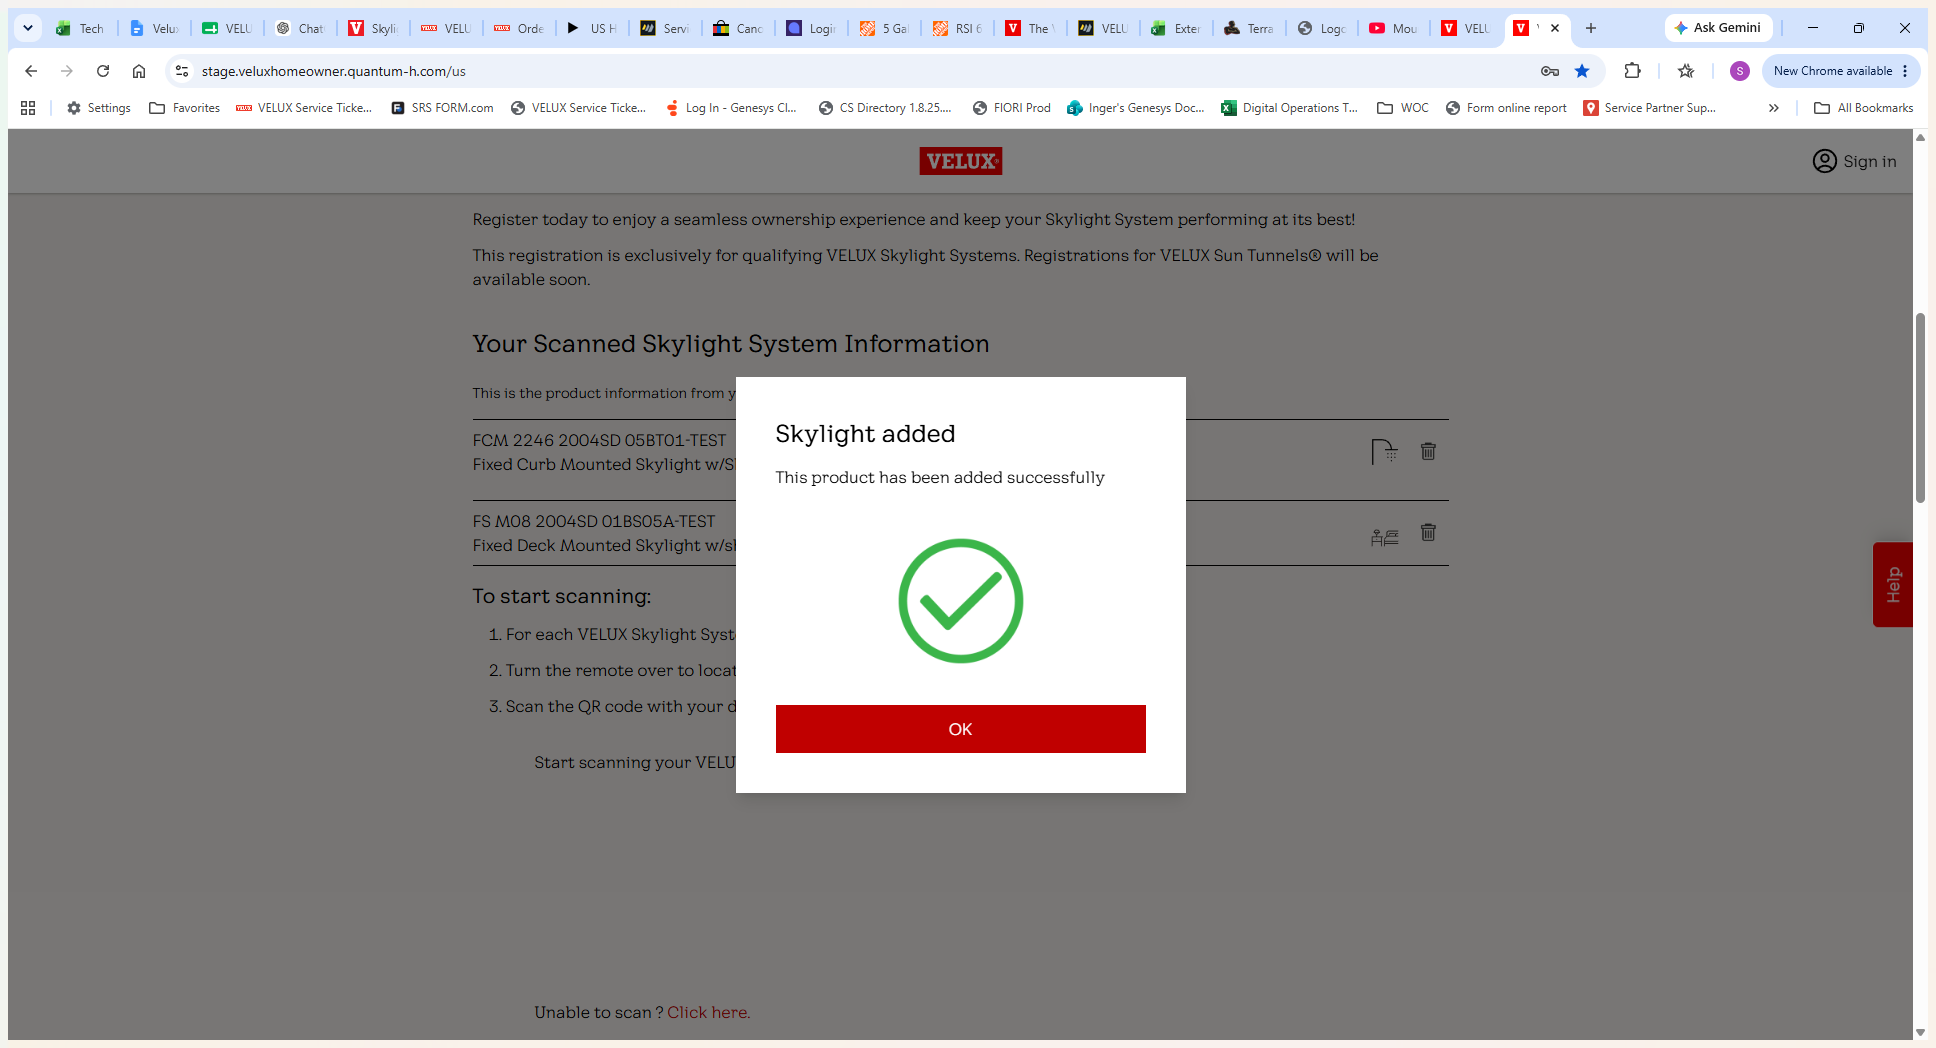
Click OK to confirm the addition.
Step #7: Click OK to confirm the addition.
8
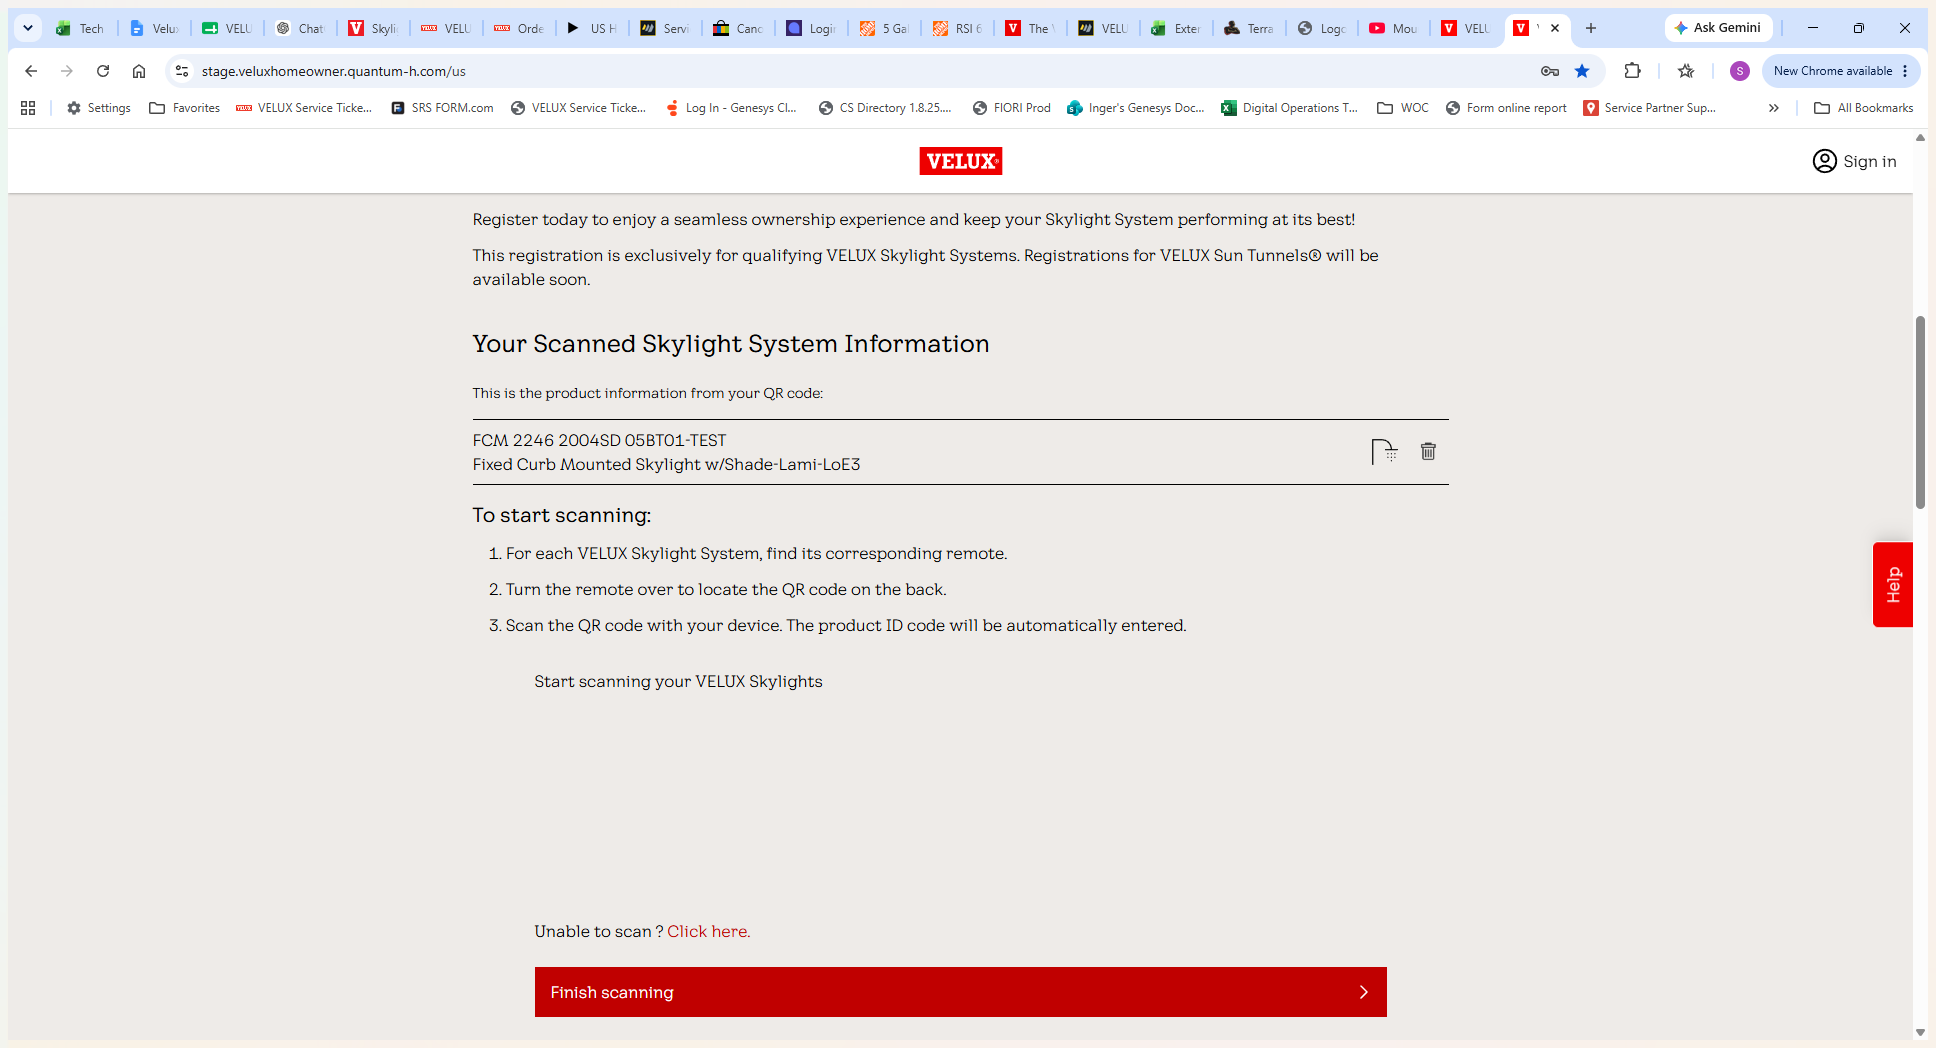
Once all products are added, click Finish scanning at the bottom of the page.
Step #8: Once all products are added, click Finish scanning at the bottom of the page.

Create Your Account

9
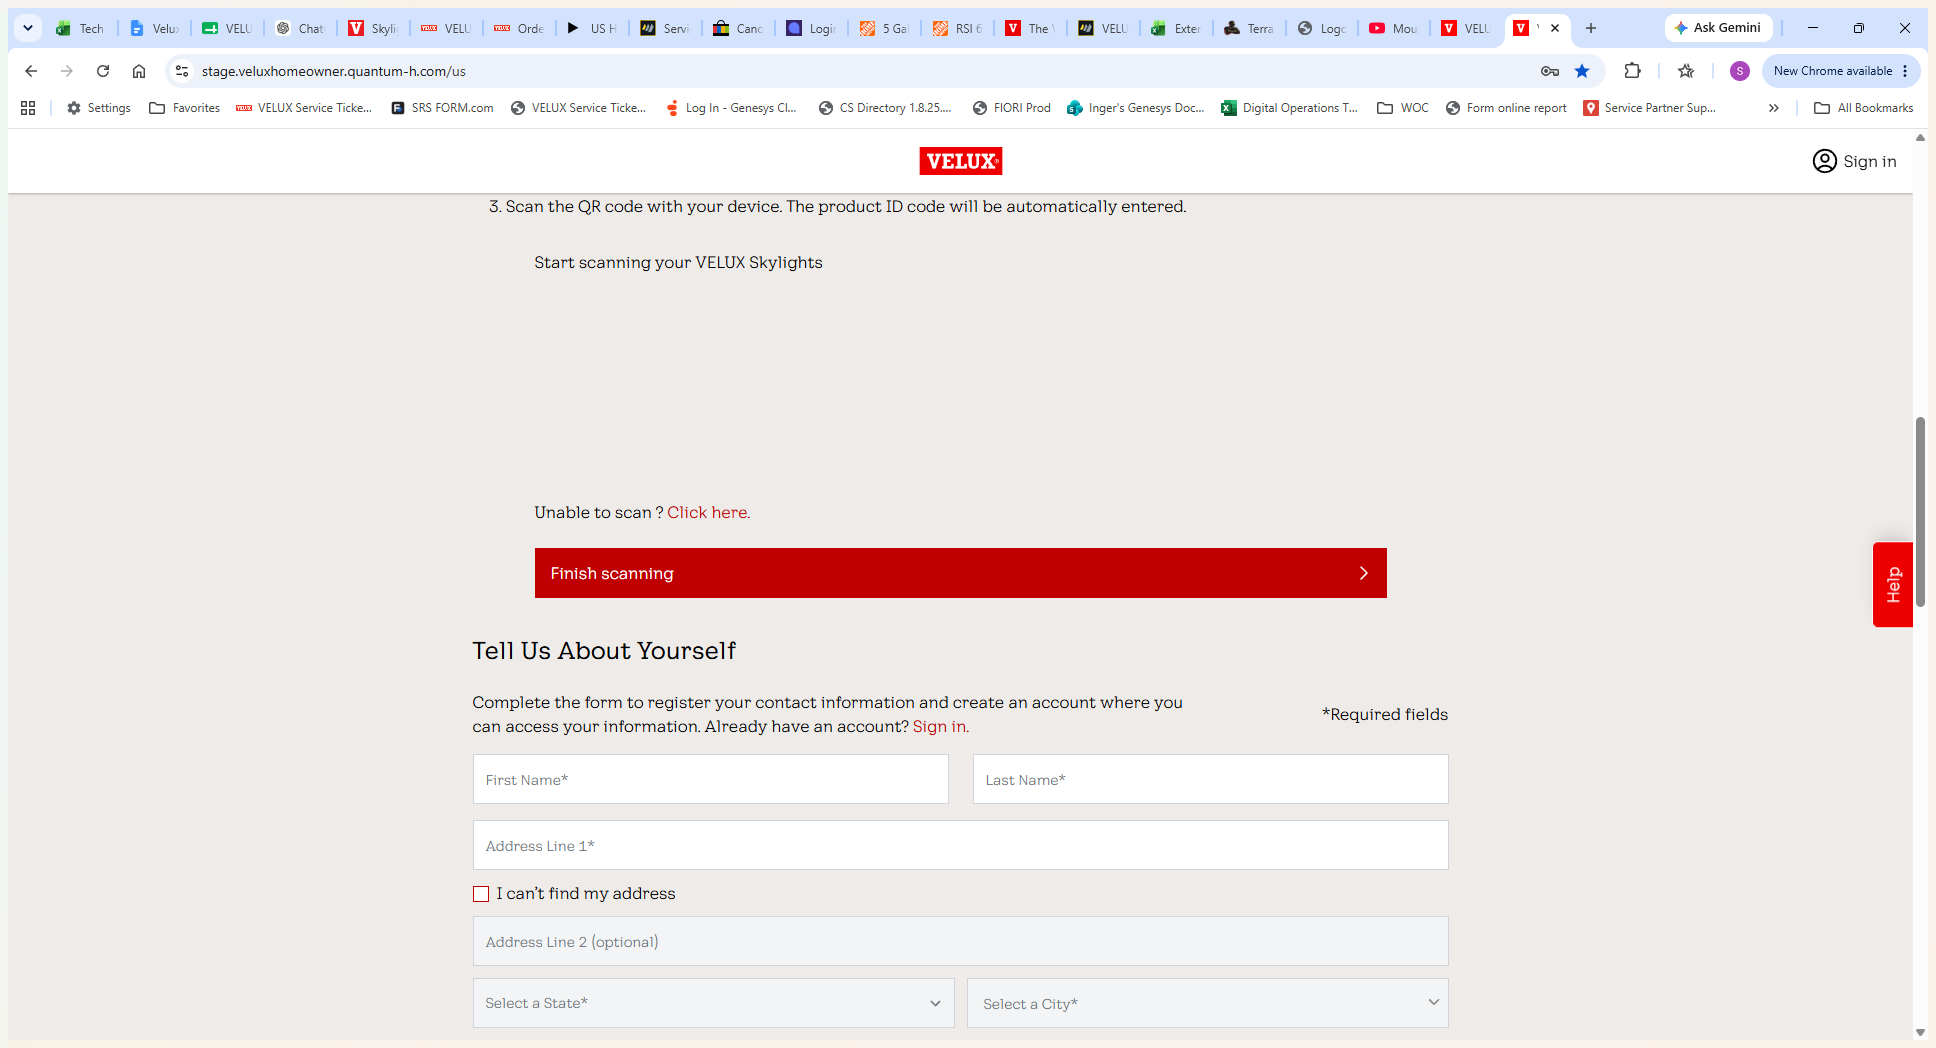
Fill out the required contact information, including your name, address, and secure password, to create your homeowner account.
Step #9: Fill out the required contact information, including your name, address, and secure password, to create your homeowner account.
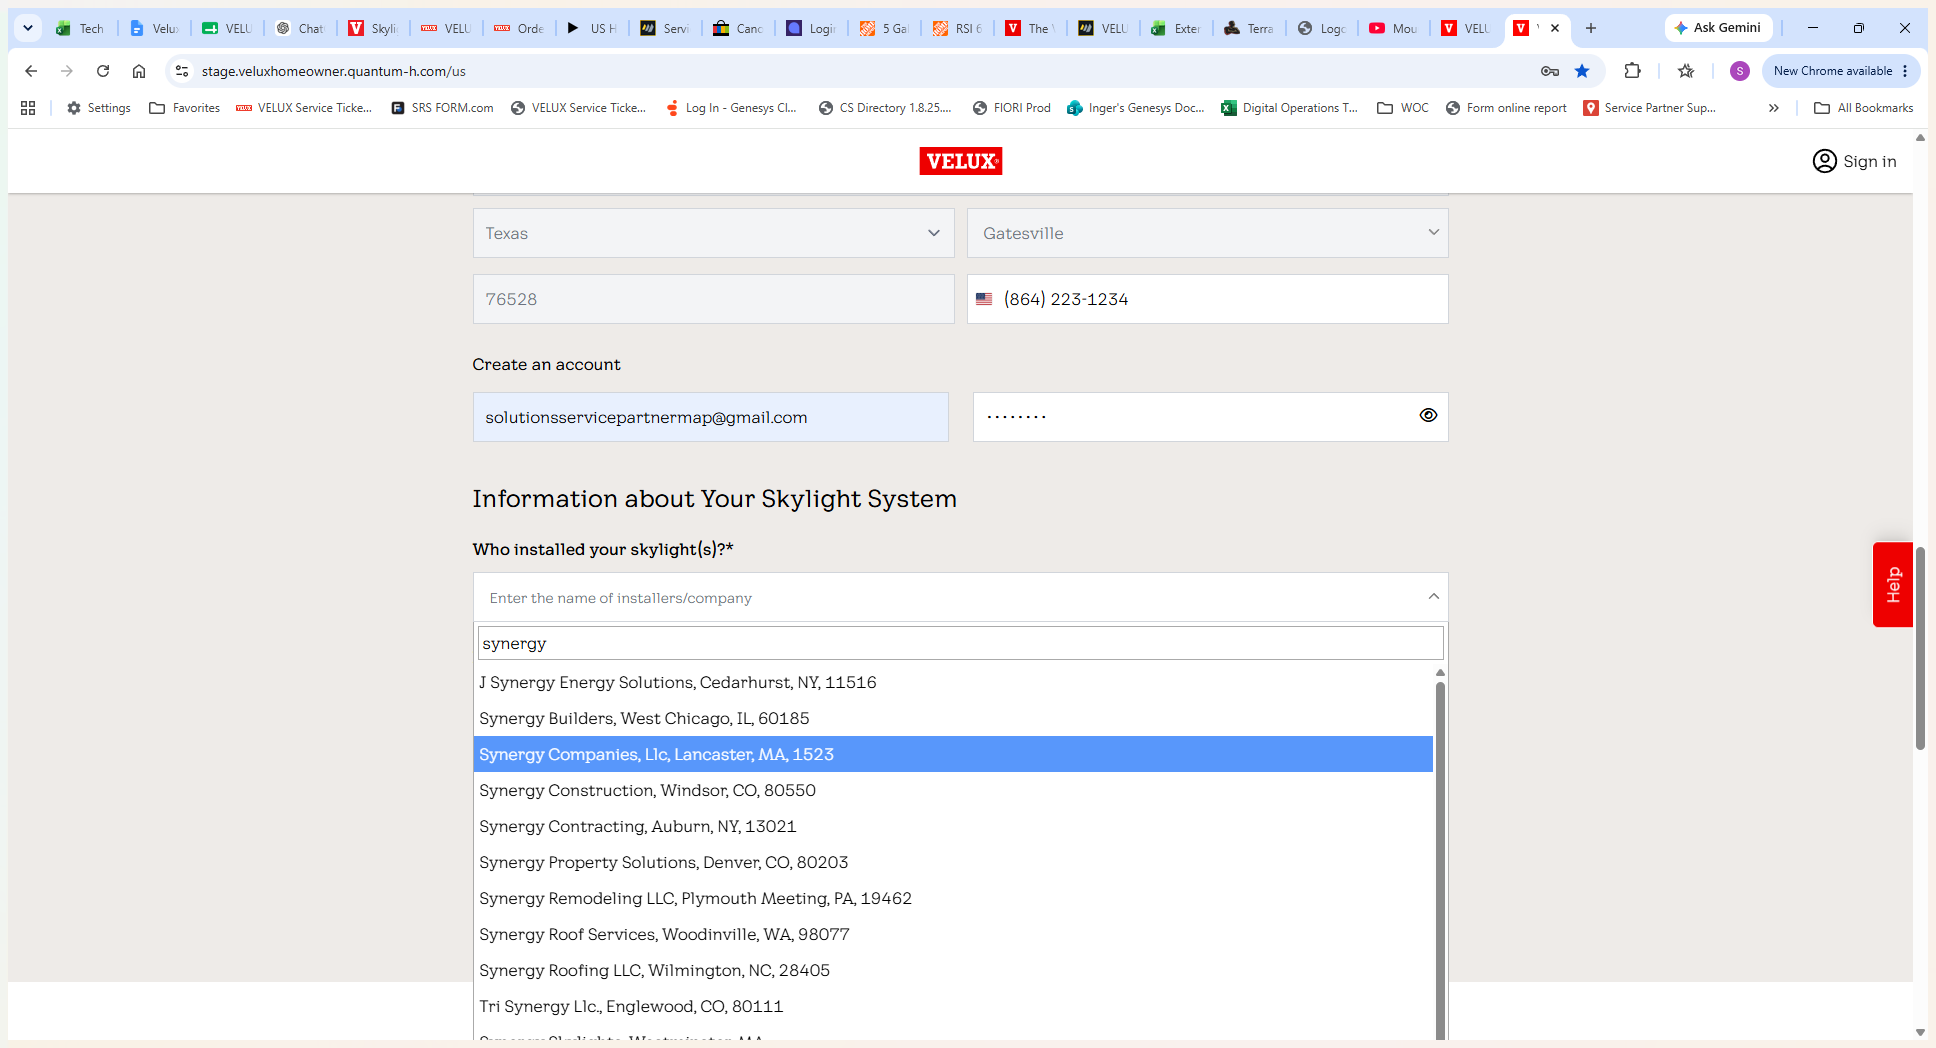
10
Search for and select your installer or installation company from the dropdown menu.
Step #10: Search for and select your installer or installation company from the dropdown menu.
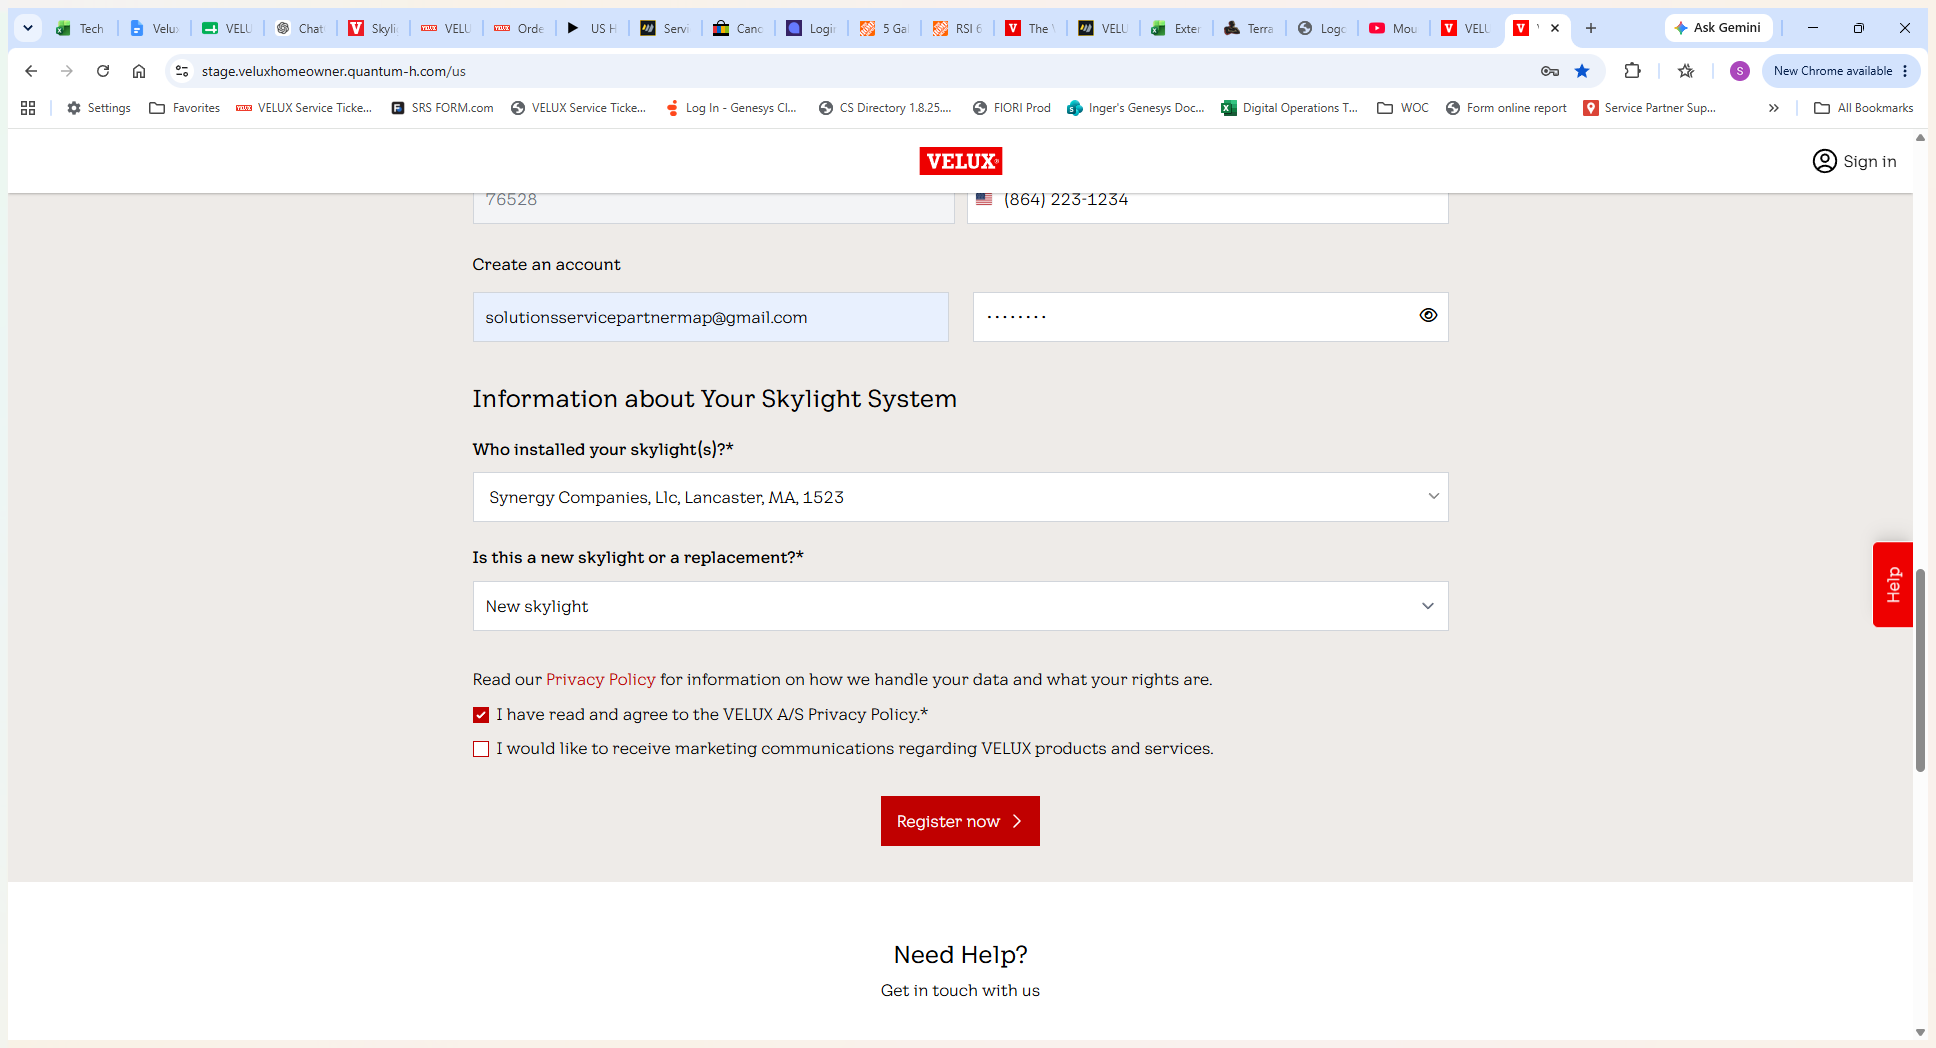
11
Review your details, accept any necessary policies, and click Register now.
Step #11: Review your details, accept any necessary policies, and click Register now.
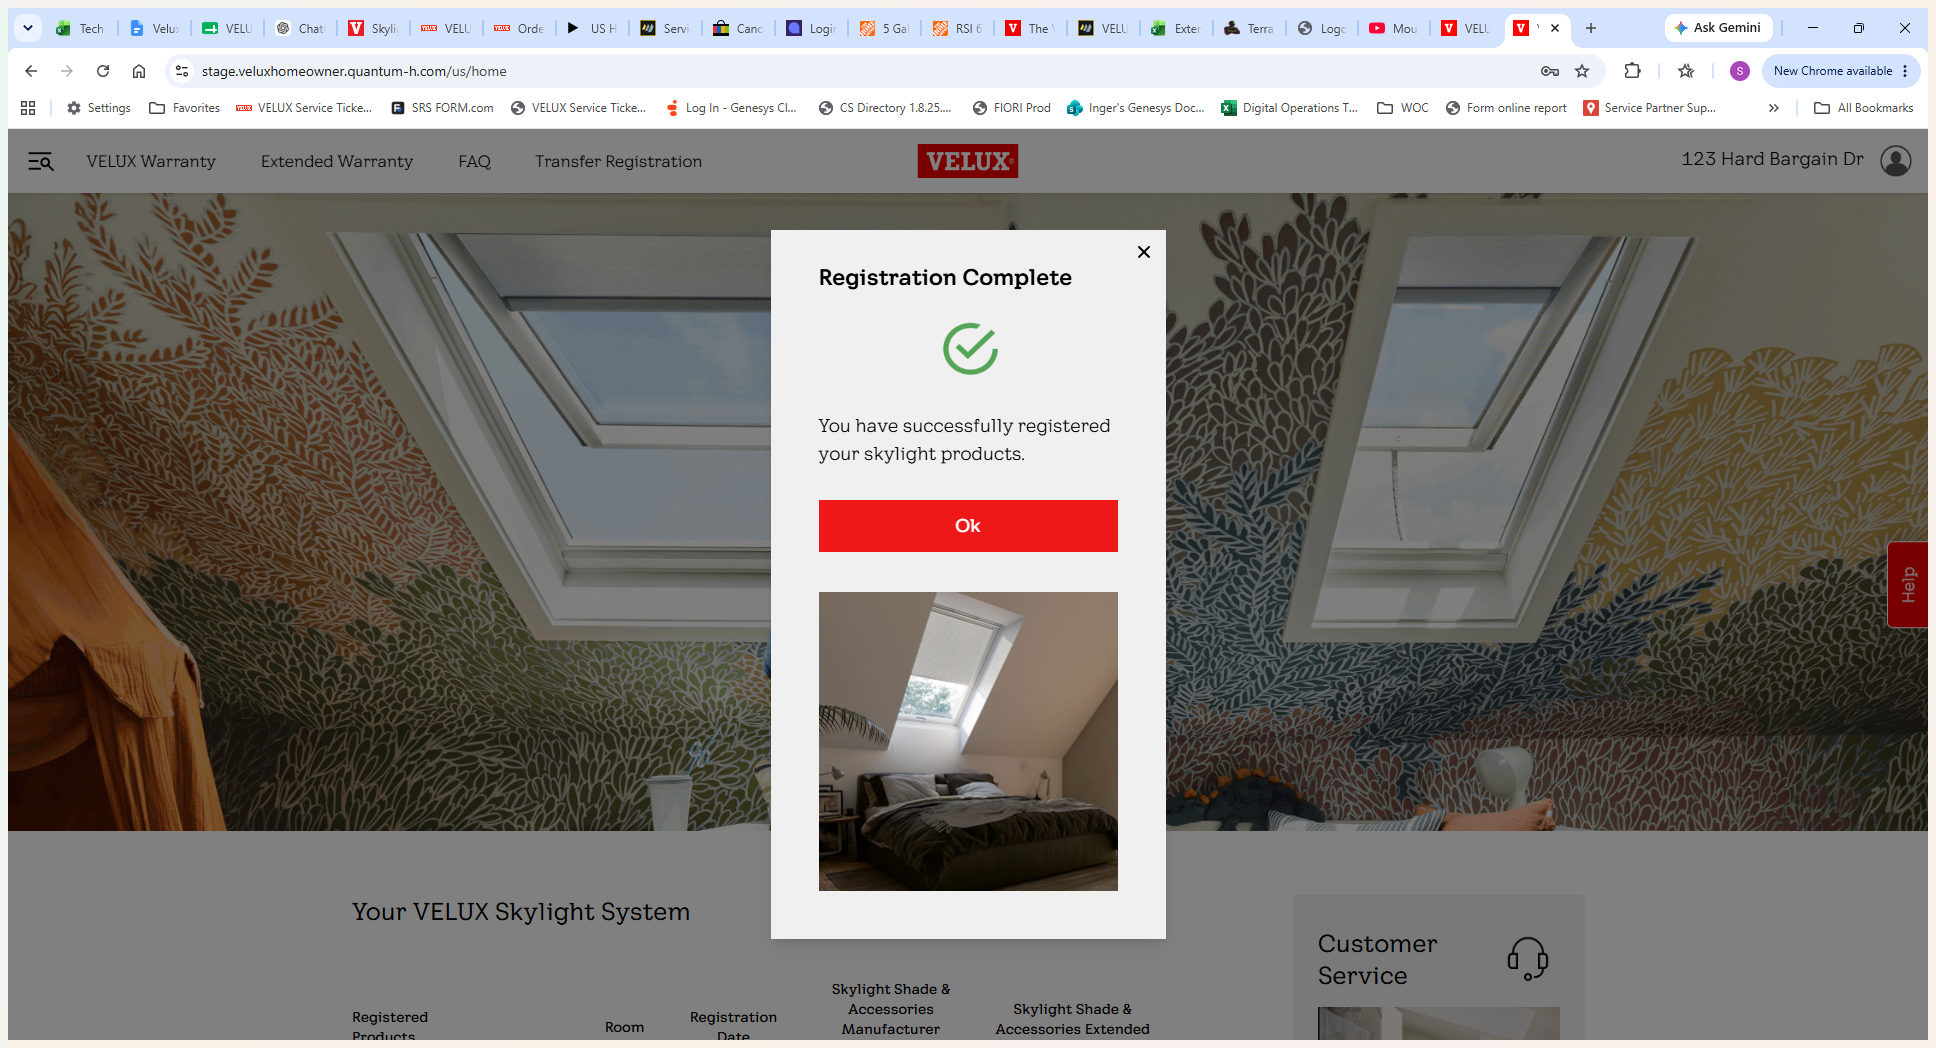
12
Click OK on the final confirmation screen to complete the process and access your homeowner portal dashboard.
Step #12: Click OK on the final confirmation screen to complete the process and access your homeowner portal dashboard.

Q: What if I don't have a camera or cannot scan the product code?

A: If you are unable to use a camera to scan the code on your remote, you can select the option to manually enter your product codes instead.

Q: Where can I manage my warranties after registration?

A: Once you successfully register your products, log into the homeowner portal. Your dashboard will display your active skylight system warranties and give you the option to add extended coverage.

Term

Definition

Product Code

A unique alphanumeric identifier found on the skylight product plate used for registration.

Homeowner Portal

The personal dashboard where customers manage their registered skylights and view active warranties.

Quantum Portal

The underlying platform system used to process and host the homeowner registration environment.