Icon

How to Run and Print the Weekly Production Schedule

Learn how to export the Job Order Status report in Made2Manage and properly format the weekly production schedule in Microsoft Excel.

By Adam Deye

This guide explains how to generate the weekly production schedule using the Made2Manage ERP software and Microsoft Excel. Completing this task ensures your team has an up-to-date and properly formatted job order status report for the week's manufacturing operations.

This workflow is for production managers and scheduling teams who need to prepare the weekly manufacturing schedule. You will use this process at the start of each week to refresh and distribute the latest job order statuses to the production floor.

Export Job Order Data from Made2Manage
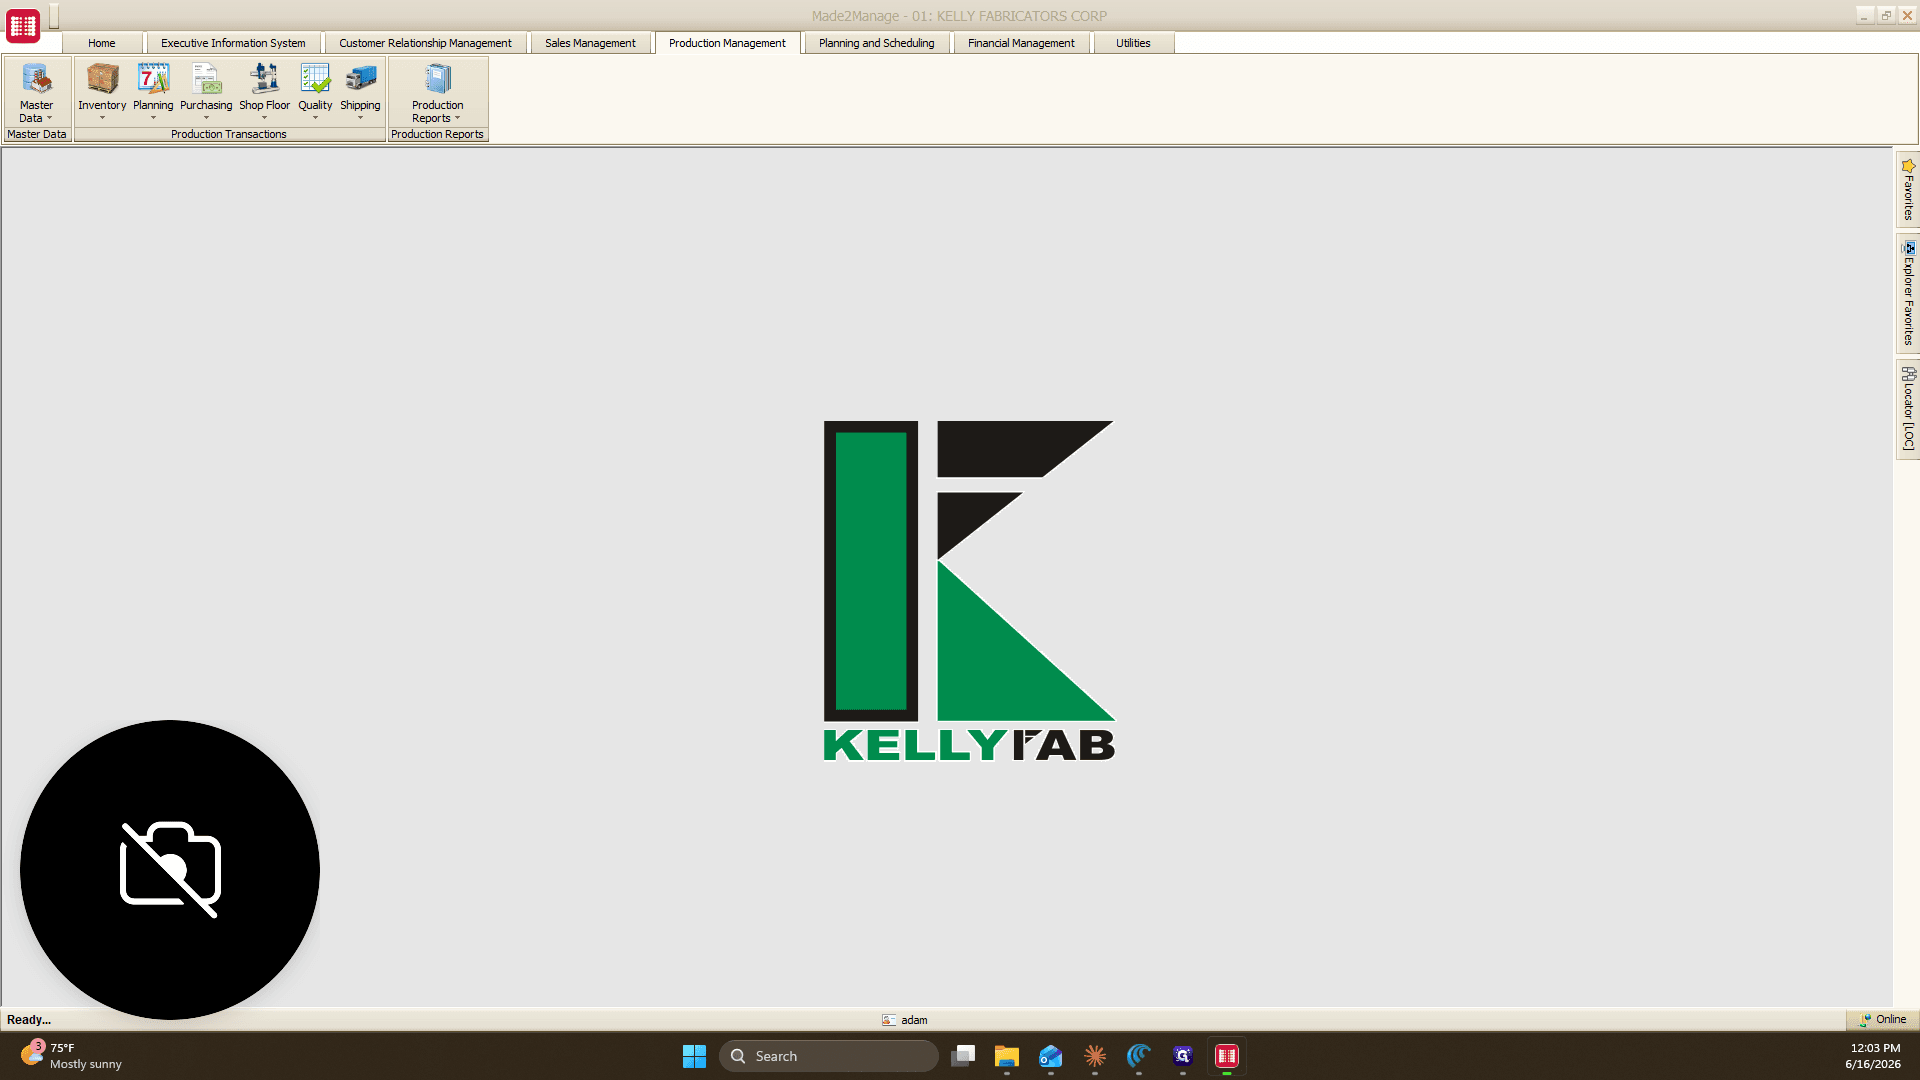
1
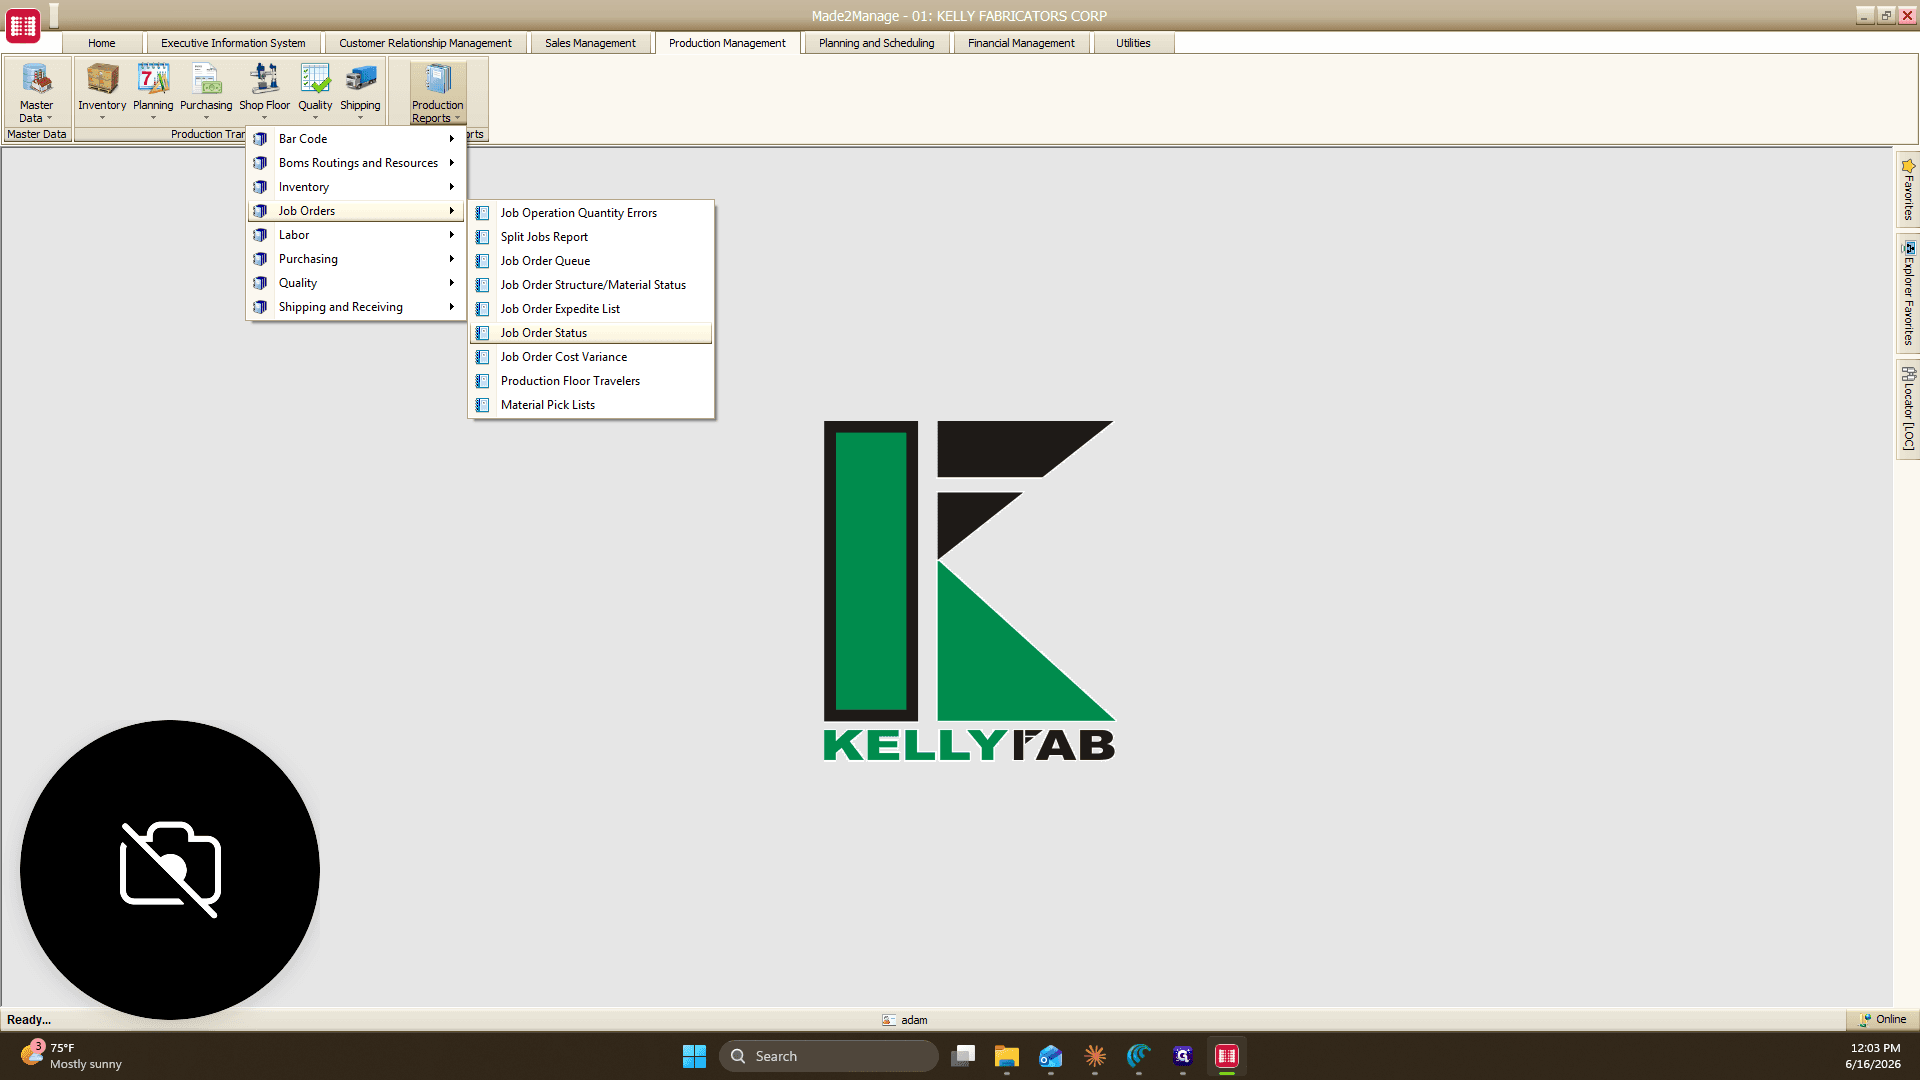
Click Production Reports in the Made2Manage main navigation.
Step #1: Click Production Reports in the Made2Manage main navigation.
2
Select Job Order Status from the dropdown menu.
Step #2: Select Job Order Status from the dropdown menu.
3
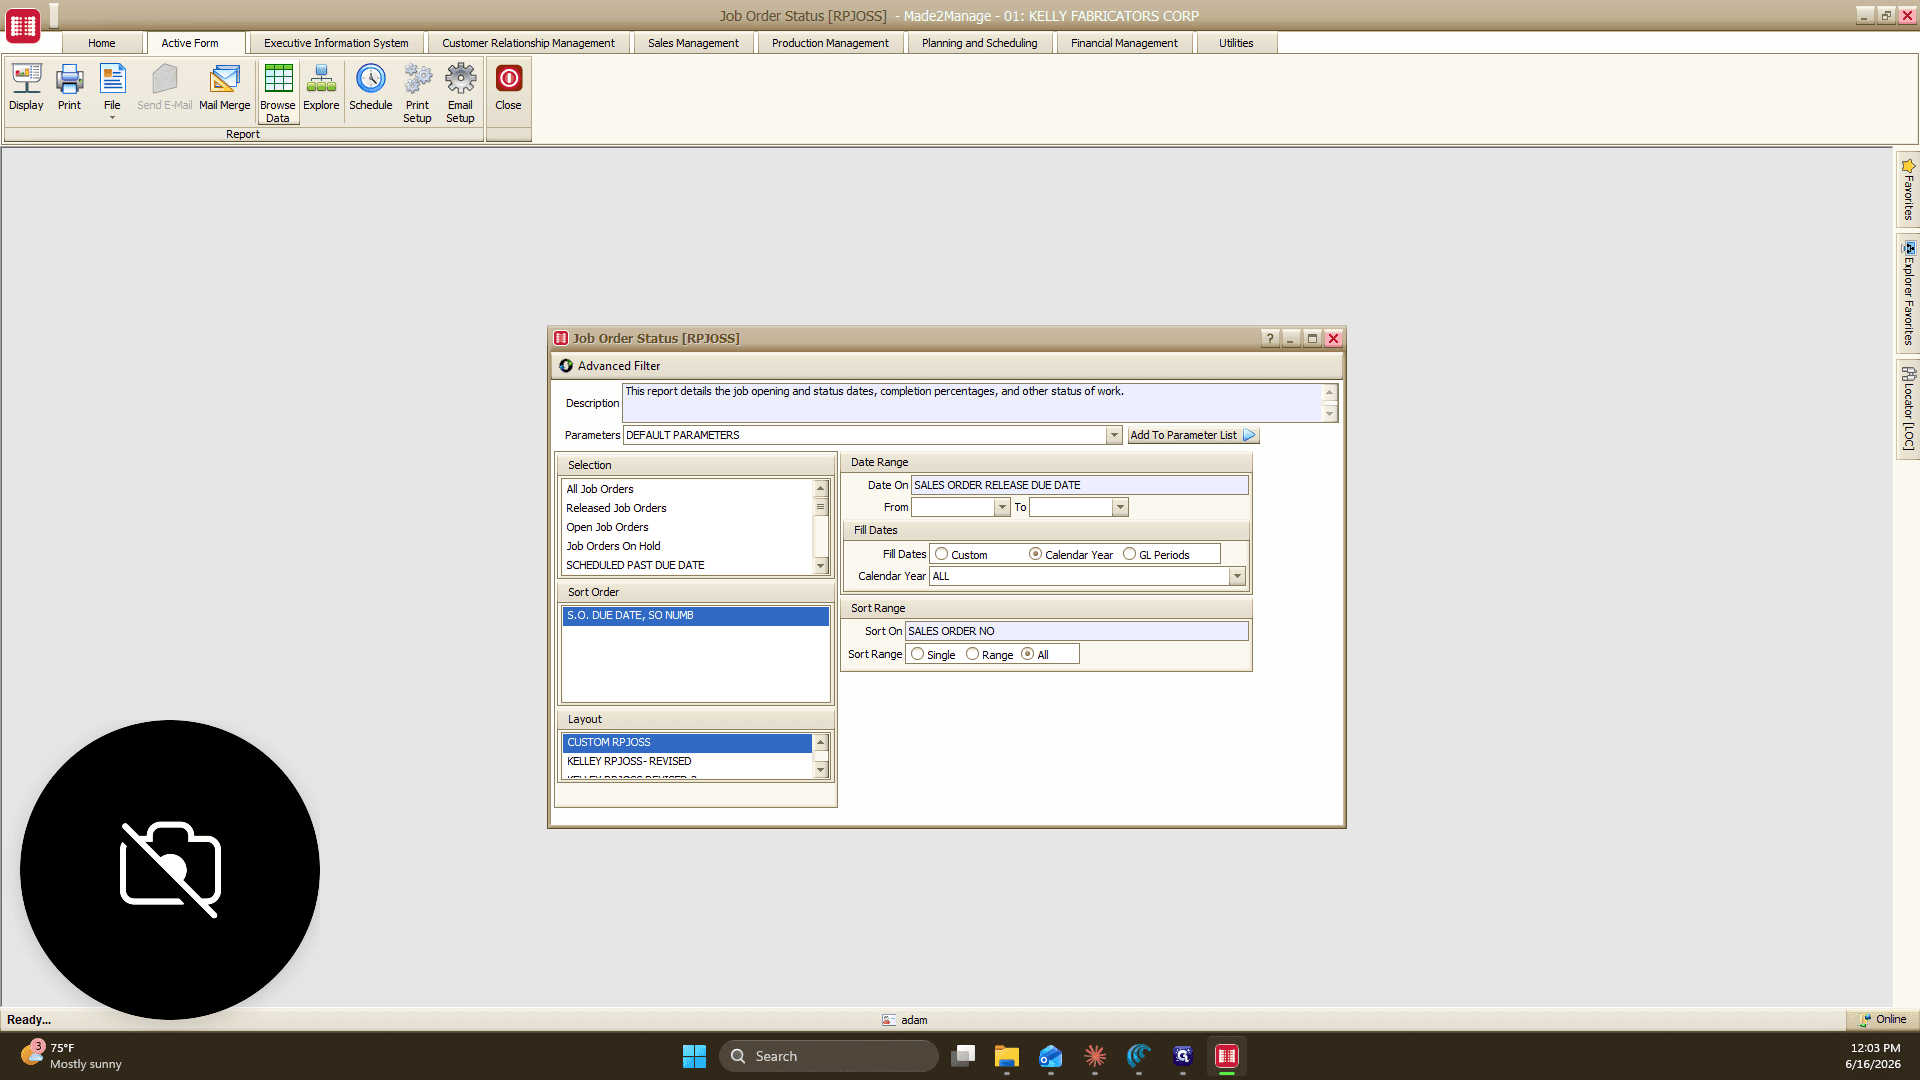
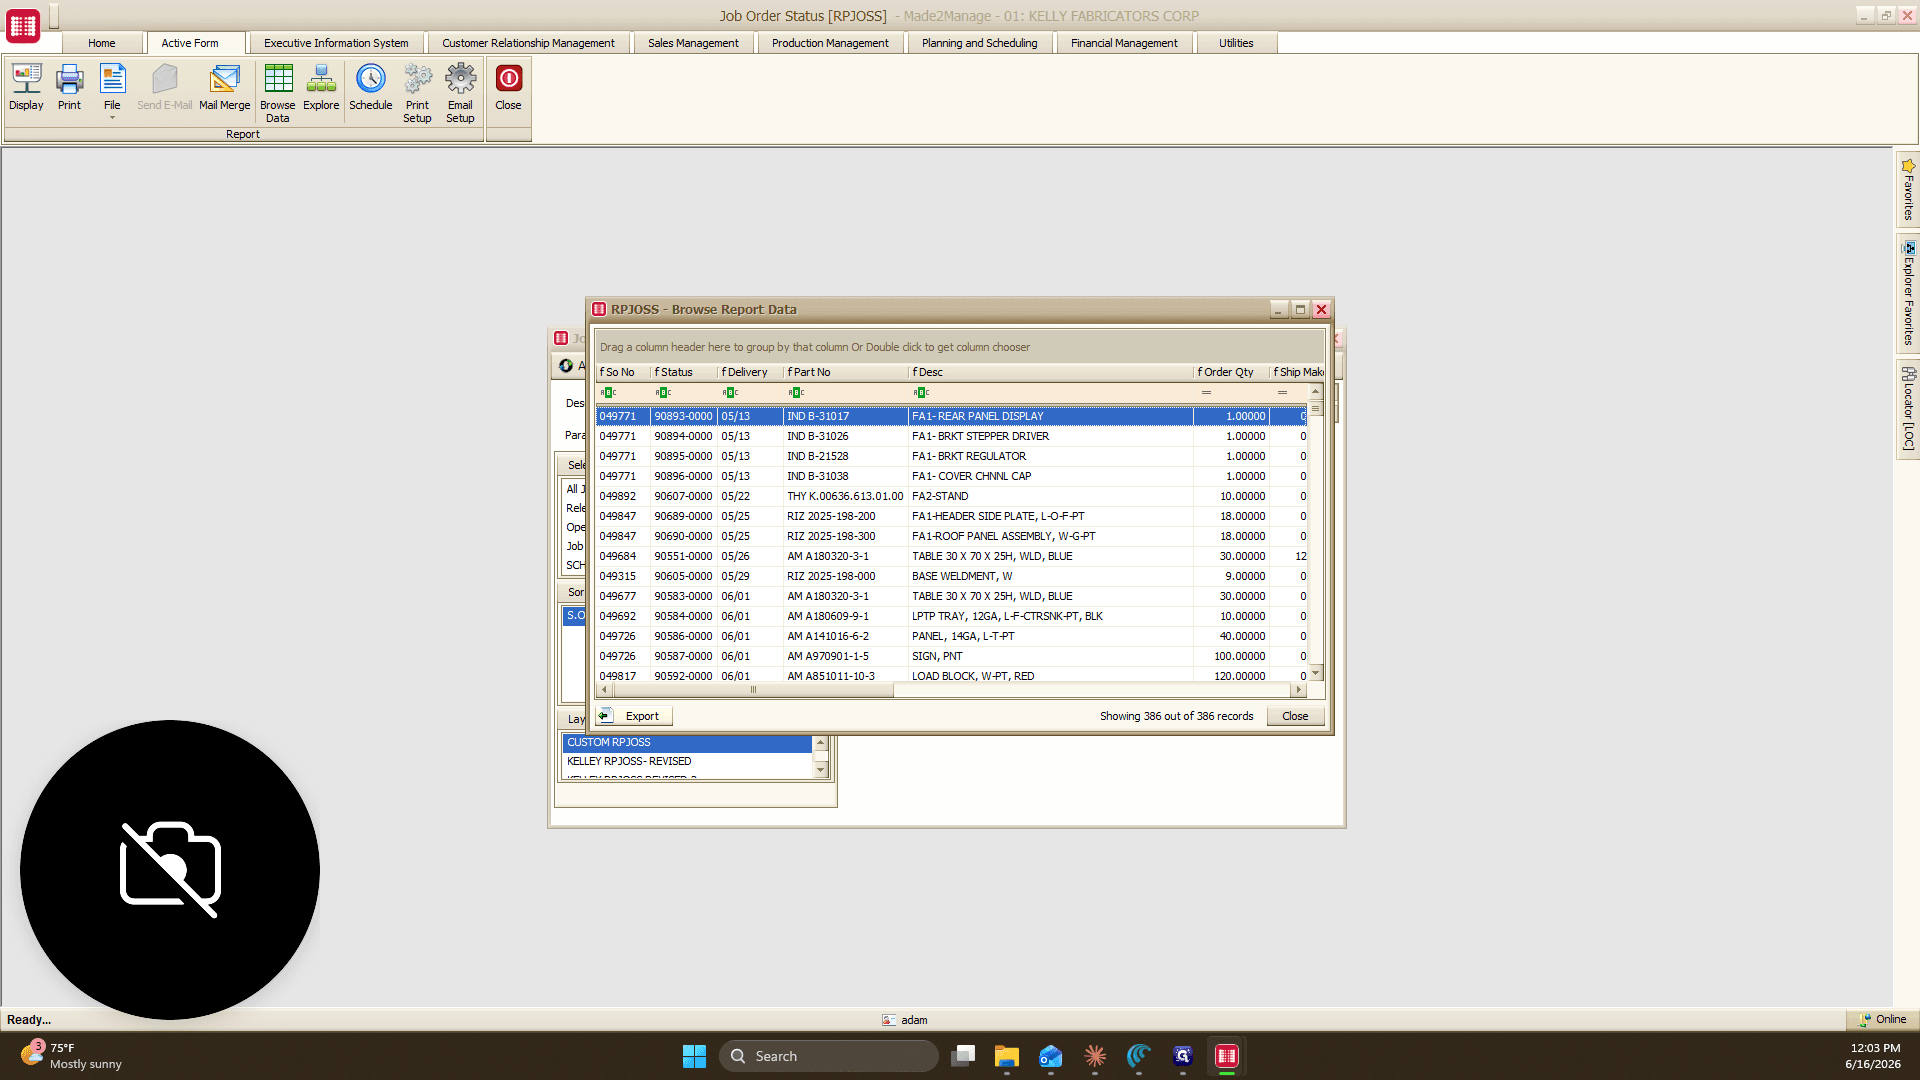
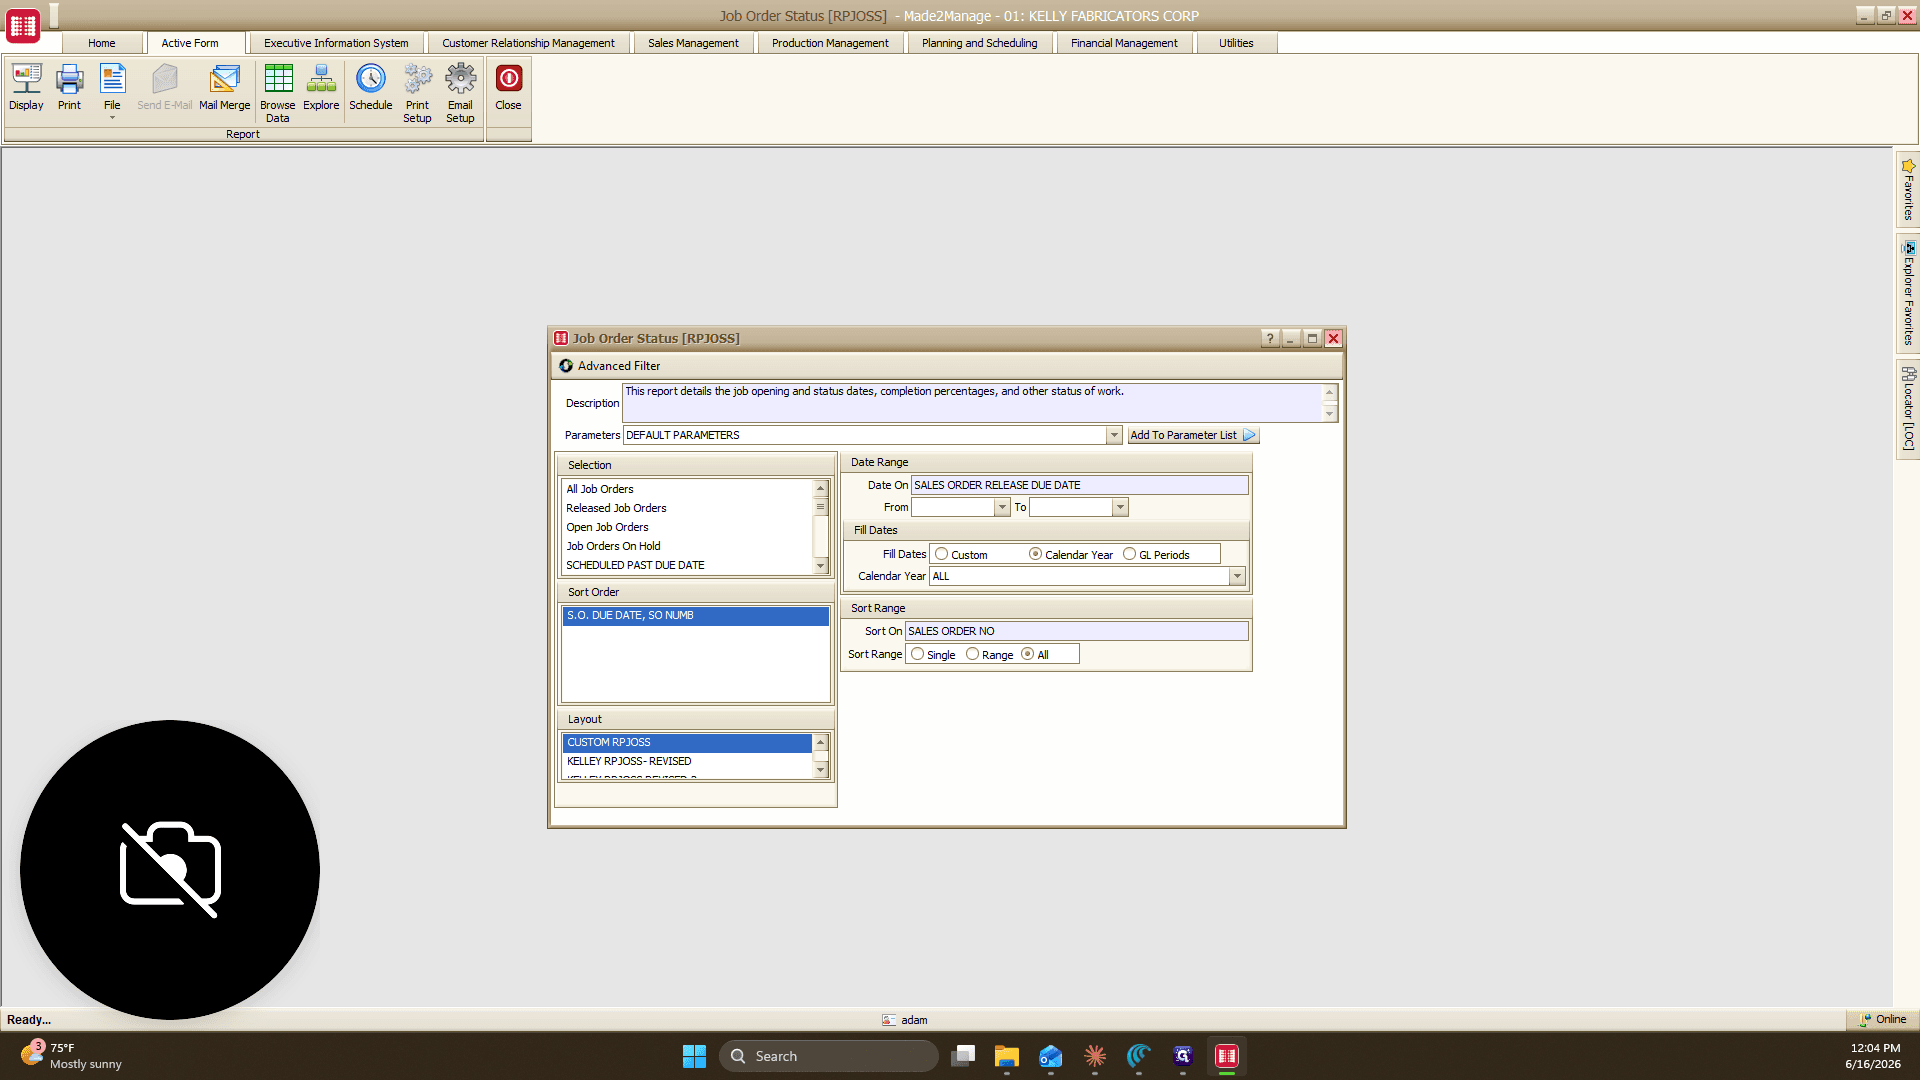
Click Browse to view the custom RP JOSS report data.
Step #3: Click Browse to view the custom RP JOSS report data.
4
Click Export.
Step #4: Click Export.
5
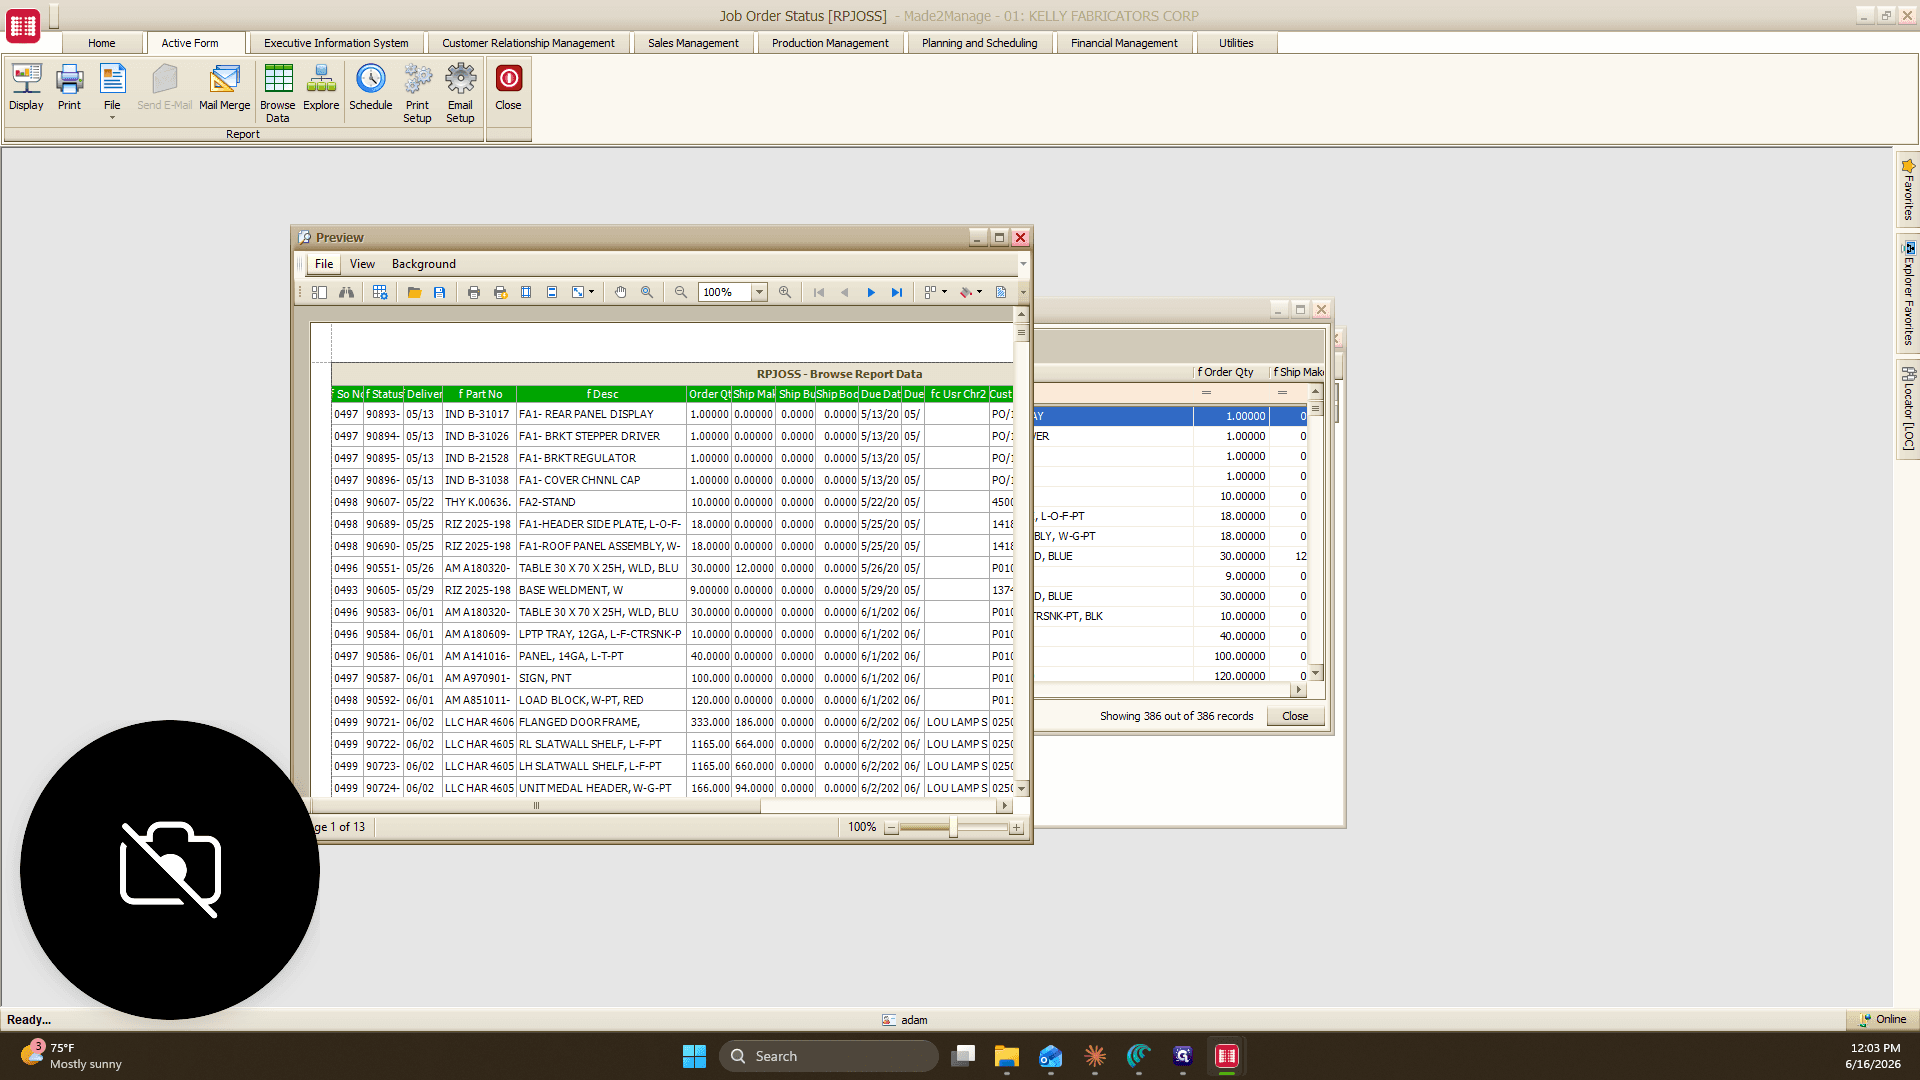
Click File in the preview window.
Step #5: Click File in the preview window.
6
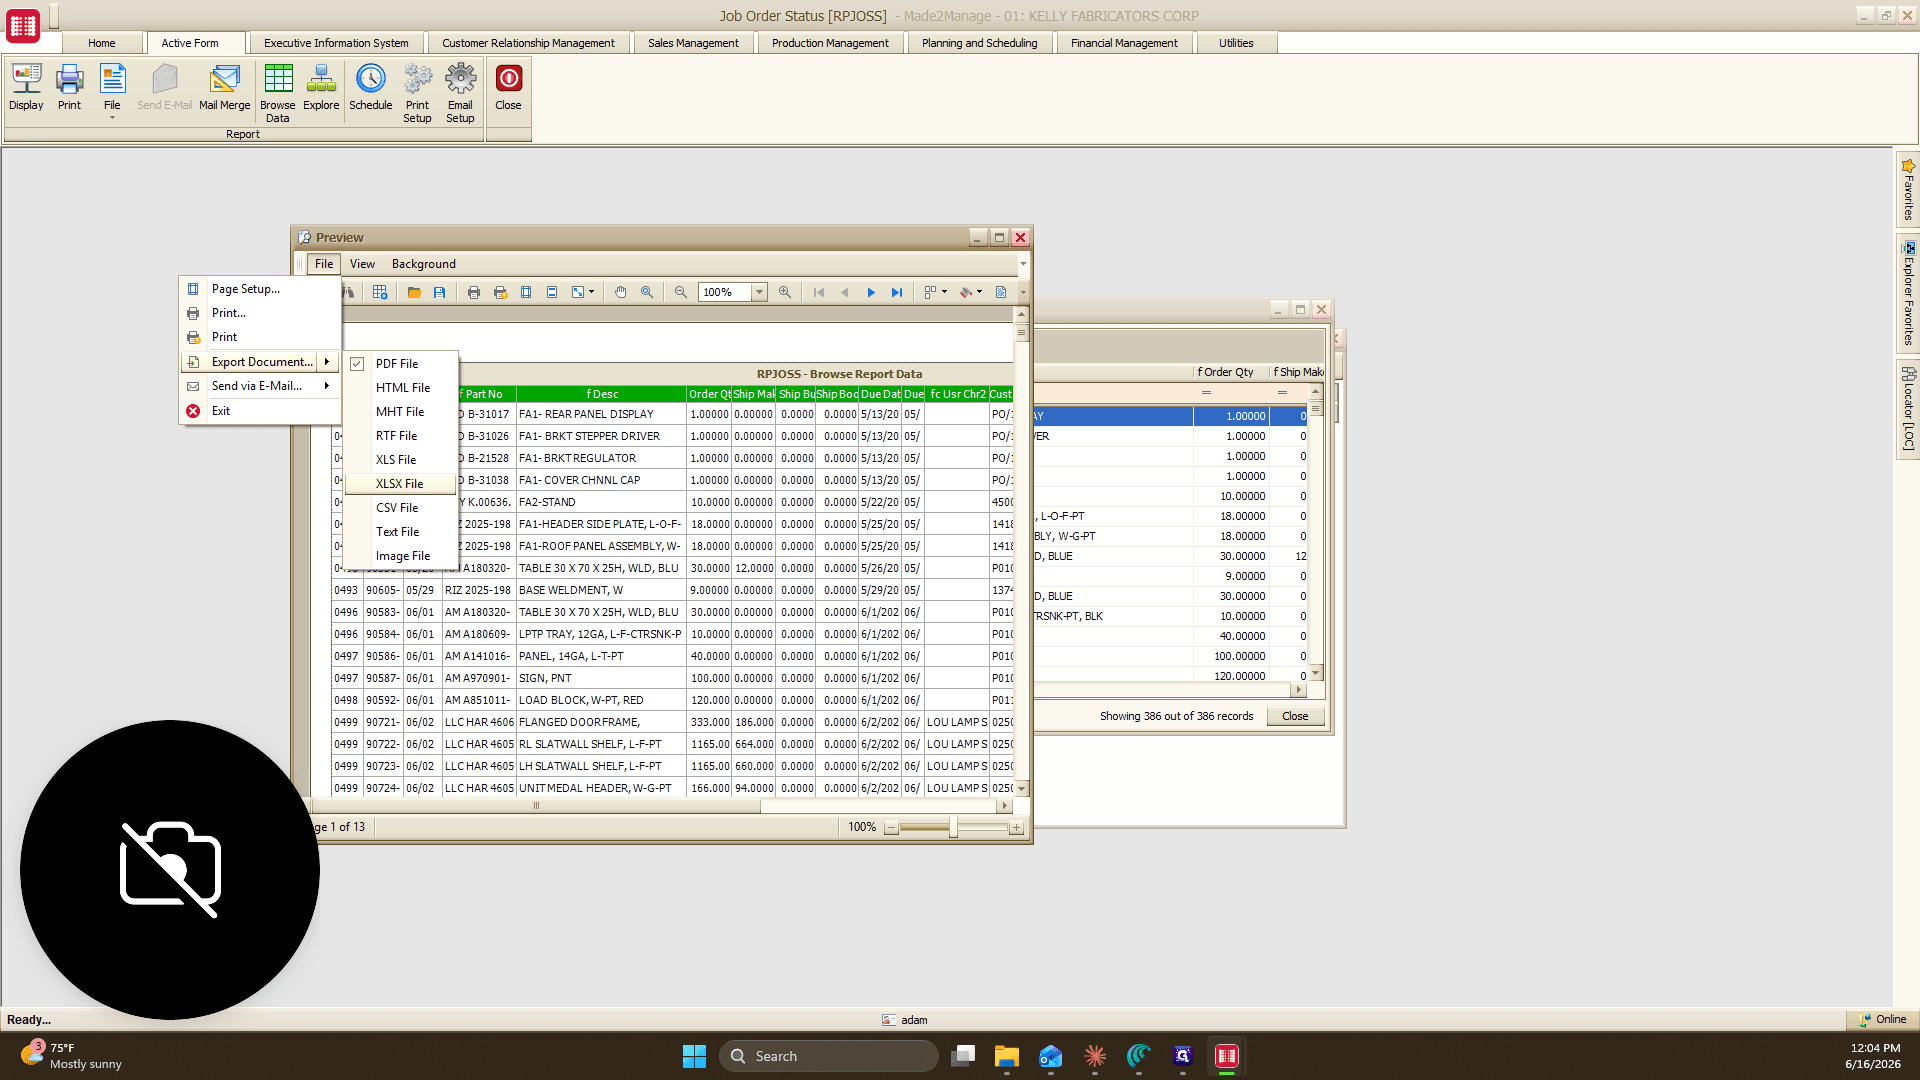
Select the XLSX File option to export the document.
Step #6: Select the XLSX File option to export the document.
7
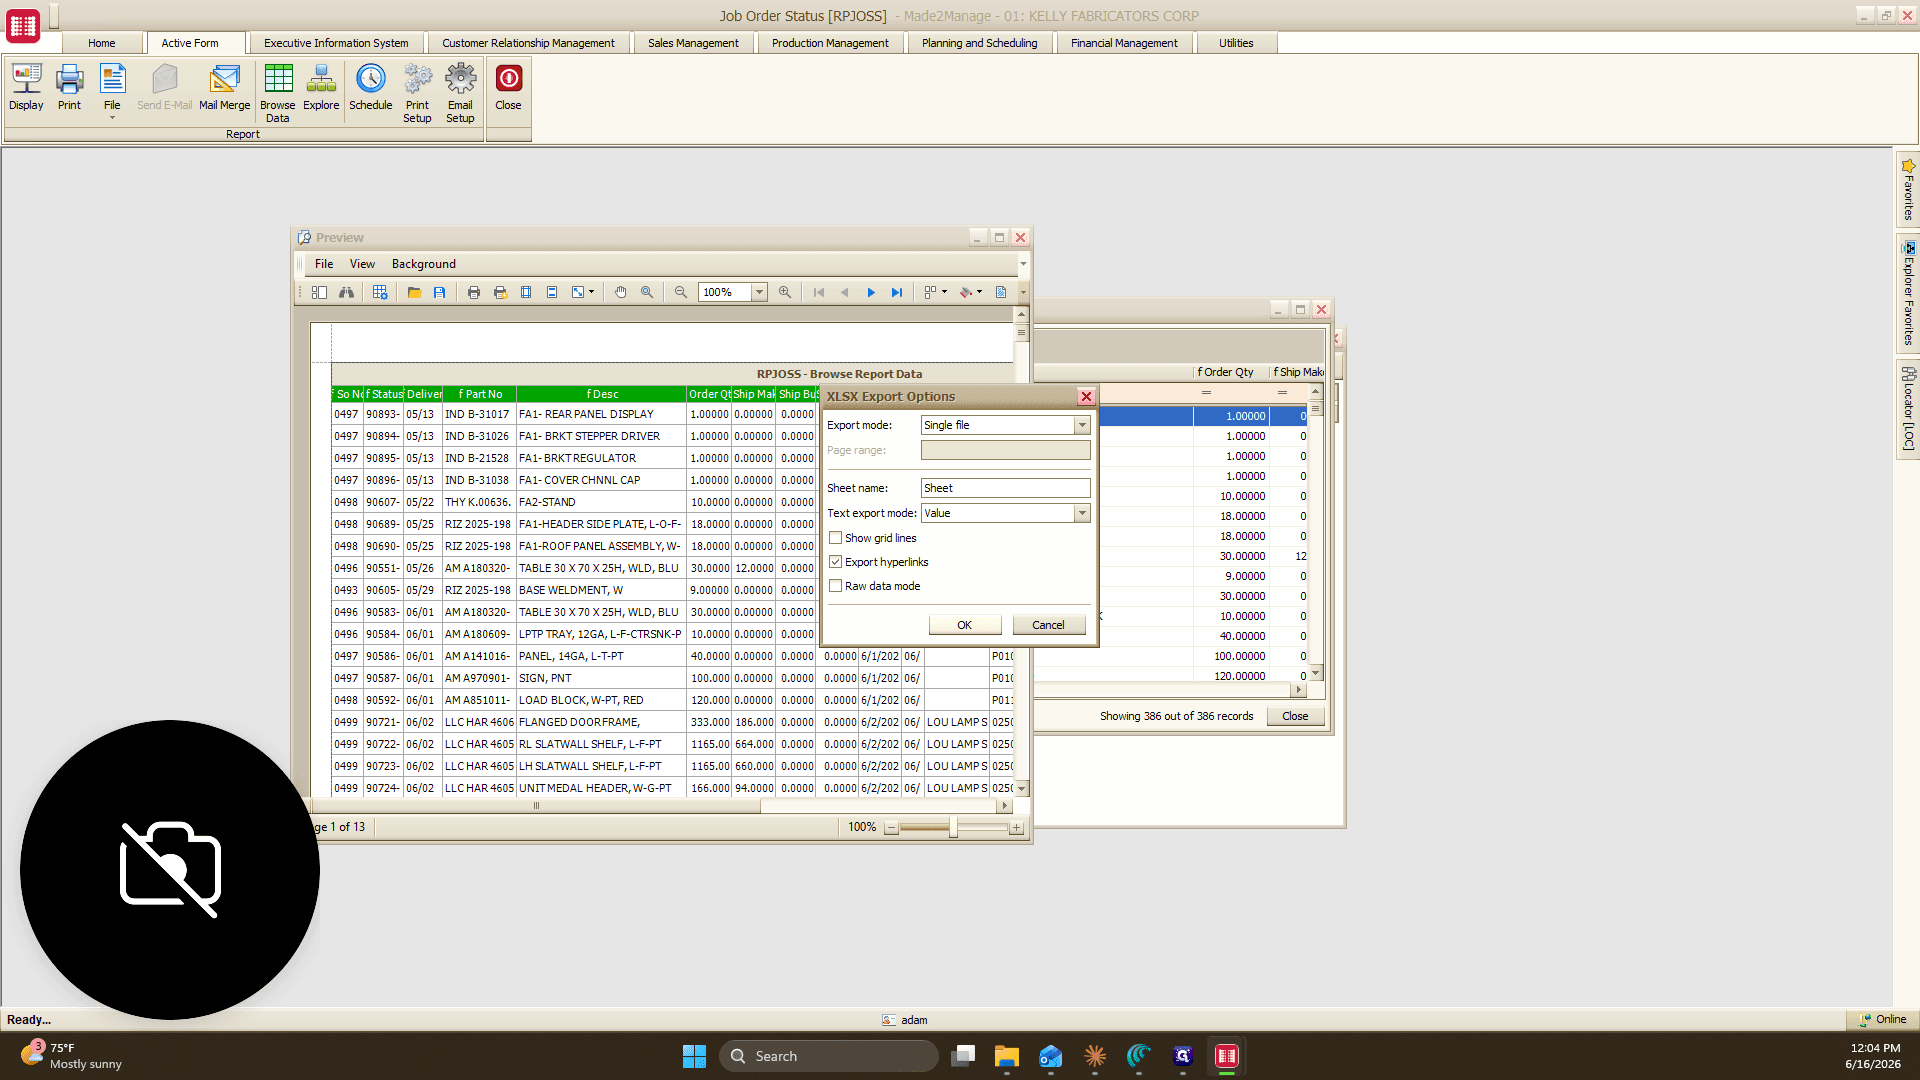
Click OK on the export options dialog.
Step #7: Click OK on the export options dialog.
8
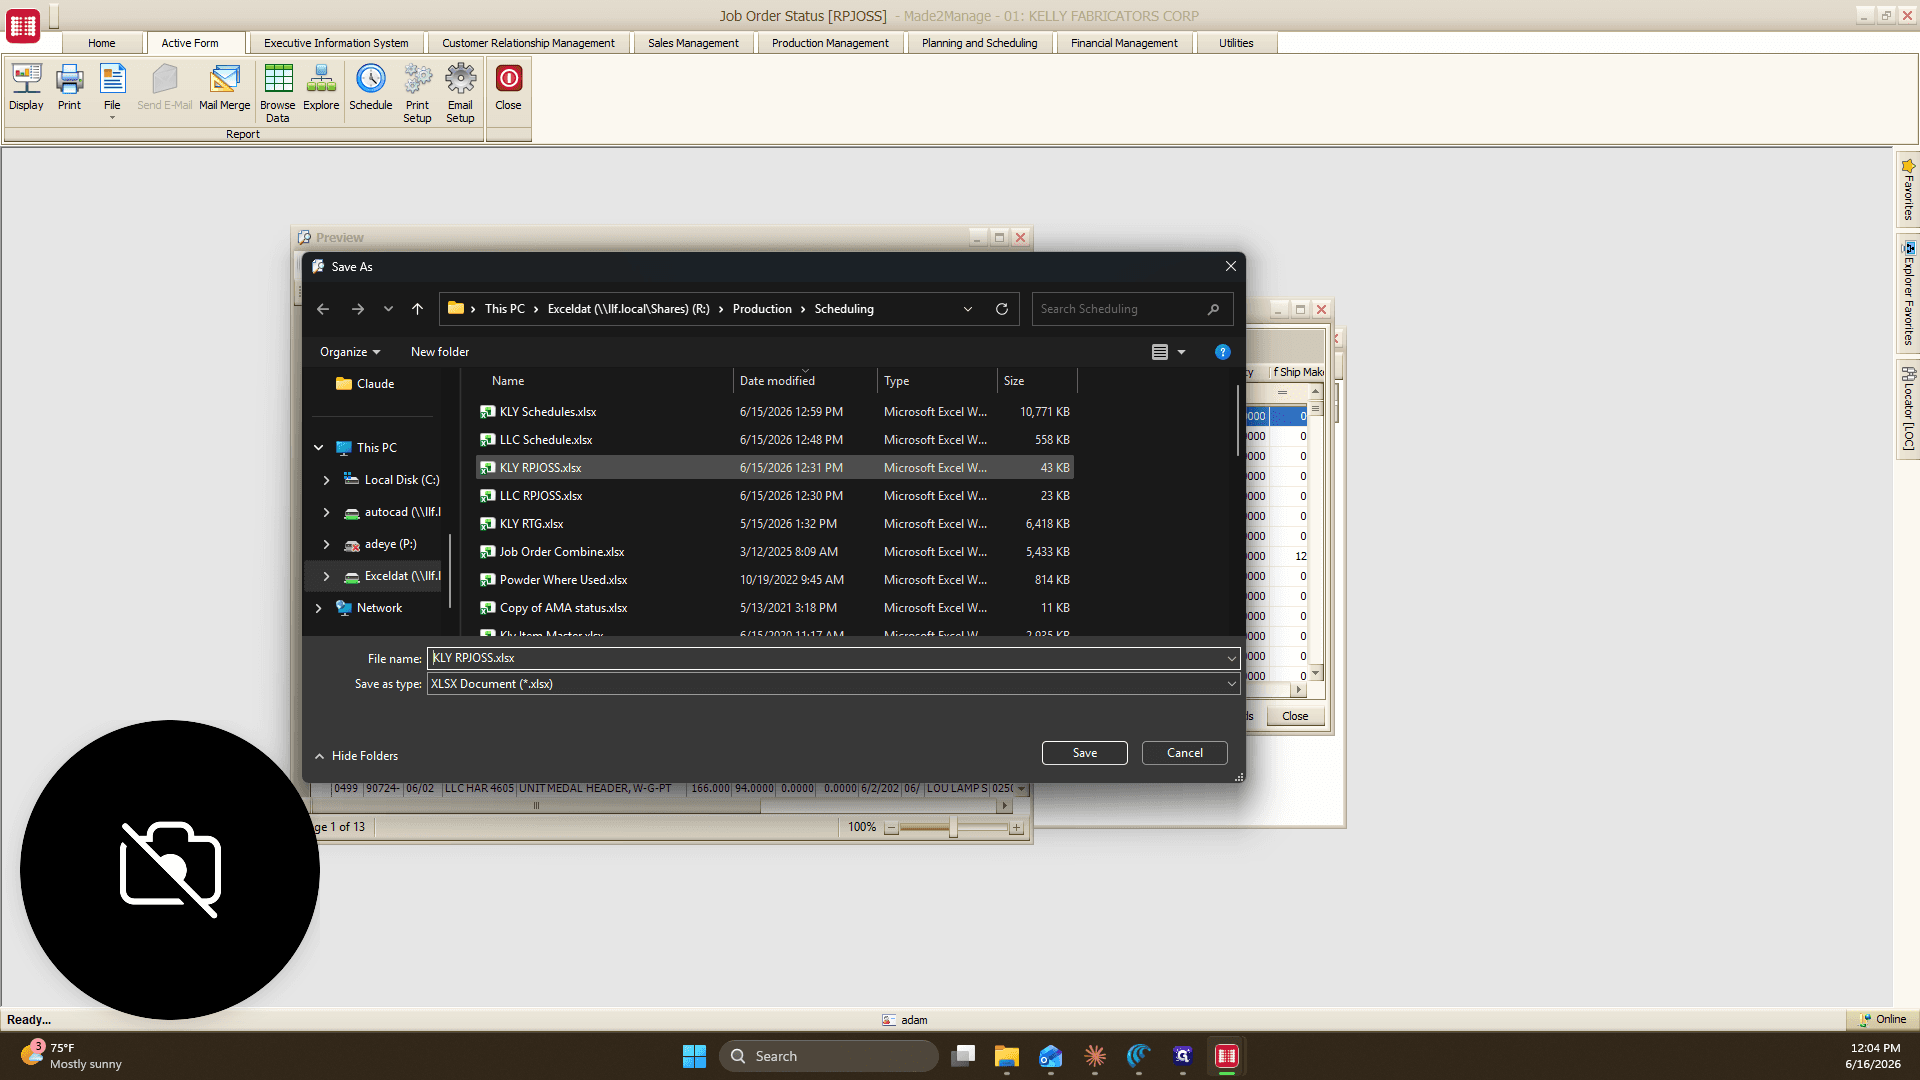
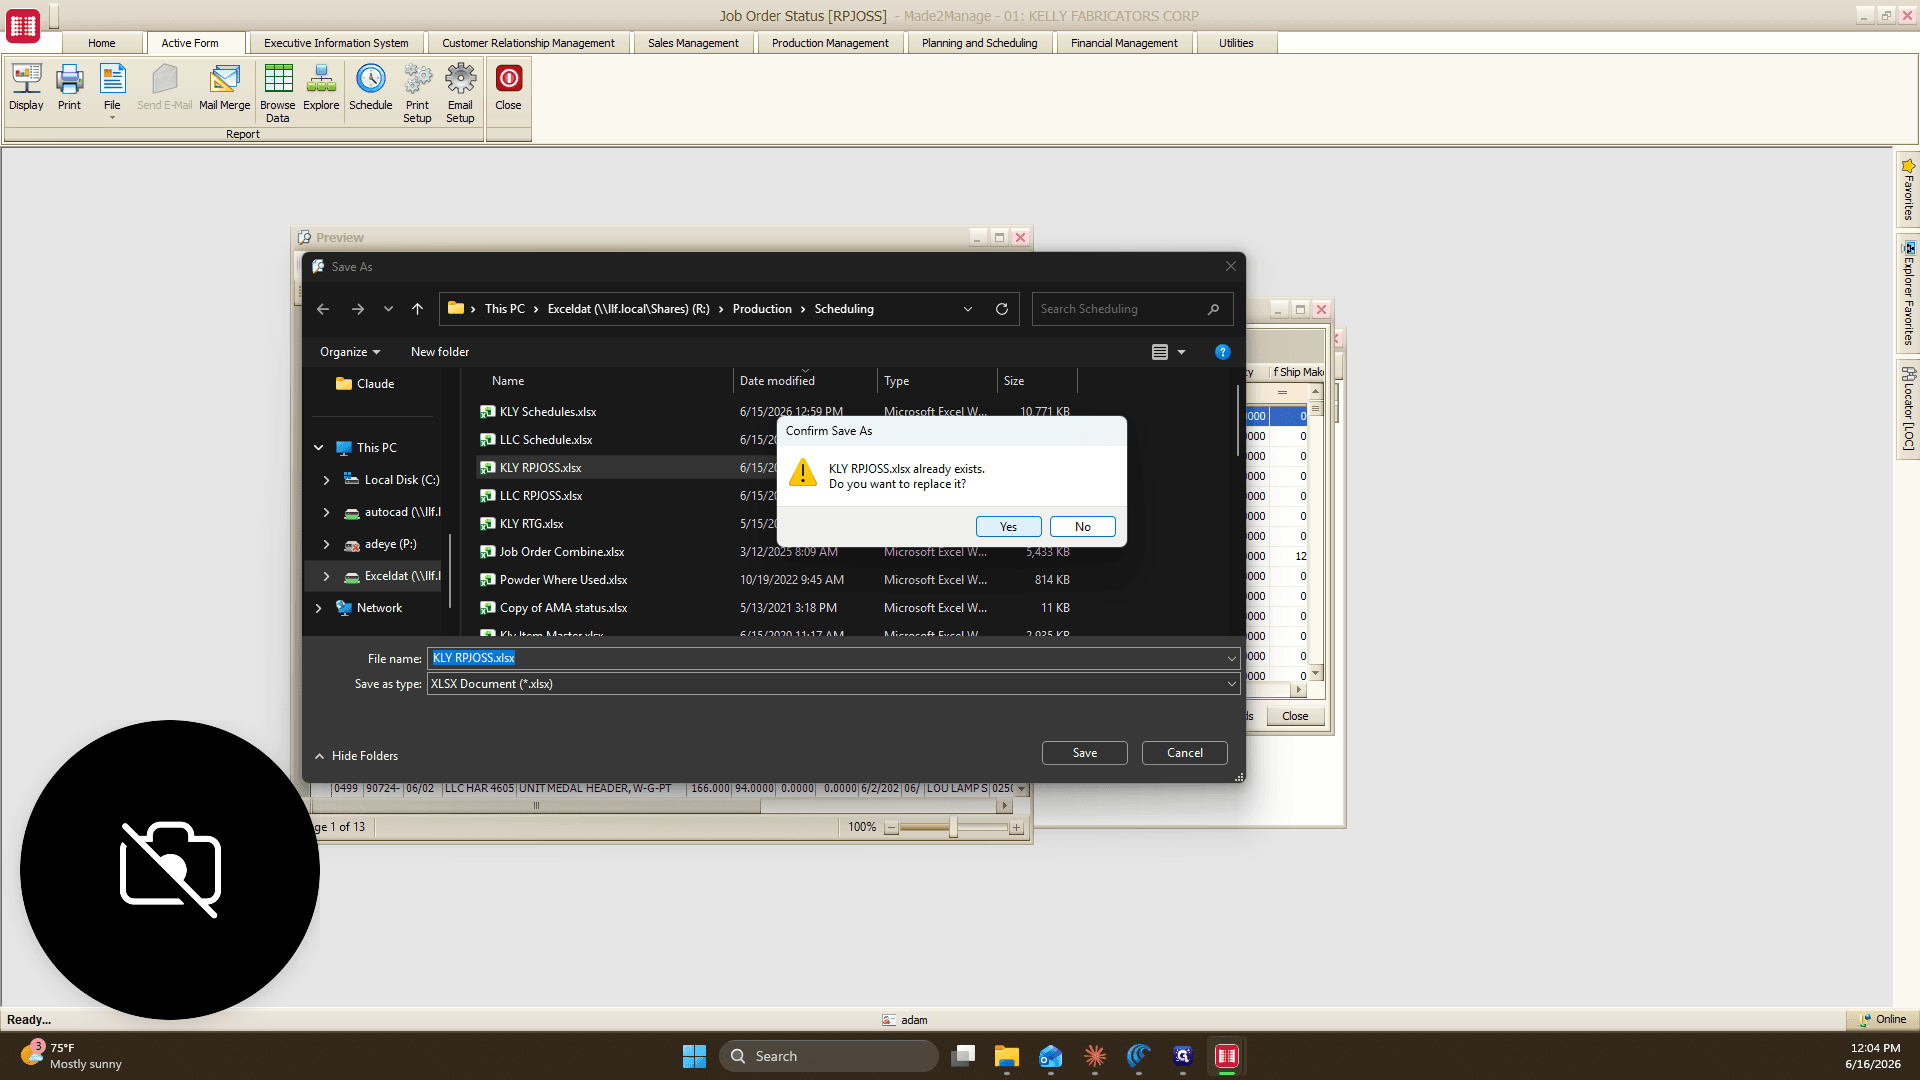
Navigate to the production scheduling folder (e.g., your network R drive) and select the existing KLY RPJOSS.xlsx file to overwrite it.
Step #8: Navigate to the production scheduling folder (e.g., your network R drive) and select the existing KLY RPJOSS.xlsx file to overwrite it.
9
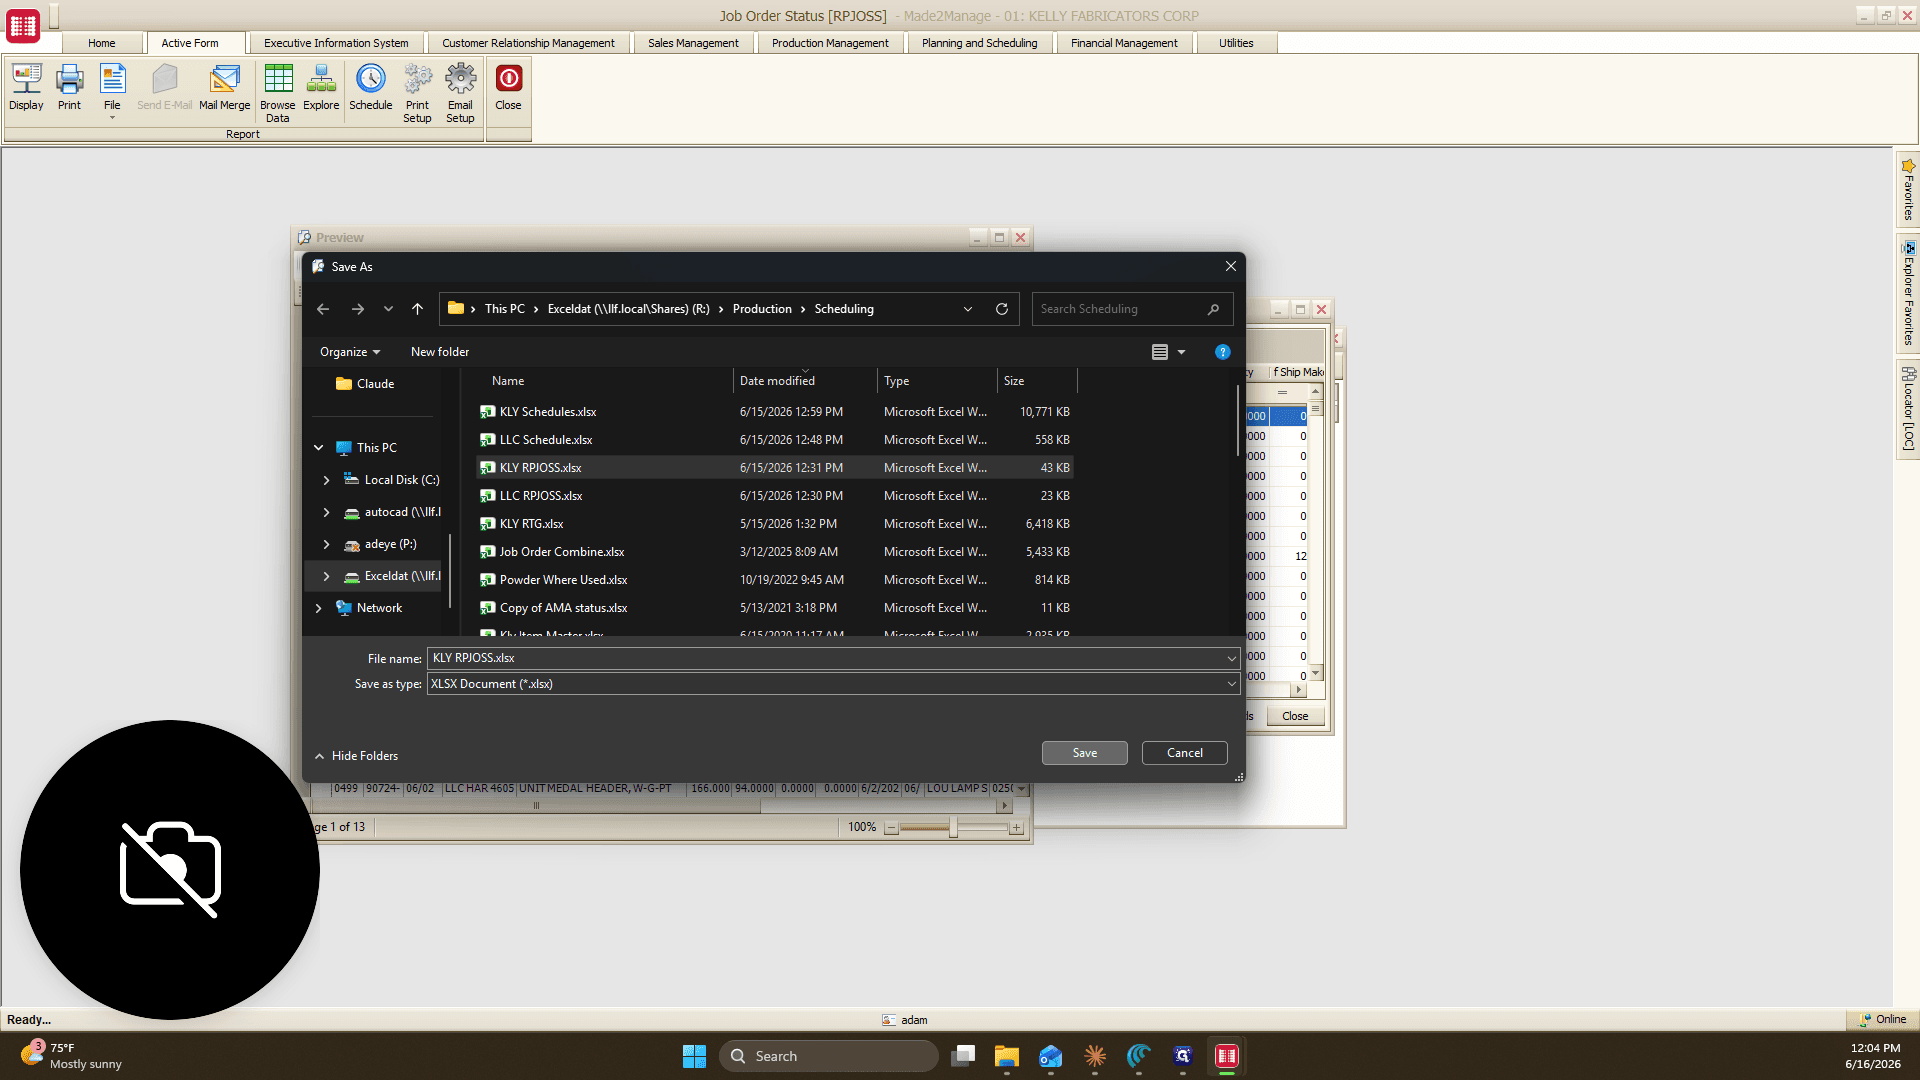
Click Save.
Step #9: Click Save.
10
Click Yes when prompted to confirm that you want to replace the file.
Step #10: Click Yes when prompted to confirm that you want to replace the file.
11
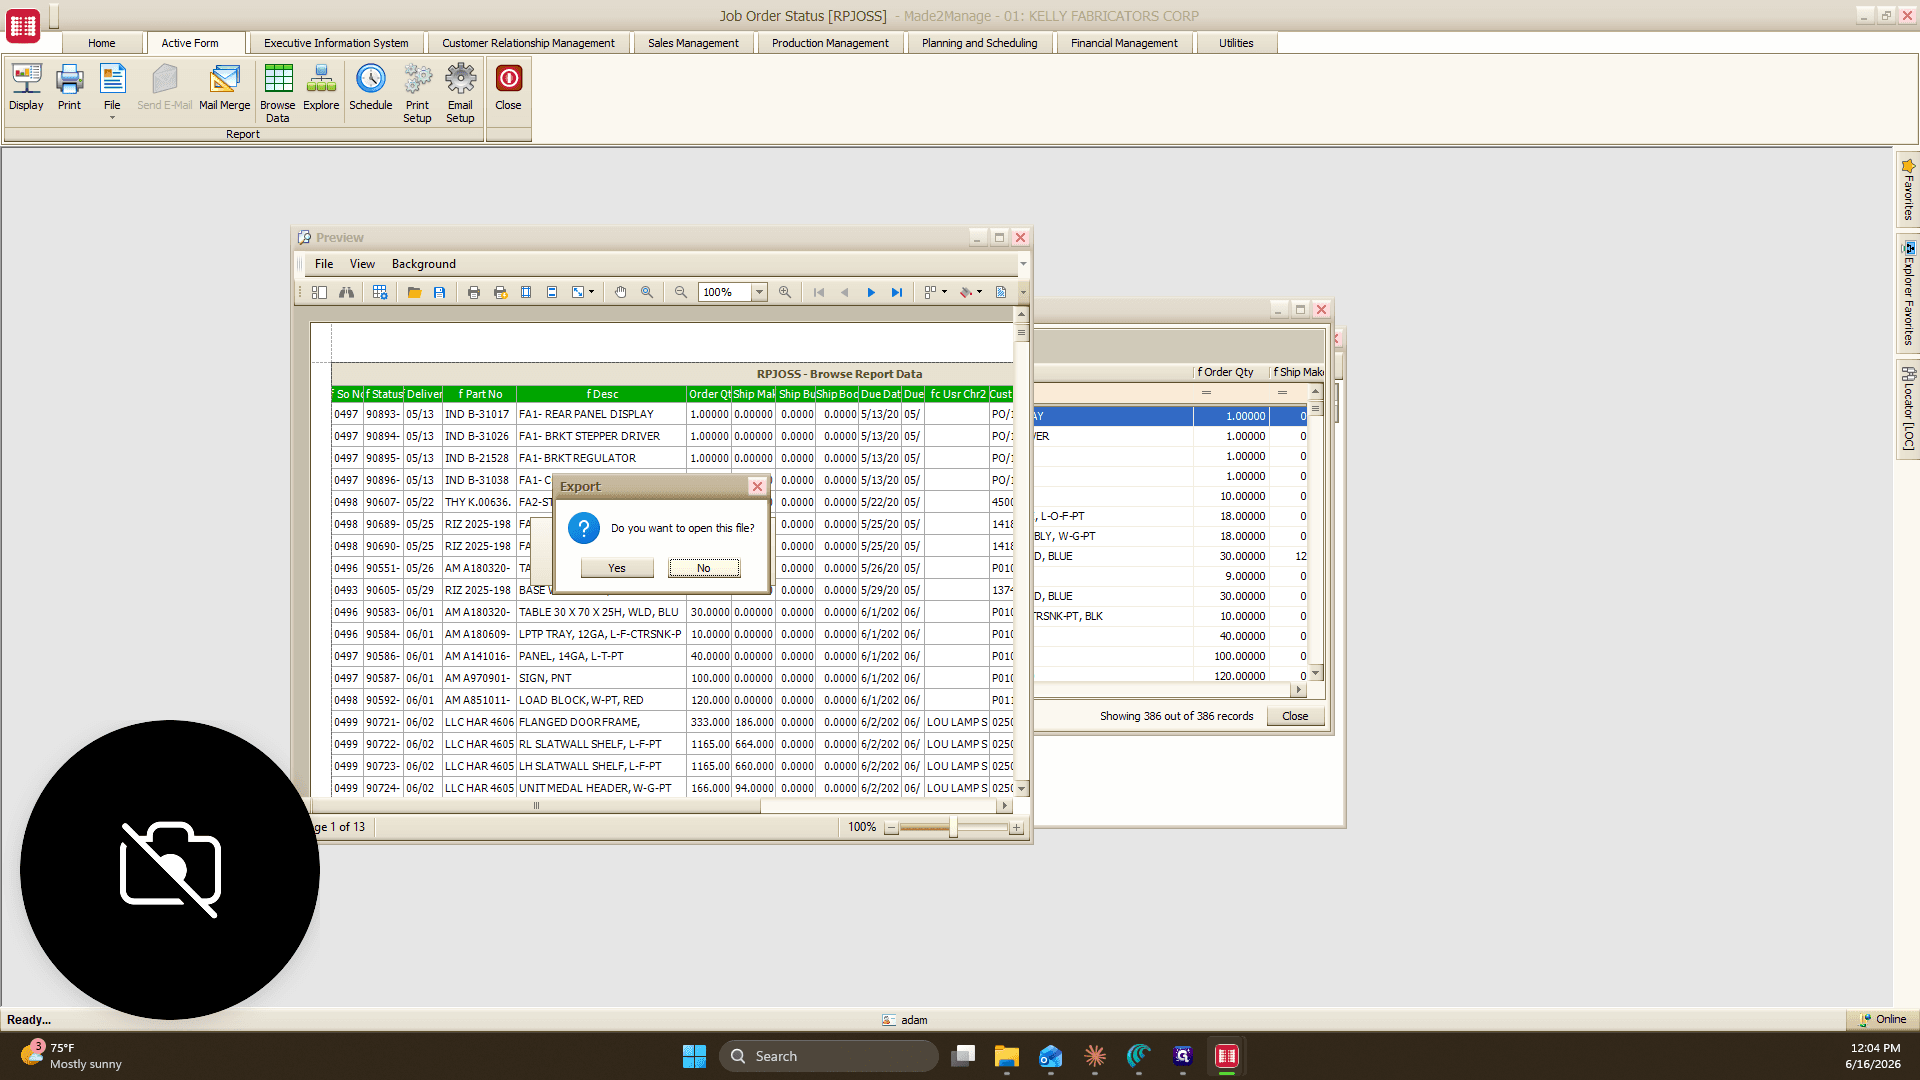
Click No when the system asks if you want to open the exported file.
Step #11: Click No when the system asks if you want to open the exported file.
12
Close all remaining Made2Manage report and preview windows.
Step #12: Close all remaining Made2Manage report and preview windows.

Update the Production Schedule in Excel

13
Open File Explorer, navigate to your network scheduling folder (e.g., R:\Production\Scheduling), and double-click KLY Schedules.xlsx to open it.
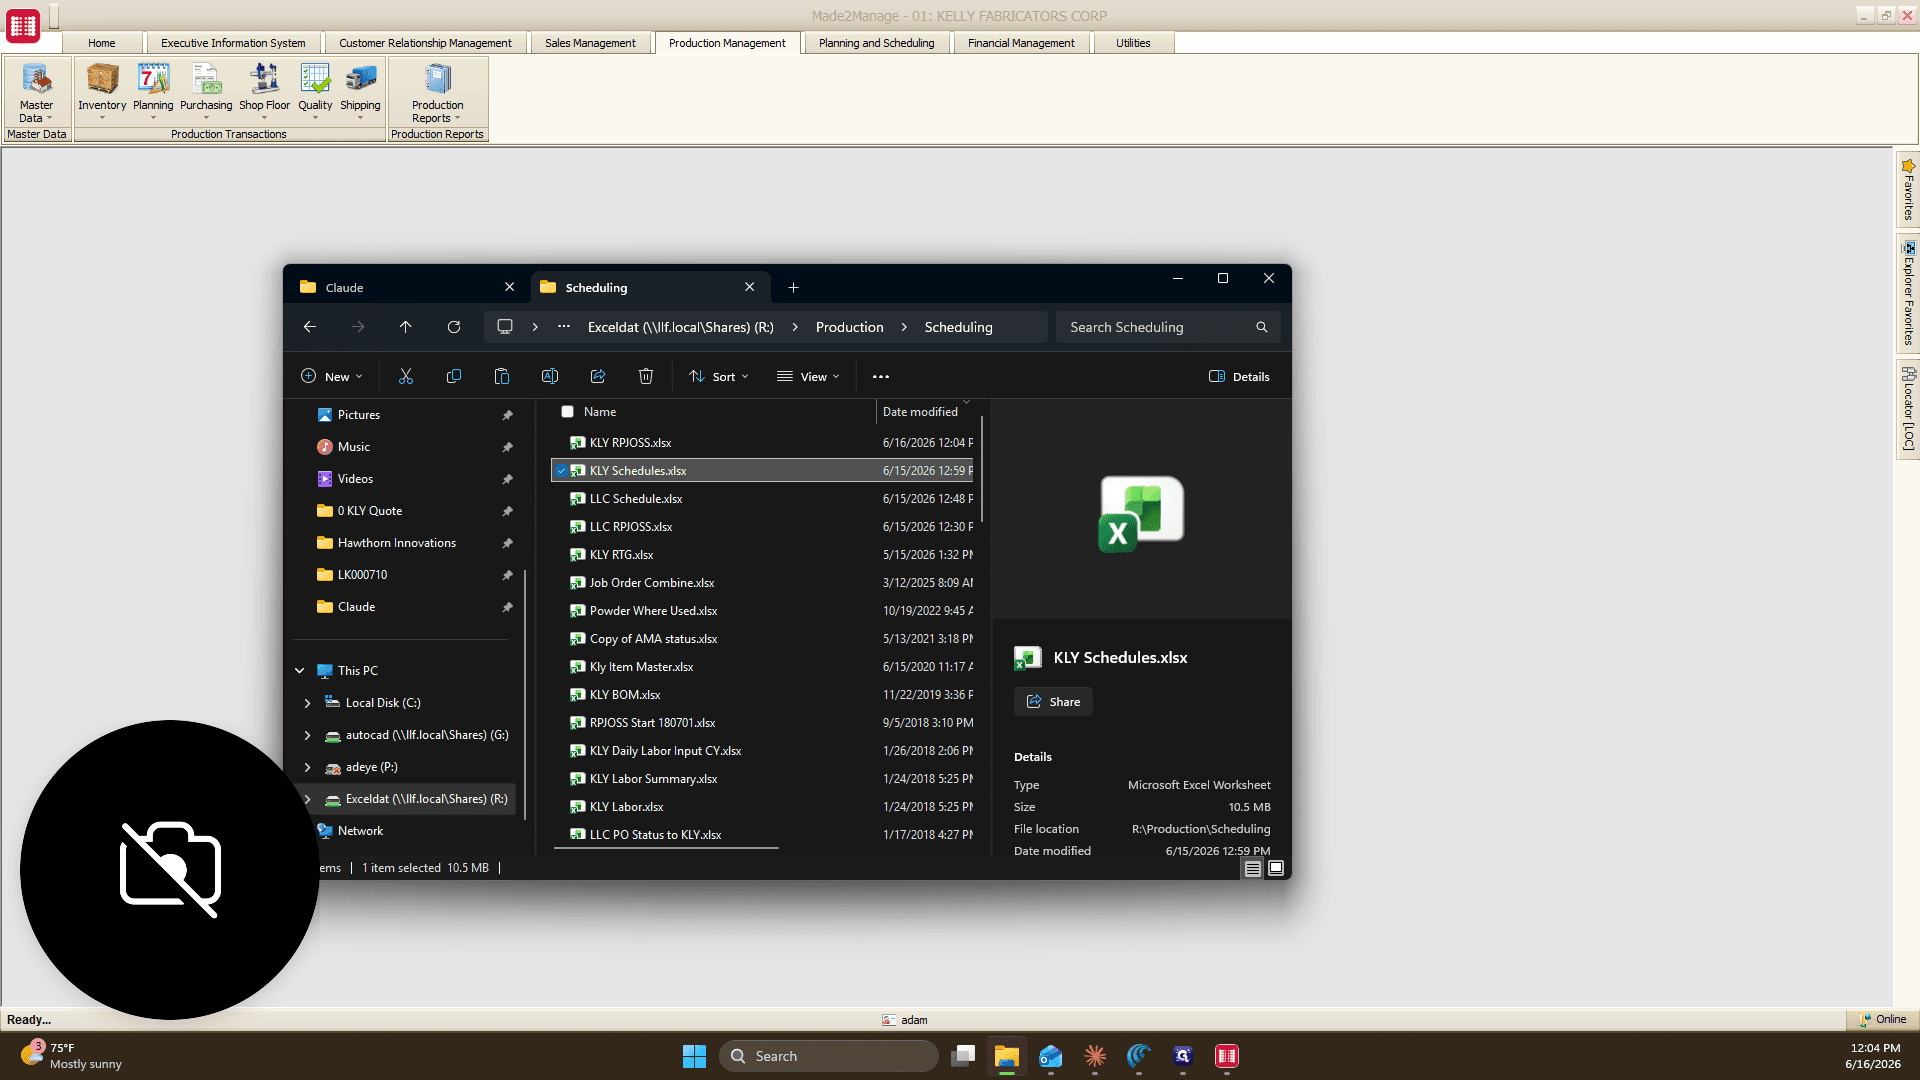
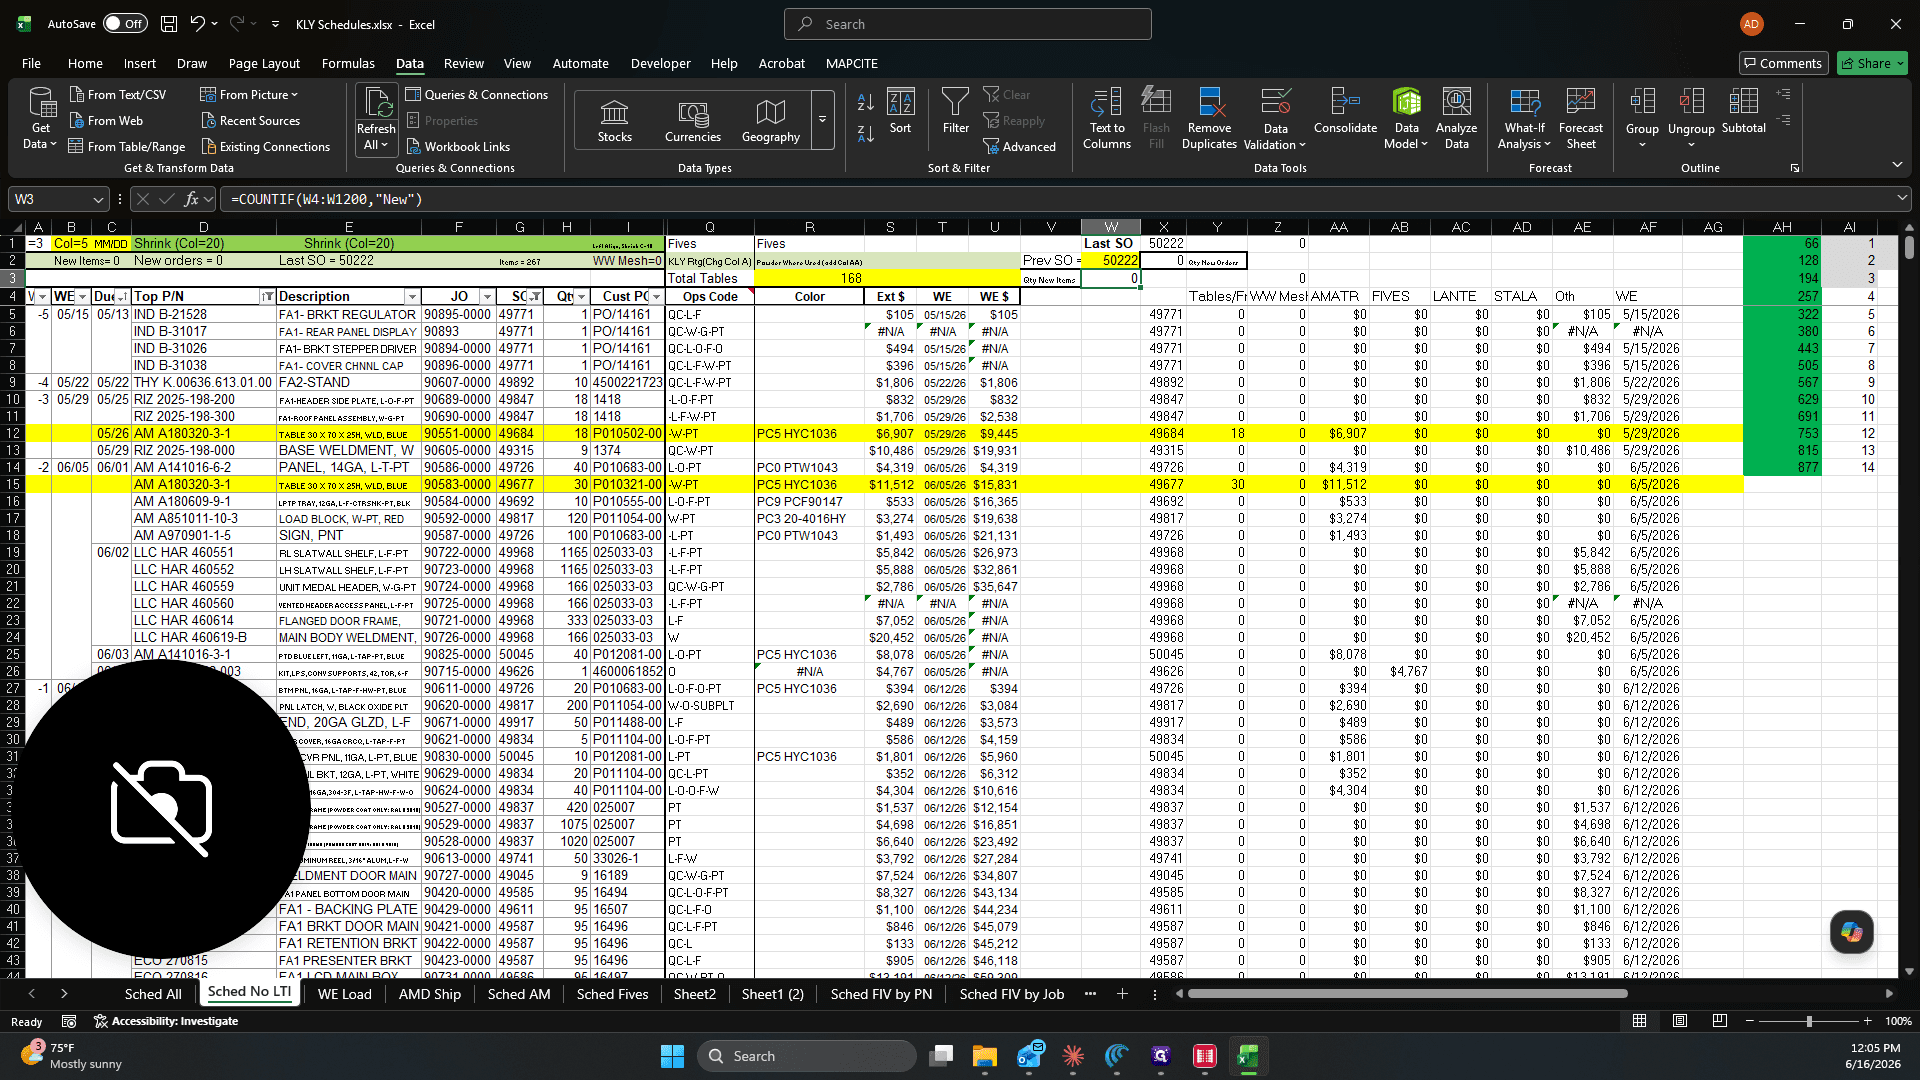
Step #13: Open File Explorer, navigate to your network scheduling folder (e.g., R:\Production\Scheduling), and double-click KLY Schedules.xlsx to open it.
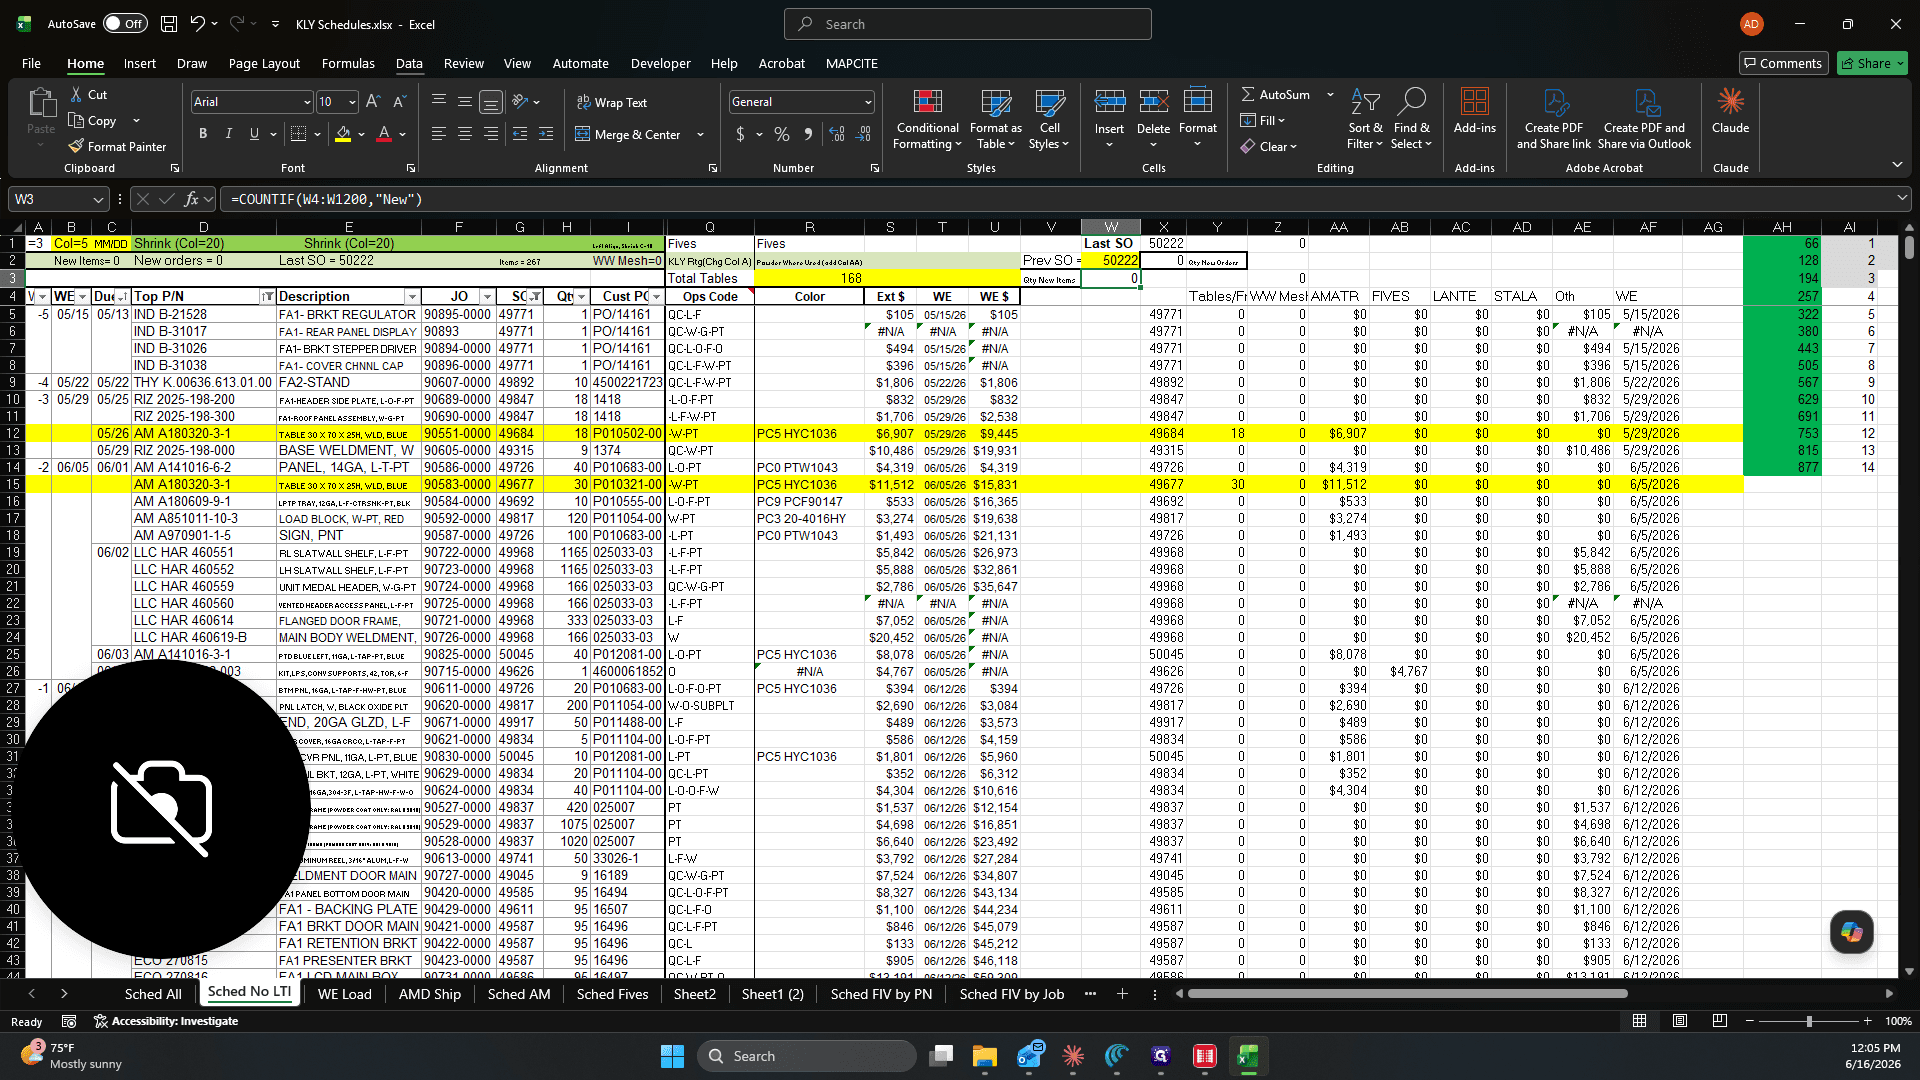
14
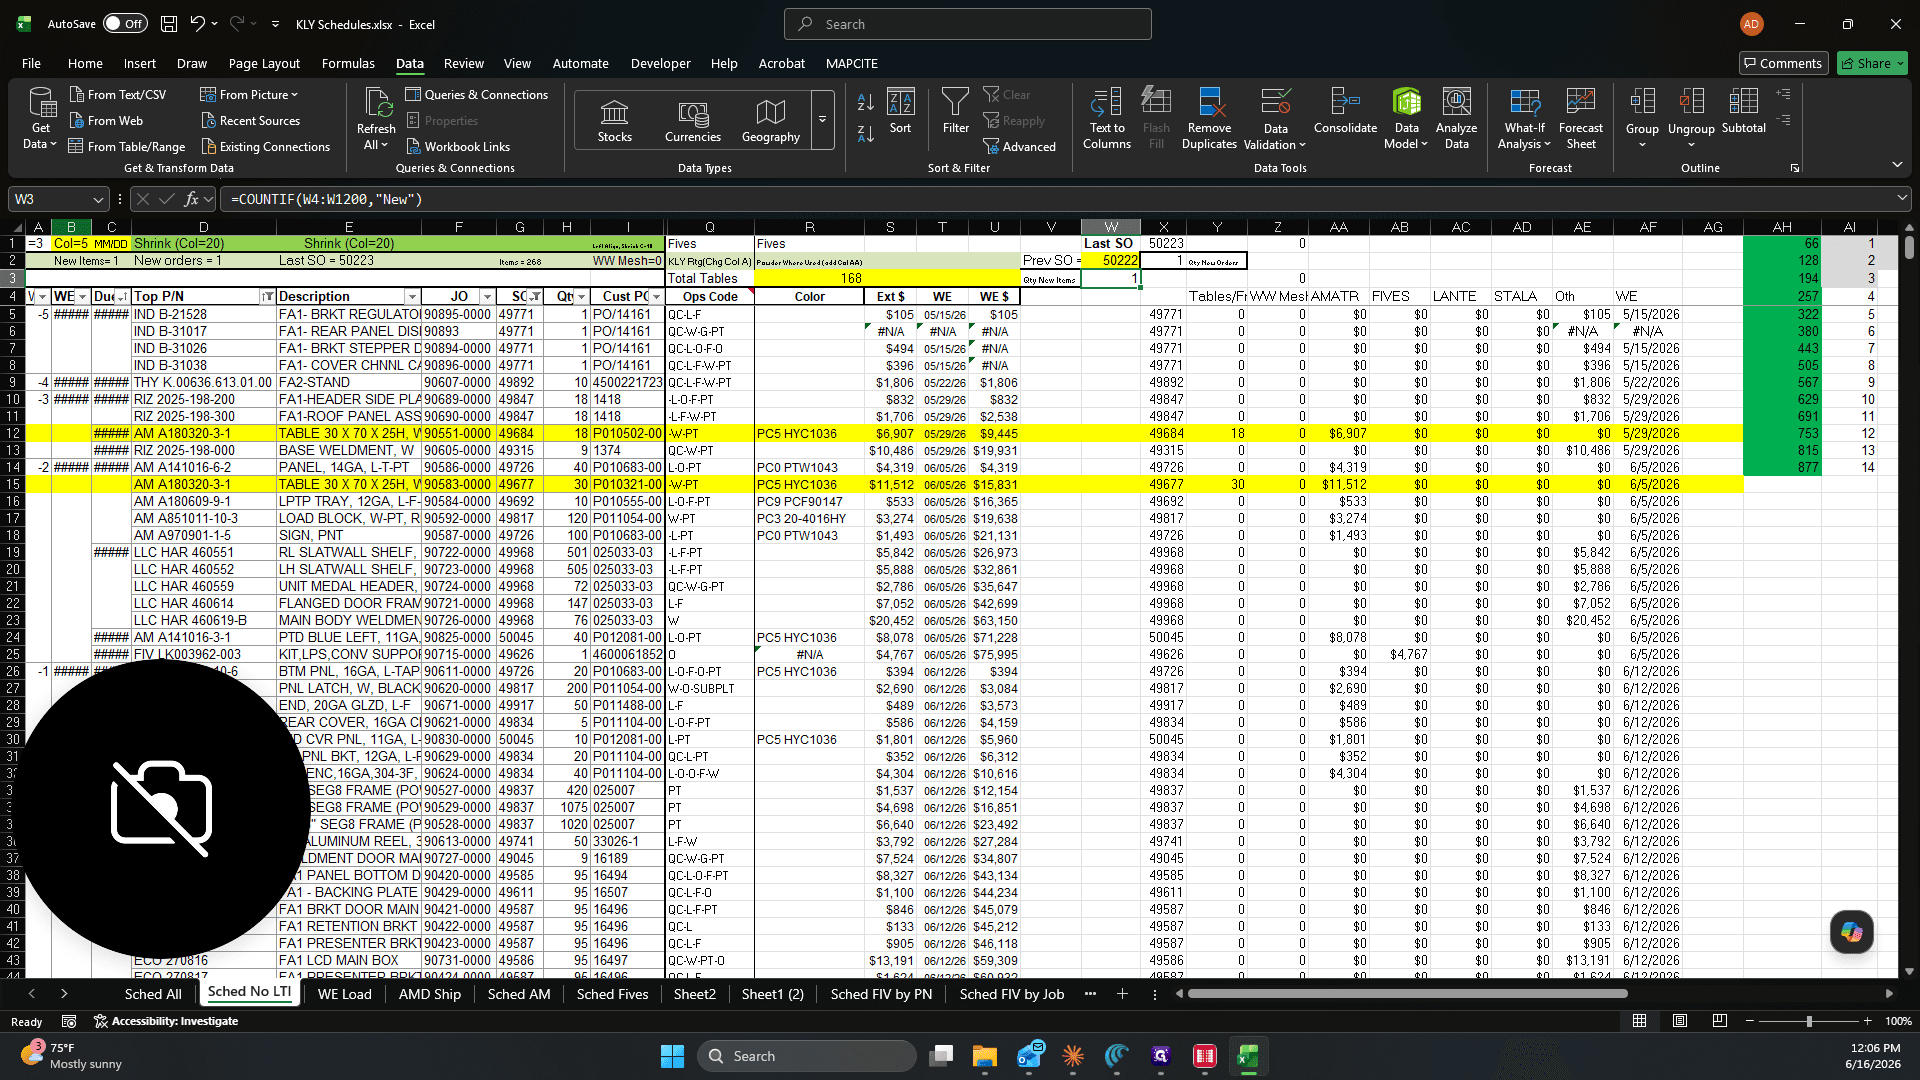
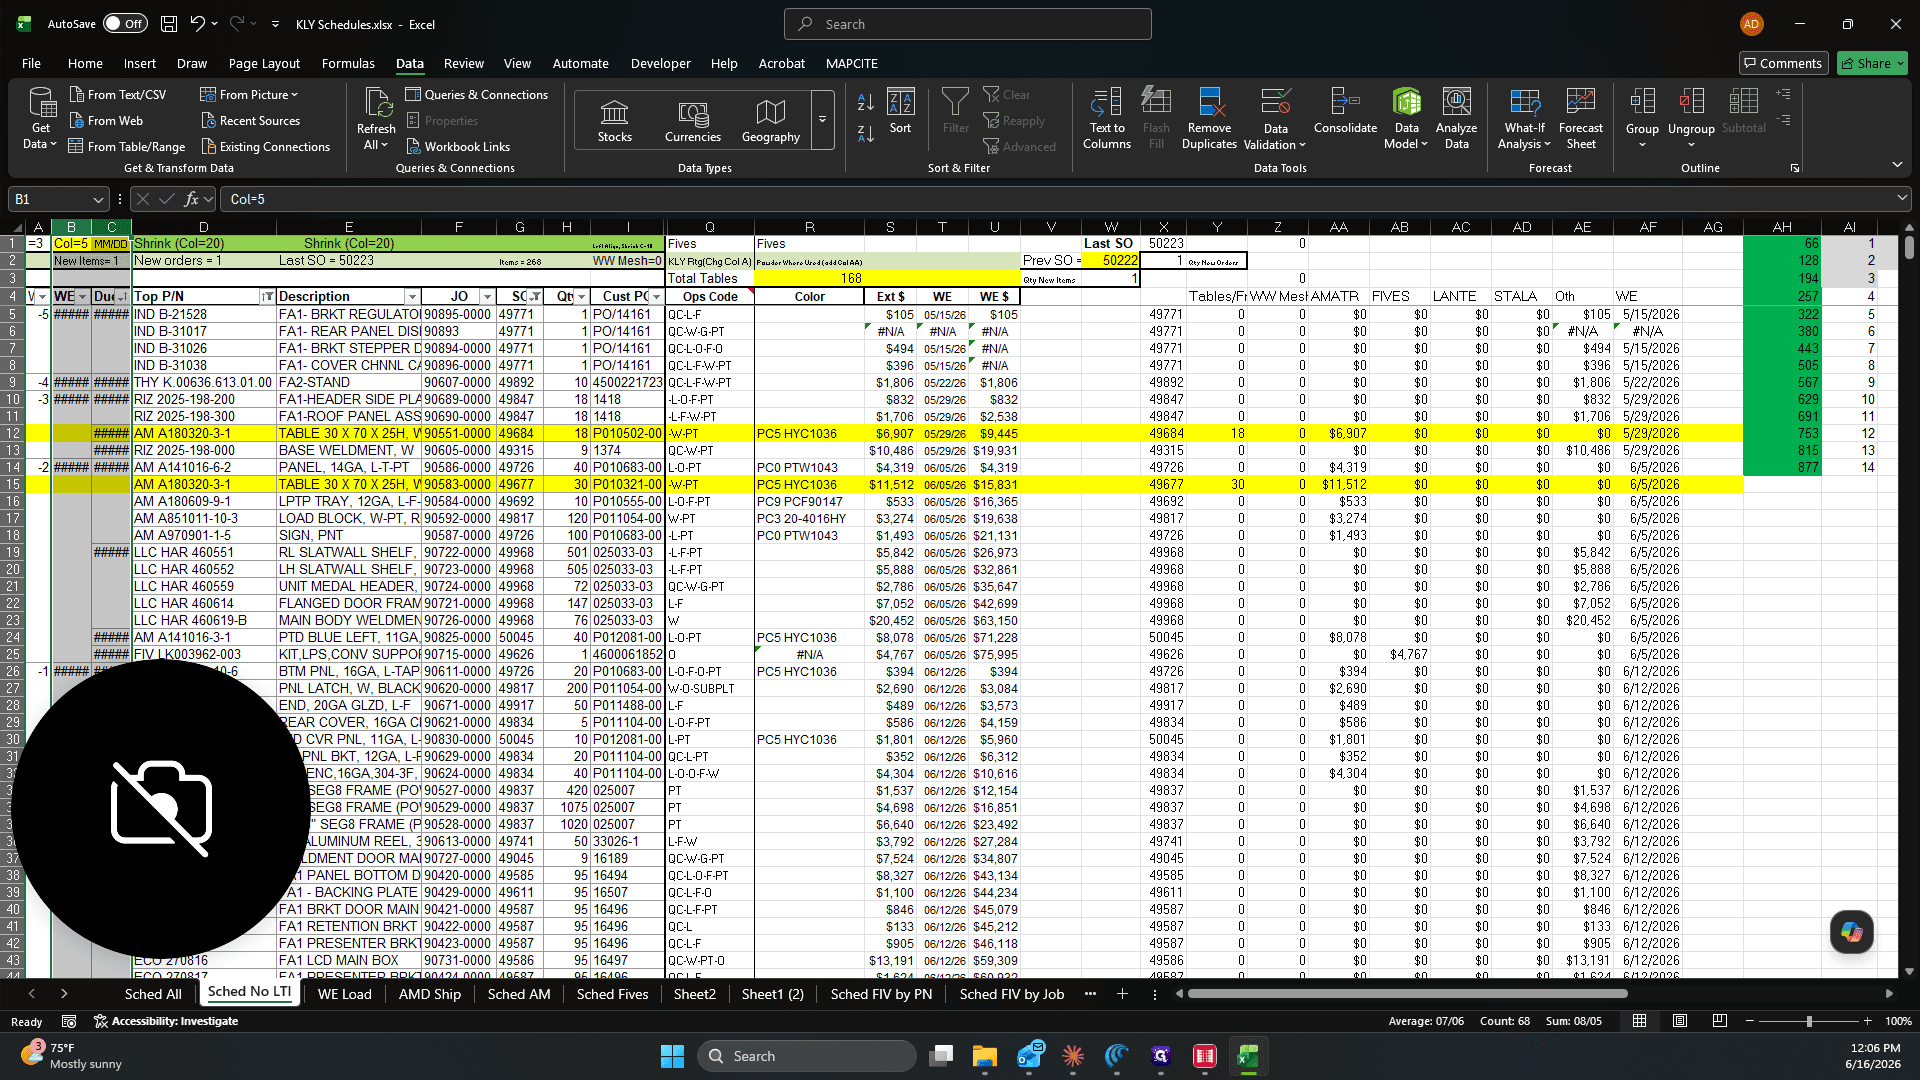
Navigate to the Sched No LTI worksheet tab at the bottom of the window.
Step #14: Navigate to the Sched No LTI worksheet tab at the bottom of the window.
15
Find the last Sales Order (SO) number in cell E2, type it into cell W2, then press Enter.
16
Go to the Data tab in the ribbon and click Refresh All to update the spreadsheet.
Step #16: Go to the Data tab in the ribbon and click Refresh All to update the spreadsheet.

Format the Schedule for Printing
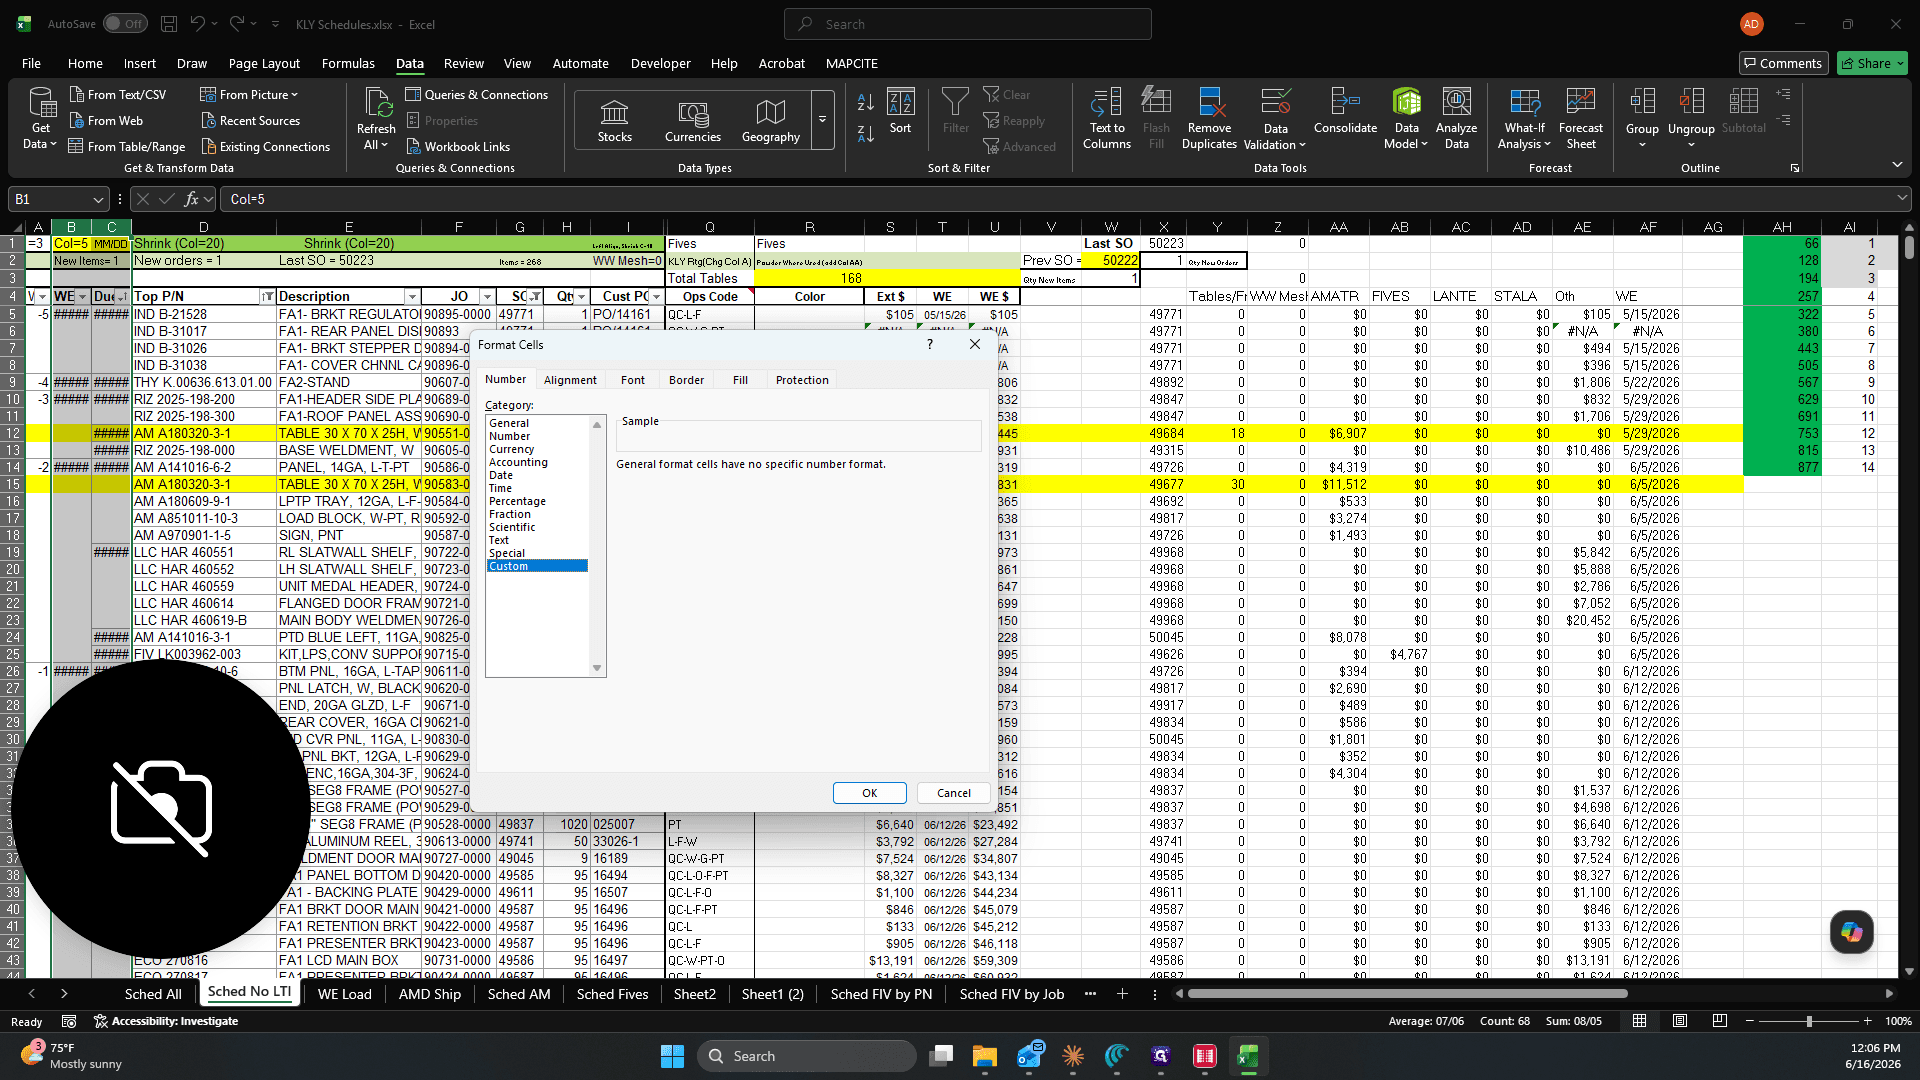
17
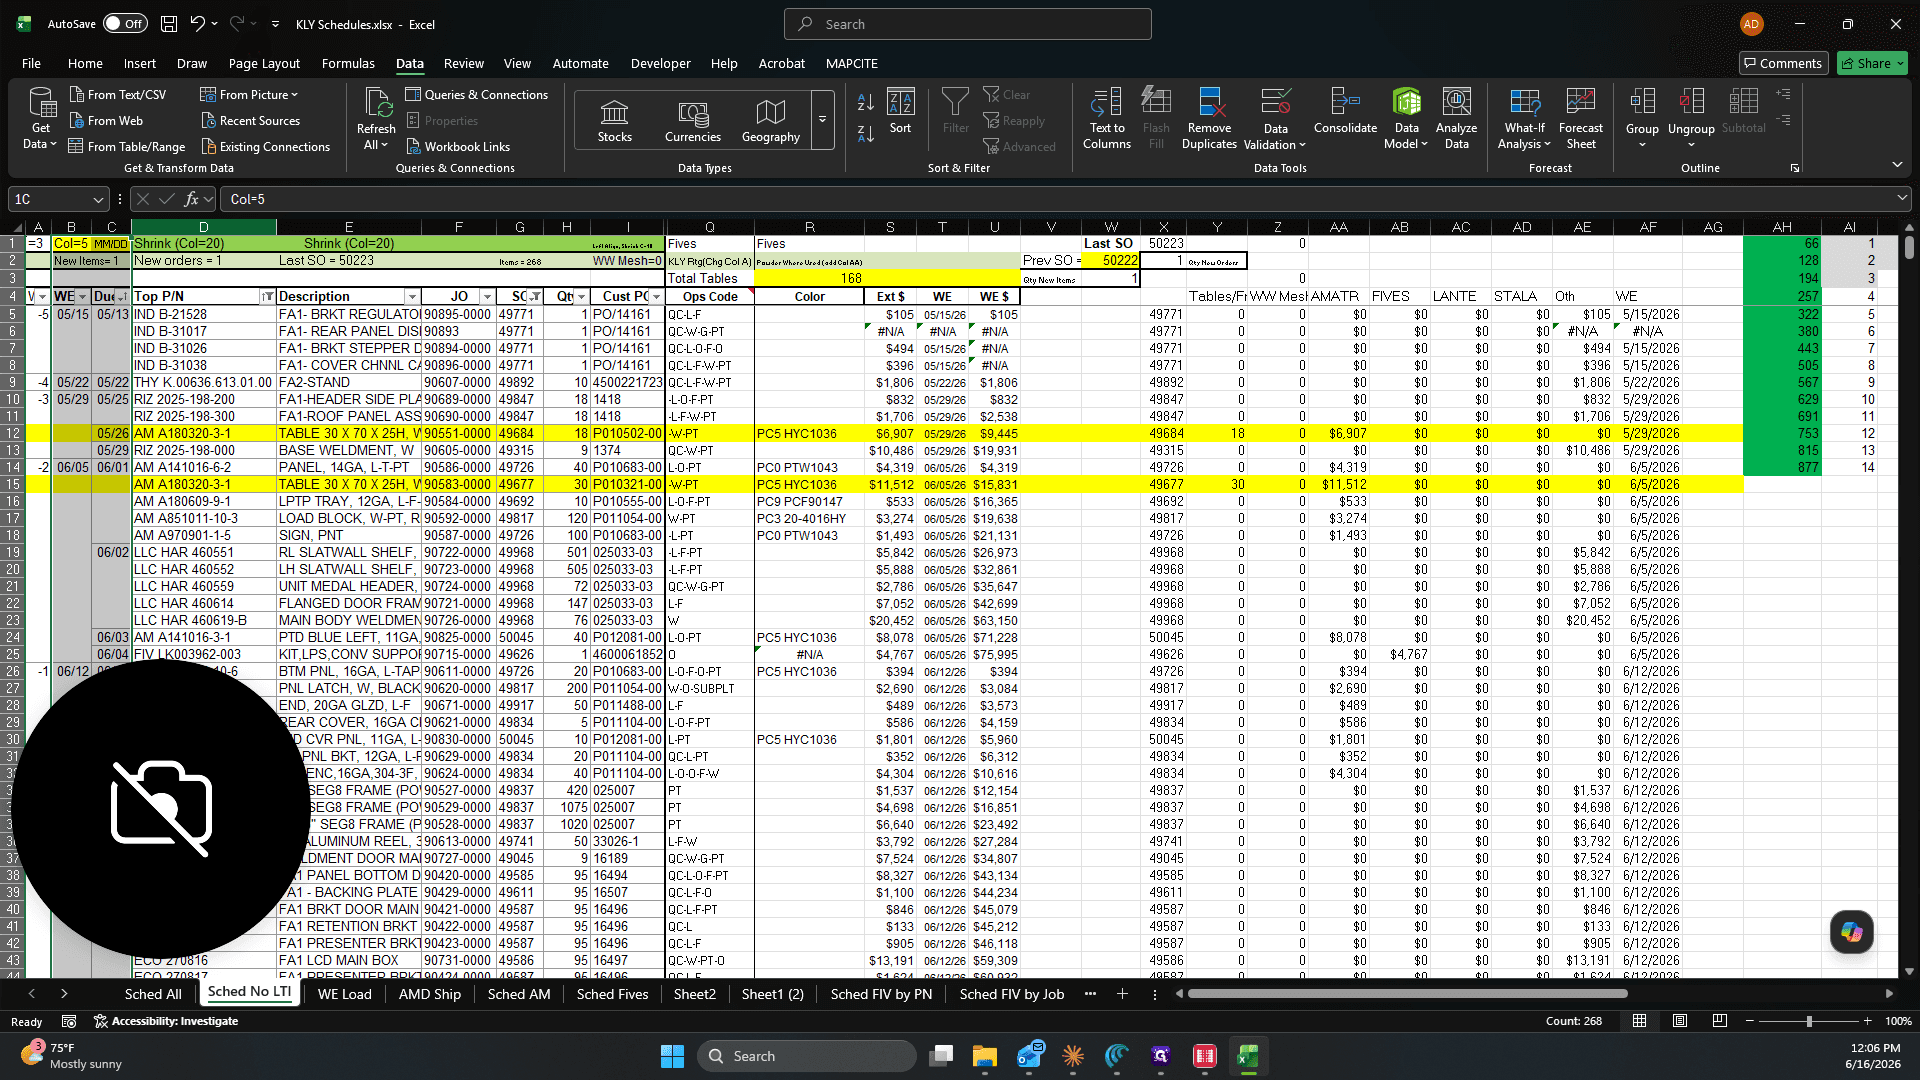
Select columns B and C.
Step #17: Select columns B and C.
18
Right-click the selected columns and choose Format Cells.
Step #18: Right-click the selected columns and choose Format Cells.
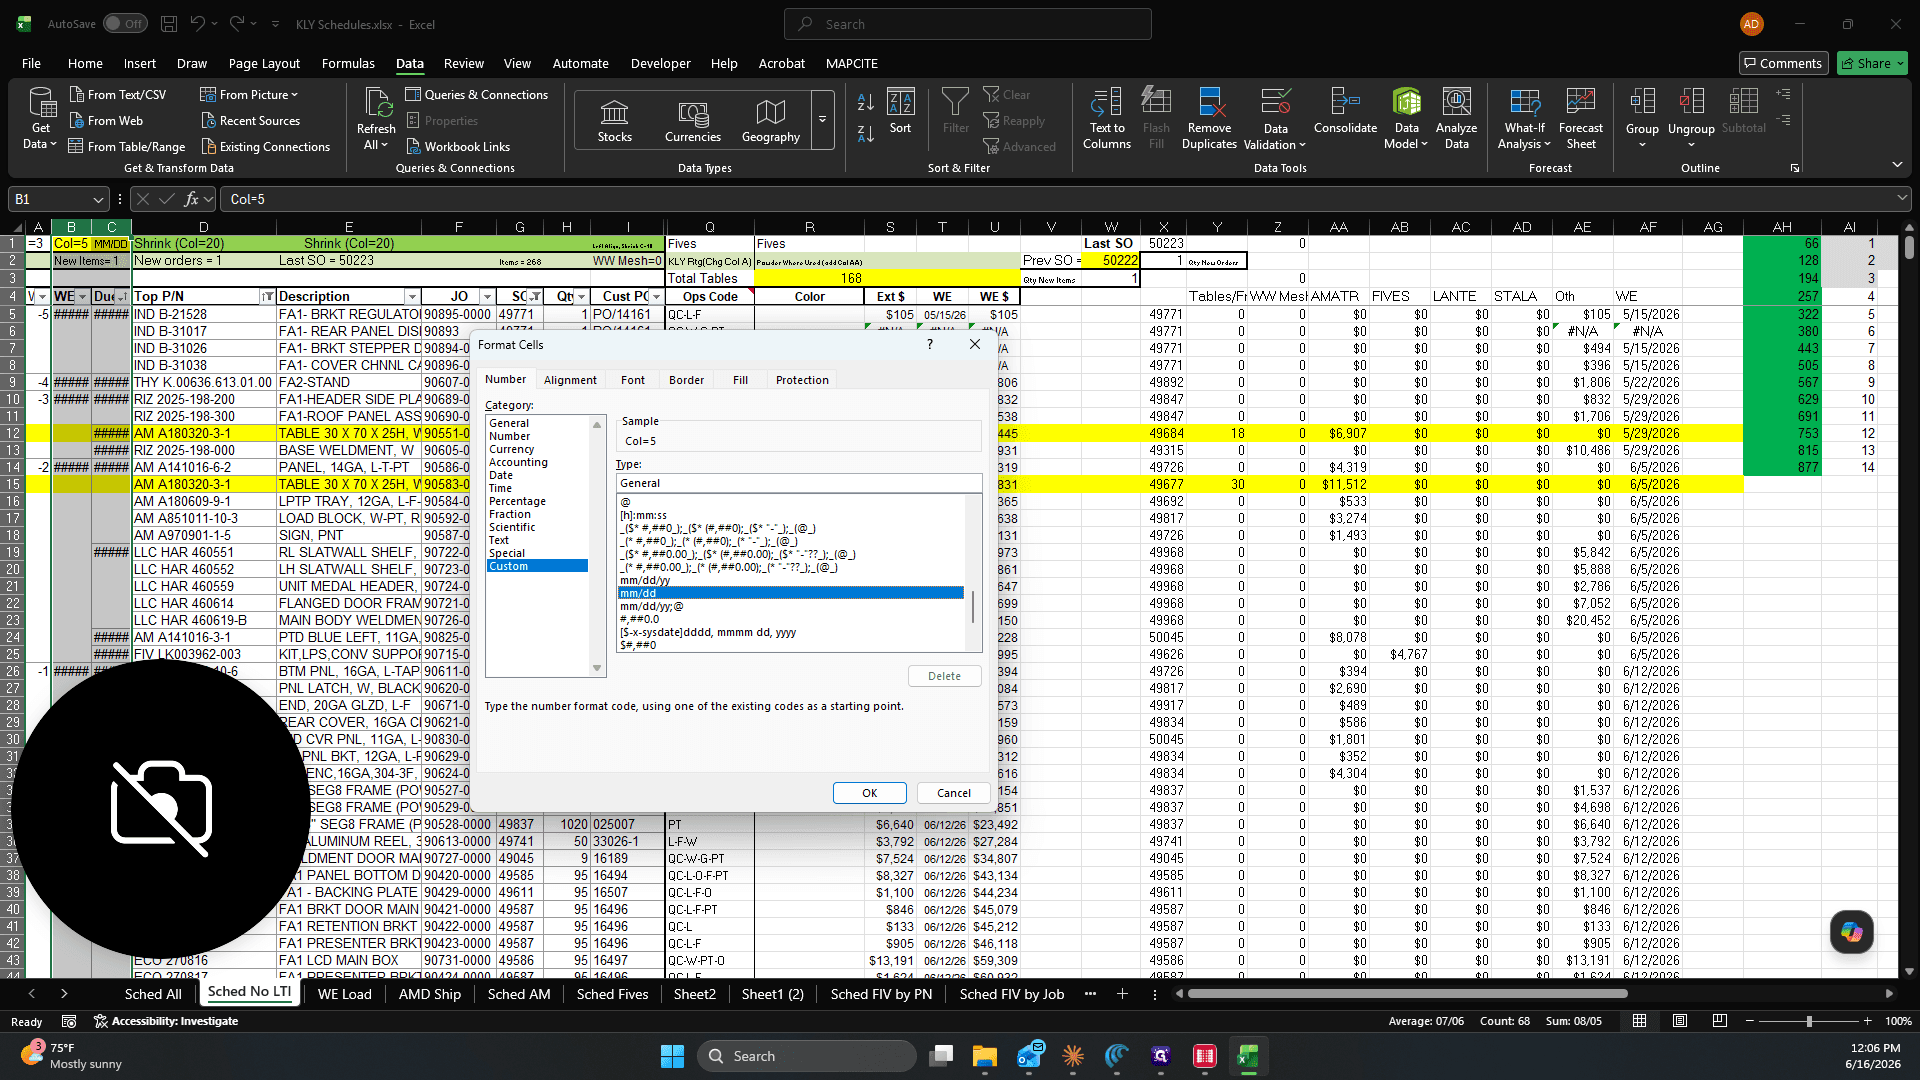
19
Select the Custom category.
Step #19: Select the Custom category.
20
Select or type mm/dd in the Type field and click OK.
Step #20: Select or type mm/dd in the Type field and click OK.
21
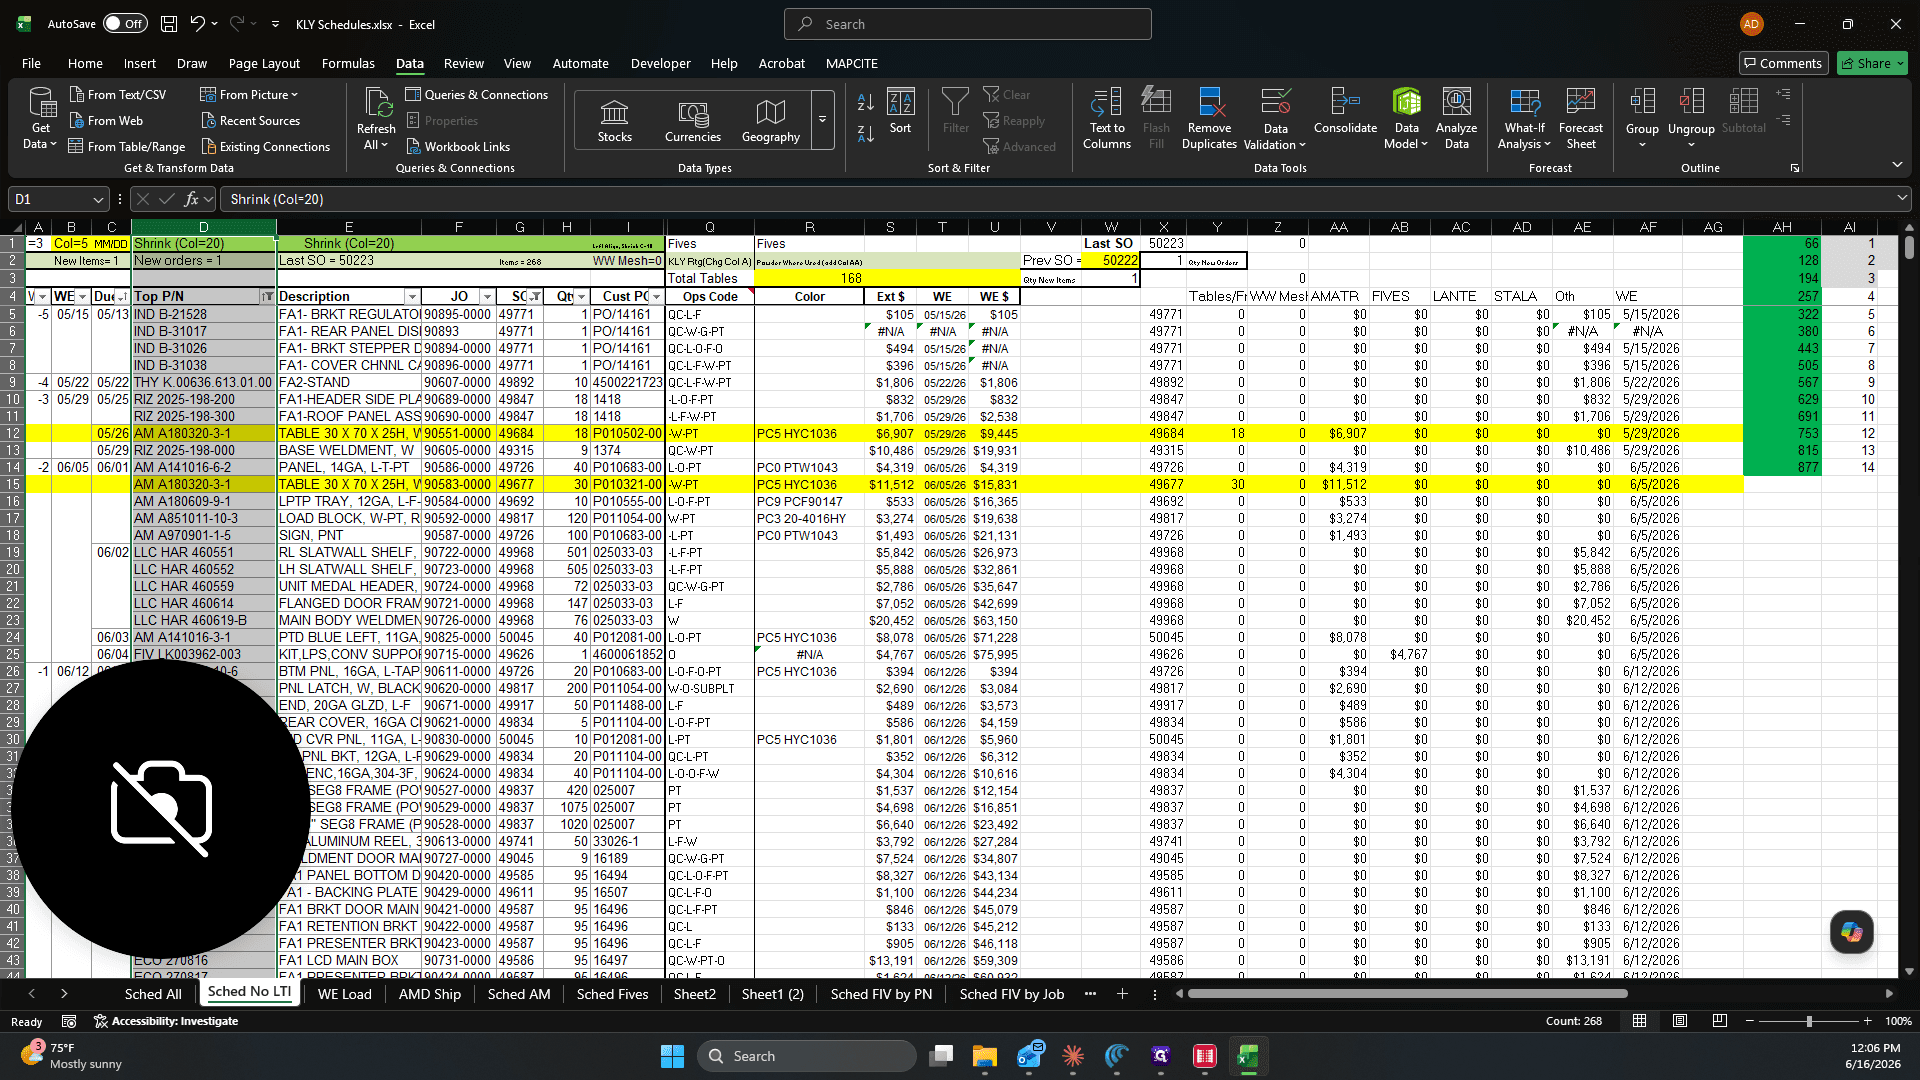
Select column D.
Step #21: Select column D.
22
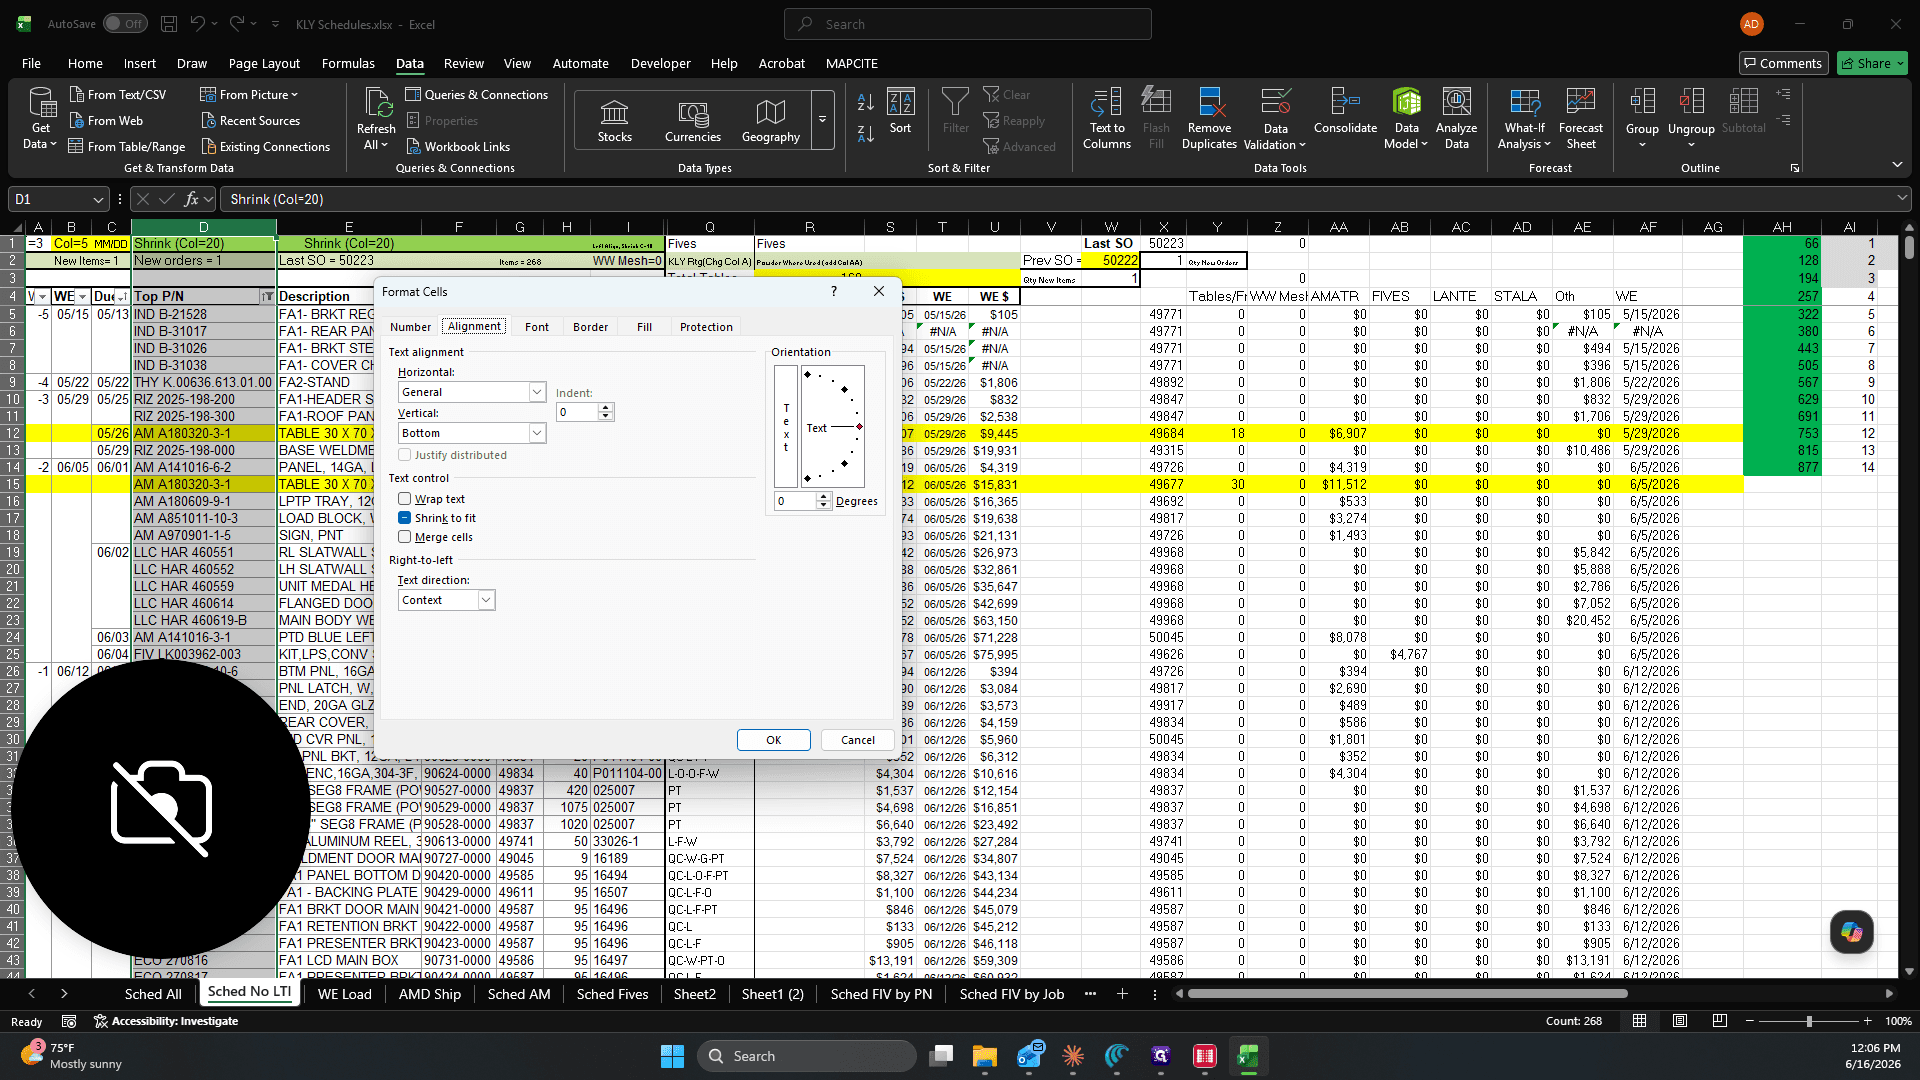
Right-click column D and select Format Cells.
Step #22: Right-click column D and select Format Cells.
23
Navigate to the Alignment tab.
Step #23: Navigate to the Alignment tab.
24
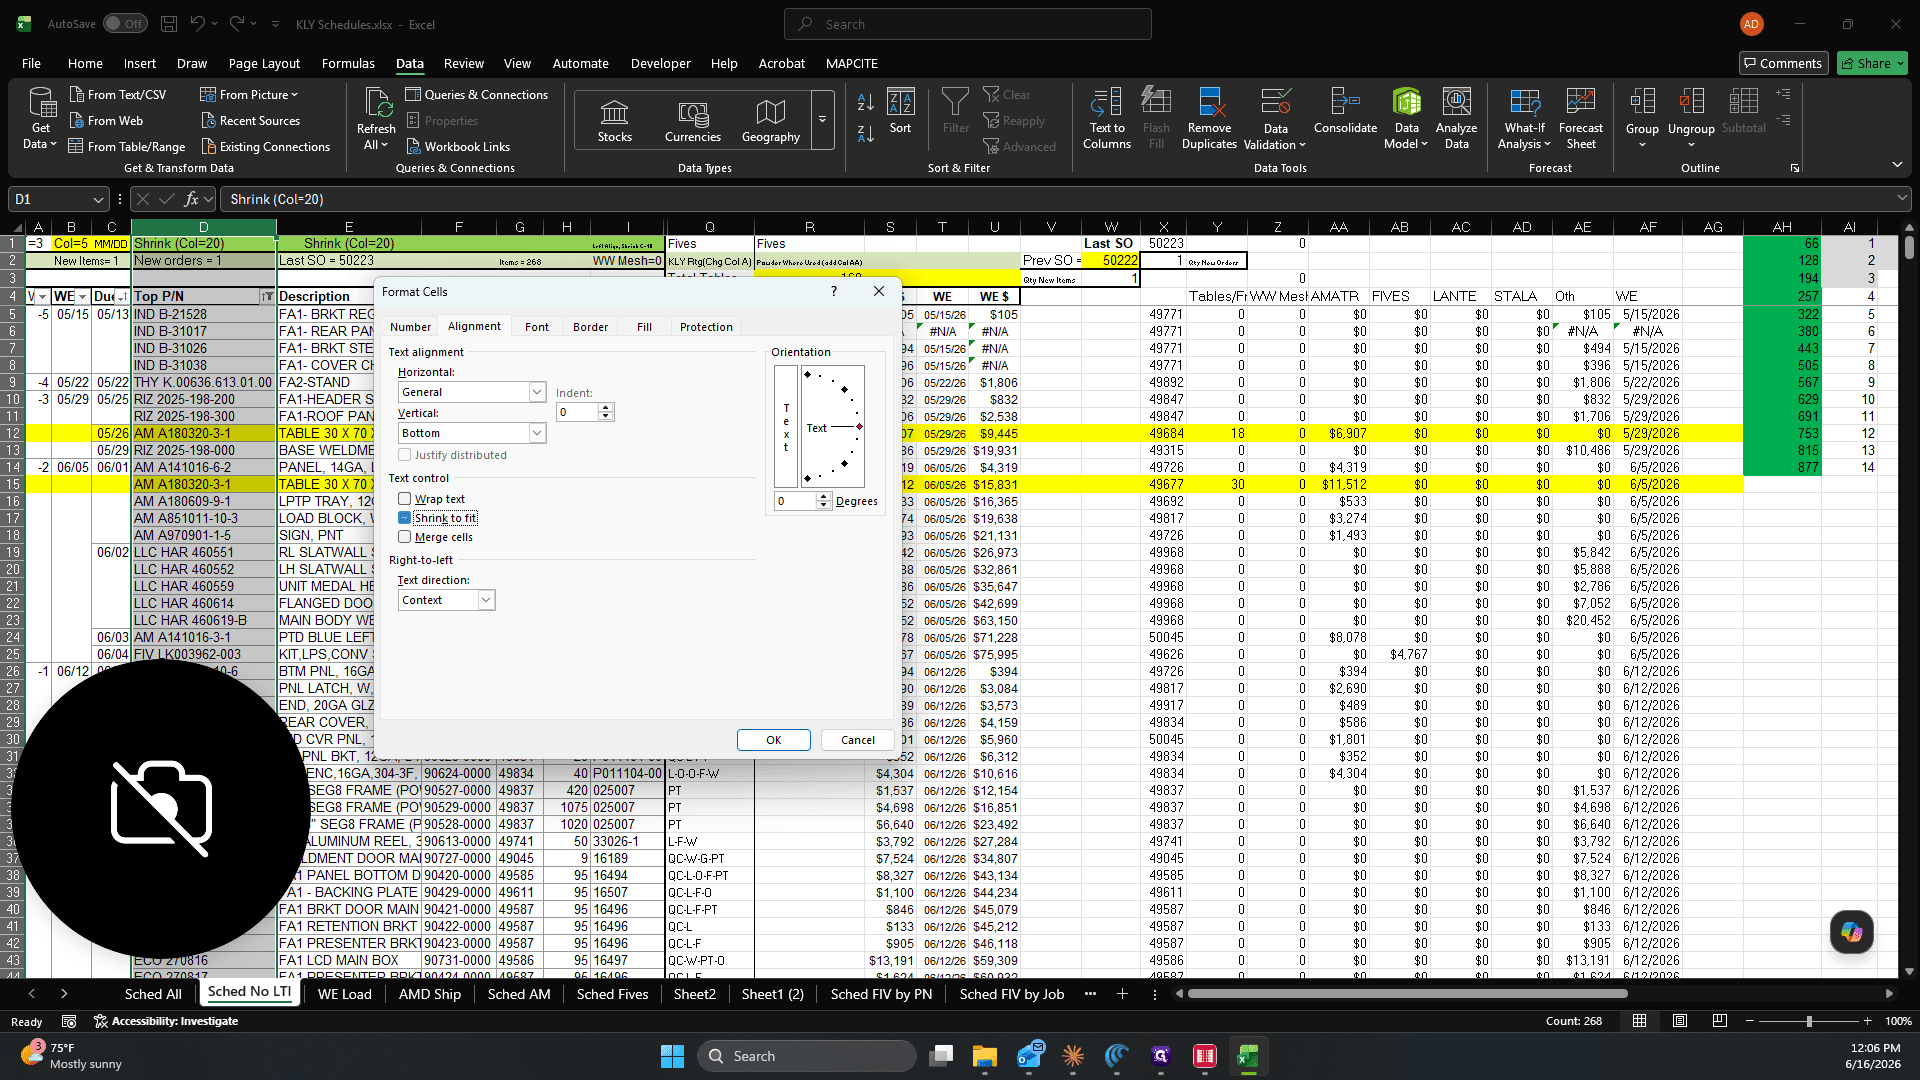
Check the box for Shrink to fit.
Step #24: Check the box for Shrink to fit.
25
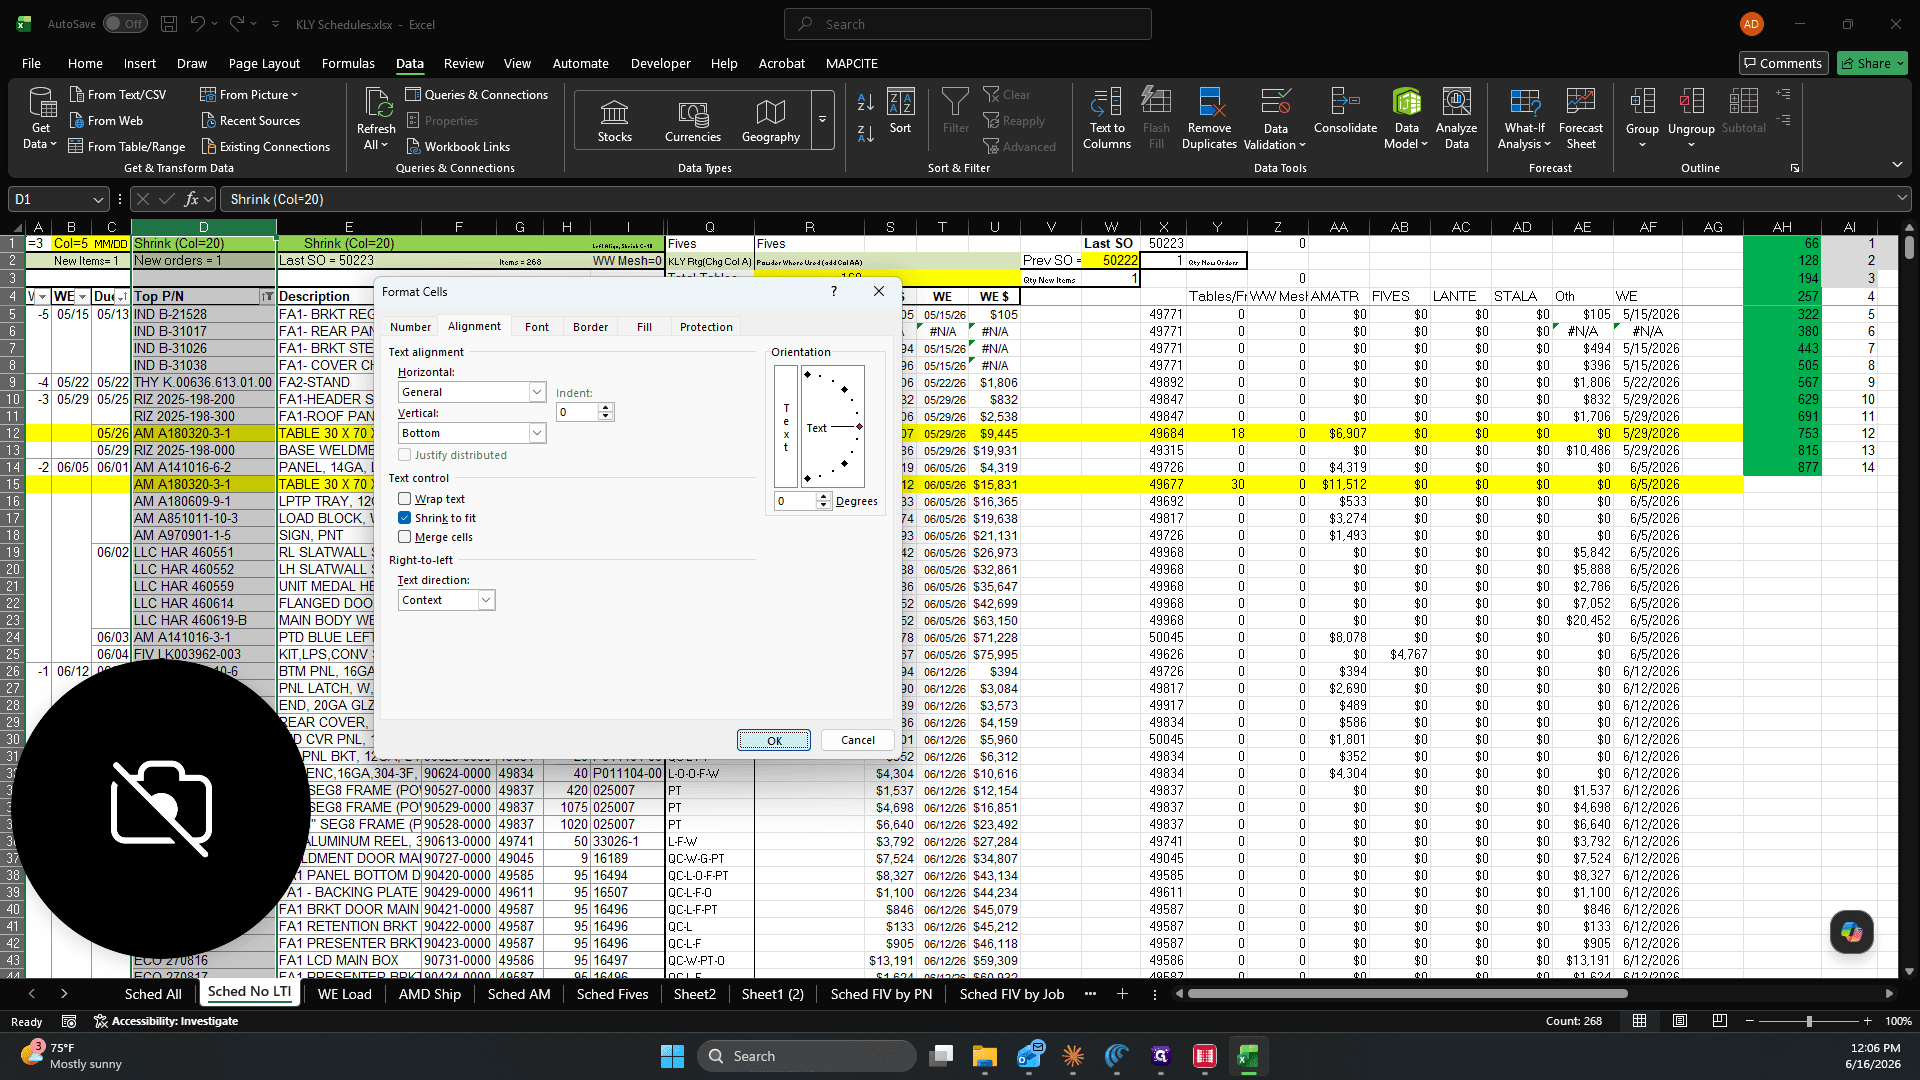
Click OK to apply the alignment setting.
Step #25: Click OK to apply the alignment setting.
26
Press Ctrl + S to save the updated schedule file.
27
Press Ctrl + P to open the print menu.
28
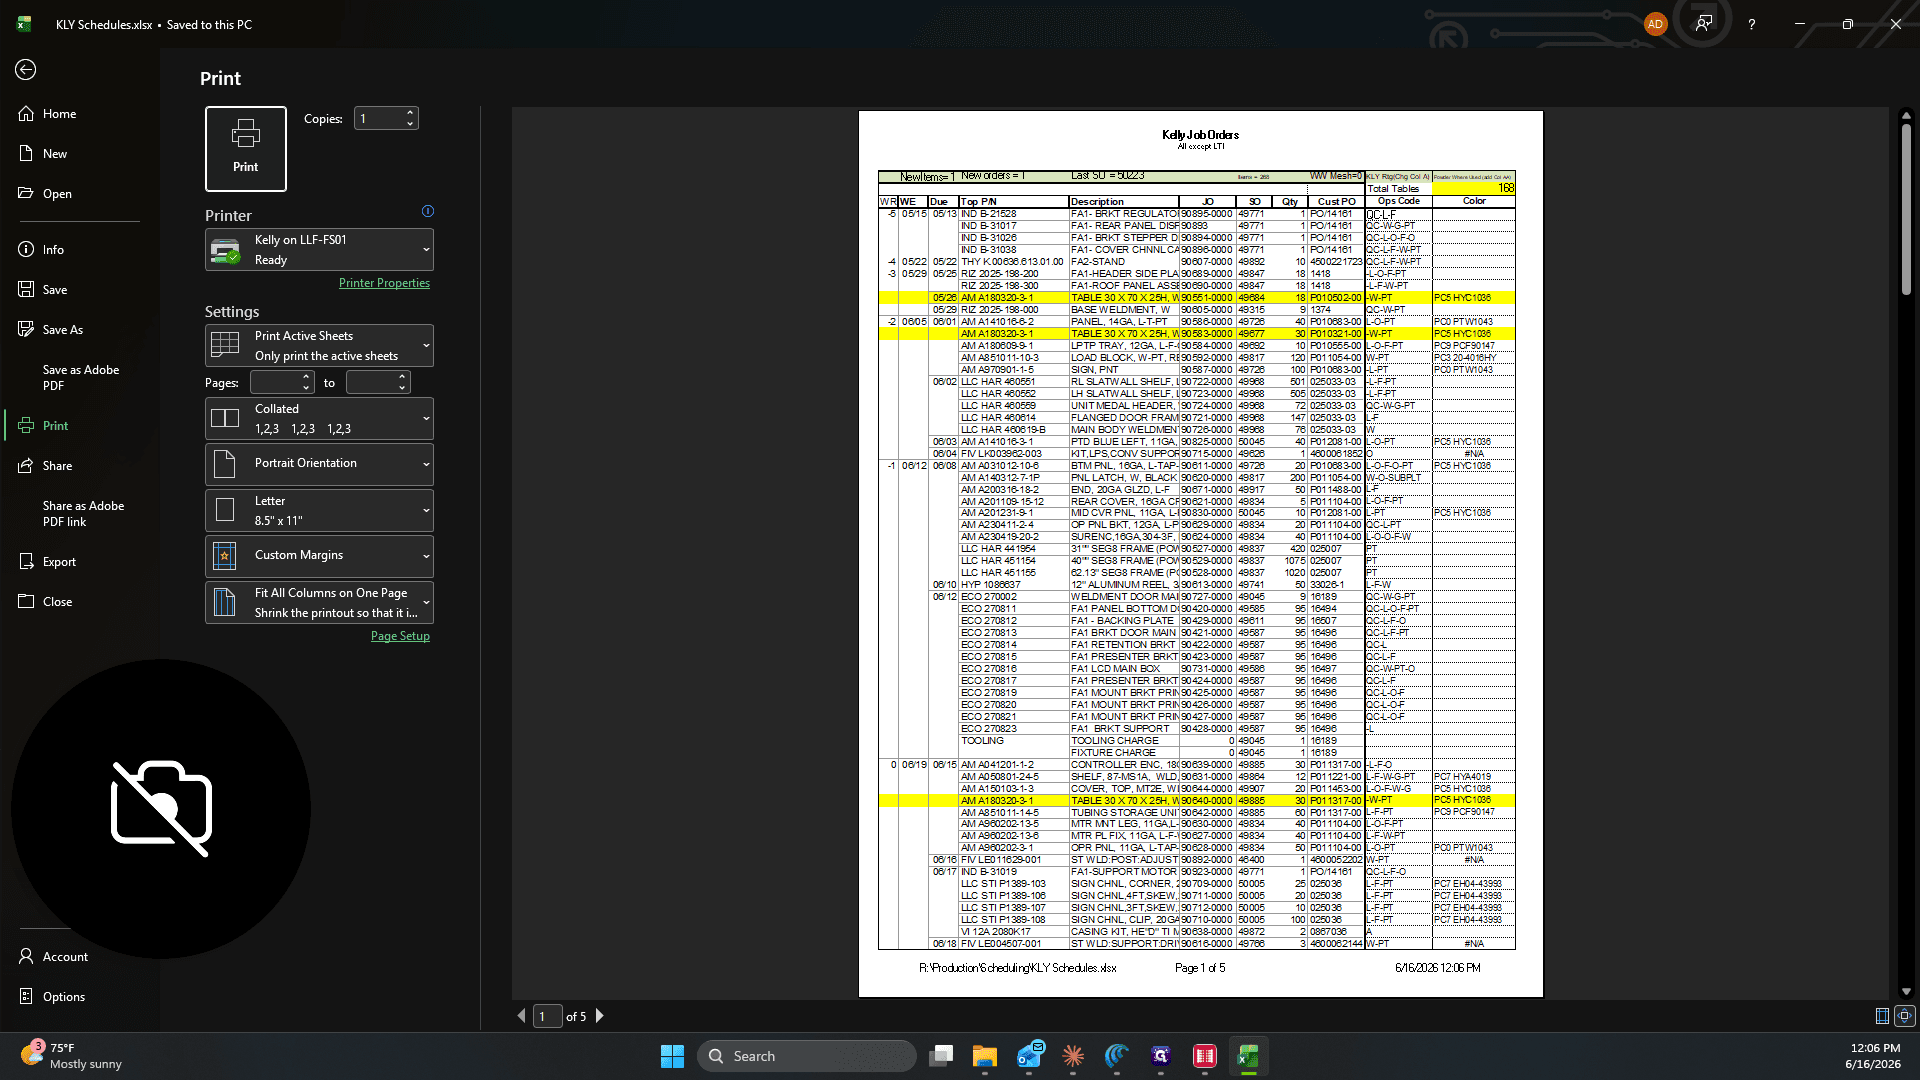
Verify the print settings and click Print to distribute the updated schedule.
Step #28: Verify the print settings and click Print to distribute the updated schedule.

Q: Should I open the exported Made2Manage report after saving it?

A: No. When the system prompts asking if you want to open the exported XLSX file, click "No" and proceed directly to your main Excel scheduling spreadsheet.

Q: What should I do if Excel asks to update links when opening the schedule?

A: If you receive a prompt asking to update the file or its links, always click "Update" so your spreadsheet pulls in the newly exported data from Made2Manage.

Term

Definition

Made2Manage

An enterprise resource planning (ERP) software used for managing production and manufacturing operations.

Job Order Status

A specific report in the ERP system that tracks the progress, quantities, and delivery dates of current production jobs.

SO Number

Stands for Sales Order number, a unique identifier for a customer's requested product order.

RP JOSS

The internal designation for the custom Job Order Status report exported from Made2Manage.