
How to Set Up Task Delegation in Morney
Learn how to assign a delegate in Morney to create, submit, or approve tasks on your behalf while you are away.
This guide explains how to set up account delegation in Morney so you can authorize a subordinate or colleague to perform essential system tasks on your behalf.
This process applies to any Morney user, particularly managers or team leads, who needs to ensure daily operations and approvals continue uninterrupted while they are out of the office or otherwise unavailable.
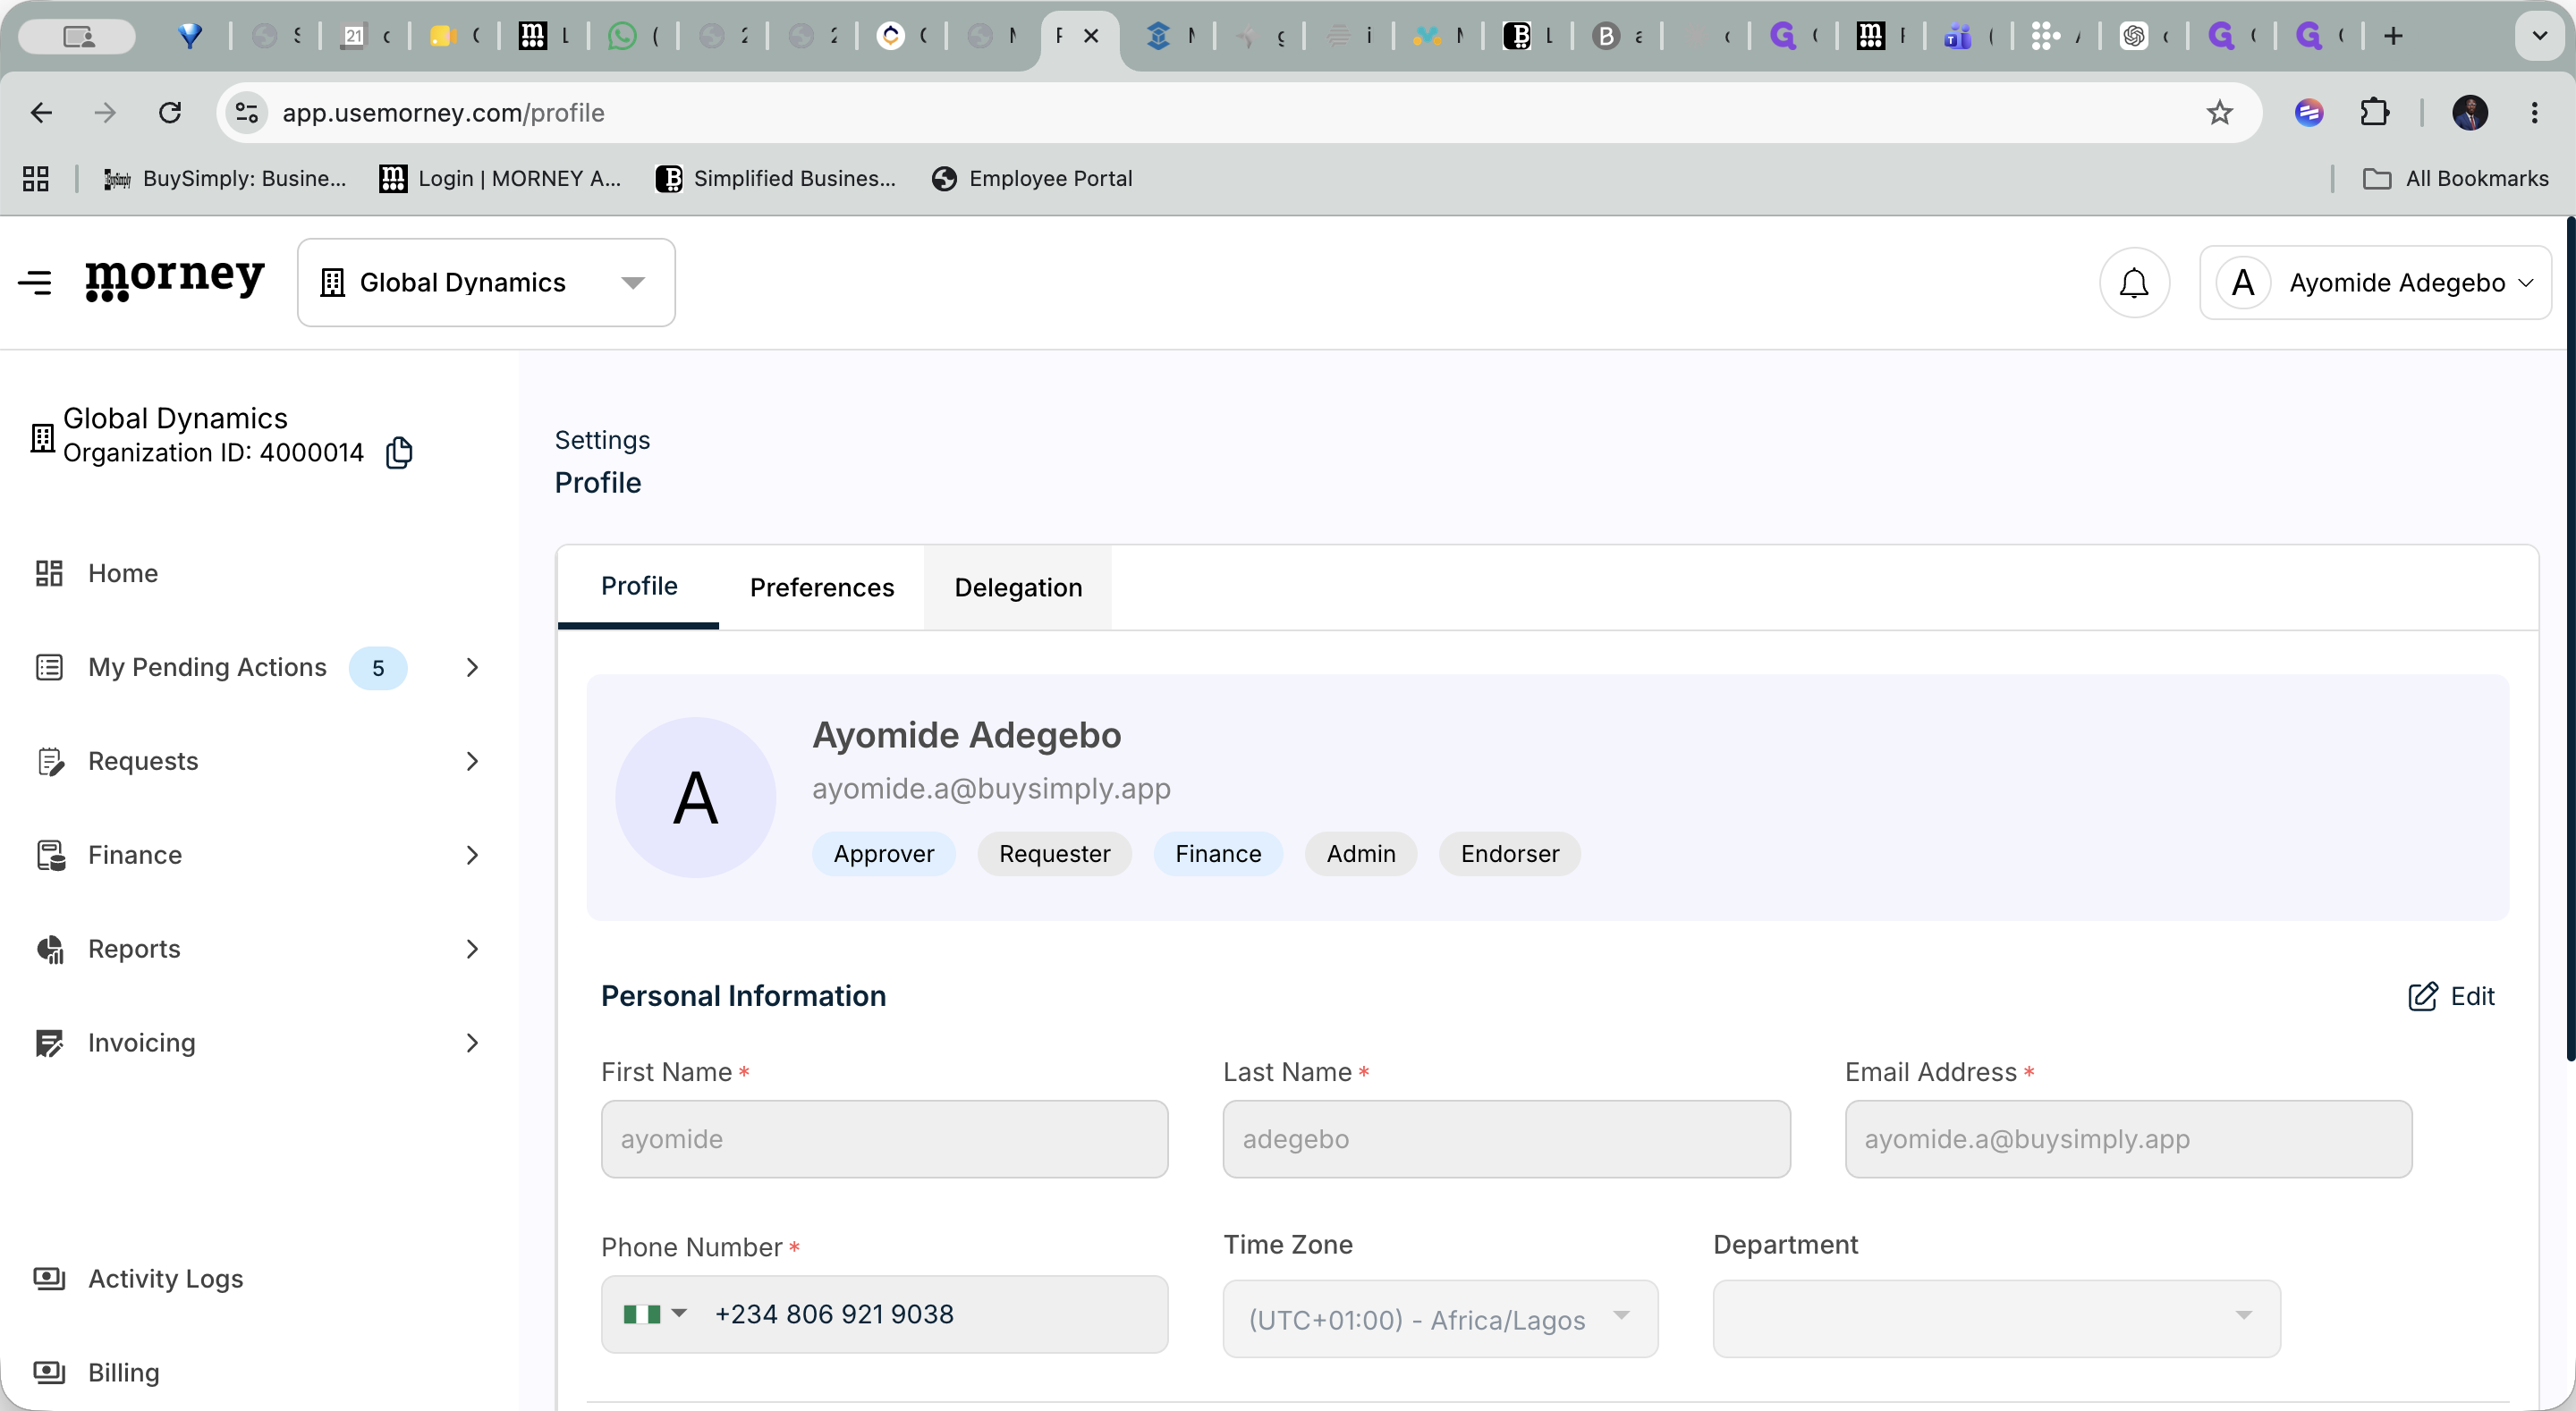
Navigate to Delegation Settings

Assign a Delegate and Permissions
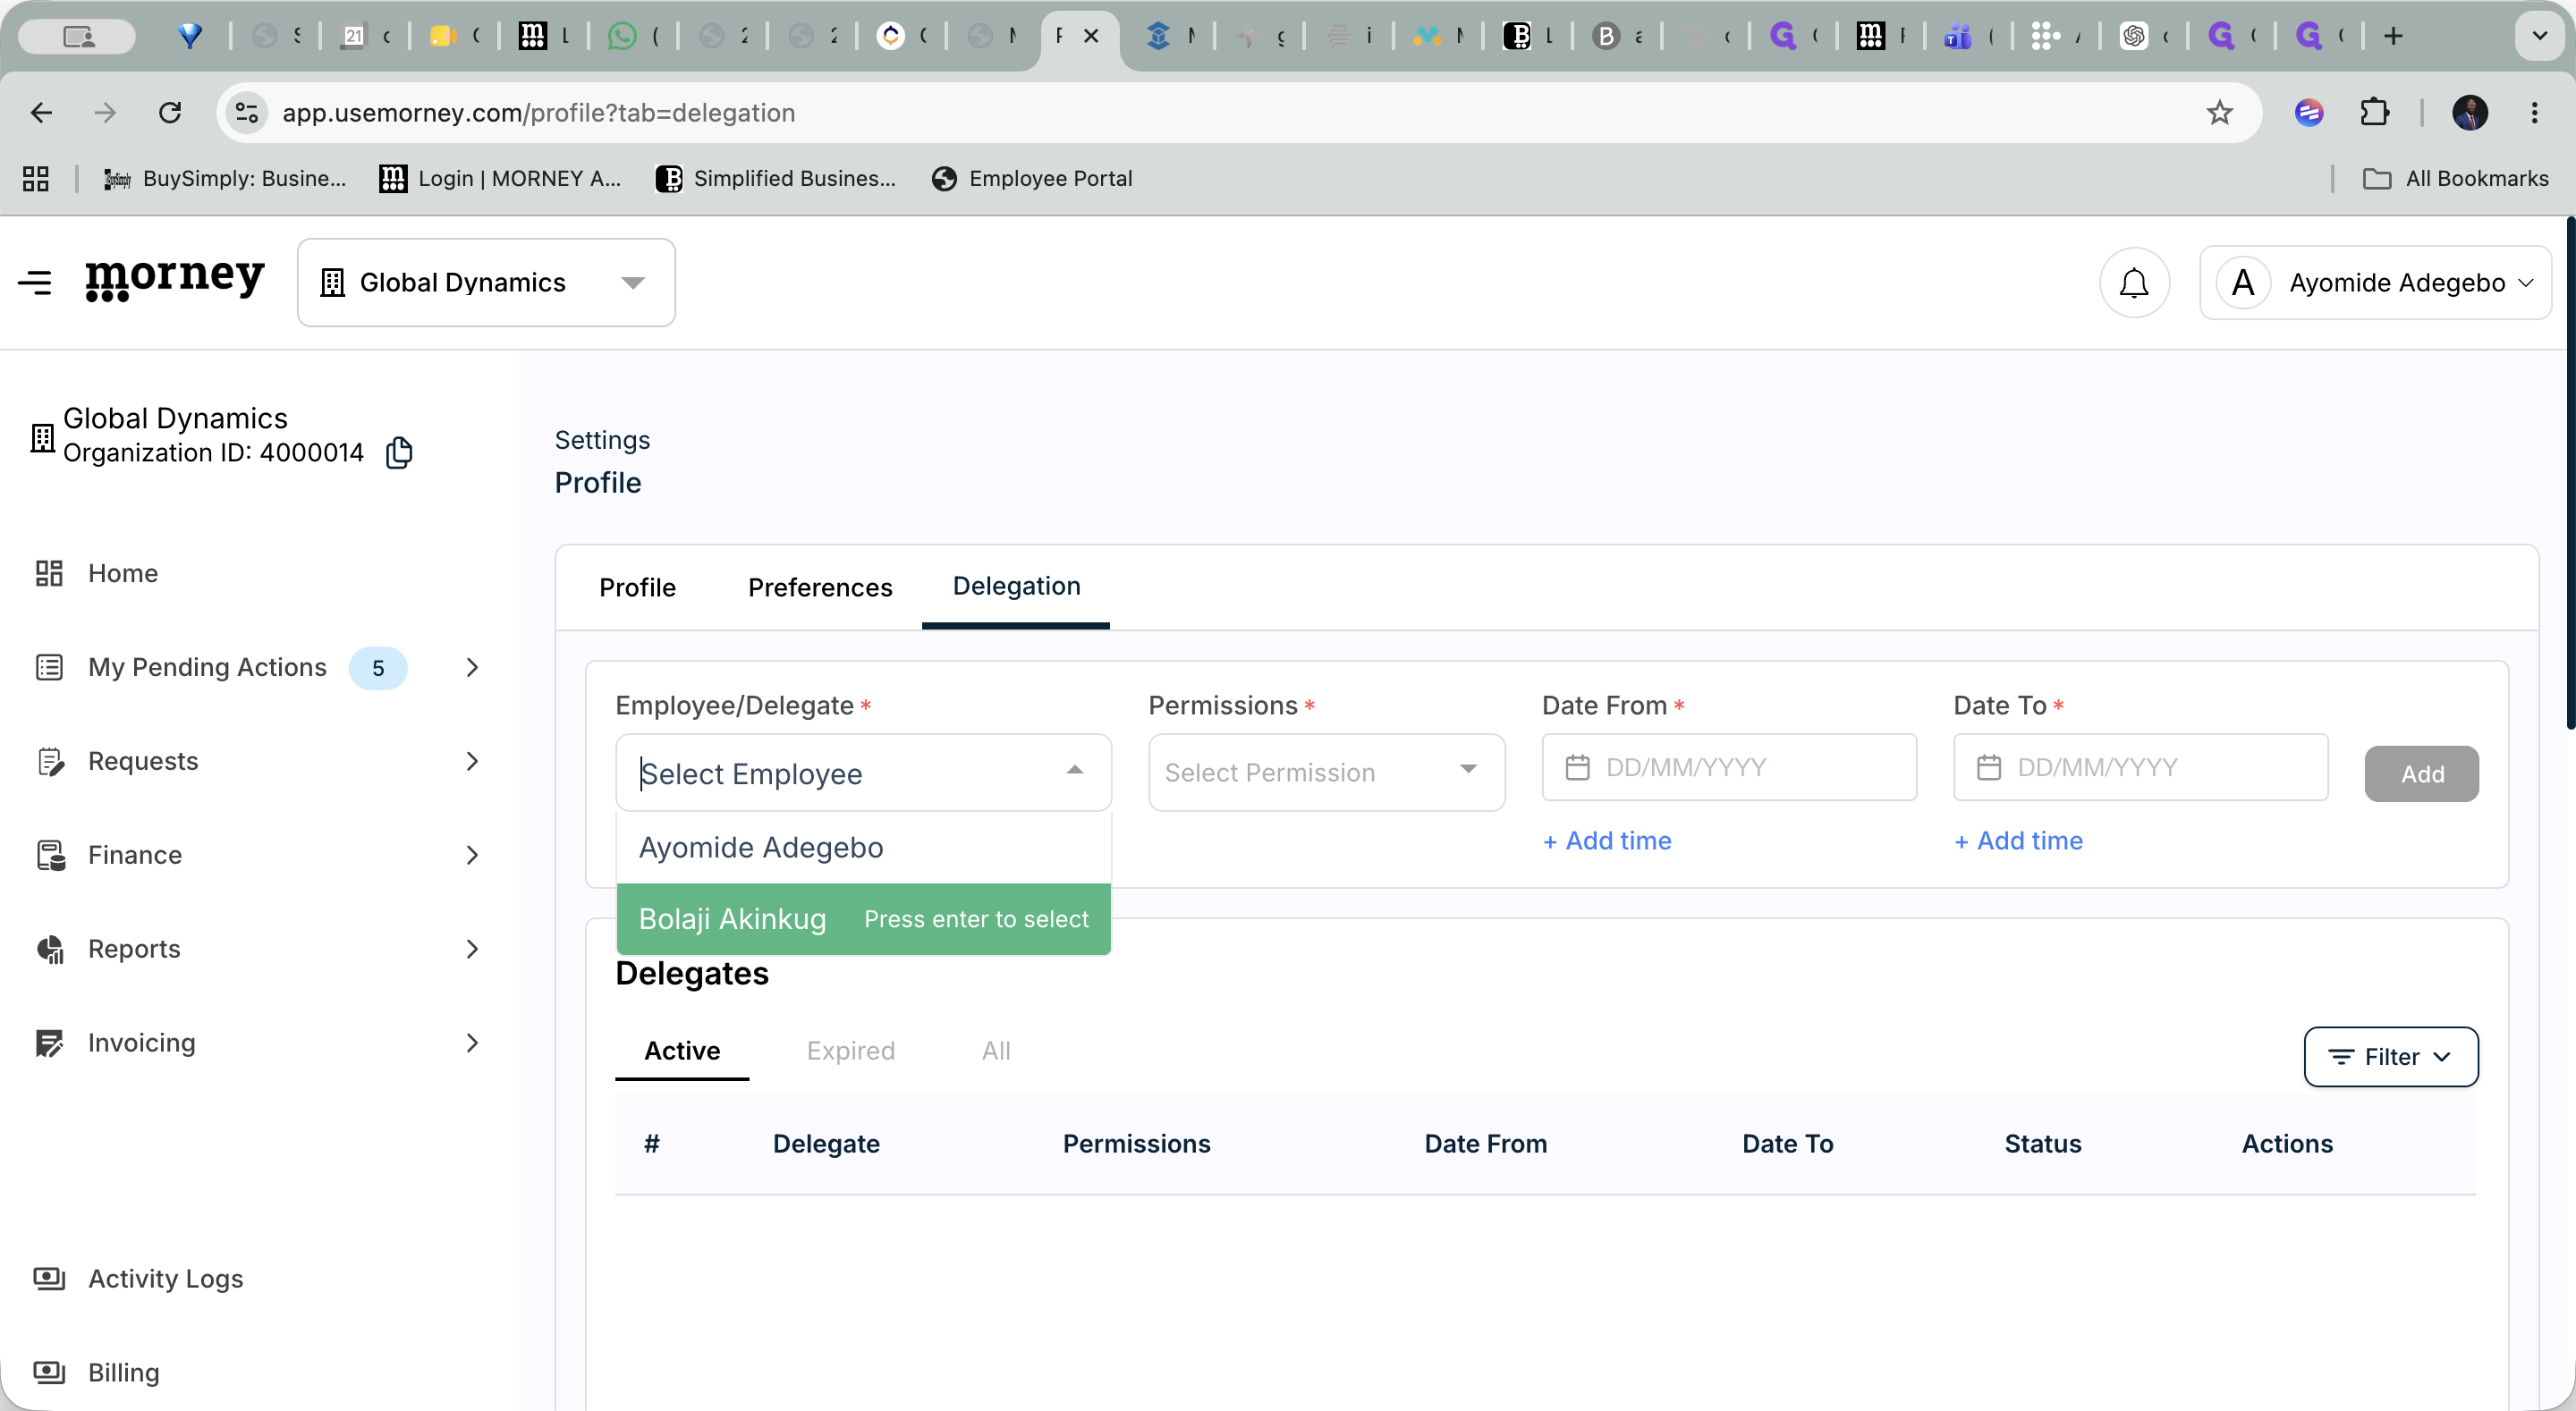
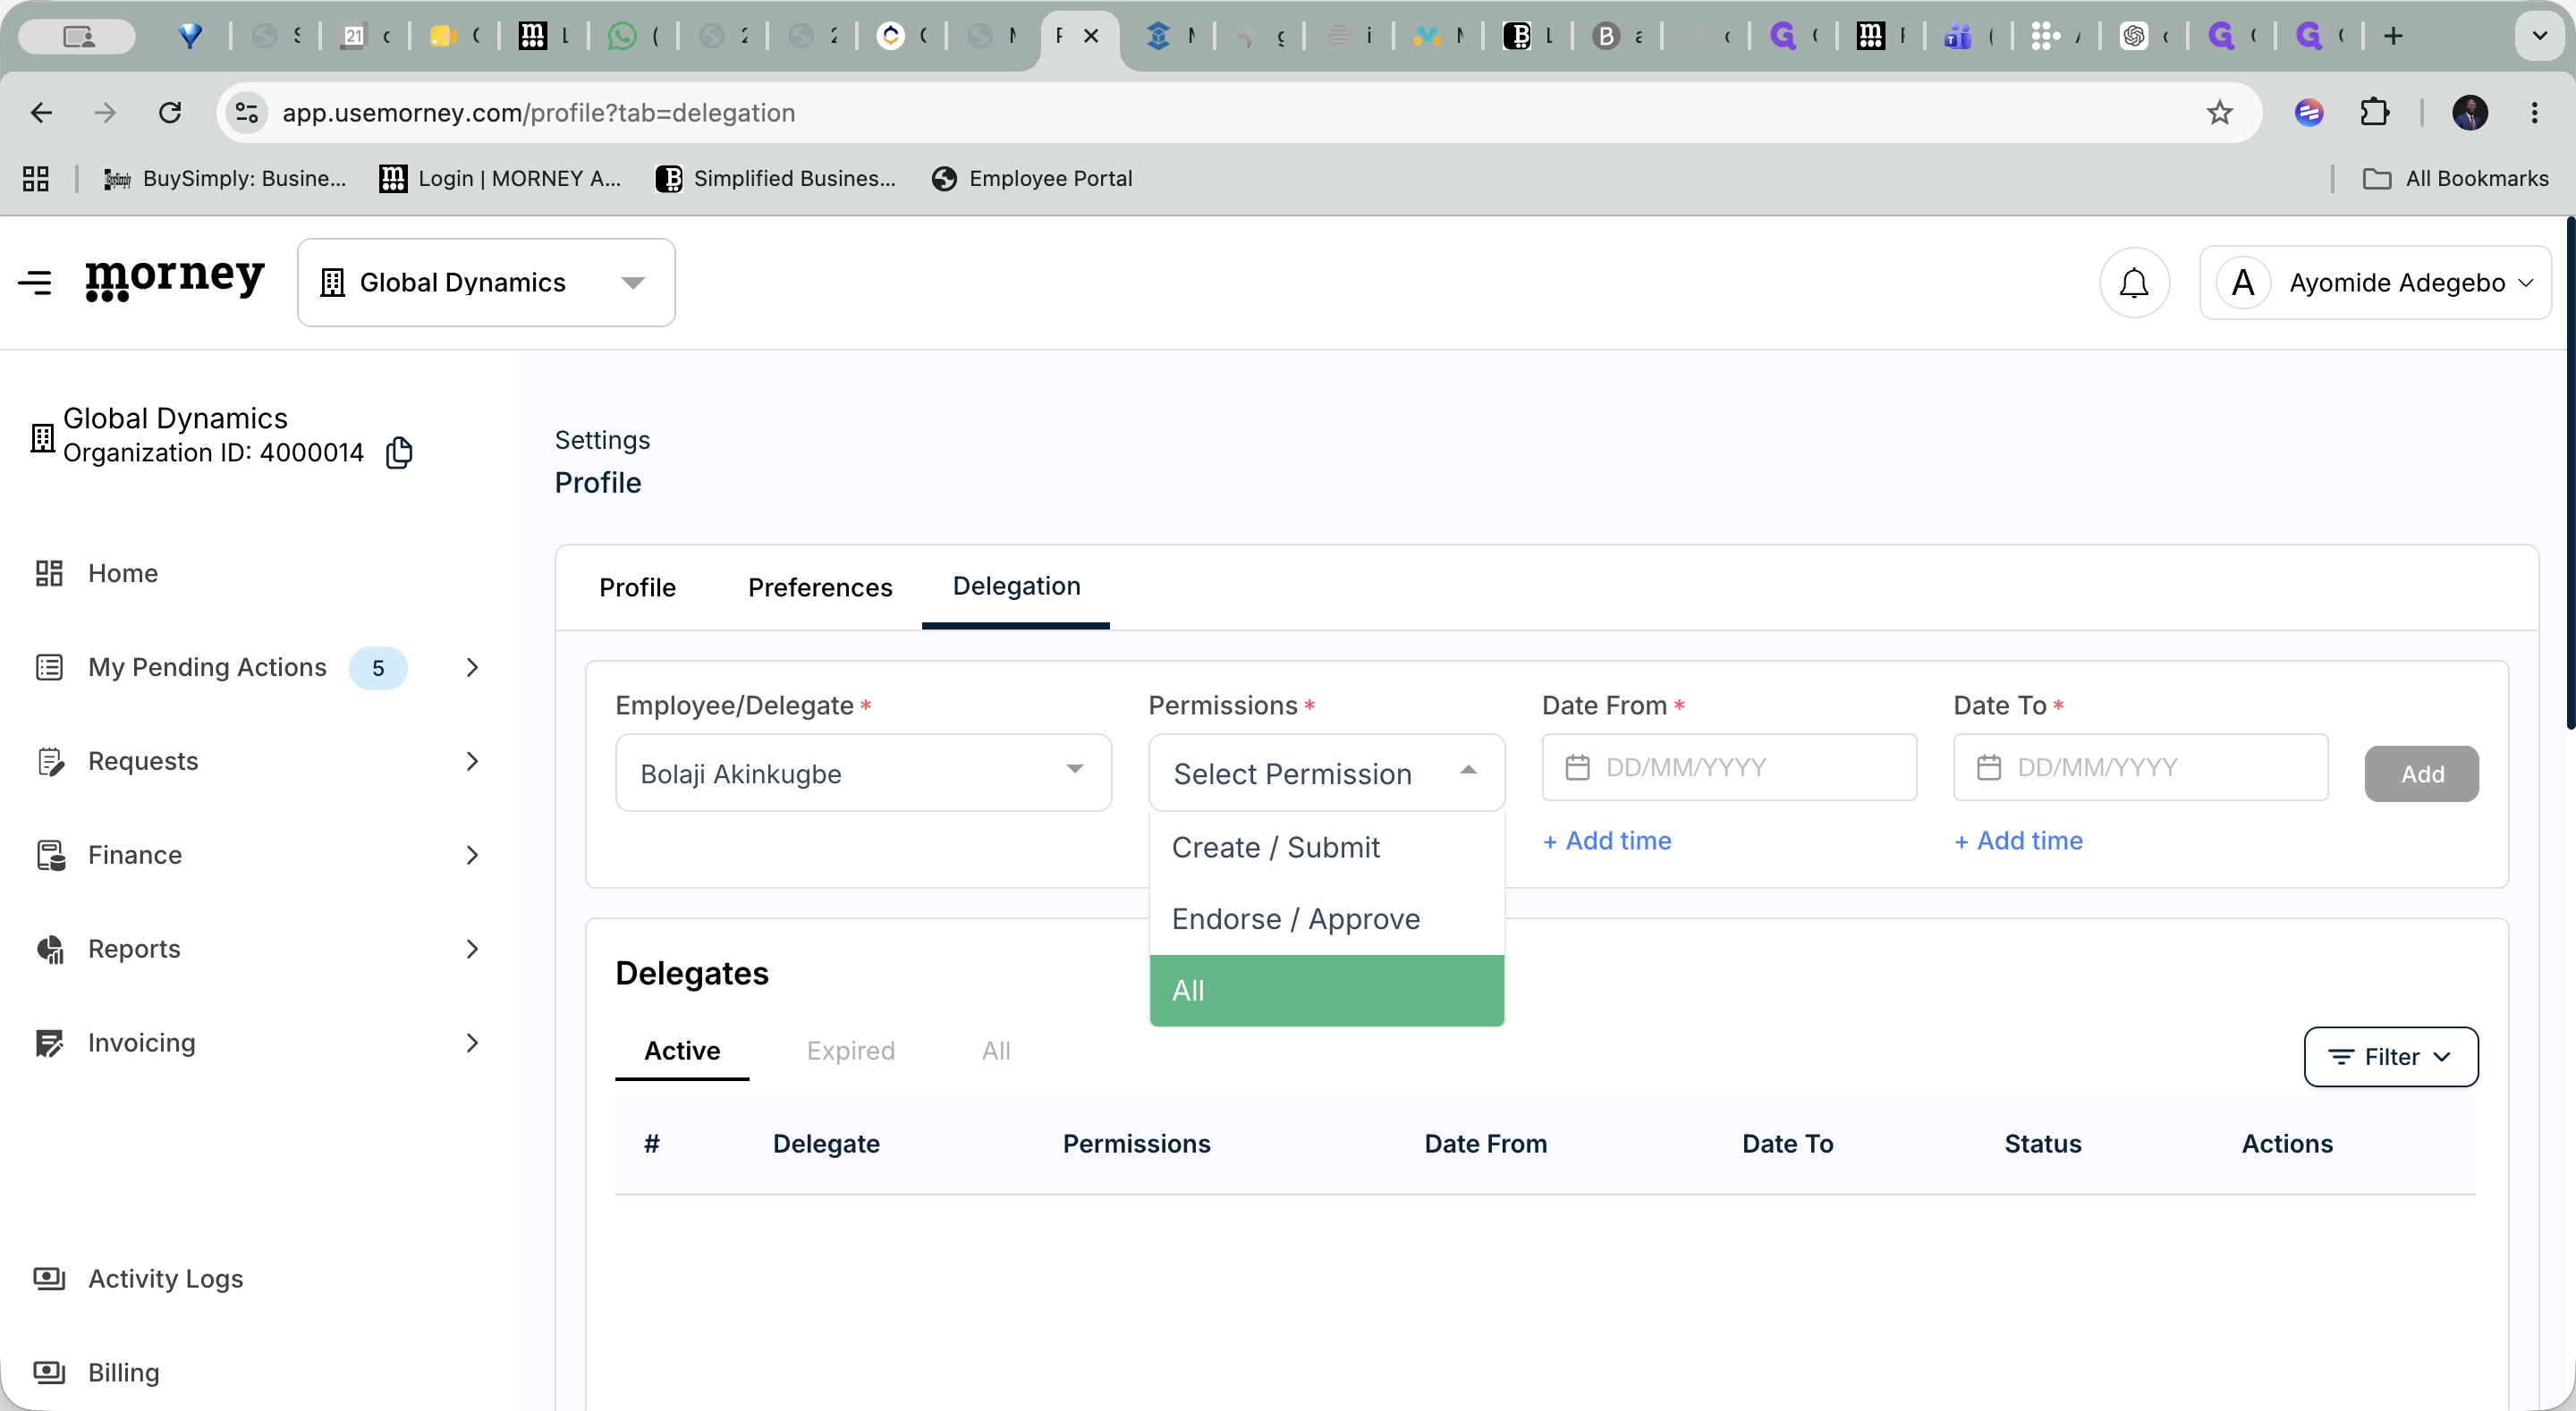
Before selecting their access level, review the available permissions:
Permission Level | What it allows | When to use it |
|---|---|---|
Create/Submit | The delegate can draft and submit new entries. | Use for subordinates handling data entry or initial requests. |
Endorse/Approve | The delegate can review and approve pending requests. | Use for peer managers or team leads covering your review queue. |
All | The delegate receives full access to both submit and approve. | Use for comprehensive coverage when you are entirely unavailable. |
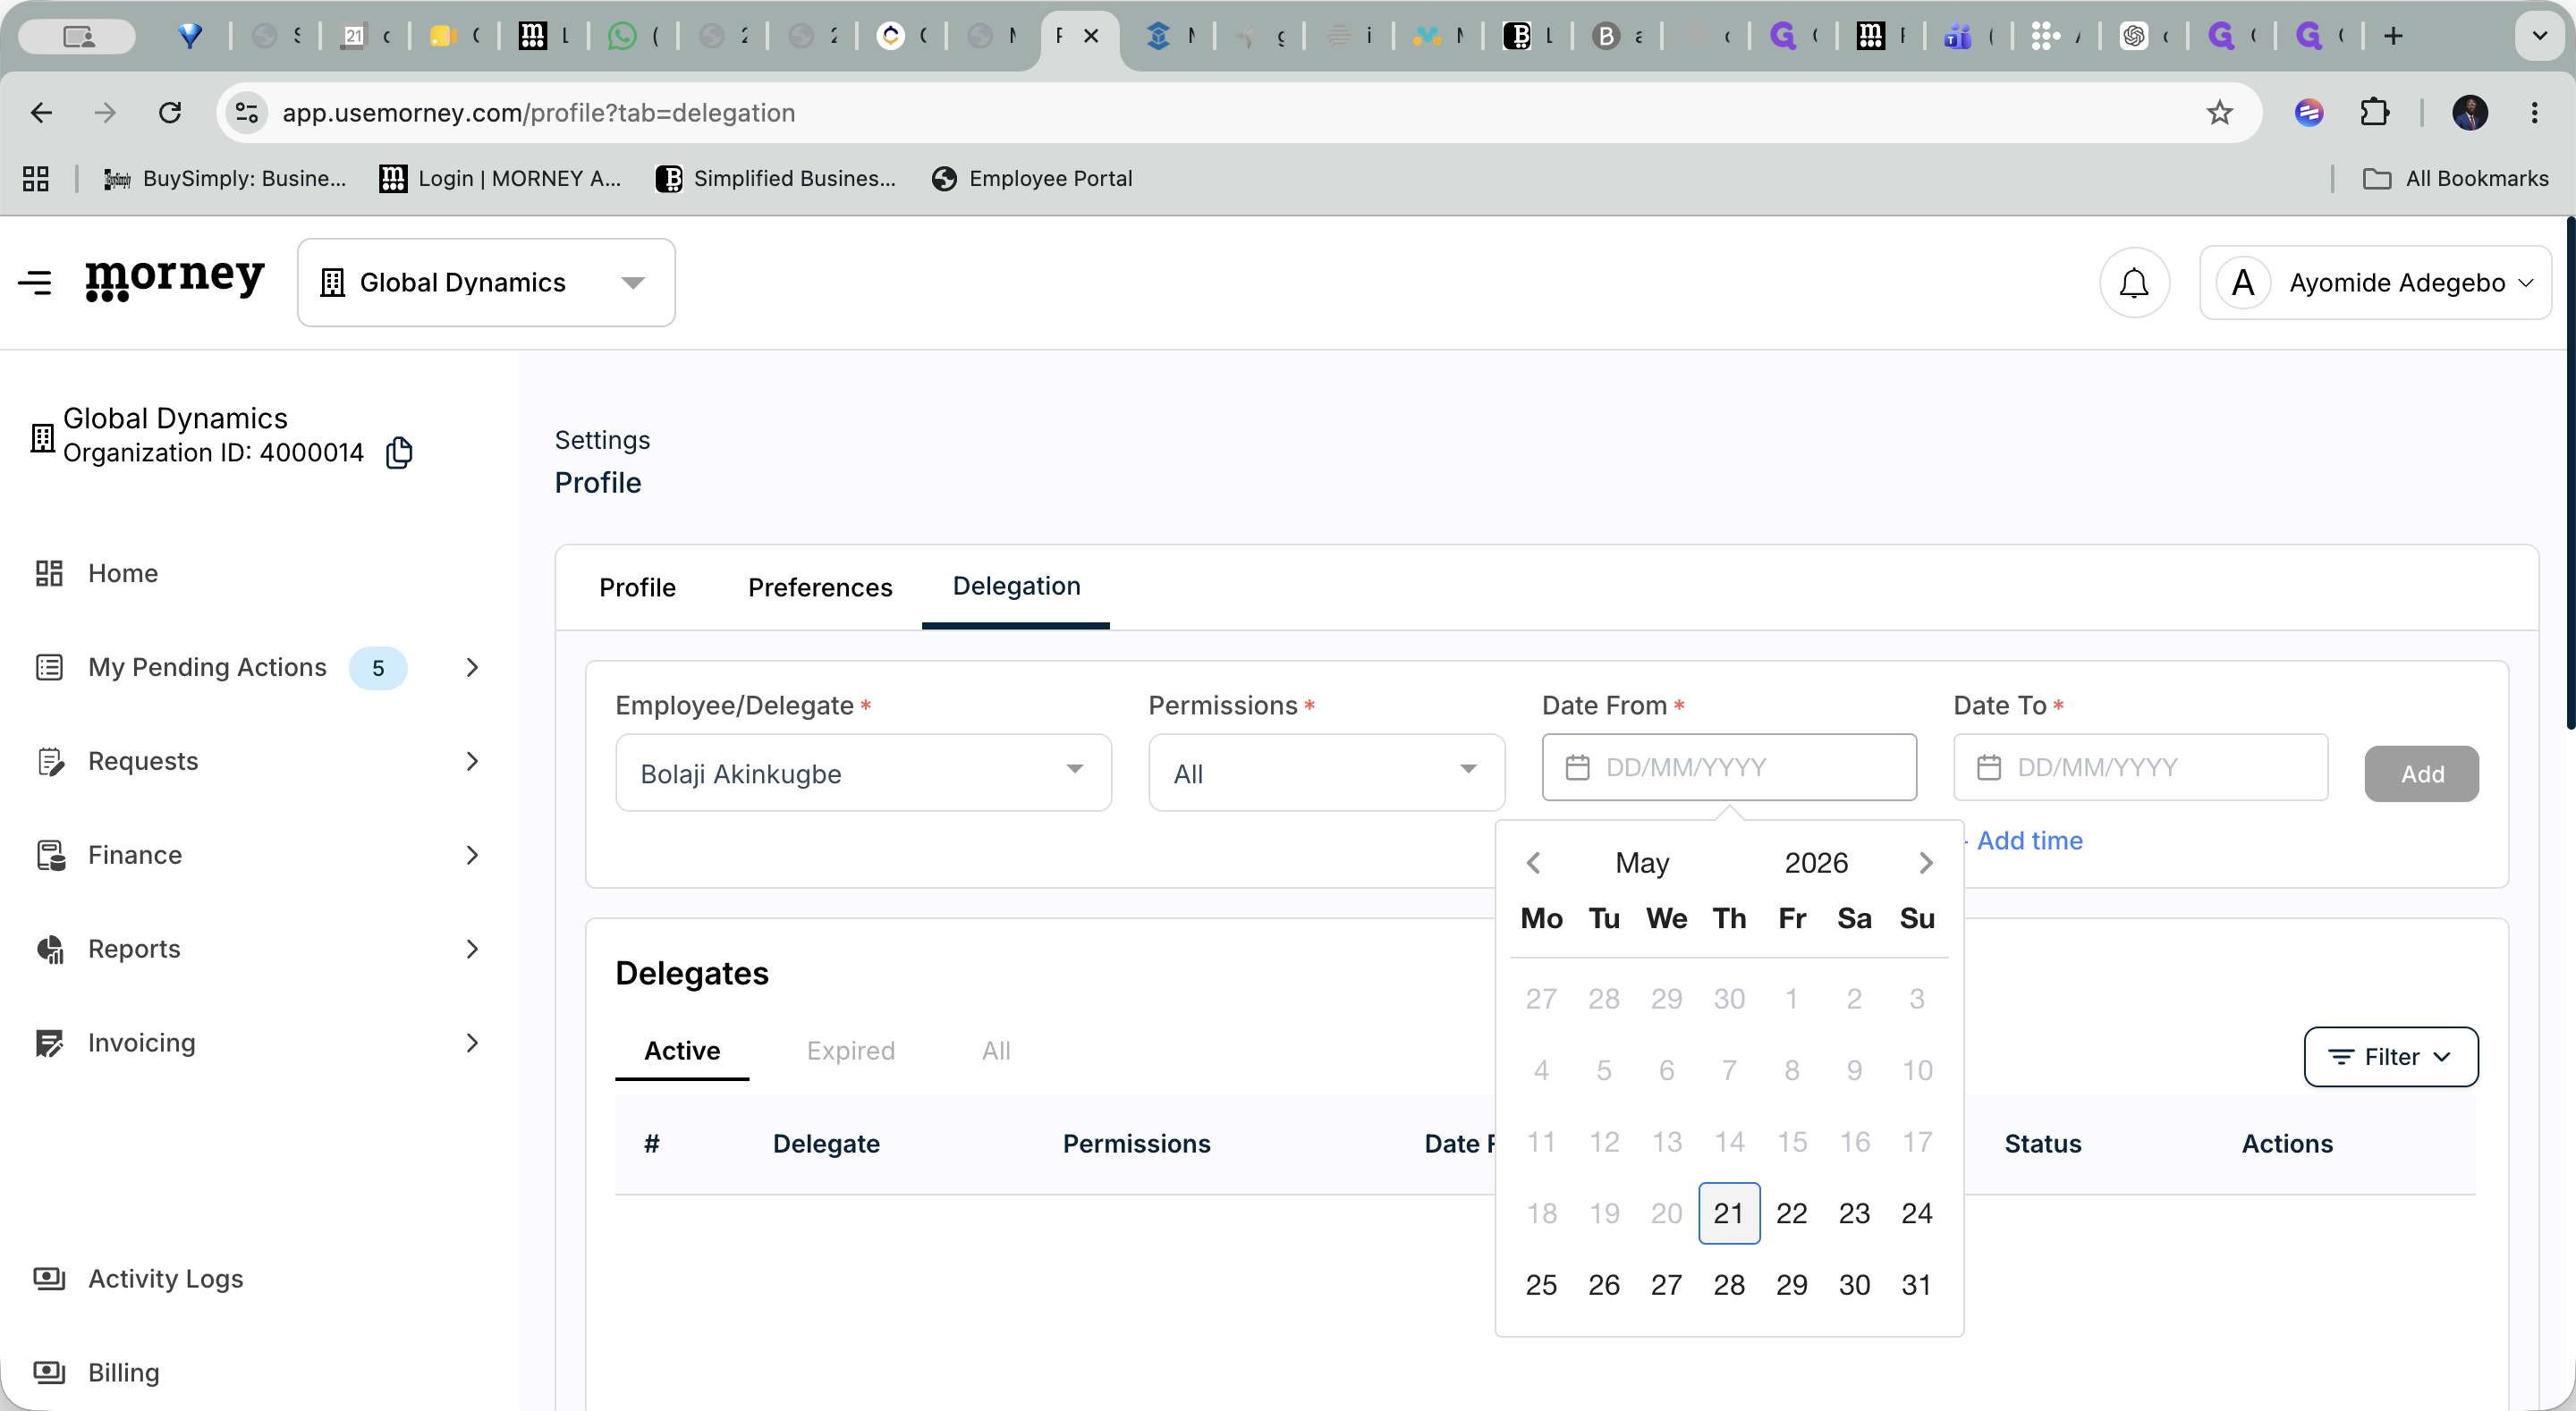
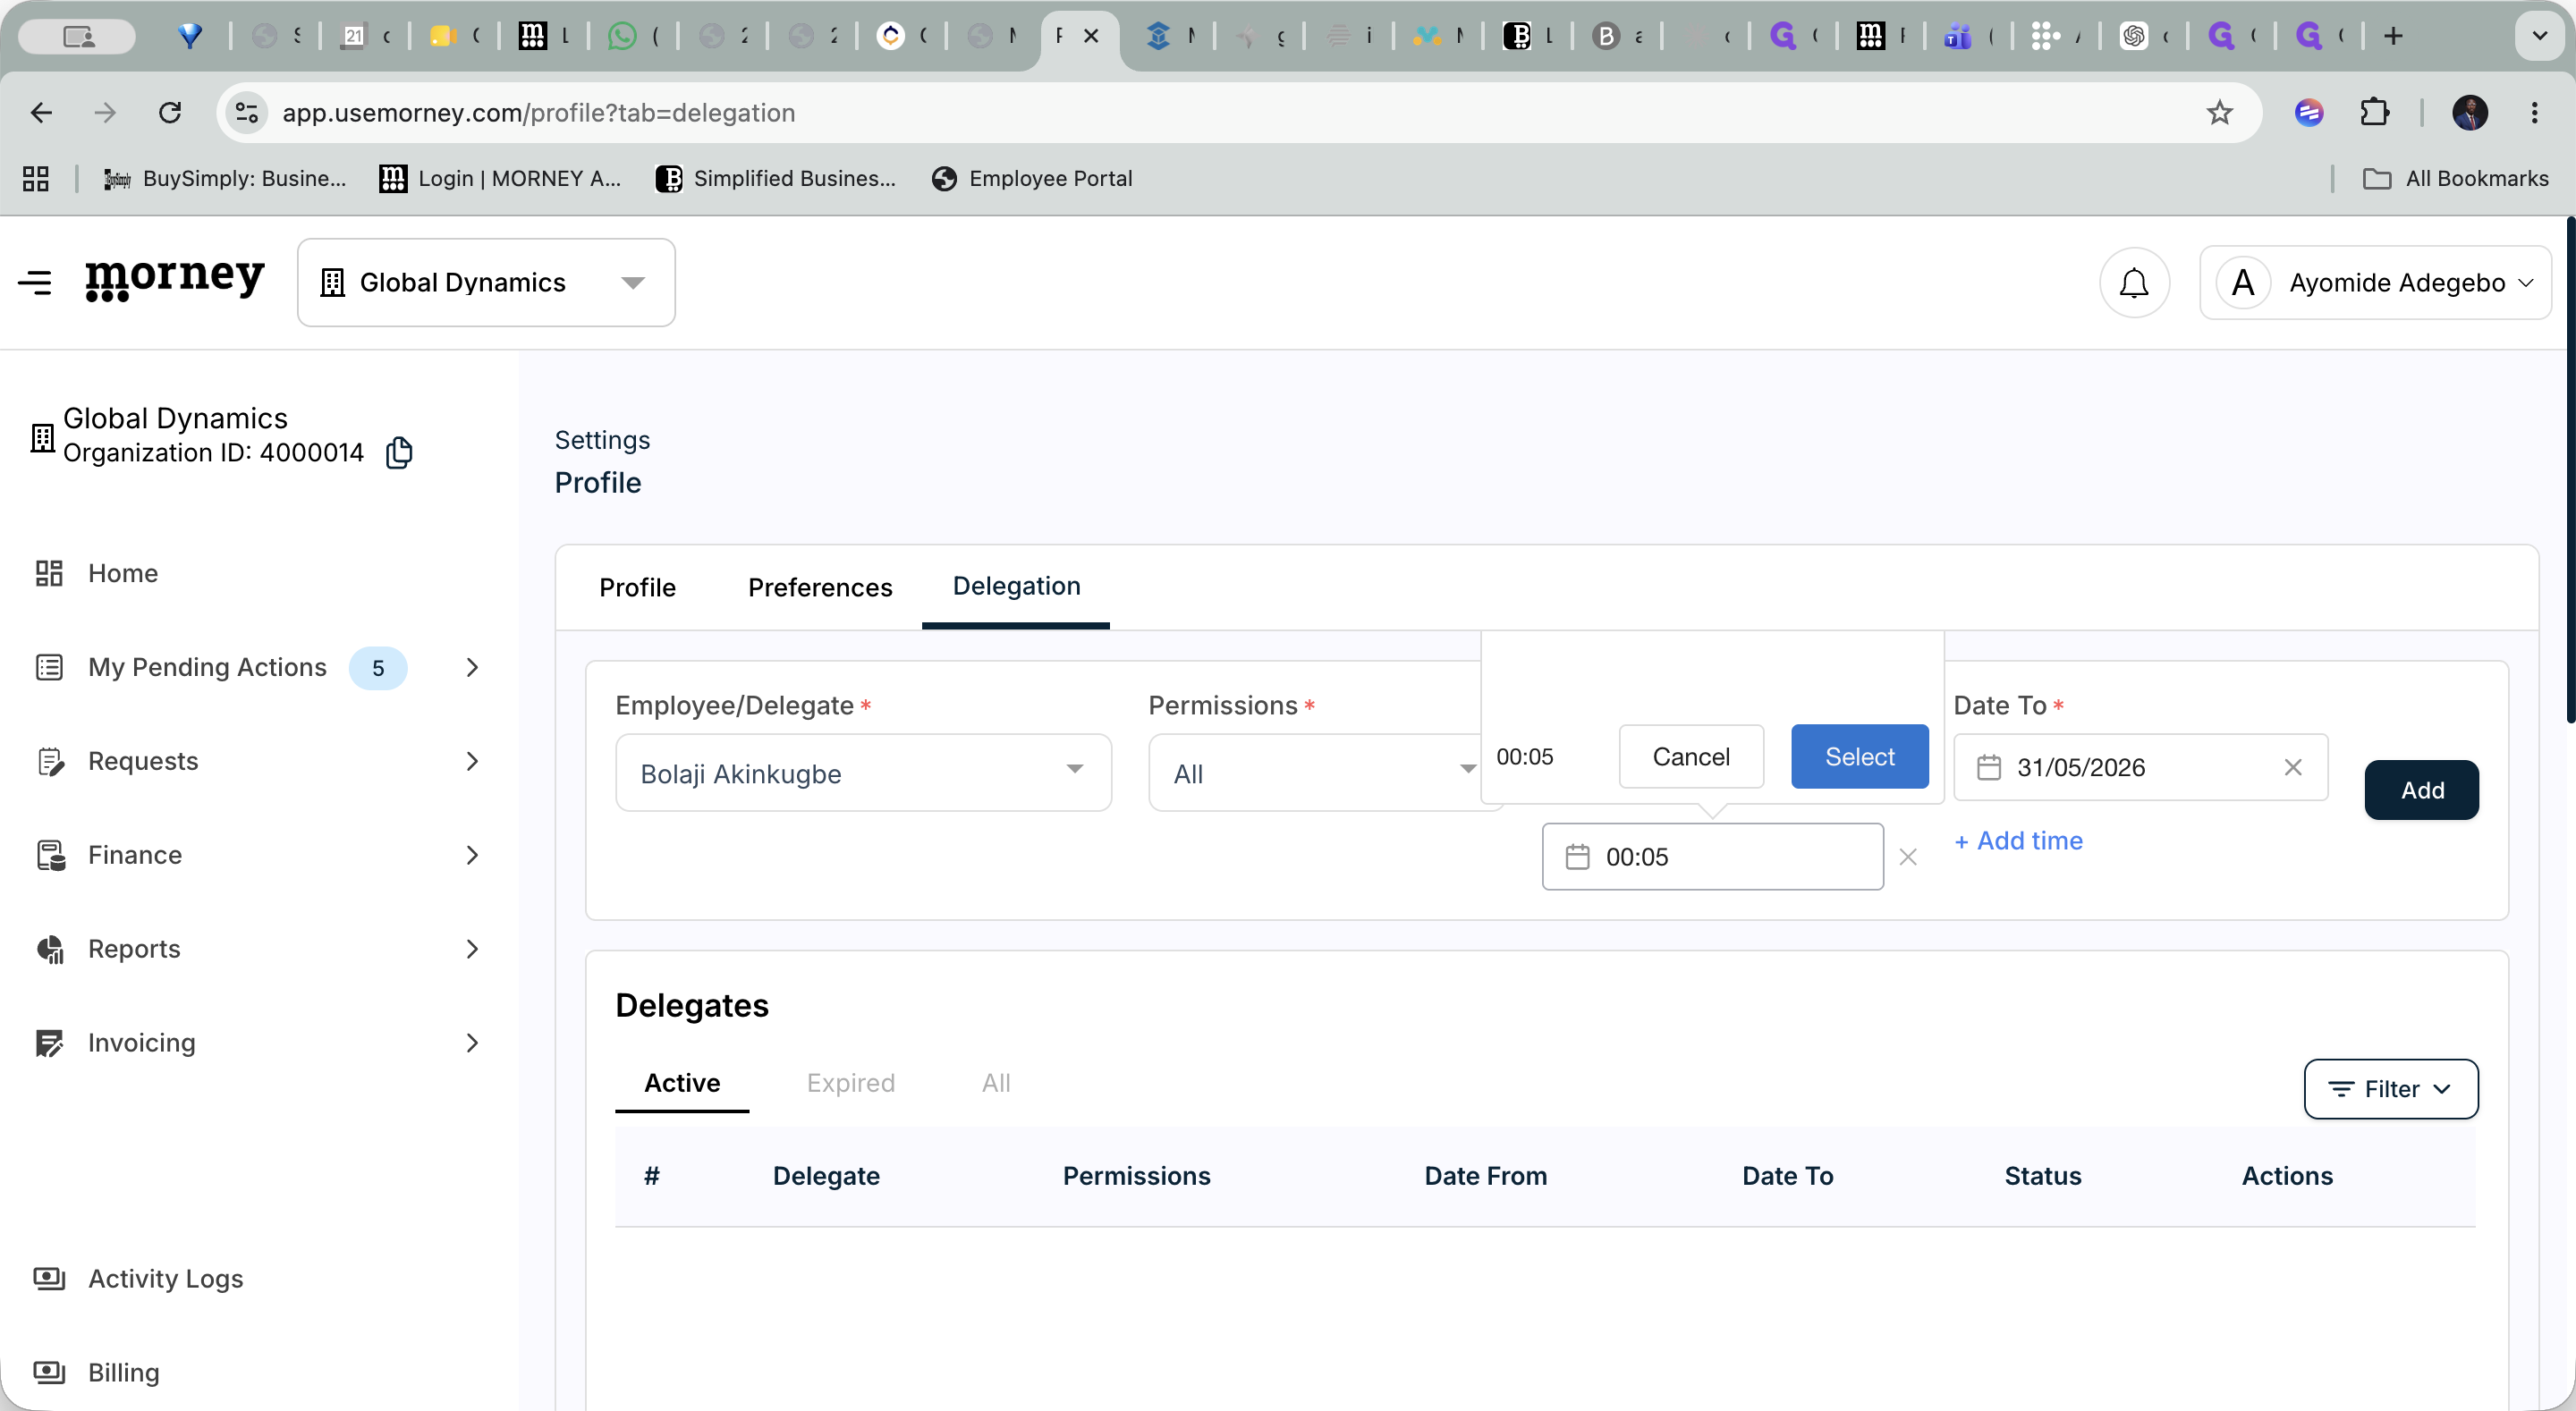
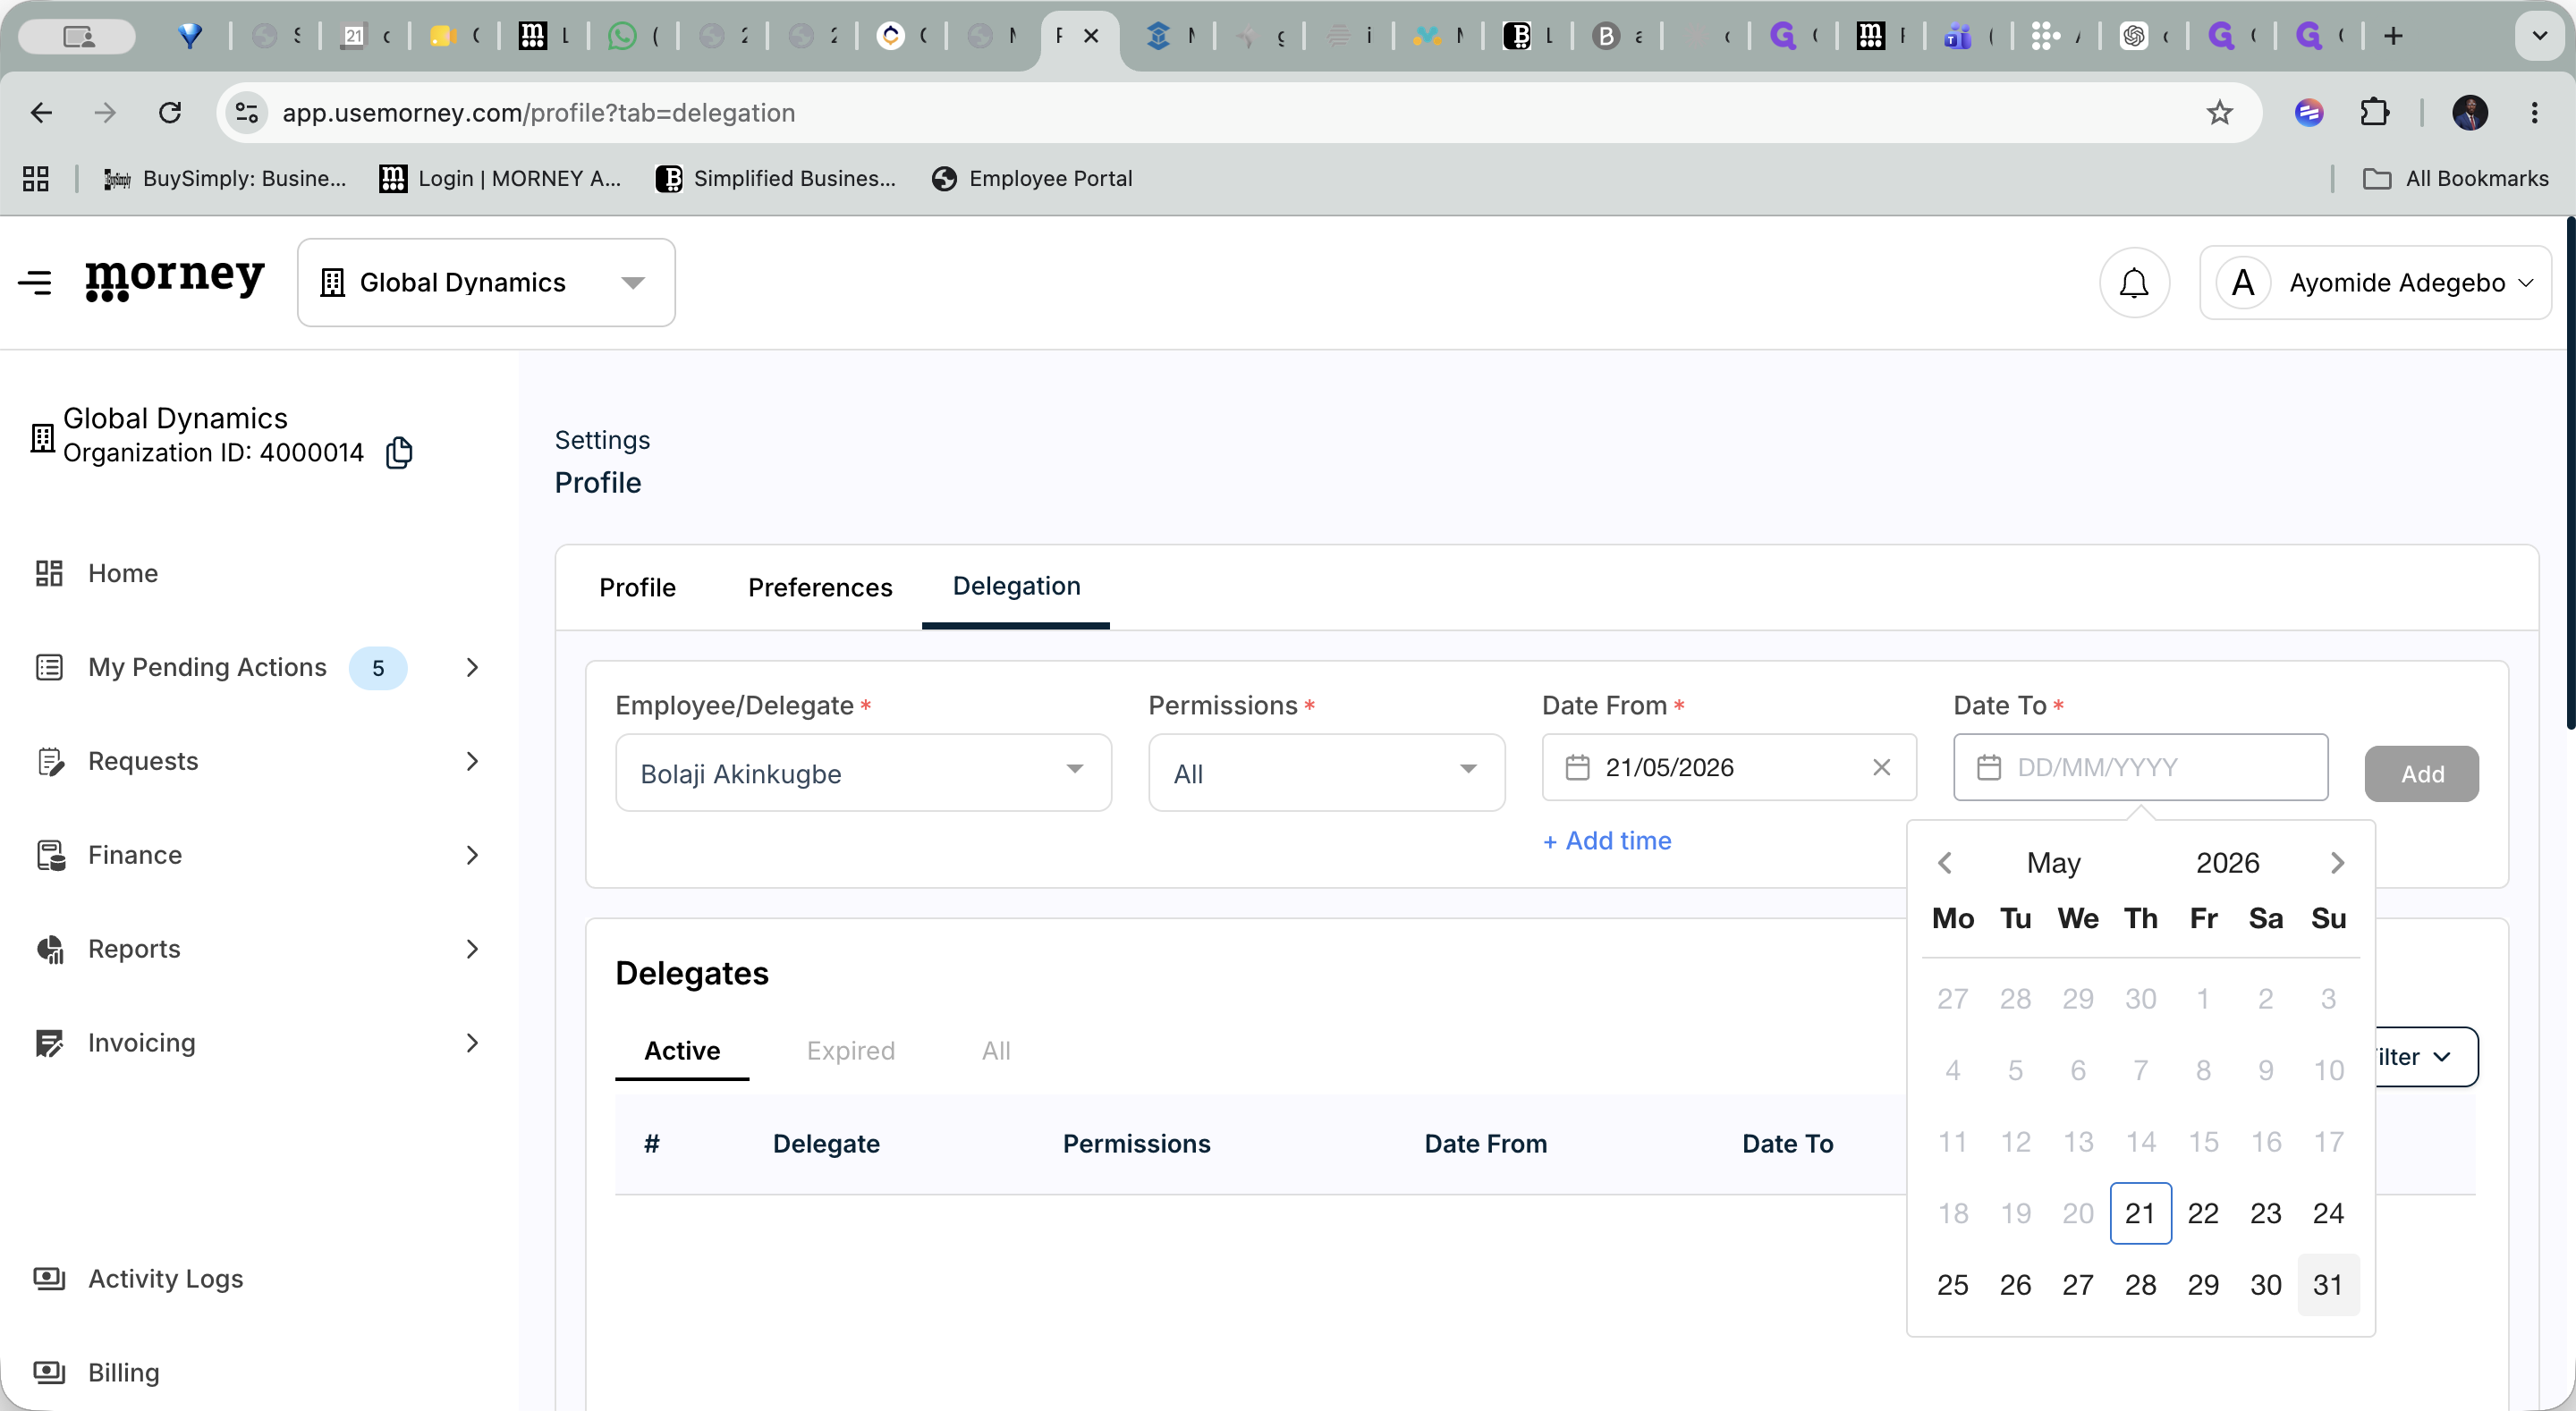
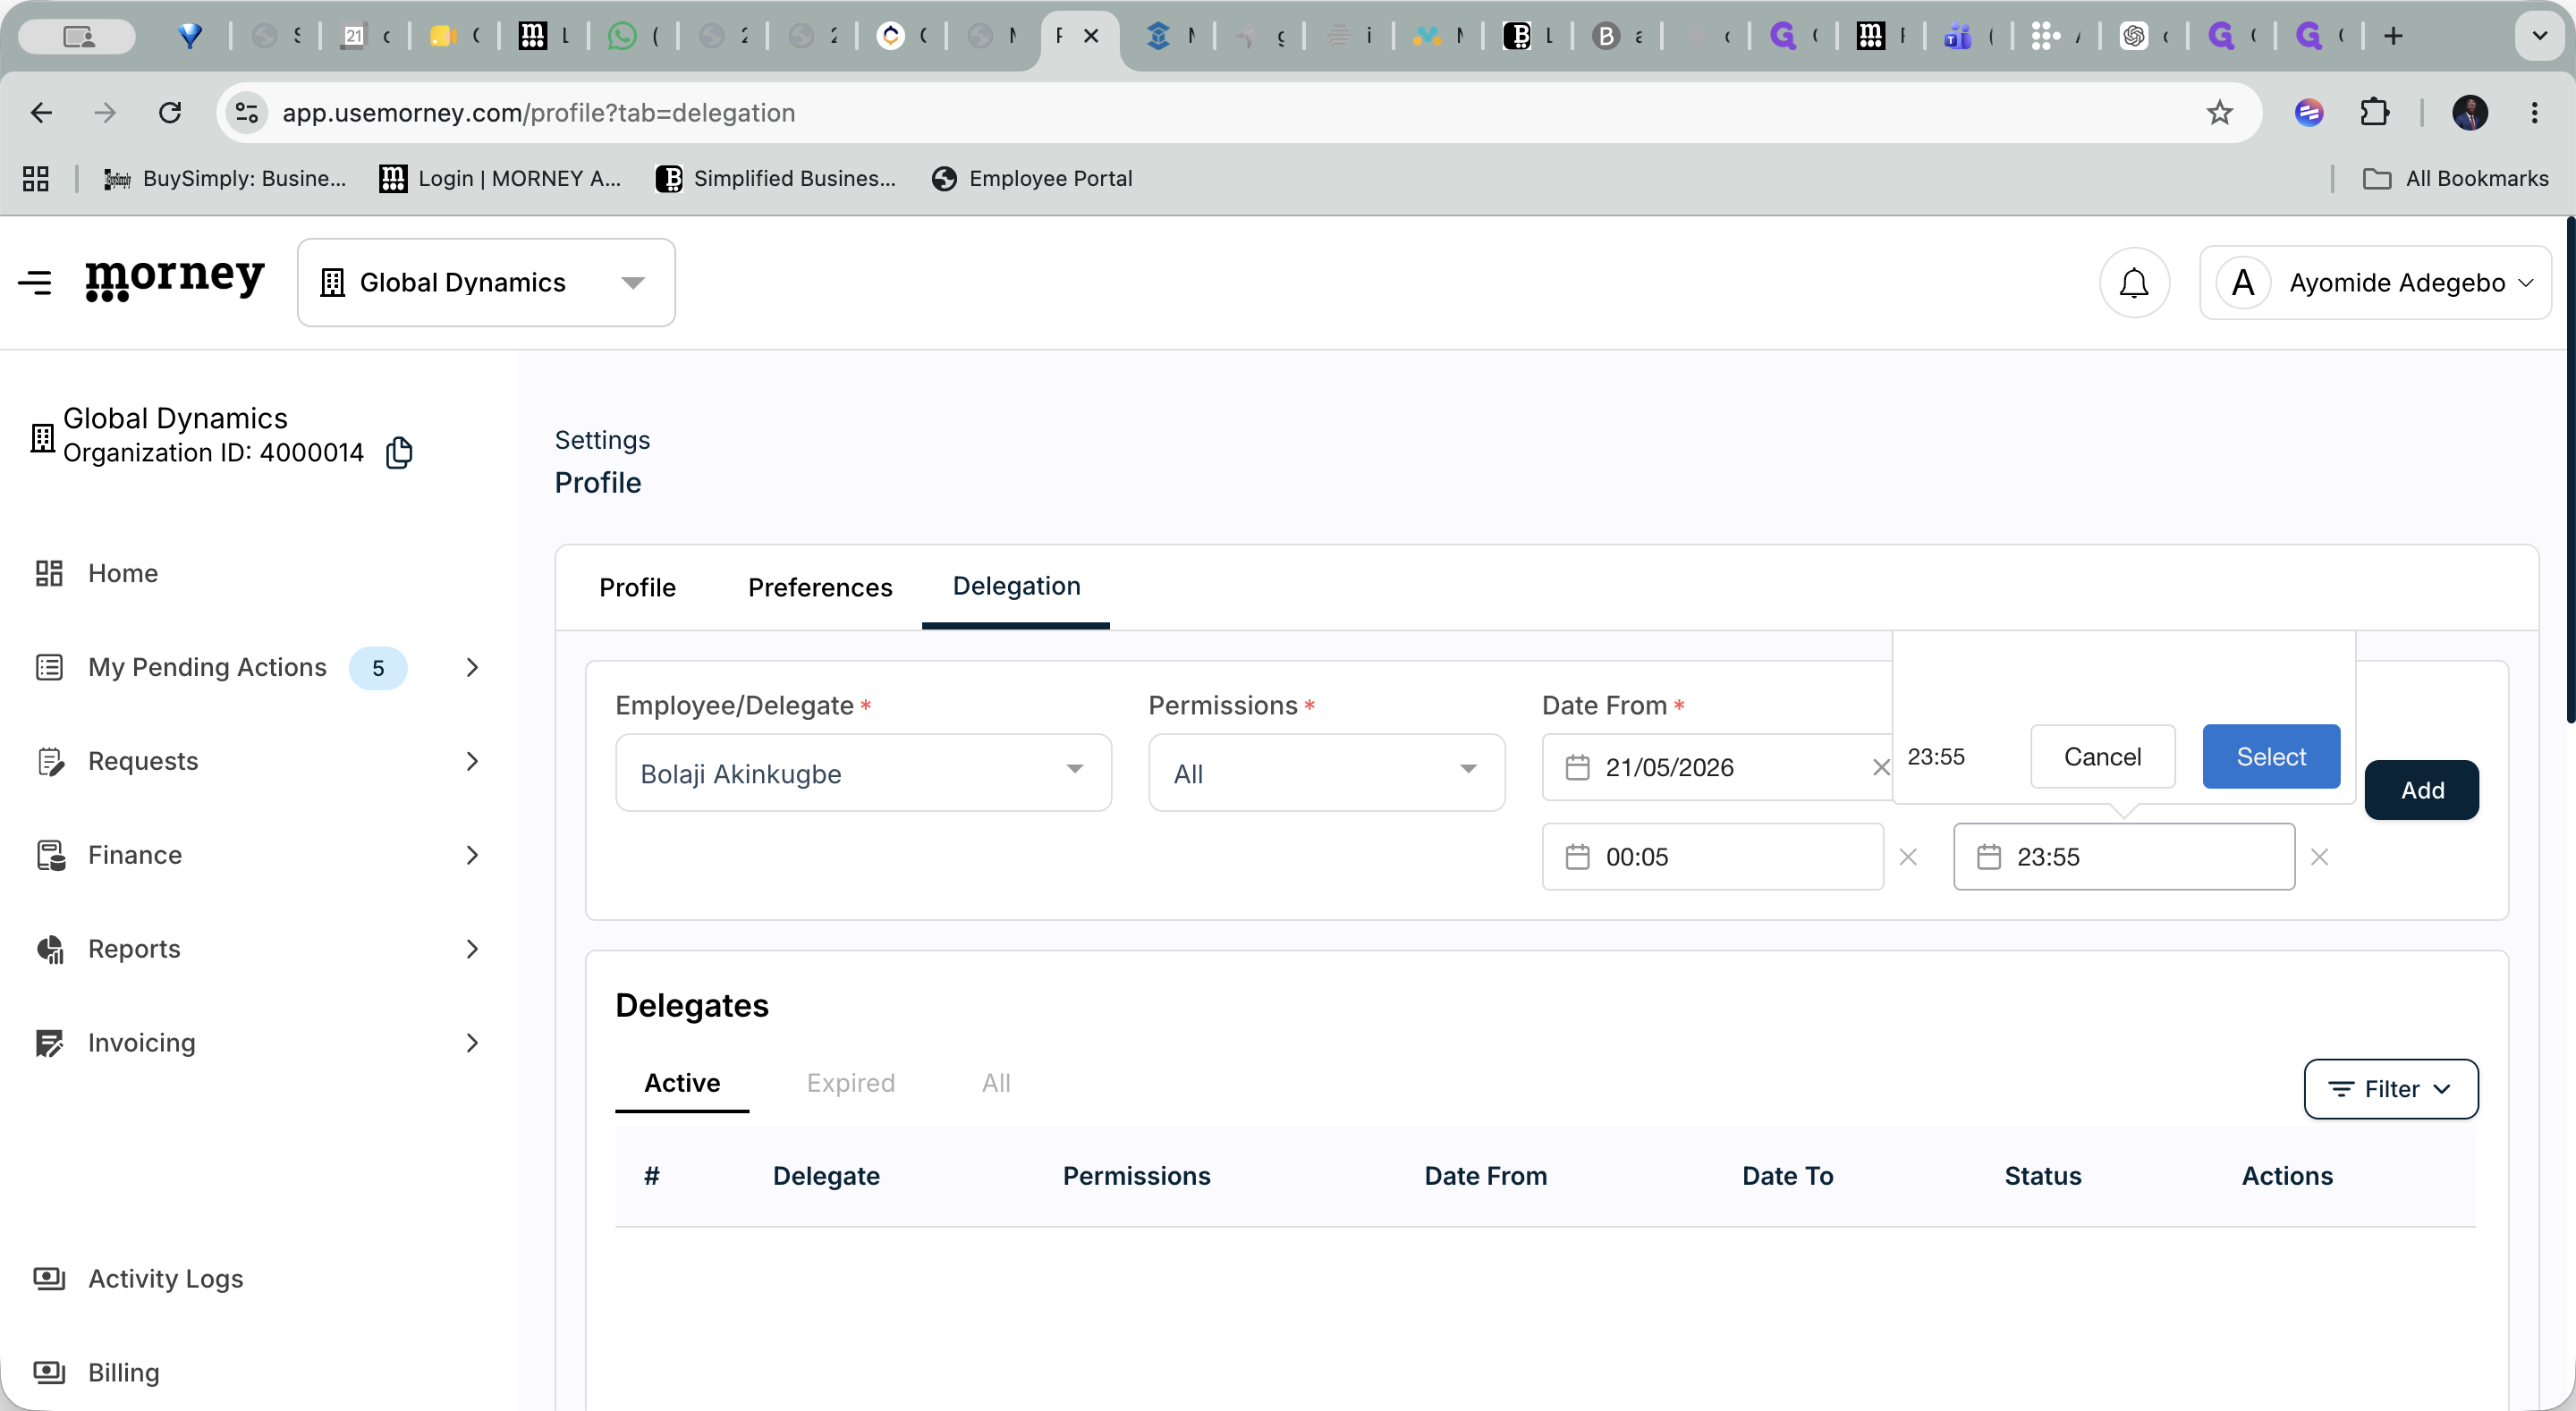
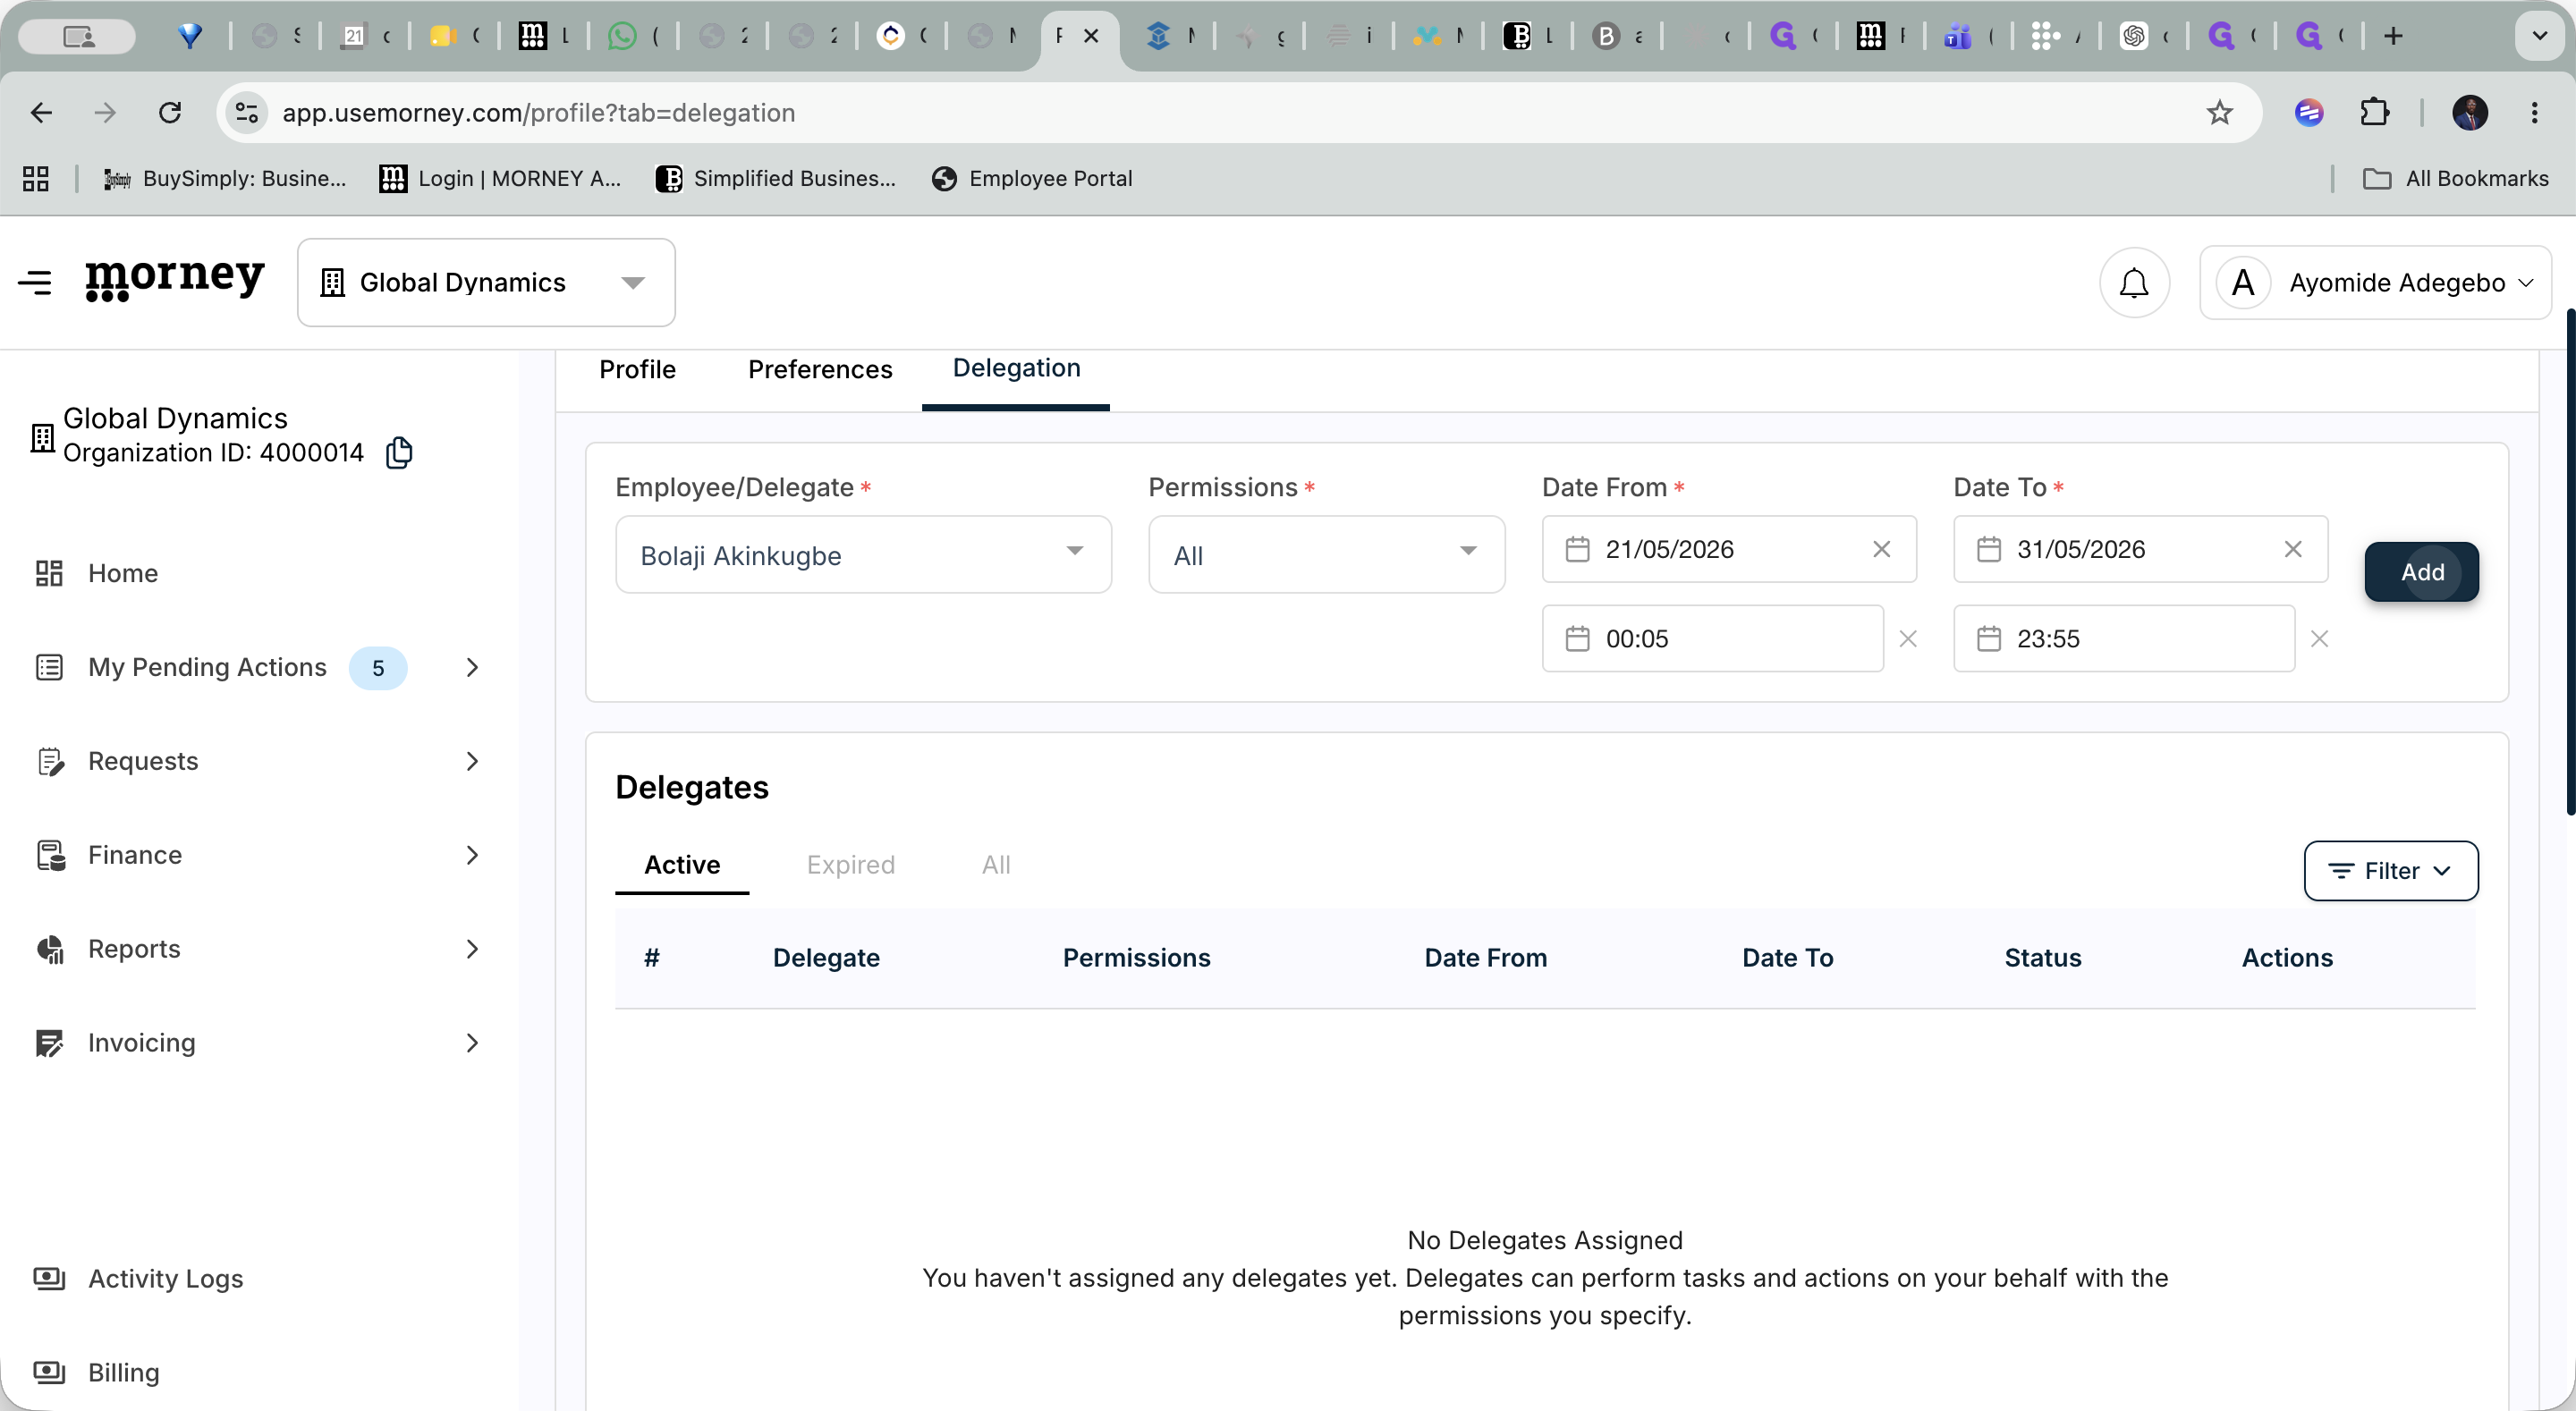
Set the Duration and Save
Define the exact window when the delegate is permitted to act on your behalf.
Managing Your Delegates
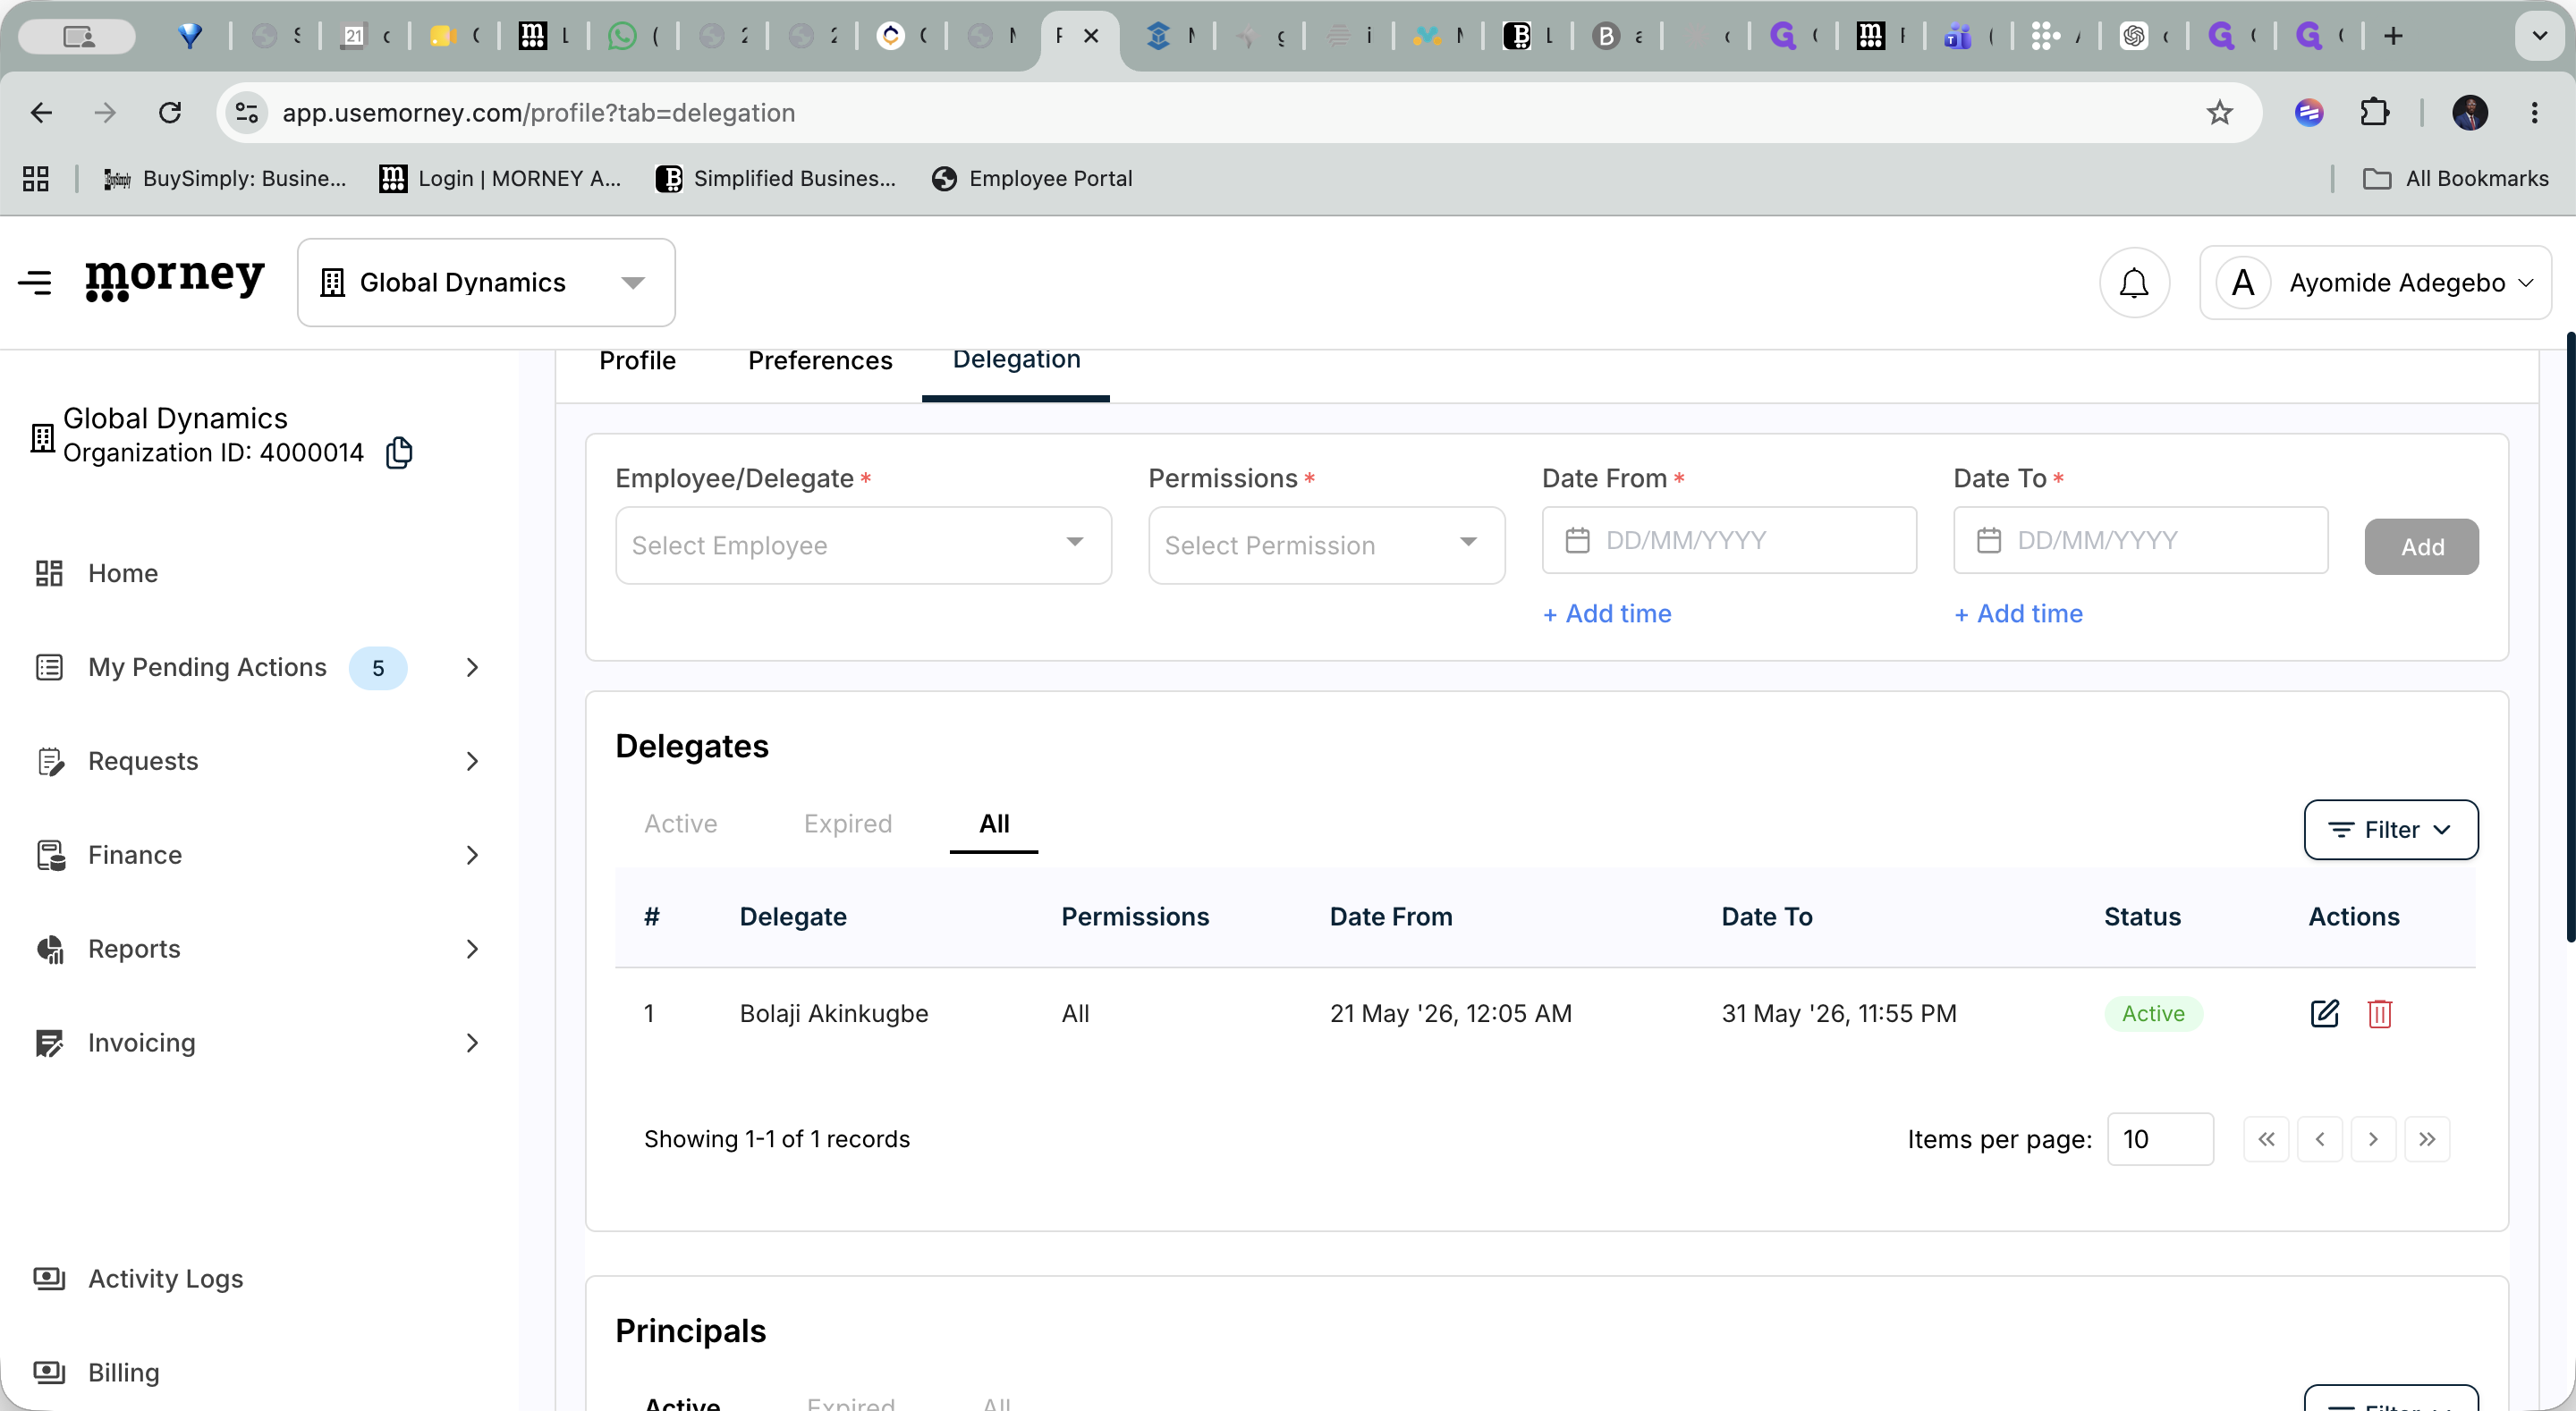
Once added, your delegate appears in the tracking list at the bottom of the page.
FAQ
Q: Can I assign multiple delegates at once?
A: Yes, you can authorize as many delegates as you need. Simply repeat the assignment process for each person, adjusting their permissions and dates accordingly.
Q: What happens when the delegation period ends?
A: The delegate's system permissions automatically expire at the exact date and time you set. Their record will then move to the "Expired" tab in your settings for future reference.
Glossary
Term | Definition |
|---|---|
Delegate | A colleague or subordinate granted temporary permission to perform tasks on your behalf. |
Principal | The original user (you) who is authorizing another person to handle their system responsibilities. |
Endorse/Approve | A permission tier in Morney that allows a user to authorize requests submitted by others. |