Startup CFO Application: QuickBooks and Plaid Integration Guide
Learn how to use the Startup CFO application to manage transactions, integrate with QuickBooks Online, connect bank accounts via Plaid, and upload CSV files. Step-by-step instructions for seamless financial management.
In this guide, we'll learn how to connect and manage your financial accounts in the My Startup CFO application. We will cover how to integrate QuickBooks Online, connect your bank accounts using Plaid, and upload transaction data through CSV files.
These steps help you keep your financial records organized and up to date.
Let's get started
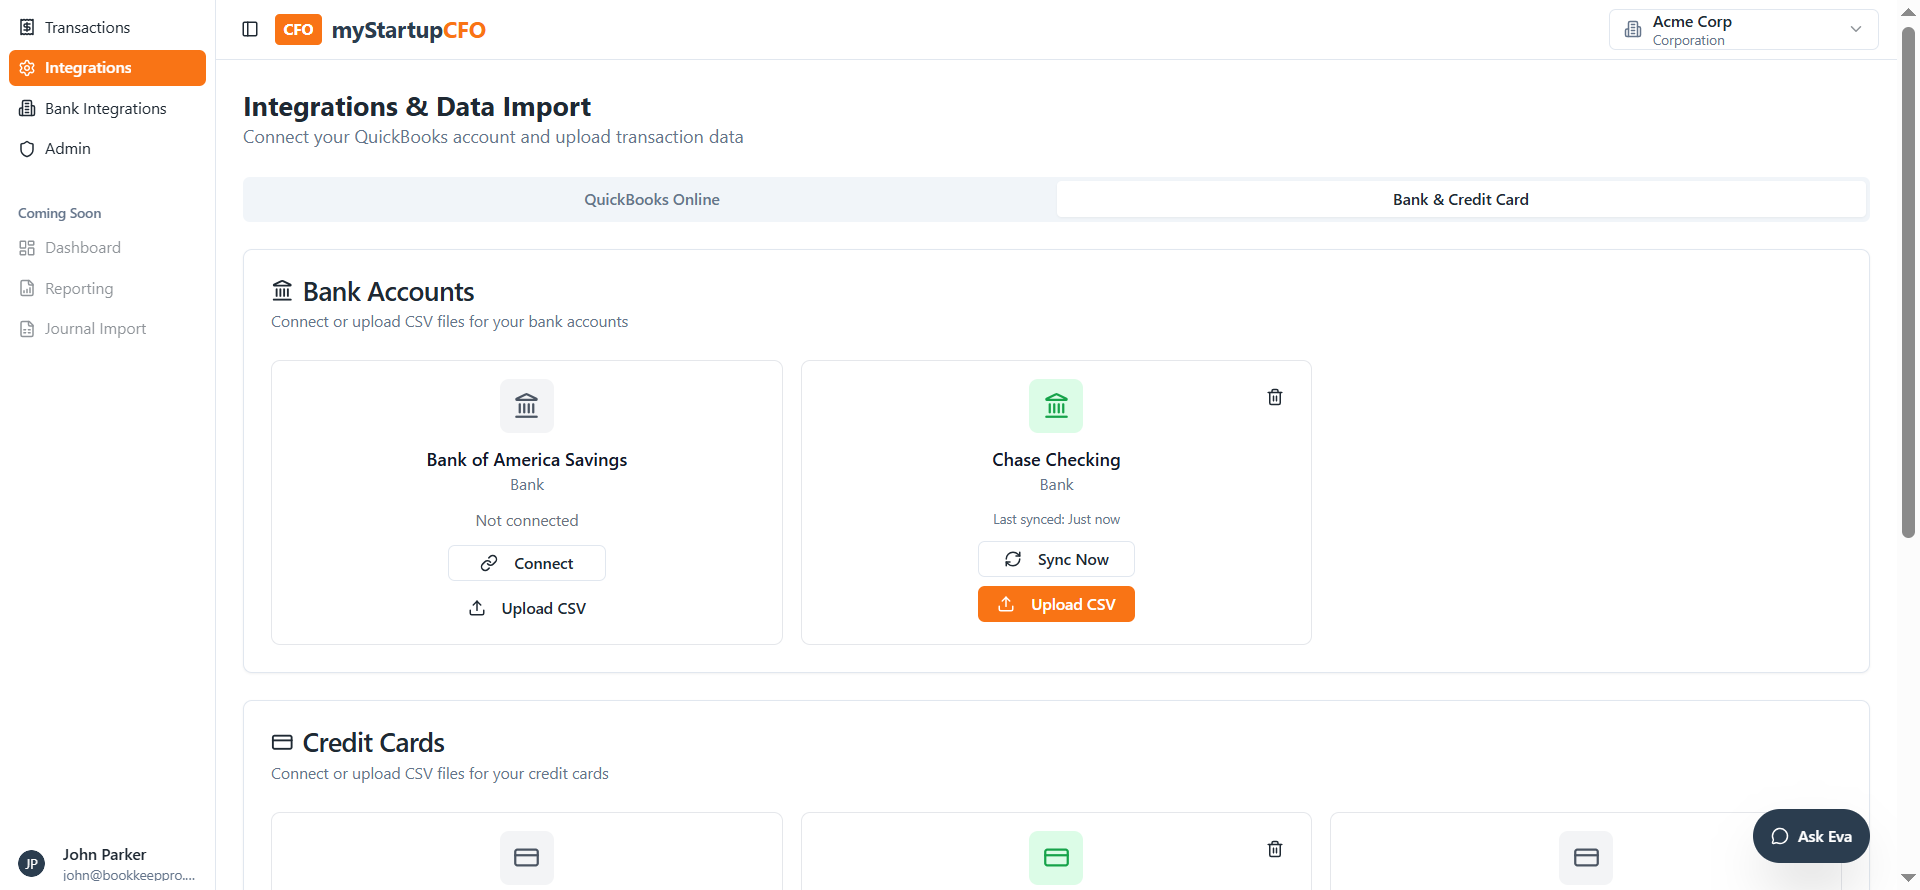
This is my Startup CFO application, which is built on QuickBooks. Here you can manage your transactions. The first page is the integration screen, where you can connect with QuickBooks (QBO).
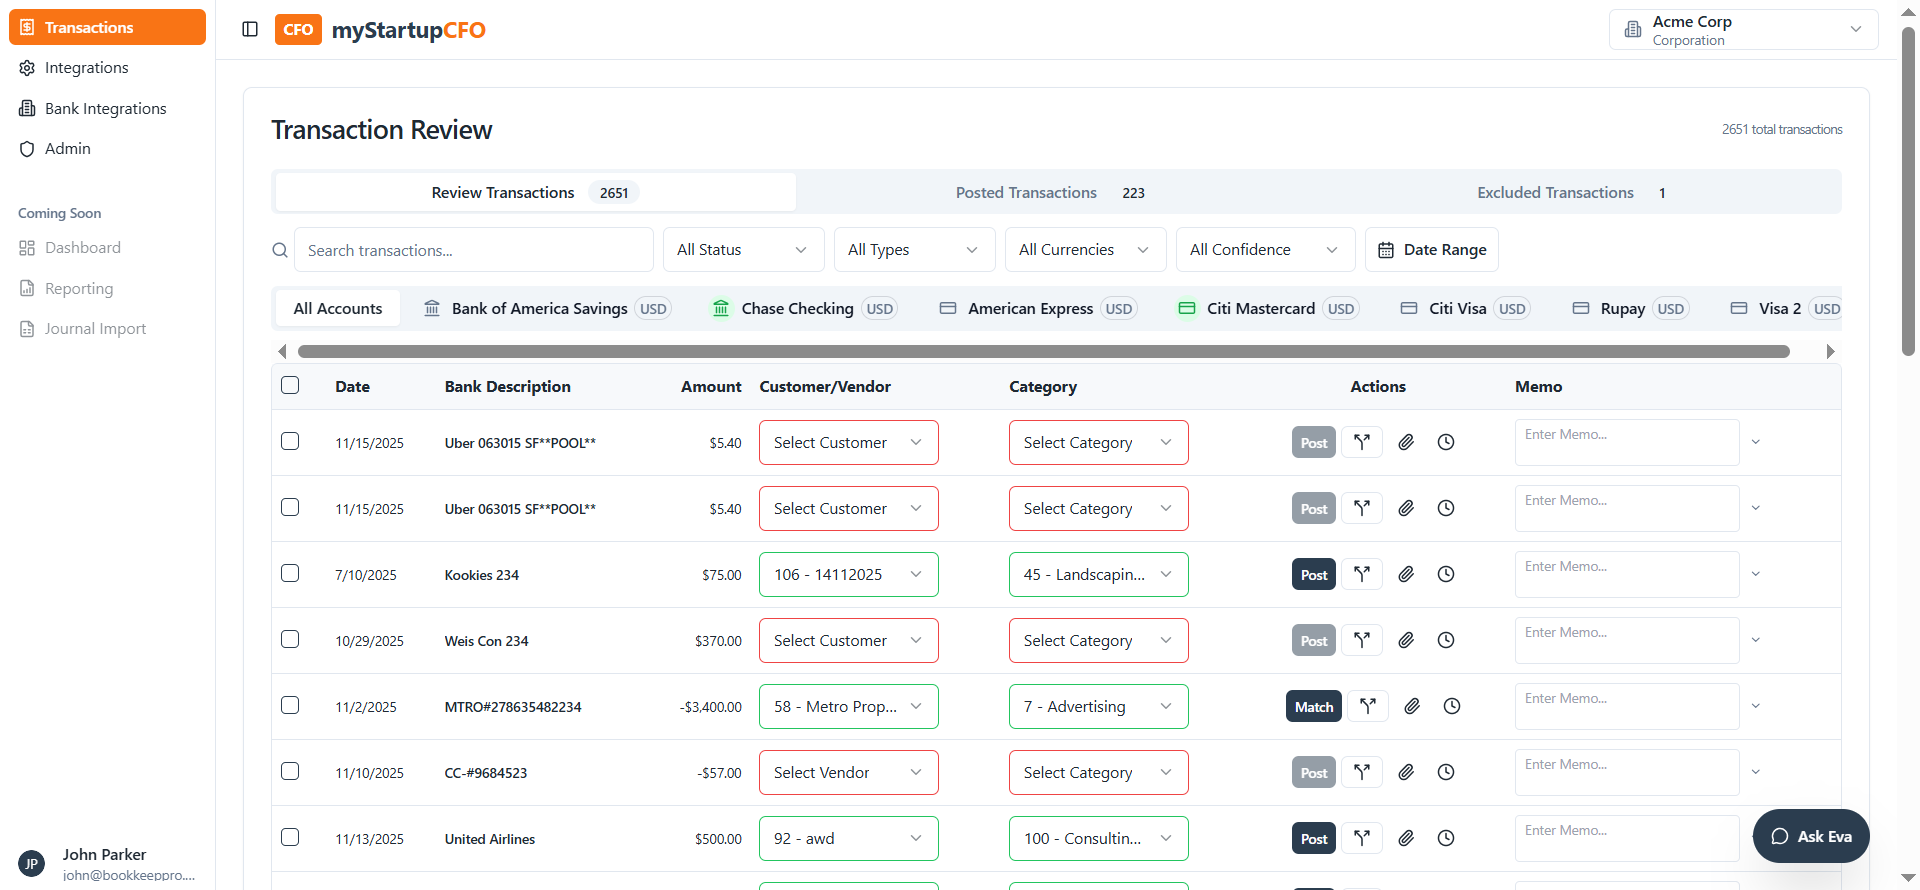
You can also upload your transactions as a CSV file.
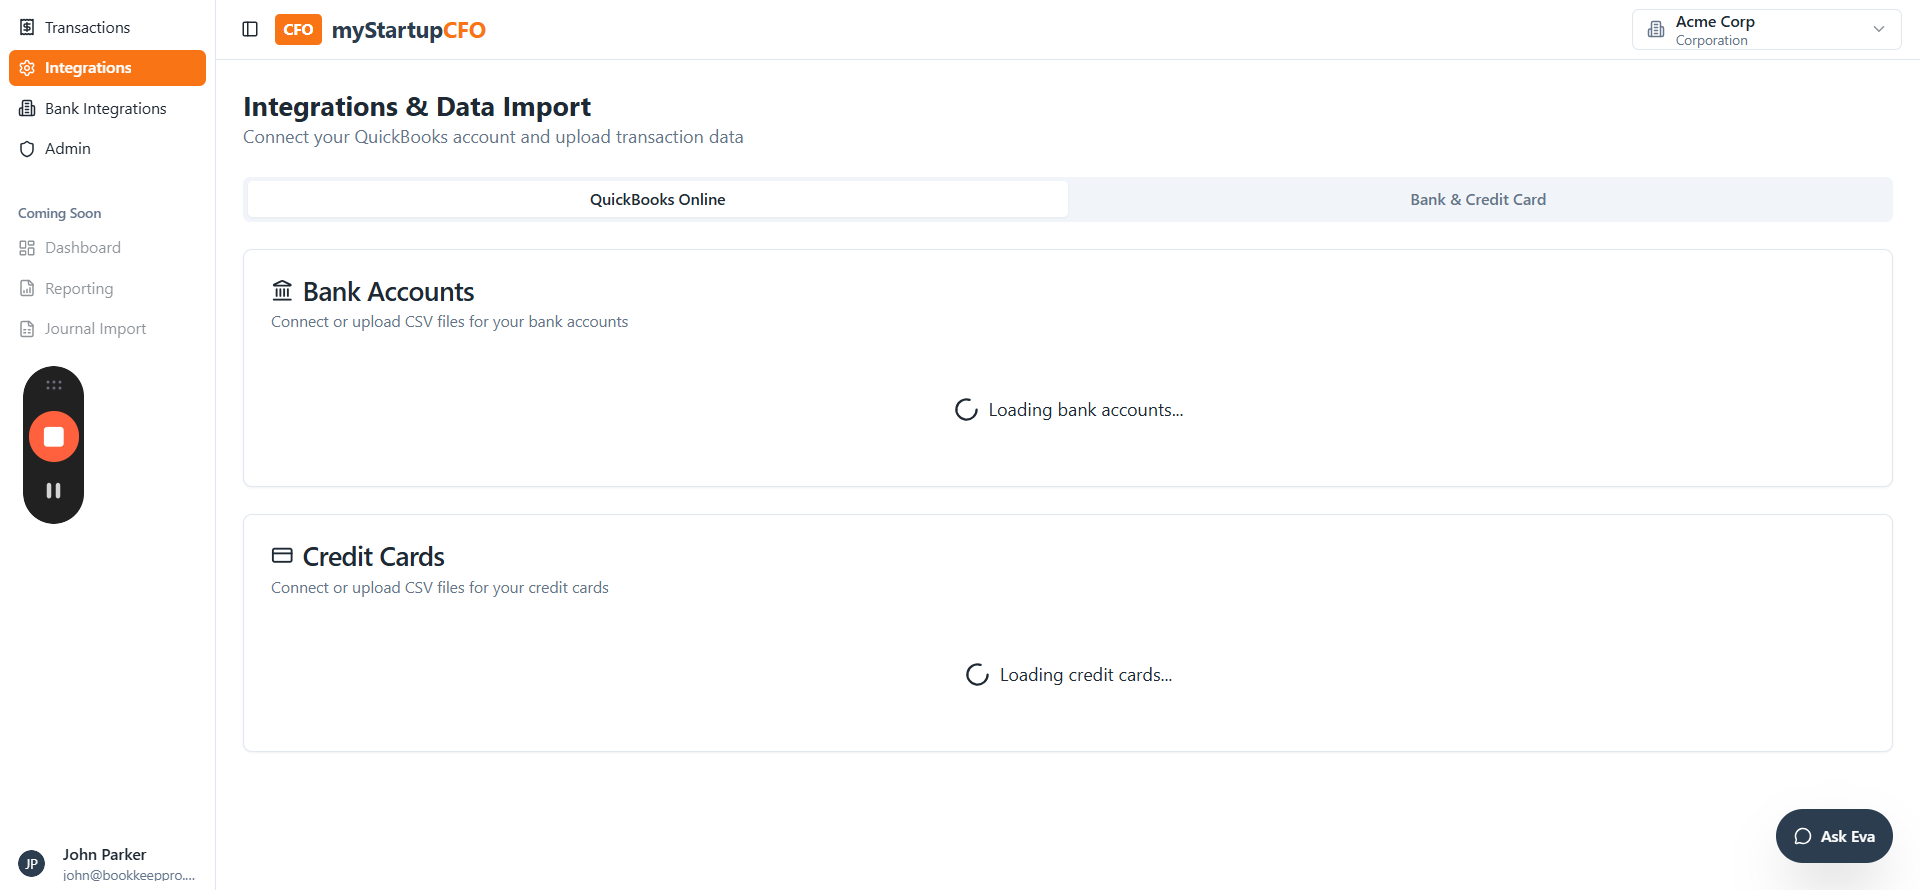
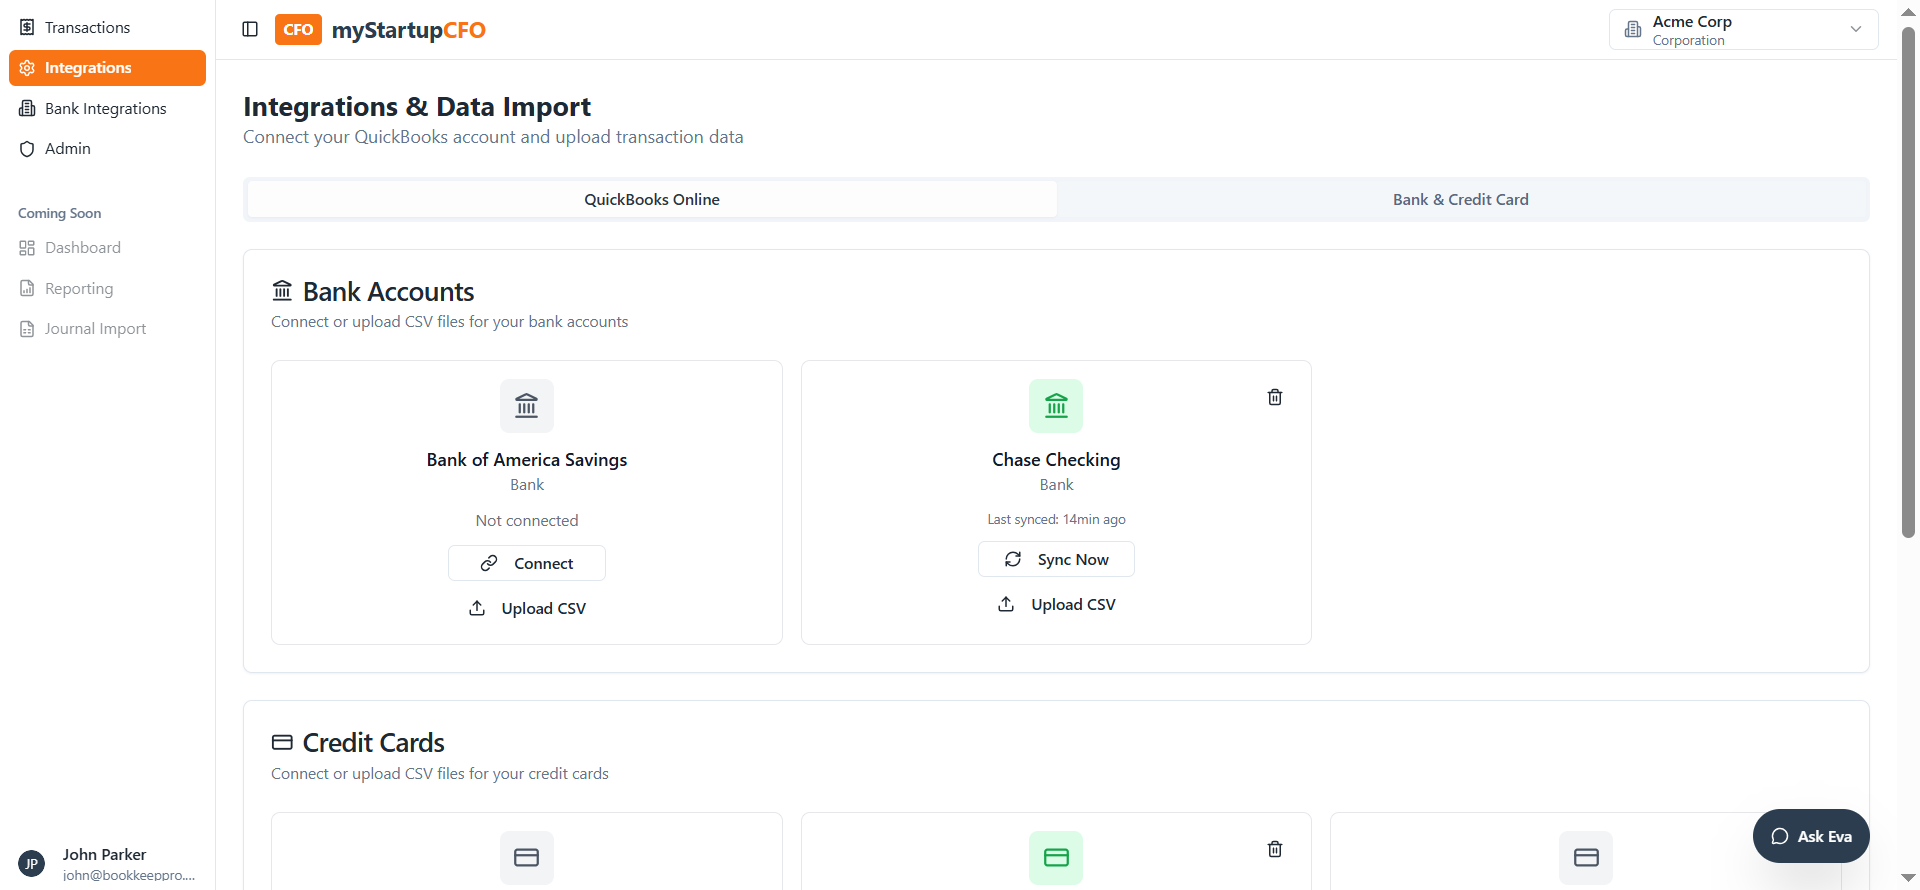
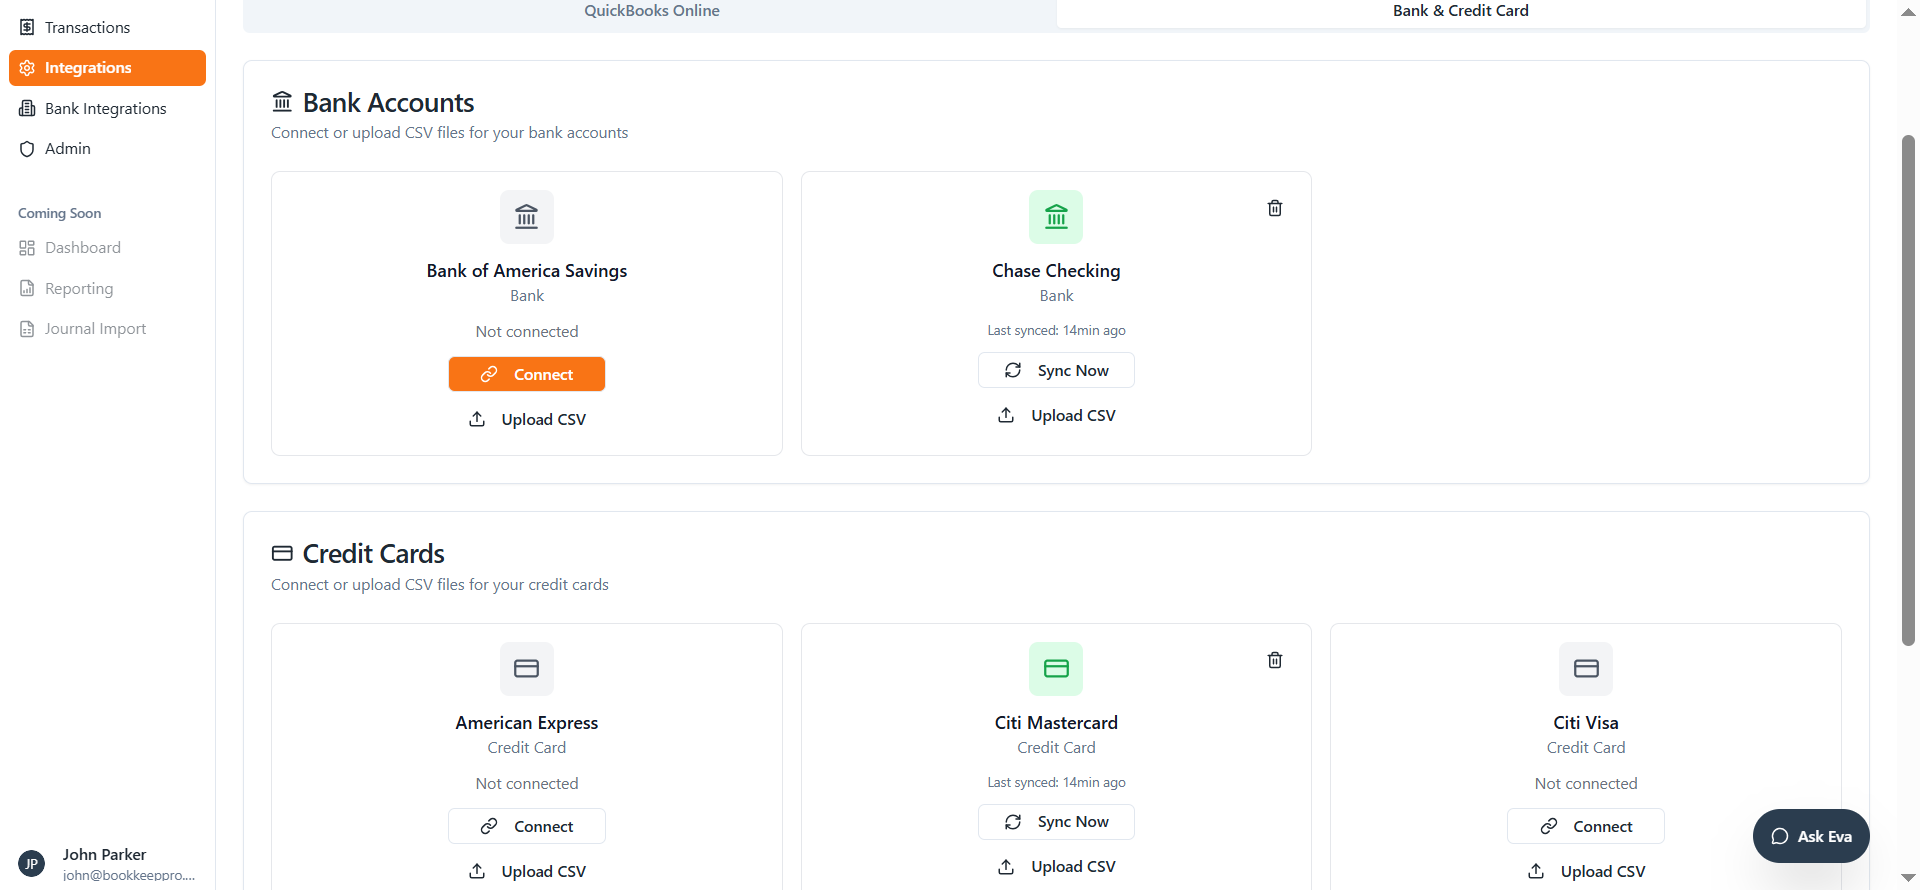
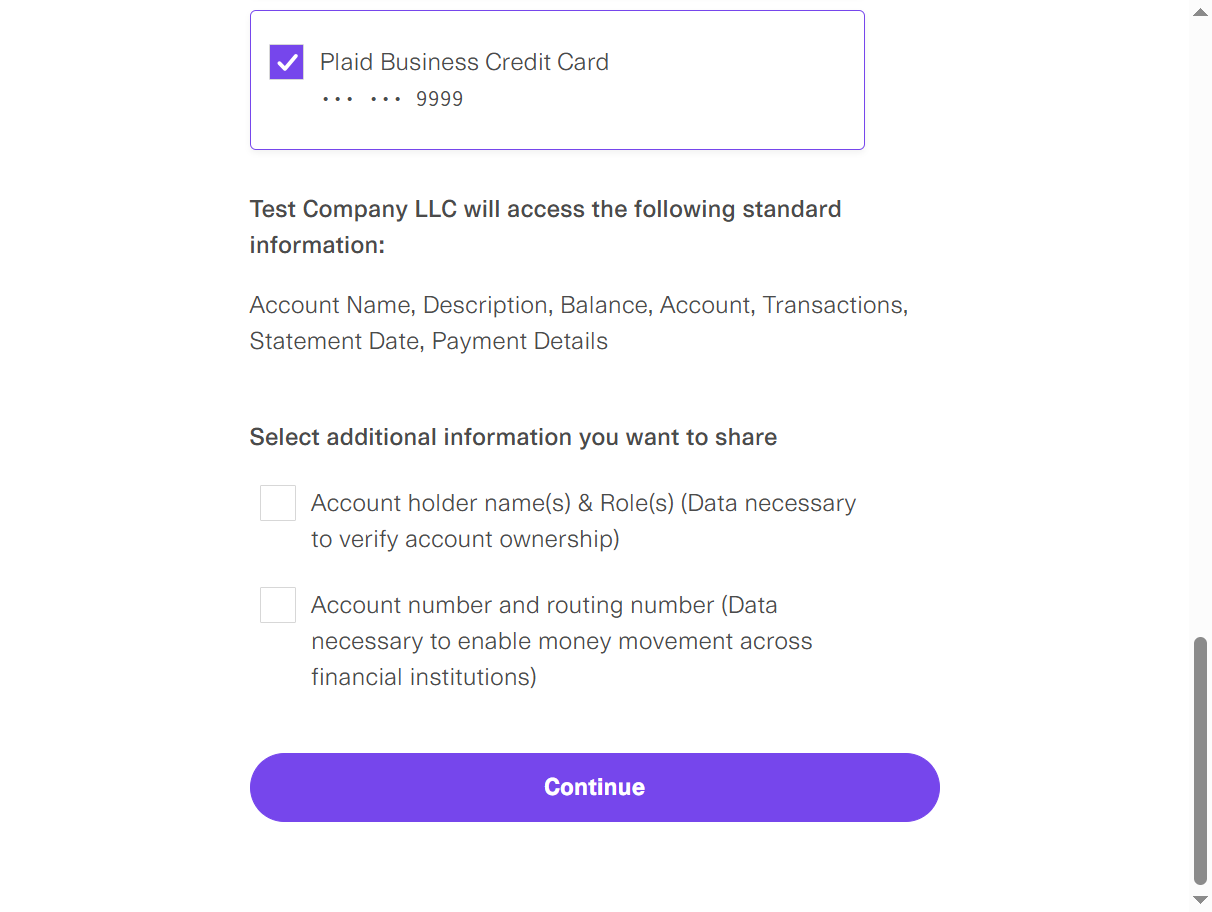
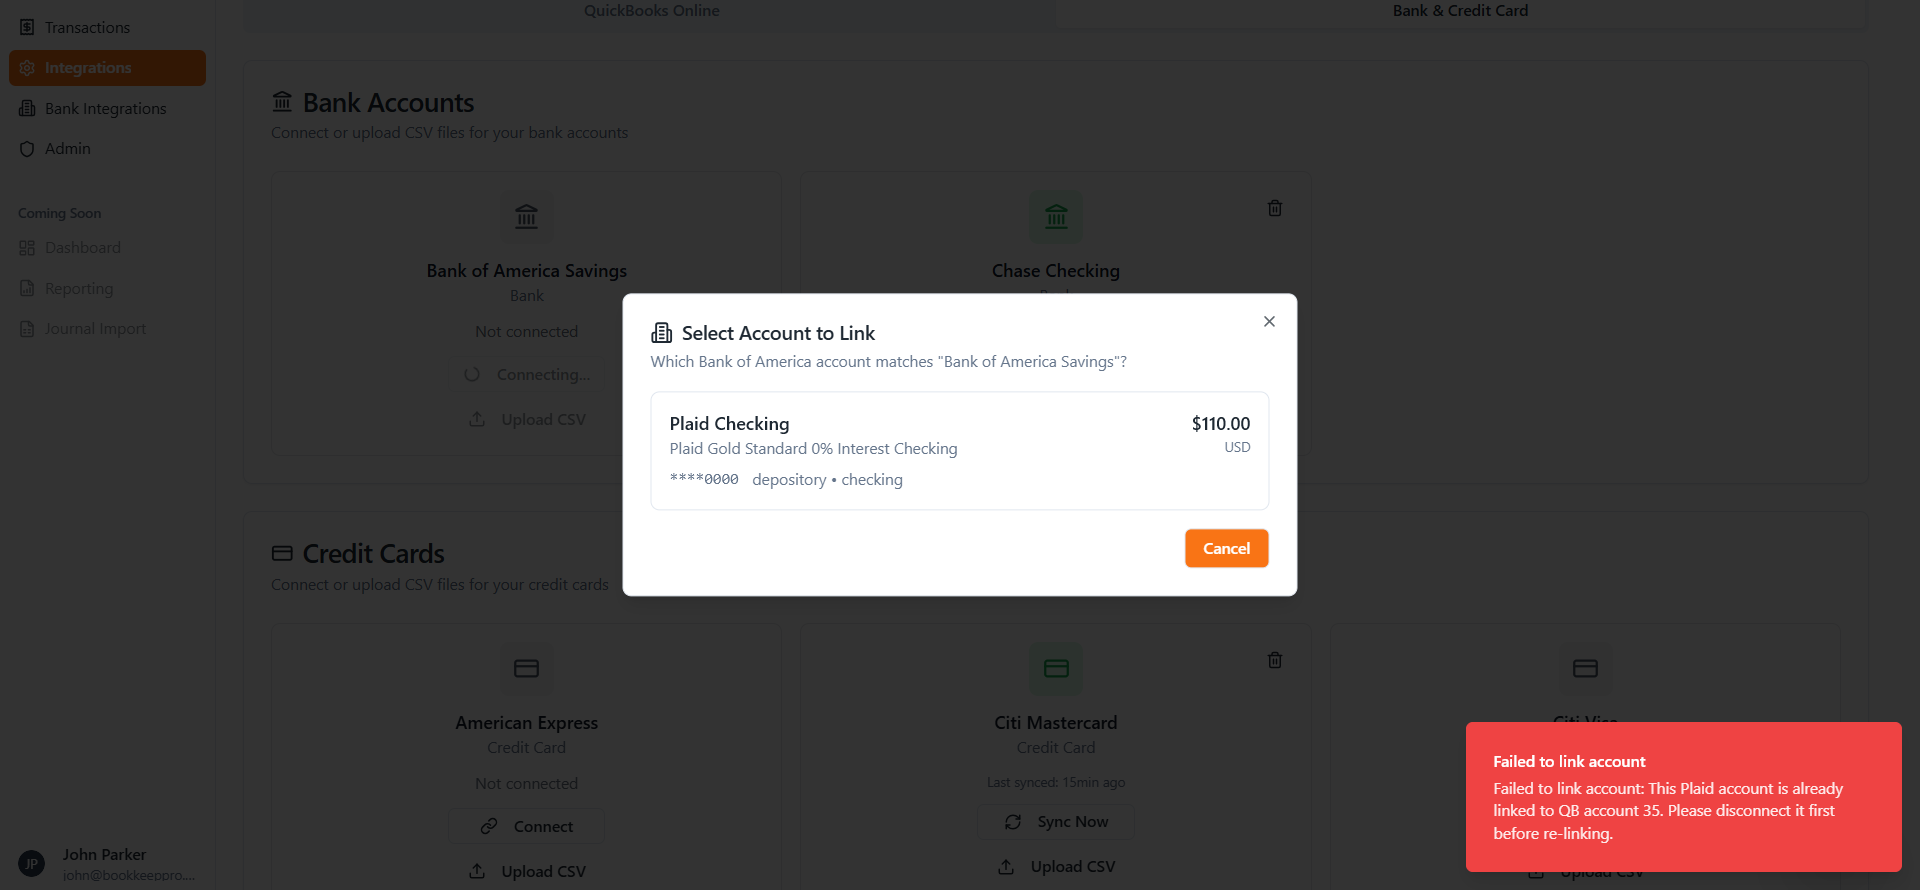
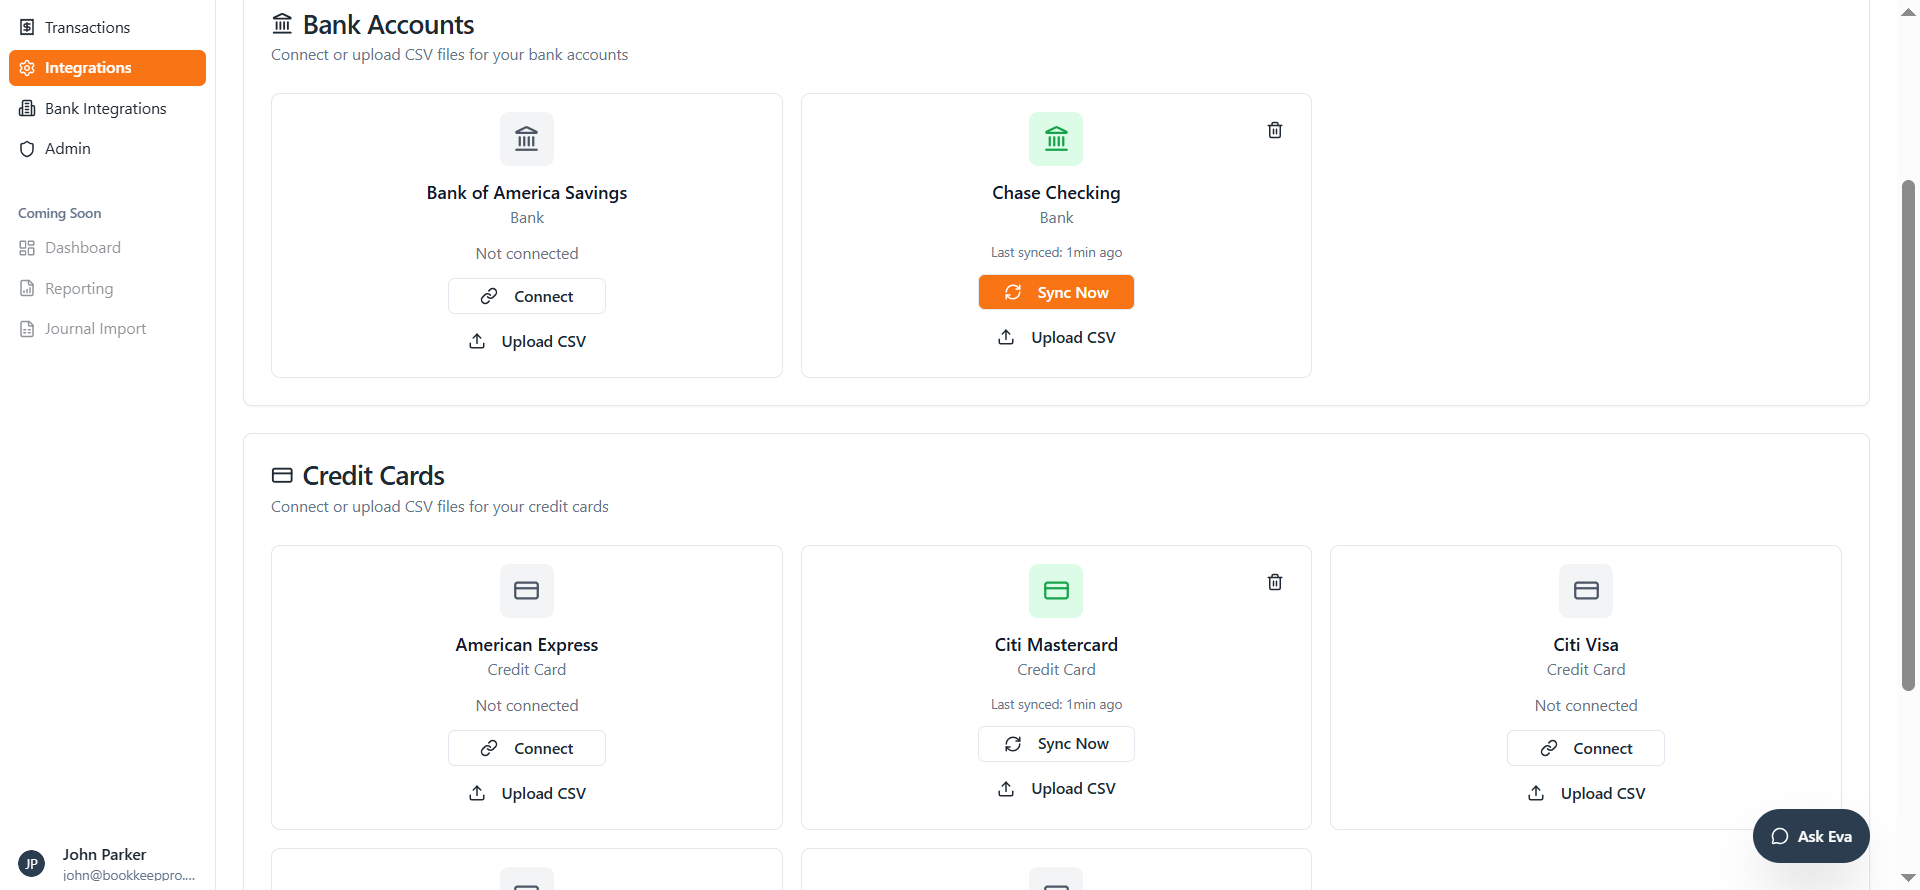
Here you can see the bank accounts. These are the bank accounts connected through Plaid. You can connect to a bank using Plaid. First, let's discuss the QuickBooks Online integration.
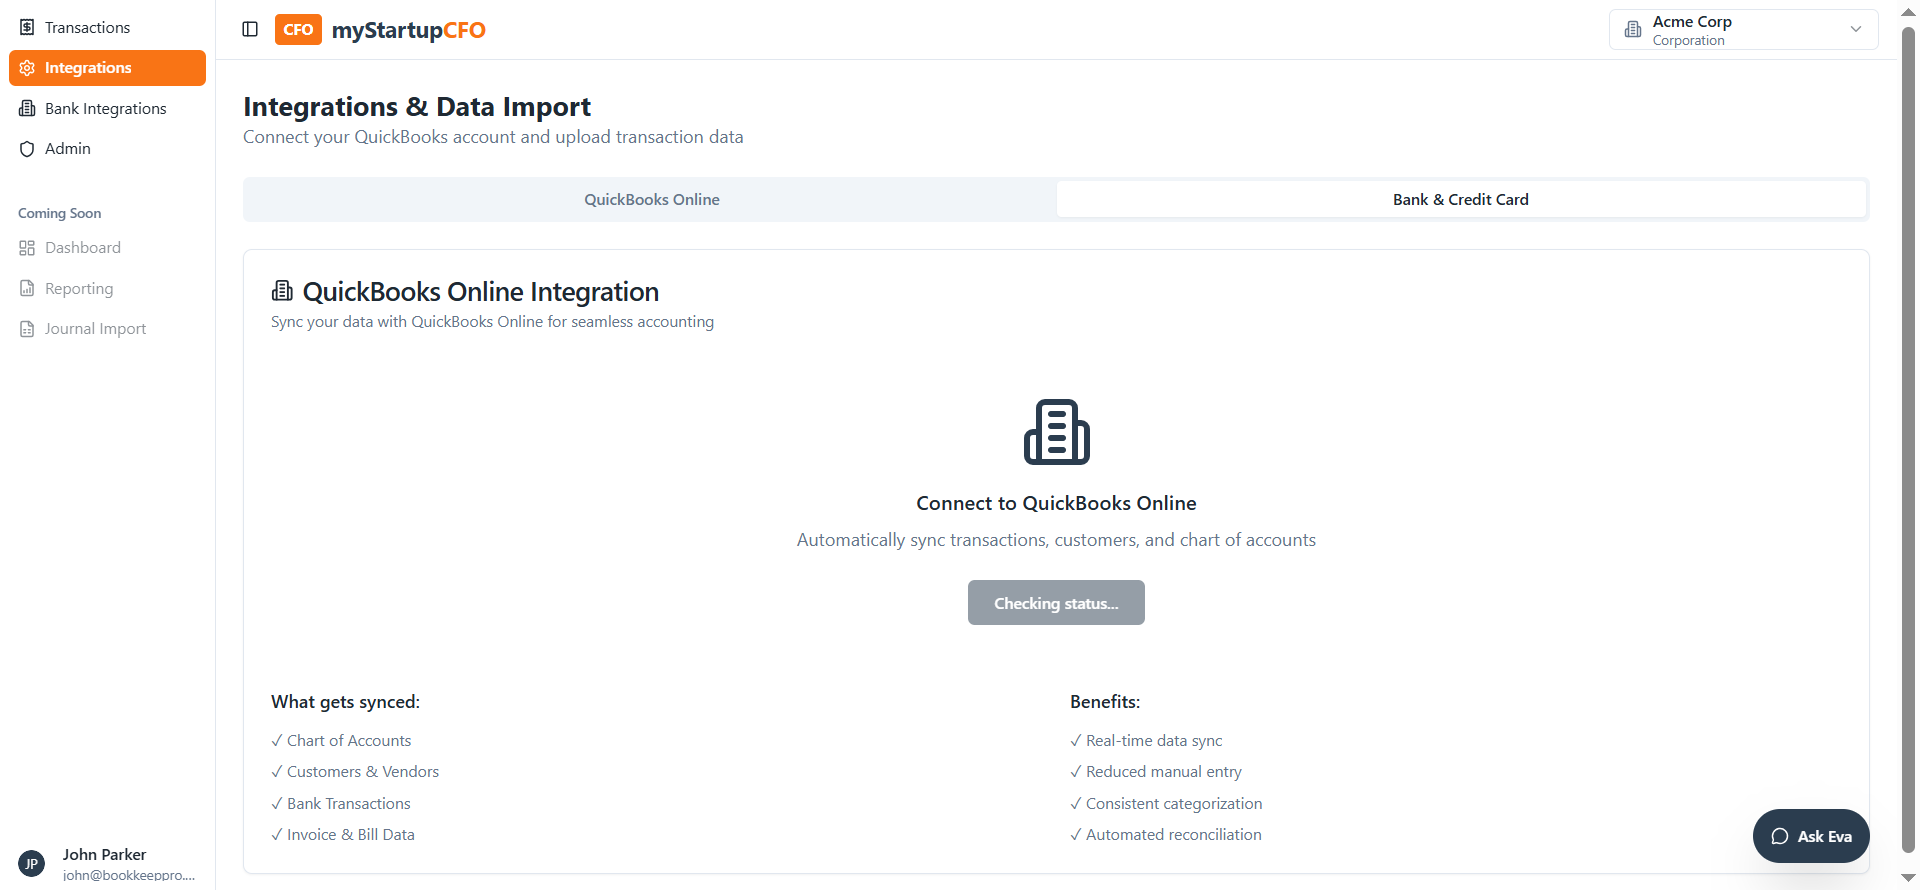
When I click the "Co-Connect" button here, it will connect to the QuickBooks accounts.
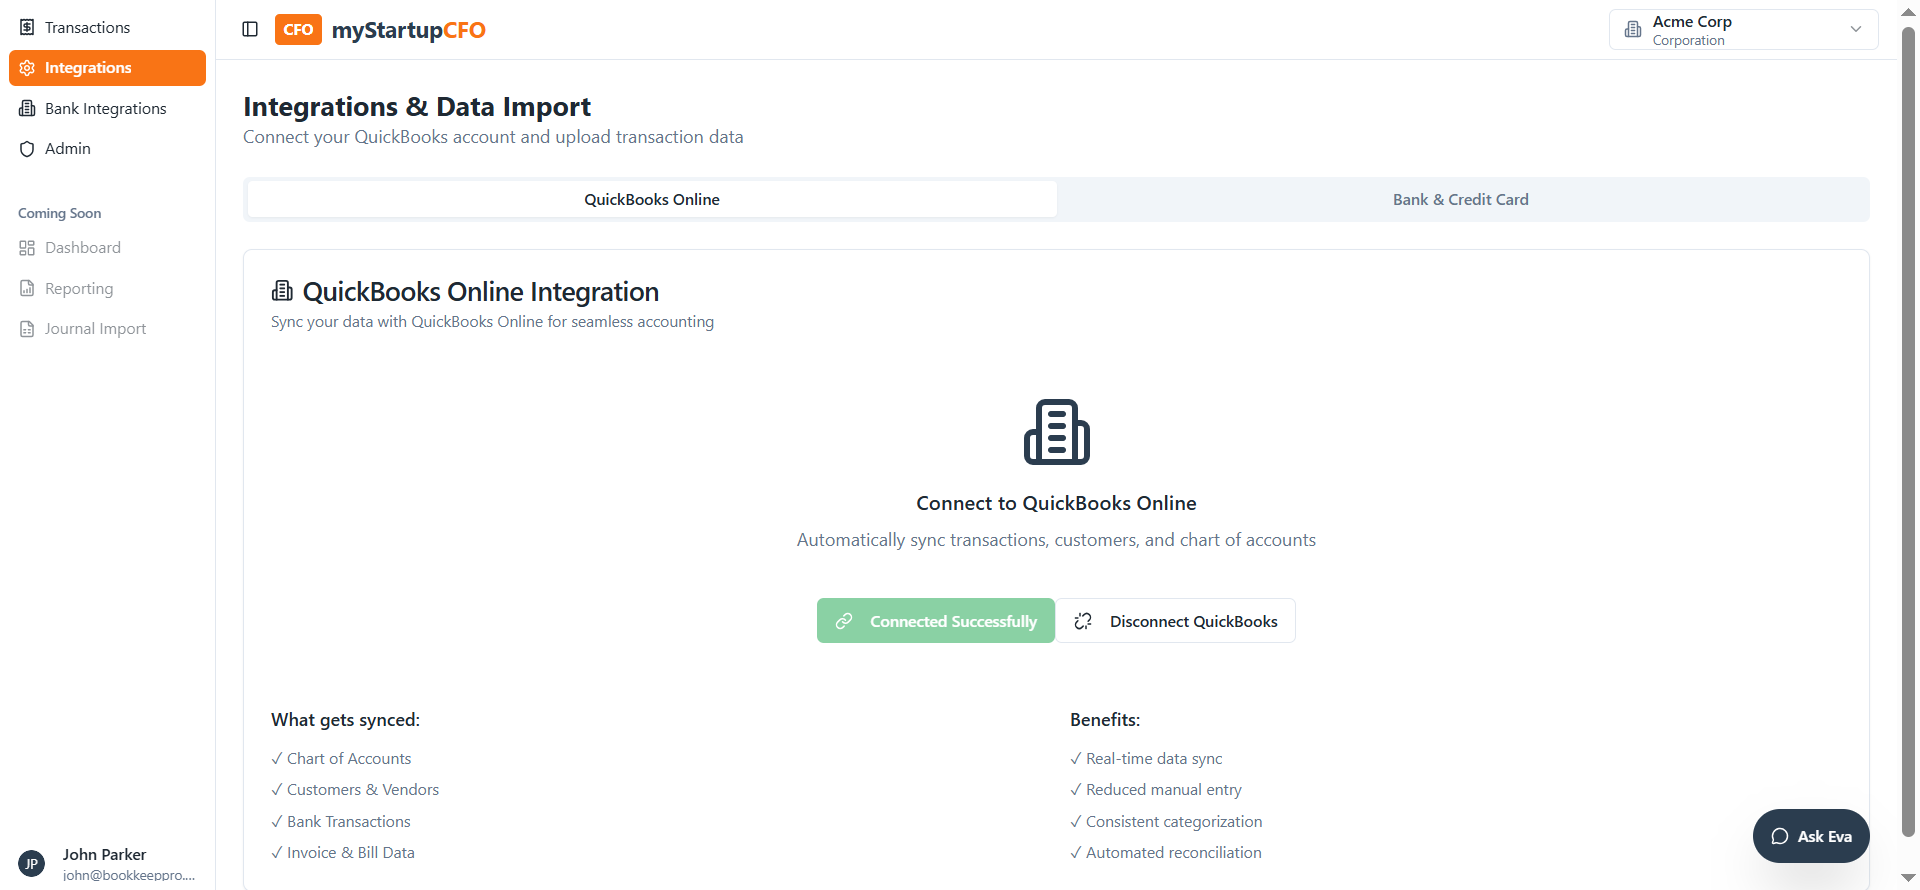
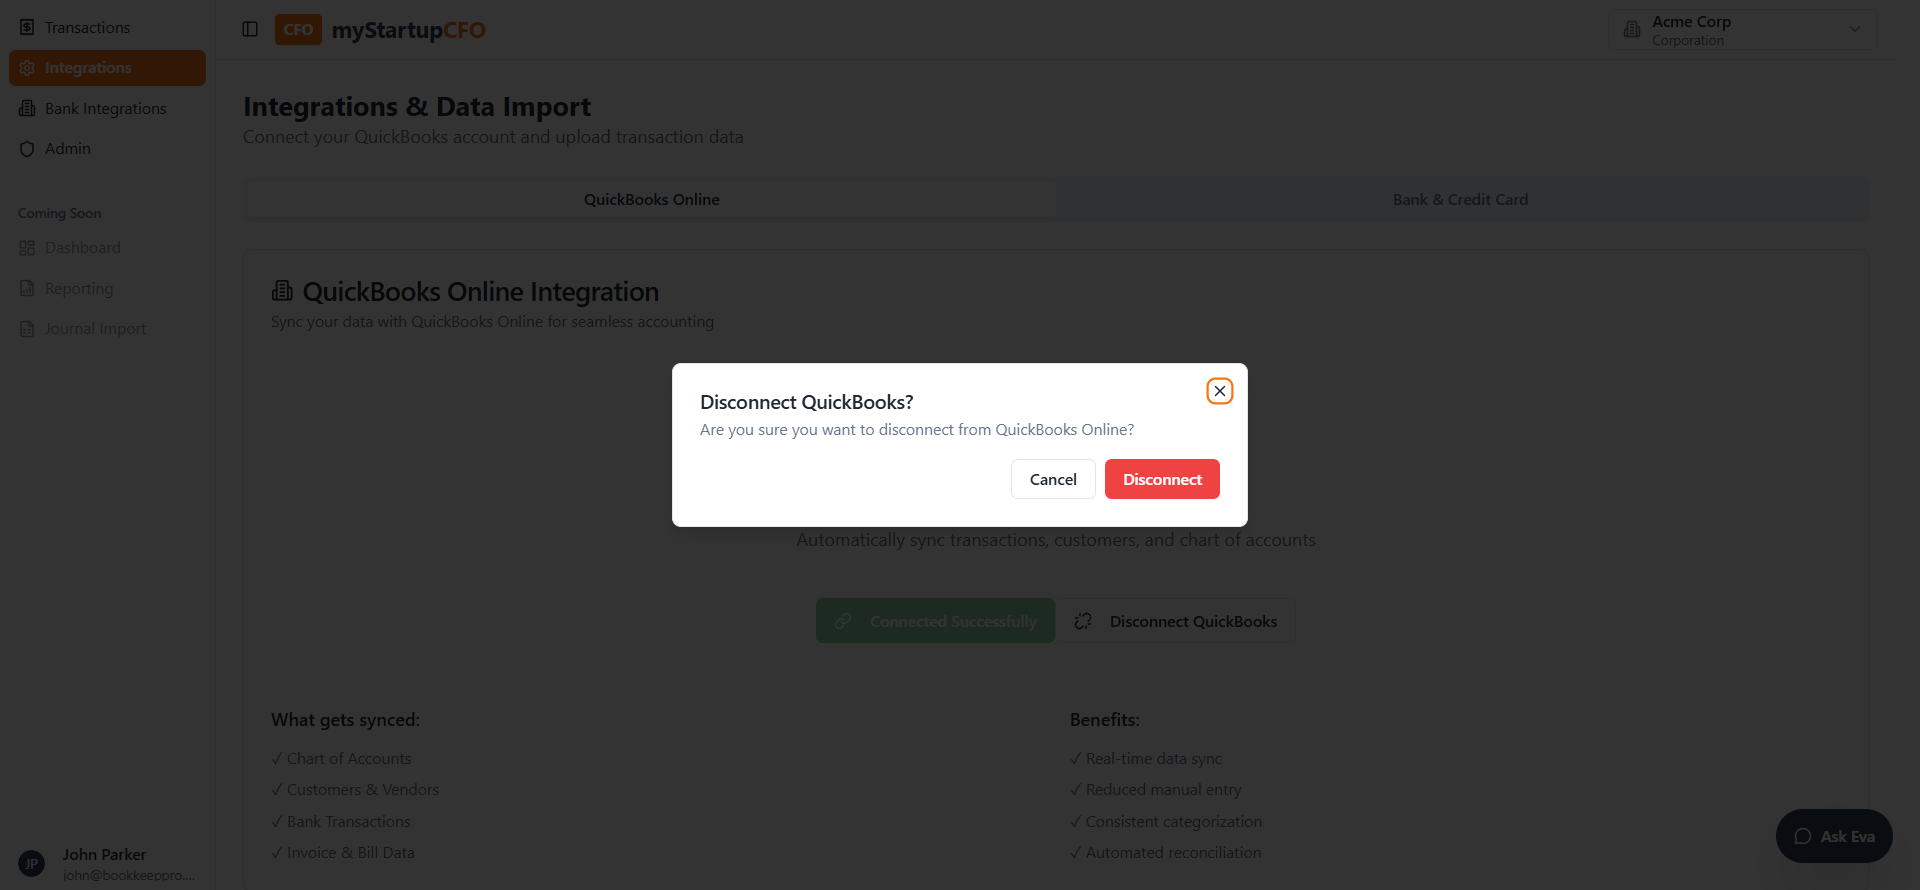
When I click on "Disconnect QuickBooks," it will disconnect from QBO.

For bank and credit card integration, if I want to connect these bank accounts, I click on "Connect"...
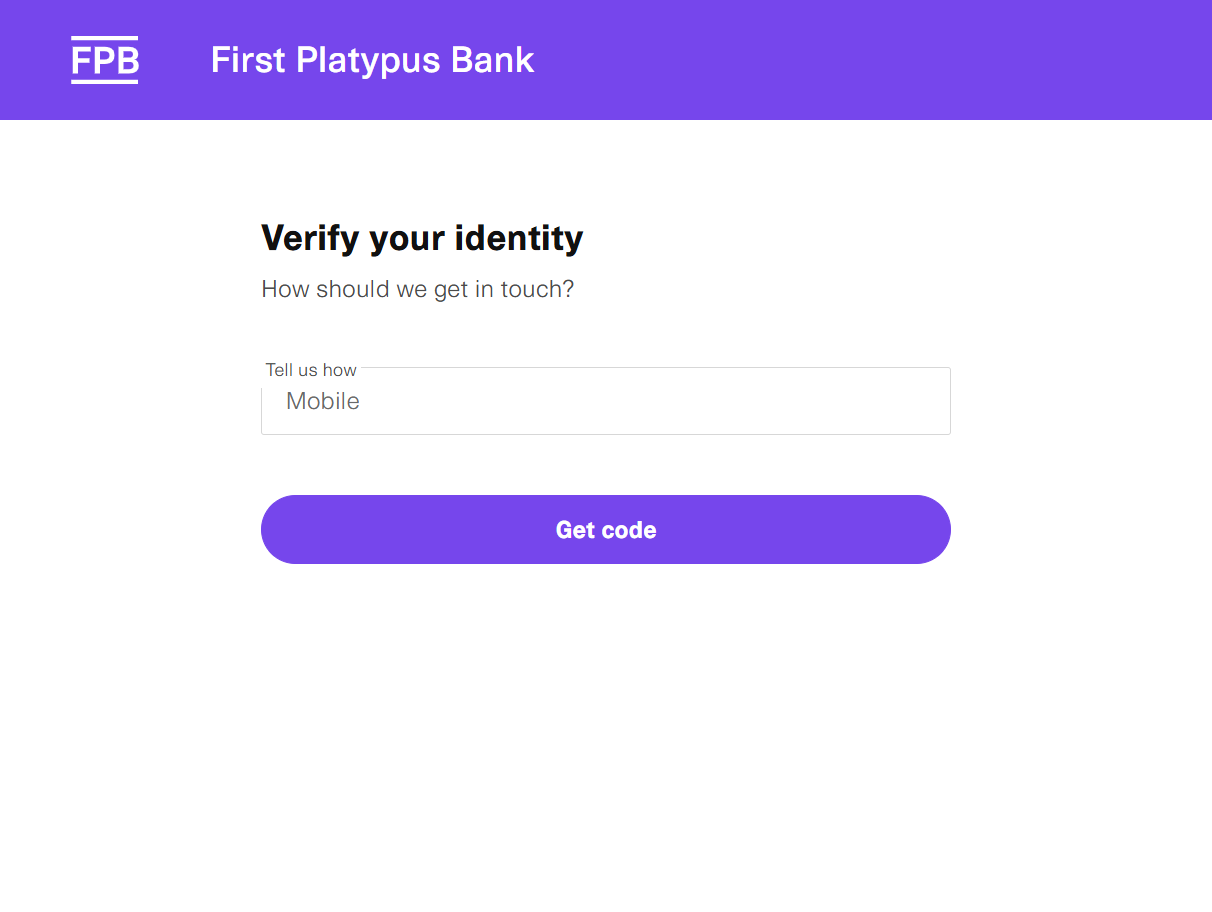
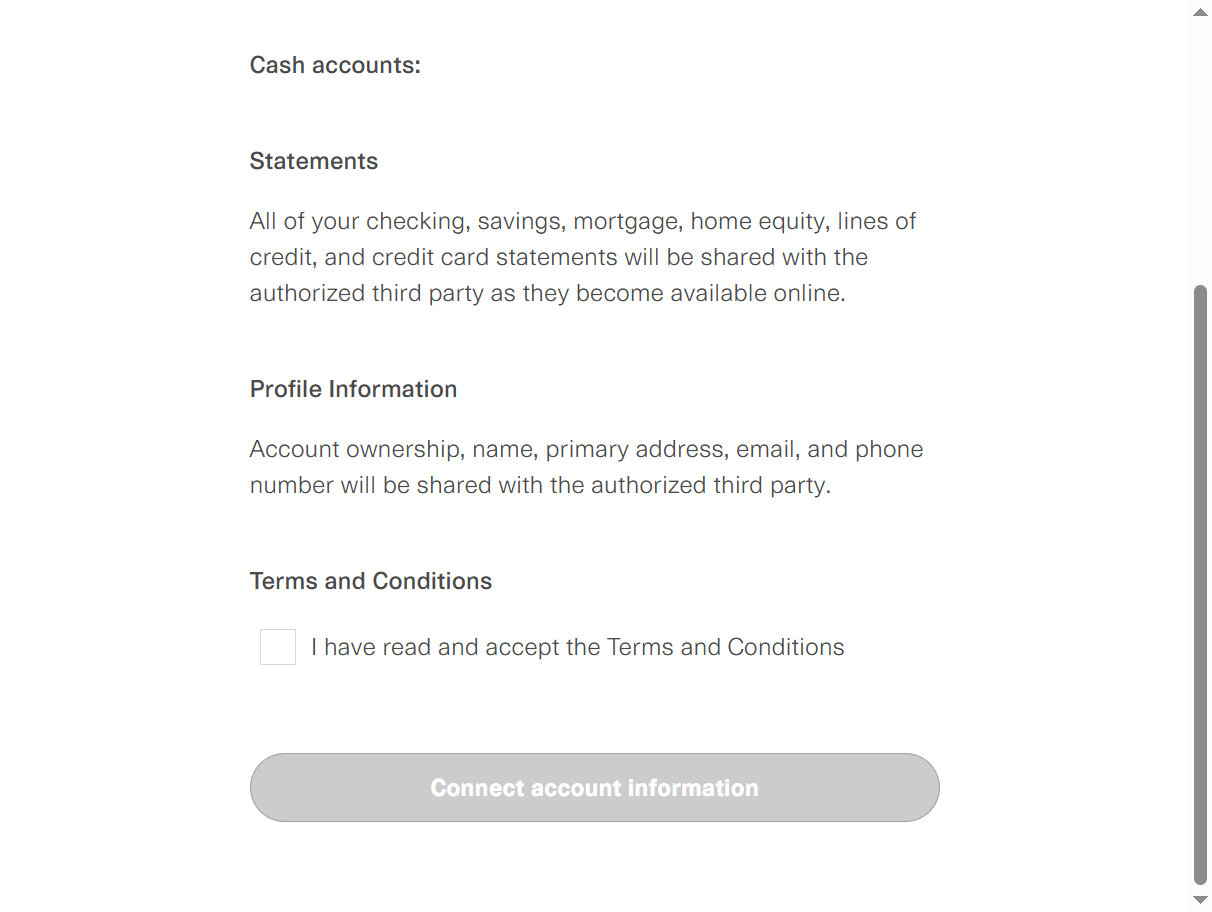
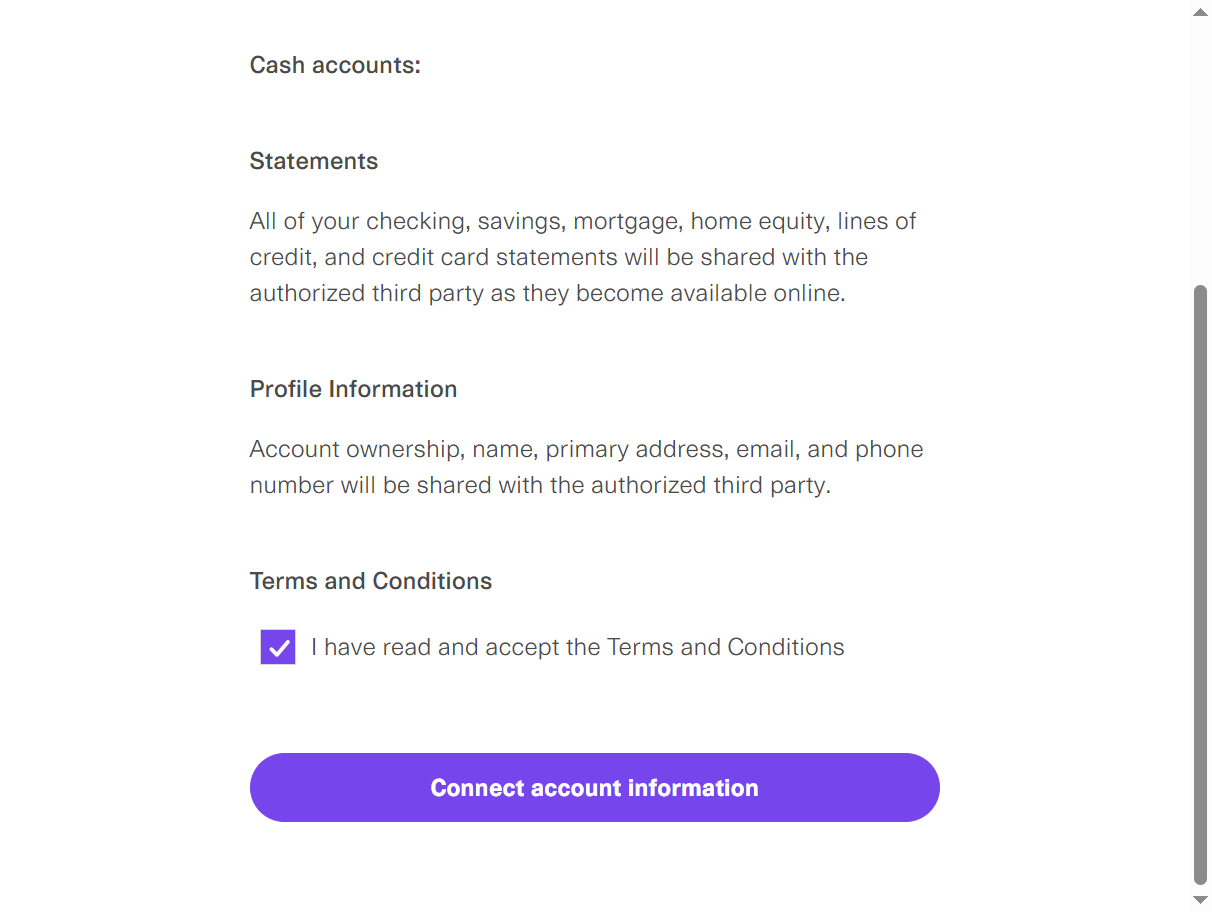
It will redirect me to another Plaid page. When I click on the sign box, I continue to log in. Sign in.
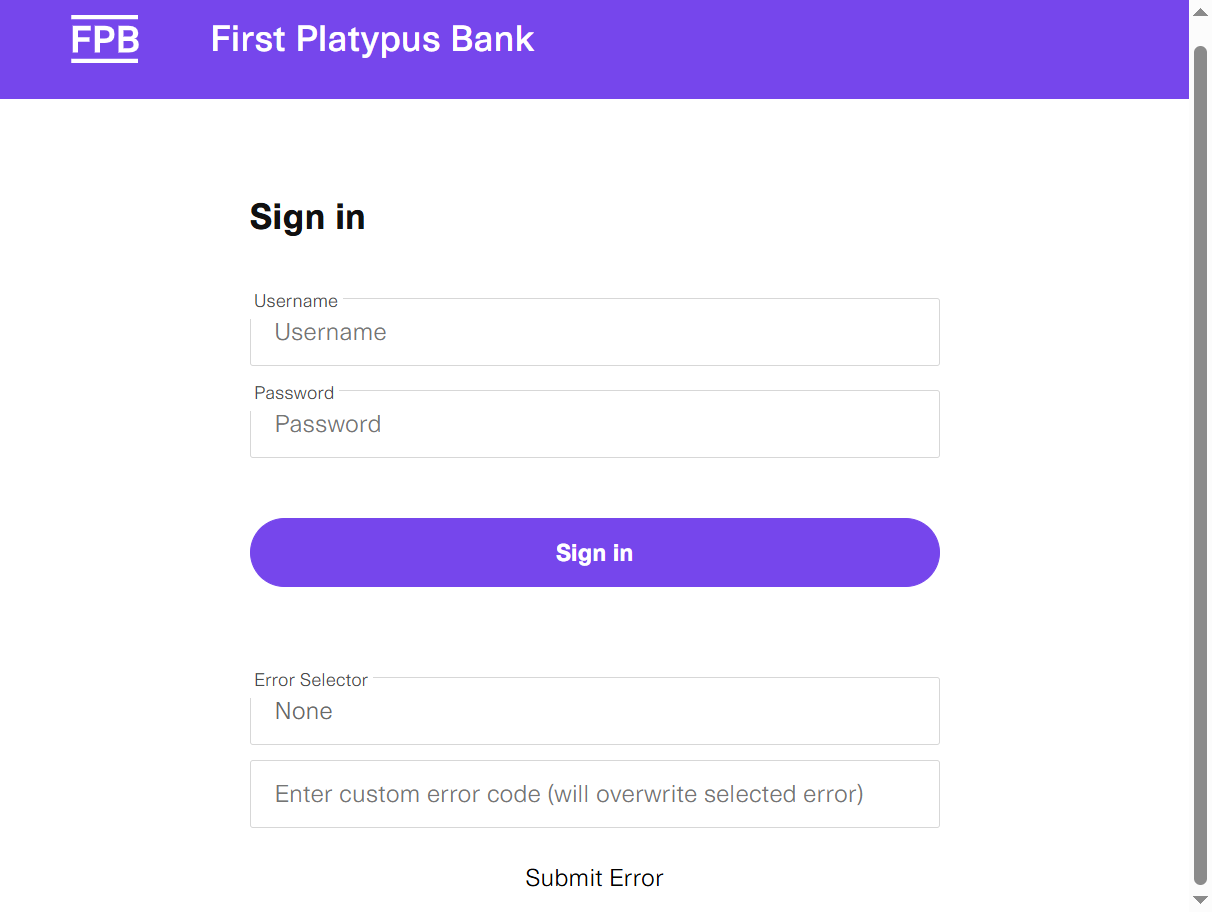
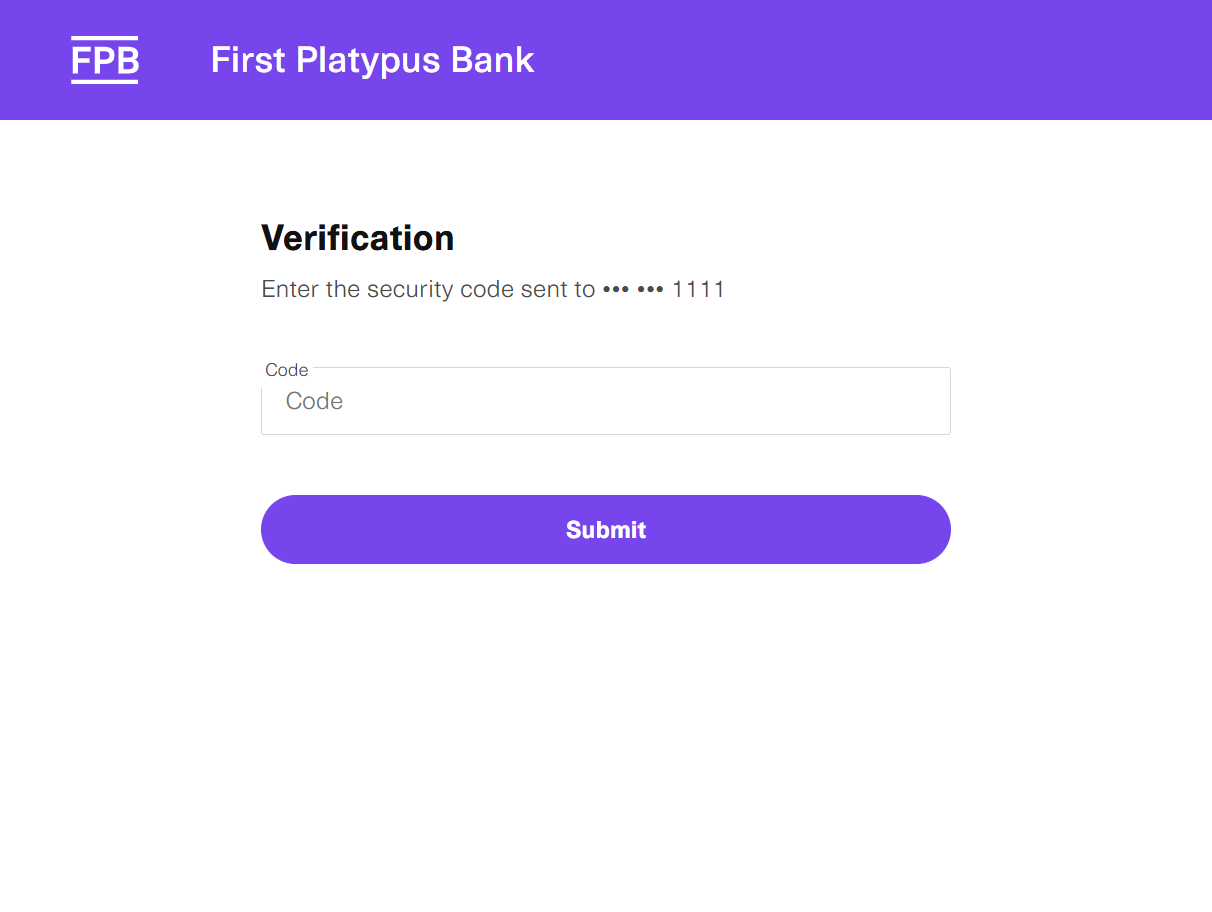
Get the code.
Submit.
I'm adding a bank account here and clicking Continue.
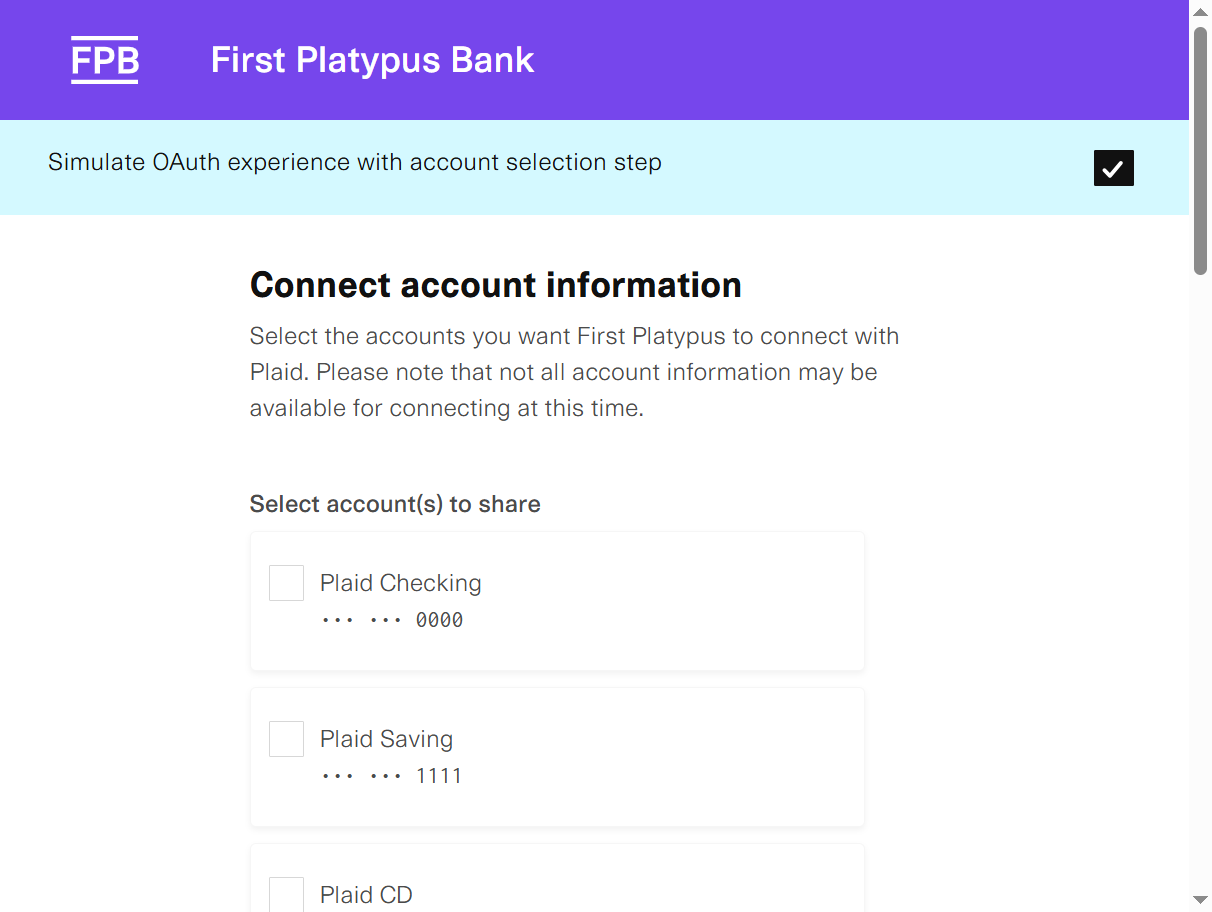
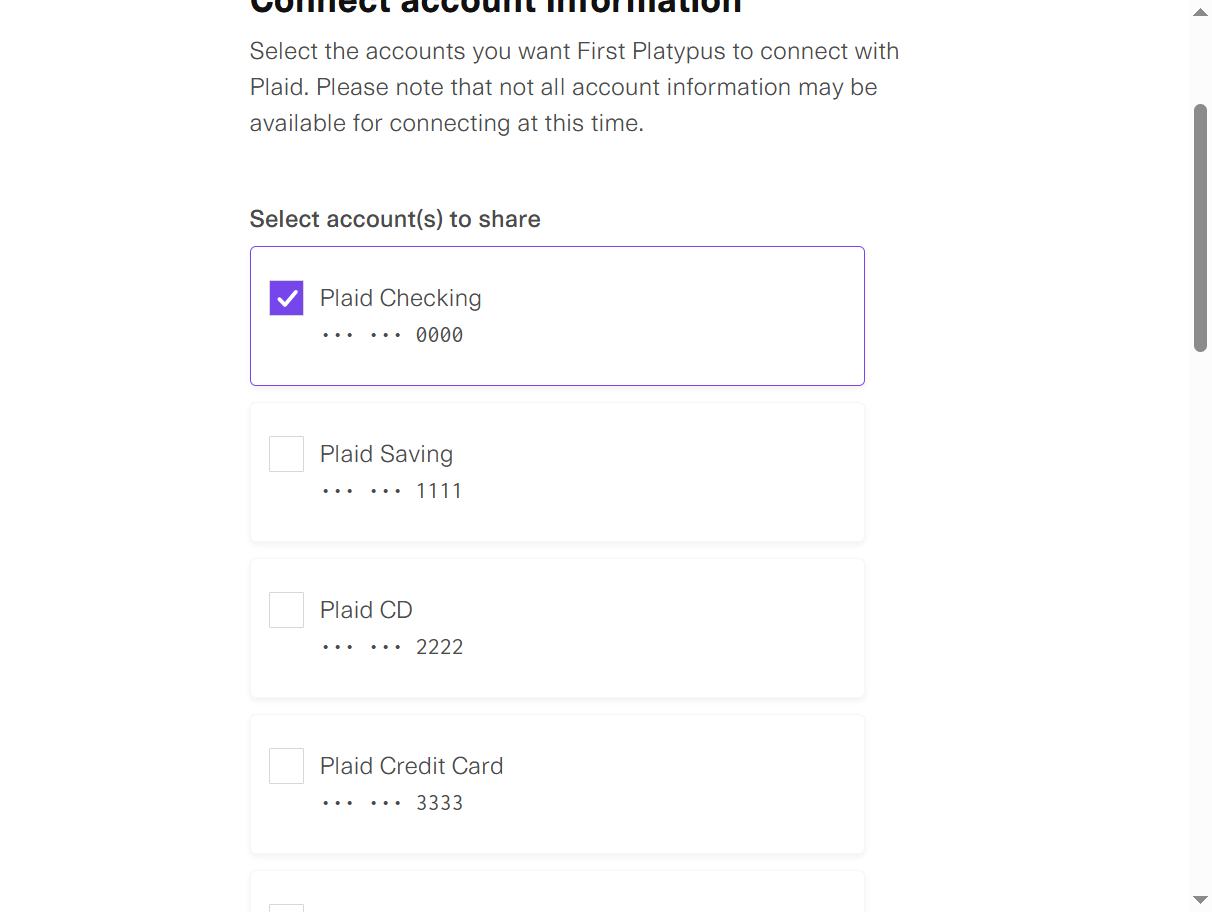

You can see that the bank account is selected. Finish without saving. Here, you need to select this bank account.
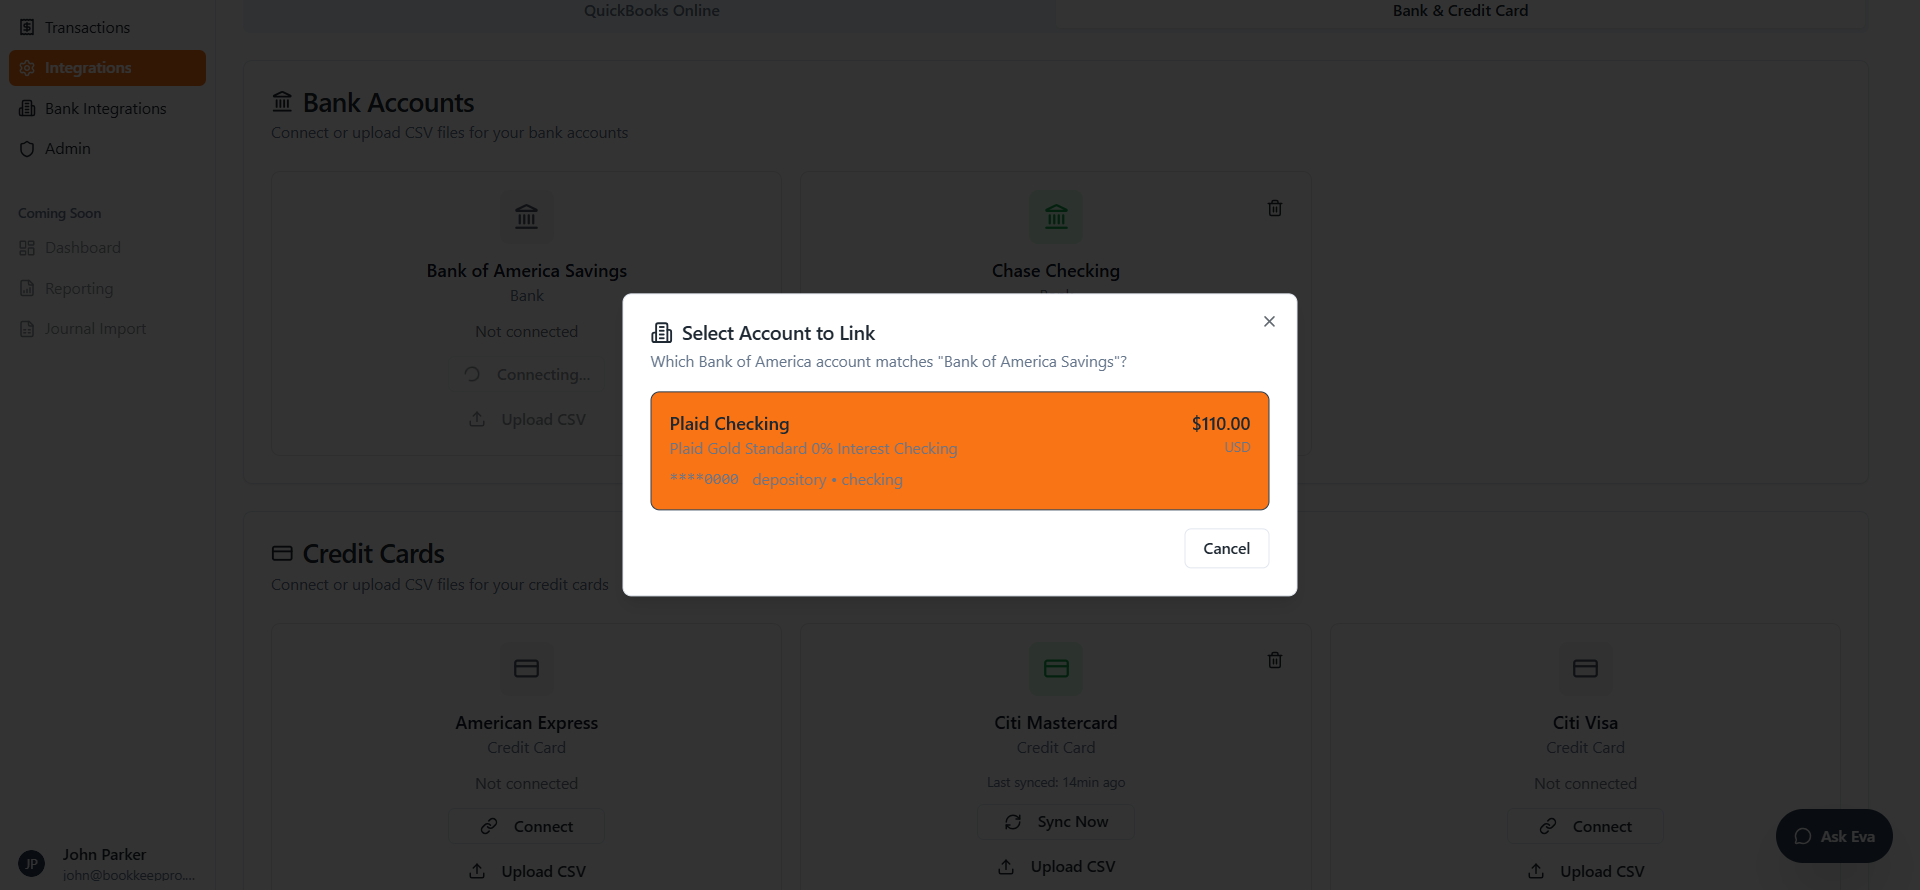
This is already connected. That's why it isn't showing.
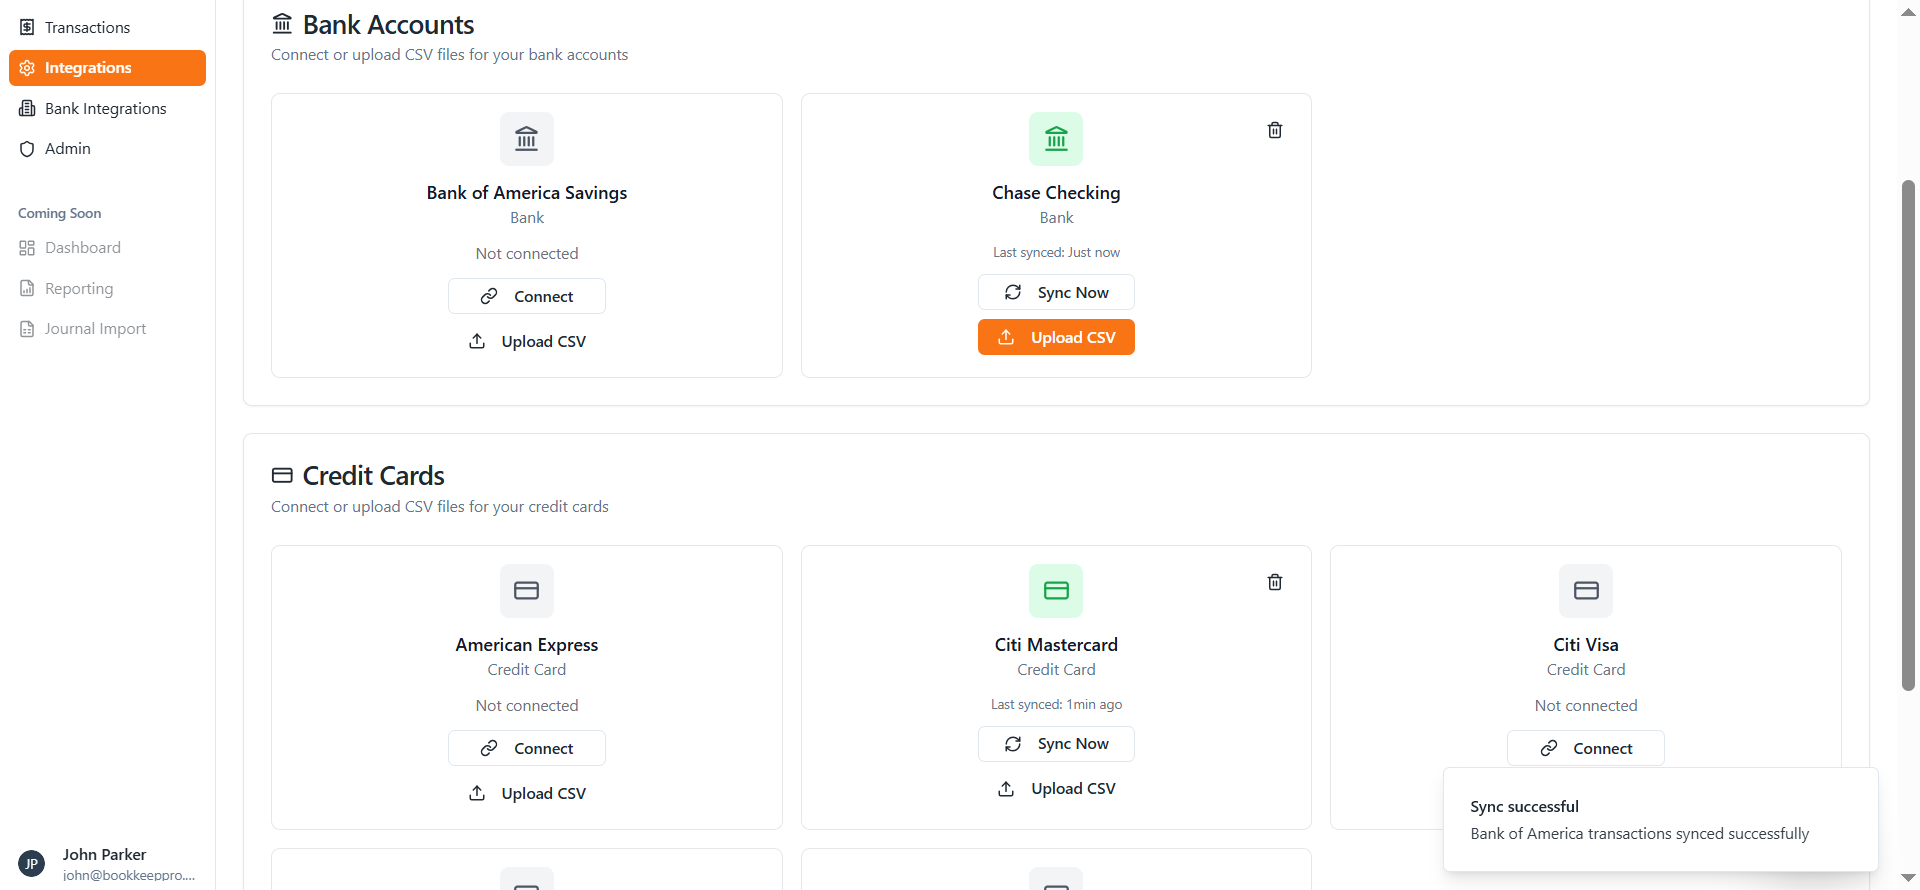
I am clicking "Sync Now" to automatically sync the account.
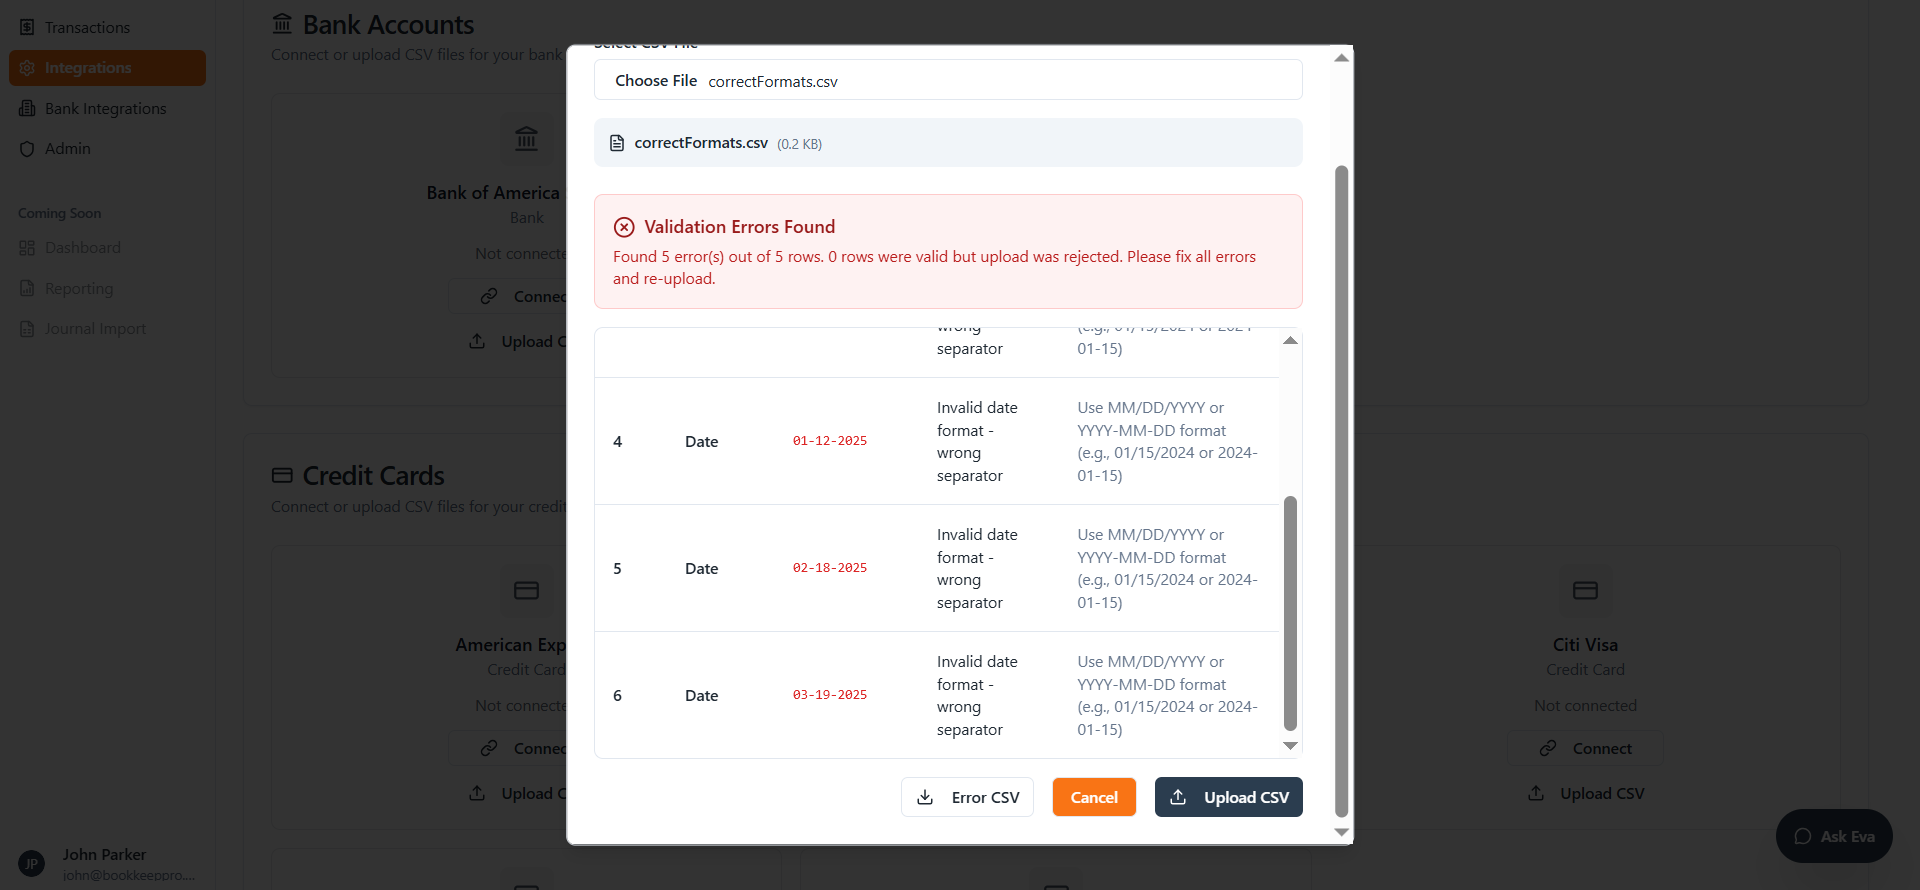
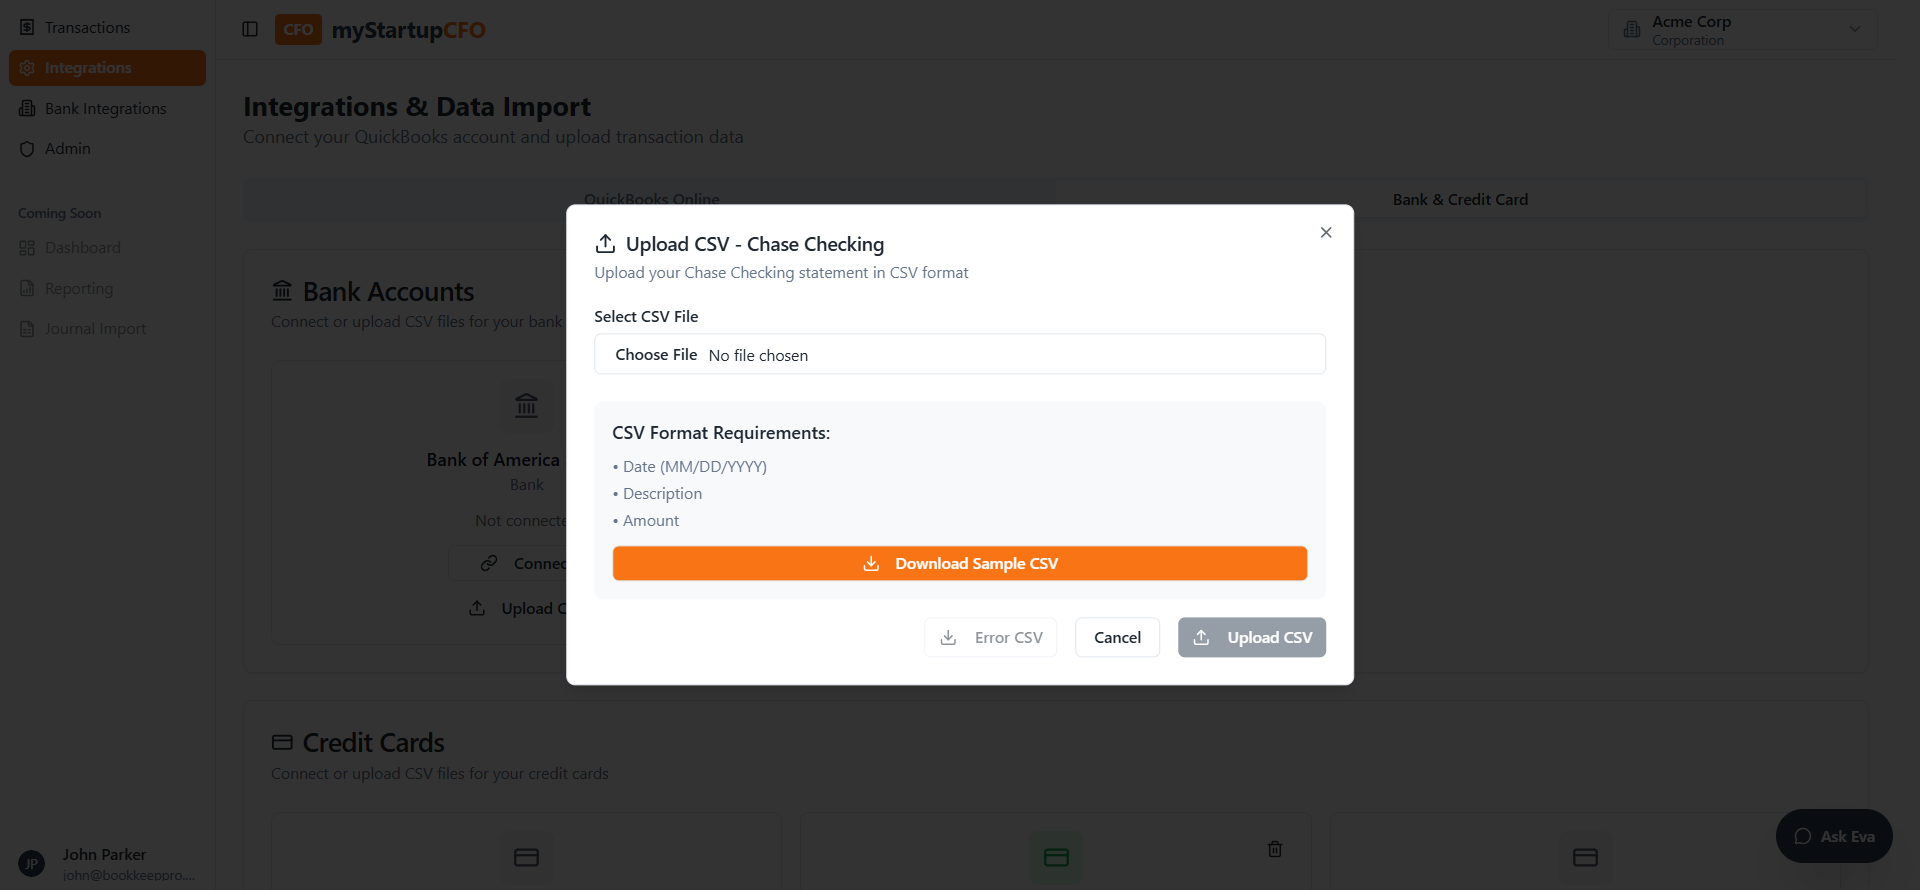
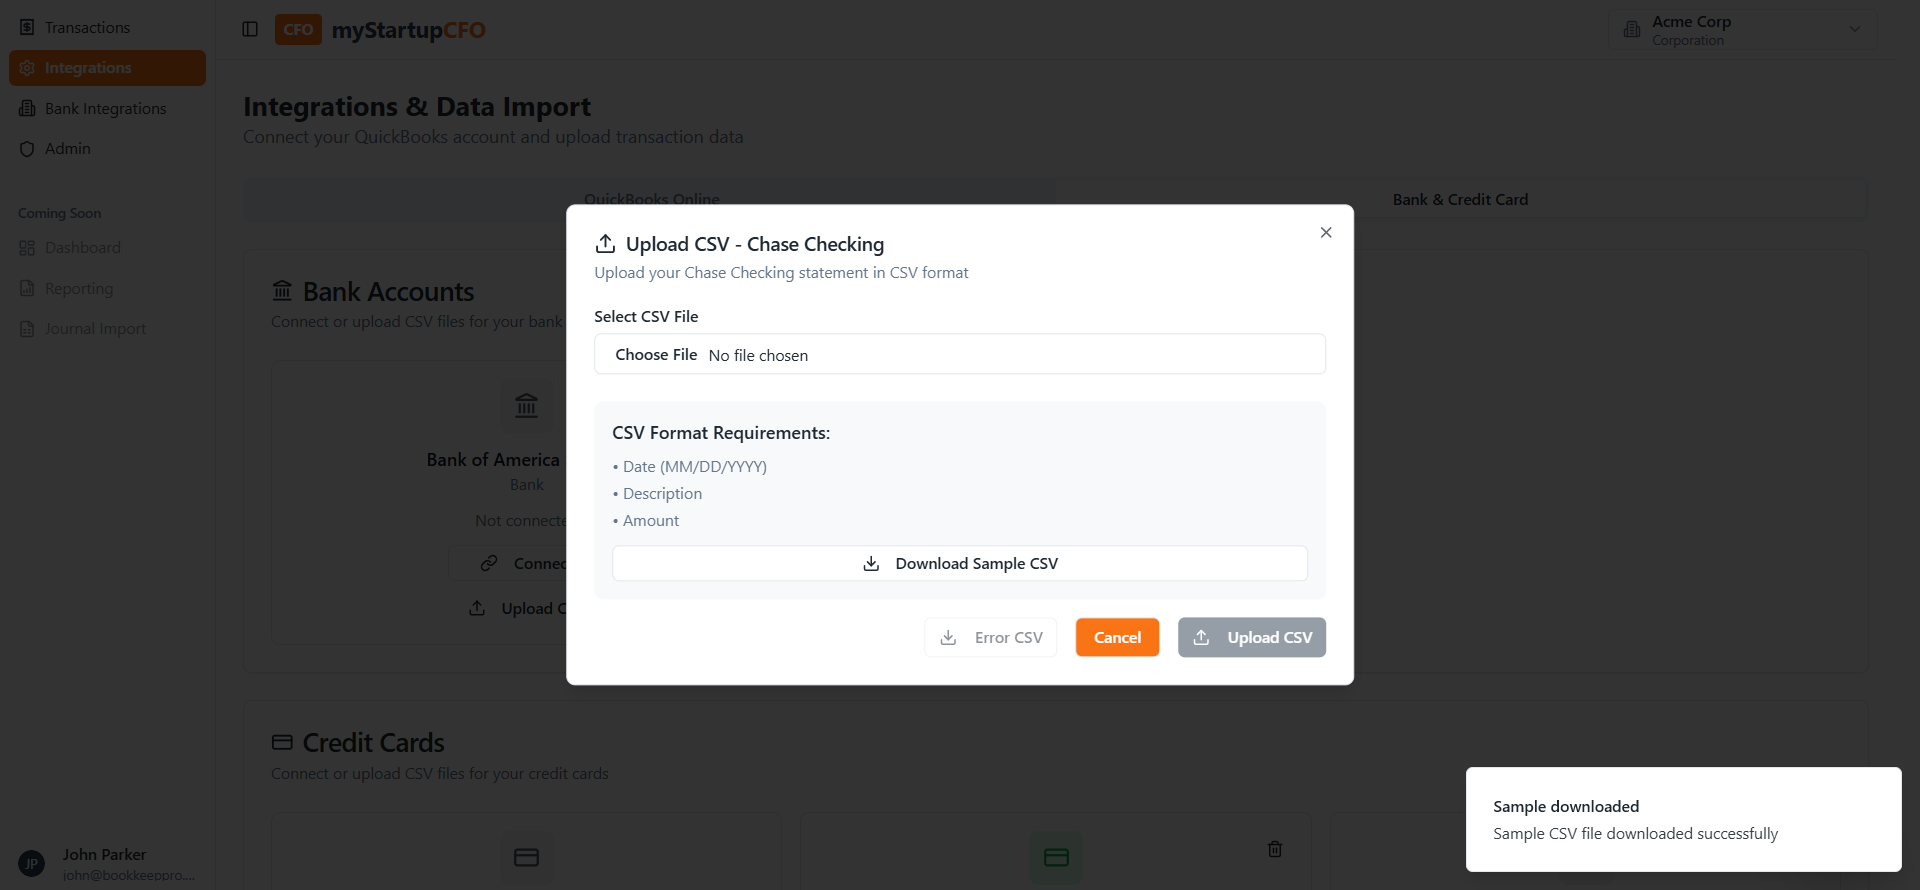
When I click on Upload CSV and select a file...
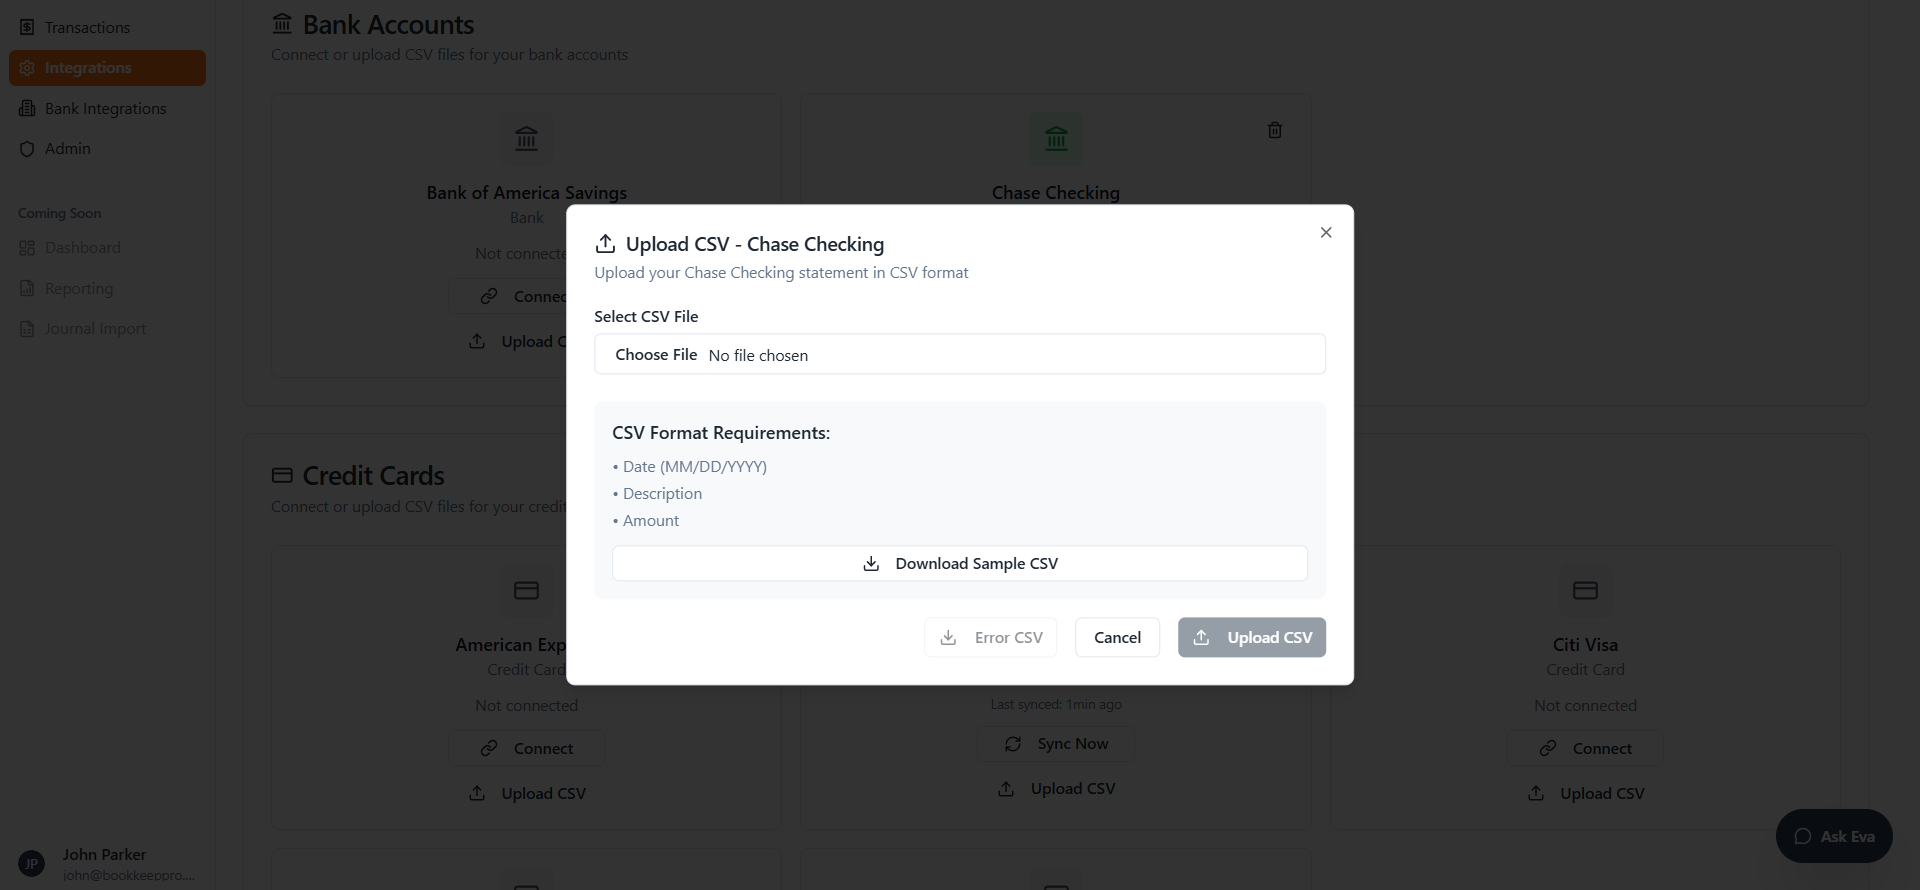
Here’s how to upload this file.
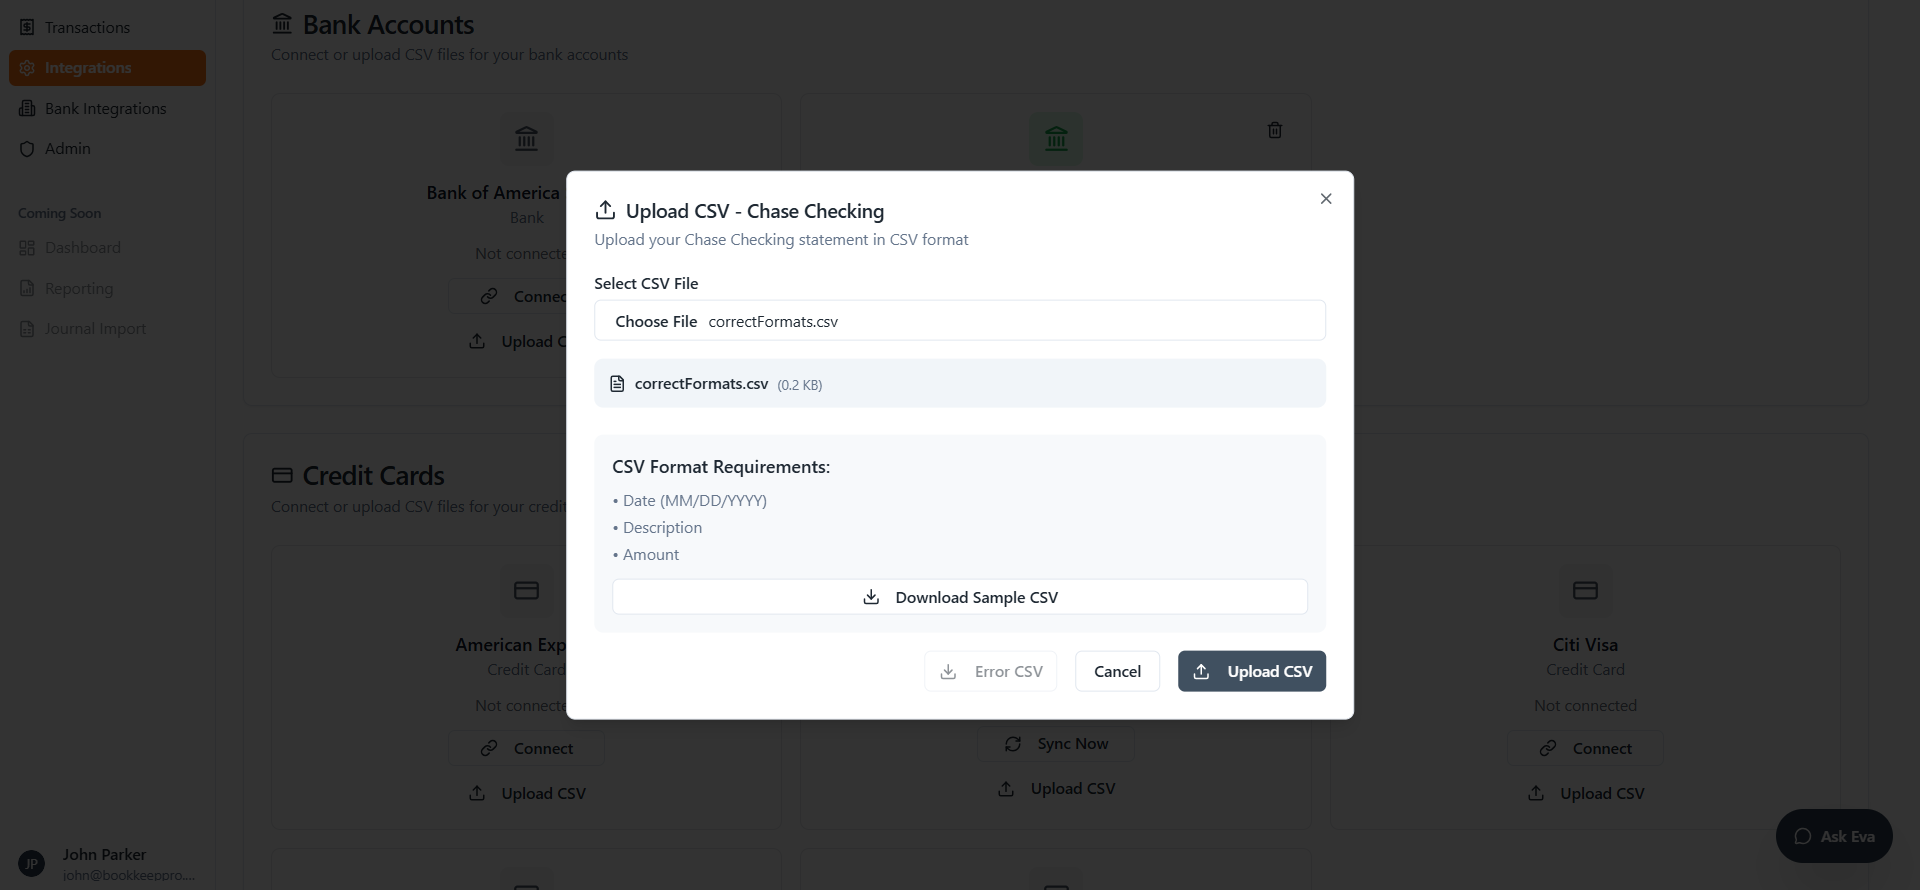
If you encounter an error, you can click Download CSV.

You can find out what the error is right now and resolve it easily. You can also download a sample CSV here.