
Step-by-Step Guide to Completing a Personal Loan Application Form
Learn how to accurately complete a personal loan application form, including client verification, income and expense entry, document uploads, and final approval steps. Follow this comprehensive guide for a smooth loan application process.
In this guide, we'll learn how to complete a personal loan application form from start to finish. We will cover how to enter client information, verify details, add financial data, upload documents, and select loan terms. This process ensures all required information is collected and the application is ready for supervisor approval.
Let's get started
From your home screen, select "New Personal Loan."
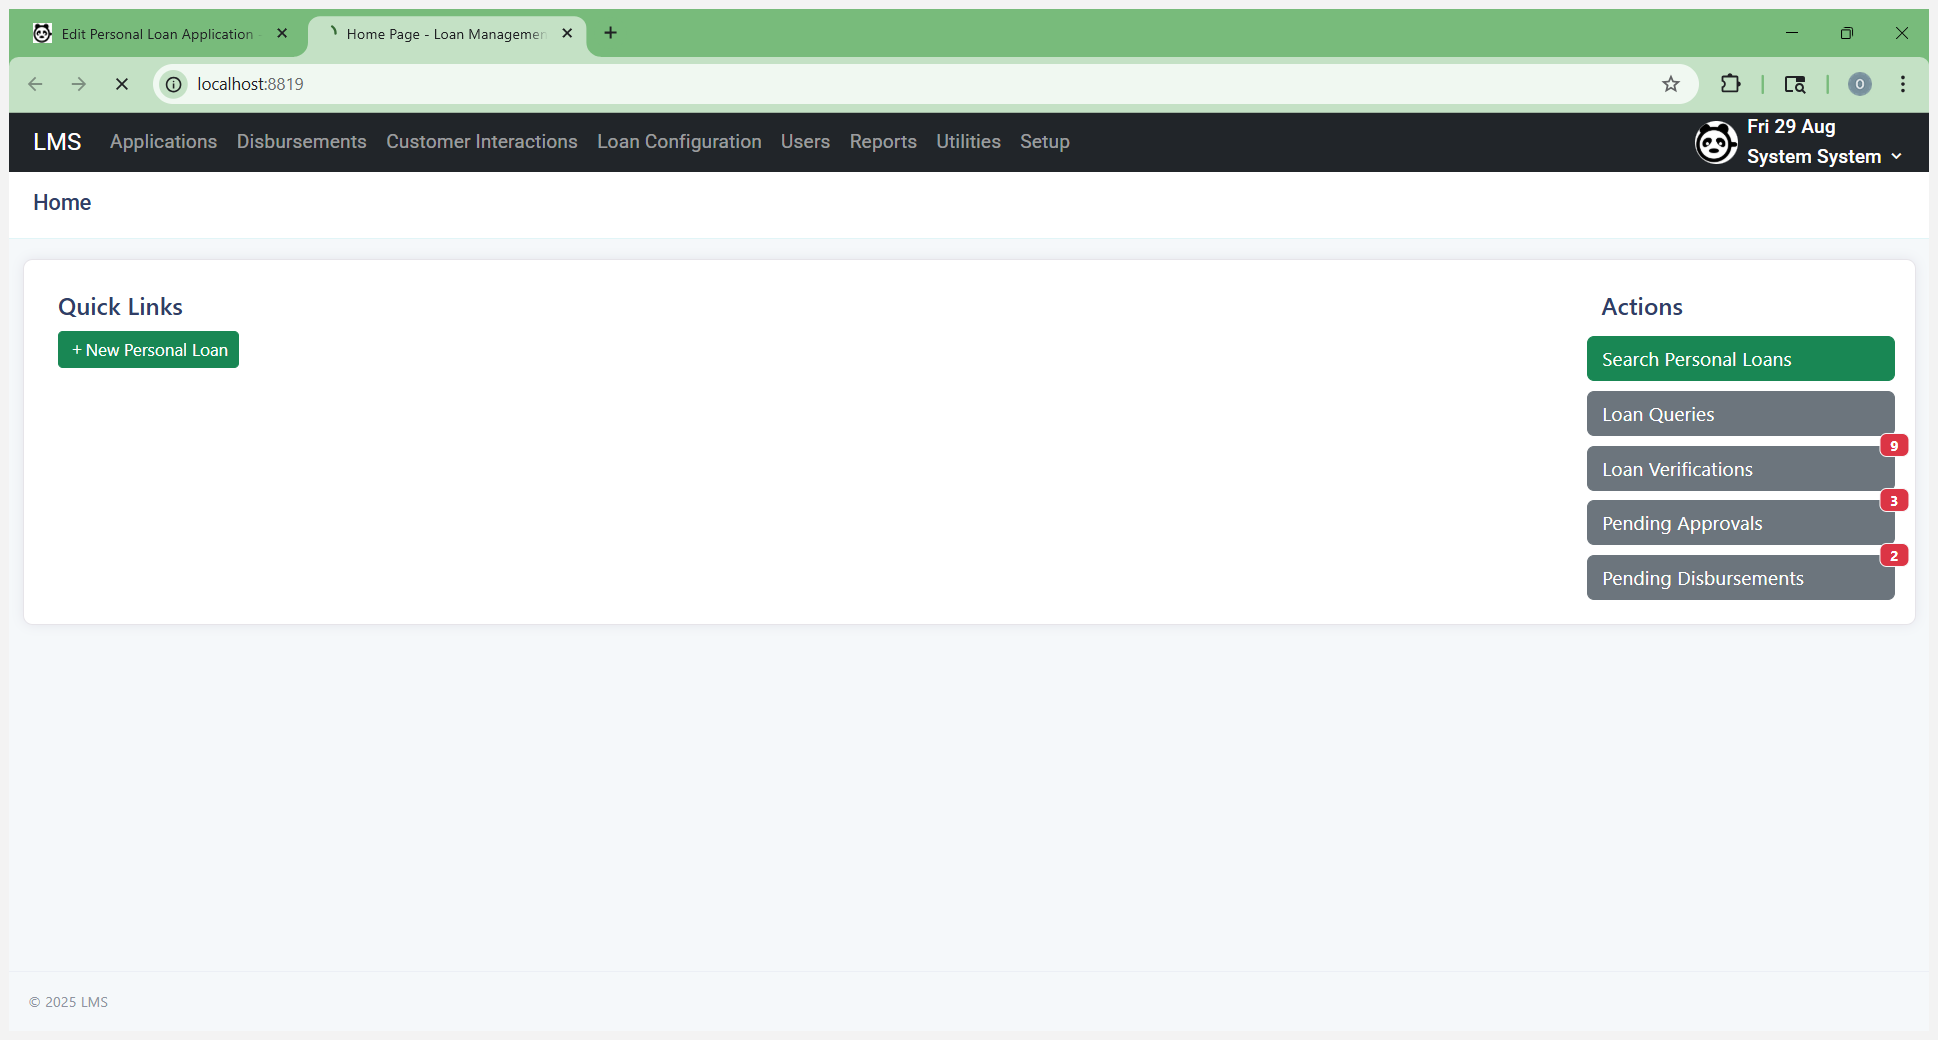
This will take you to the personal loan application form.

Enter the client's number.
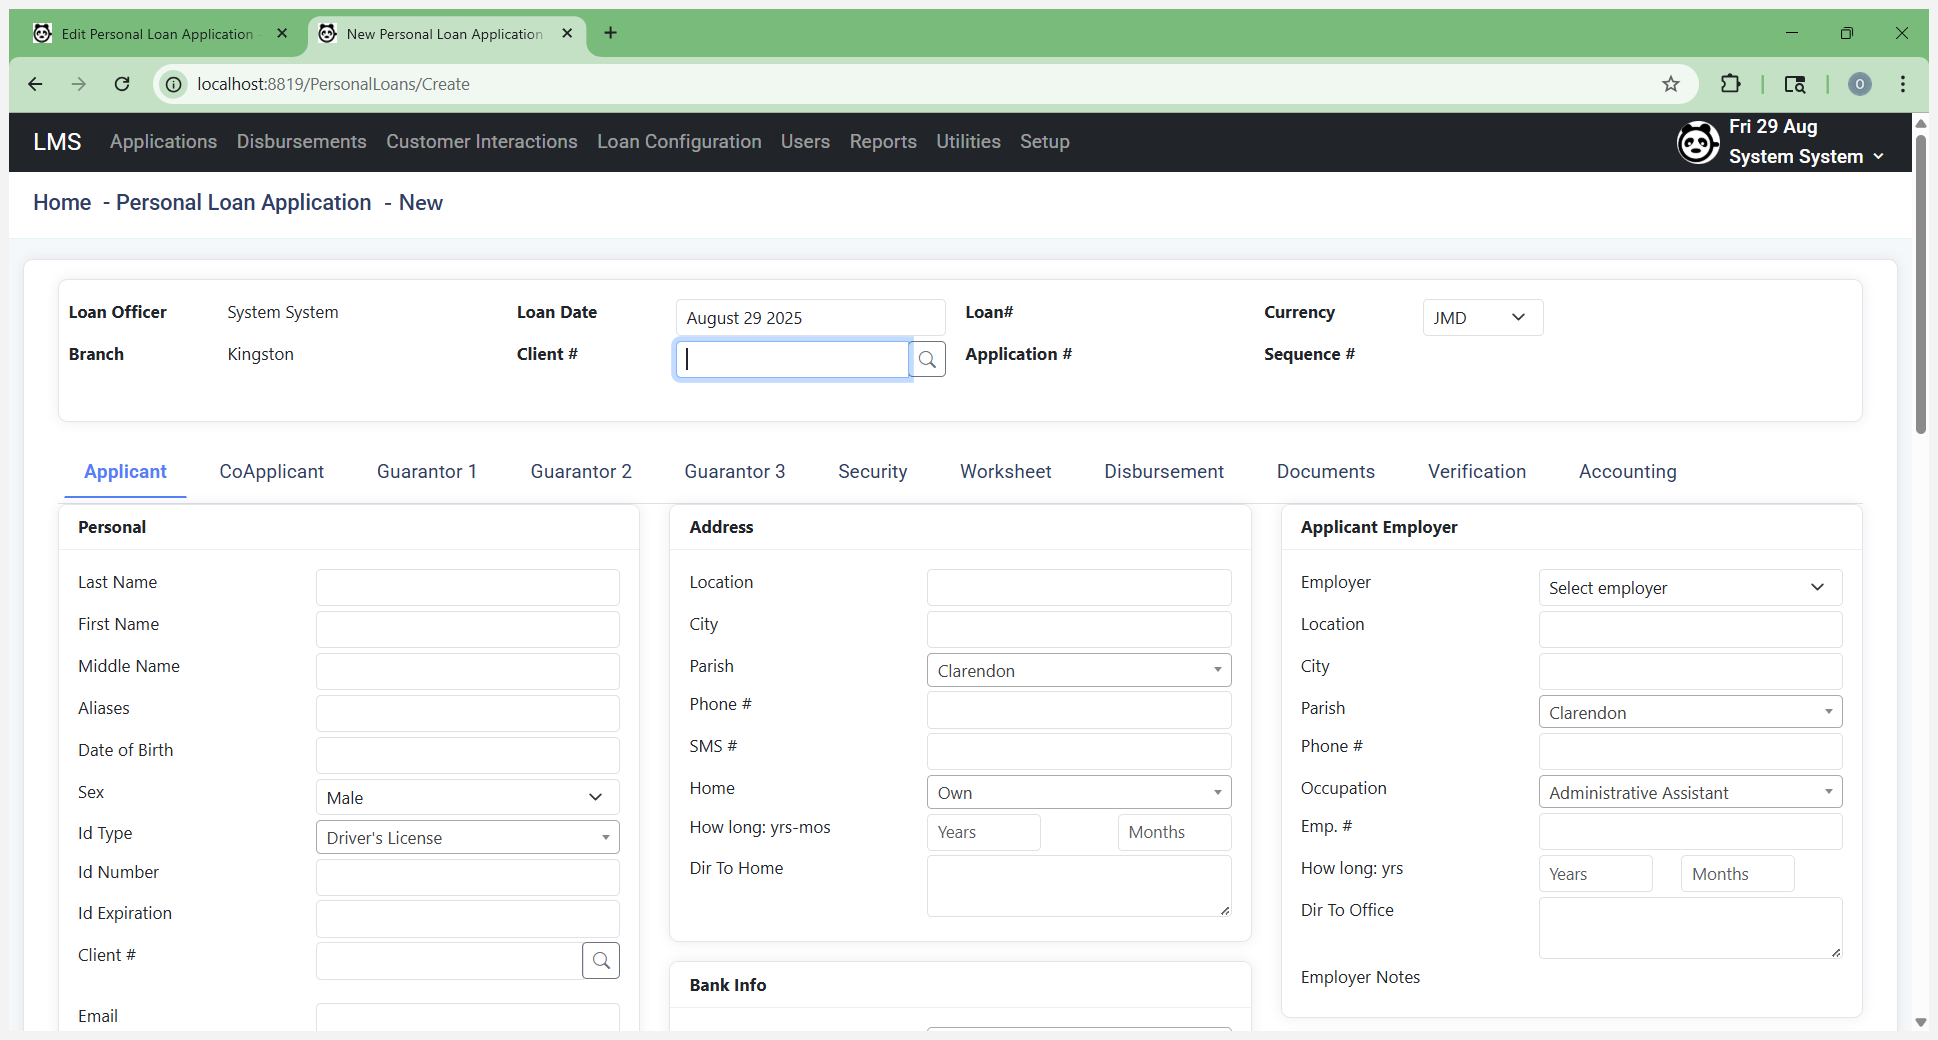
This is usually your TRN number. After you enter the TRN number, select Search for Existing Clients.
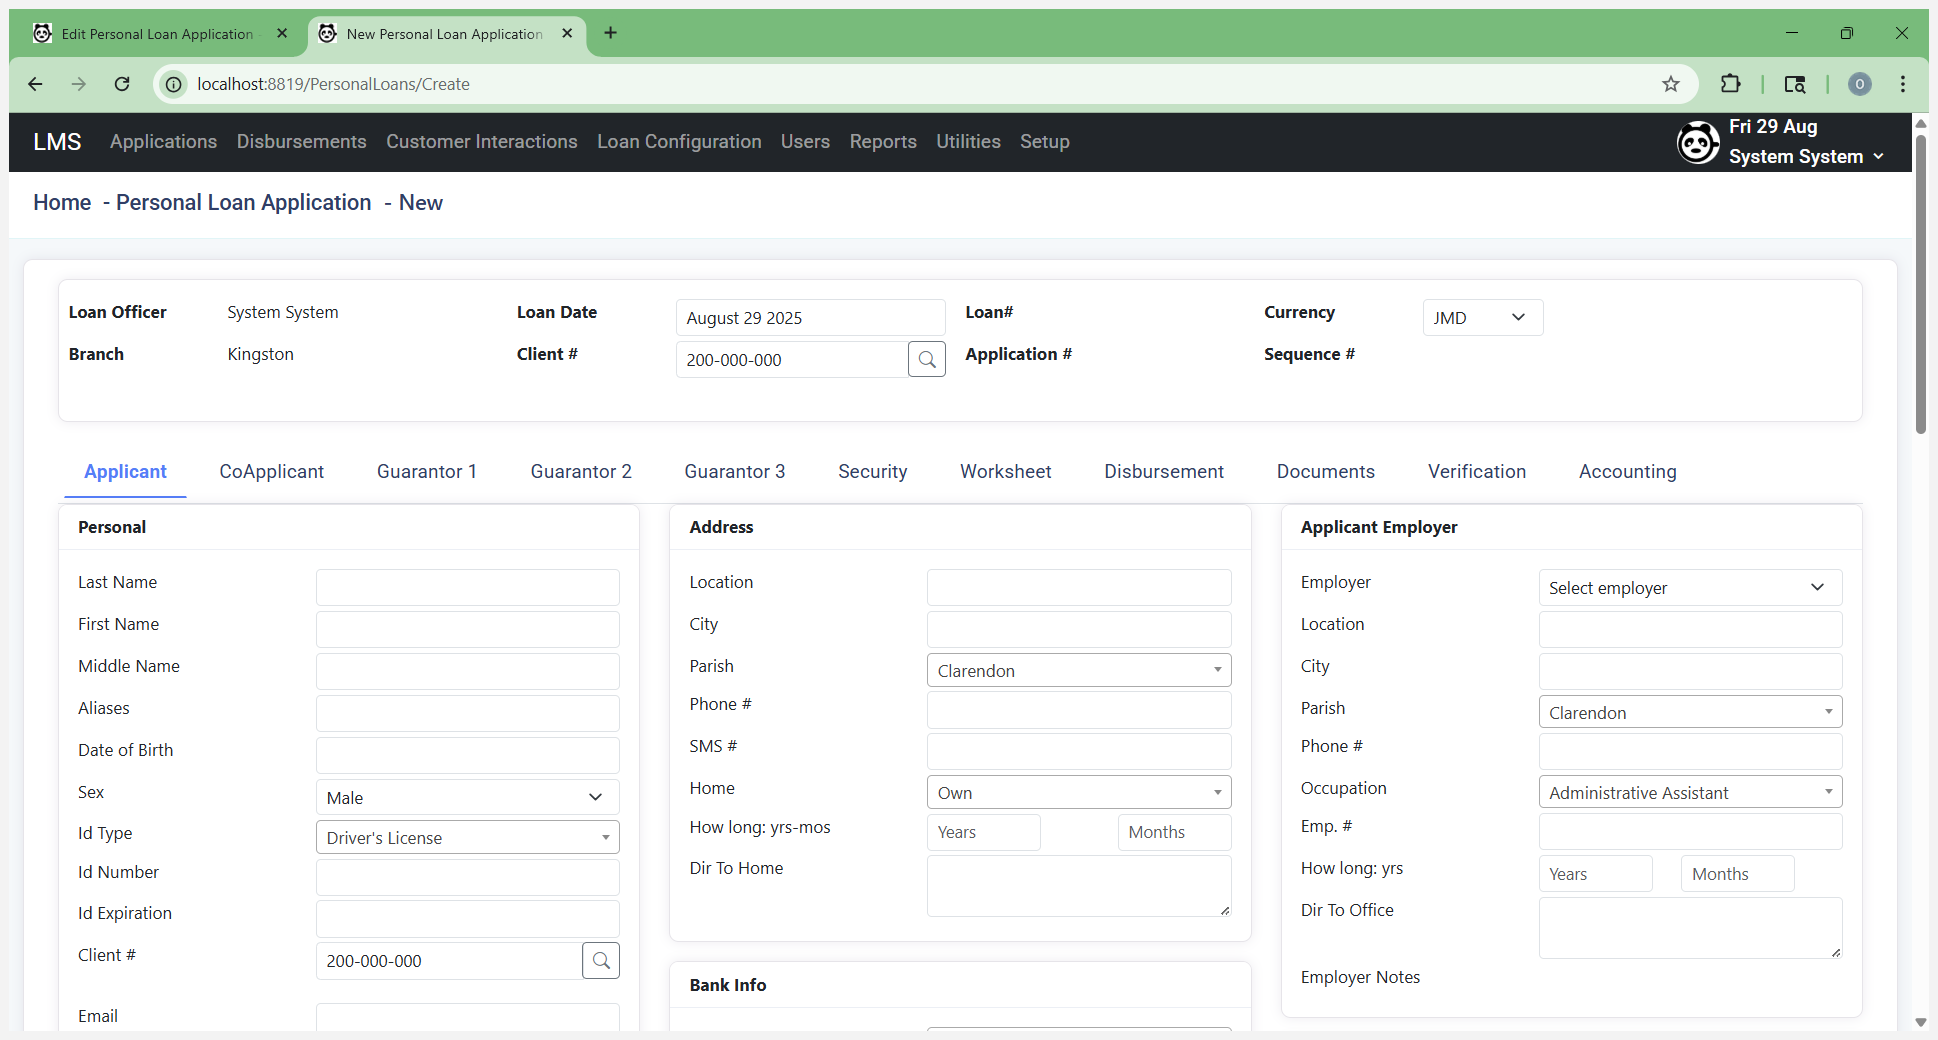
This will check if the client already exists. If so, it will automatically fill in the information we have on file.
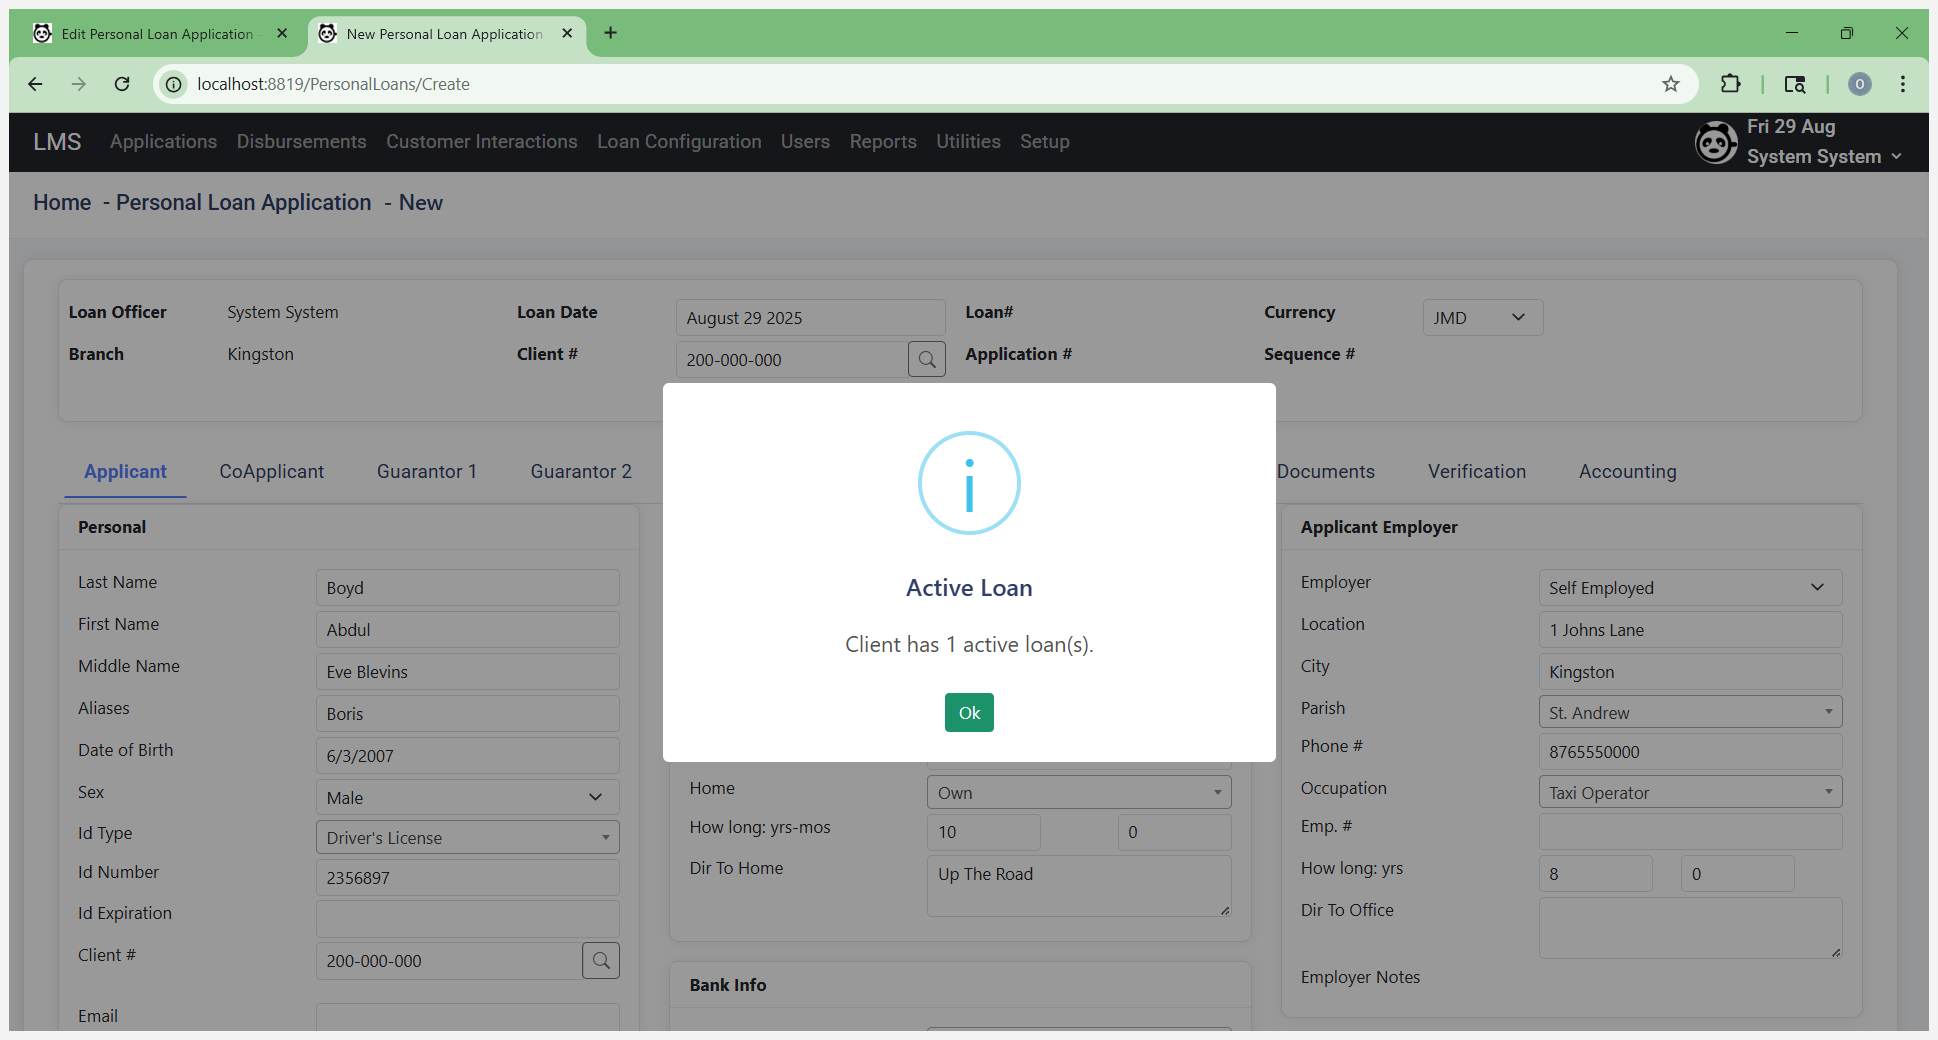
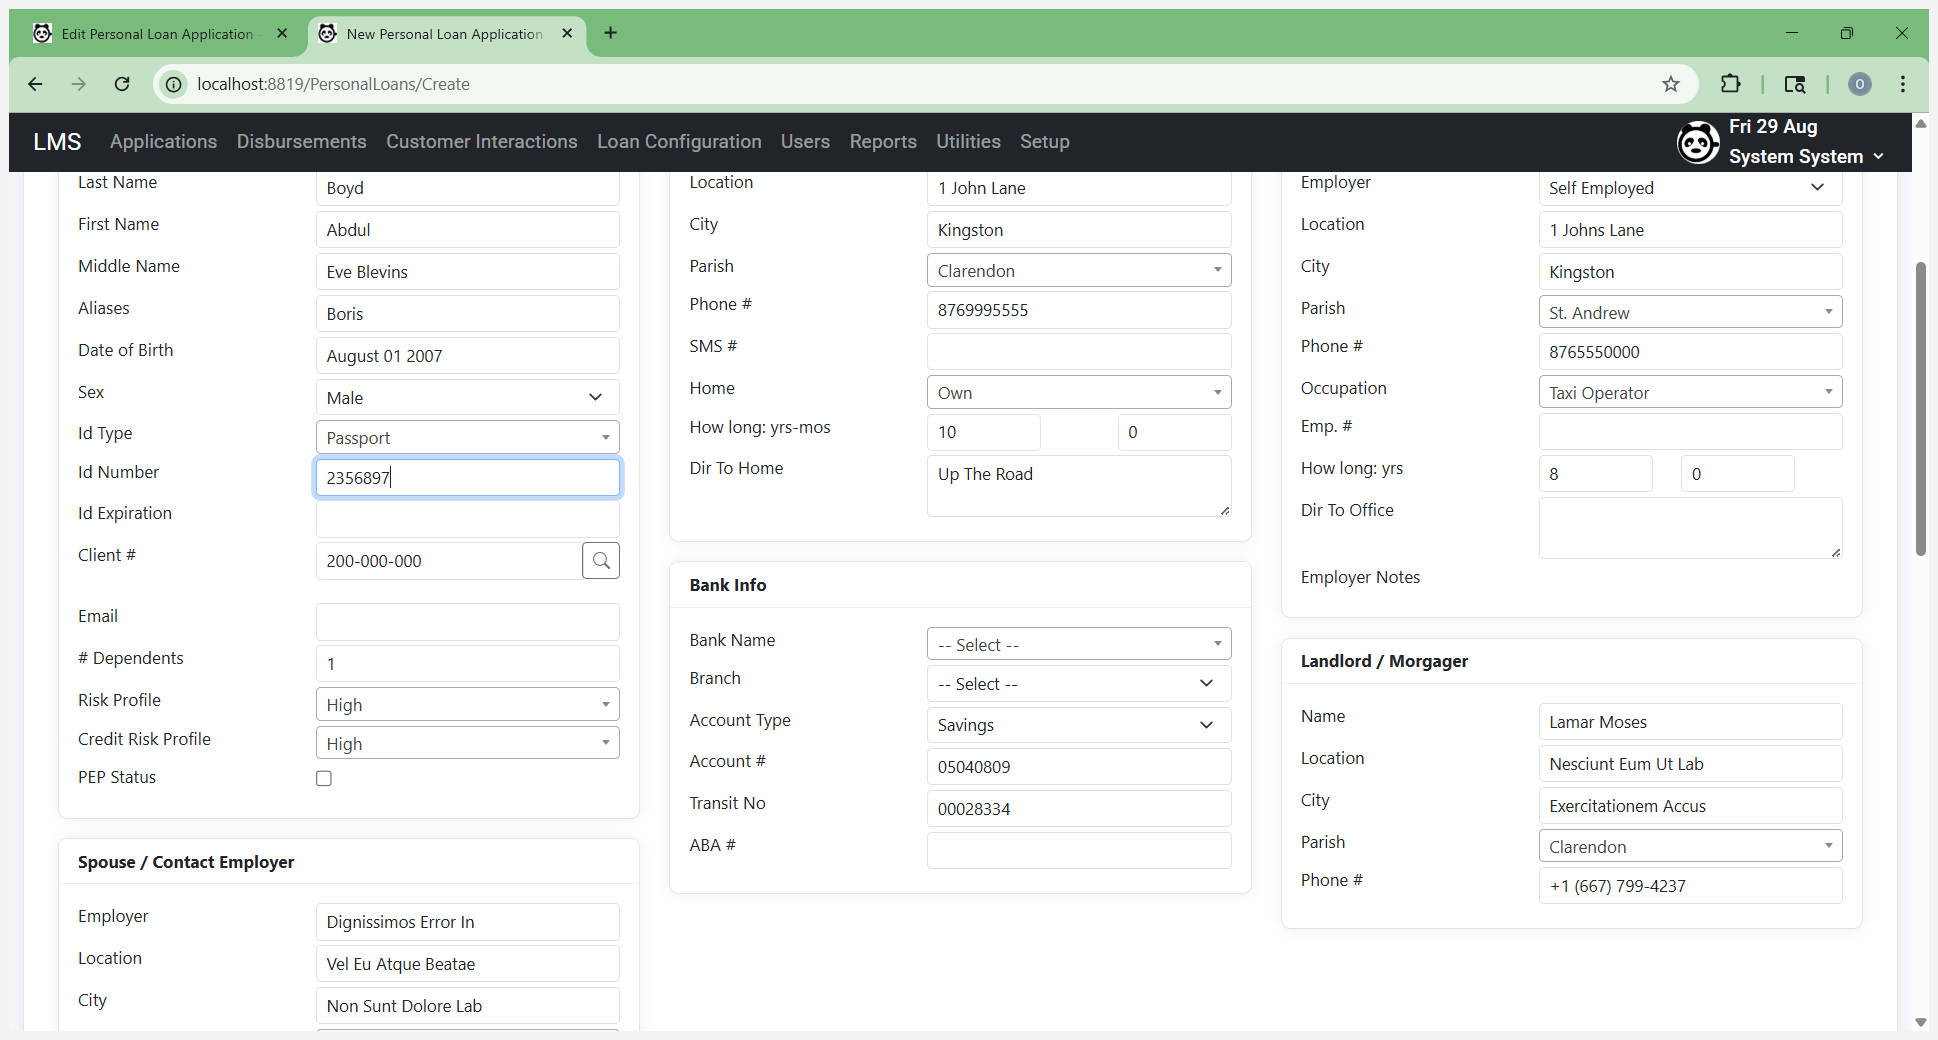
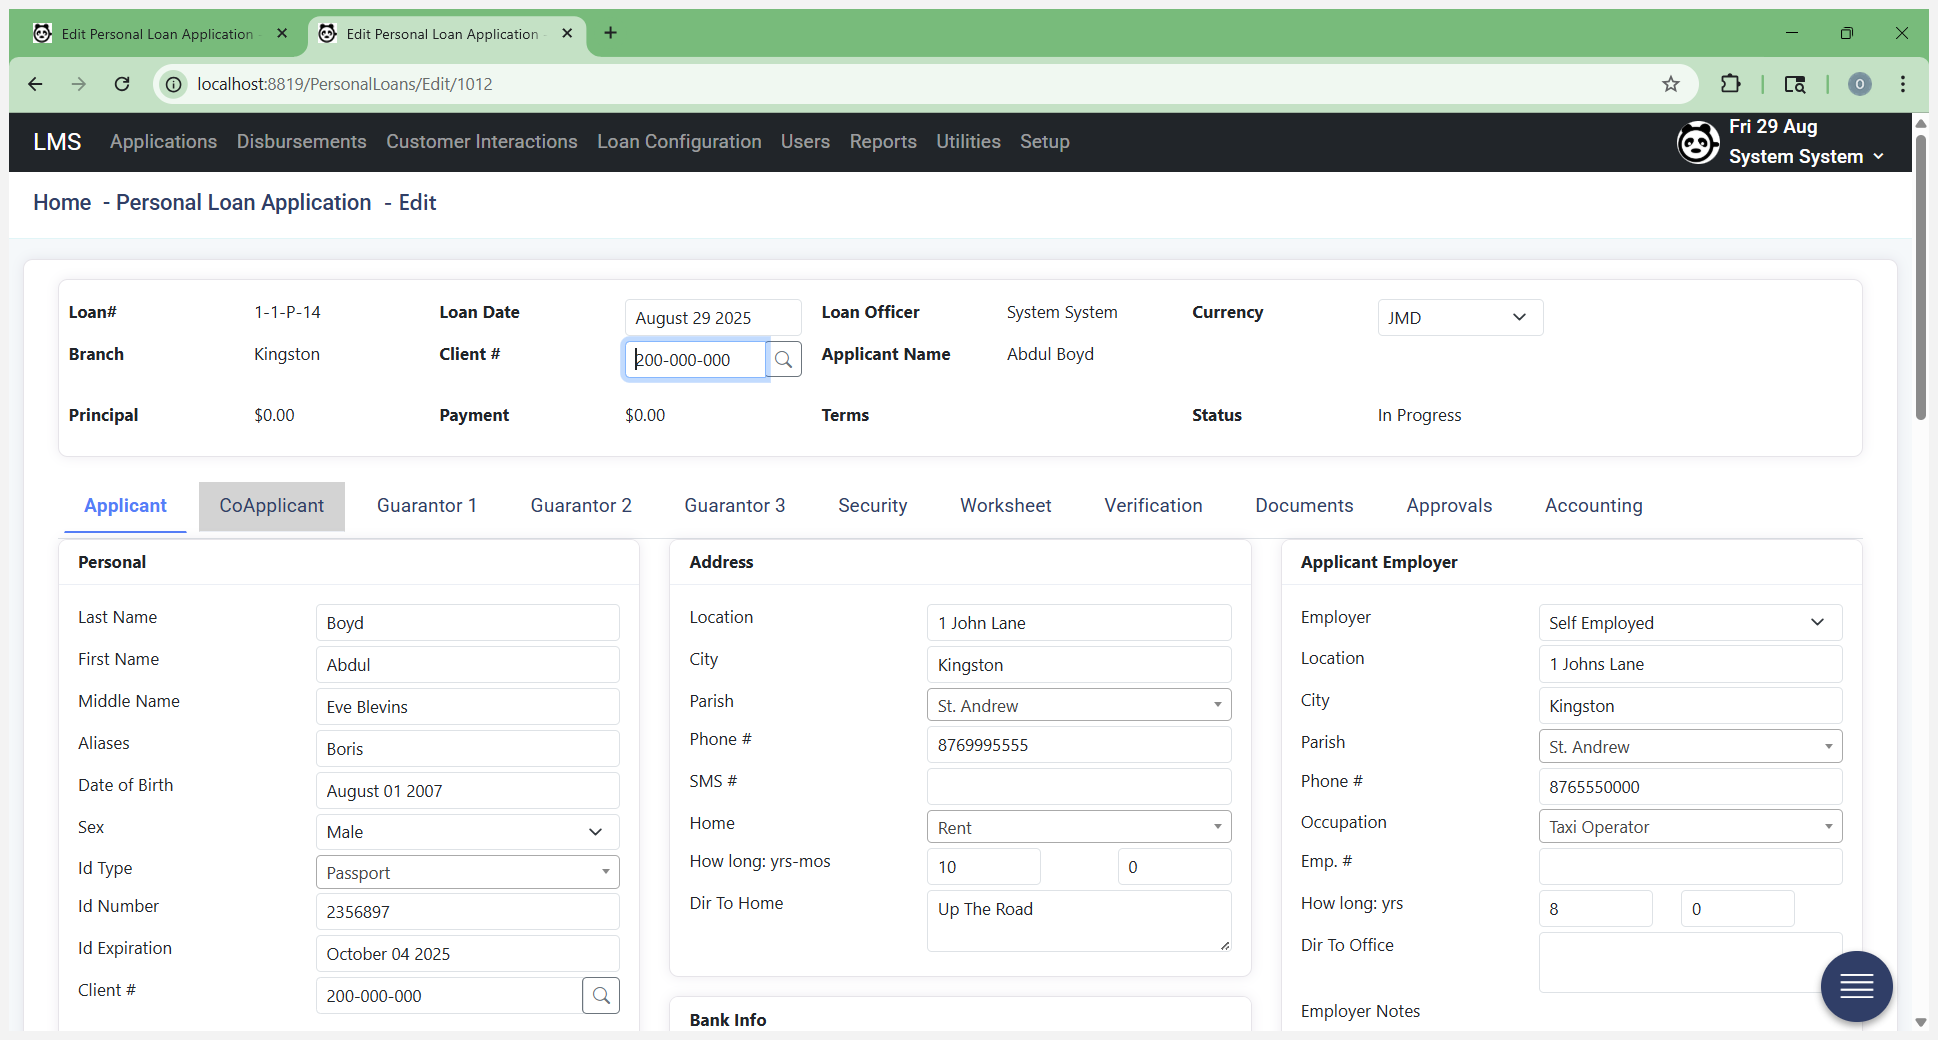
You need to check this. If it doesn't exist, it notifies you that there isn't a customer with this name. At the same time, while checking for existing customers, it will also check your blacklist and other AML lists. Next, go to the personal section. Enter the customer's last name, first name, and date of birth.

Verify that this information is correct. Fill it in.
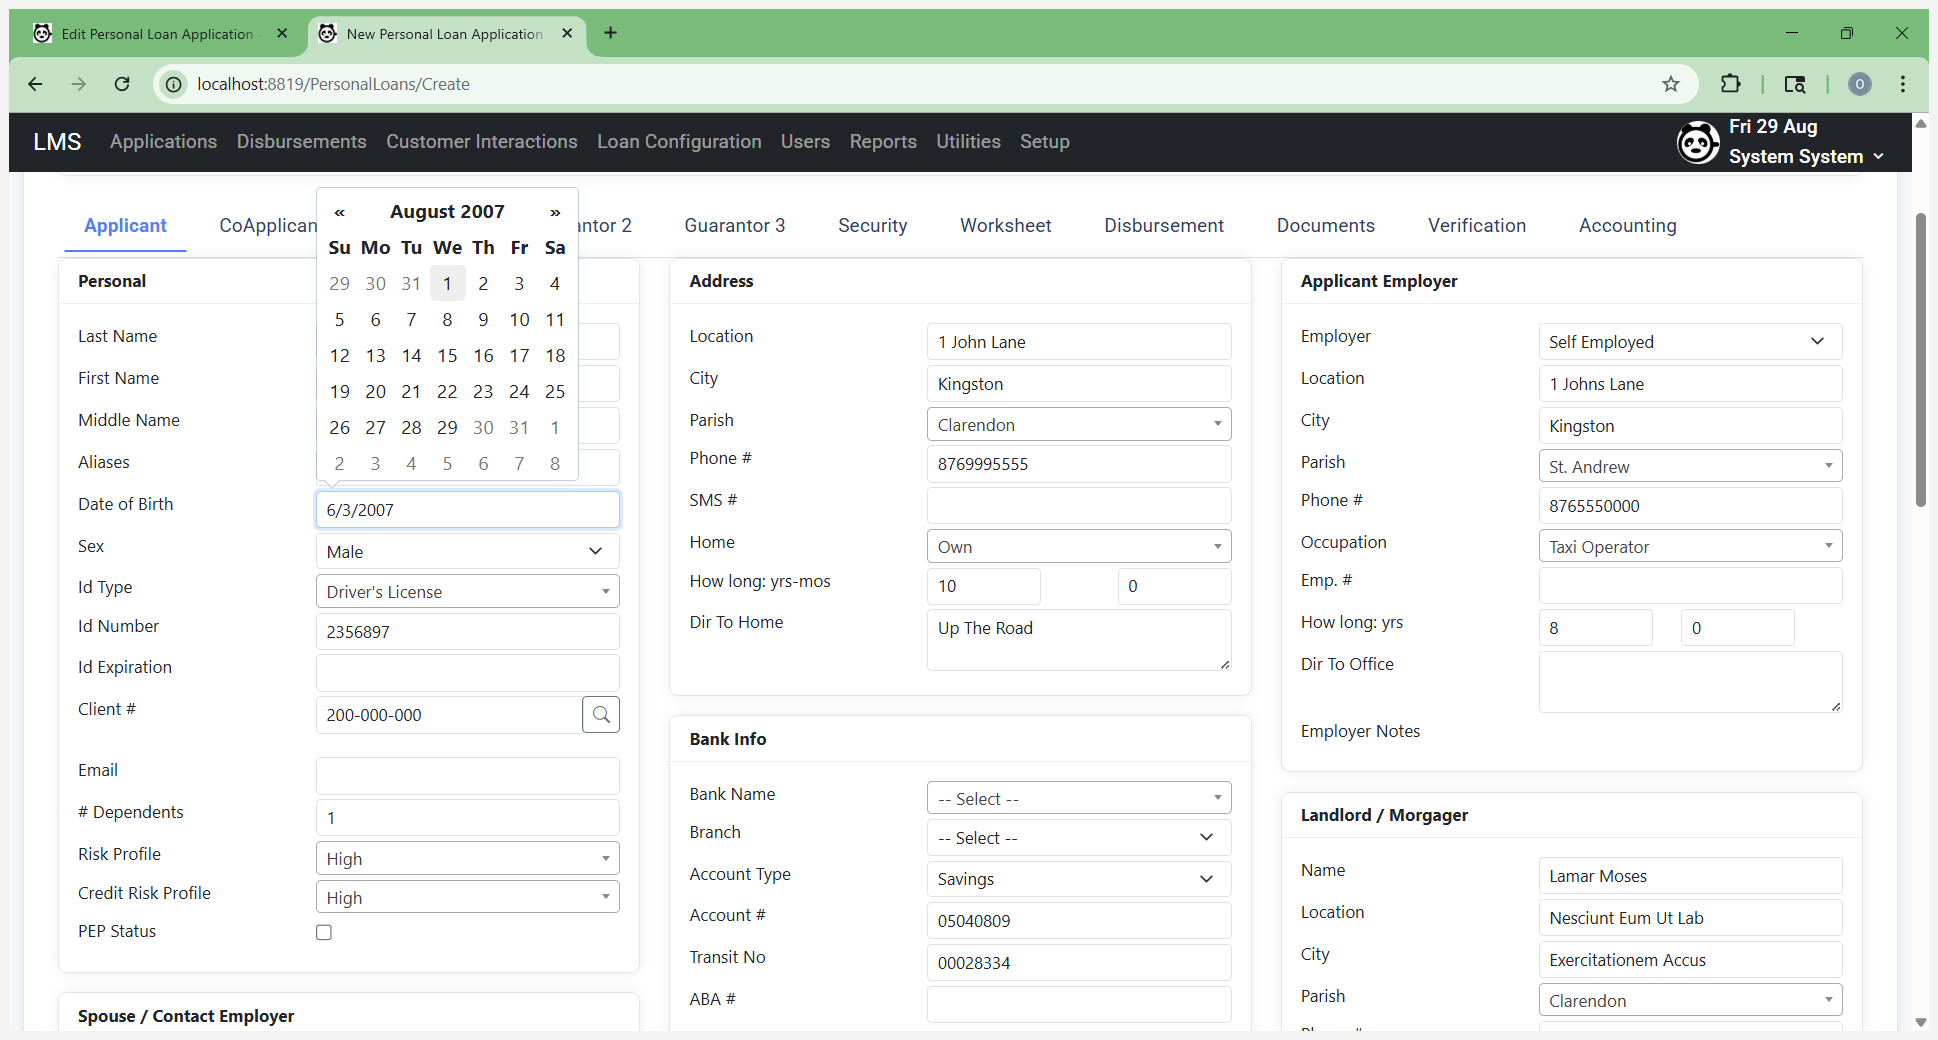
Add the additional details there. Enter the person's ID.
Select the ID expiration date.
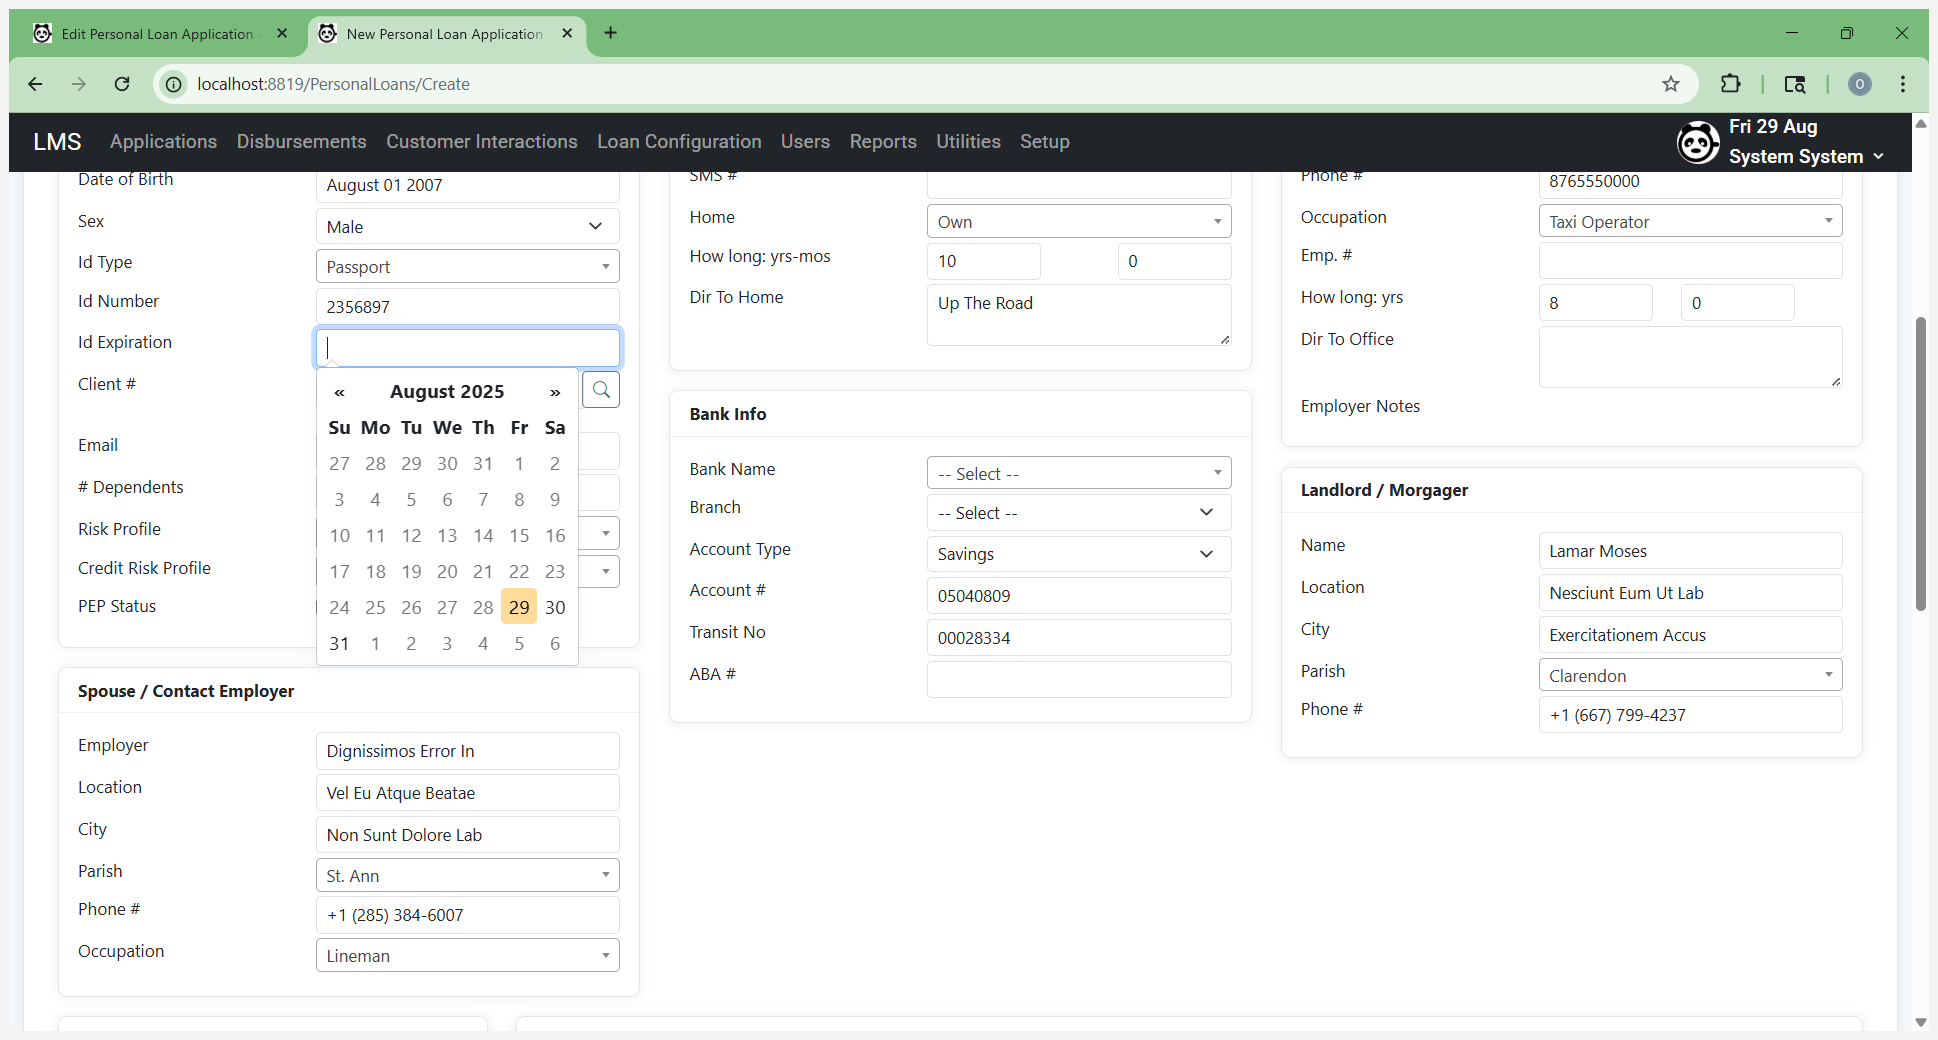
This is important. ID cannot be expired. This is part of capturing the information.

Enter the customer's email.
Add any additional details that are present.

If you don't have the credit risk details right now, just enter or set a default value.

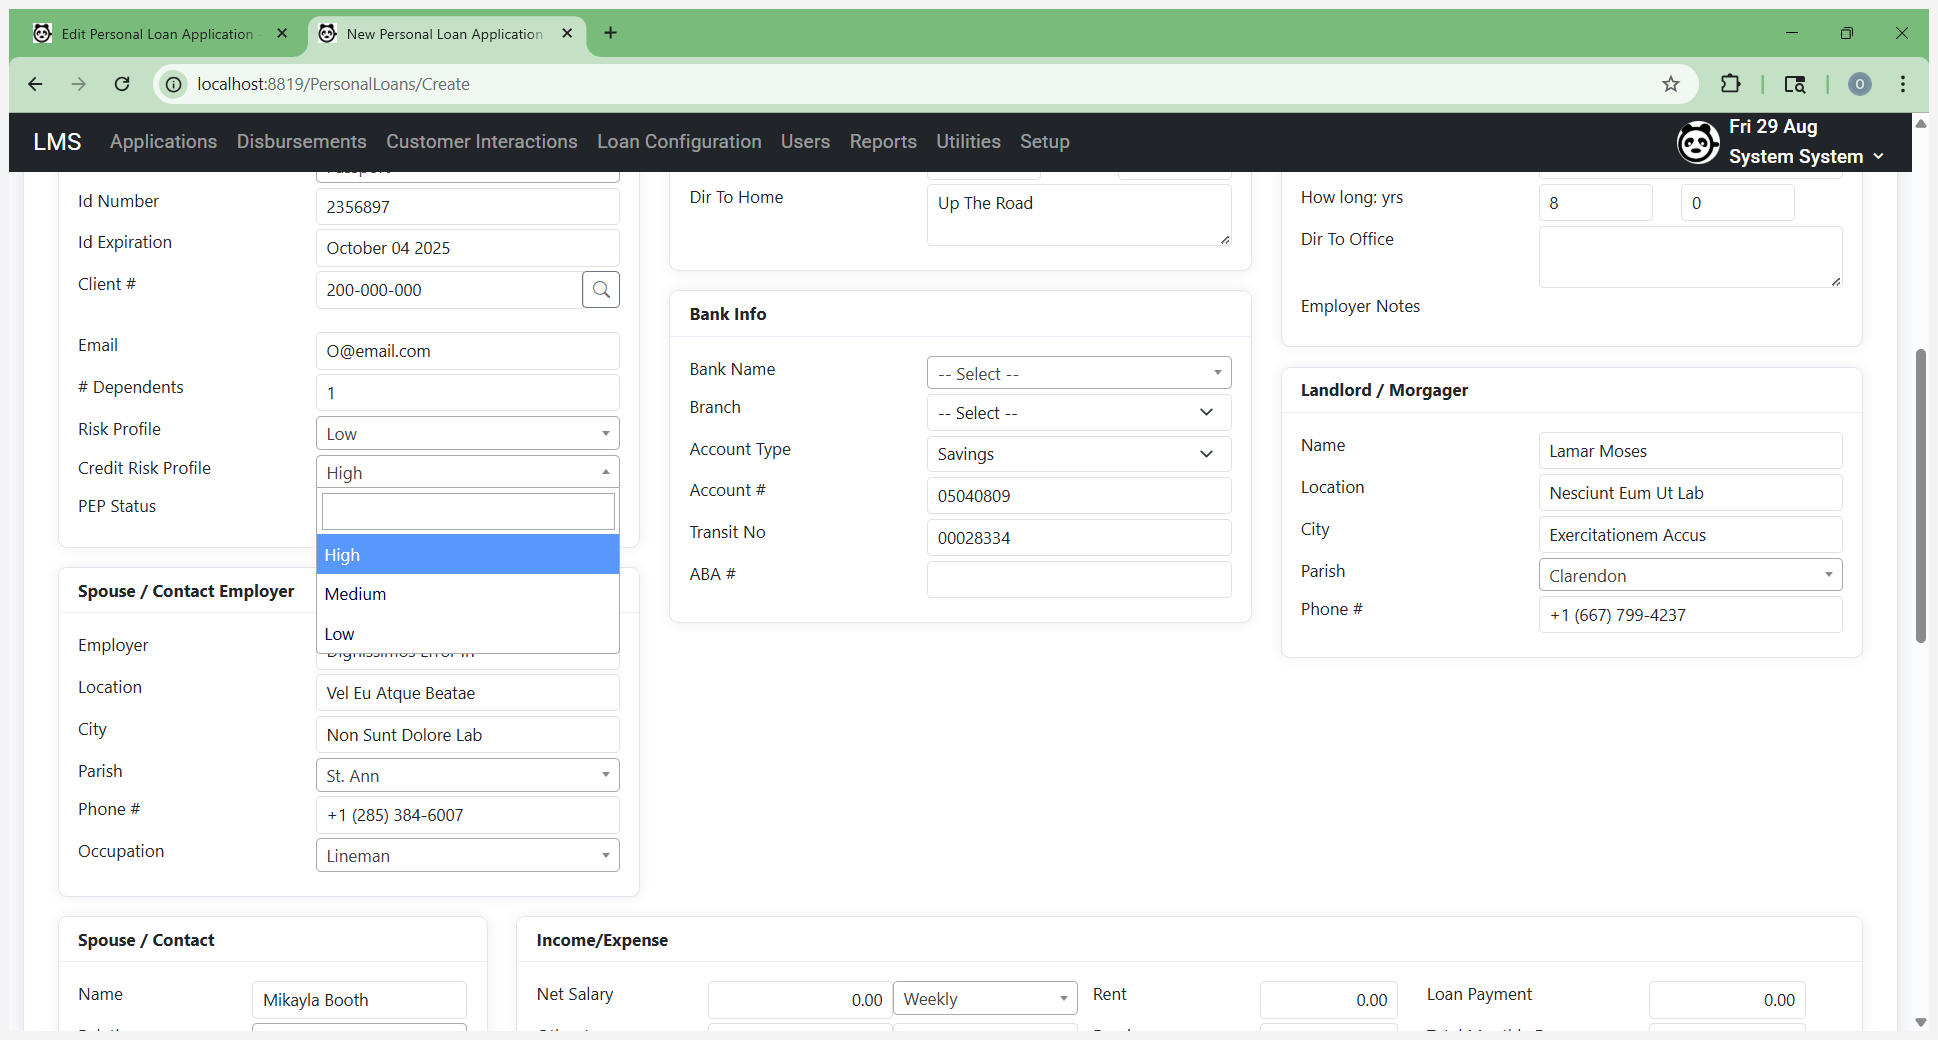
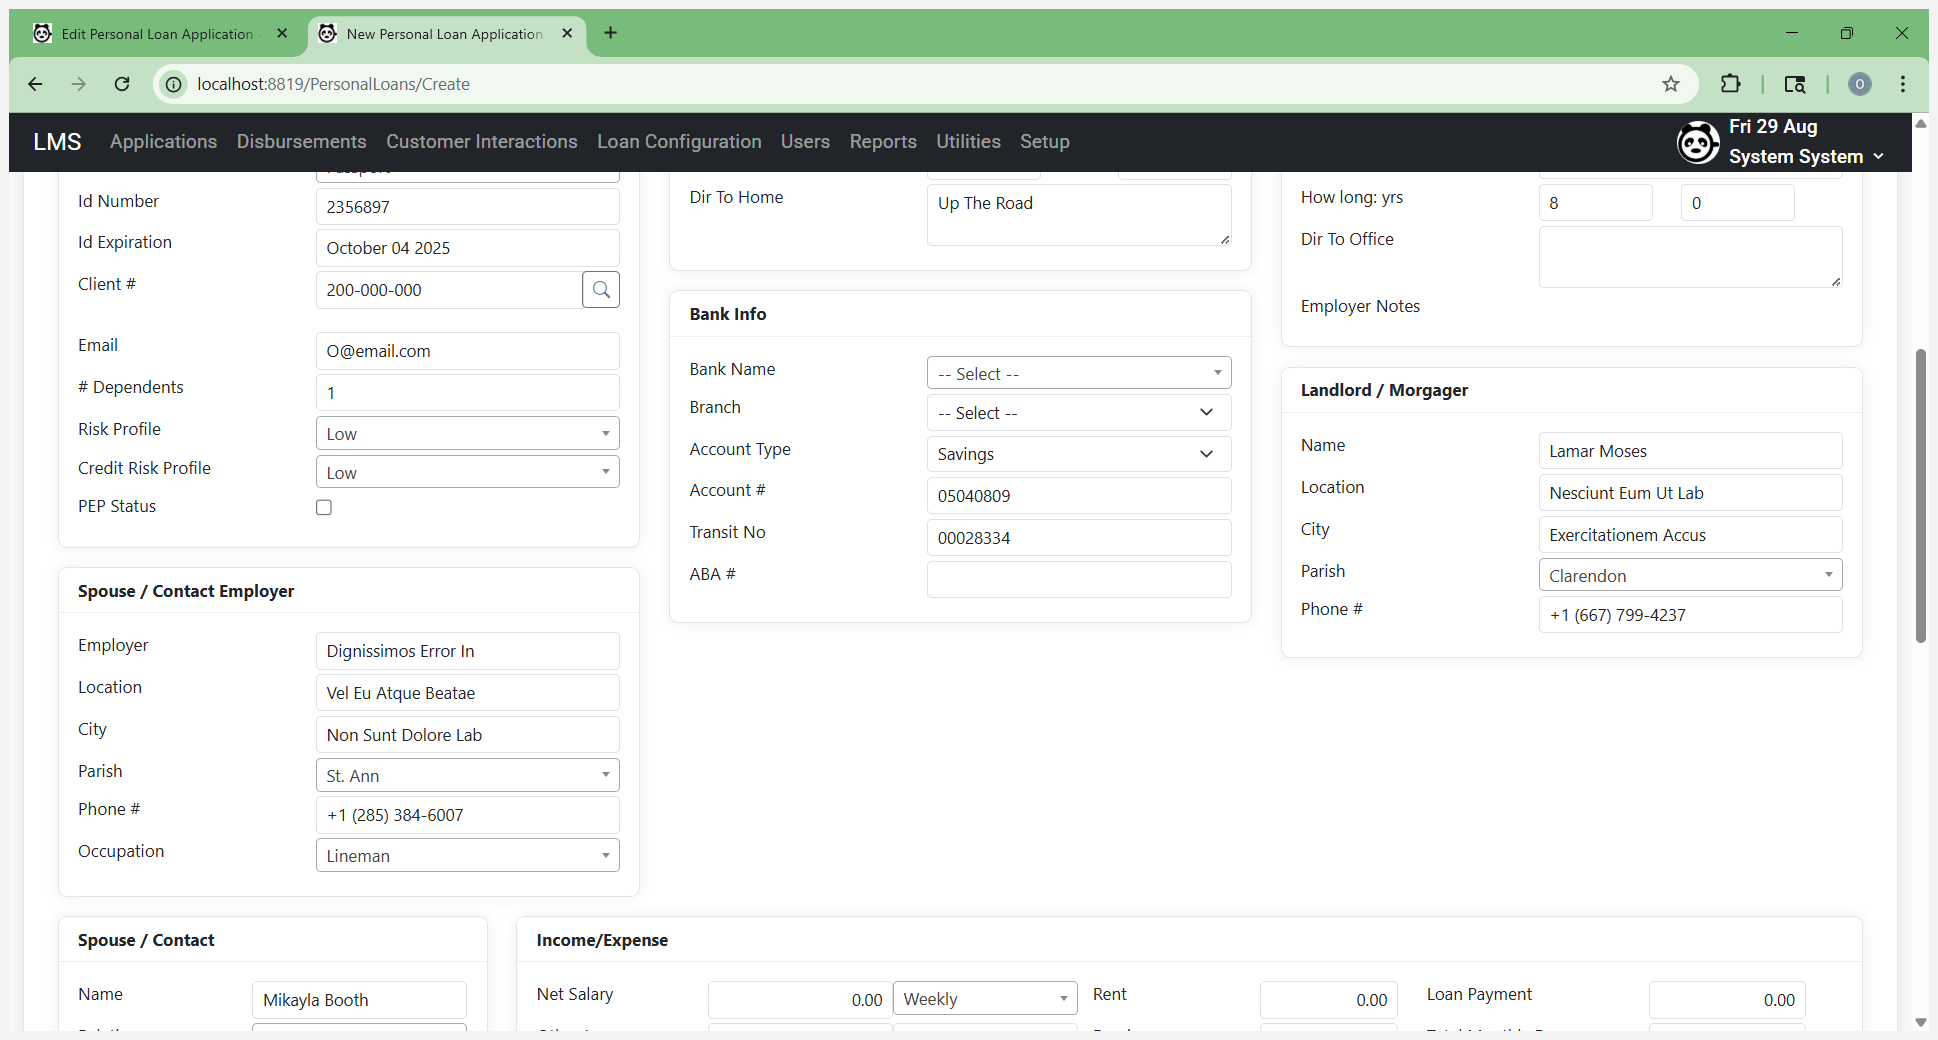
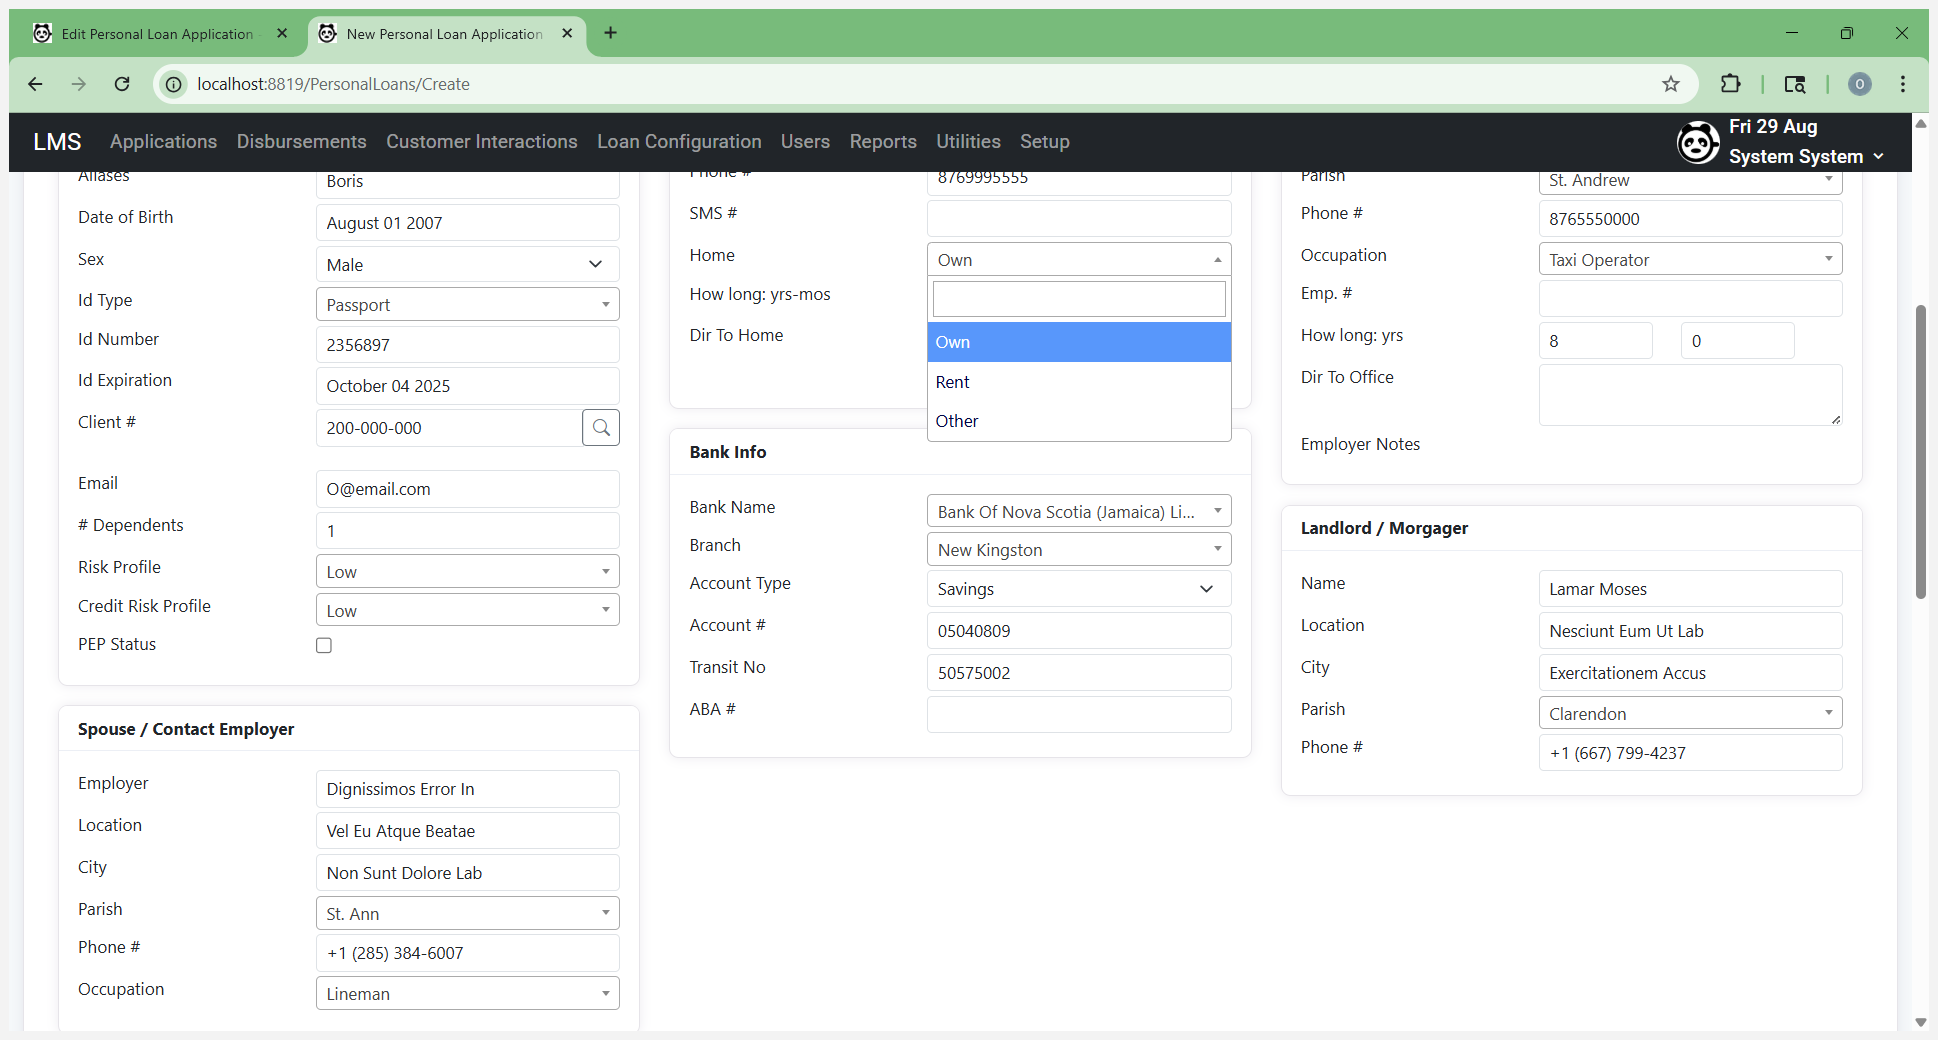
Once you receive the credit risk information, you can go back and edit or update it. Go to Address and enter the customer's employment information. Employers will appear in a searchable dropdown list. There will be pre-populated employers included as part of the LMS system.
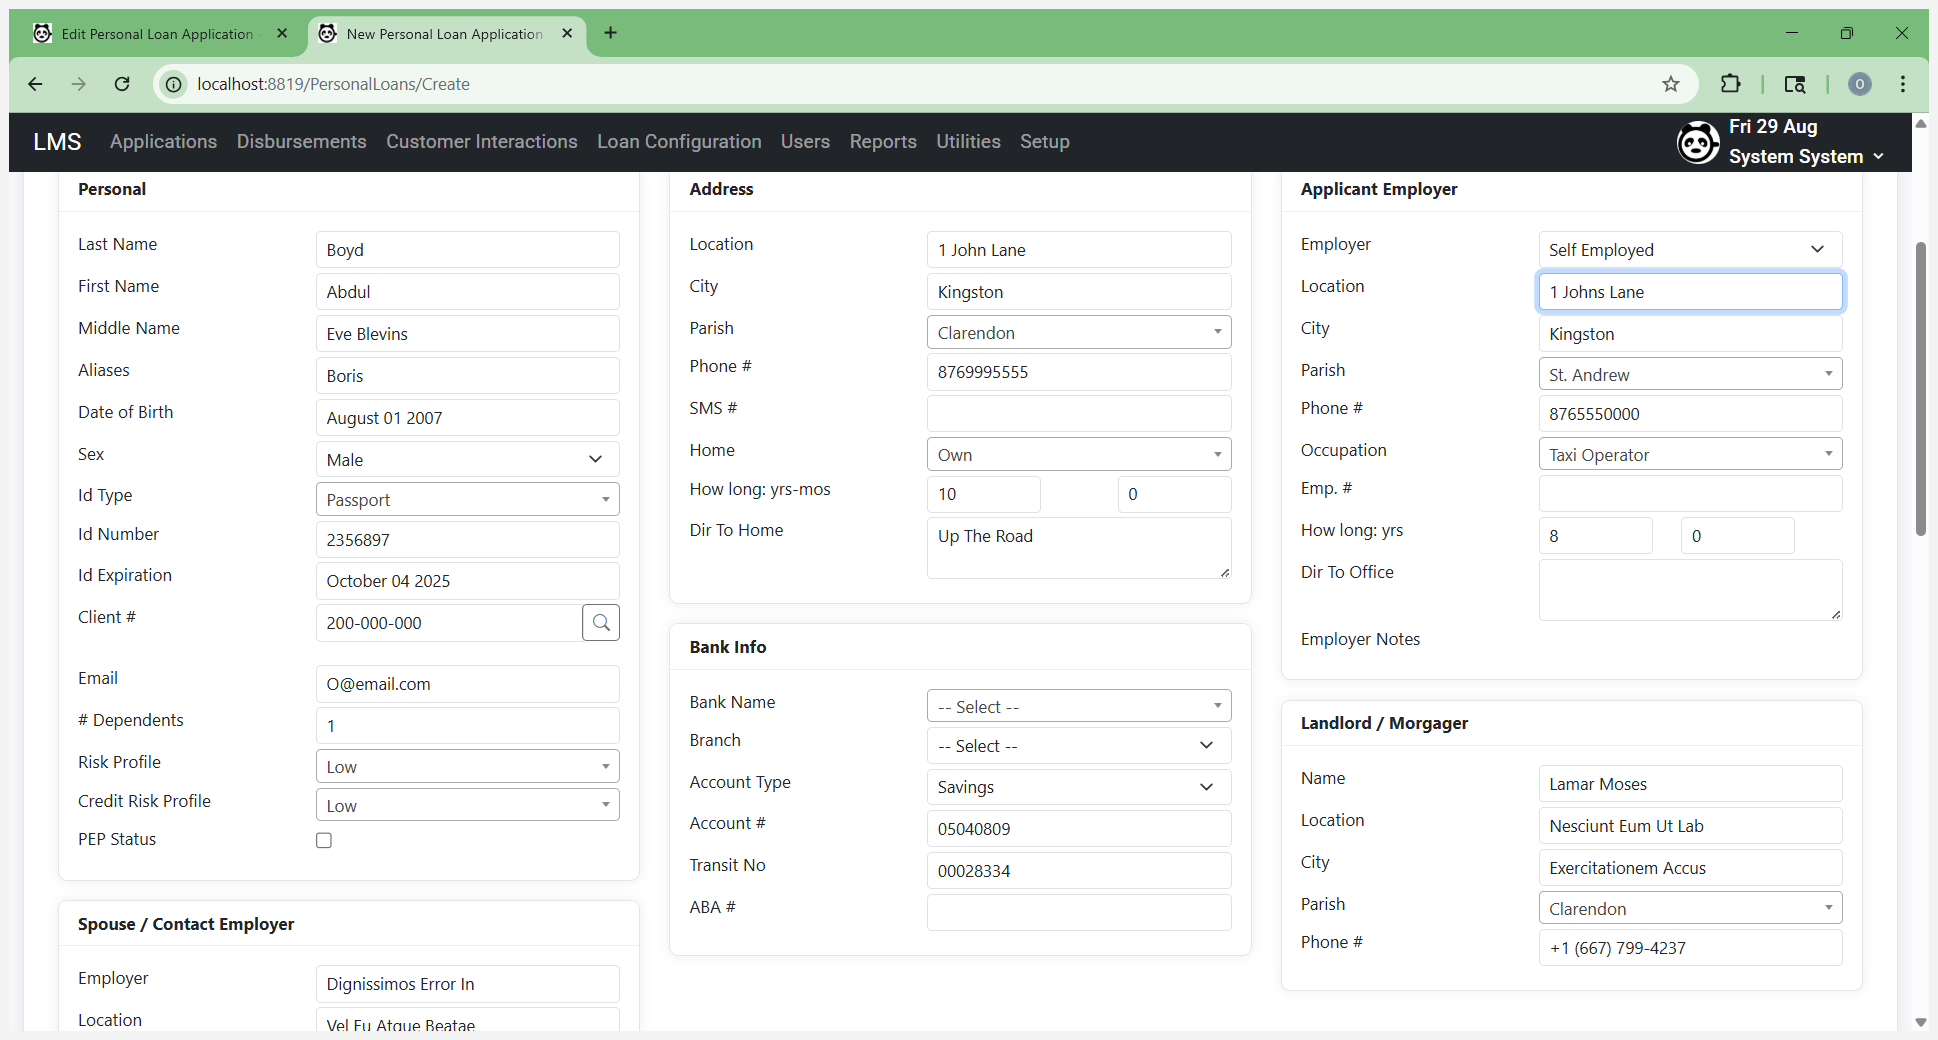
Select your banking information.
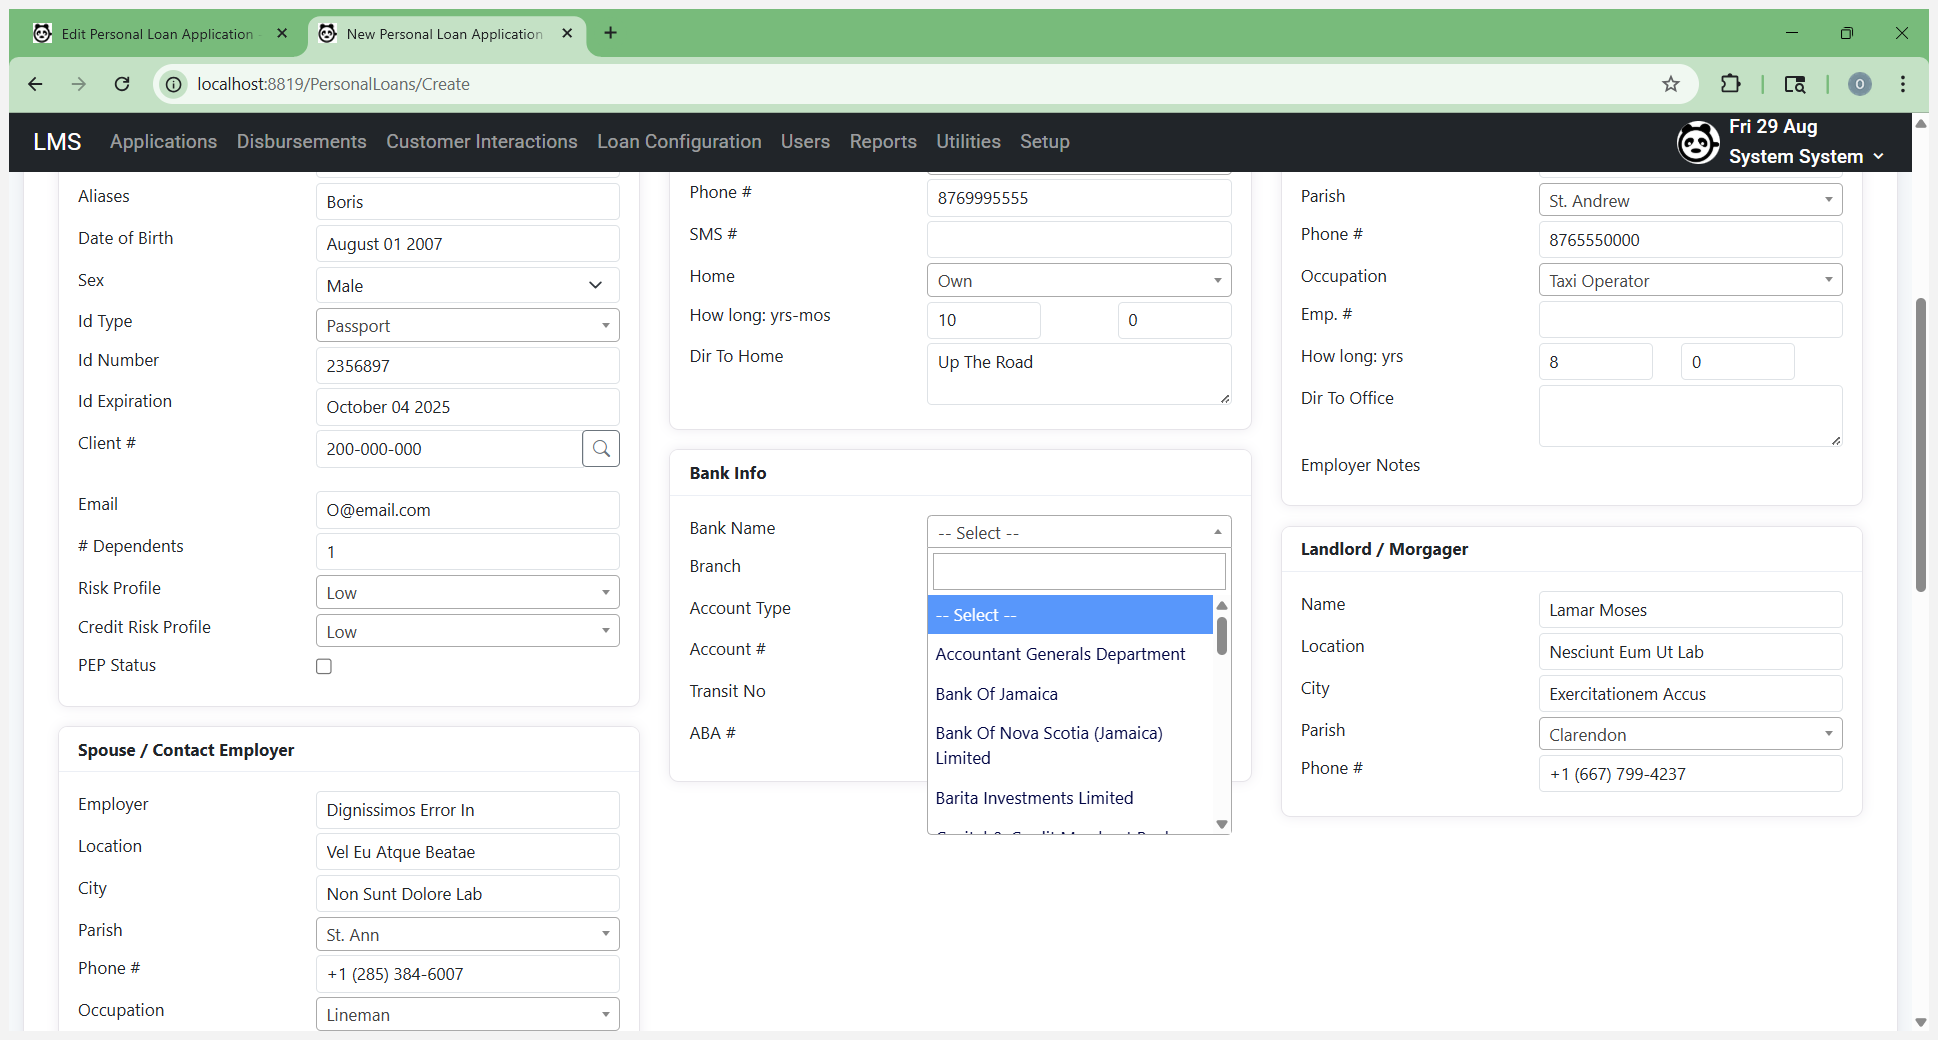

This is important for the disbursement process and the automated generation of files used by that process.
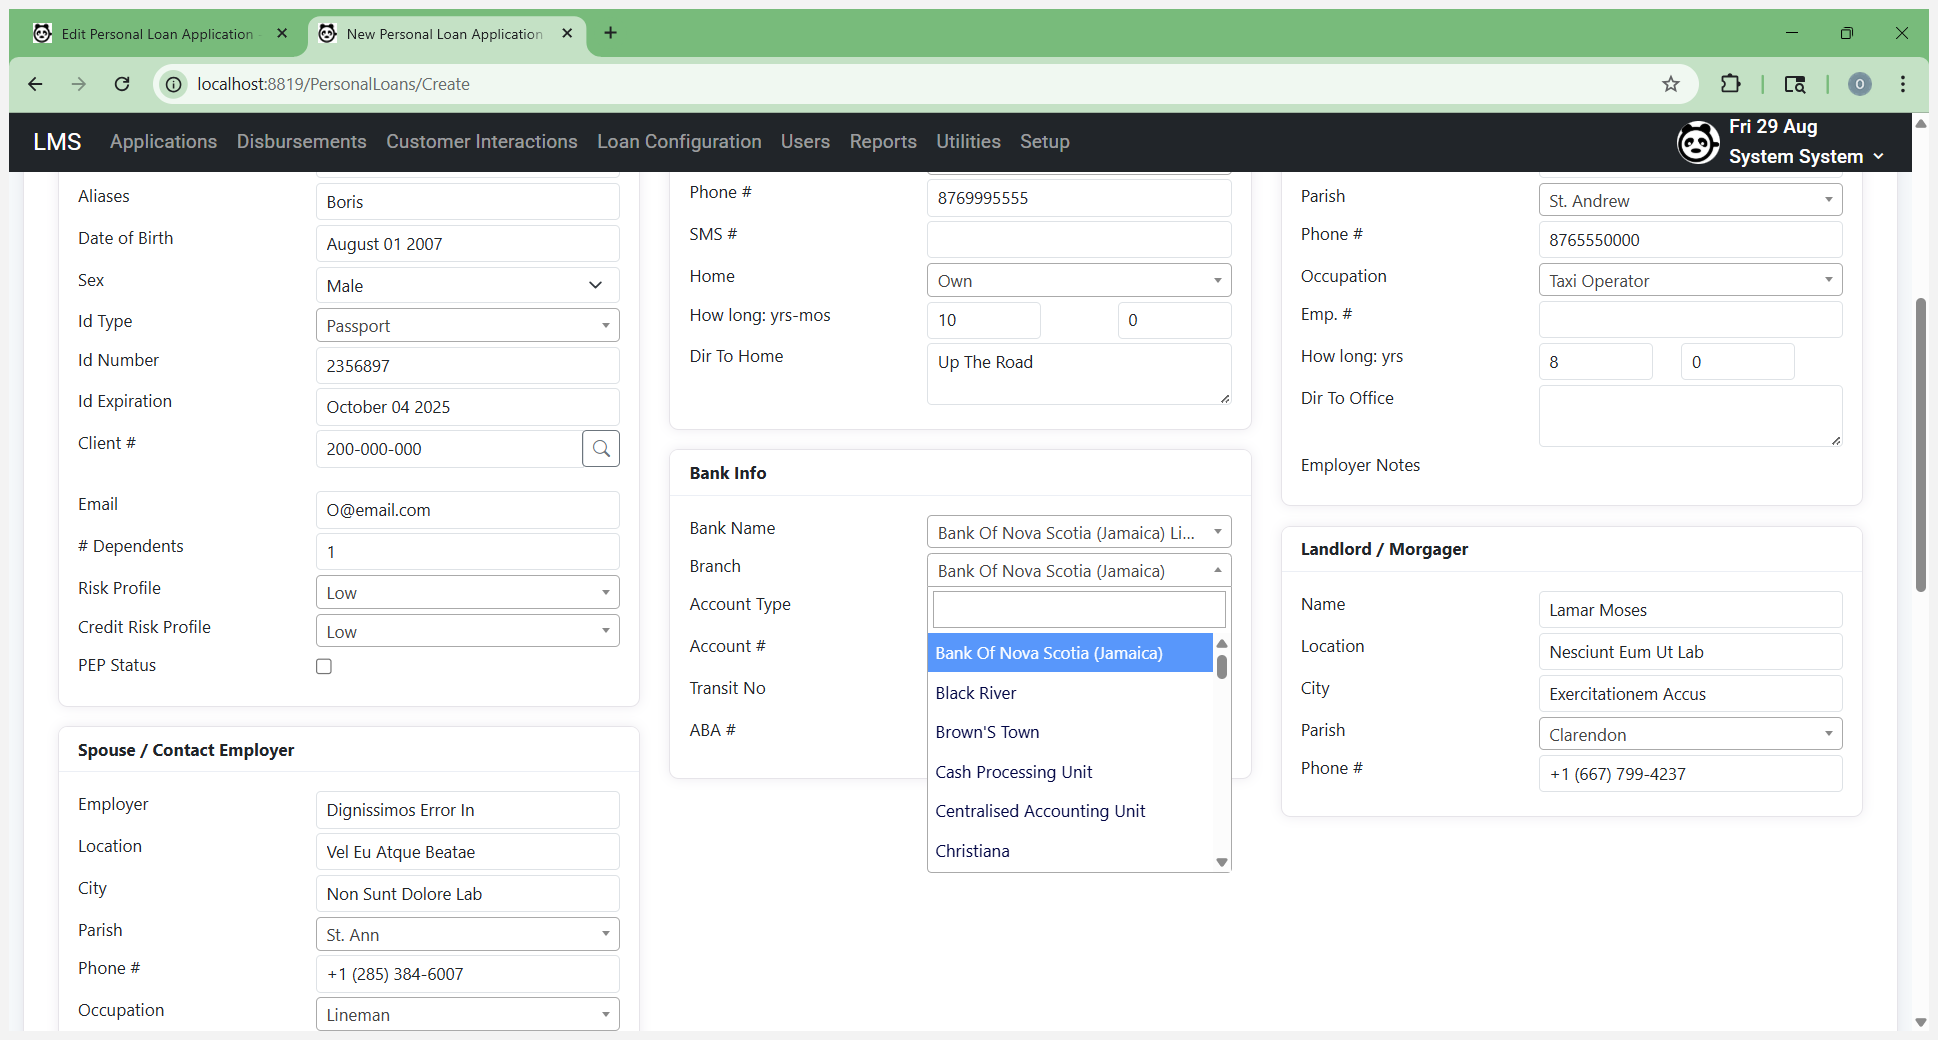
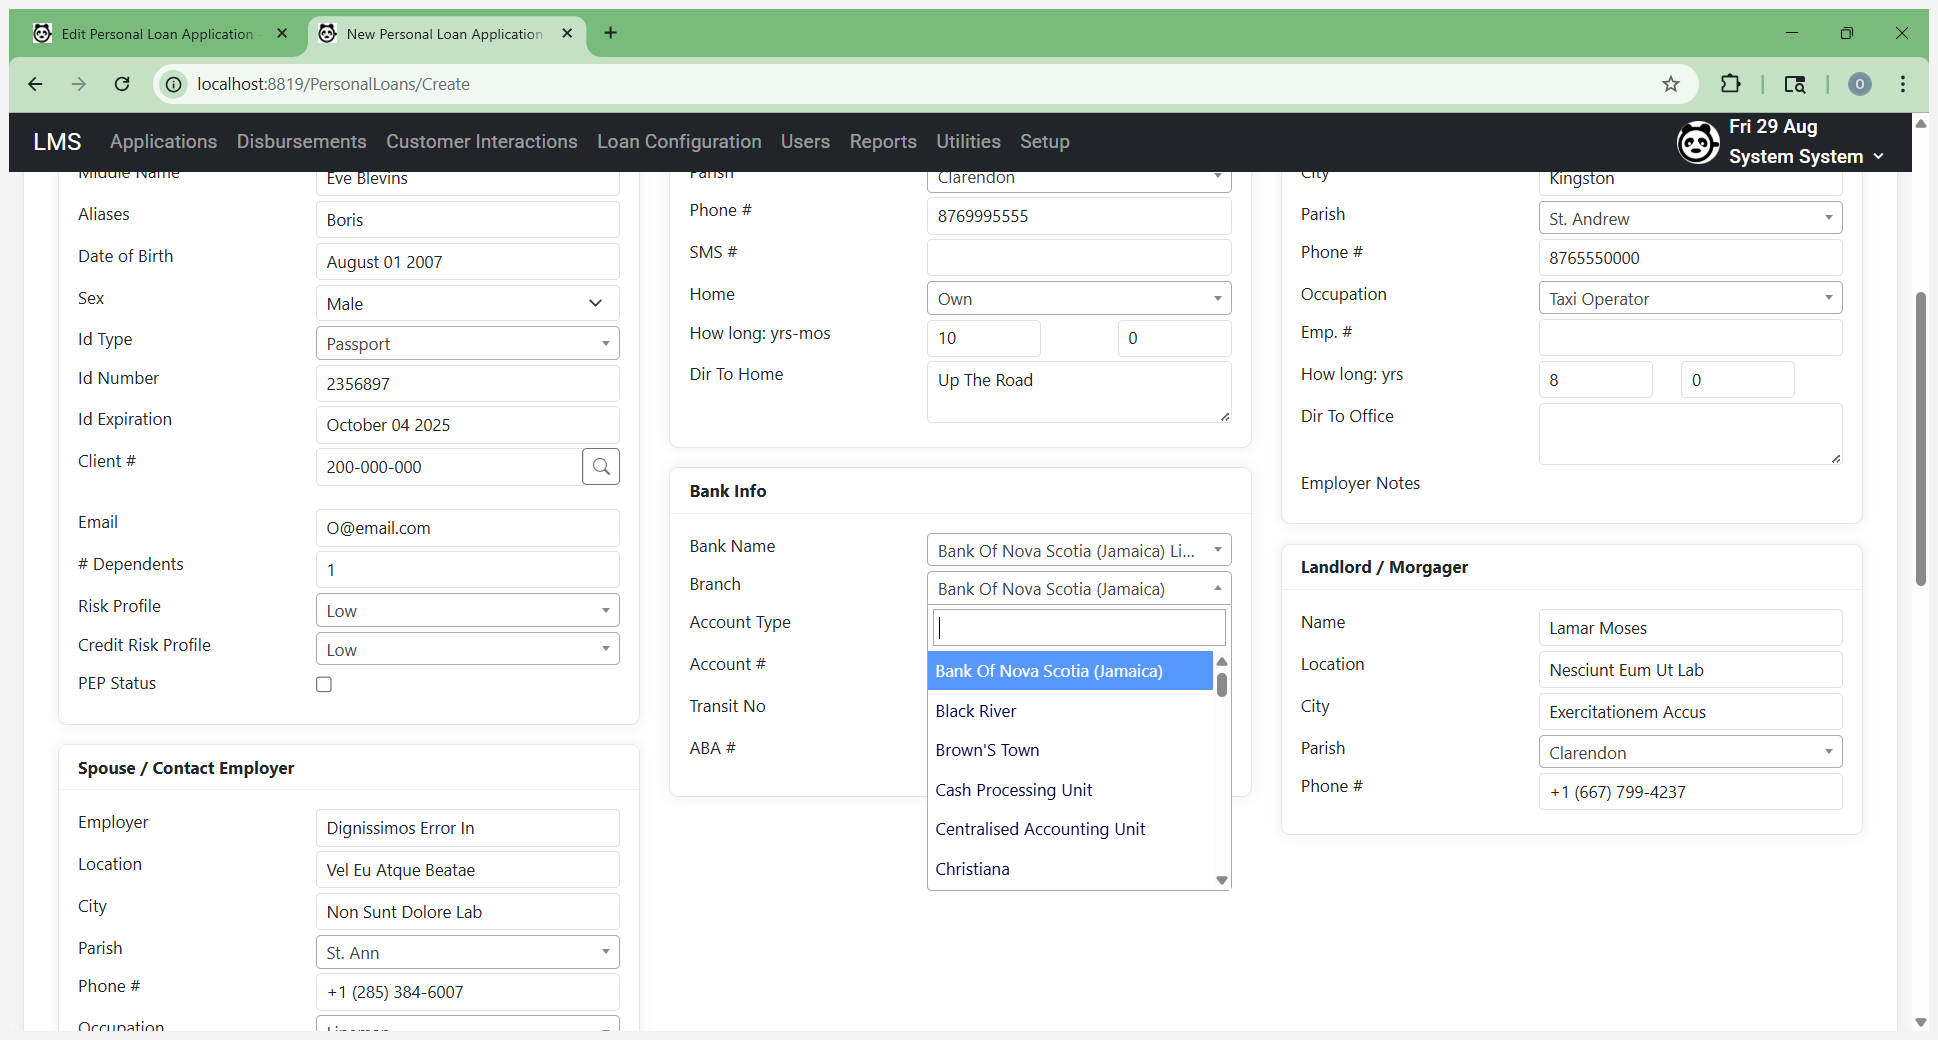
It will automatically fill in a transit number.

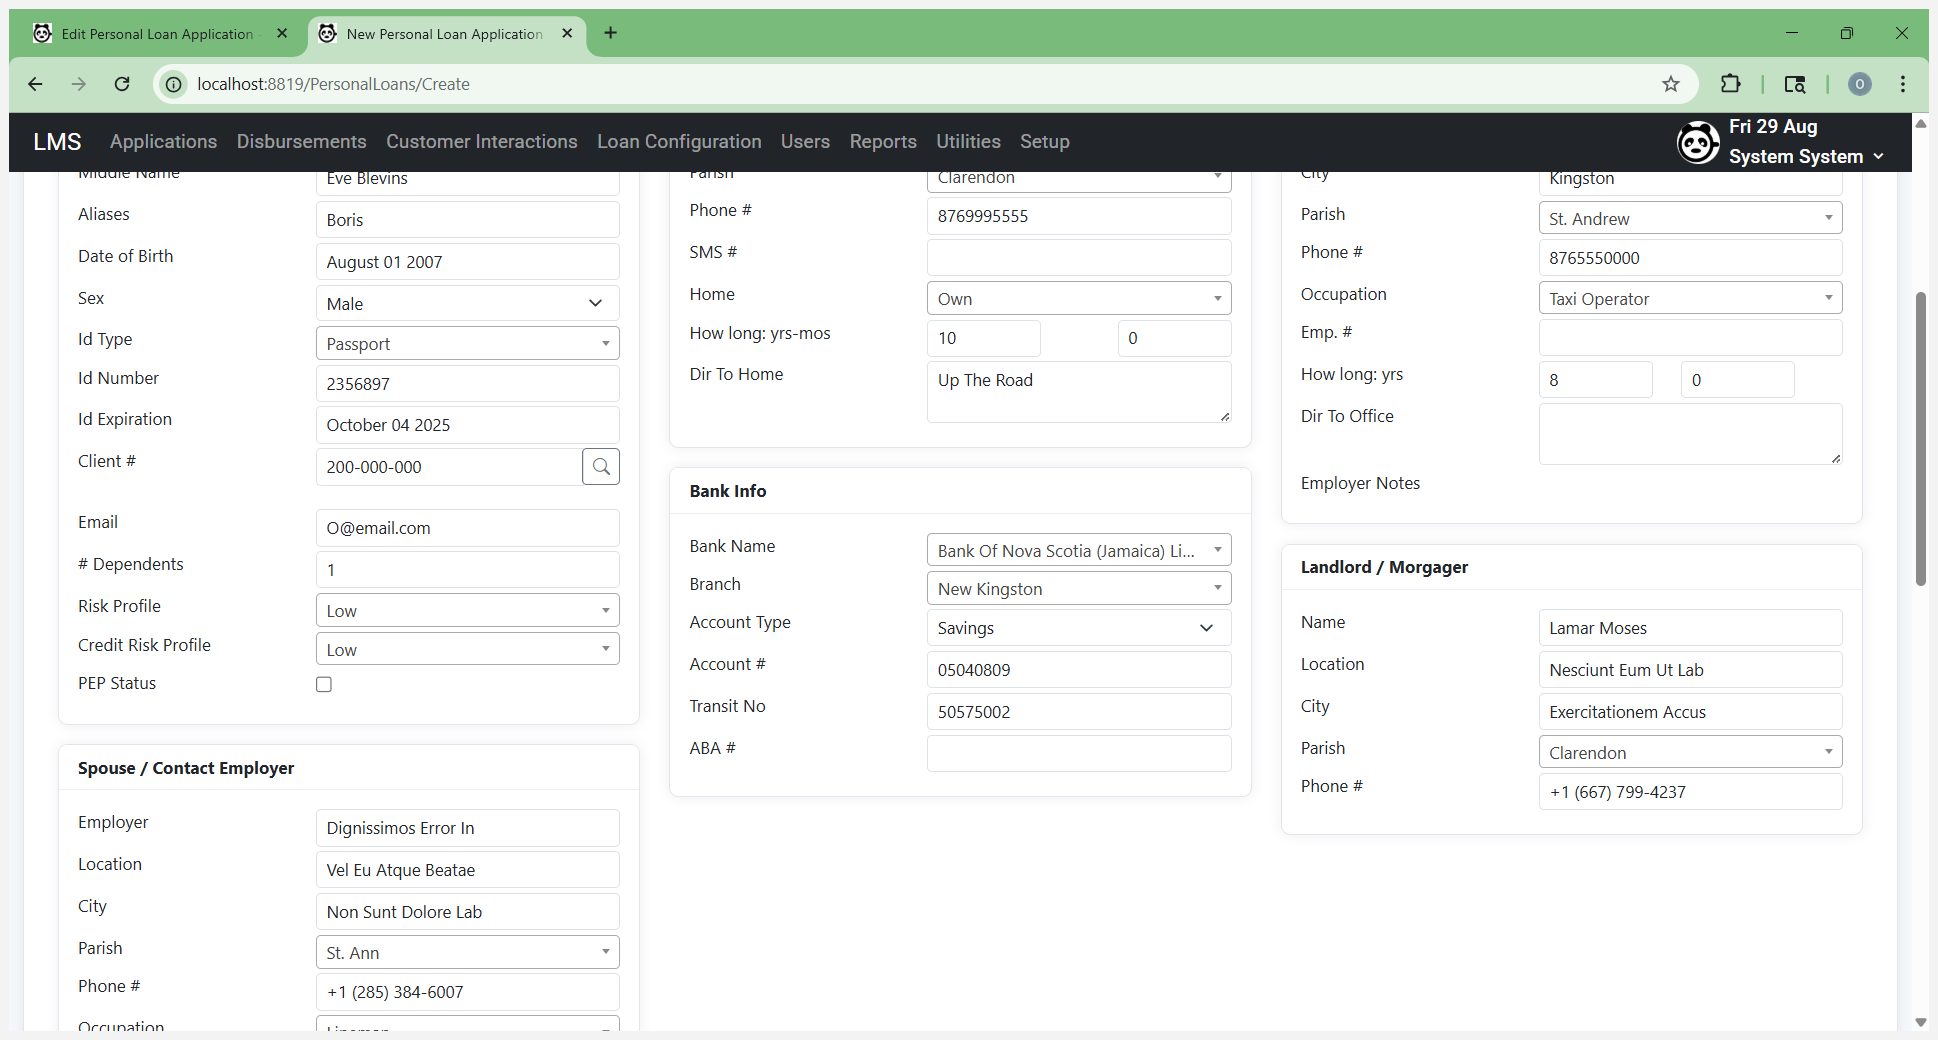
ABA isn't something that is automatically filled in, and if you're not using it, you don't have to enter it. Fill in the landlord details if required.
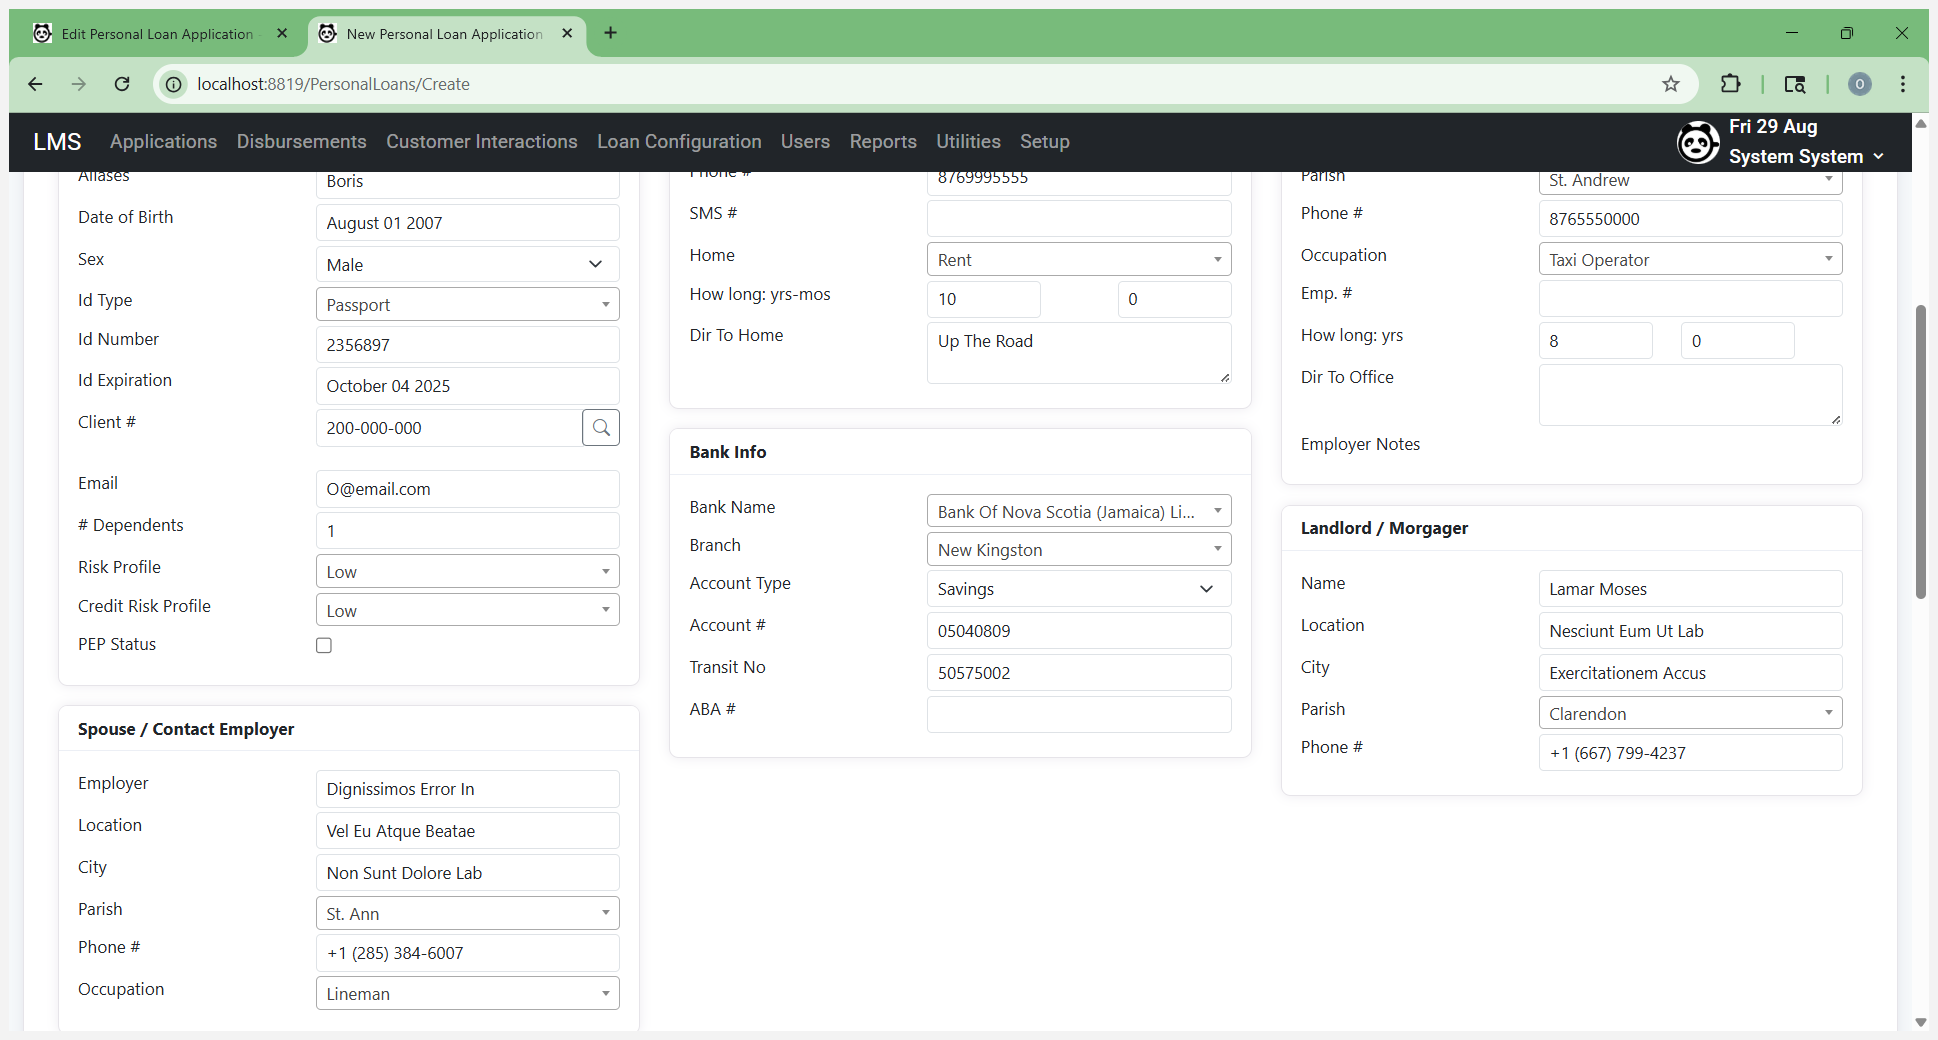
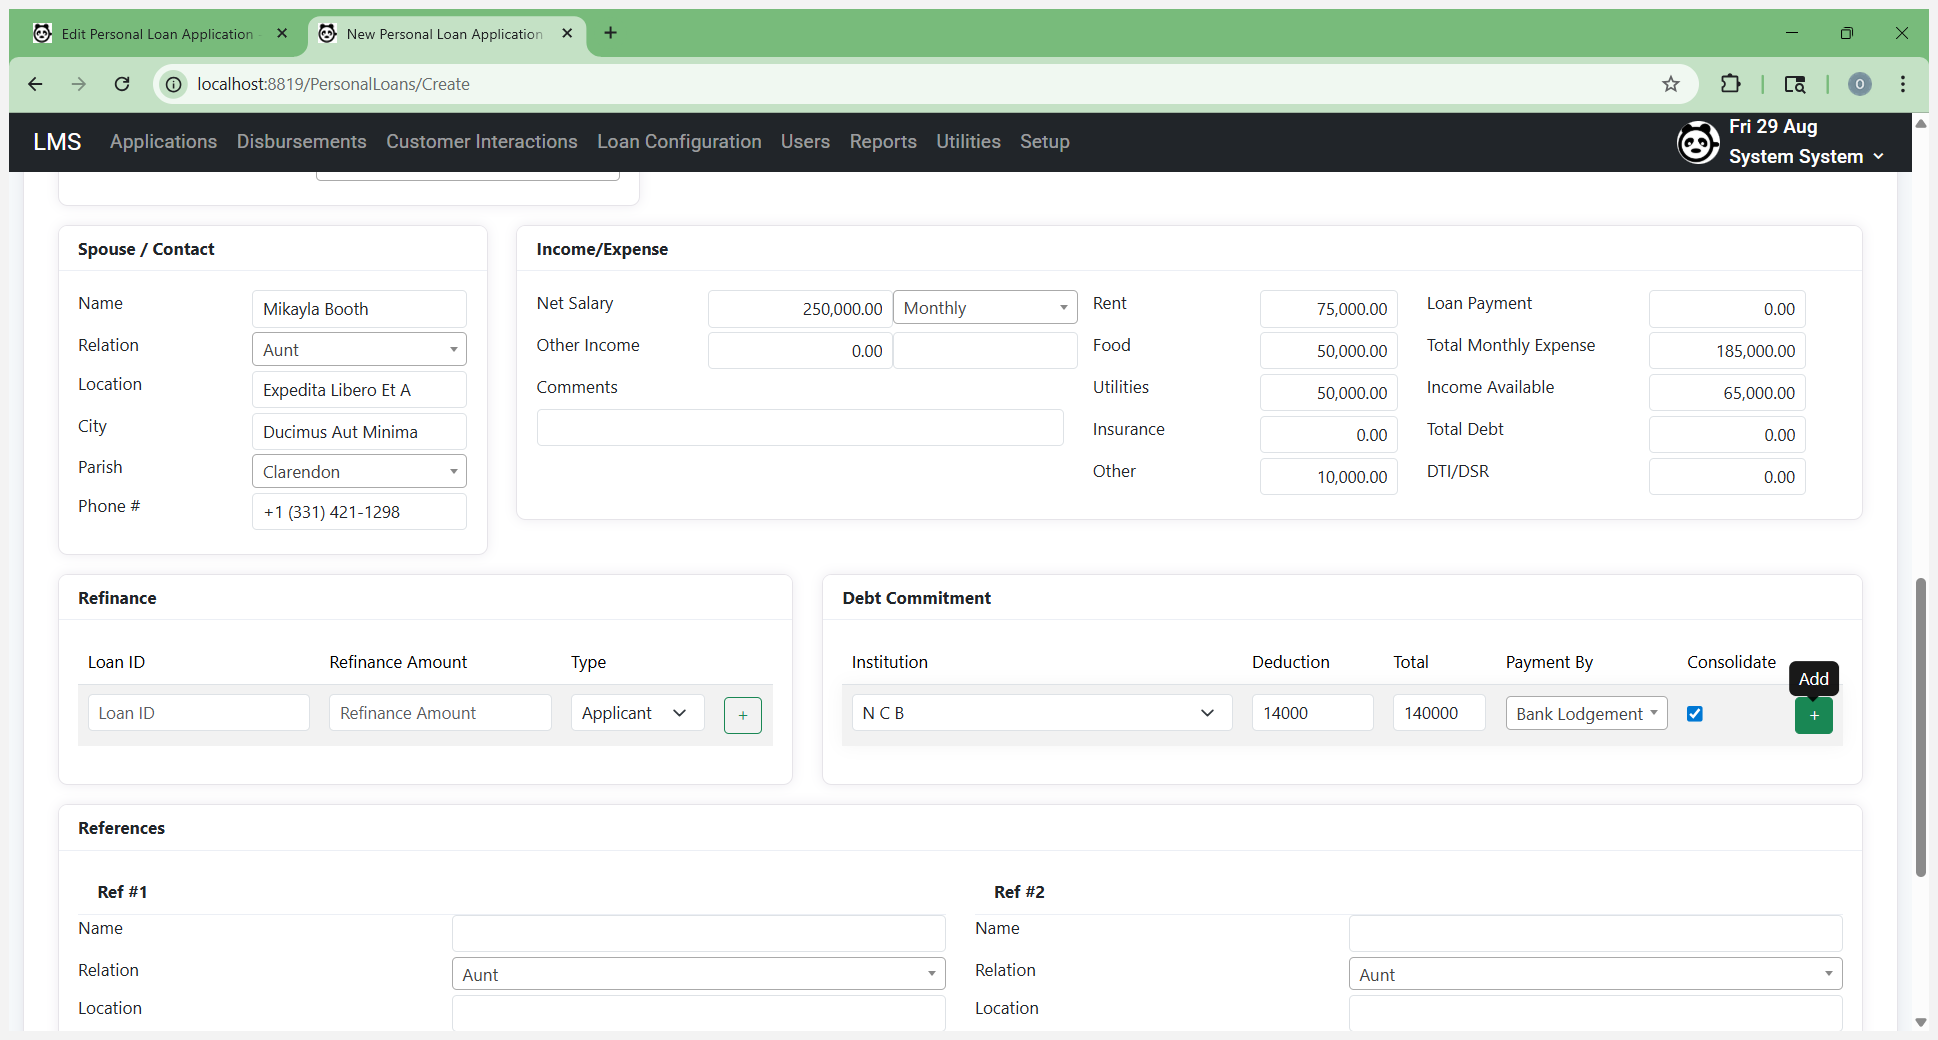
Enter your spouse's or contact's information. Now we come to income and expenses.
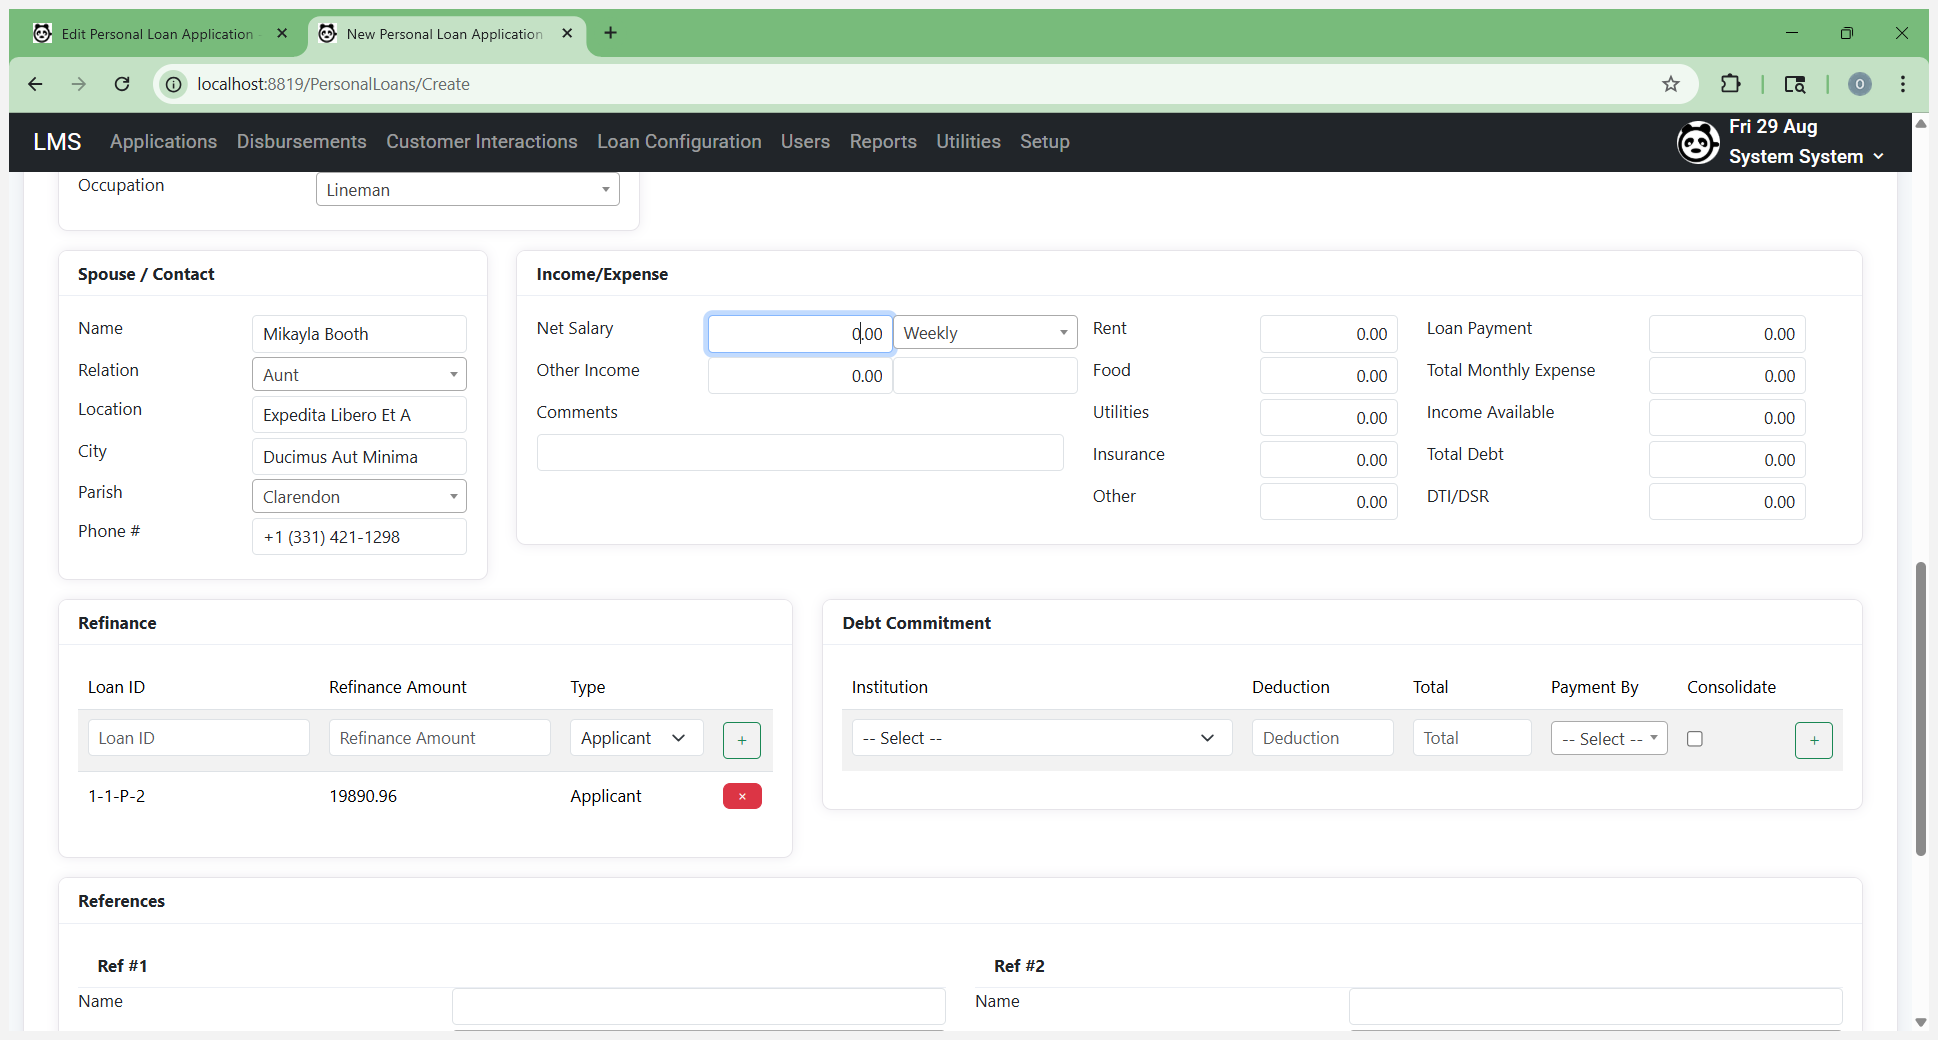

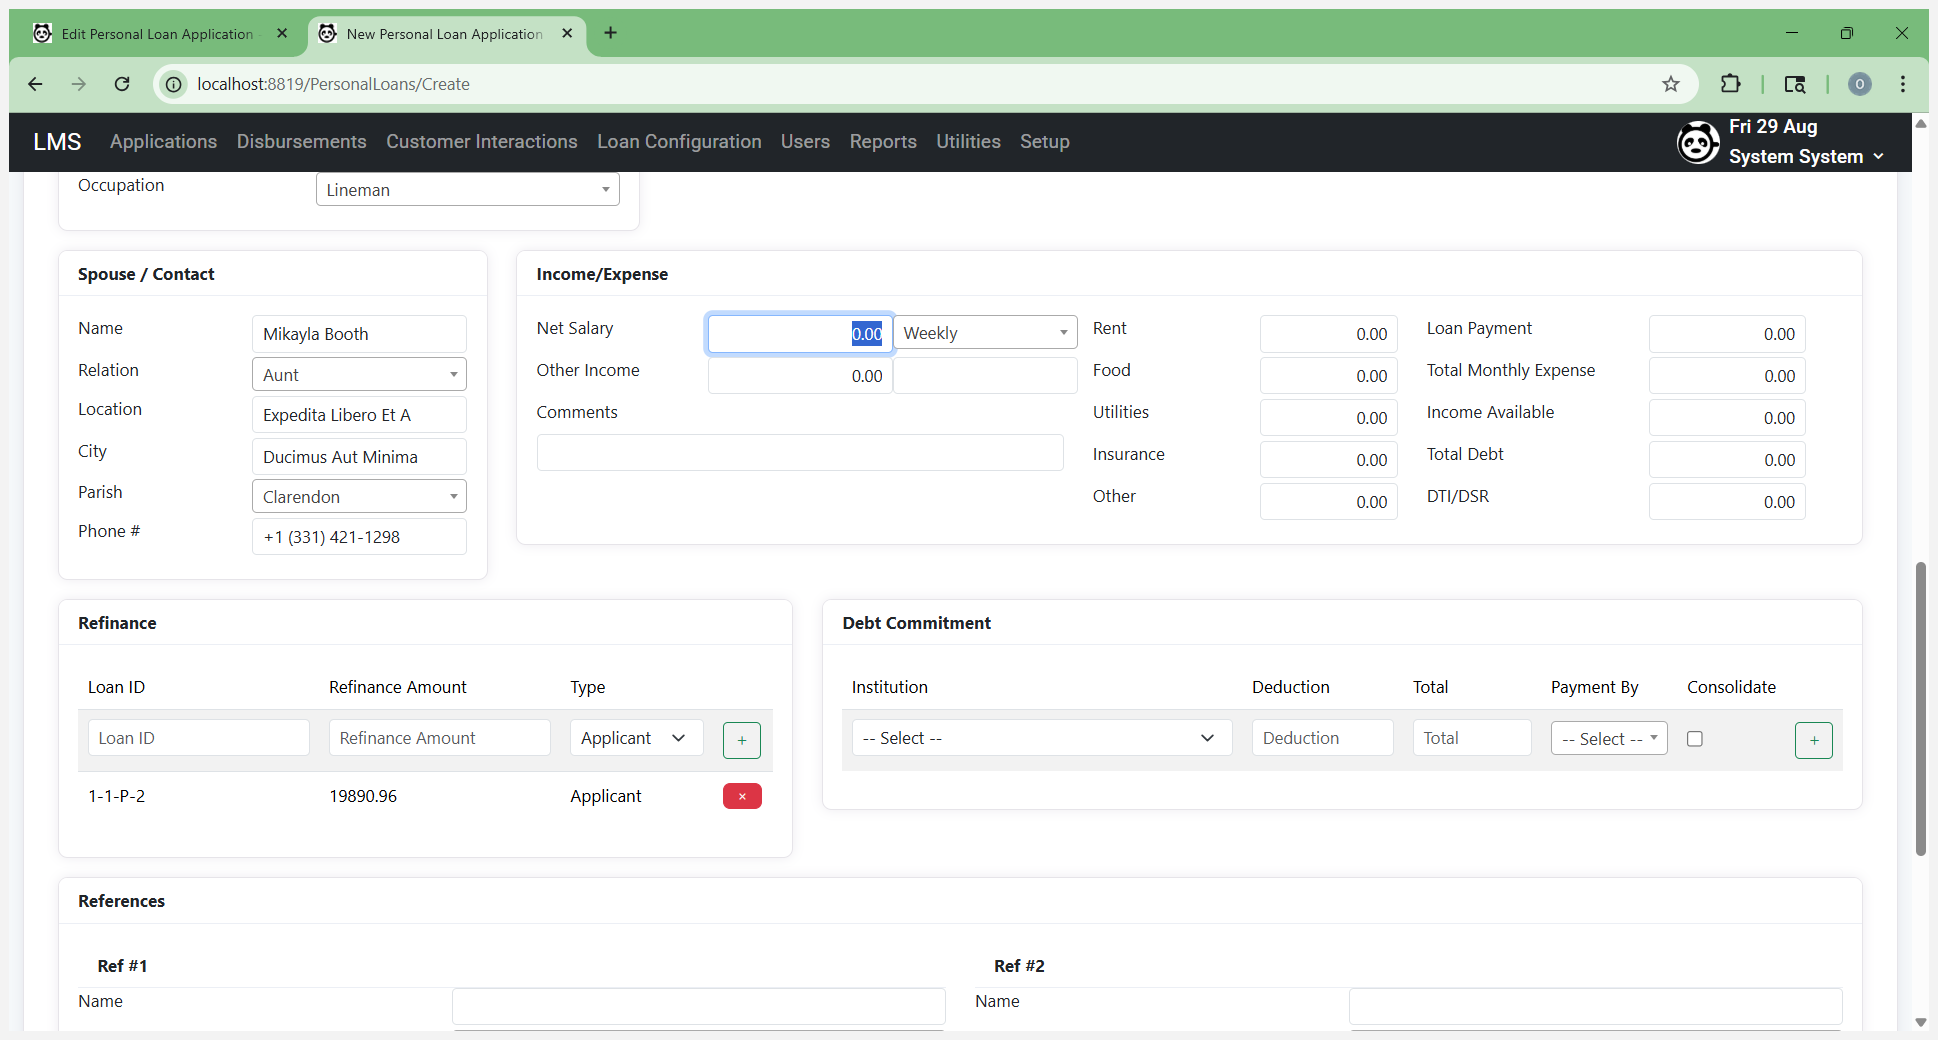
This calculates the available income used in the worksheet to determine repayment capacity. Enter the person's net salary. You can find this on the pay stub or by verifying their income.

Enter the amount and specify how often they receive it.
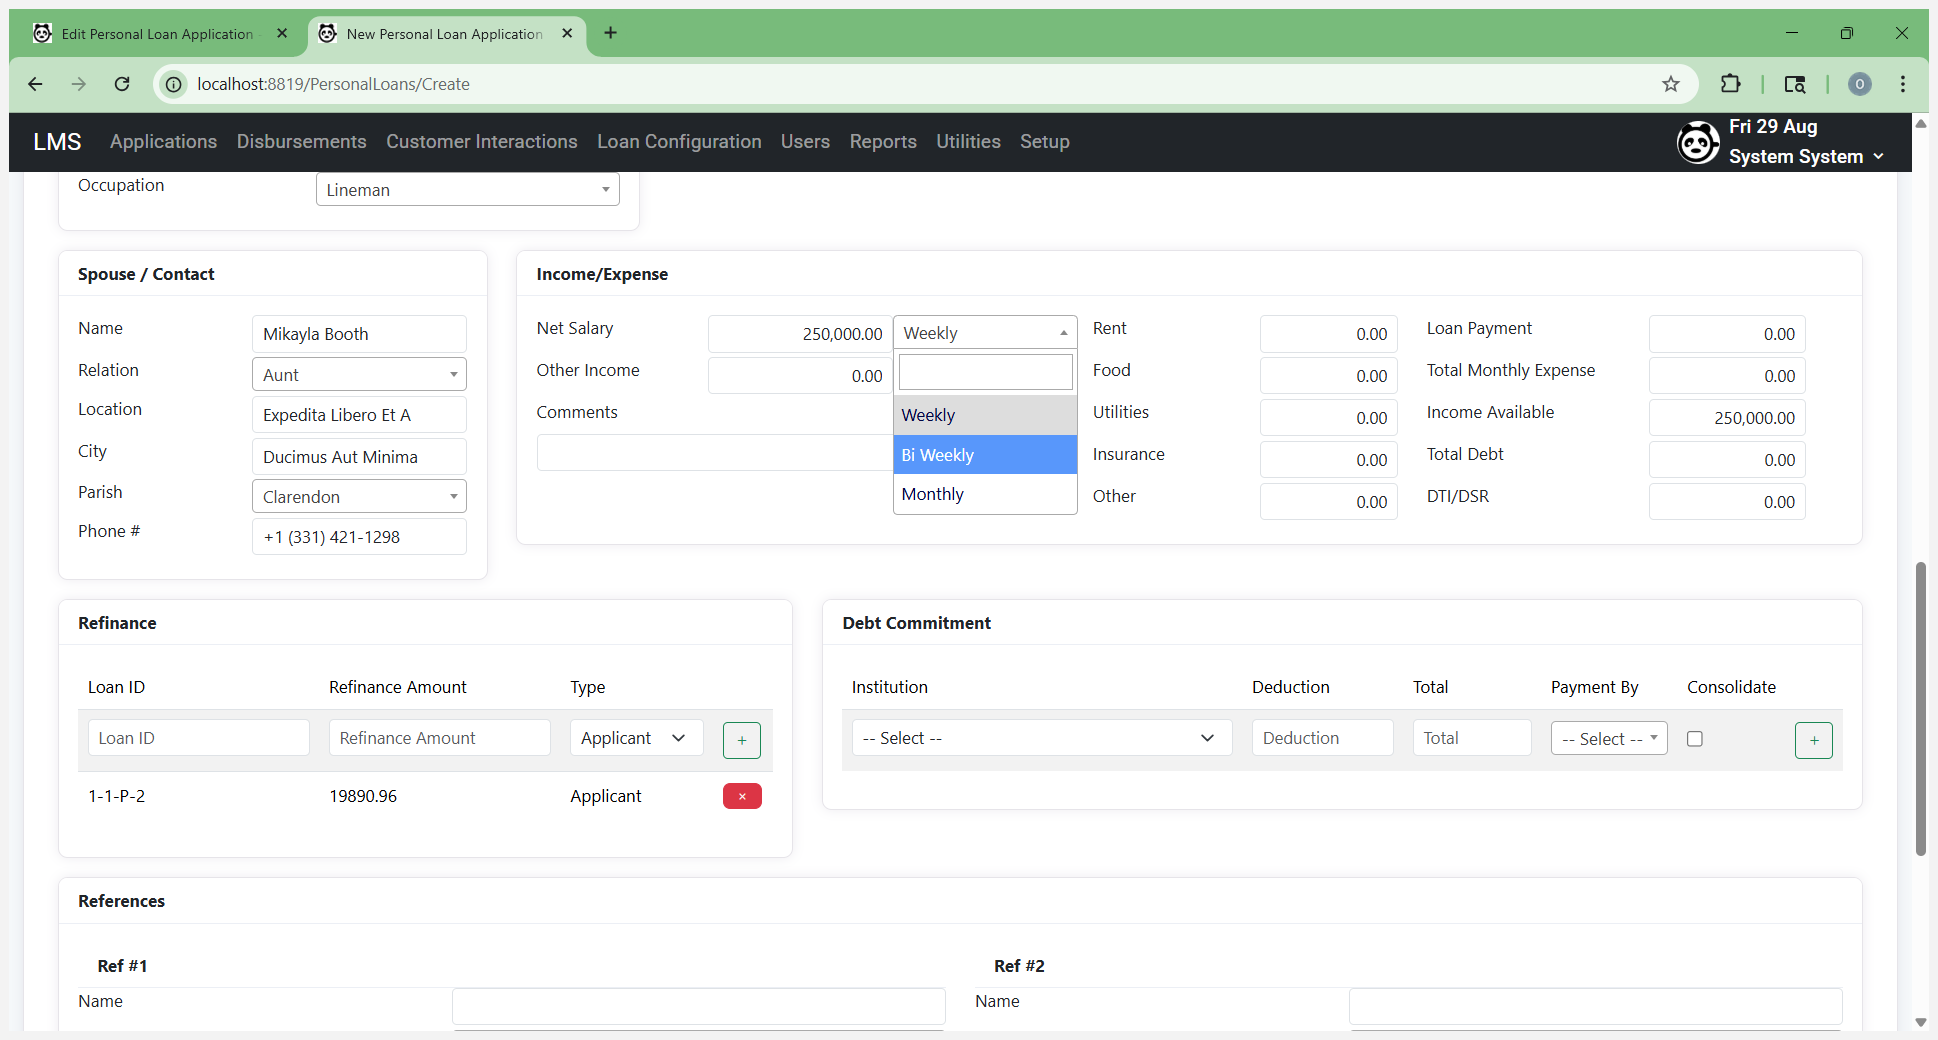
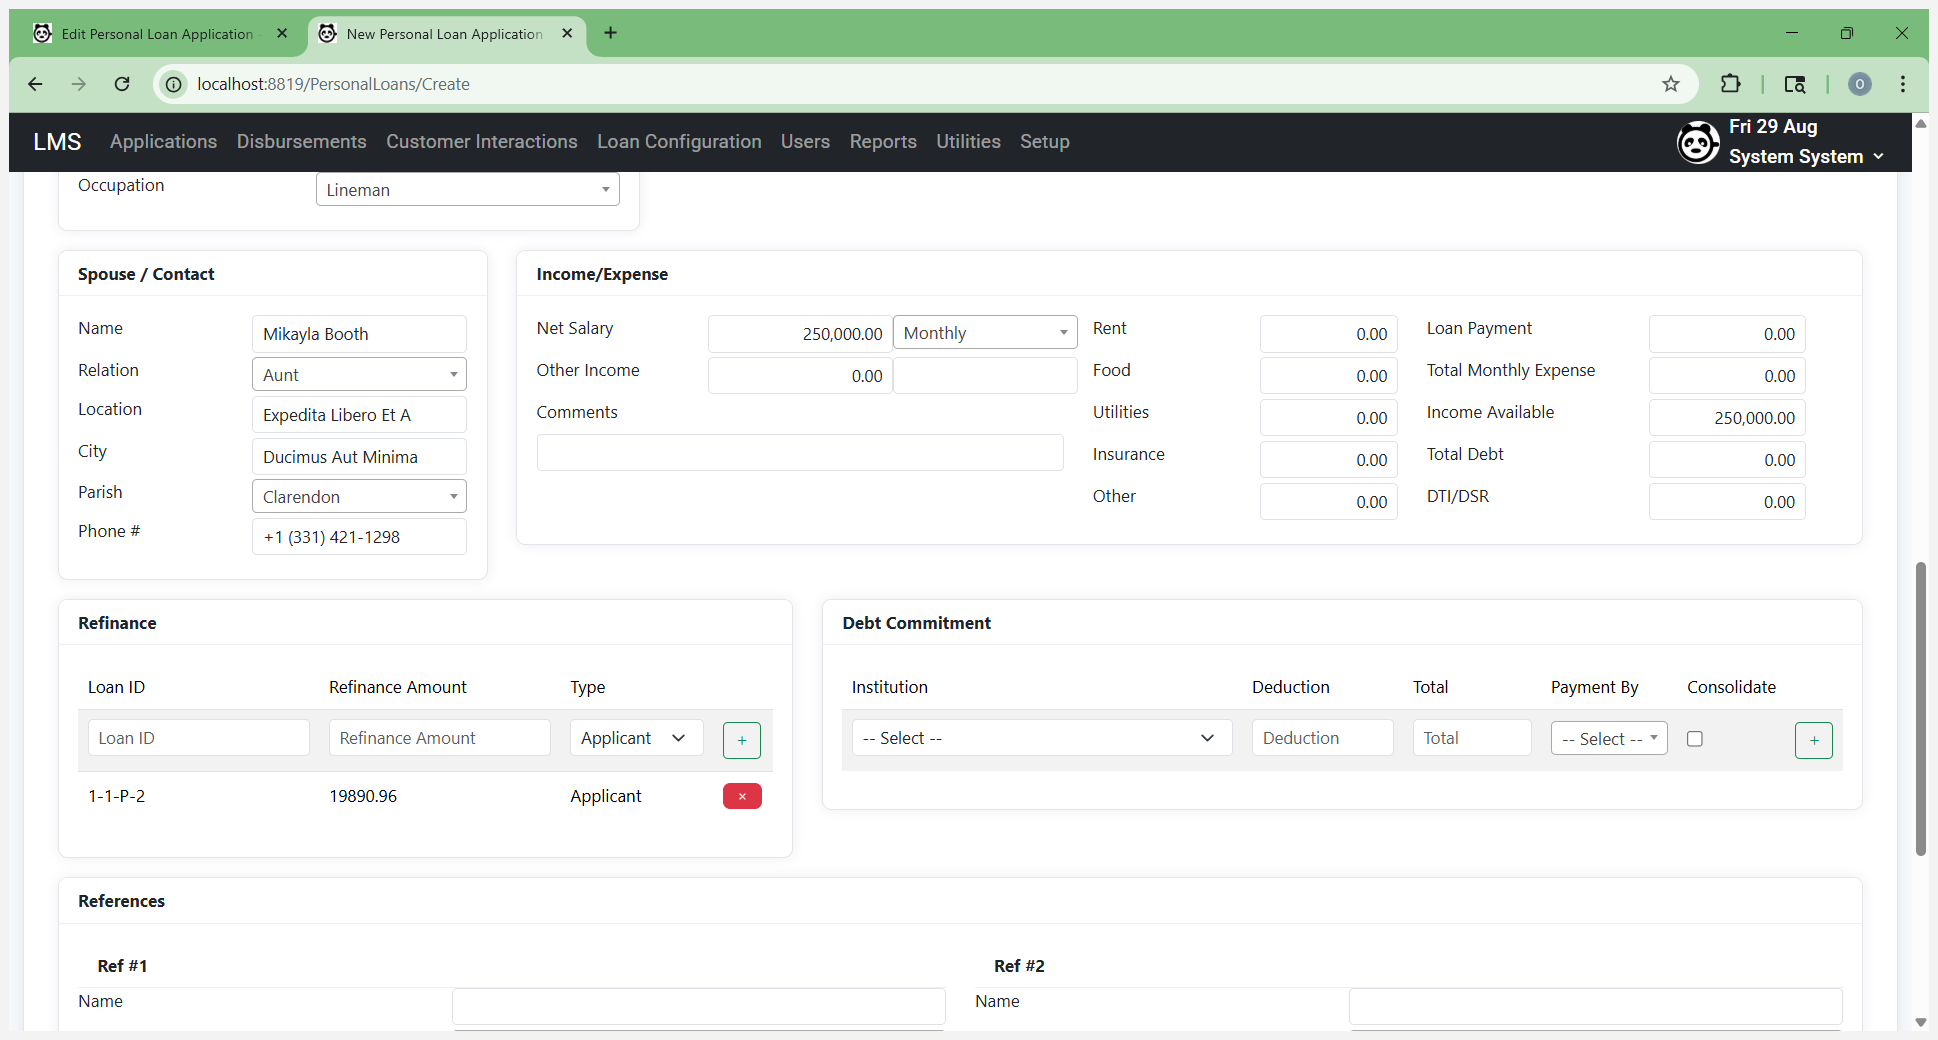
You can also make additional deductions from it.
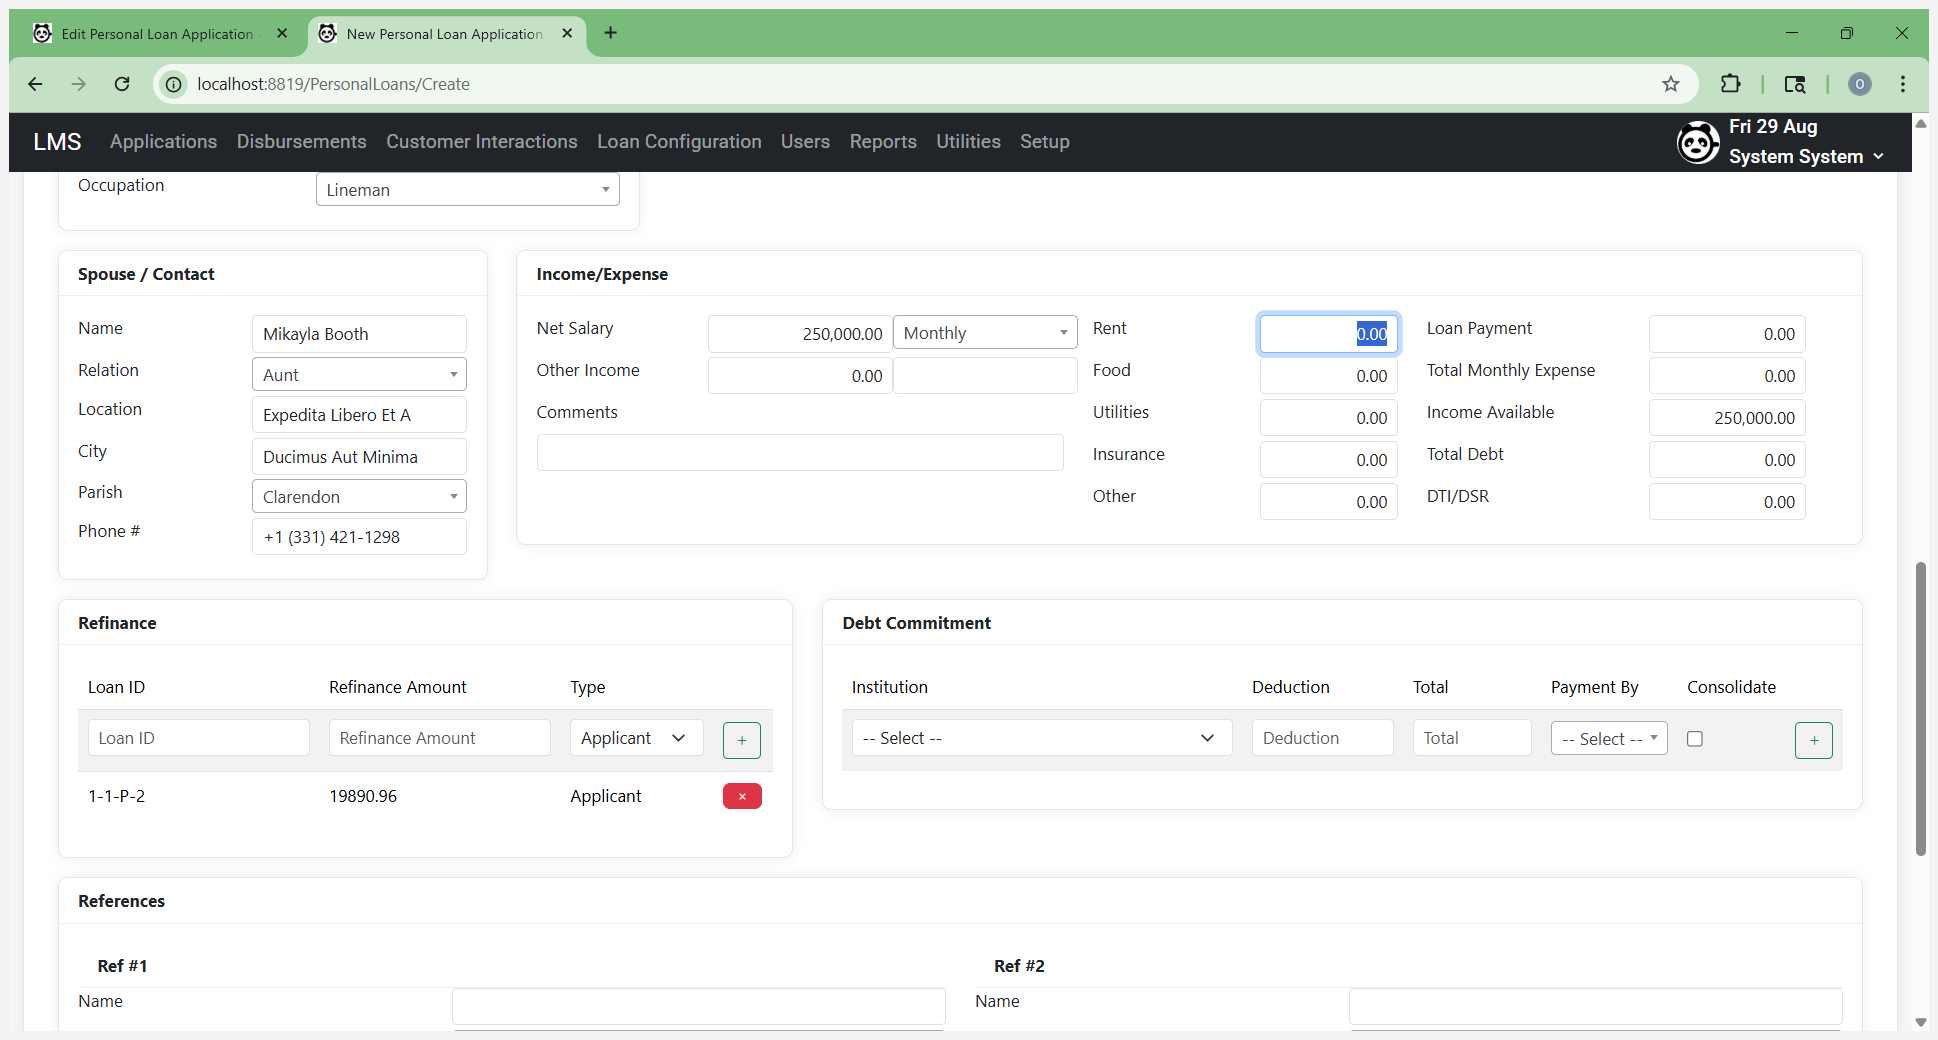
For example, if they have rent, enter "rent."
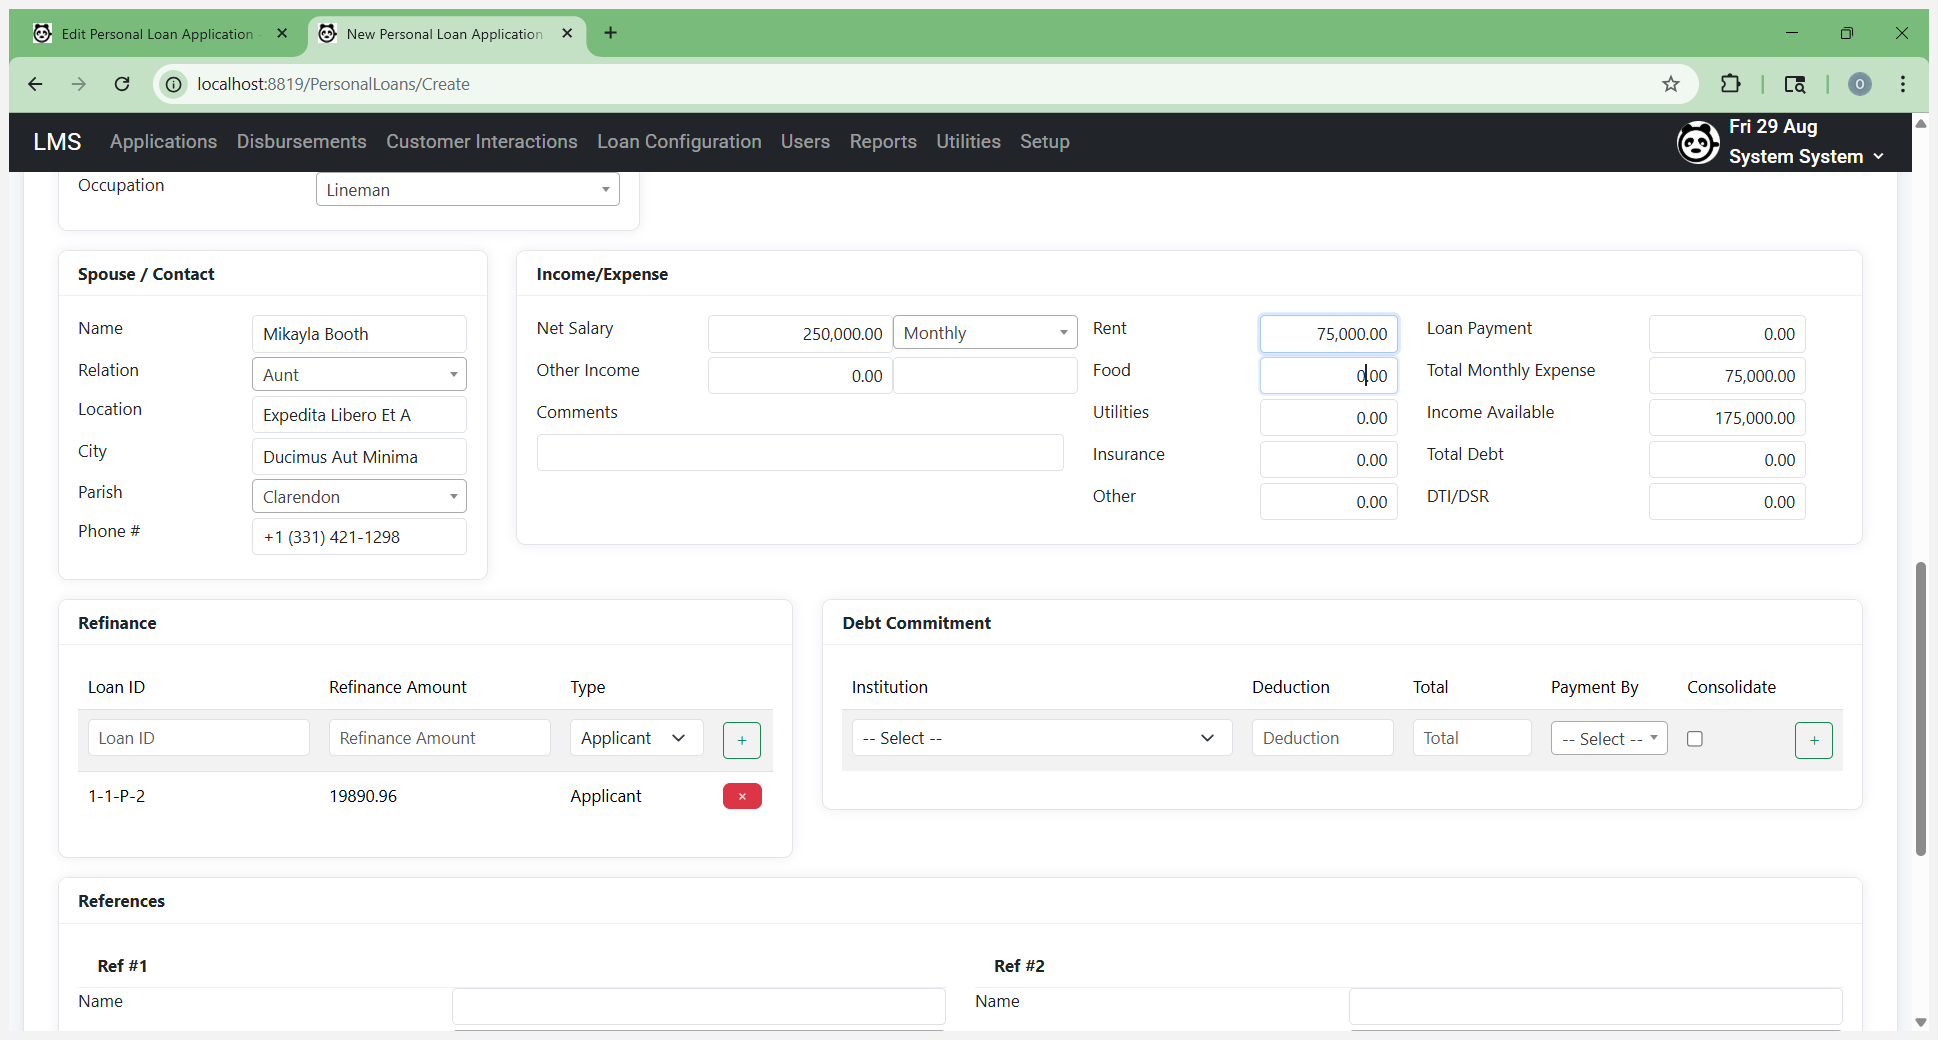
Enter food, utilities, and insurance if applicable.
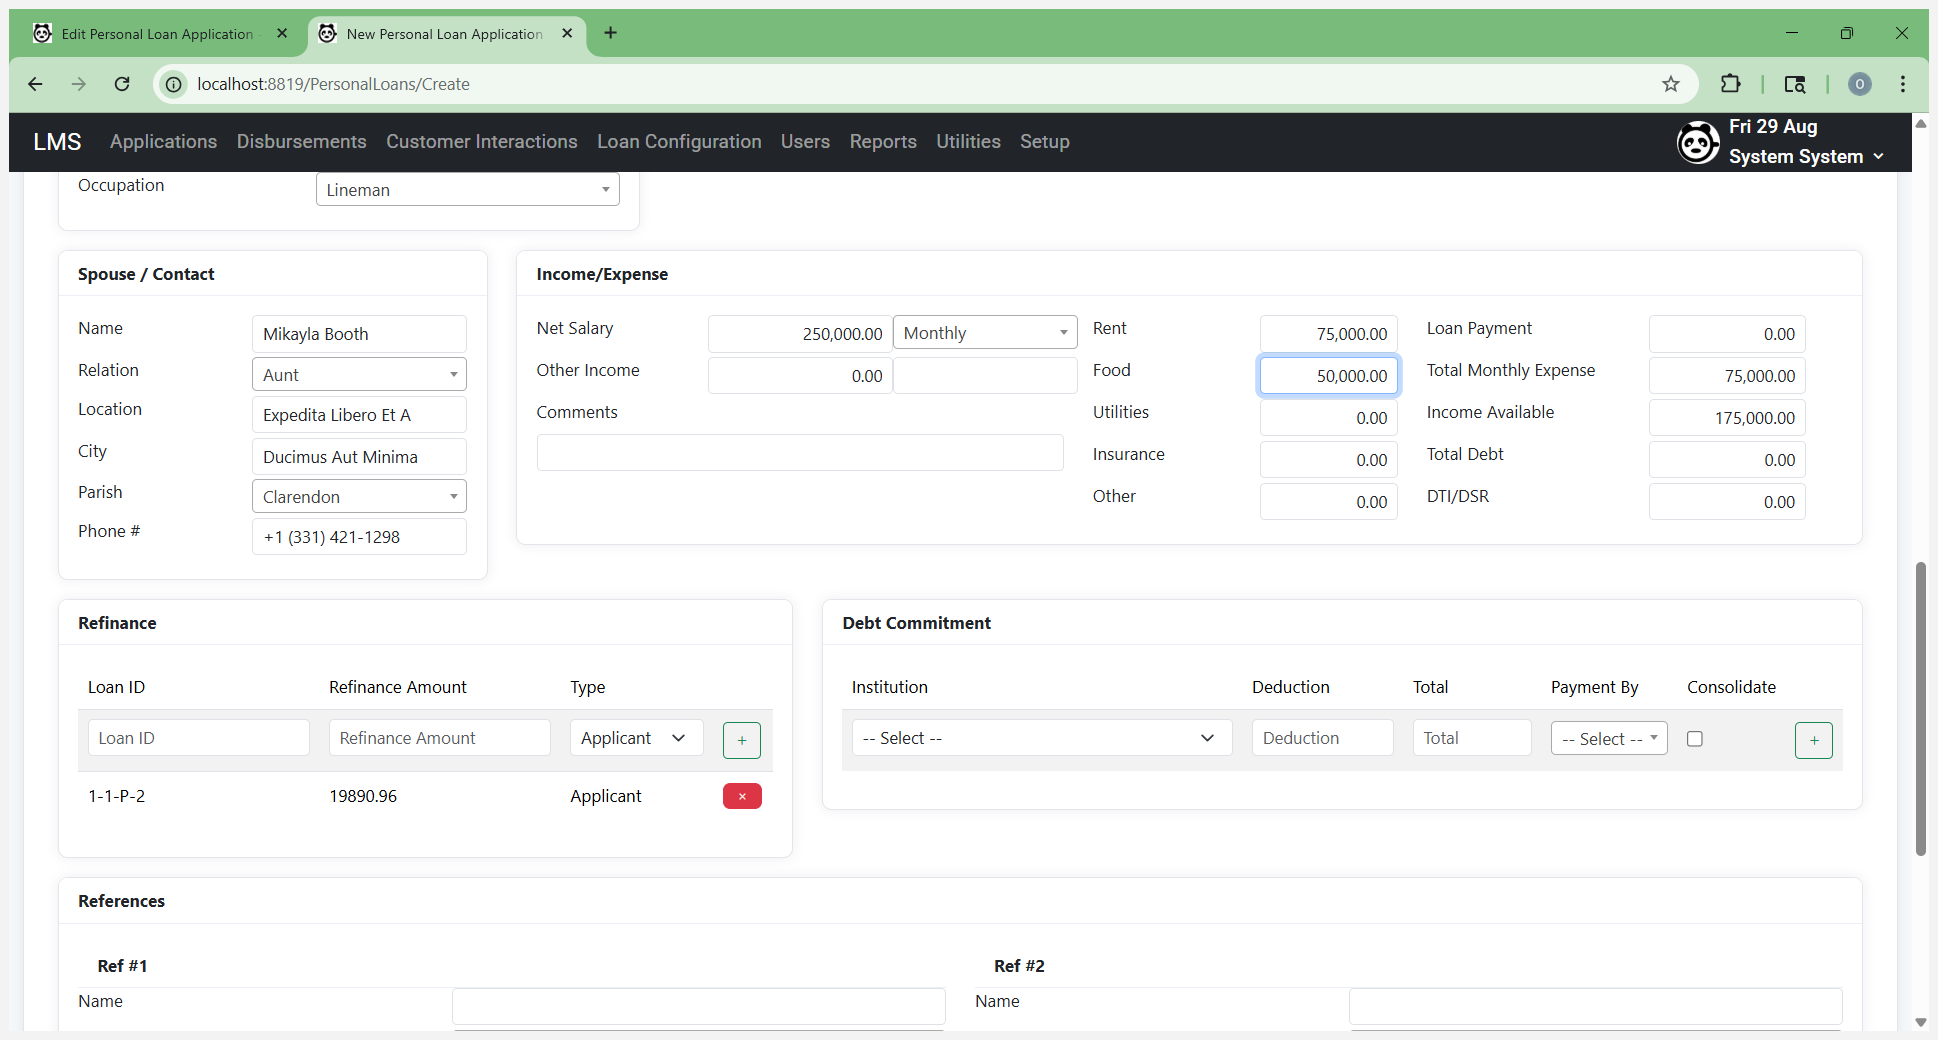
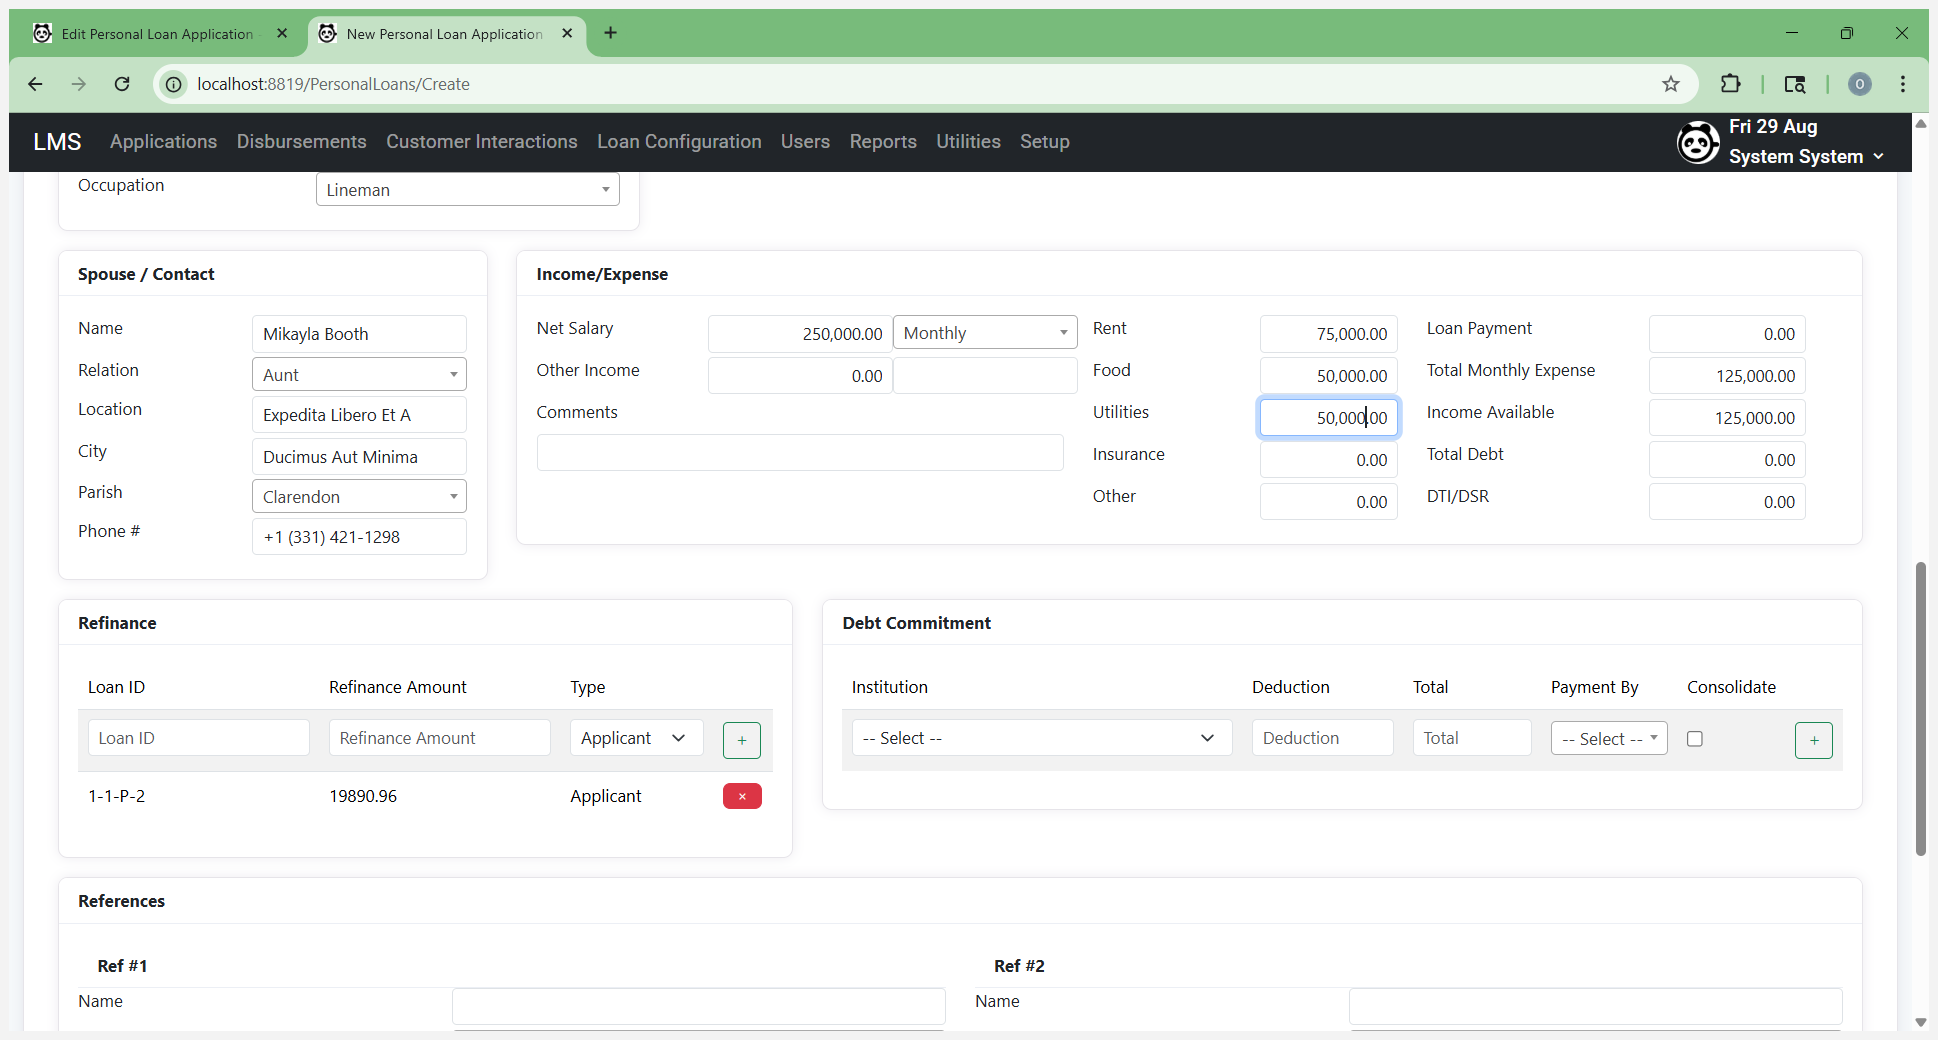
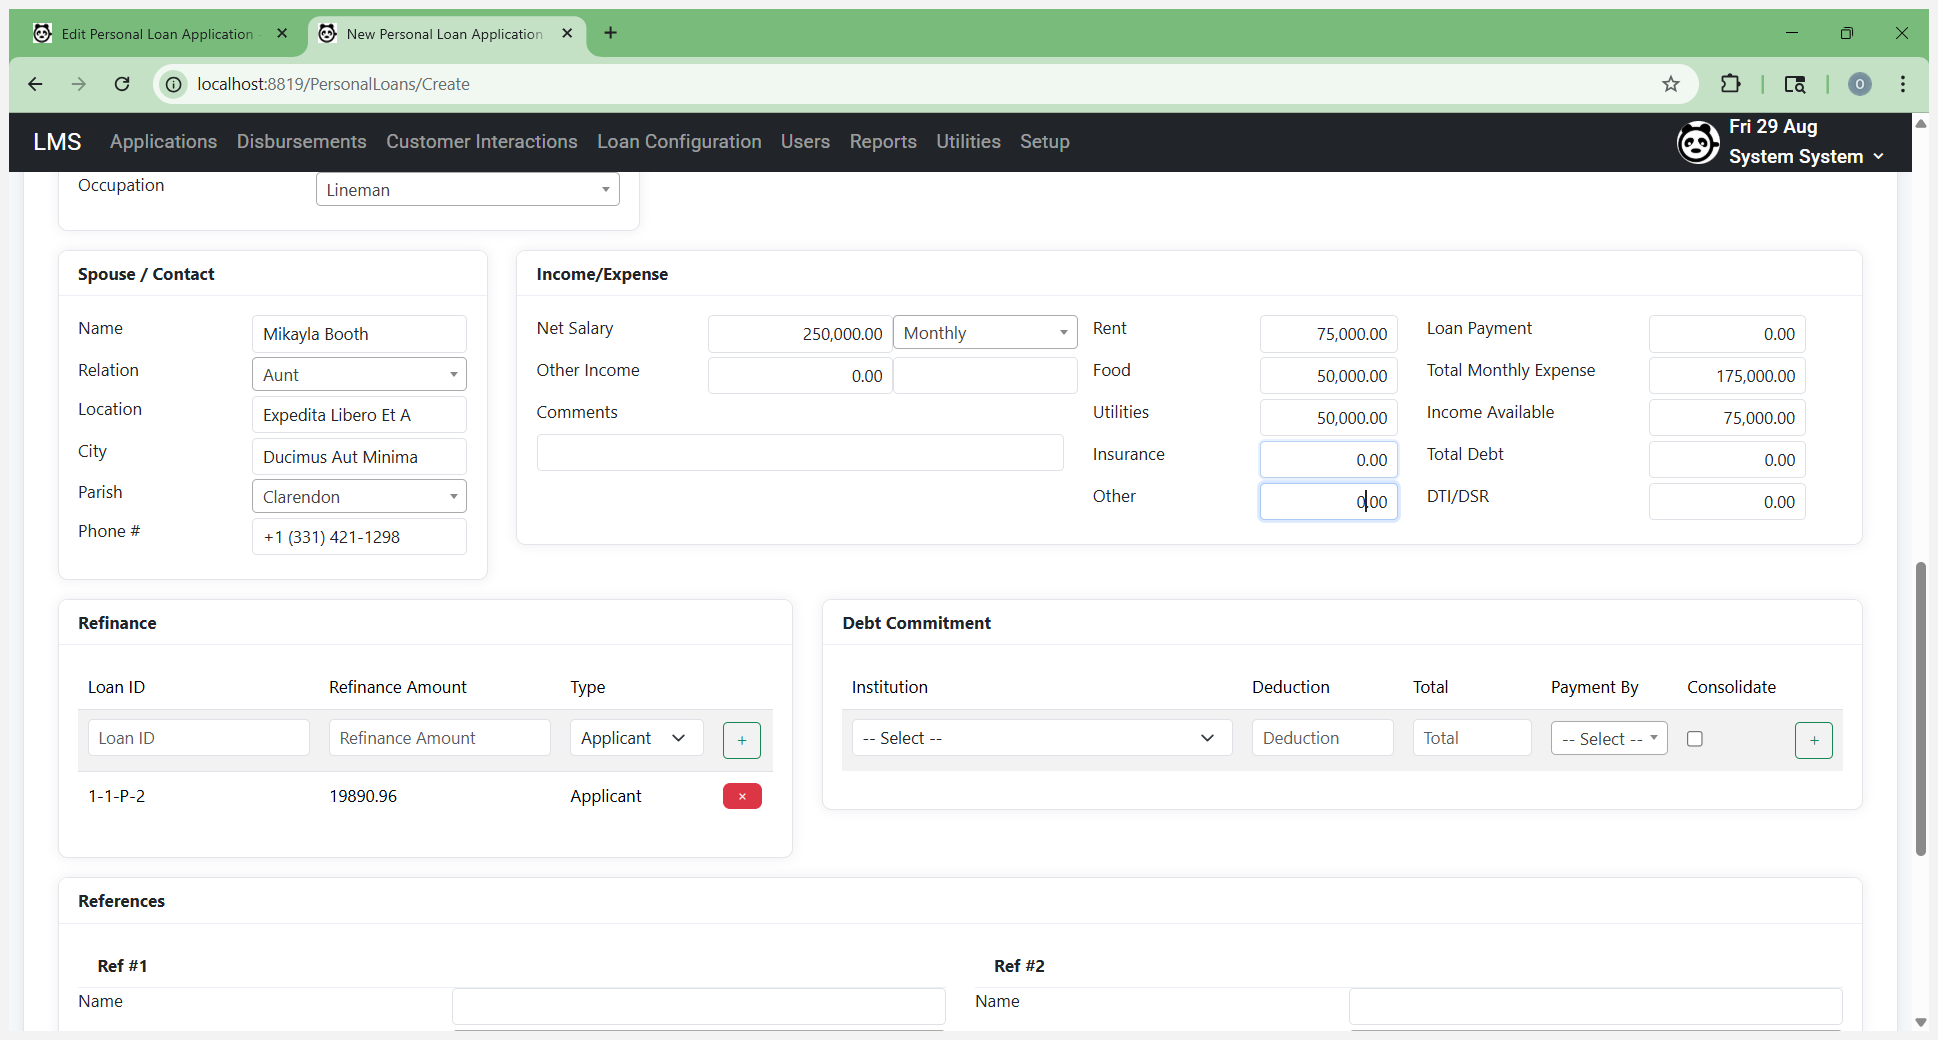
If there are any other expenses, such as miscellaneous items the customer wants to include, enter them here.

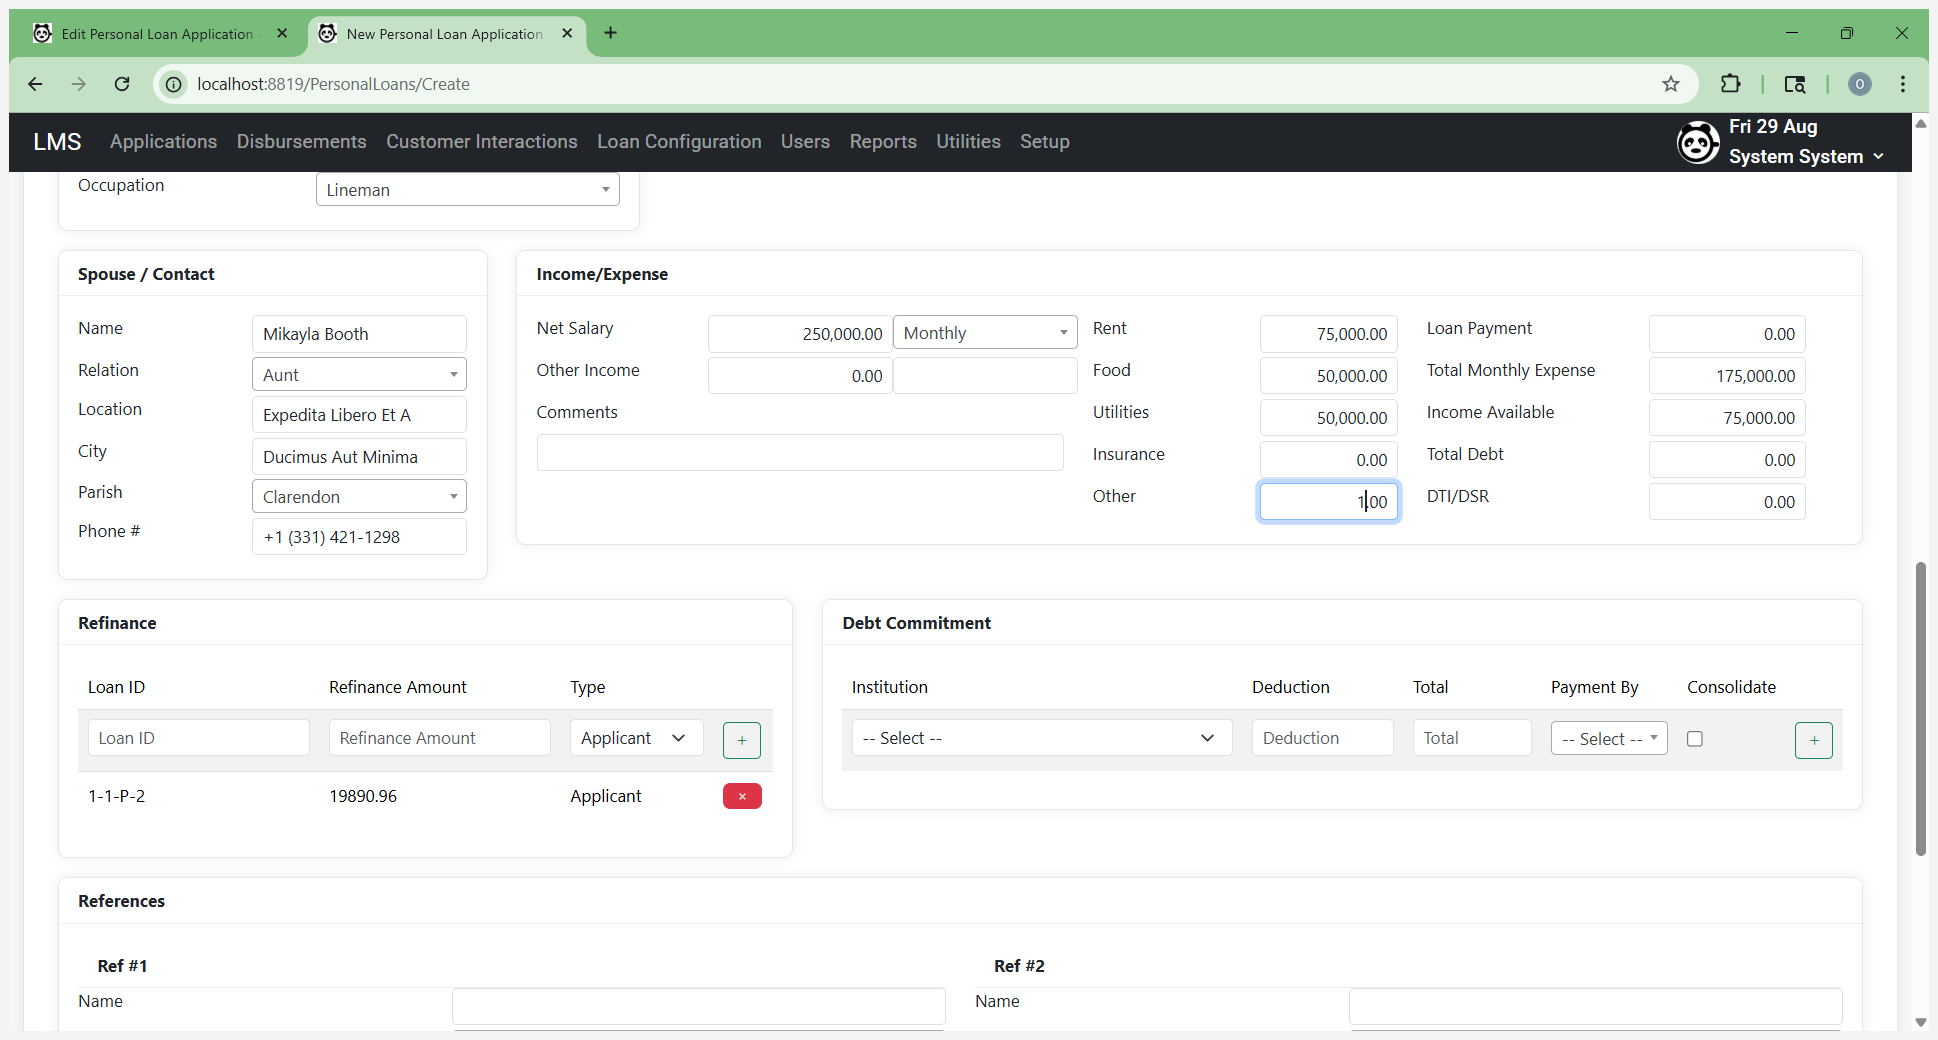

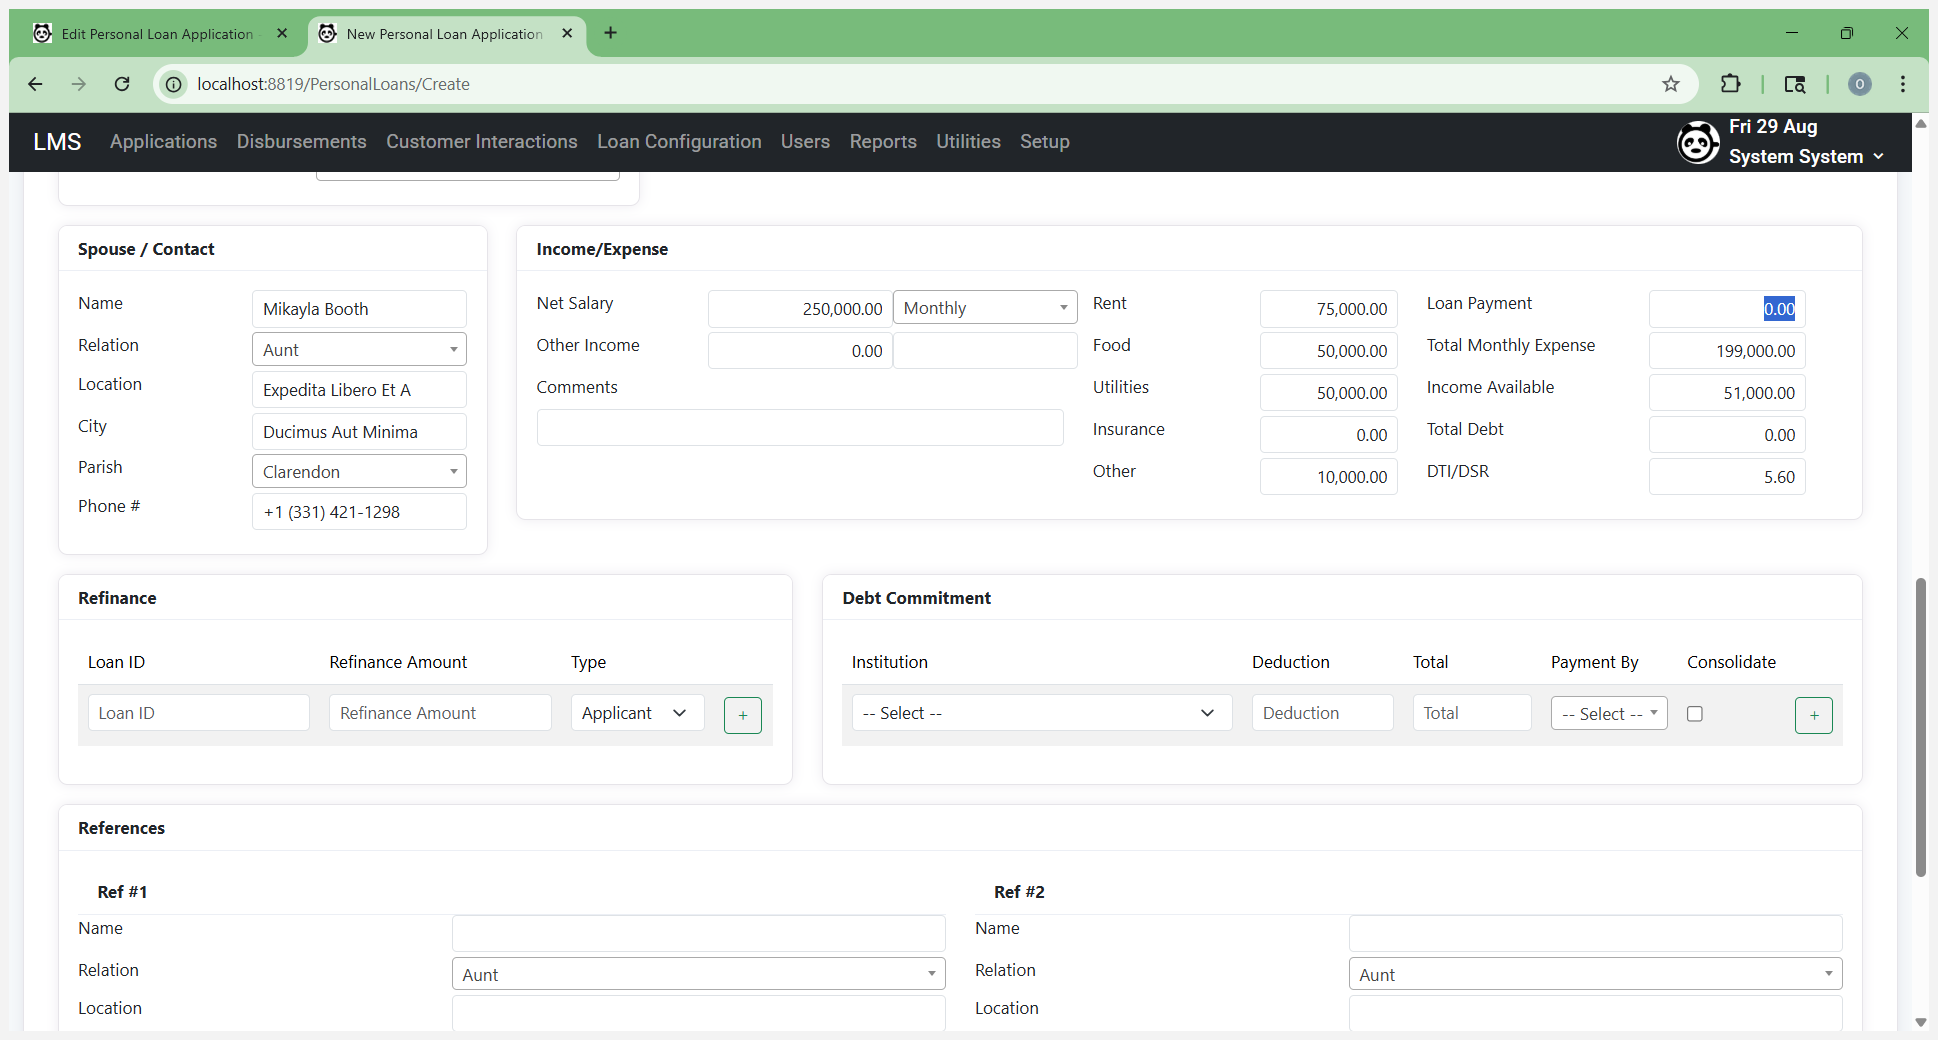
That automatically calculates the available income. This customer already has a loan. If this is a refinanced loan, this information needs to be entered here. This happens automatically because it originally found an existing account for the customer. If this is not a refinance loan, or if it is a second loan being refinanced, you can resolve this by clicking the X.
If it is being refinanced, leave it there, as it is also used in the worksheet and refinancing process. I’m going to remove it.

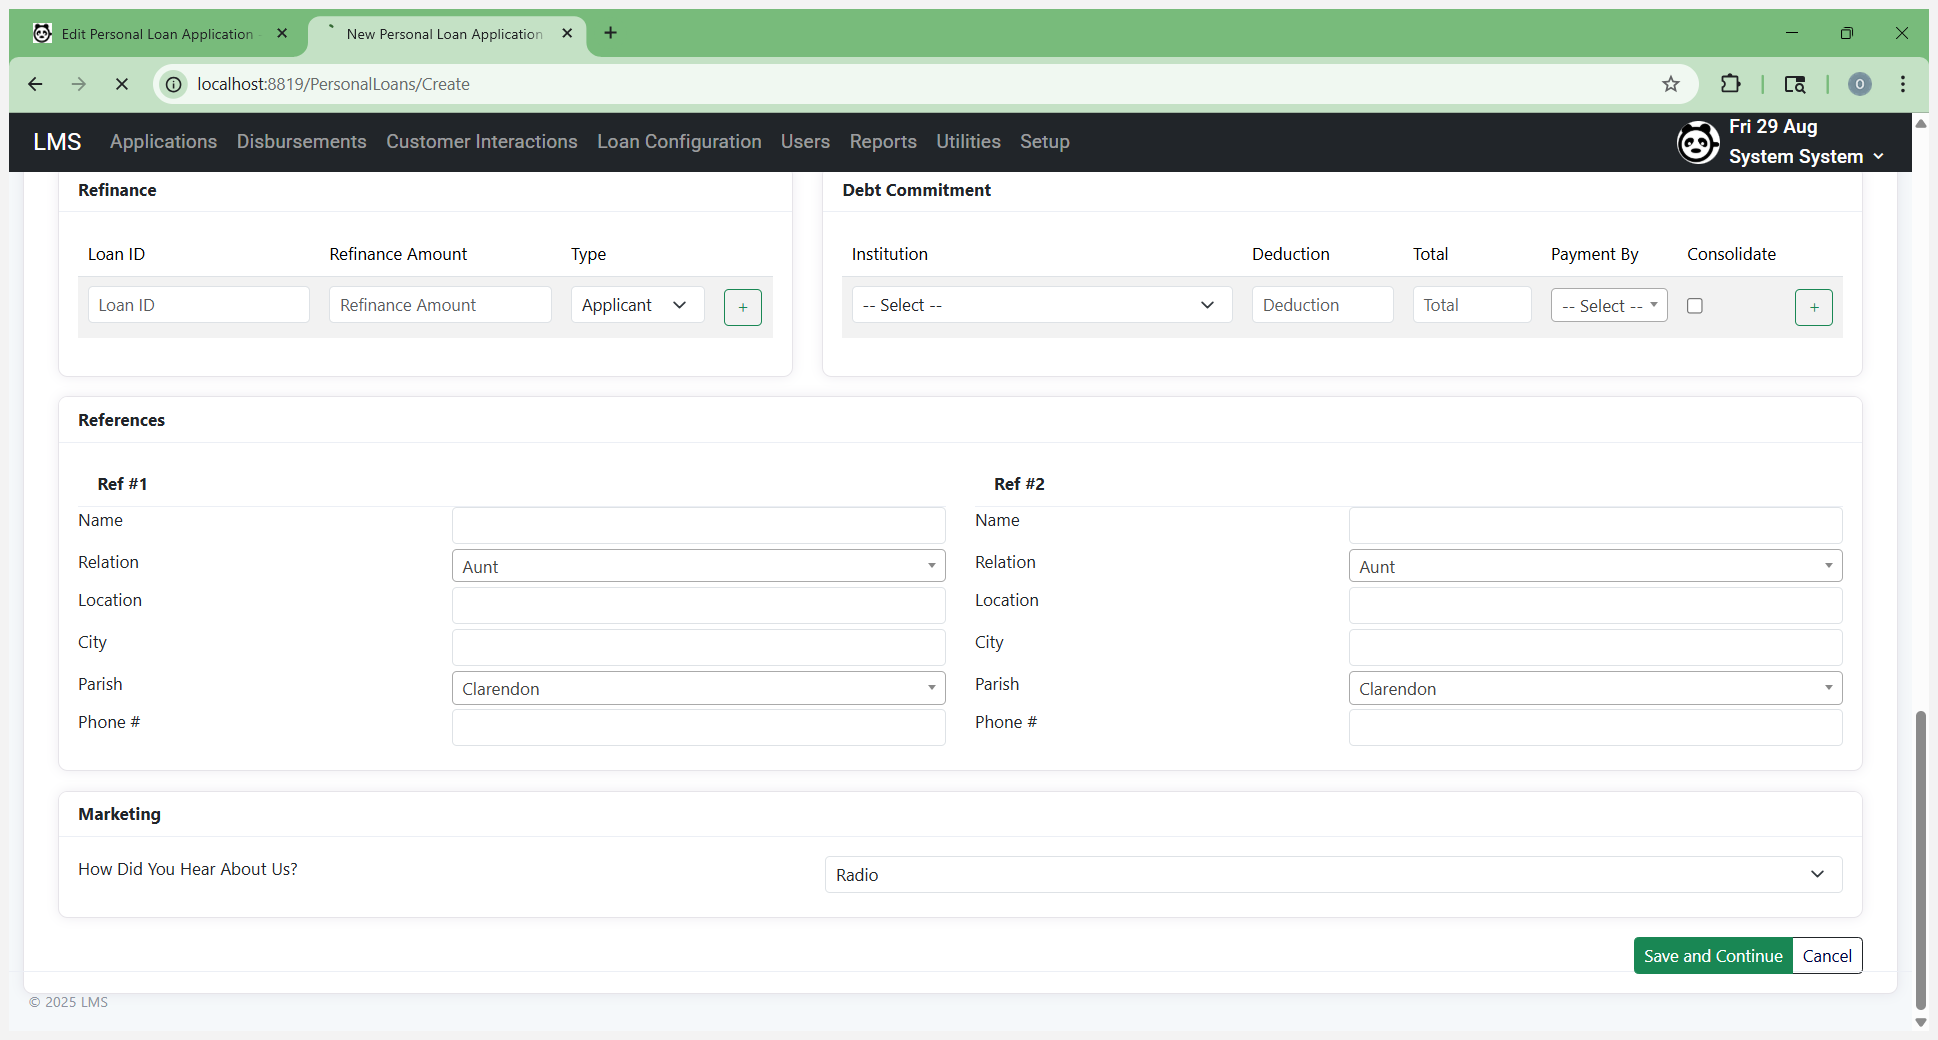
For debt commitment, if you are consolidating, simply select the institutions.
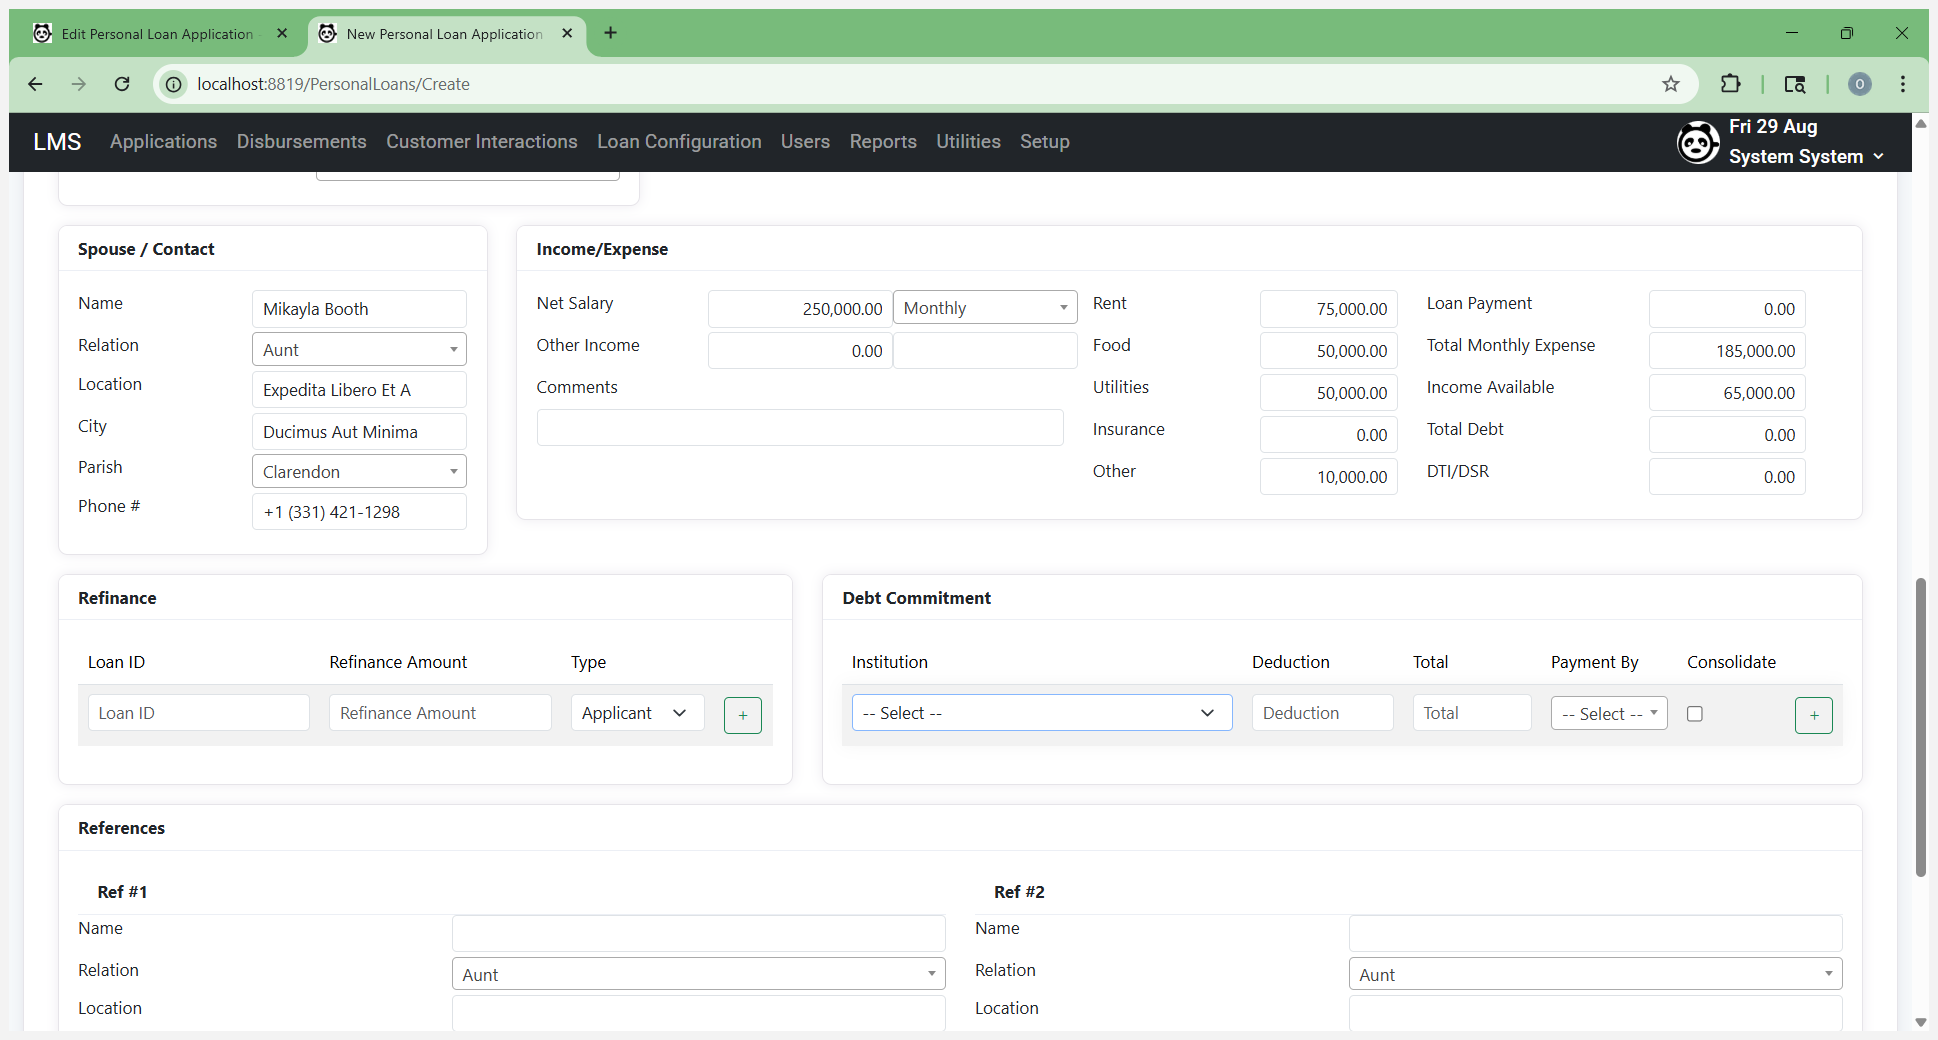
They will be listed there. More institutions will appear there once they are added to the system.

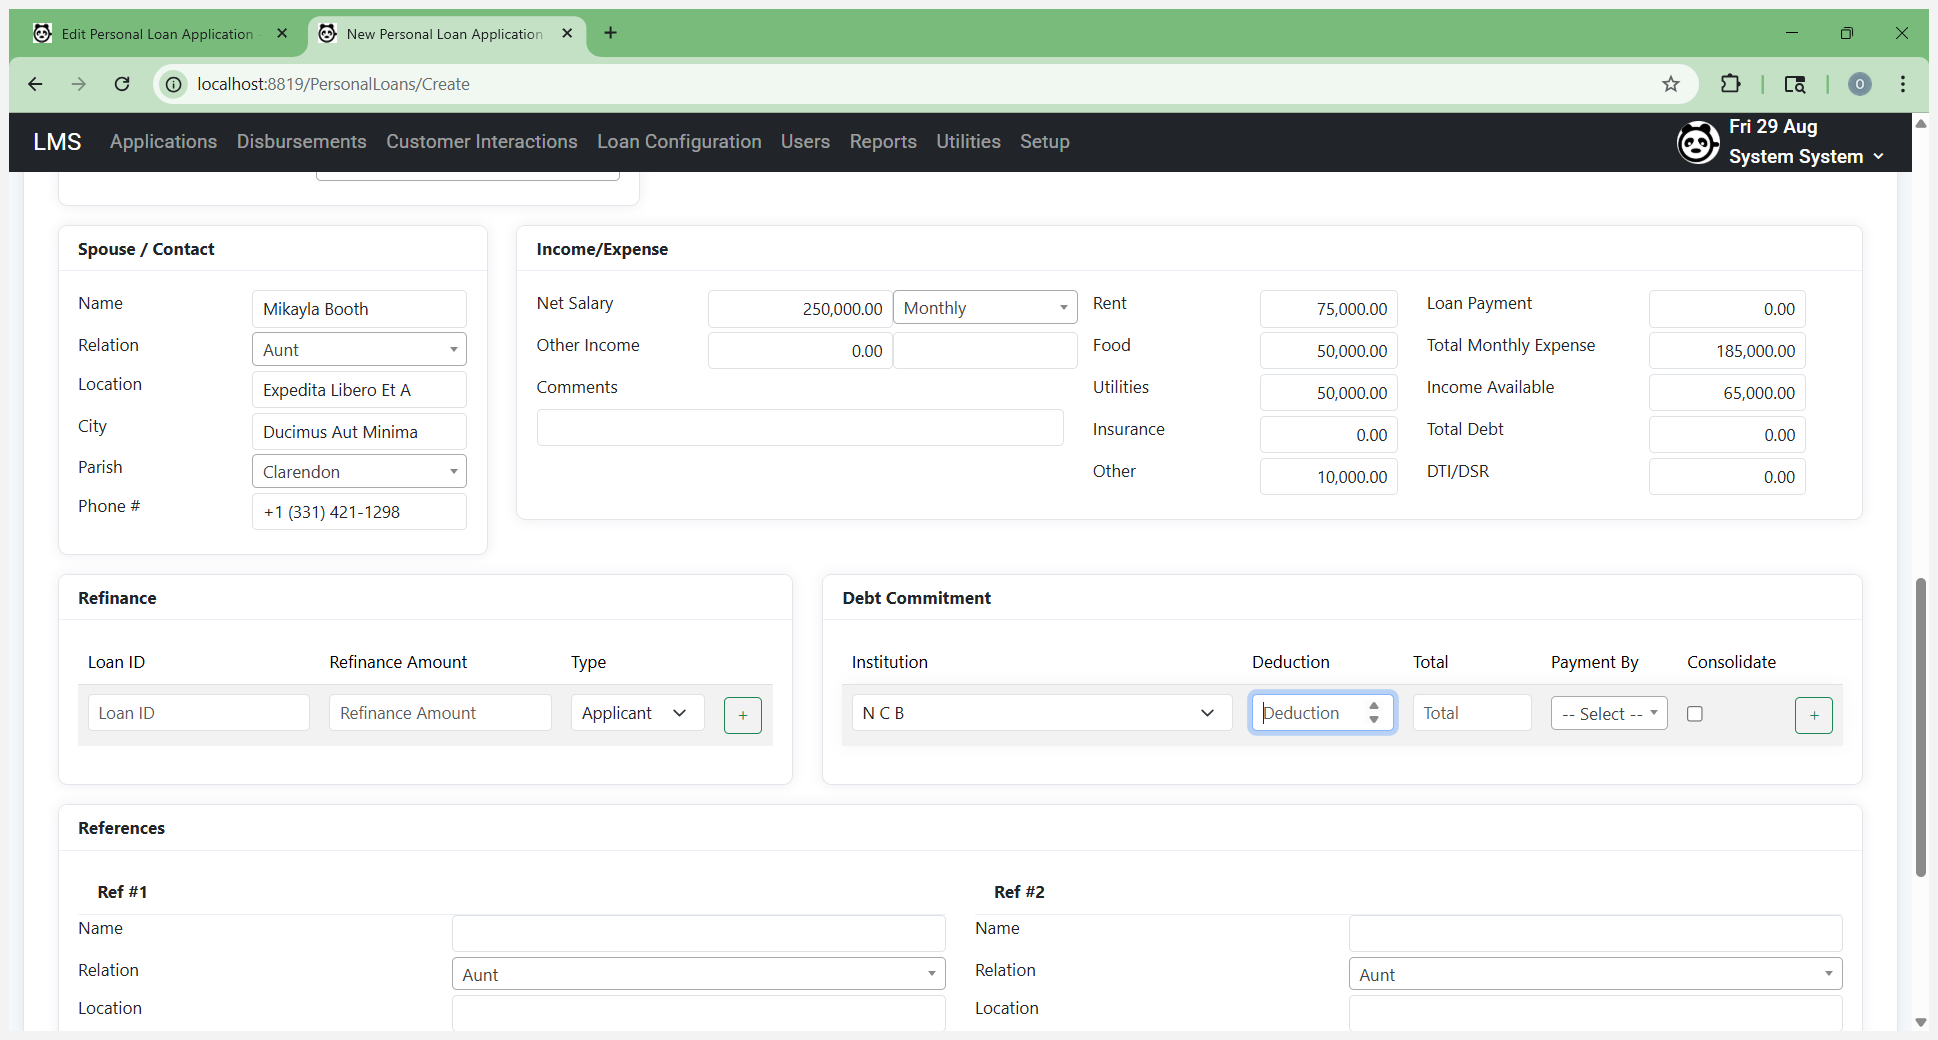
List the deduction, which is your monthly deduction or whatever amount it is. This is the payment you make on the loan—the total amount for the loan.

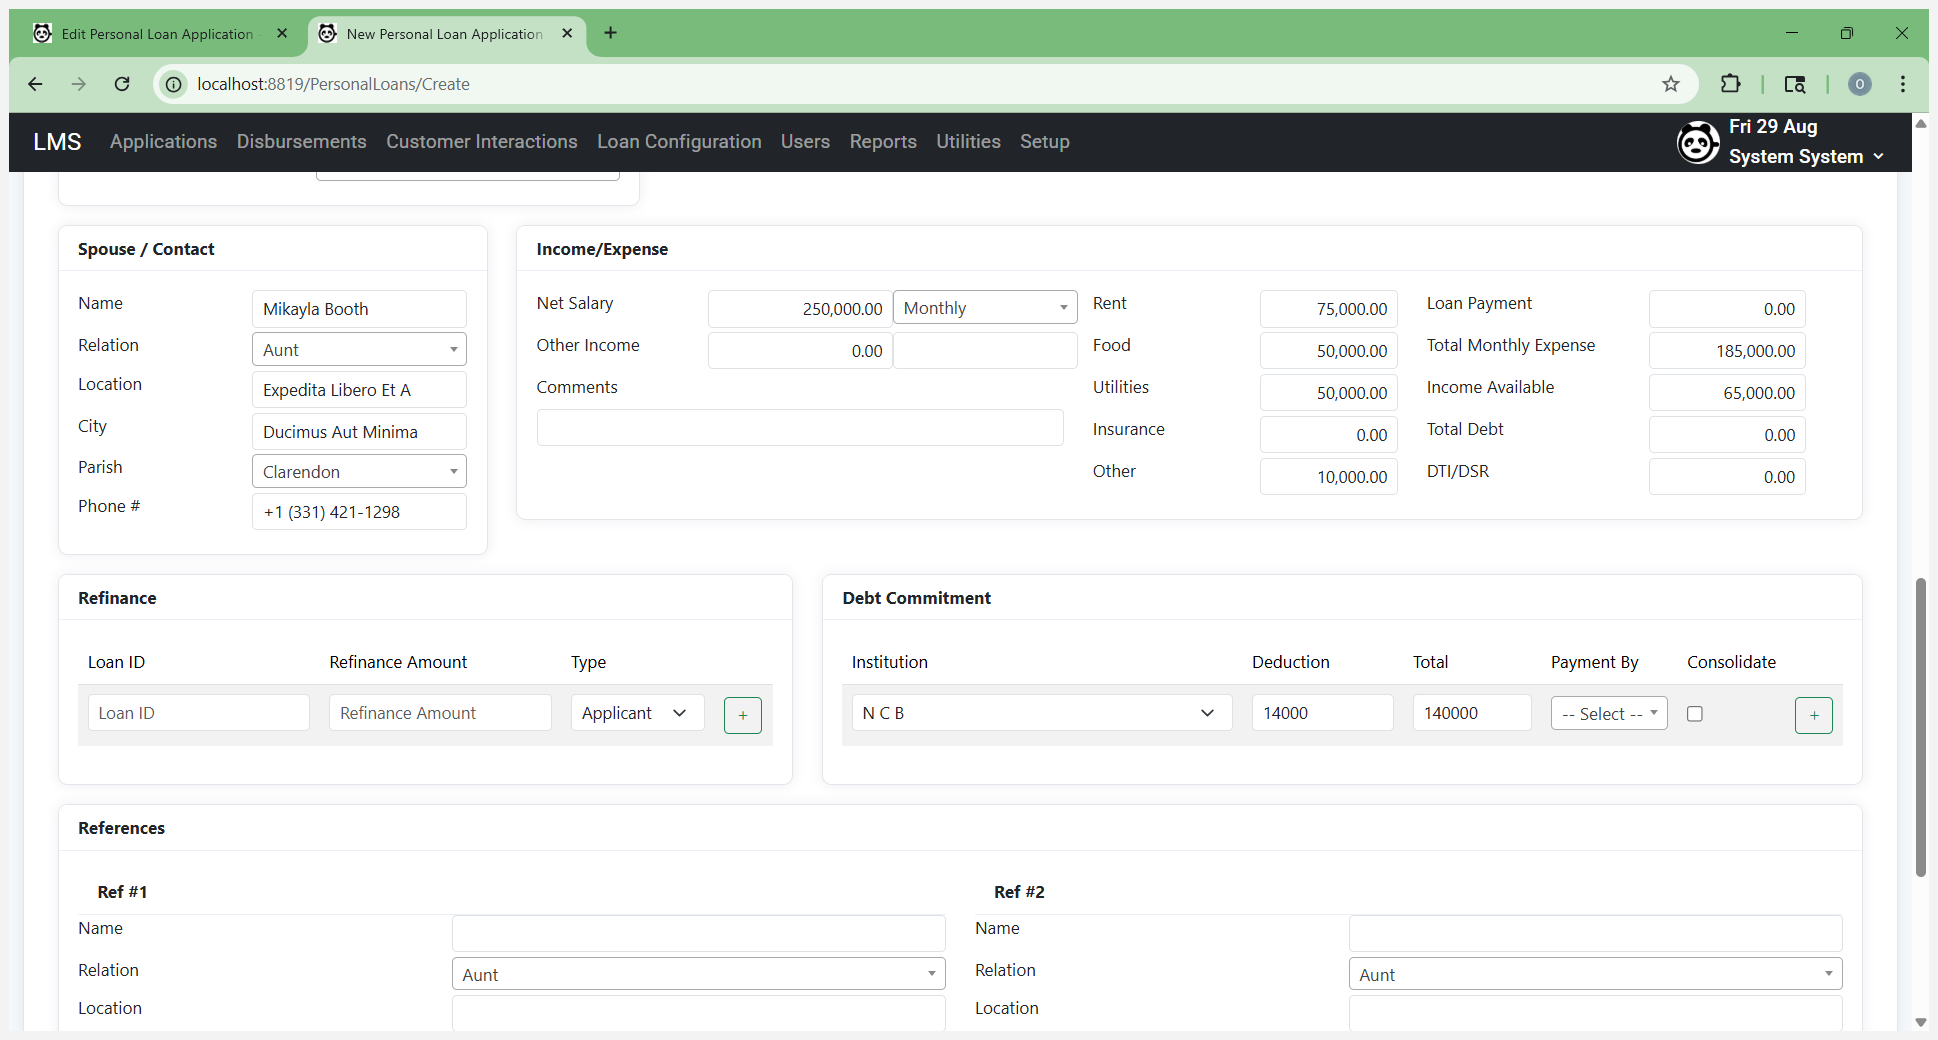
How they are doing it.
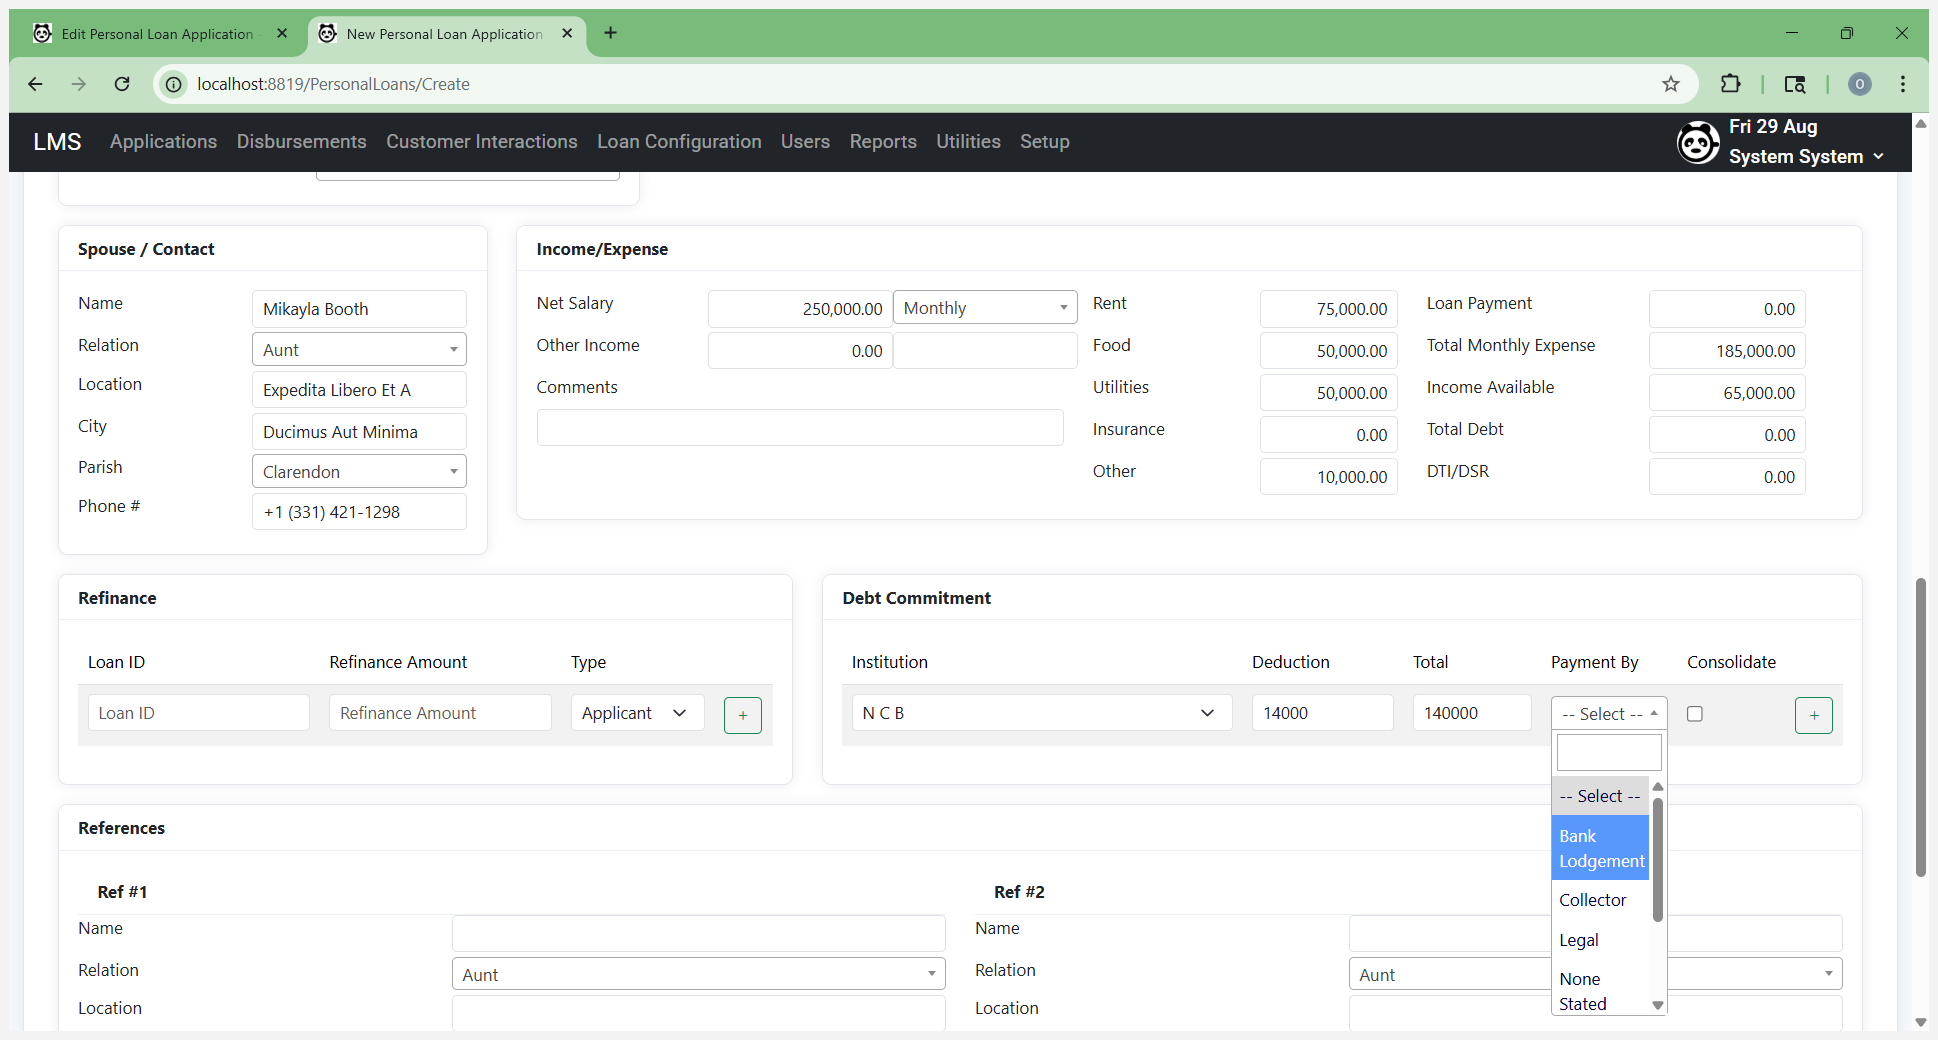
Select "Consolidate" and add it to the list.
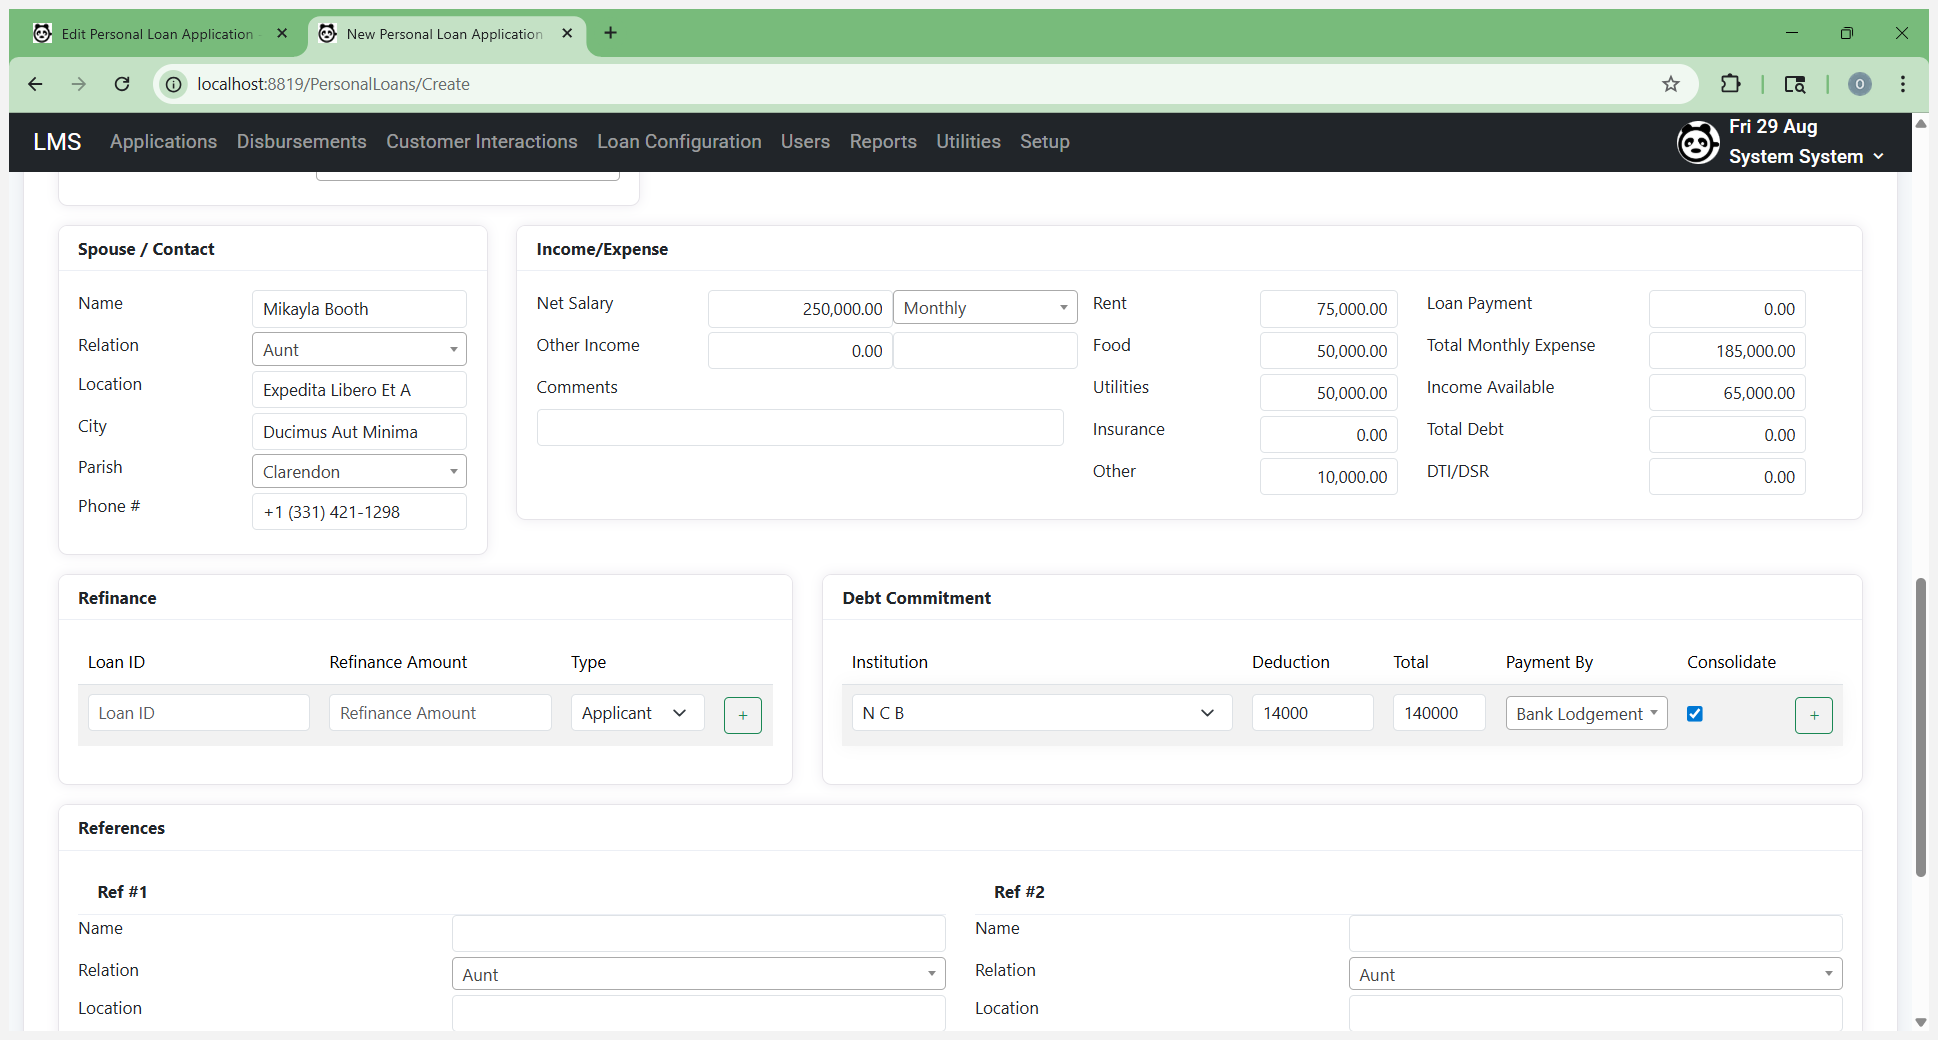
This applies to your loan payment option.
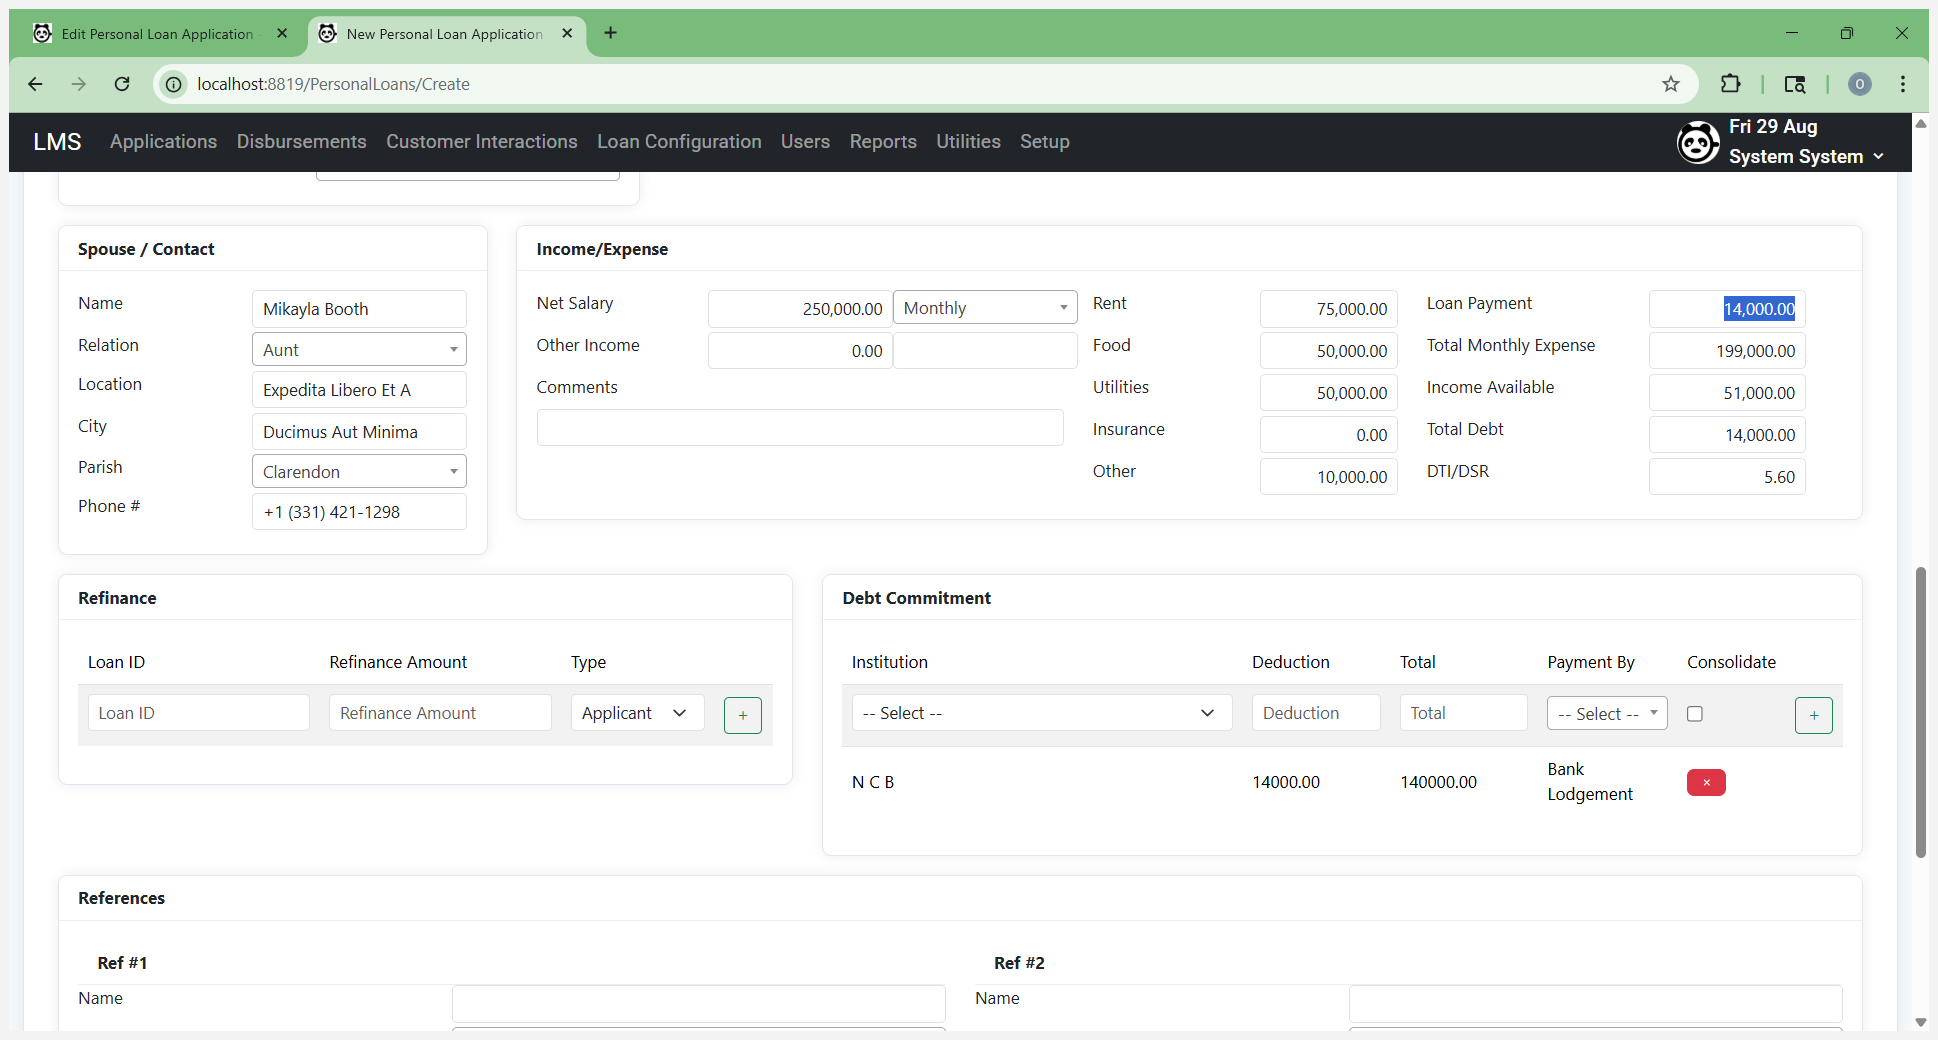
This also reduces the total available income and total debt by loan. If you are not consolidating this loan, you do not need to include it here. If it is an automatic deduction taken out before you receive your net salary, you do not need to account for it, since the net salary already reflects this deduction. If it isn't removed before the customer pays at the counter, you can list it as "Other" here as a deduction. The idea is to account for all deductions to ensure you have a more accurate result.
available income. I'm going to remove the debt commitment.
Enter your references if they are mandatory or required.
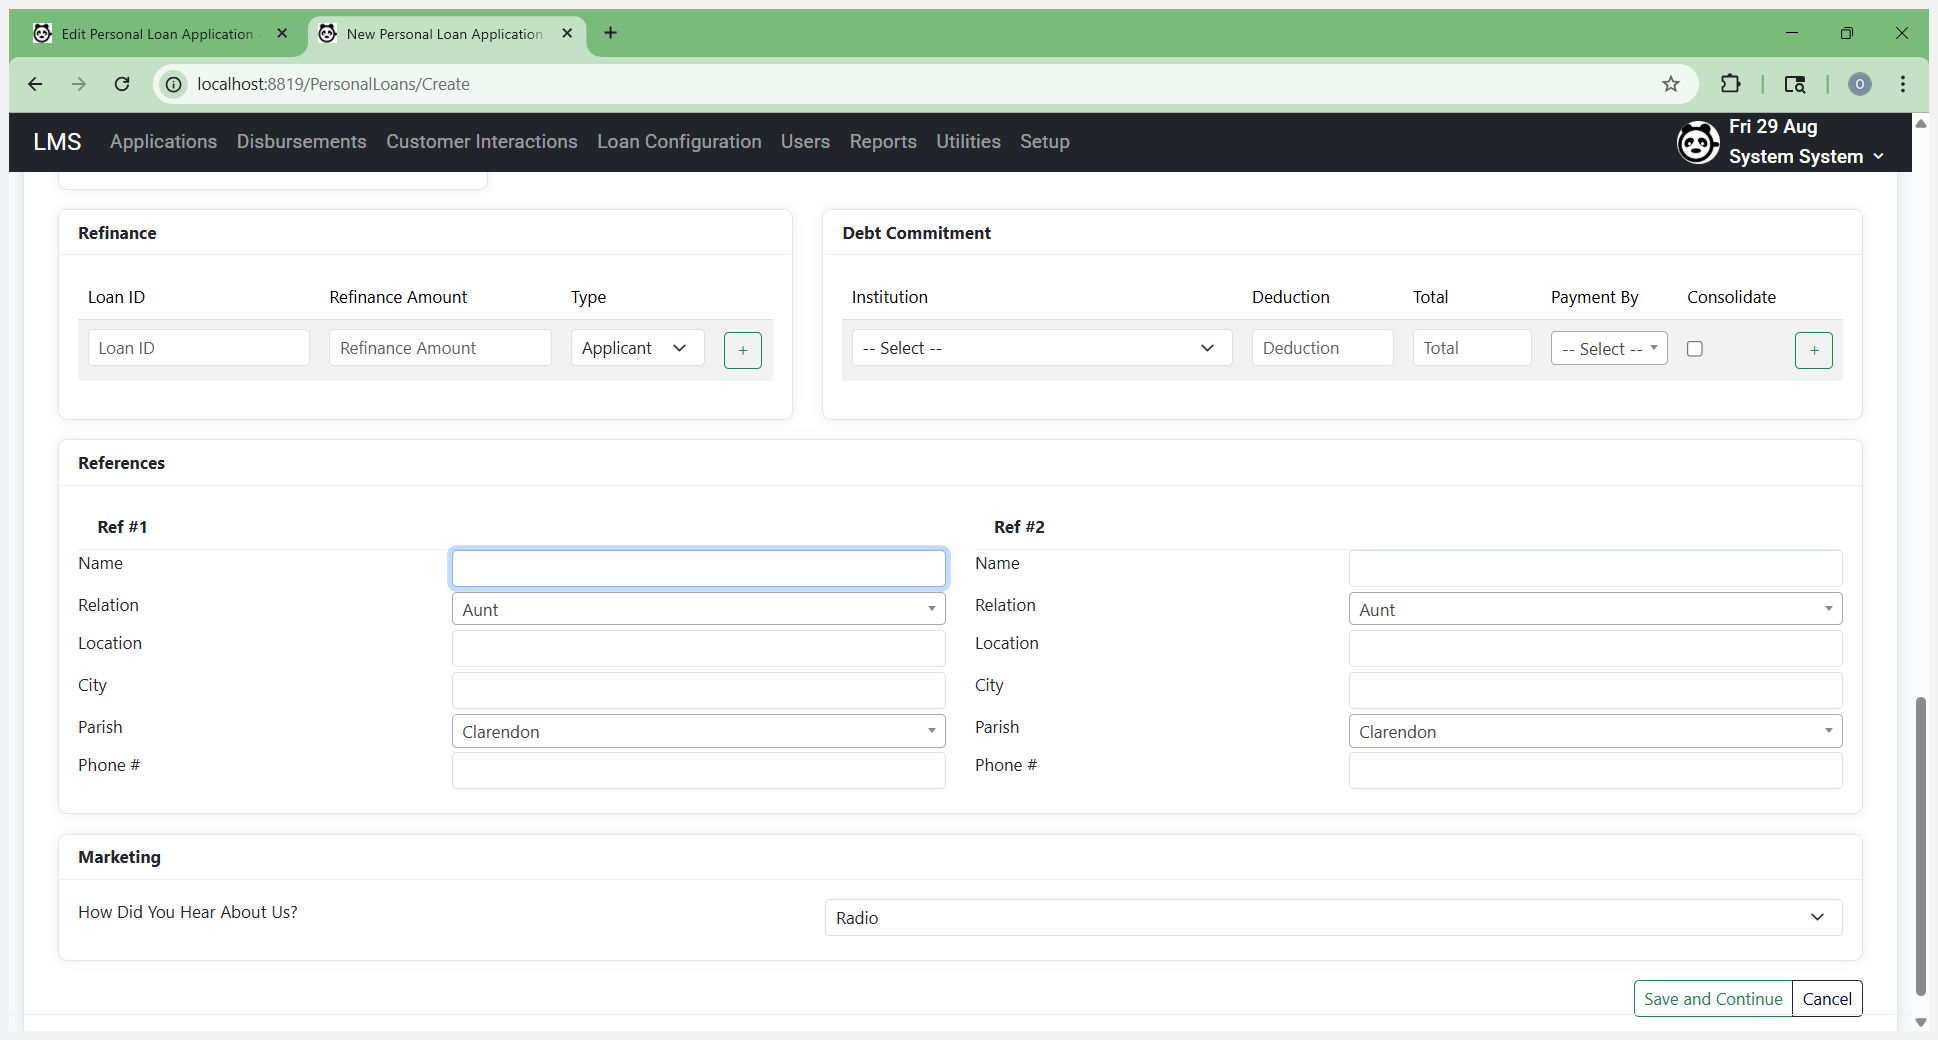
If not, they are optional on this form. You can then save and continue. Save and continue lets you save the form after background validations. You can then fill in any additional required fields.
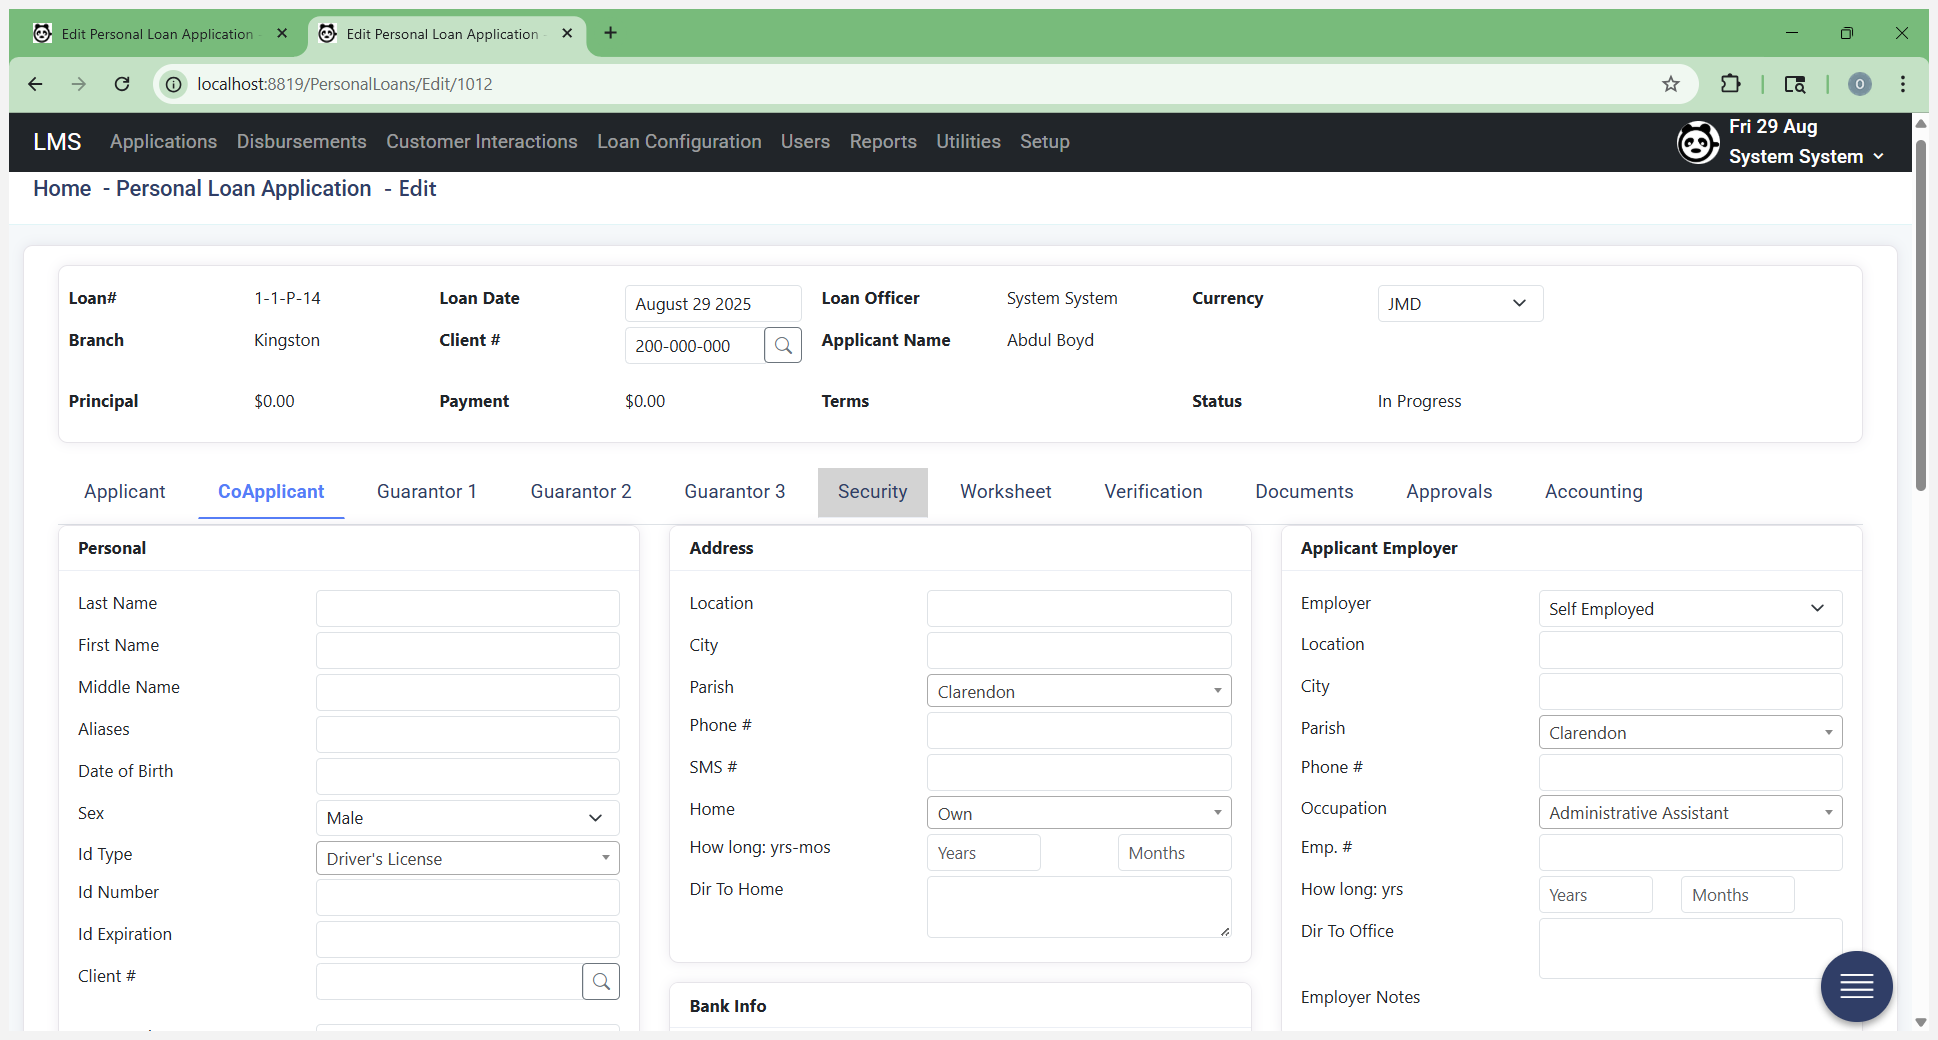
At this point, save your work. Now that the form is saved and reloaded, if co-applicant or guarantor one, two, or three are required, fill in their information as needed.
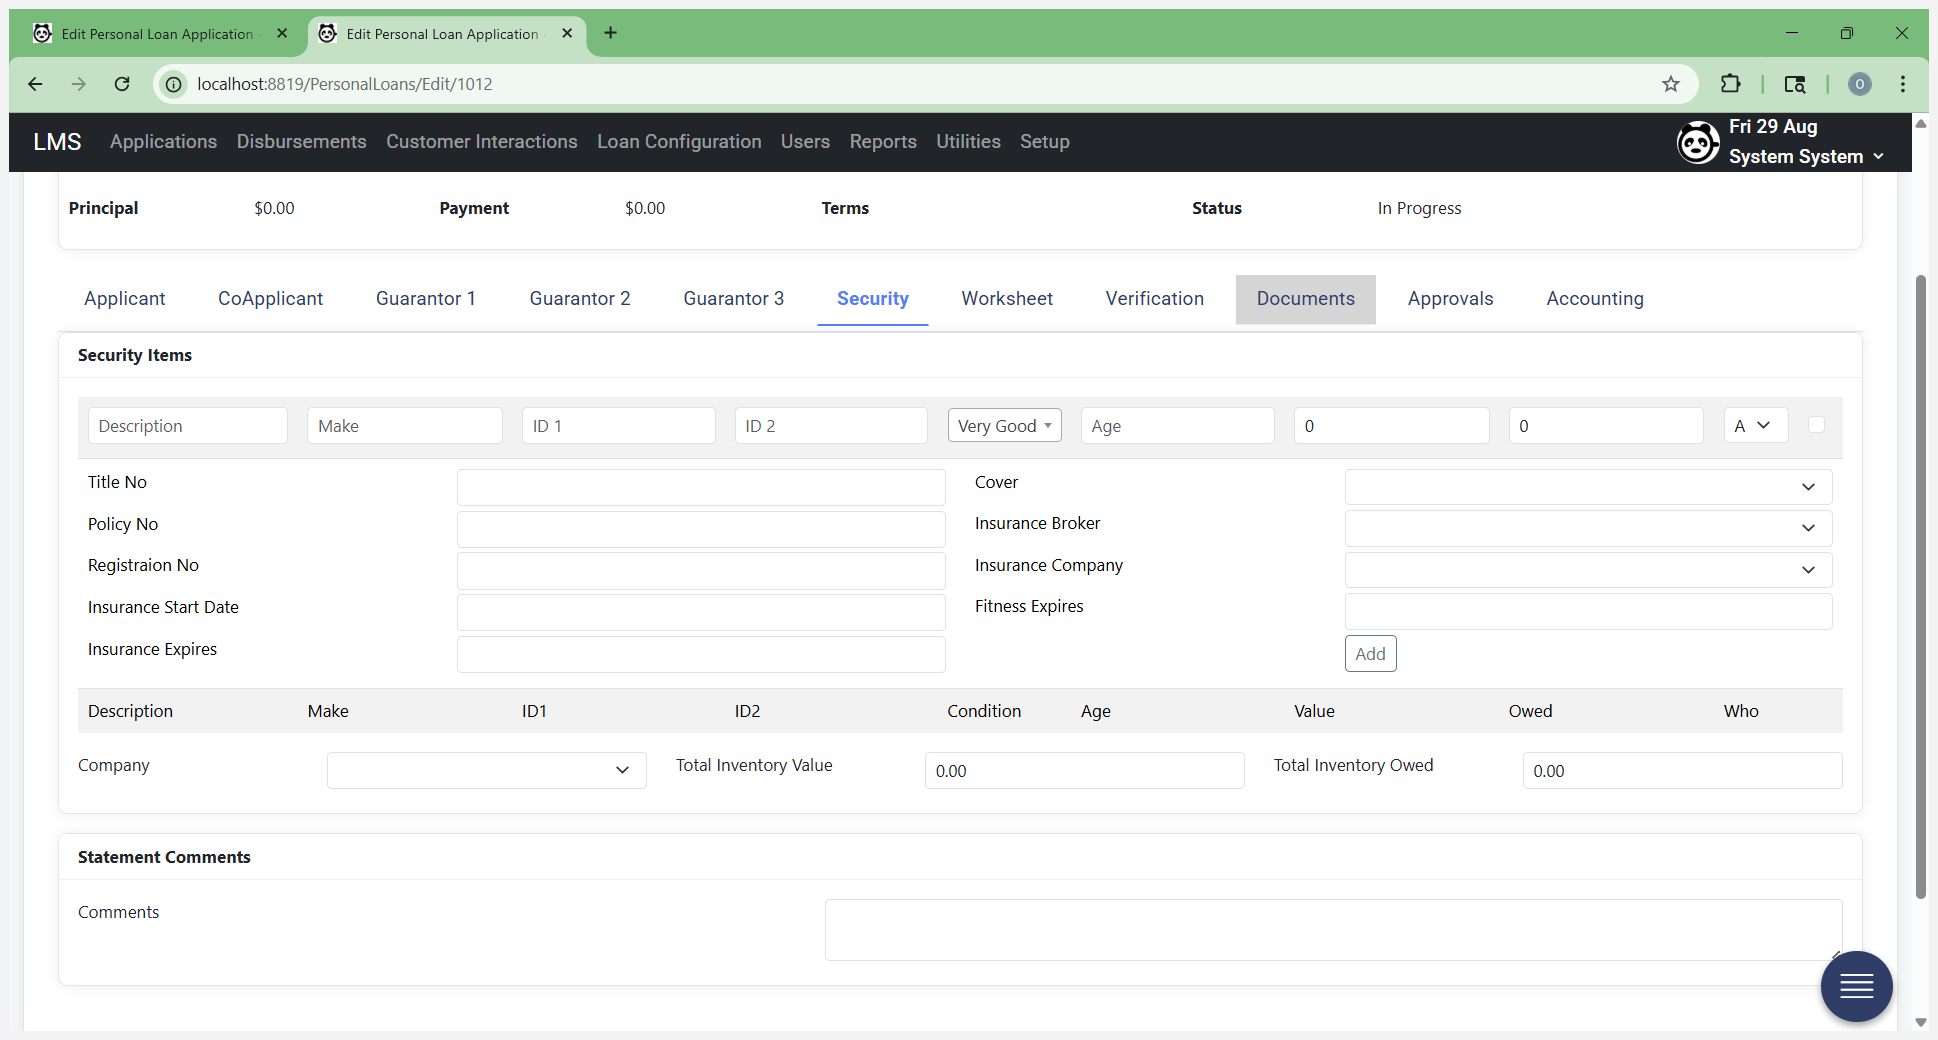
It is very similar to what you see on the applicant screen and captures the same information. If it isn't required, move on to the next required tab. If this is a secured loan, such as a vehicle or car loan, or if you are using other items as security, complete this screen by entering the required information. You can add multiple items by filling out the details and clicking Add.
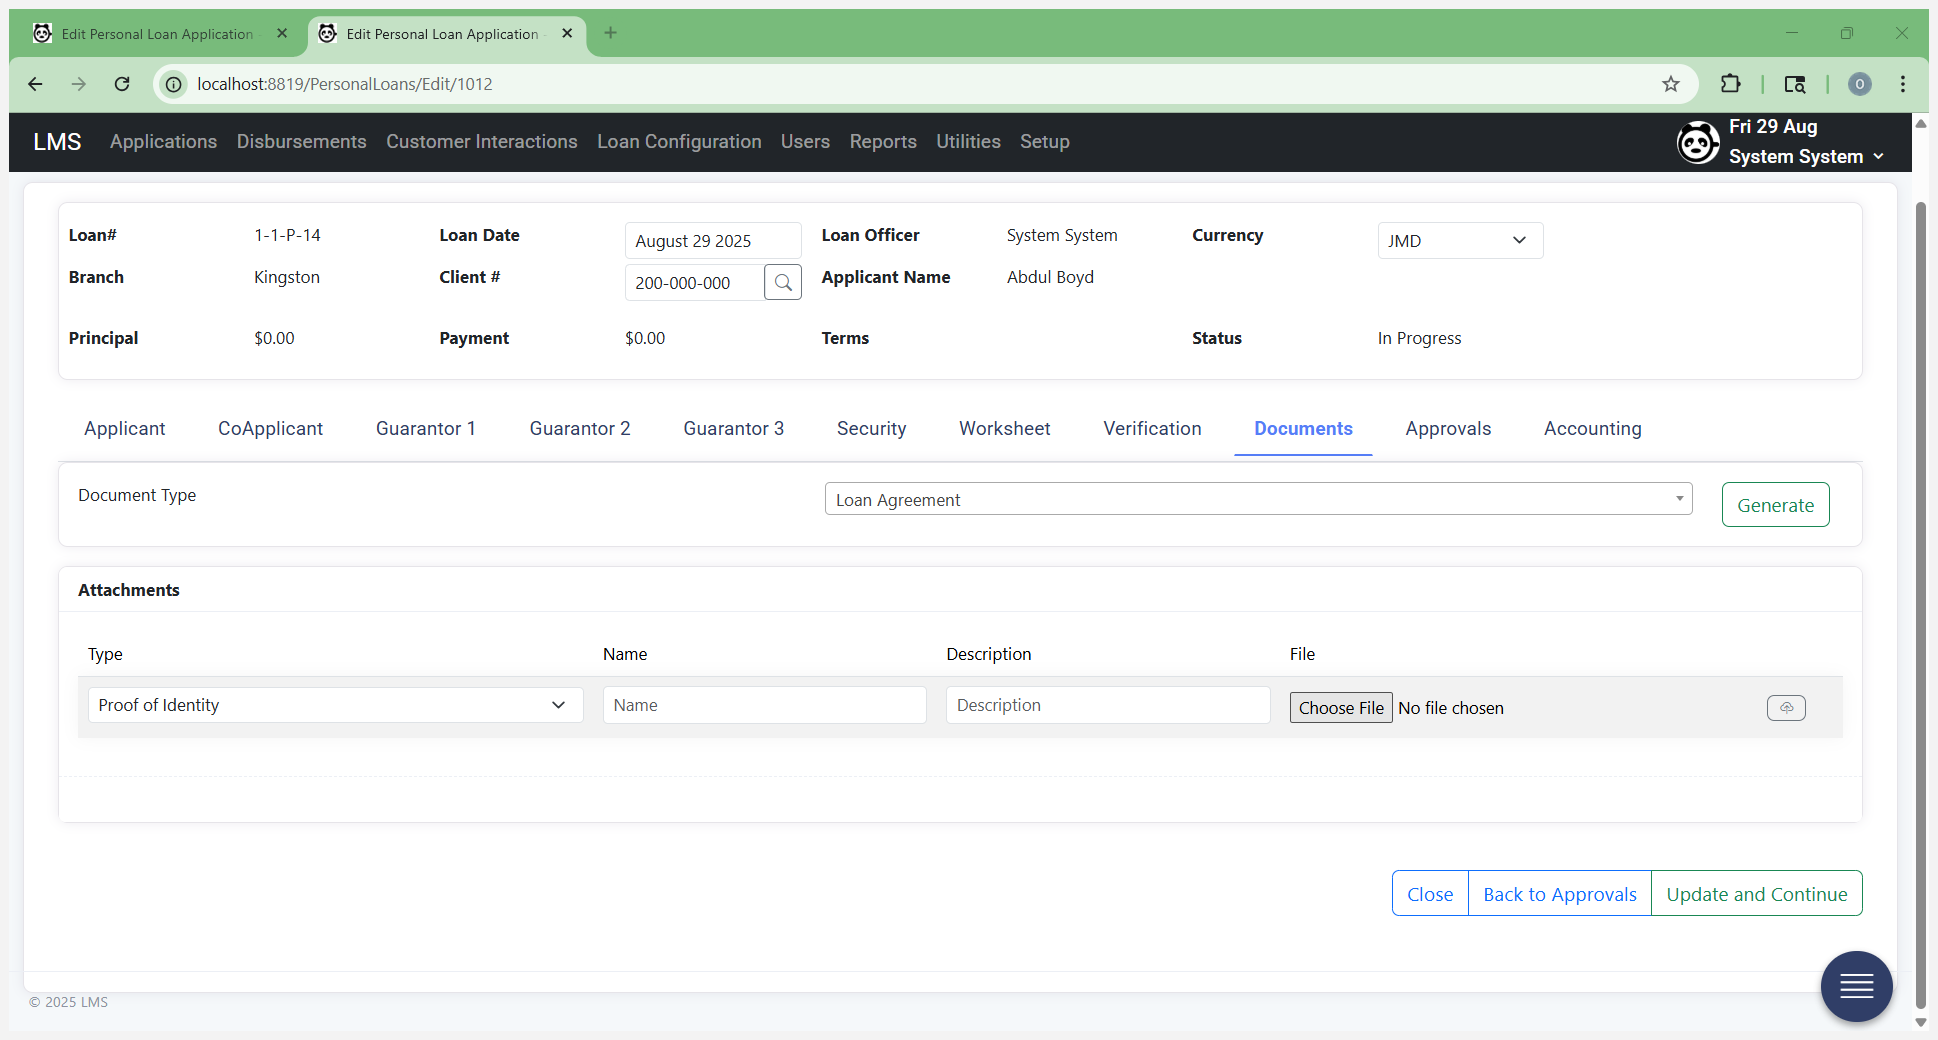
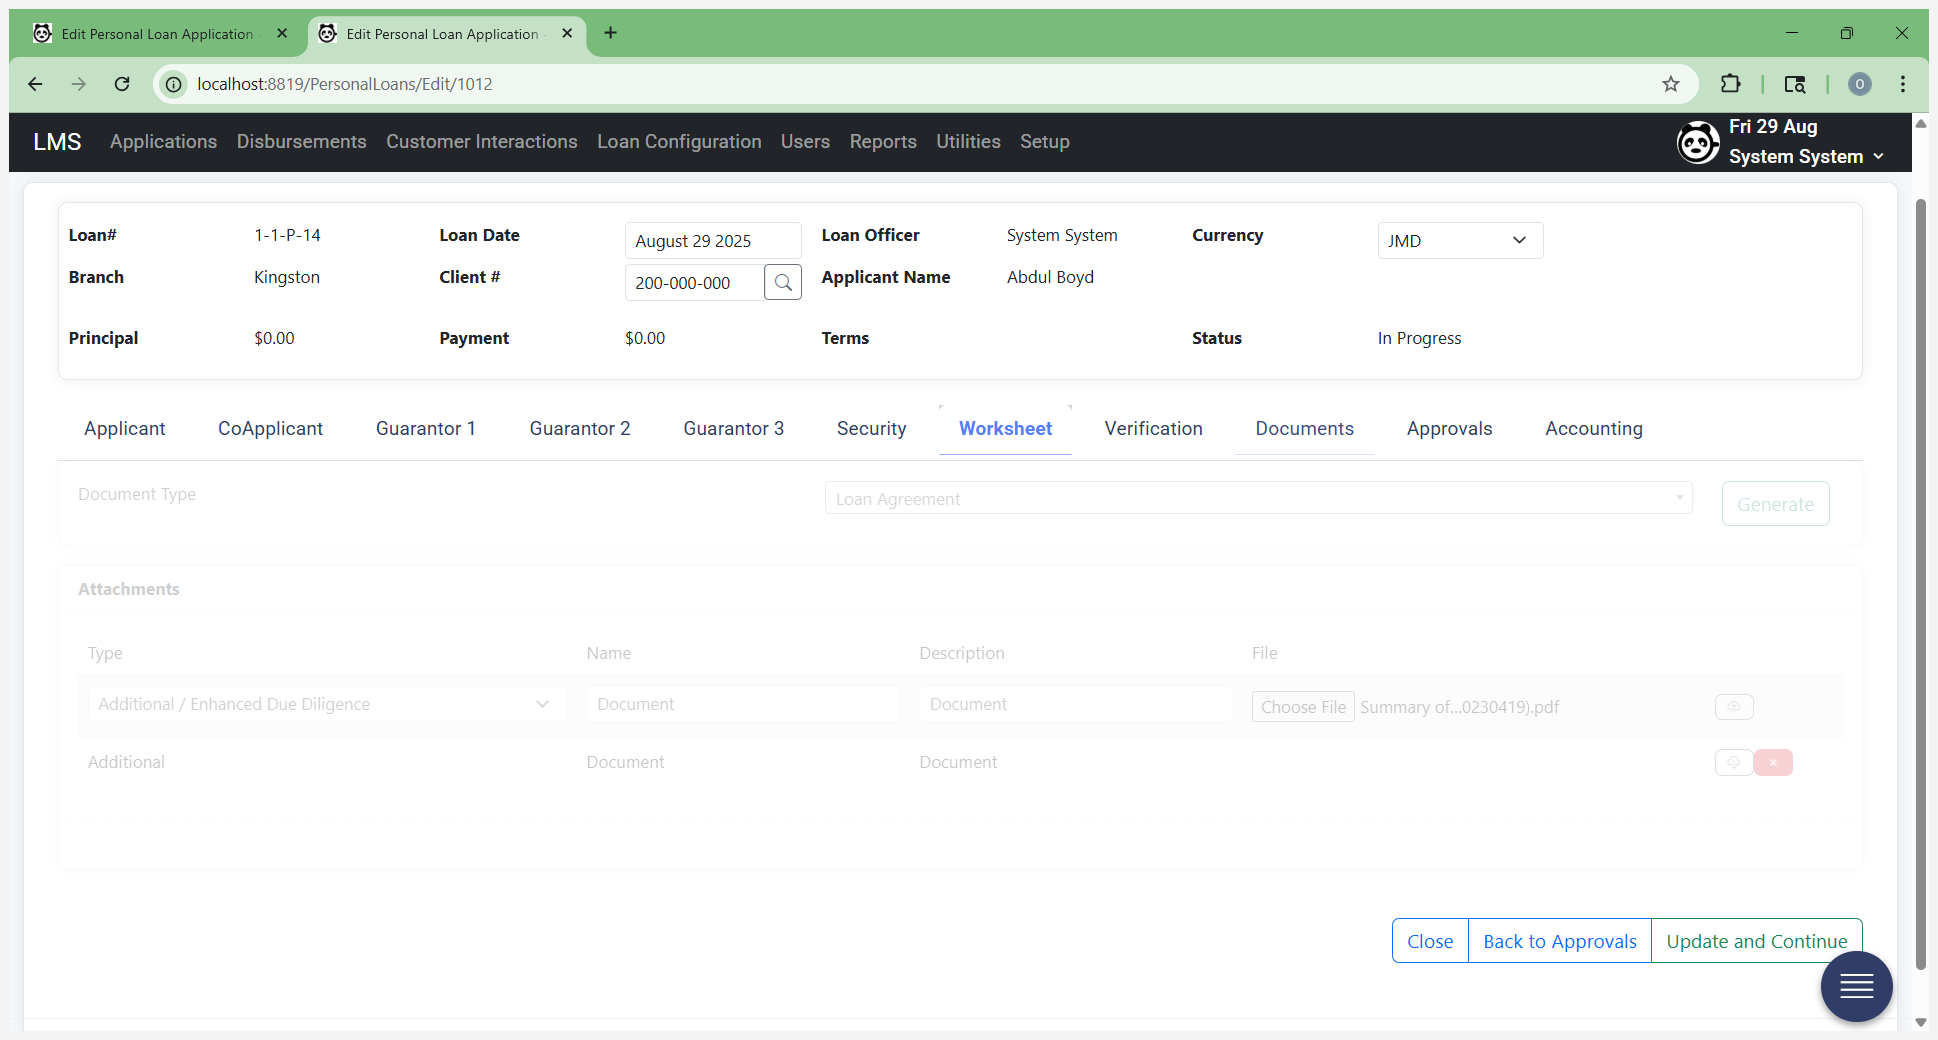
That increases the inventory. You can also go back and add more information if you don't have the documentation available when generating the loan, such as registration or insurance details. You can come back later and add this. Once you've populated that, you will capture original documents at the source and scan them in. Attach them under the Documents tab.
Simply select the document type if it appears in the list.
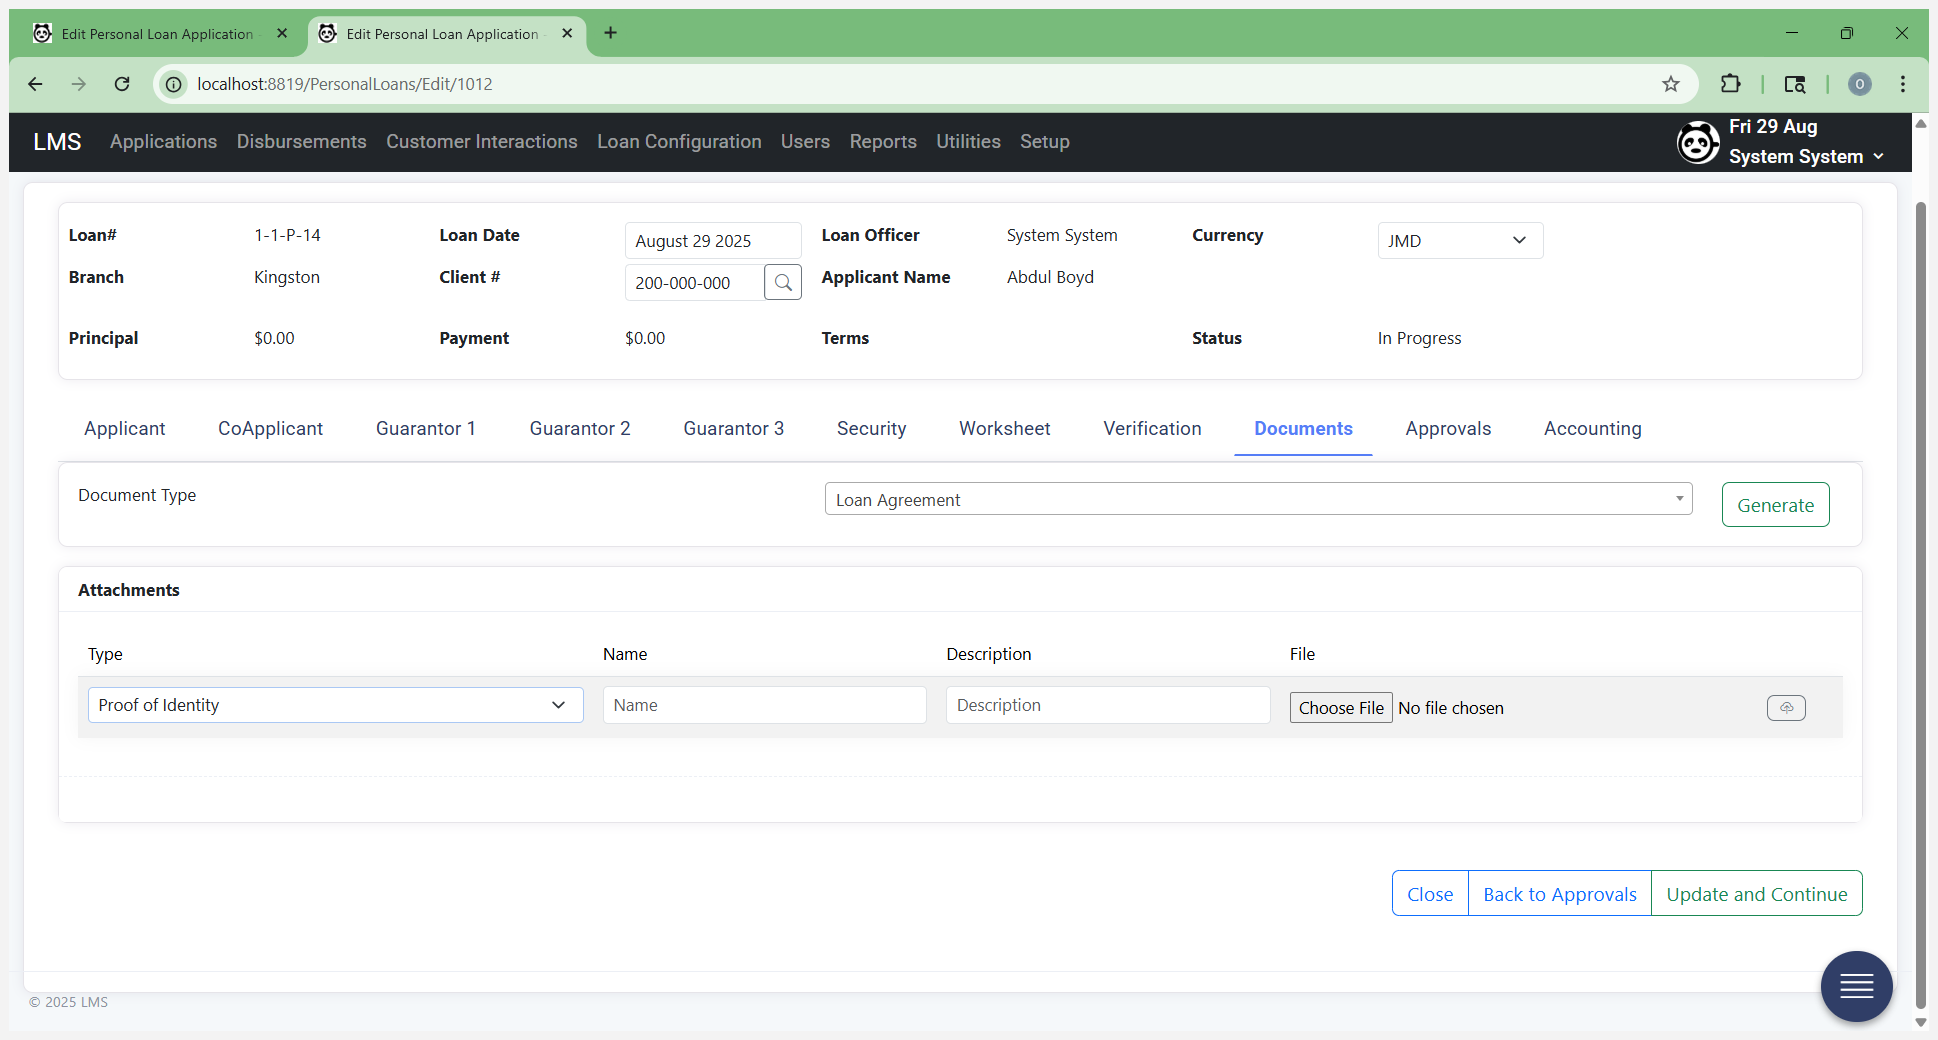
Other, if it isn't listed. This list may have additional entries.

Give it a name and description to ensure it is valid. You should upload each document separately, not a single file containing scans of all the individual source documents. If you have a photo ID, pay stubs, or any other required documents, upload each one separately. This allows us to identify and describe each document individually.

Browse your computer files and click the Upload button.
You just browse and look for a file. Here is an example of a file.


This is additional enhanced due diligence.


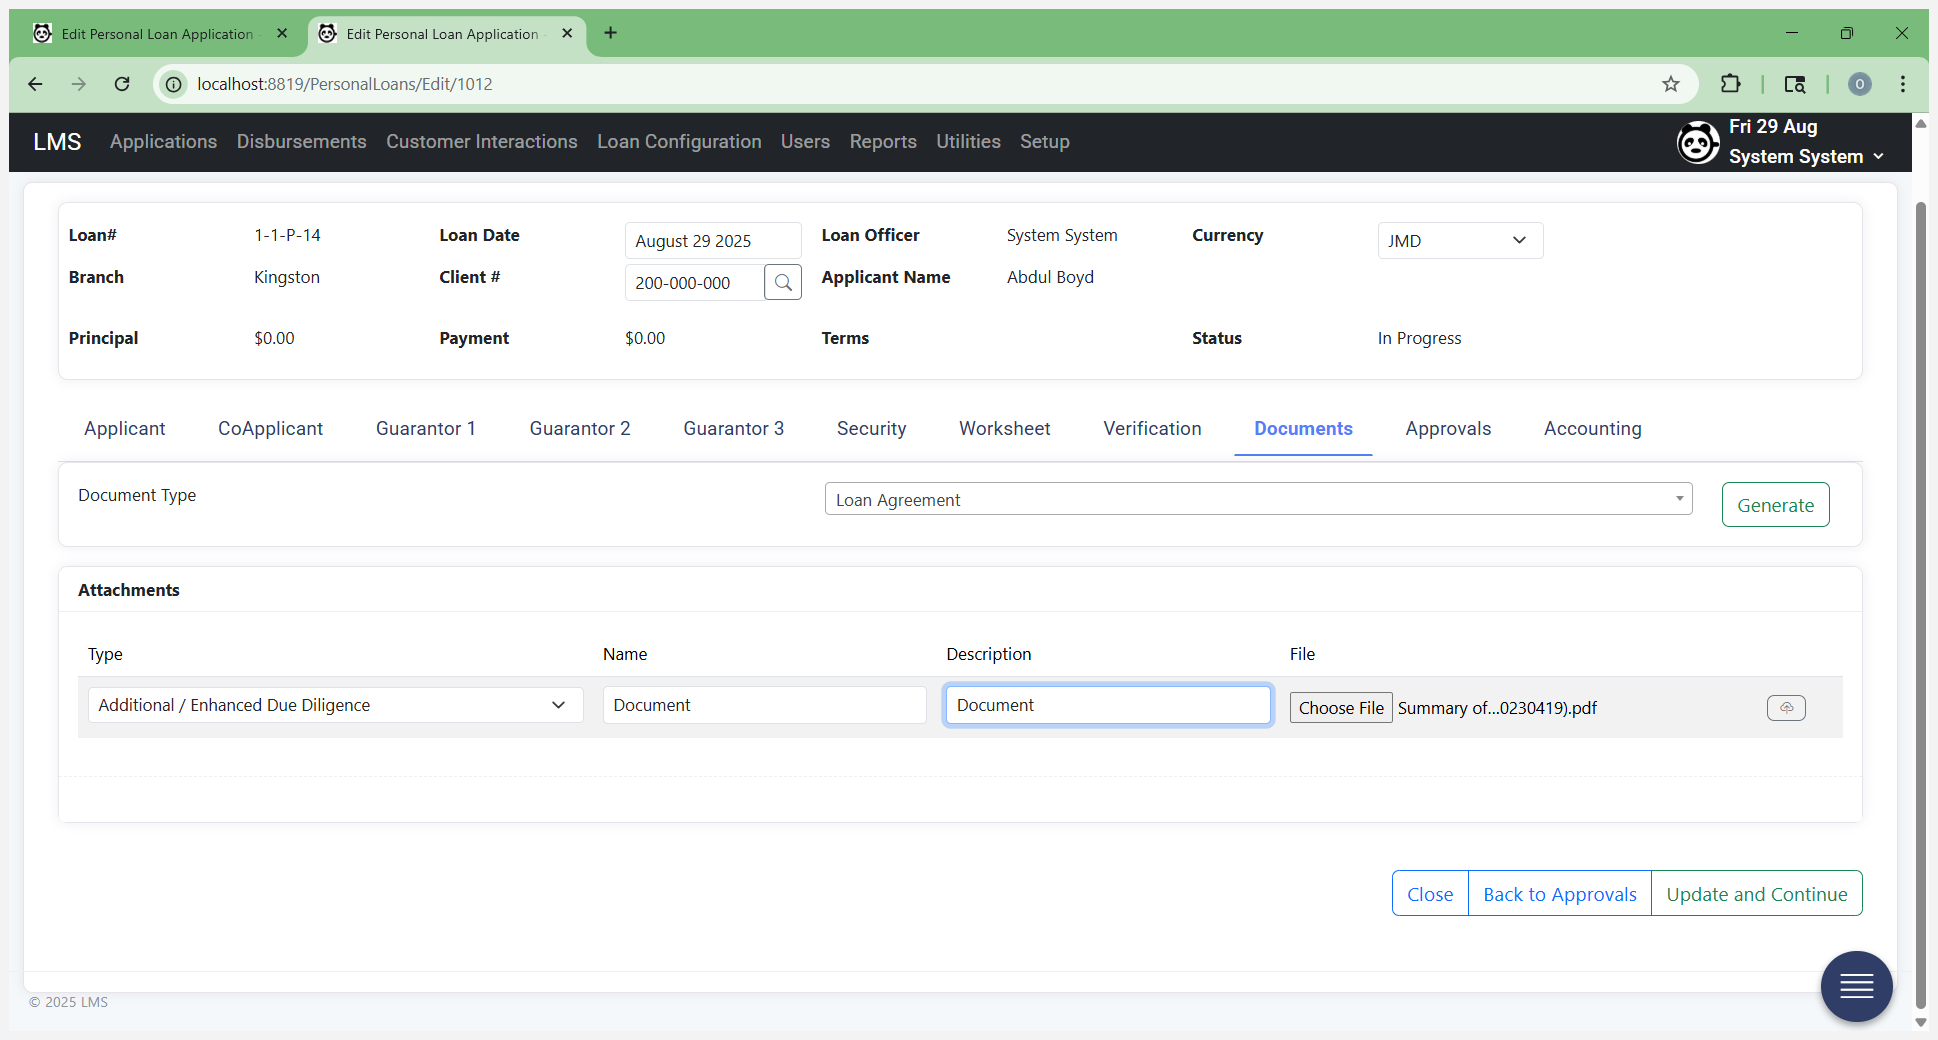
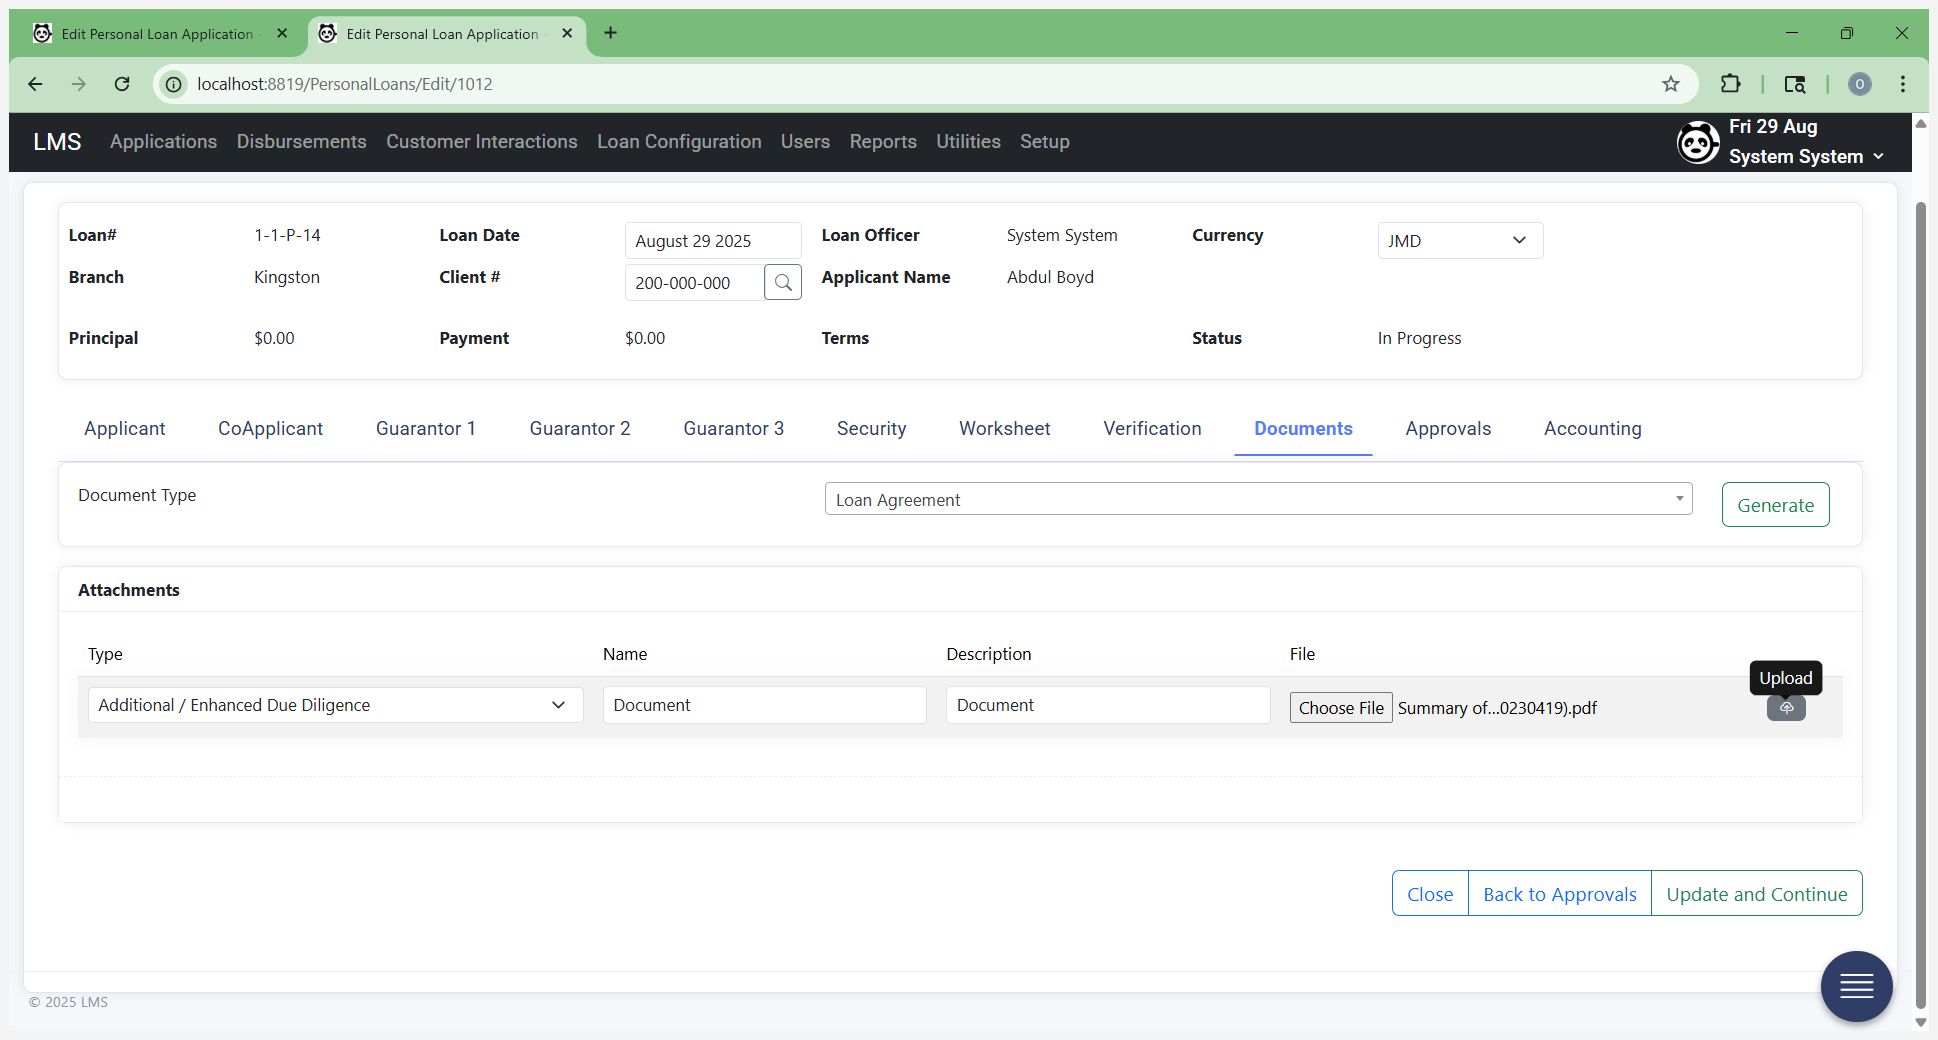
Select "On Upload." Once this file is attached to the form, it travels with the application and loan throughout their lifetime. Once you've attached your documents, you can proceed to the worksheet.
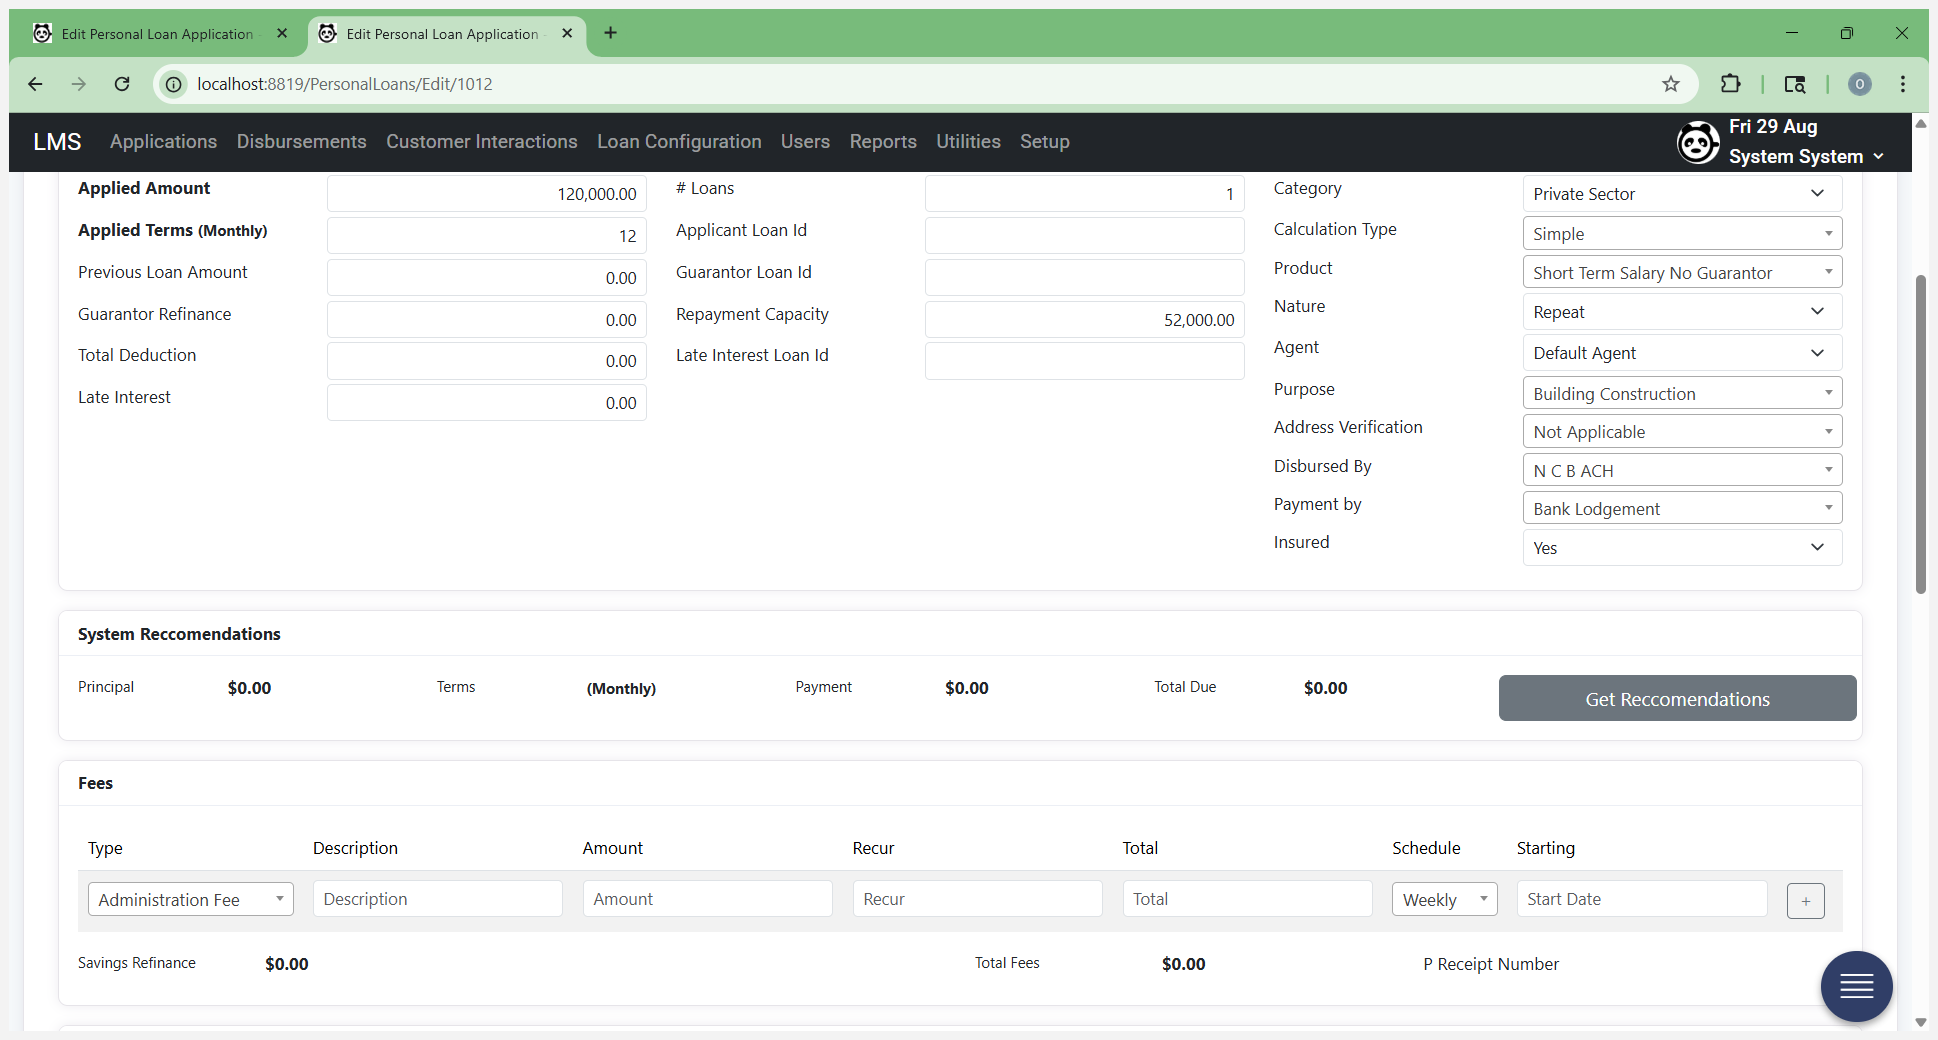
Enter your loan amount here.
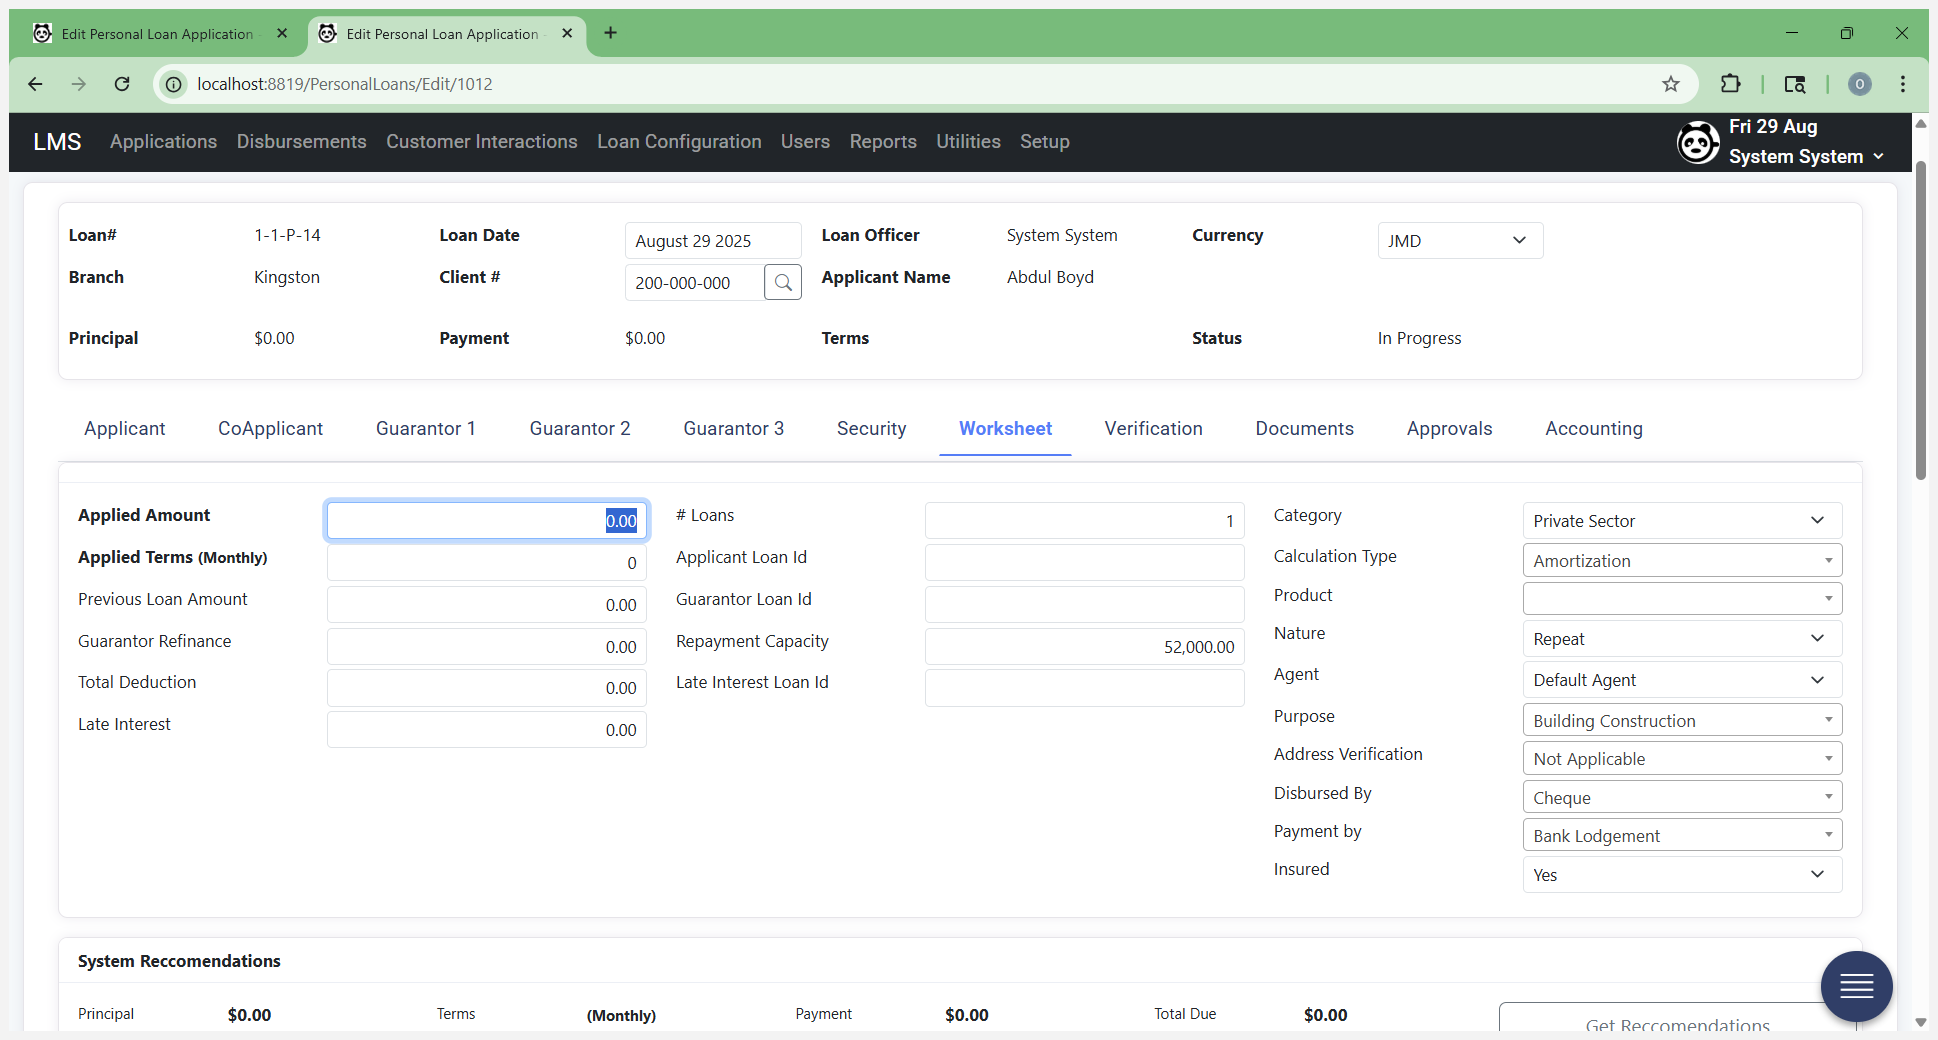
That's the amount being applied for. This person will apply for $120,000 over 12 months.
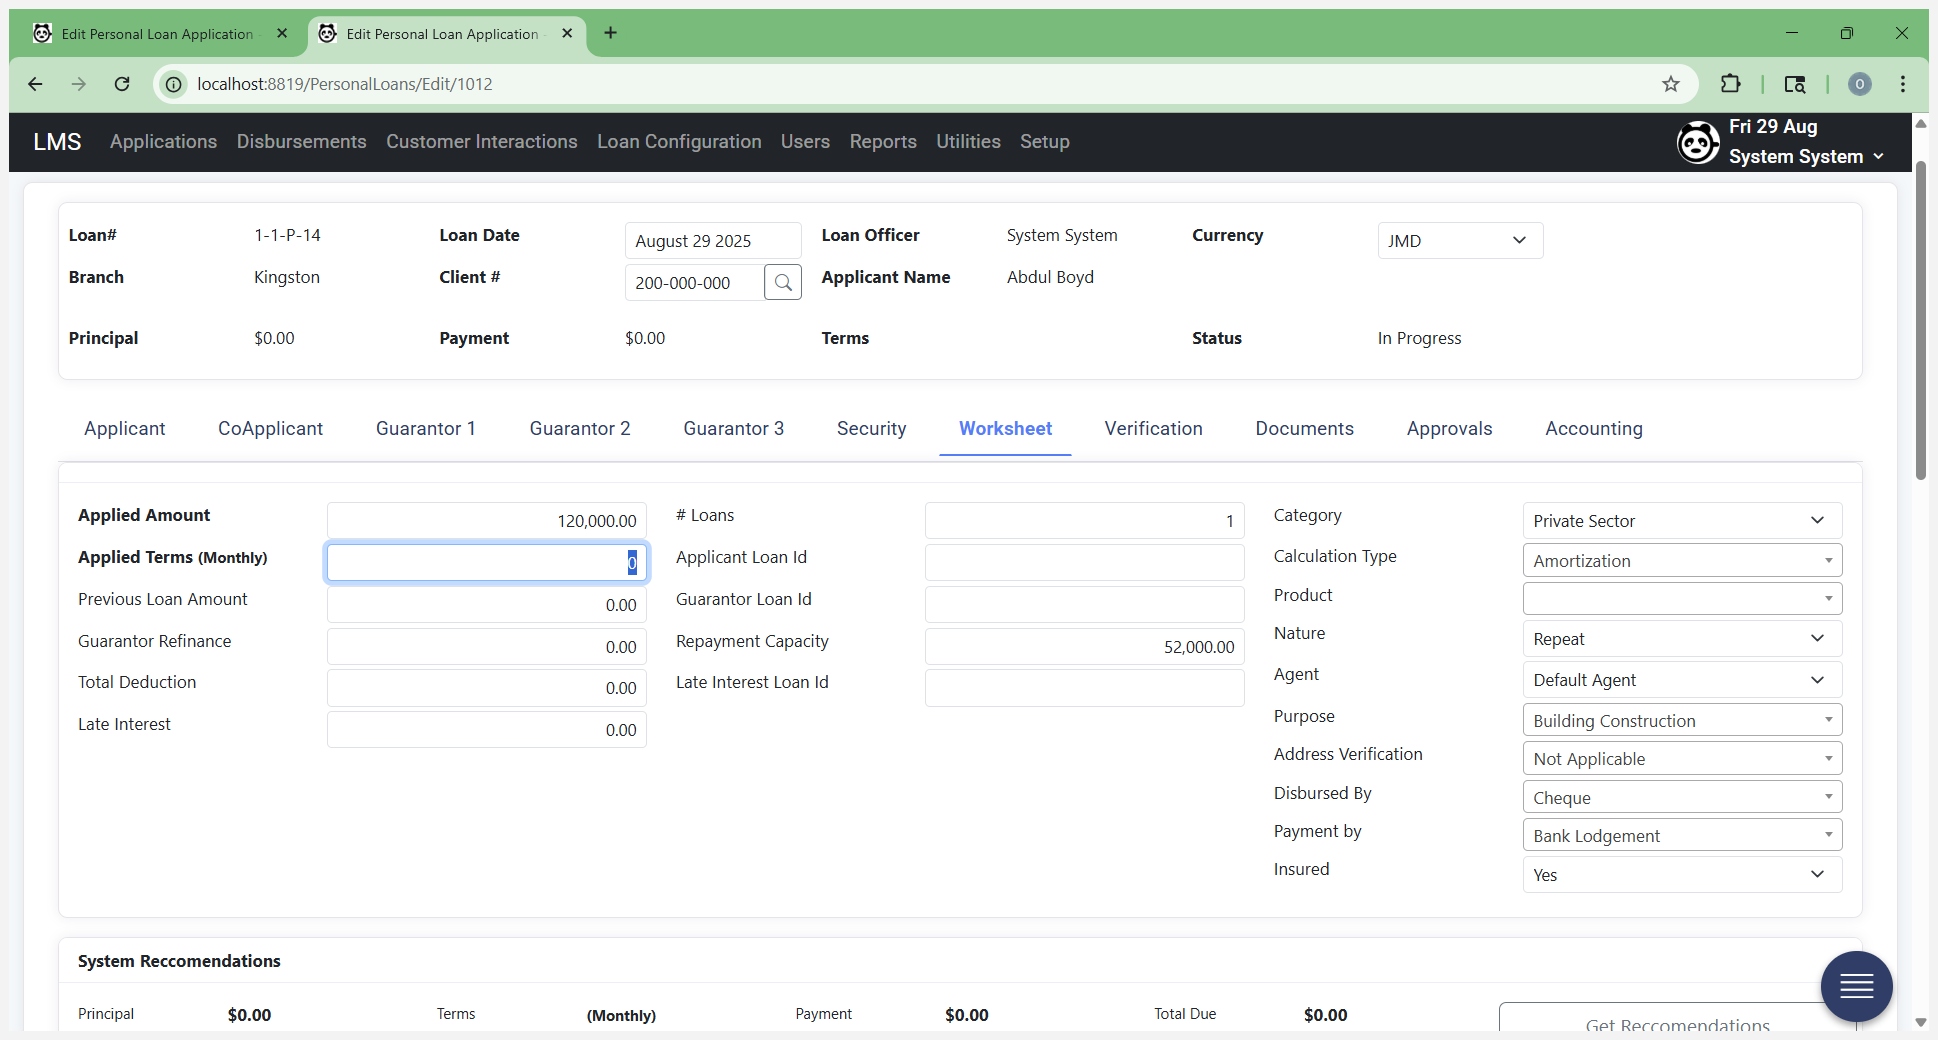
Select a product using your rate guide.
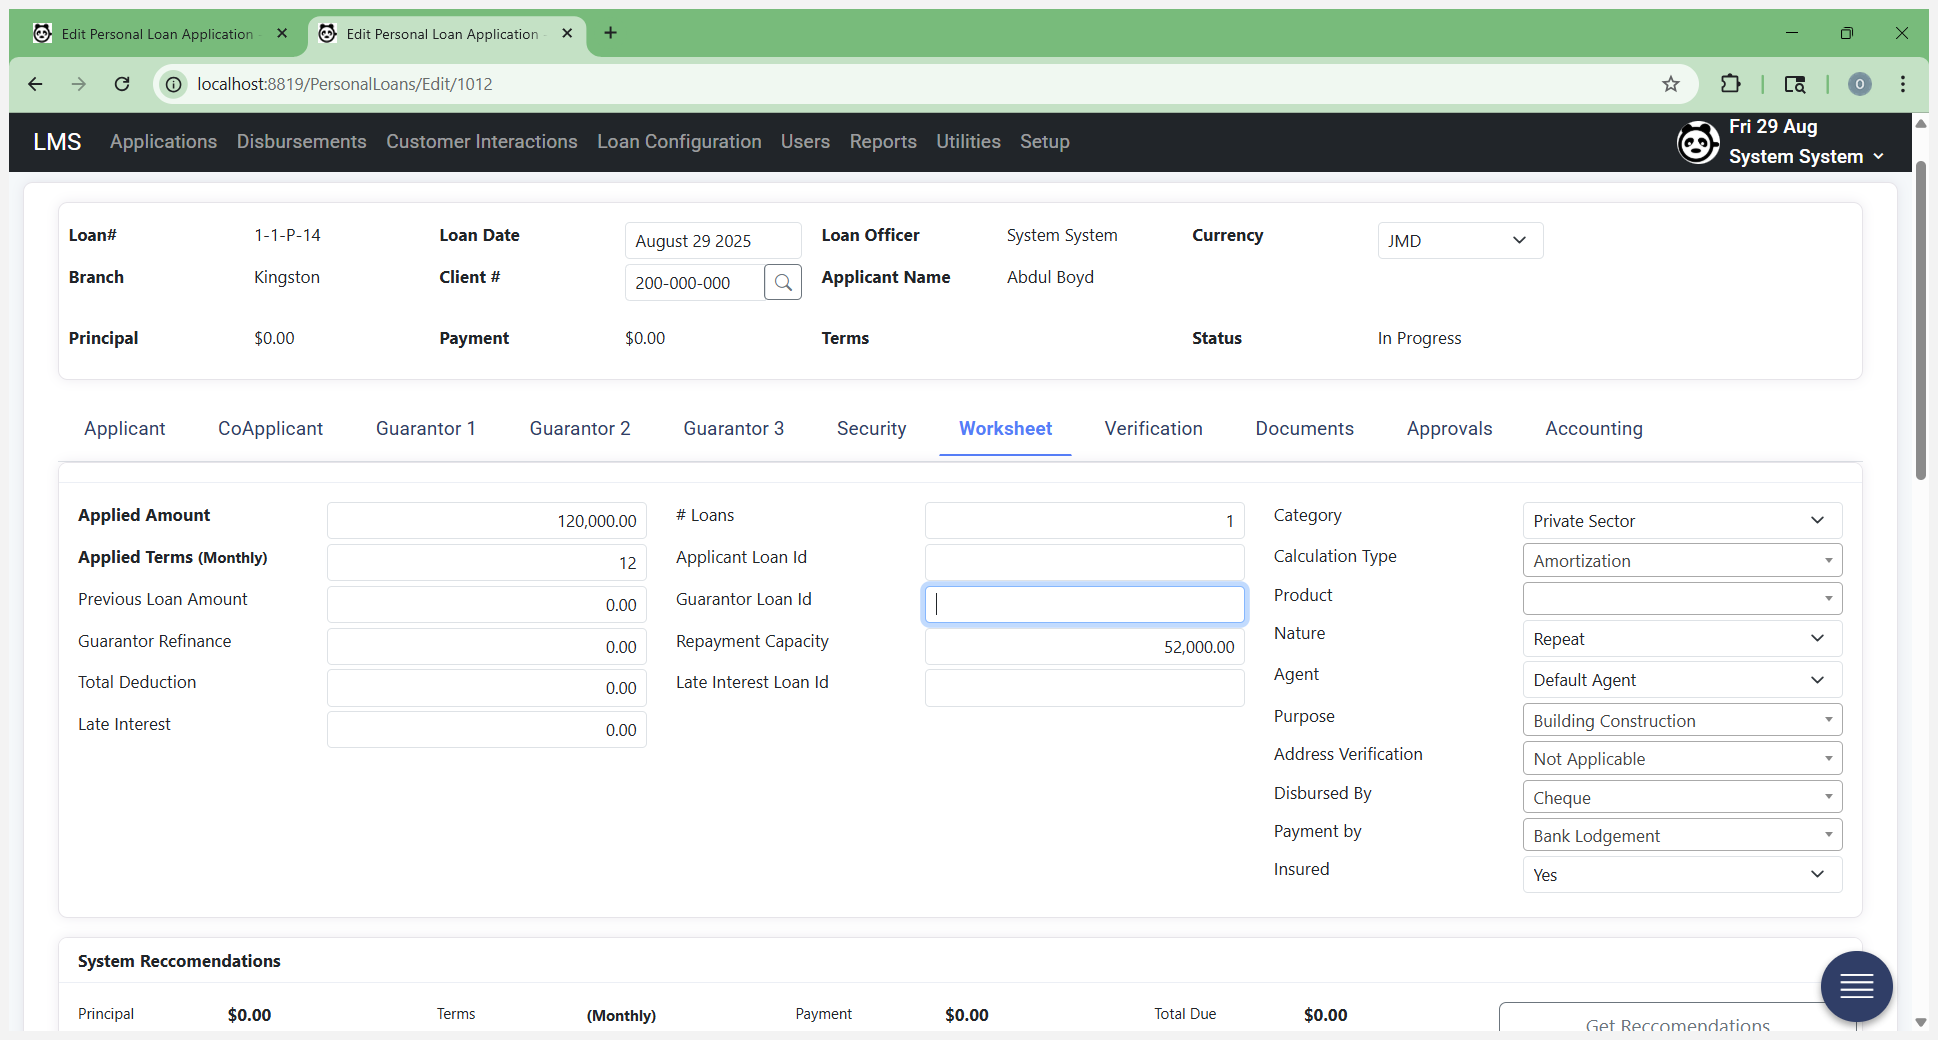
You know the product you are using, and you have the customer's information they collected.

This is a private sector customer.
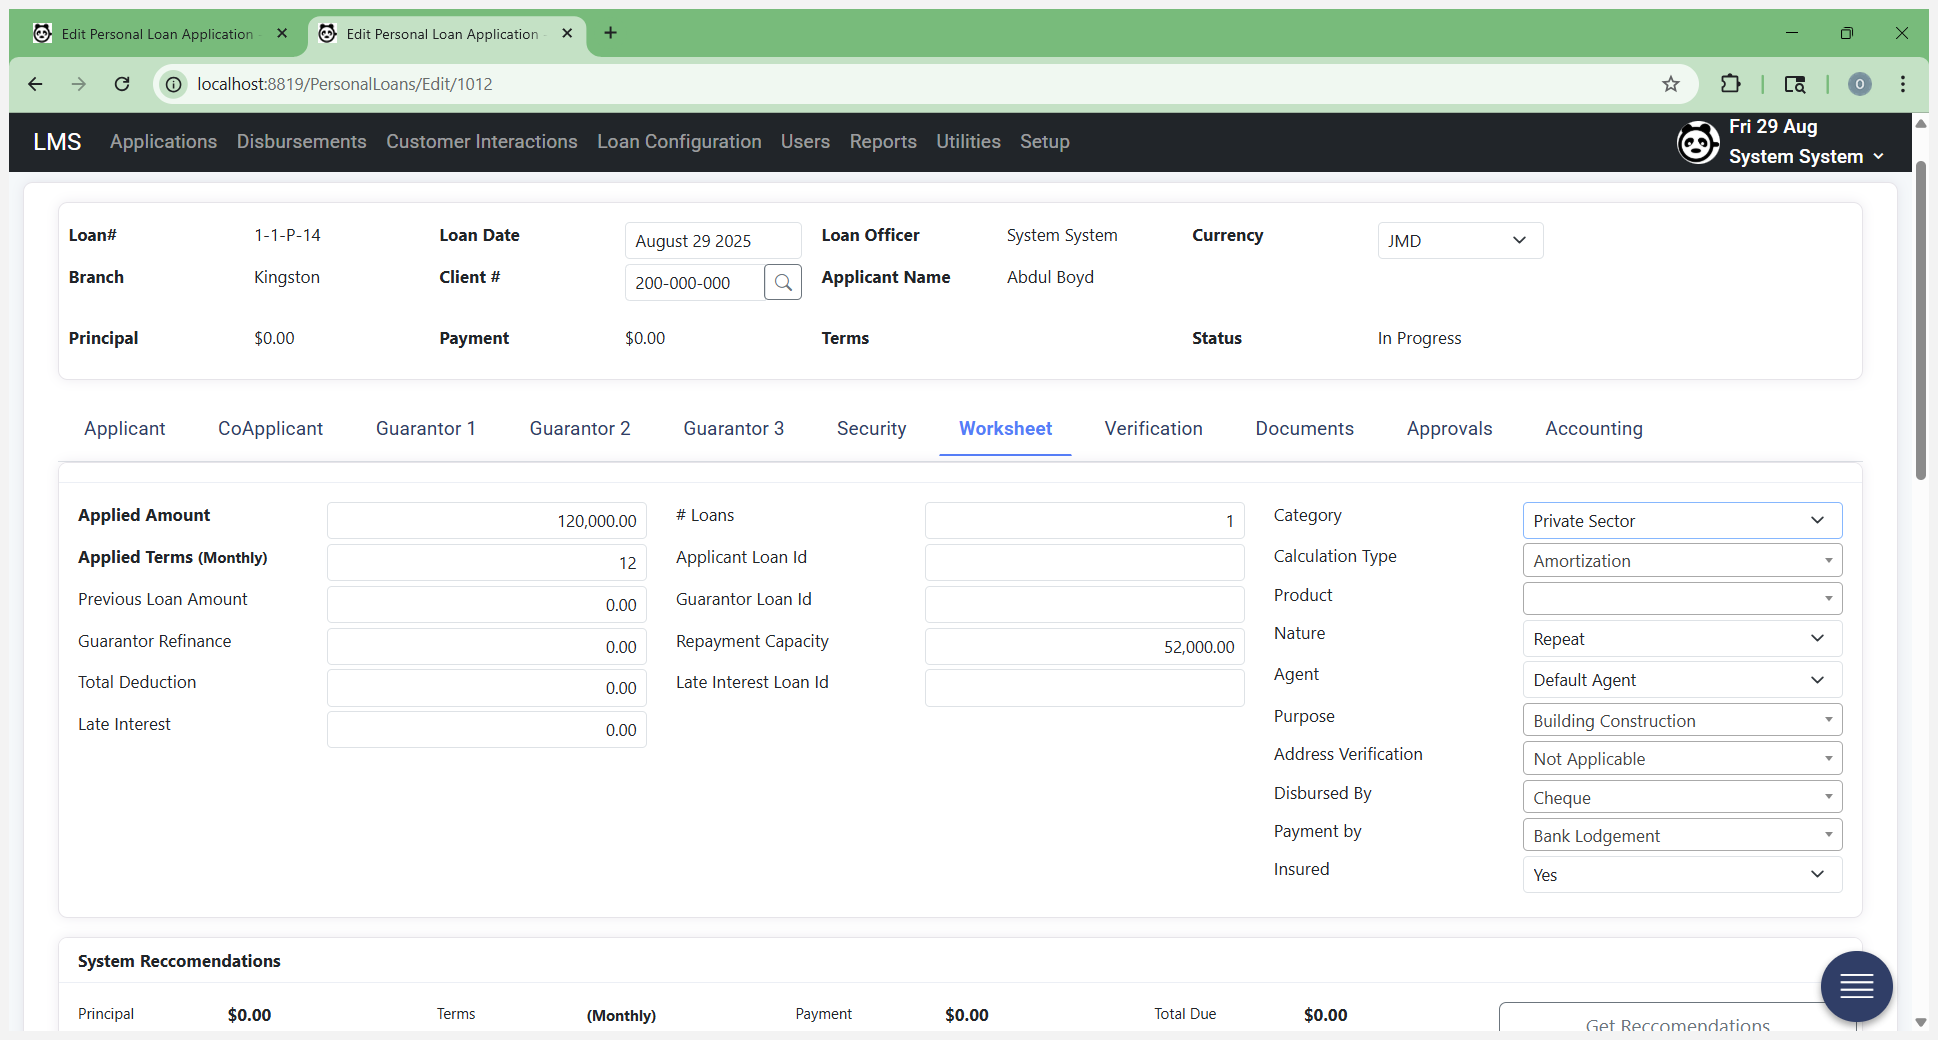
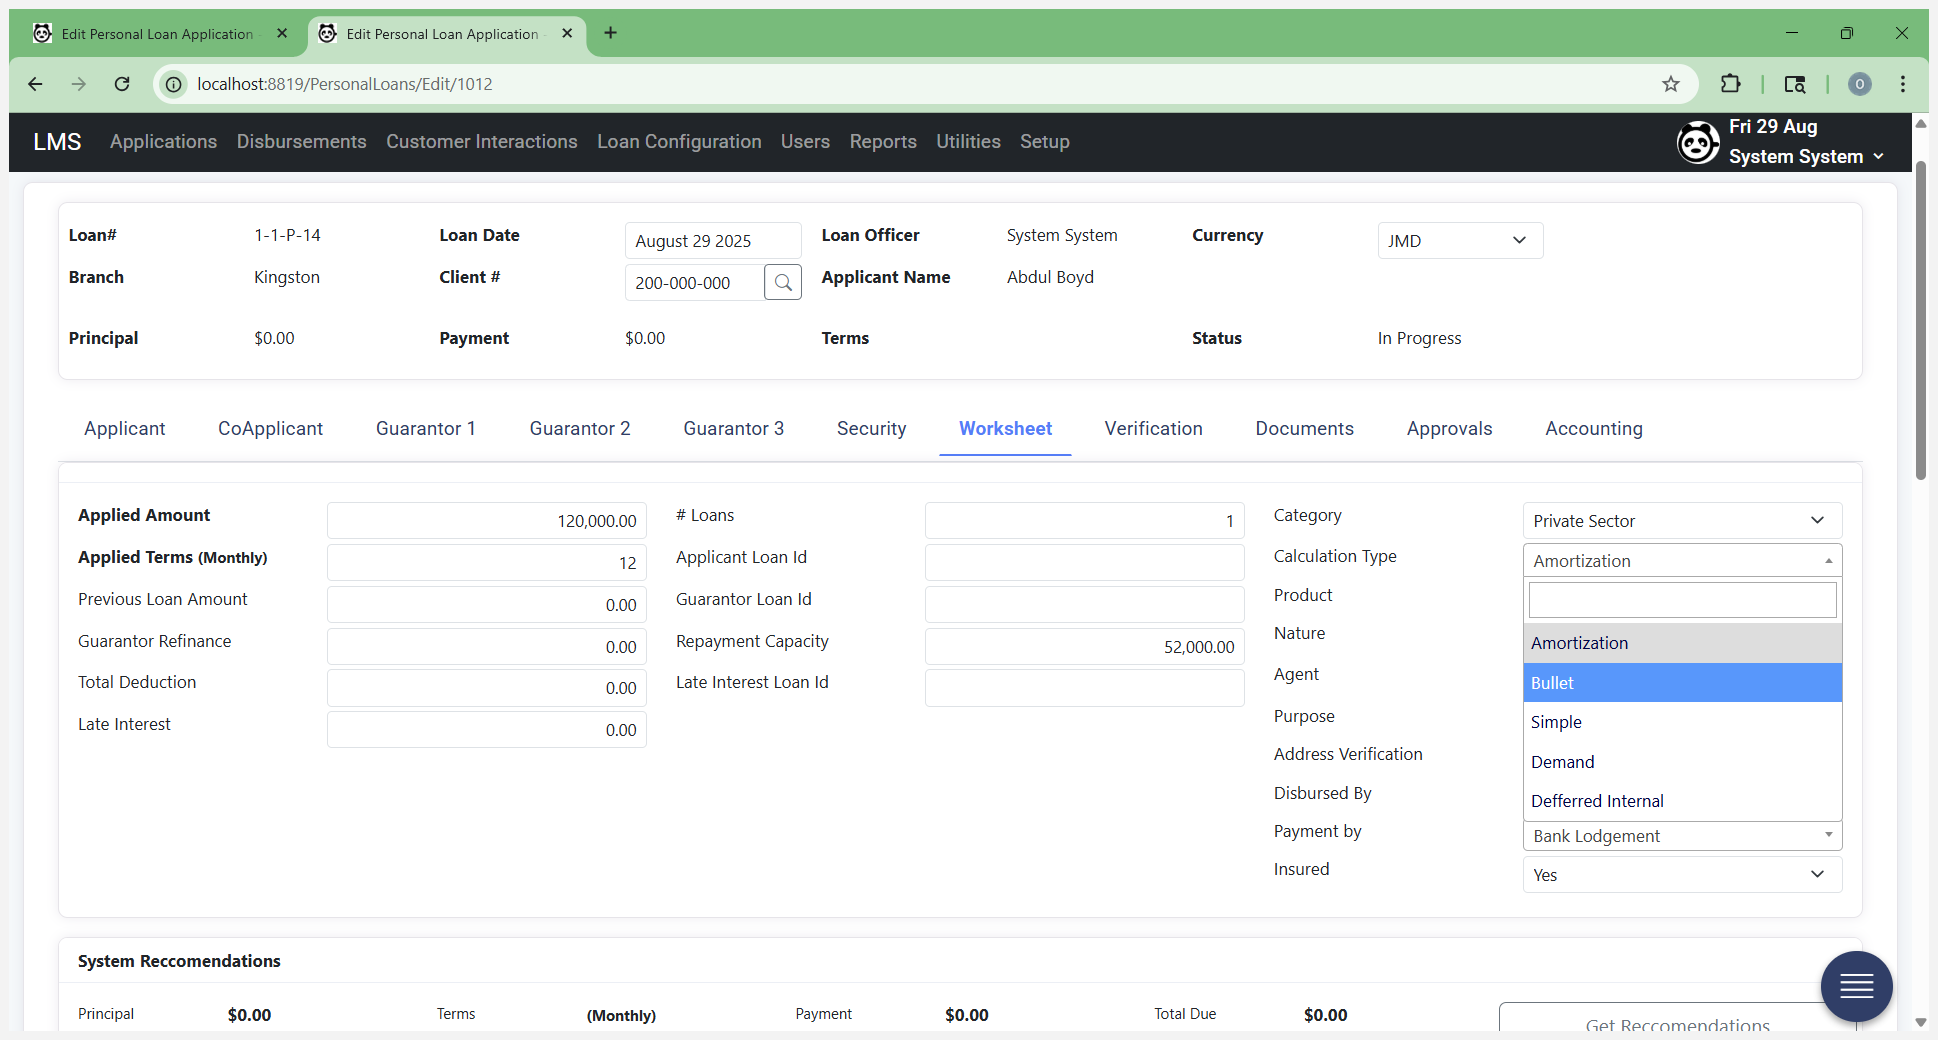
You select Simple. Your calculations can be done using either Simple or Amortization methods. This time, we are selecting Simple.
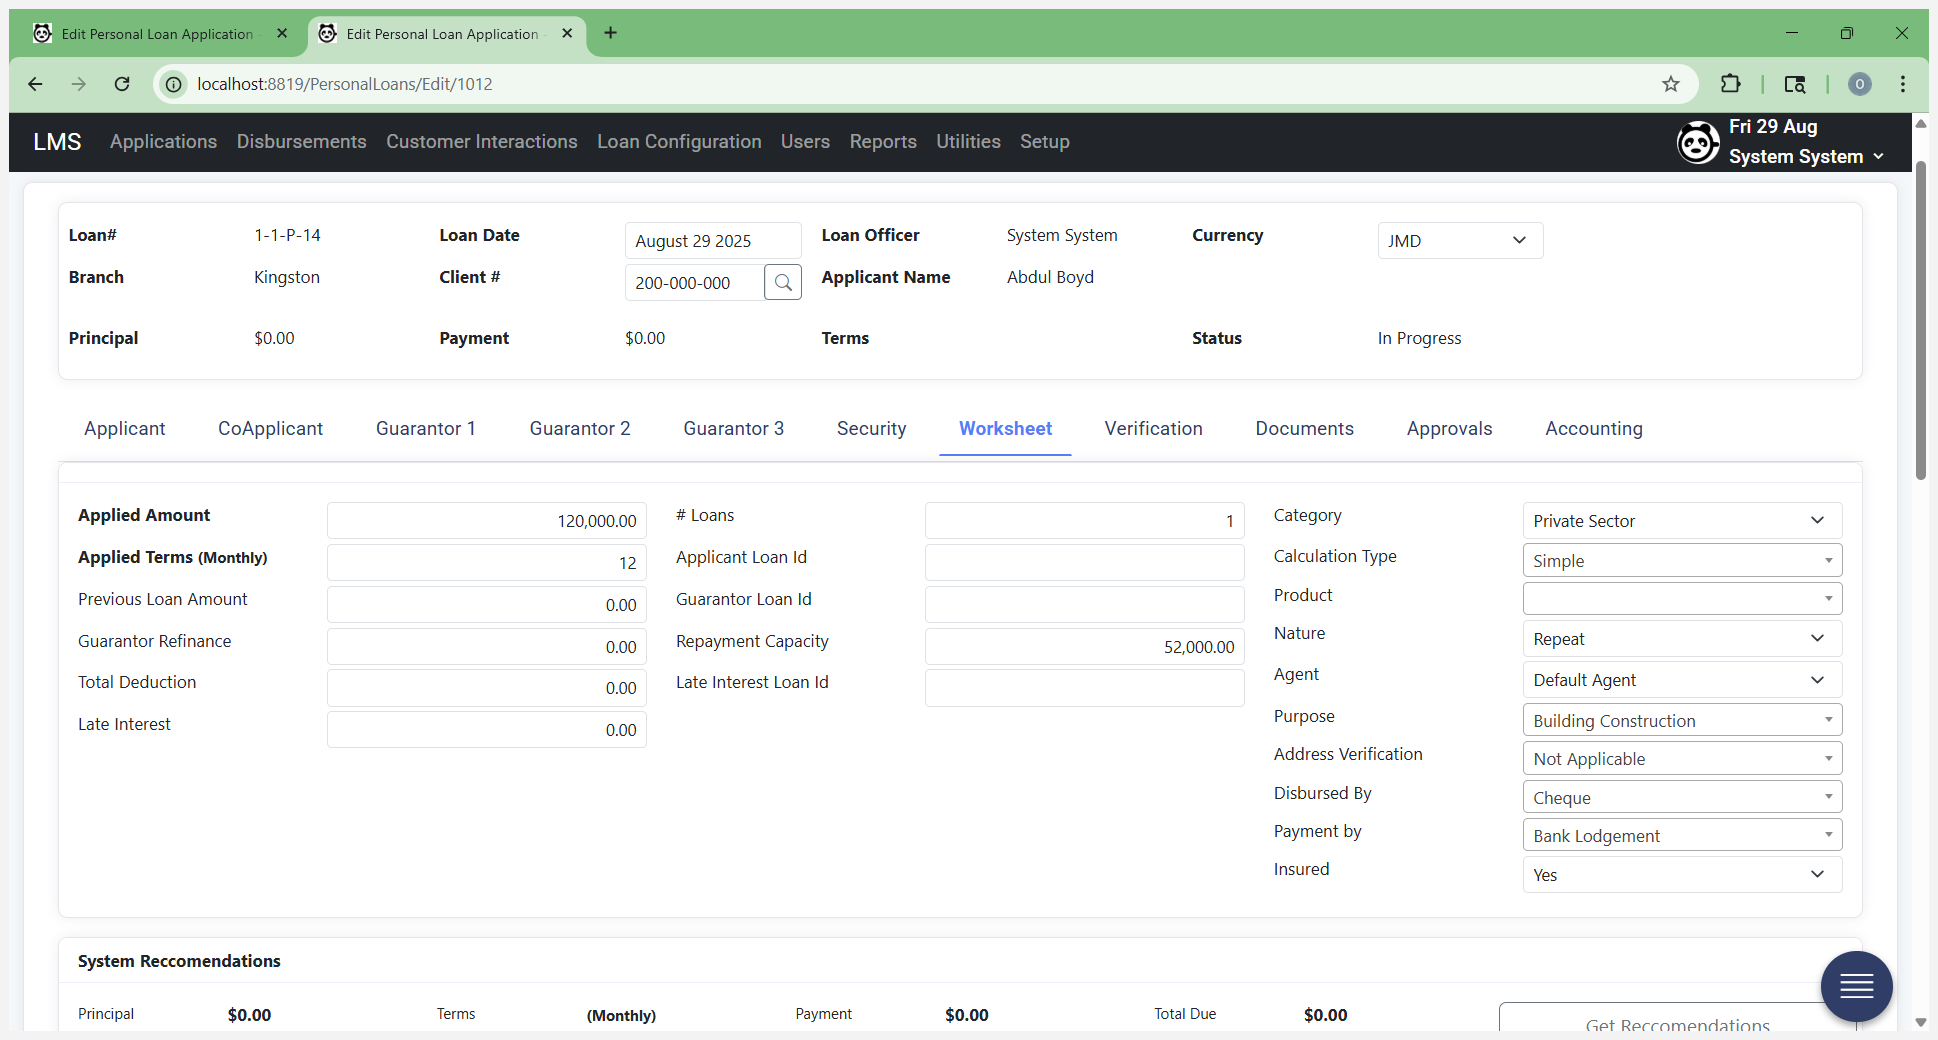
Select the product they will be borrowing under: Short Term Salary No Guarantor.
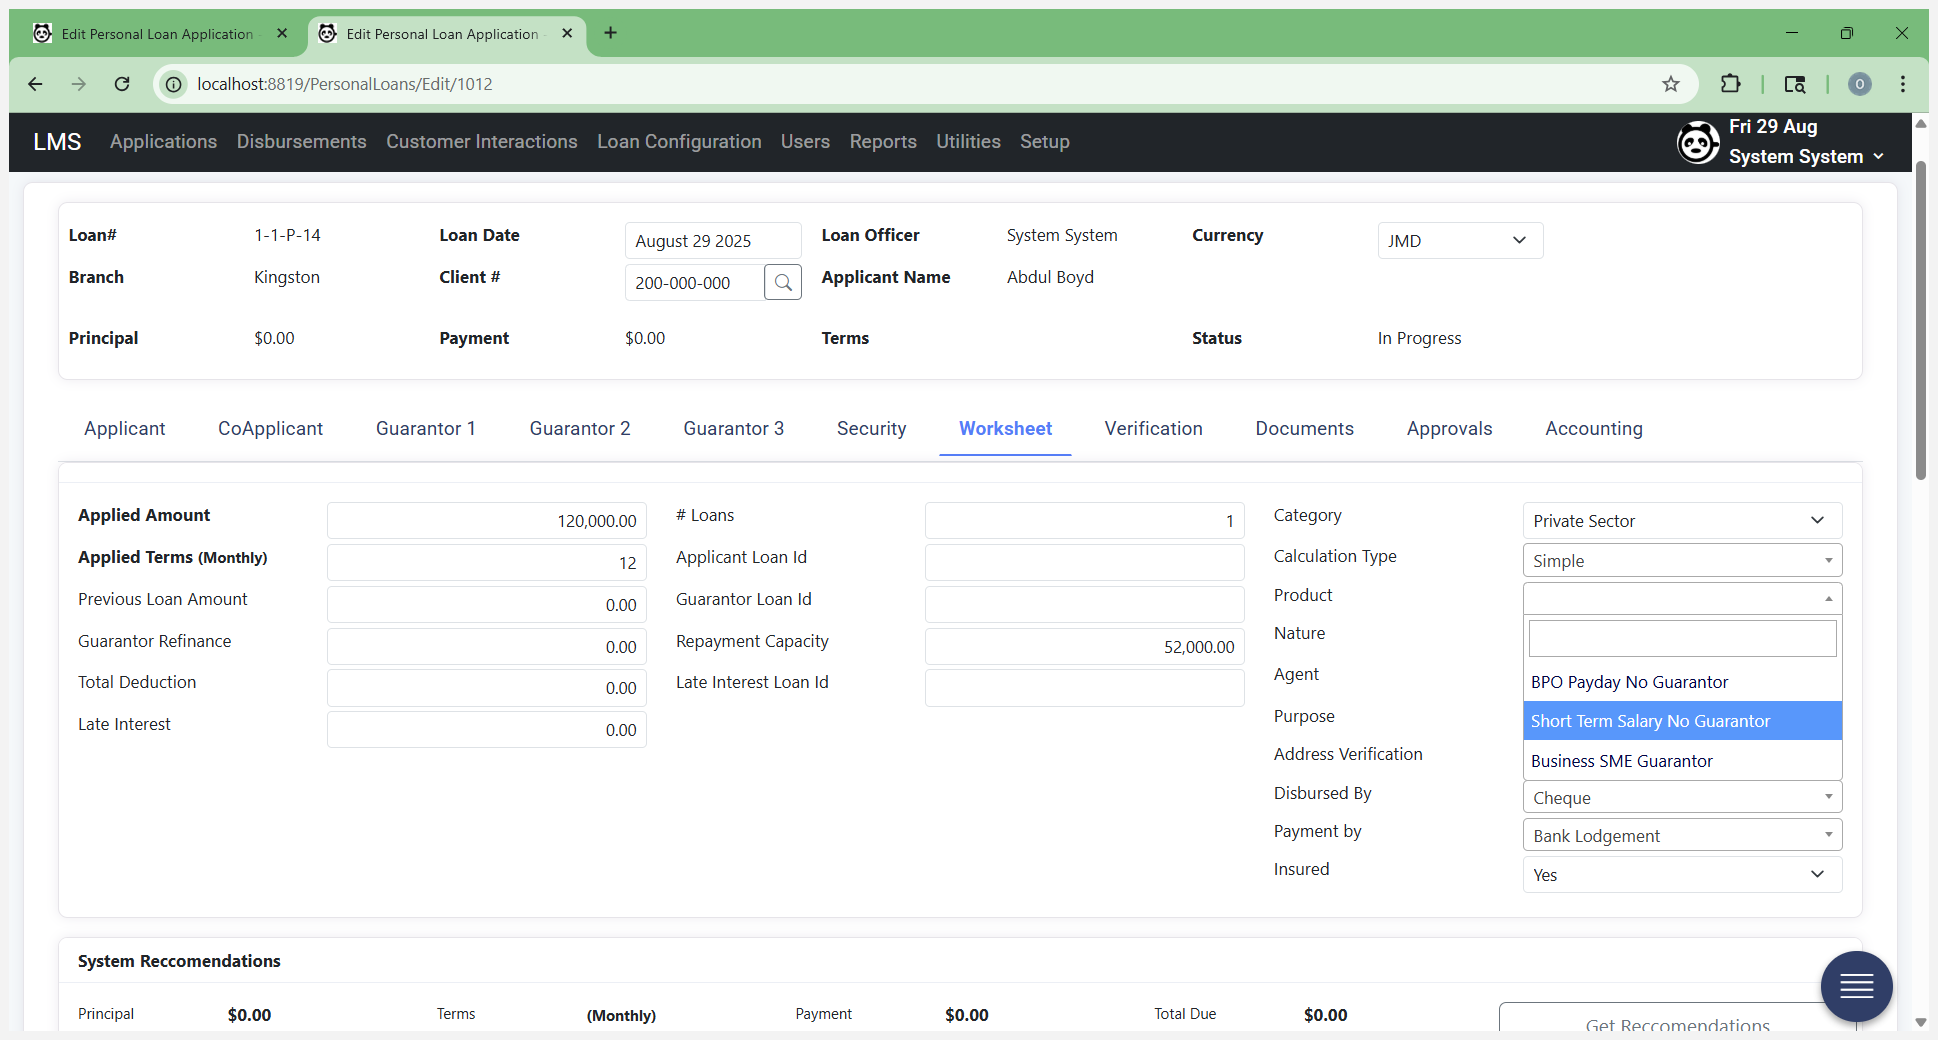

That's the one we're using here. This is a repeat customer because they already have a loan with you.
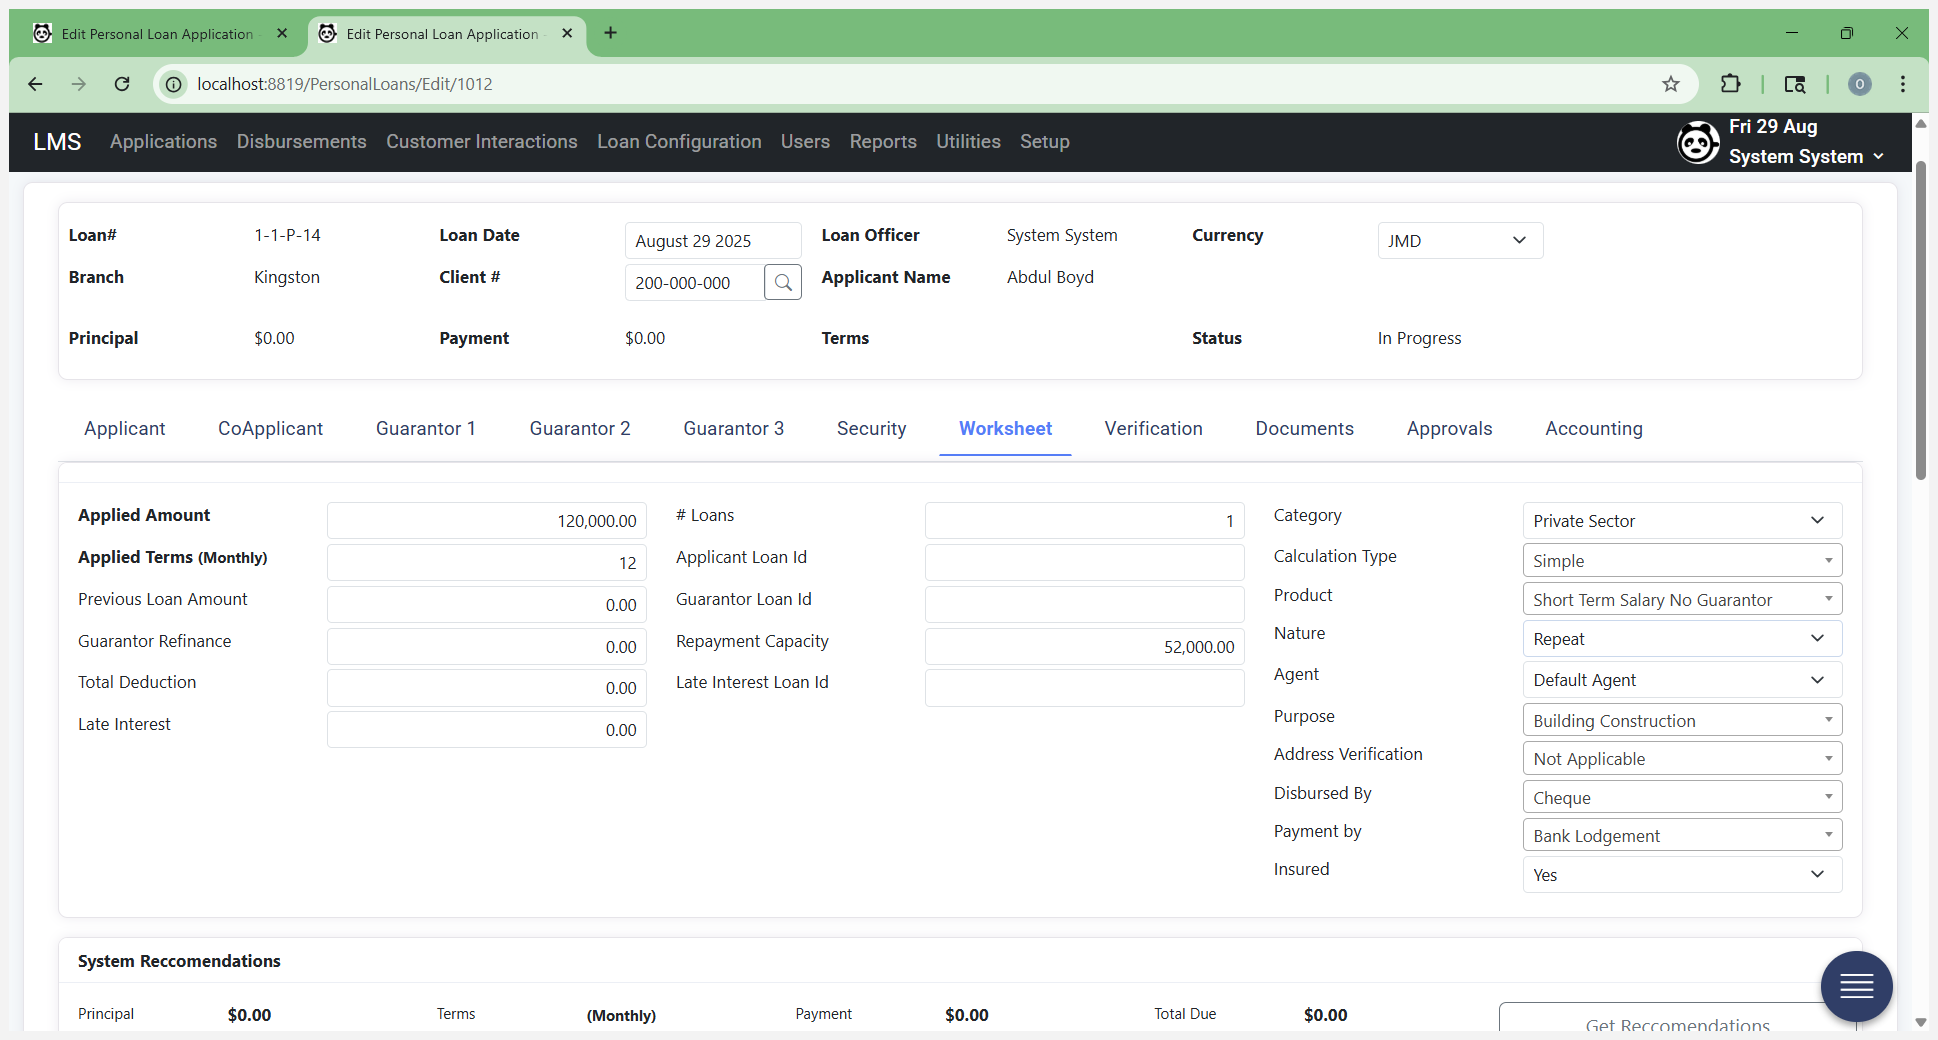
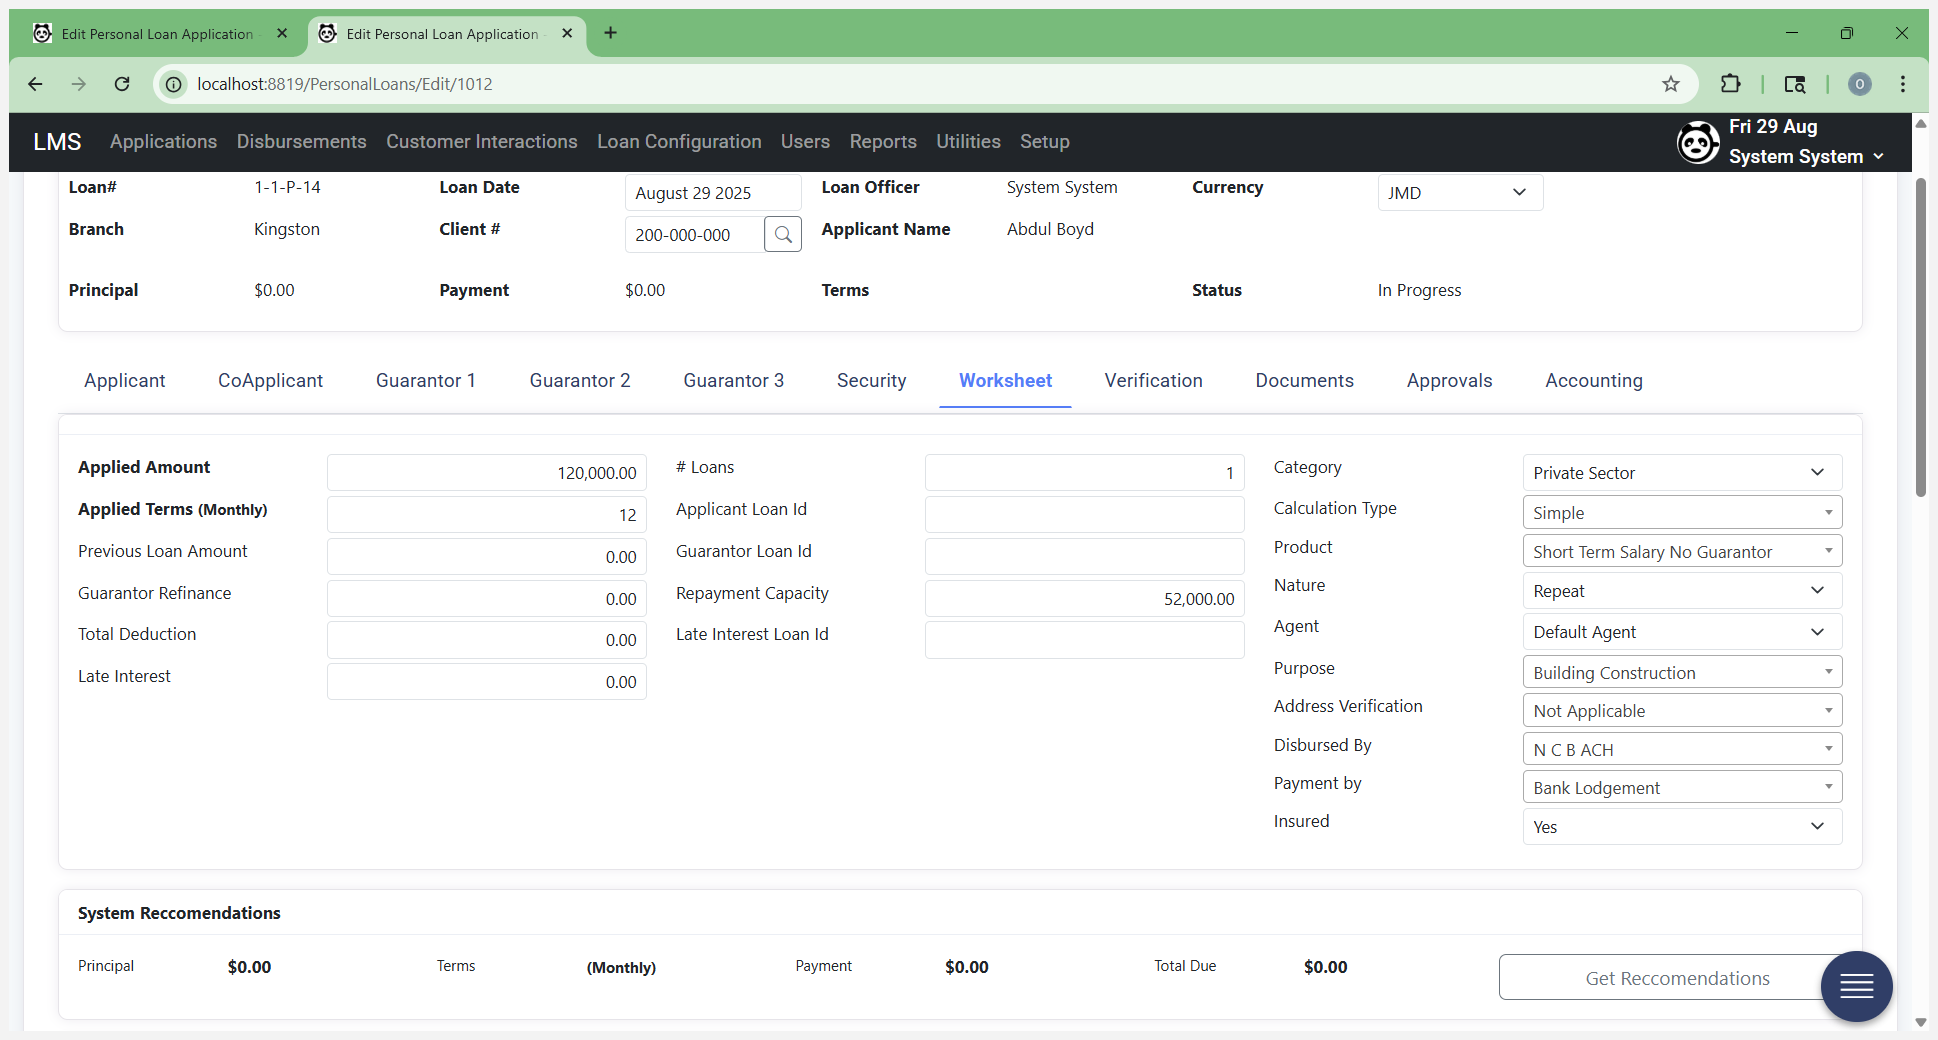
That is automatically selected. You need to pay close attention to the "Disburse by" date.
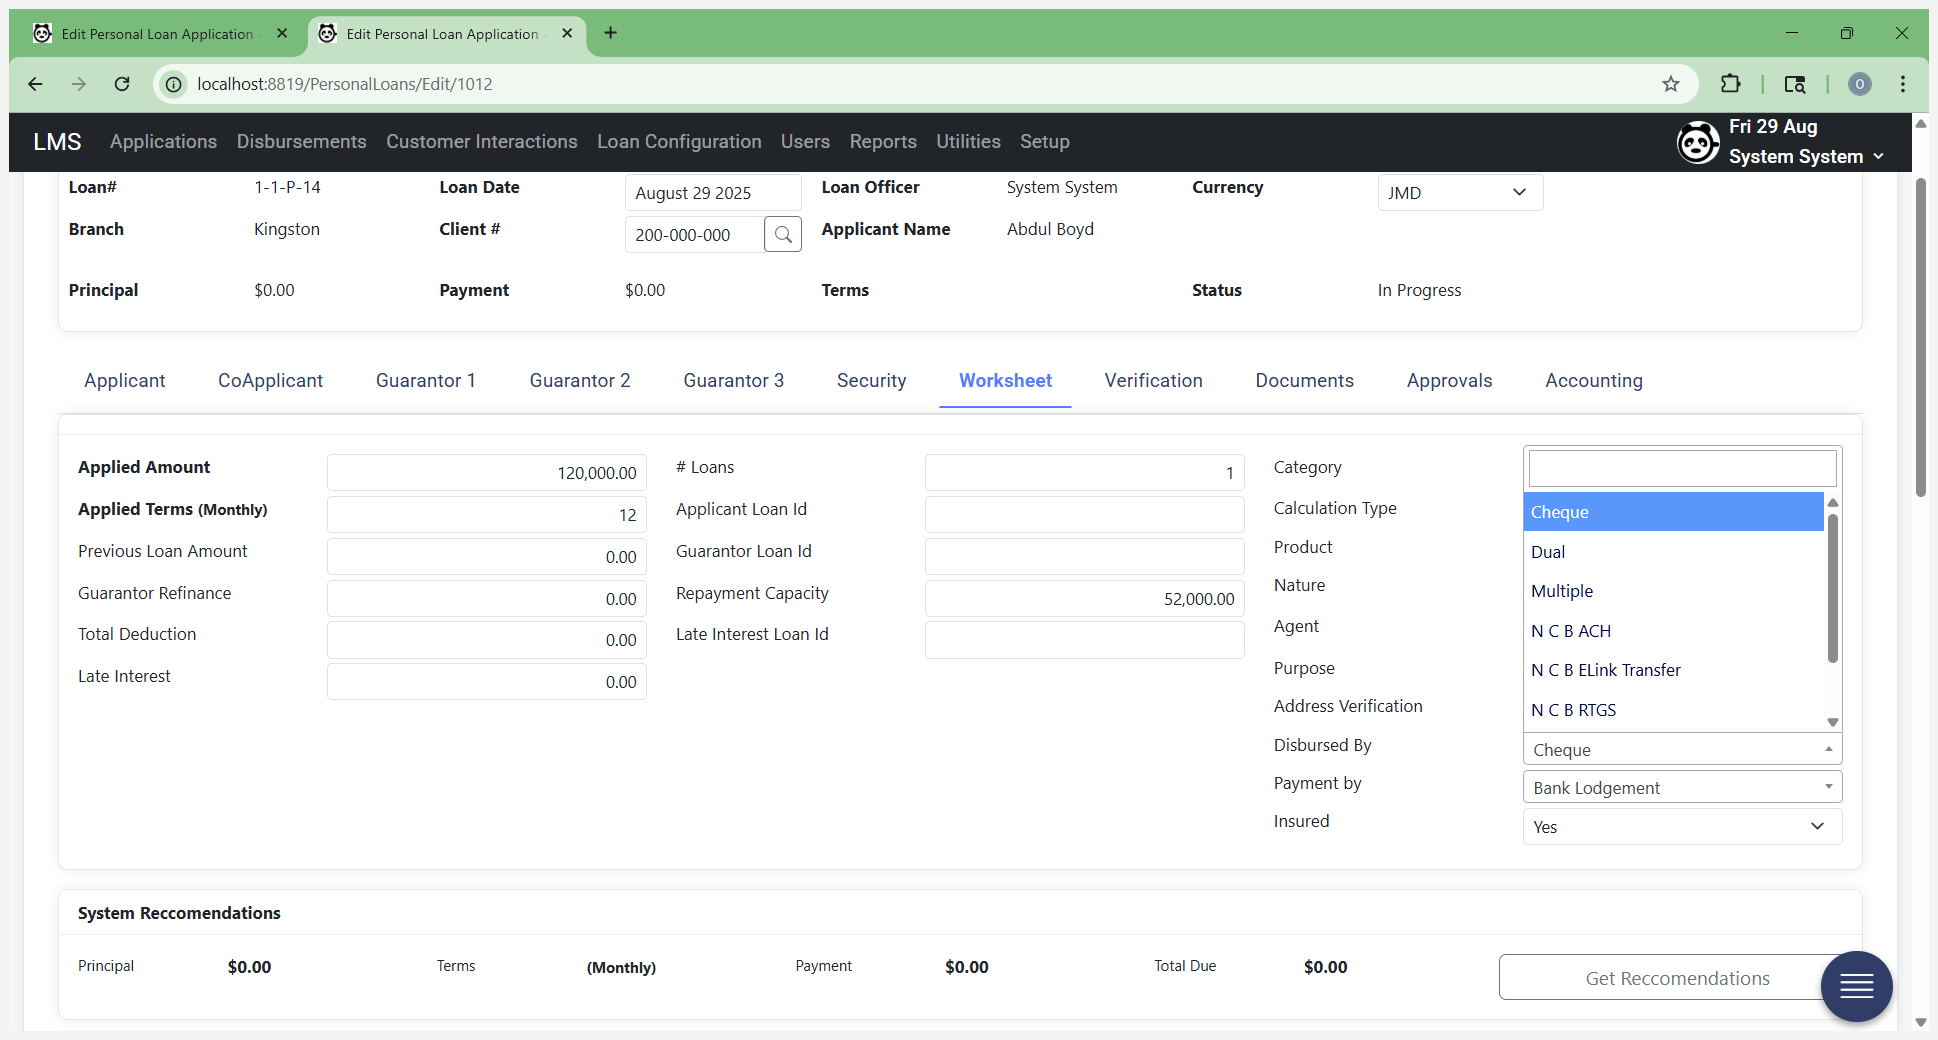
Select the correct type to match. We will disburse funds via ACH, eLink, or RTGS, depending on whether it is NCB to NCB, NCB cross-bank, and whether the amount is over or under a million.

Select ACH in this section. Next, click Get Recommendations.
Click on "Get Recommendations."
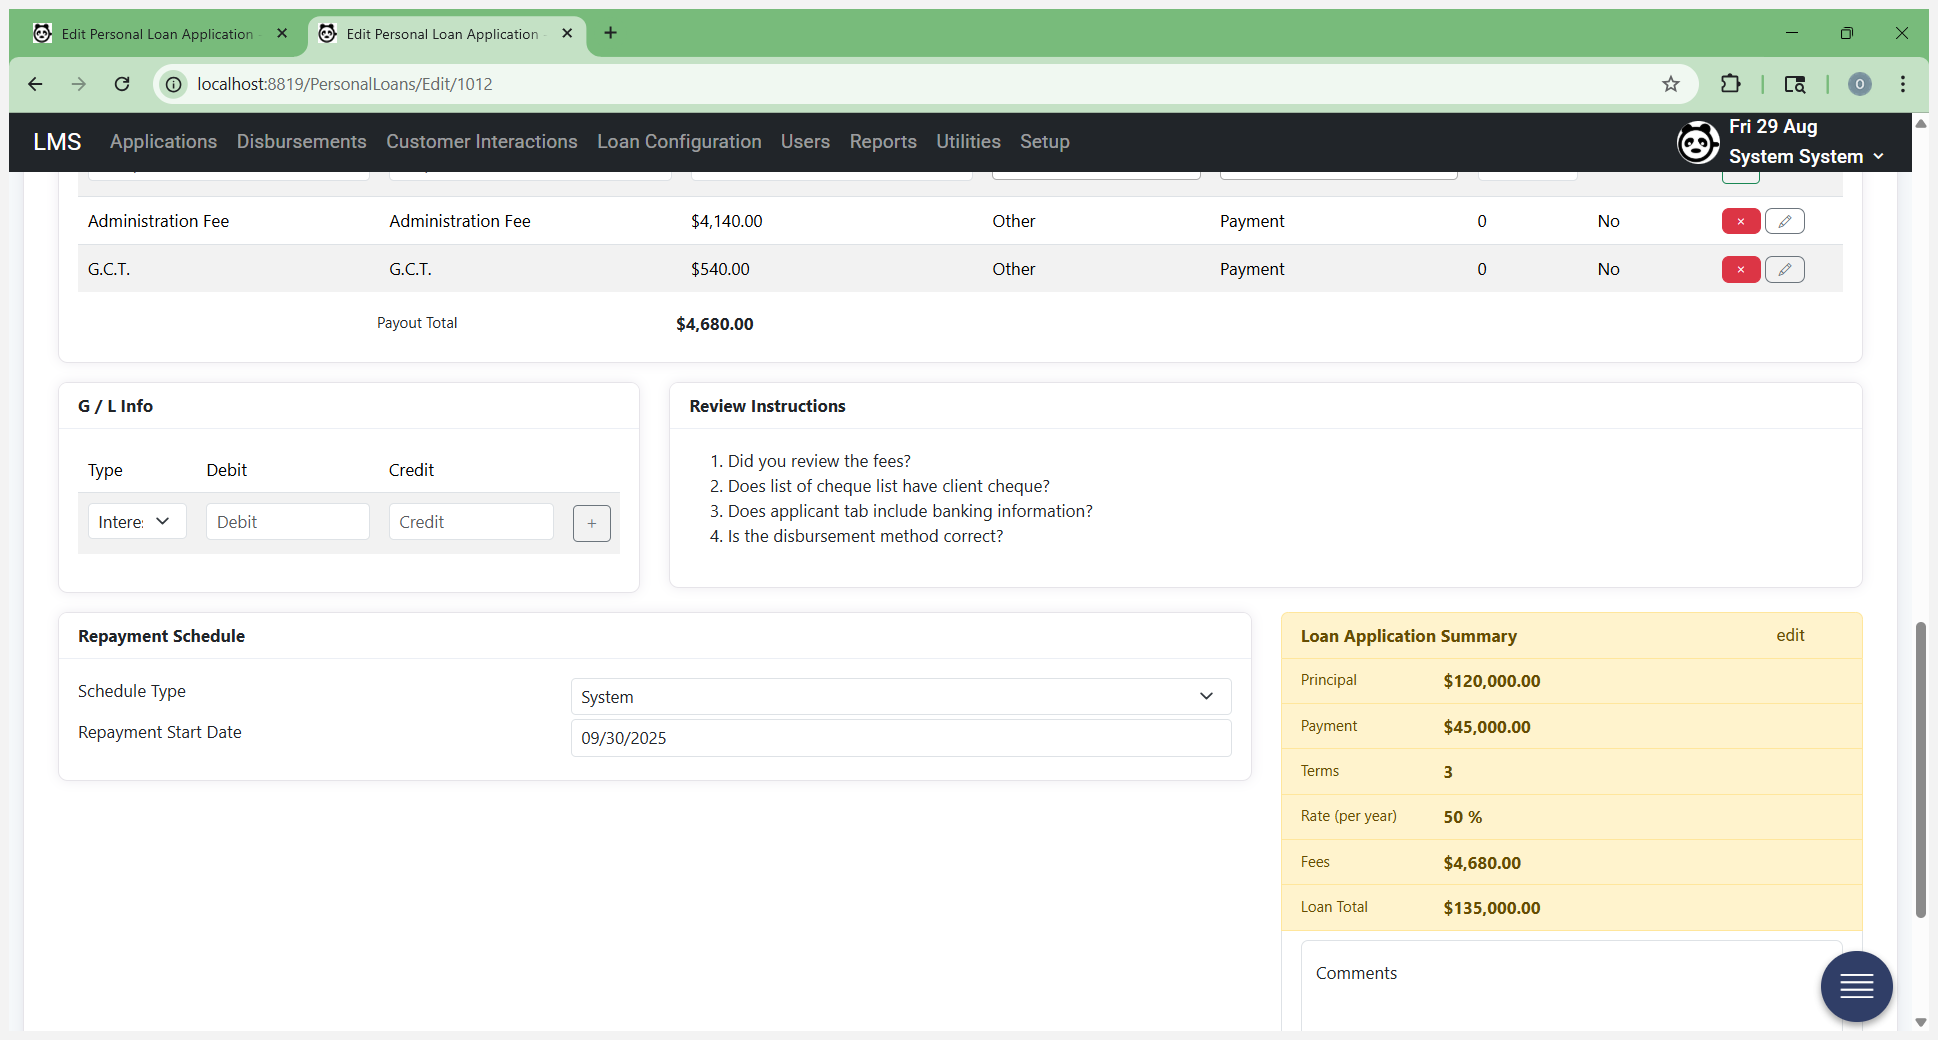
The system sends data to the backend, calculates the best recommendation based on the information collected so far, and presents it to you. At this point, it will save the form and give you options to make changes.
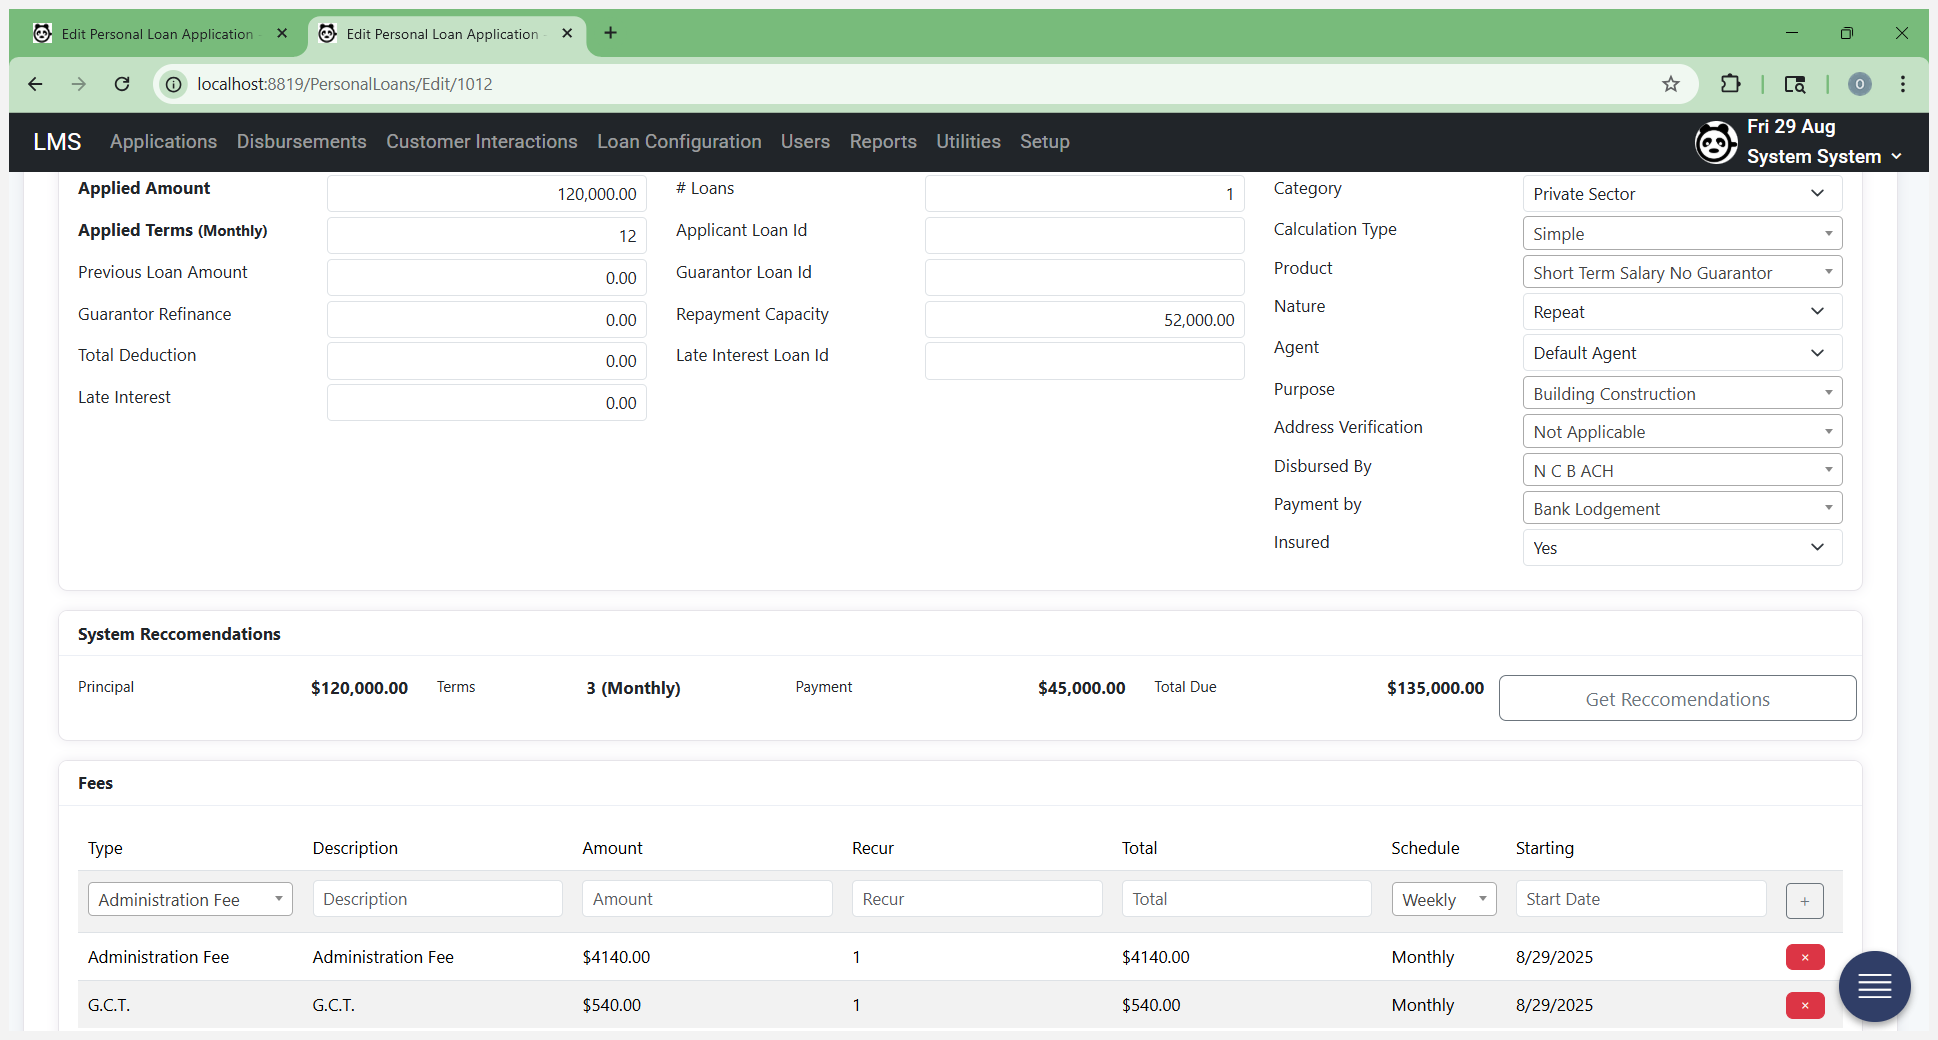


Now that it's finished saving, we see that the principal remains the same amount. It recommends three months of payments at 45,000 each, for a total of 135,000. This may or may not be what you want. The monthly payment may be too high for the customer, even if their capacity suggests they can afford it. The terms may be too short, depending on the loan type.
You can find that information on your rate sheet and by understanding how your products are designed to work.
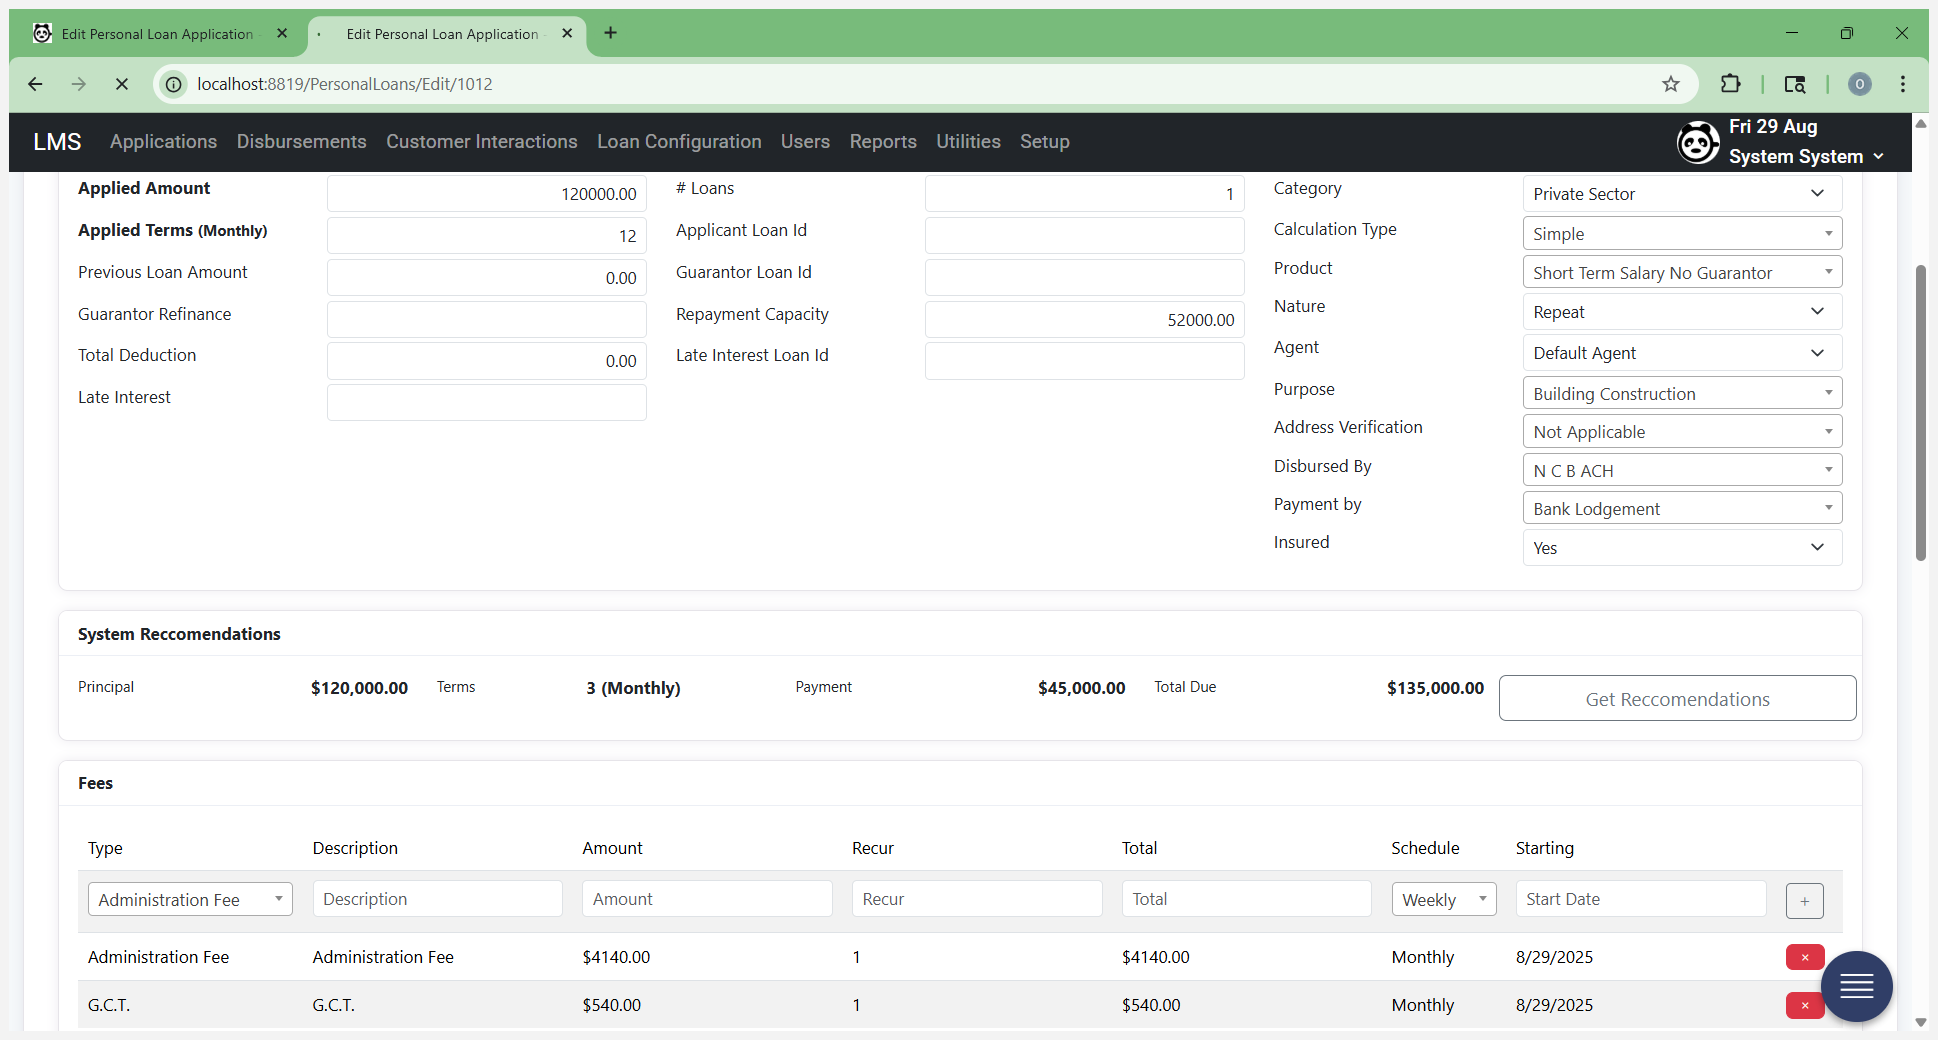
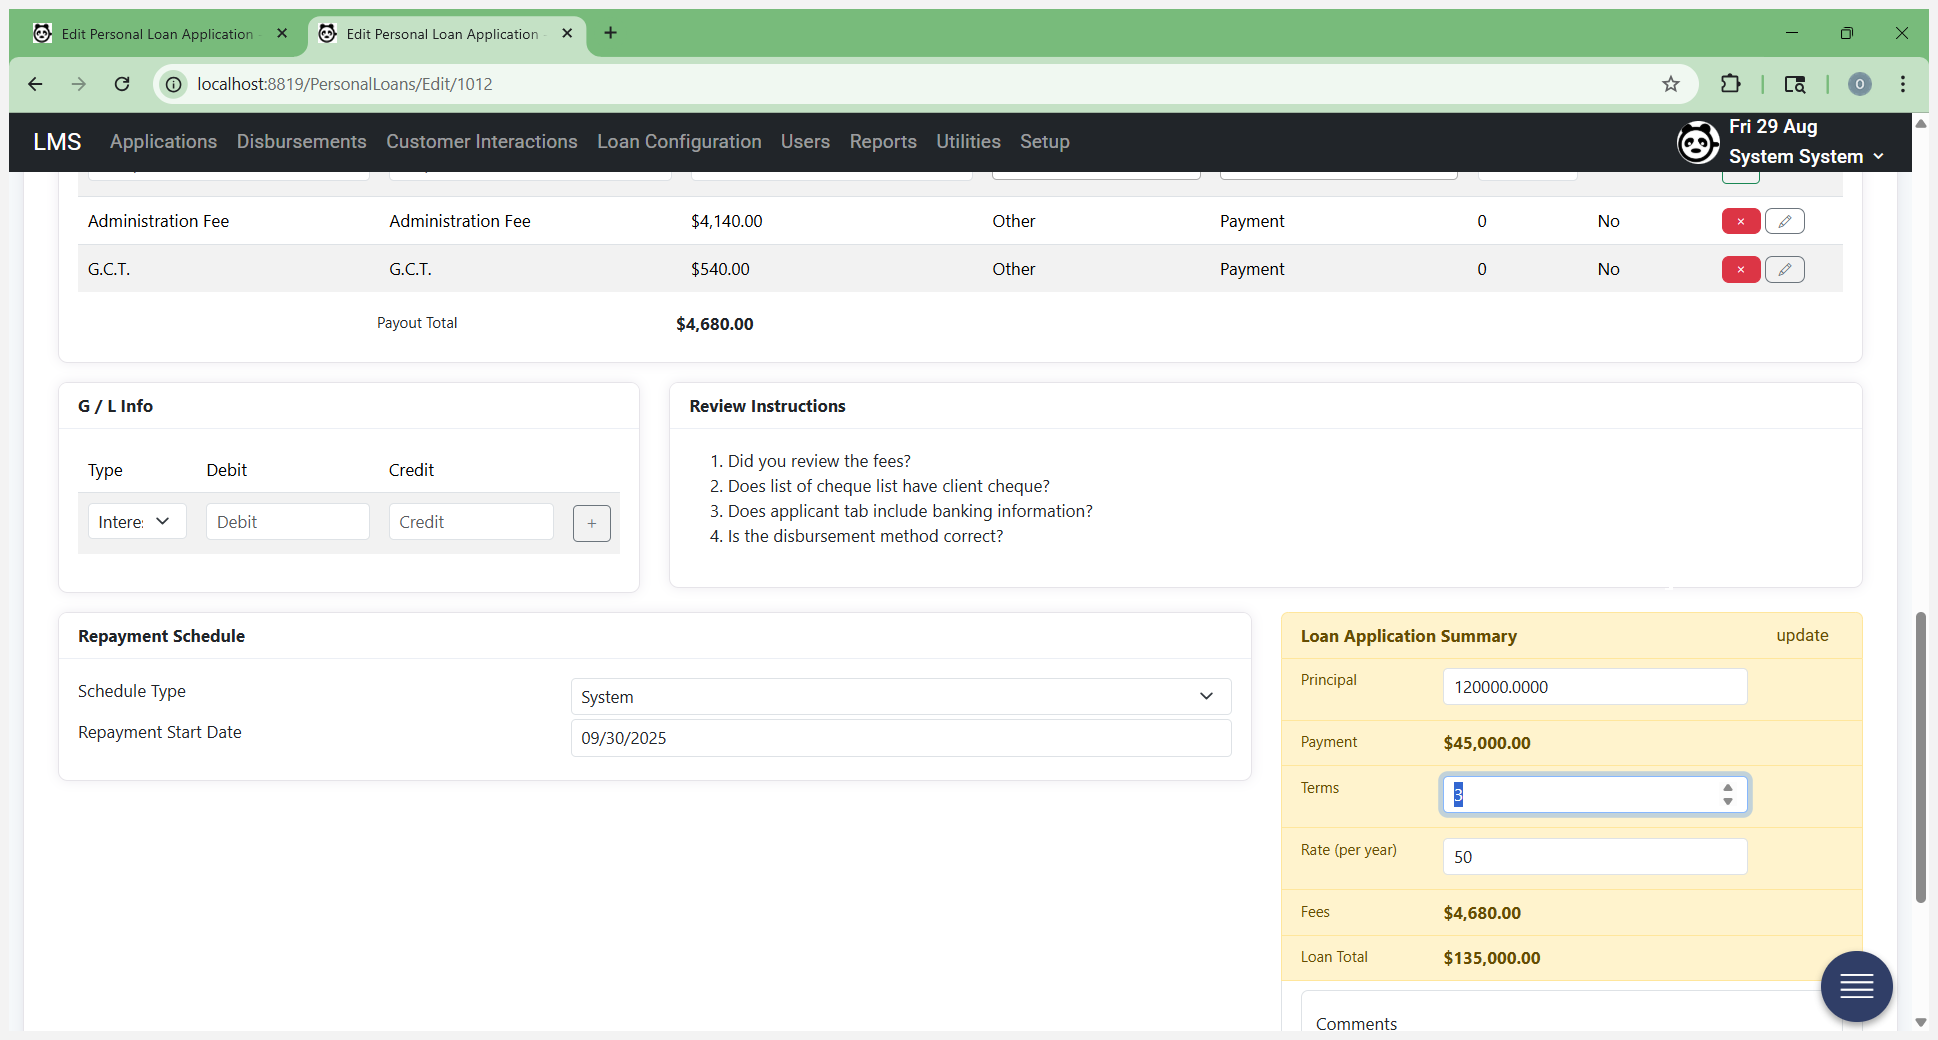
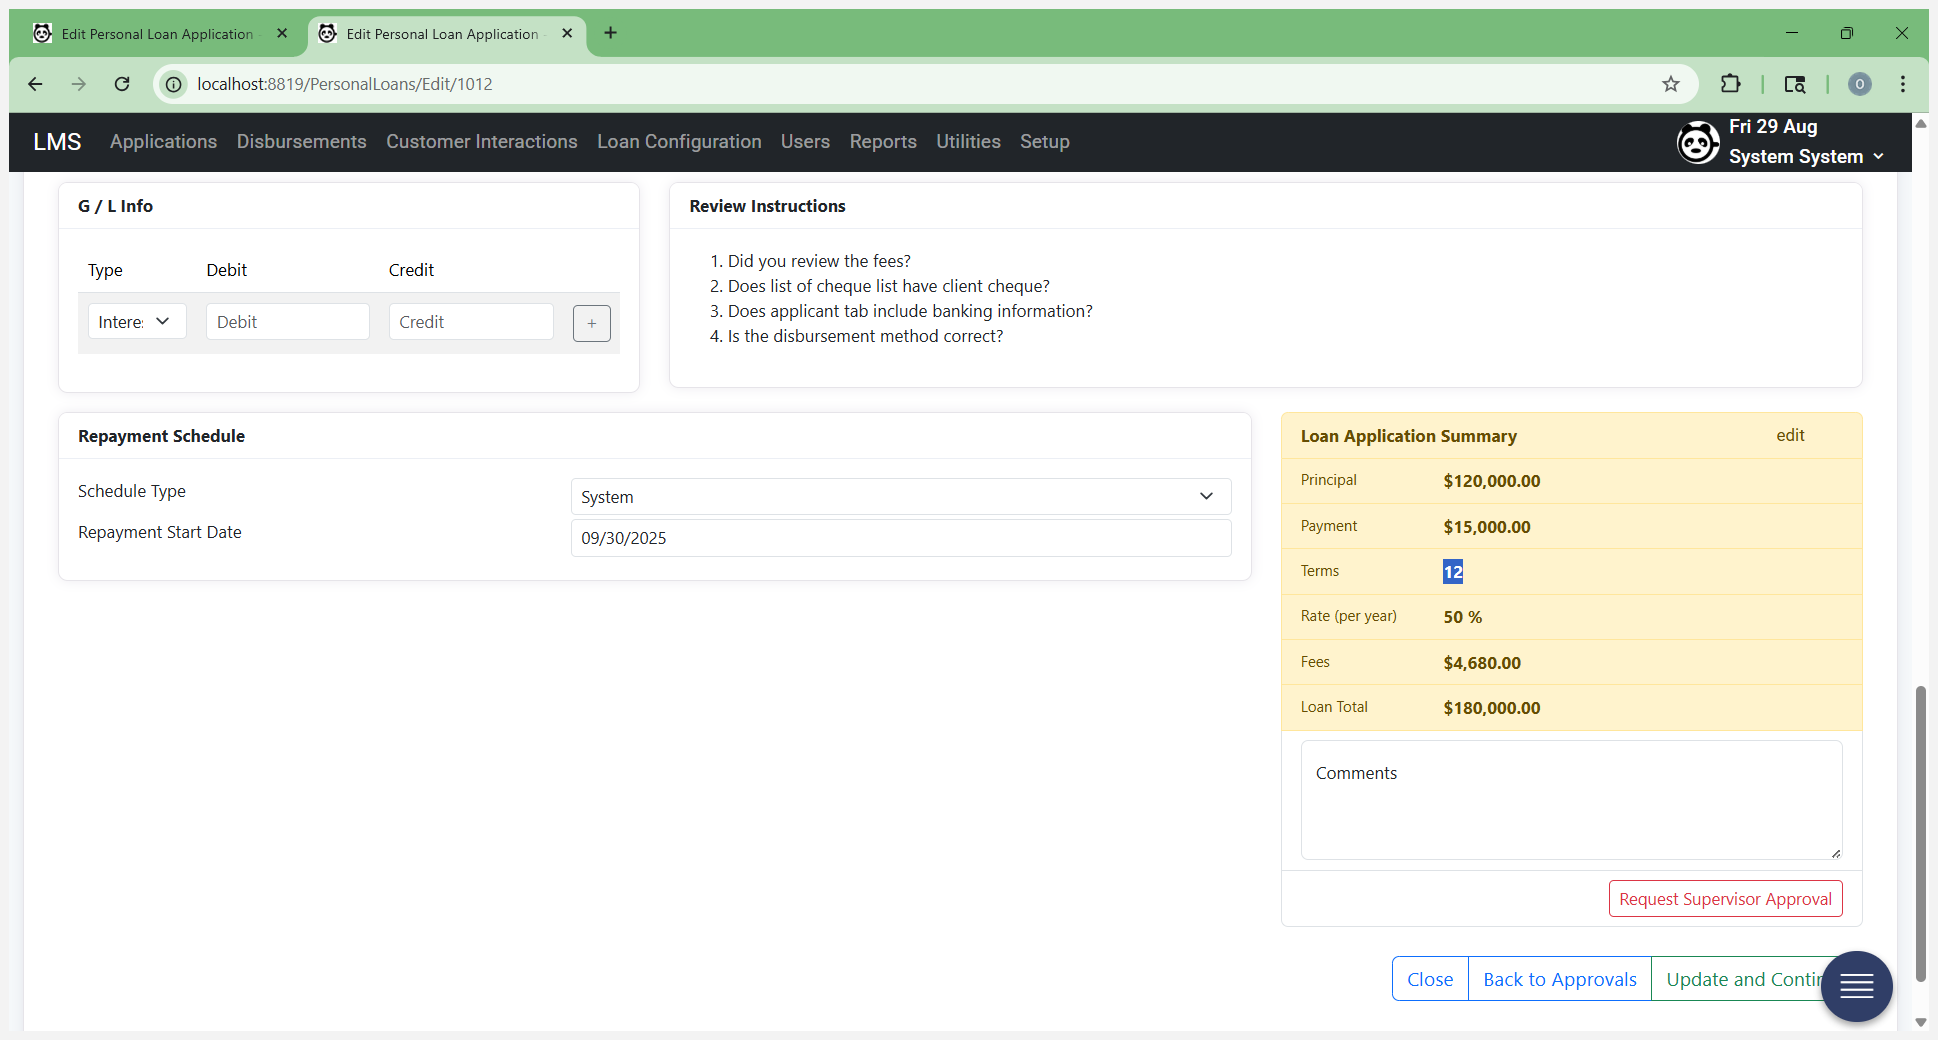
If this is incorrect and does not match what your system should recommend, you can change it. At the bottom of the screen, go in and edit the loan summary. I want to give them the 12 terms they requested. I'm leaving the principal as is because it's fine. Click on Update.
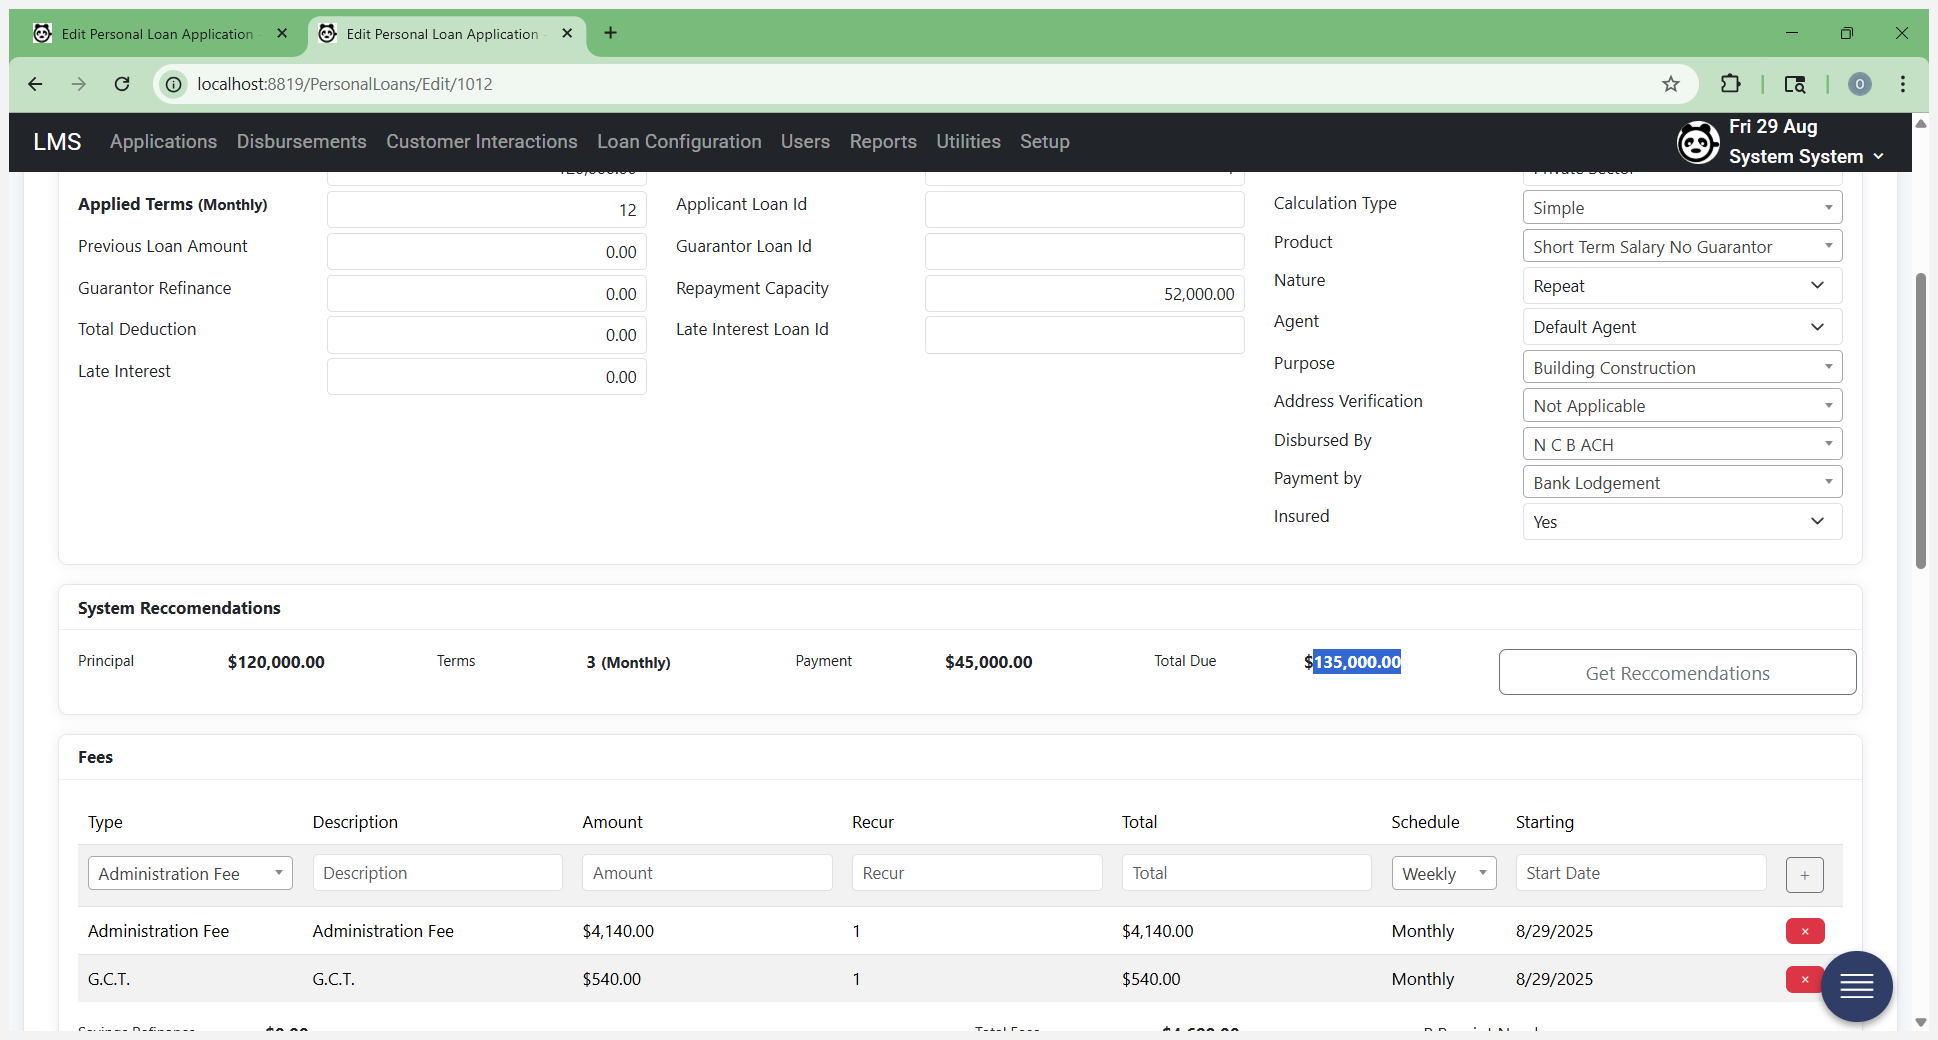
When you select On Update, it will recalculate and regenerate the payments based on the new terms, as well as update the total loan fees.
Once it's done, it will ask you to recheck the form. Click OK and wait for it to update. After it finishes updating, you'll see the payment is now reduced to 15,000.

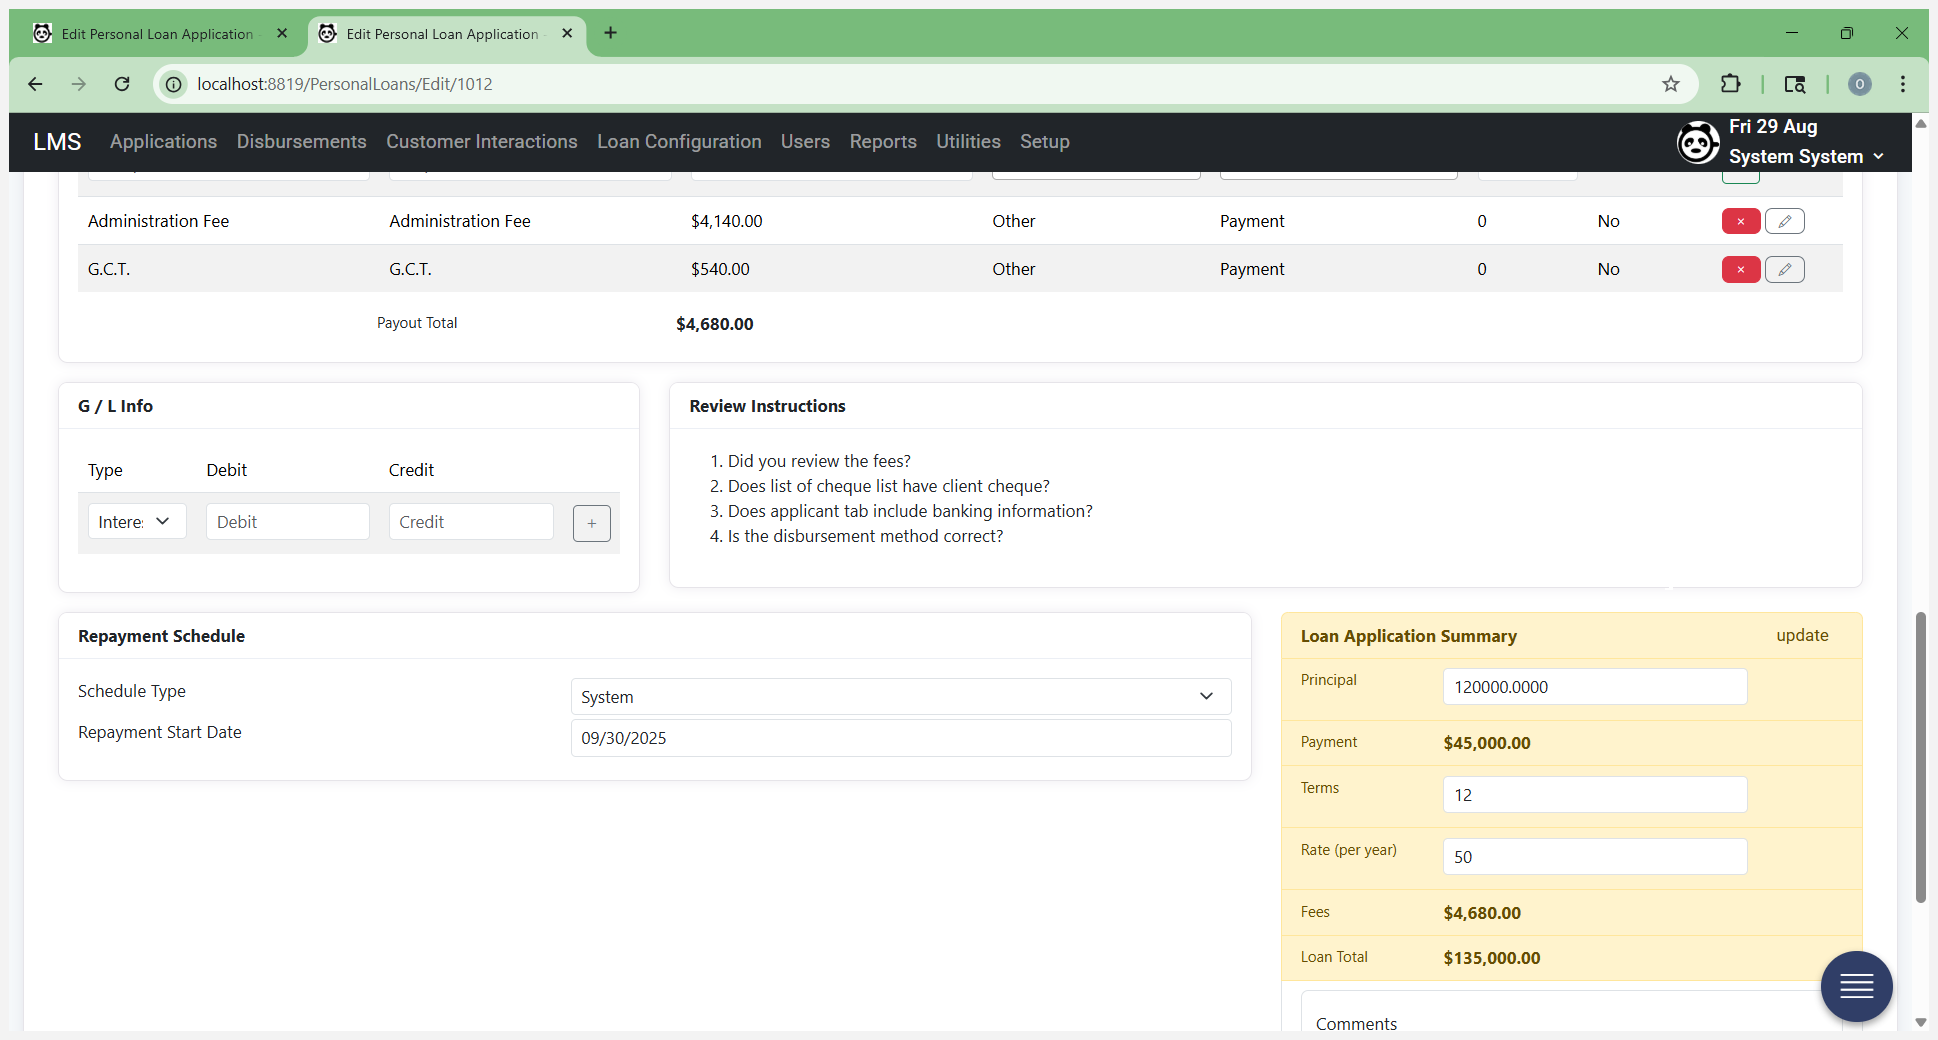
The terms are as the customer requested. Fees are the same. The total loan is $180,000.
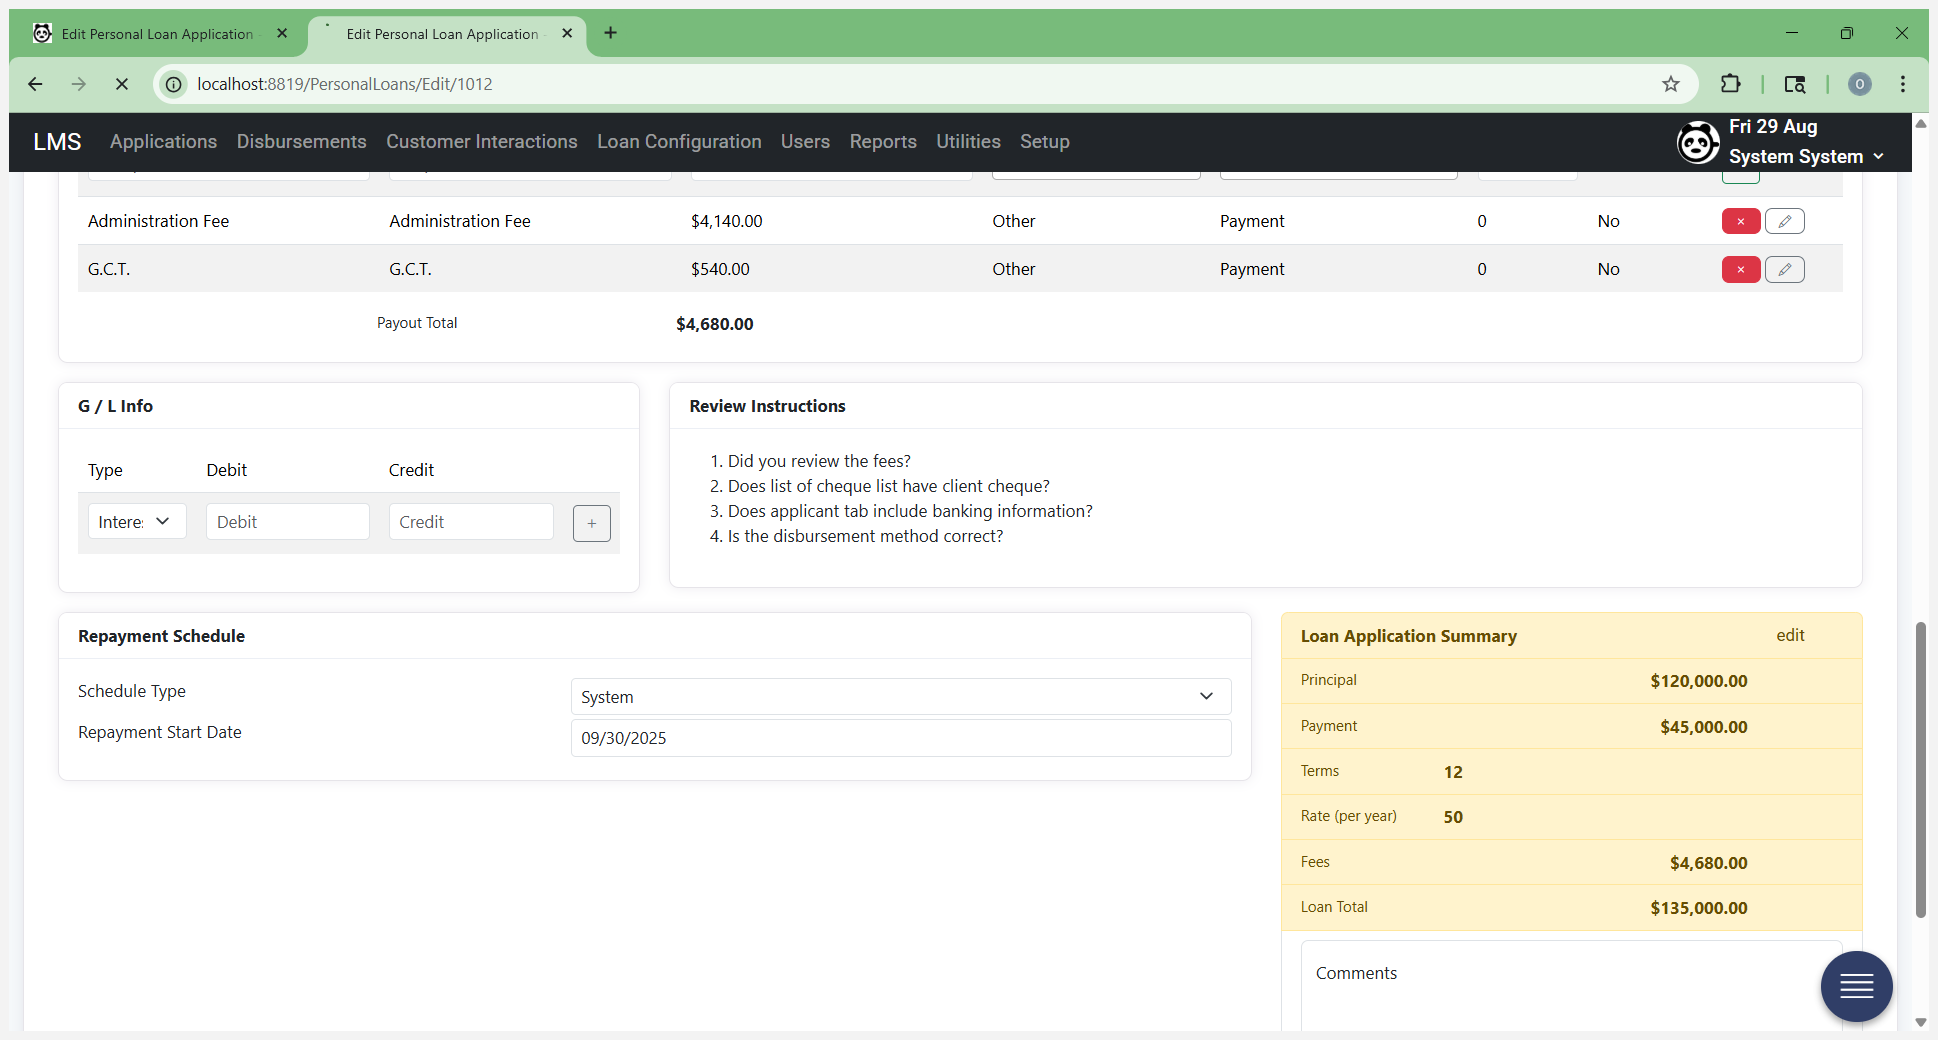
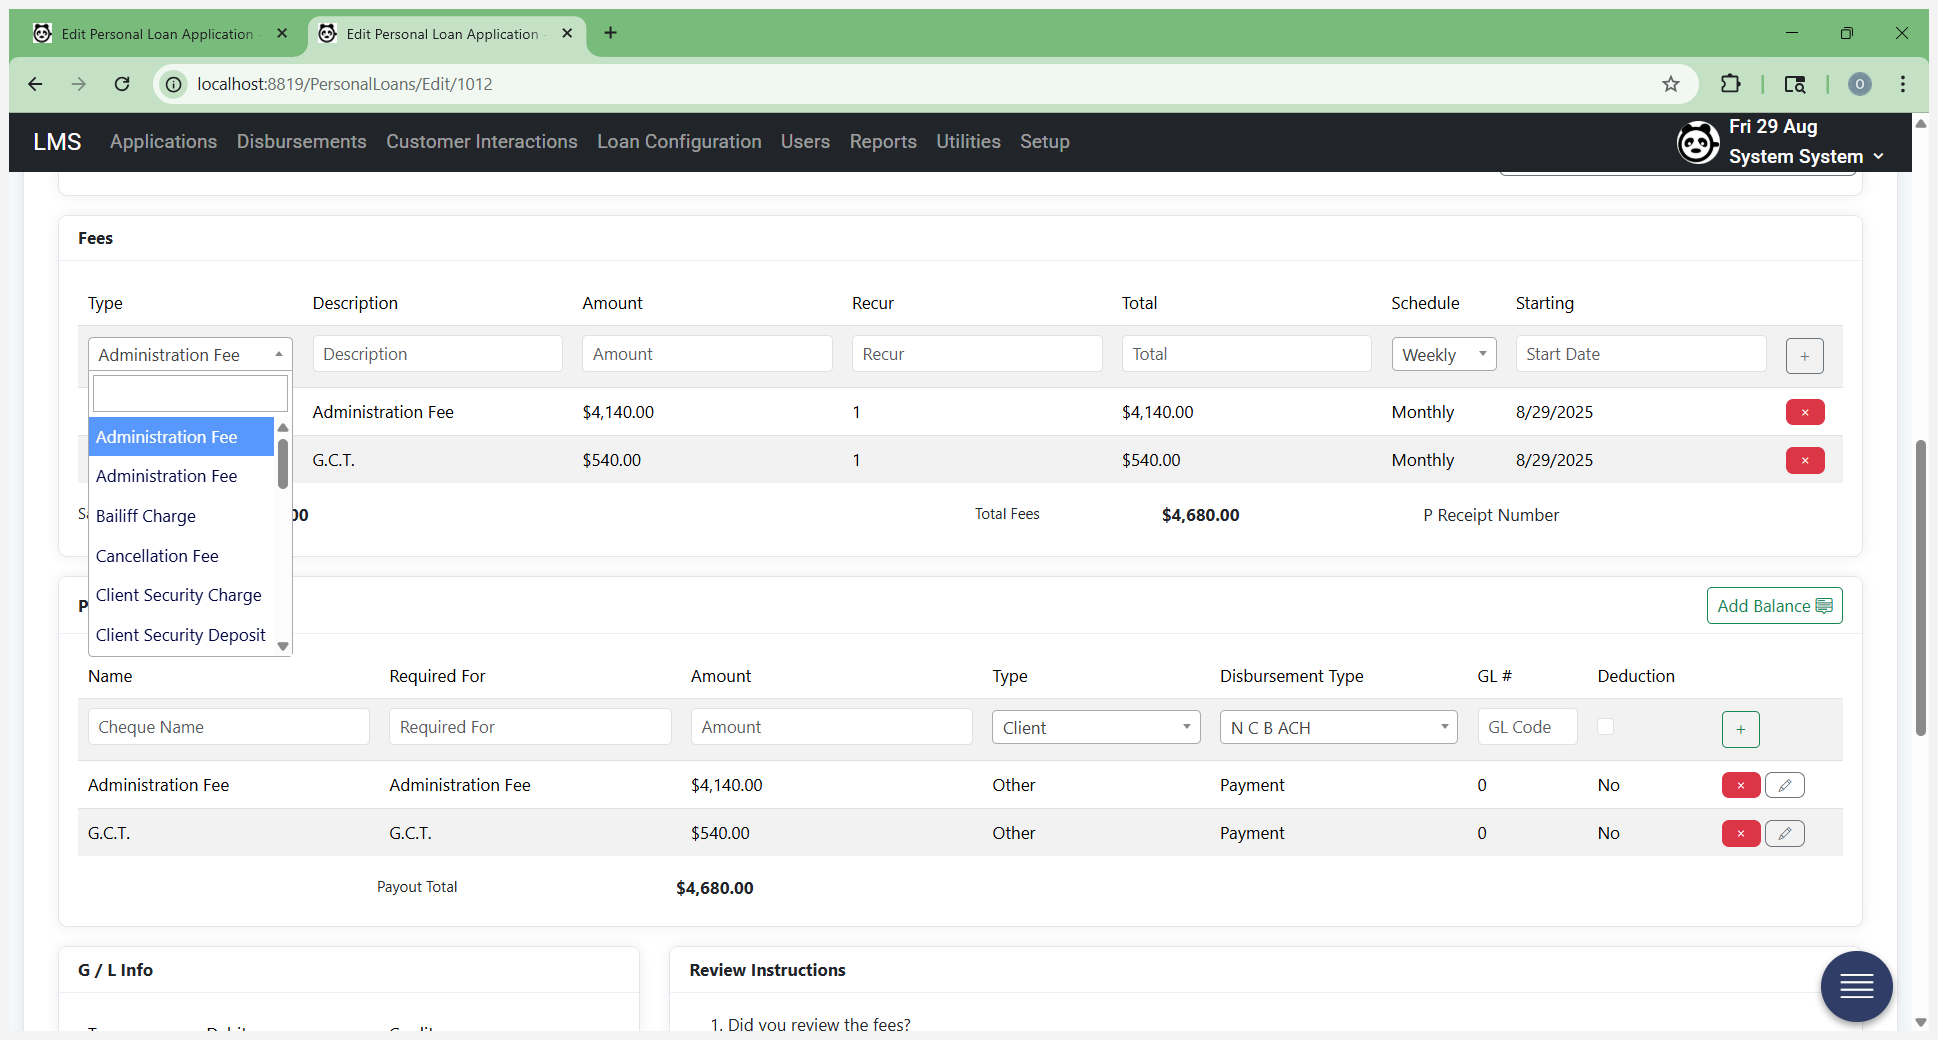
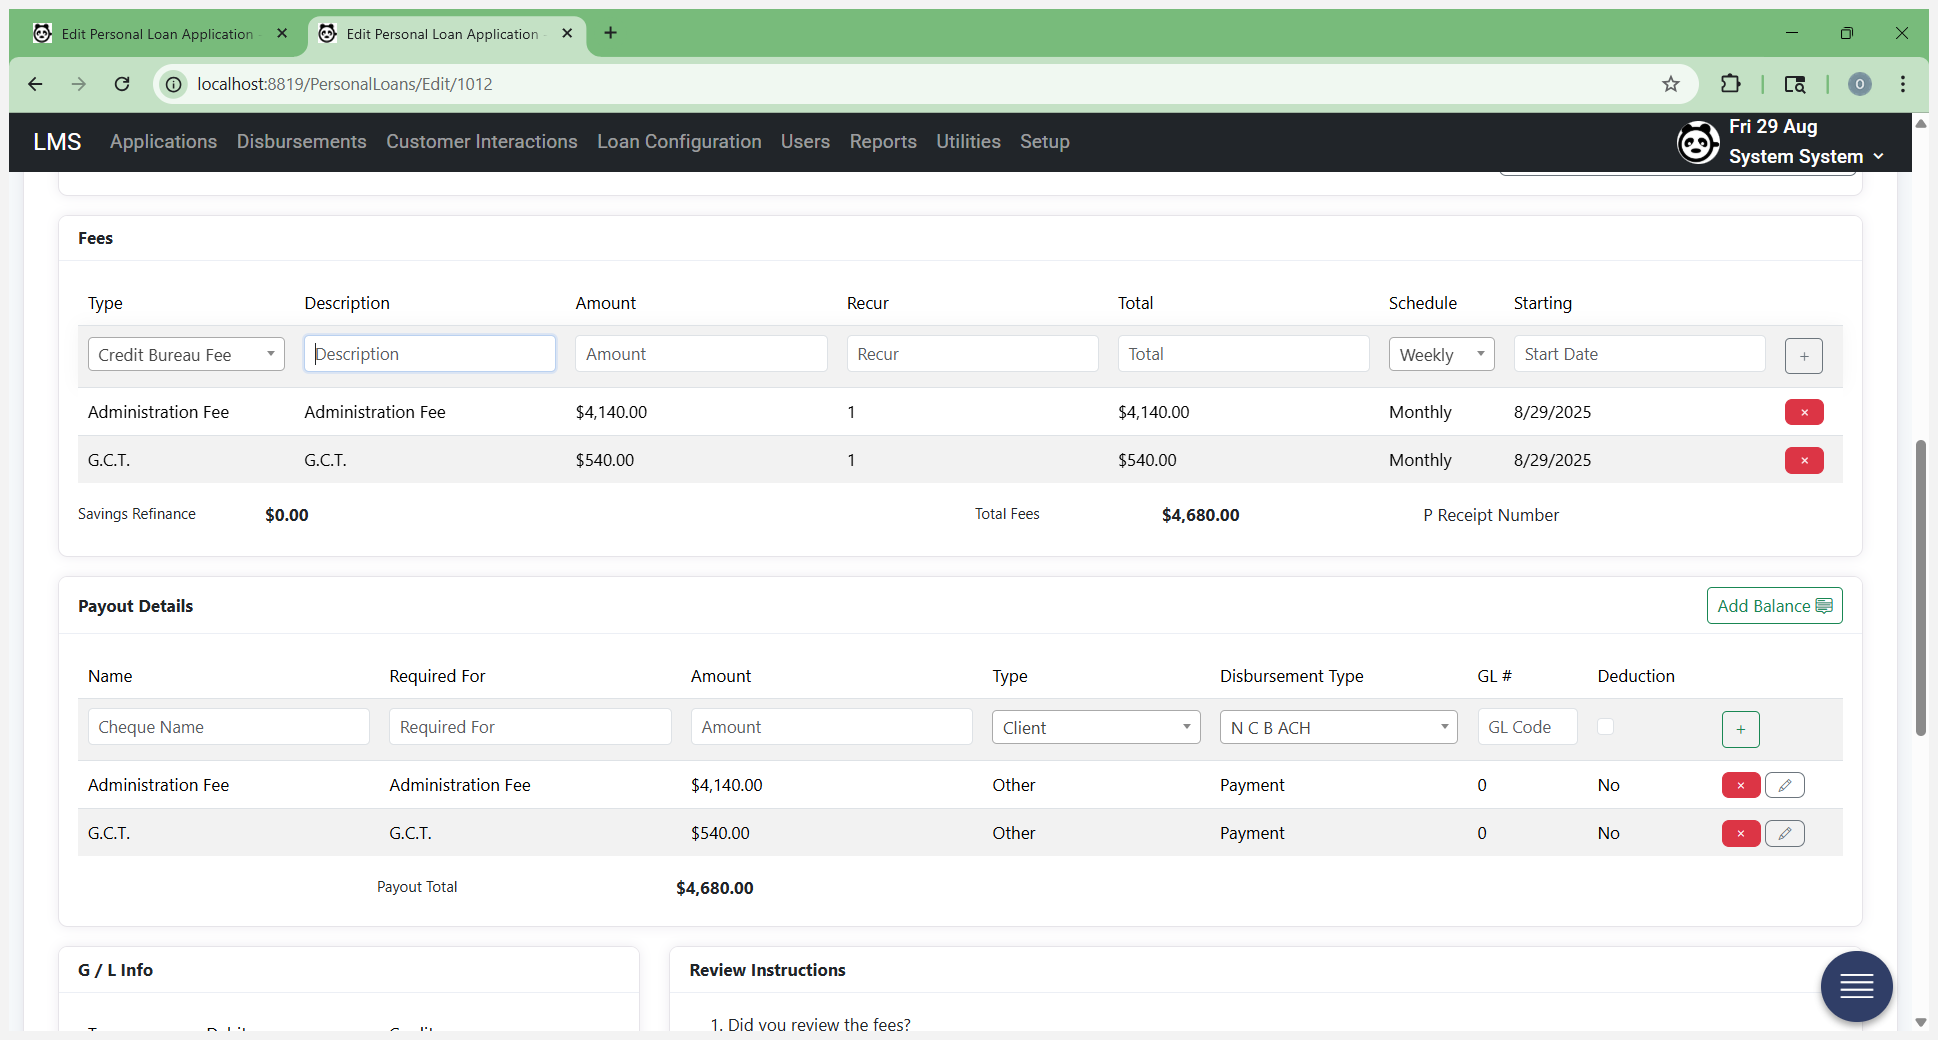
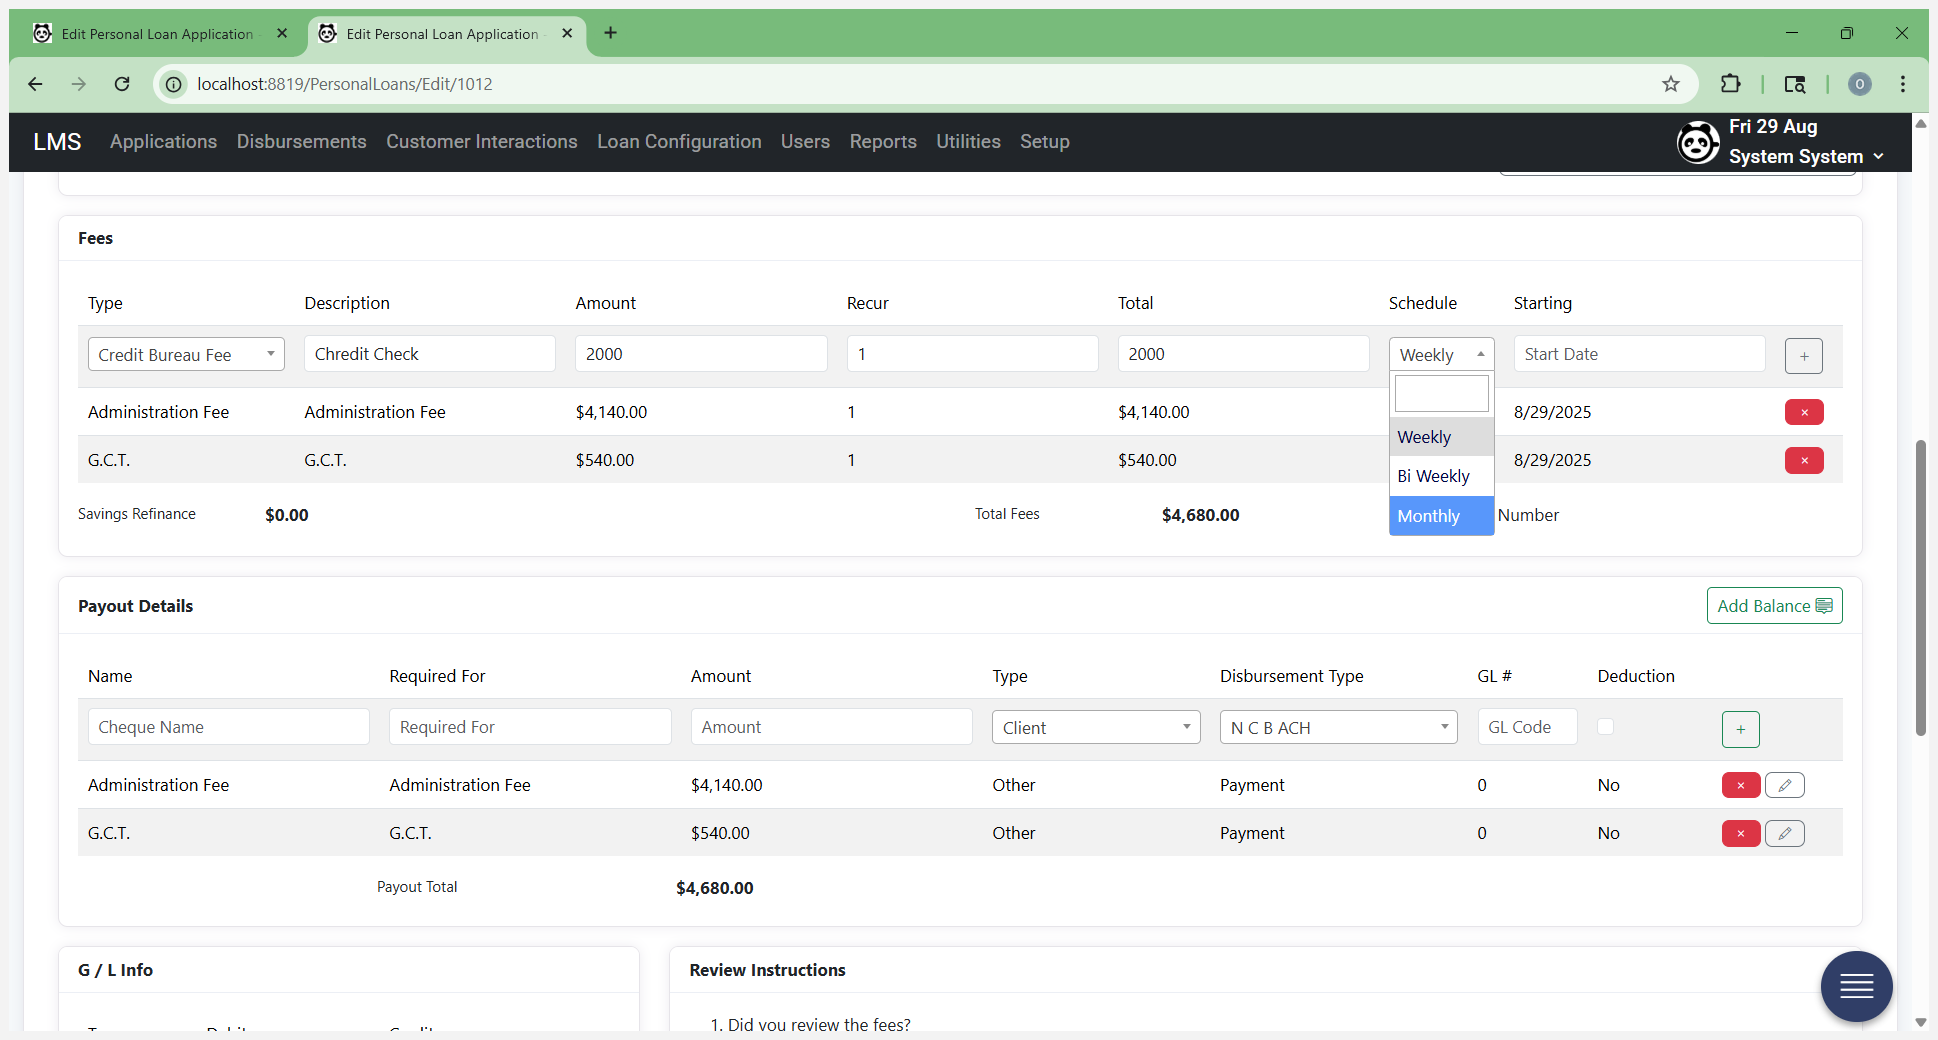
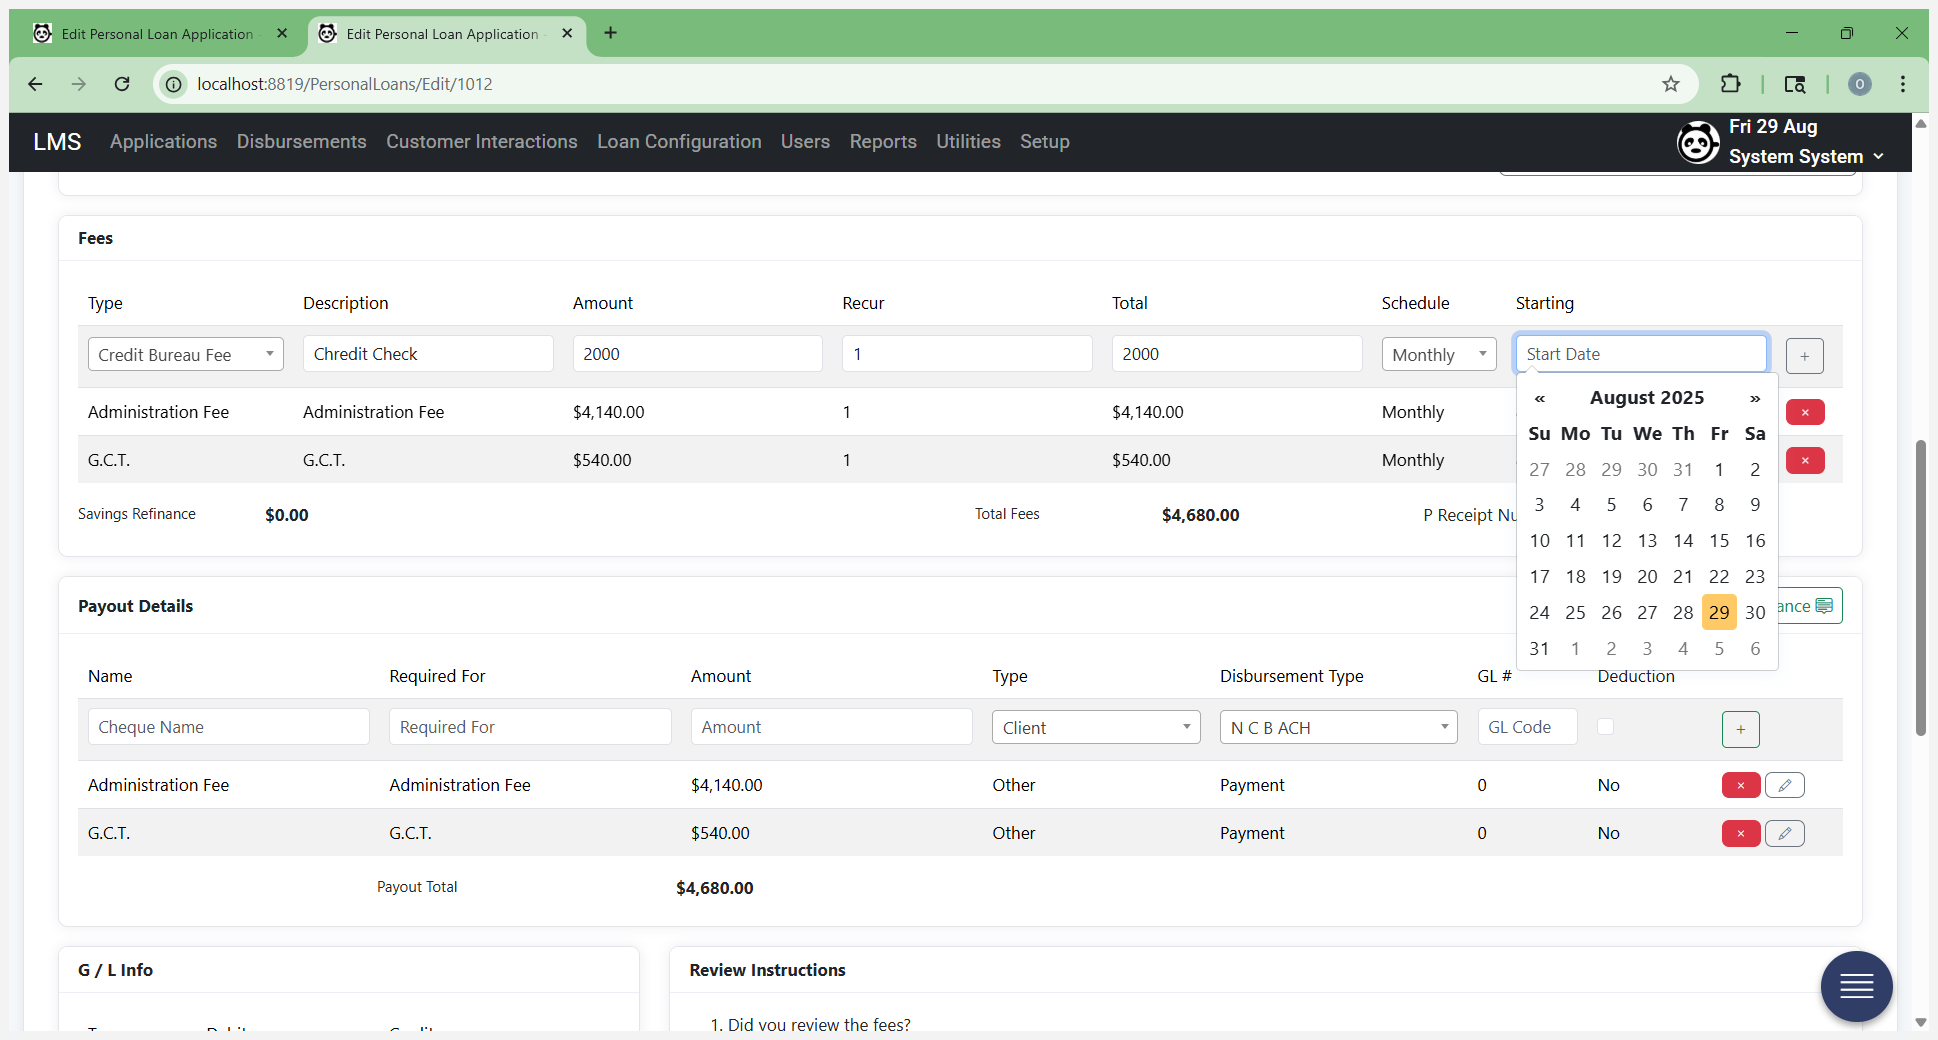
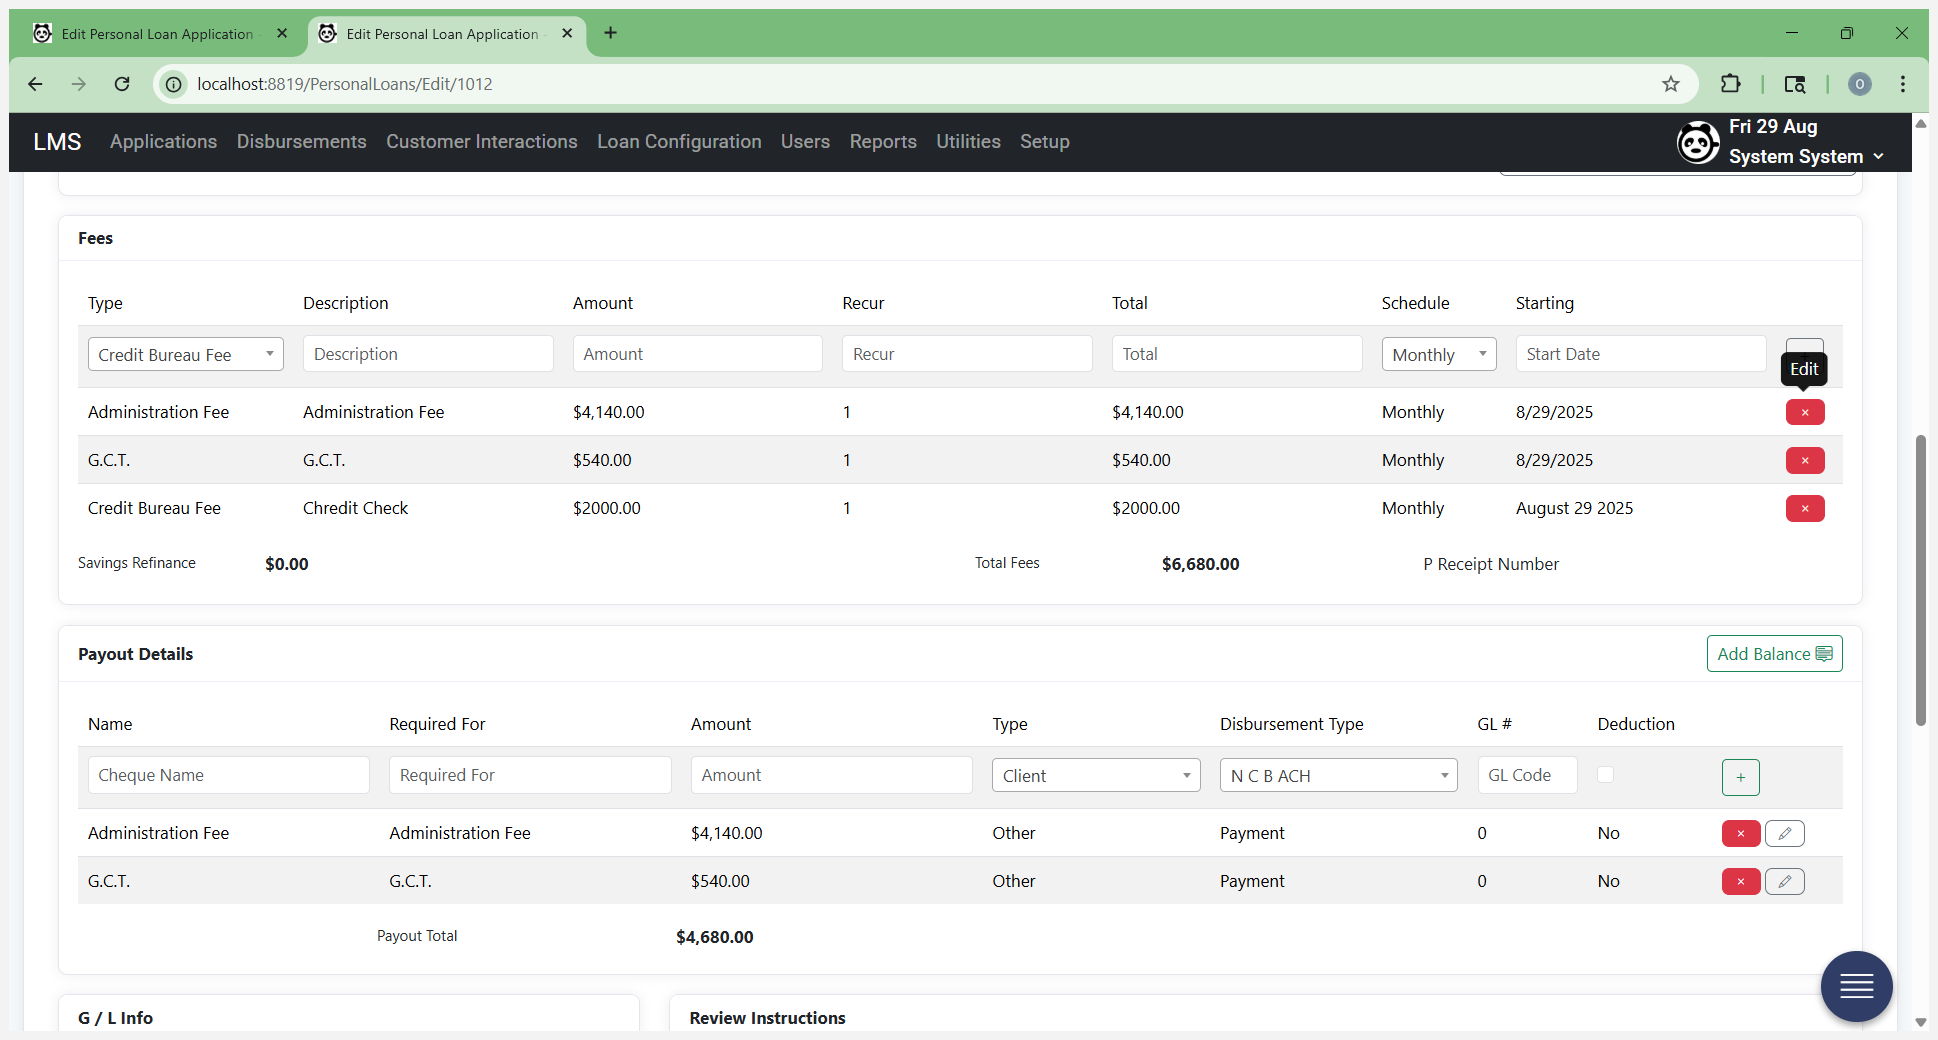
Providing this information here is fine. You can update your additional fees if needed. You can also update payout details, which refer to what you previously entered as check requisitions or how the loan will be disbursed. From here, do not click on "Get Recommendations" again. If you click it, it will override the loan application summary you just edited and updated. You can add additional fees, such as a credit bureau fee.
Let's add that one.

If there are any fees you do not want, you can remove them. At that point, you made a change to the form. Update and continue at every step when you make changes to the form. Payout details, including the check information. There’s a quick way to add the remaining balance after all applicable fees are deducted.
You can click "Add Balance," or enter the customer's name and the required amount, then click the plus sign to add them to the form.

Once all this information is correct and the rescheduled payment start date is verified, proceed. We are creating this form one month from now.
Everything is set to a one-month default.
You can choose to change it.
At that point, once the form is saved, request supervisor approval.
This will send an approval request to your supervisor to review and sign the form. At this stage, the loan application form is no longer with the credit officer.