Step-by-Step Guide to Completing GRN in SAP at Store
Learn how to efficiently complete the Goods Receipt Note (GRN) process in SAP at Jet Store, including handling damaged and missing items, scanning HU labels, and posting GRN for outbound trips.
In this guide, we'll learn how to process a Goods Receipt Note (GRN) for outbound trips in SAP at a store. We will cover how to scan Handling Units (HUs), record damages and shortages, and complete the GRN posting. This process helps ensure accurate inventory records and proper handling of received goods.
Let's get started
Let's begin with SAP.
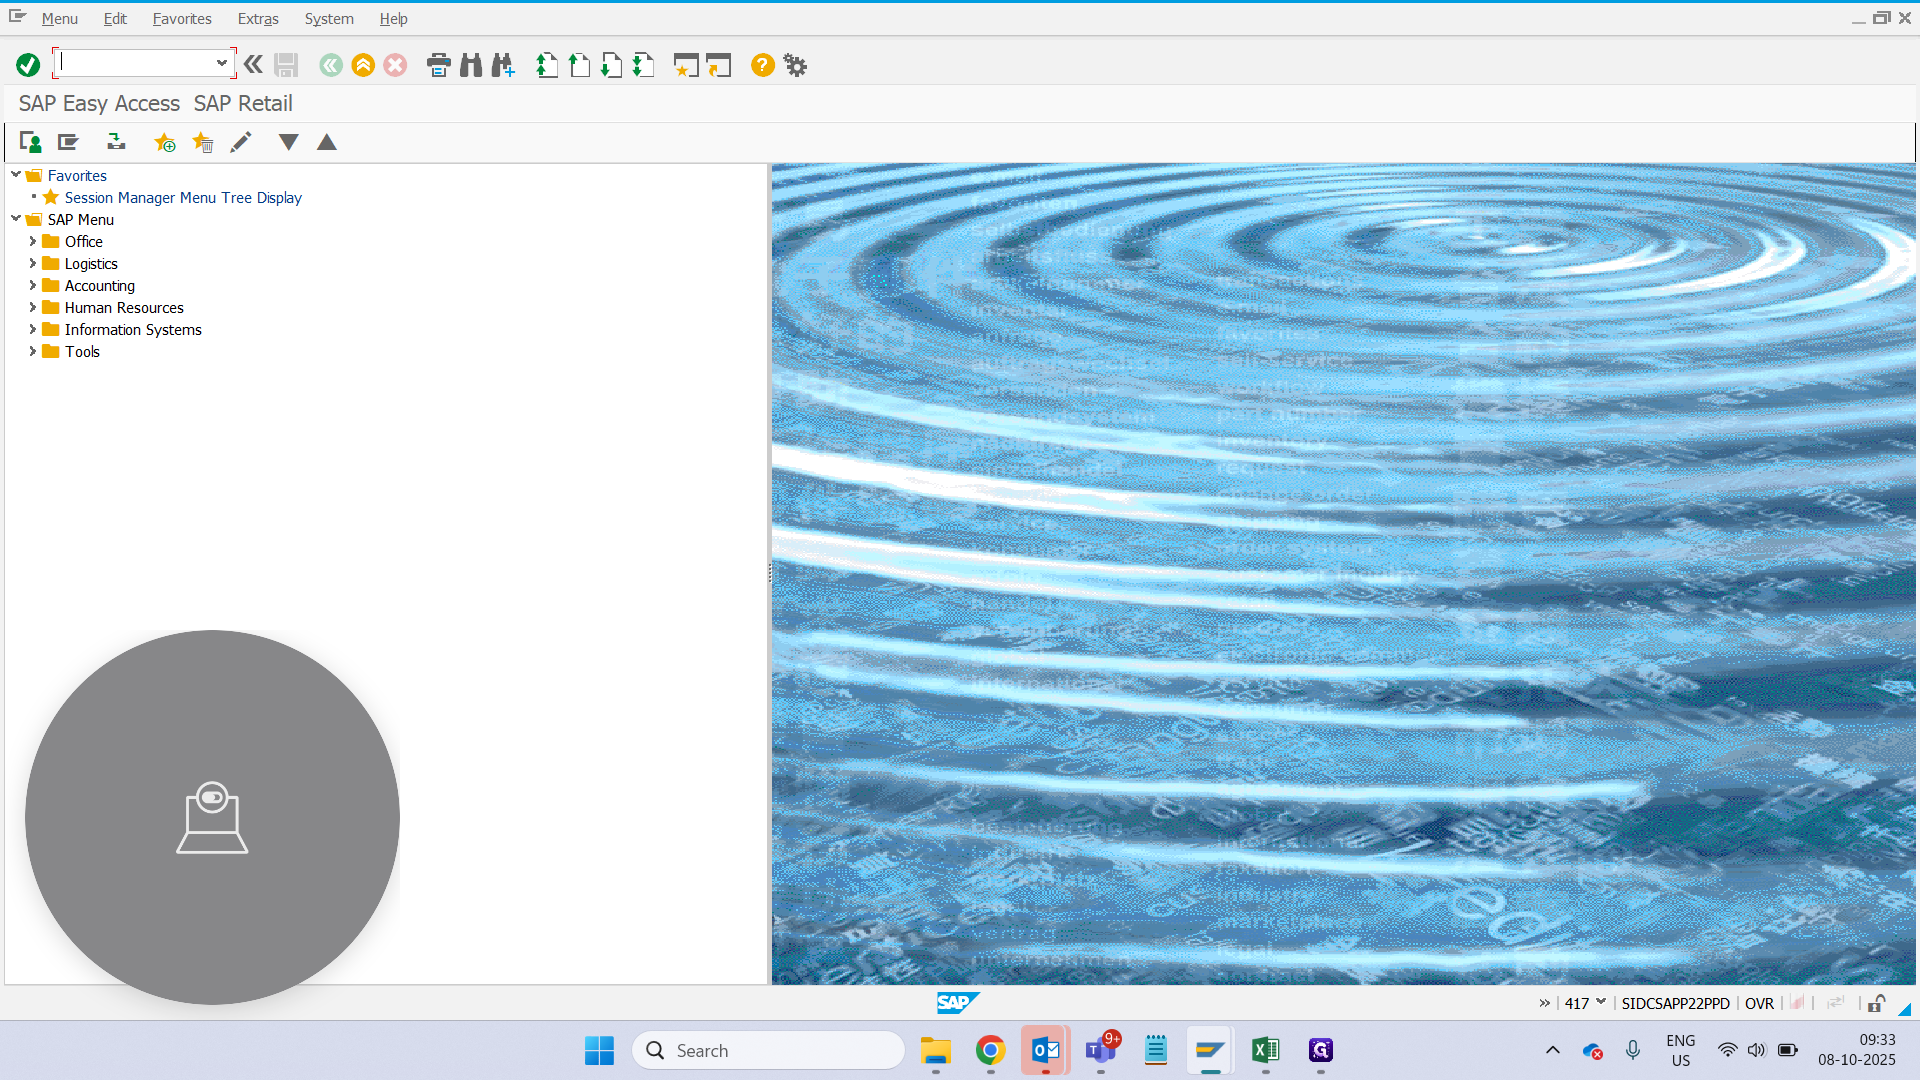
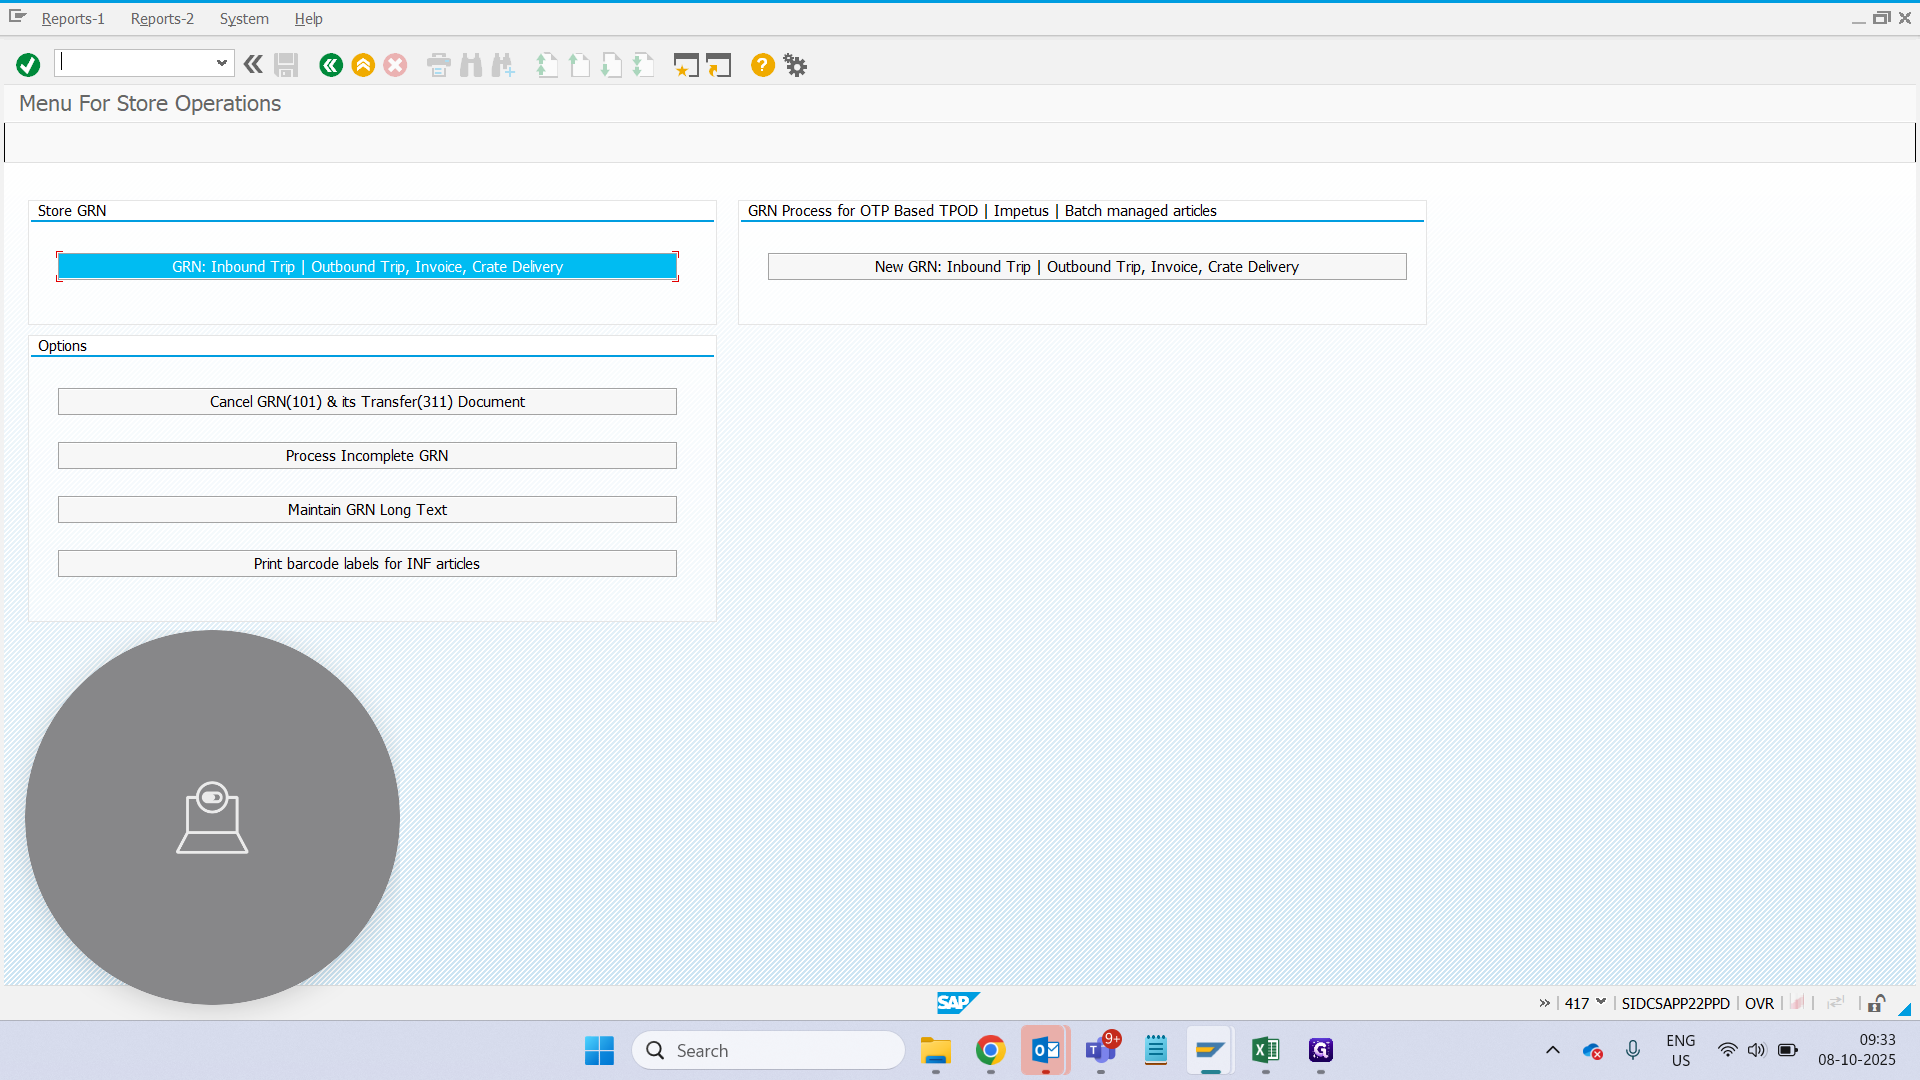
Type "ZSTORE & hit Enter"
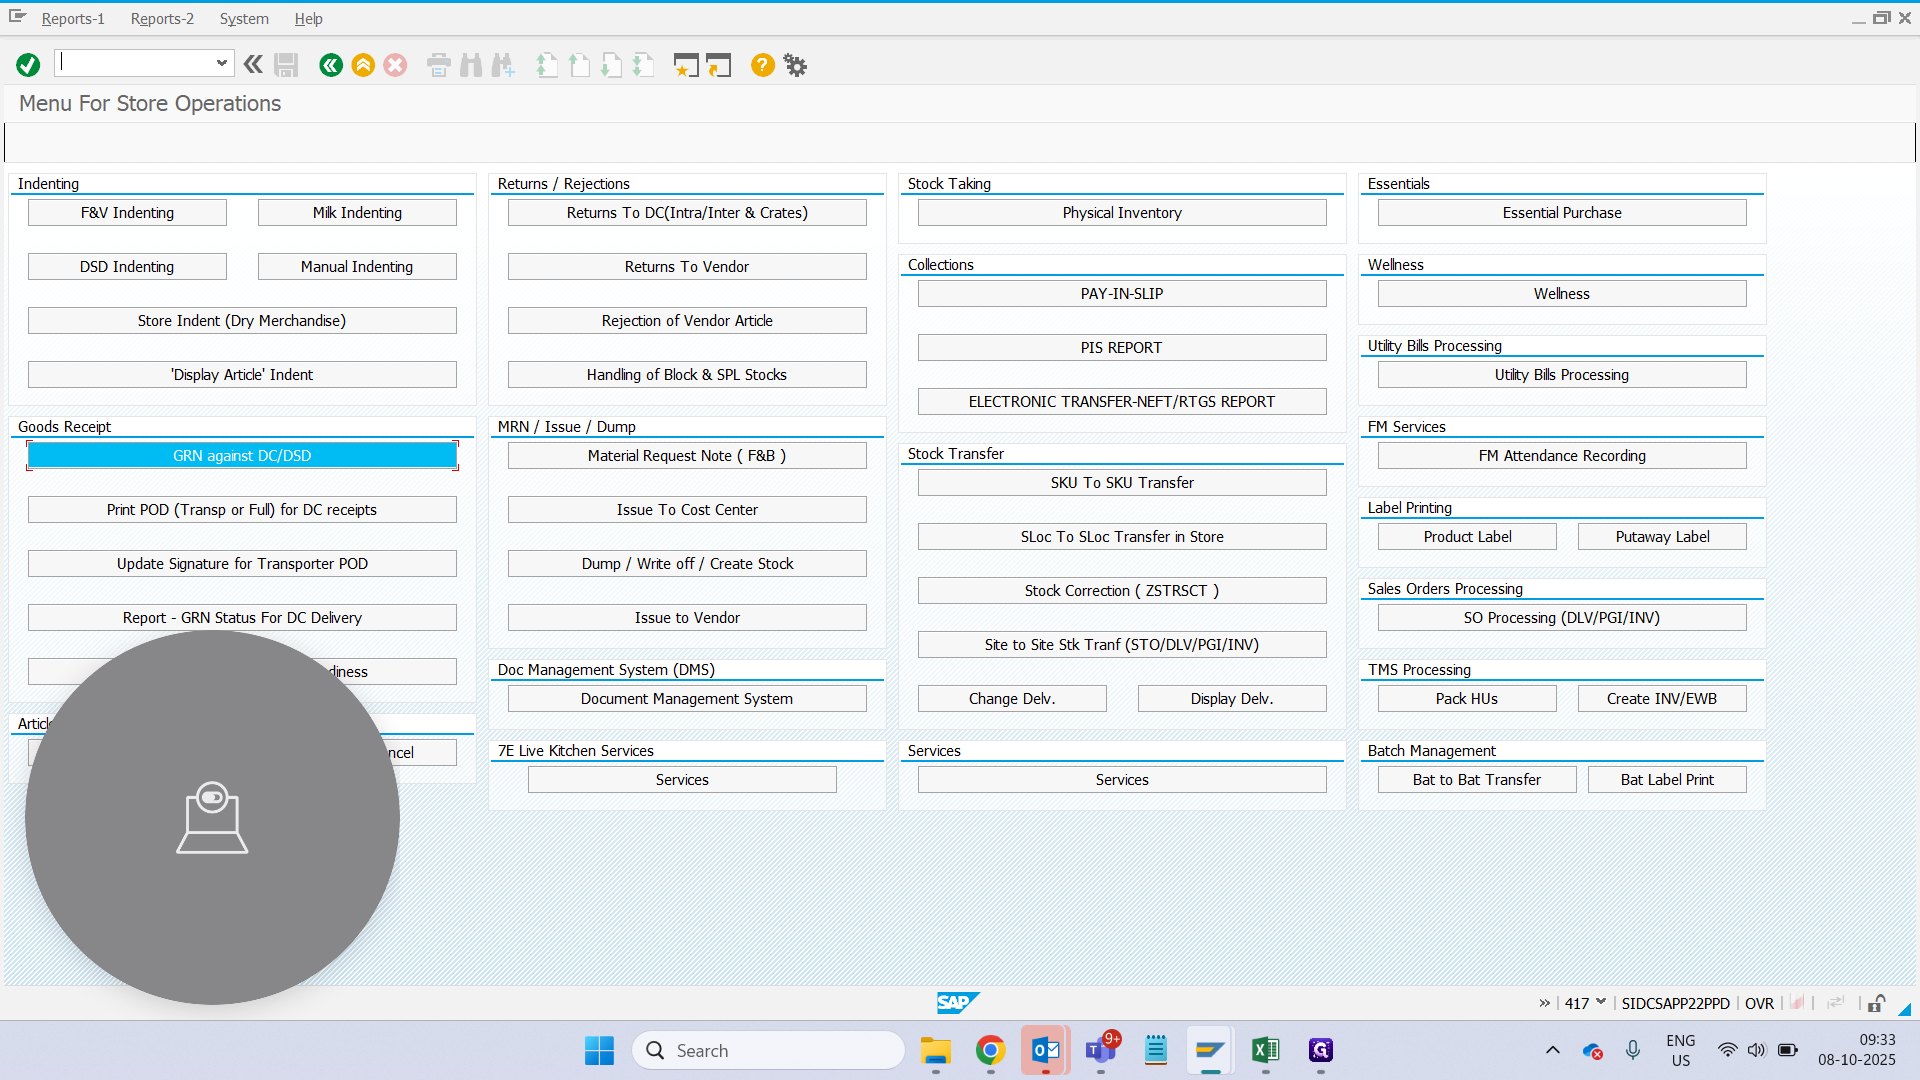
Click on GRN using either the inbound or outbound trip. Here, we will use the outbound trip.

Enter the trip and select the secondary radio button for 100% scanning.
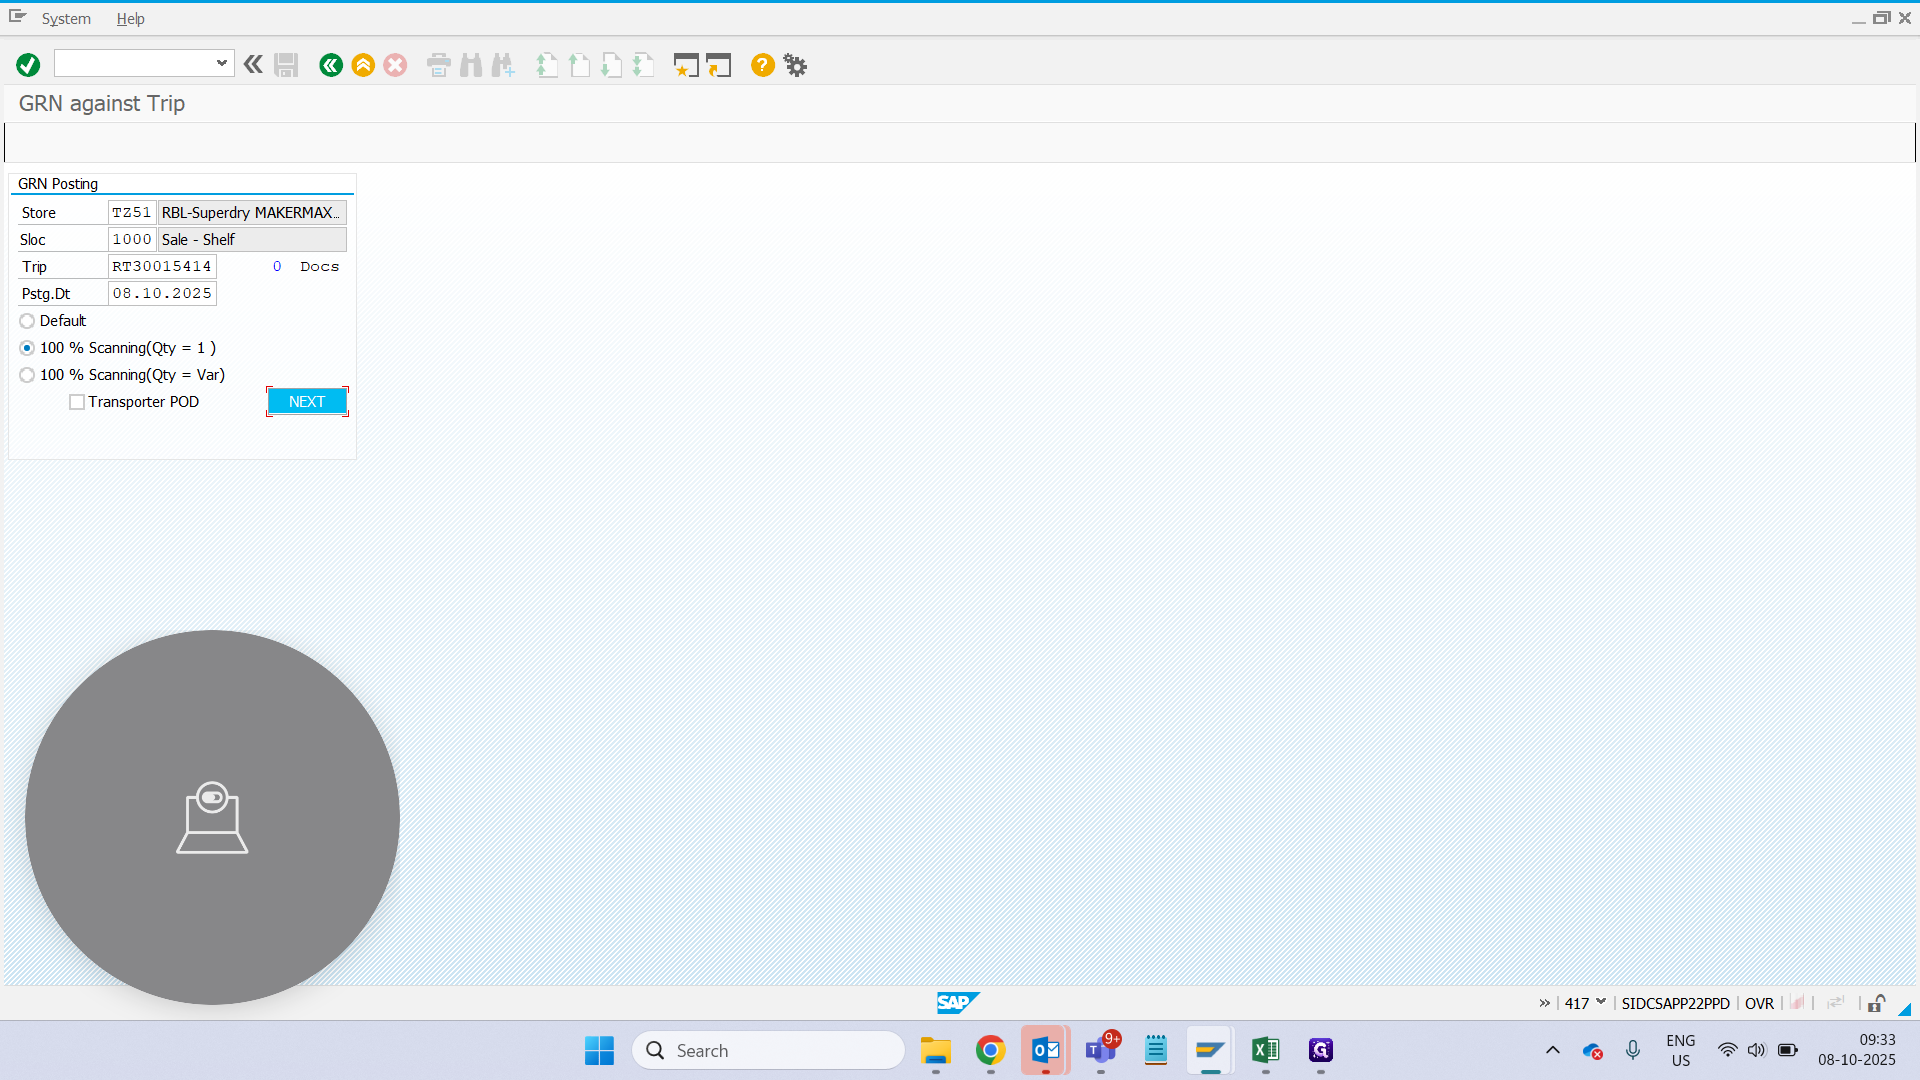
Next.

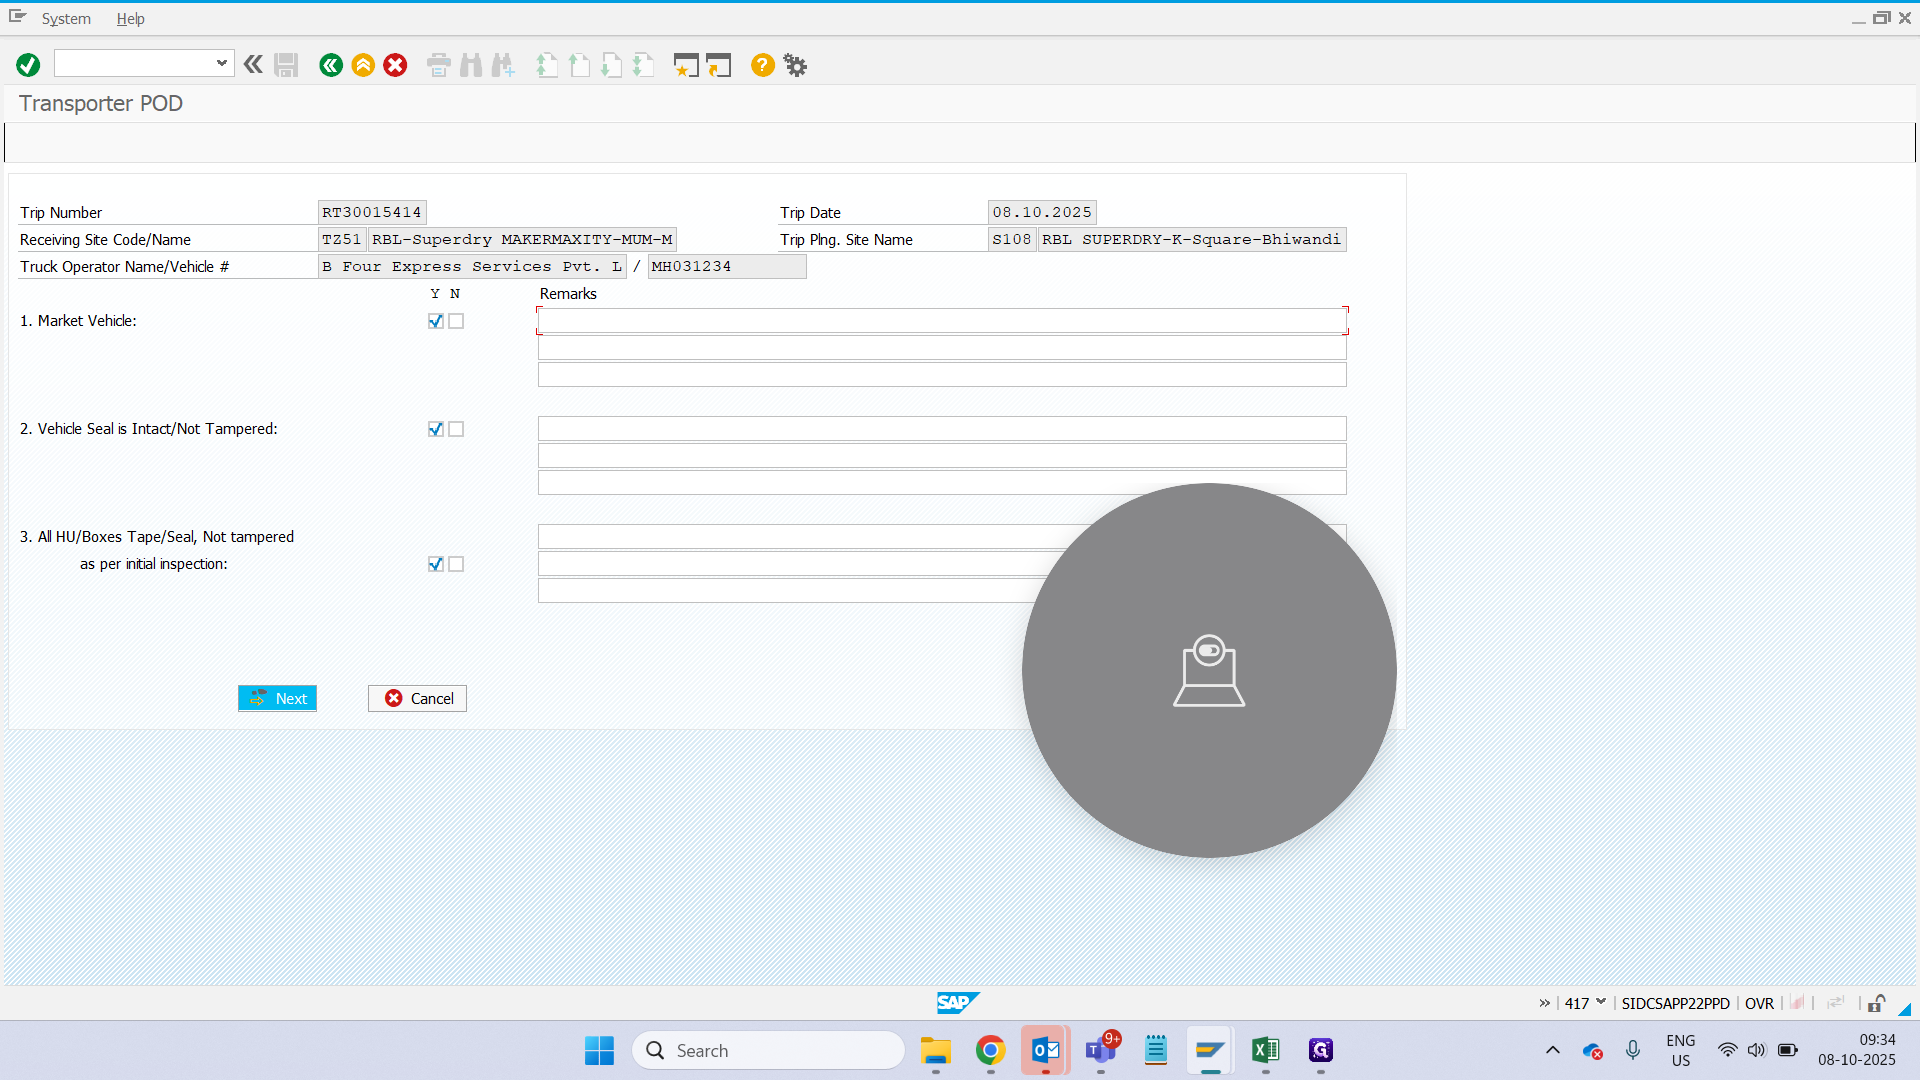
If everything looks good for all the remarks, just click yes.

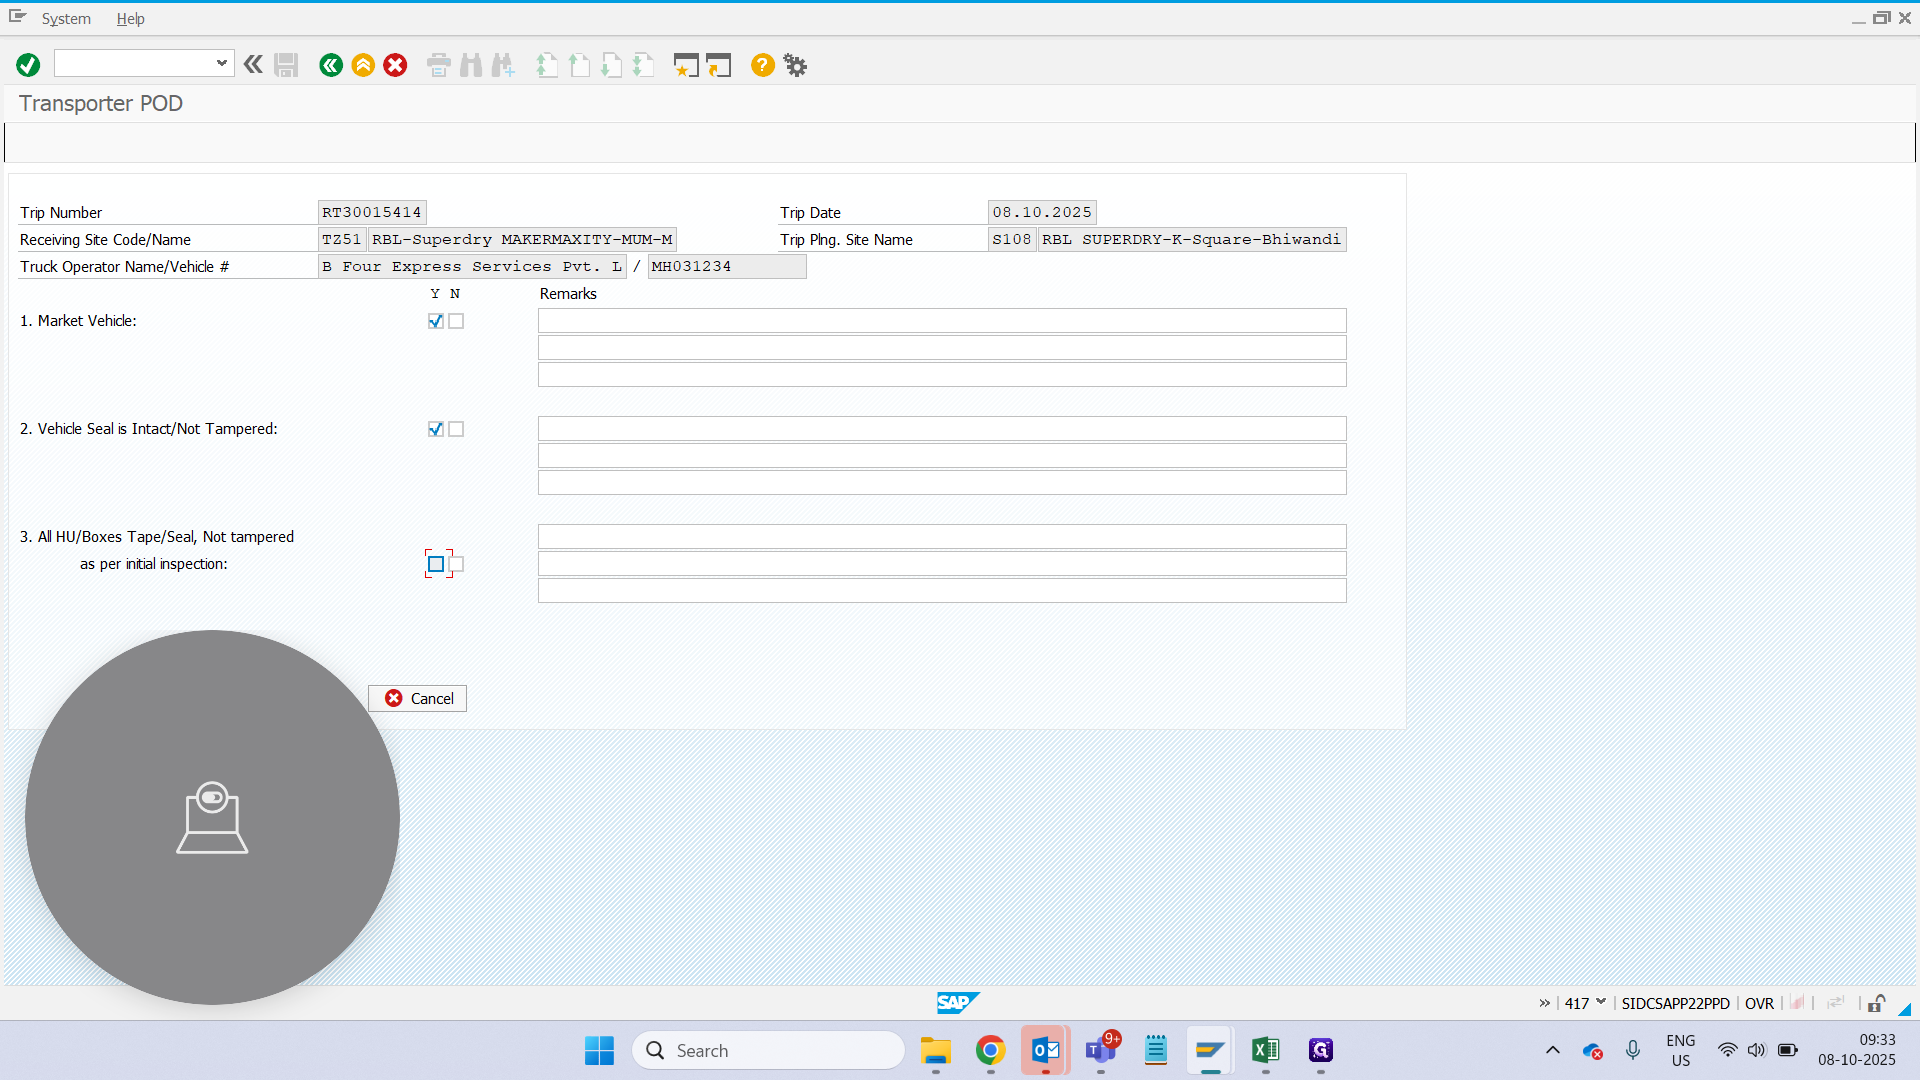
Go next.
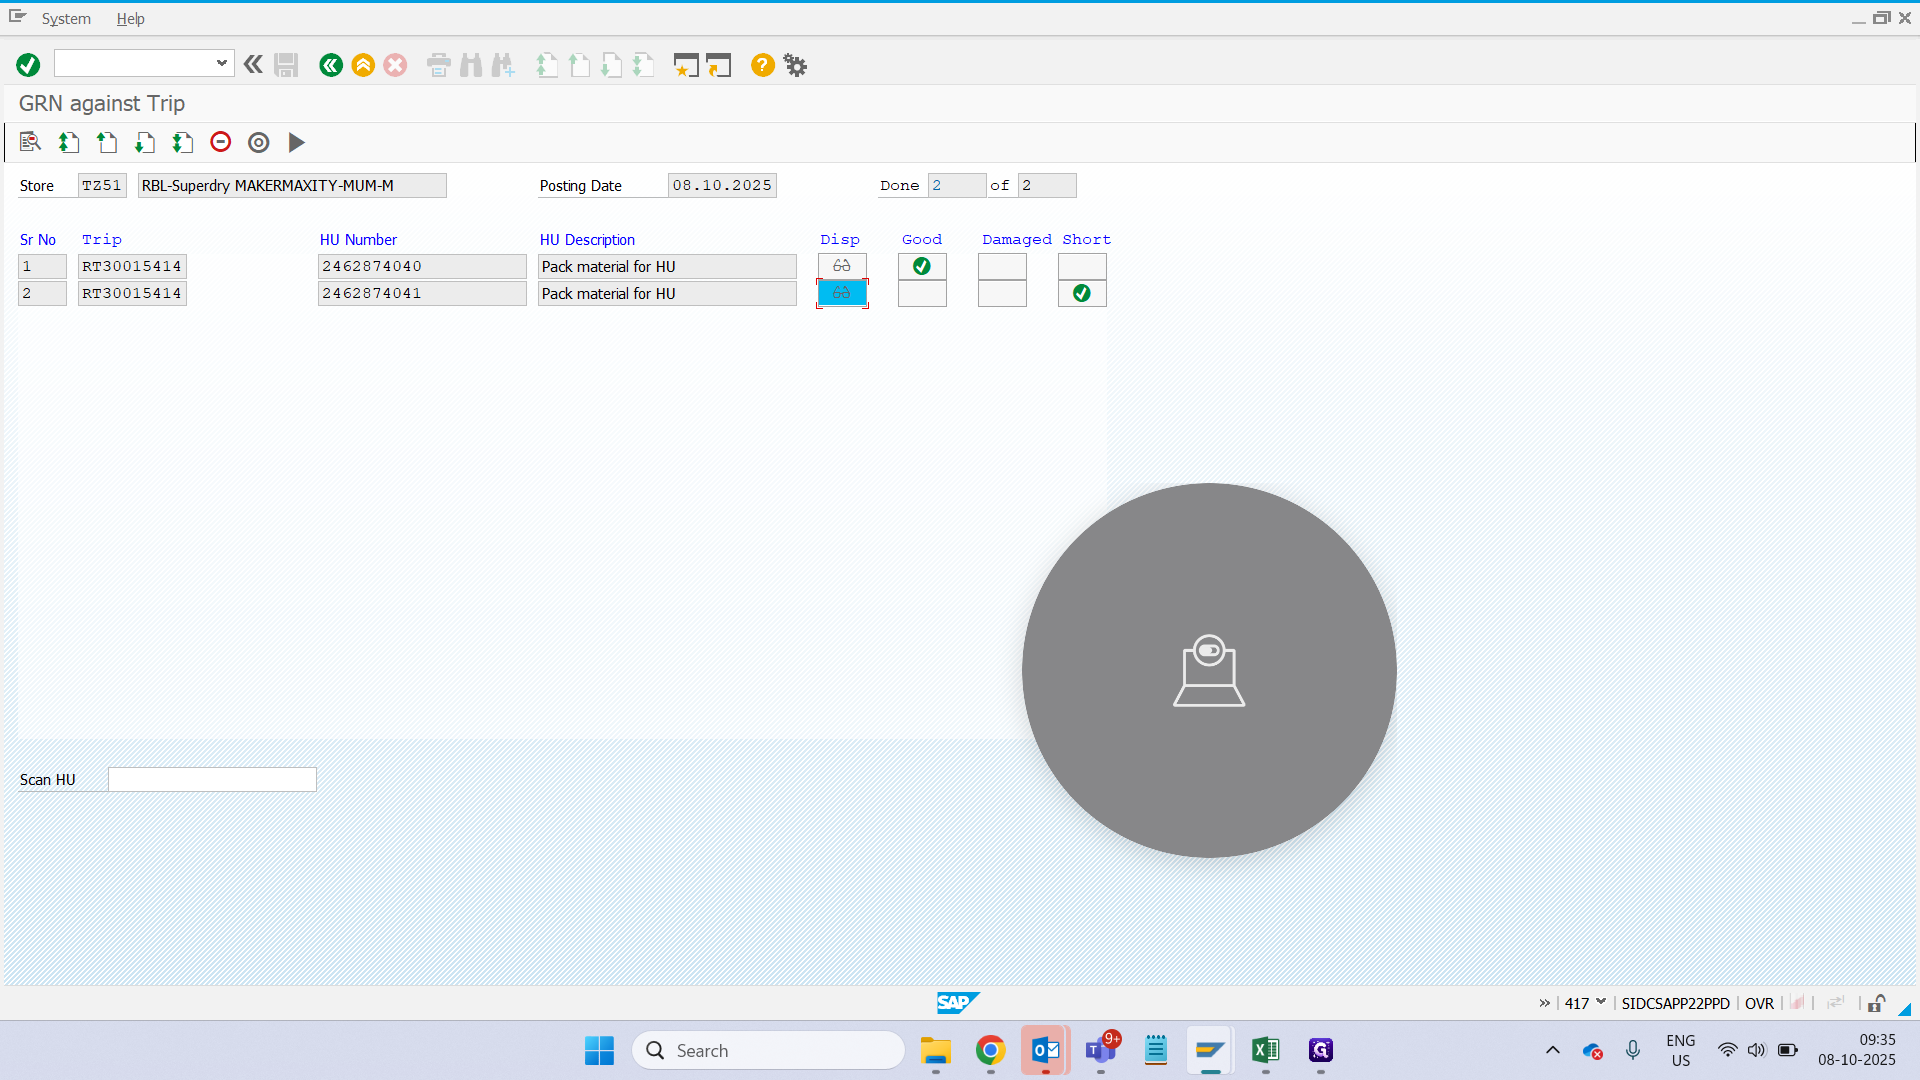
It now says we have two HUs that need to be GRN'ed at the store.

Let's follow a simple process: Suppose an HU has 10 items. You want to scan the HU label and complete the GRN at this store.
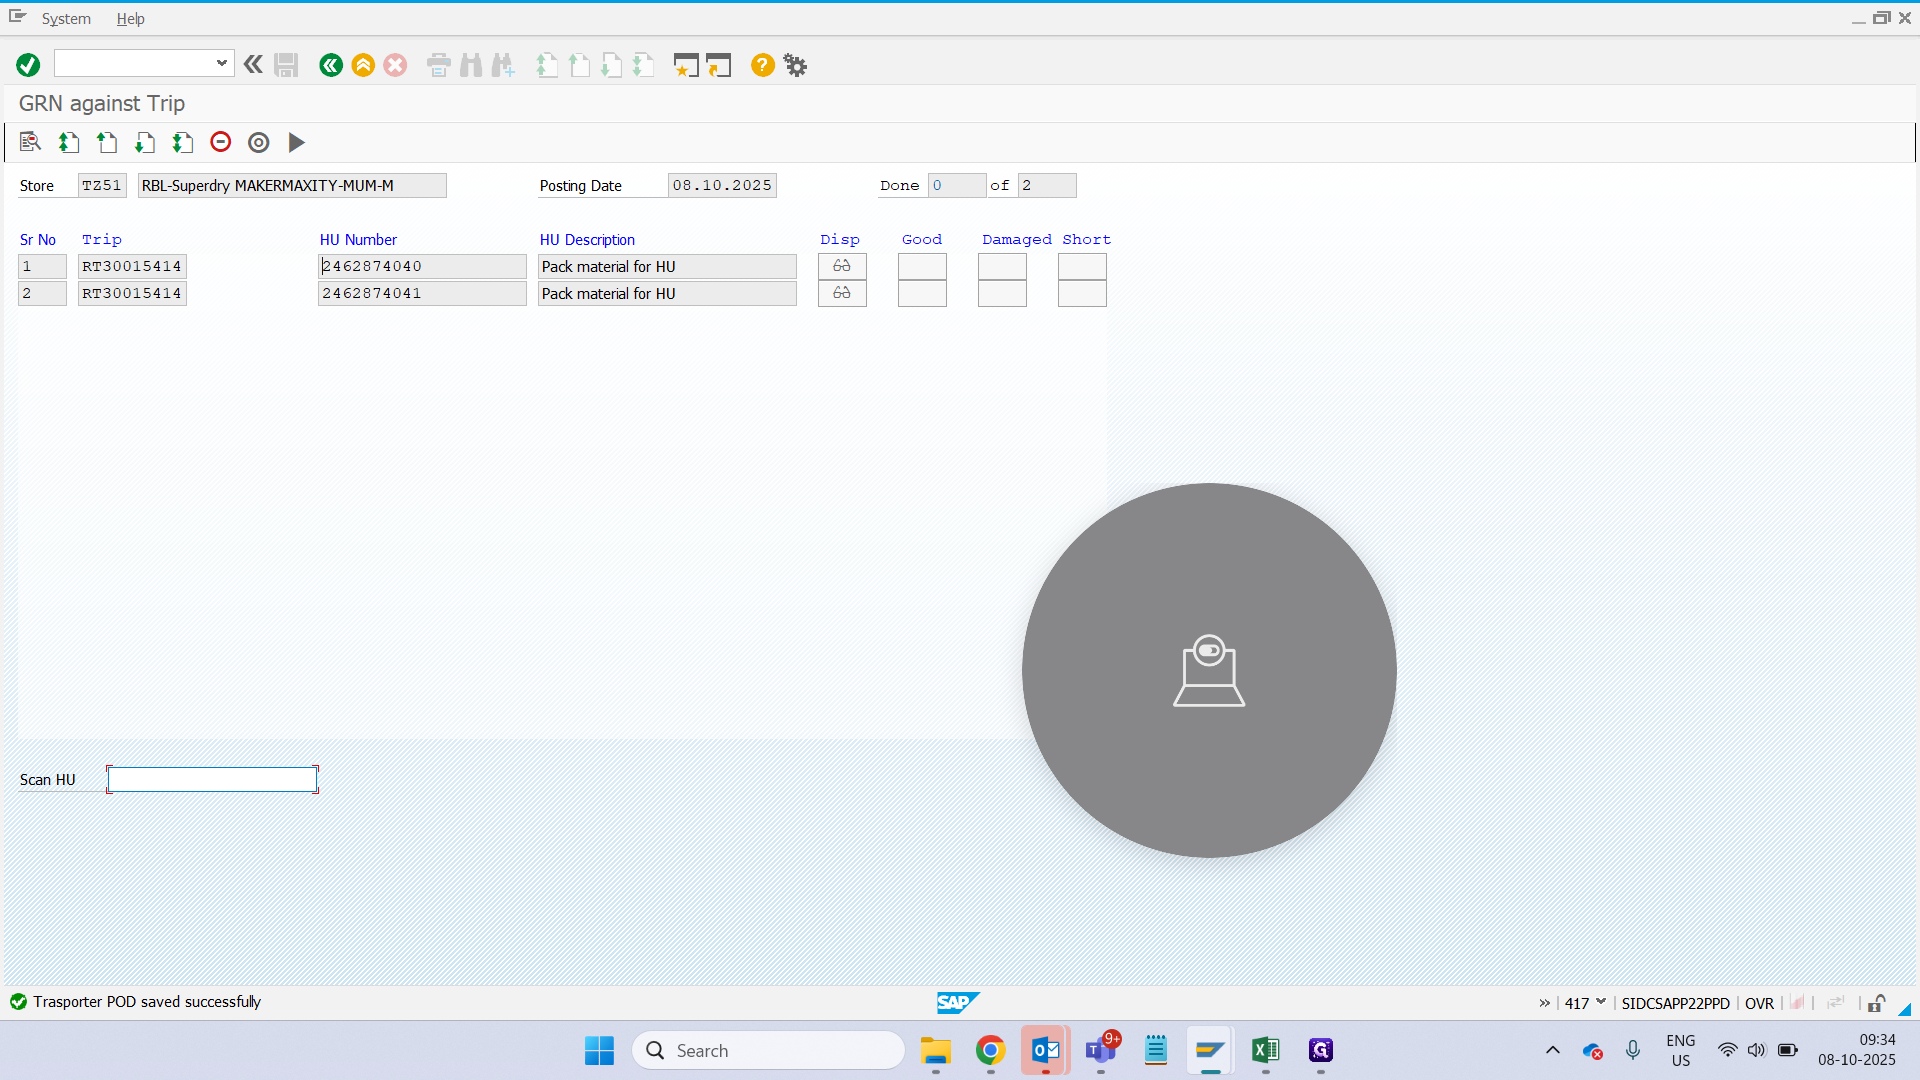
Here, we have a scan HU. It says "good."

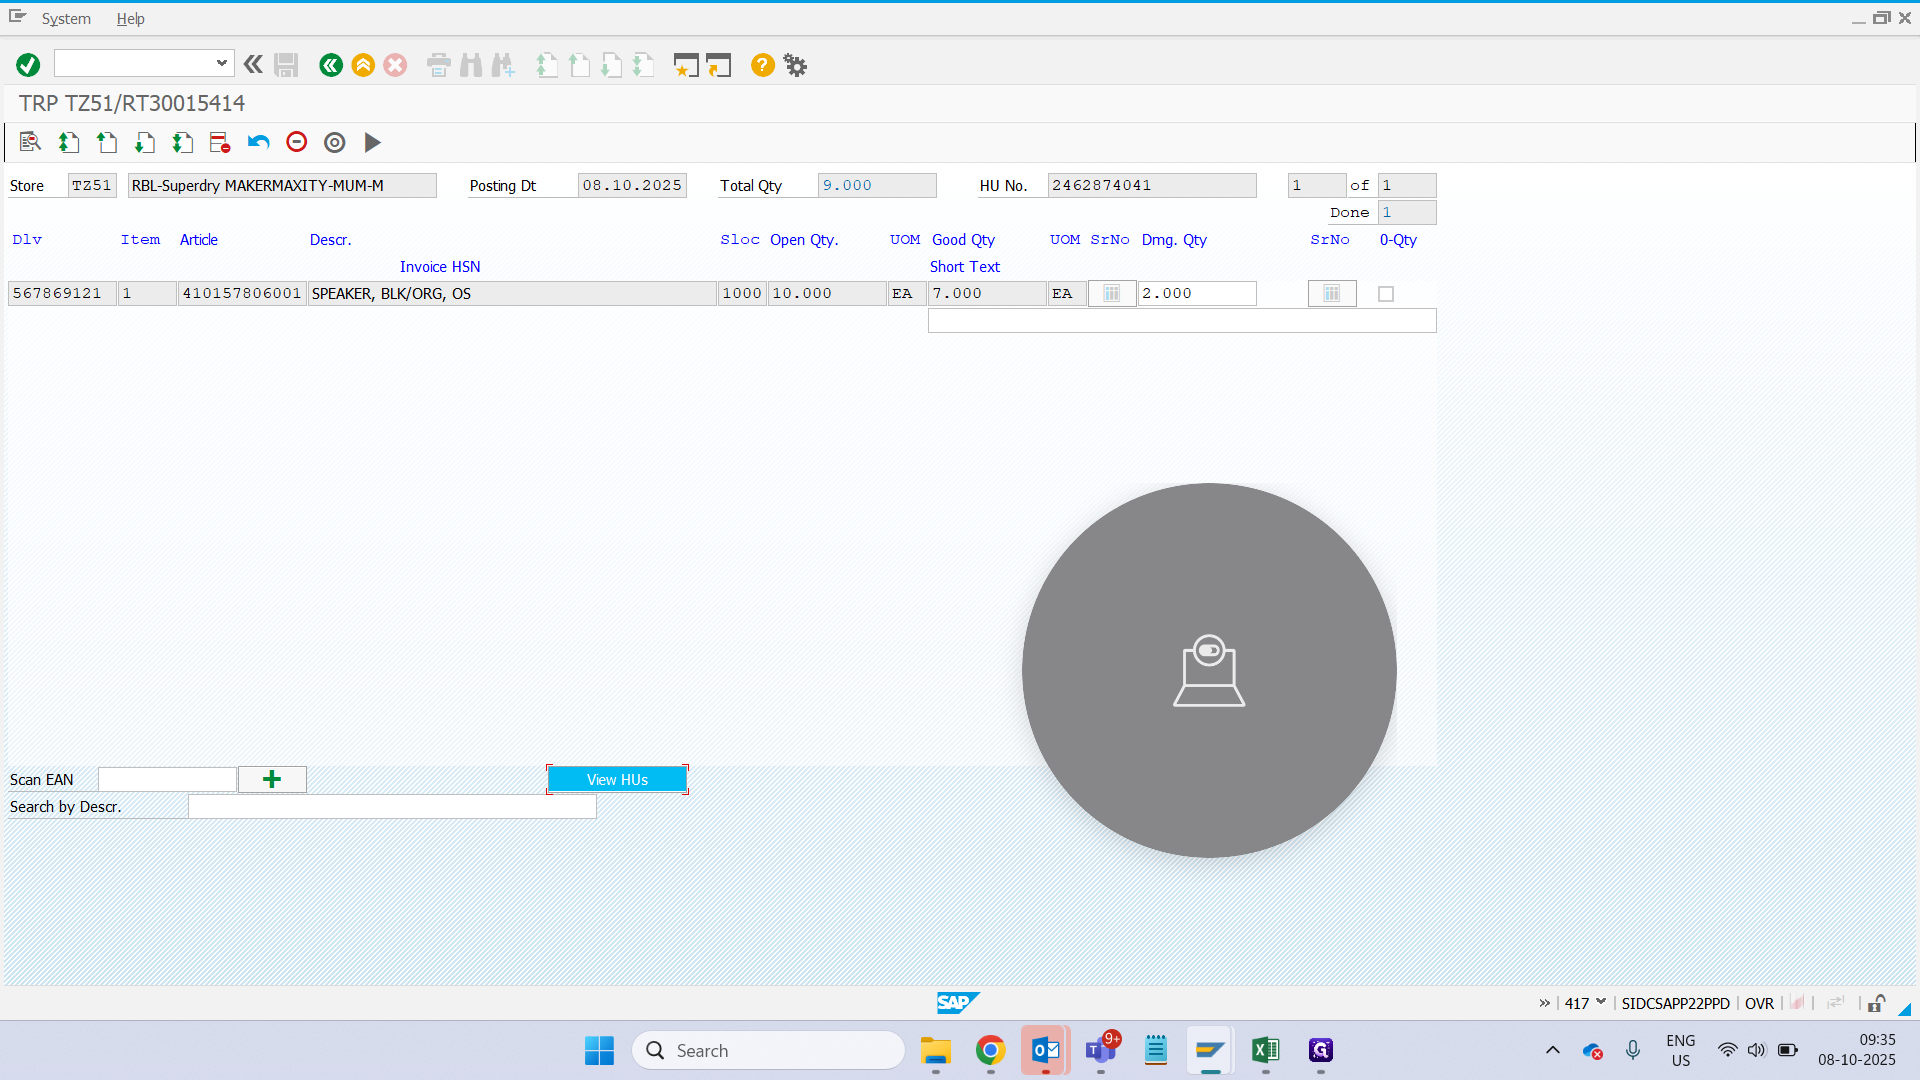
Suppose you have another HU that you have physically counted, and it has one shortage/missing item.
You can simply click on "Display" next to the HU number.

We will continue scanning this article. Since we have 10, we 1 shortage.

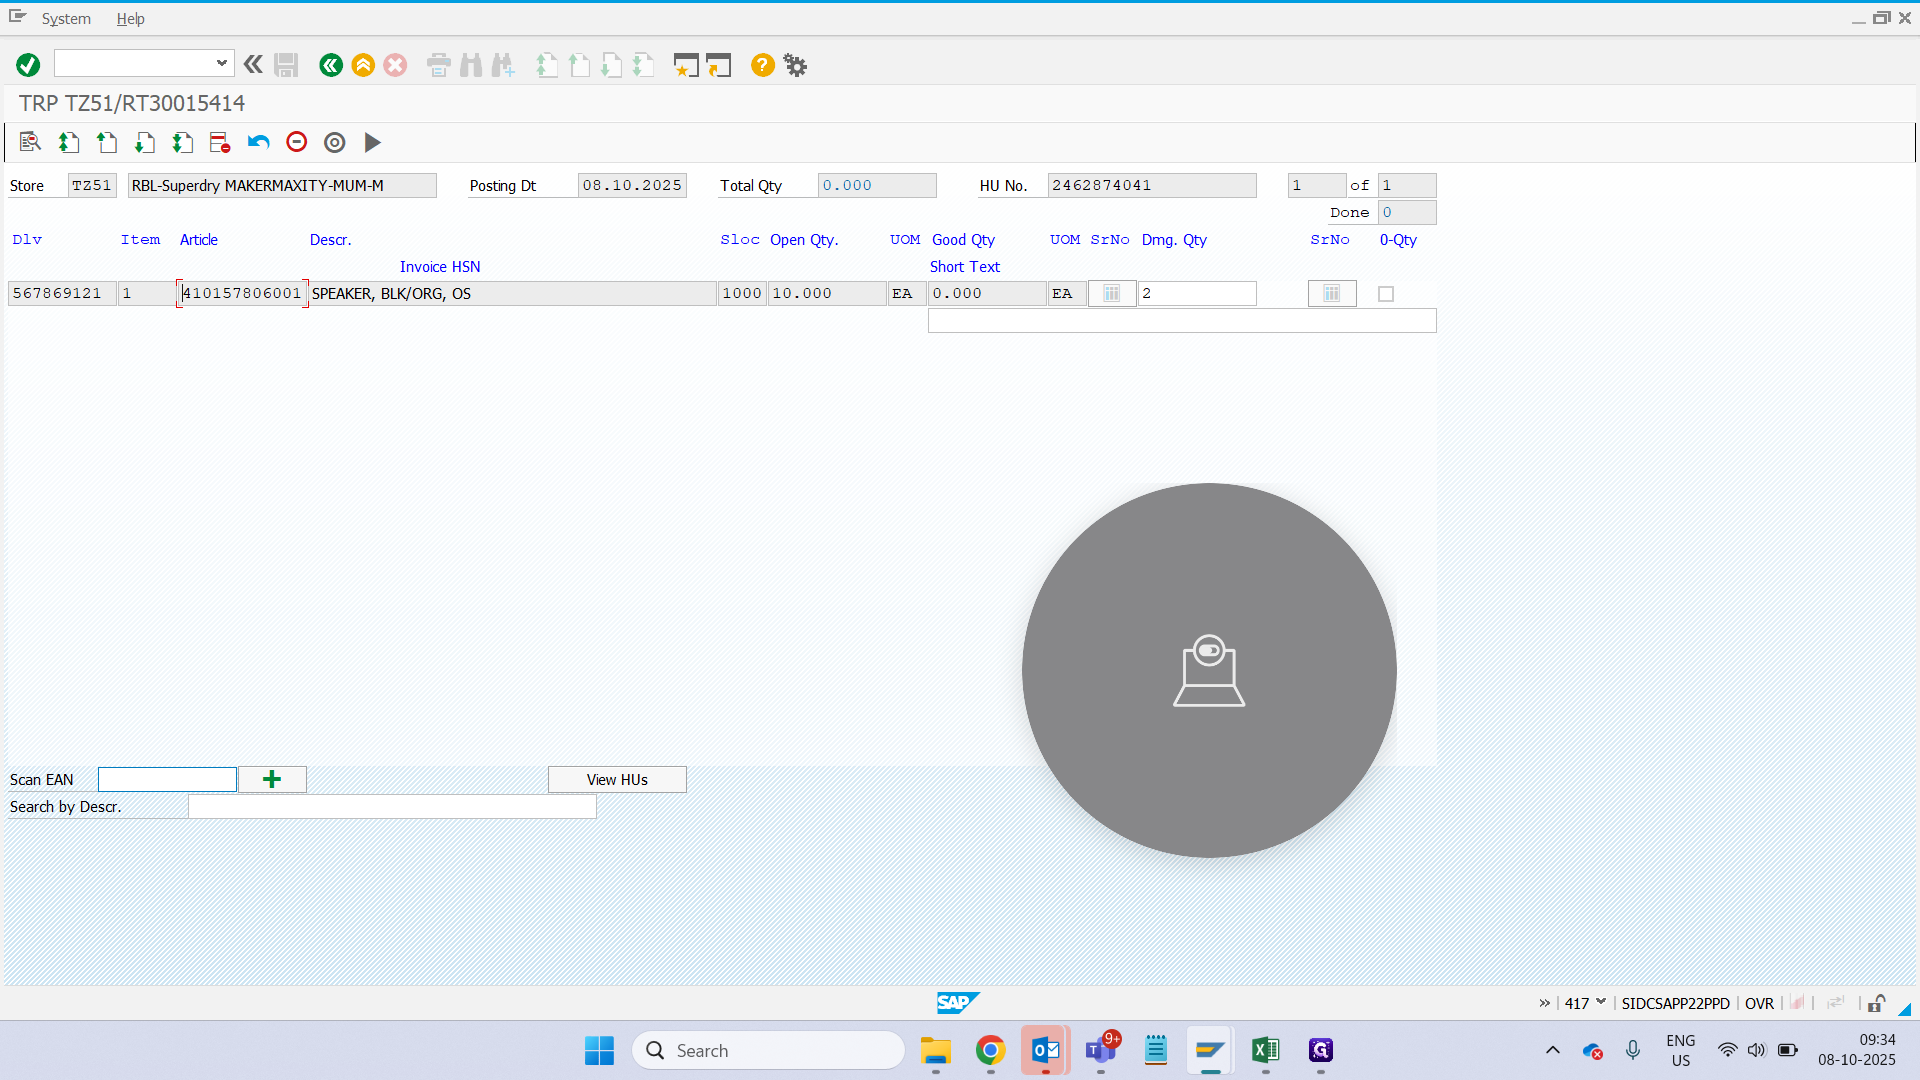
We will continue adding it.
As we proceed, you can see here that it shows one.
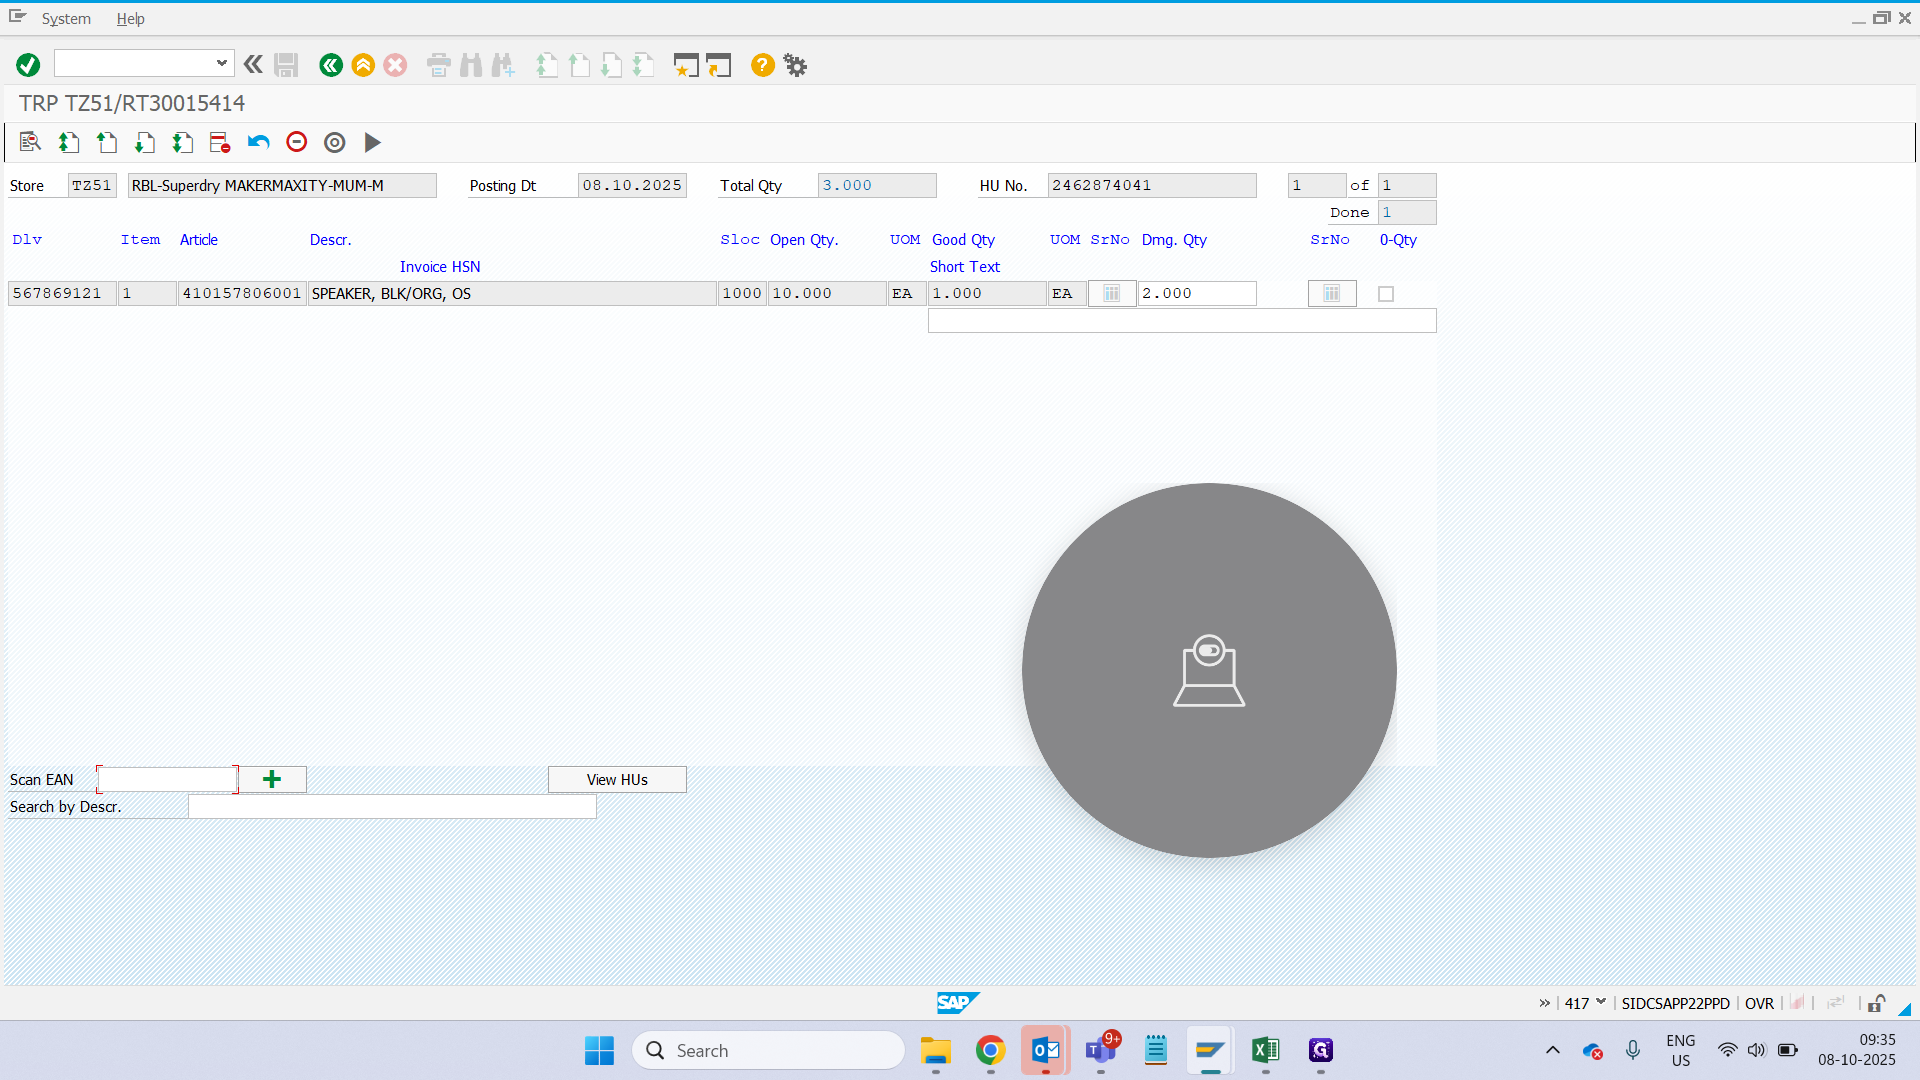
Keep doing that until you reach 7 quantities.
Keep scanning.
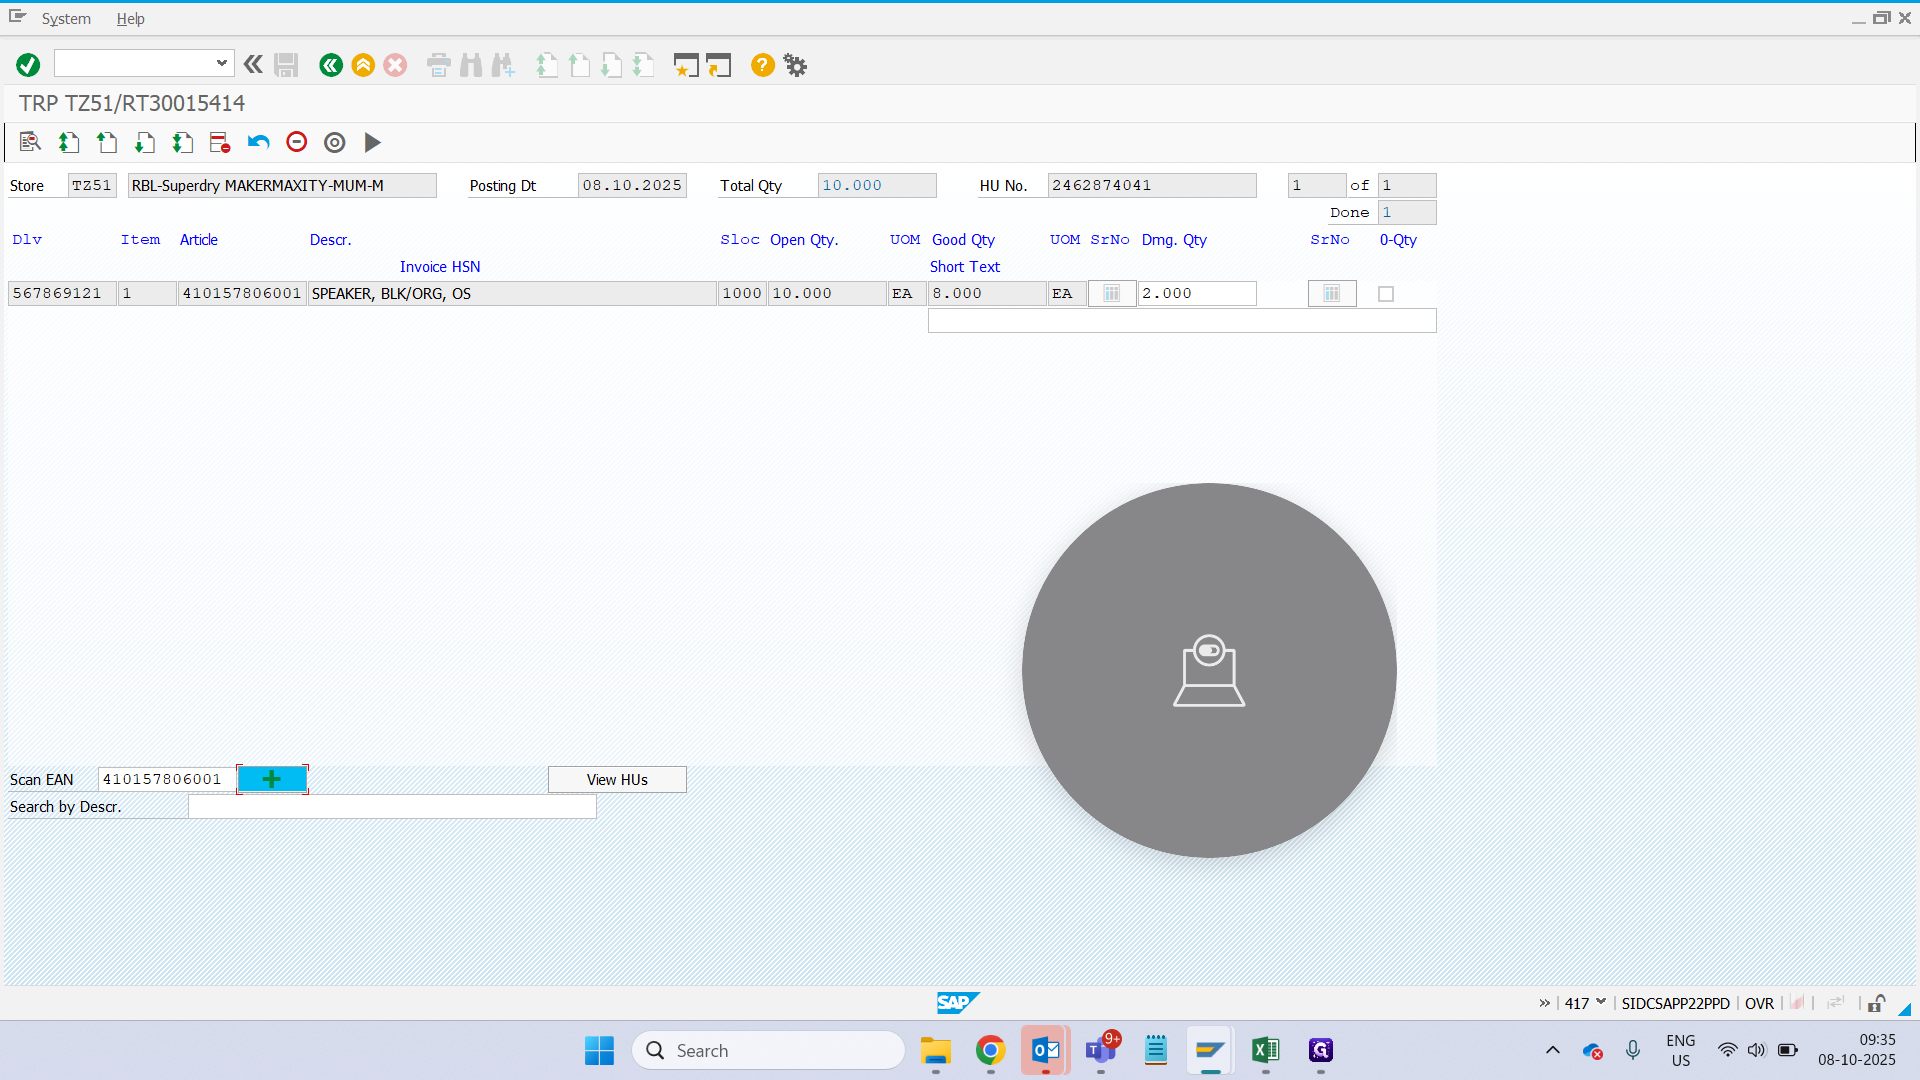
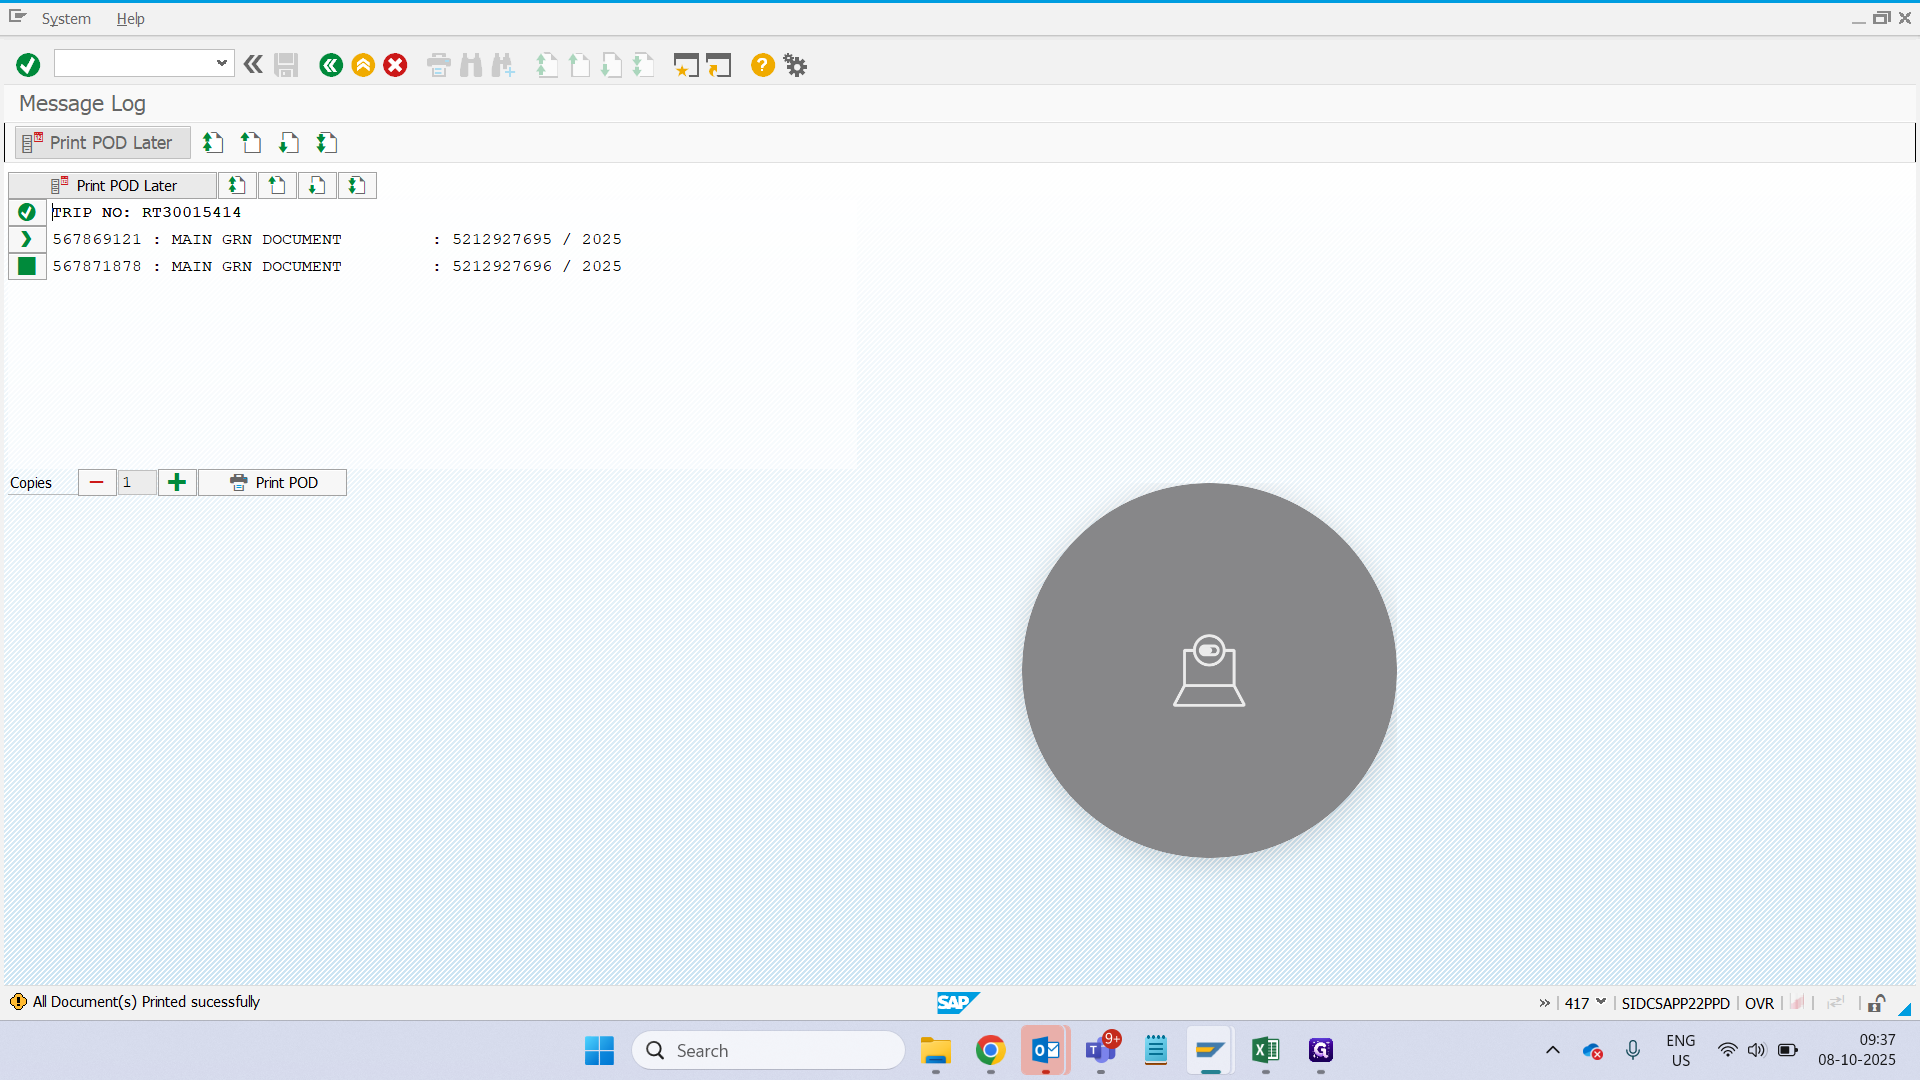
Once this is done, click on "View HU." It should display this message.
Once this is done, click here. The scan is complete.

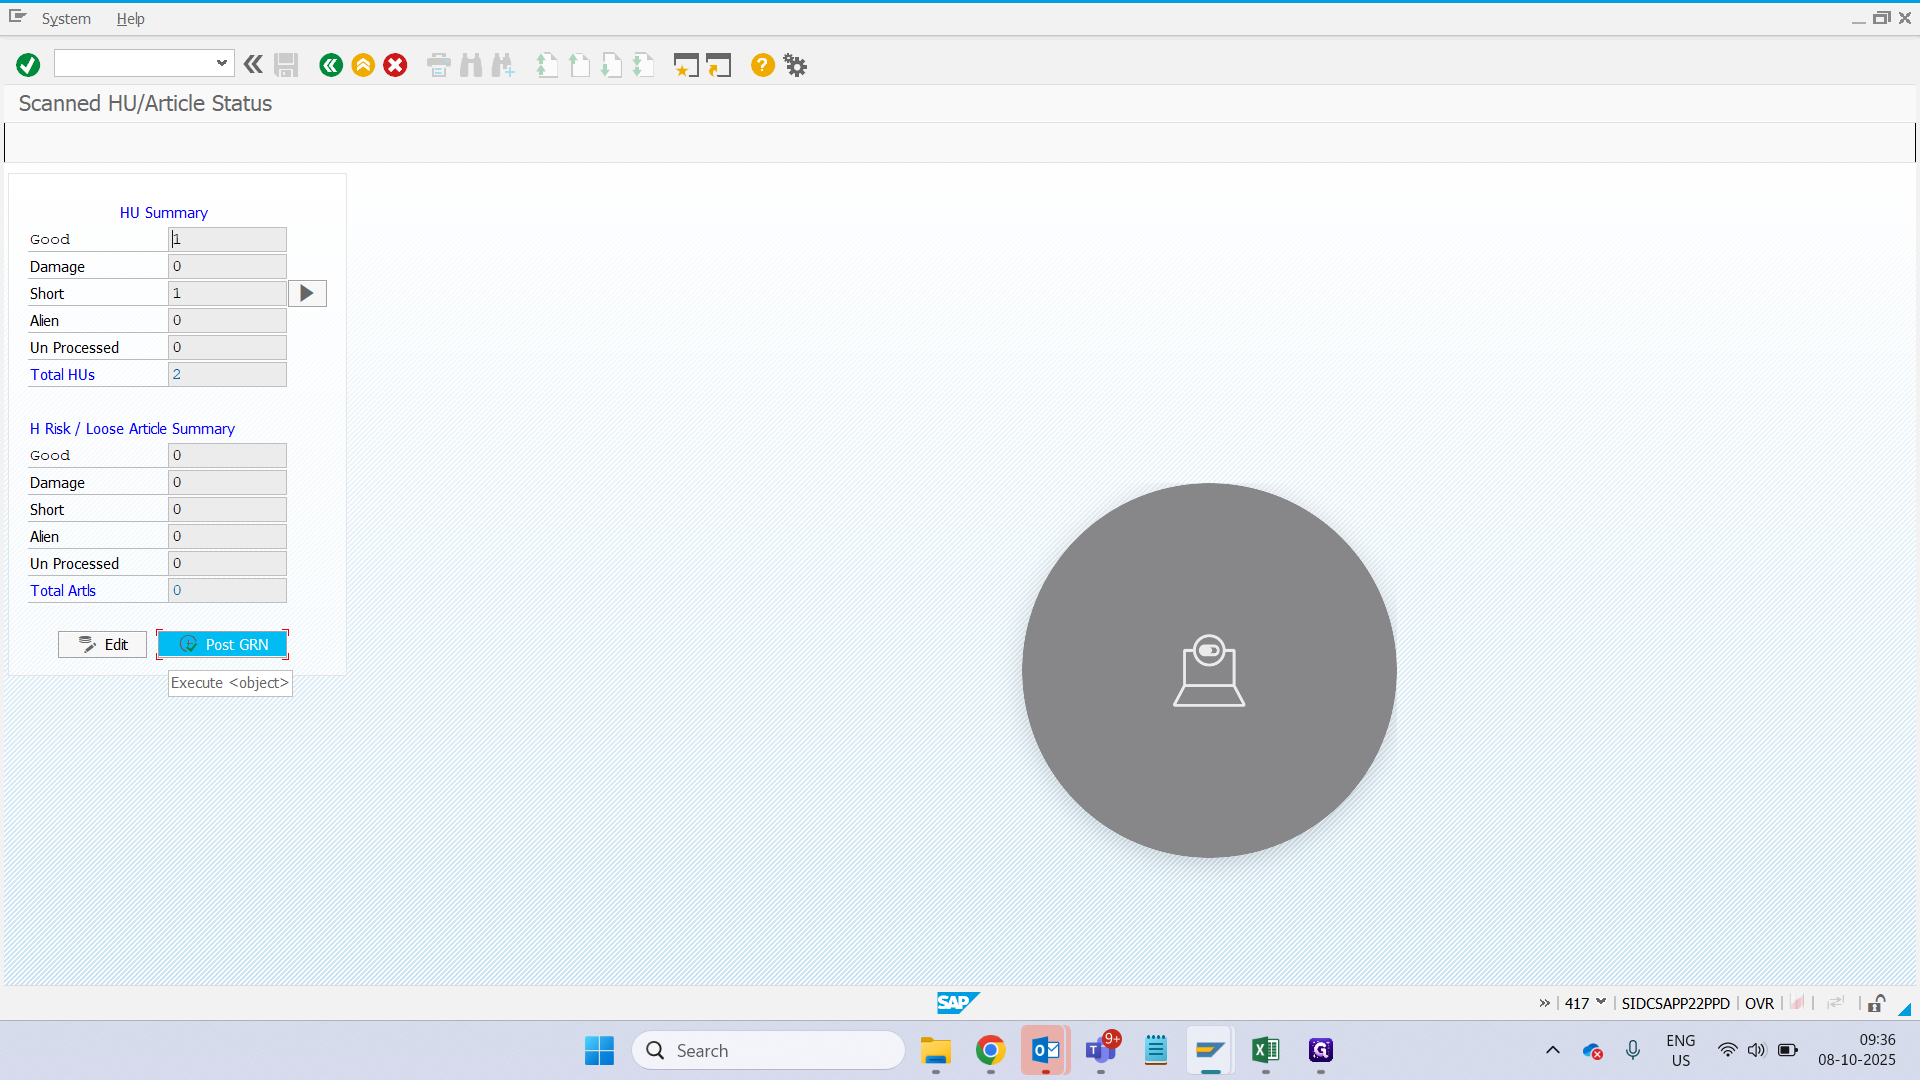
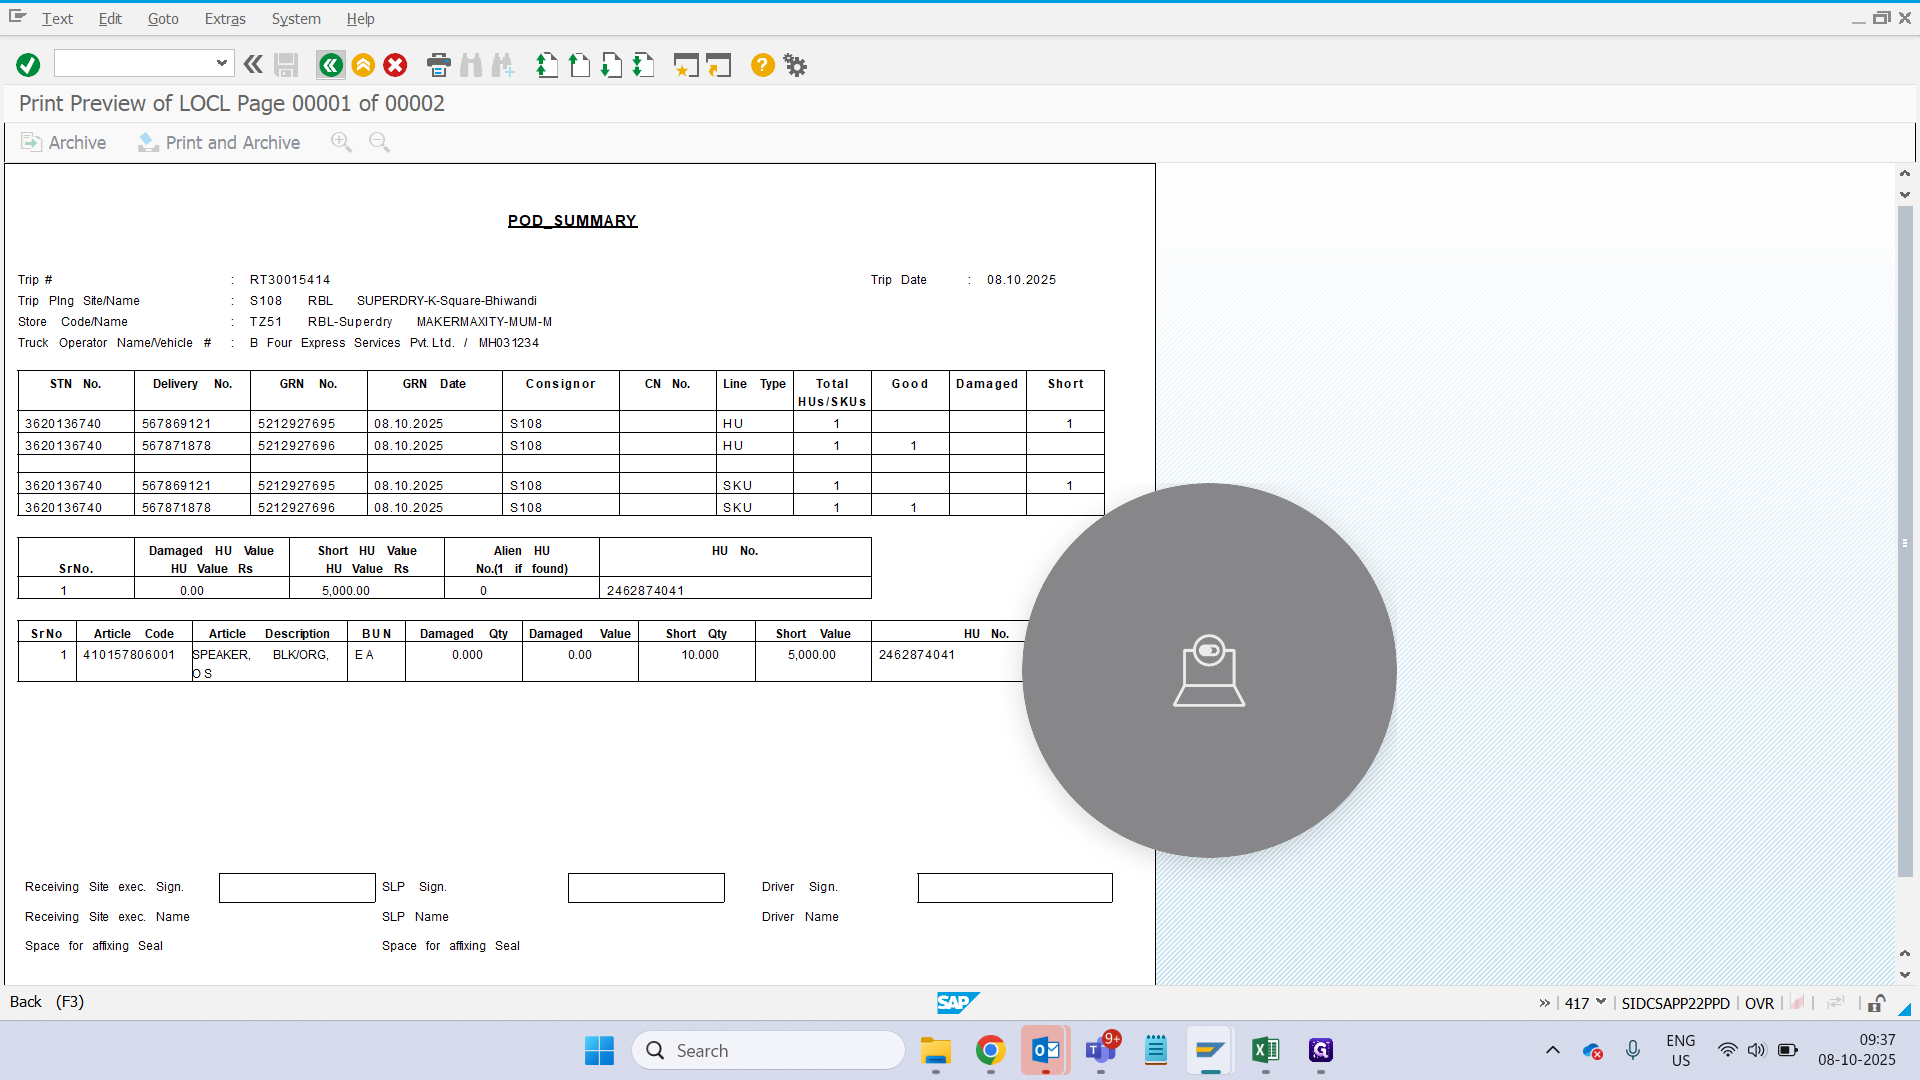
Now, you want to check the preview to see what your shortages were.
It says that HU number one went smoothly. Whereas for another HU, shortage is mentioned on summary level.