SOP: Payroll Step 3
A comprehensive guide to payroll processing, including how to add severance pay, PTO payouts, deduction adjustments, and manage employee terminations. Learn step-by-step payroll worksheet management for accurate and efficient payroll administration.
In this guide, we'll learn how to manually update payroll records for employees, including adding severance pay, adjusting hours, processing PTO payouts, and handling benefit refunds. We will also review how to ensure all payroll changes are accurate before finalizing each batch.
This process helps maintain correct payroll data and ensures employees receive the right compensation and deductions.
Let's get started
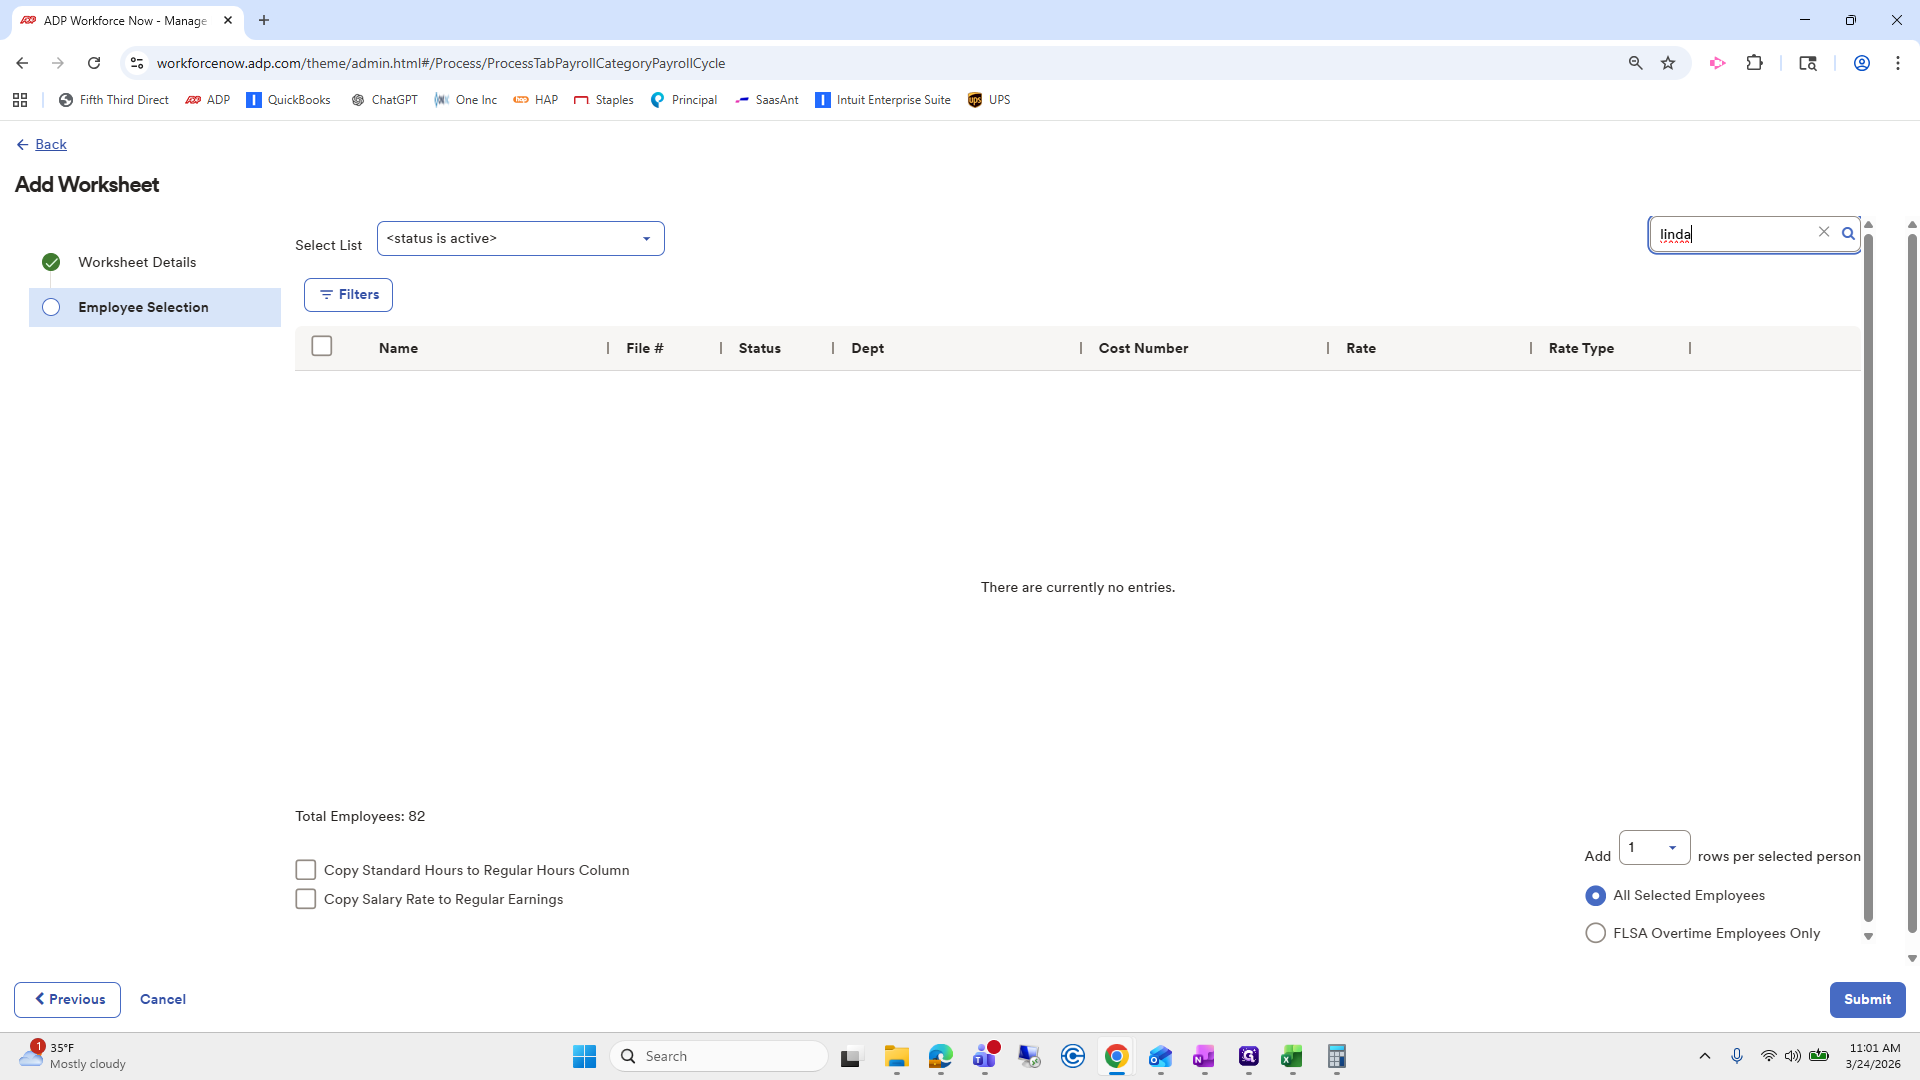
Okay. We were reviewing the Comp 1 tab to check for any additional payroll that needed to be added manually. We left off with Linda Roberts.
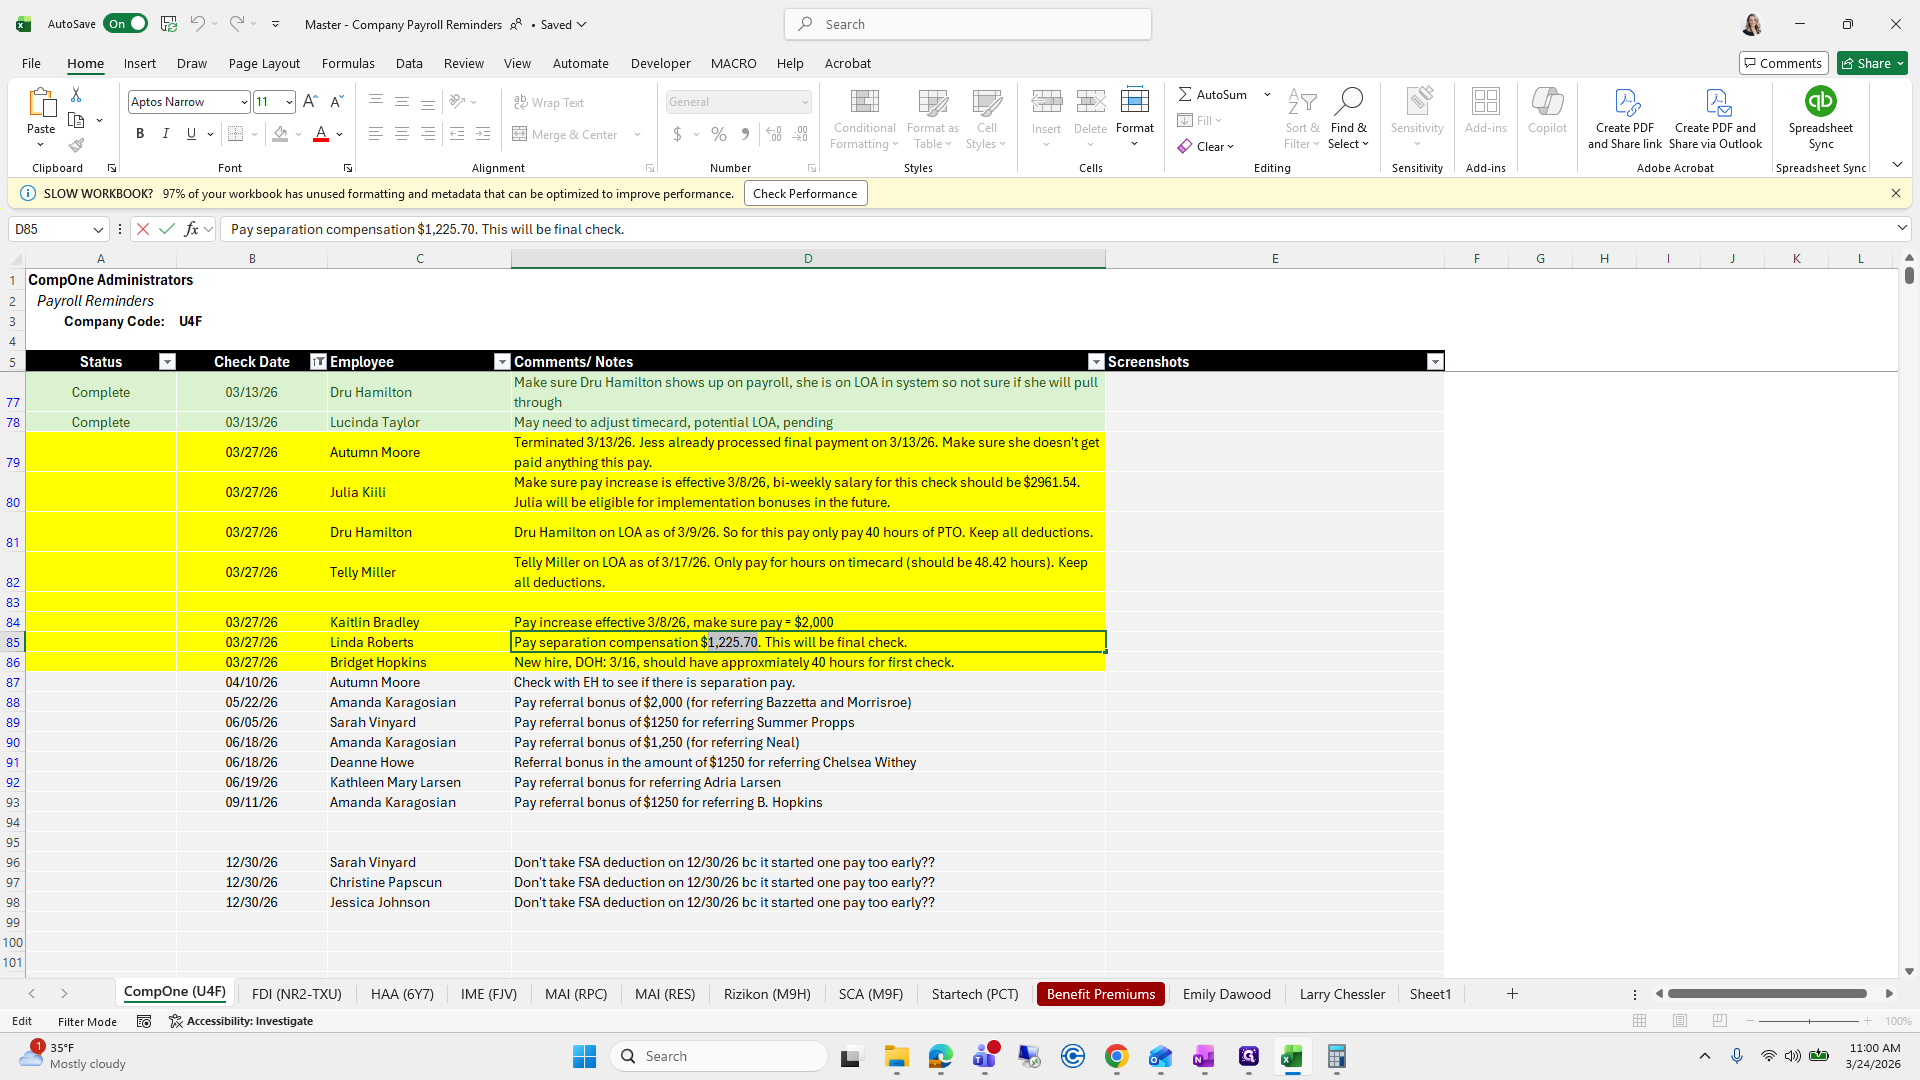
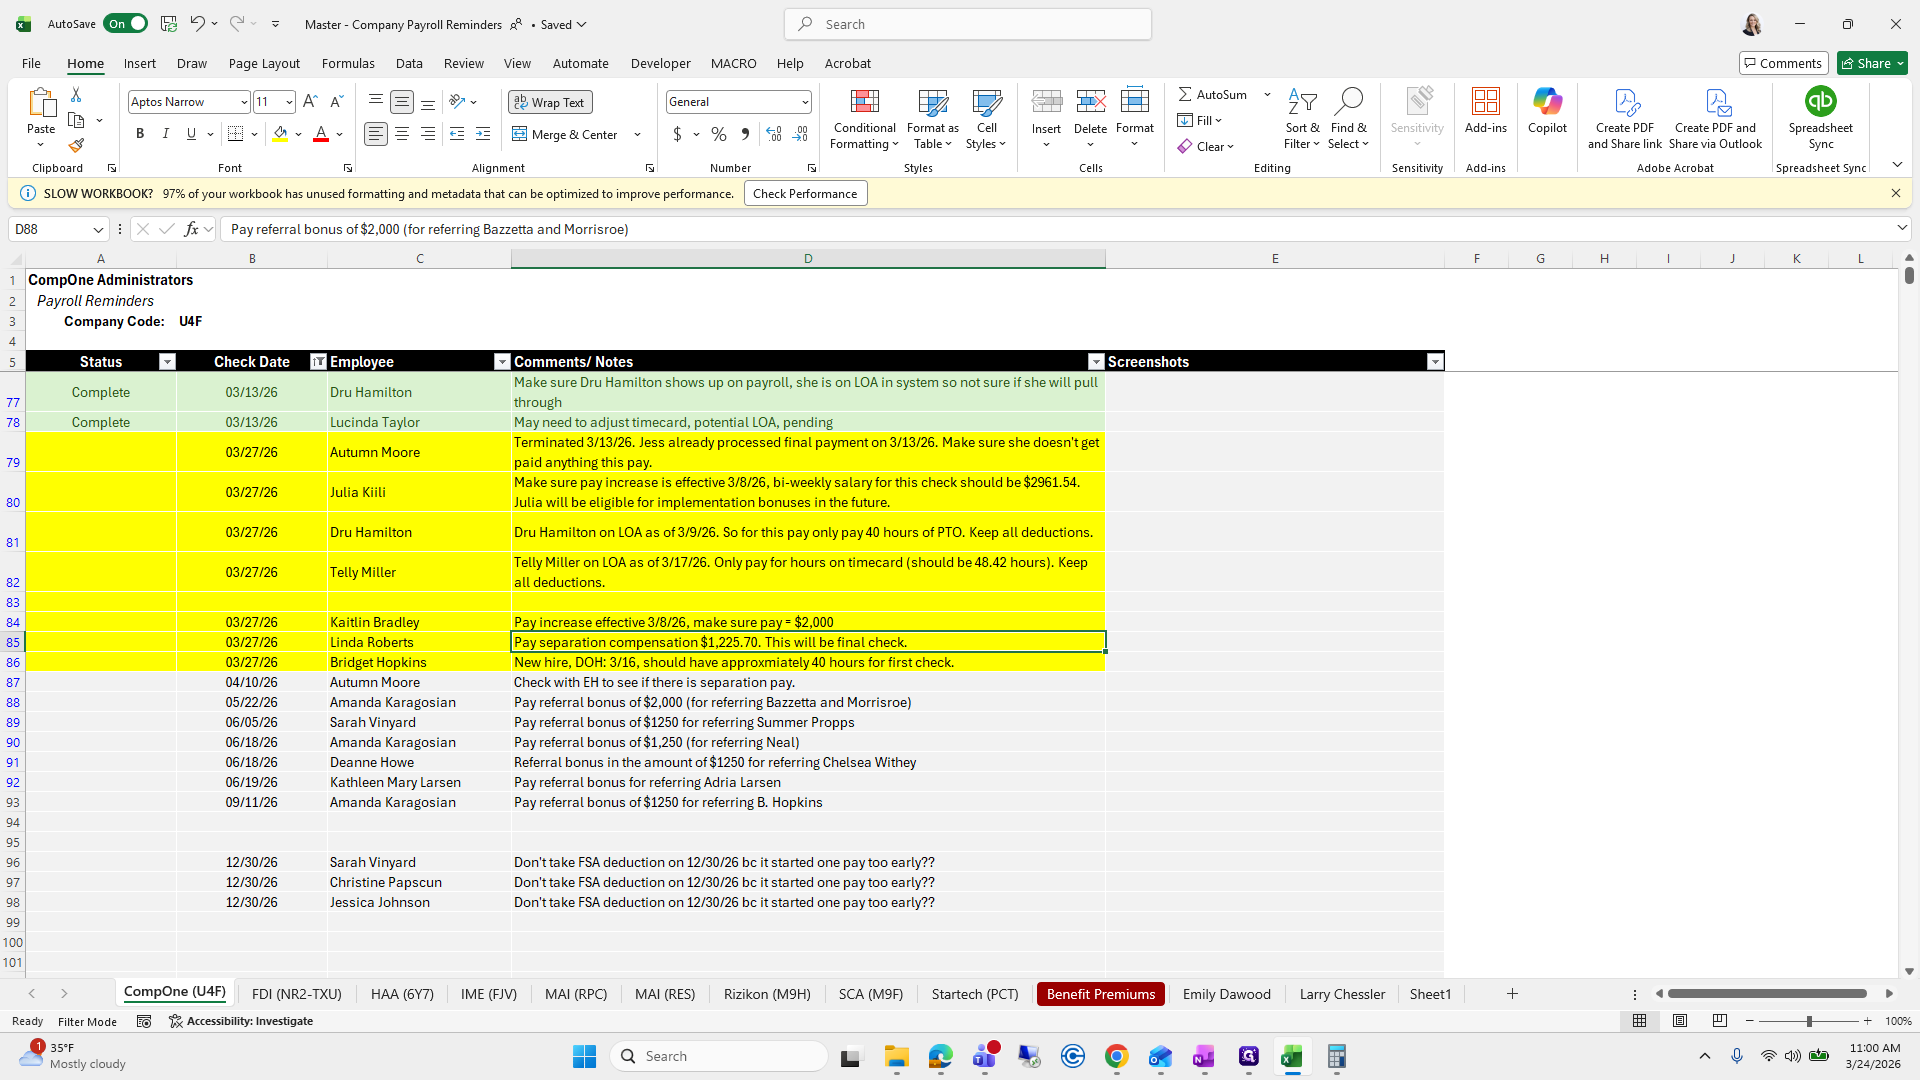
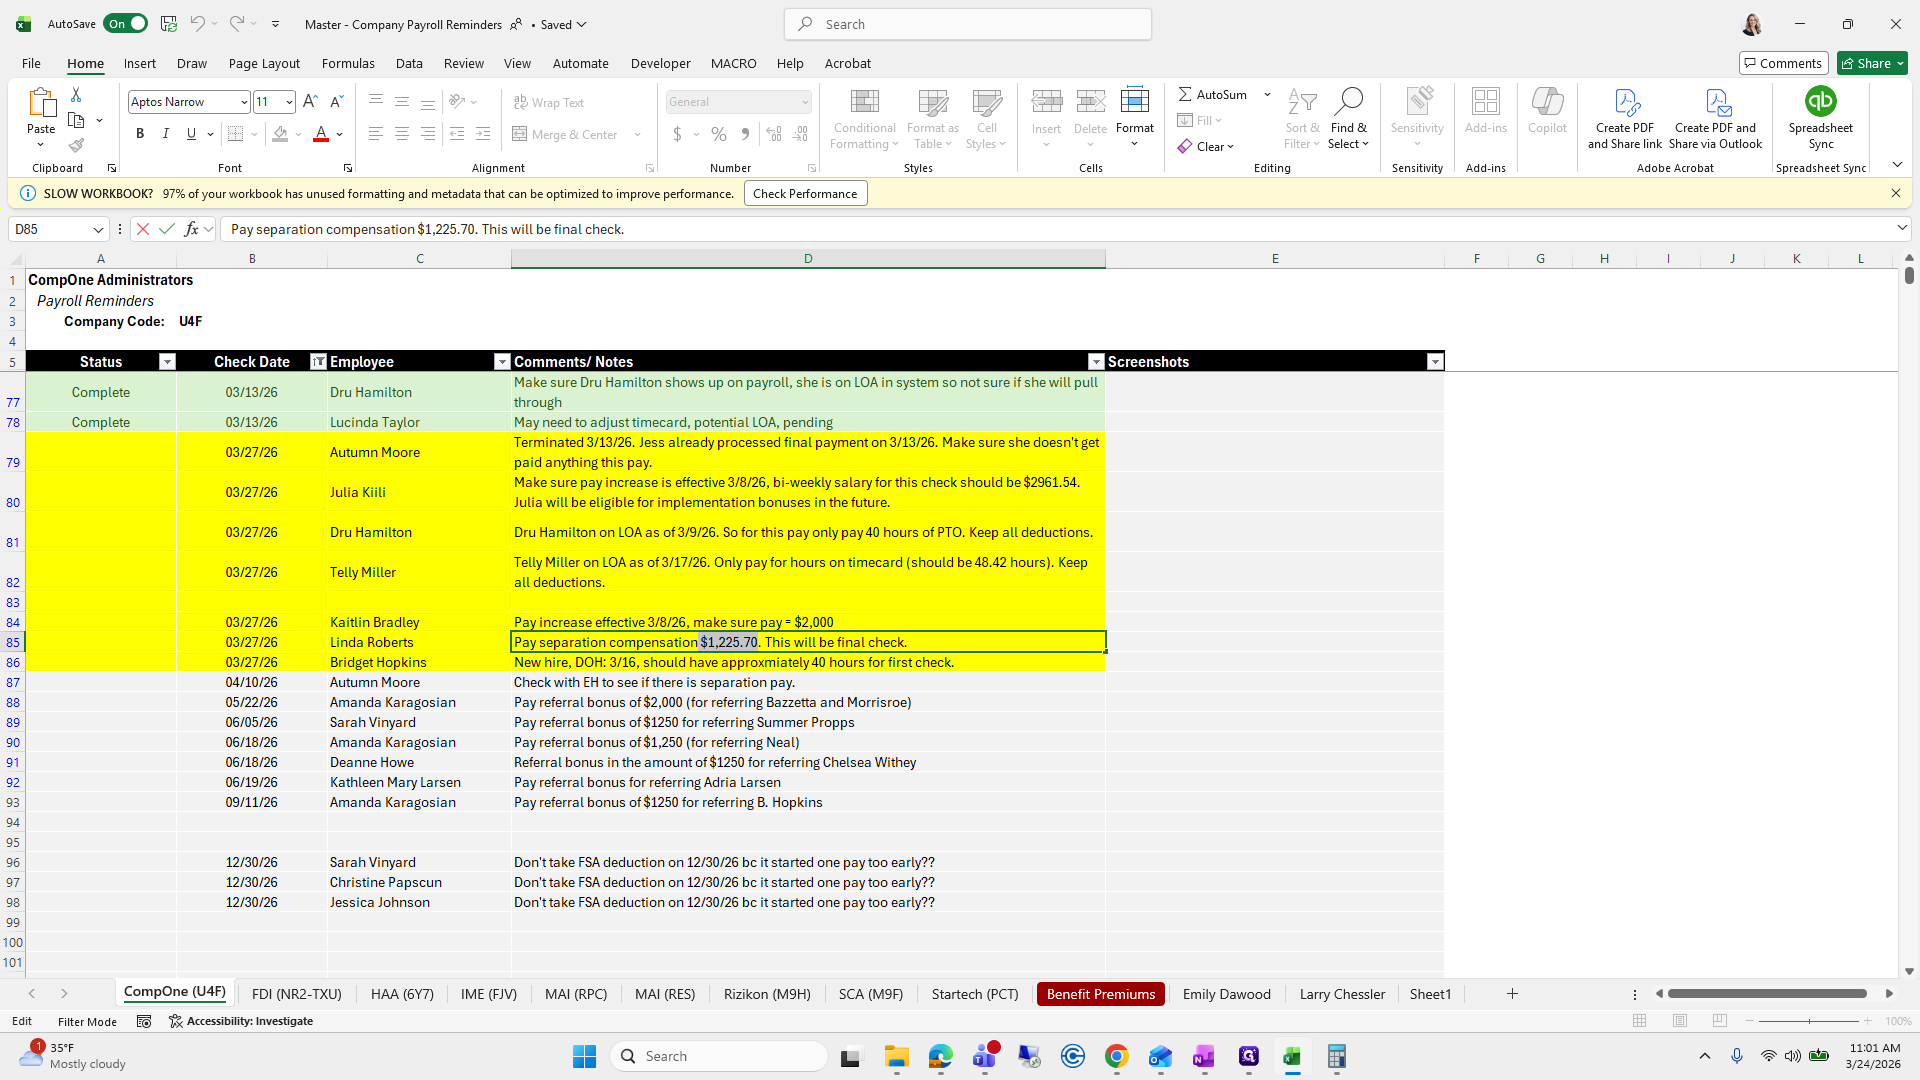
We need to add pay separation compensation for 12/25/70.


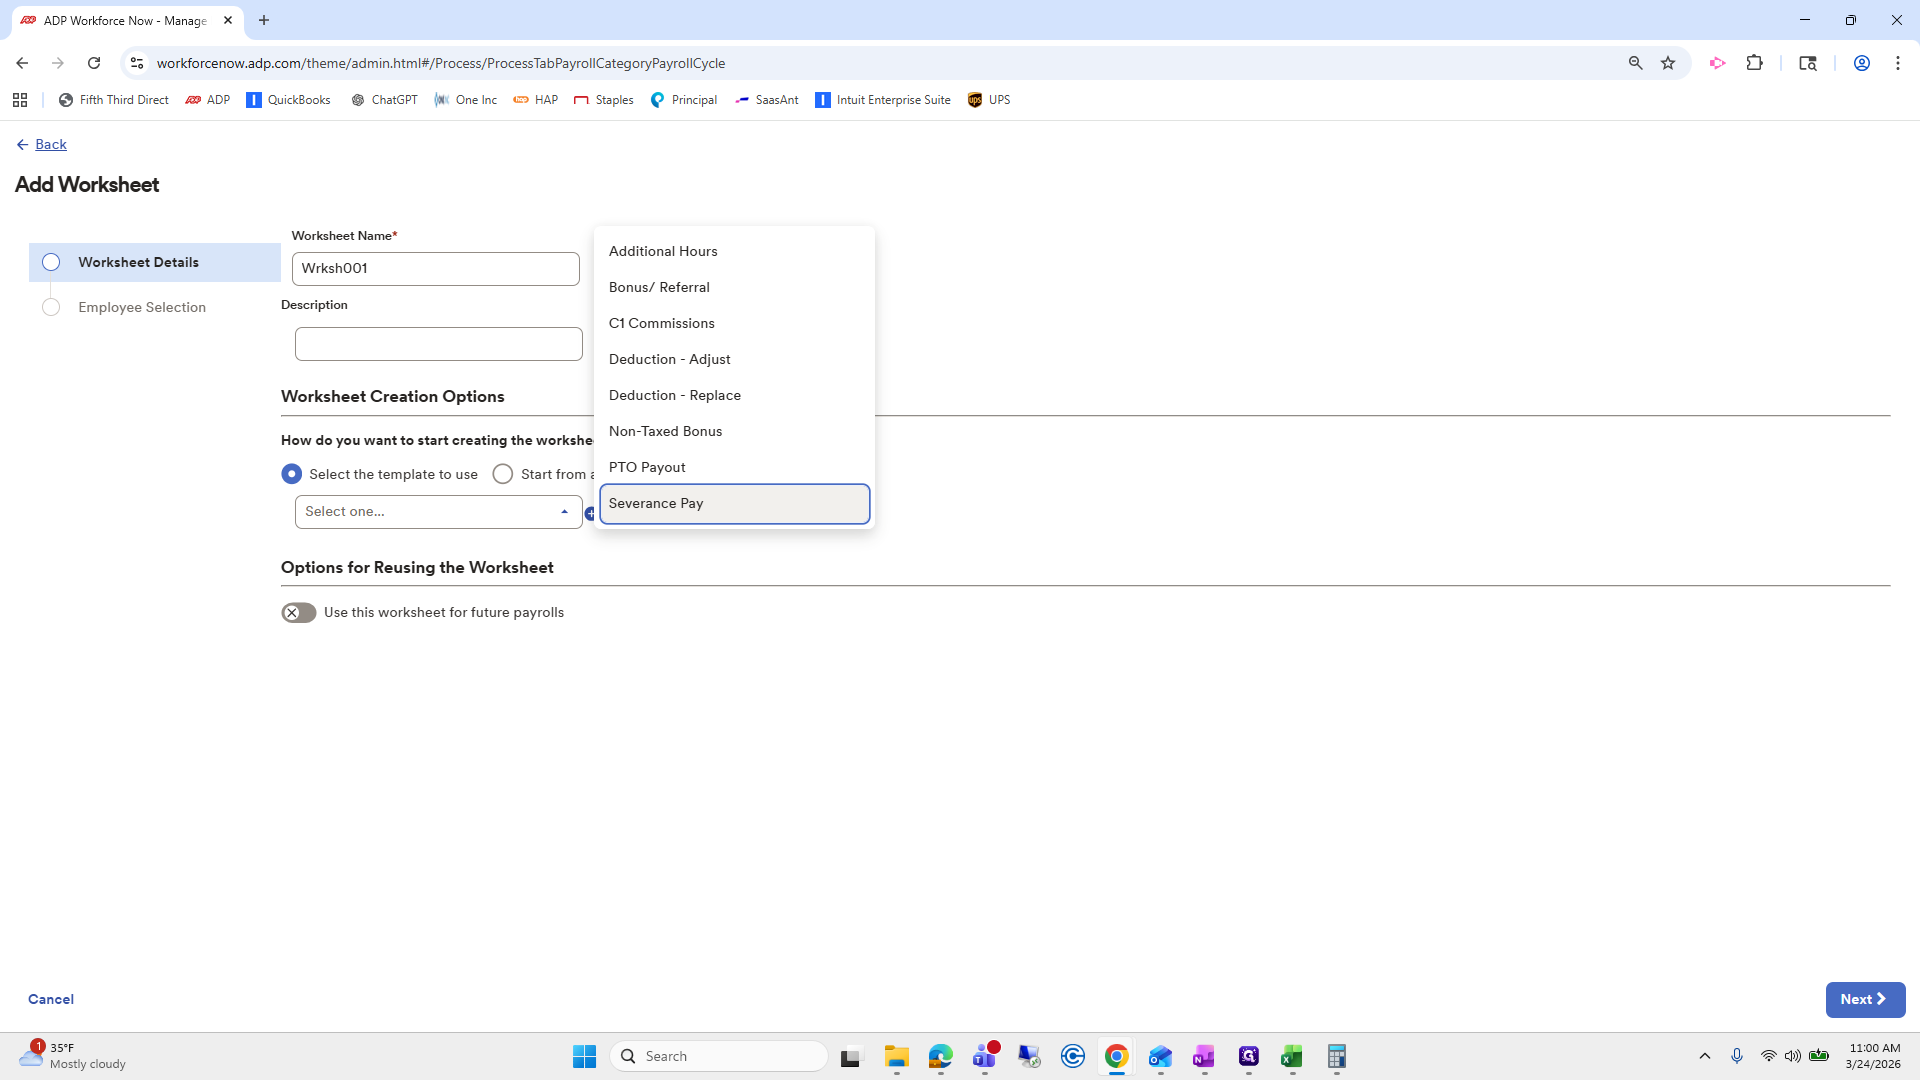
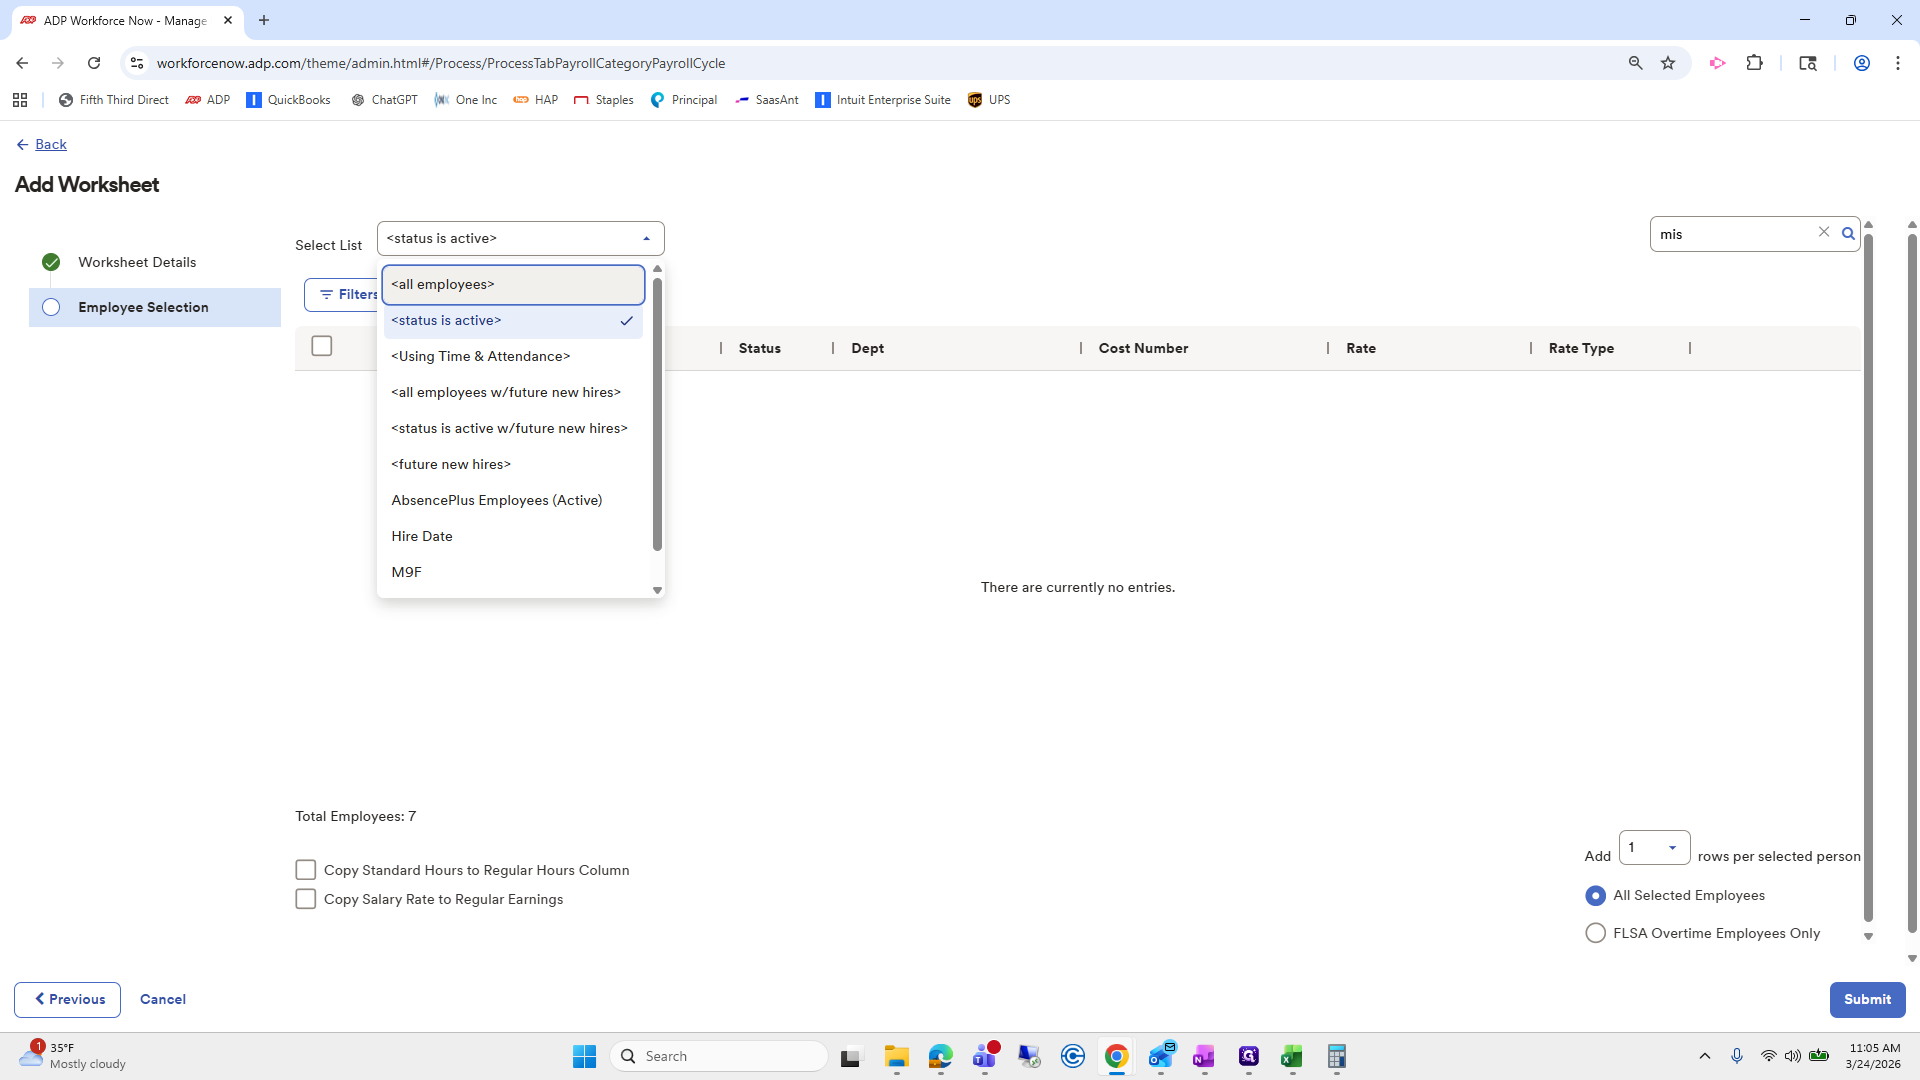
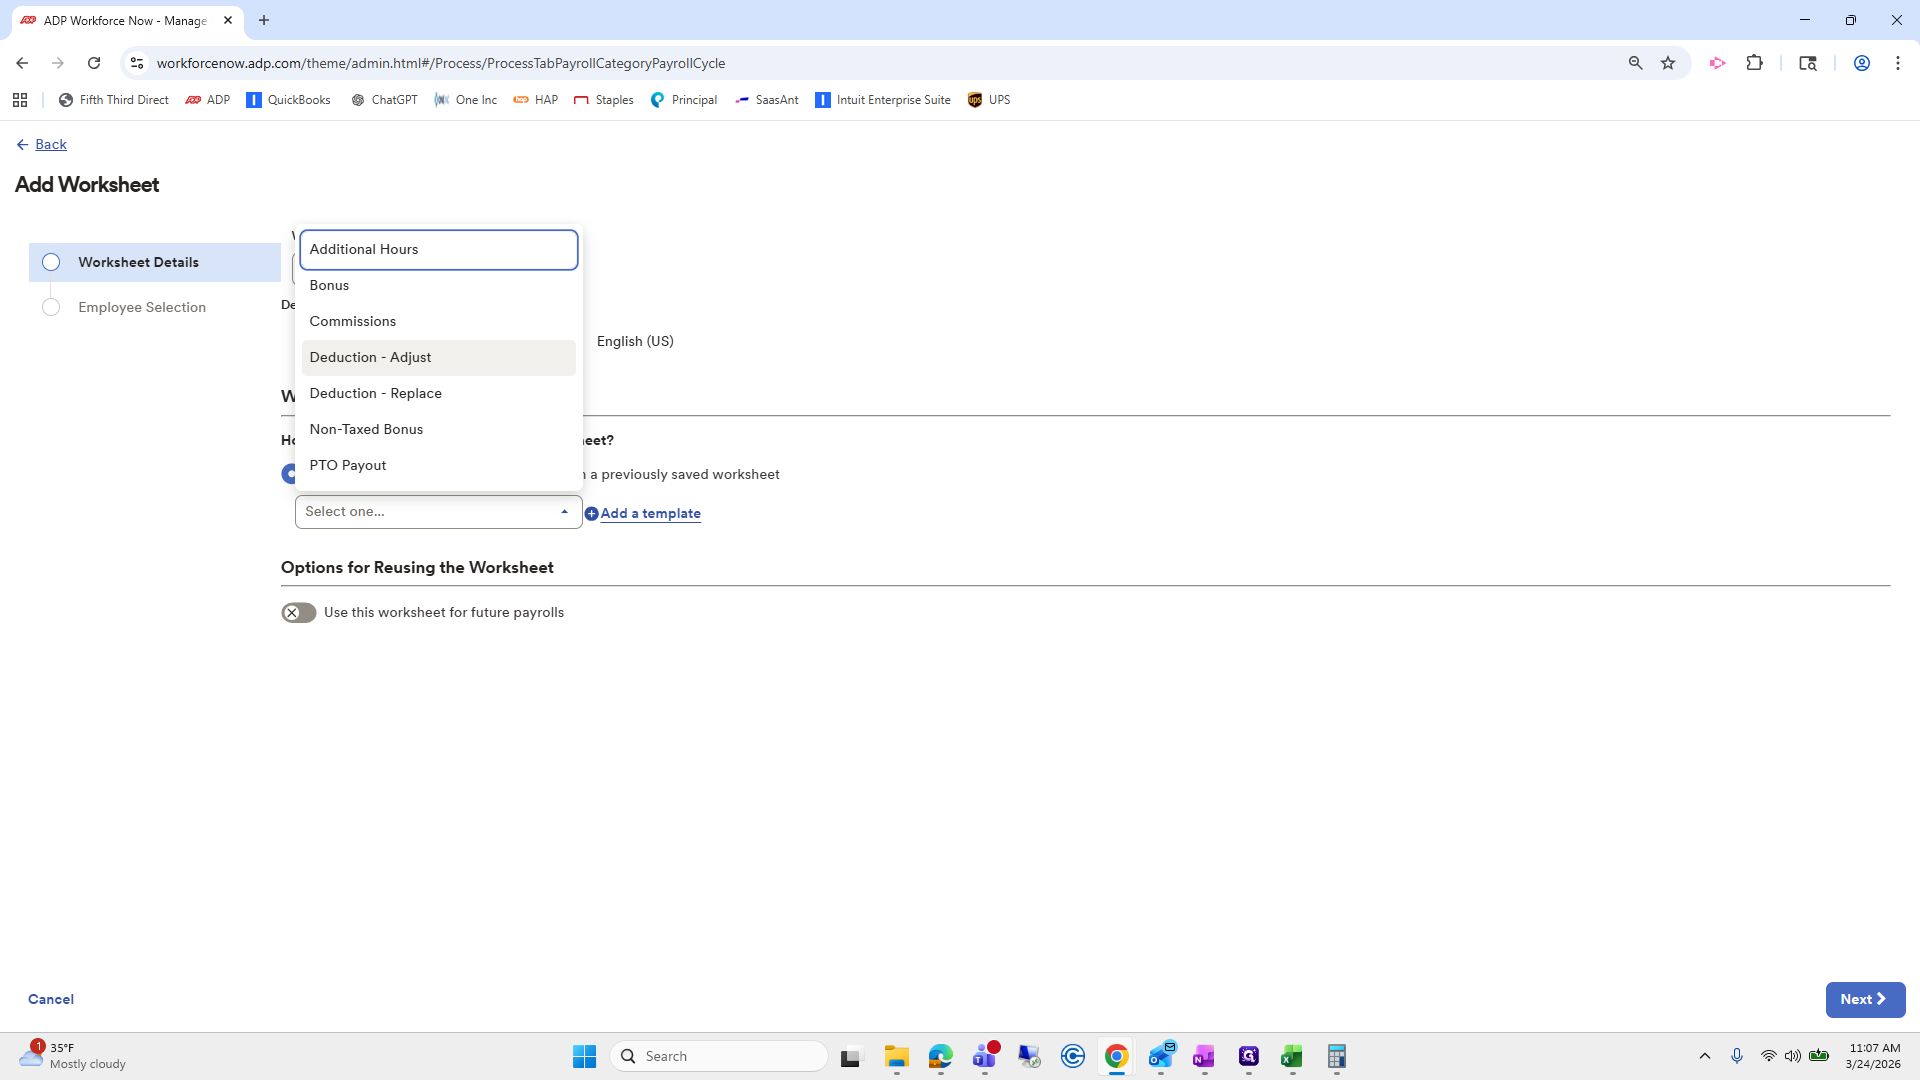
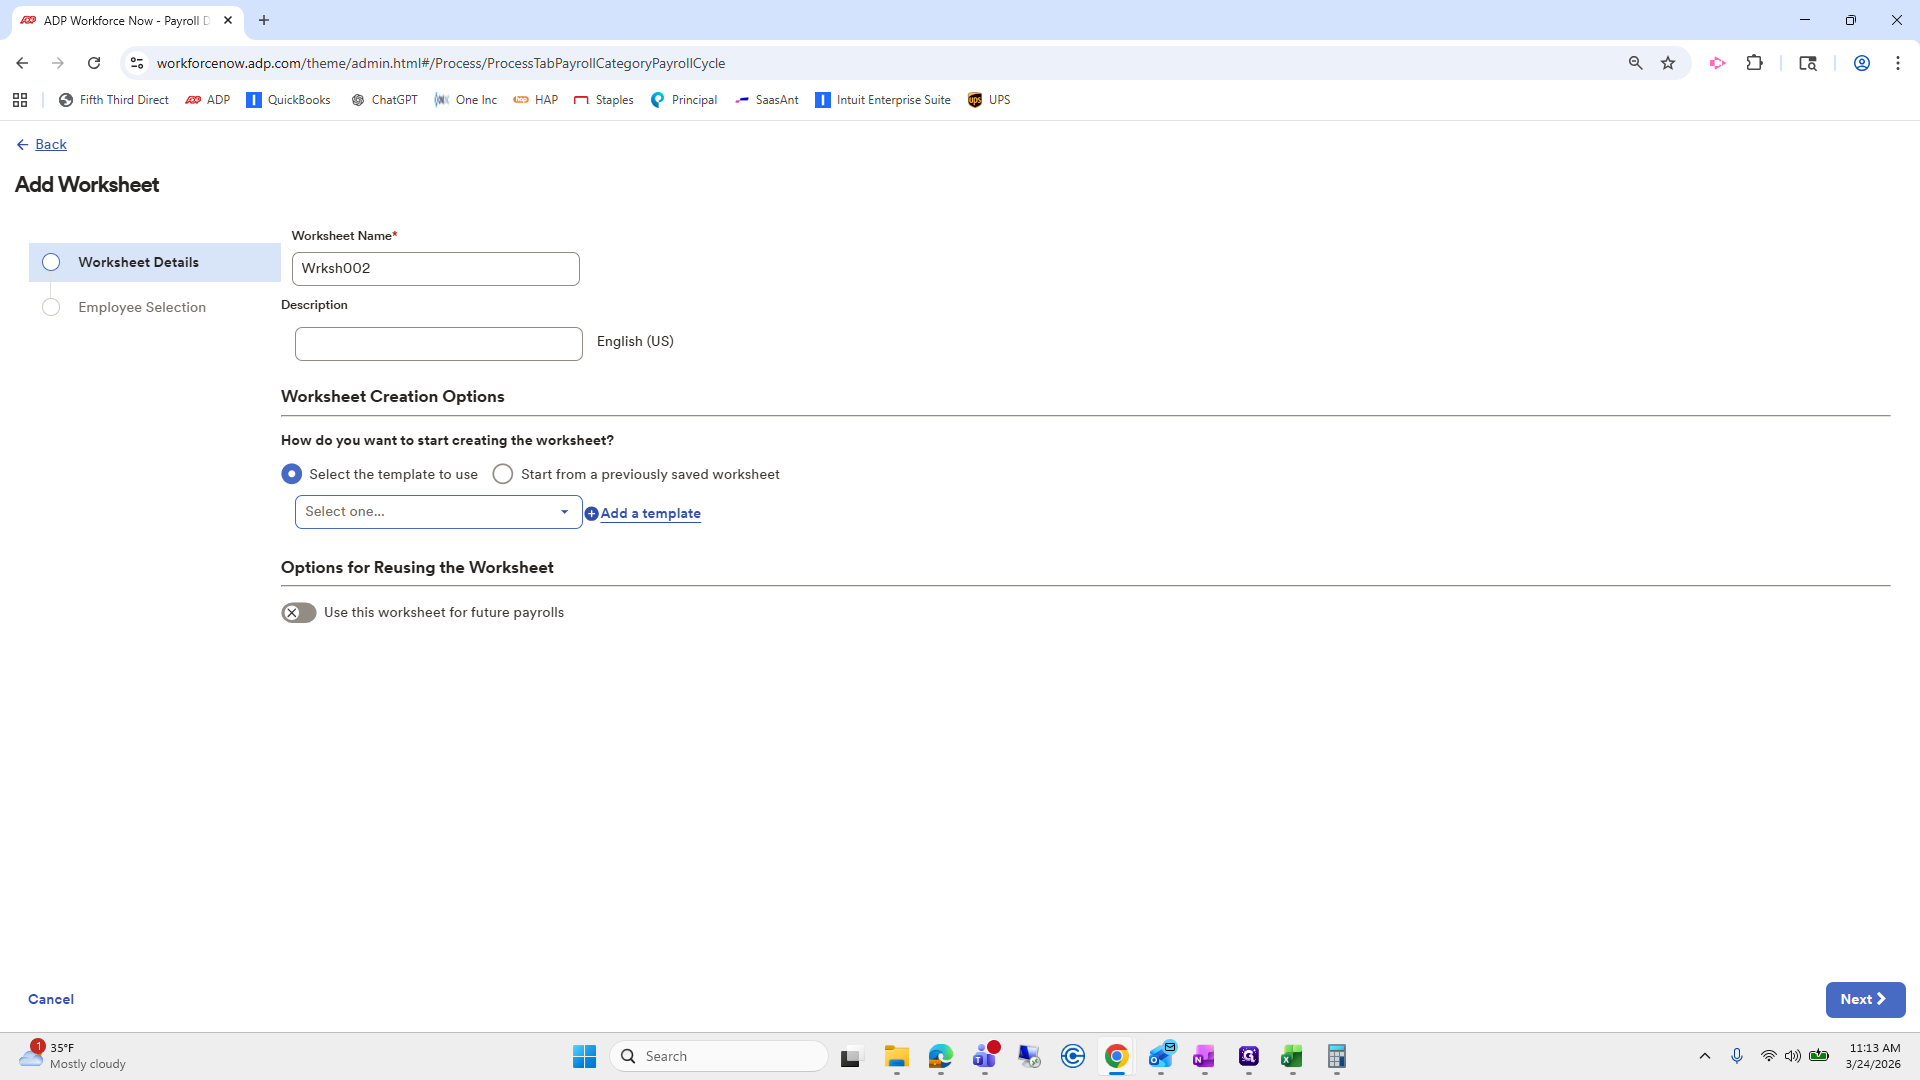
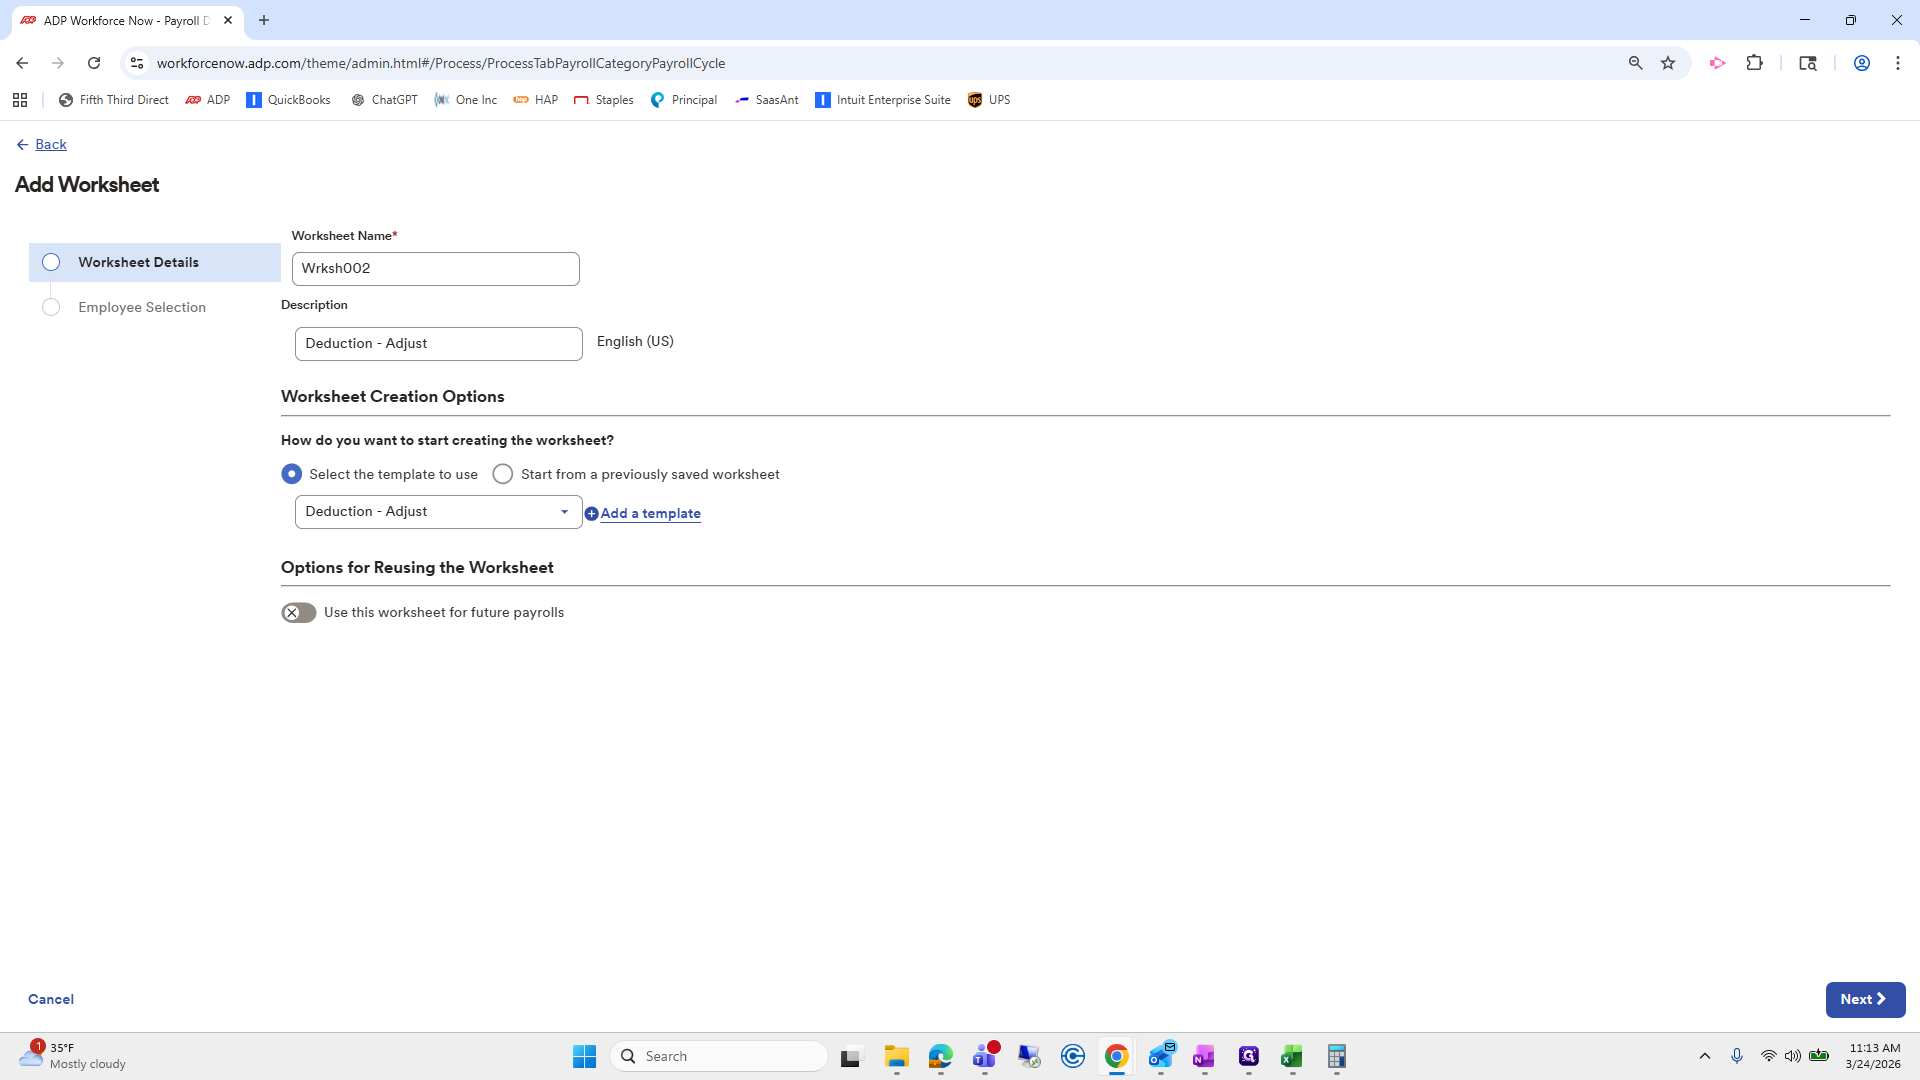
We will go to Add Worksheet.


Go to Worksheet Creation Options and click the dropdown.

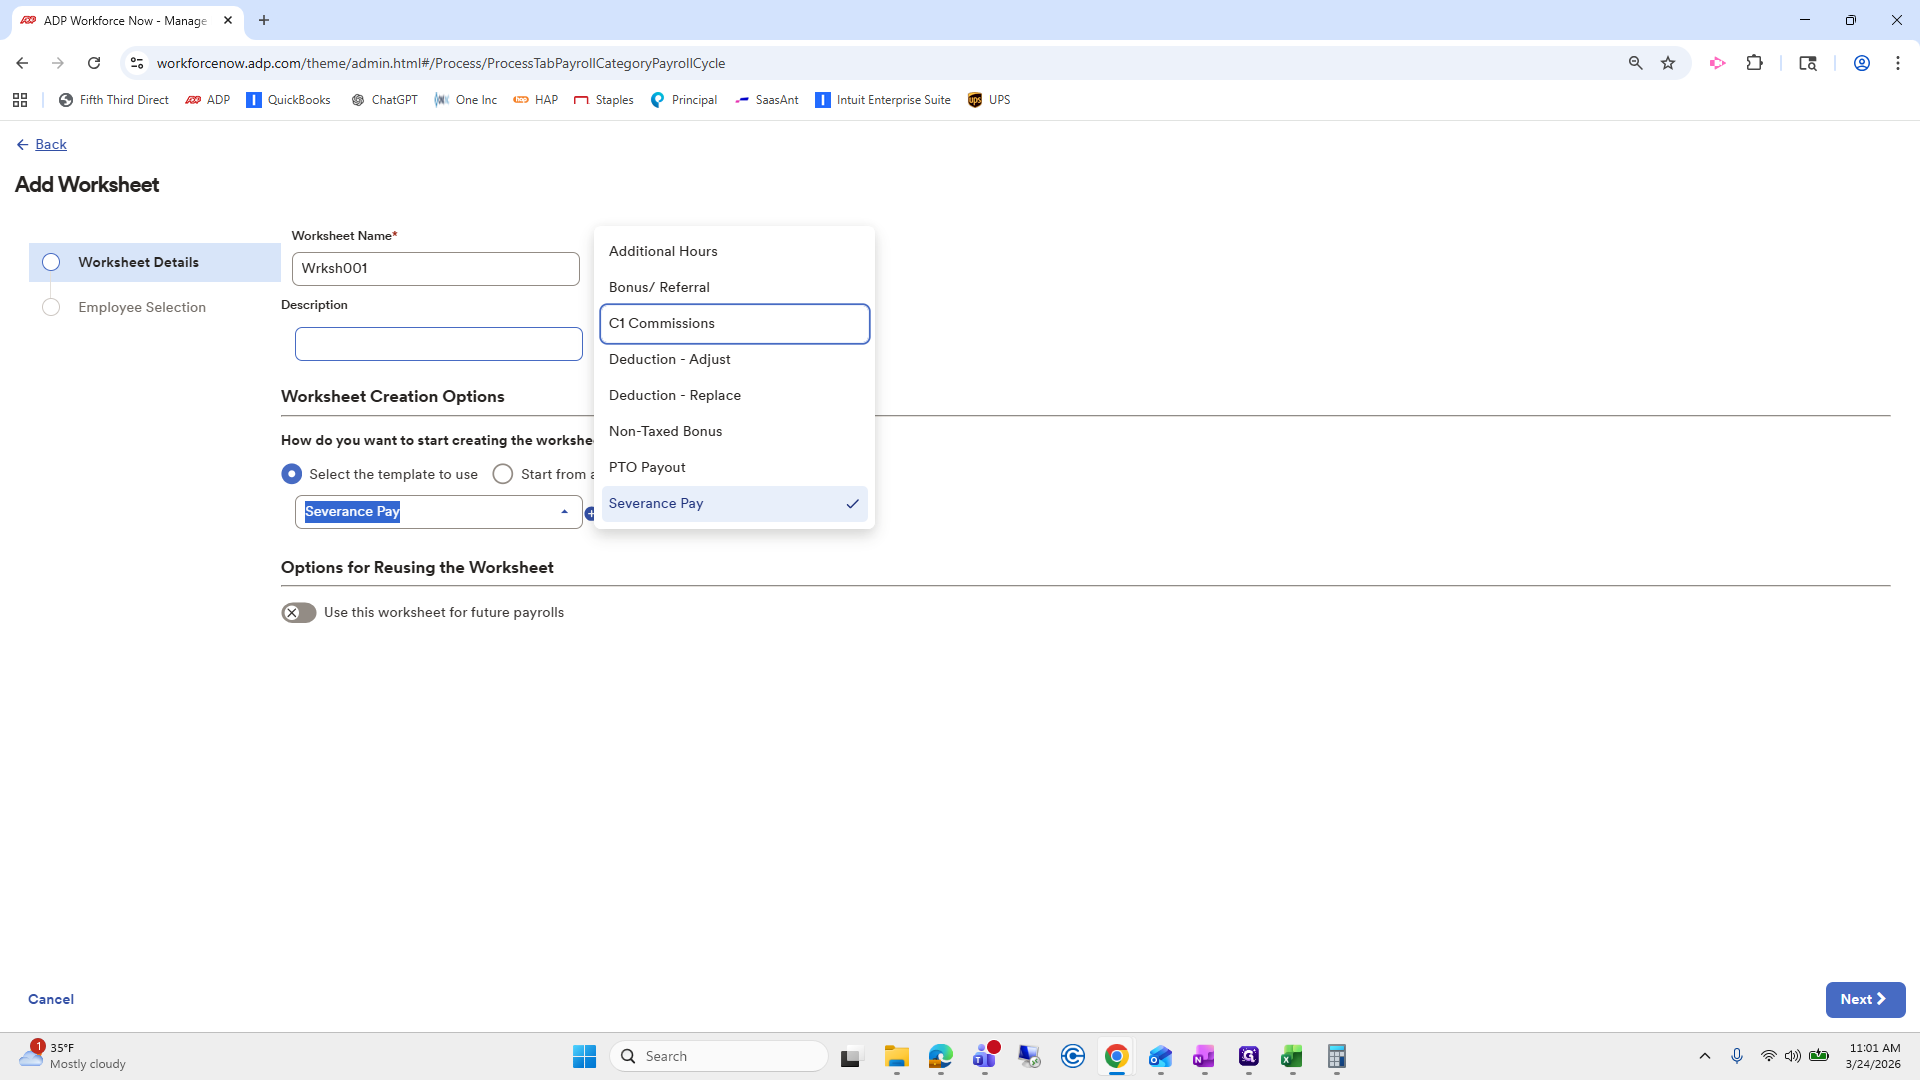
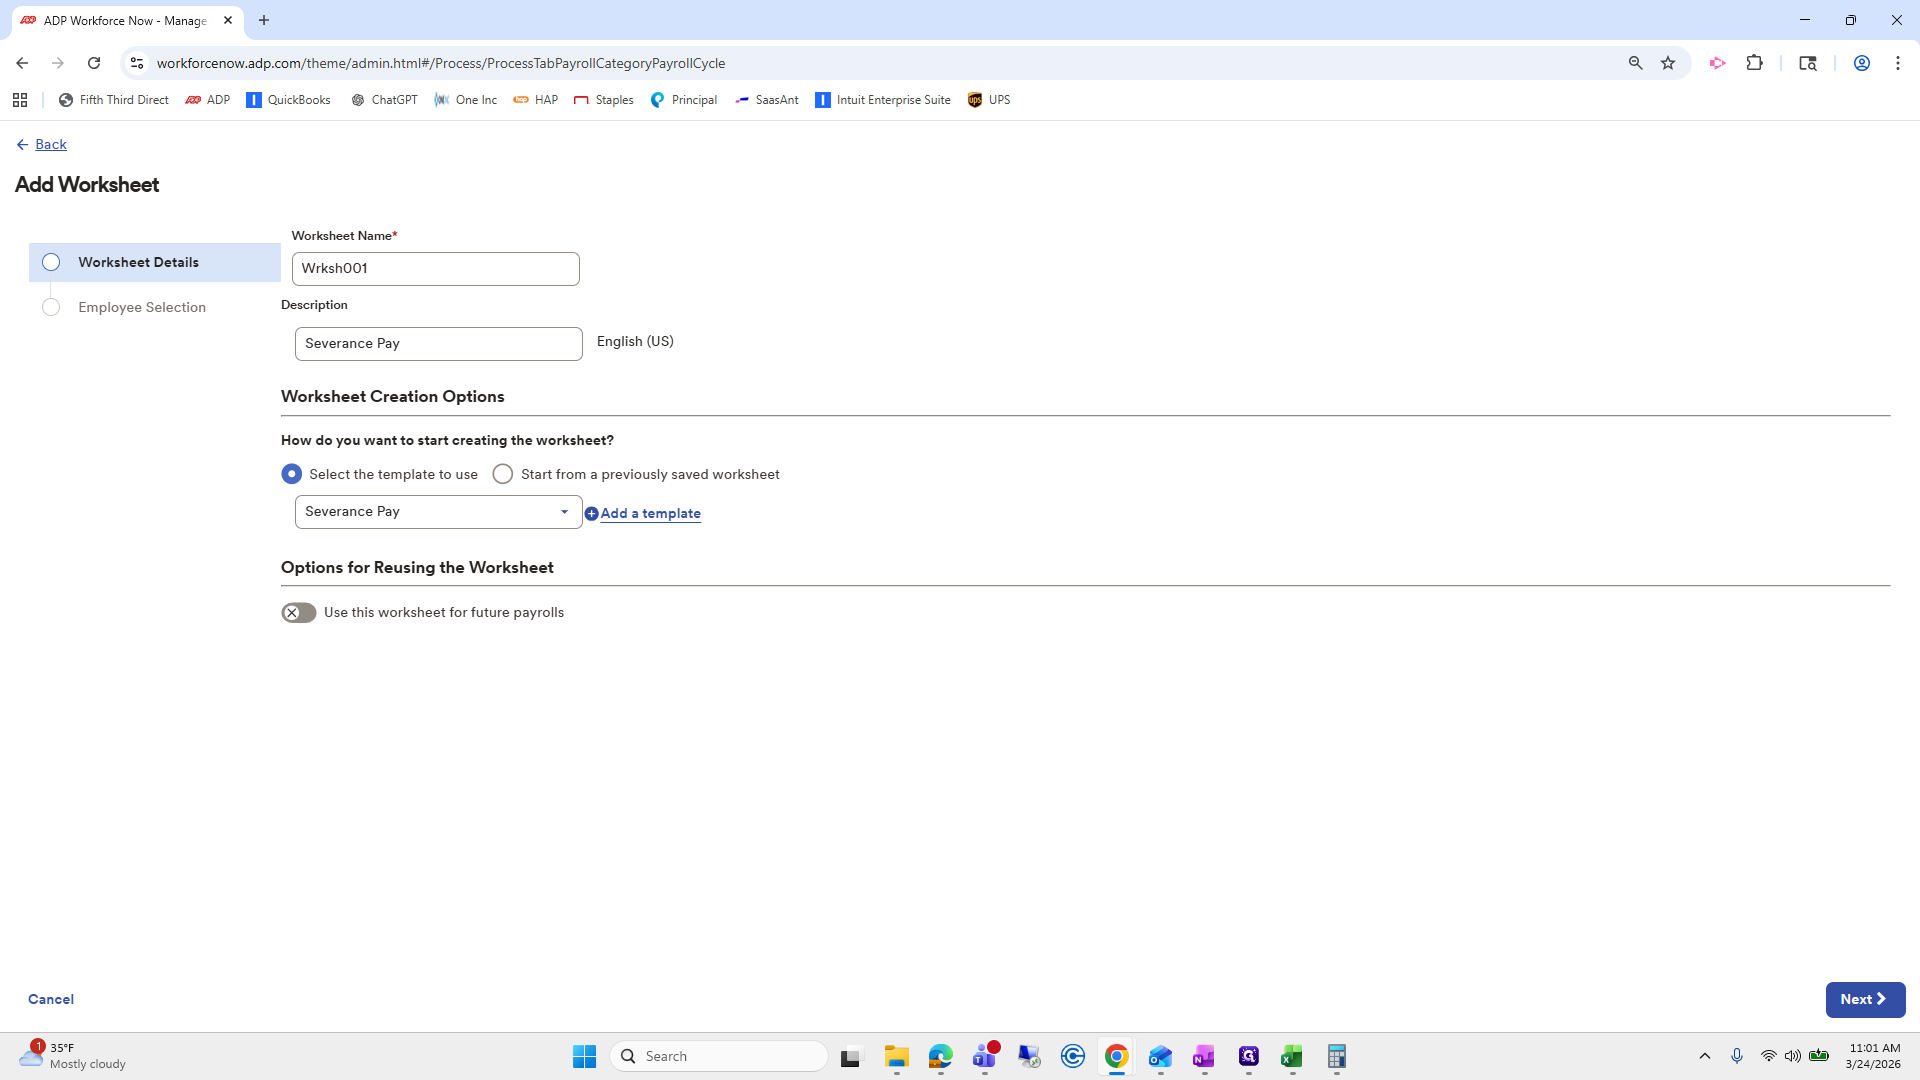
I already have several templates created. We will go to Severance Pay.
You can enter severance pay here if you wish.

It's your choice; you don't have to.

I will copy and paste it.

Click Next.
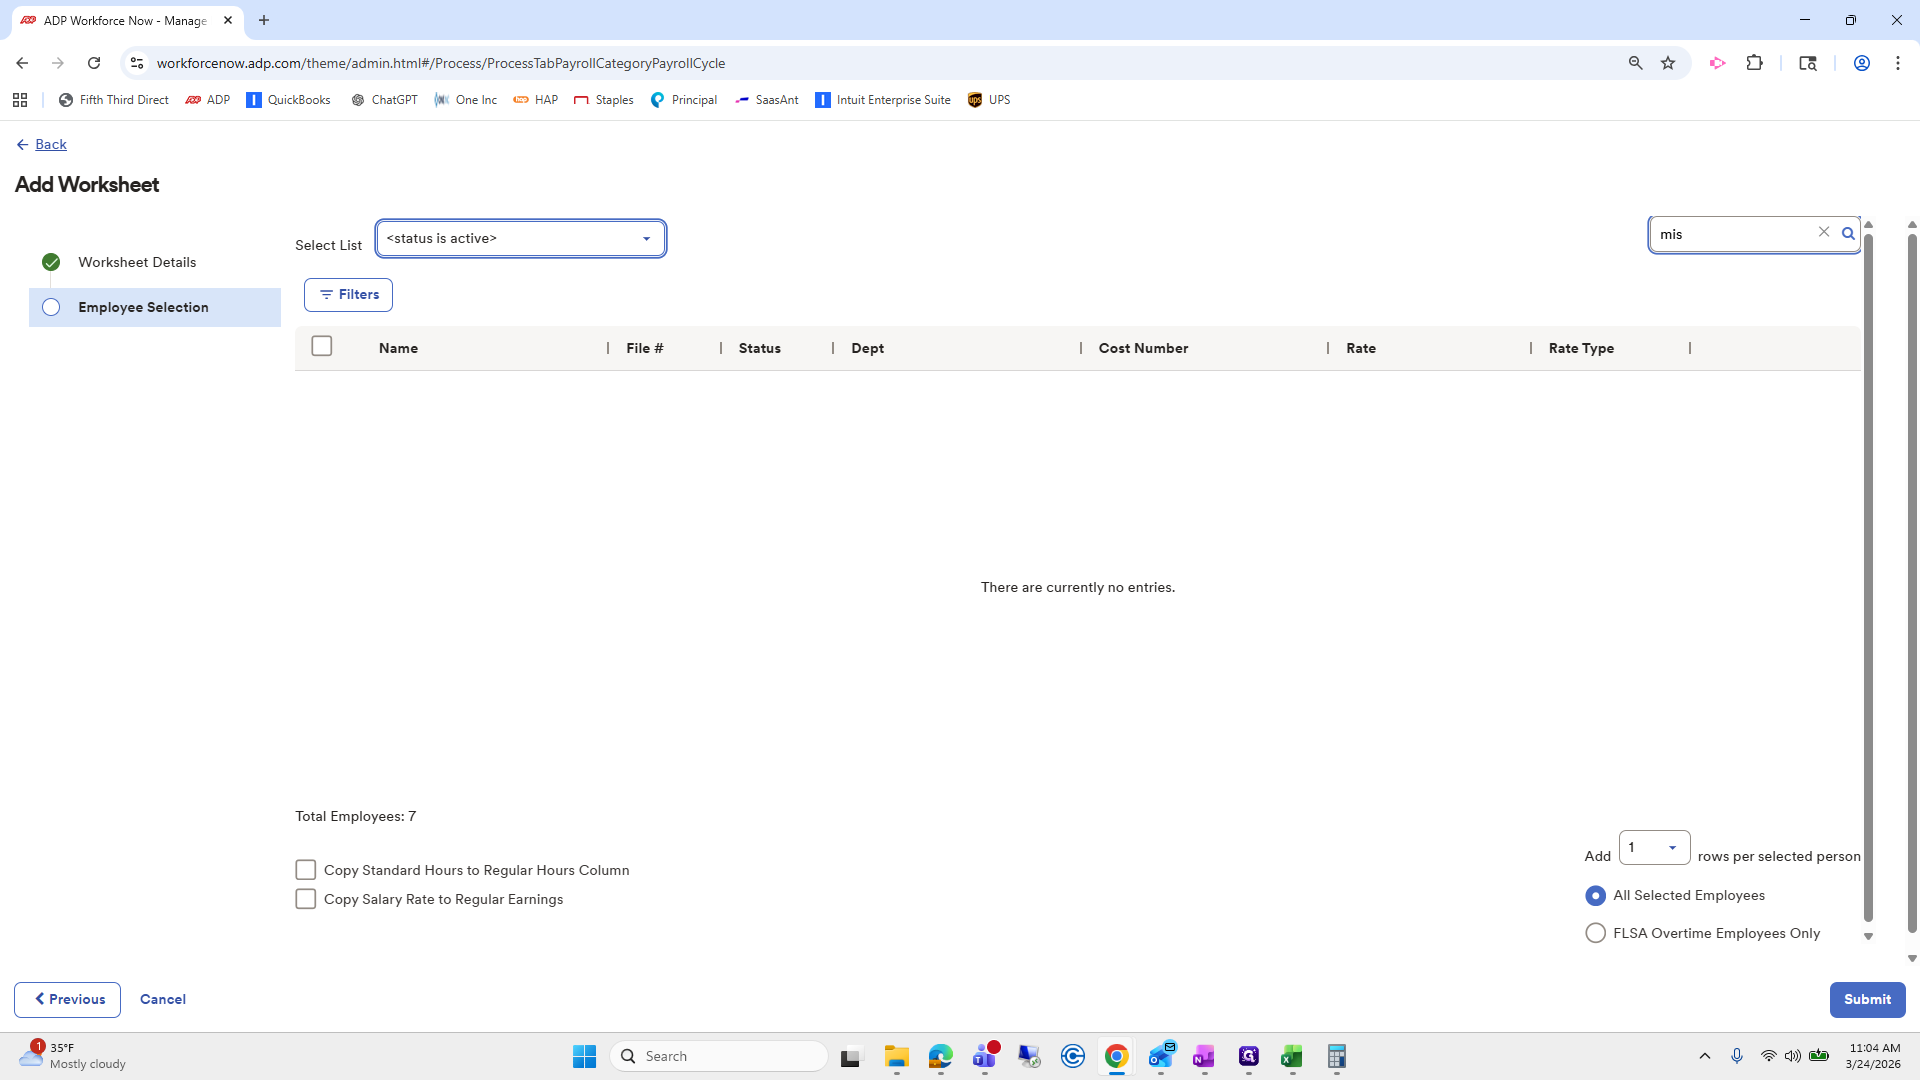
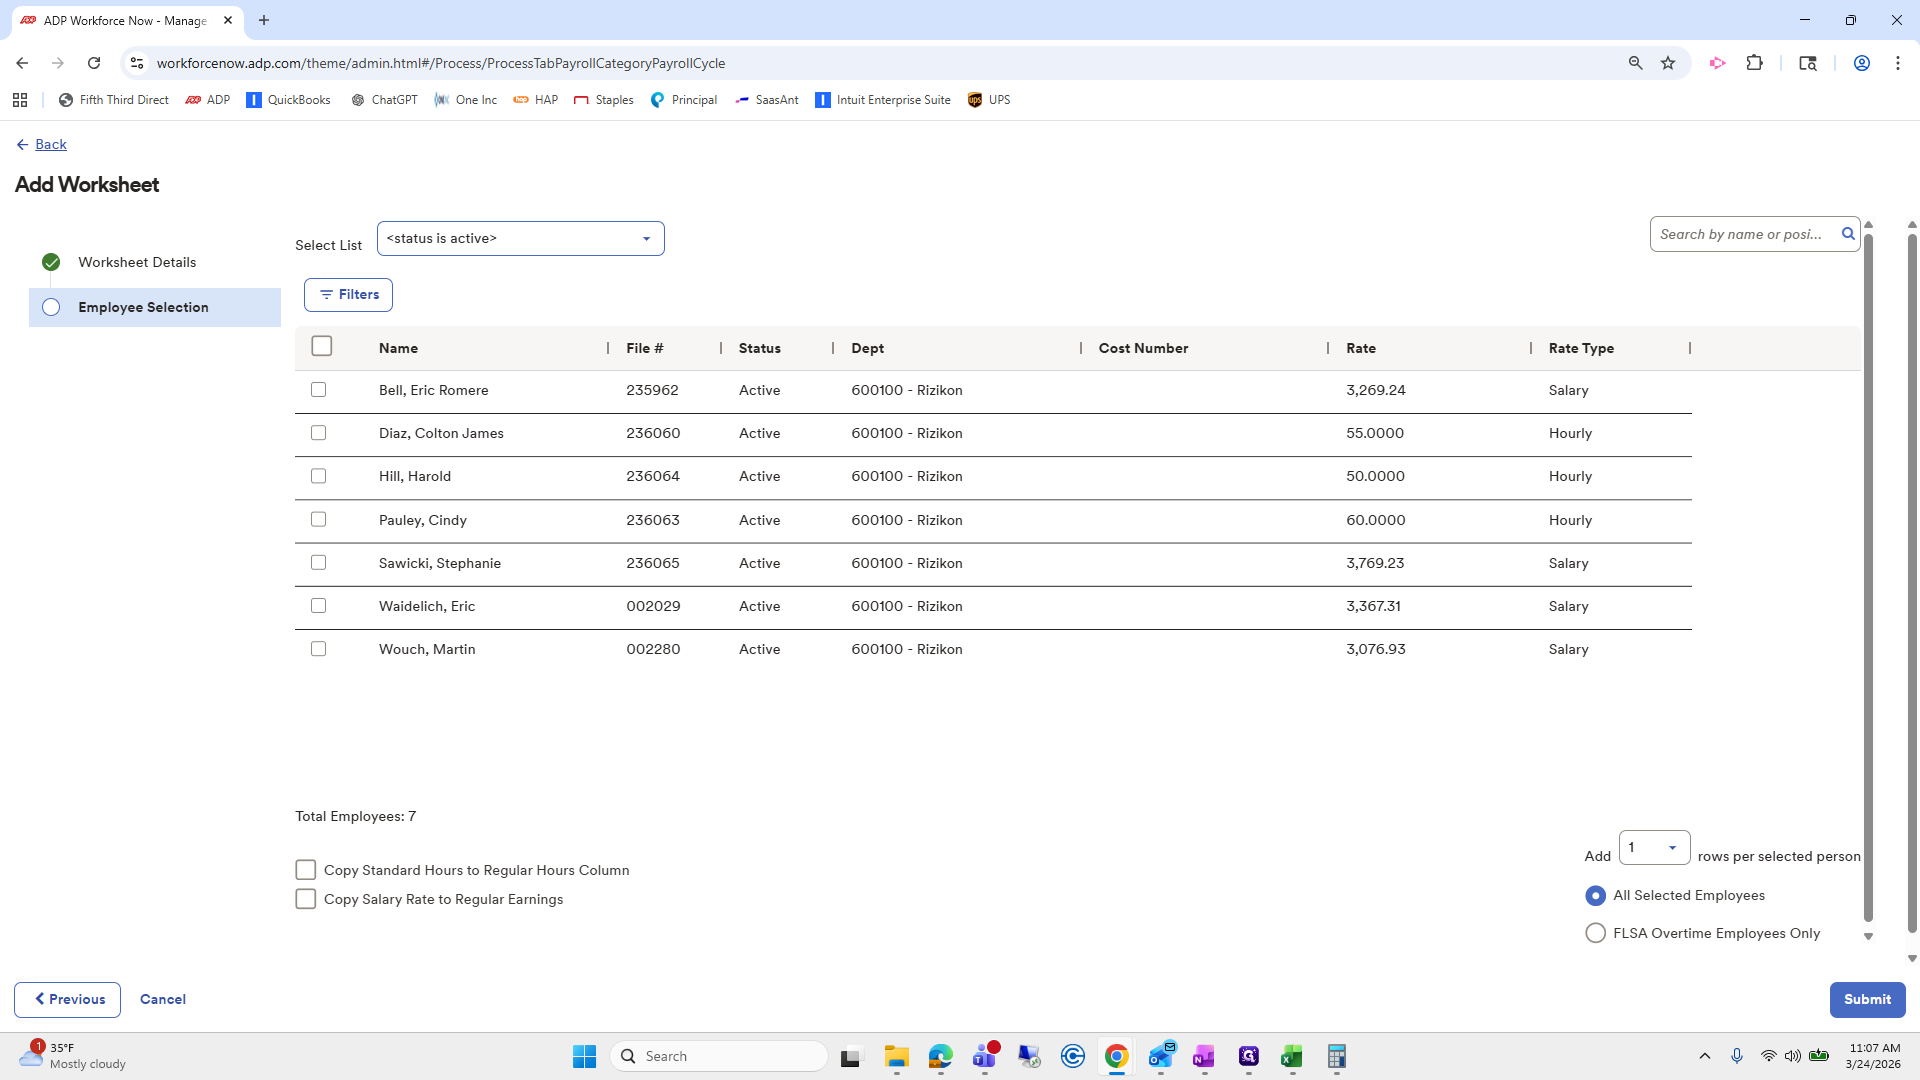
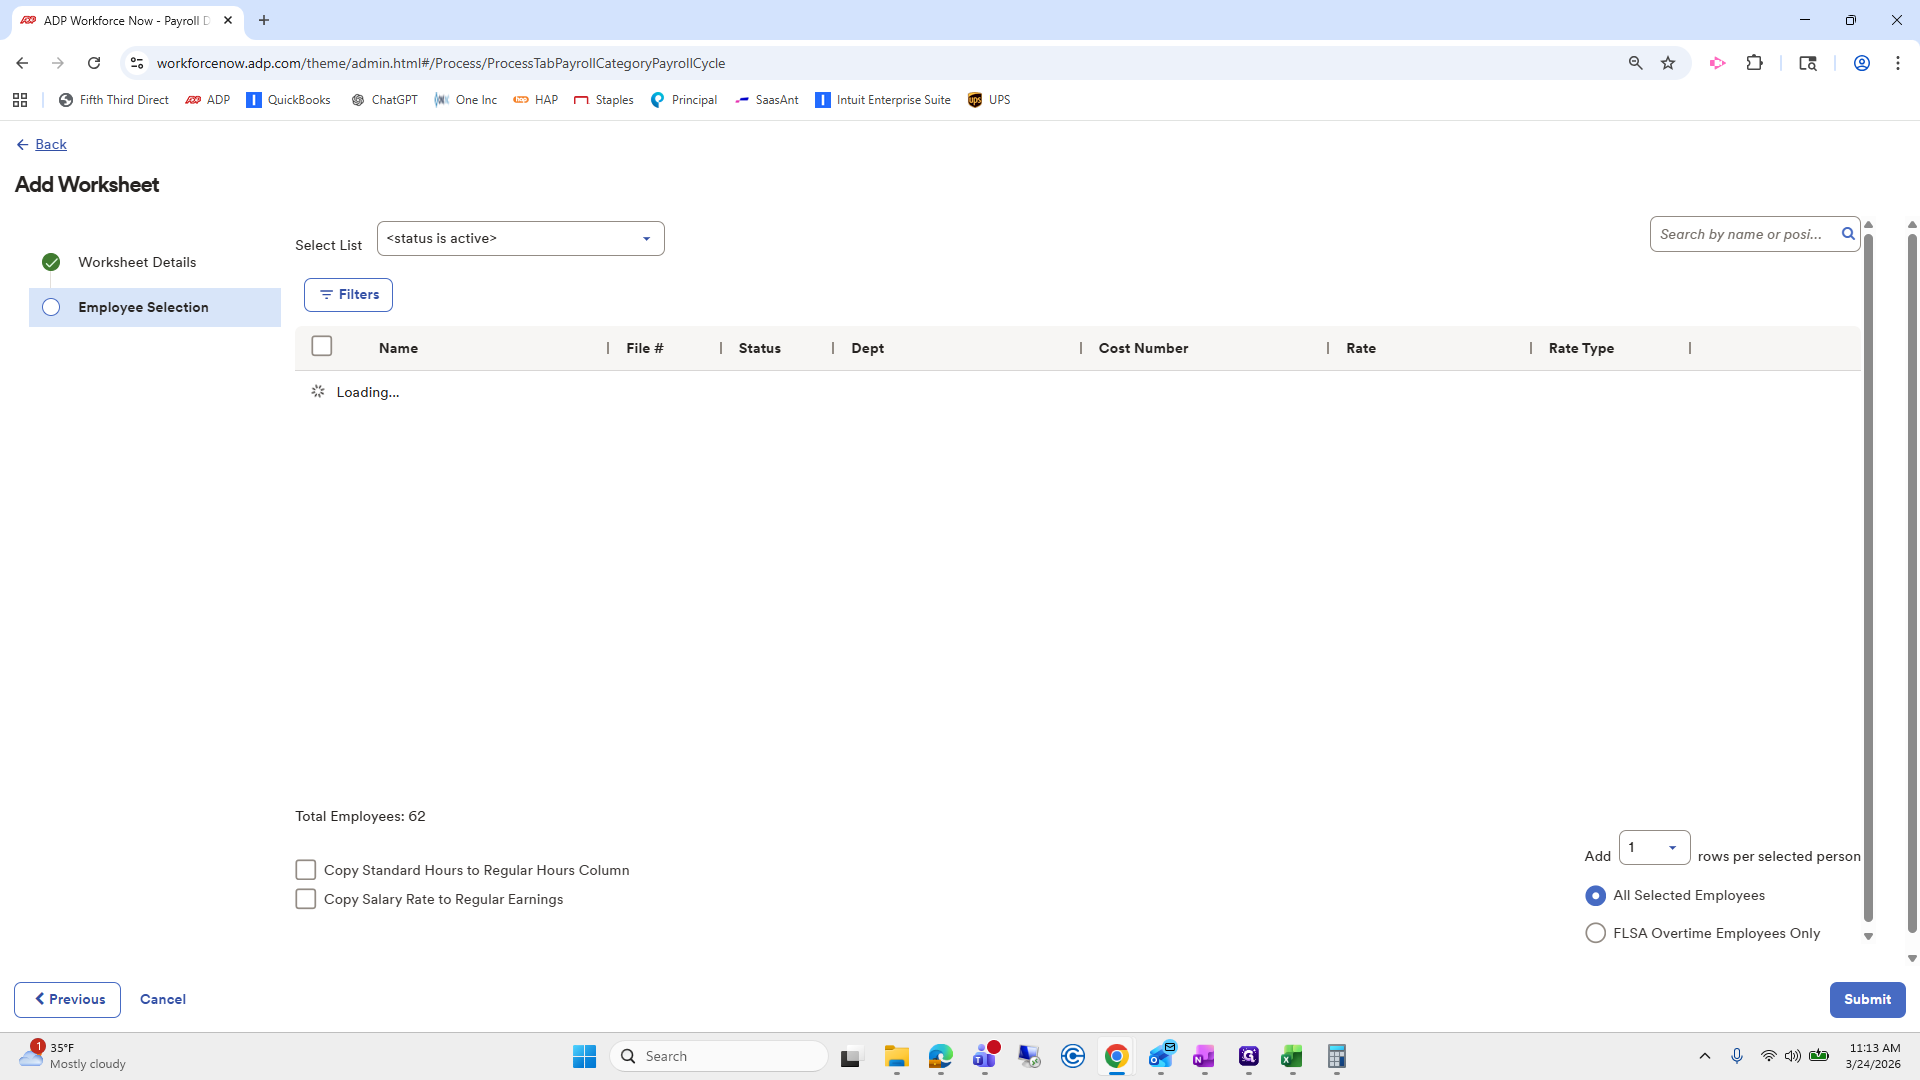
I am going to search for Linda.
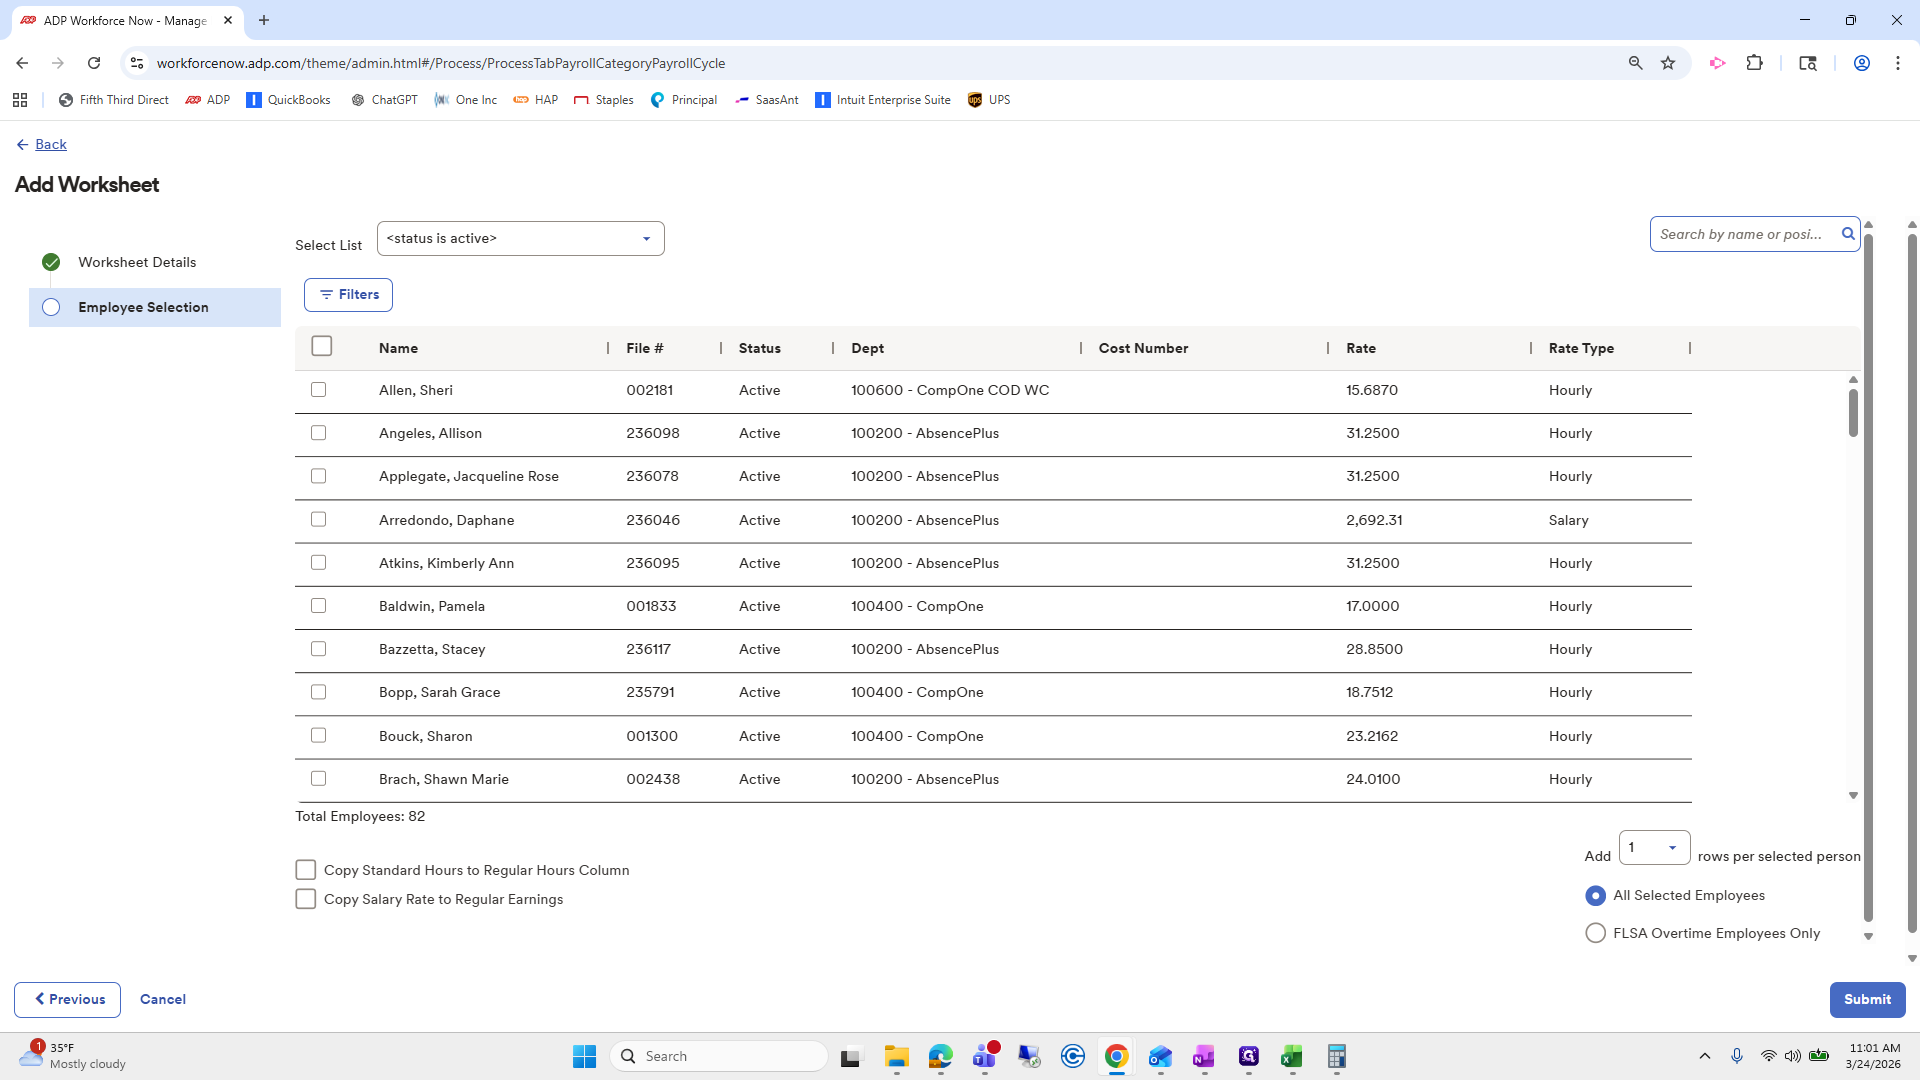
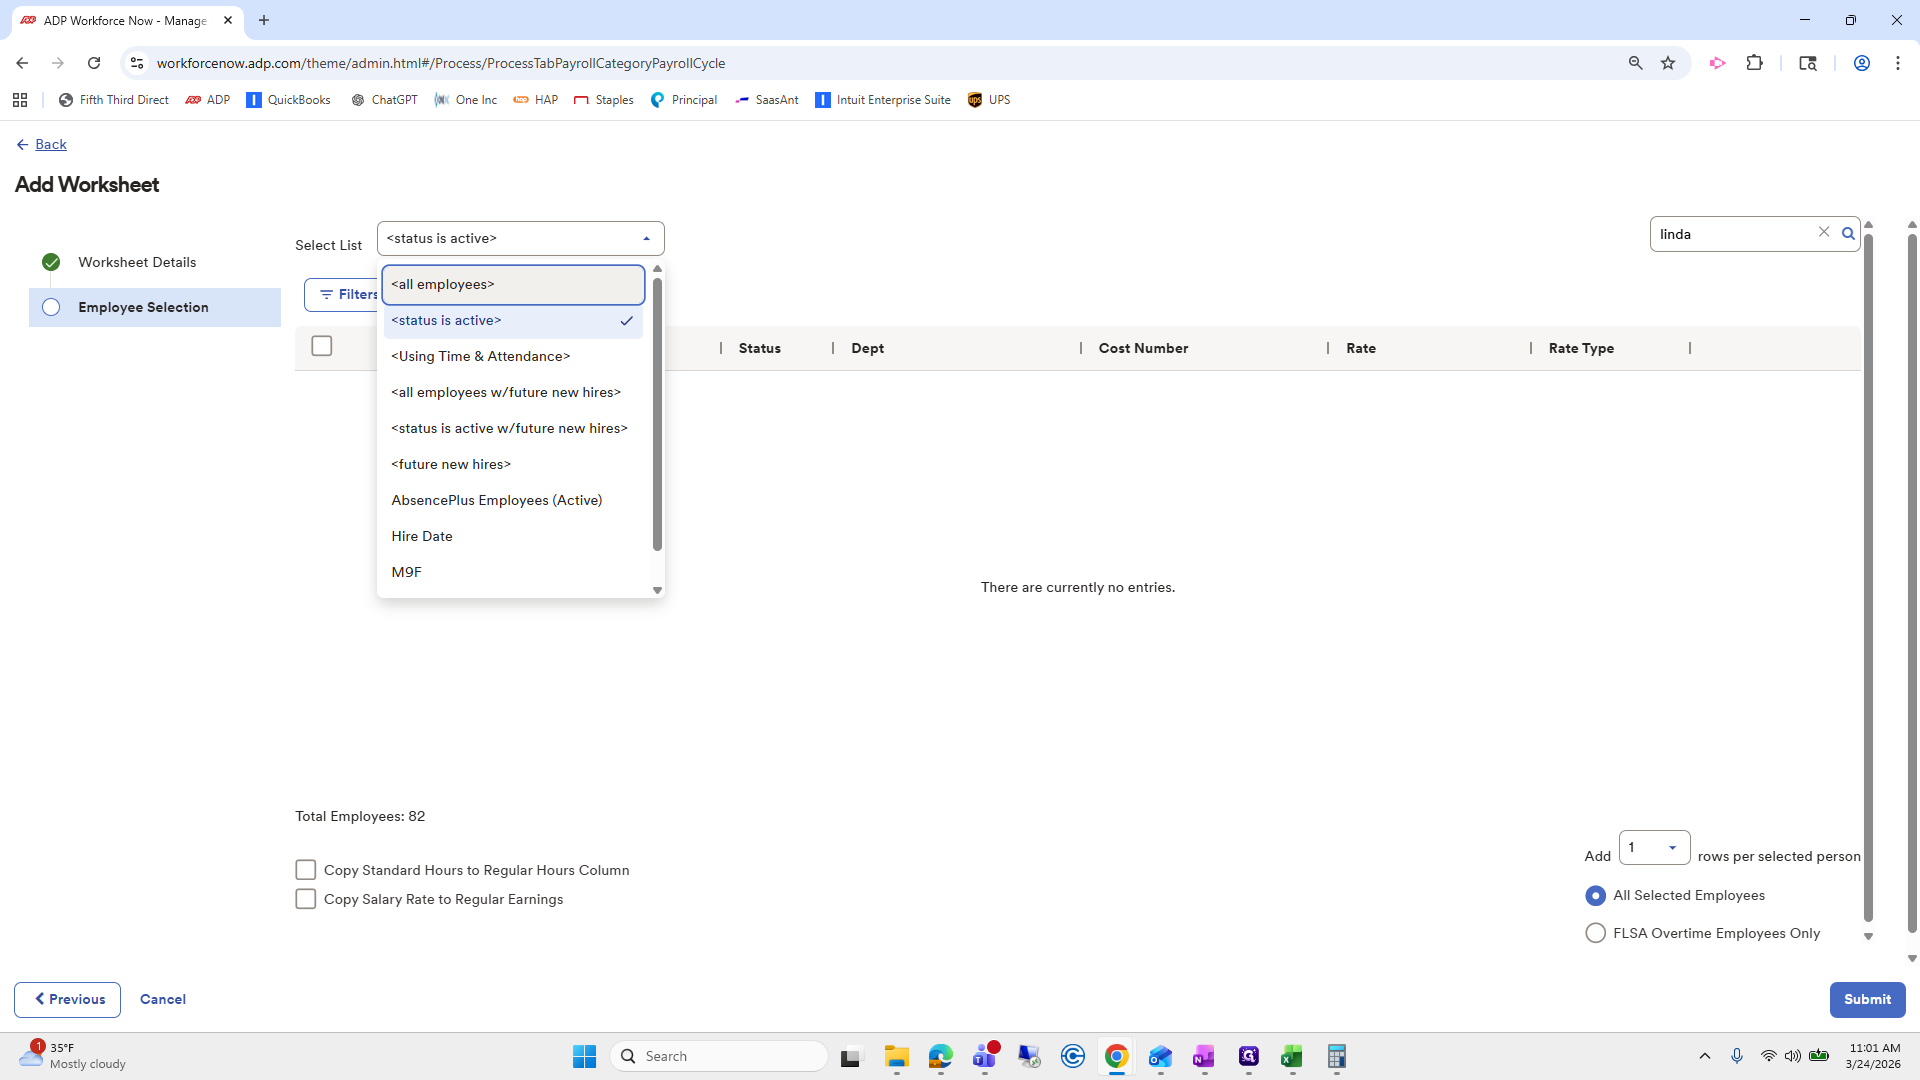
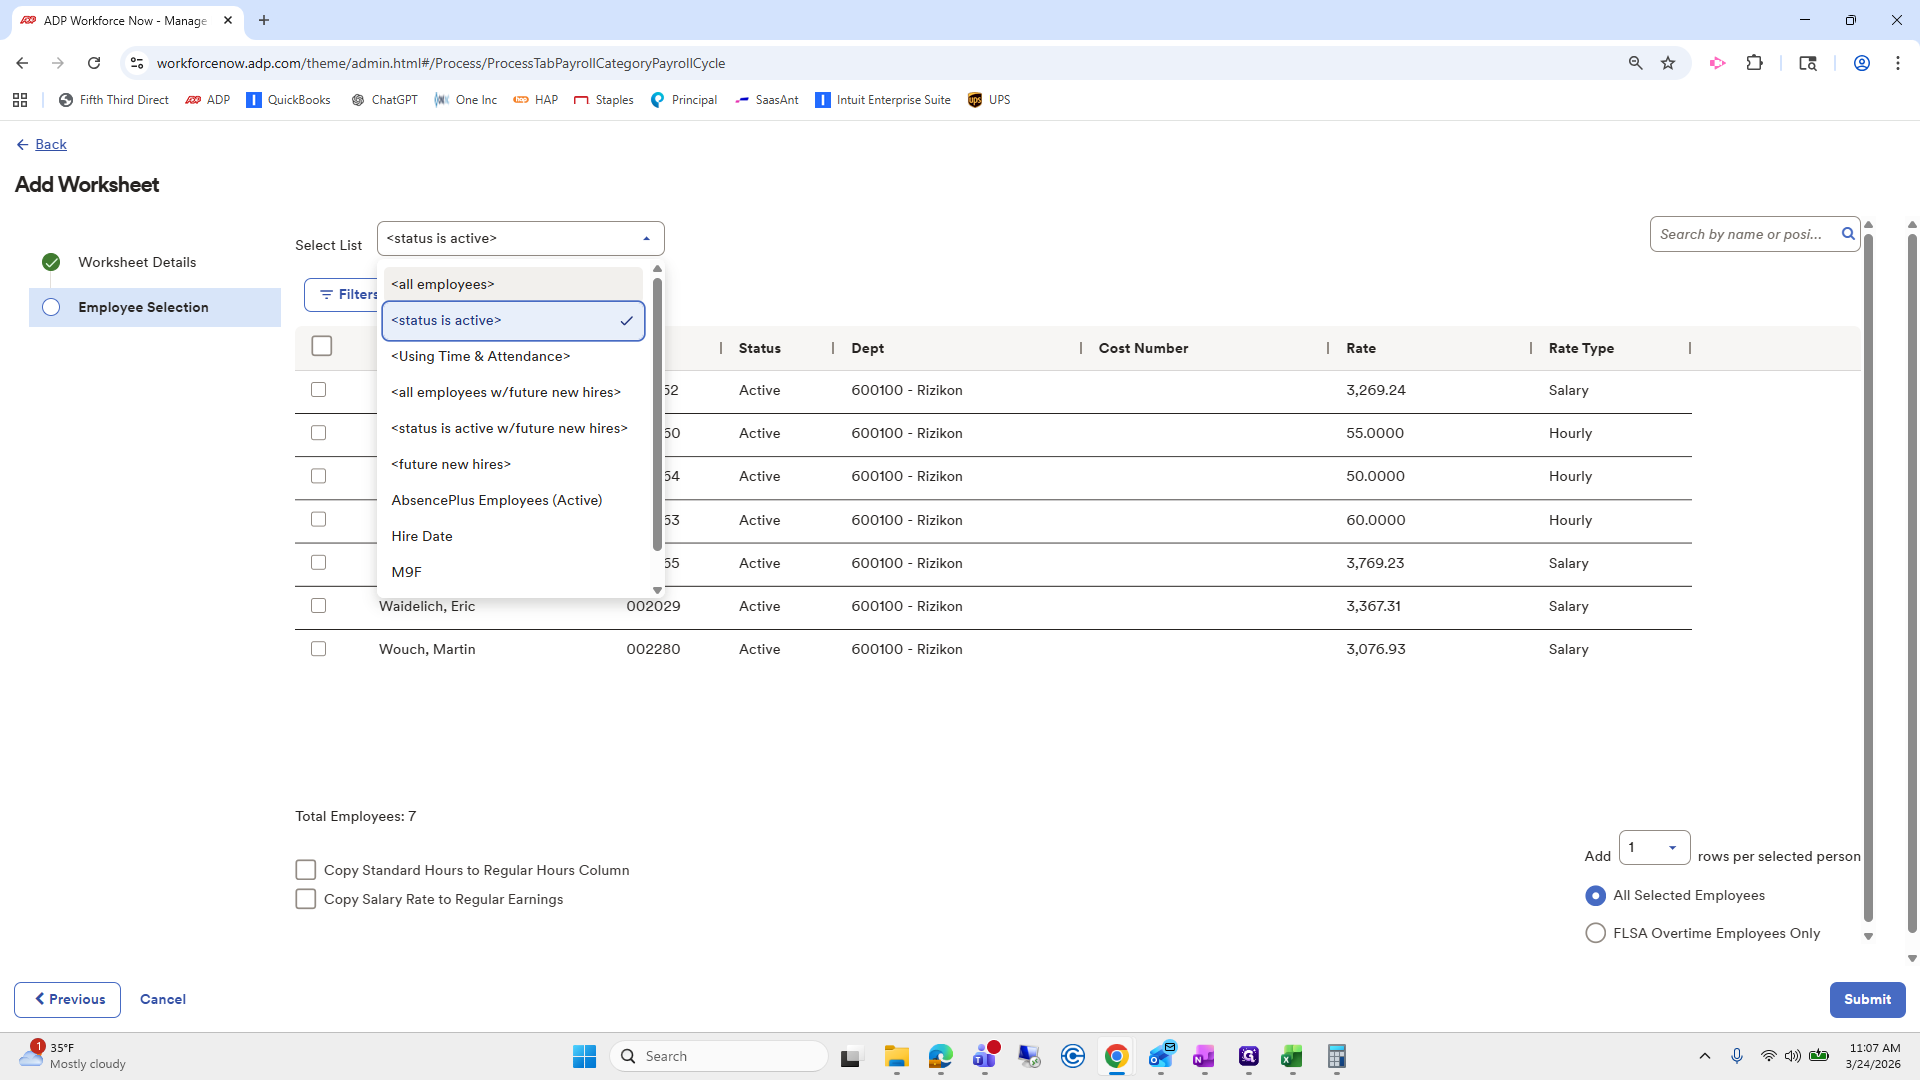
She did not appear here because the selected list is active.
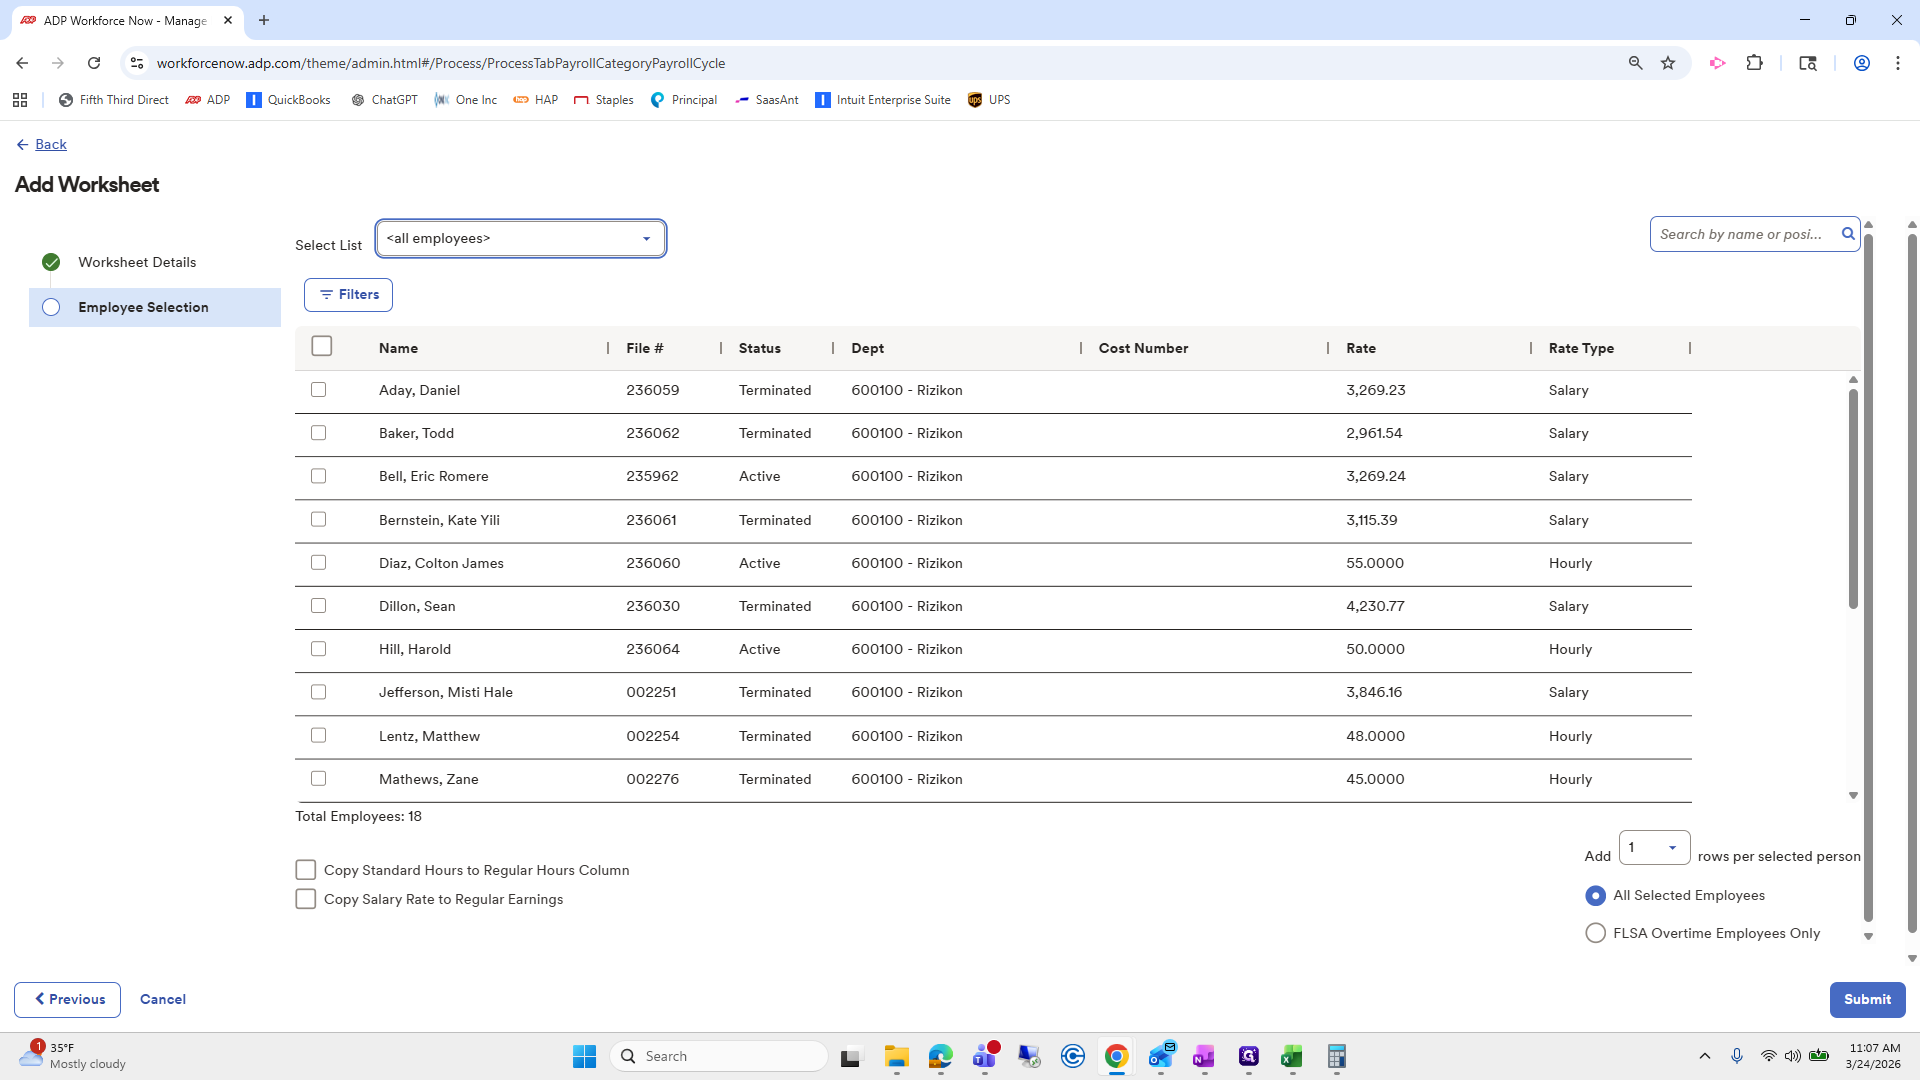
Open the dropdown, select All Employees, and you will see that she appears.
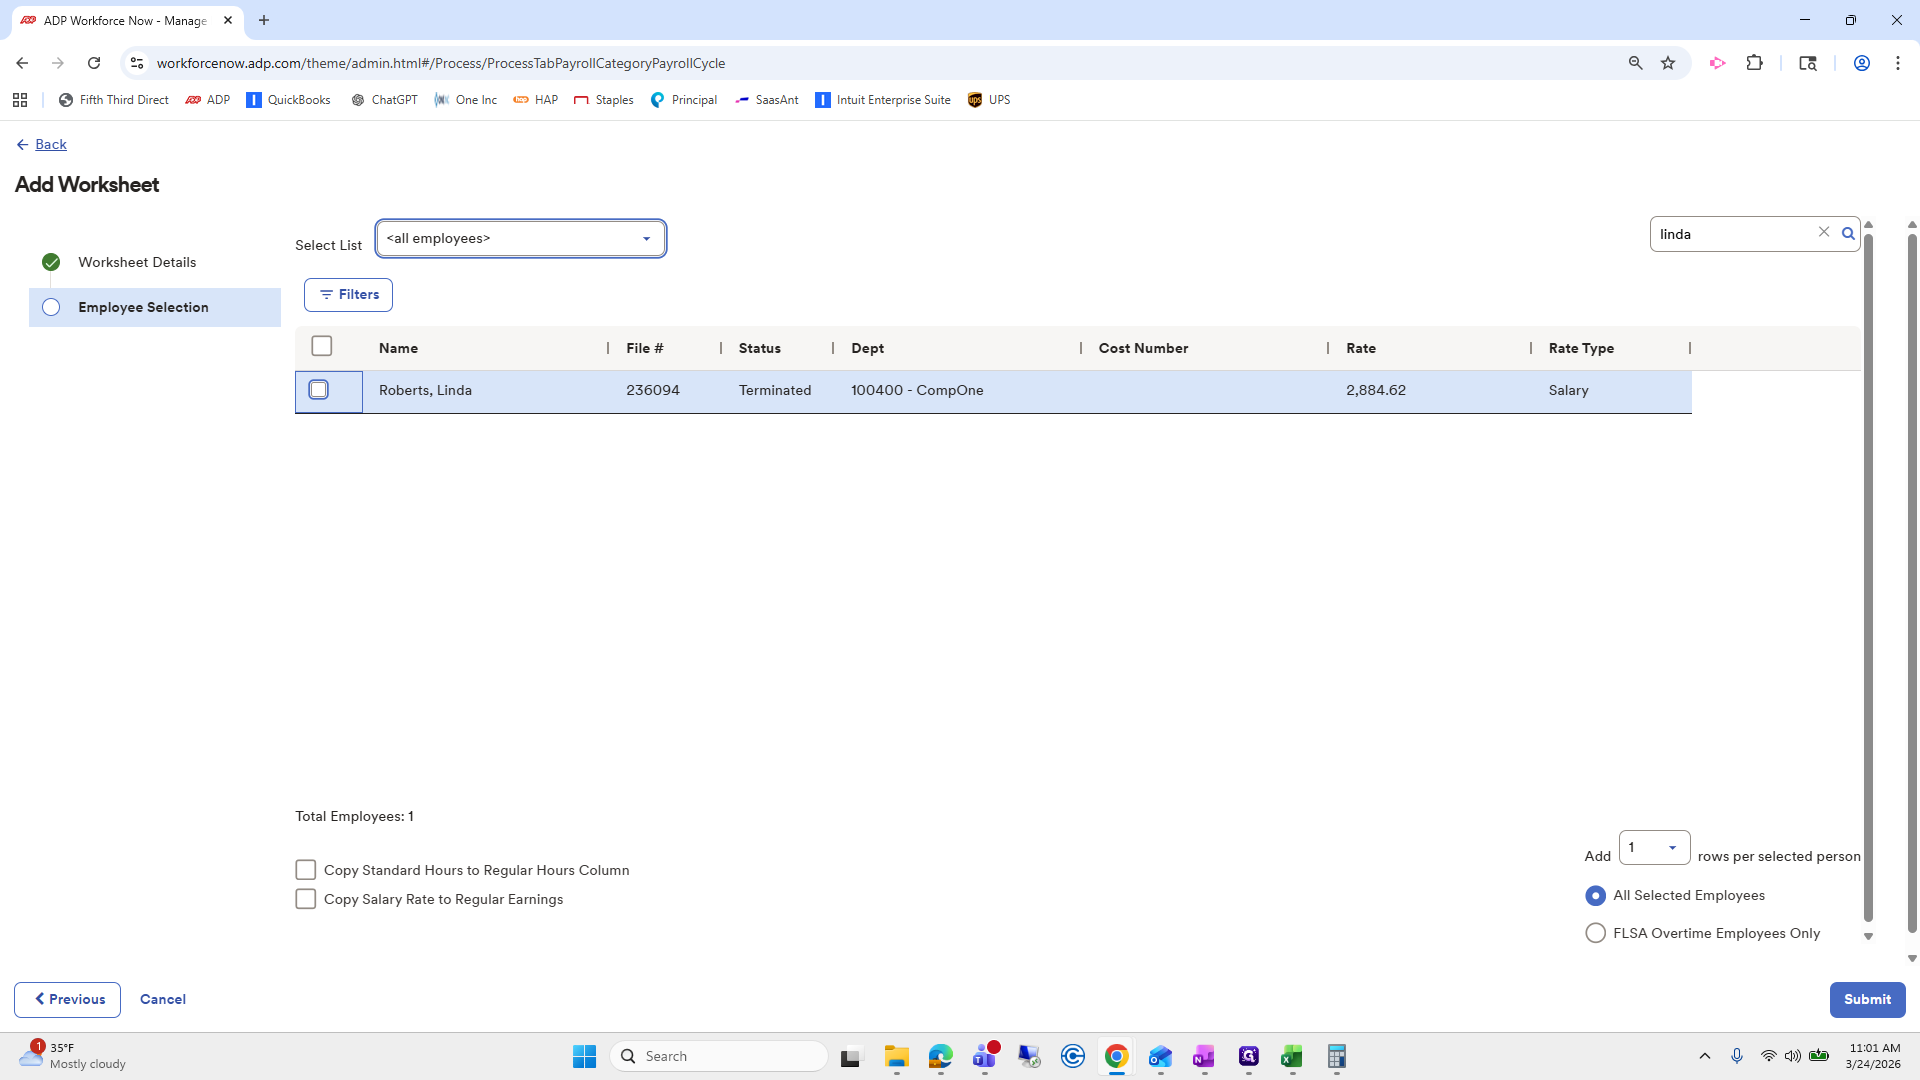
Check her, then click Submit.

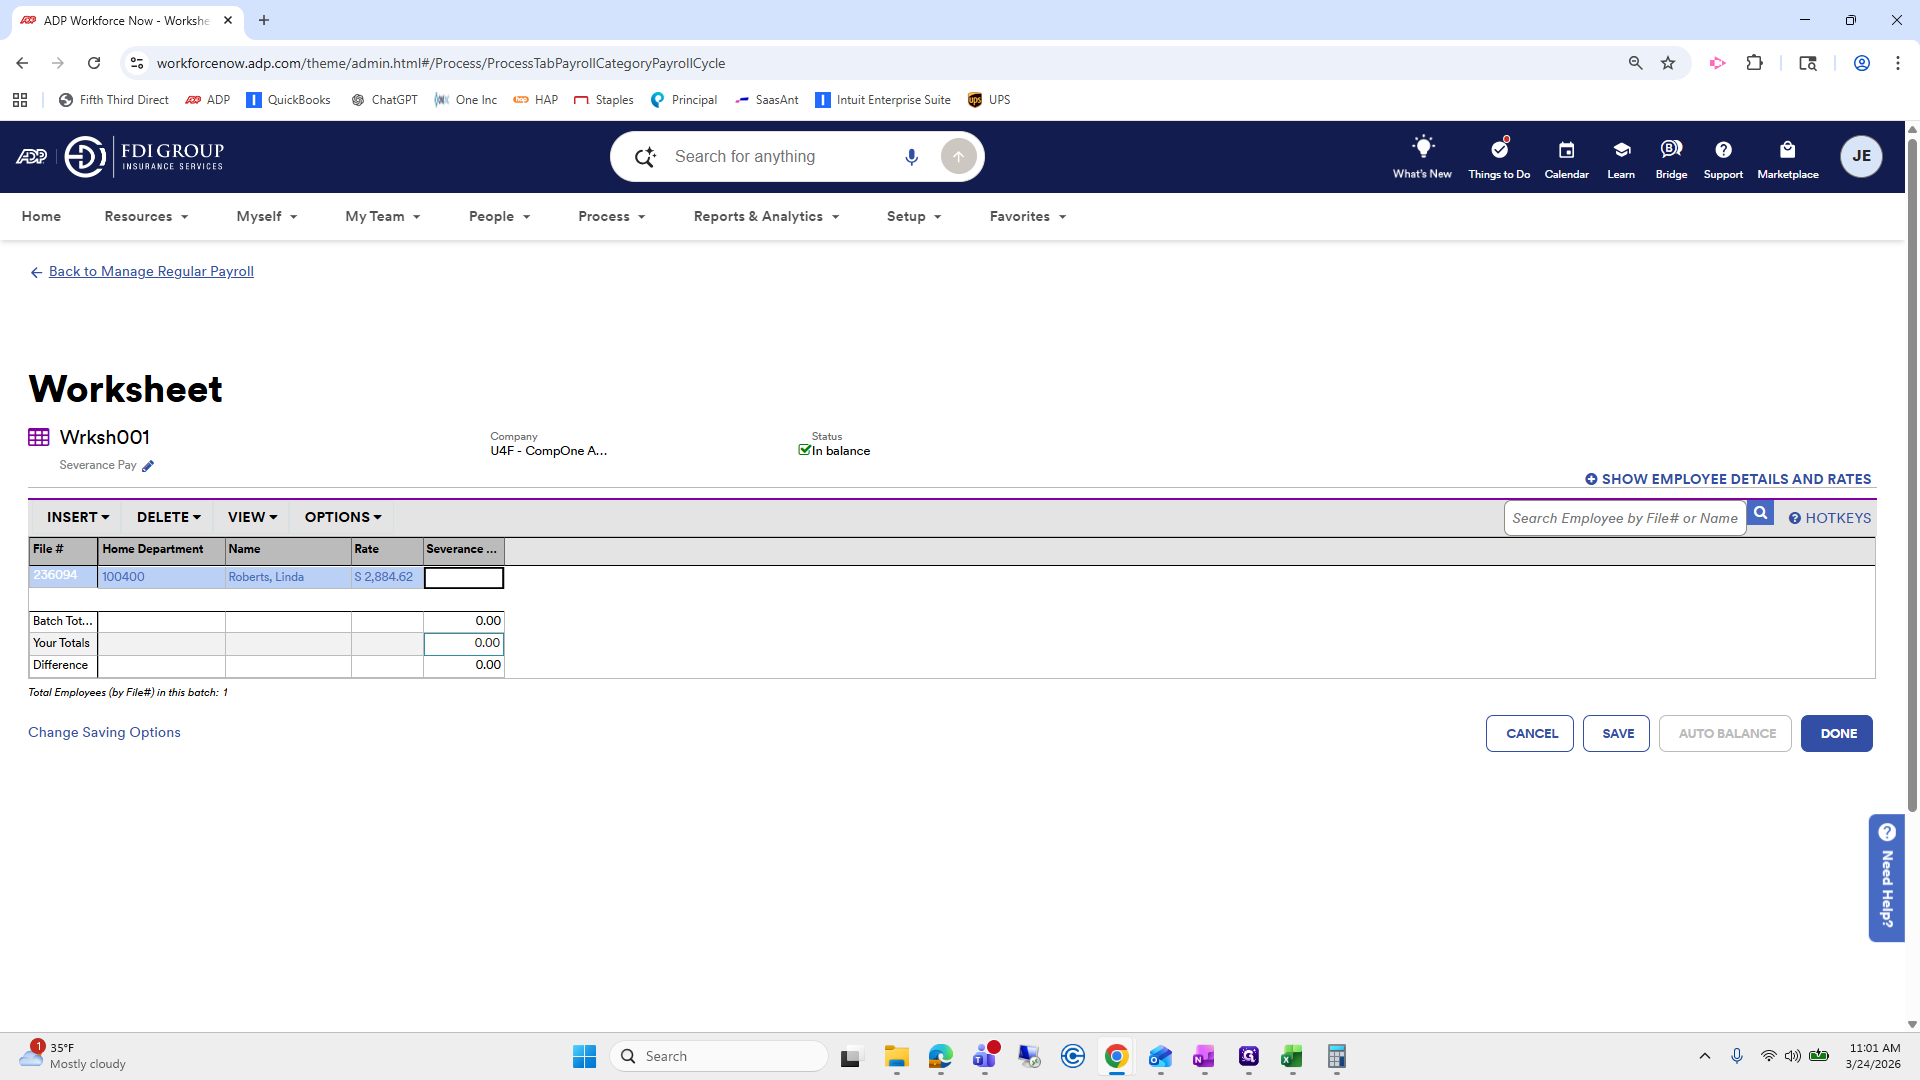
From here, you can see her severance pay amount. You would just...
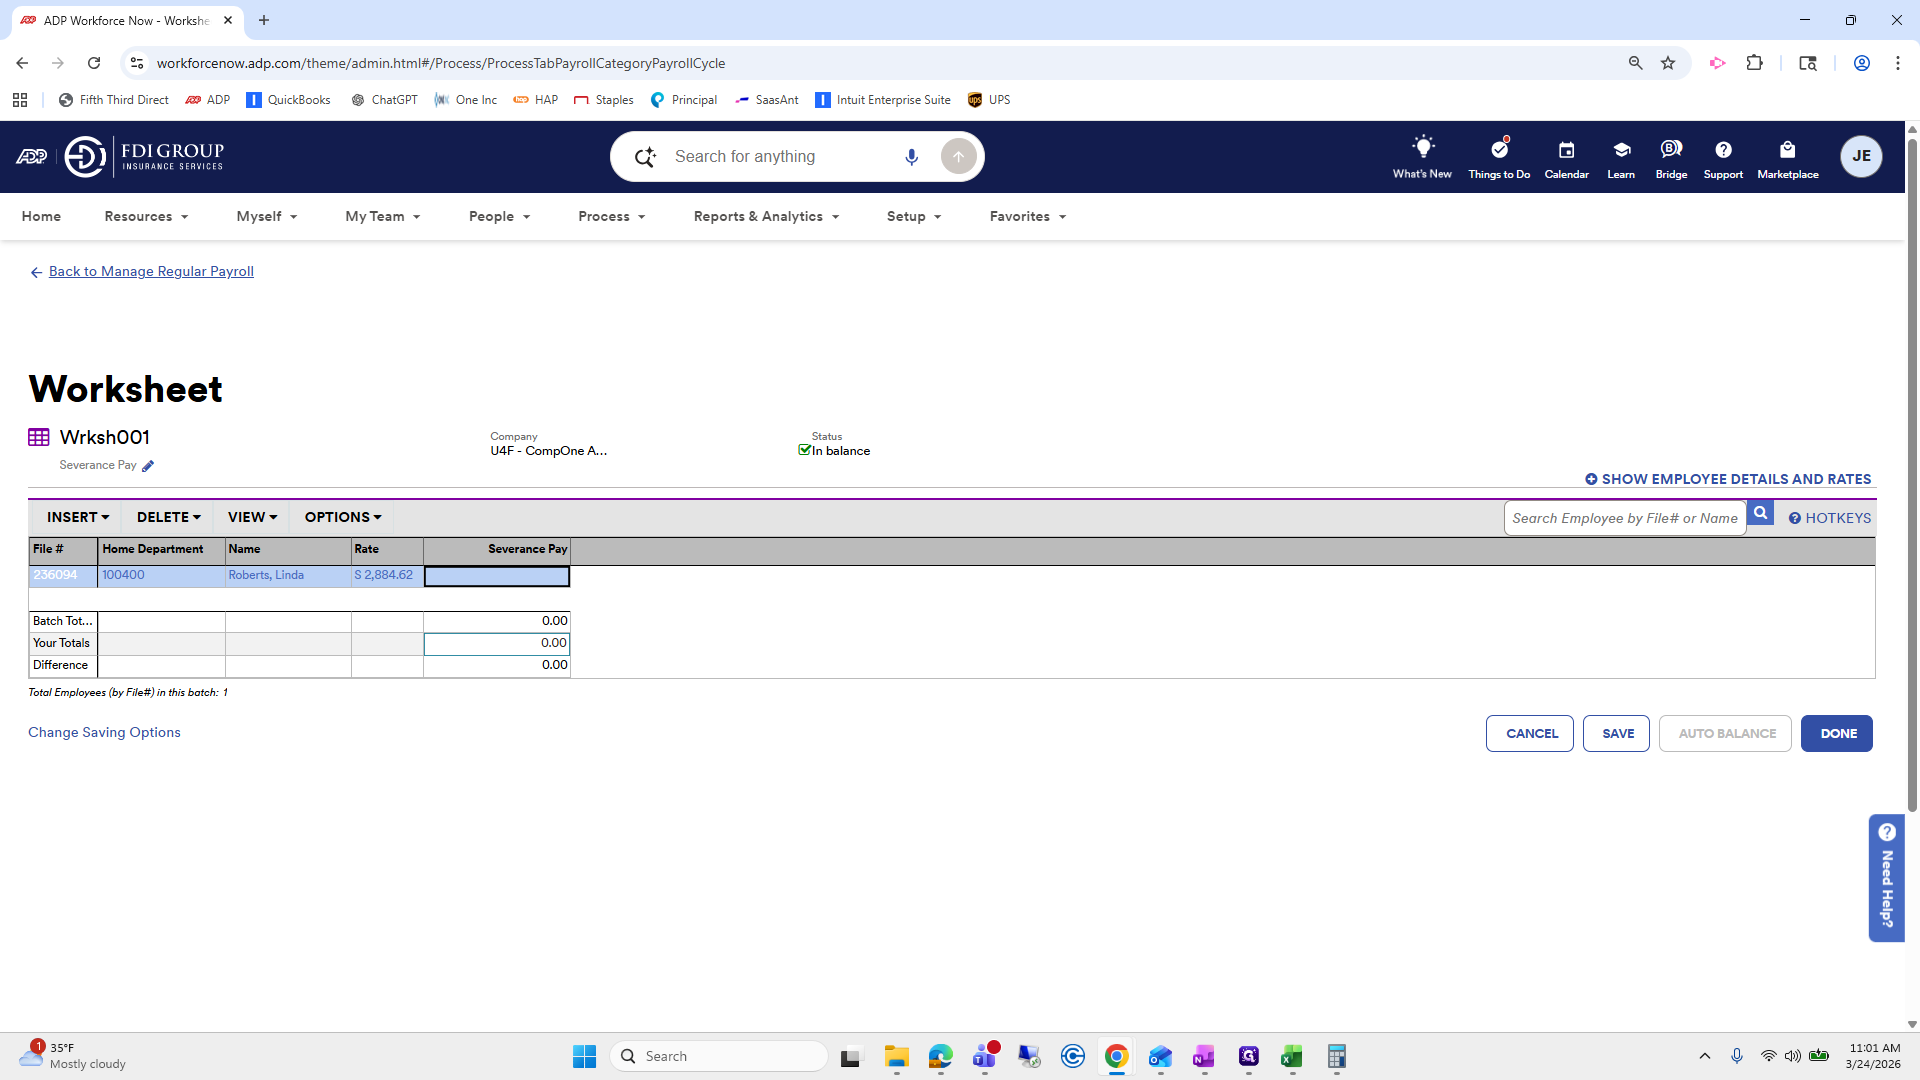
Oops.
Enter her amount: 1,225.70.


I'll double-check.
Click Save, then Auto Balance. This sets it to balance, so there is no difference.
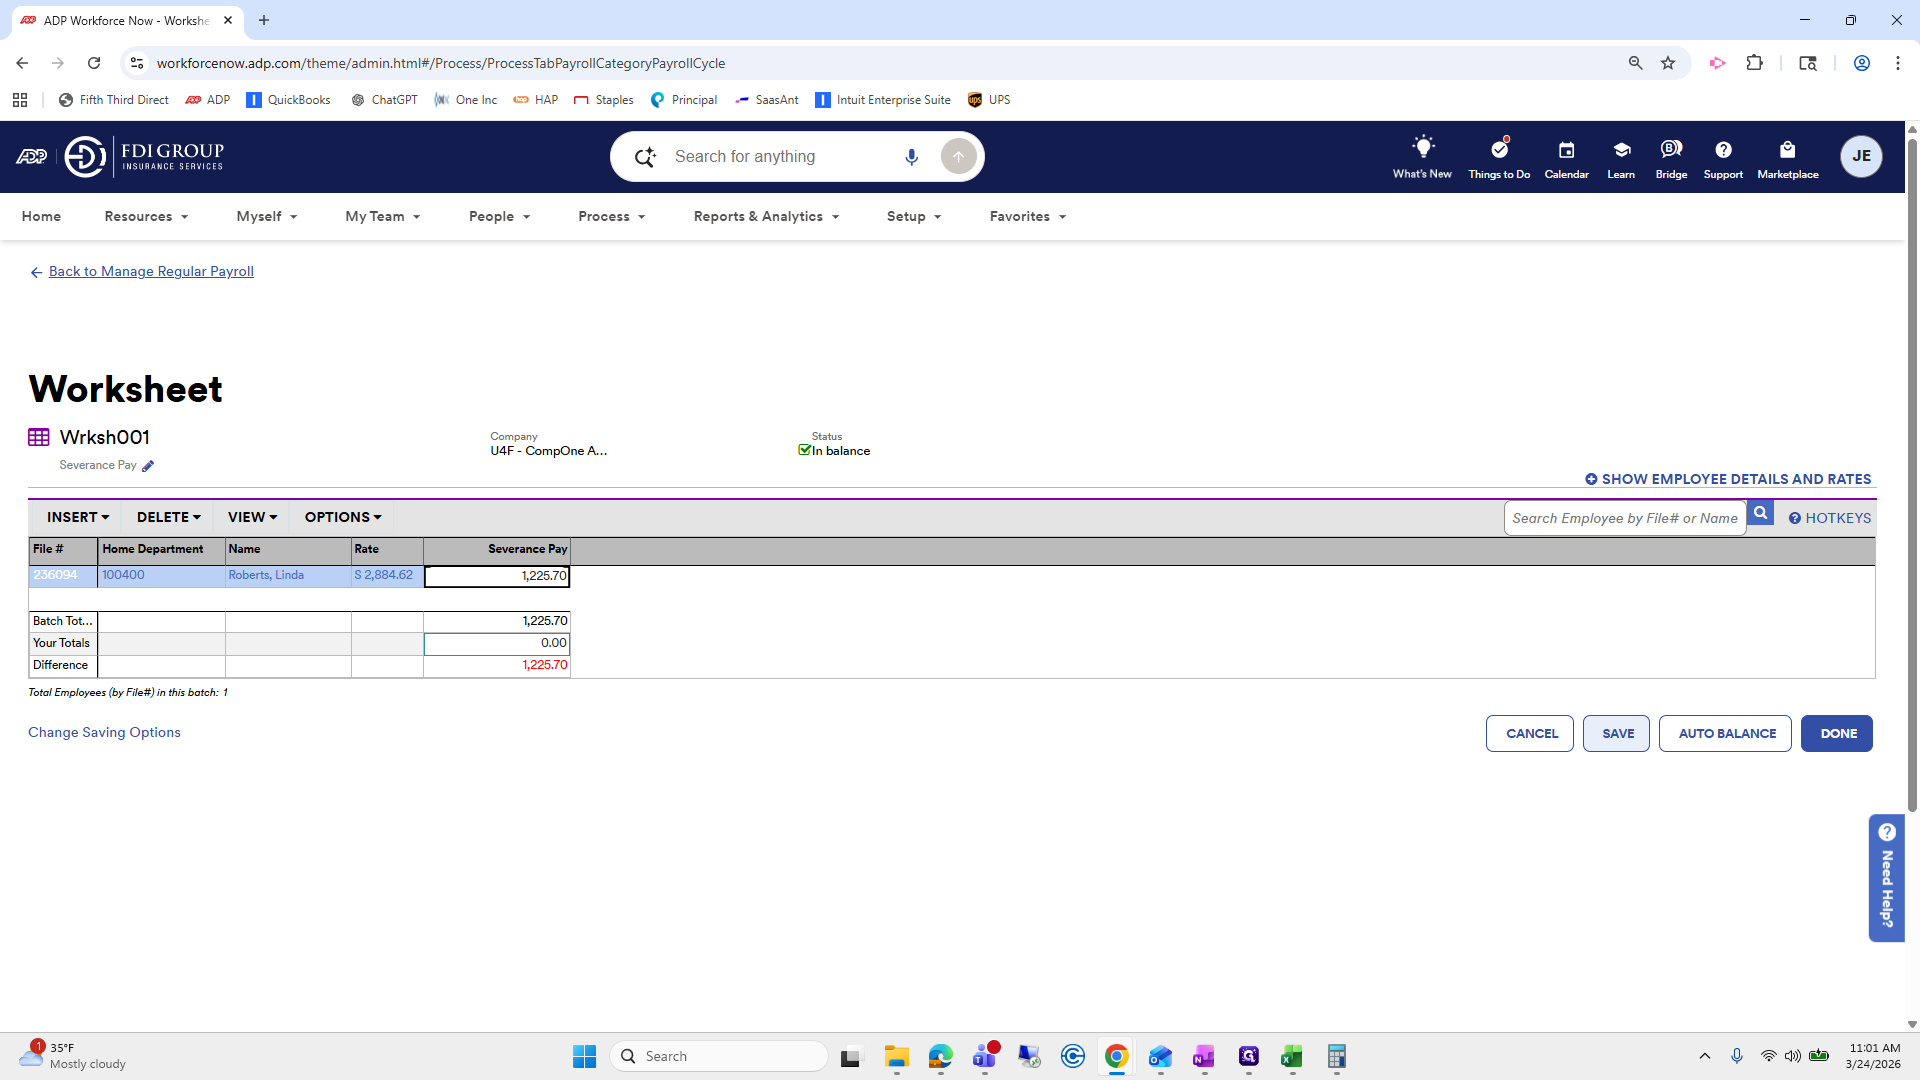
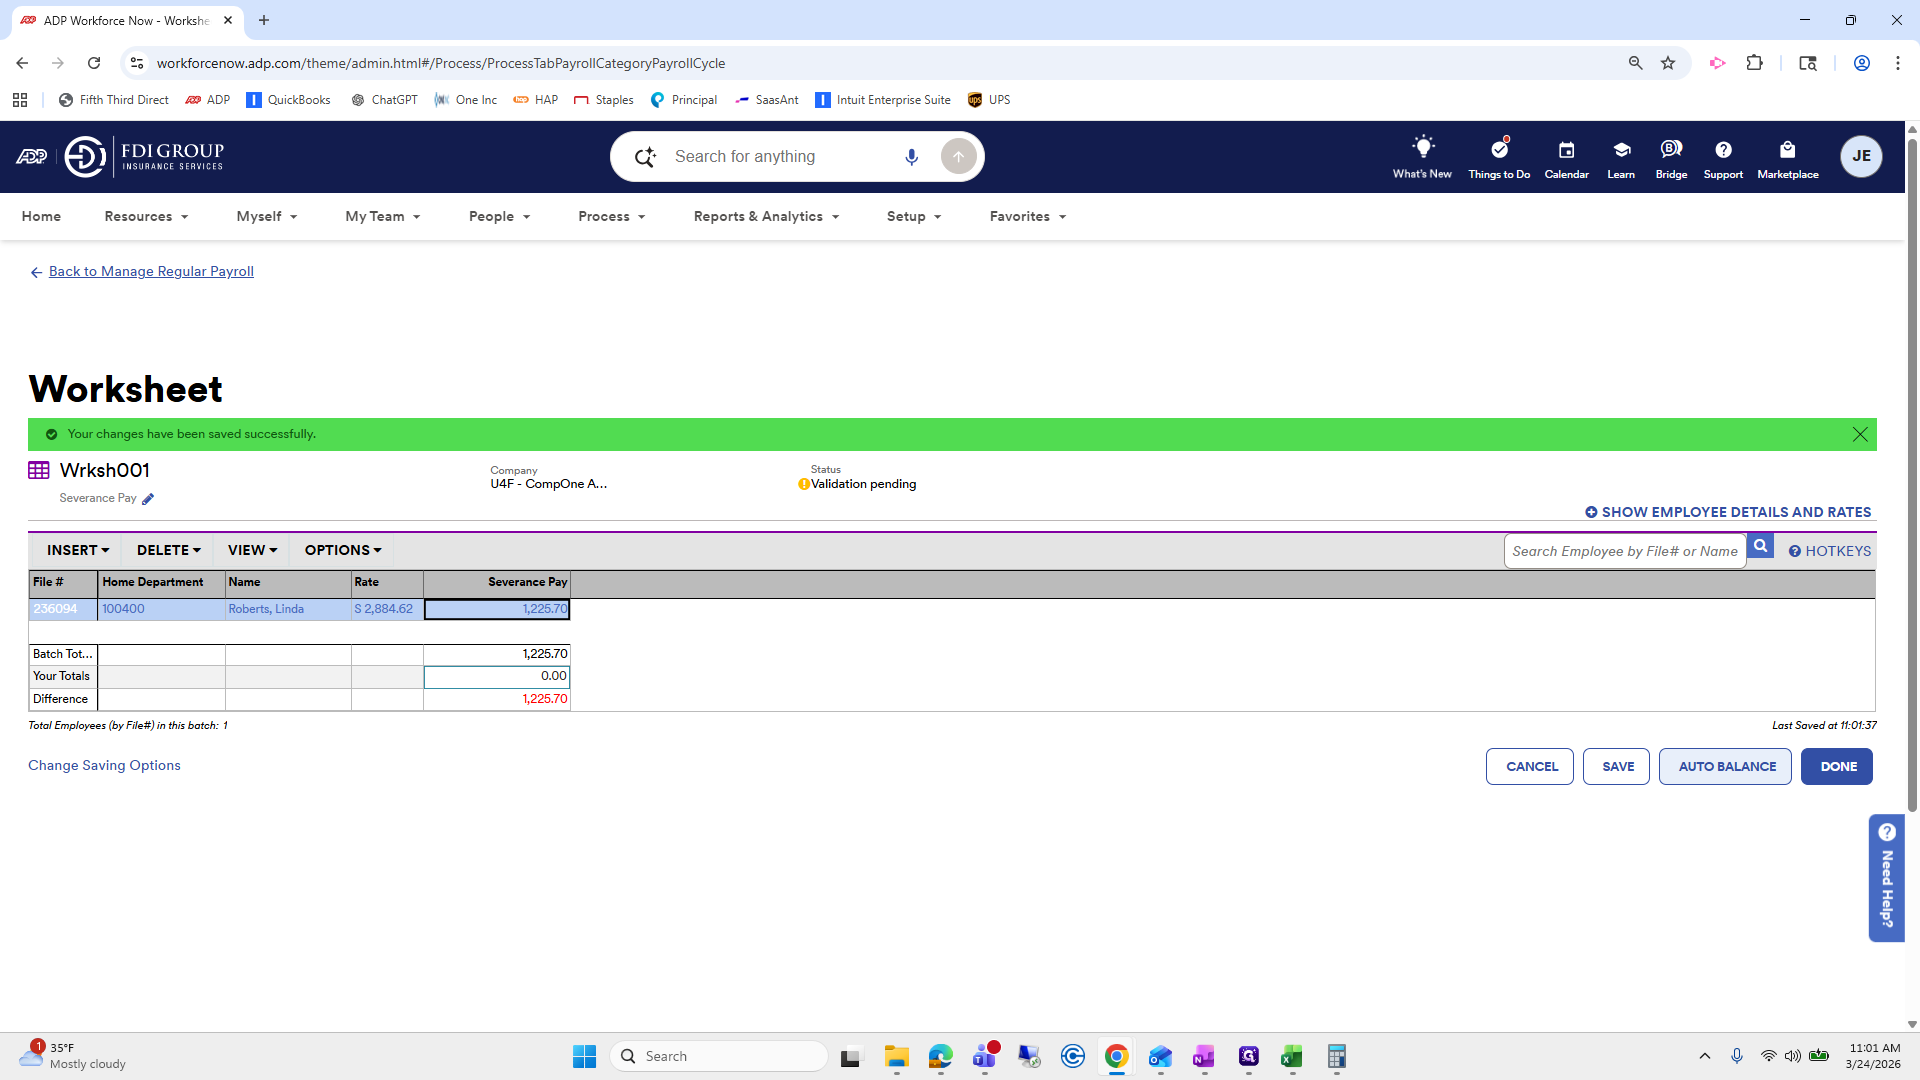
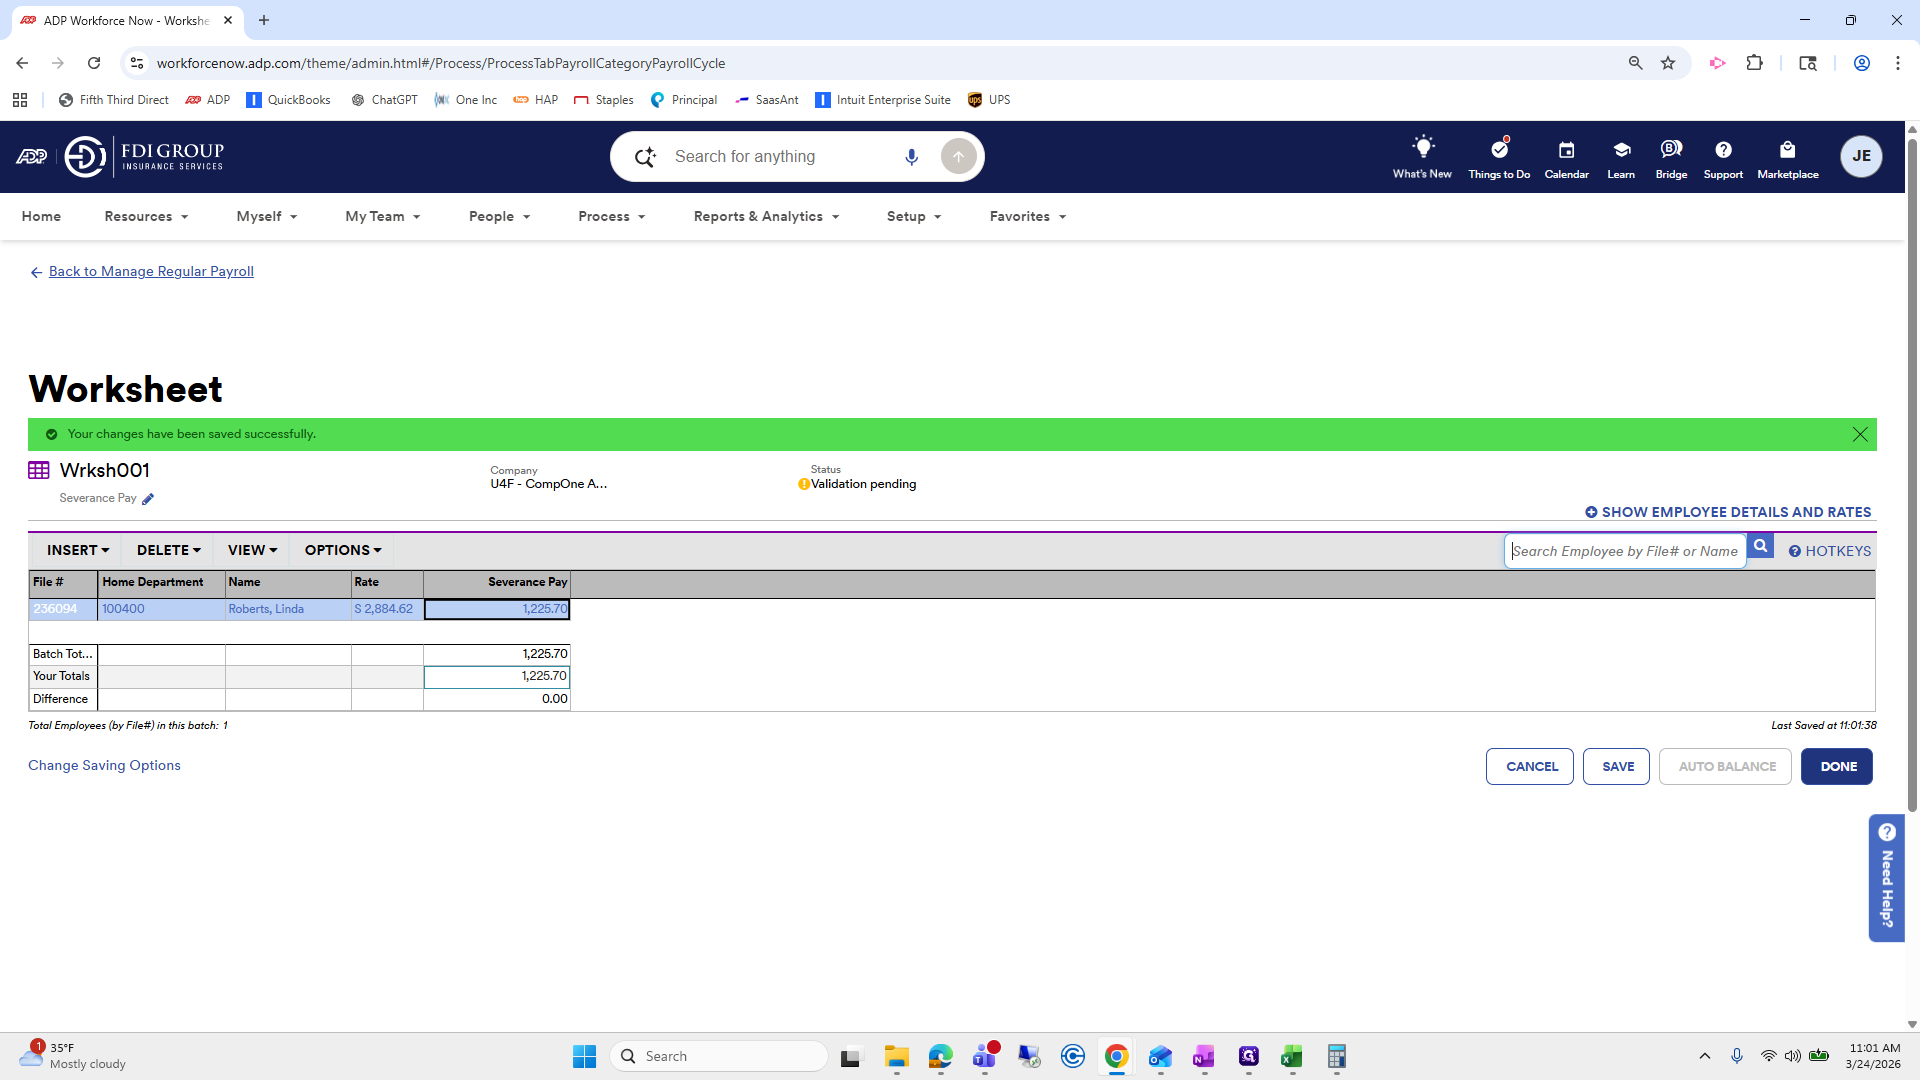
Click Done. Okay. You can see that our severance pay is available. We will go back.
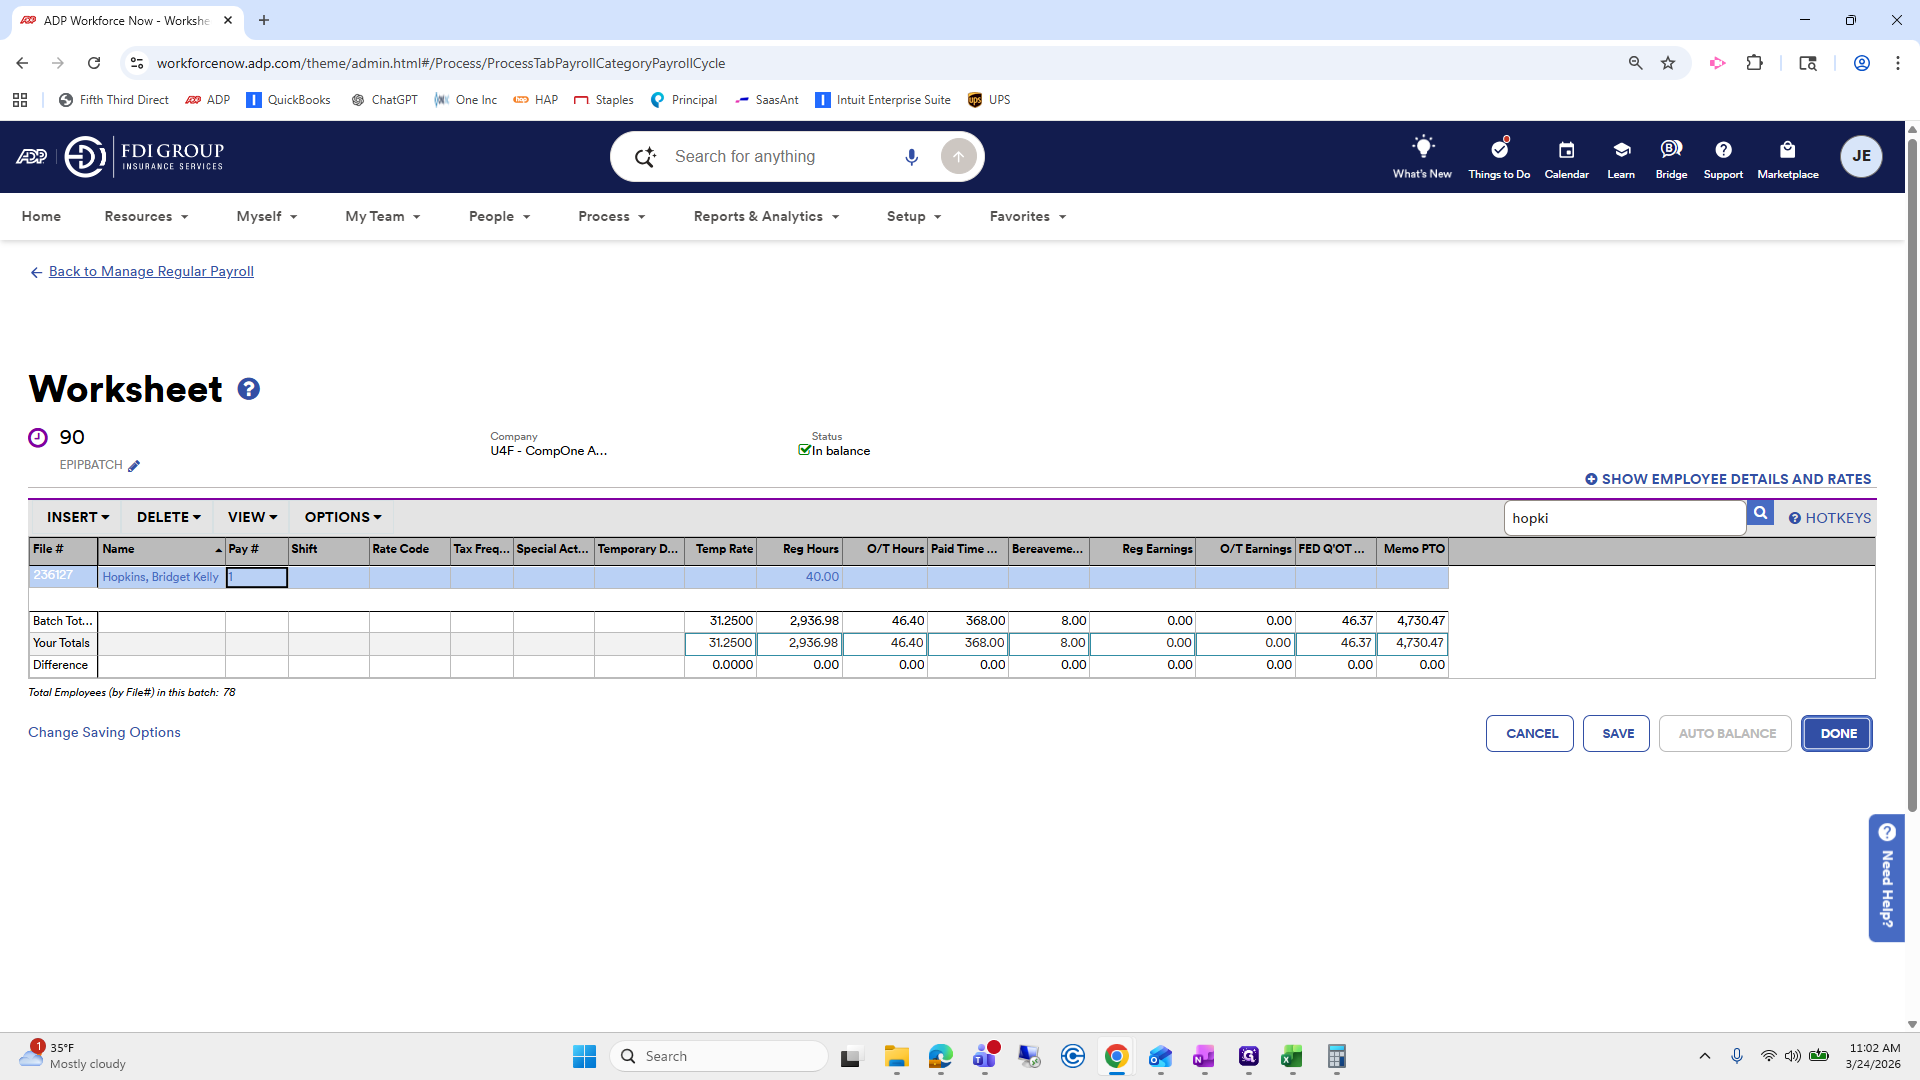
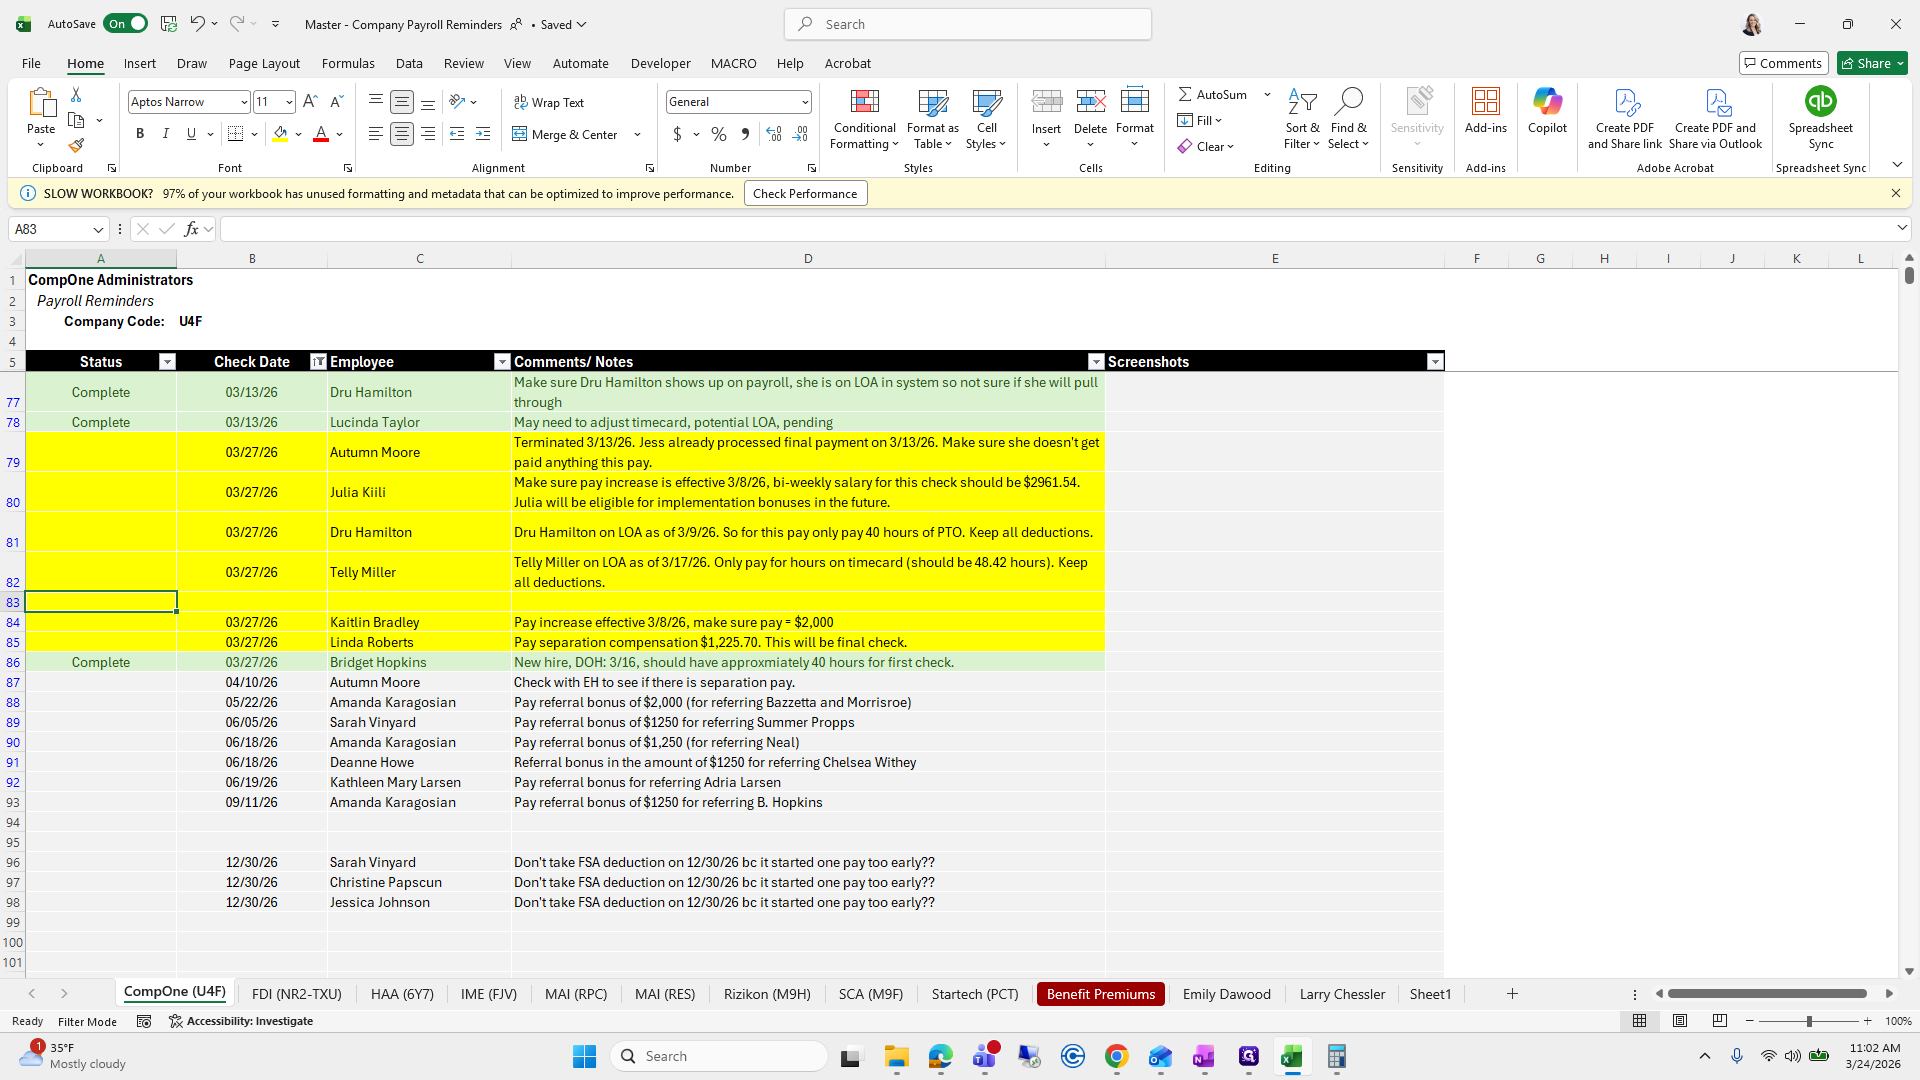
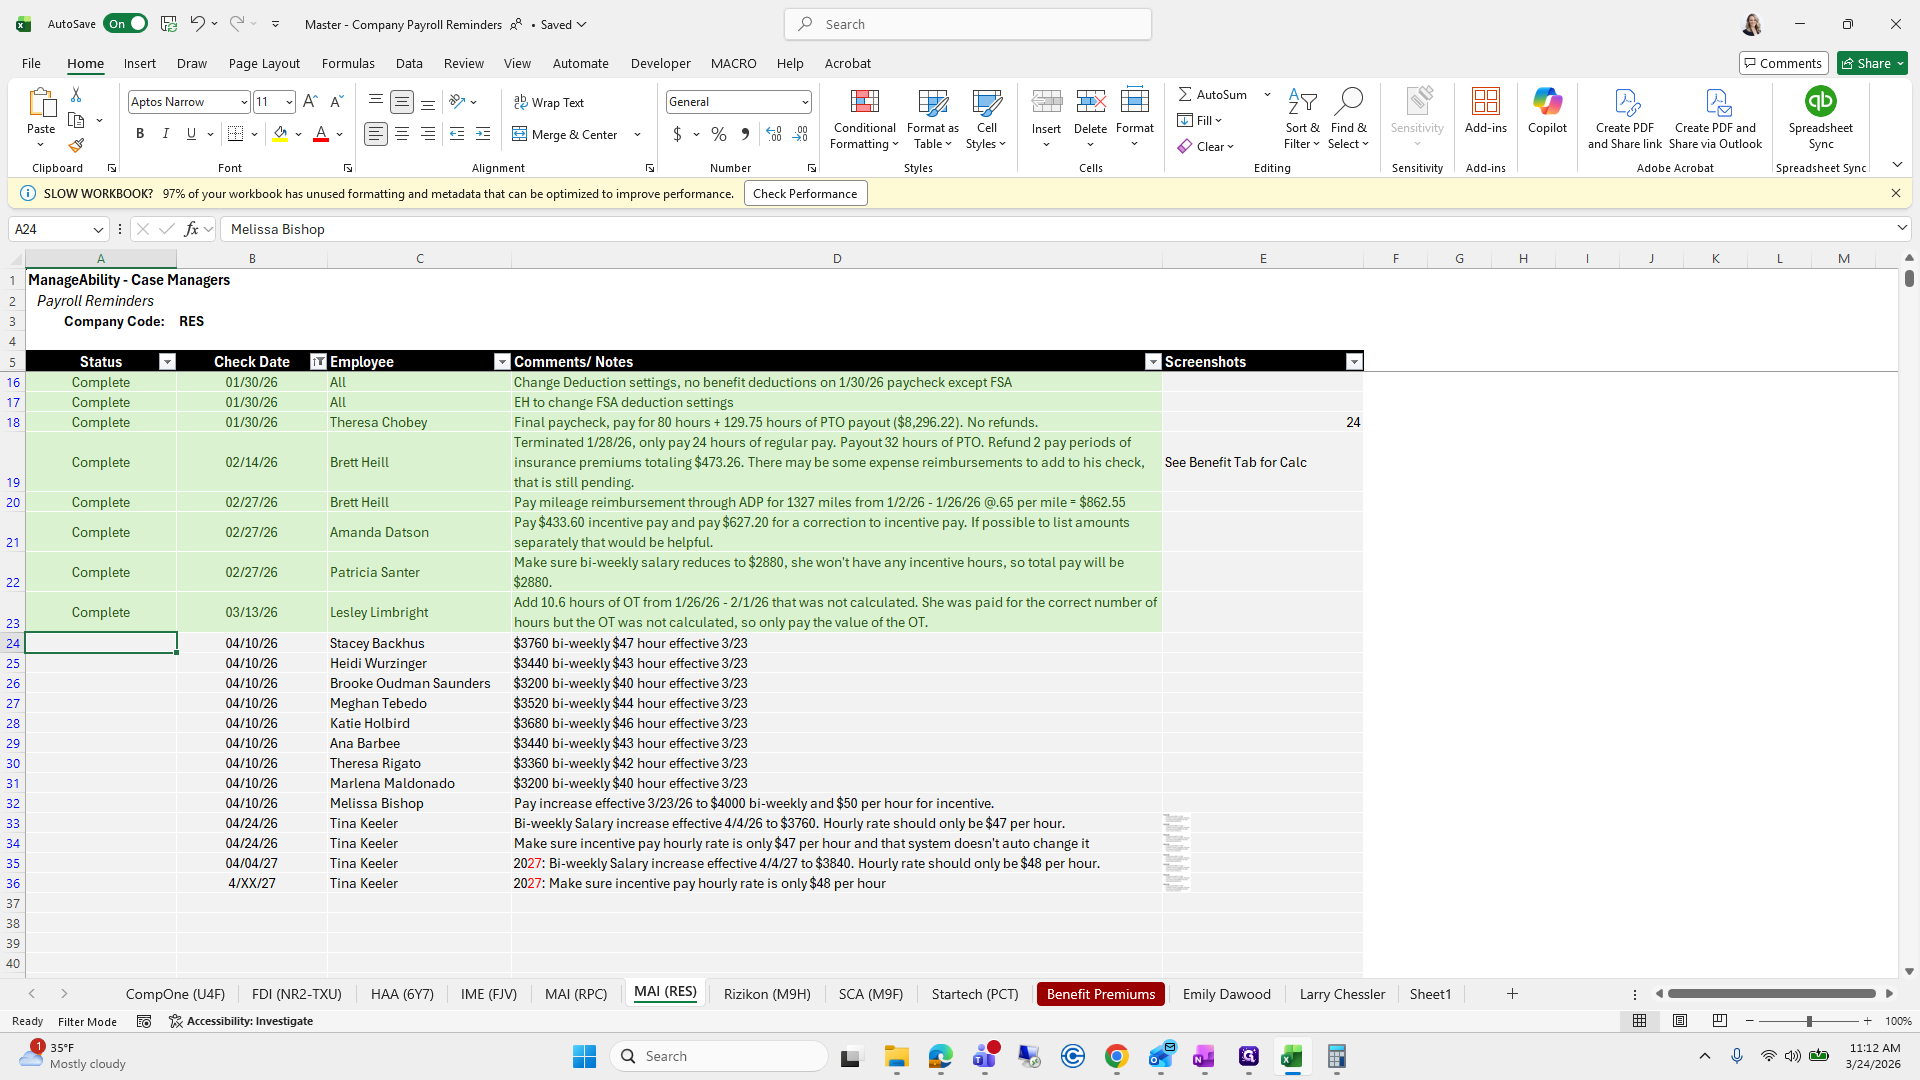
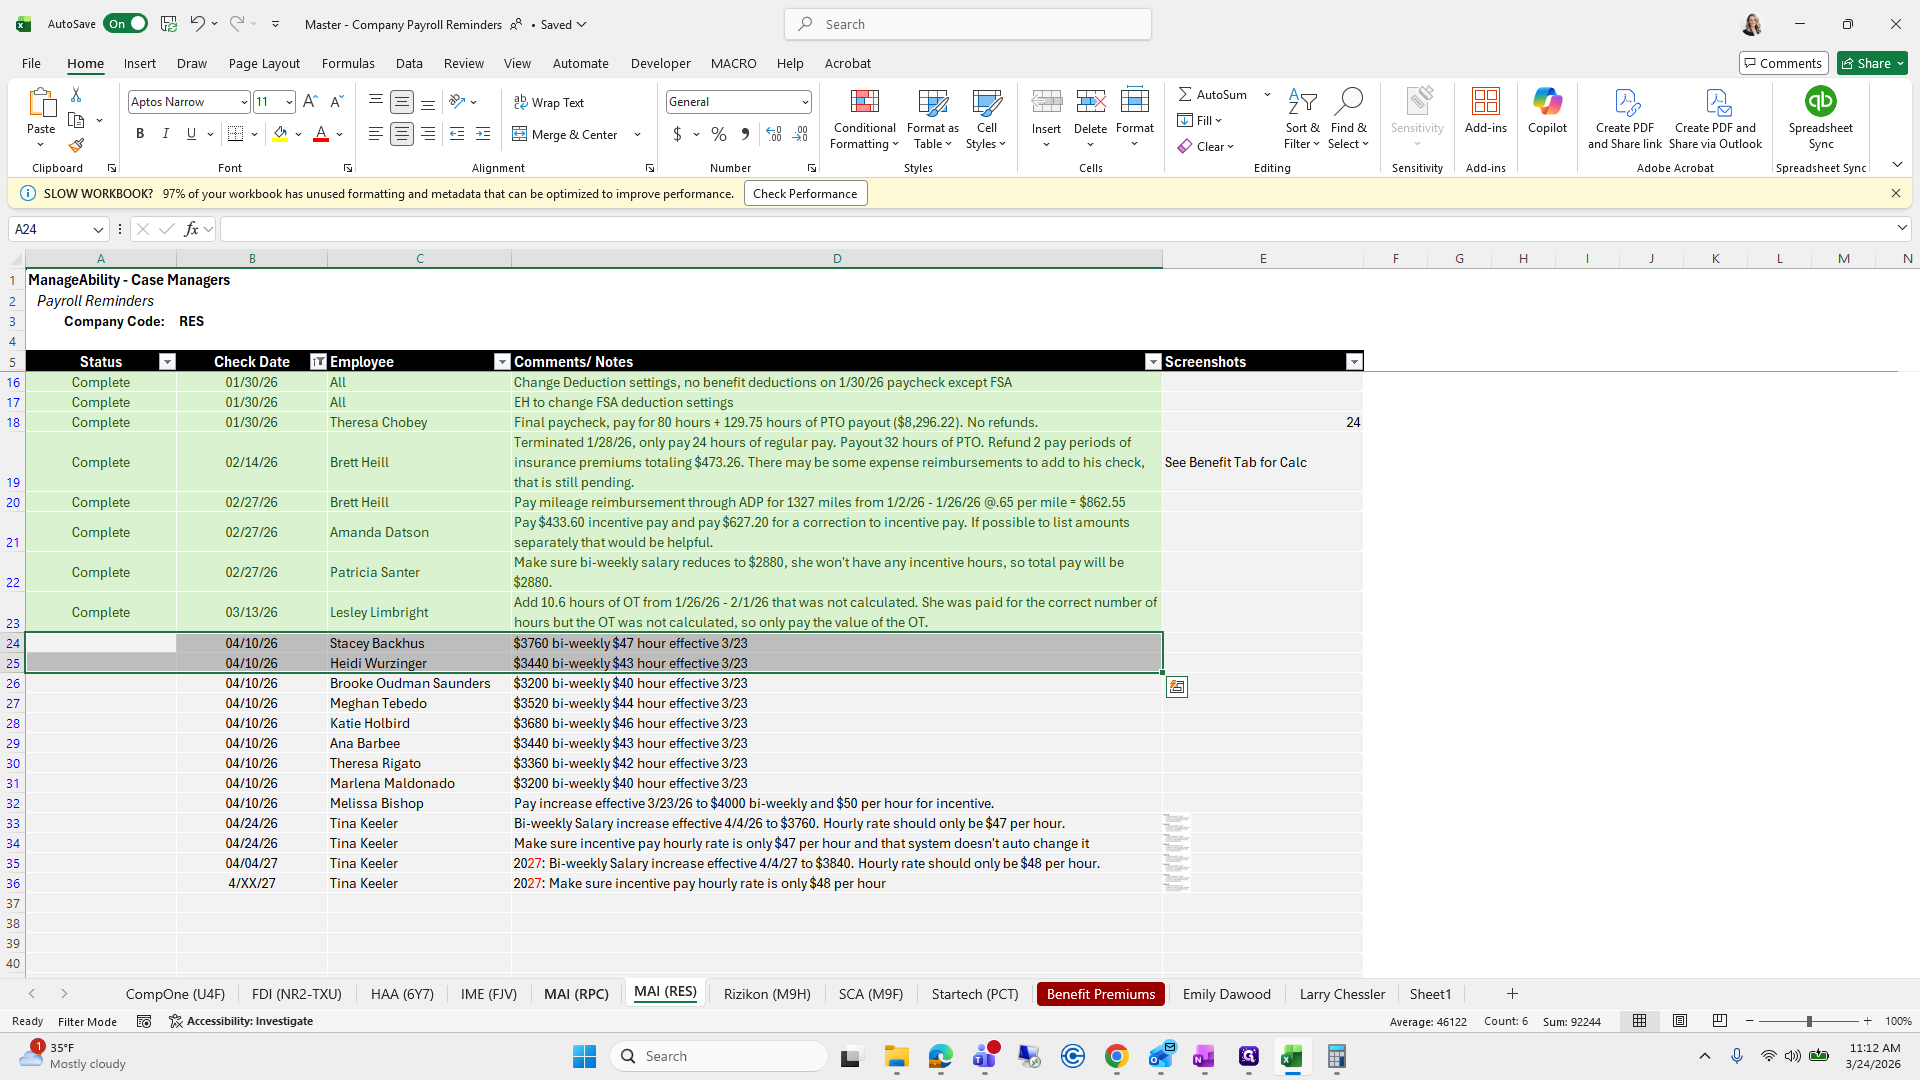
New hire Bridget's date of hire is 3/16. She should have about 40 hours for her first paycheck.


We're going to begin. My computer screen is going black again. We will go to the batch showing hours.

Her name was Bridget Hopkins.

She has approximately 40 hours.
That looks great.
I will mark this one as completed because I know it is finished.
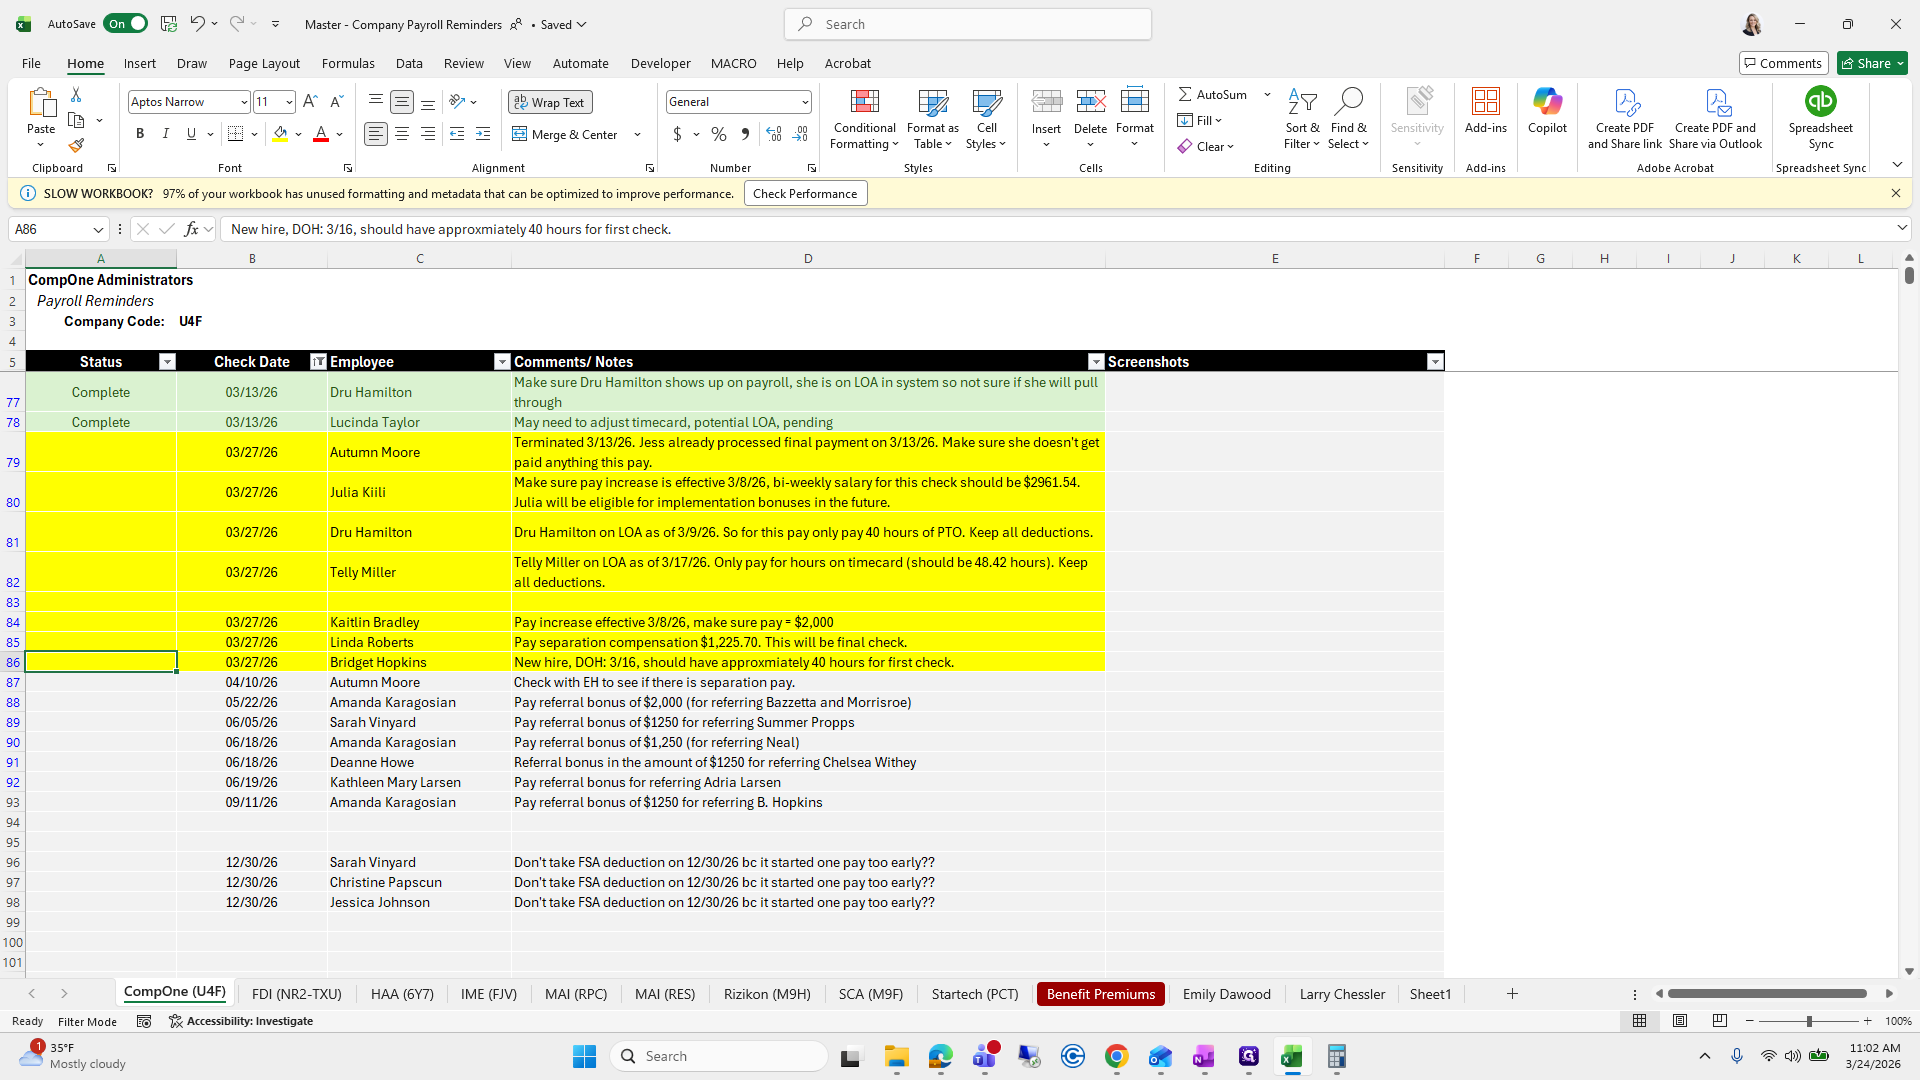
Once you mark it complete, it turns green, which is nice.
This is an extra row, so I'll mark it as complete.
Okay. Everything here looks great. Um... Let's see. Doo, doo, doo, doo.

We will stop here because we need to add commissions, but I am waiting for commissions from Julie.


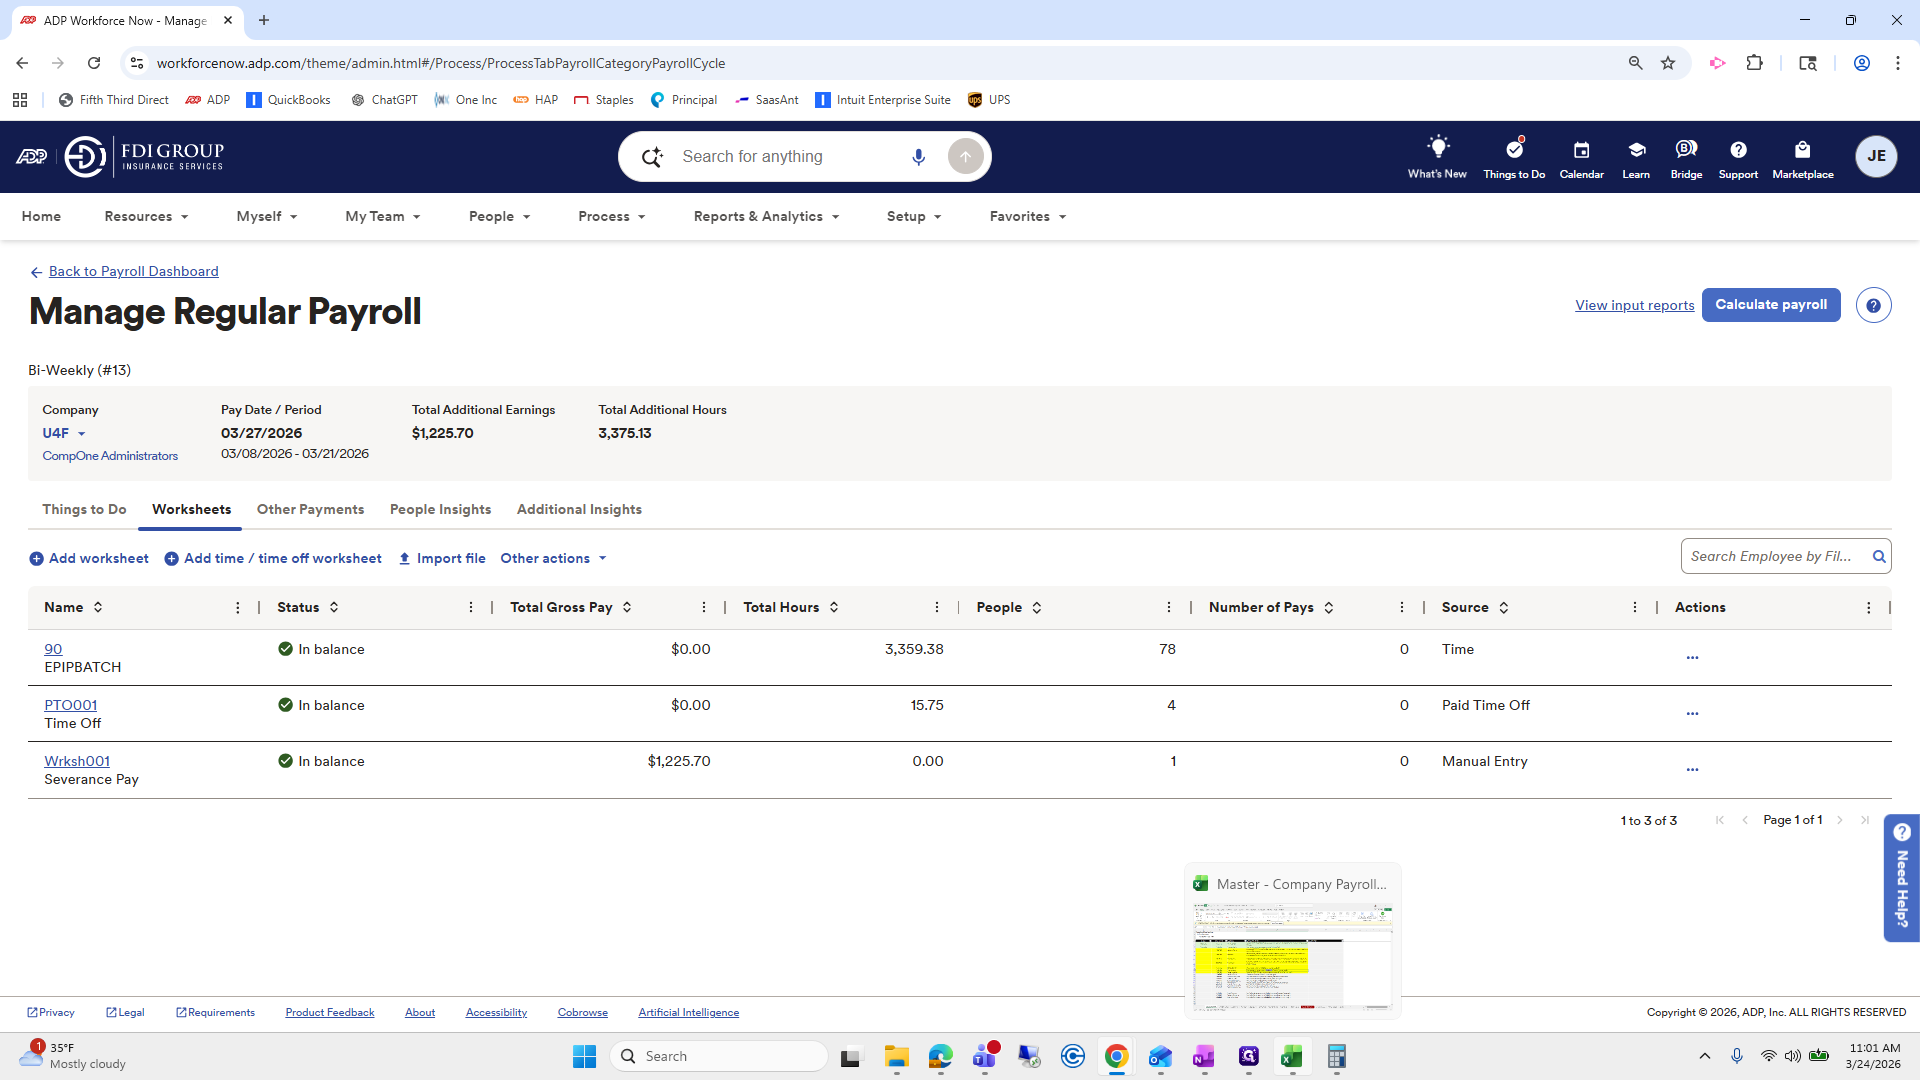
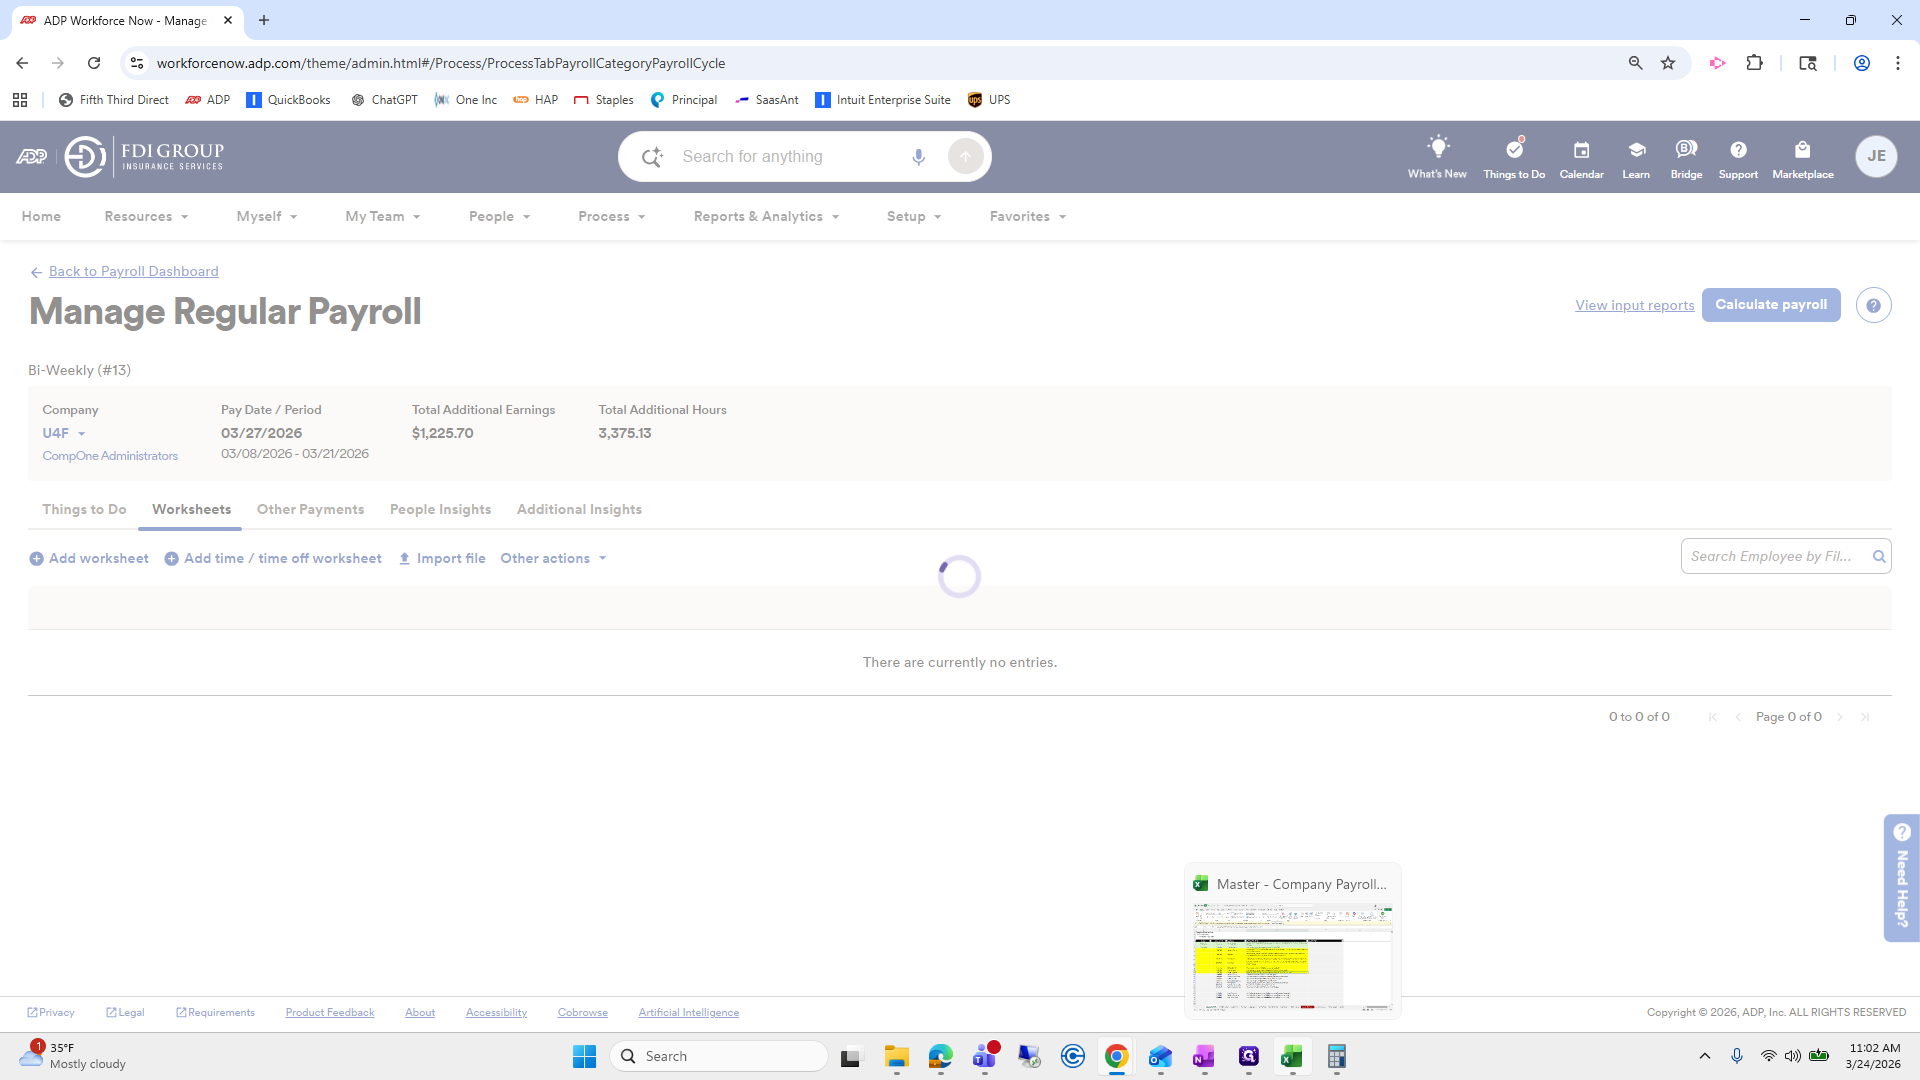
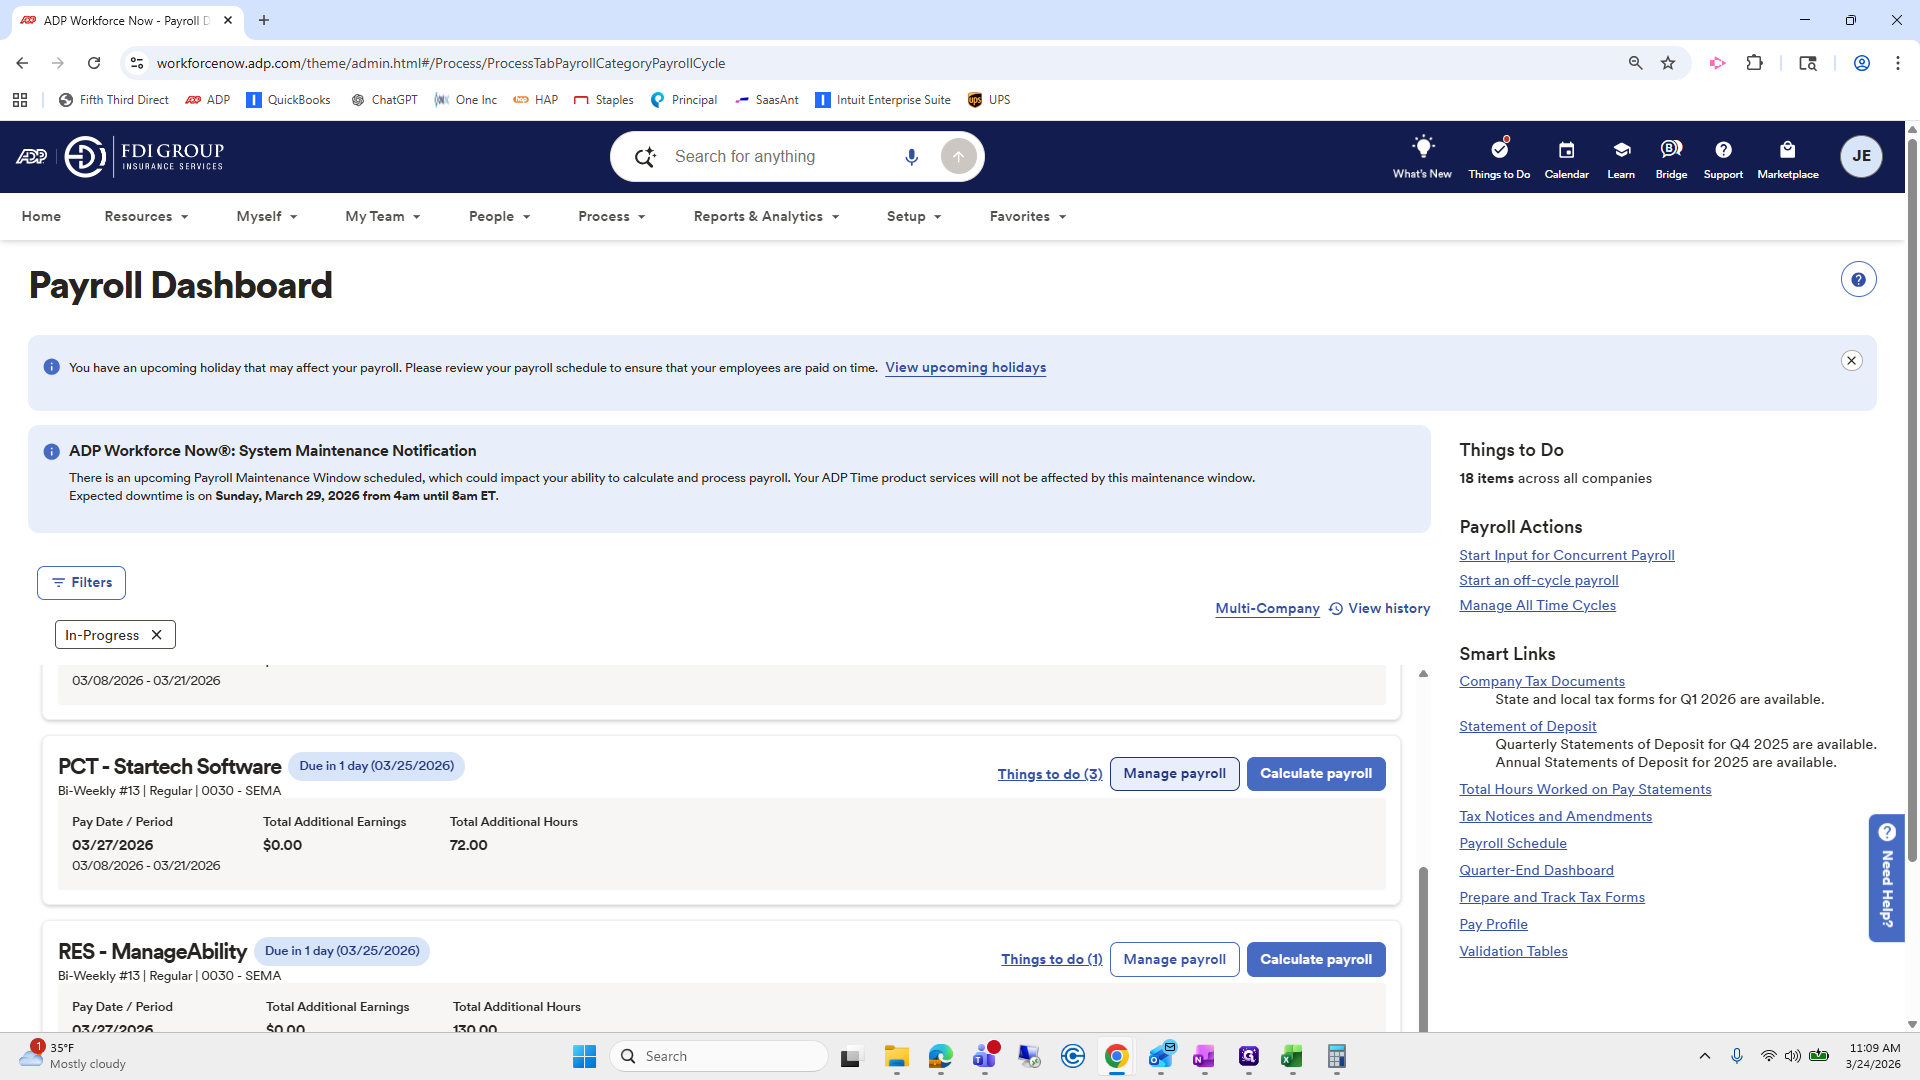
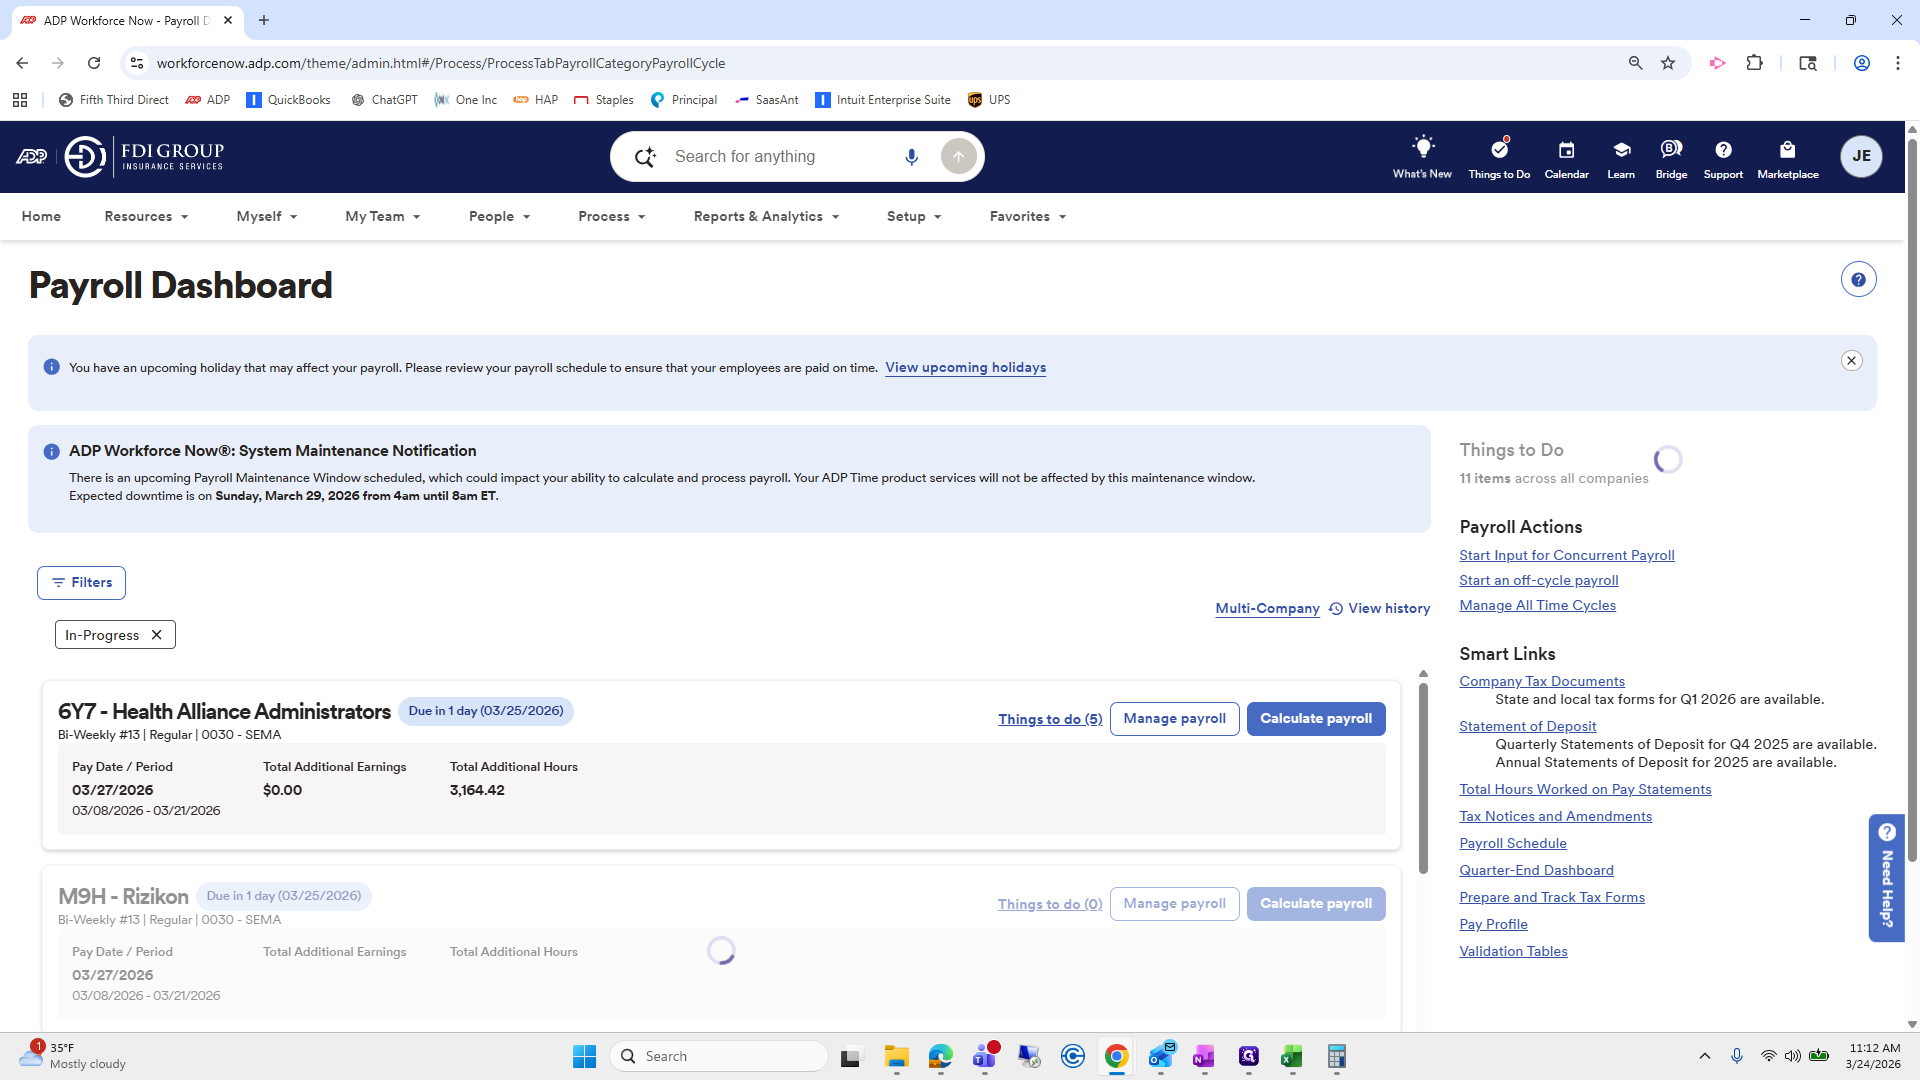
Commissions are usually paid with the second paycheck of each month at most companies. We will go back to the Payroll Dashboard.

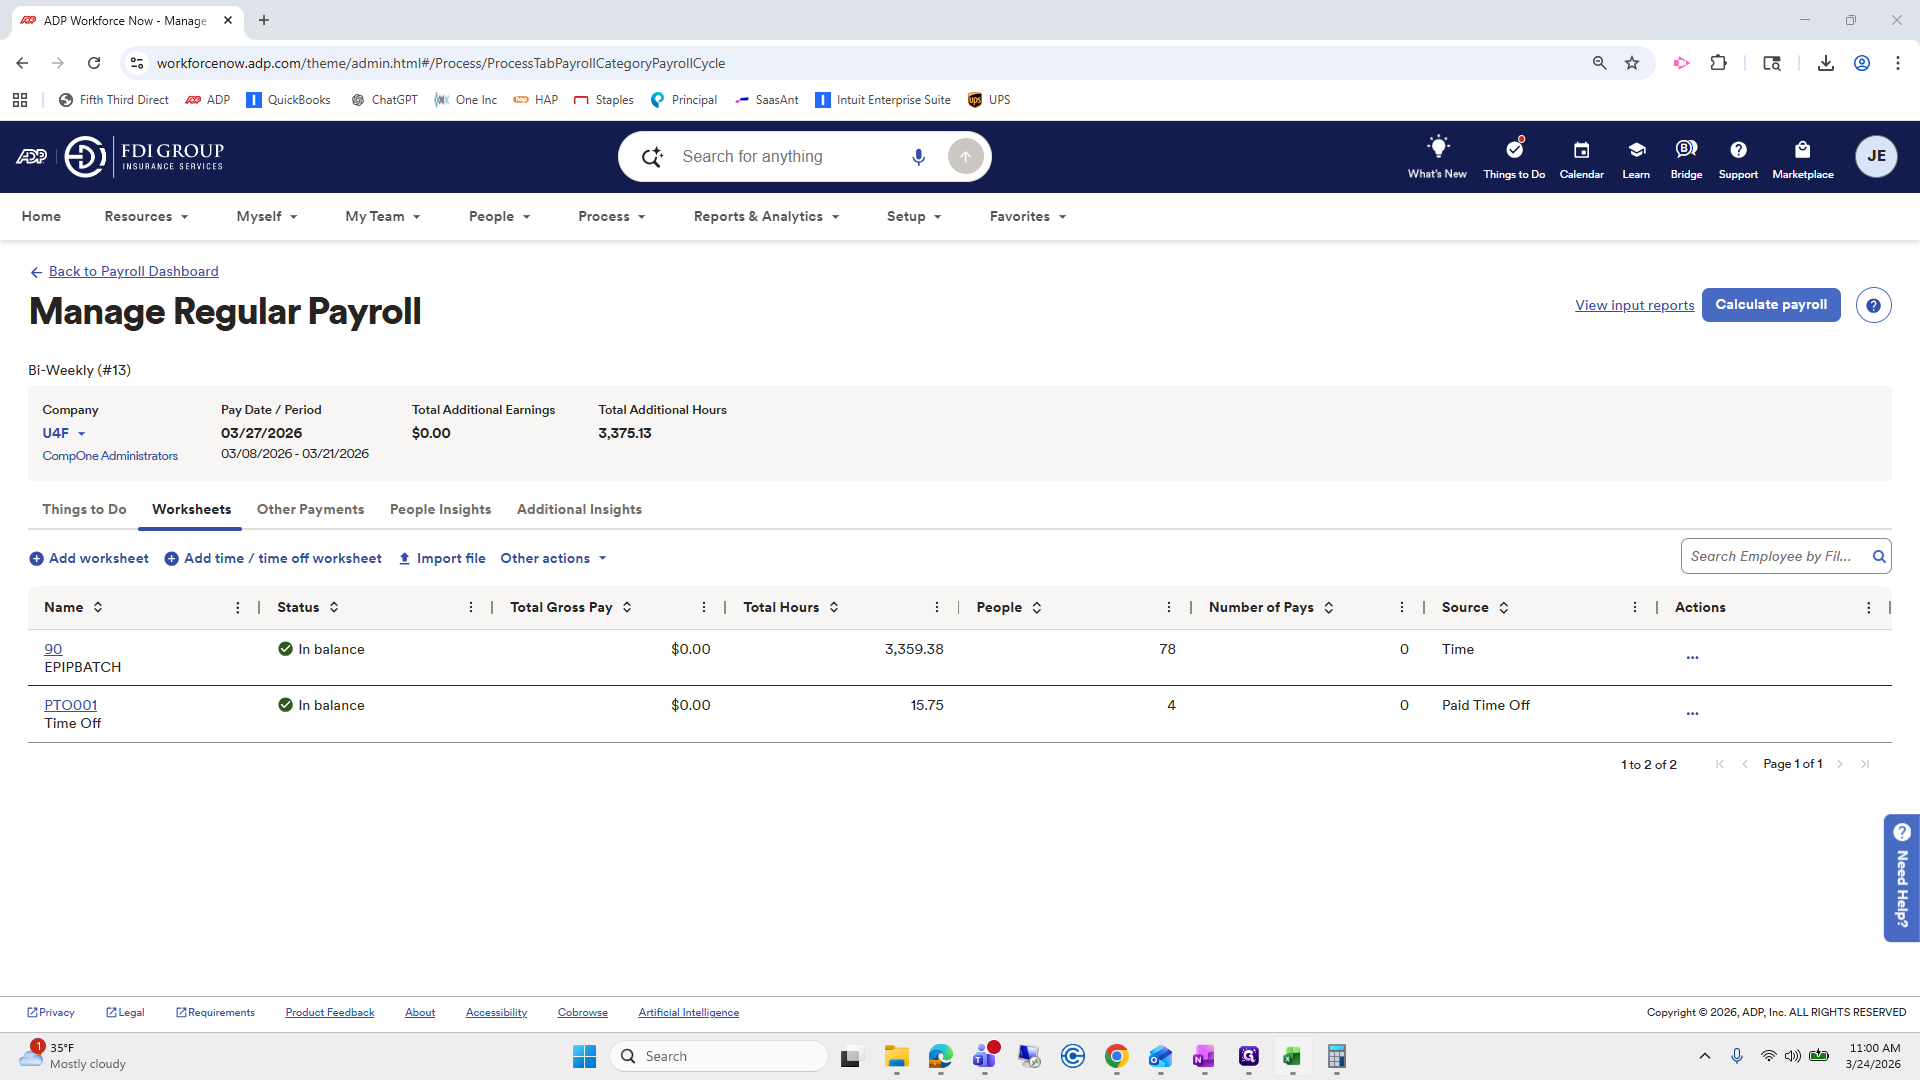
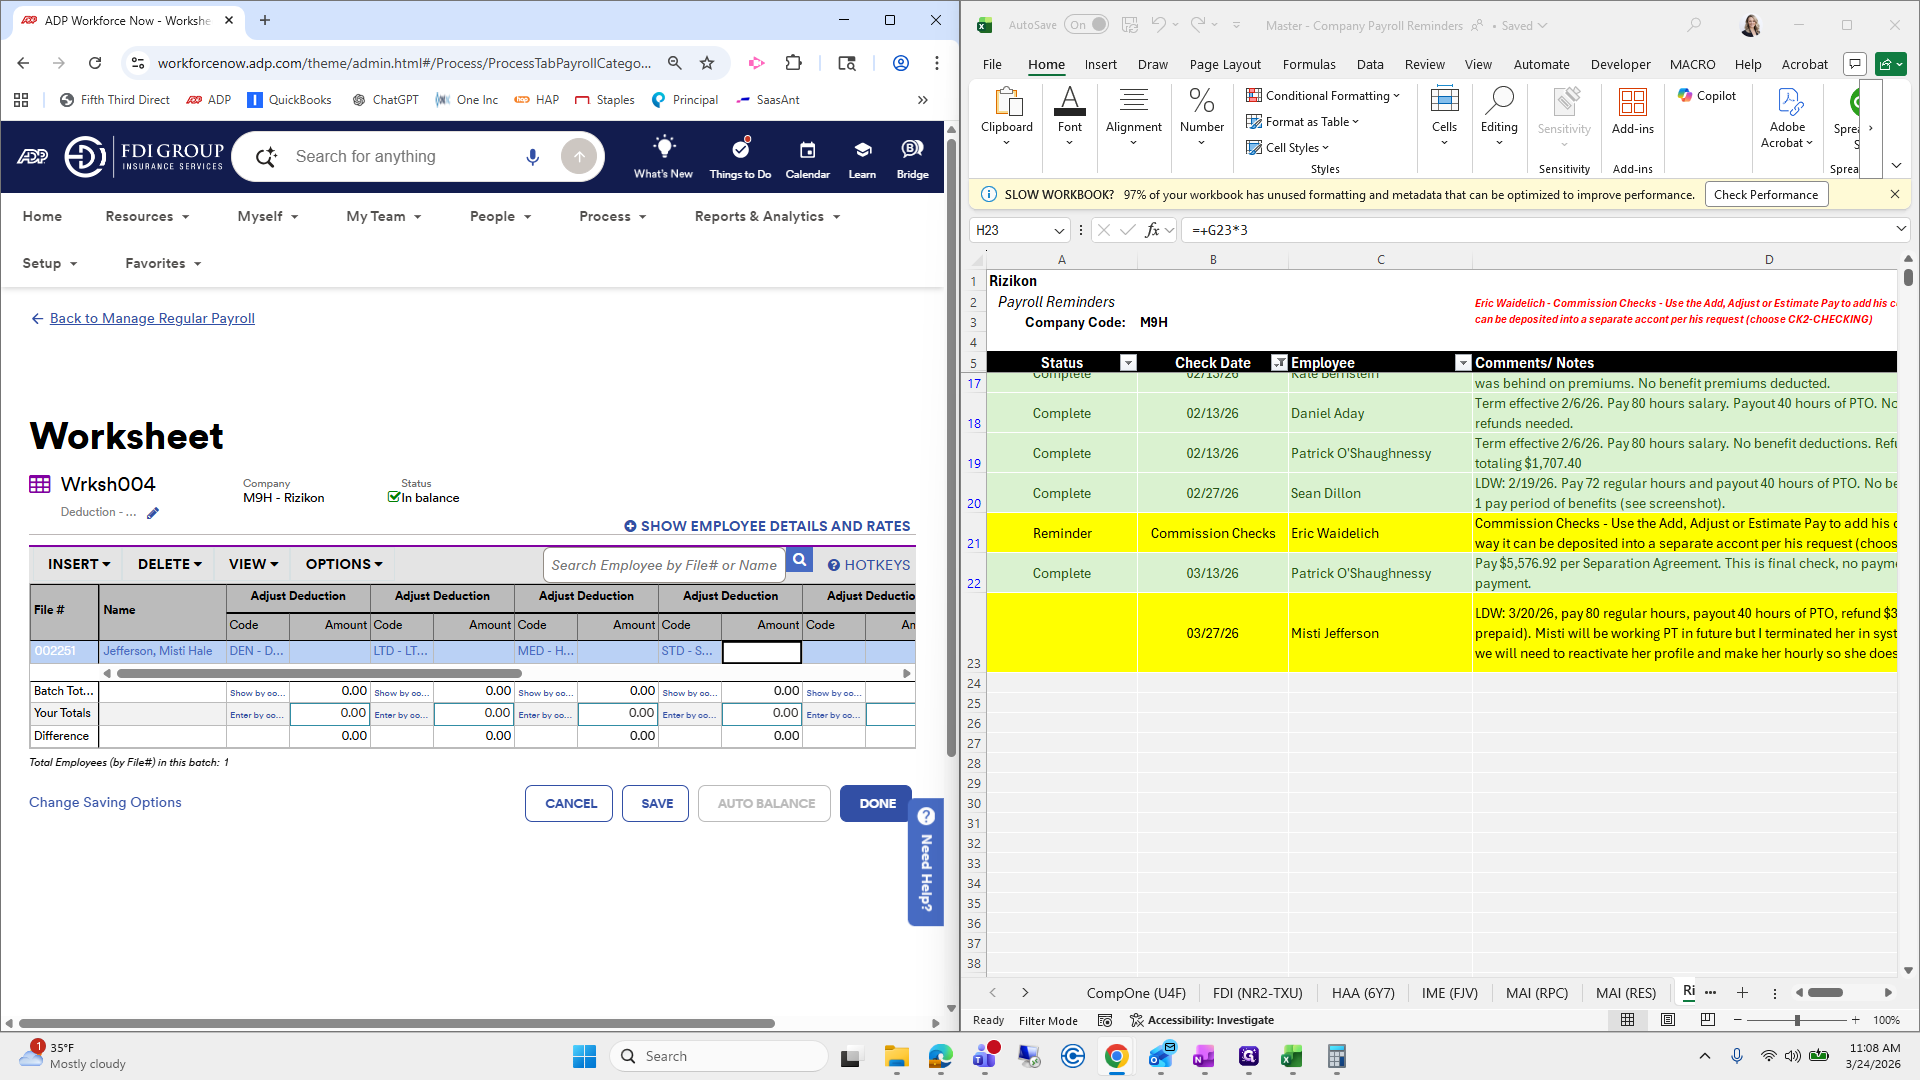
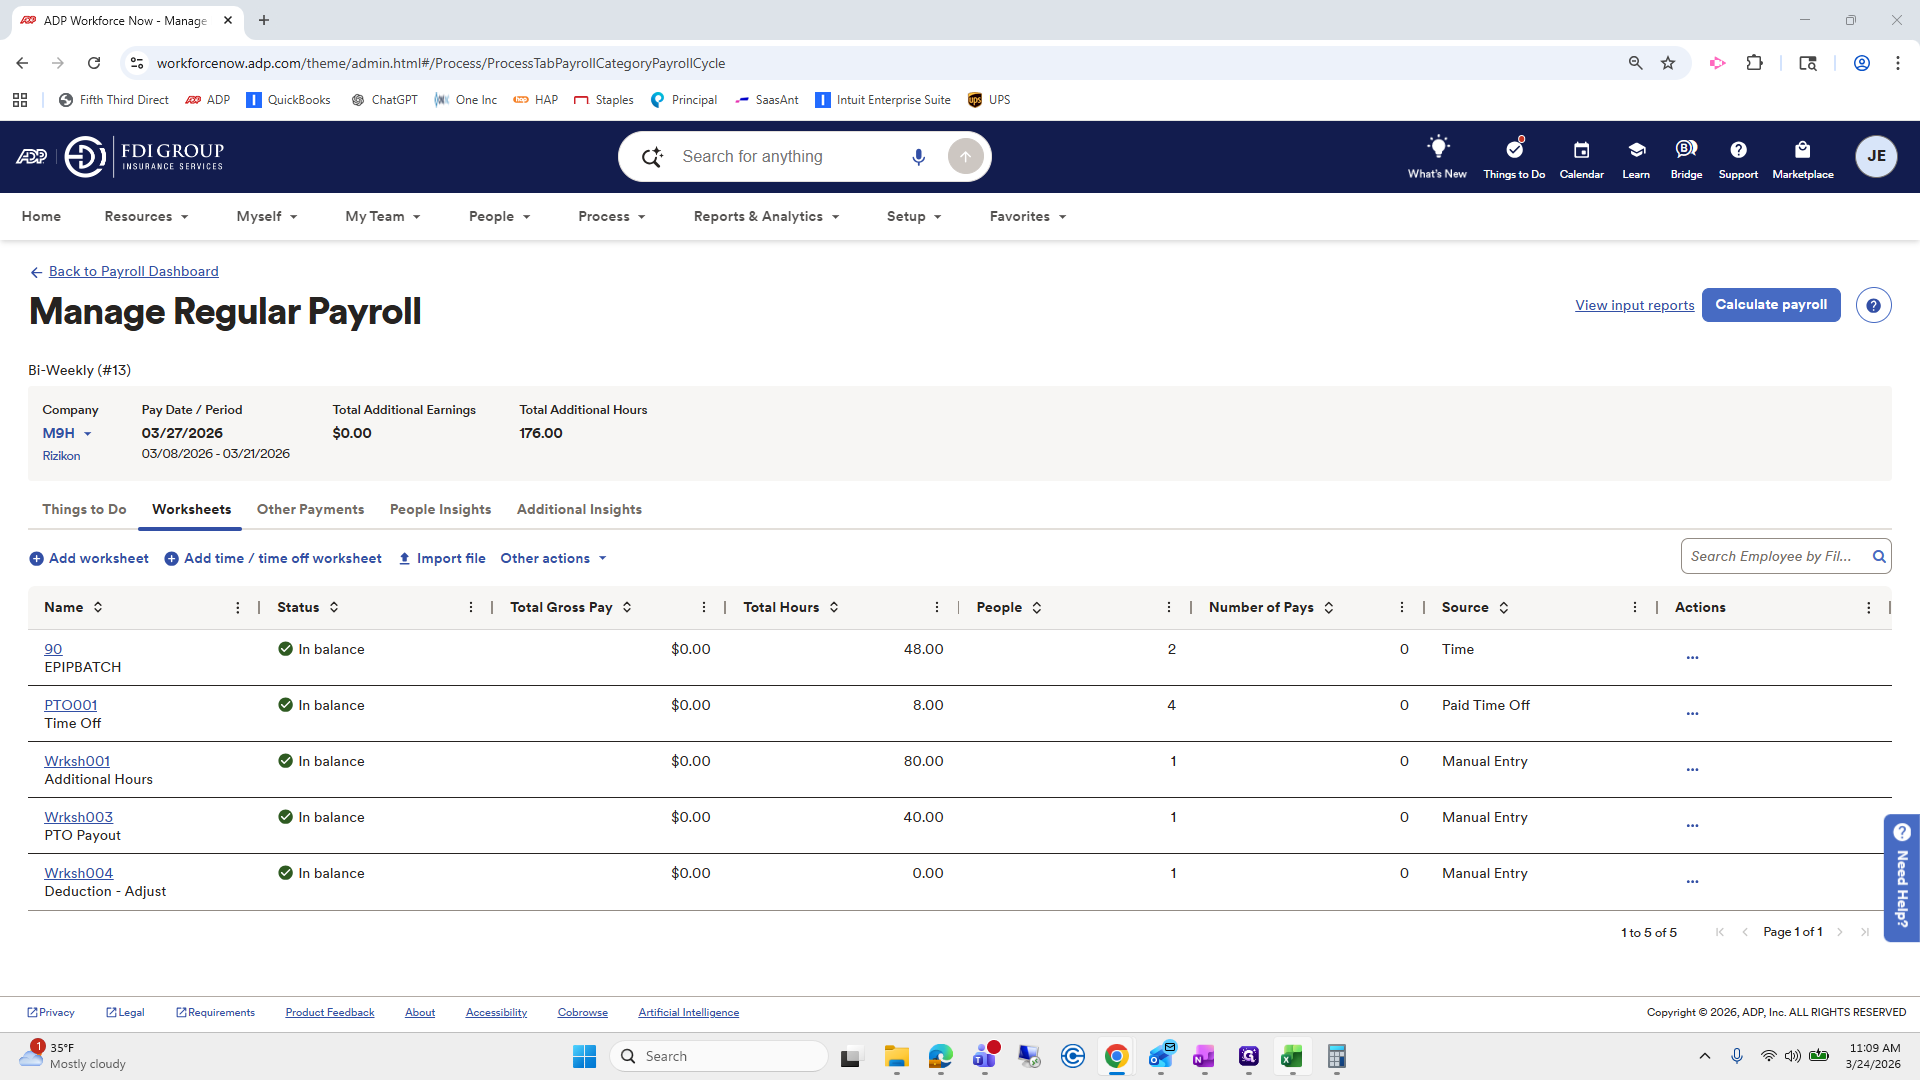
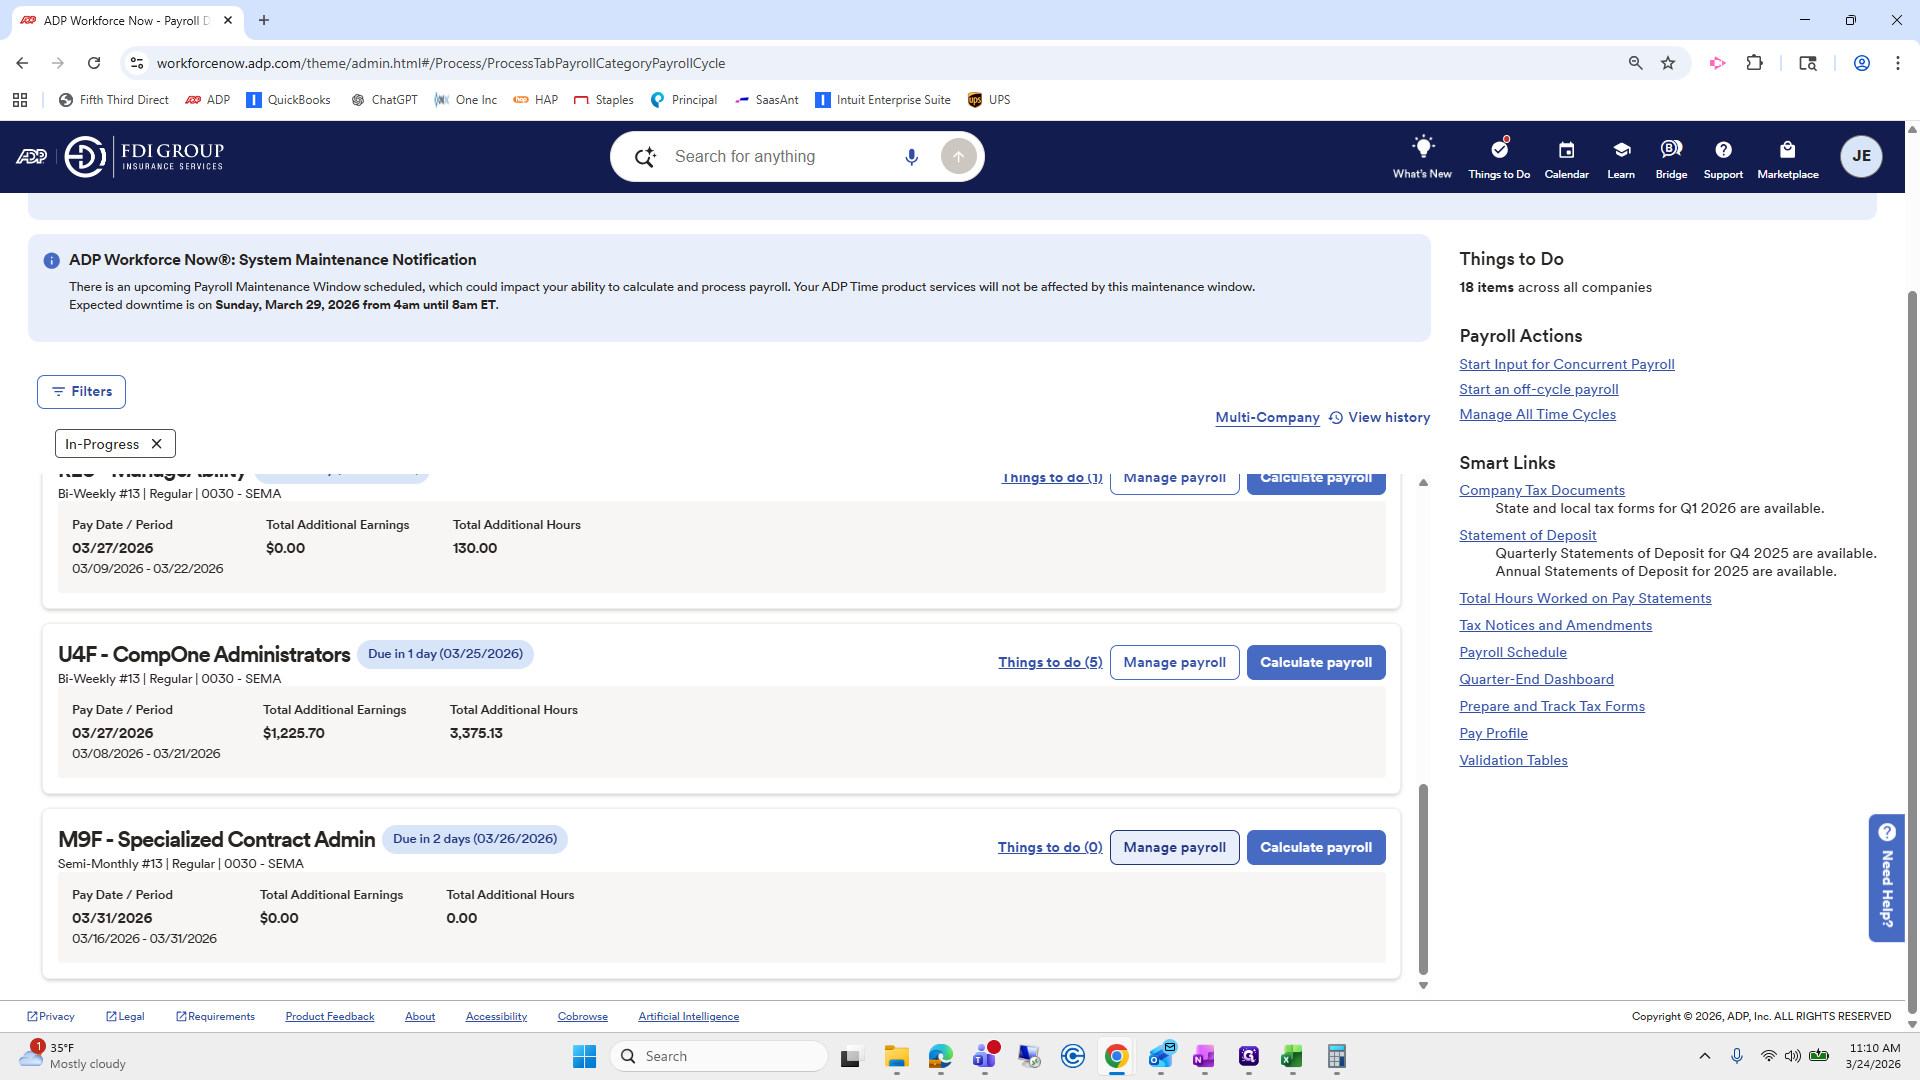
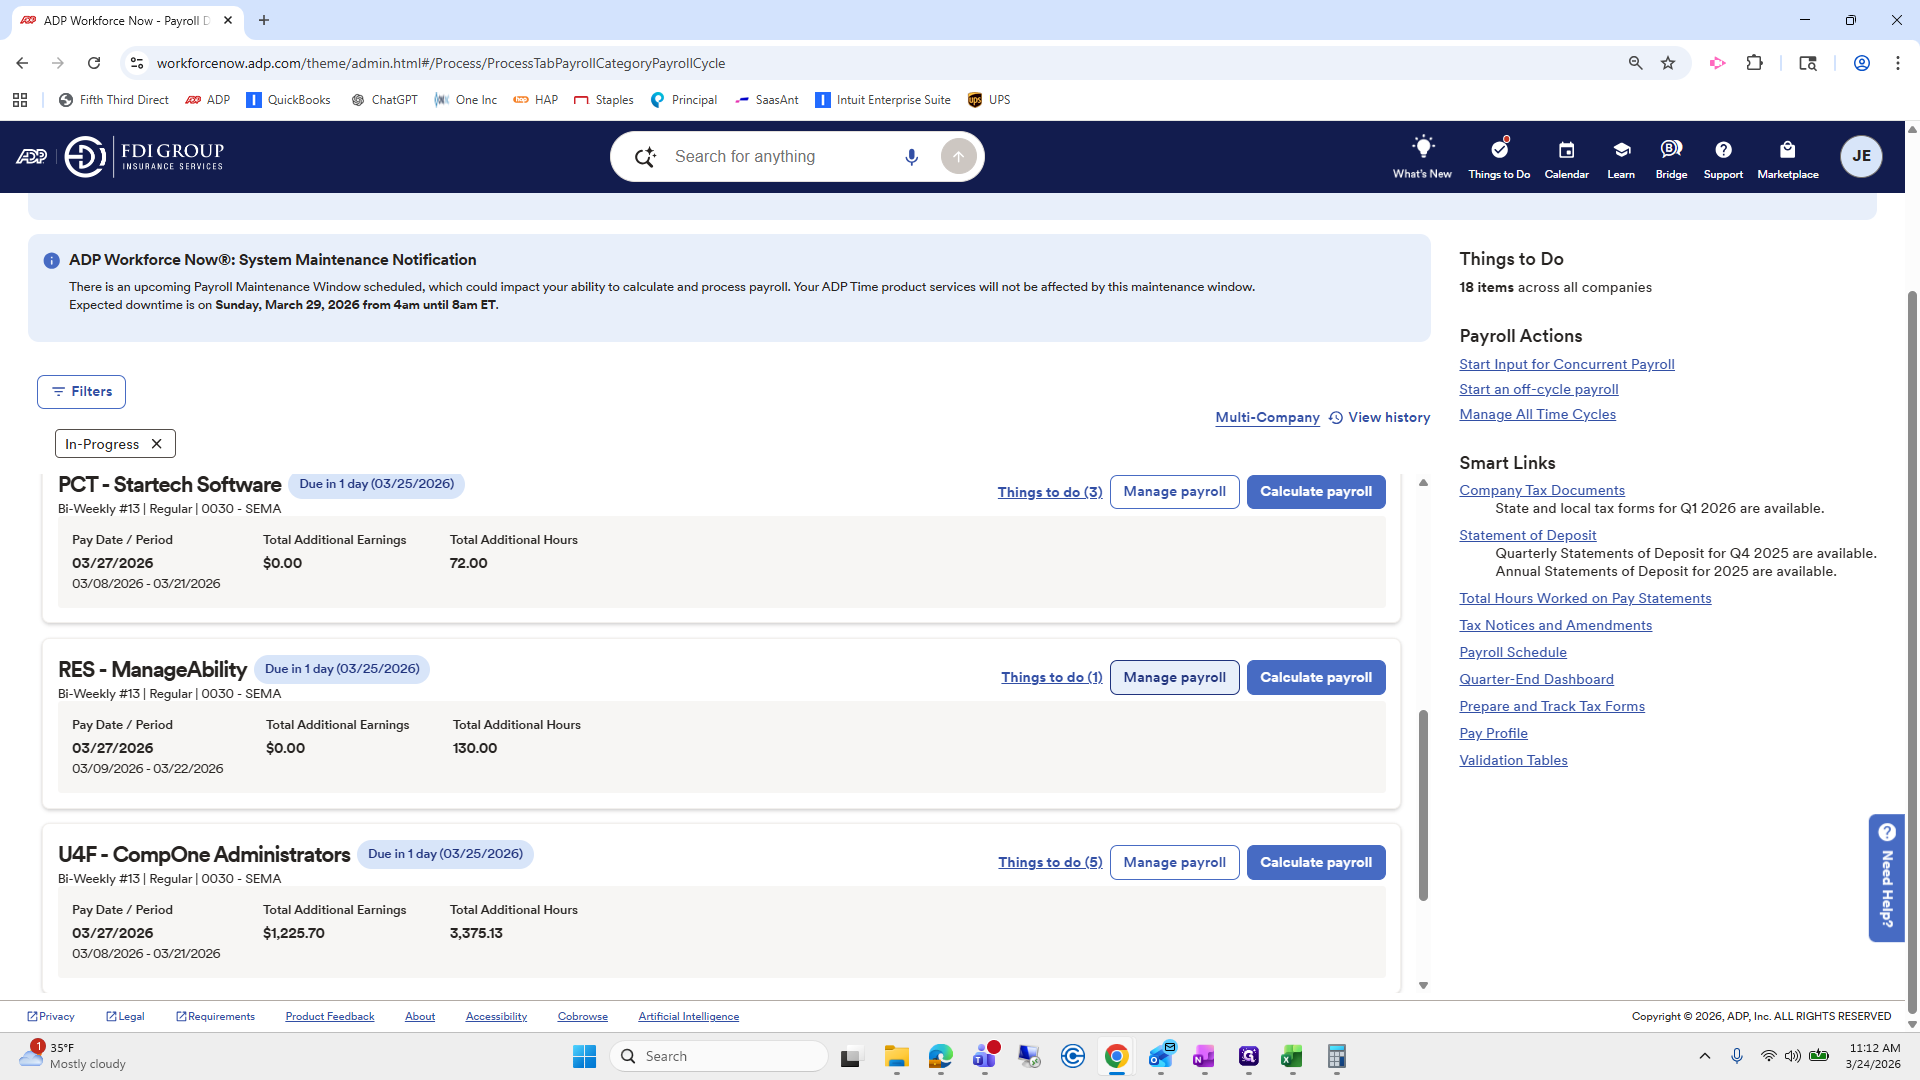
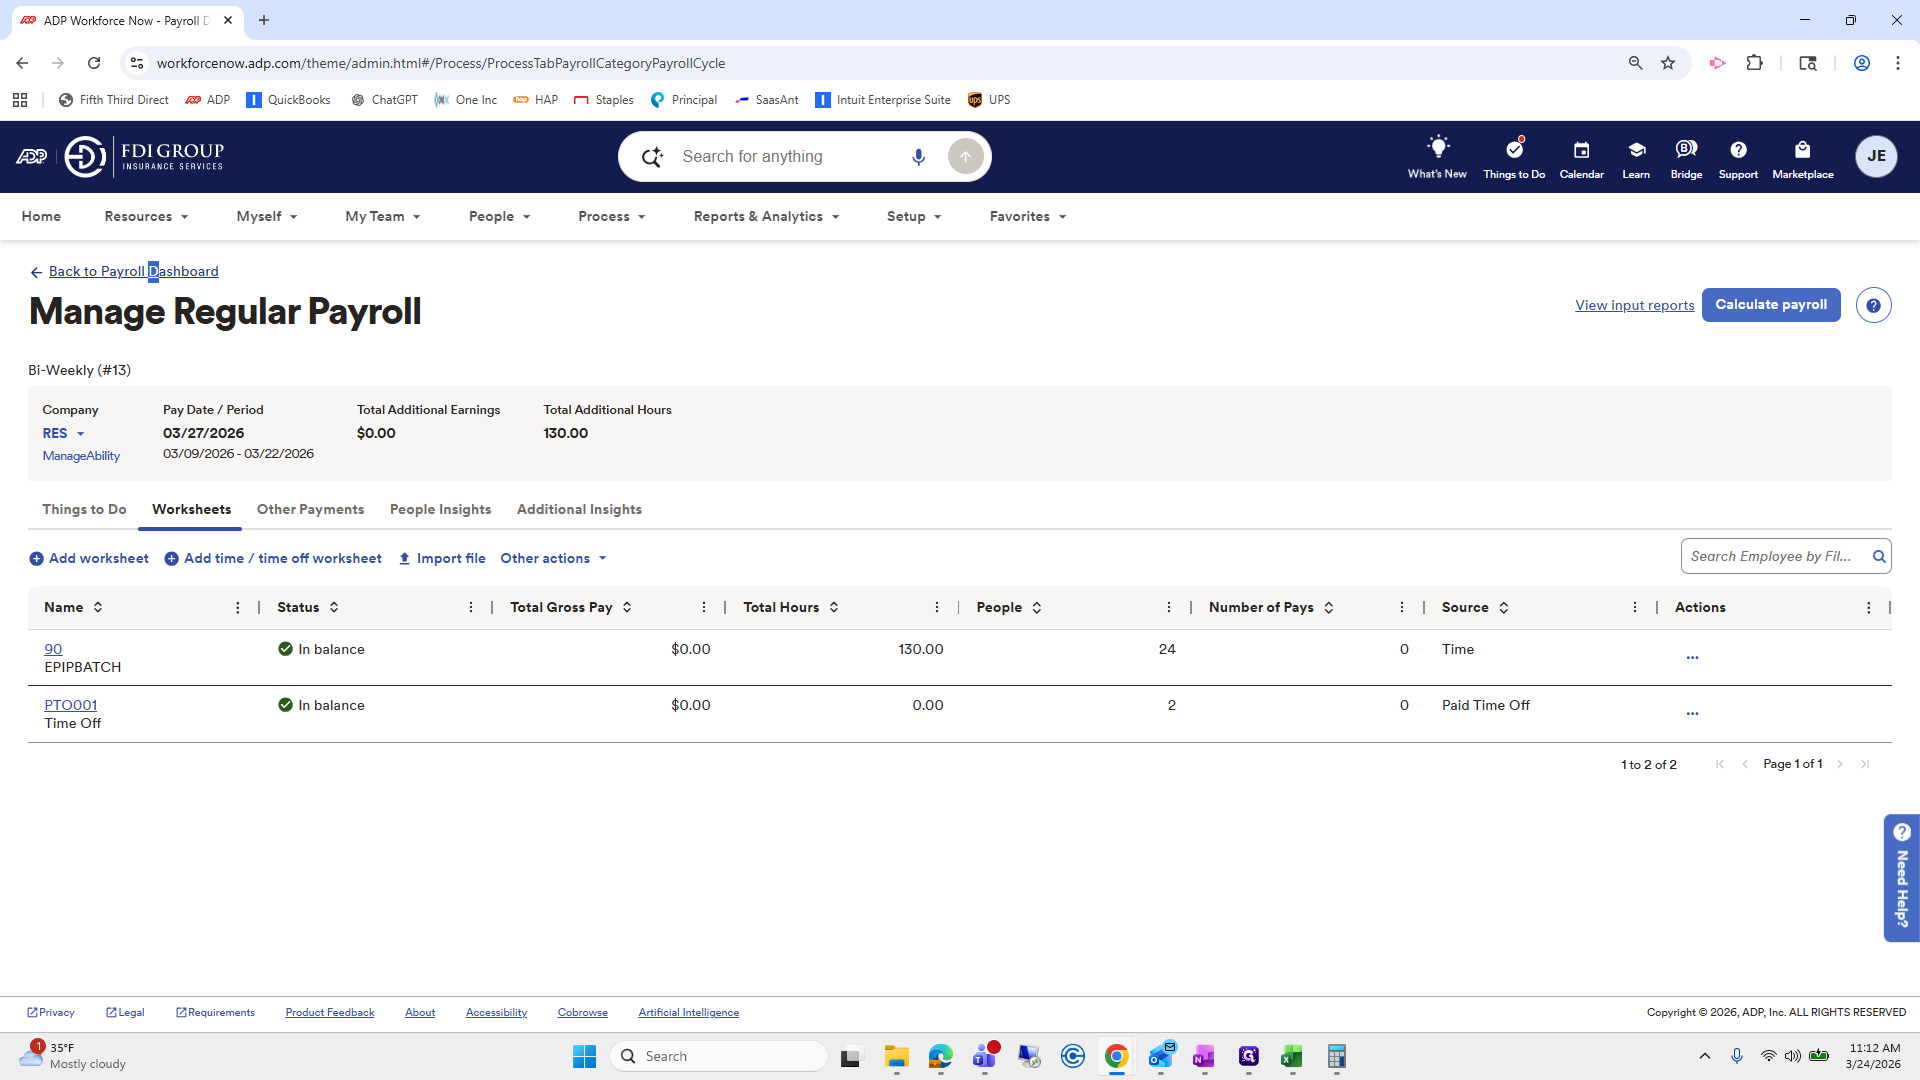
The next one we will do is Risikon. Go to Manage Payroll.
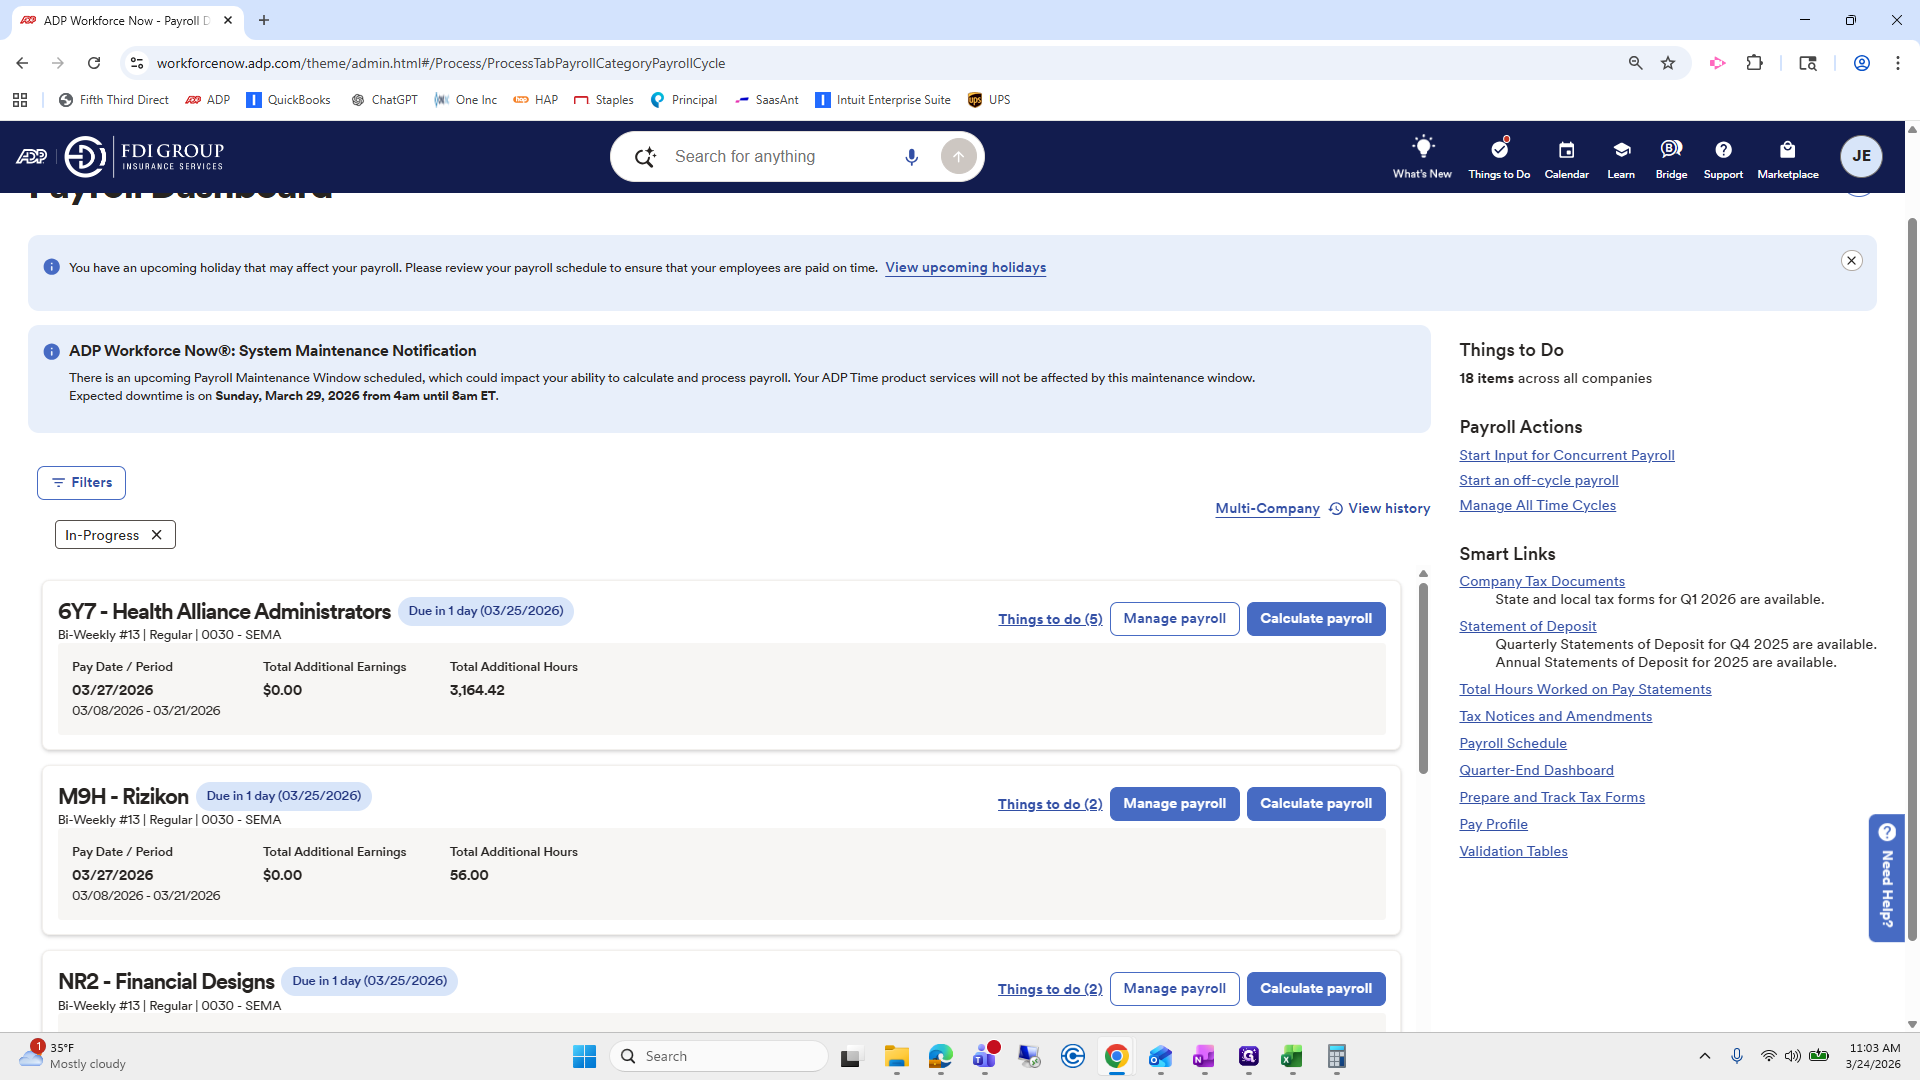
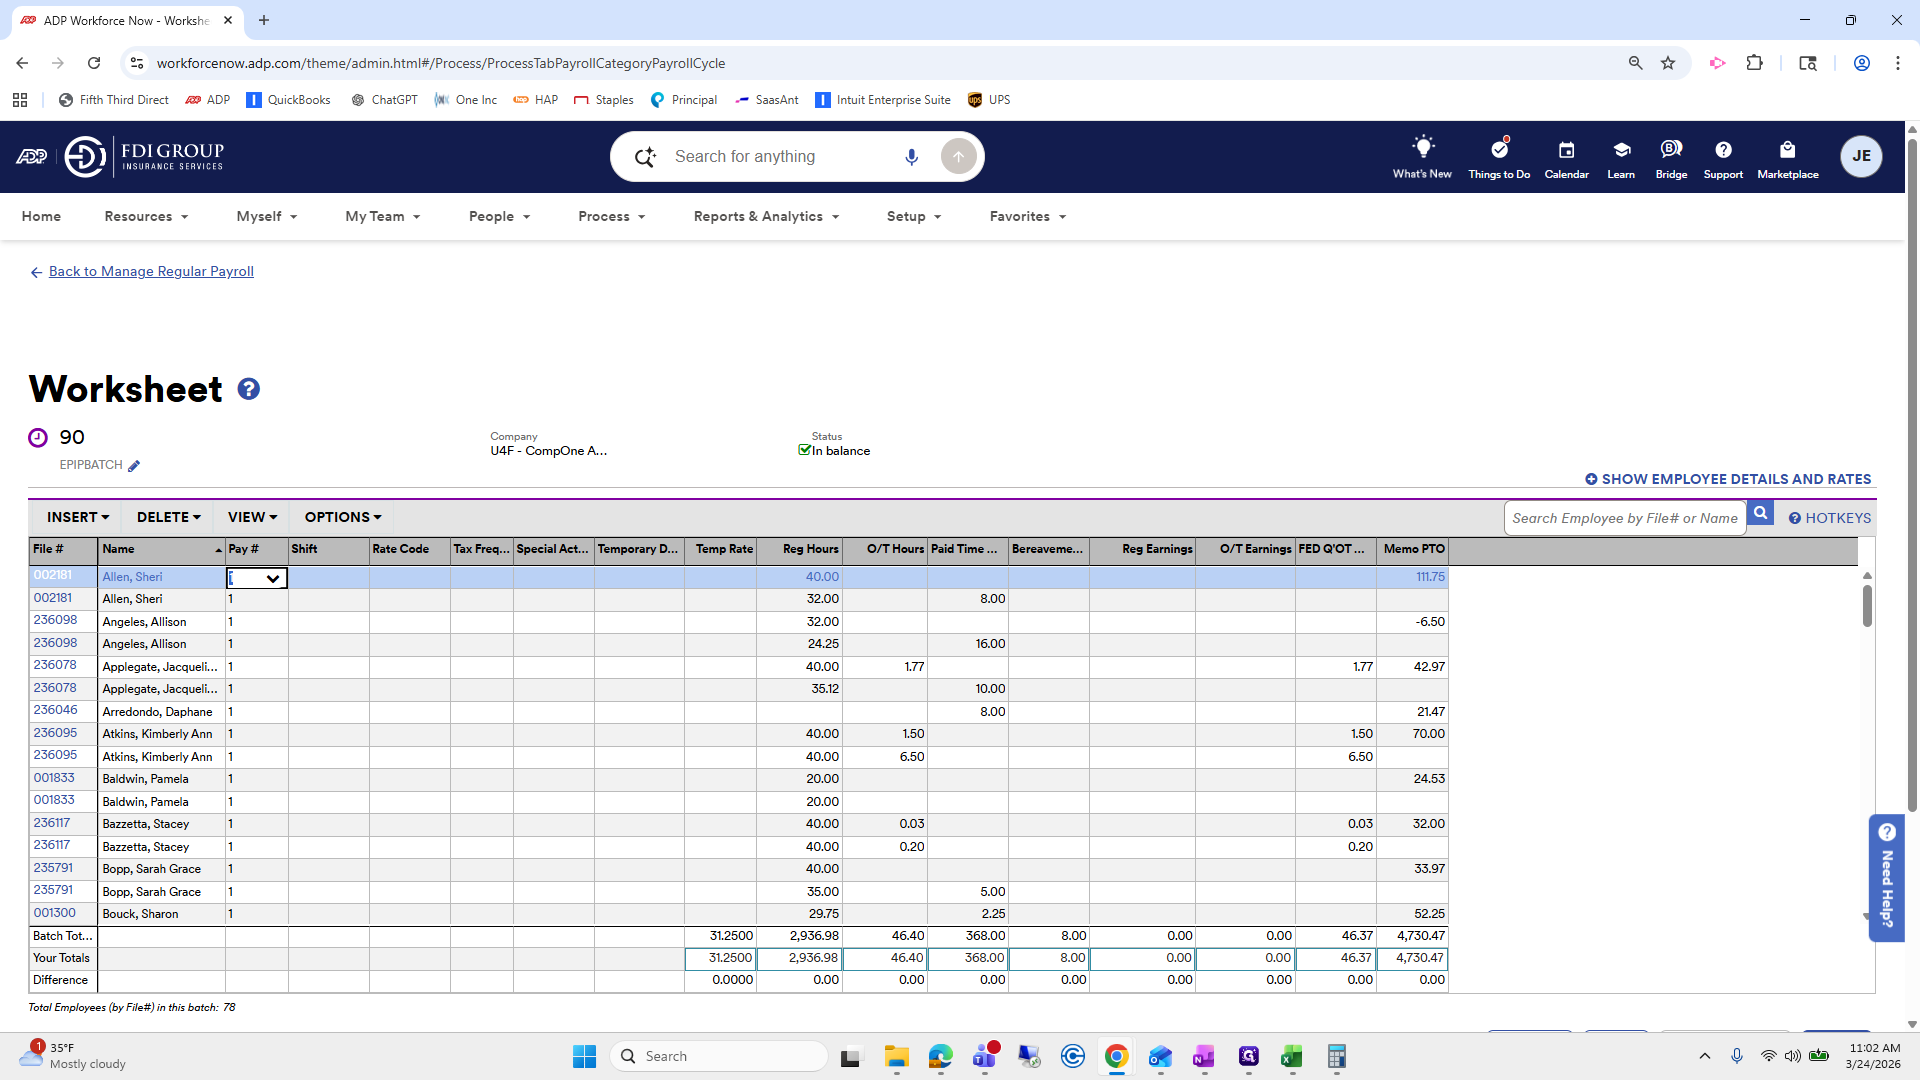
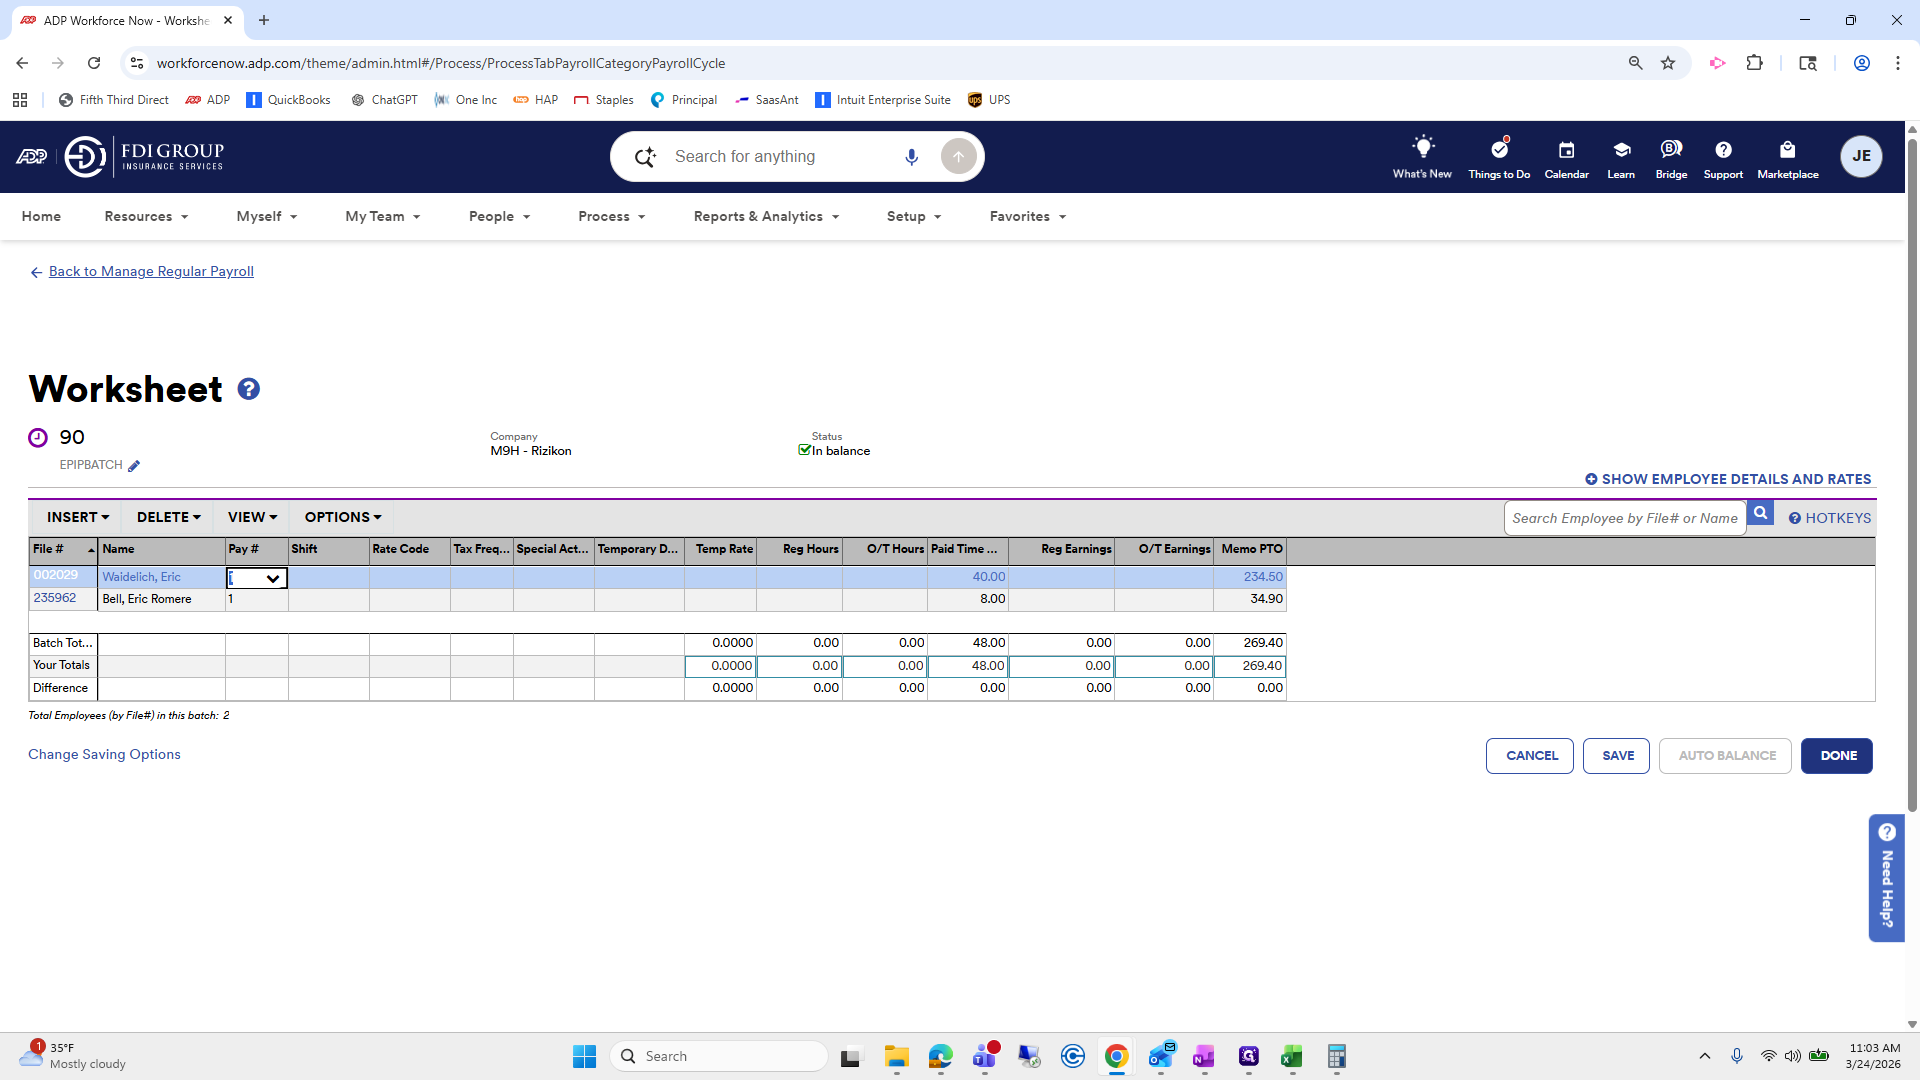
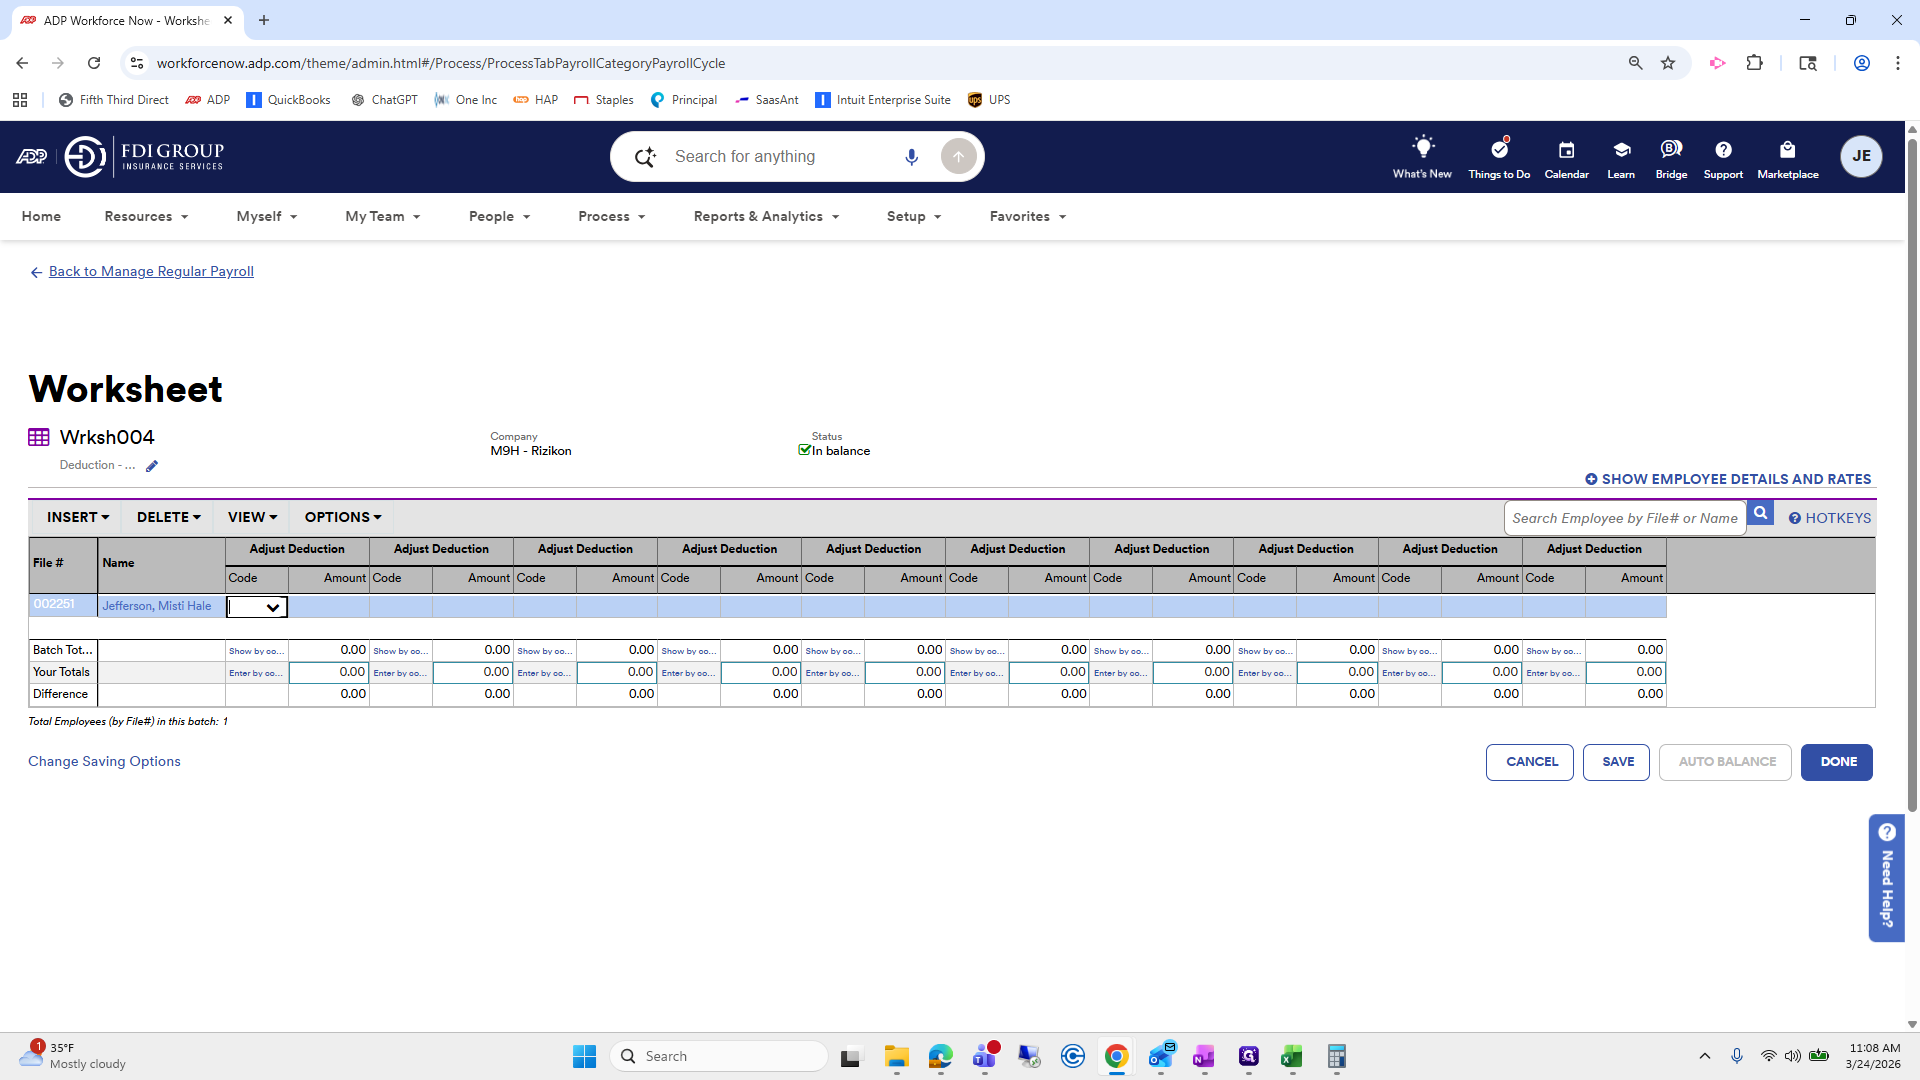
We will go to our worksheet and look at Risikon.

There is one here.
I will highlight it in yellow.
All right.
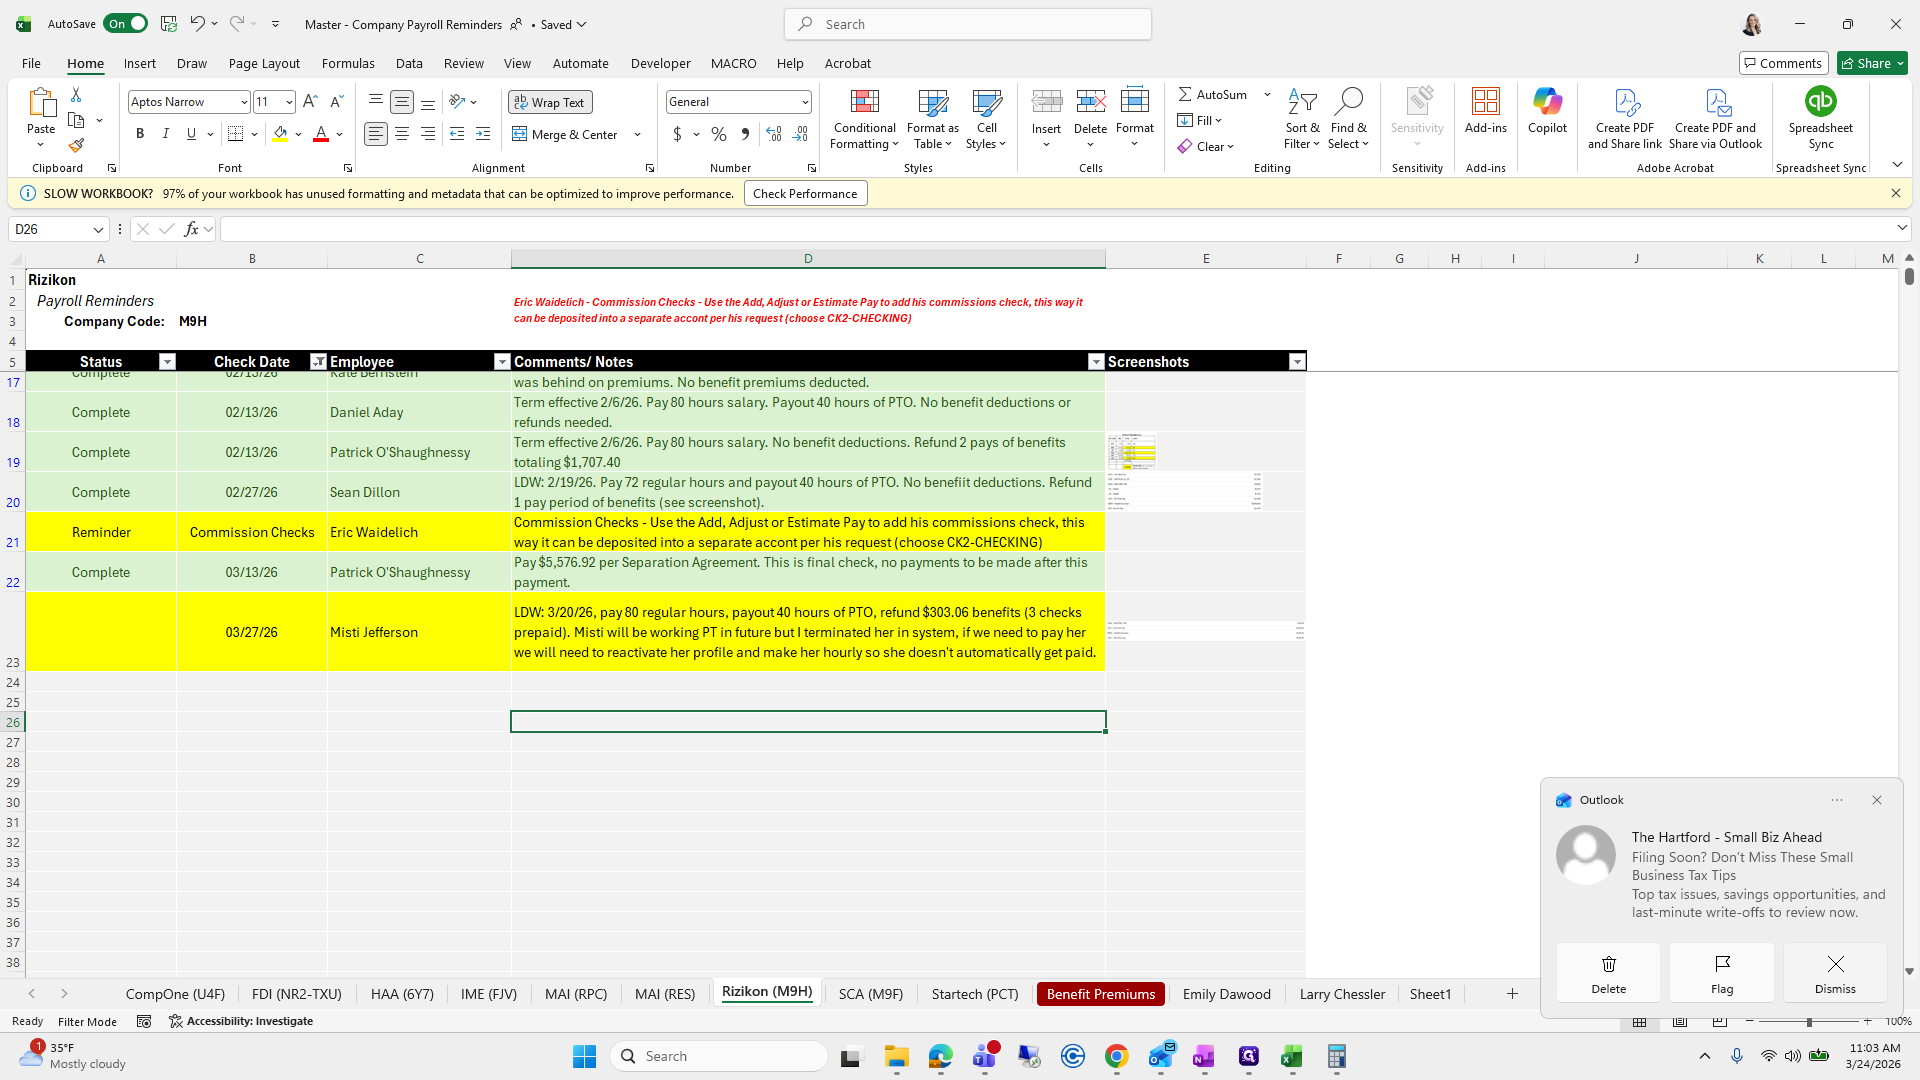
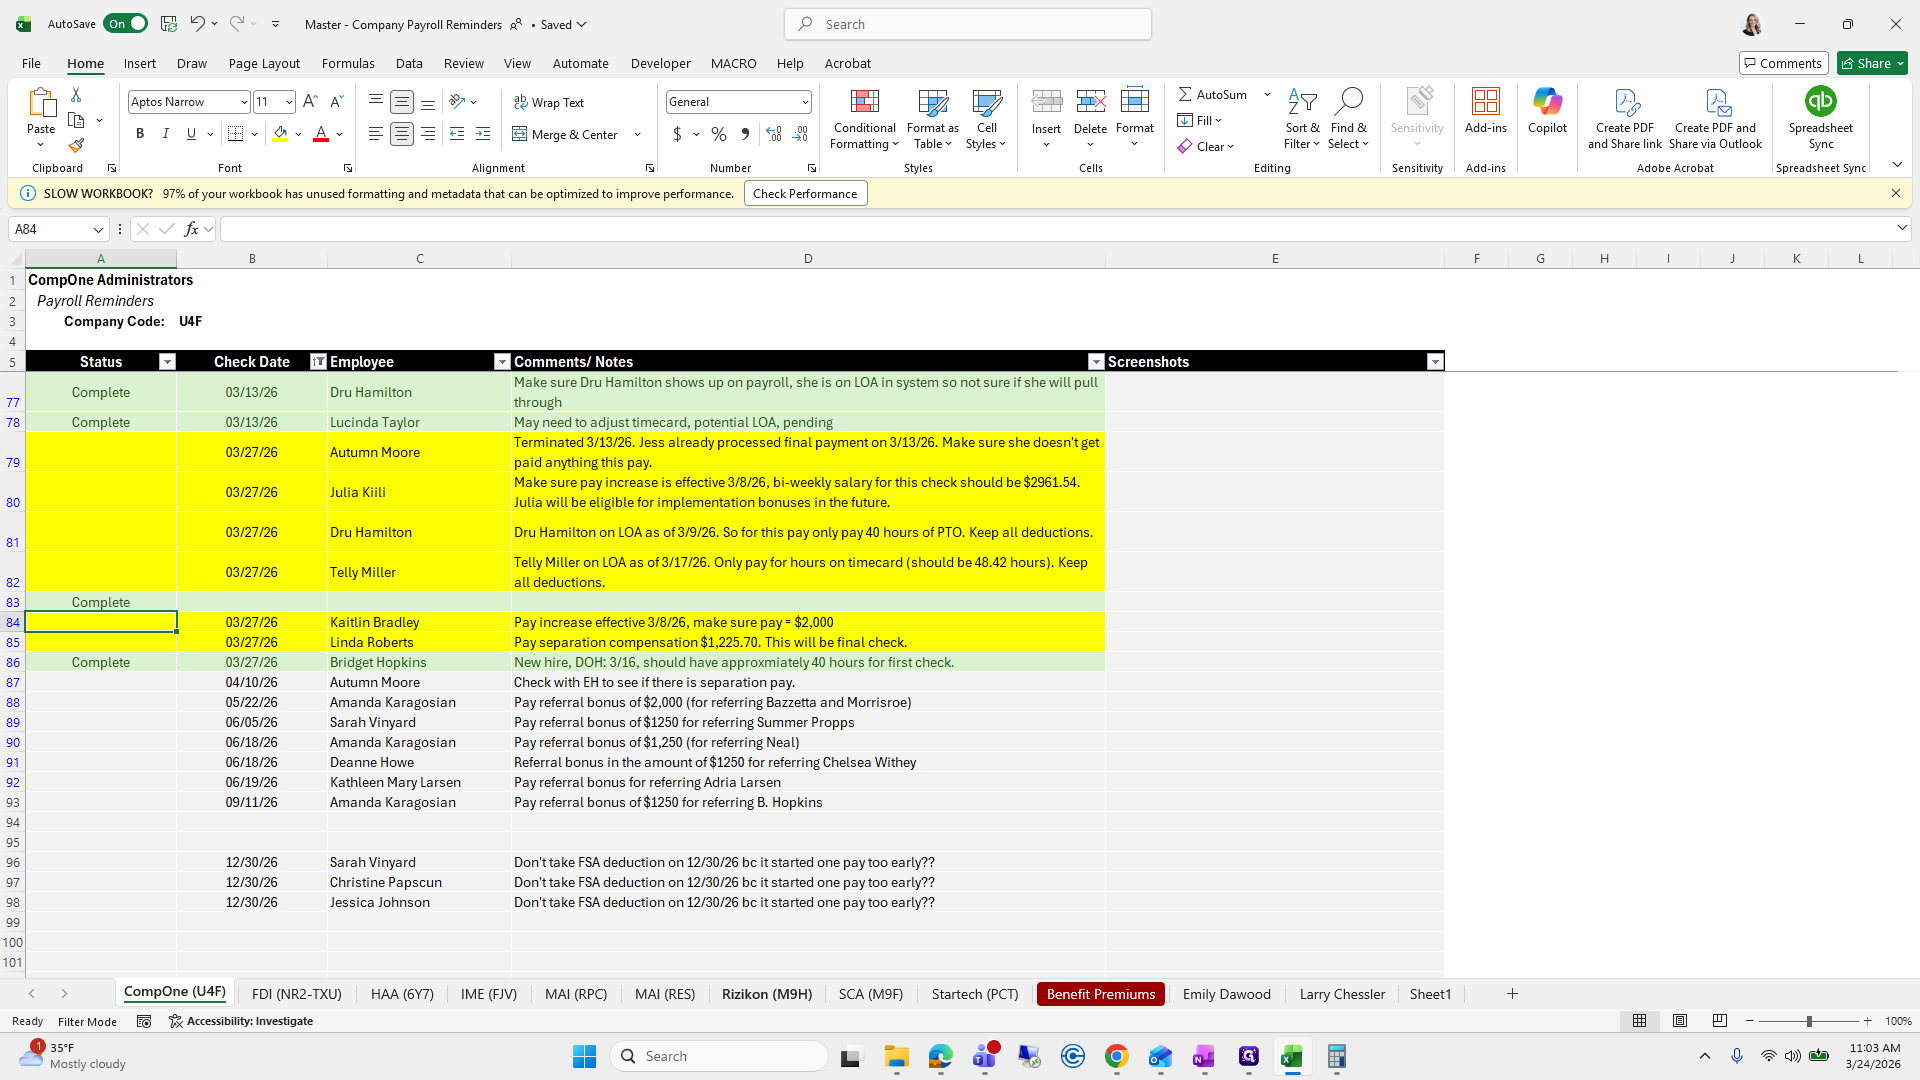
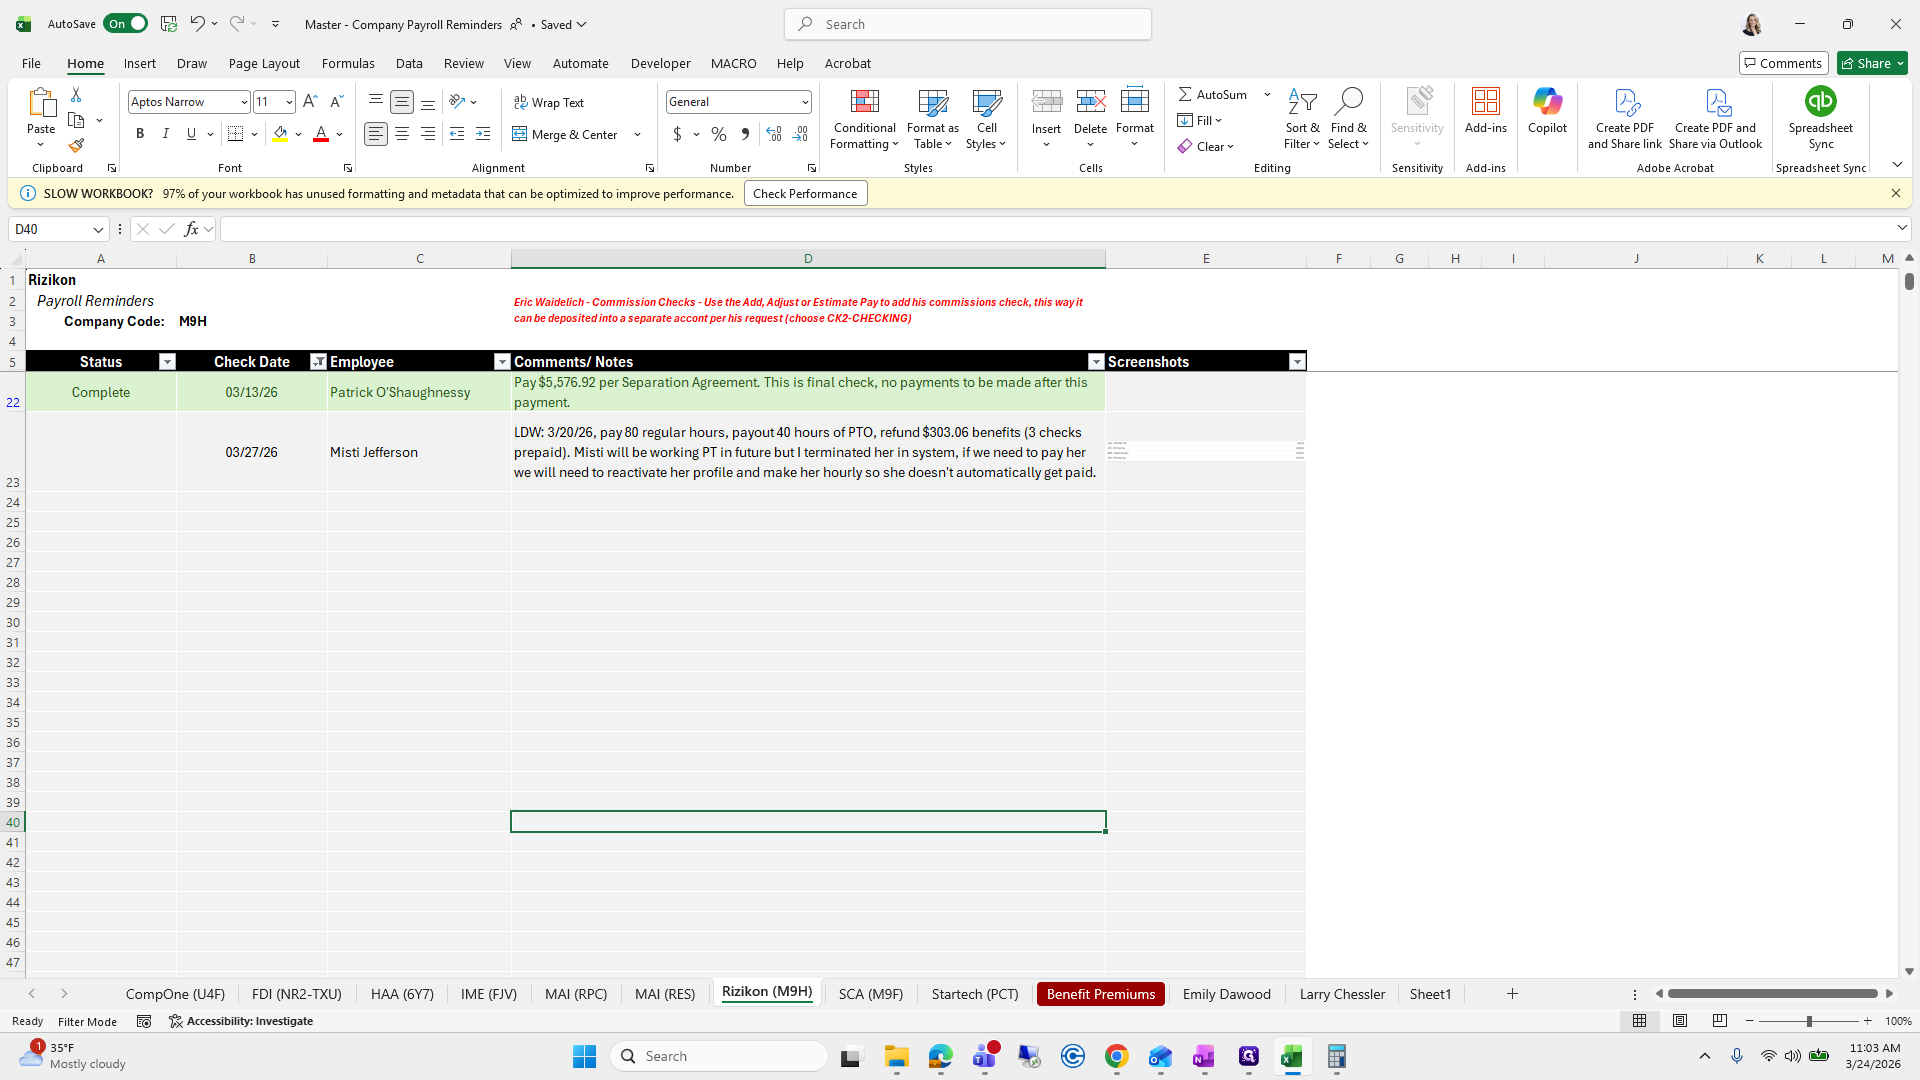
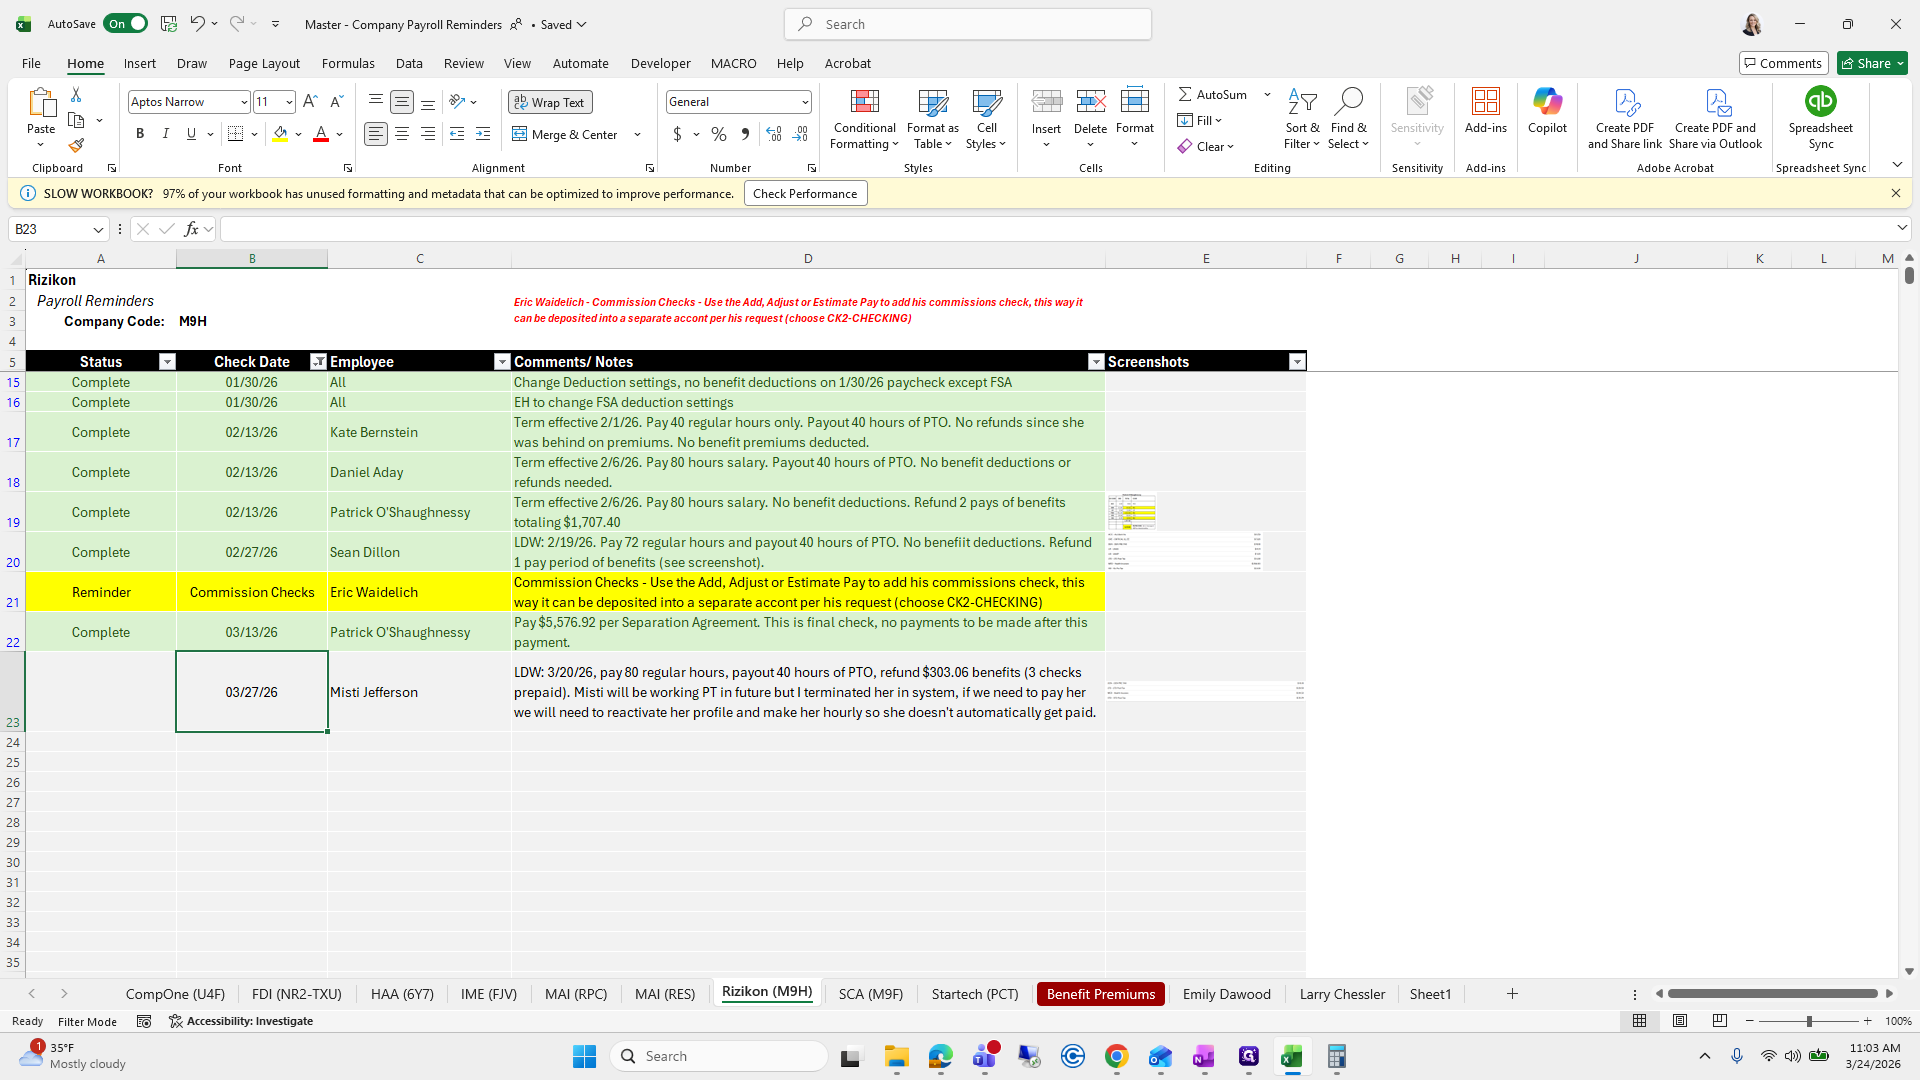
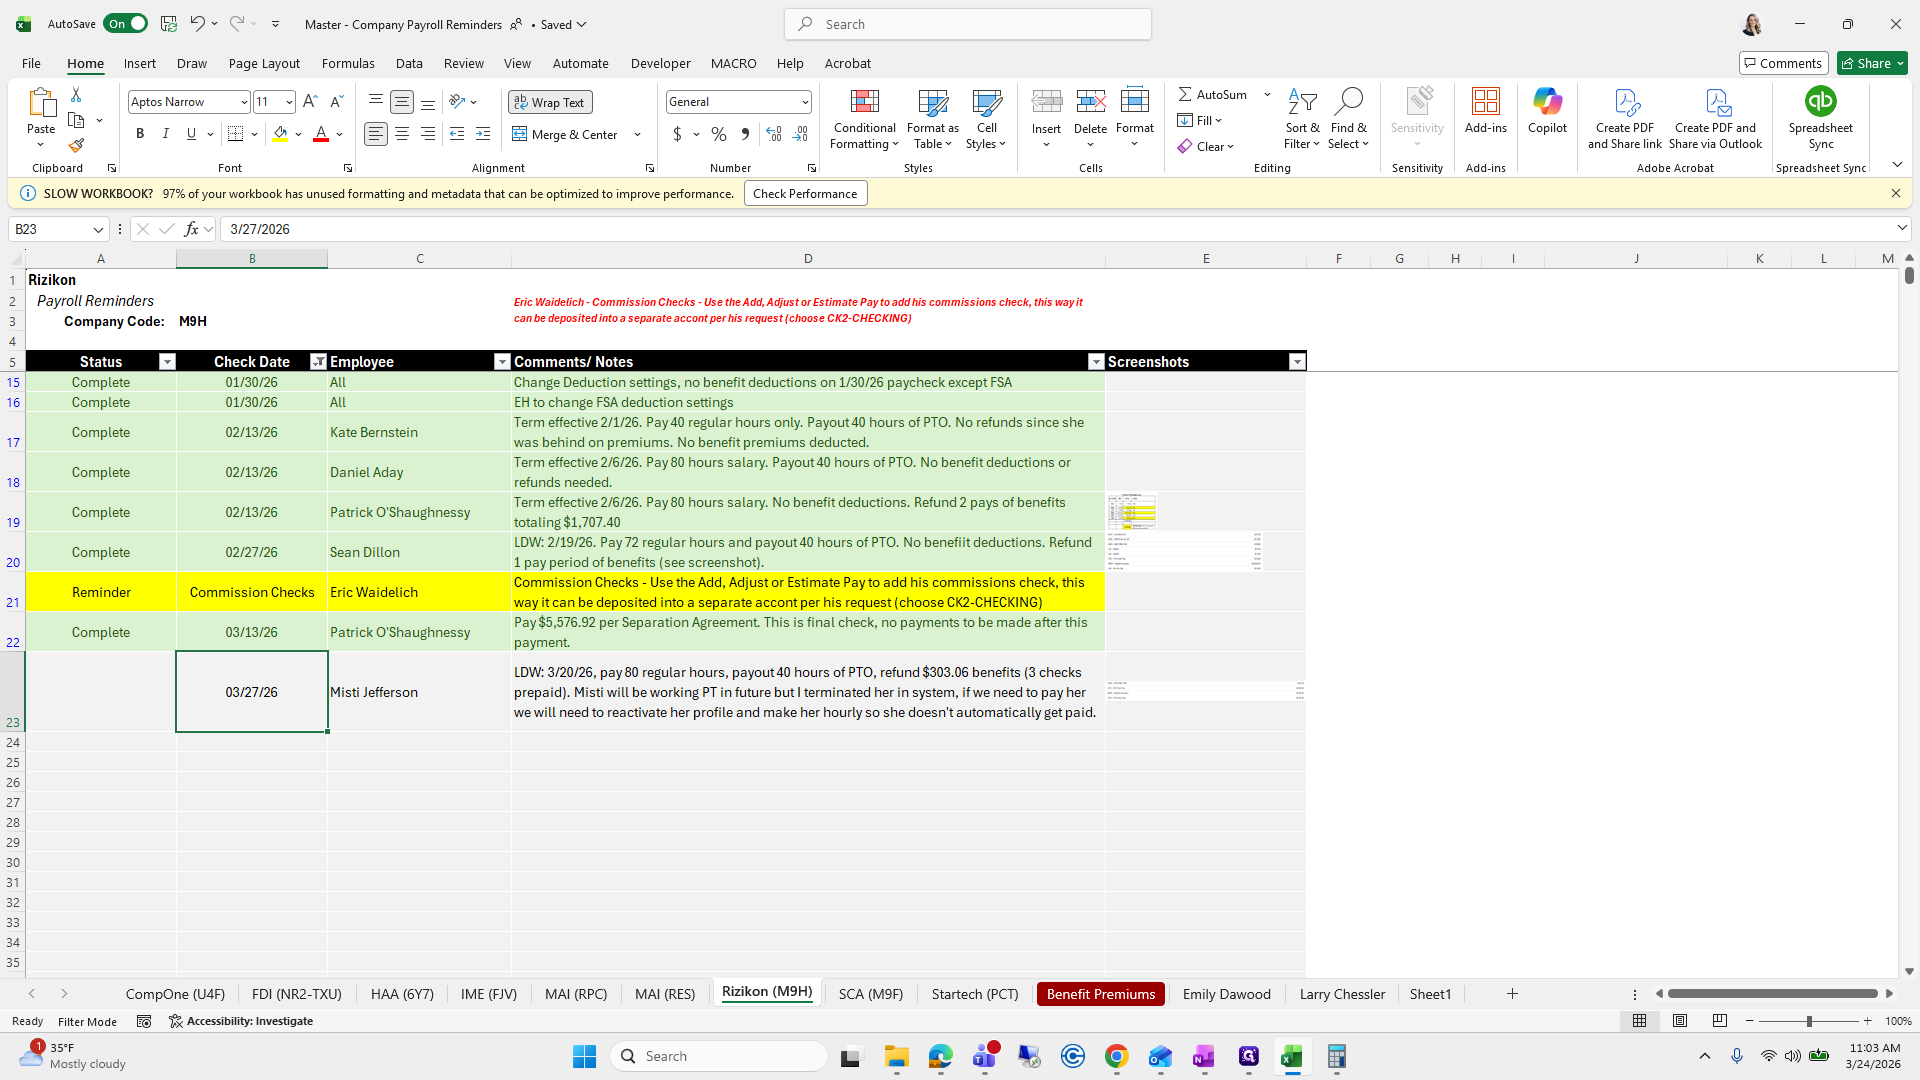
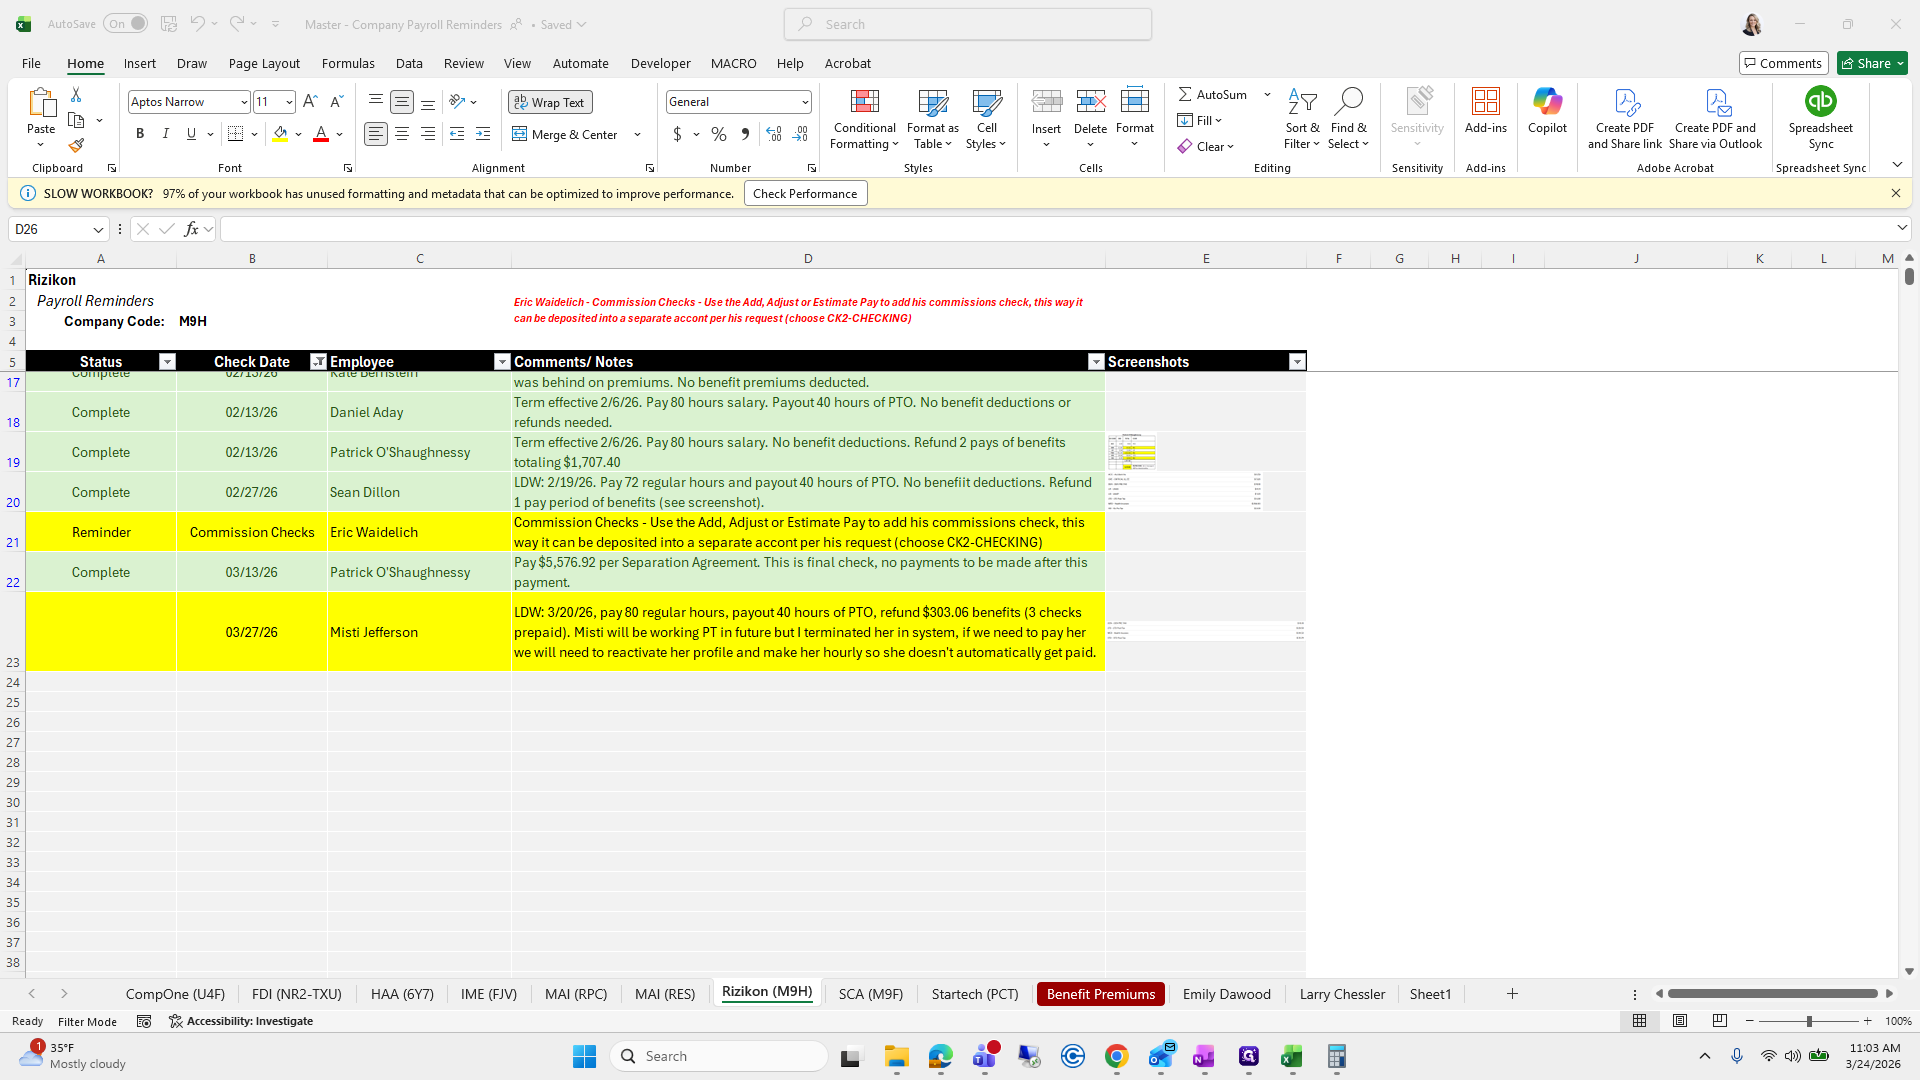
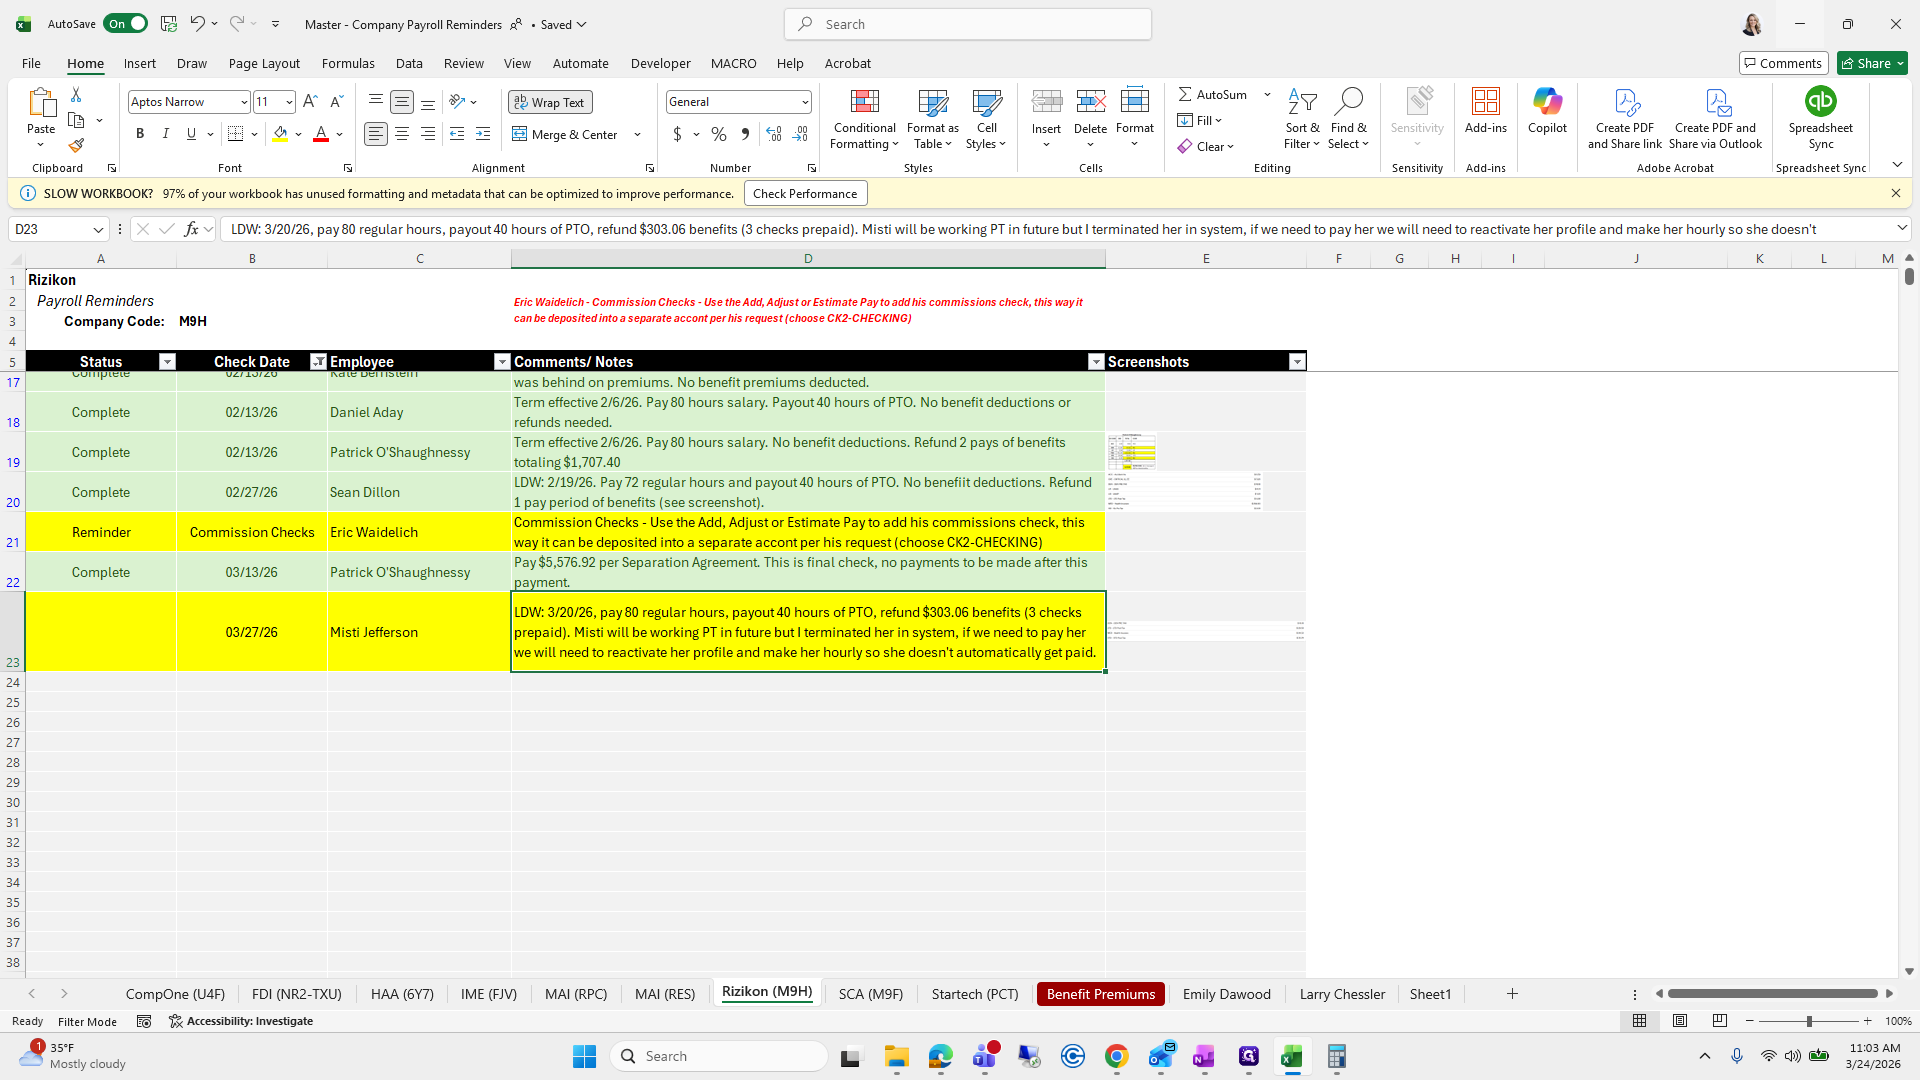
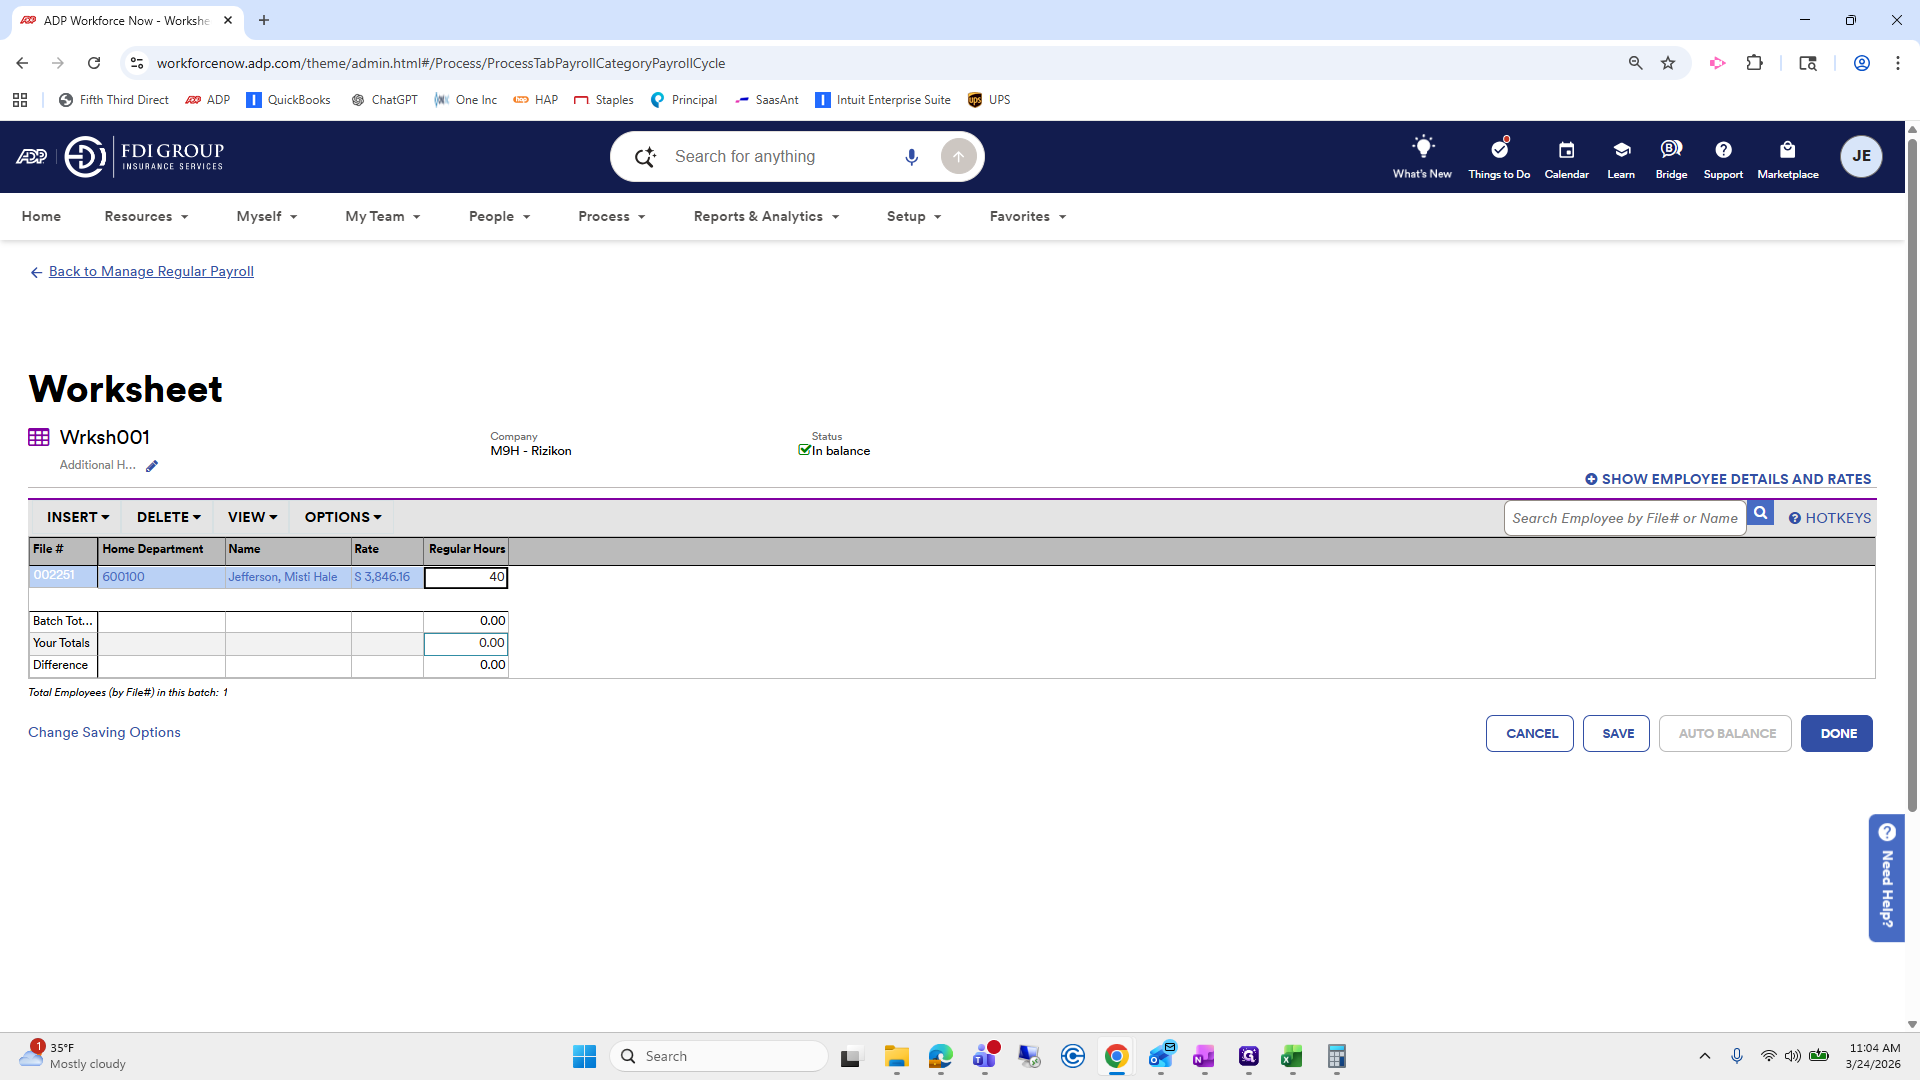
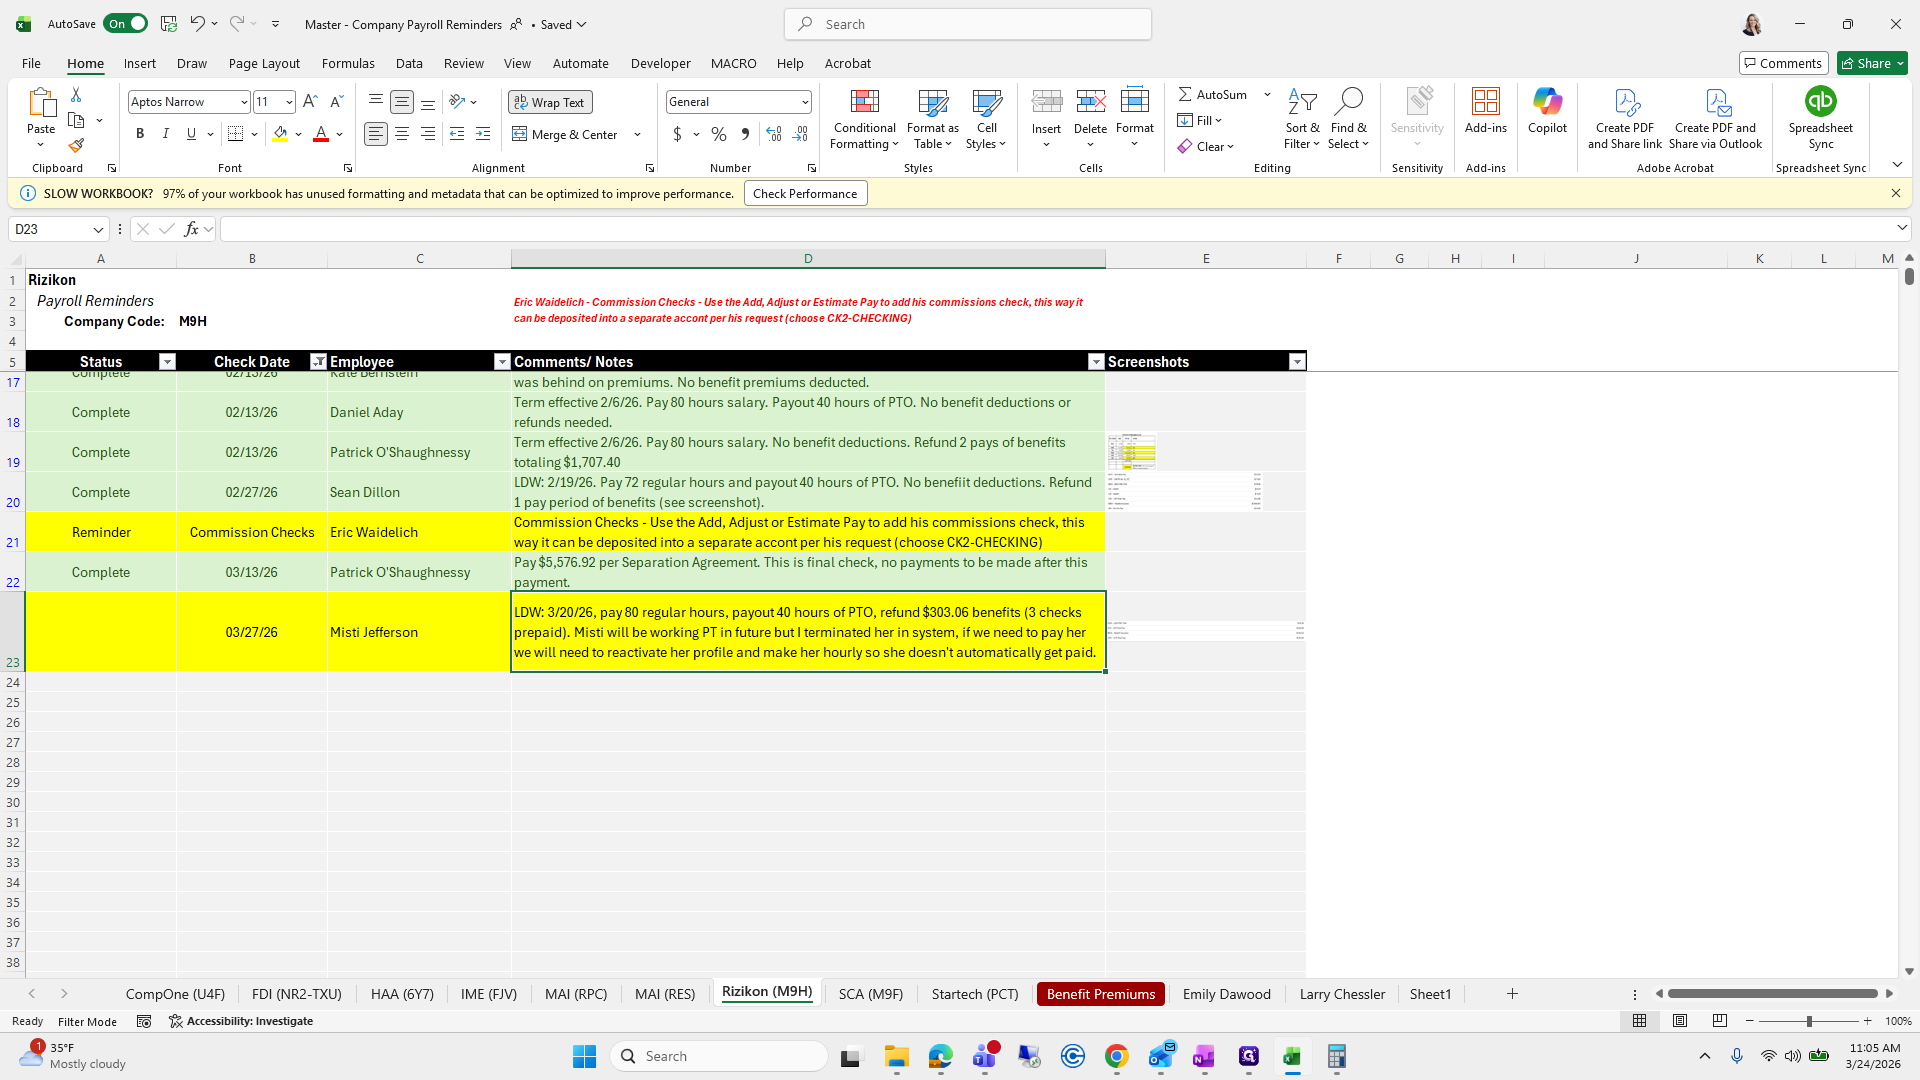
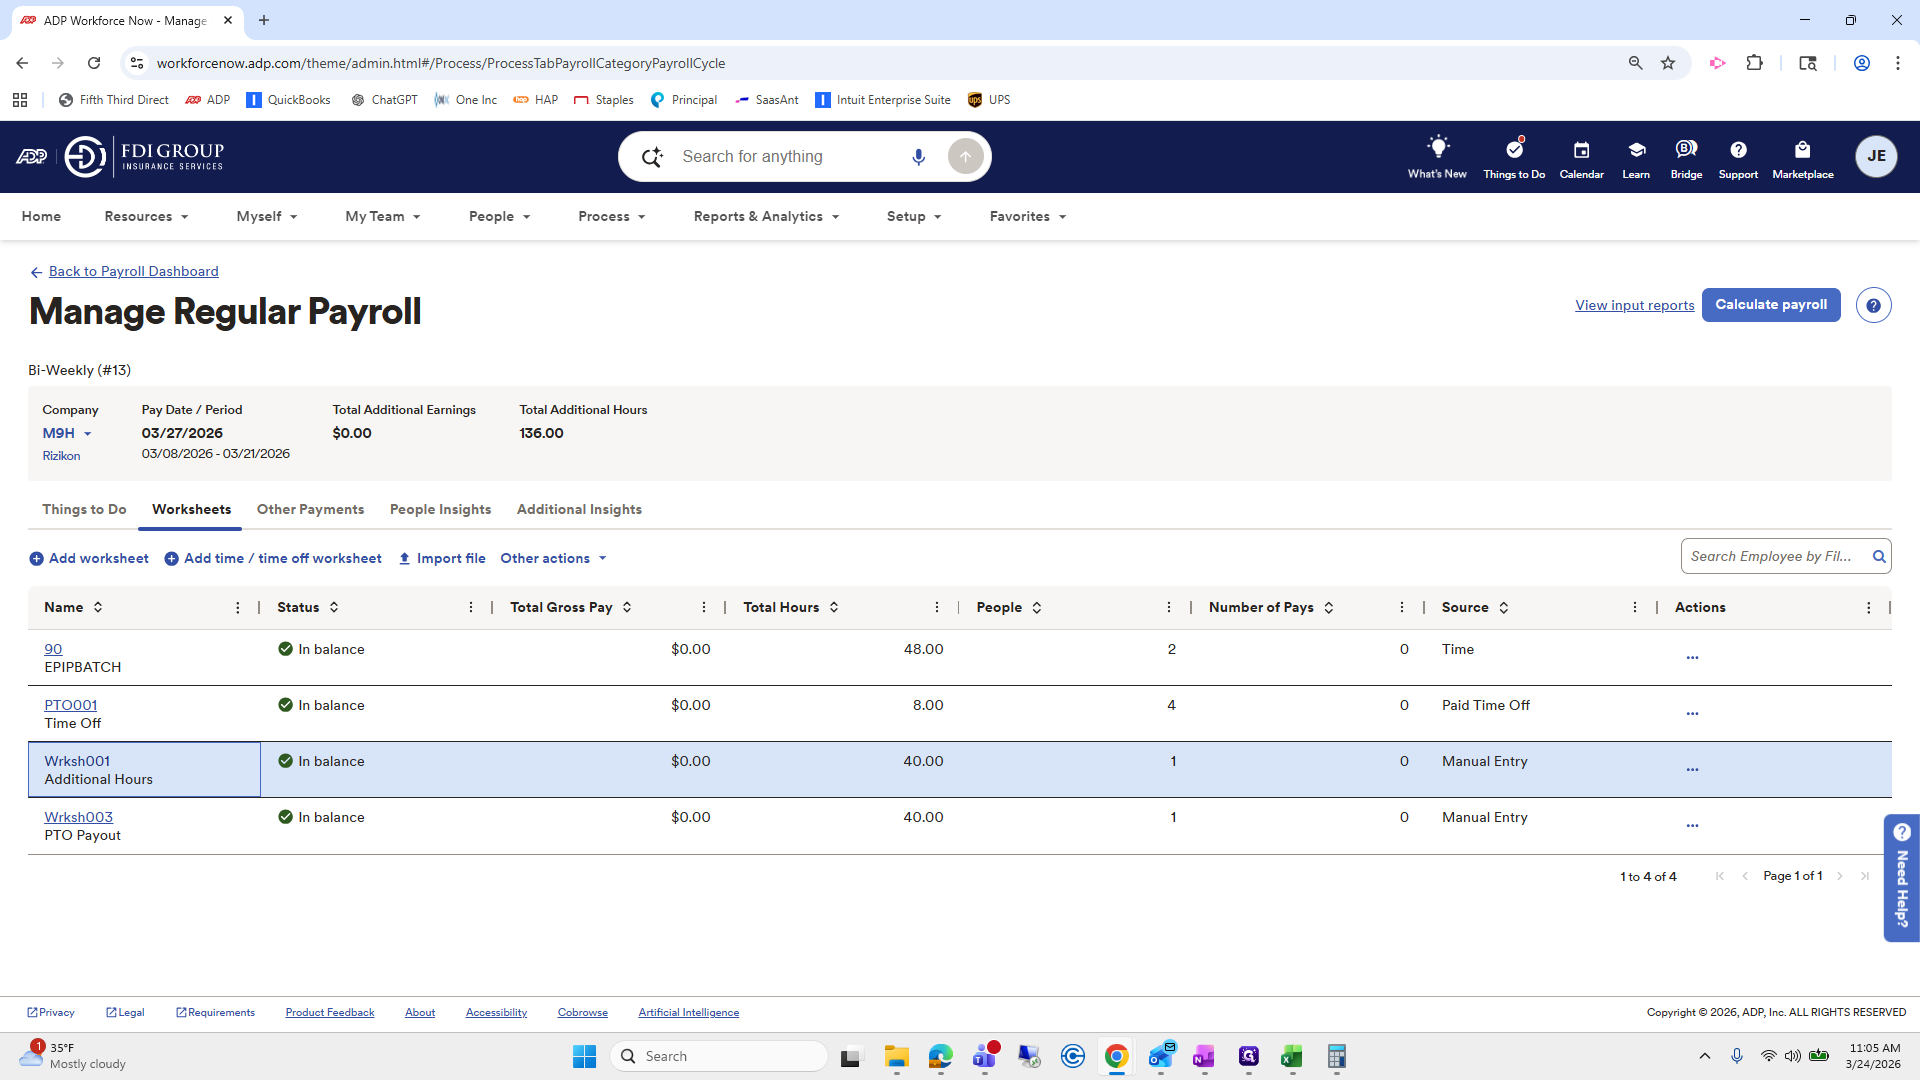
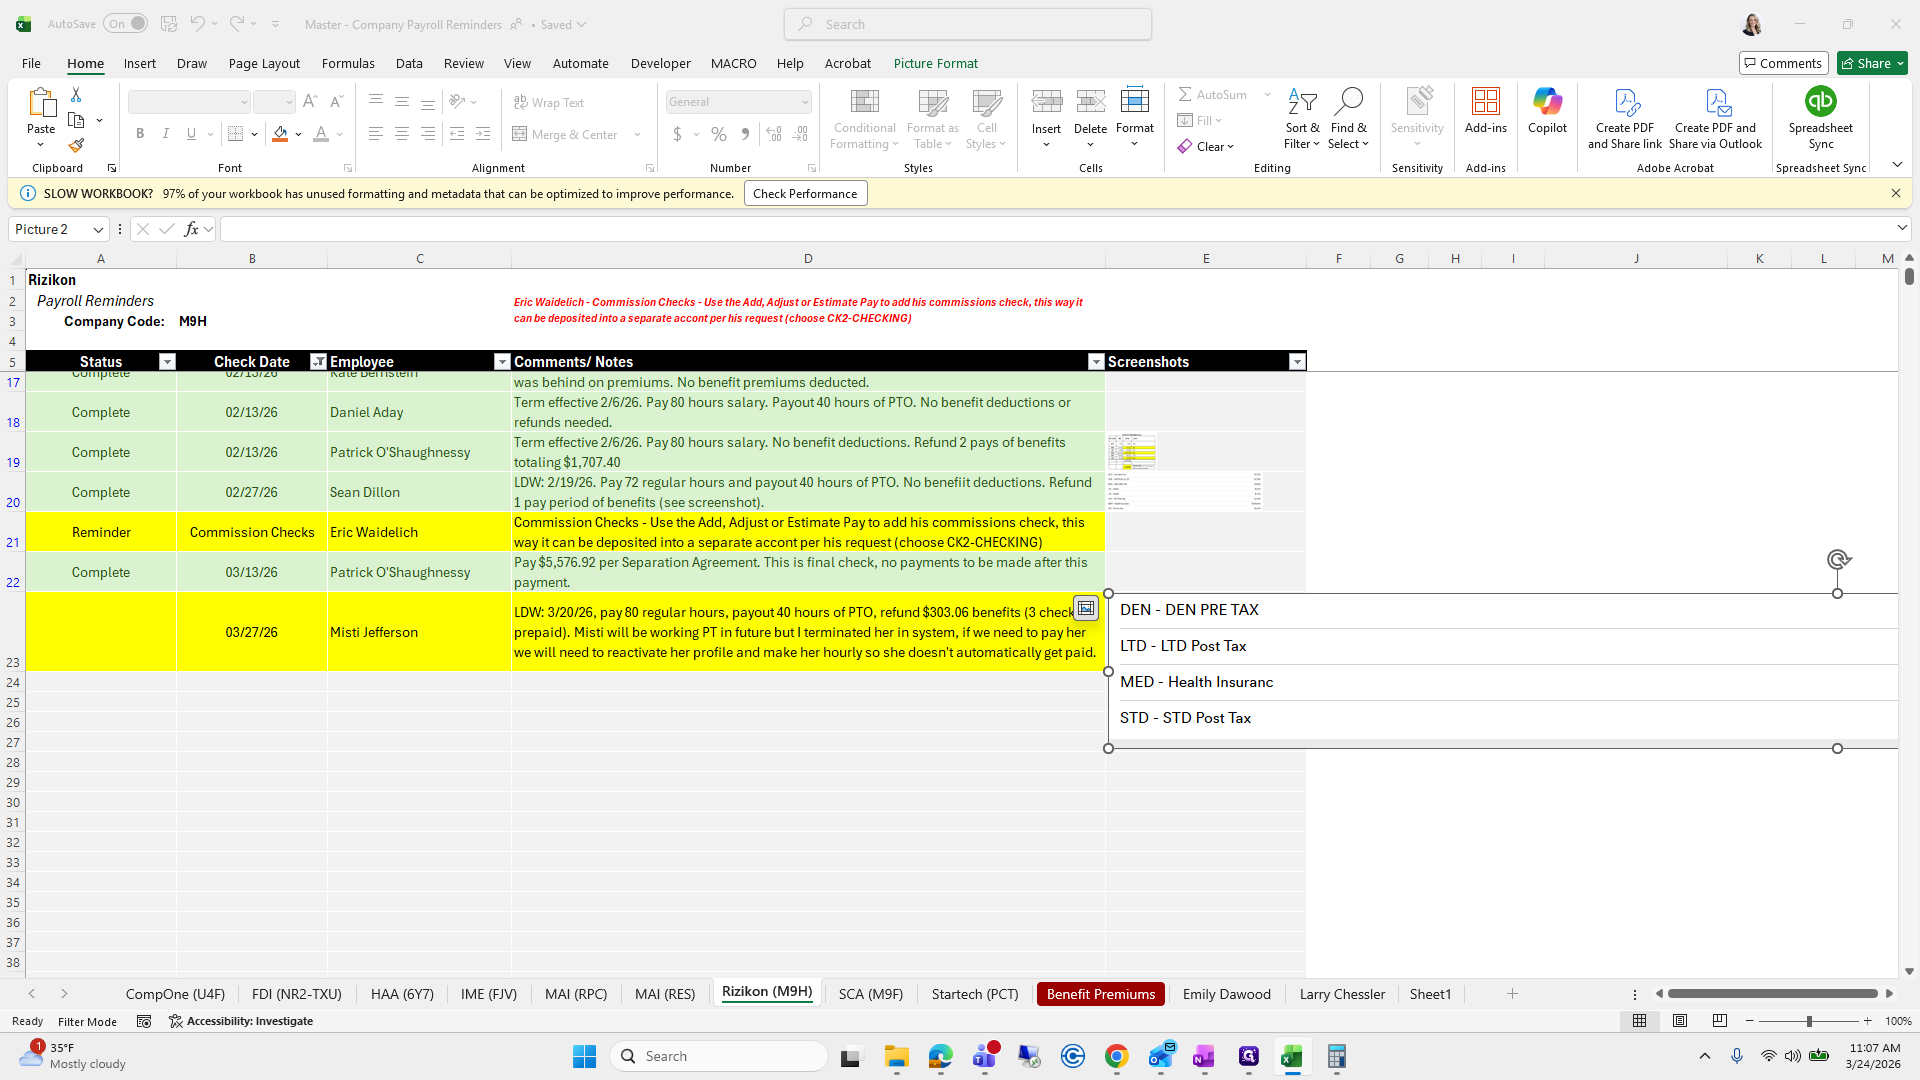
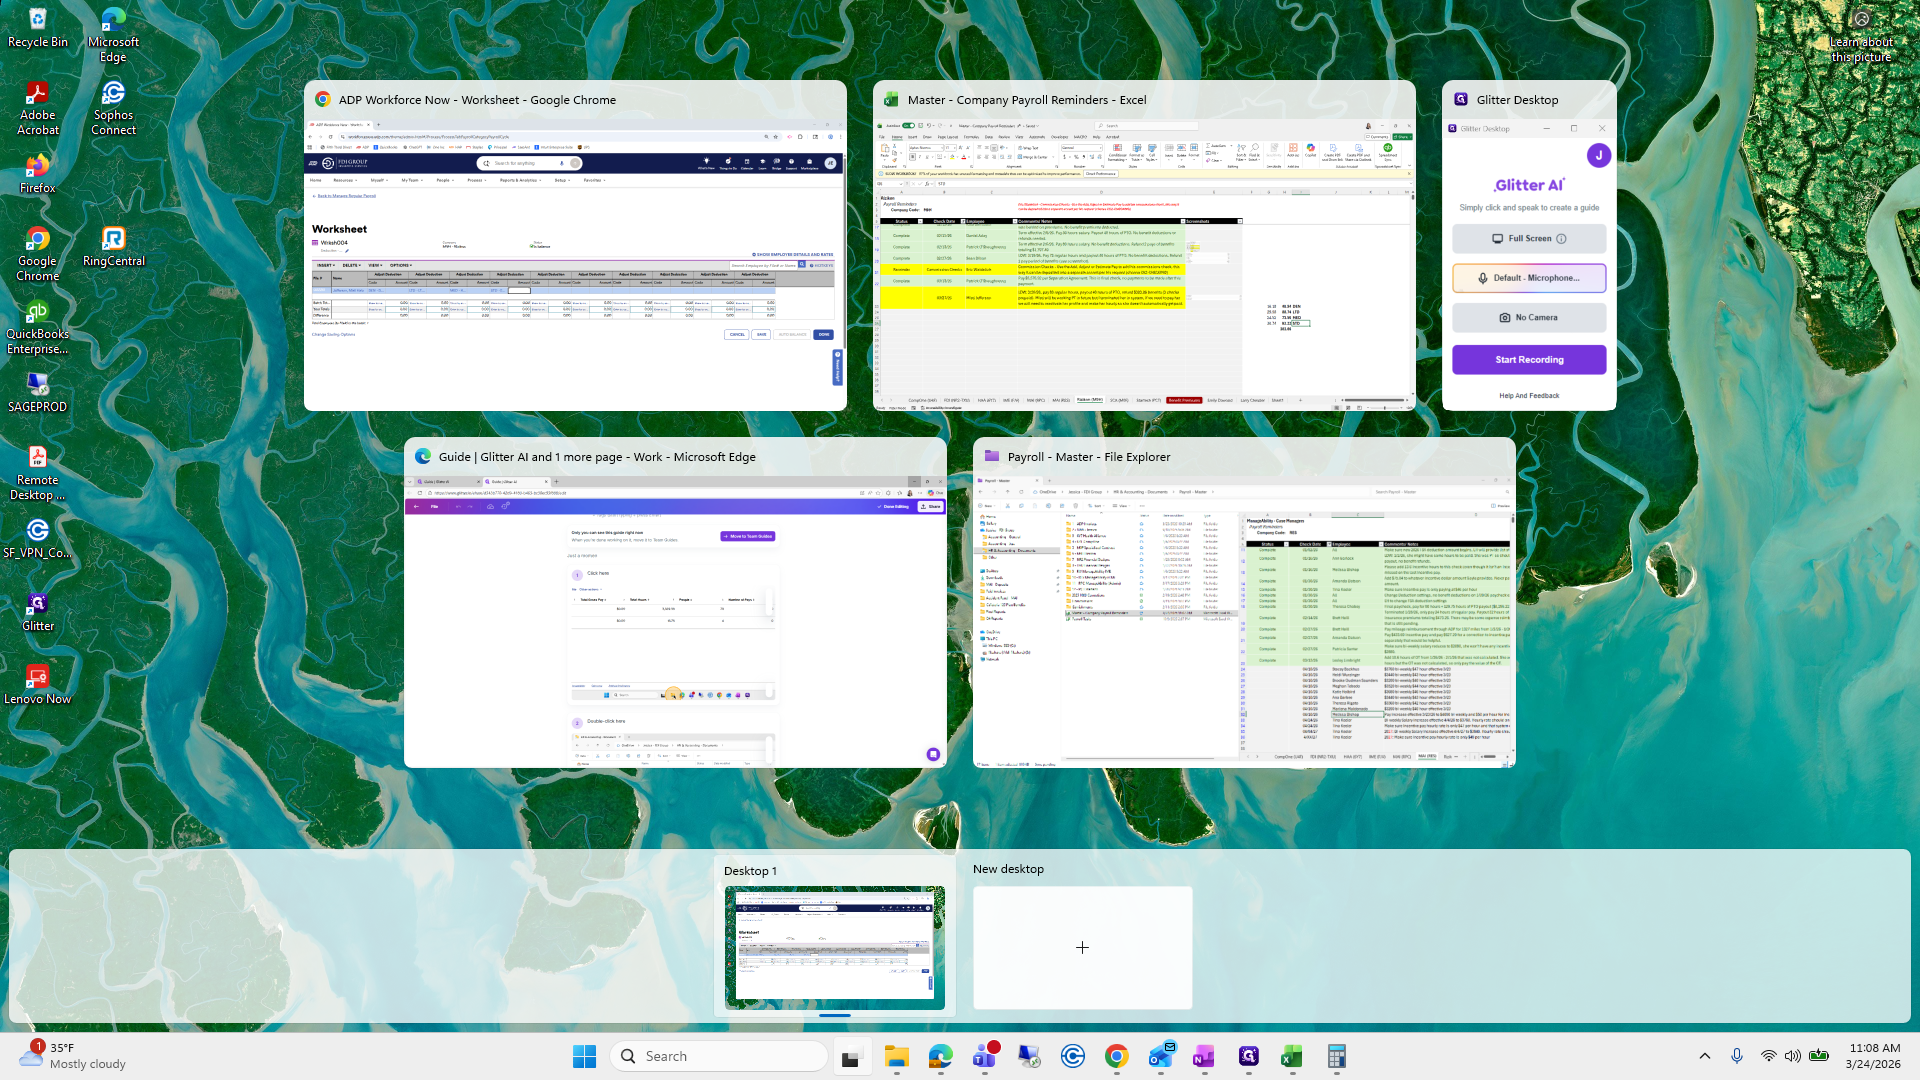
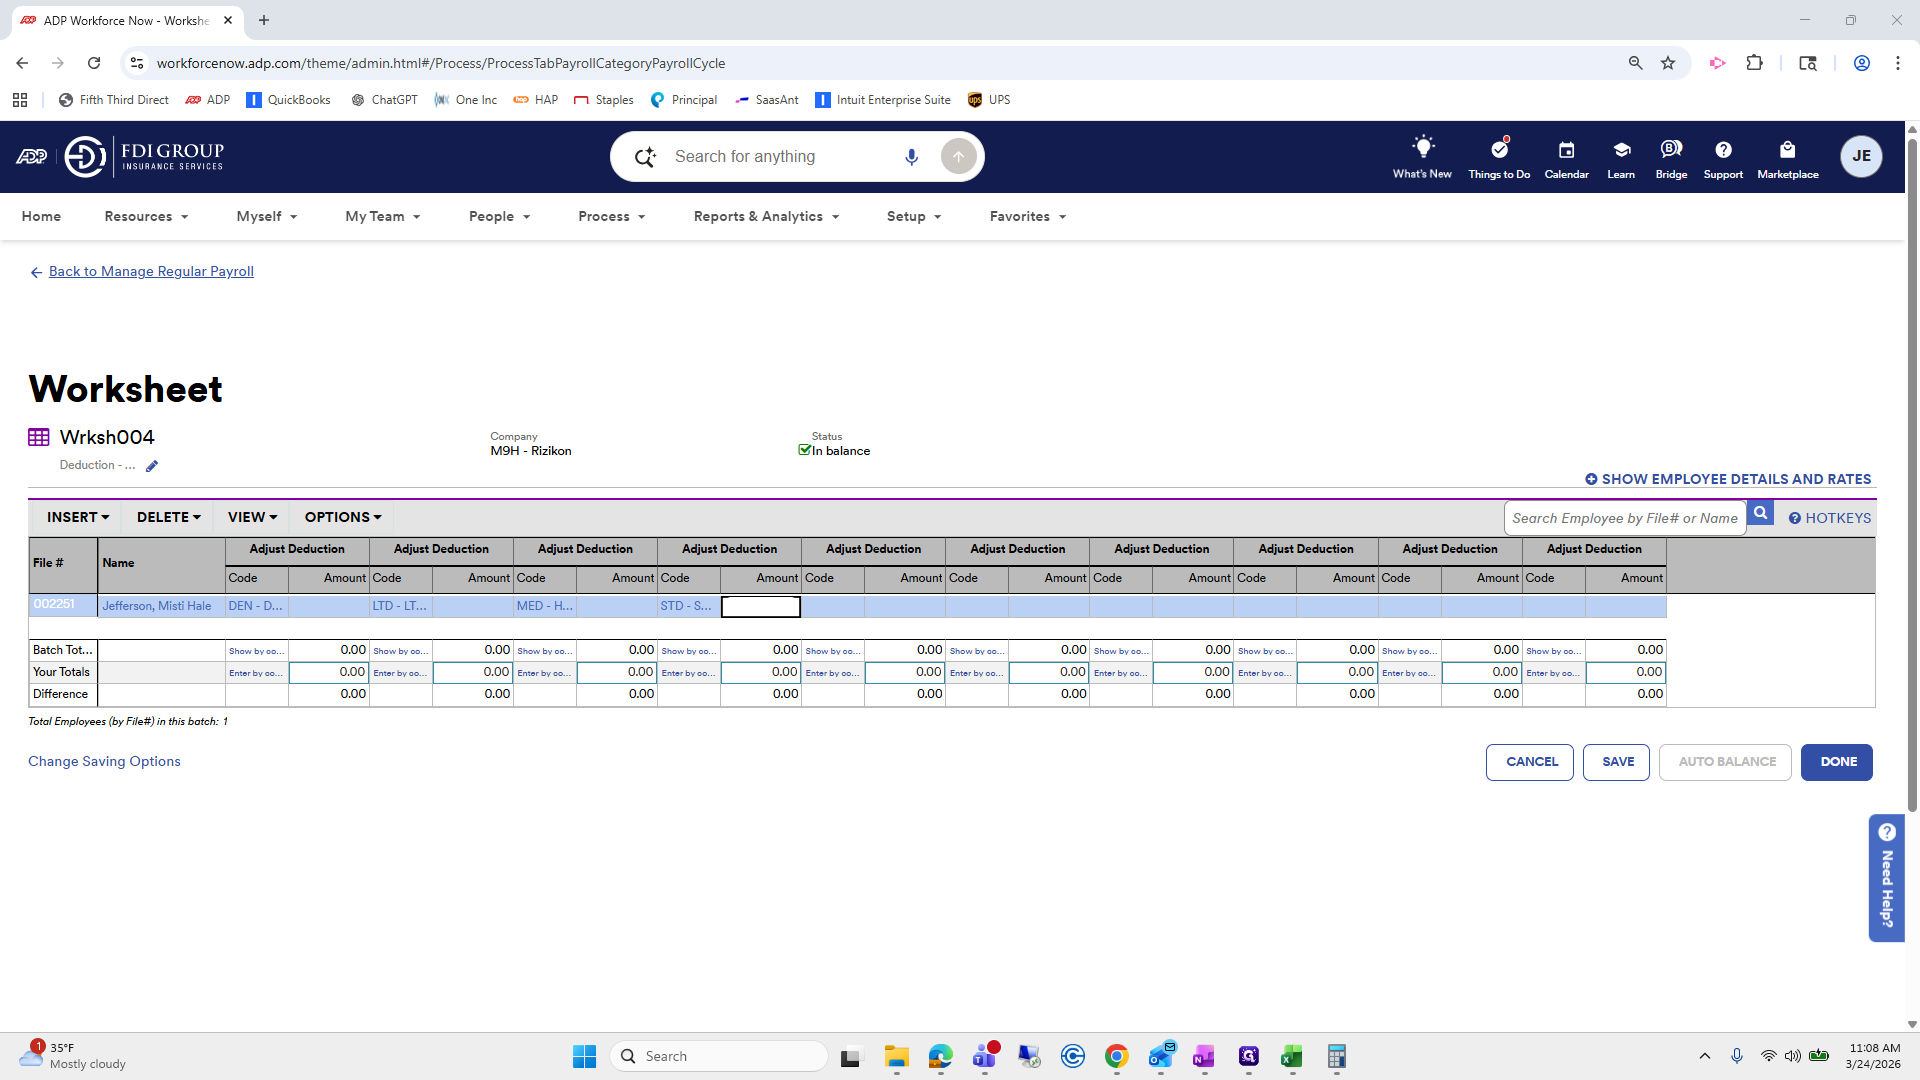
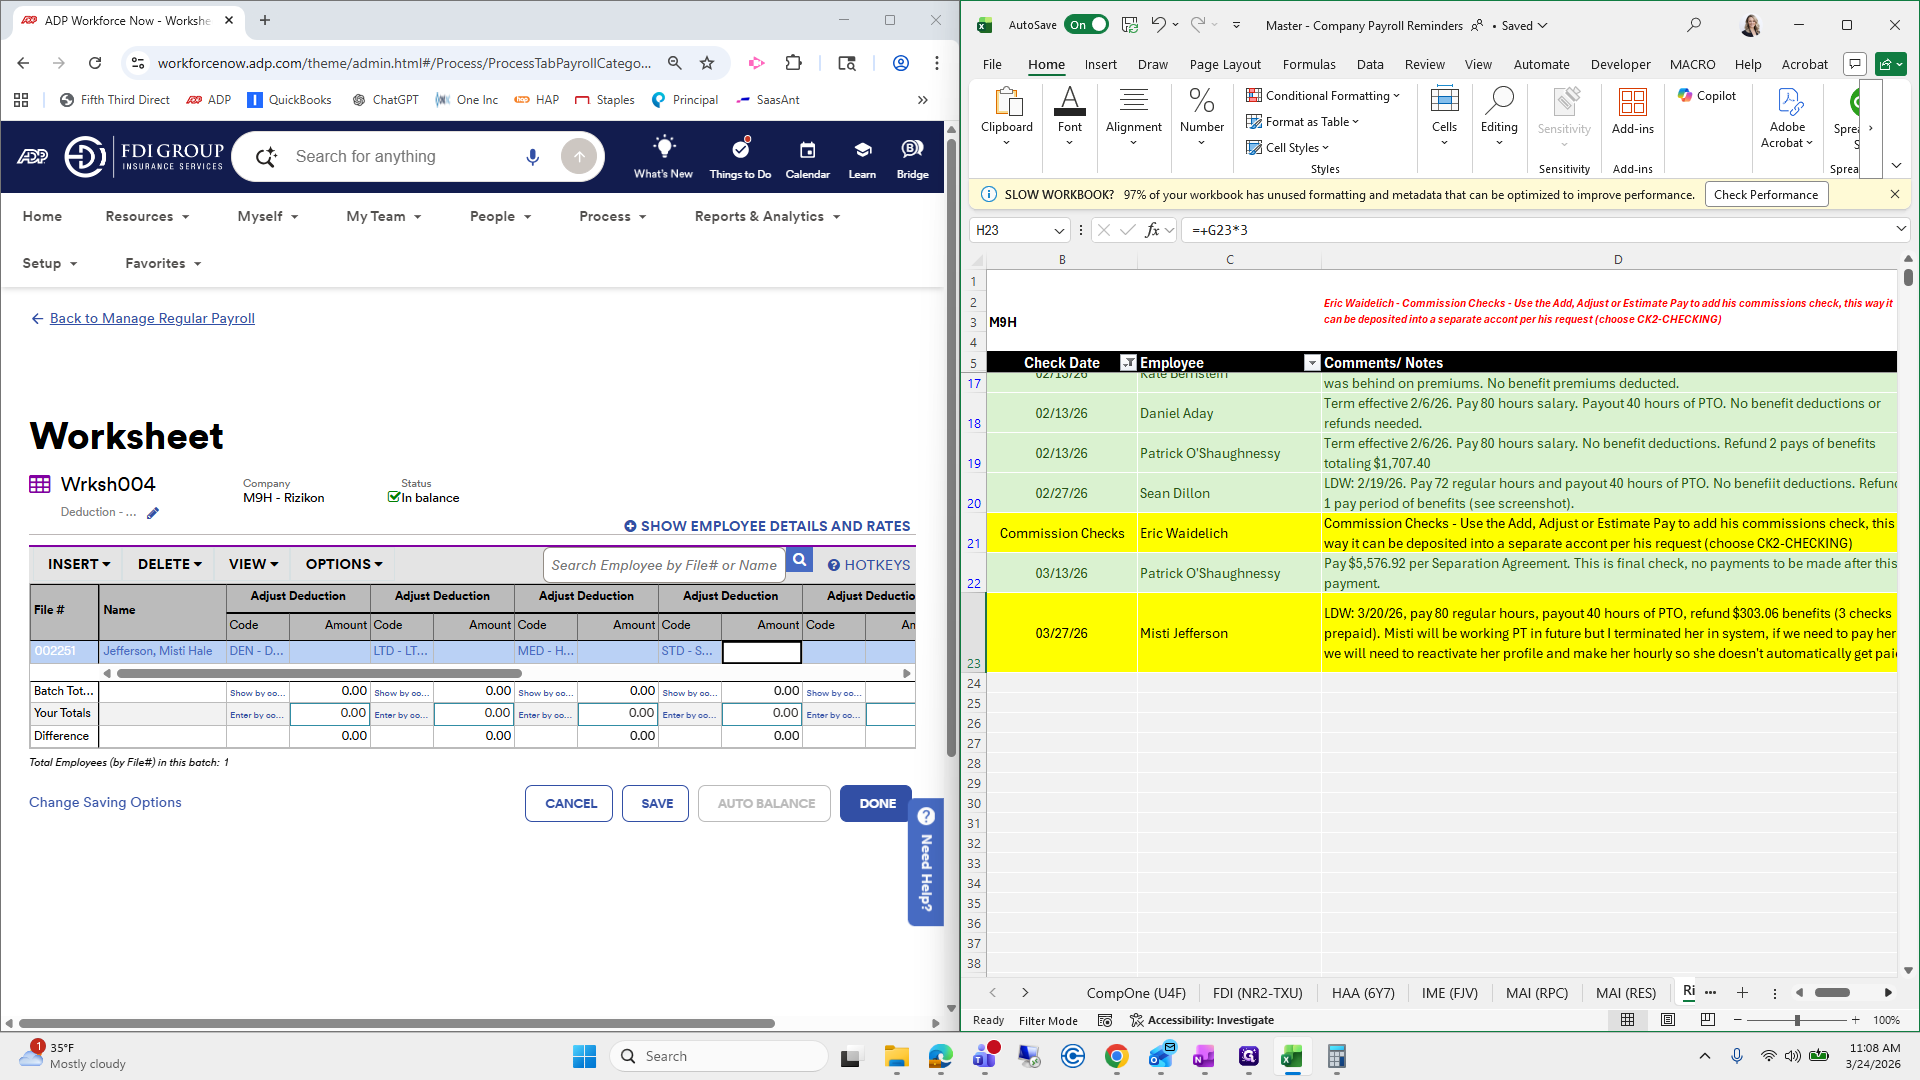
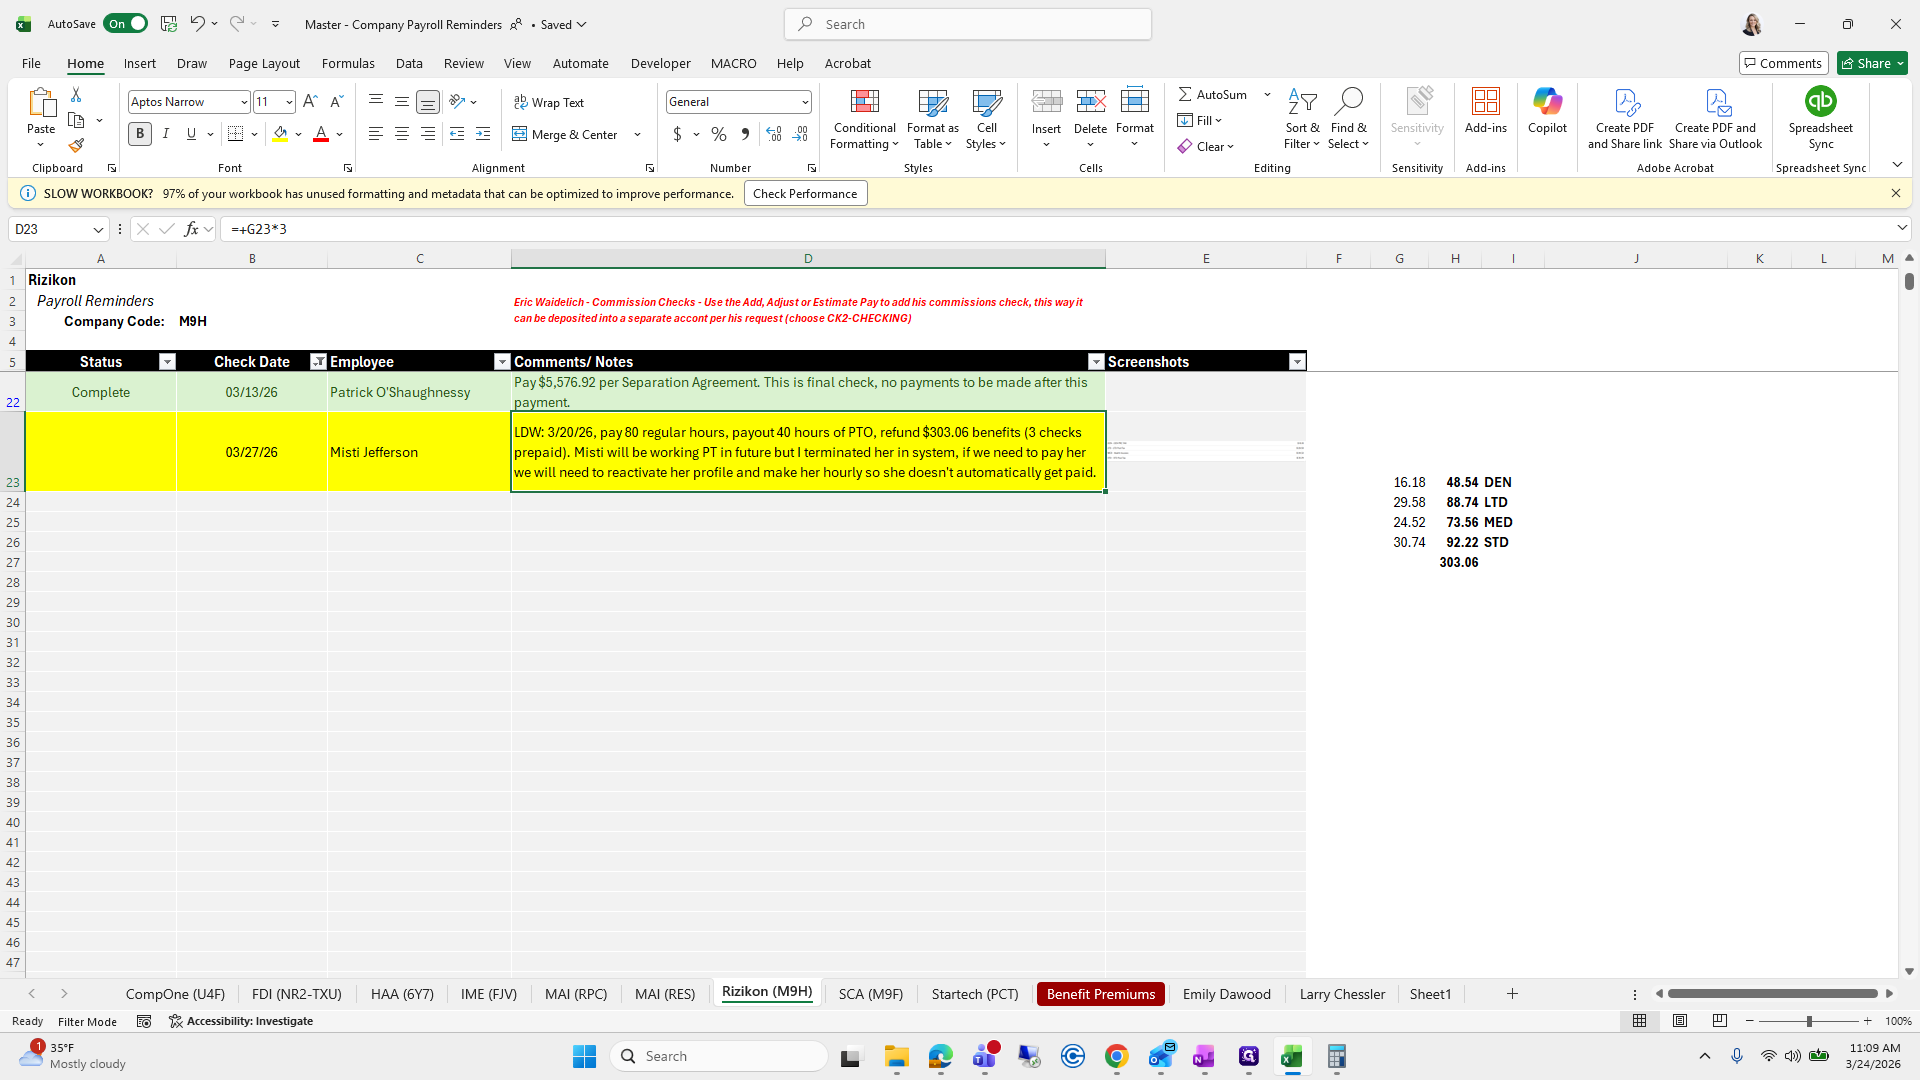
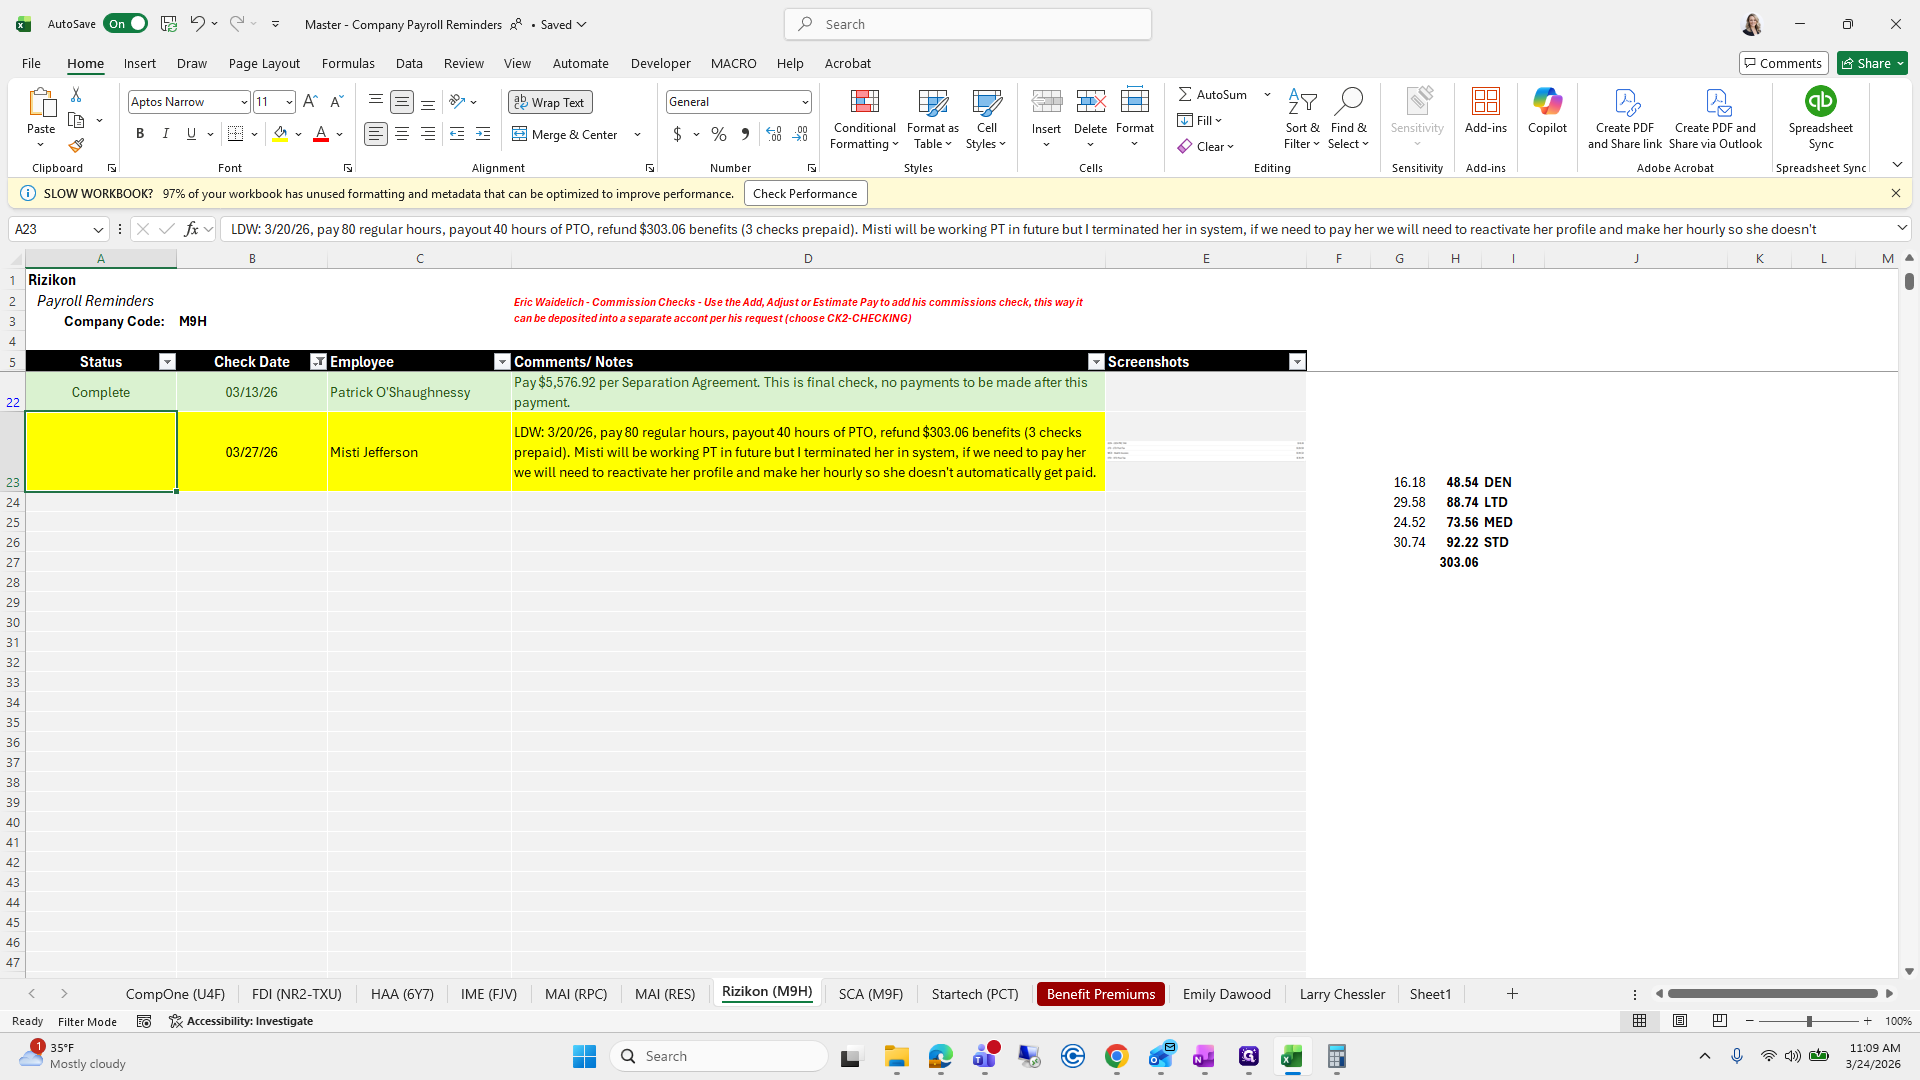
Last day of work was March 20. Paid for 80 hours, including 40 hours of PTO and refunded benefits. She will work part-time in the future, but she is currently terminated. If we need to reactivate her, we can. We need to ensure she is paid for 80 regular hours and receives a payout of 40 hours PTO.

We'll start with those two.
We will look at the batch first to see if she is included.
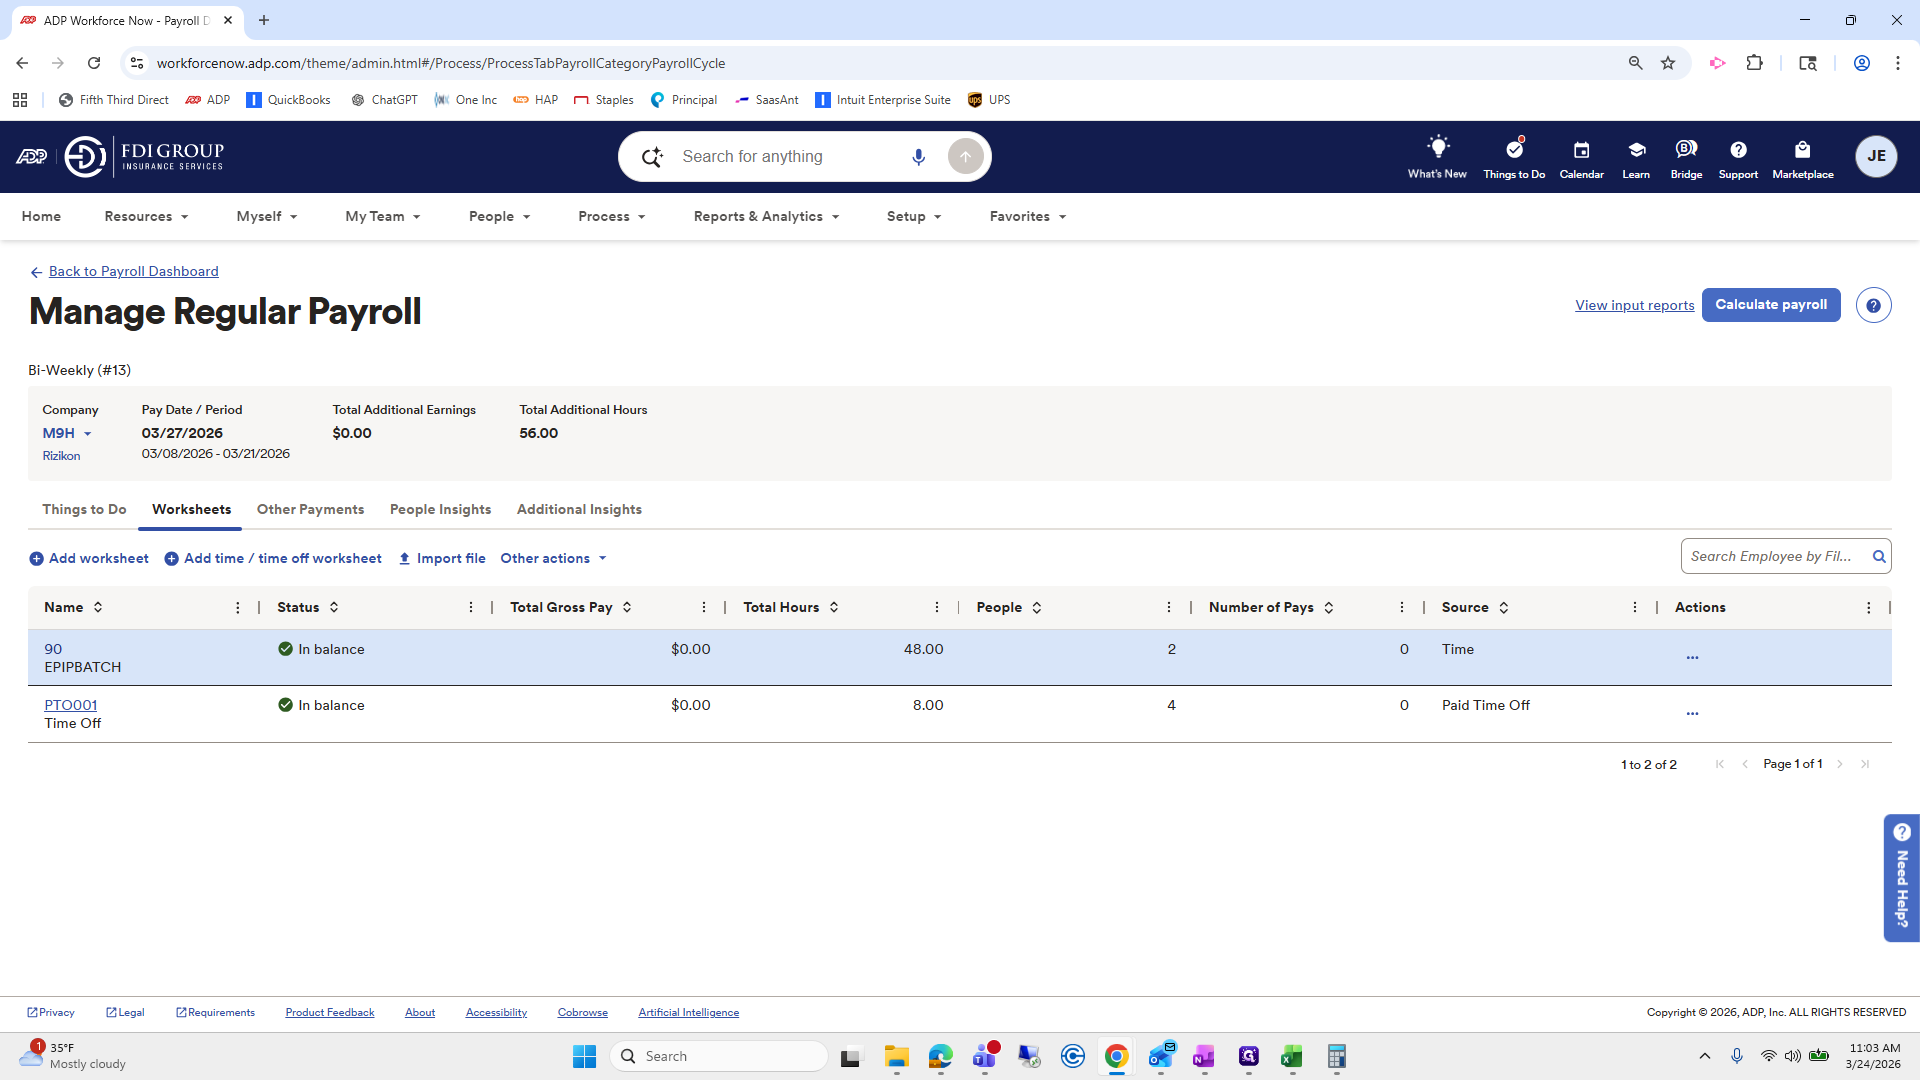
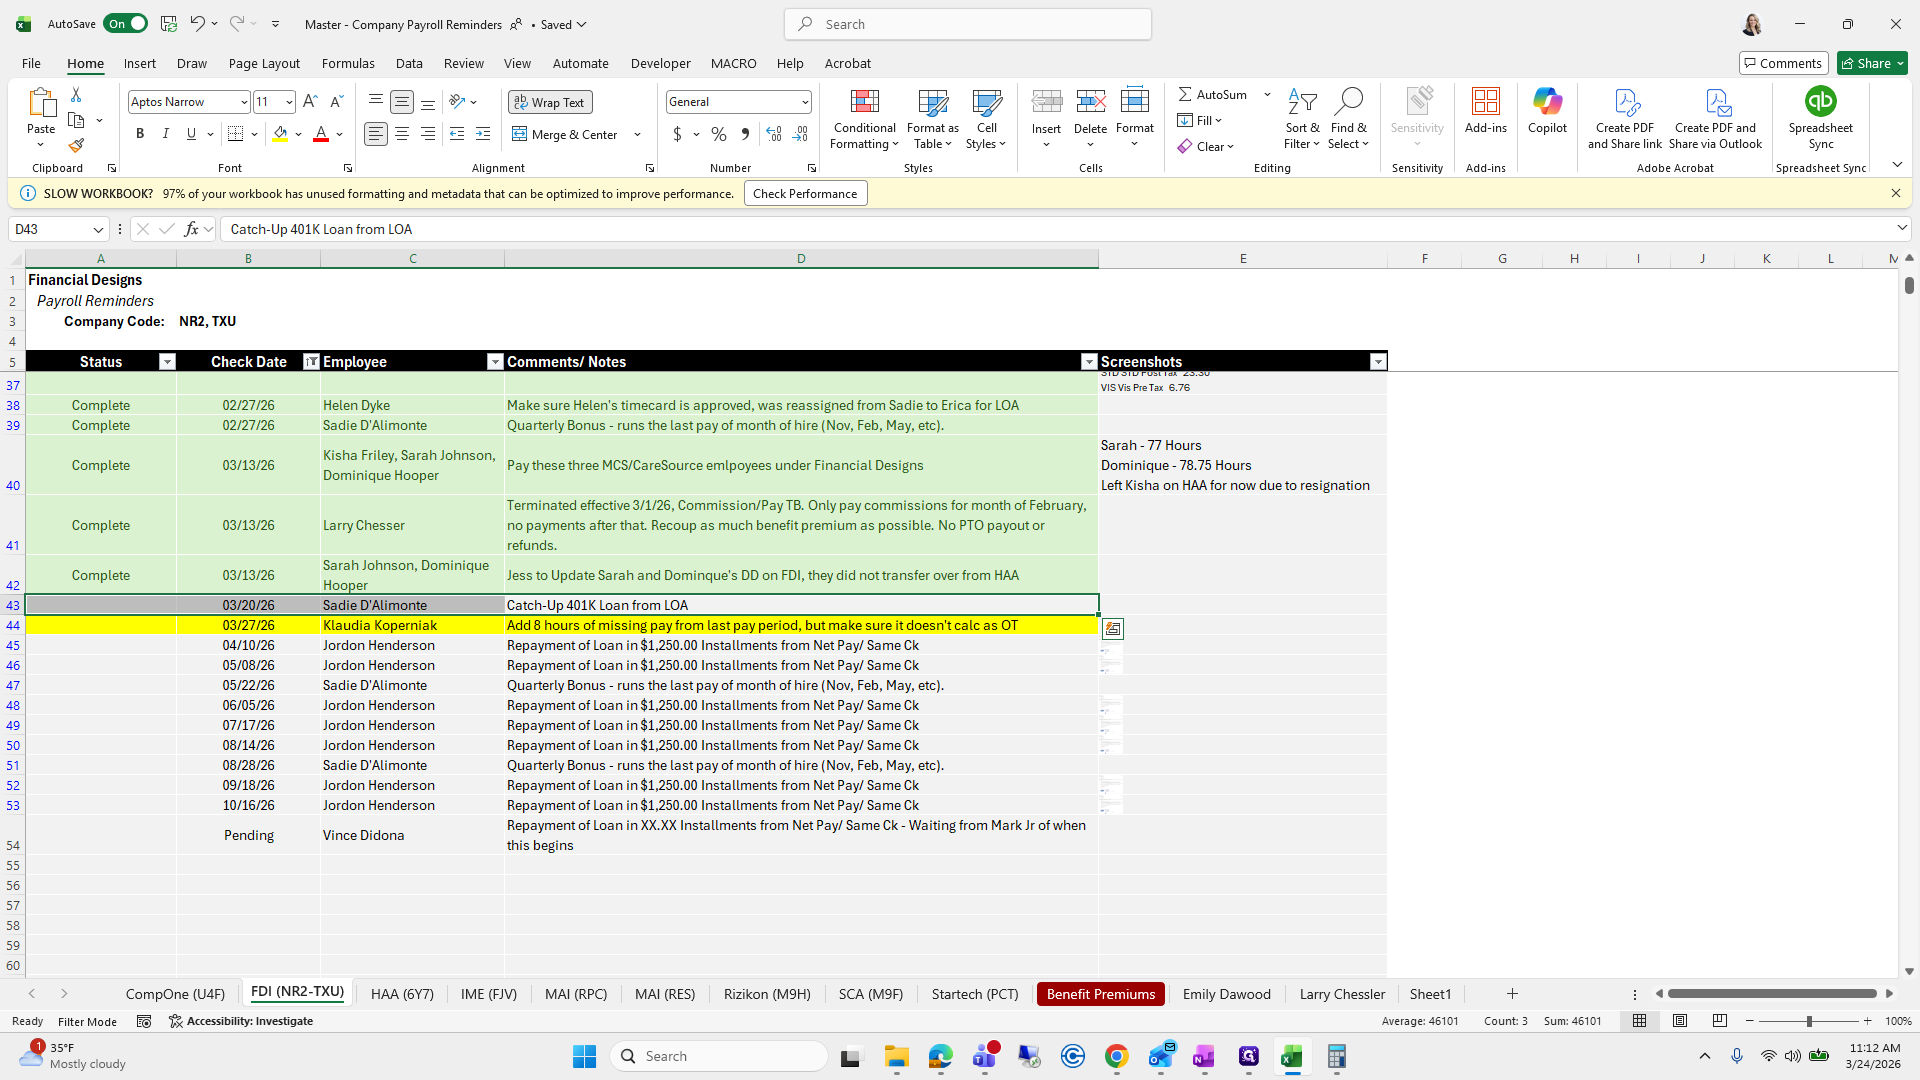
I'm going to click it.
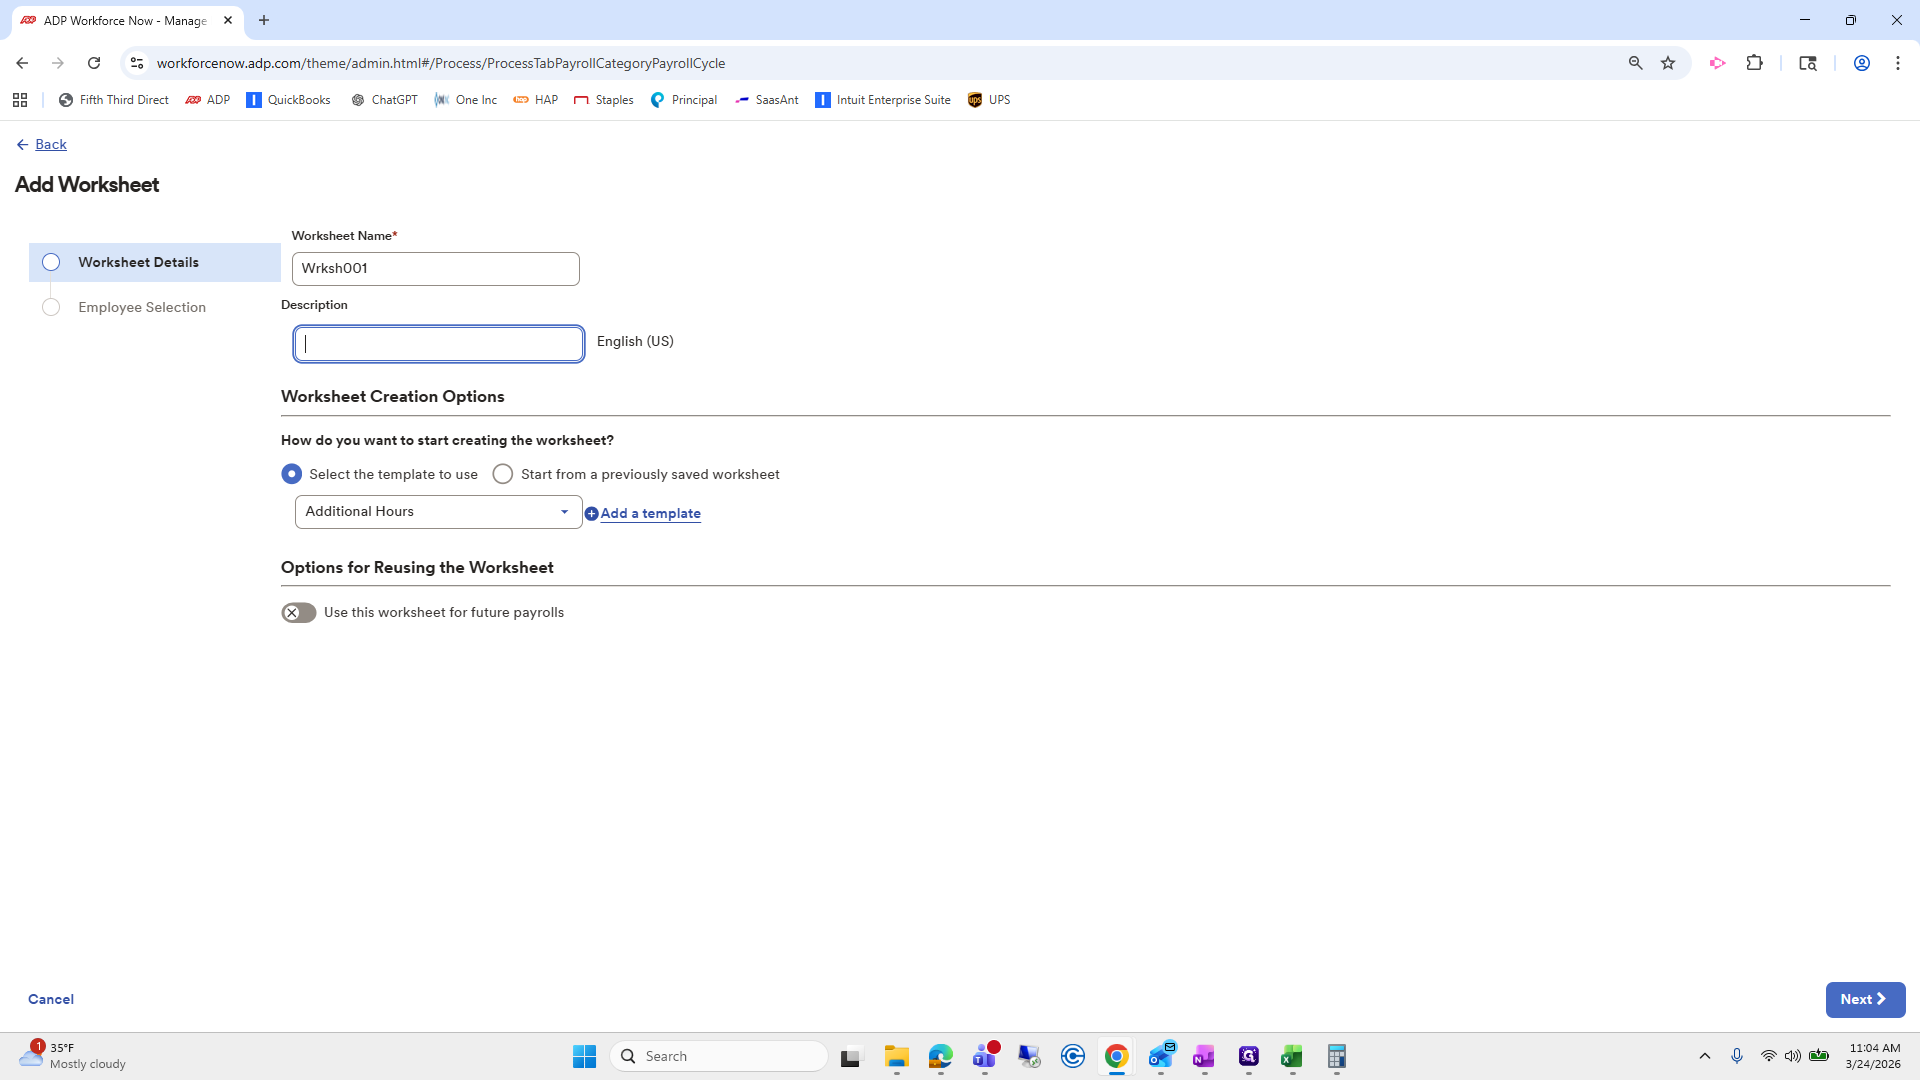
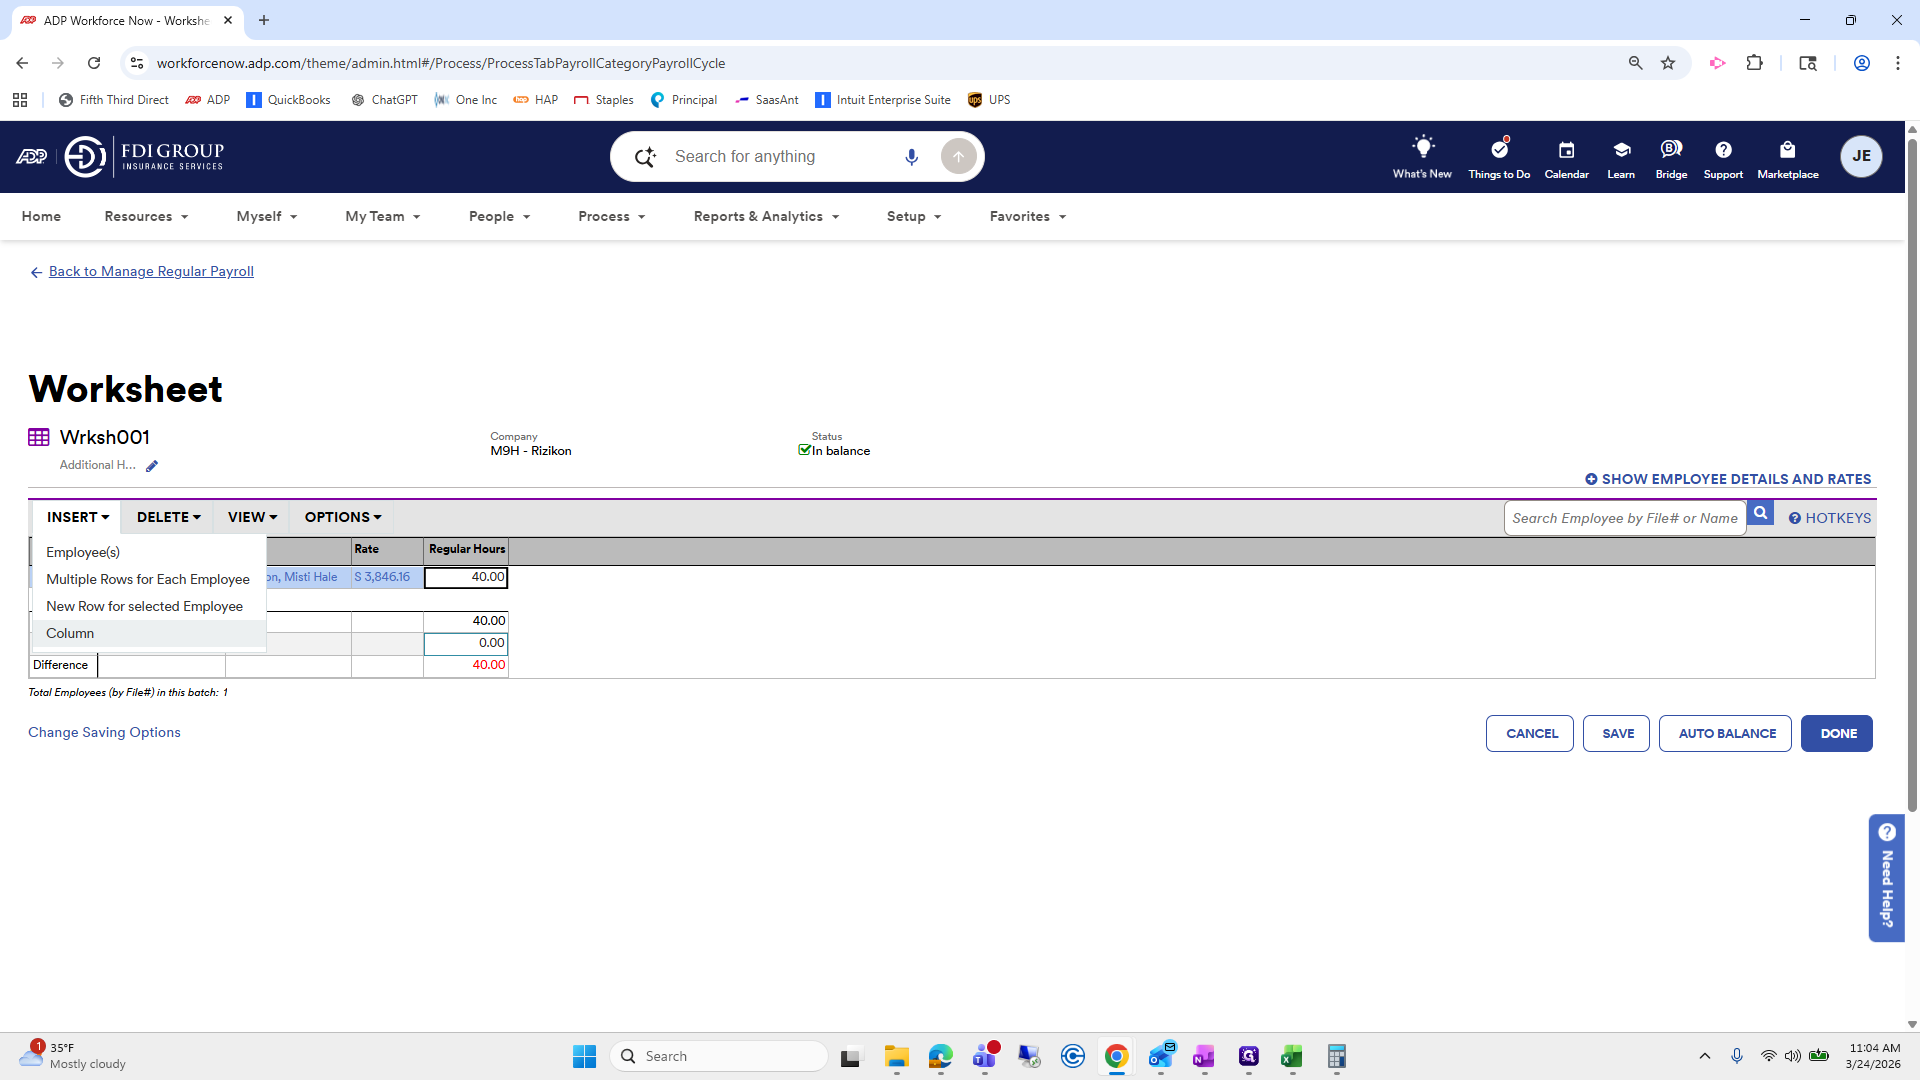
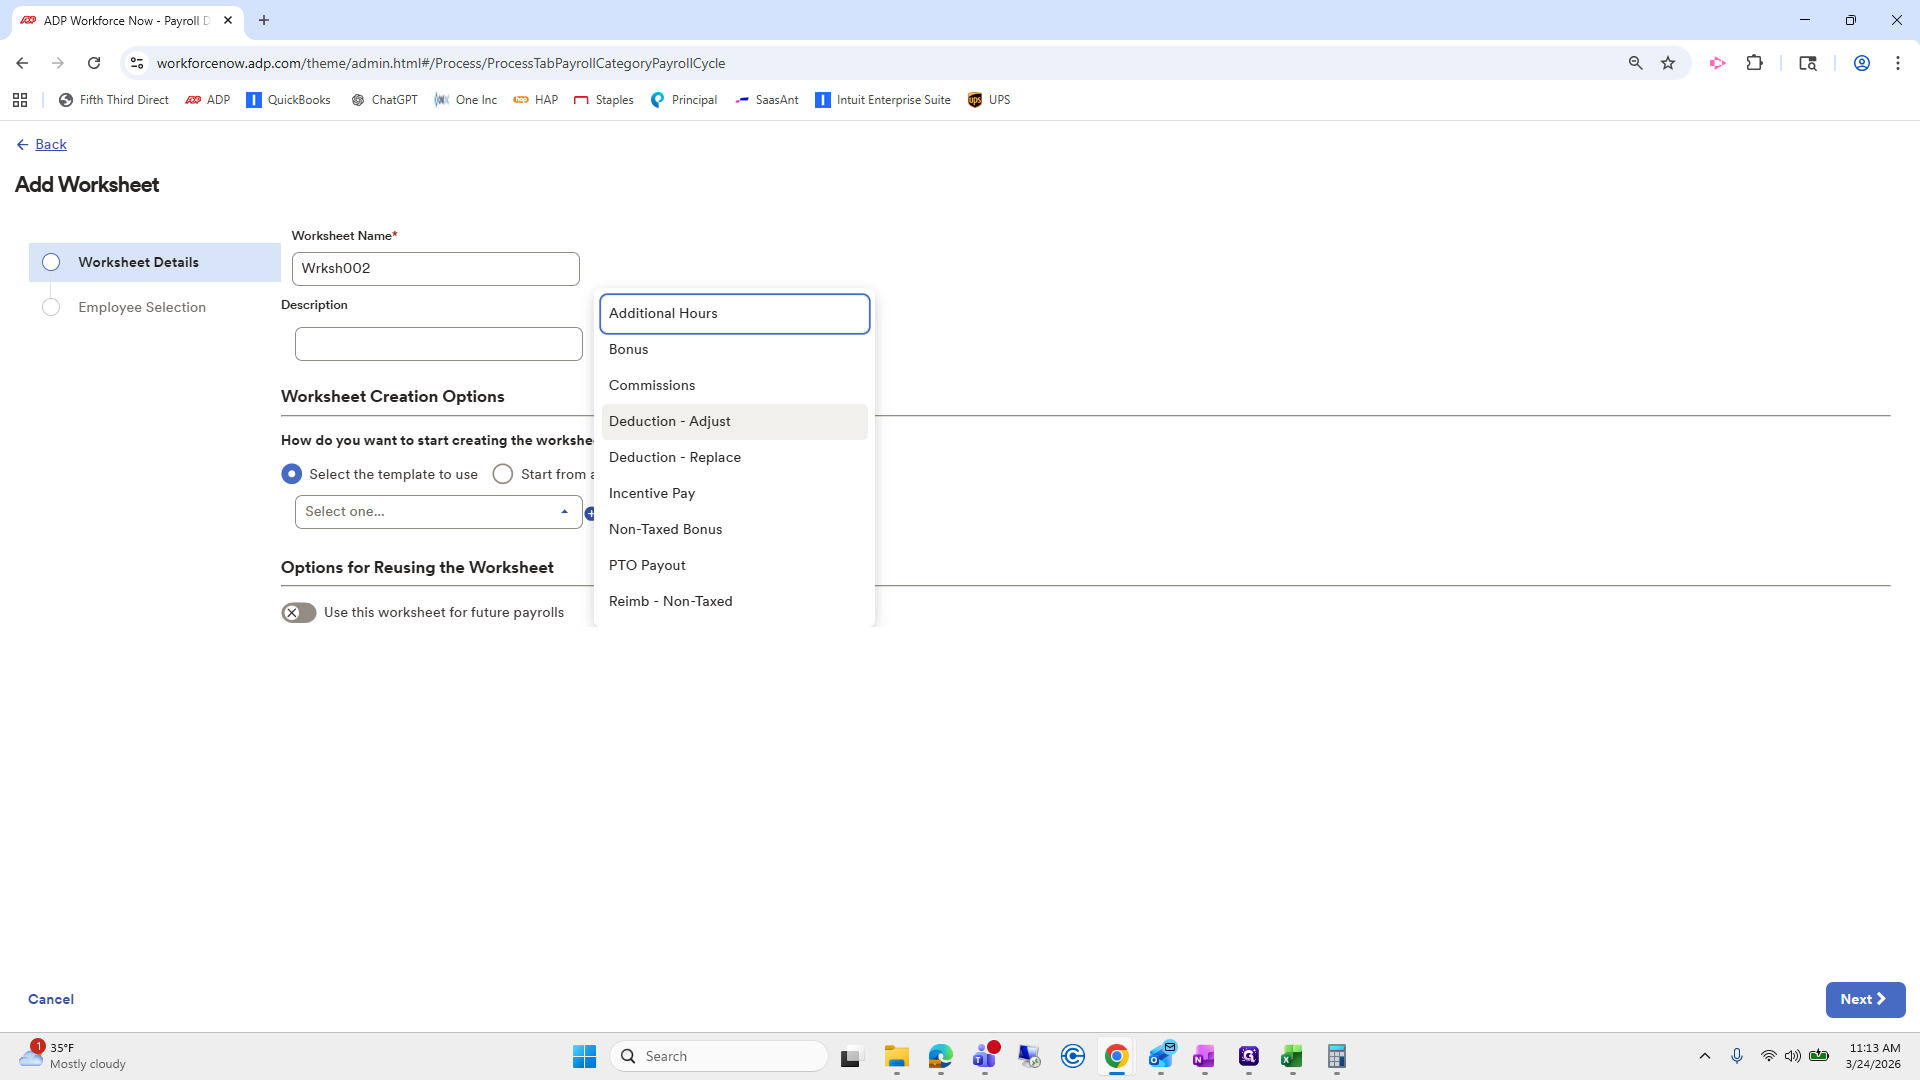
Go to Add Worksheet and click Additional Hours.


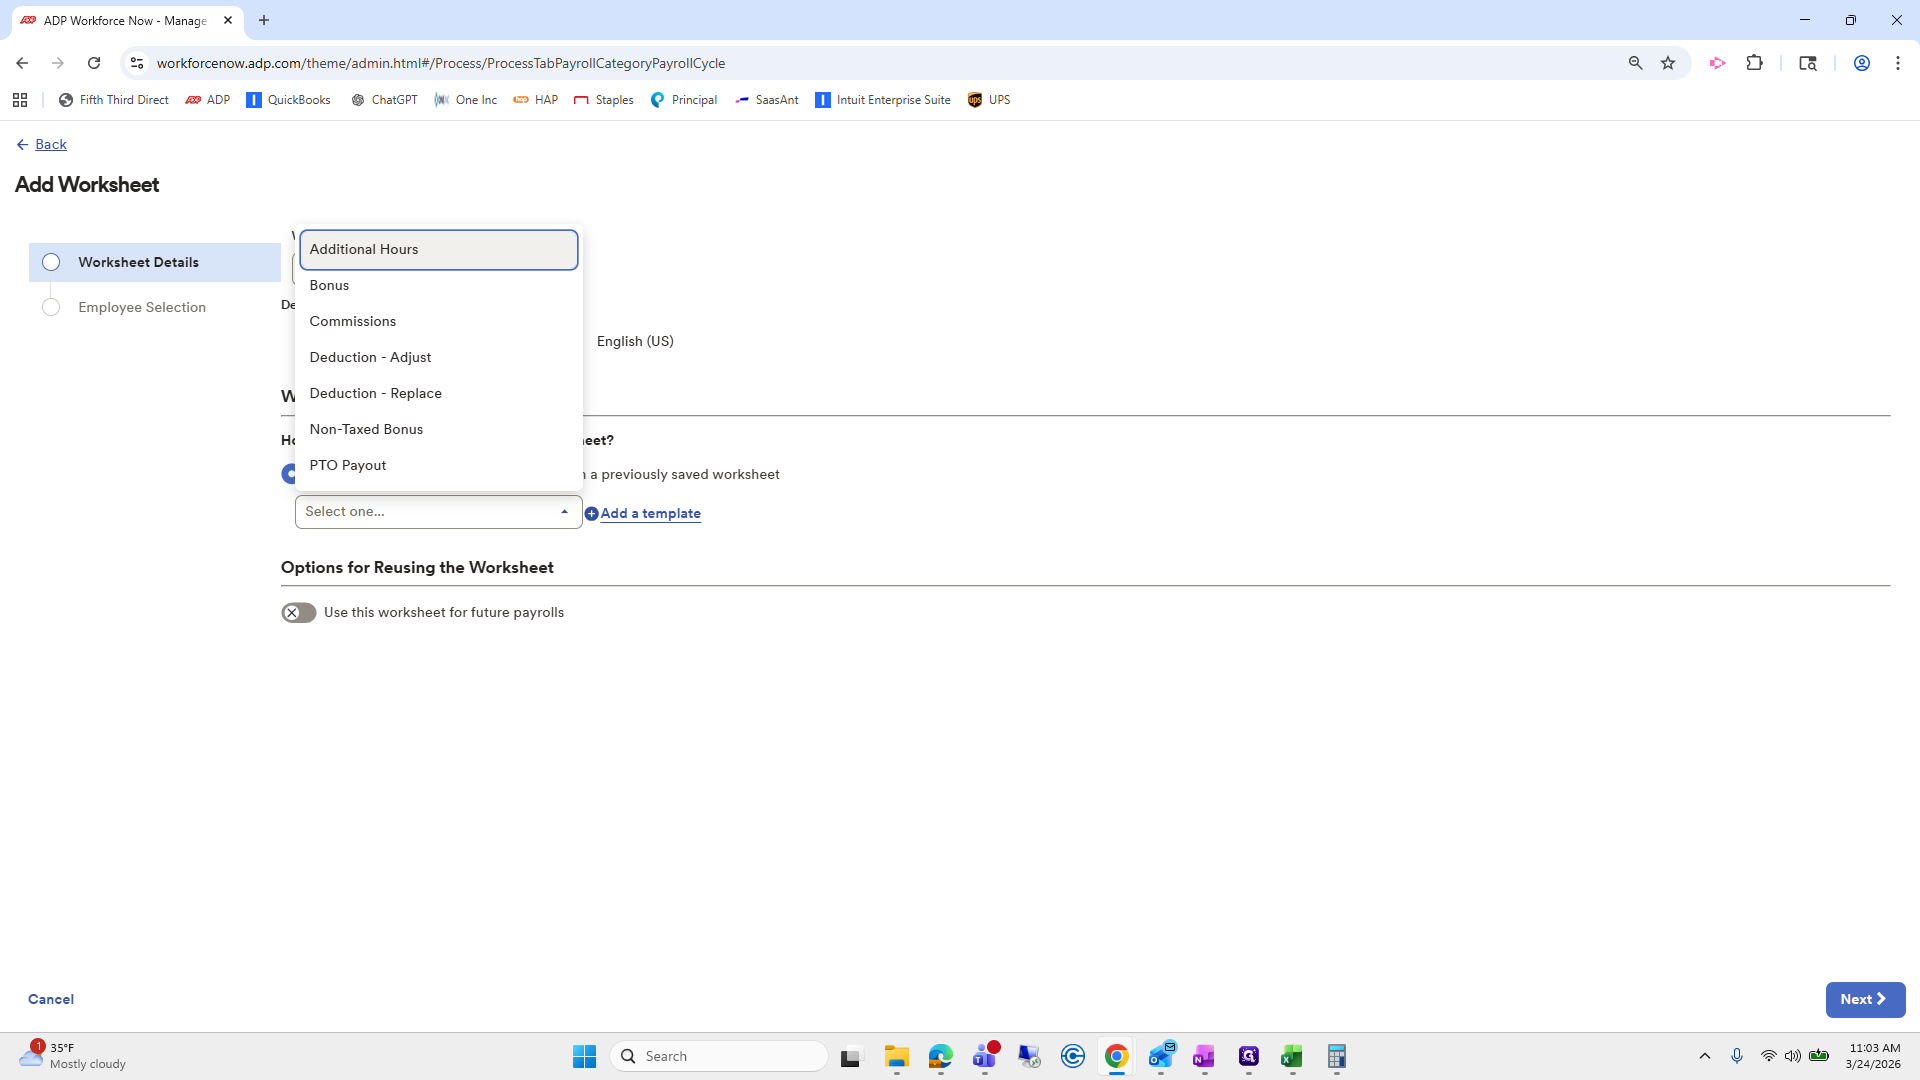
I'll copy and paste that.

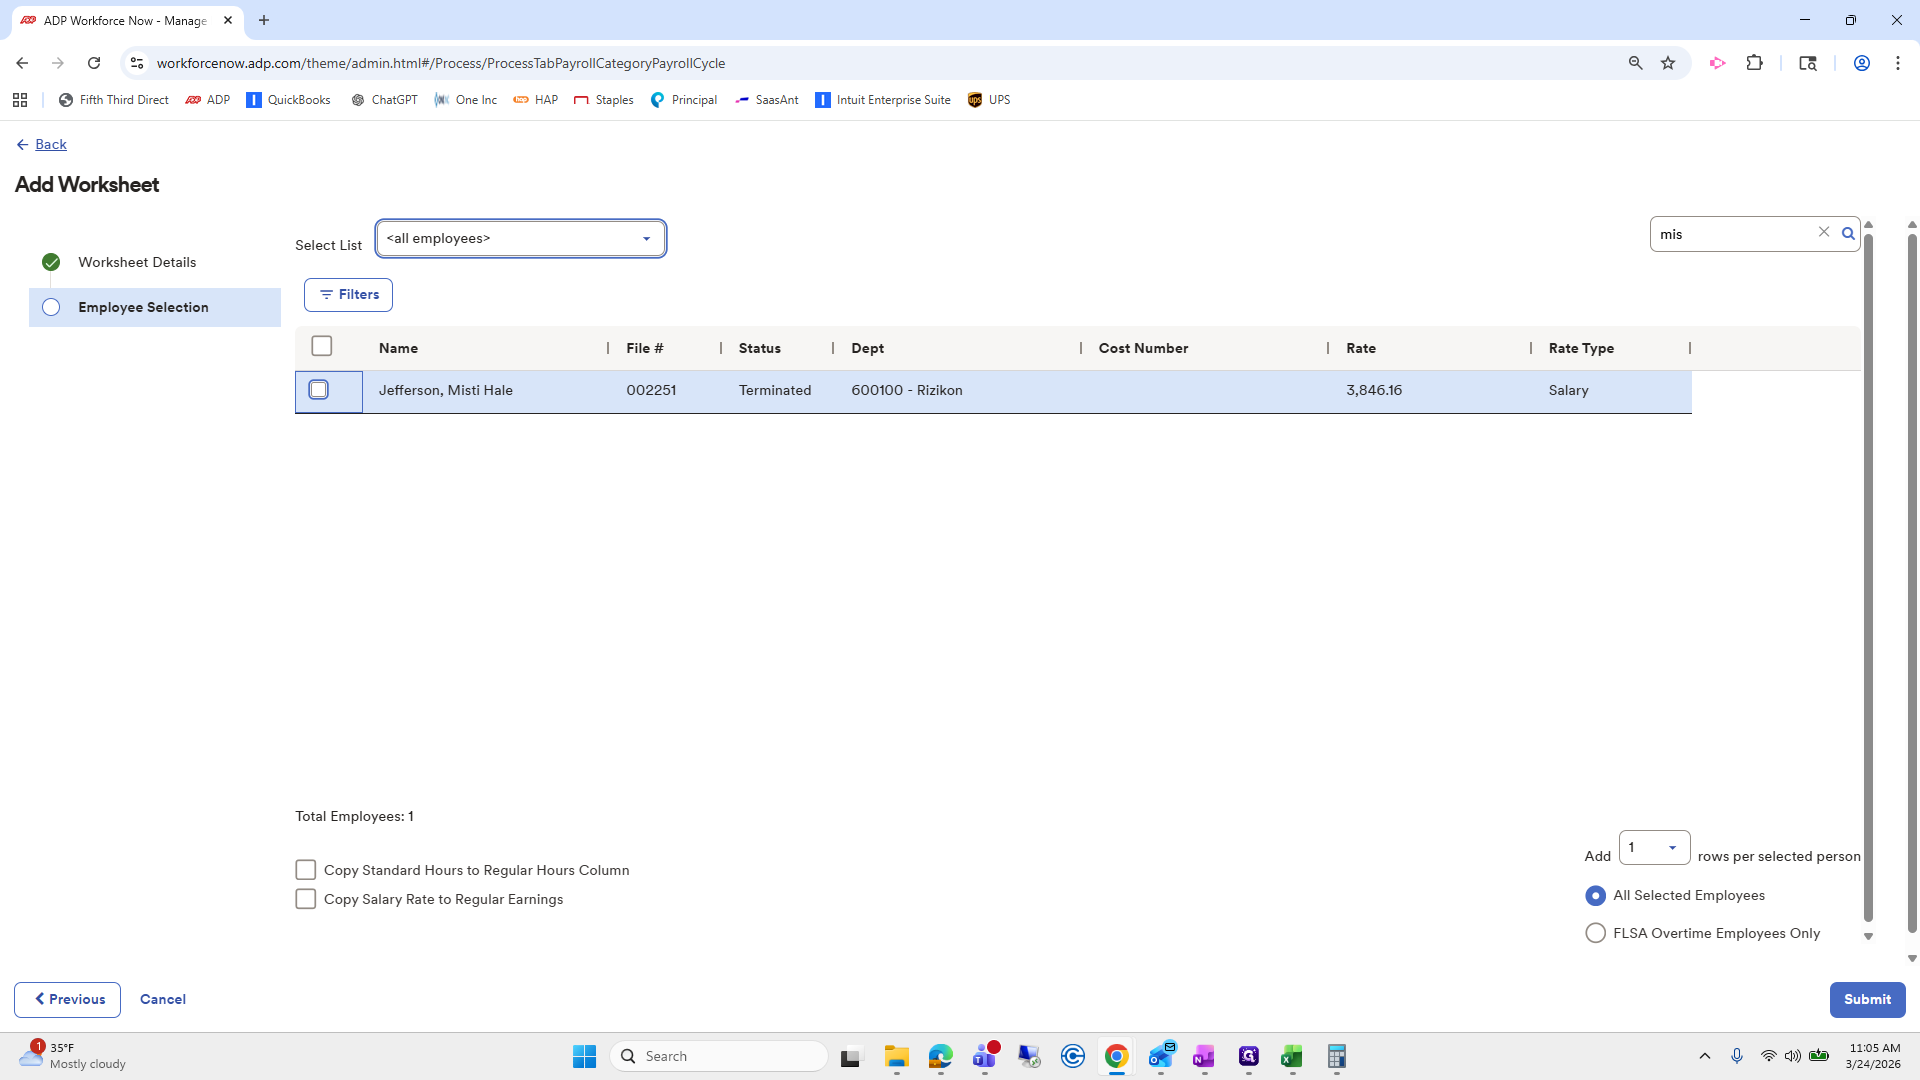
We will choose Misty.


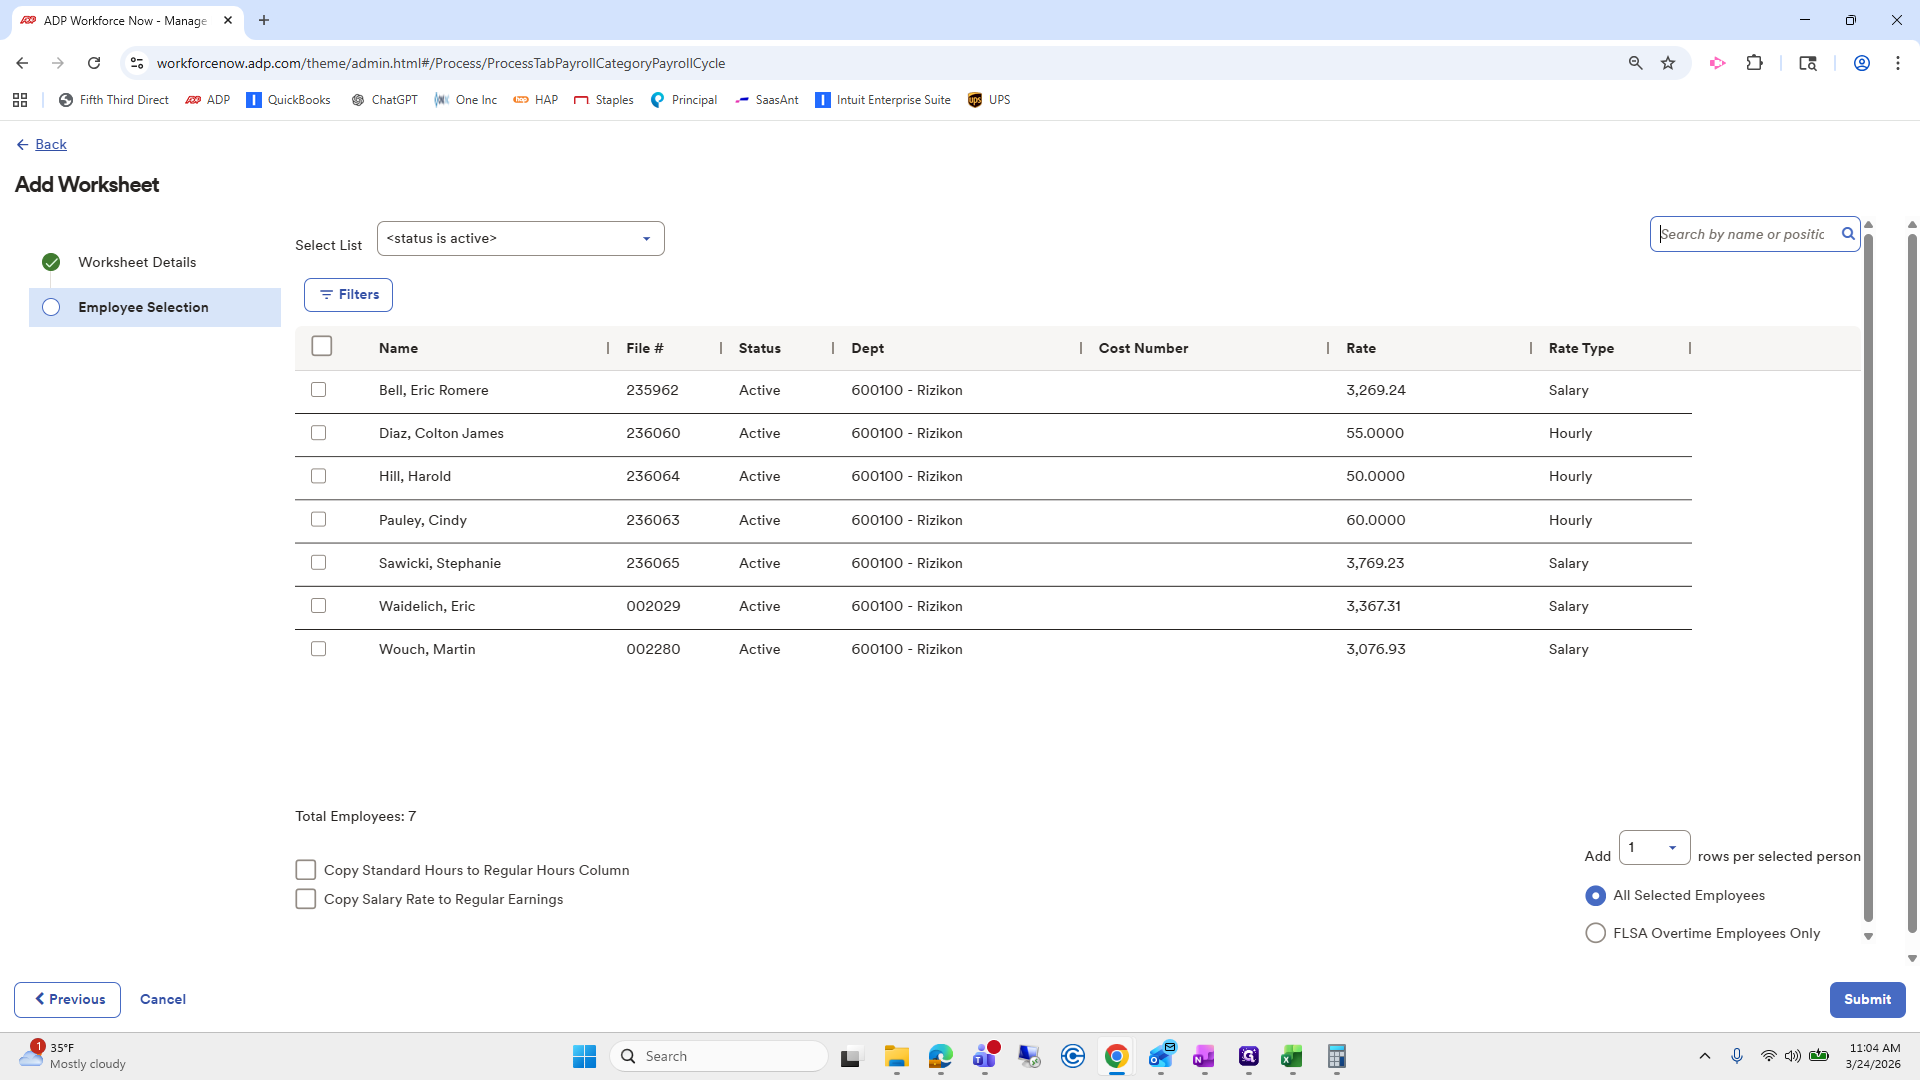
She isn't here because this is only an active list.

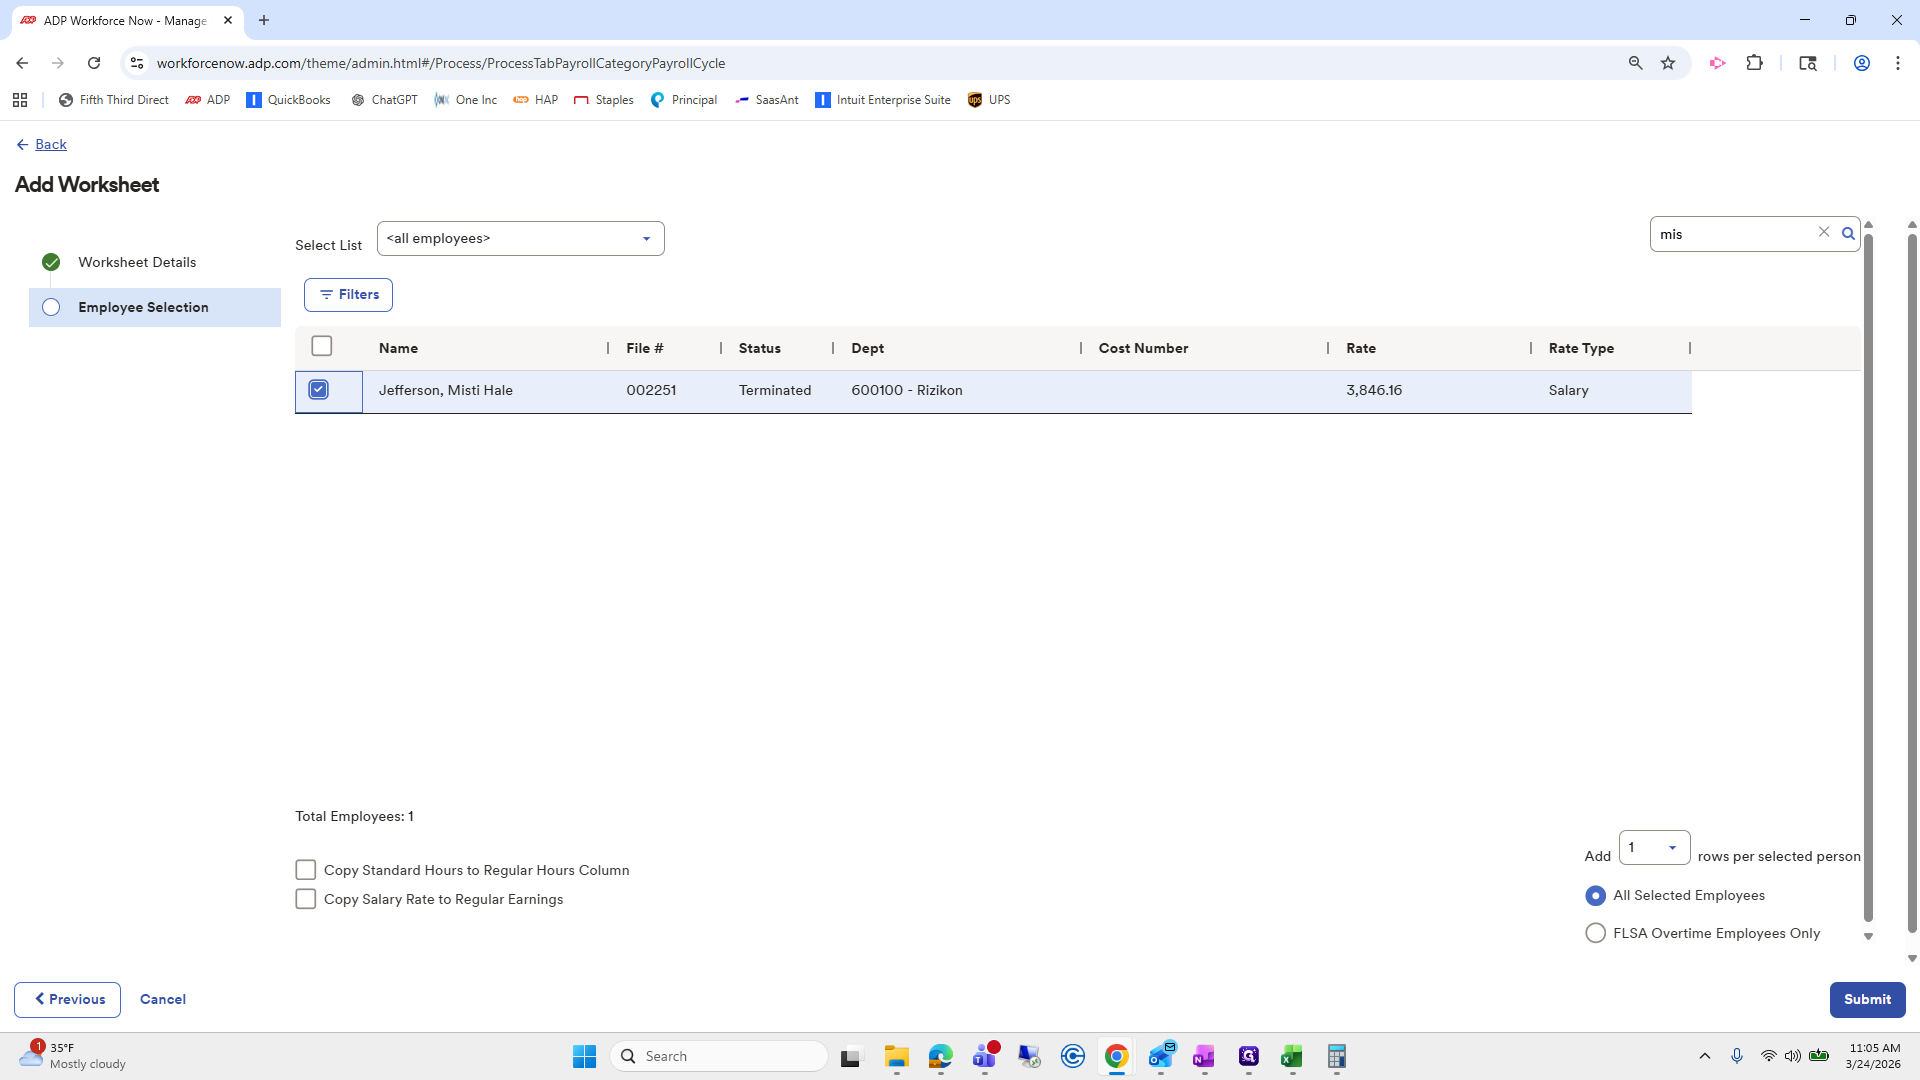
Go to All Employees, select Misty, review her details, and submit.


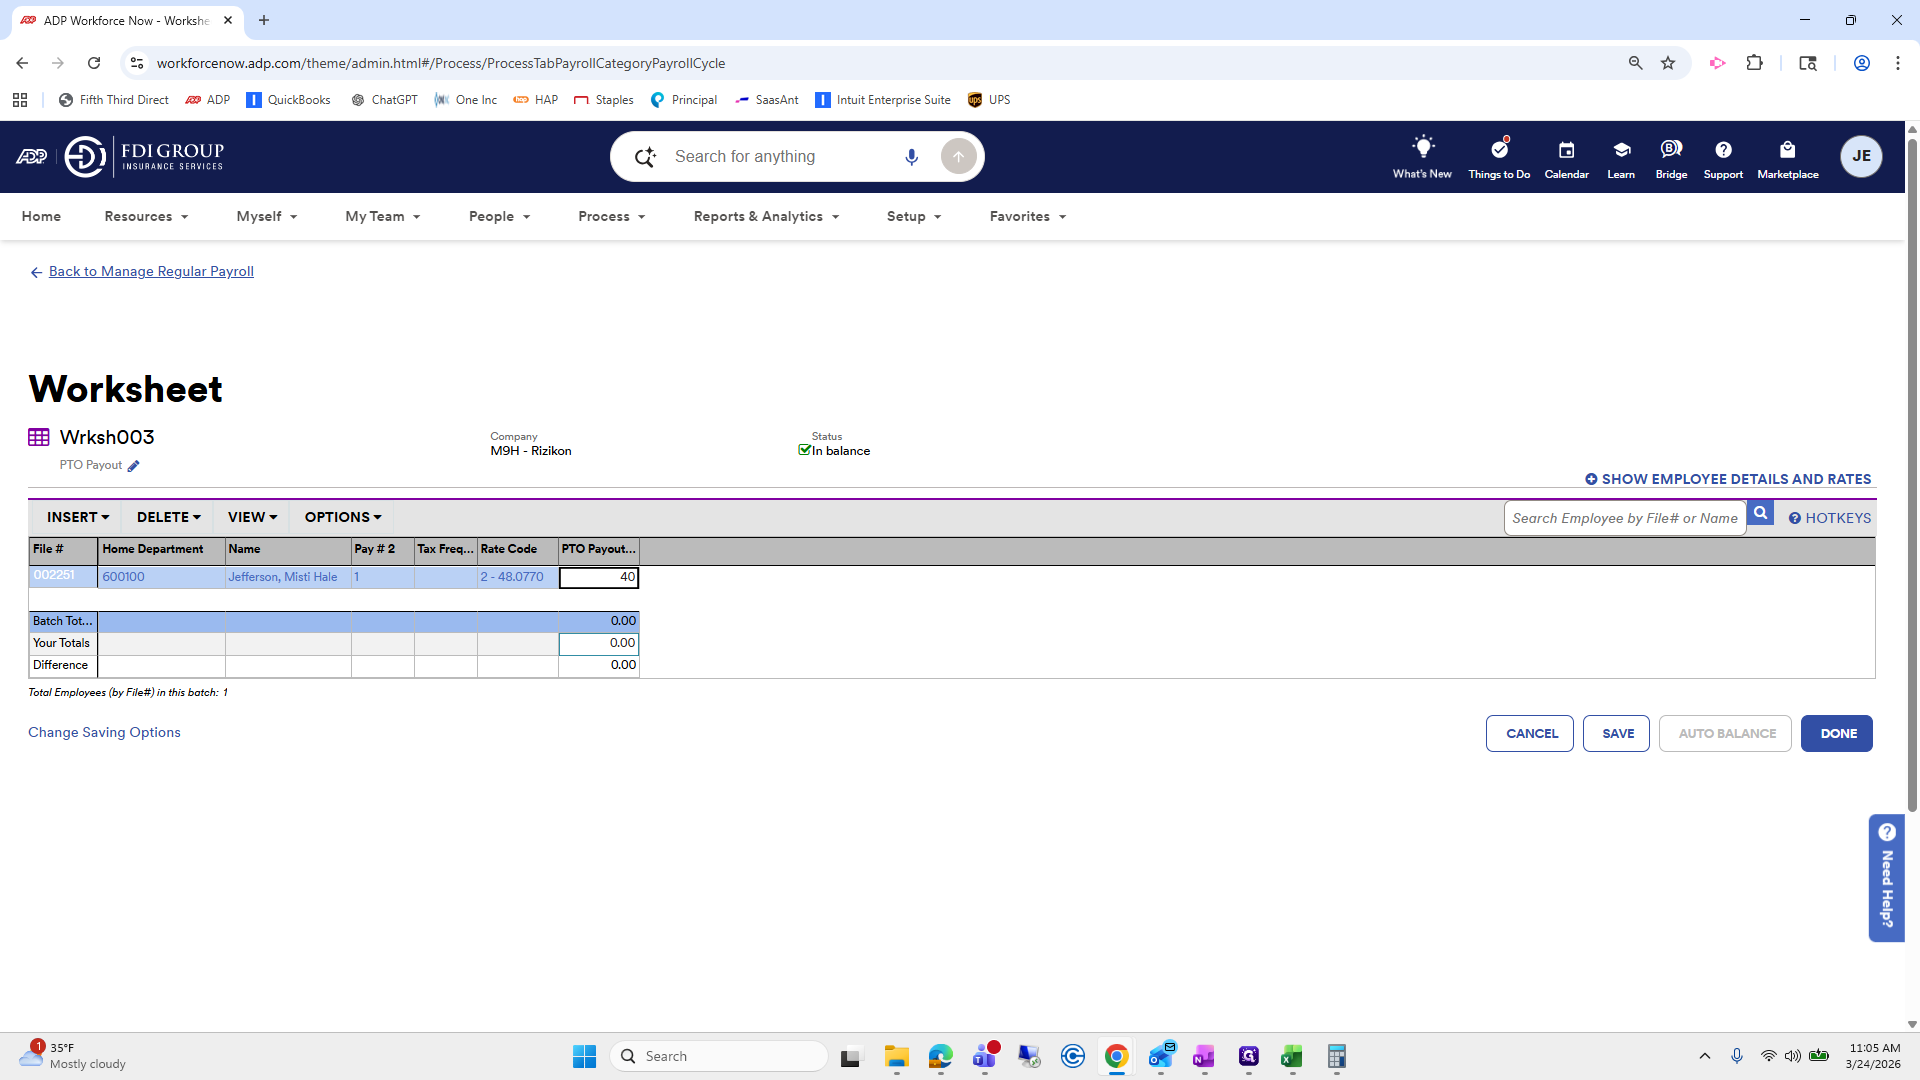
She should have 40 hours.

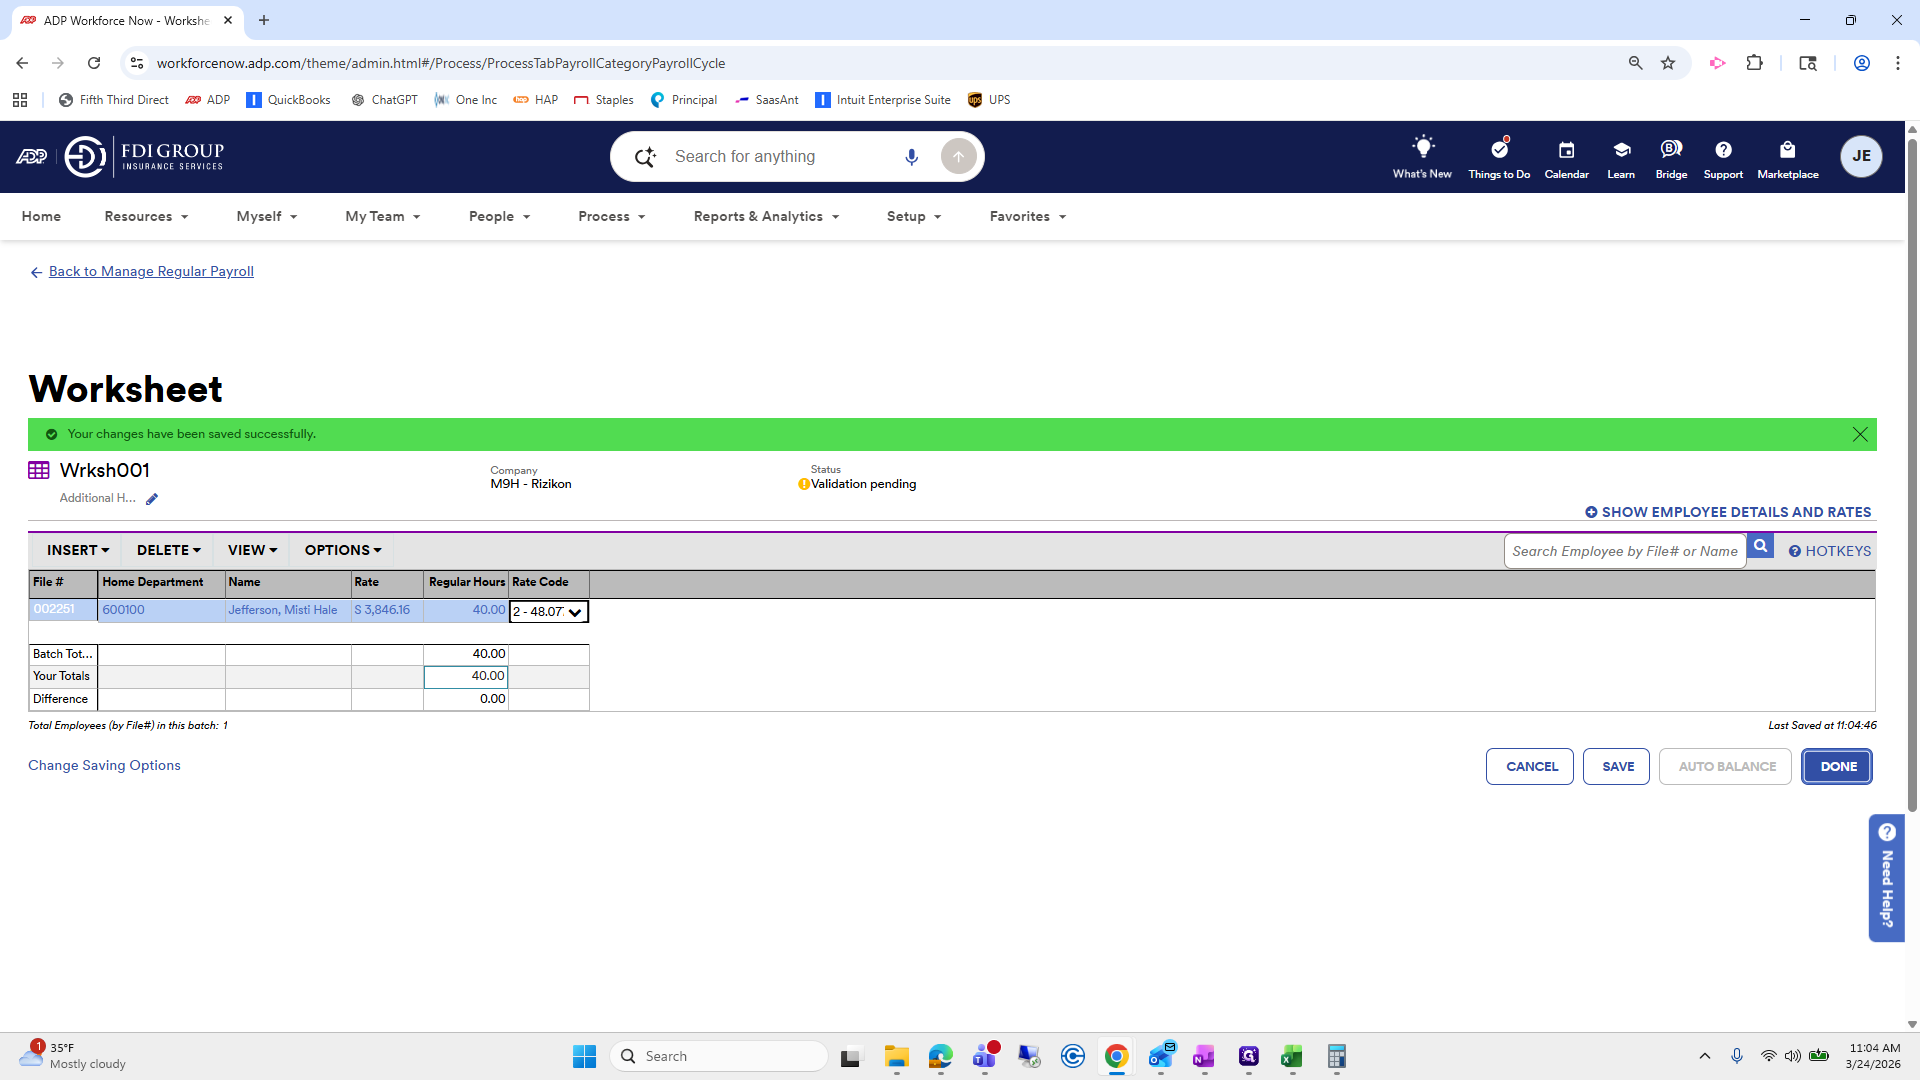
Next, insert a column for the rate code.

Click Done.
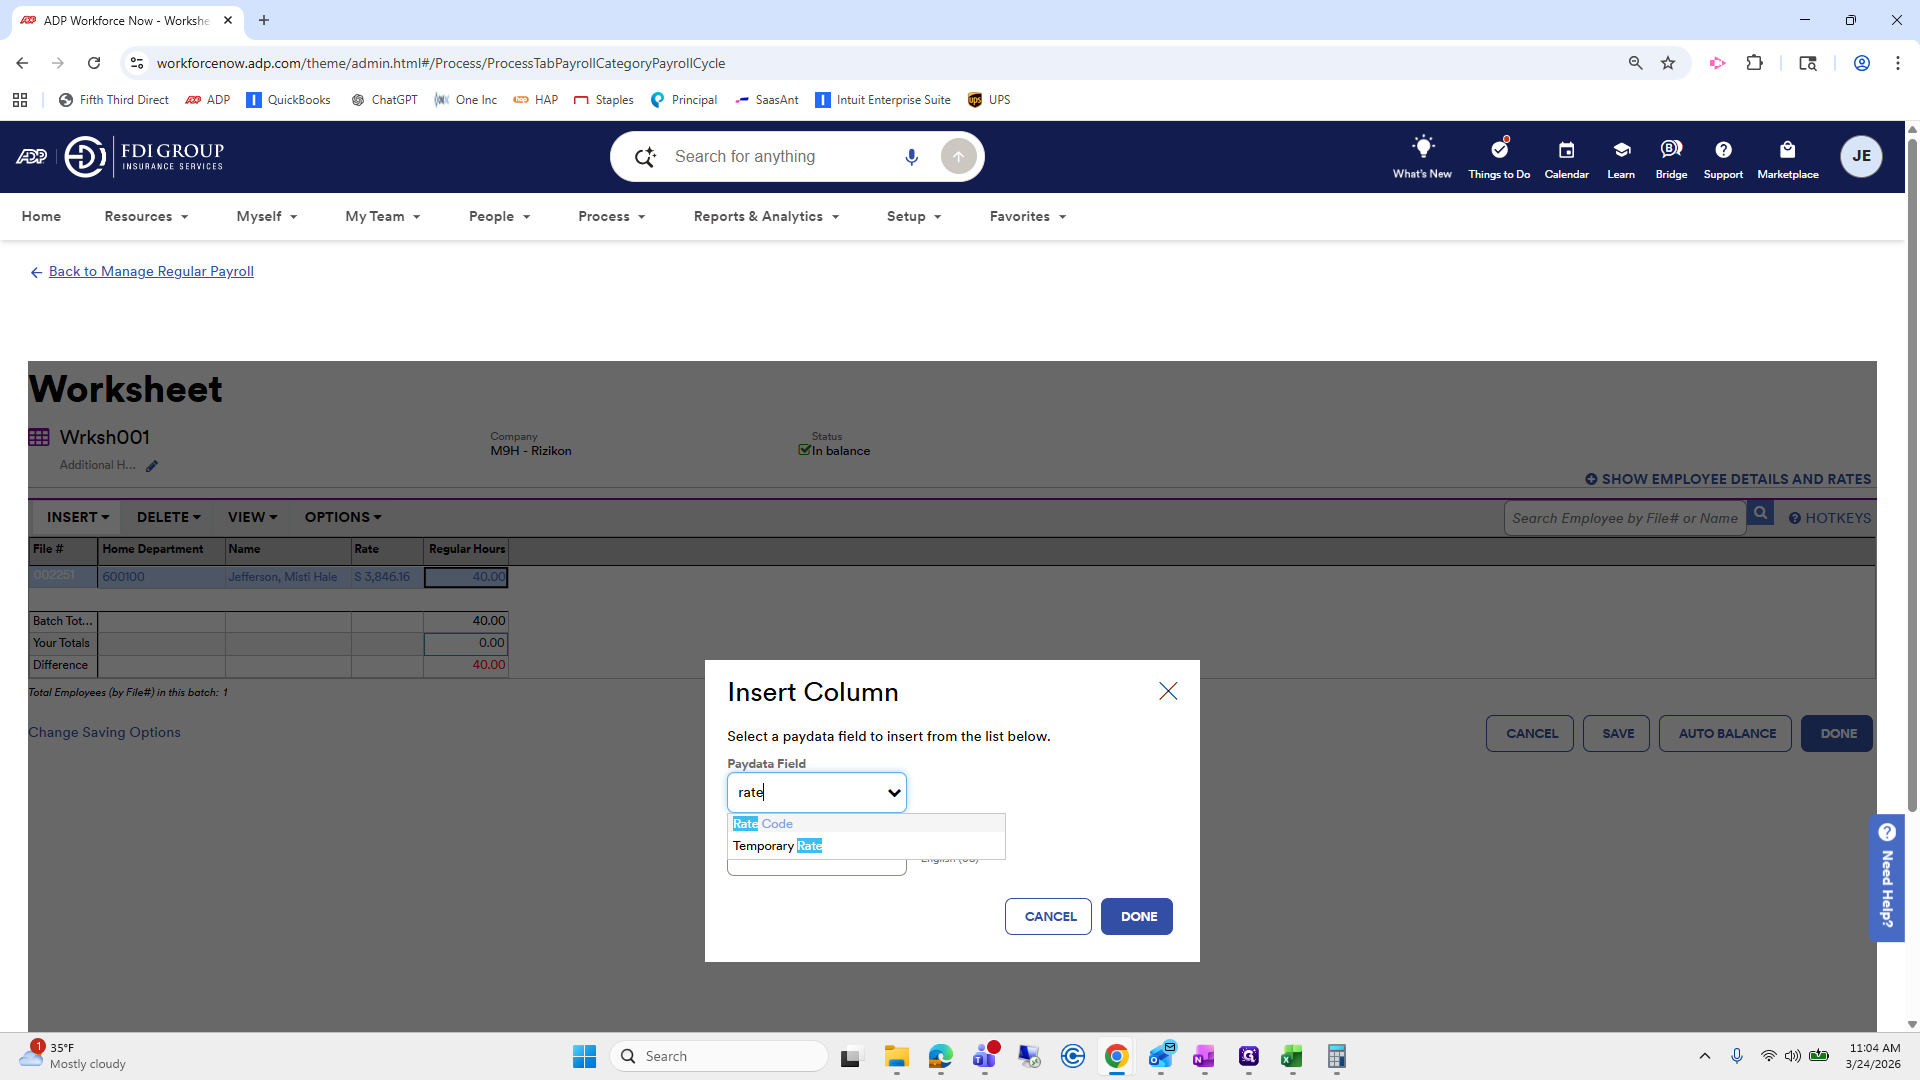
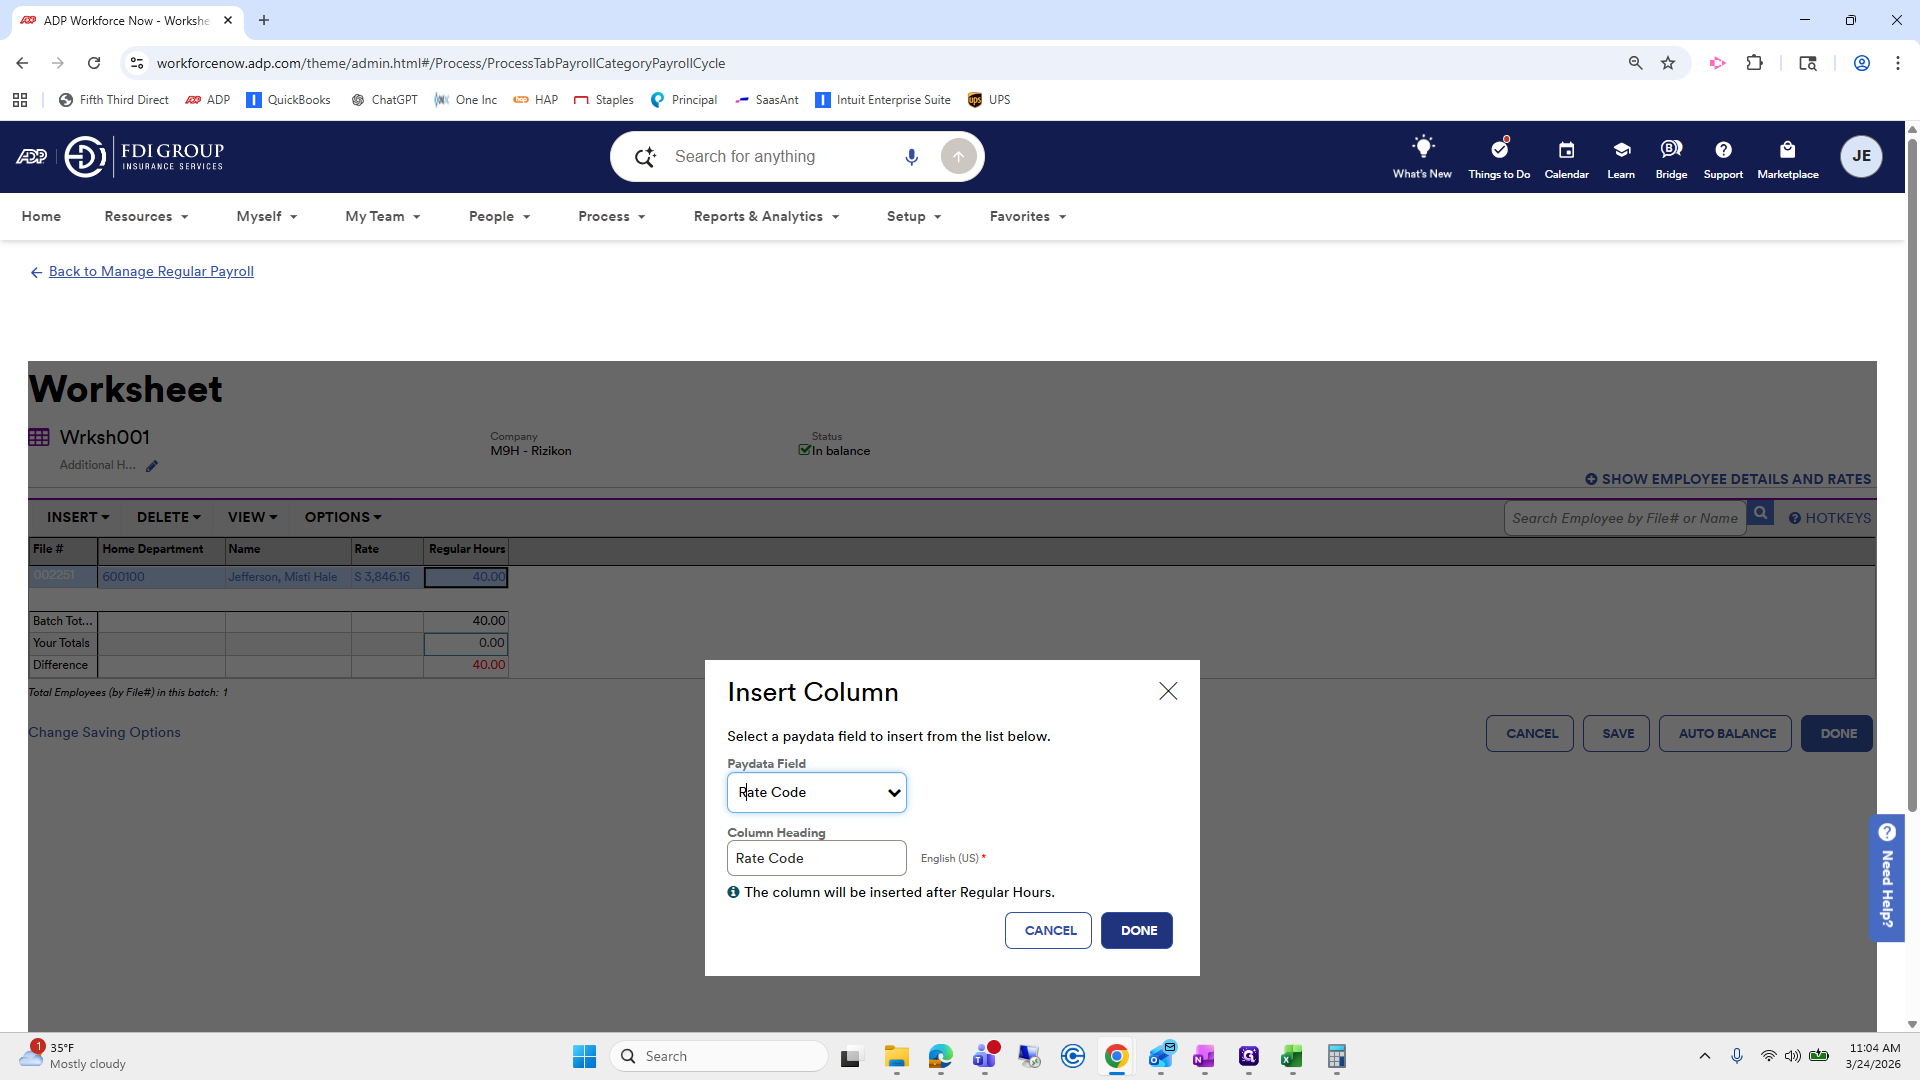
This way, we can select her rate for 40 hours instead of using the salary.


It will multiply 40 by her rate code.

Auto-Balance complete.

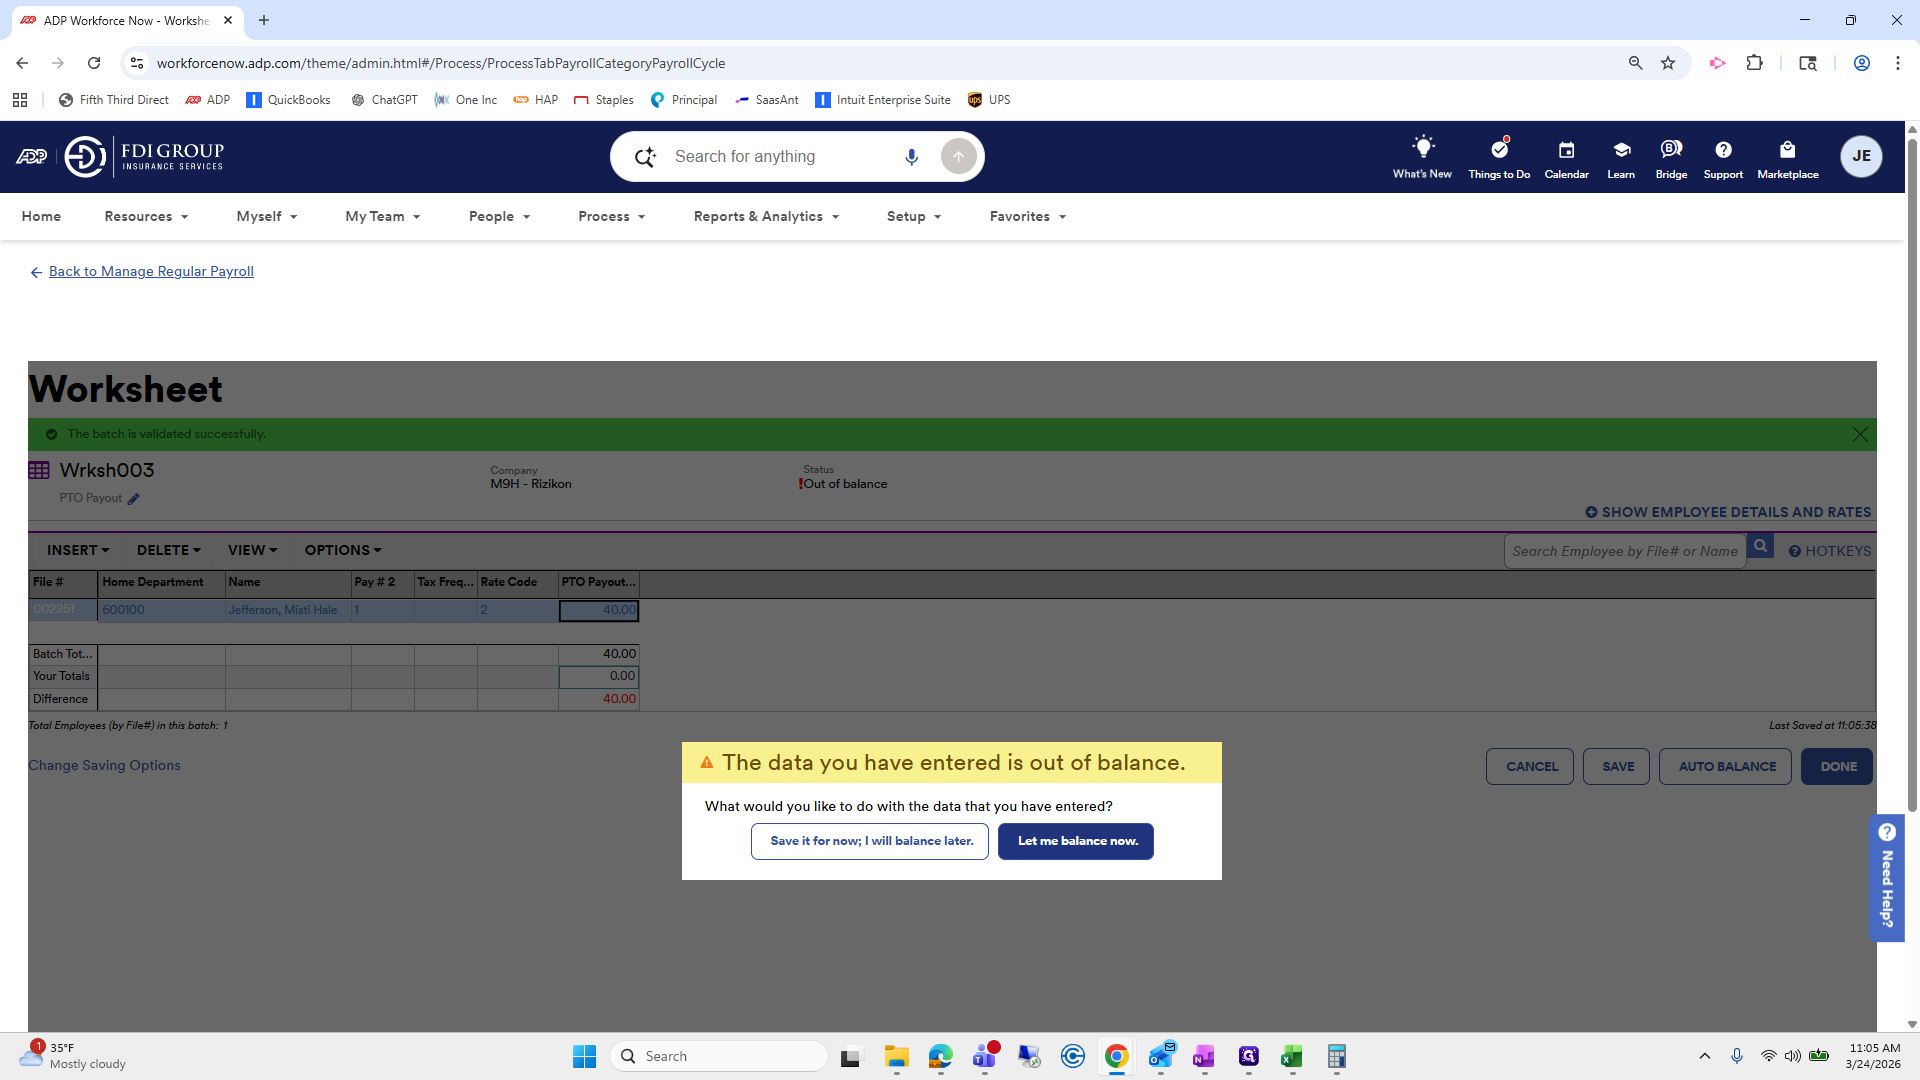
Next, we need to process her PTO payout.

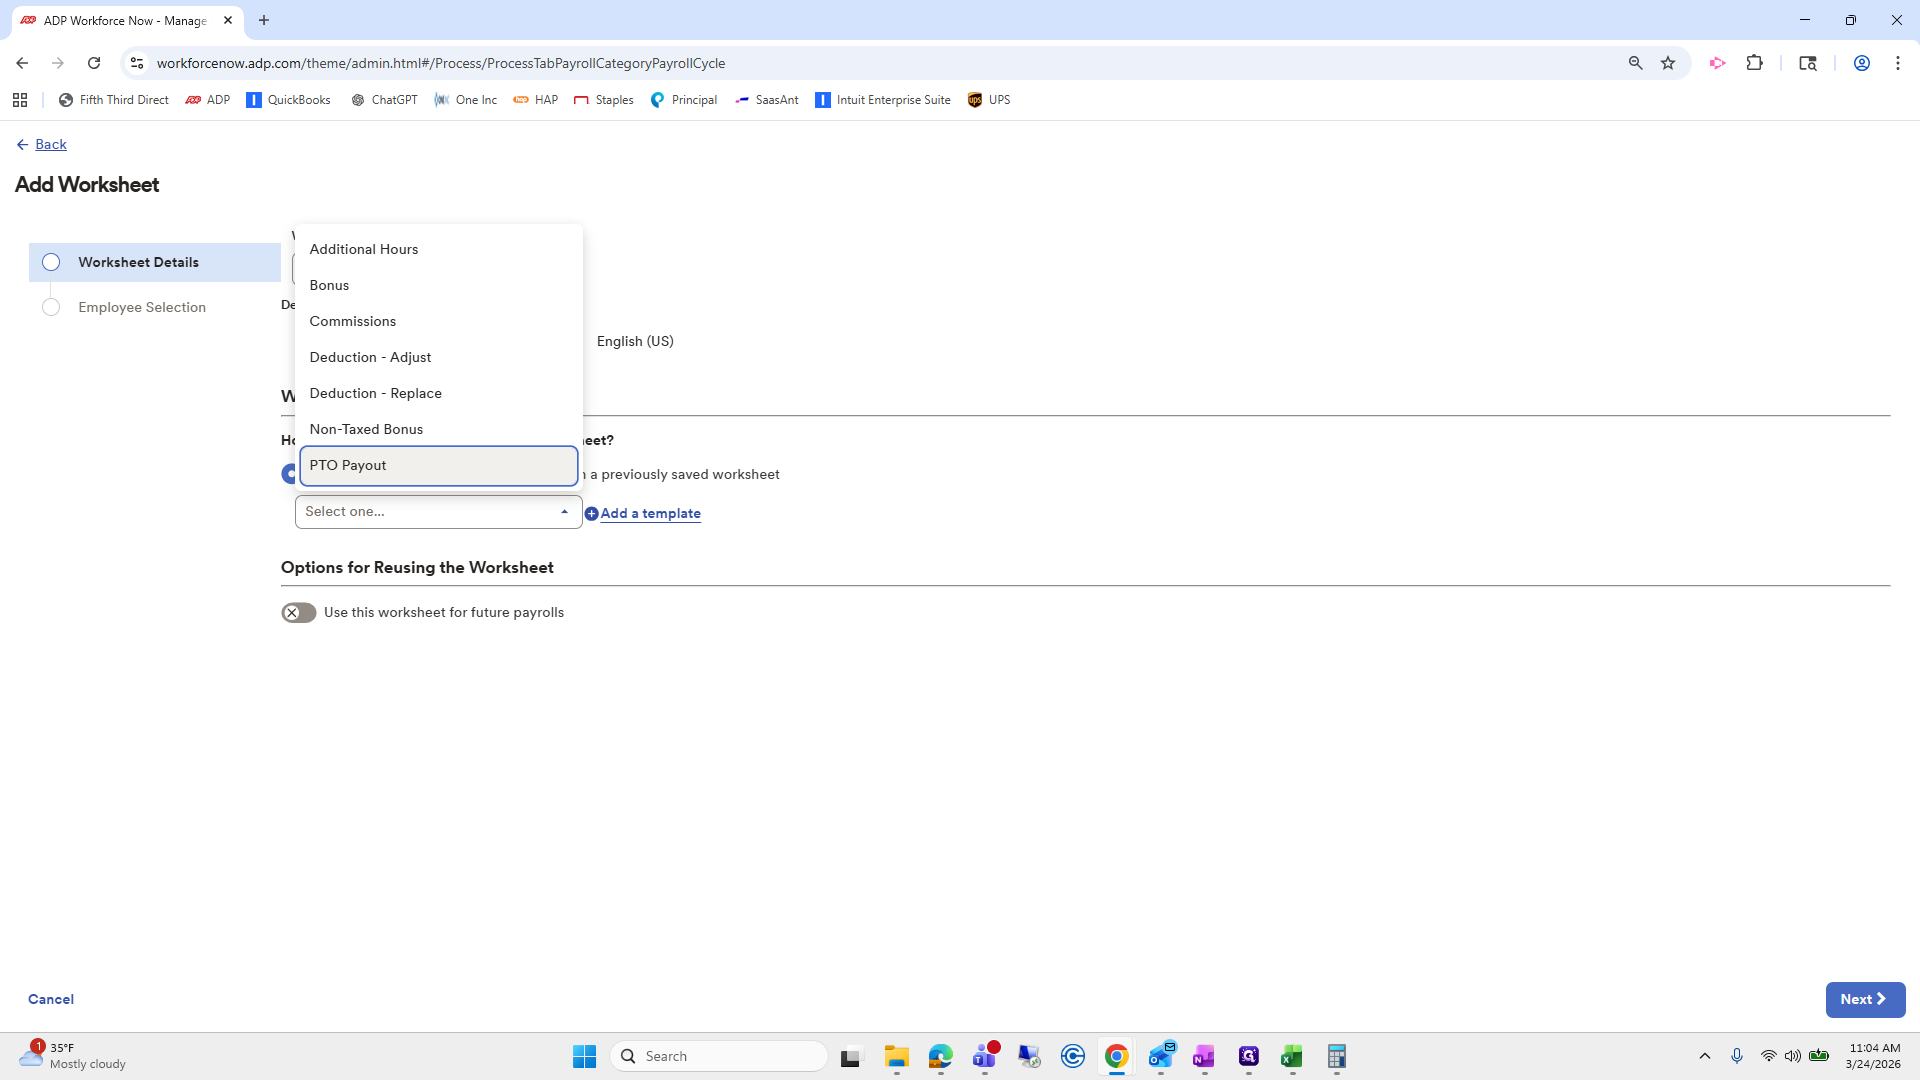
Go to Add Worksheet, then select PTO payout.

Oops.

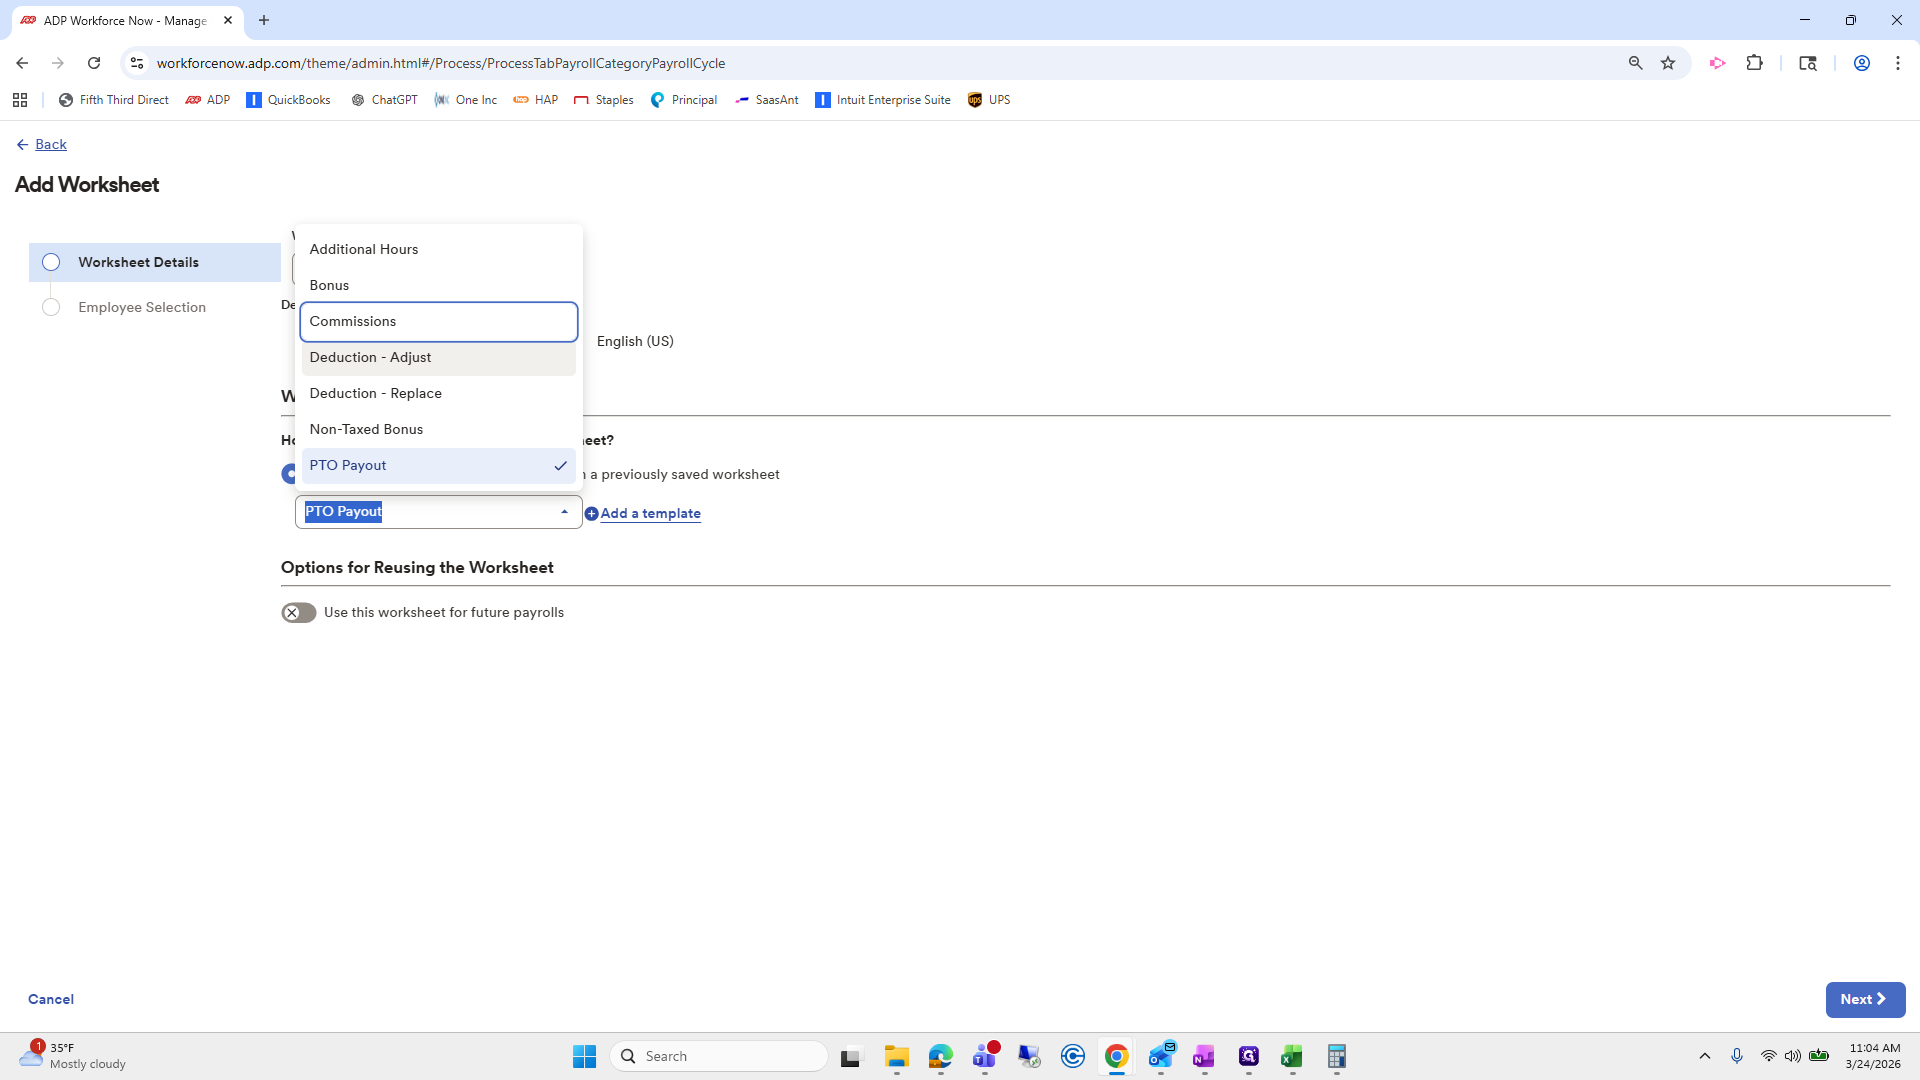
I will copy and paste the PTO payout here for reference, so I know which worksheet is which.


Again, we will choose Misty.


She is not there. We need to go to All Employees.

She is terminated.
Submit. The PTO payout amount is 40 hours.
We will do pay-1. That's fine.


Rate code is 2.


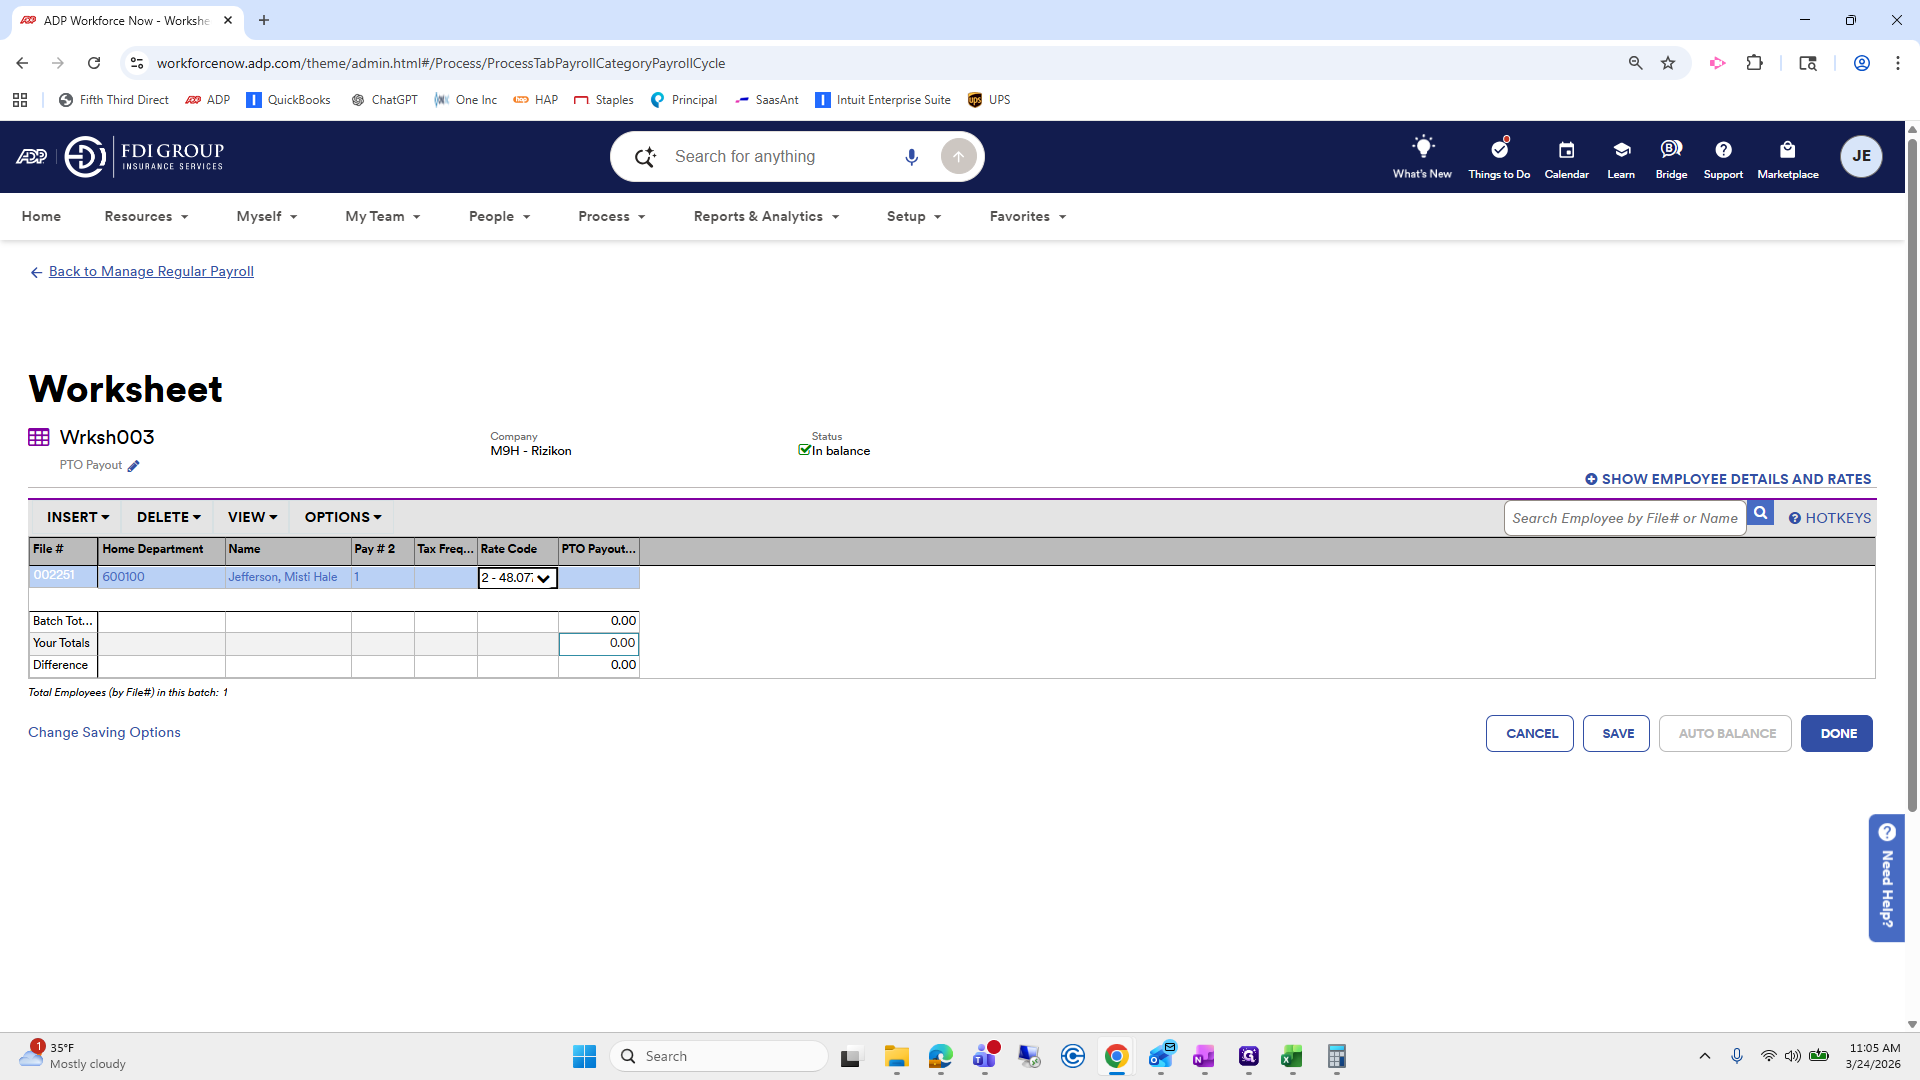
I just realized that on the other worksheet, I put 40 instead of 80.
This pays her out for 40 hours of PTO.
Save. Done.


I forgot to auto-balance.
Now, I will go back into Additional Hours because I realized I only paid her 40, but she should have been paid 80.
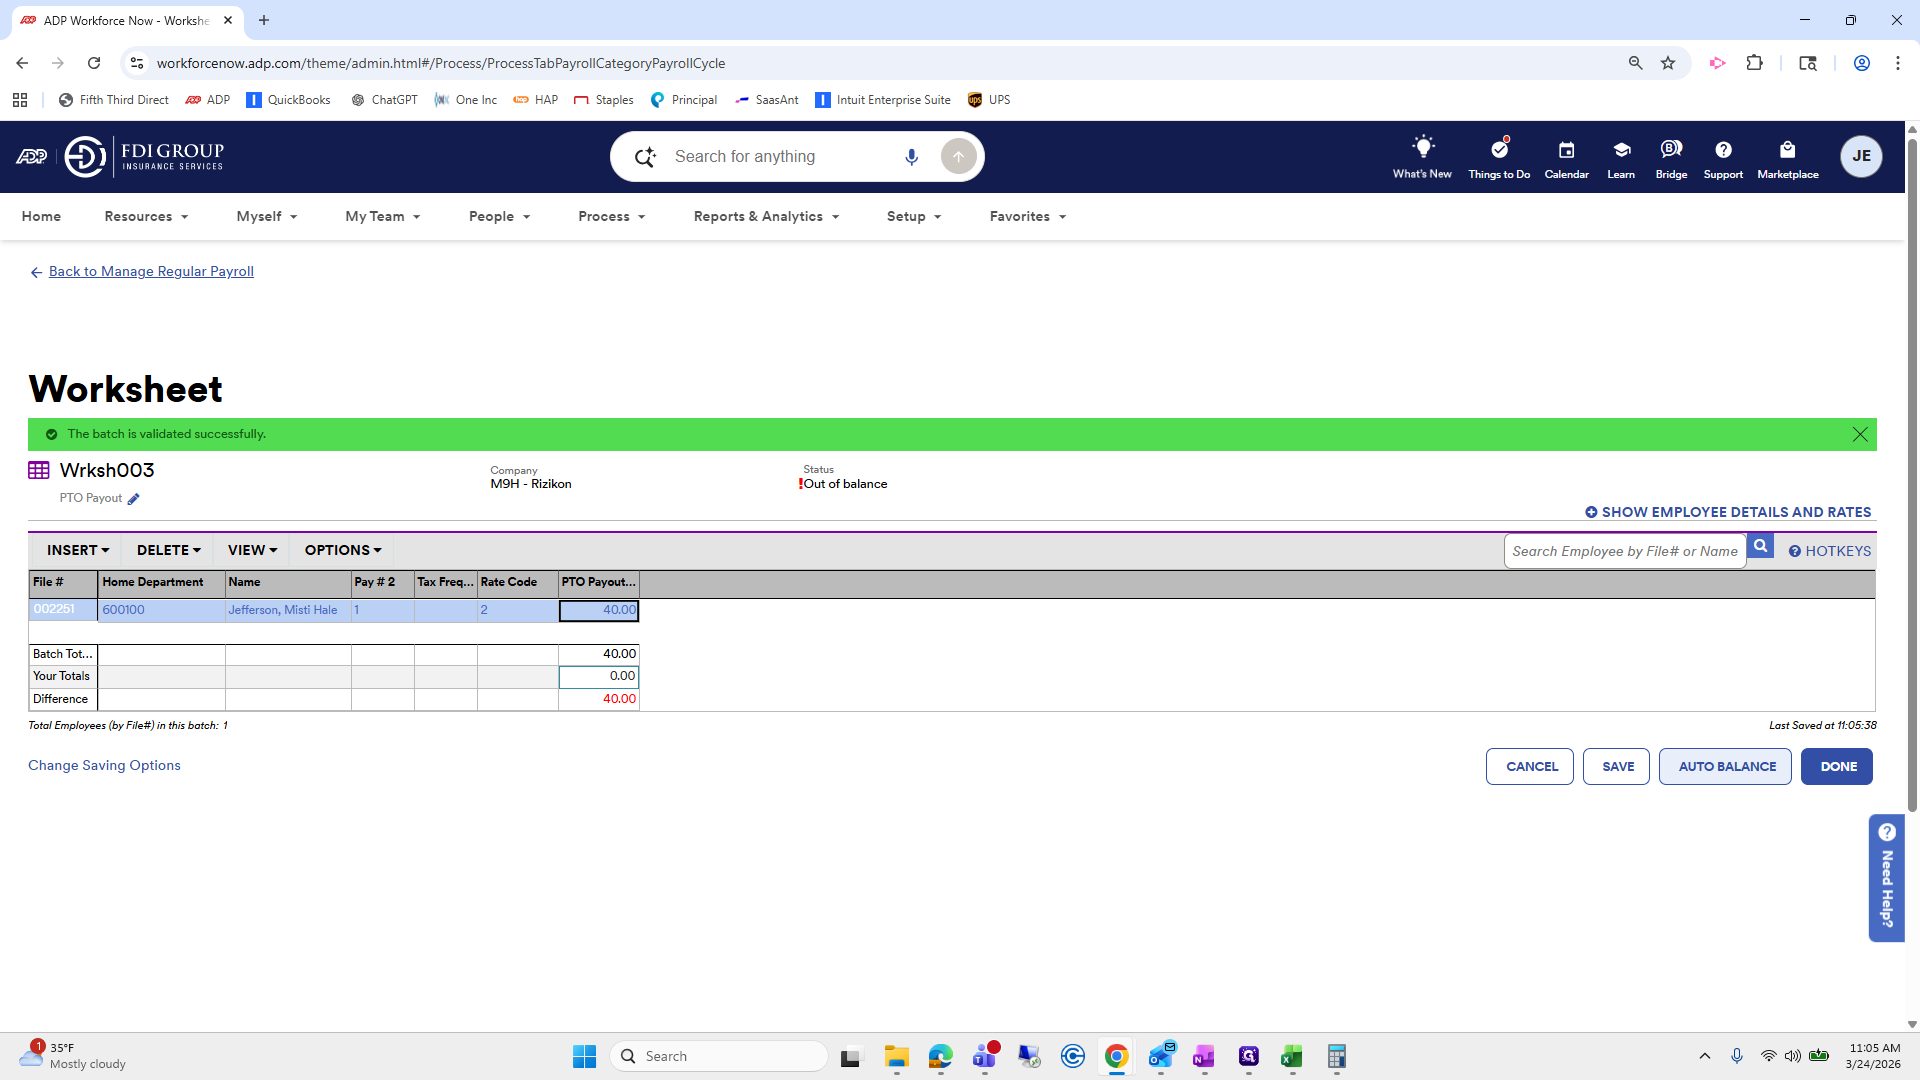
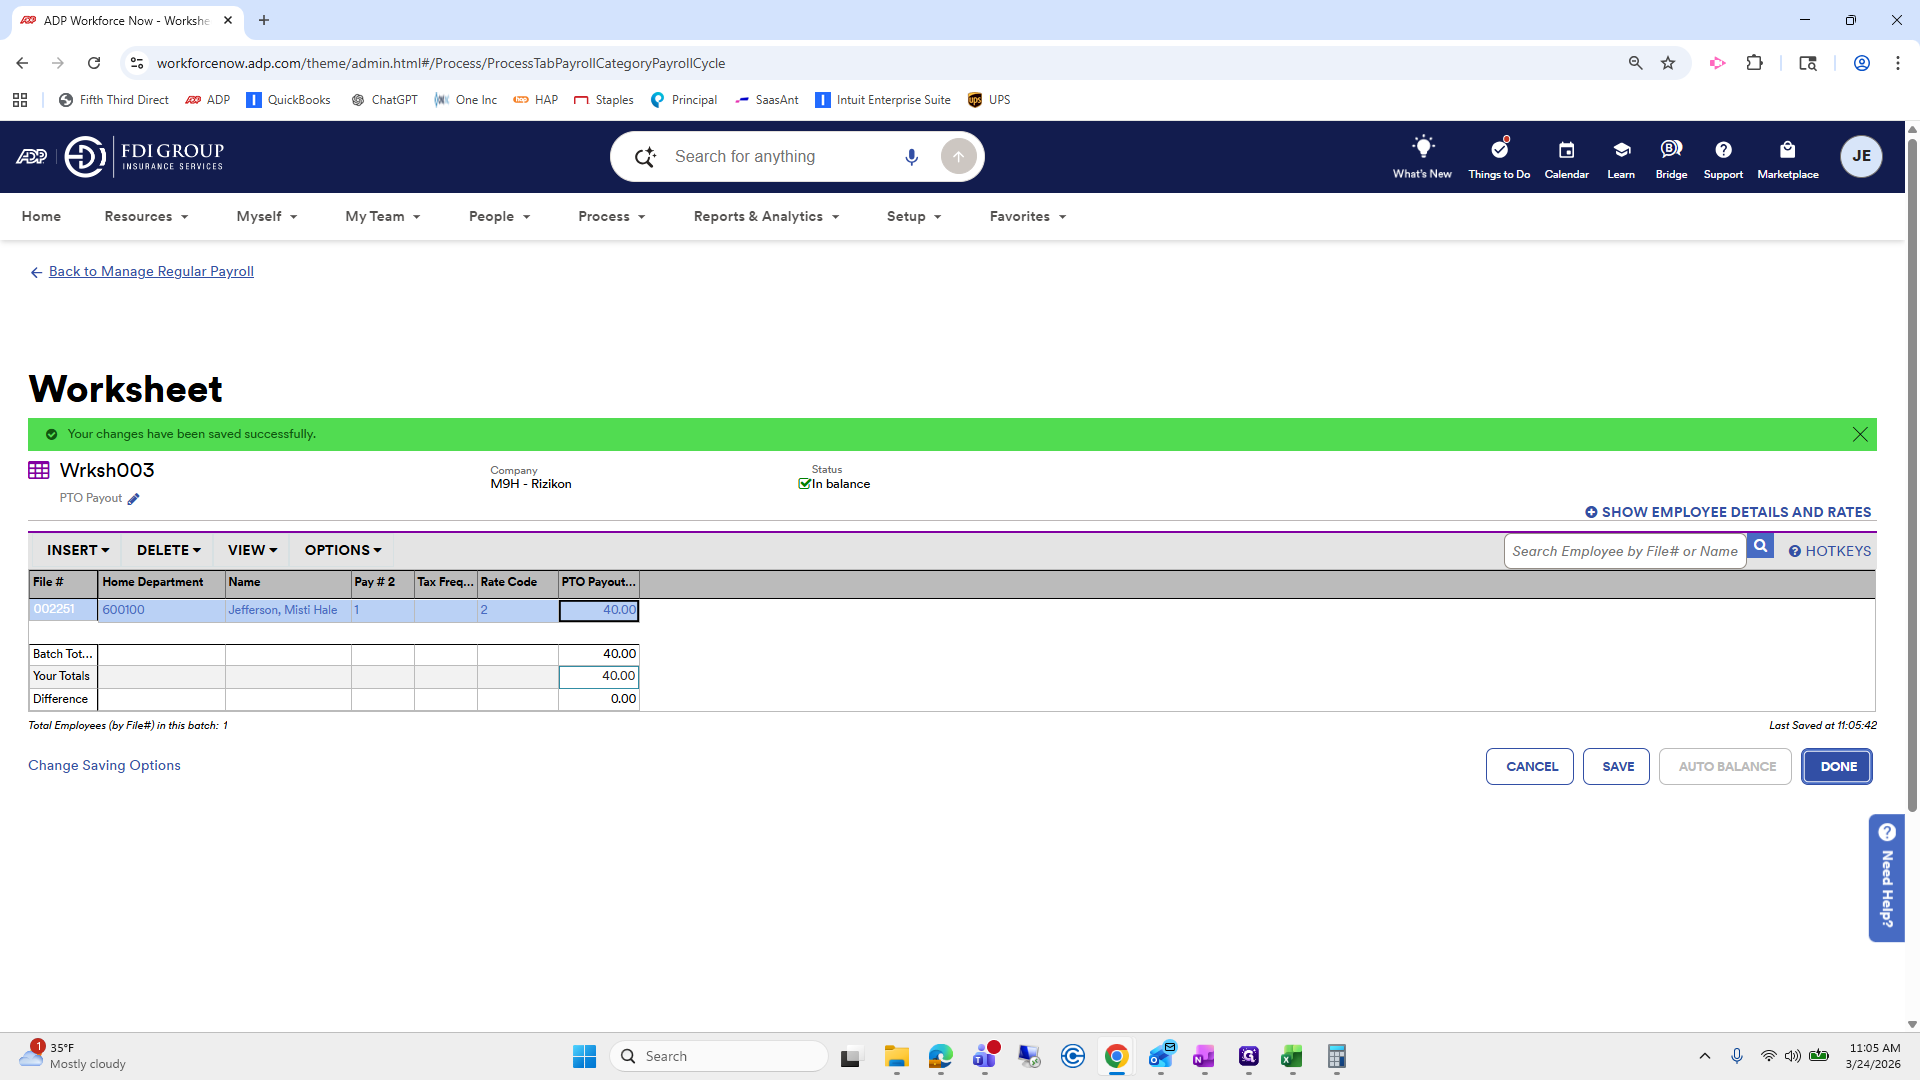


Auto-balance complete.


Okay, we have those two done.

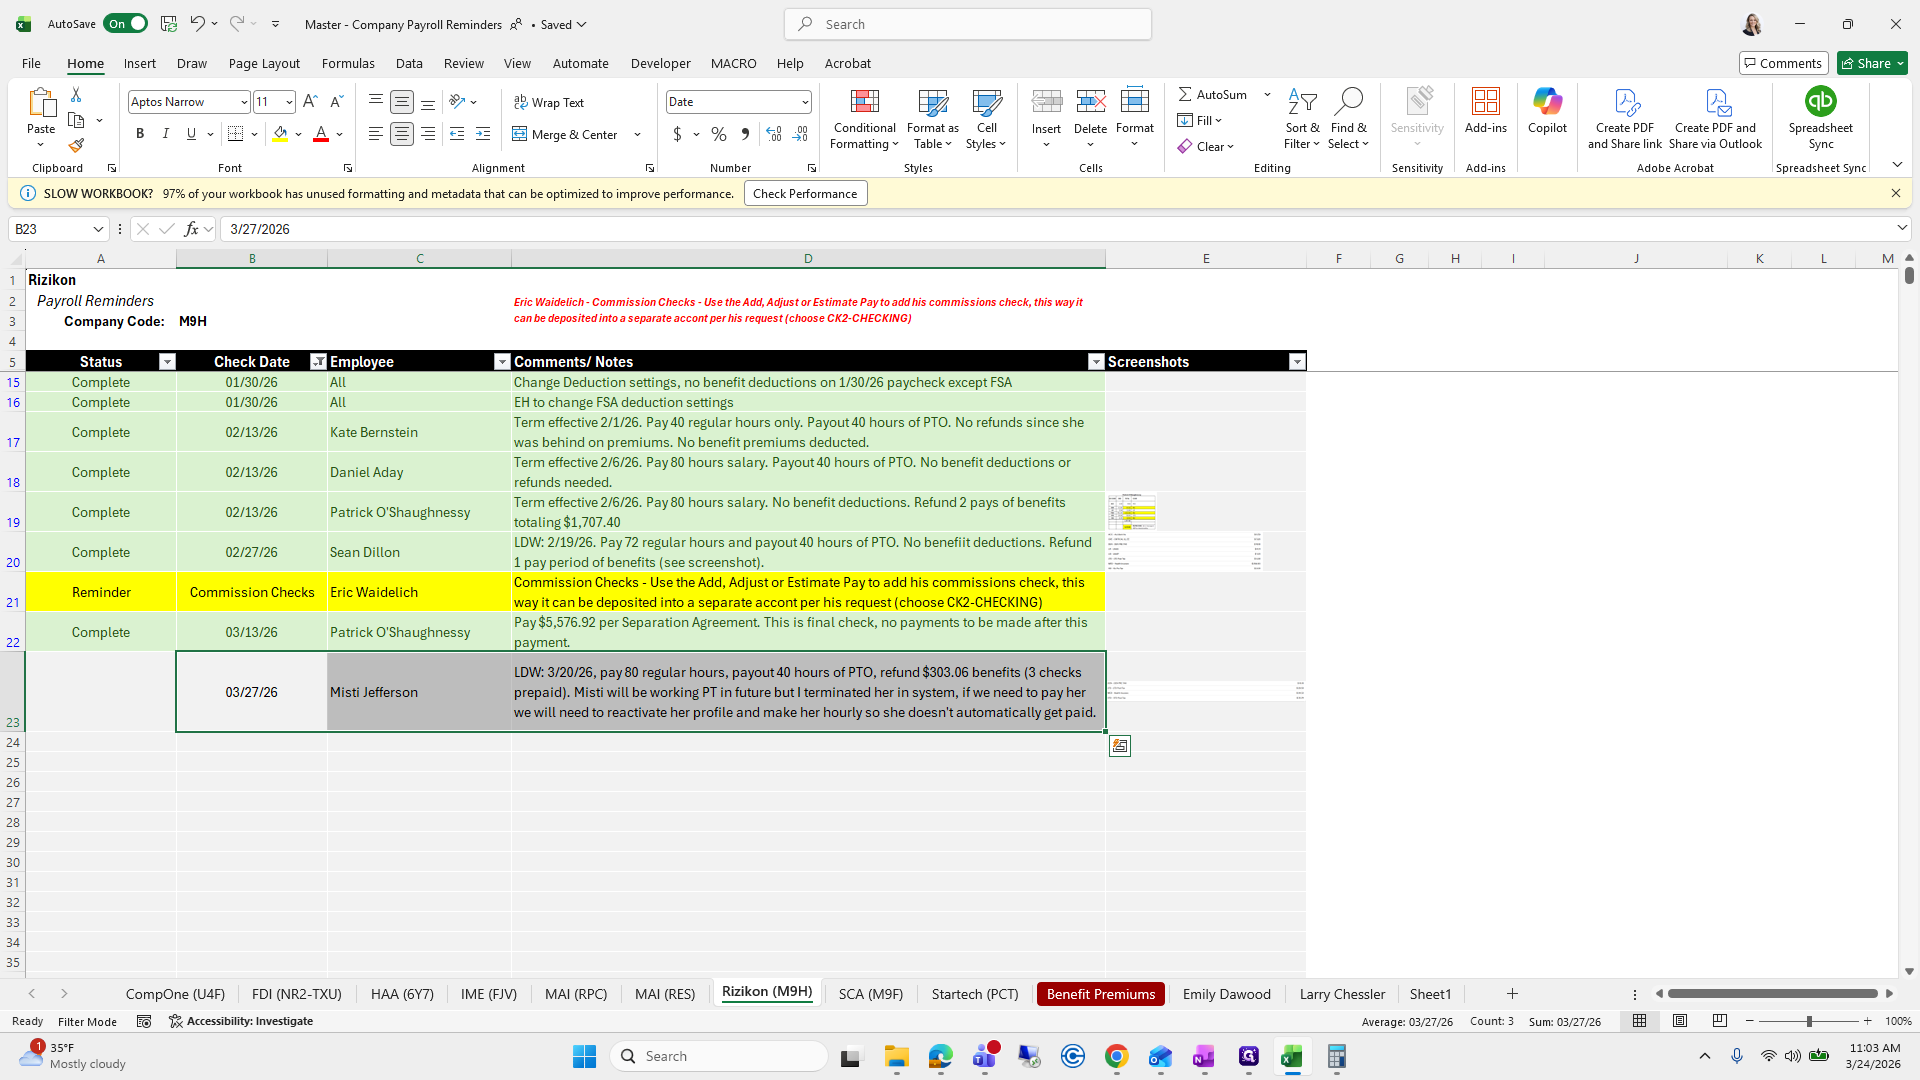
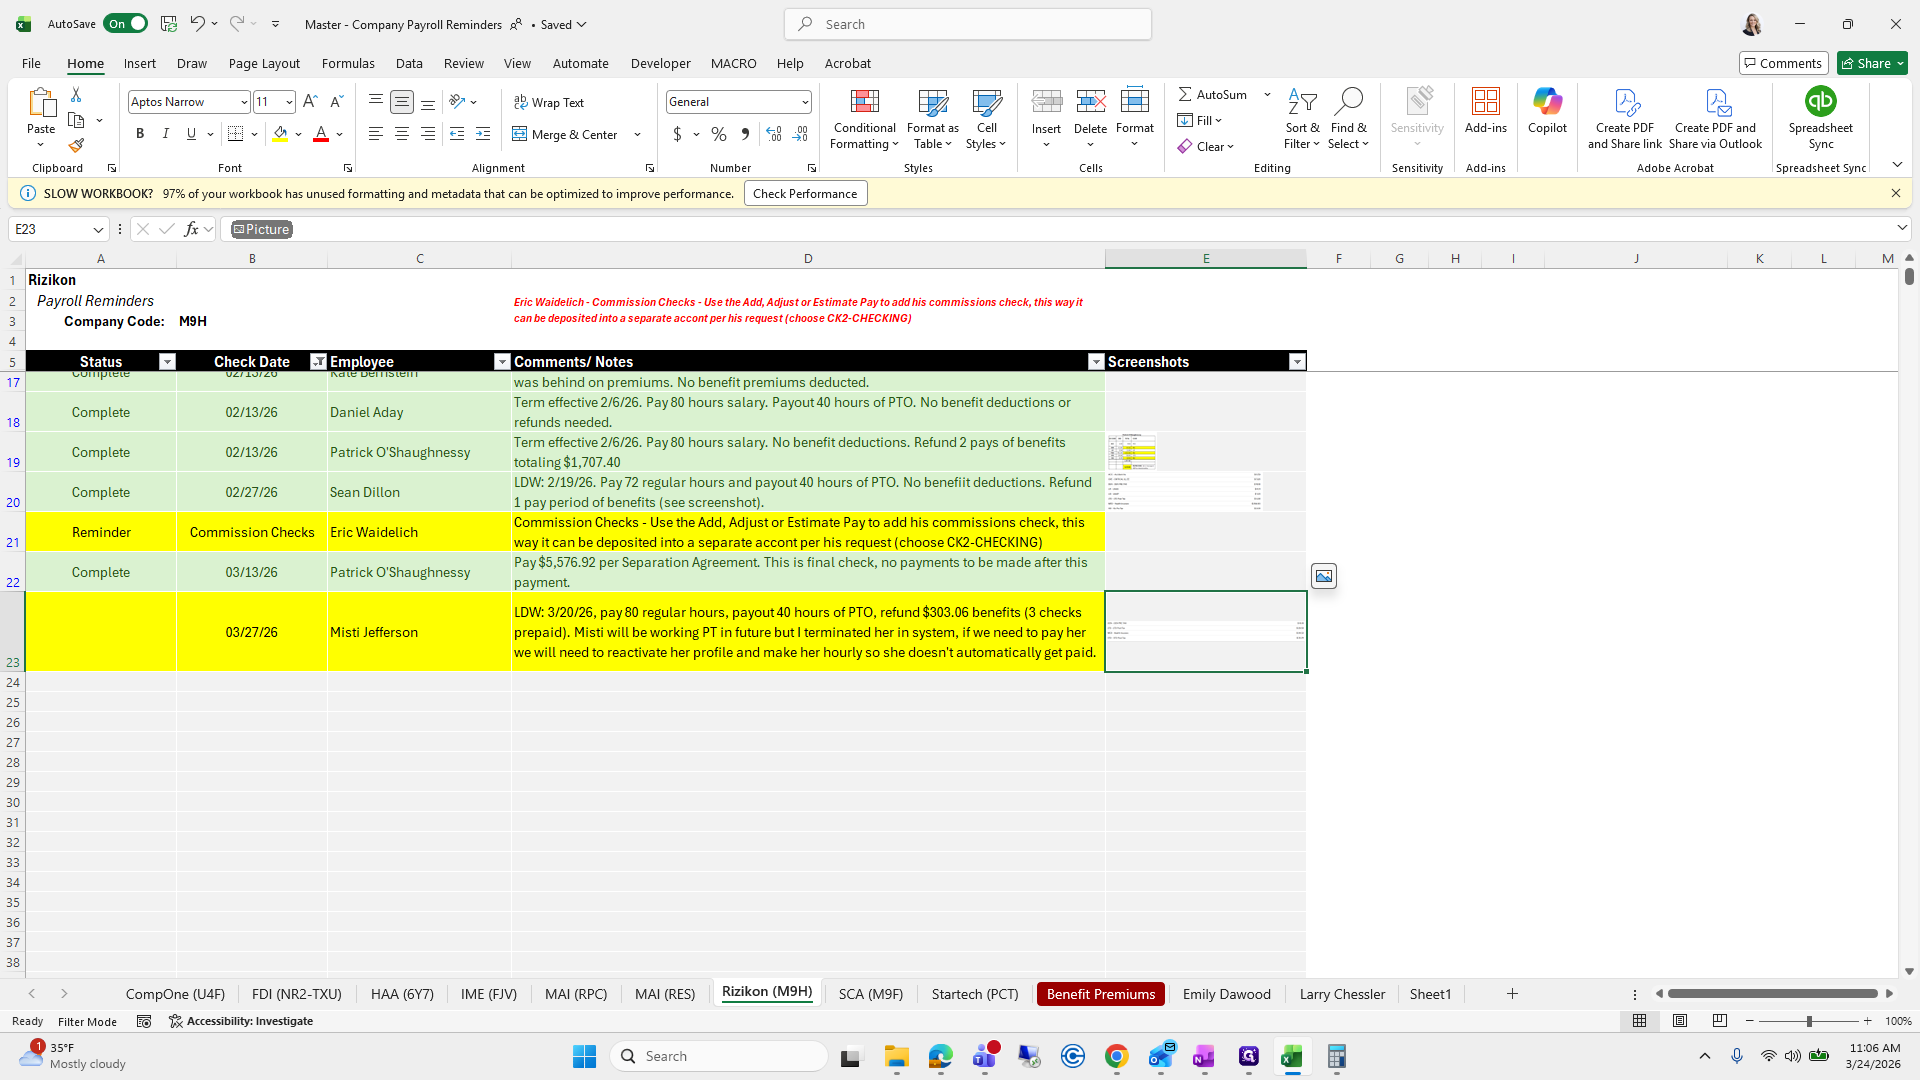
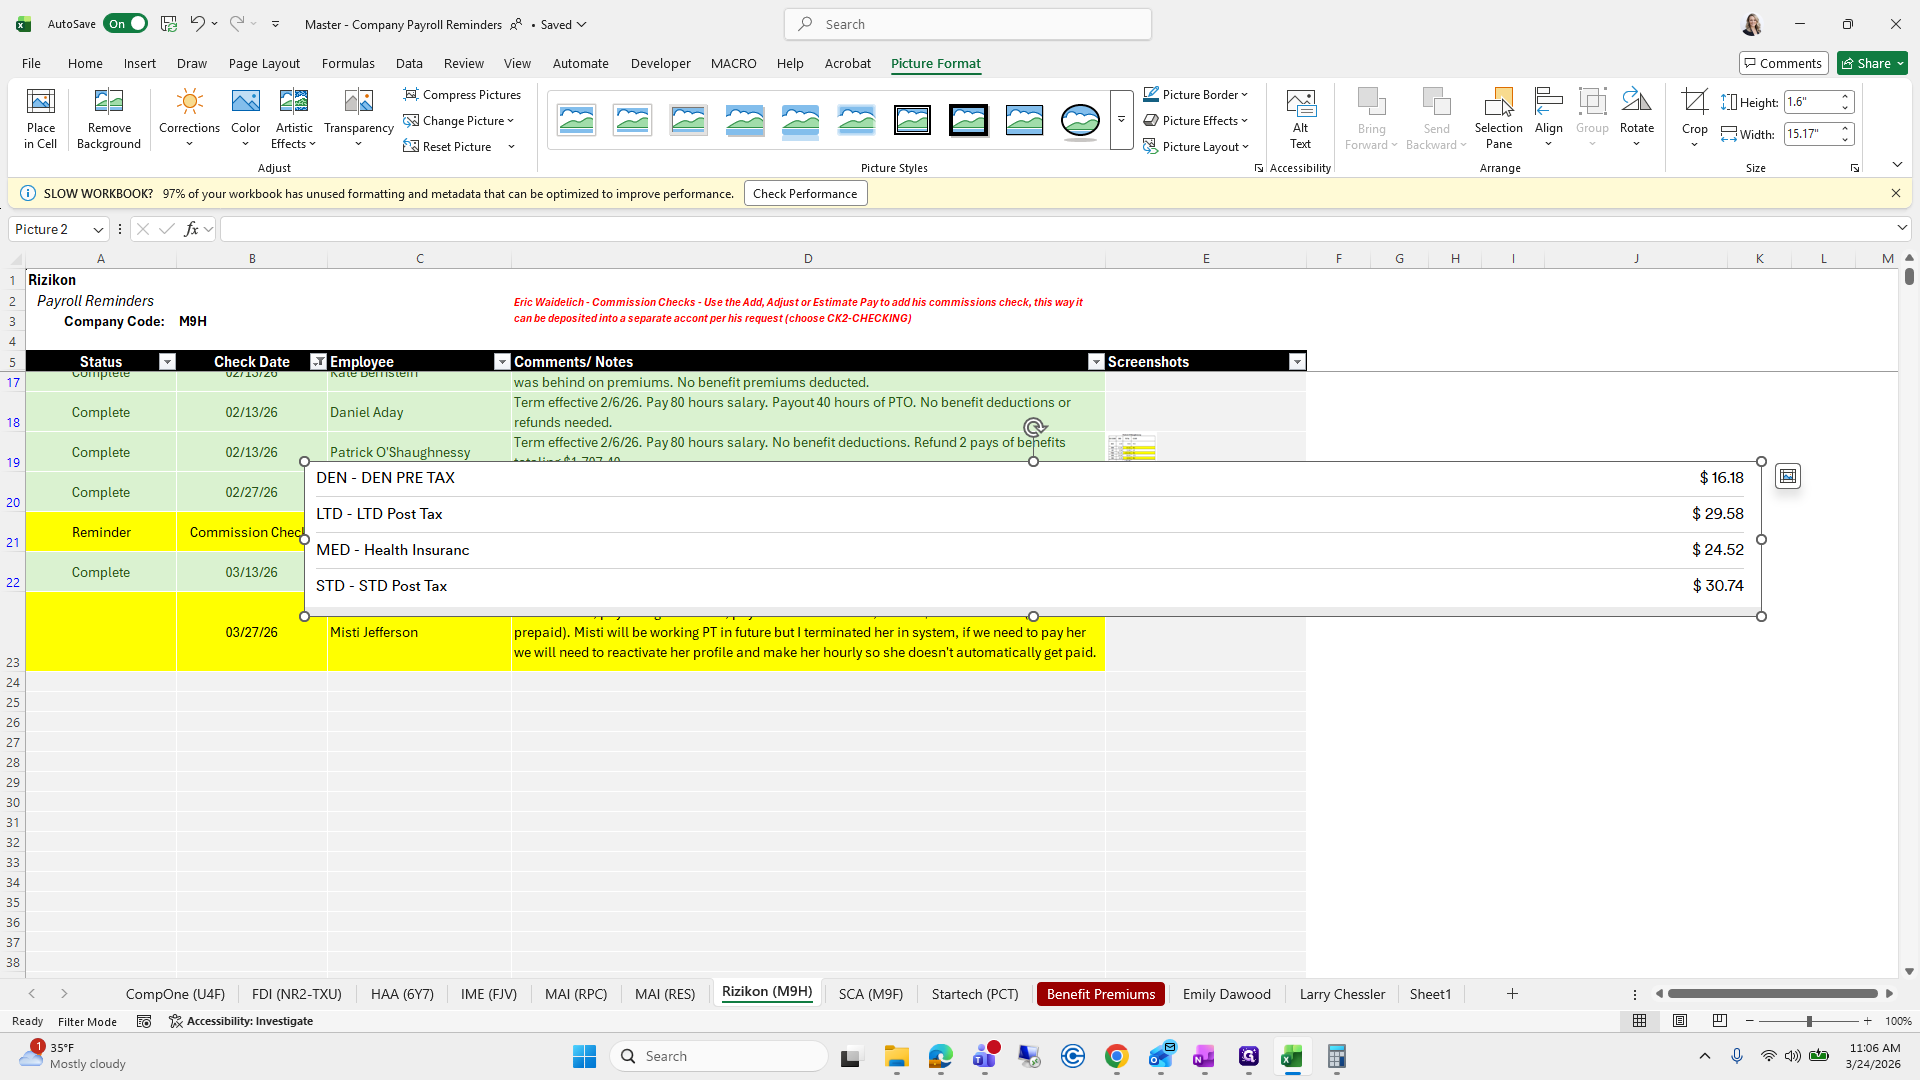
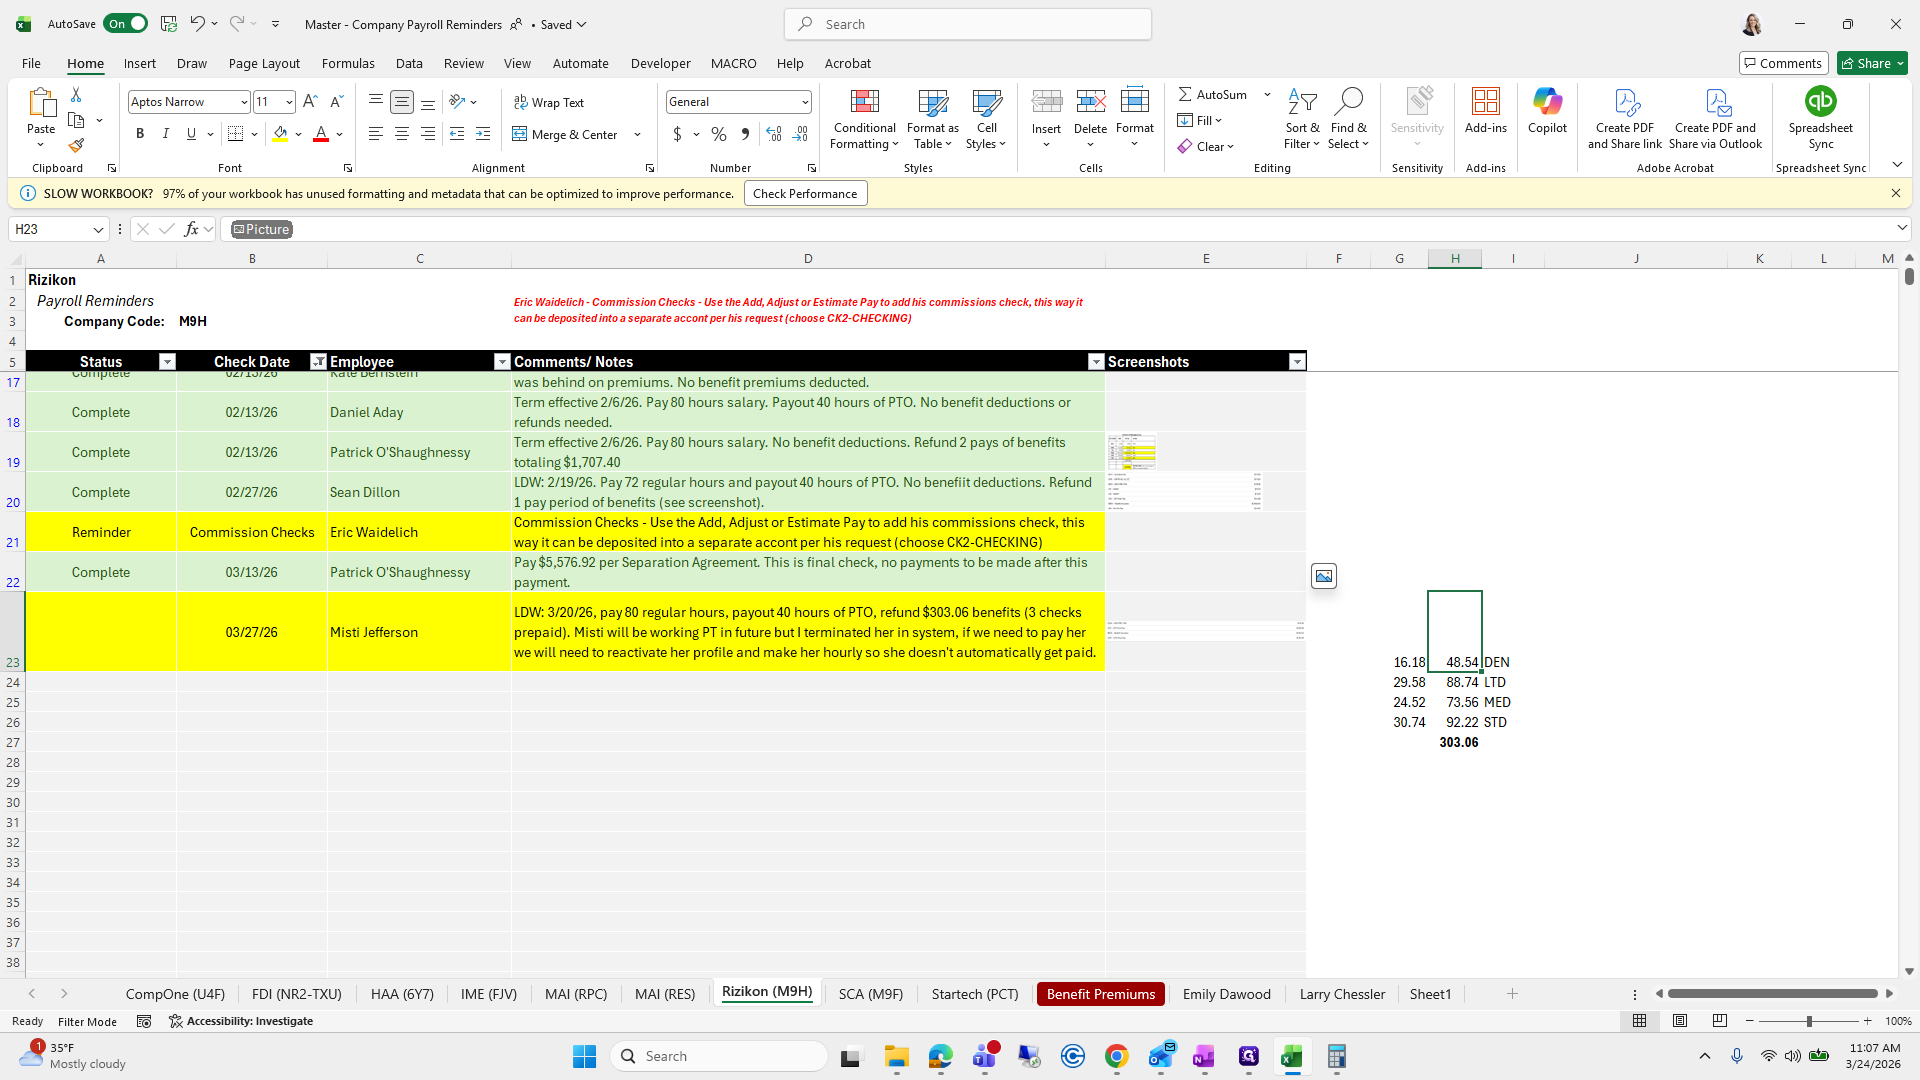
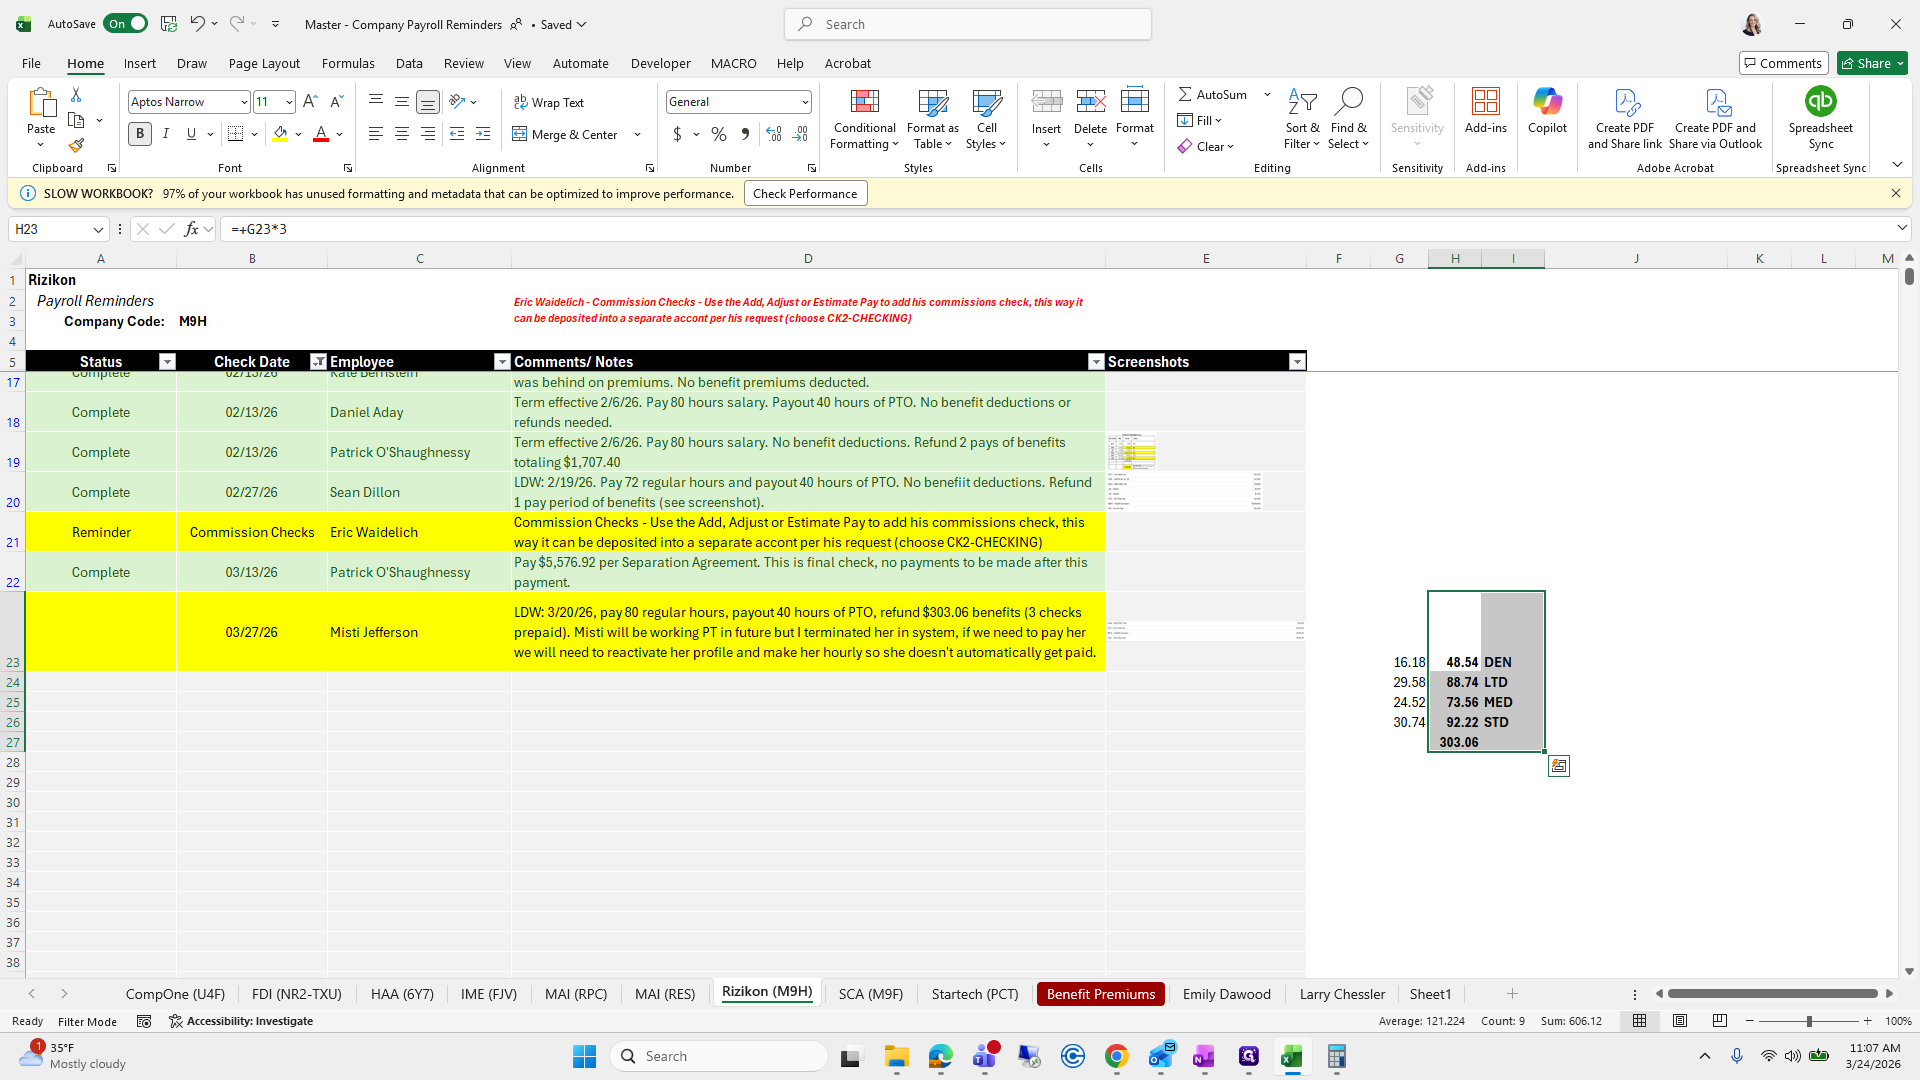
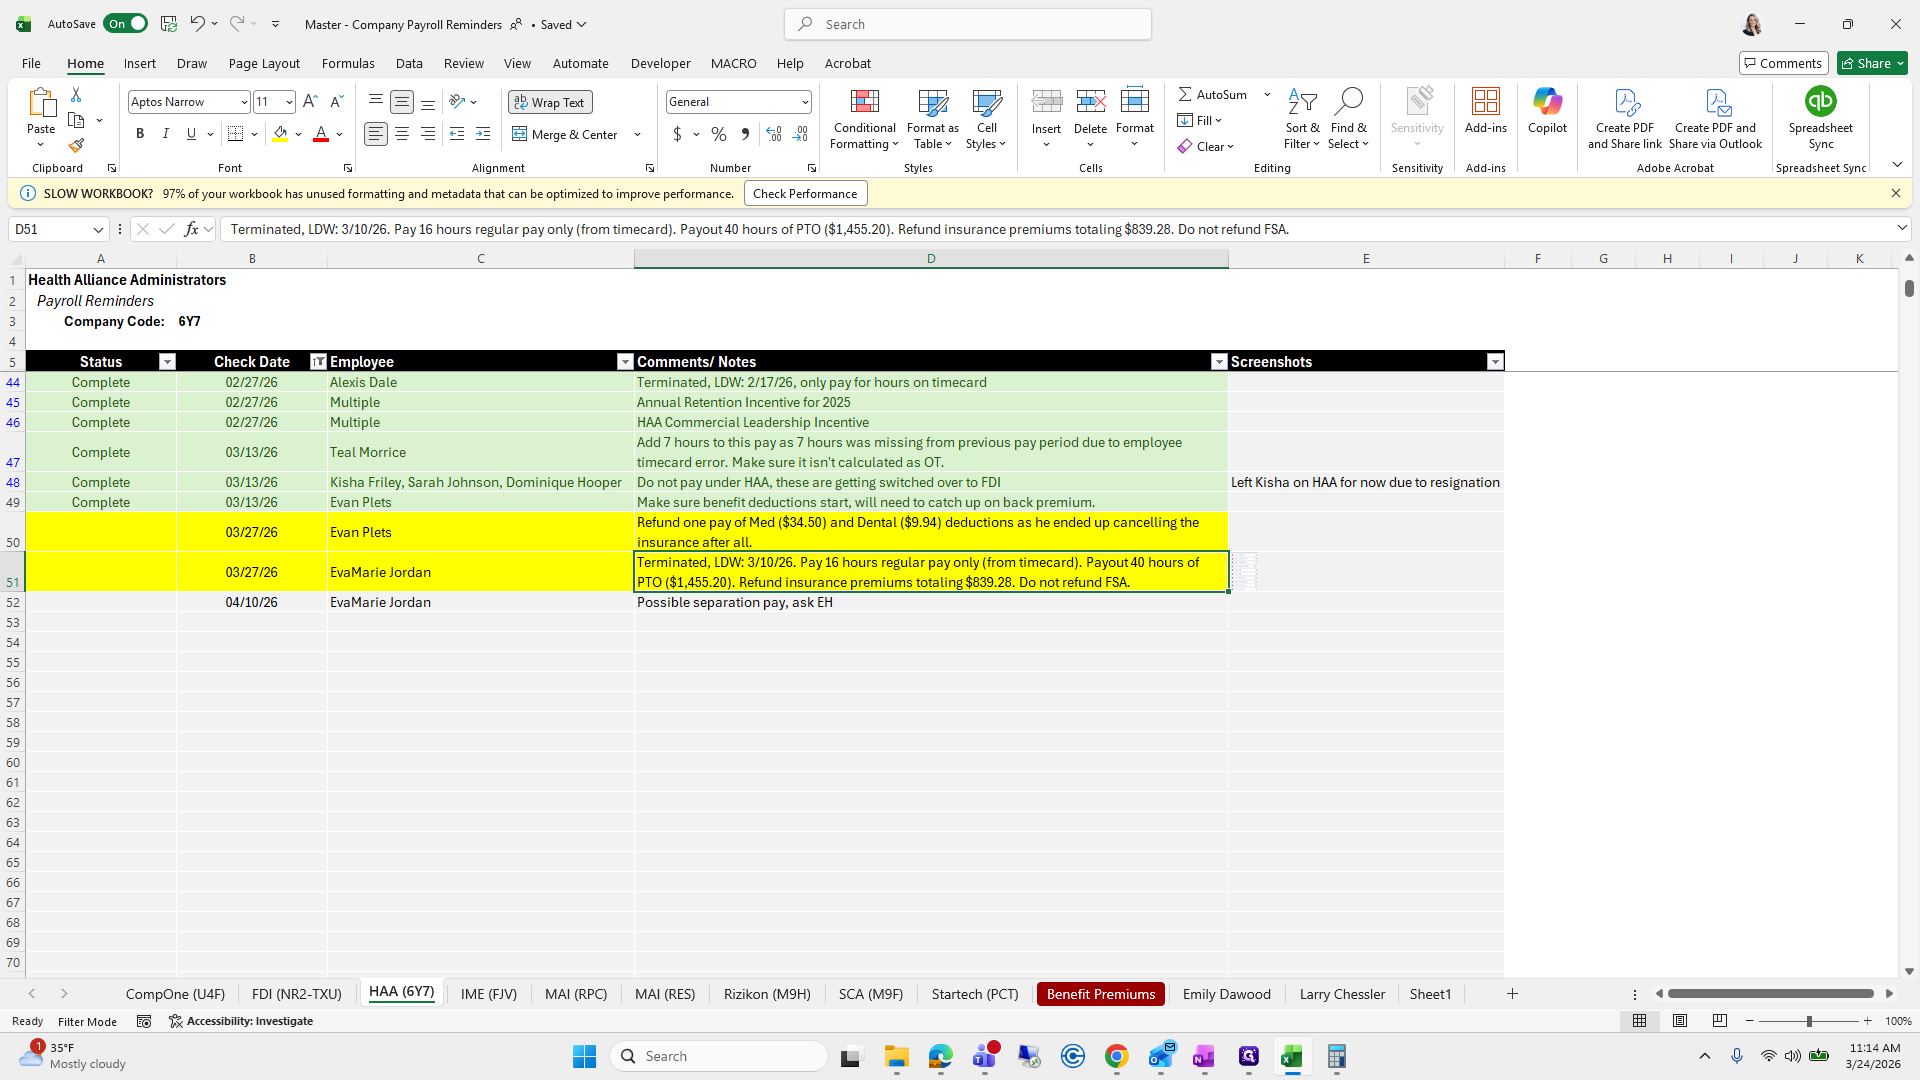
We need to refund her benefits for three prepaid checks. If you have a screenshot, you can easily add it to a cell. Simply insert the screenshot into the cell, then click the button to place it inside.


This way, when I want to view it, I can restore it to its original size. I need to process three refunds for three prepaid checks.


Okay.
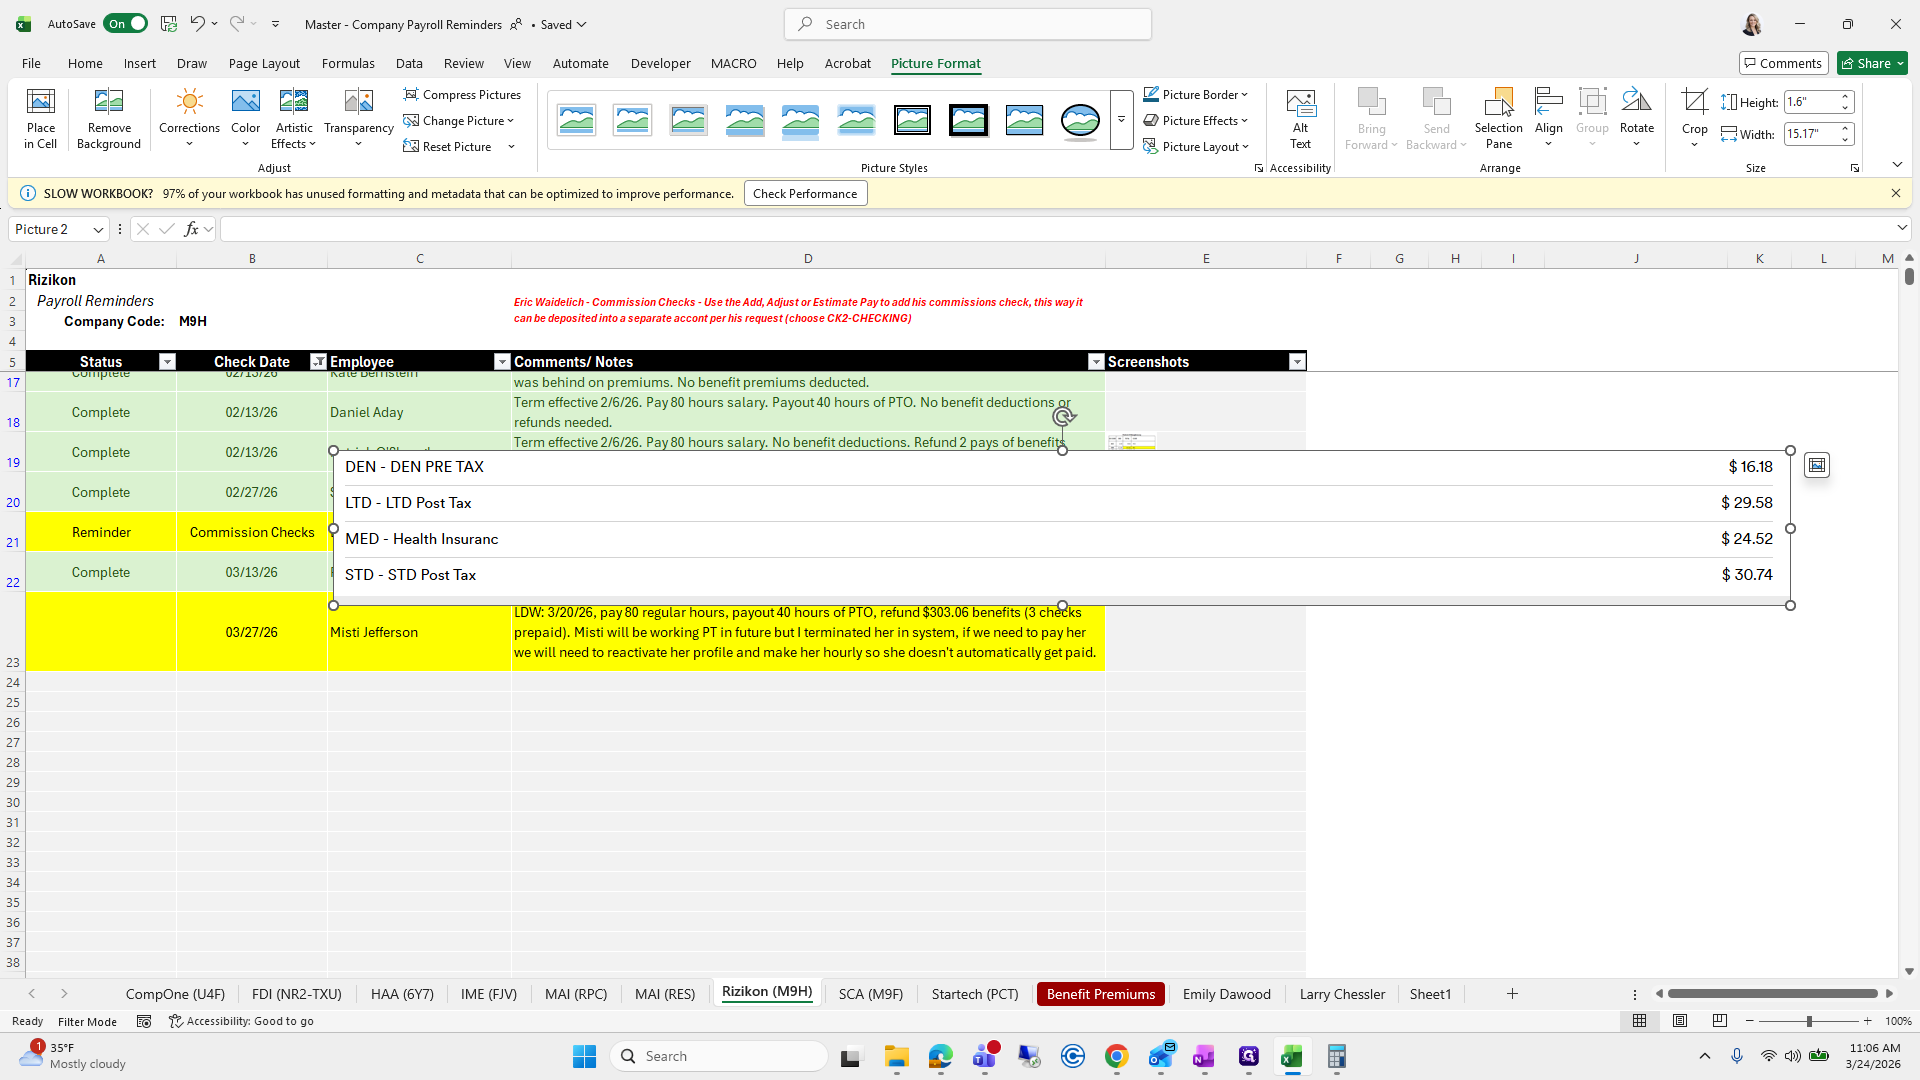
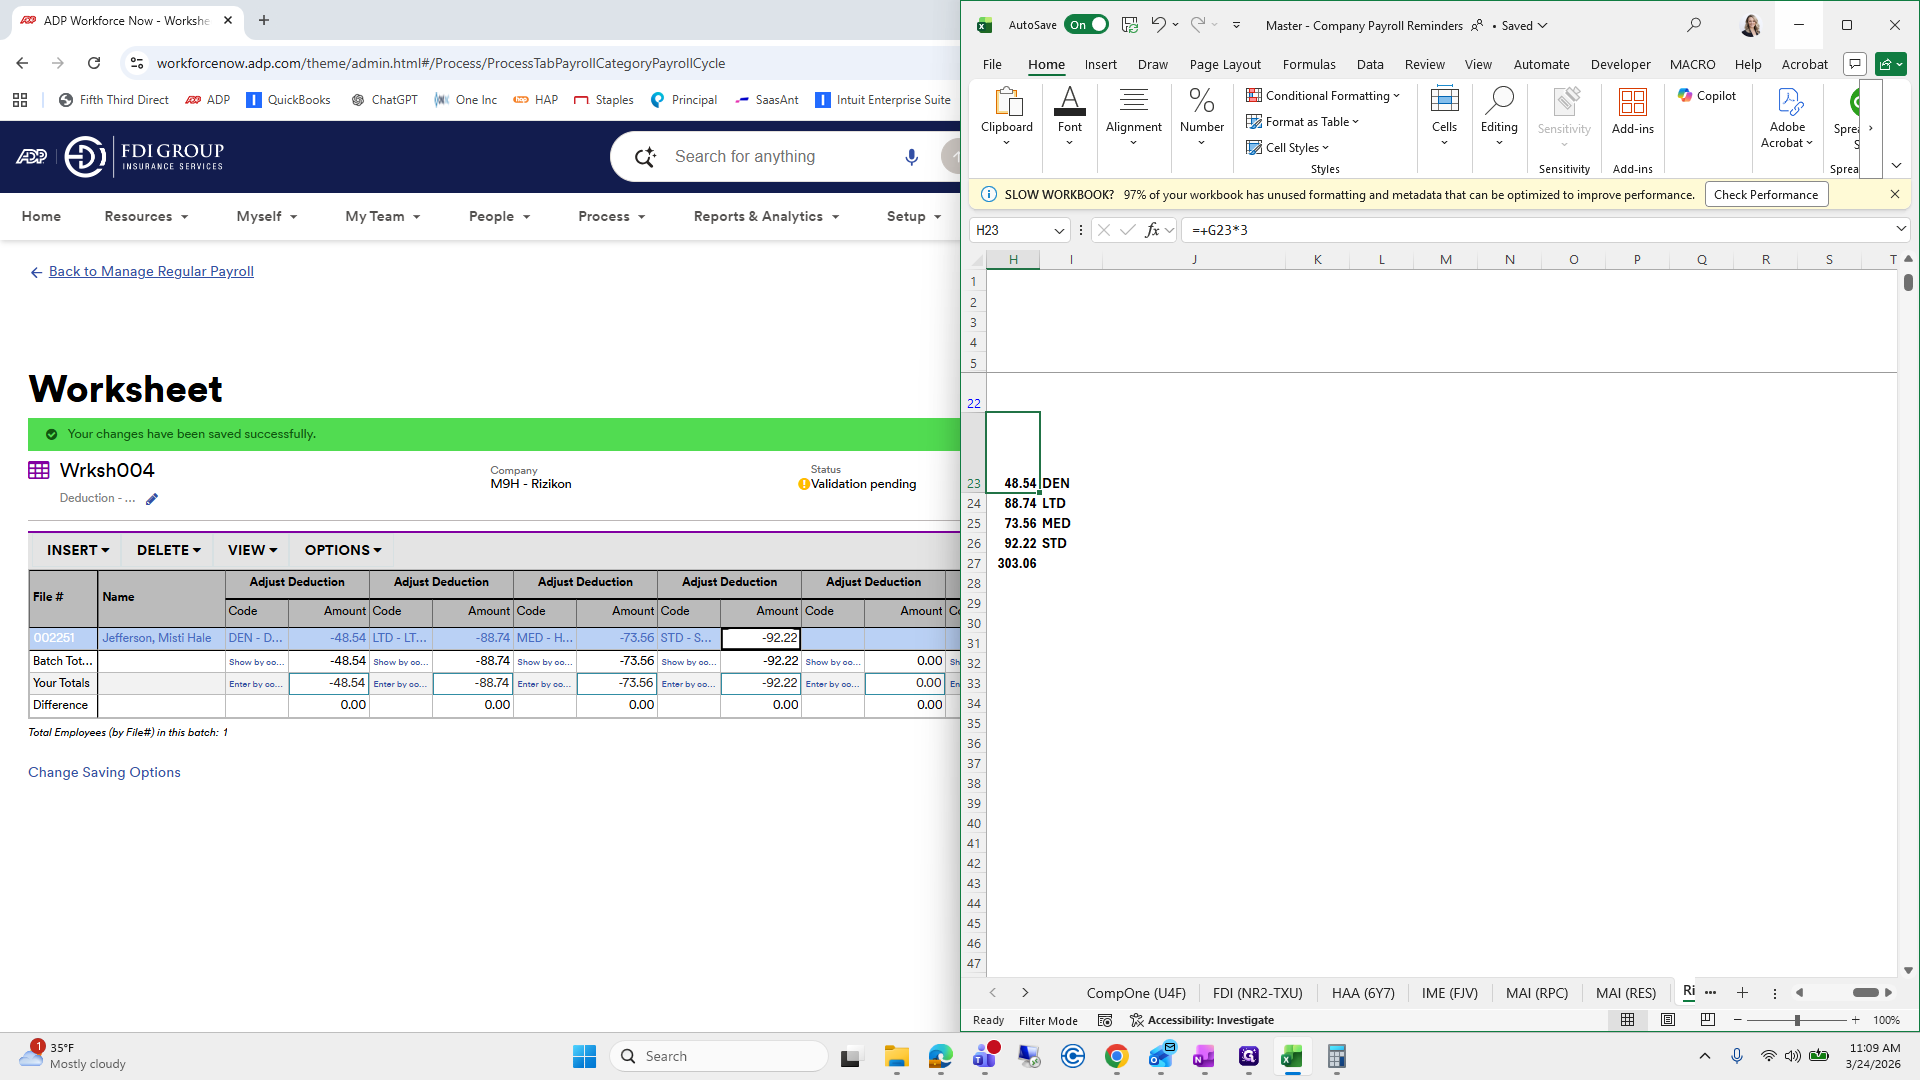
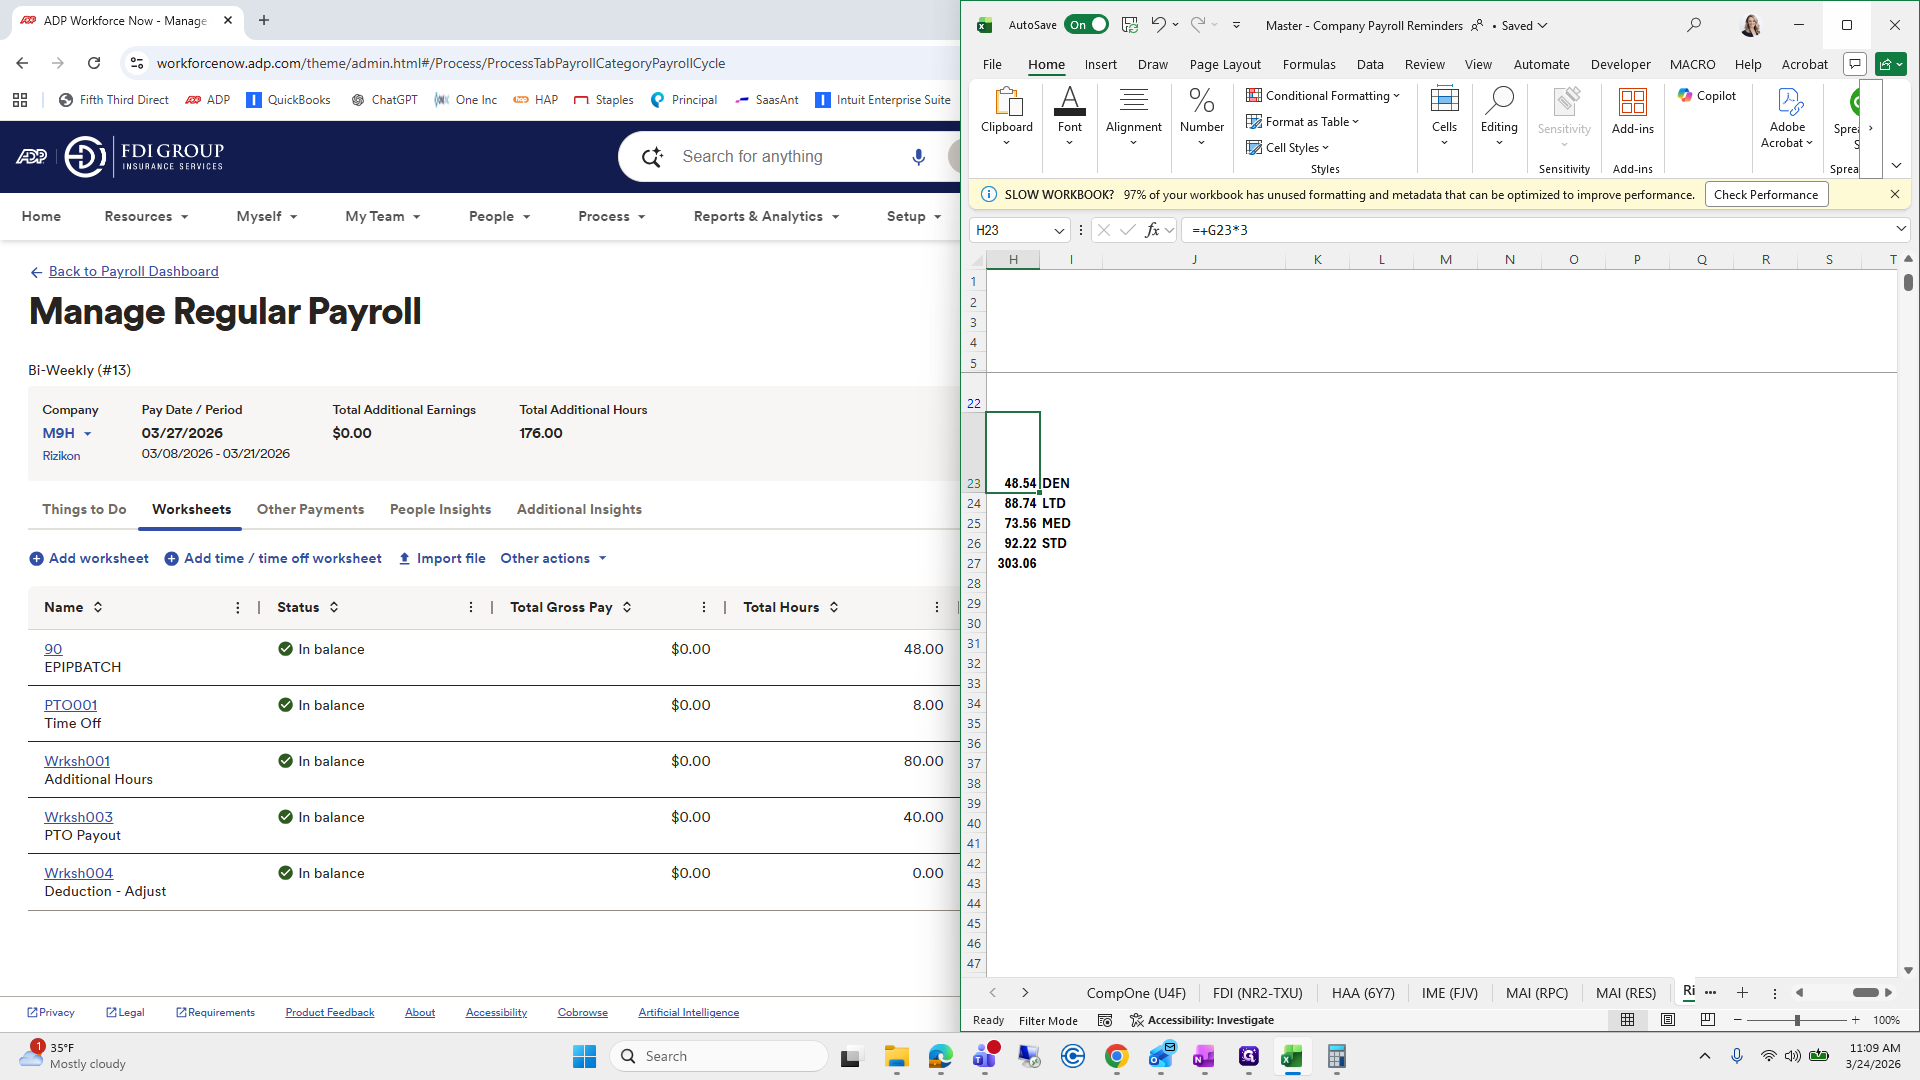
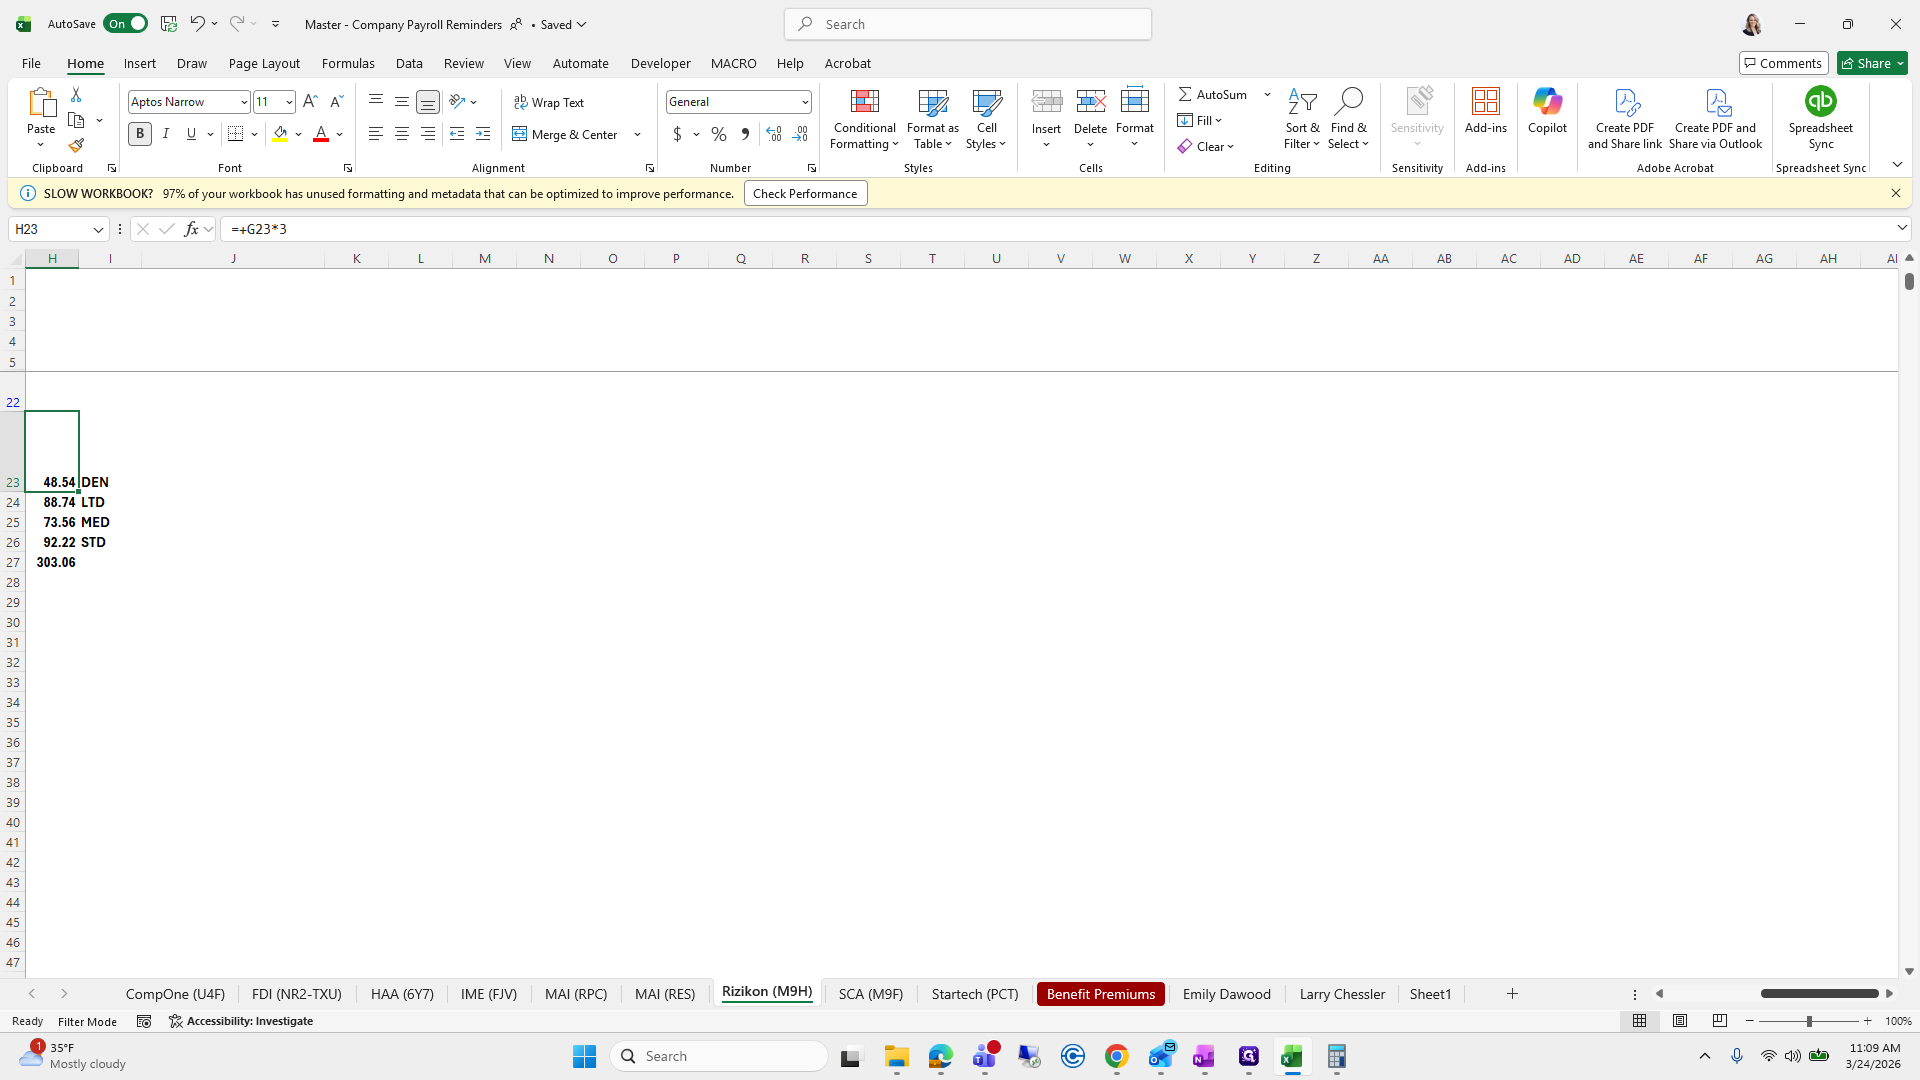
So, 303.
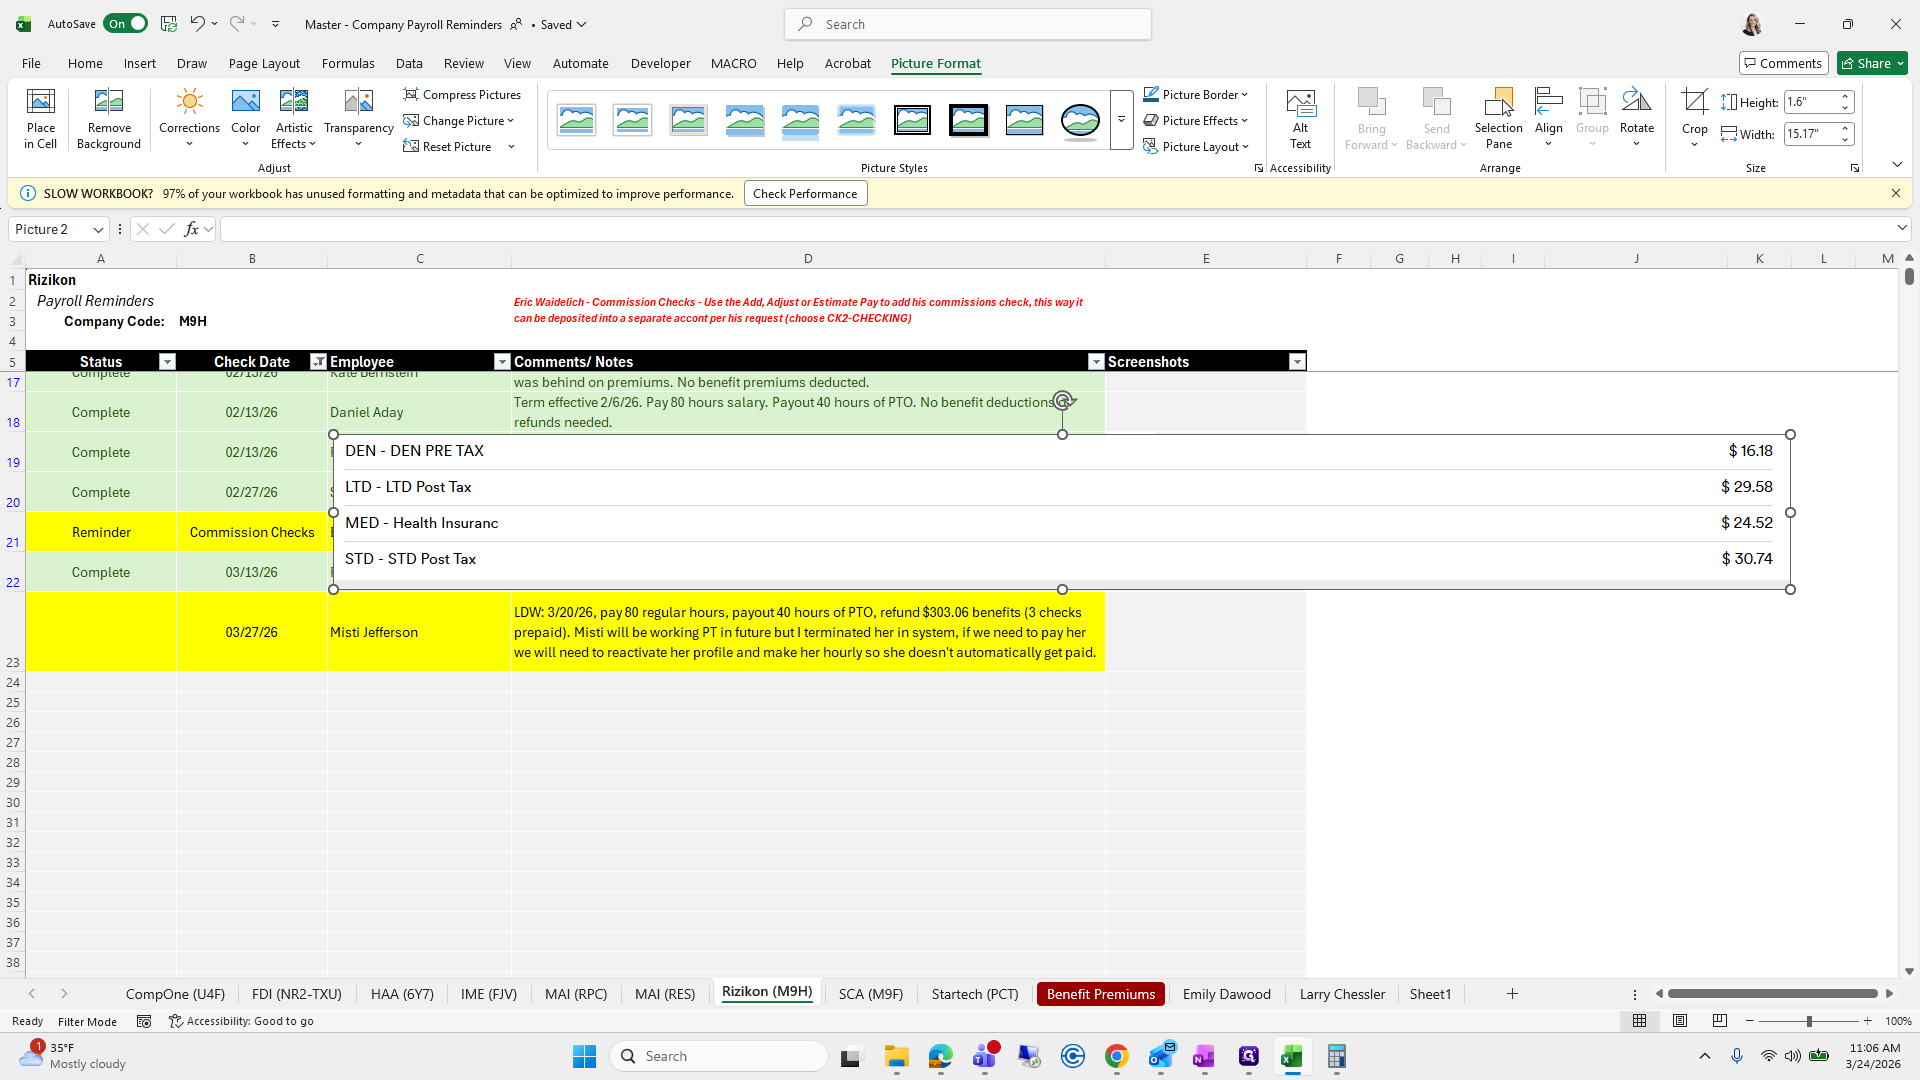
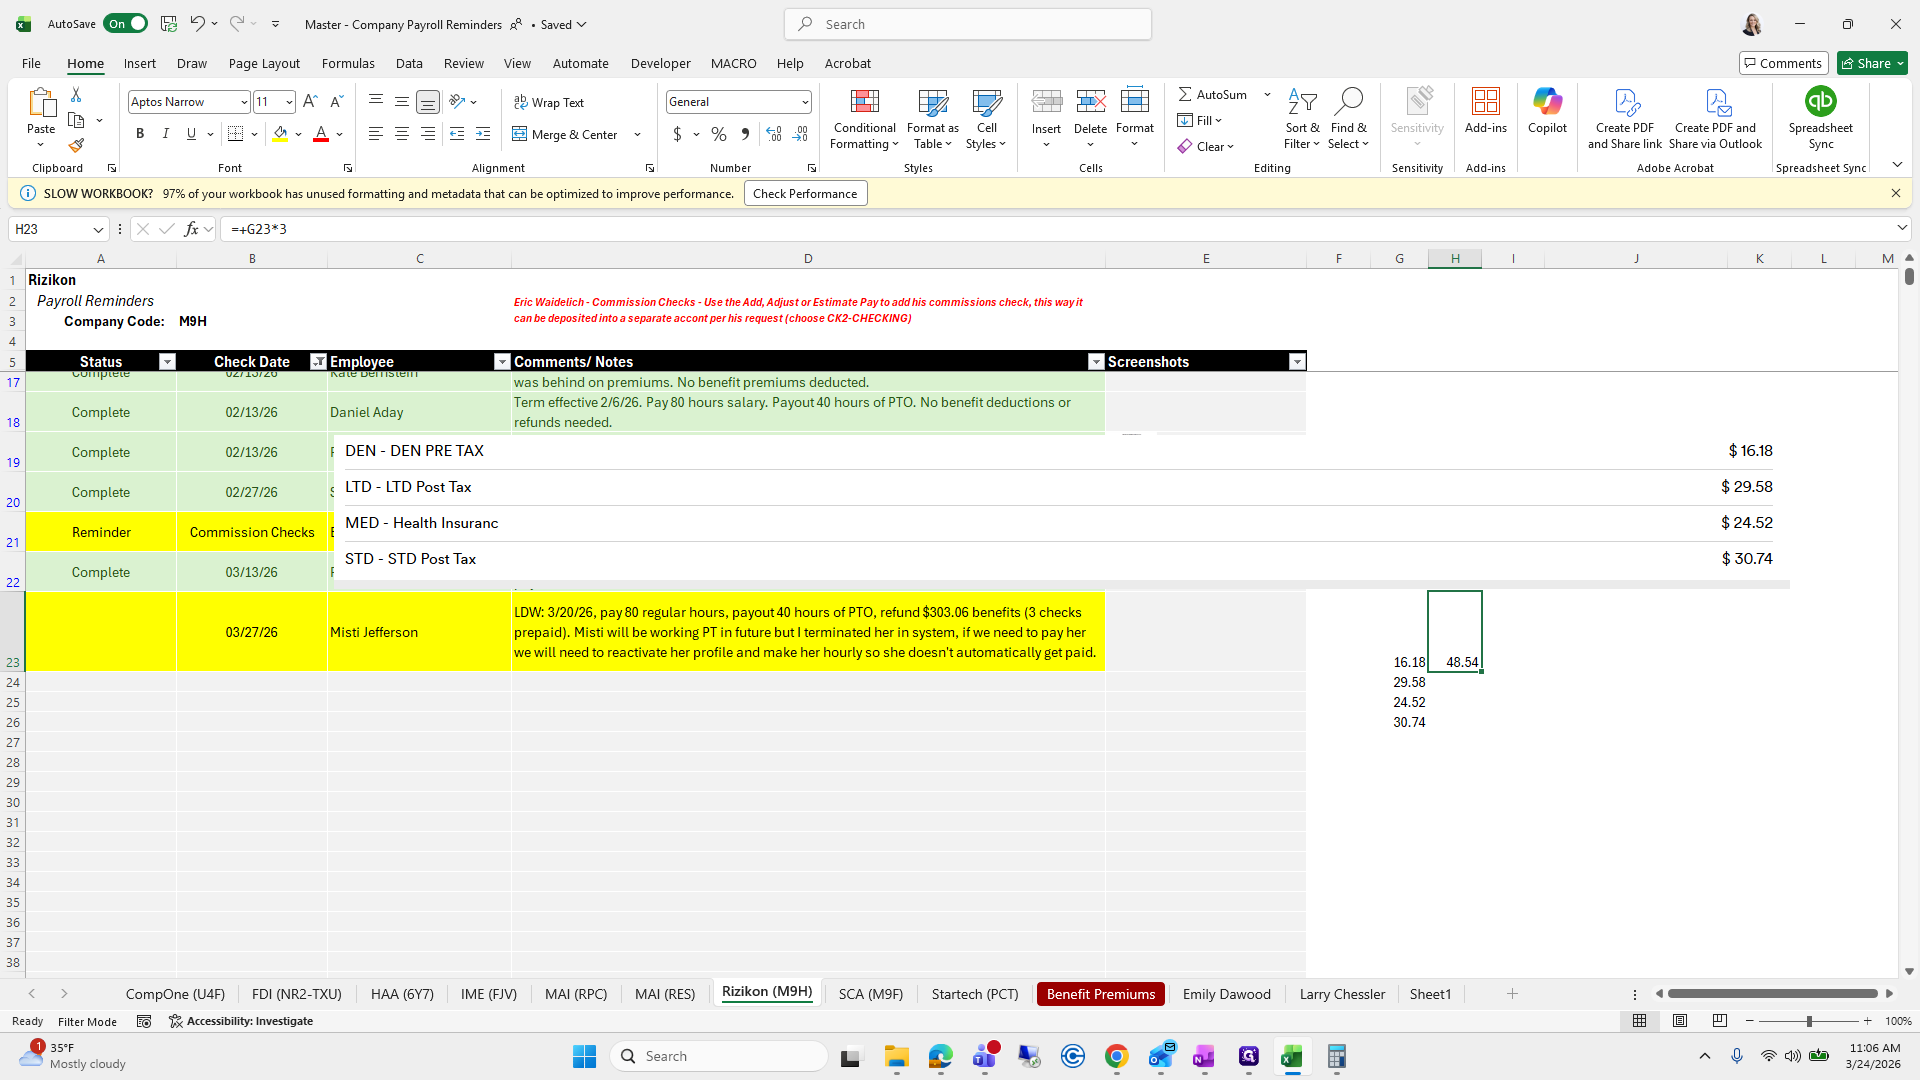
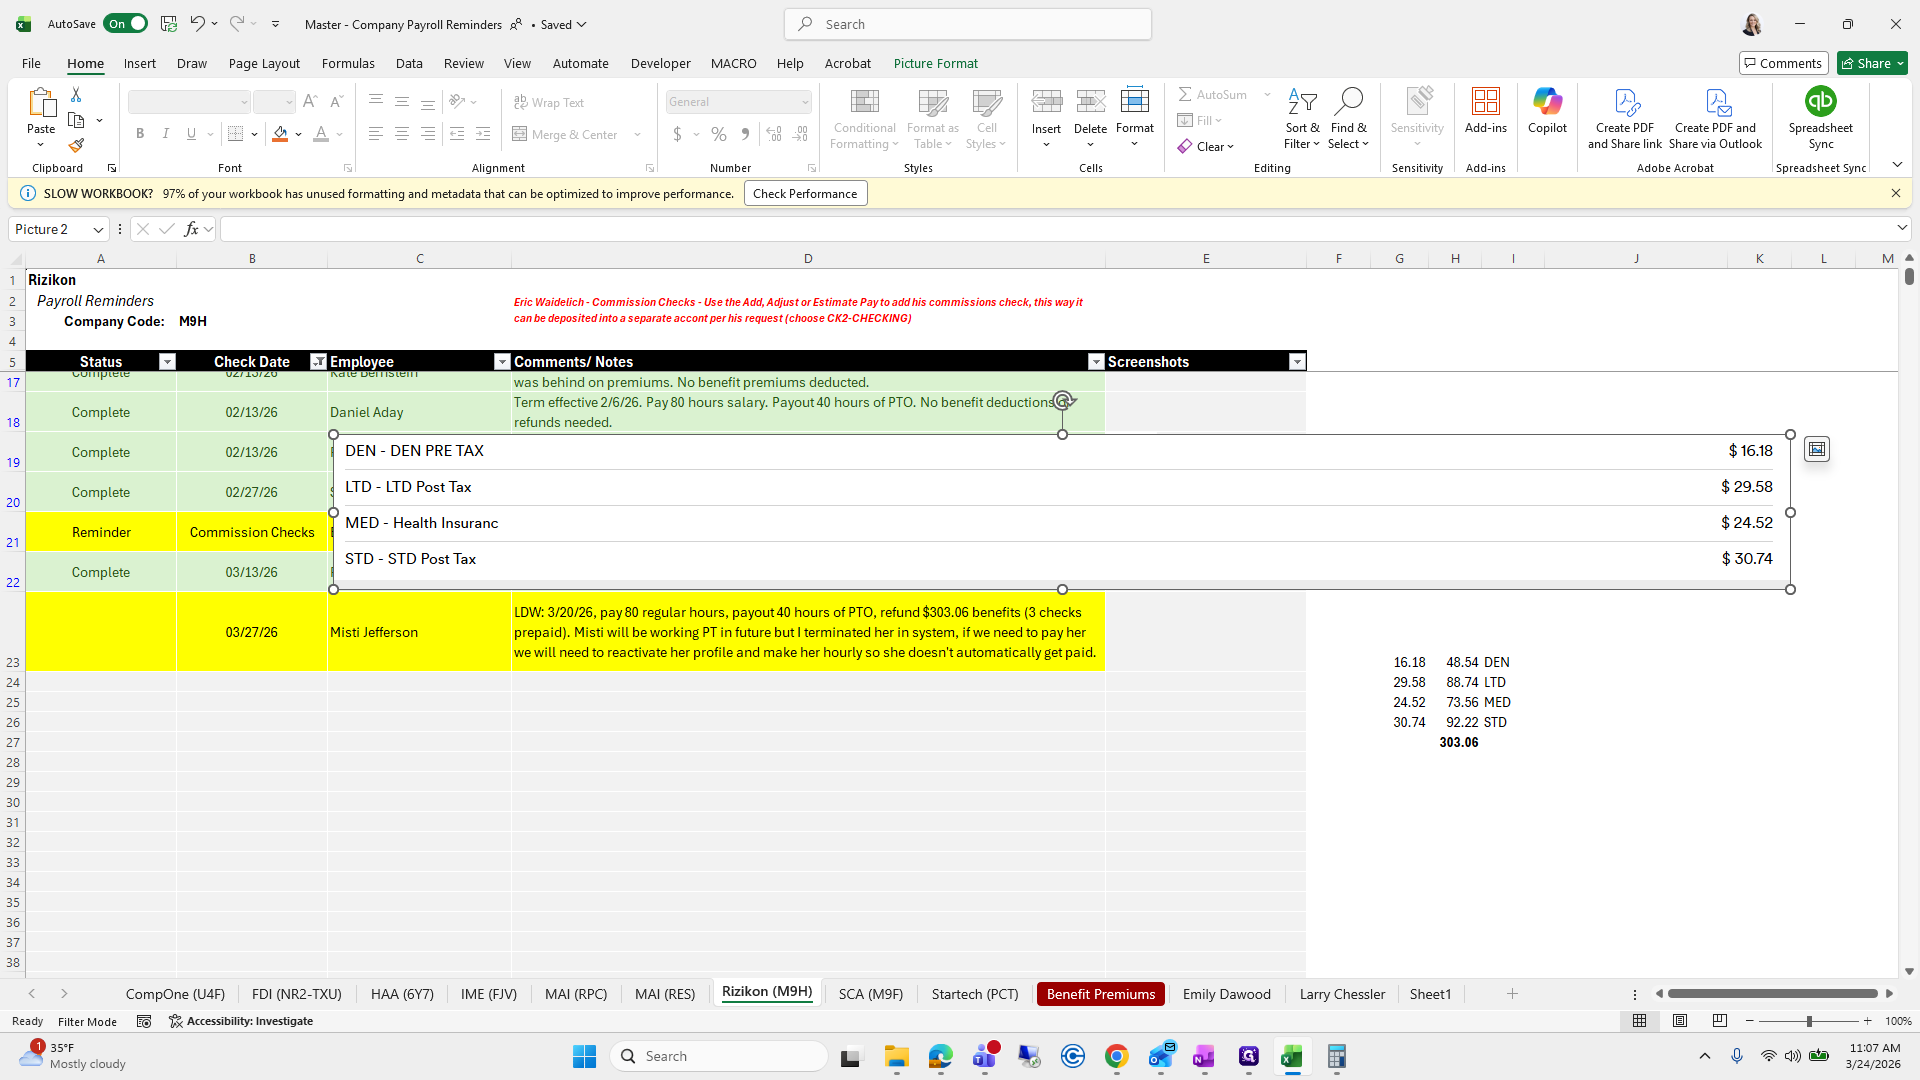
I will make quick notes on the side, such as 1618, 2958, and 3074.

I will multiply this by 3. I will drag it down.

We will do a quick auto sum to ensure the amount matches what Erica or Alyssa have.
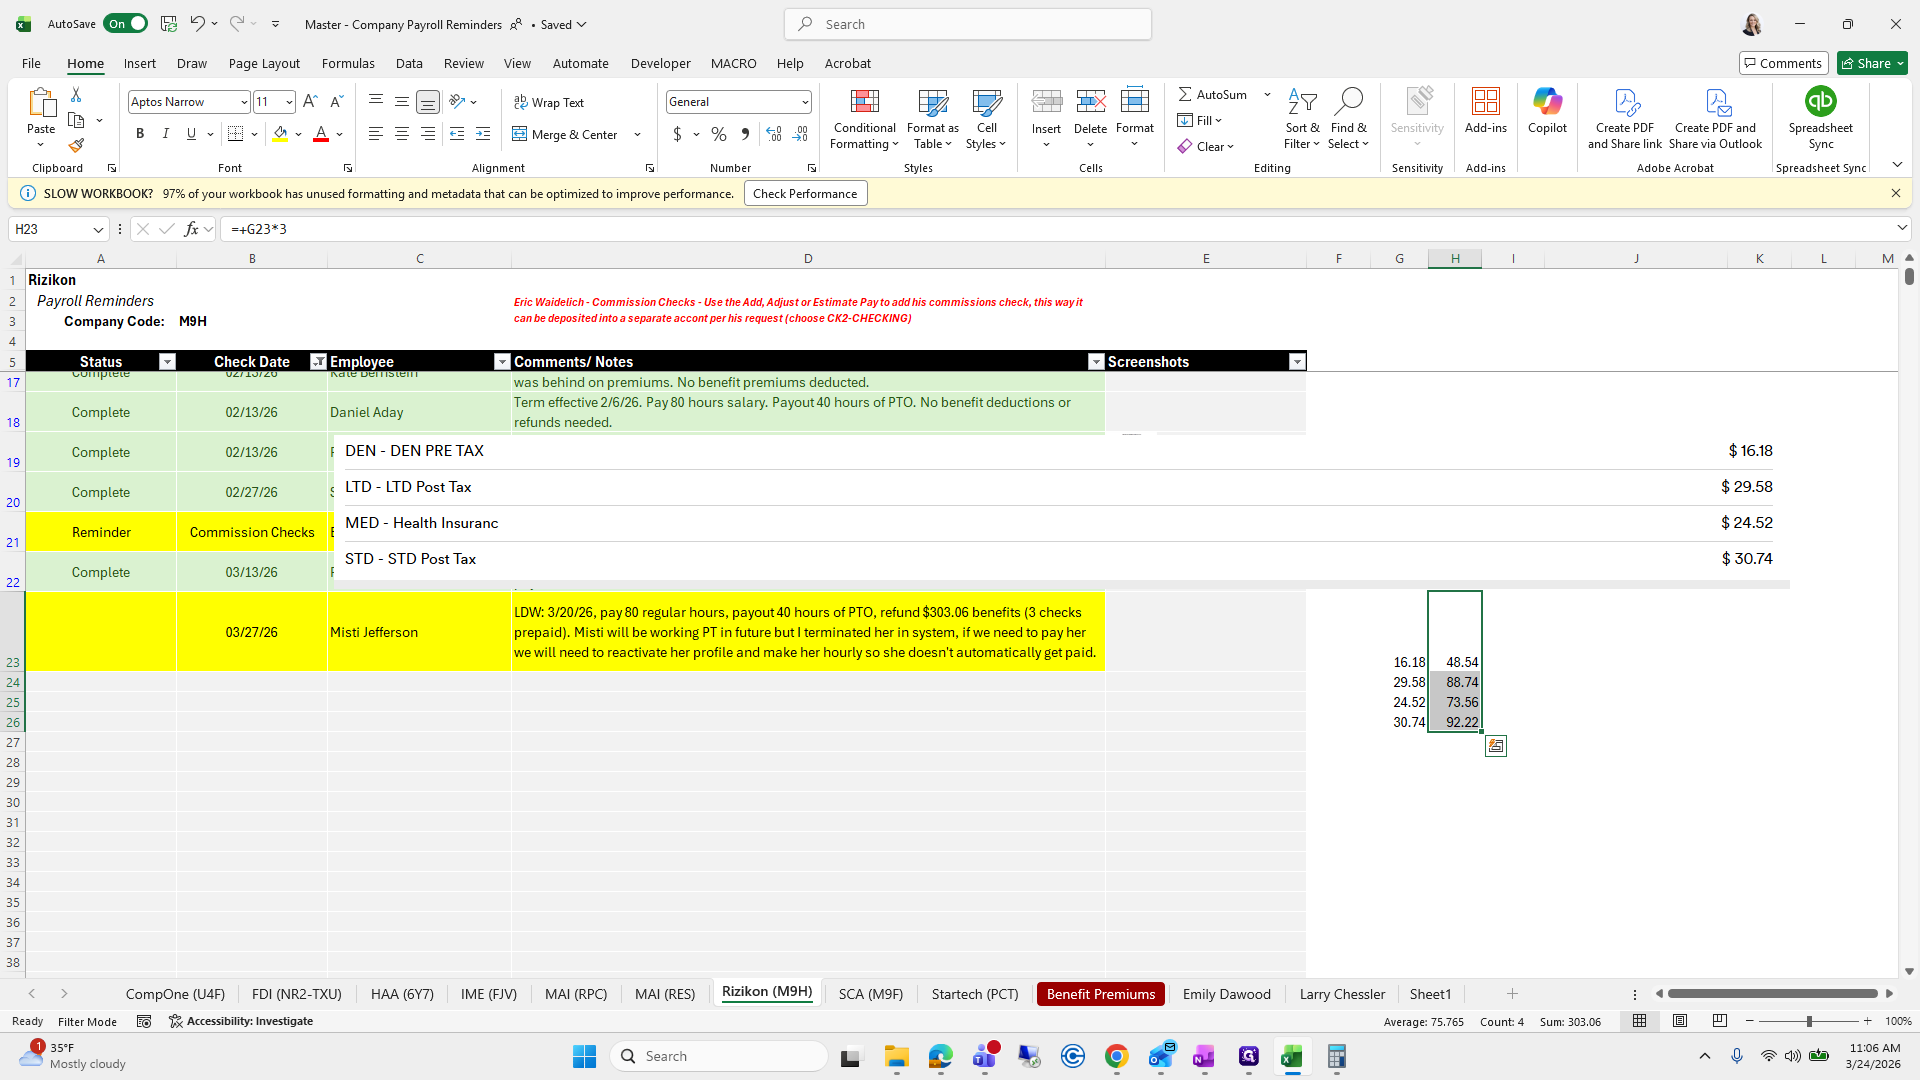


It is.
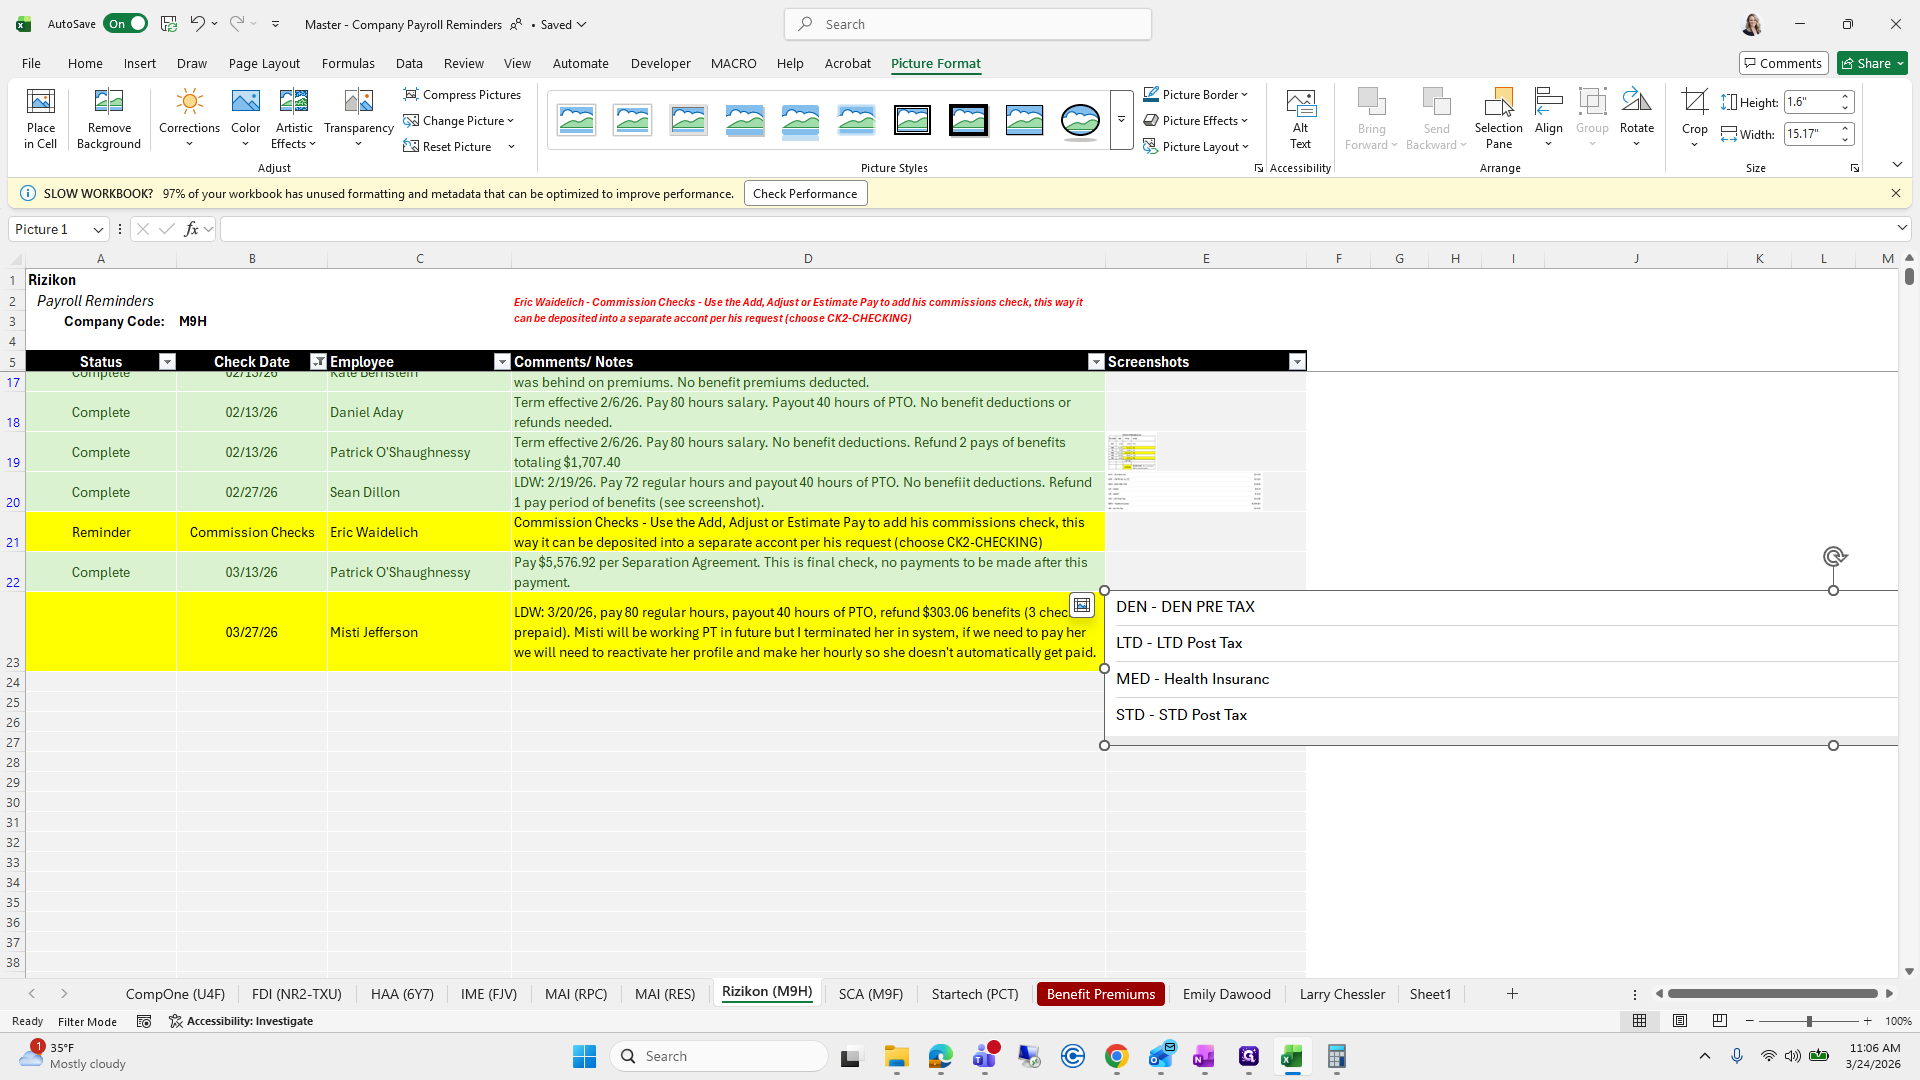
For quick checks and balances when entering it, I will copy what it says, such as Dennis, Dental Ltd., Medicare, Medical, and STD.

I'm going to put that baby back in the box.

Oops. That way, we can save it for future reference.

These are the amounts I will pay out.

So...
I'm going to add a worksheet.

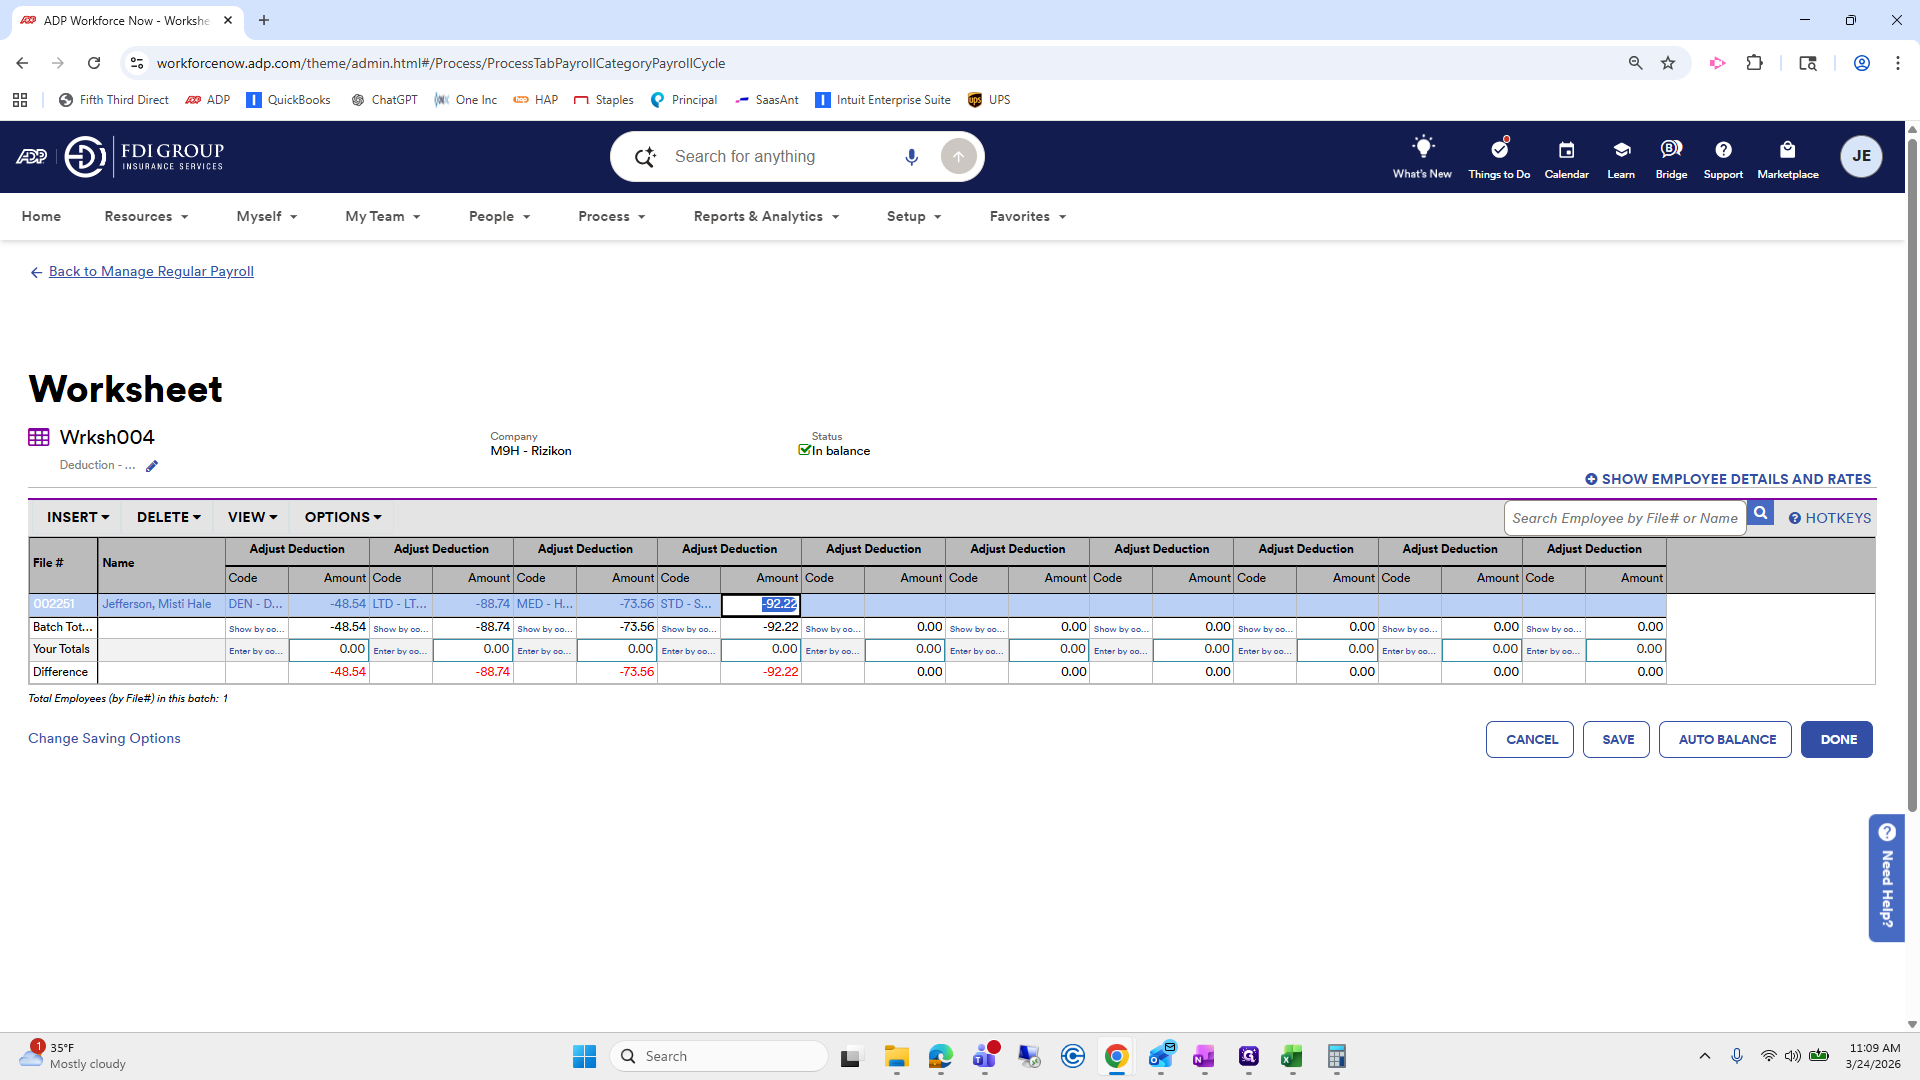
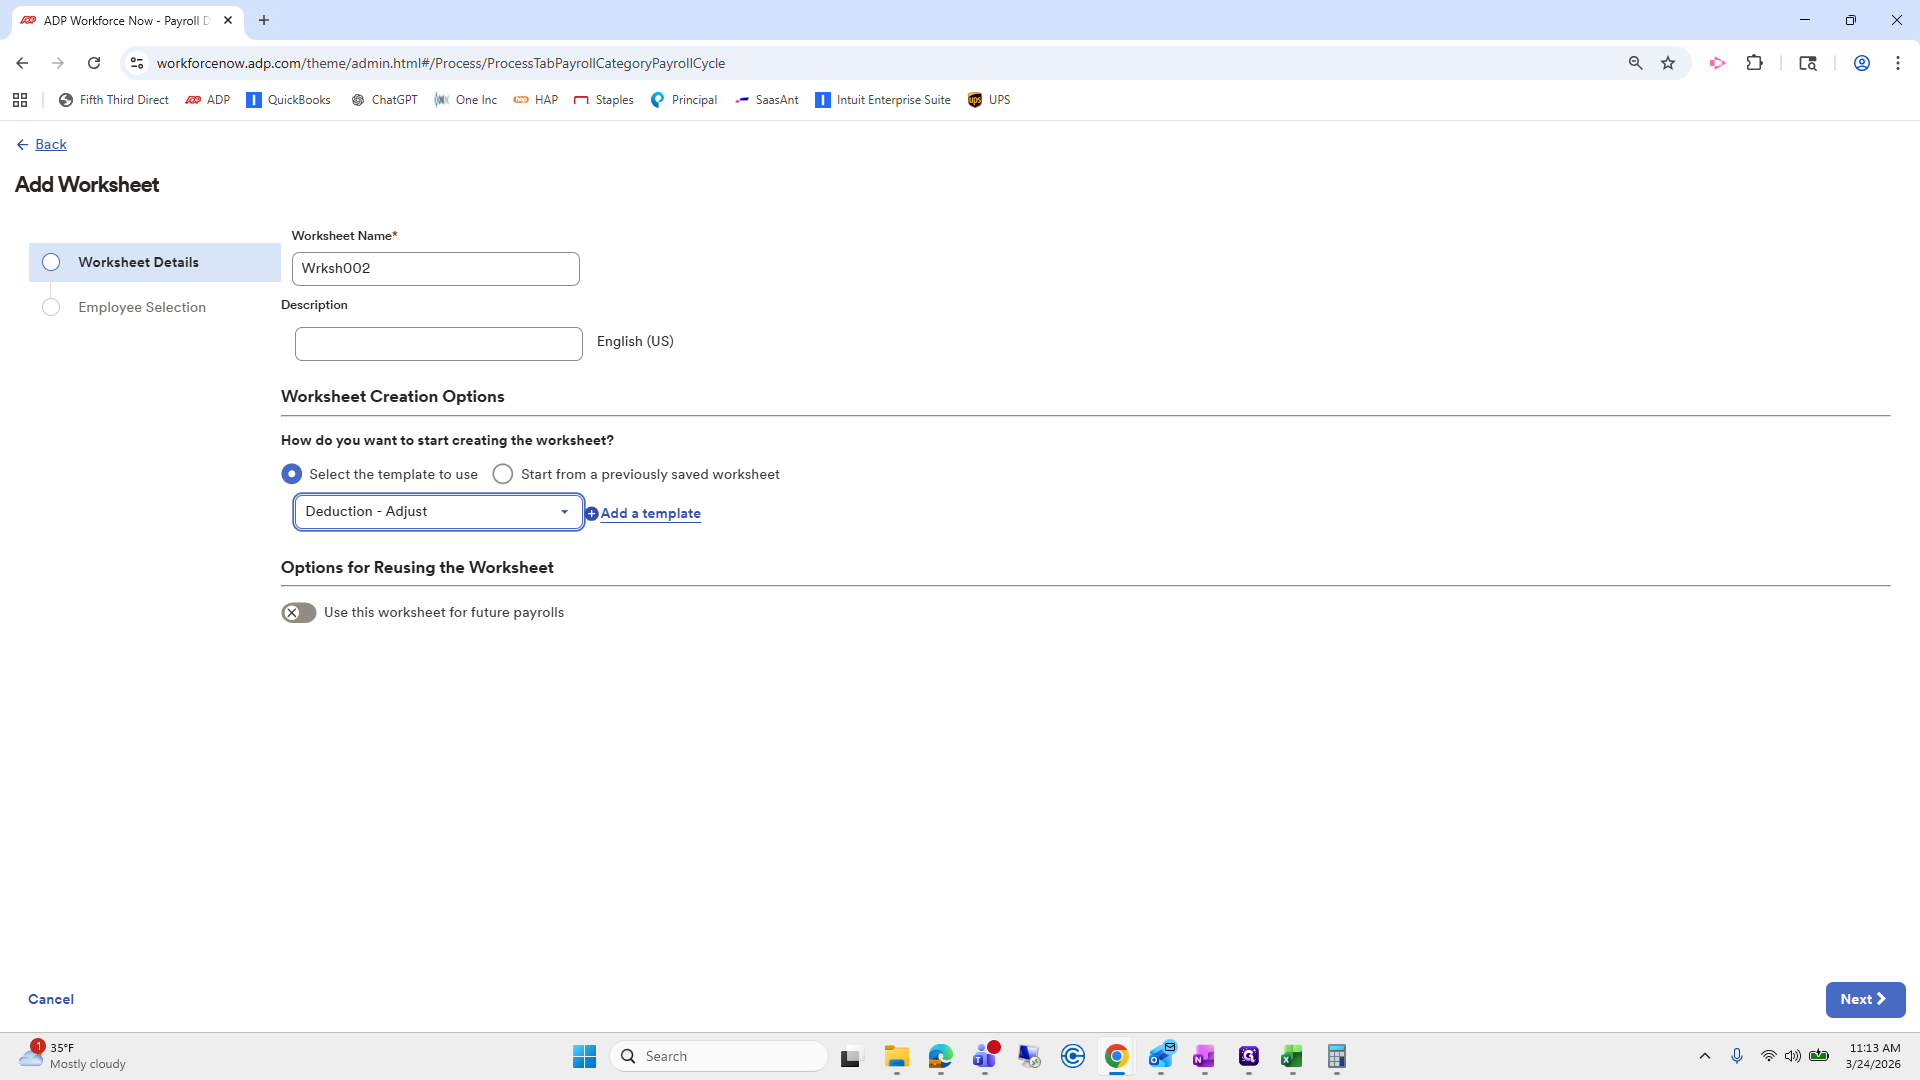
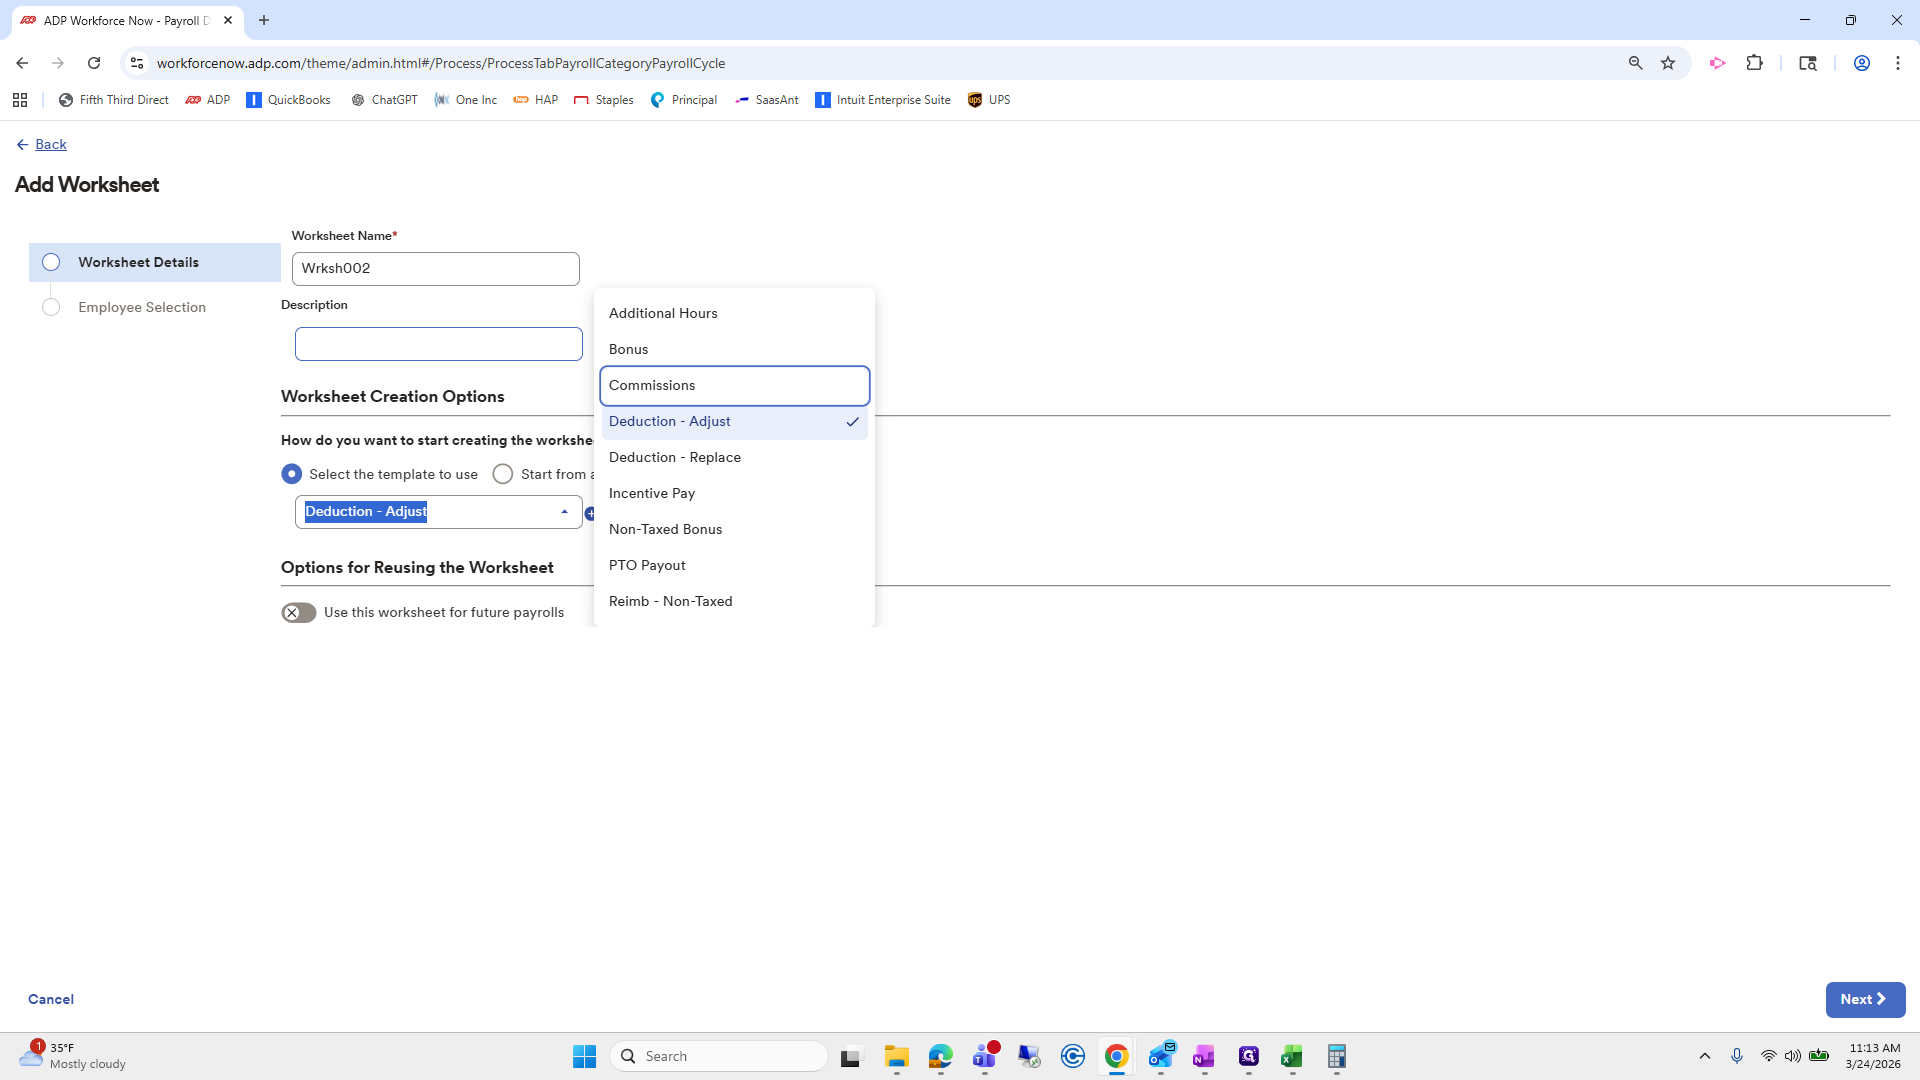
Going to make a deduction adjustment.

Next.


Next, select Misty. Go to "All Employees" so she appears in the list.

Click Misty, then submit.


Now, the first code here was...

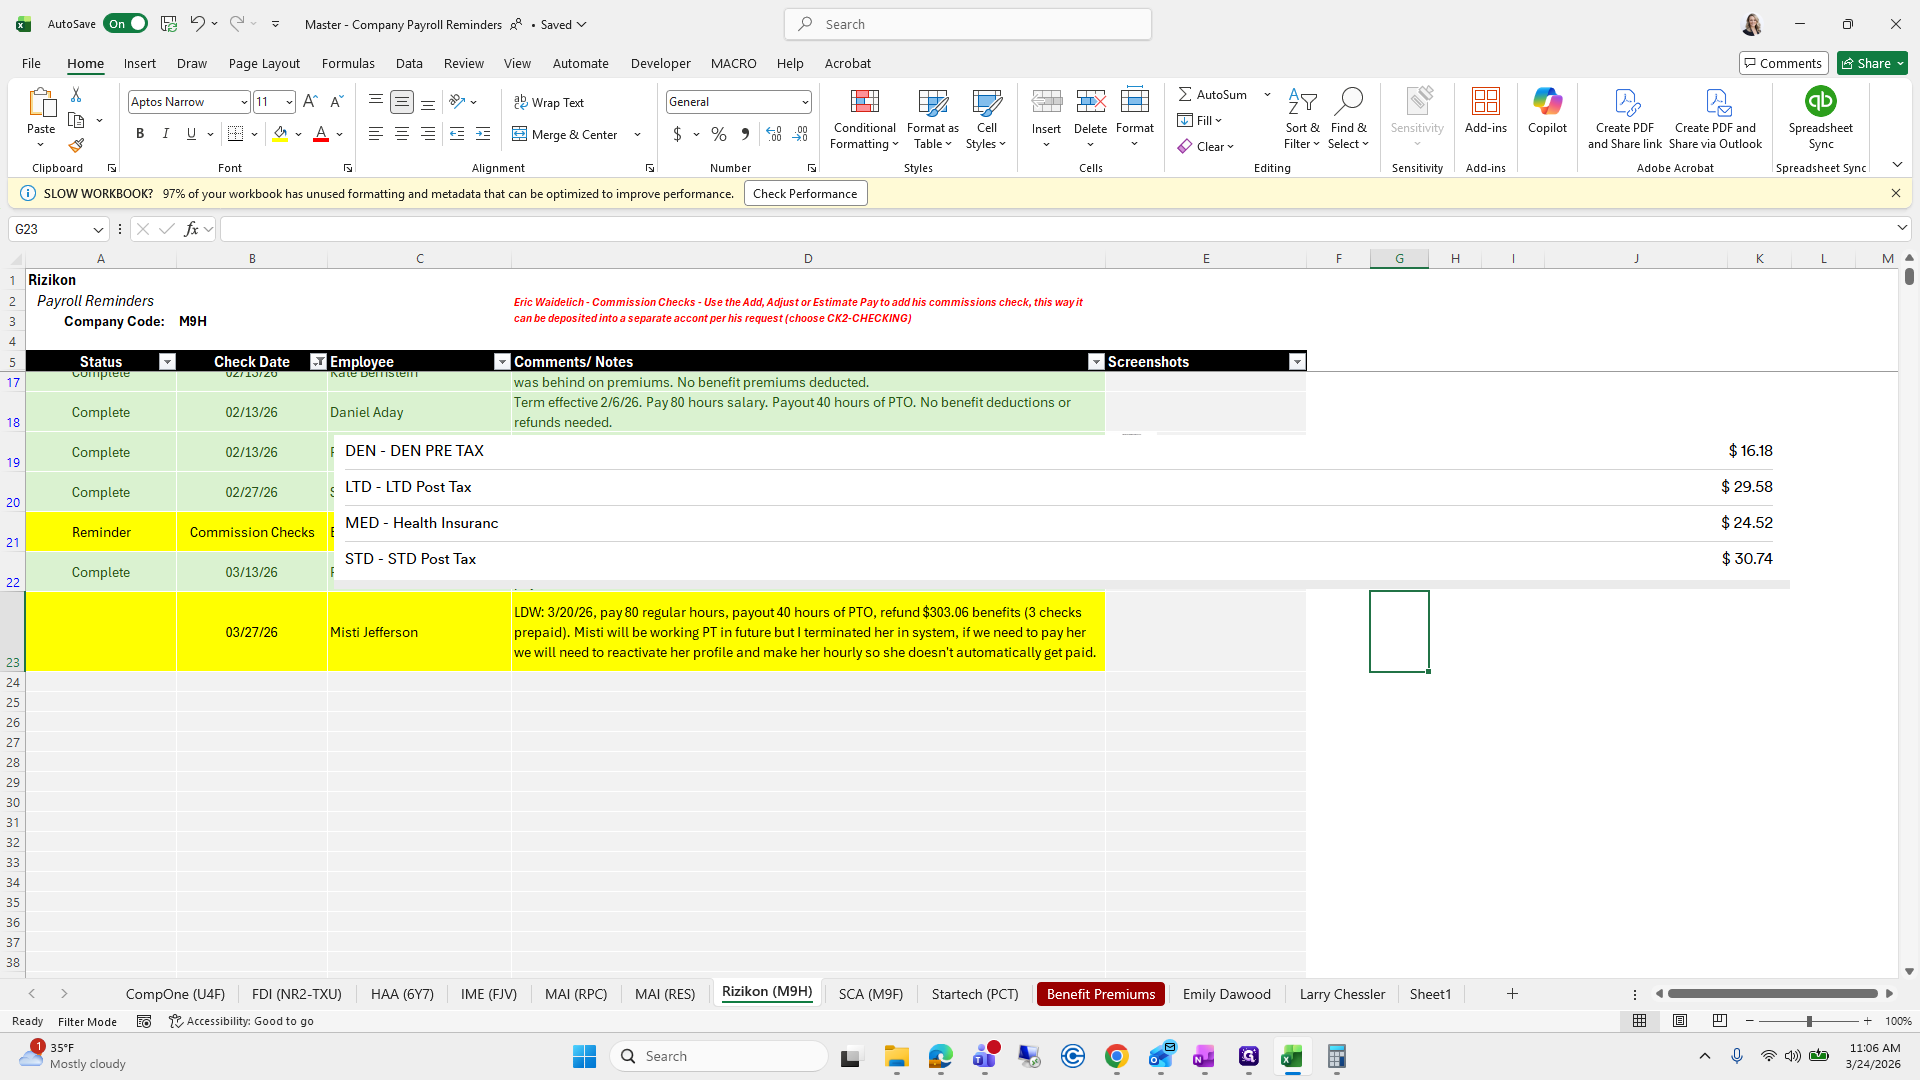
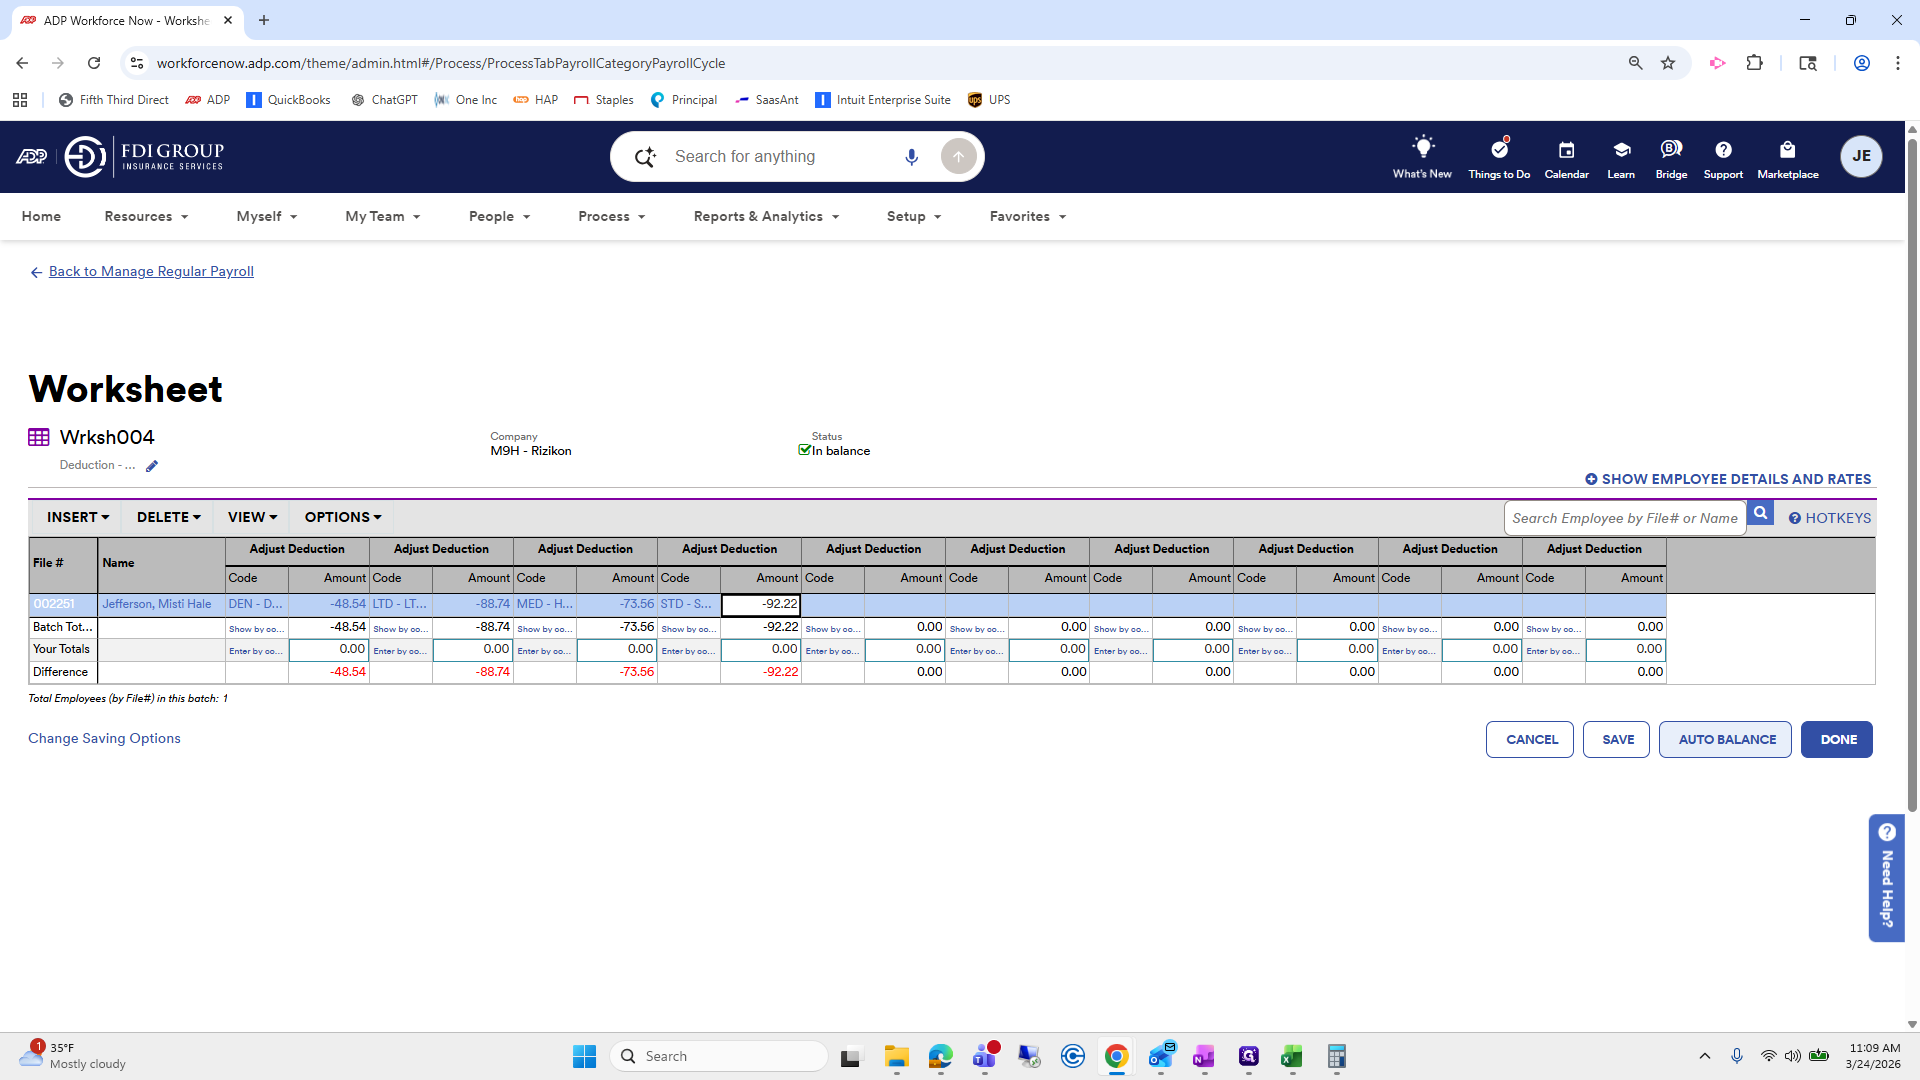
We need to add dental, LTD, medical, and STD.
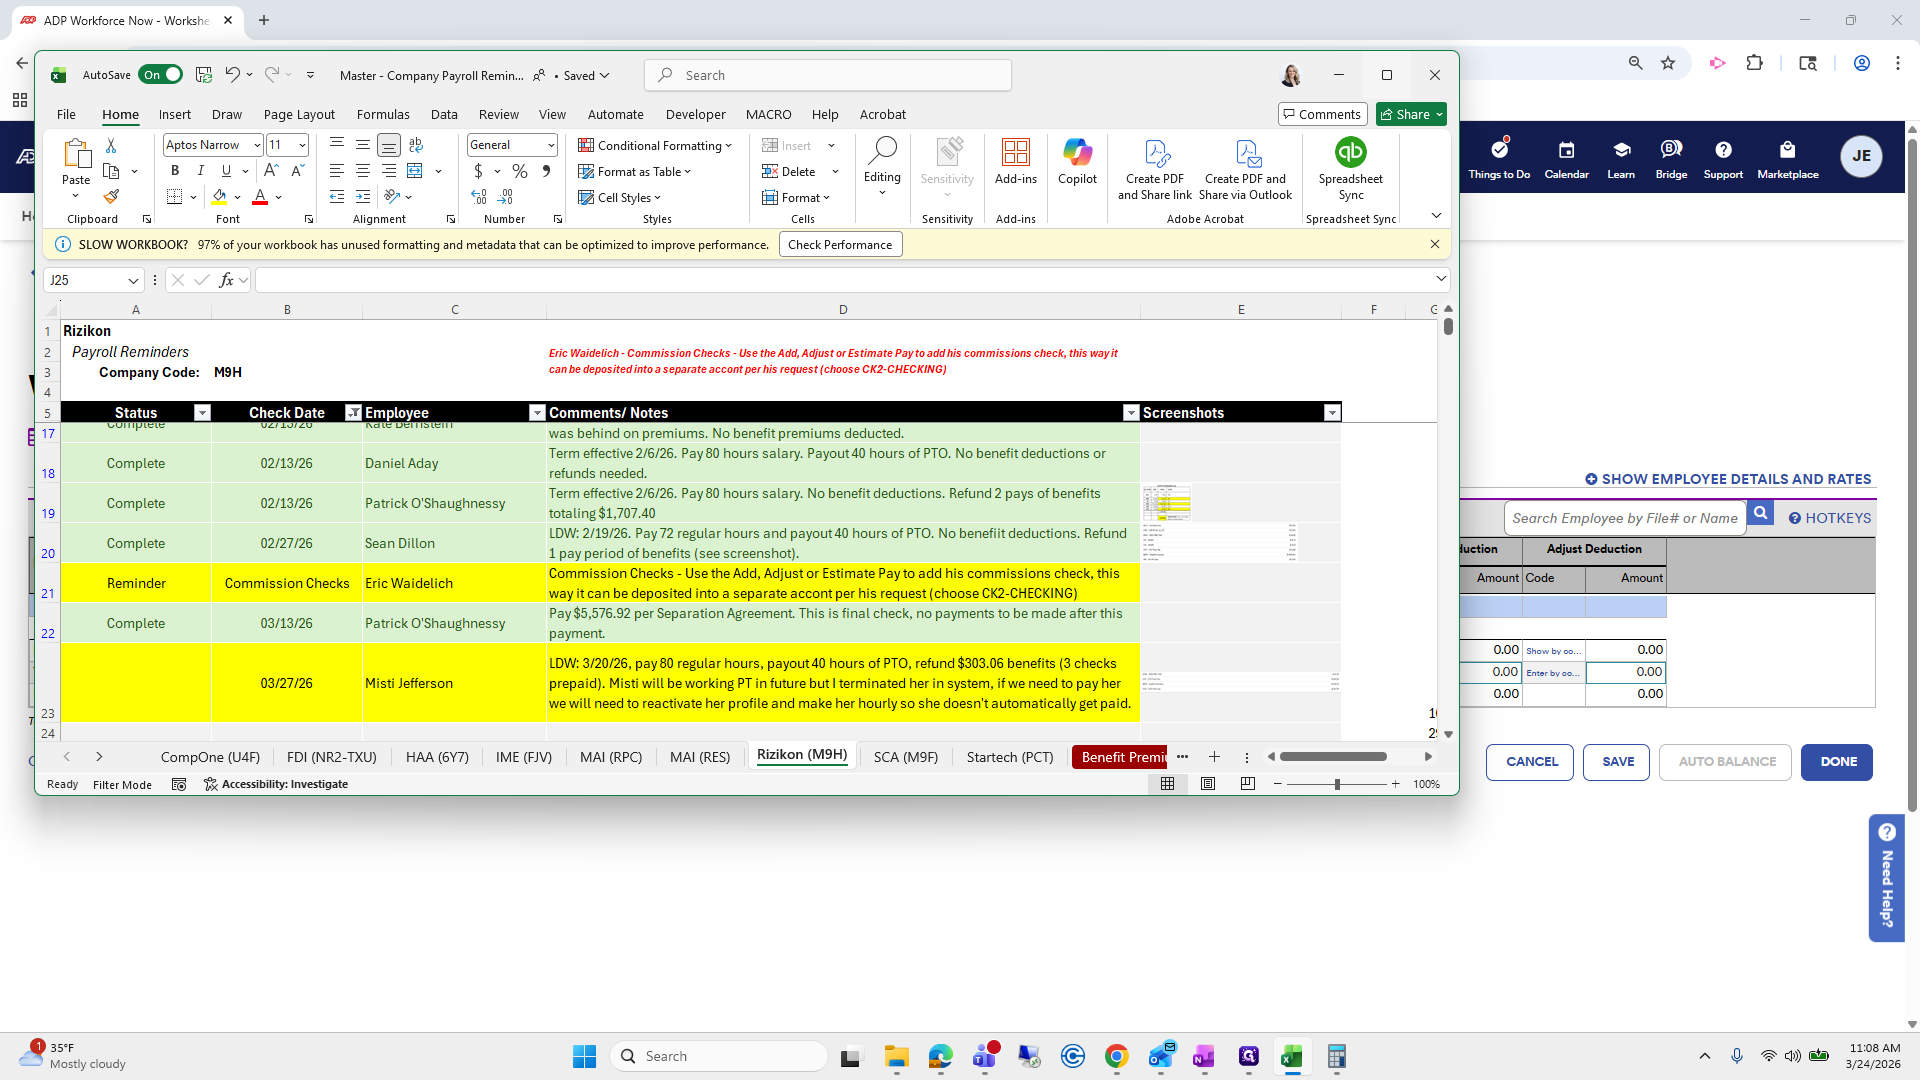


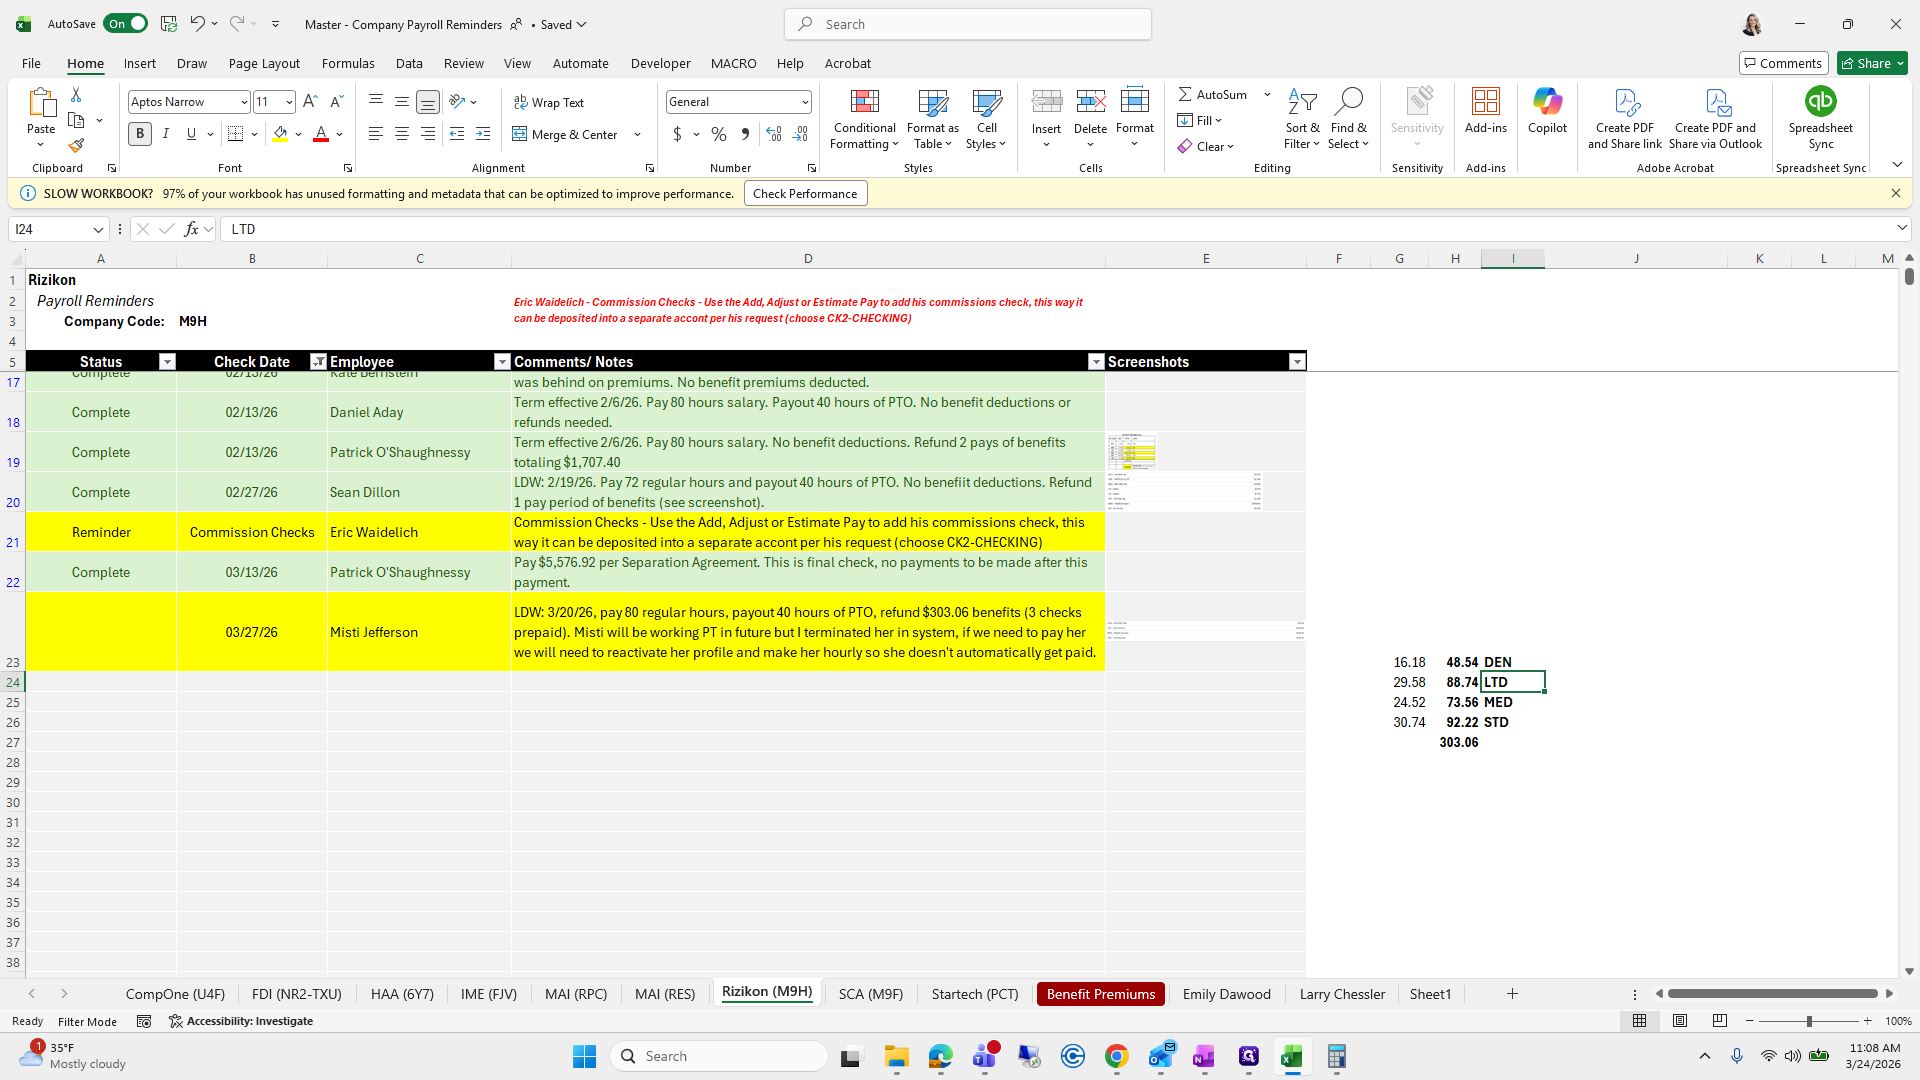

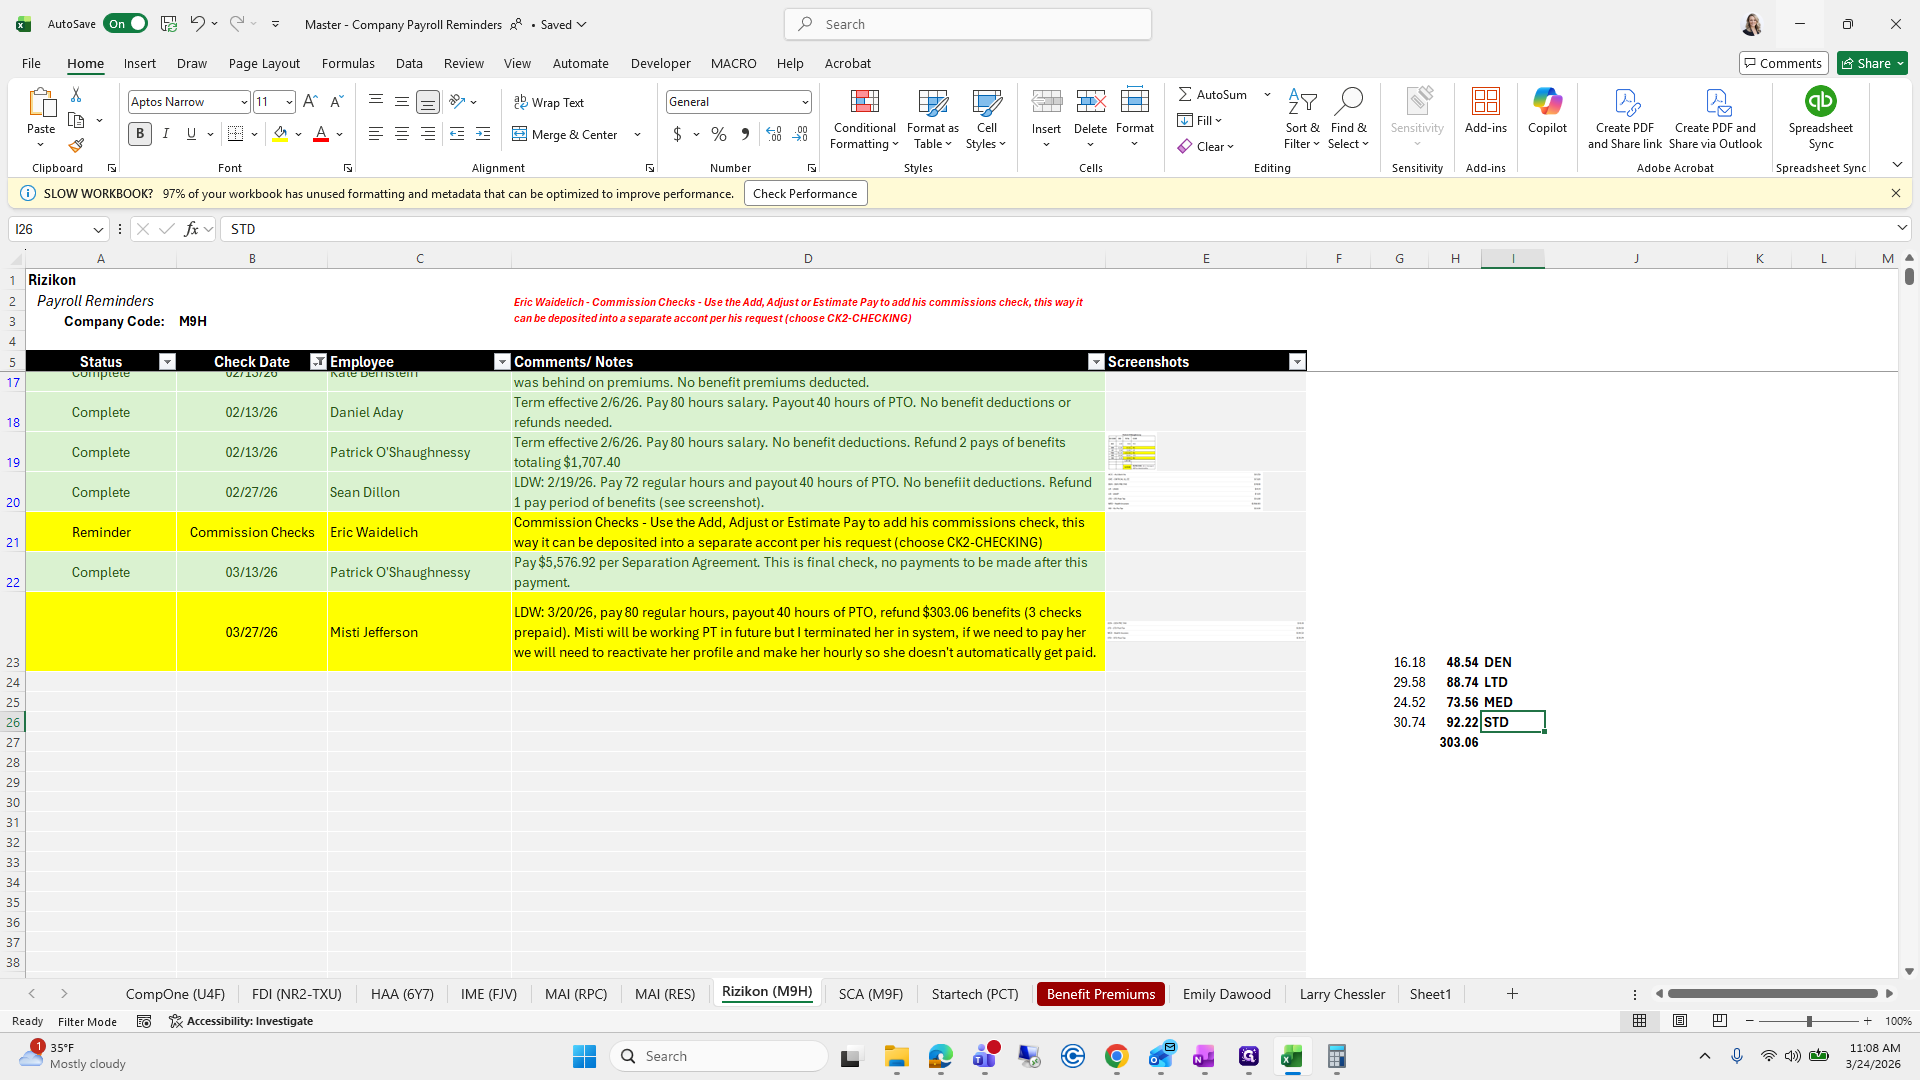
The code will include dental, LTD, medical, and STD, each separated by a tab. Since it is a refund, we need to enter these as negative amounts.


I'm going to split my screen.

If I can do it appropriately.

Okay, so dental is negative 48.54.
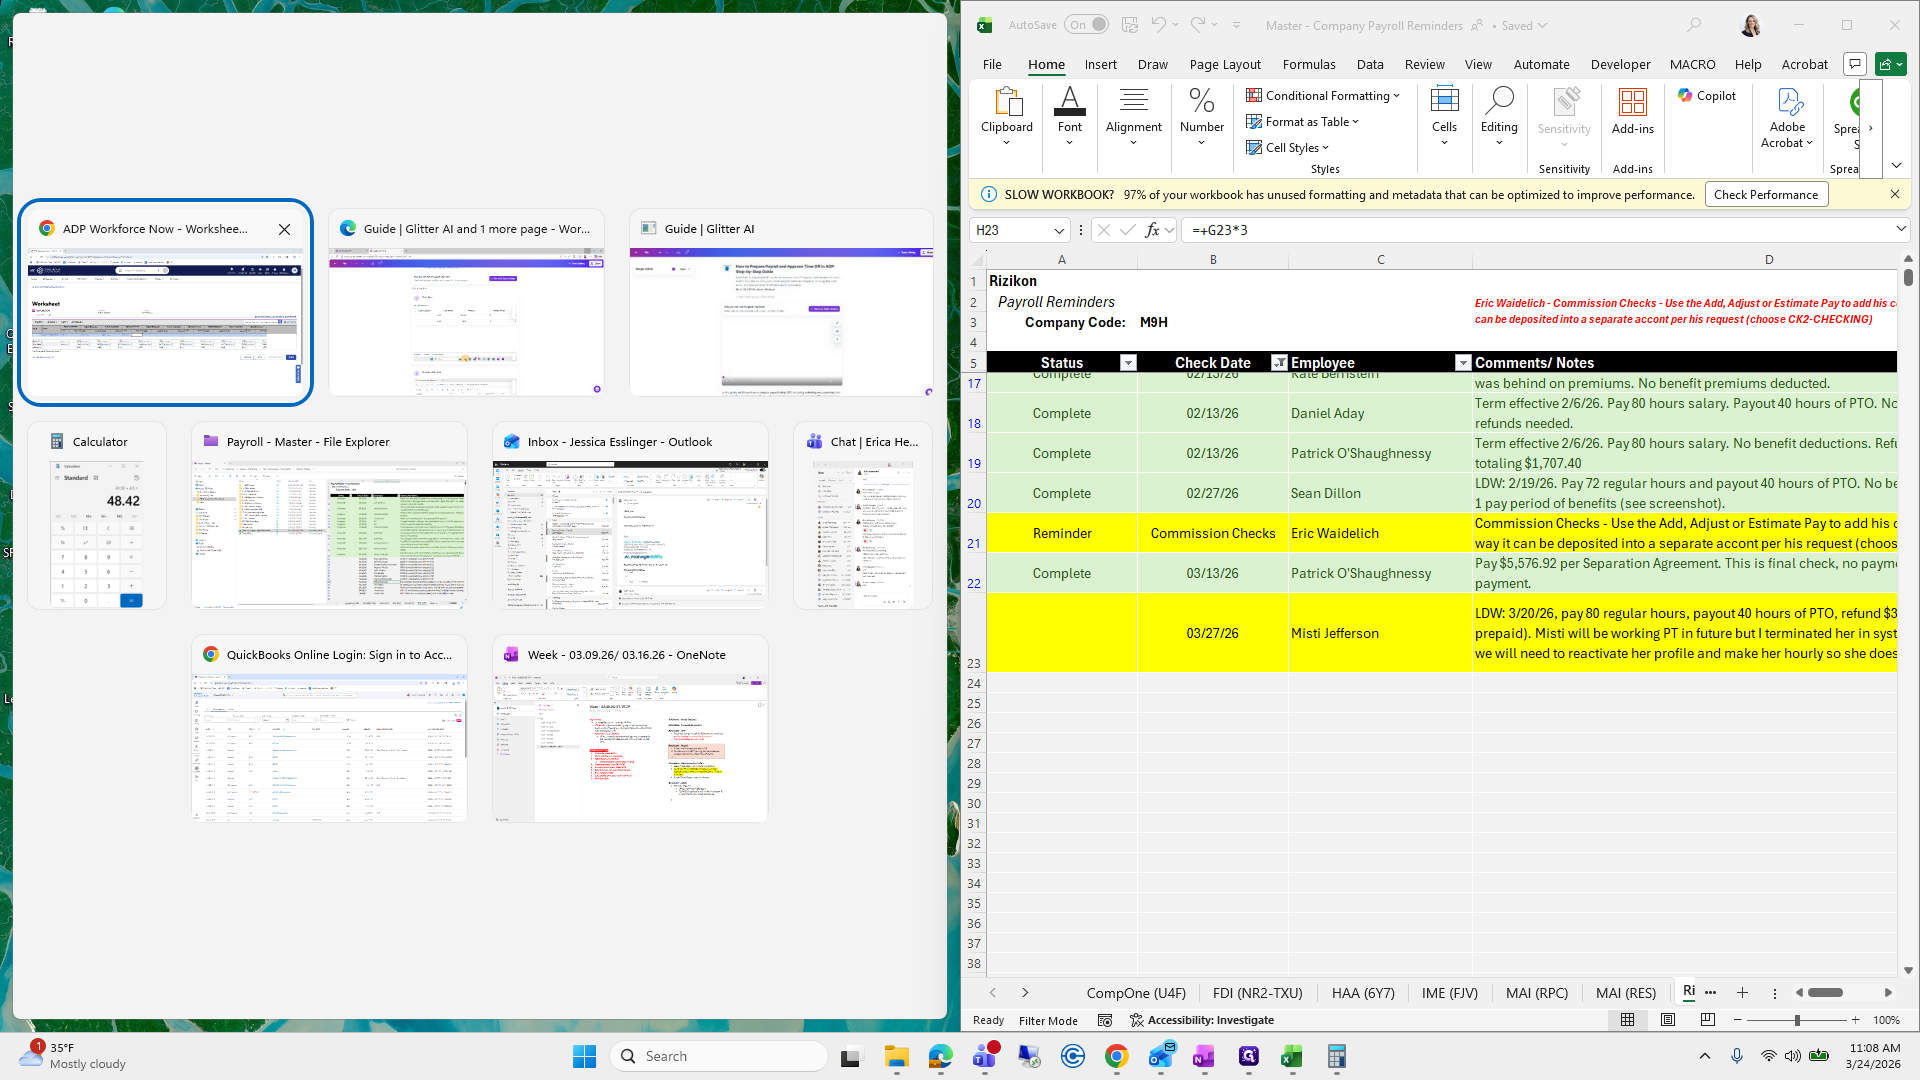
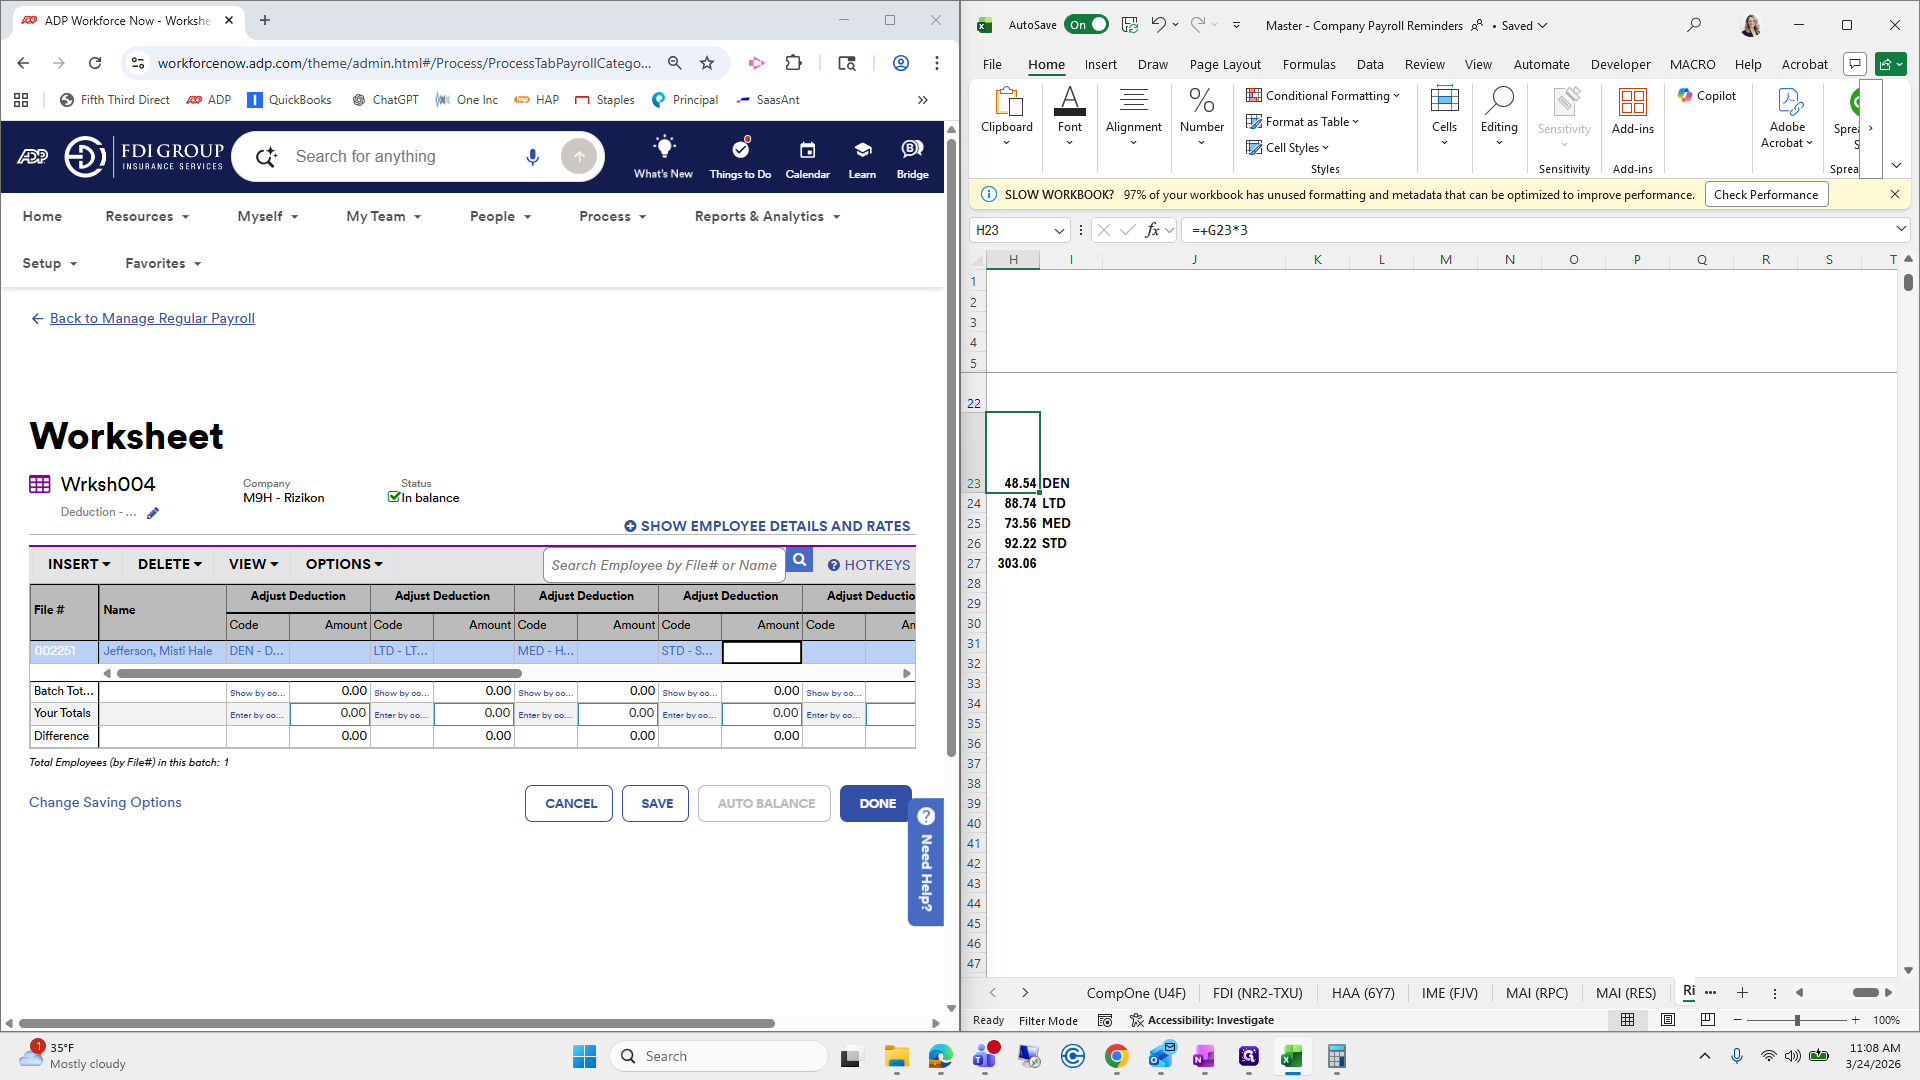
LTD is negative 88.74.

Medical is negative 73.56.

STD is negative 92.22.

Now we will auto balance that.

We will double-check the figures from our work paper.
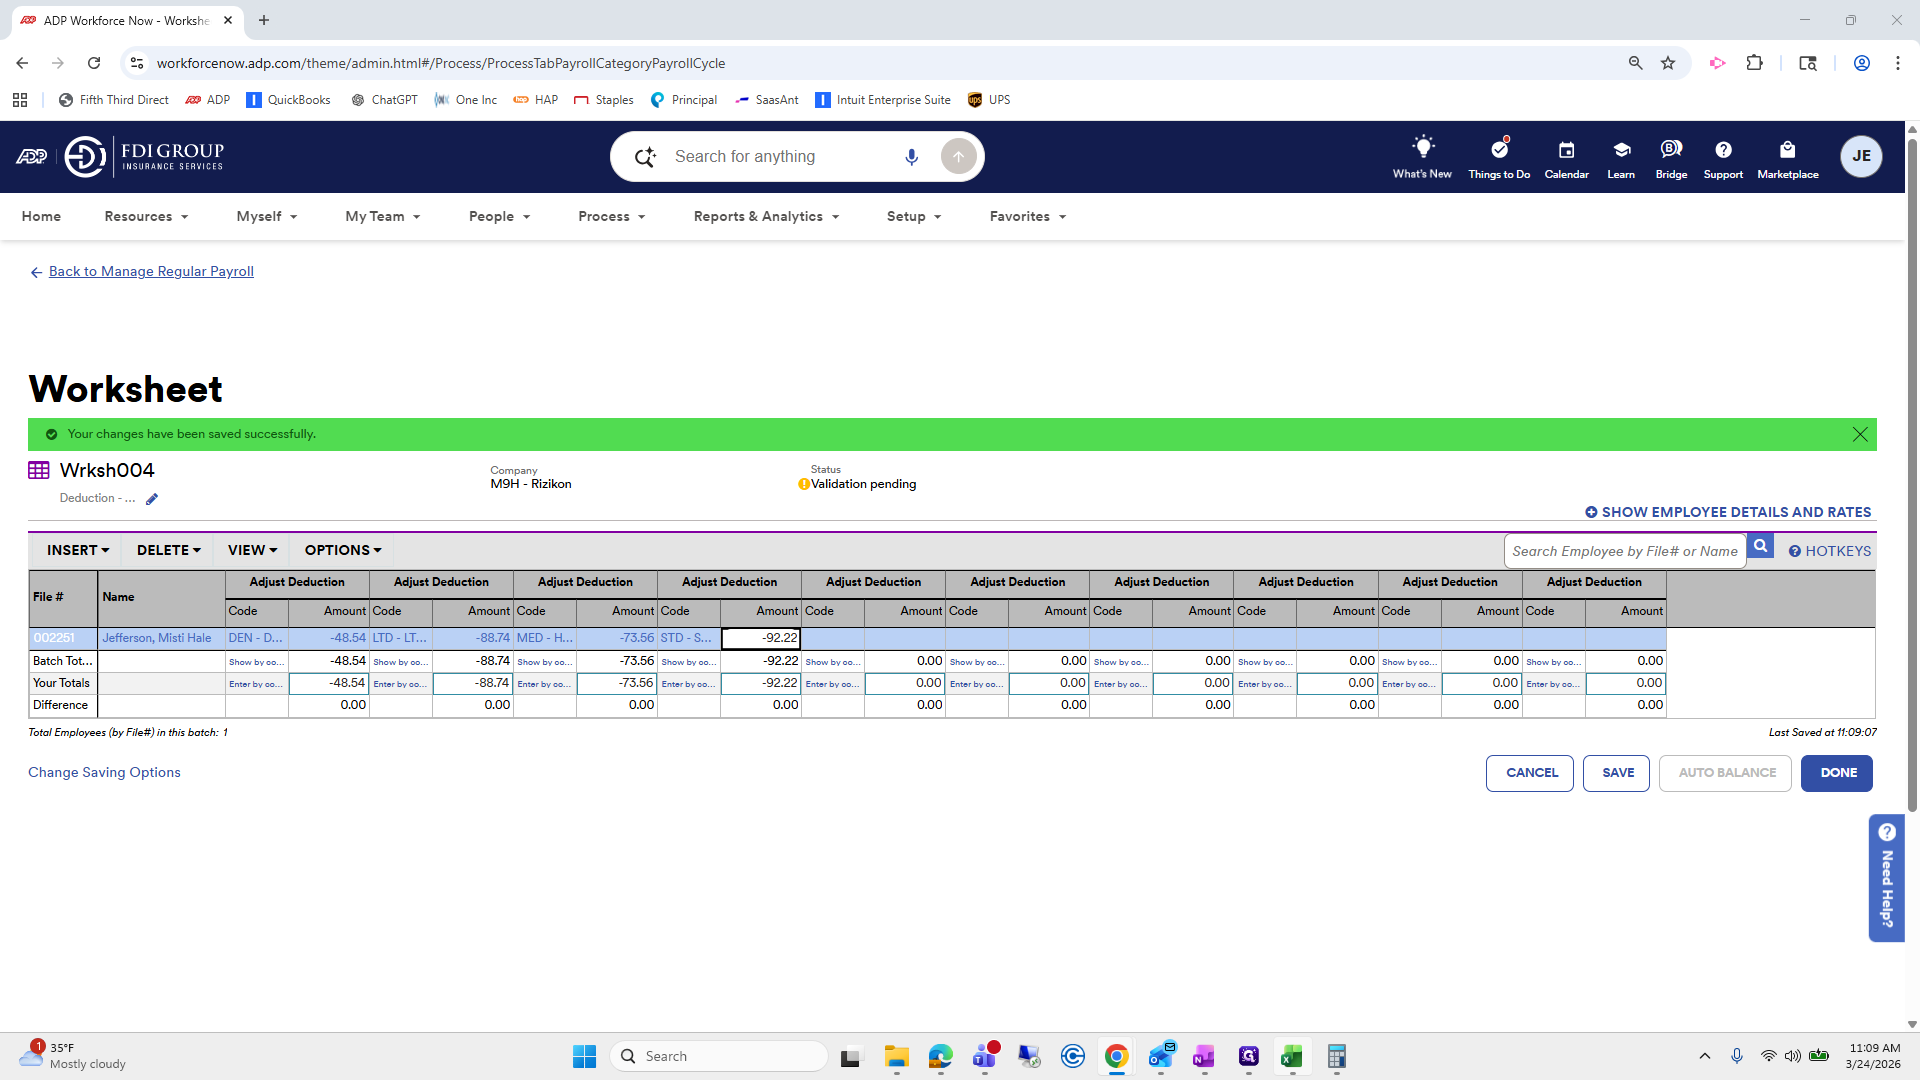
That looks good. Then click Done.
Let's check if there are any additional notes we need to add.
It looks good.
I will not mark it complete until I run the final payroll reports and review them to ensure everything is correct.
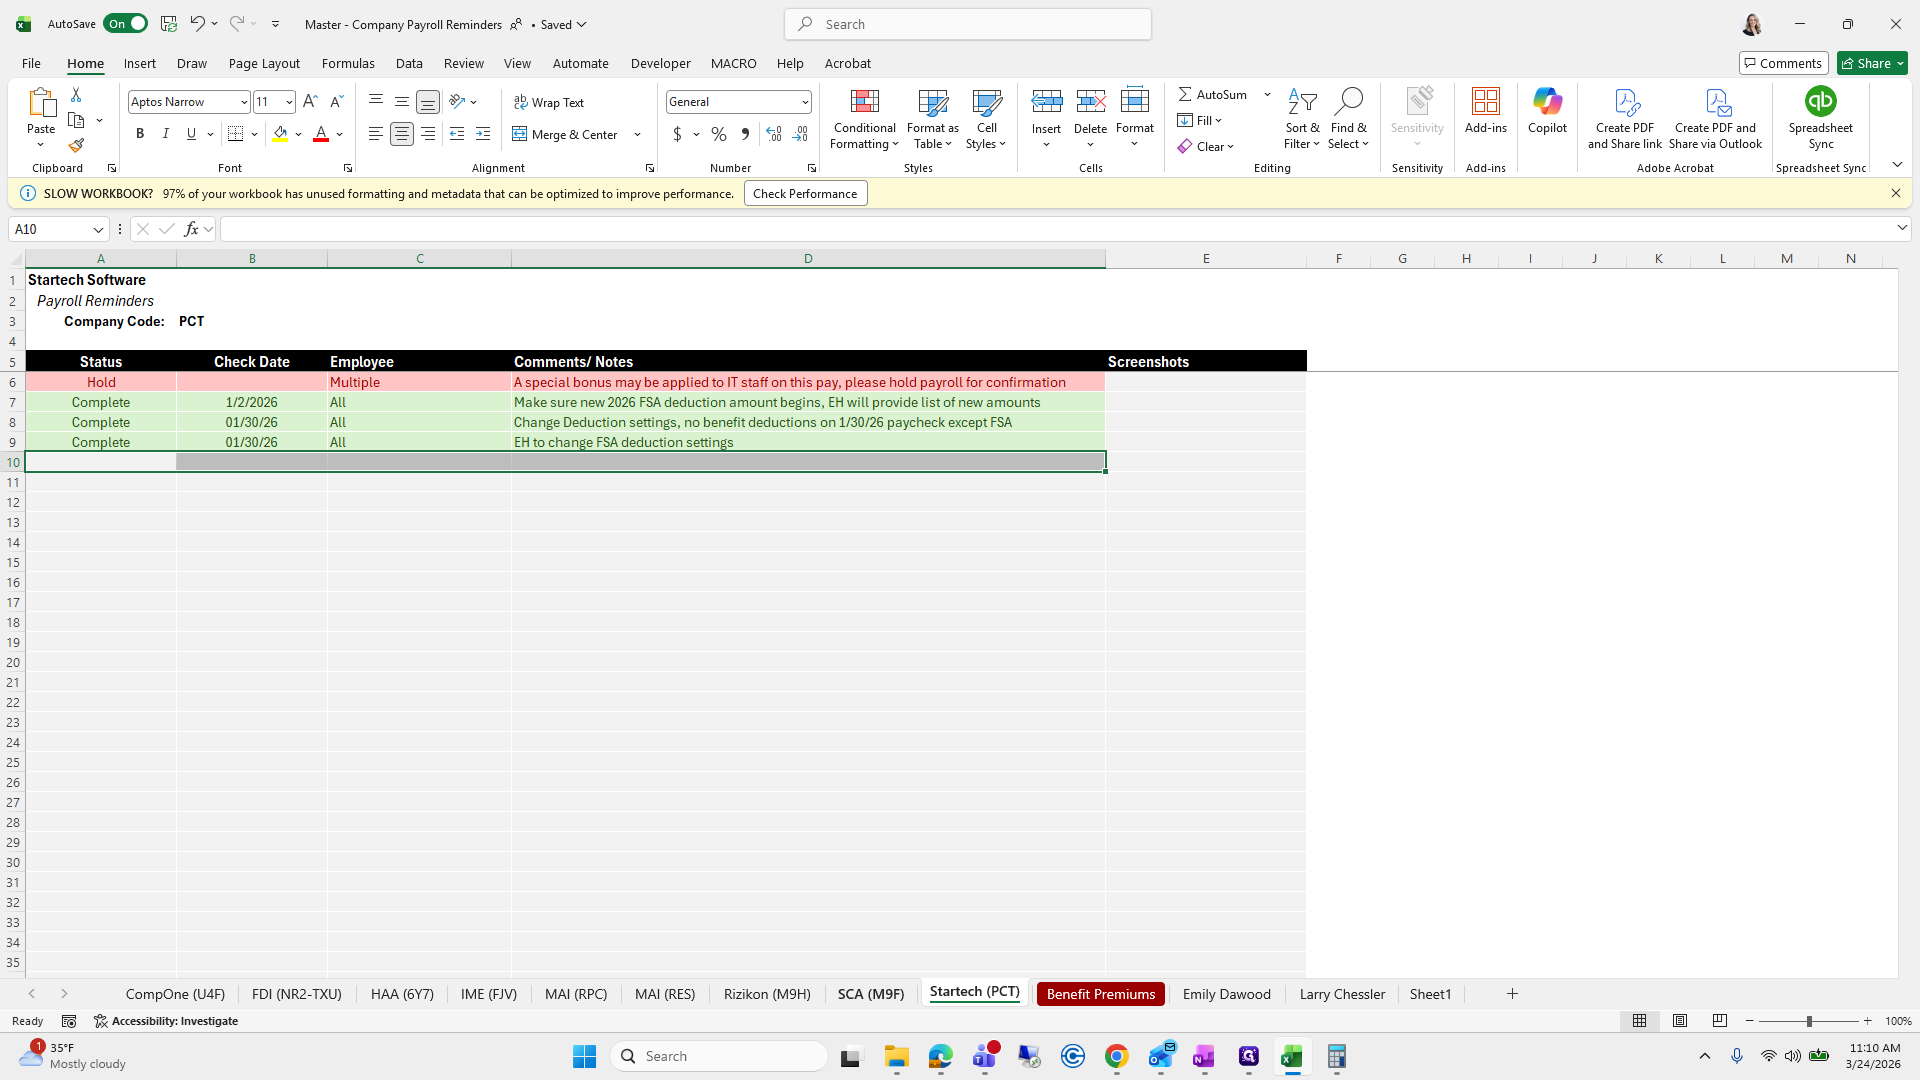
Risicon is good.
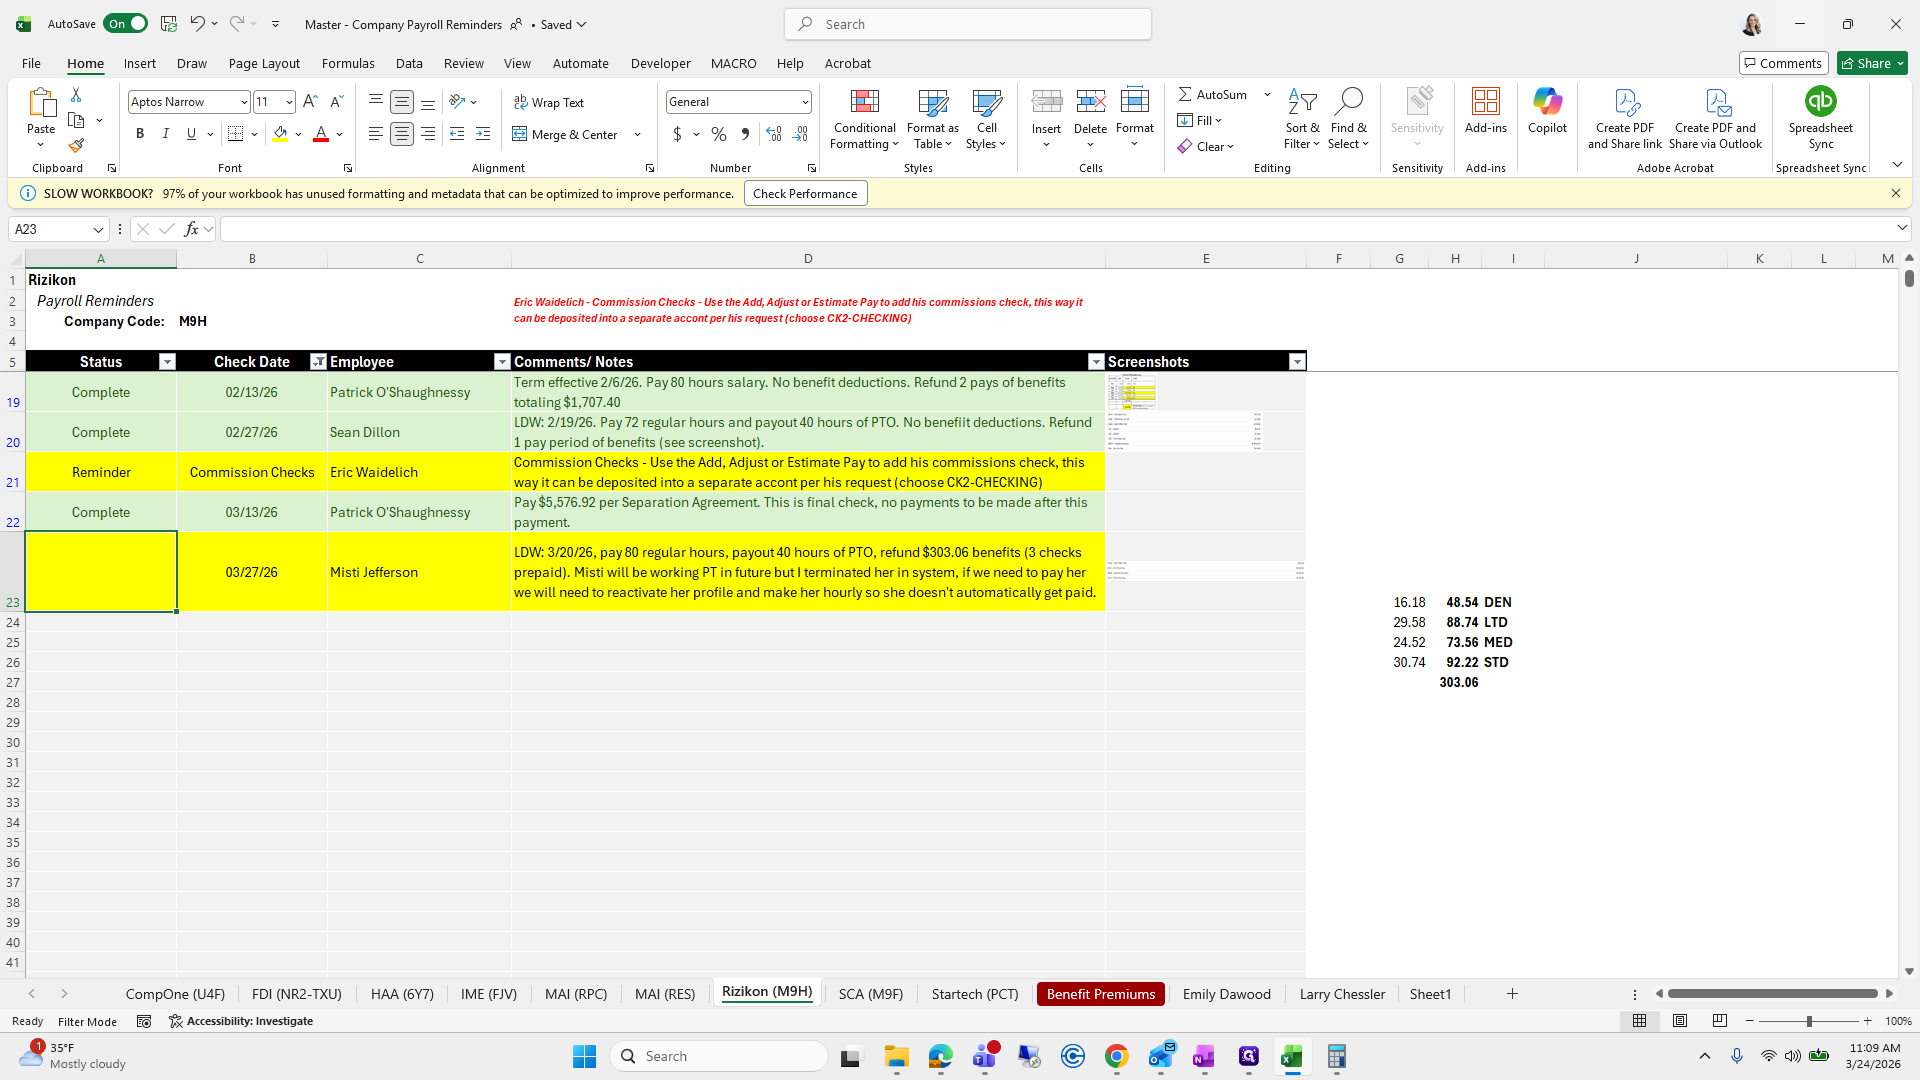
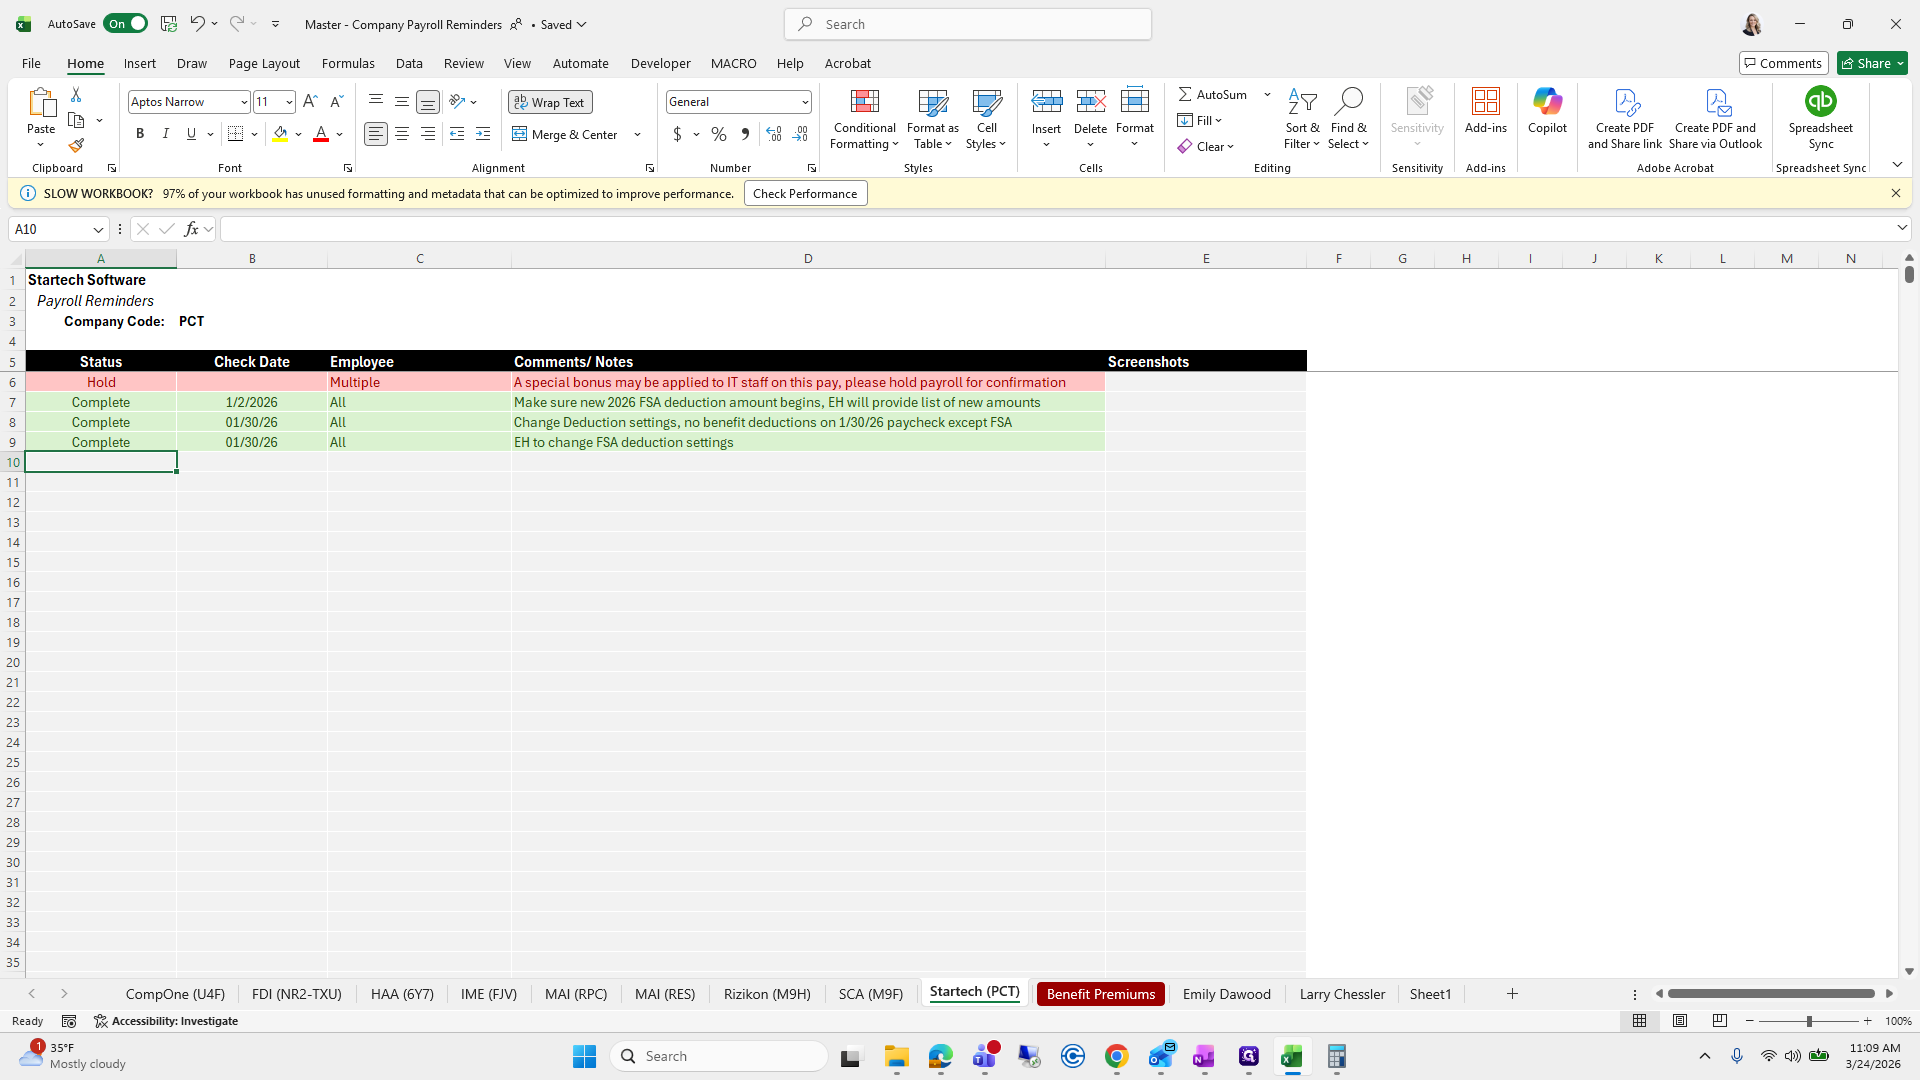
Next, we will do Star Tech. Manage payroll. Go to the work paper. Then, go to Star Tech.

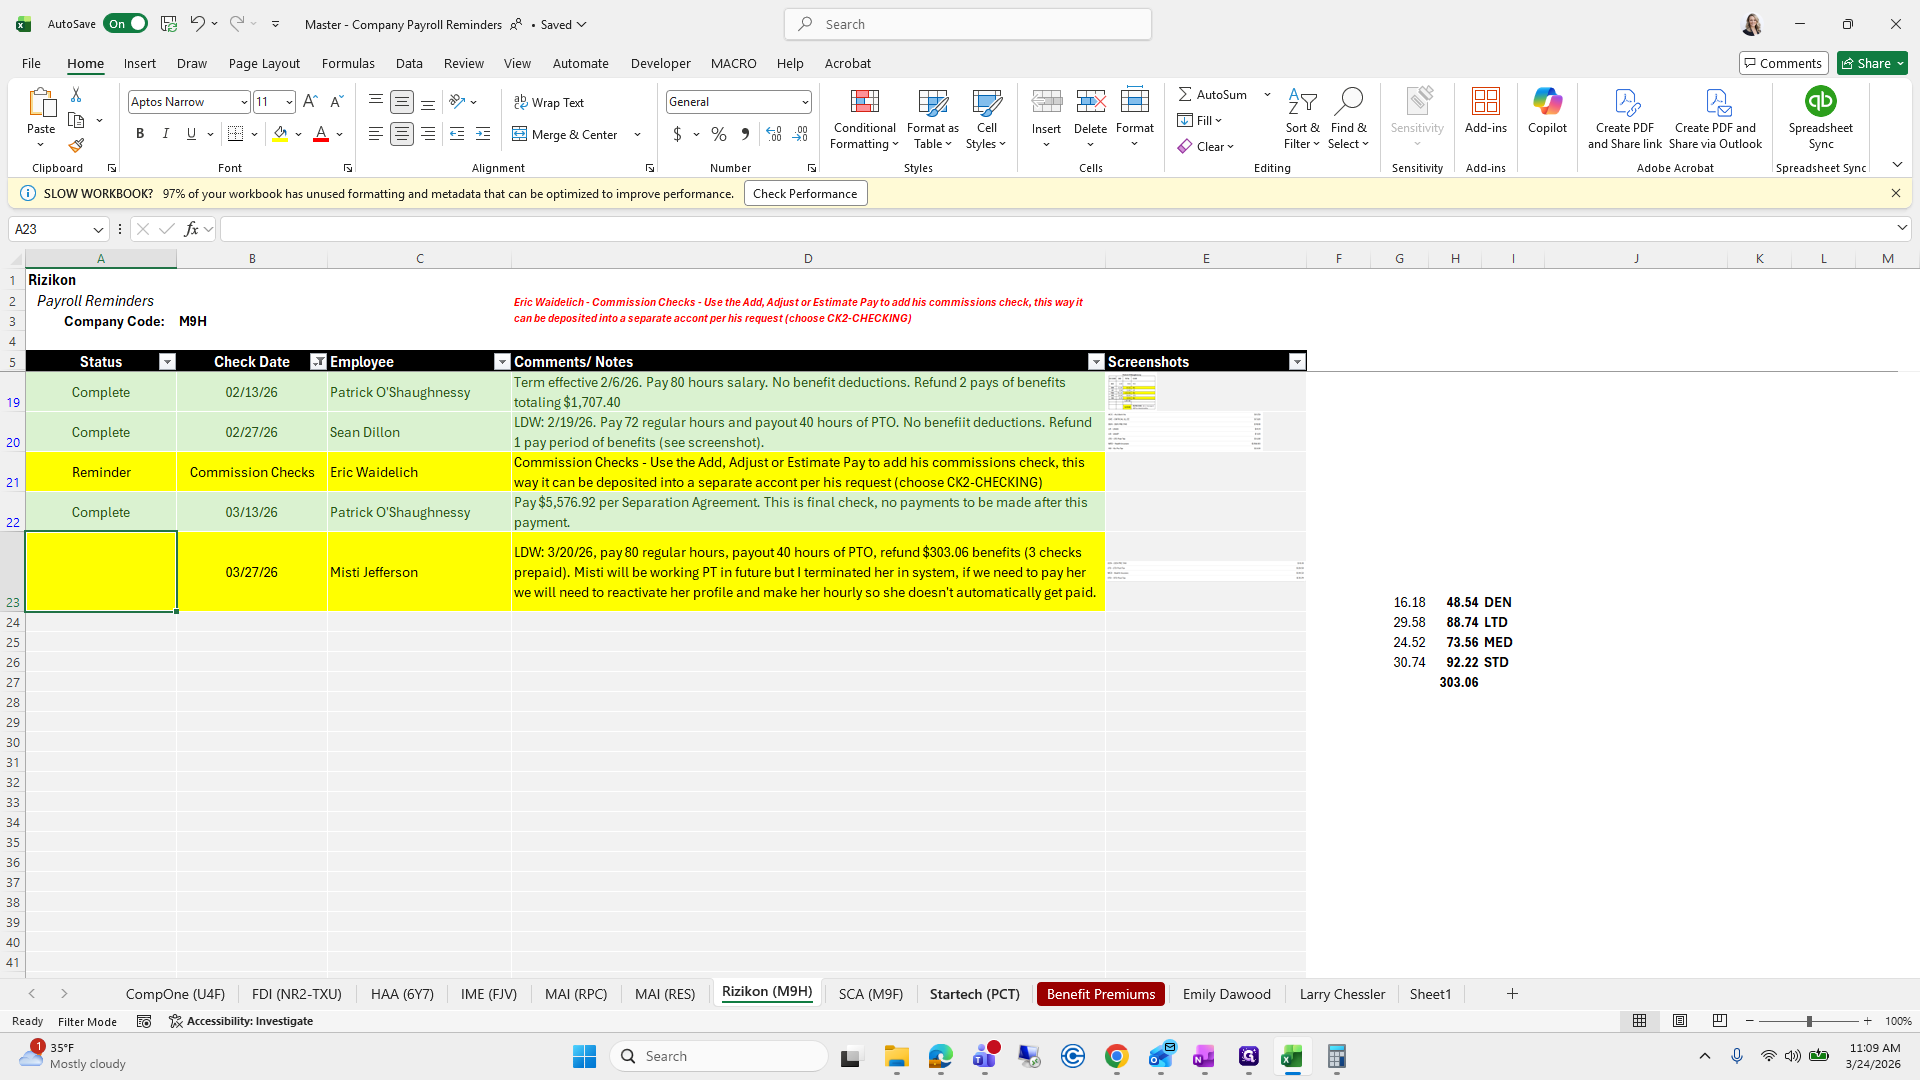
There are no notes, so Star Tech is good to go.

The next one we can do is...

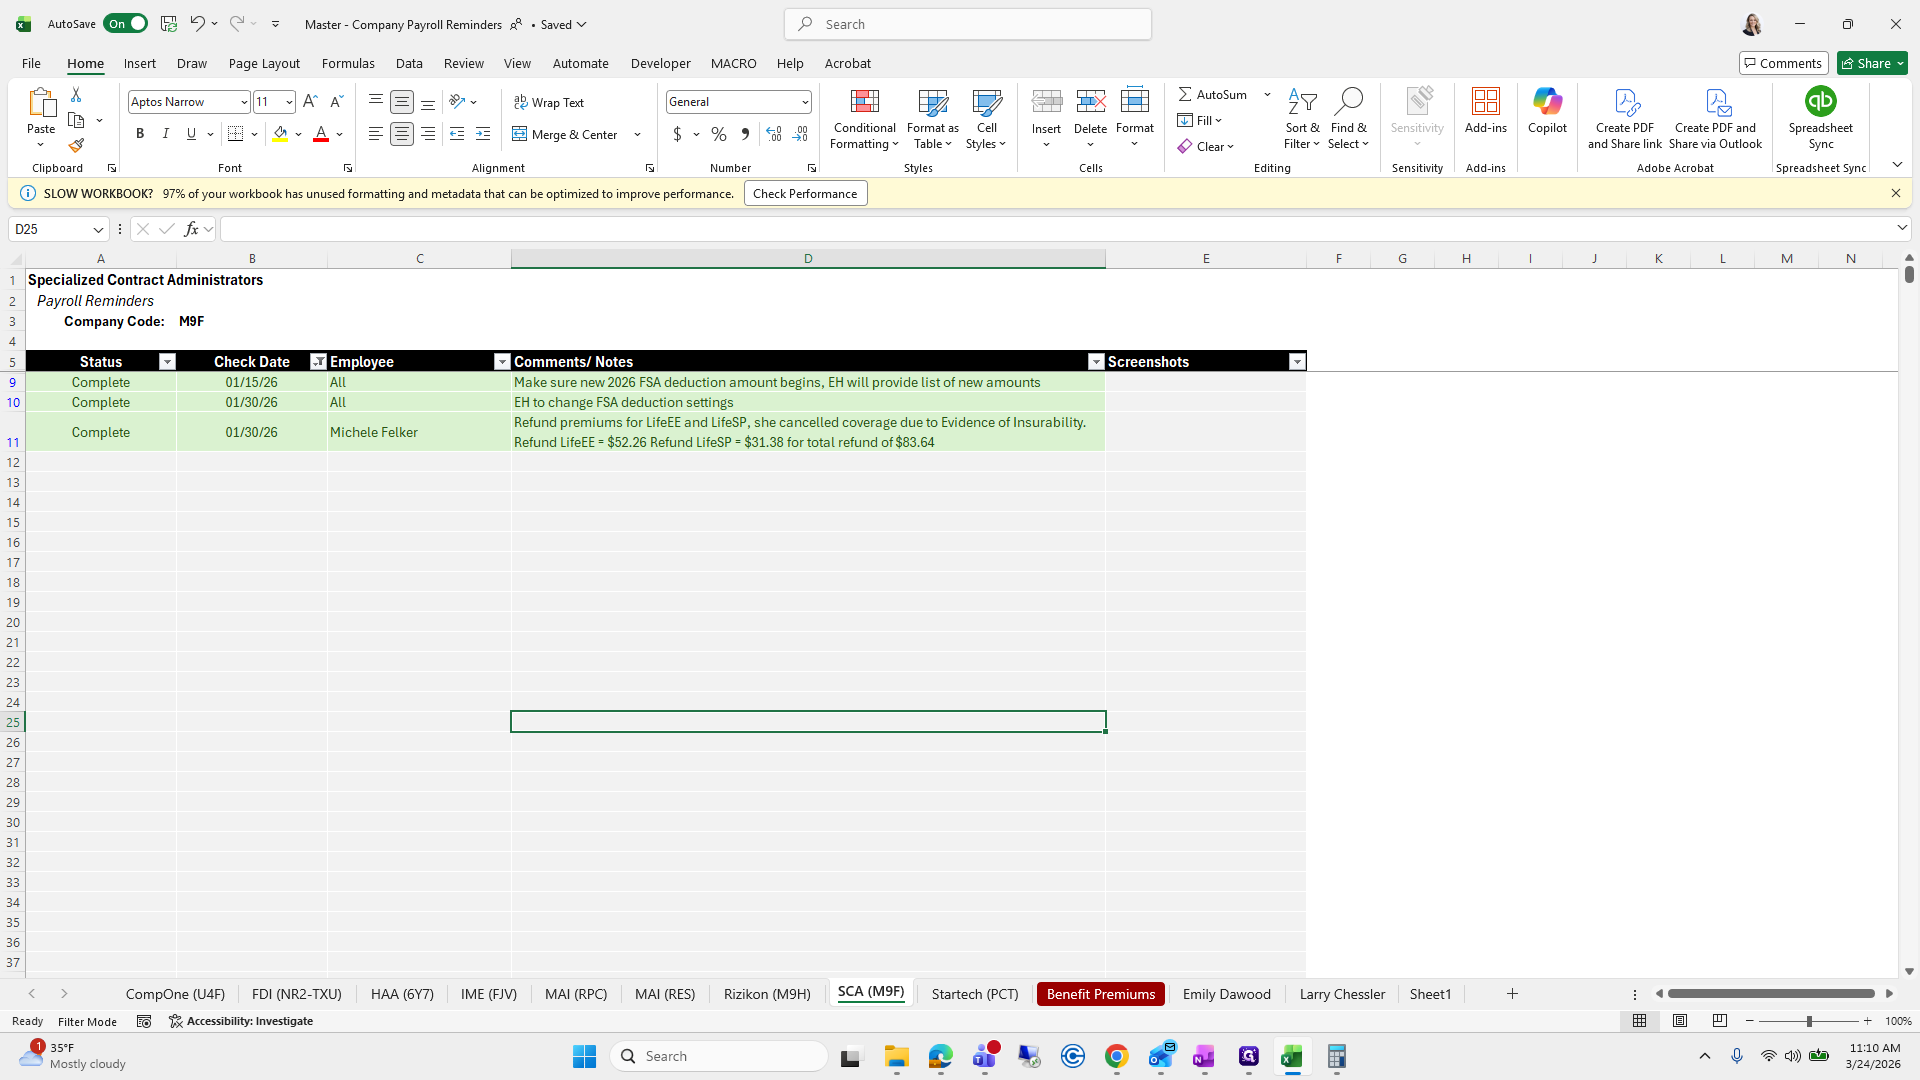
Let's do SCA.
Are there any SCA notes?

No SCA notes, which is good.

Next one we can do...

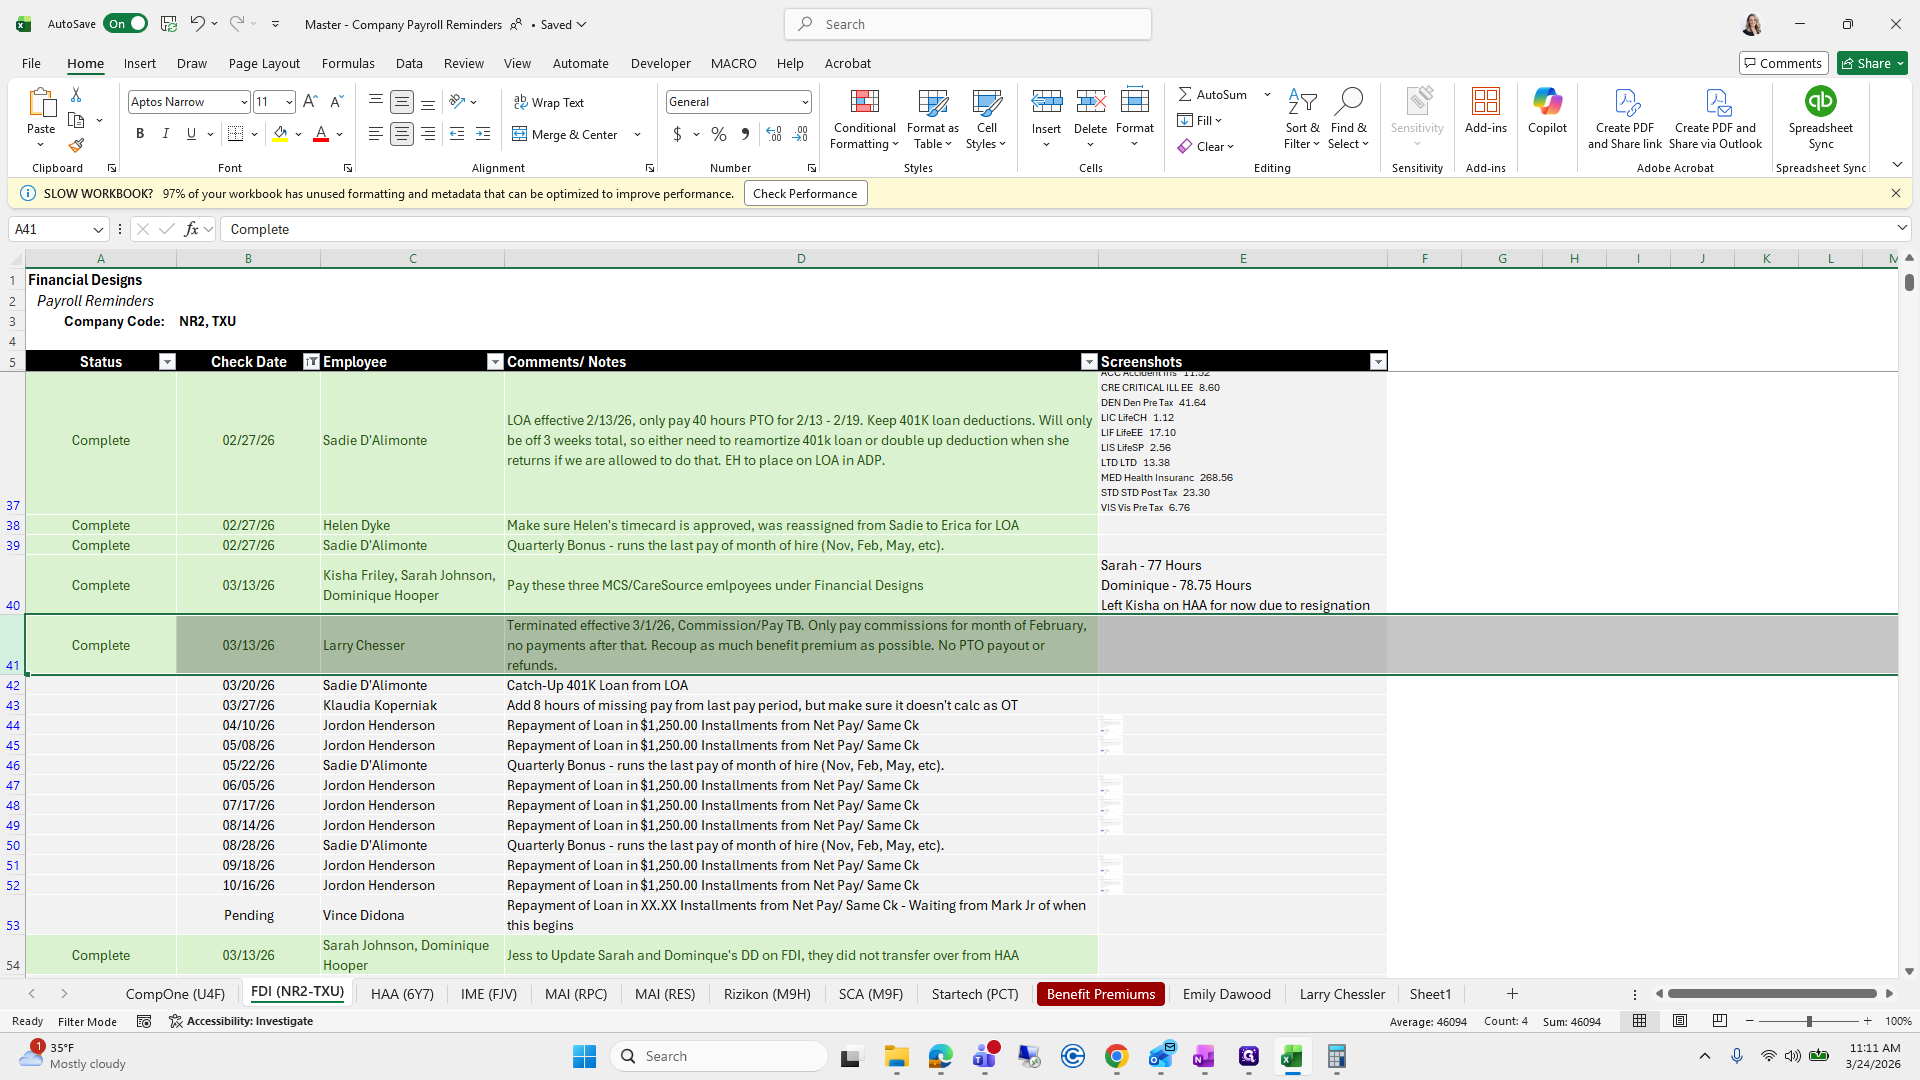
I may need to make a new video for the next one. Let's check Financial Designs.

This one does have one.
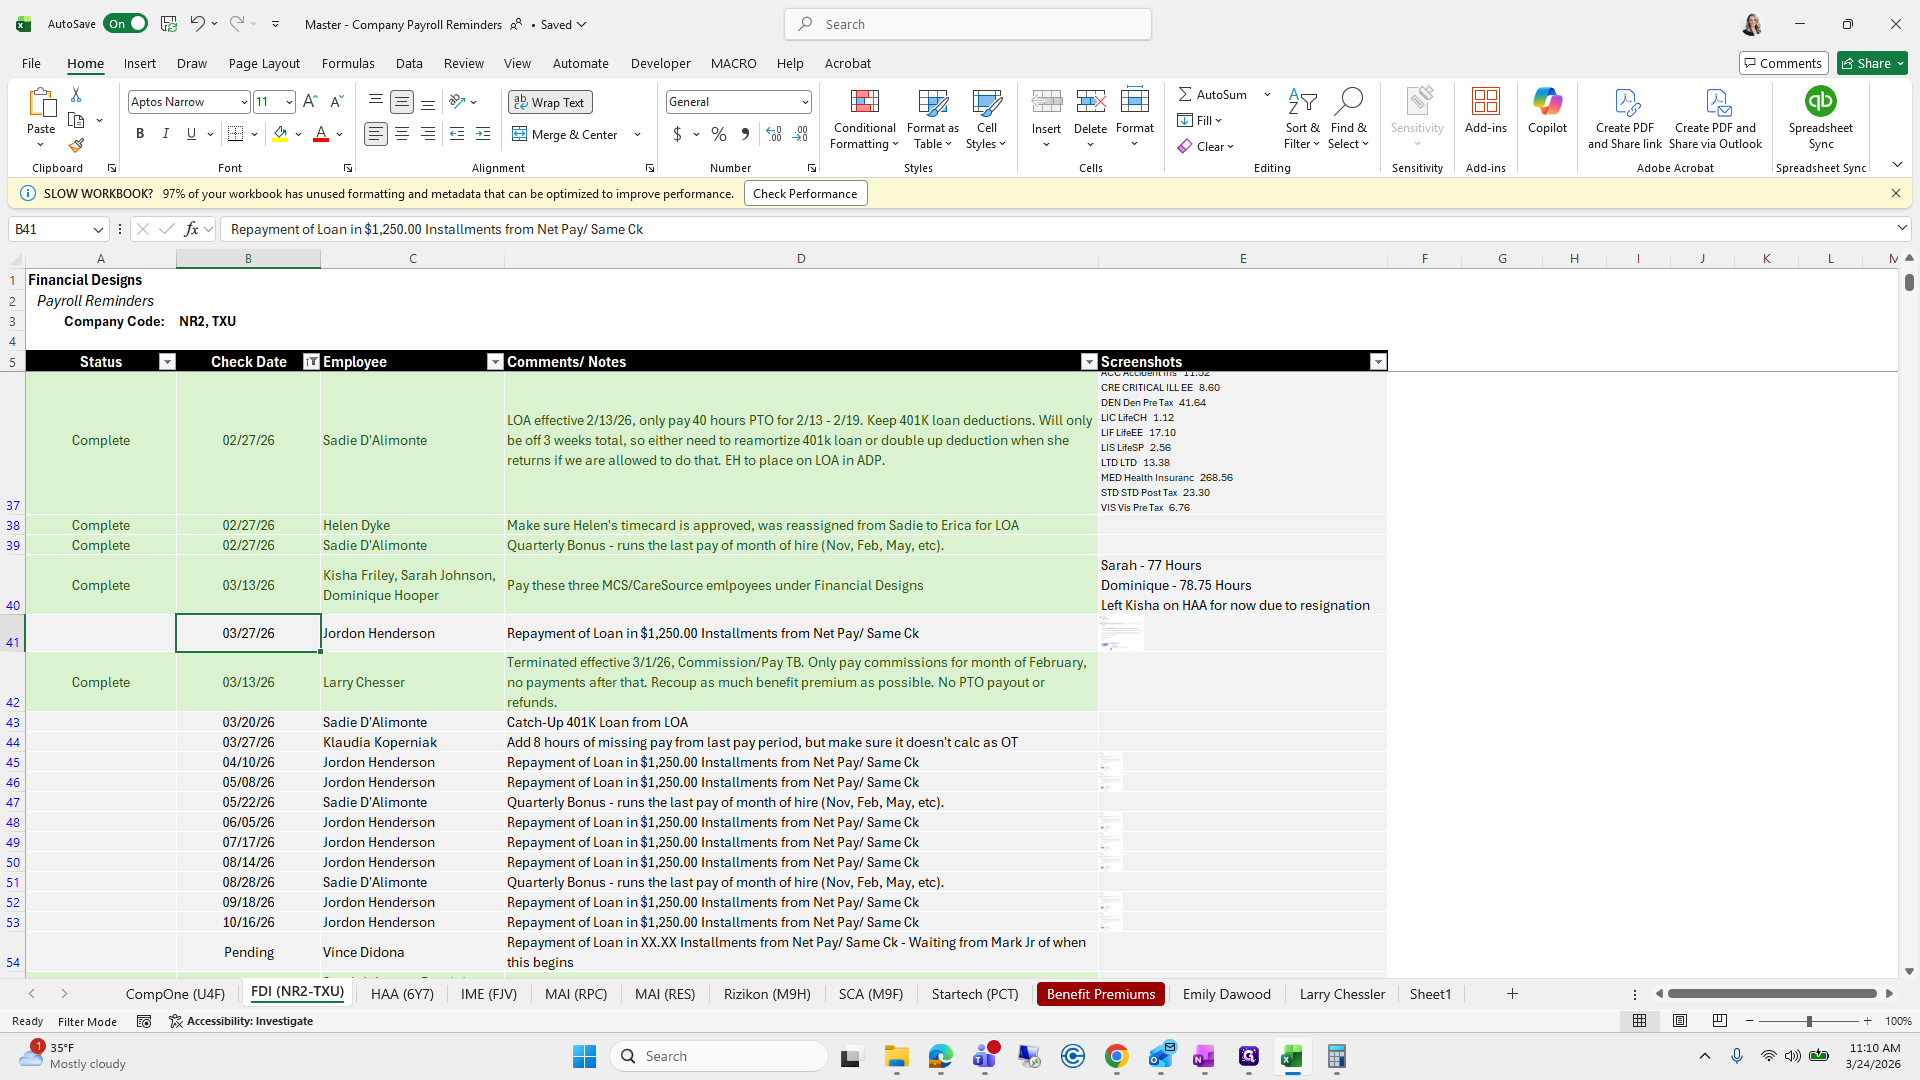
Jordan Henderson says a loan will be repaid in 12 to 15 installments, deducted from her paycheck, including commissions.
Um, do, do, do.
There are no commissions on this one, and she does not earn enough in her check to start the loan repayment. I will move this to the next paycheck on 4/10, which is already listed here.
I will delete this one.
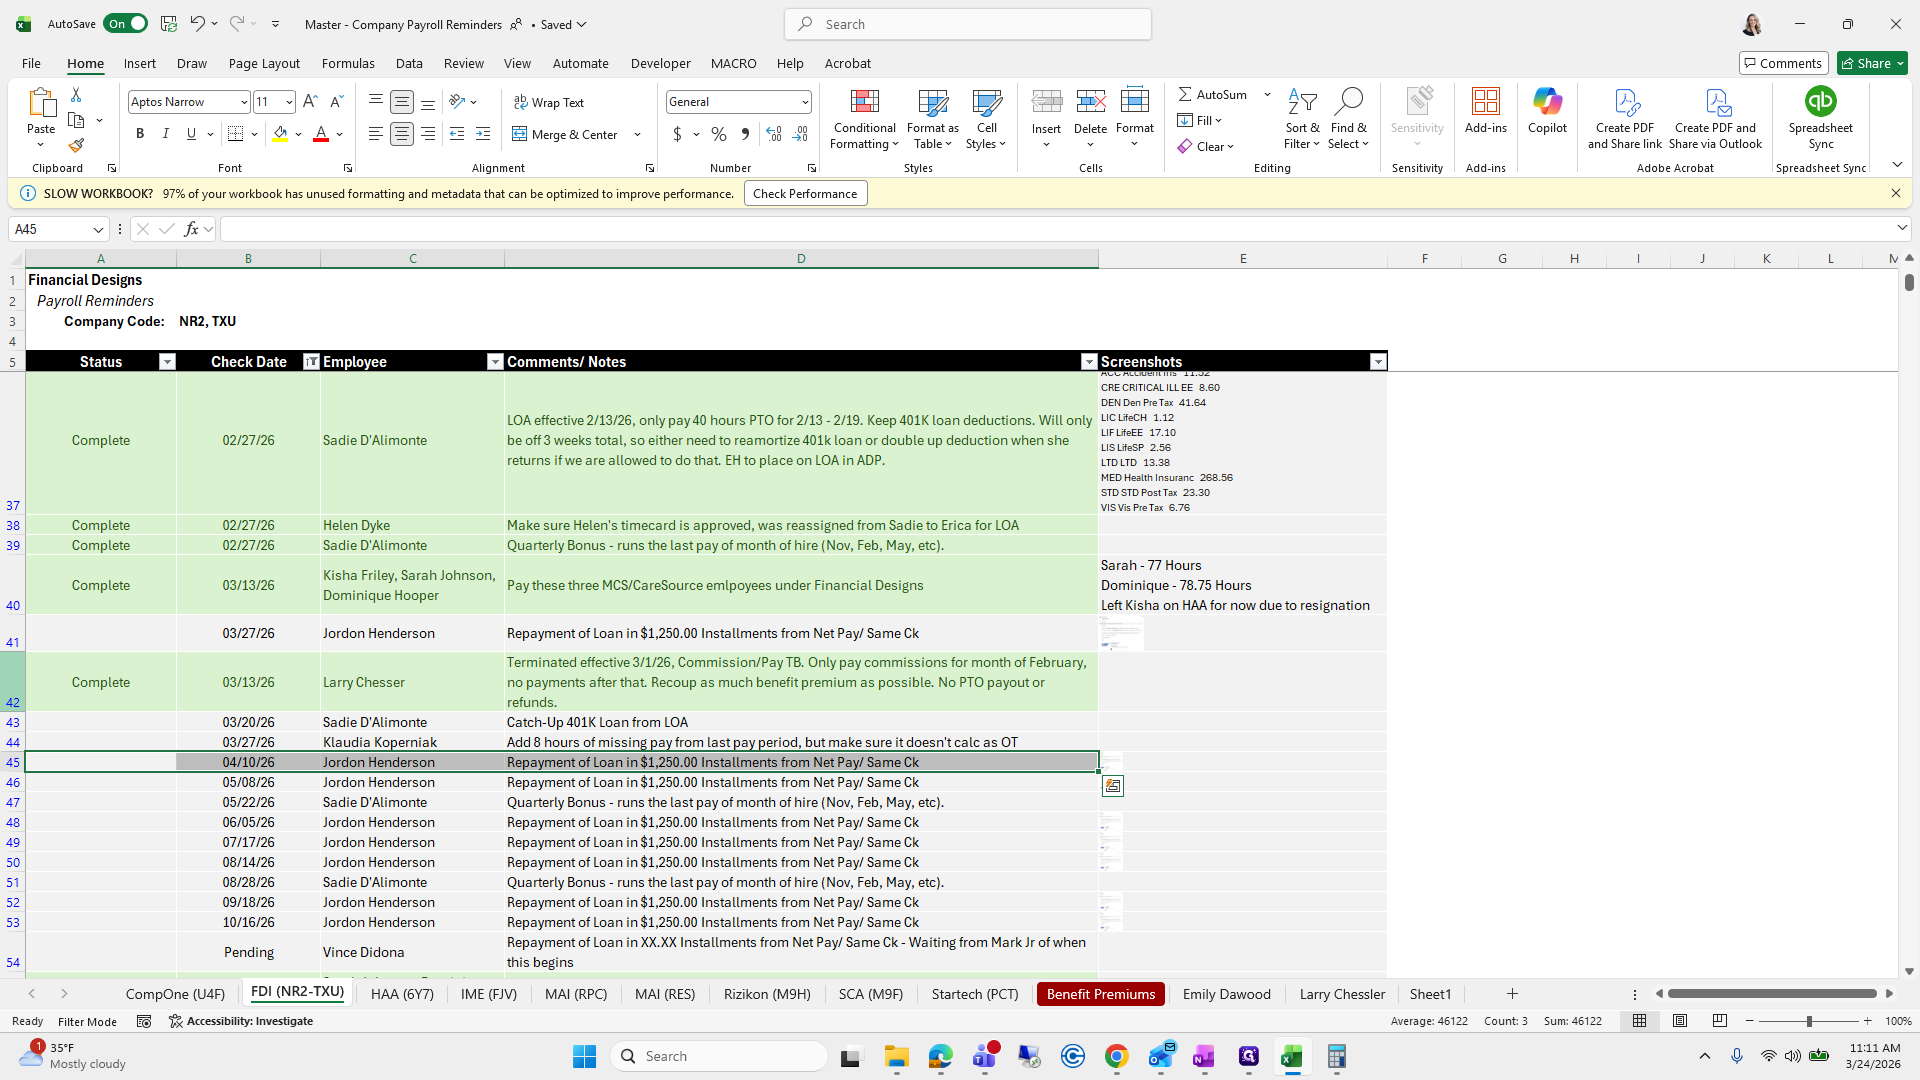
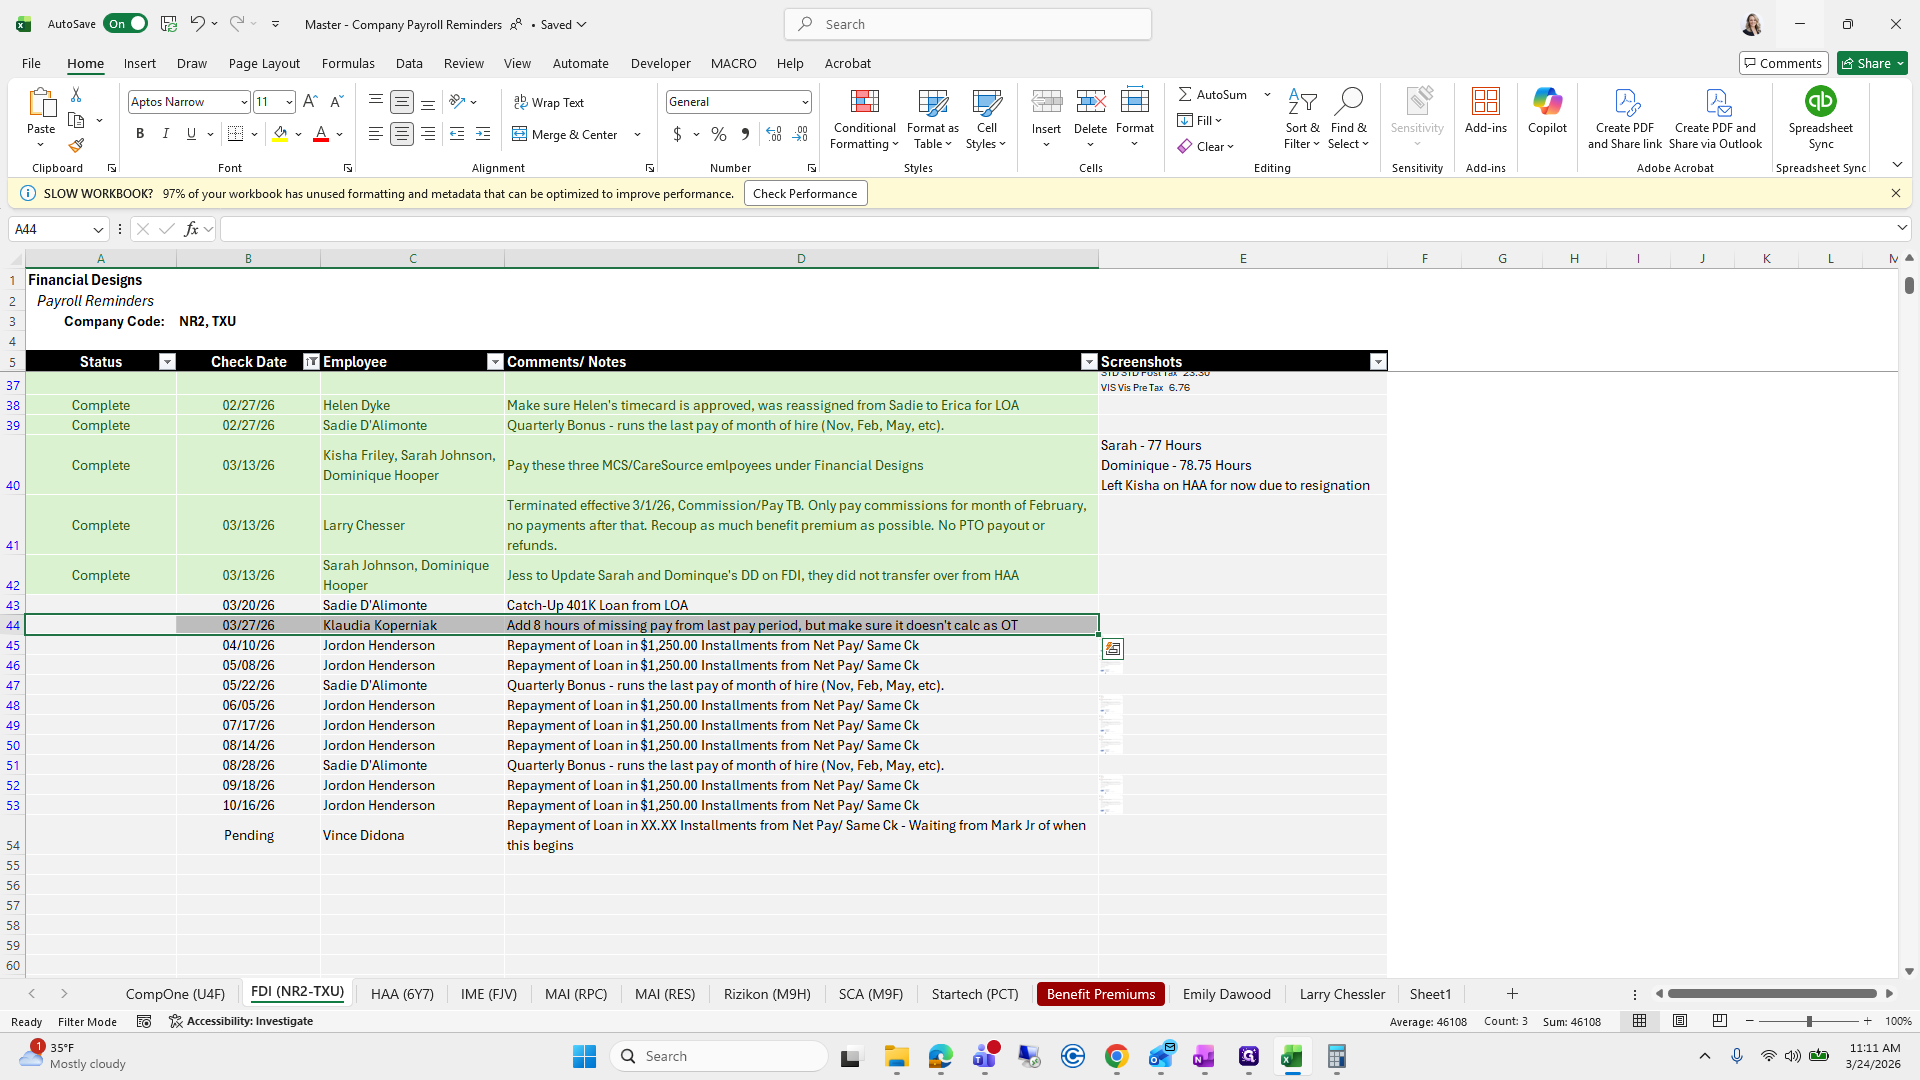
There's really not much—oh, 327.
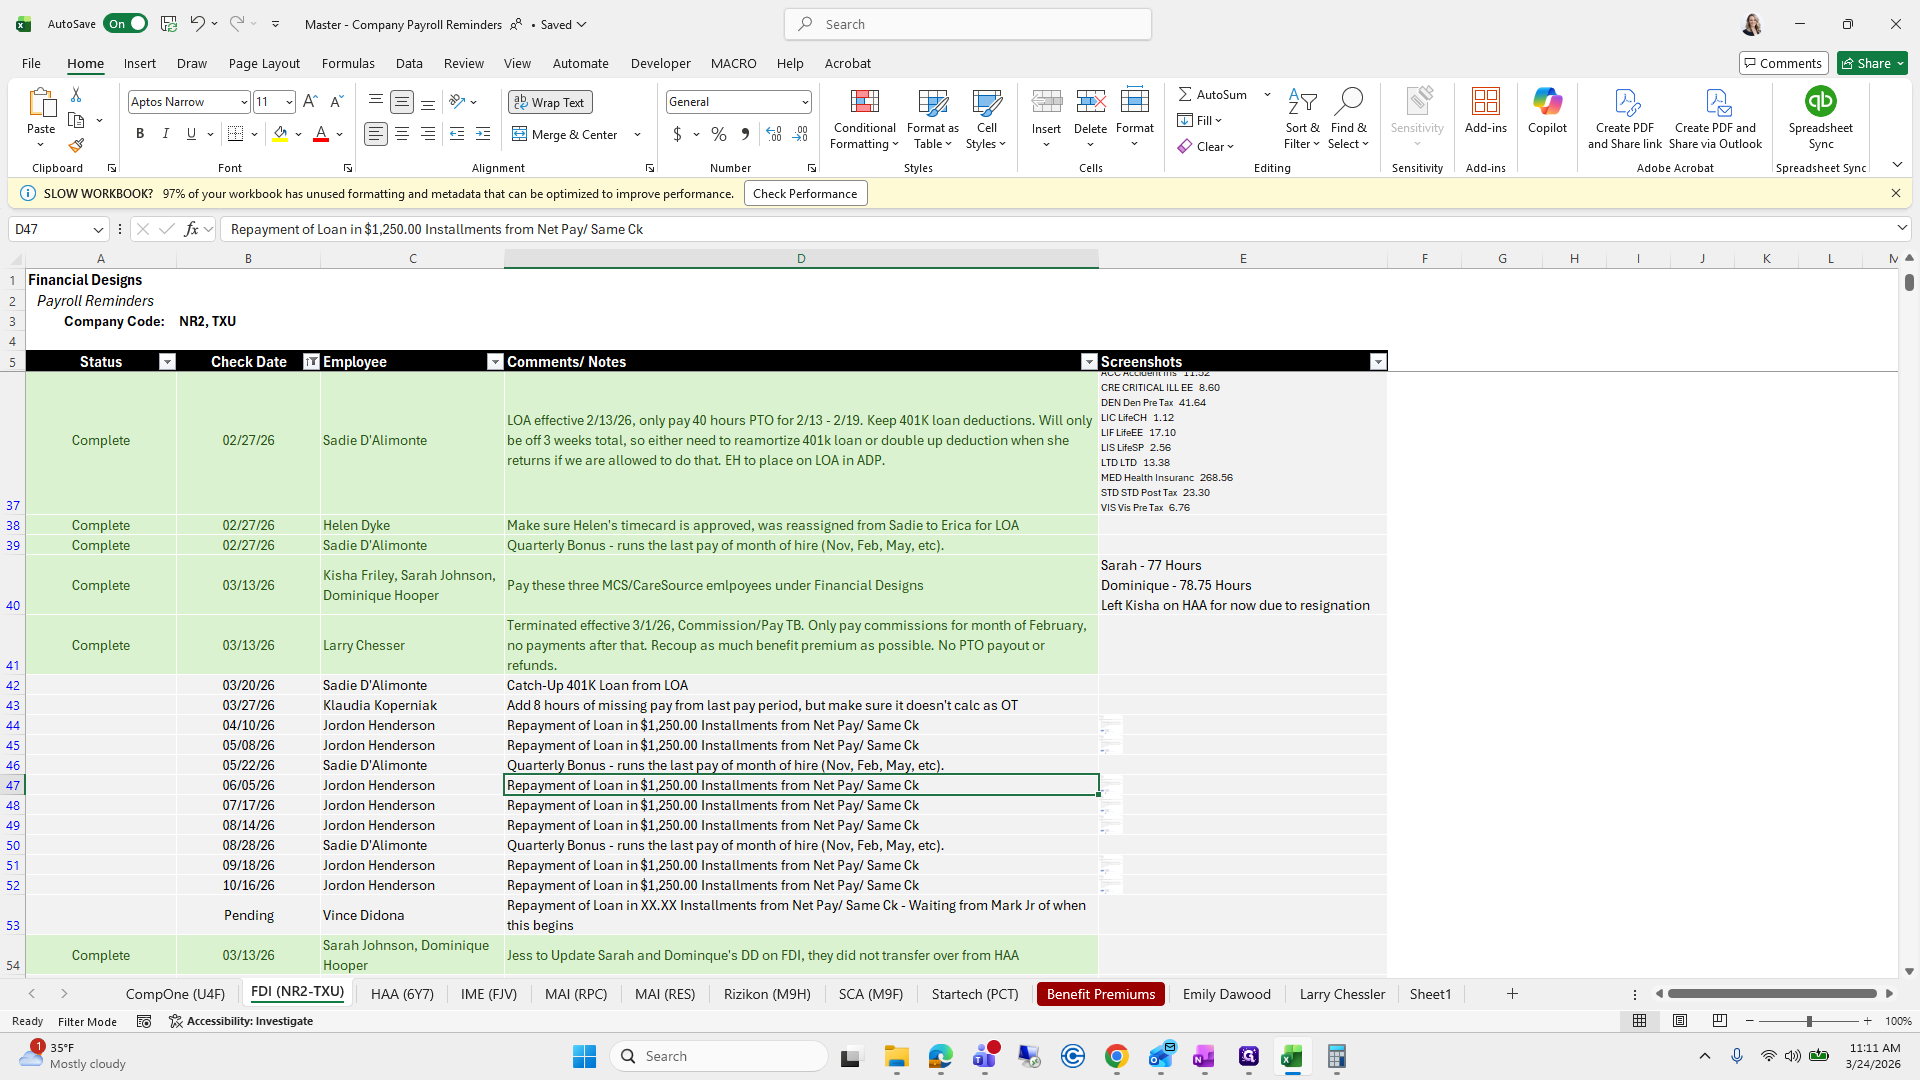
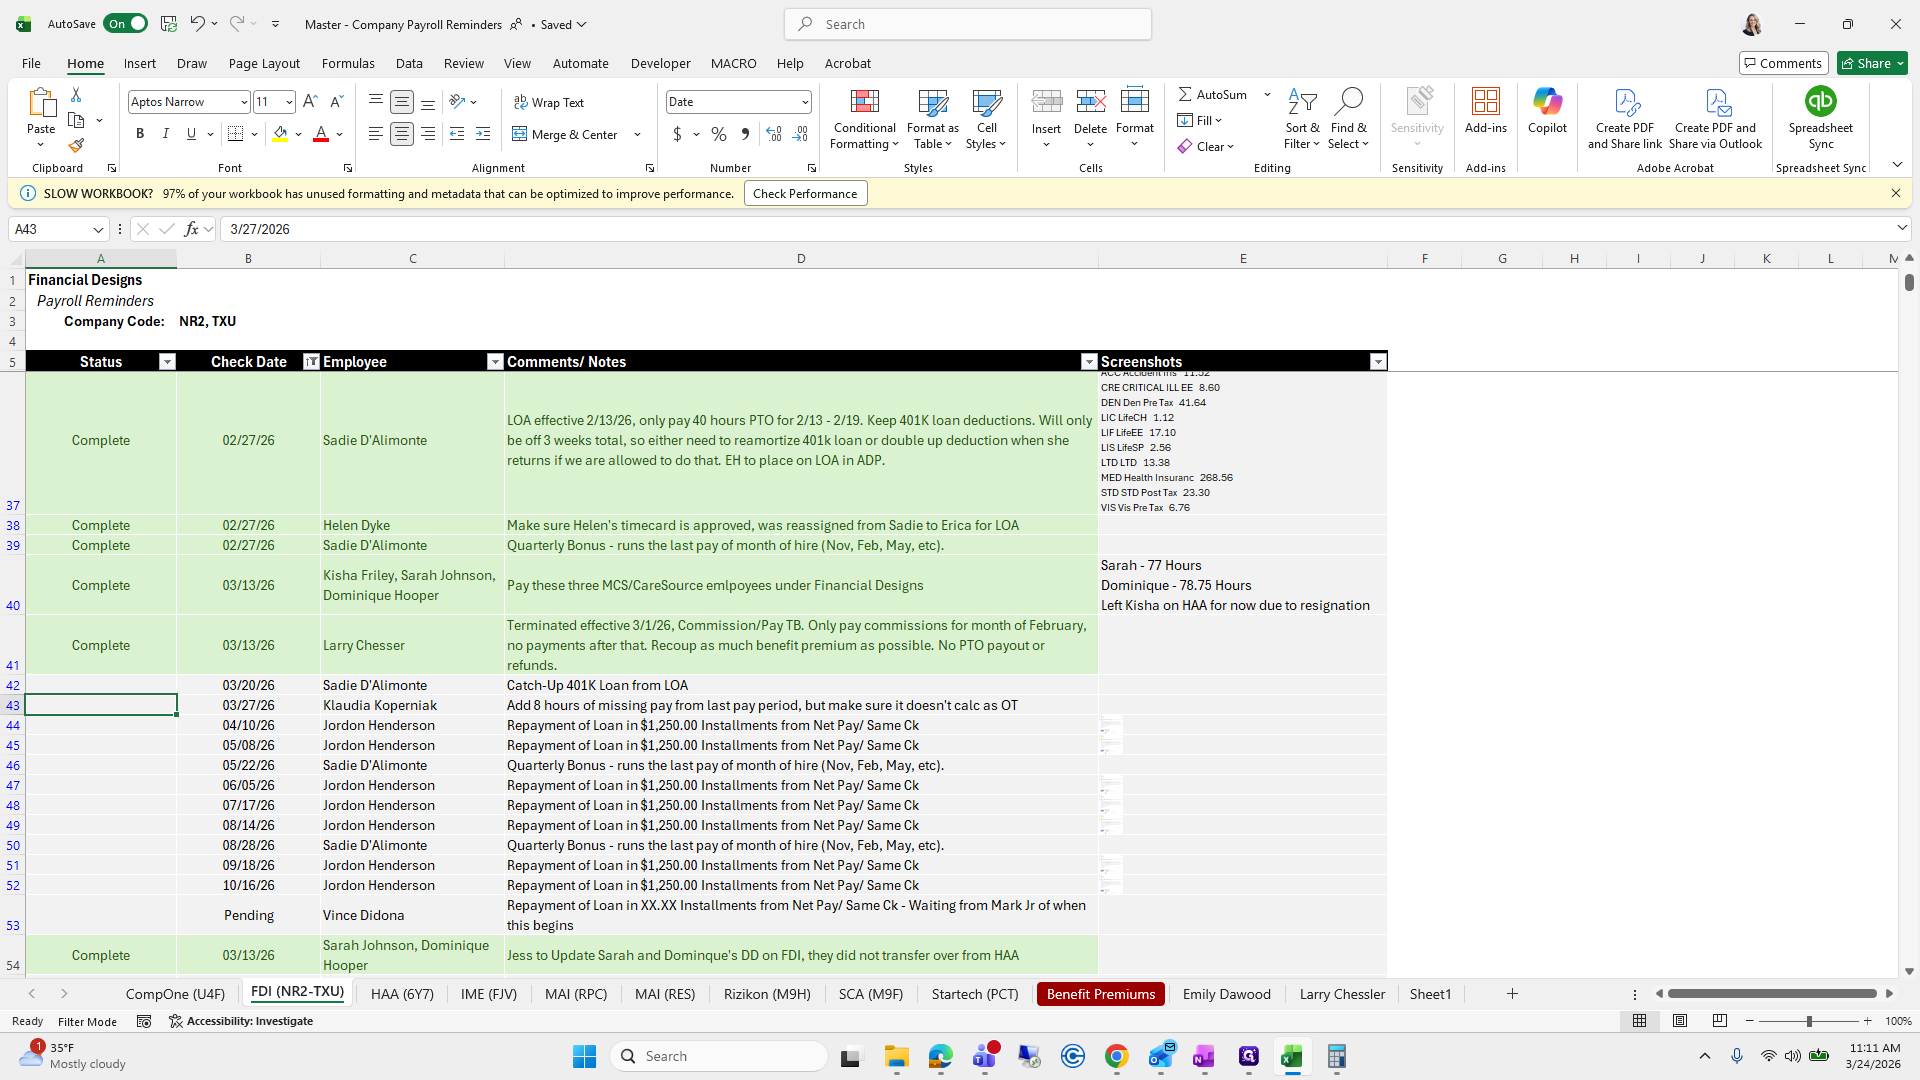
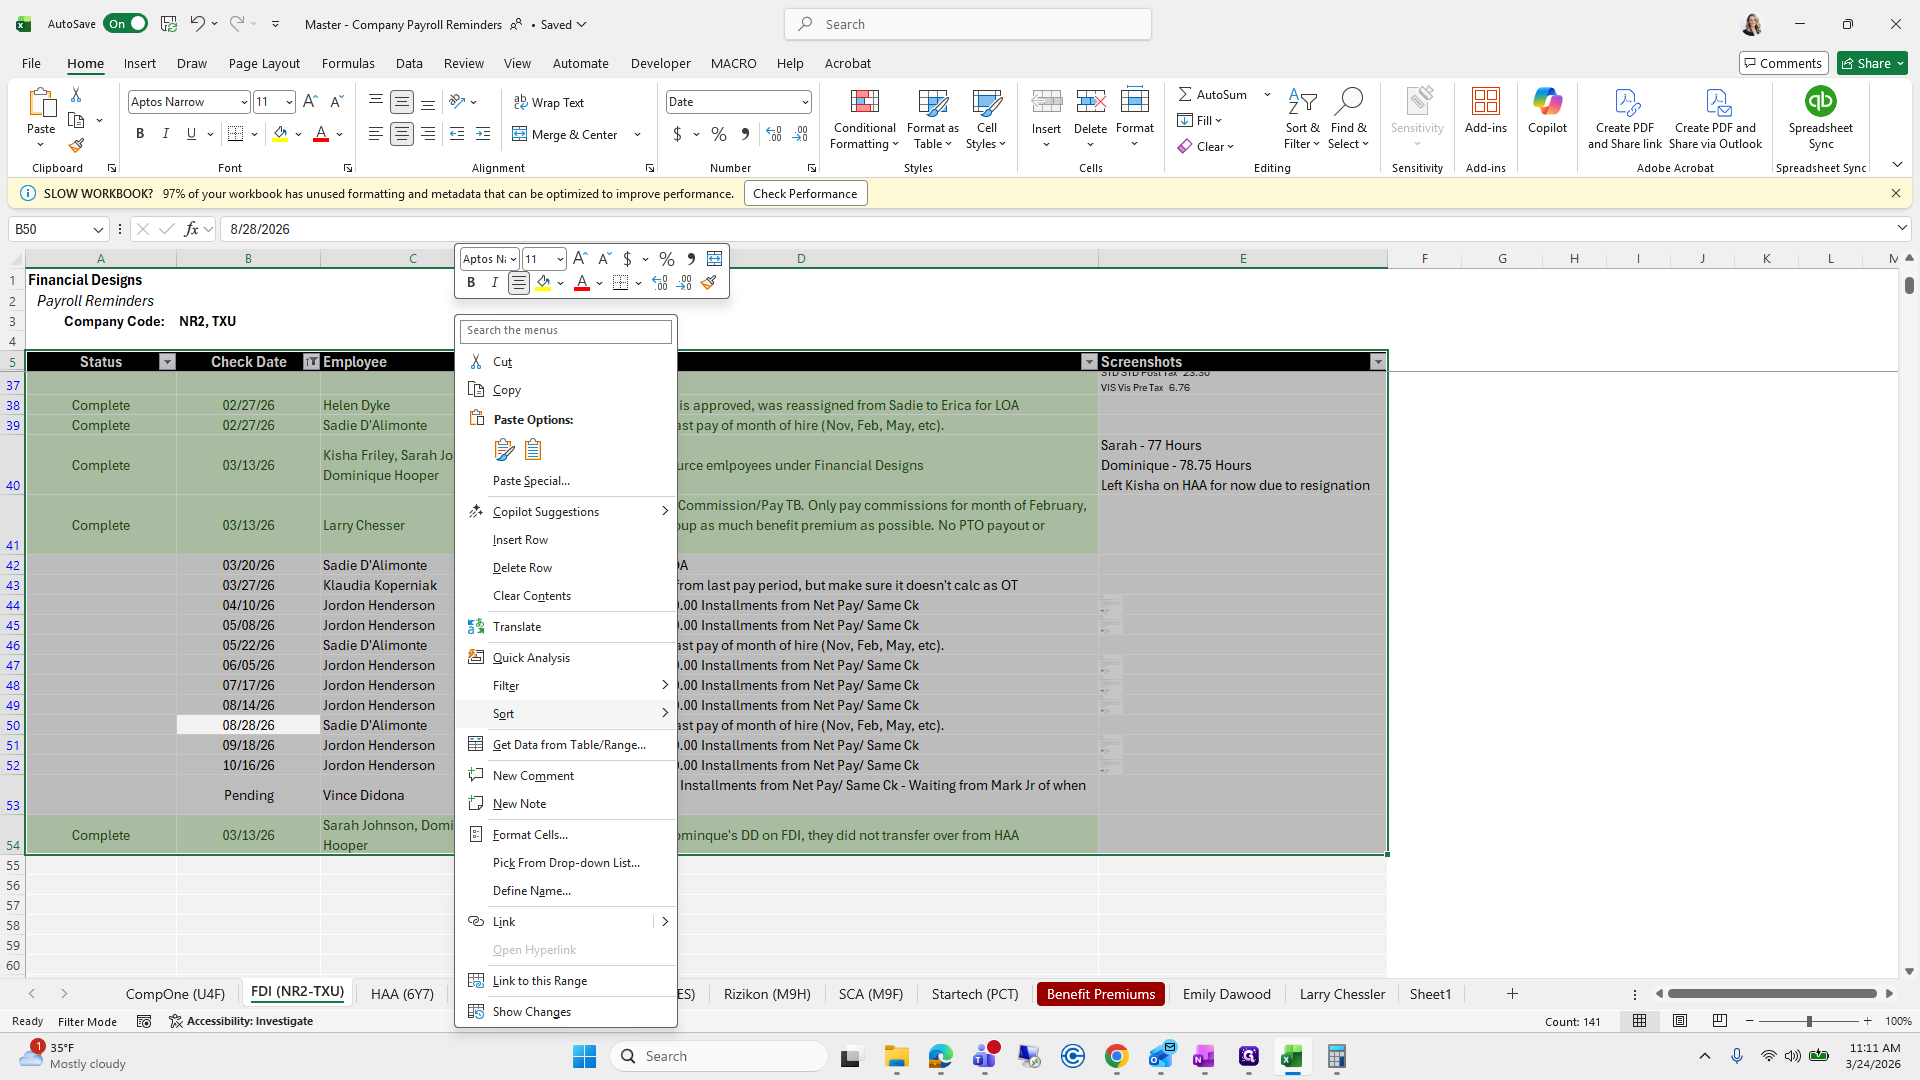
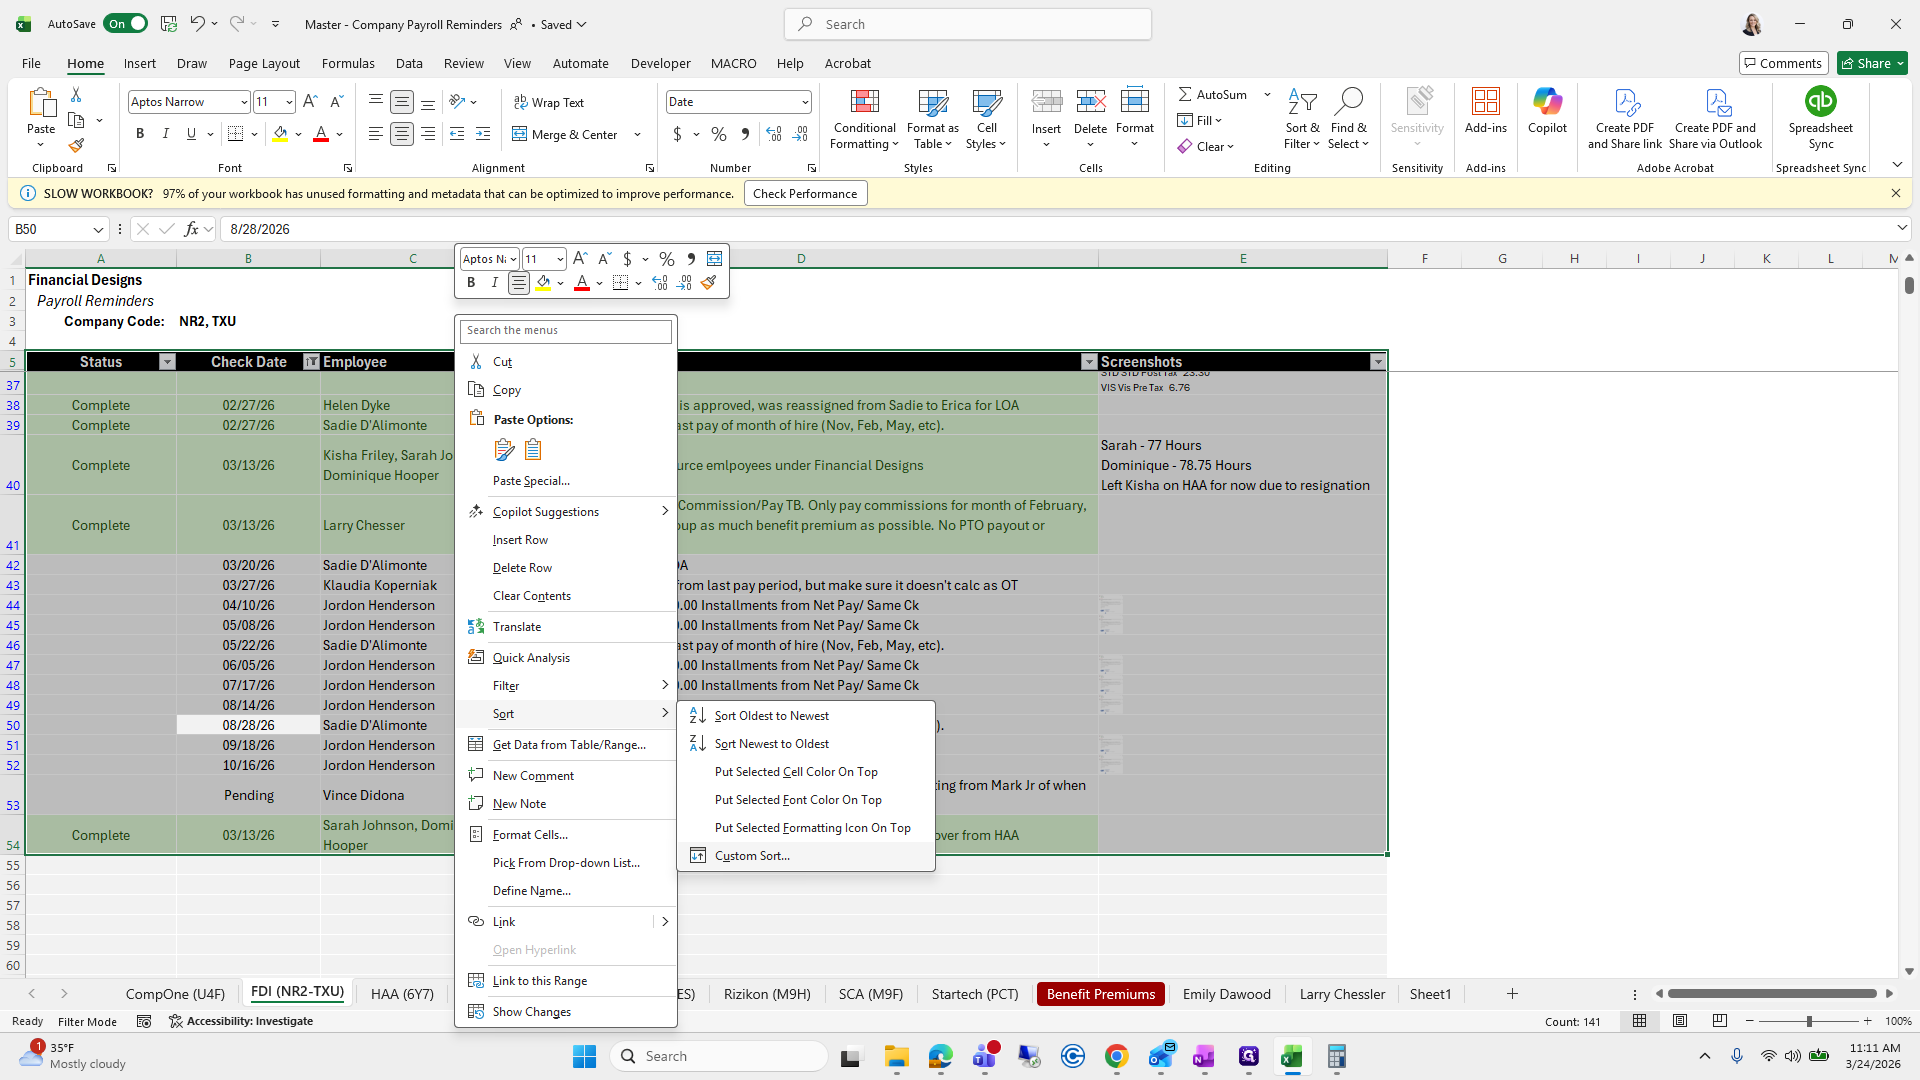
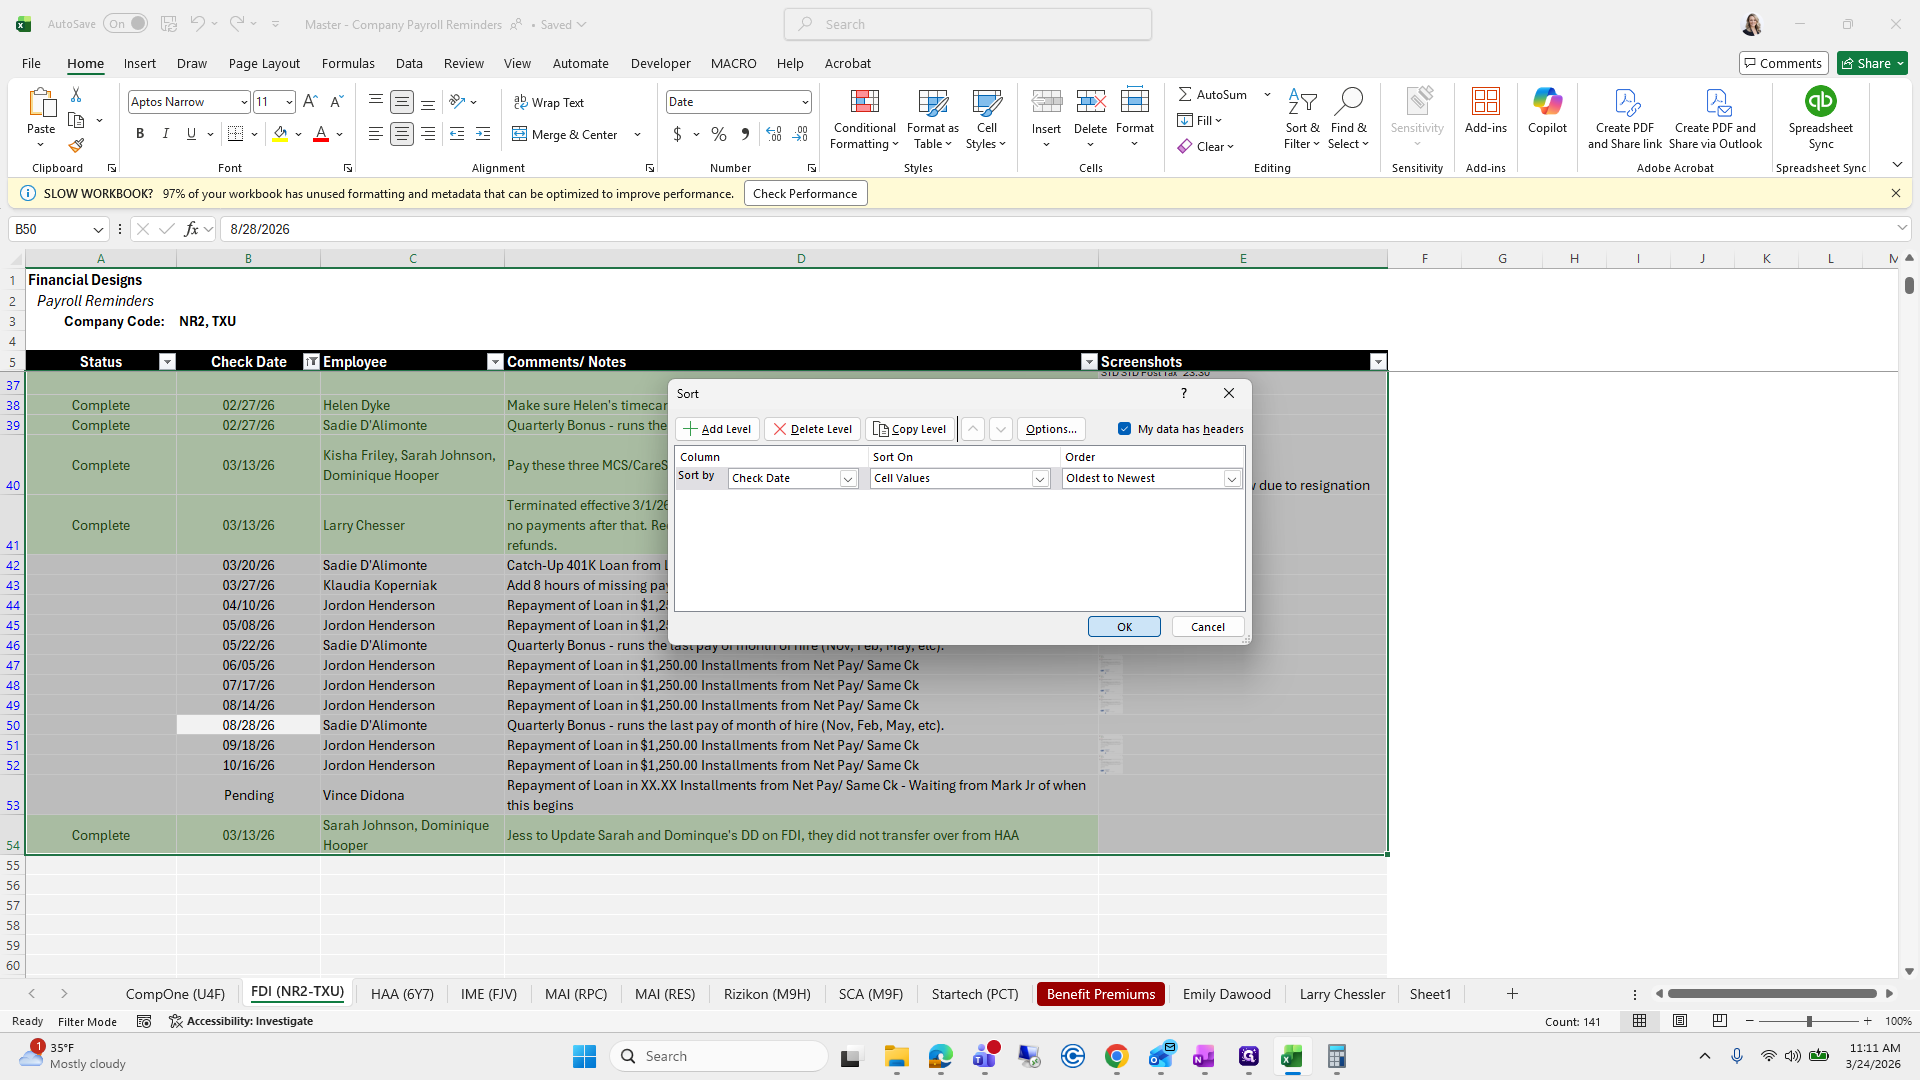
Sometimes I sort by check date to avoid missing anything.
So 327...
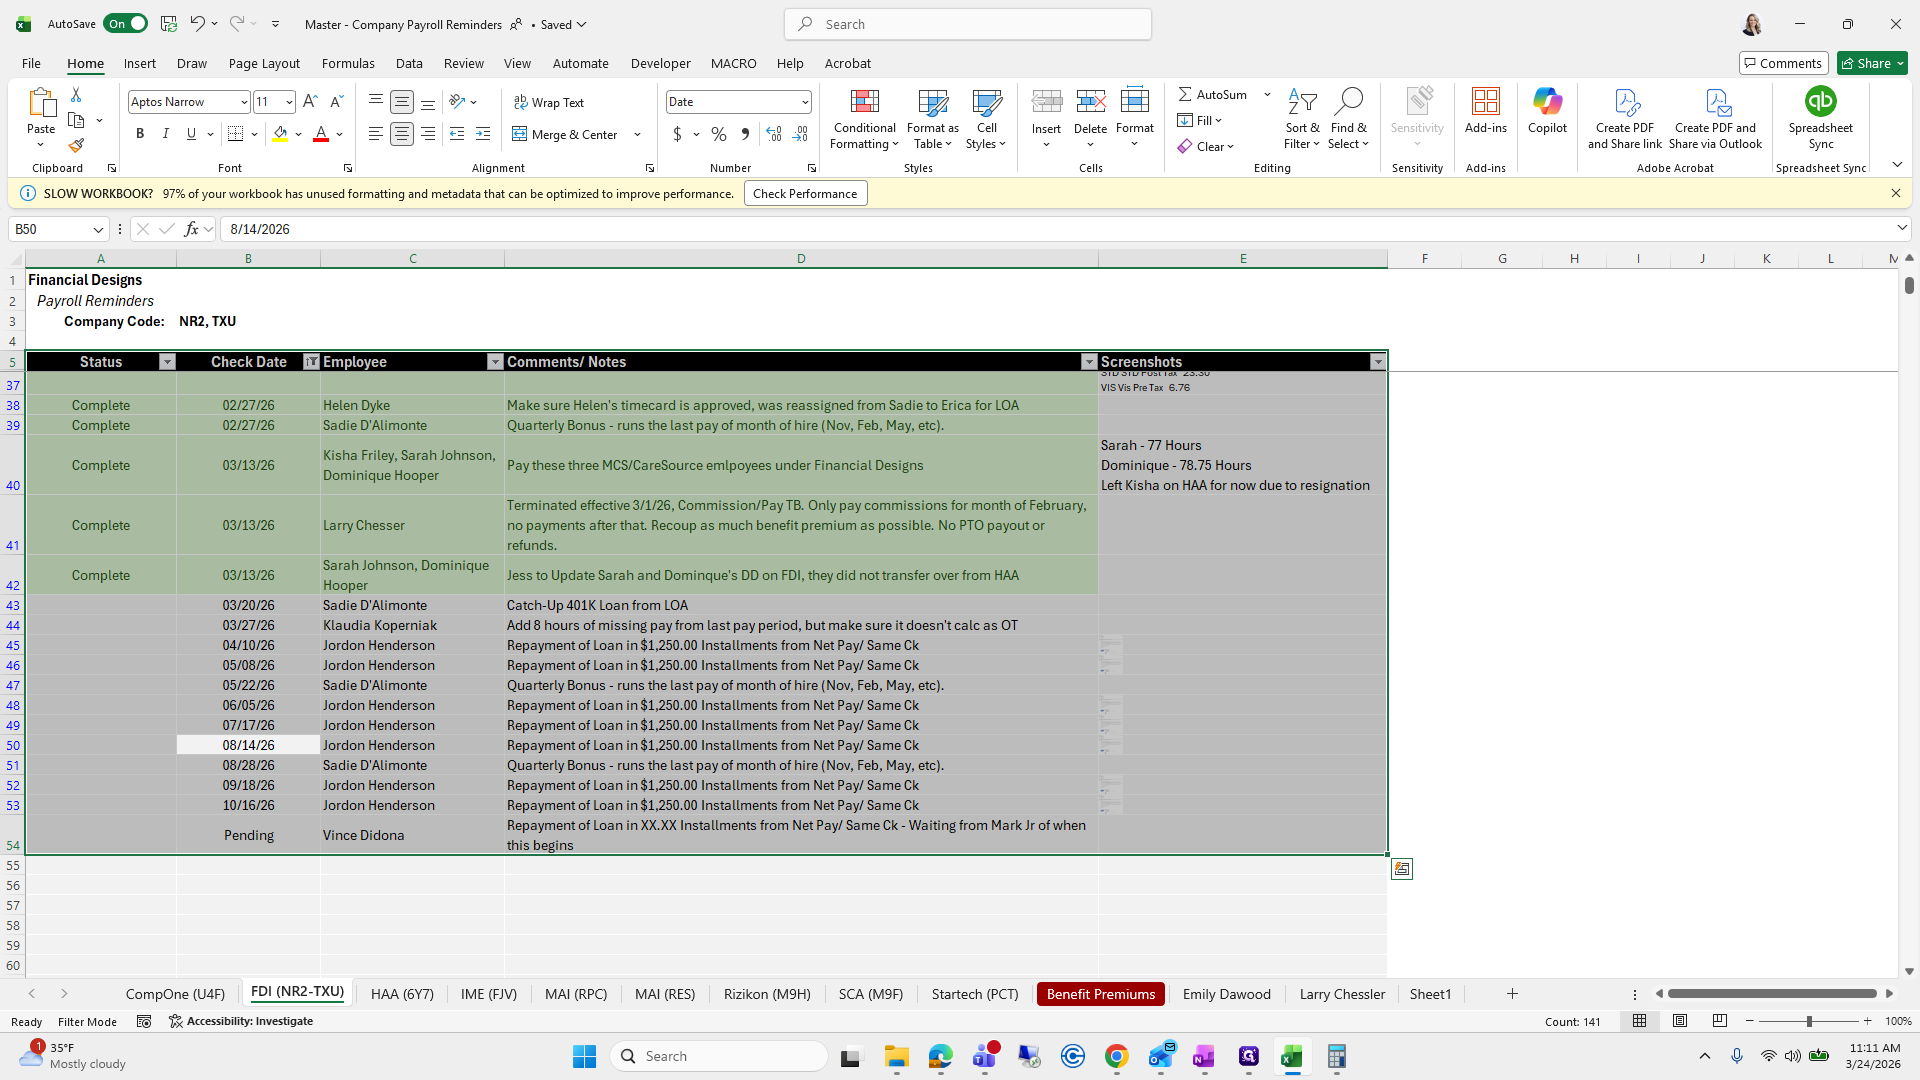
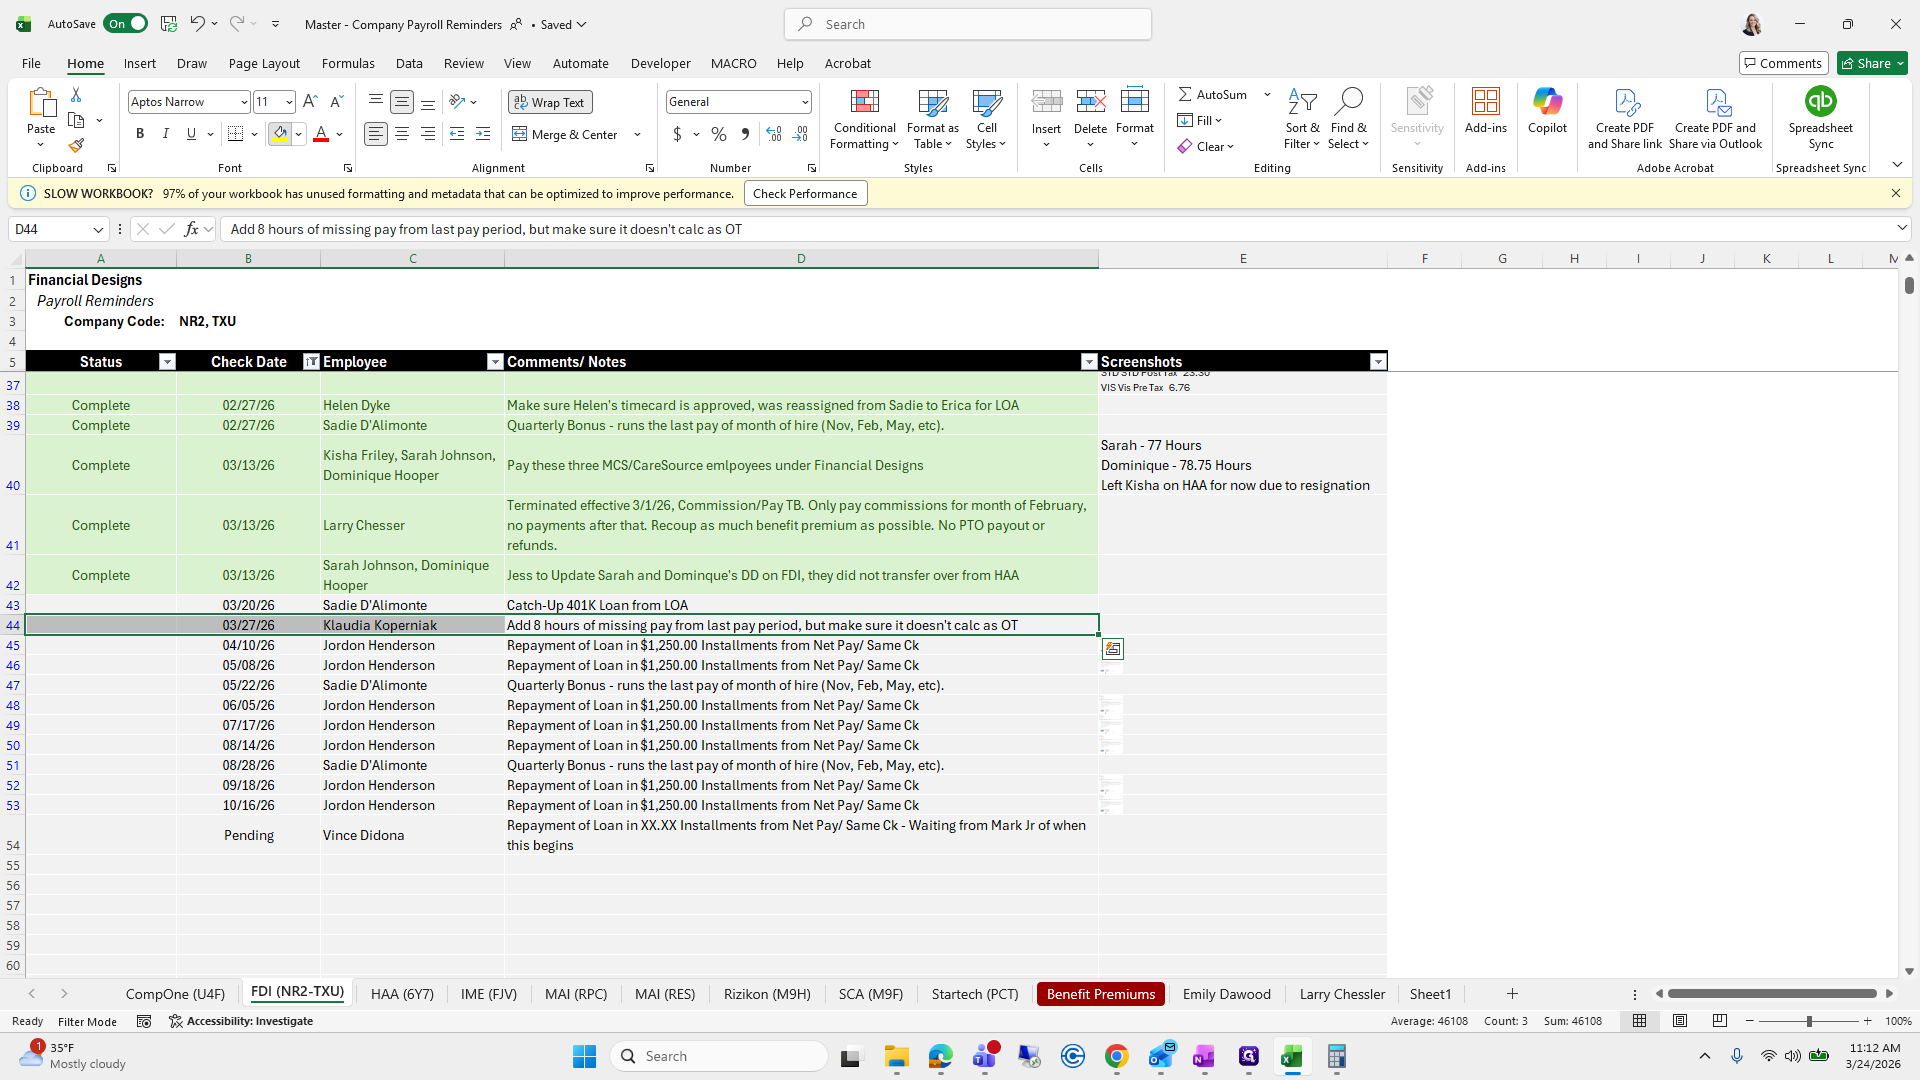
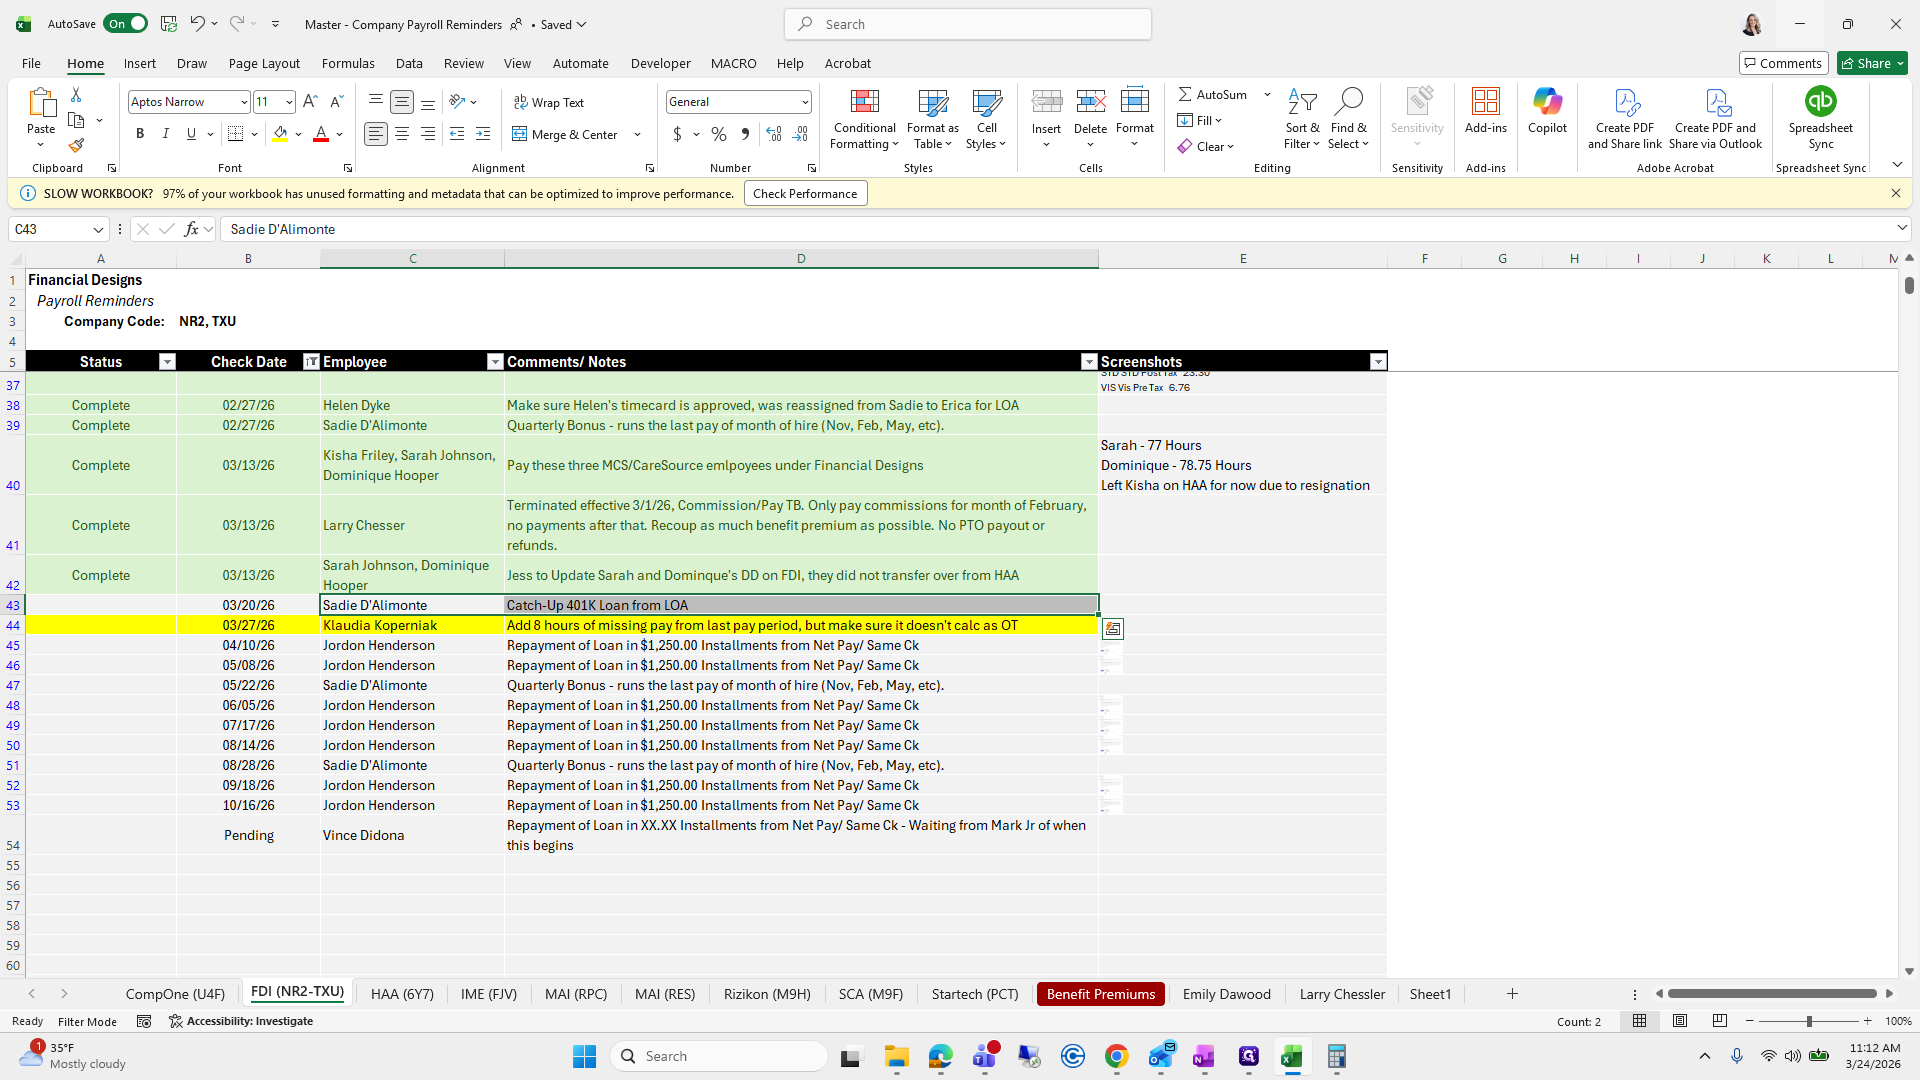
She needs to add eight hours of missing pay from the last period. We will go to Add Worksheet.

Let's see if there are additional hours.

Missed hours, that works.
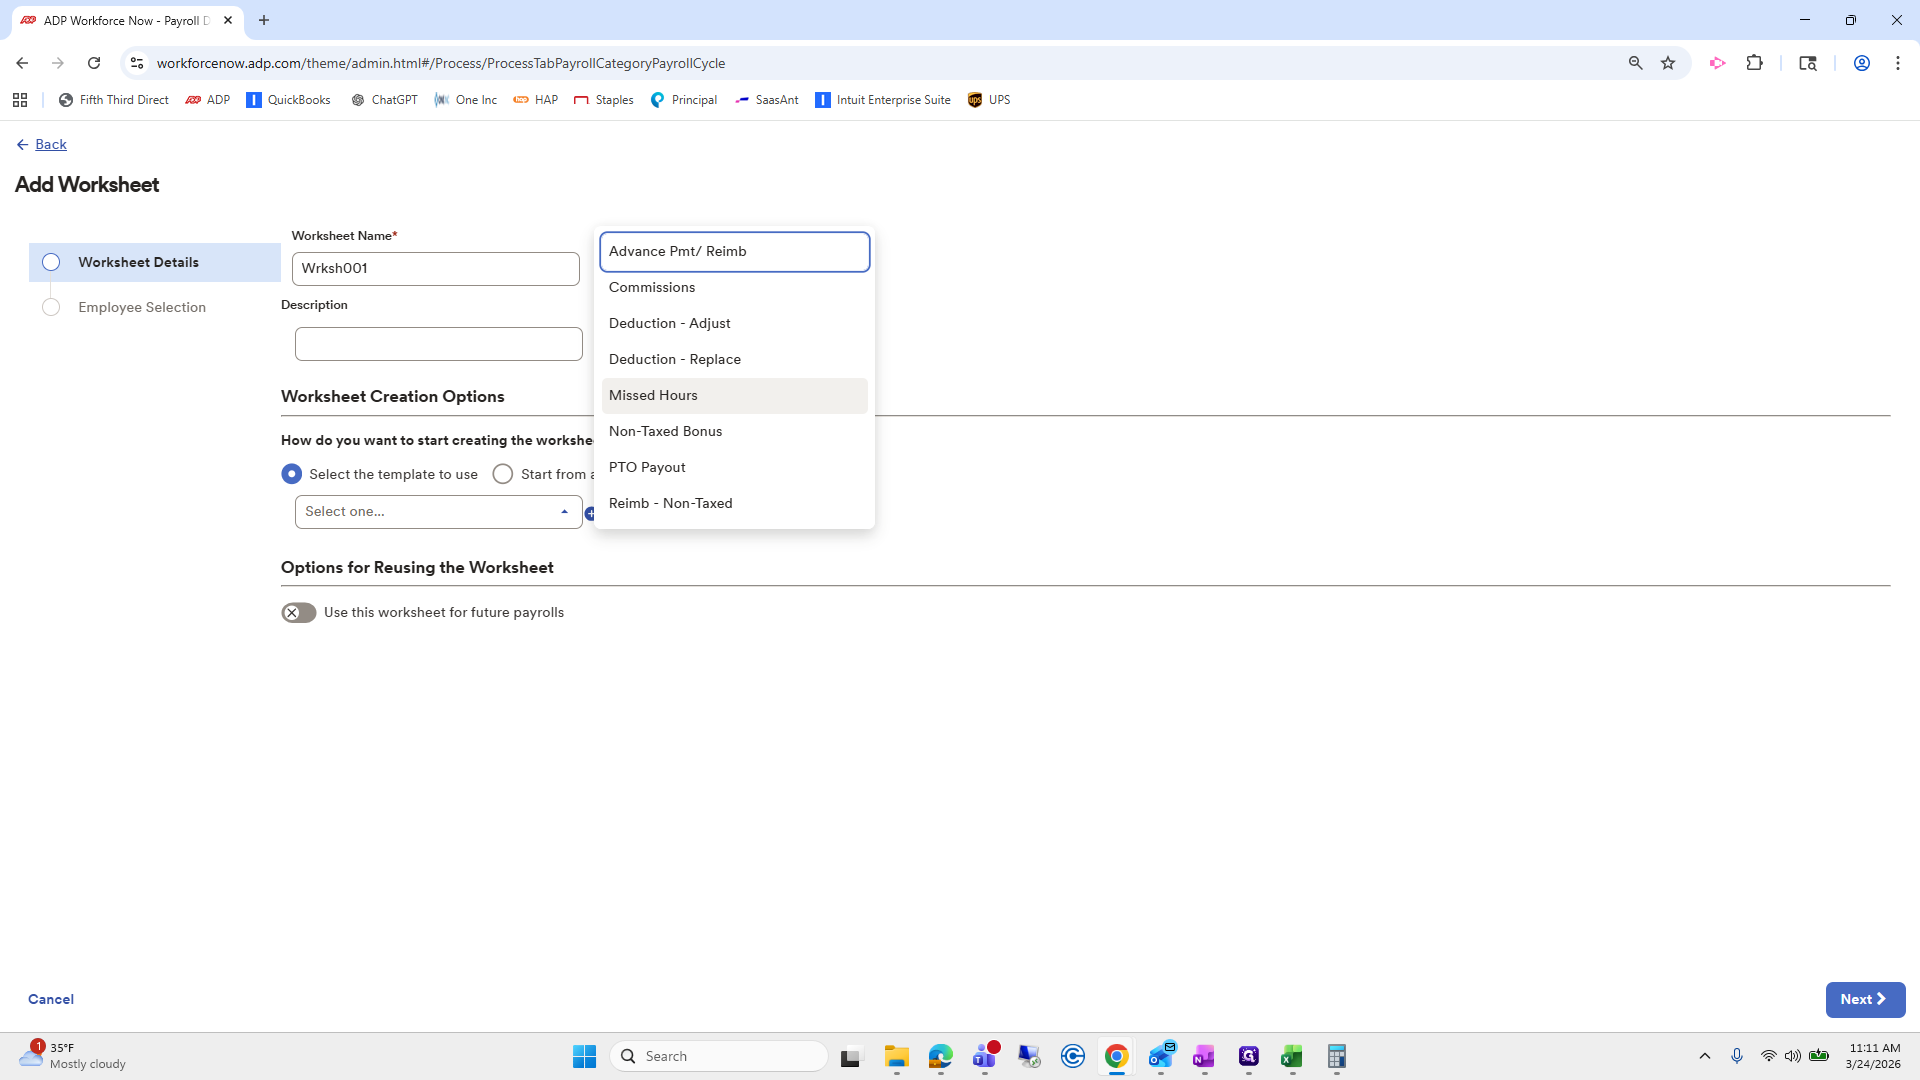

Click Next.

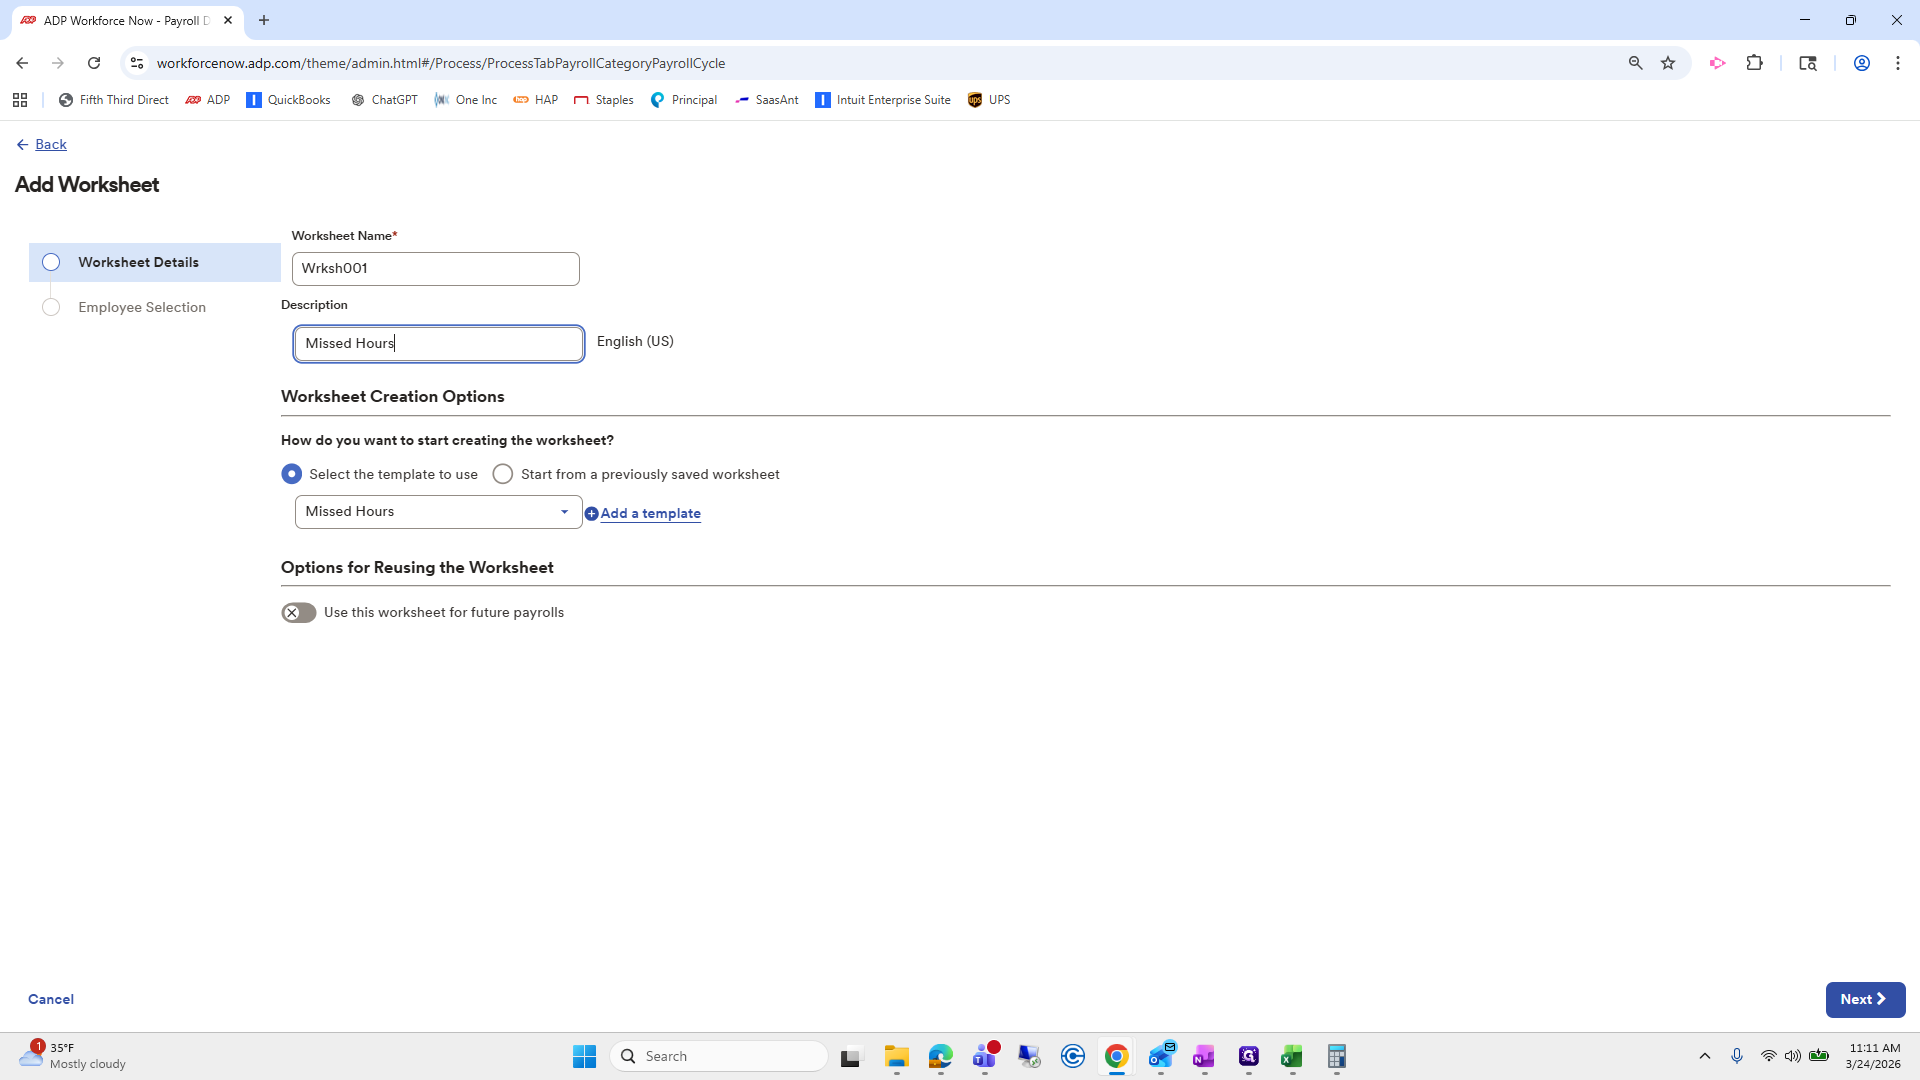

Choose Claudia.
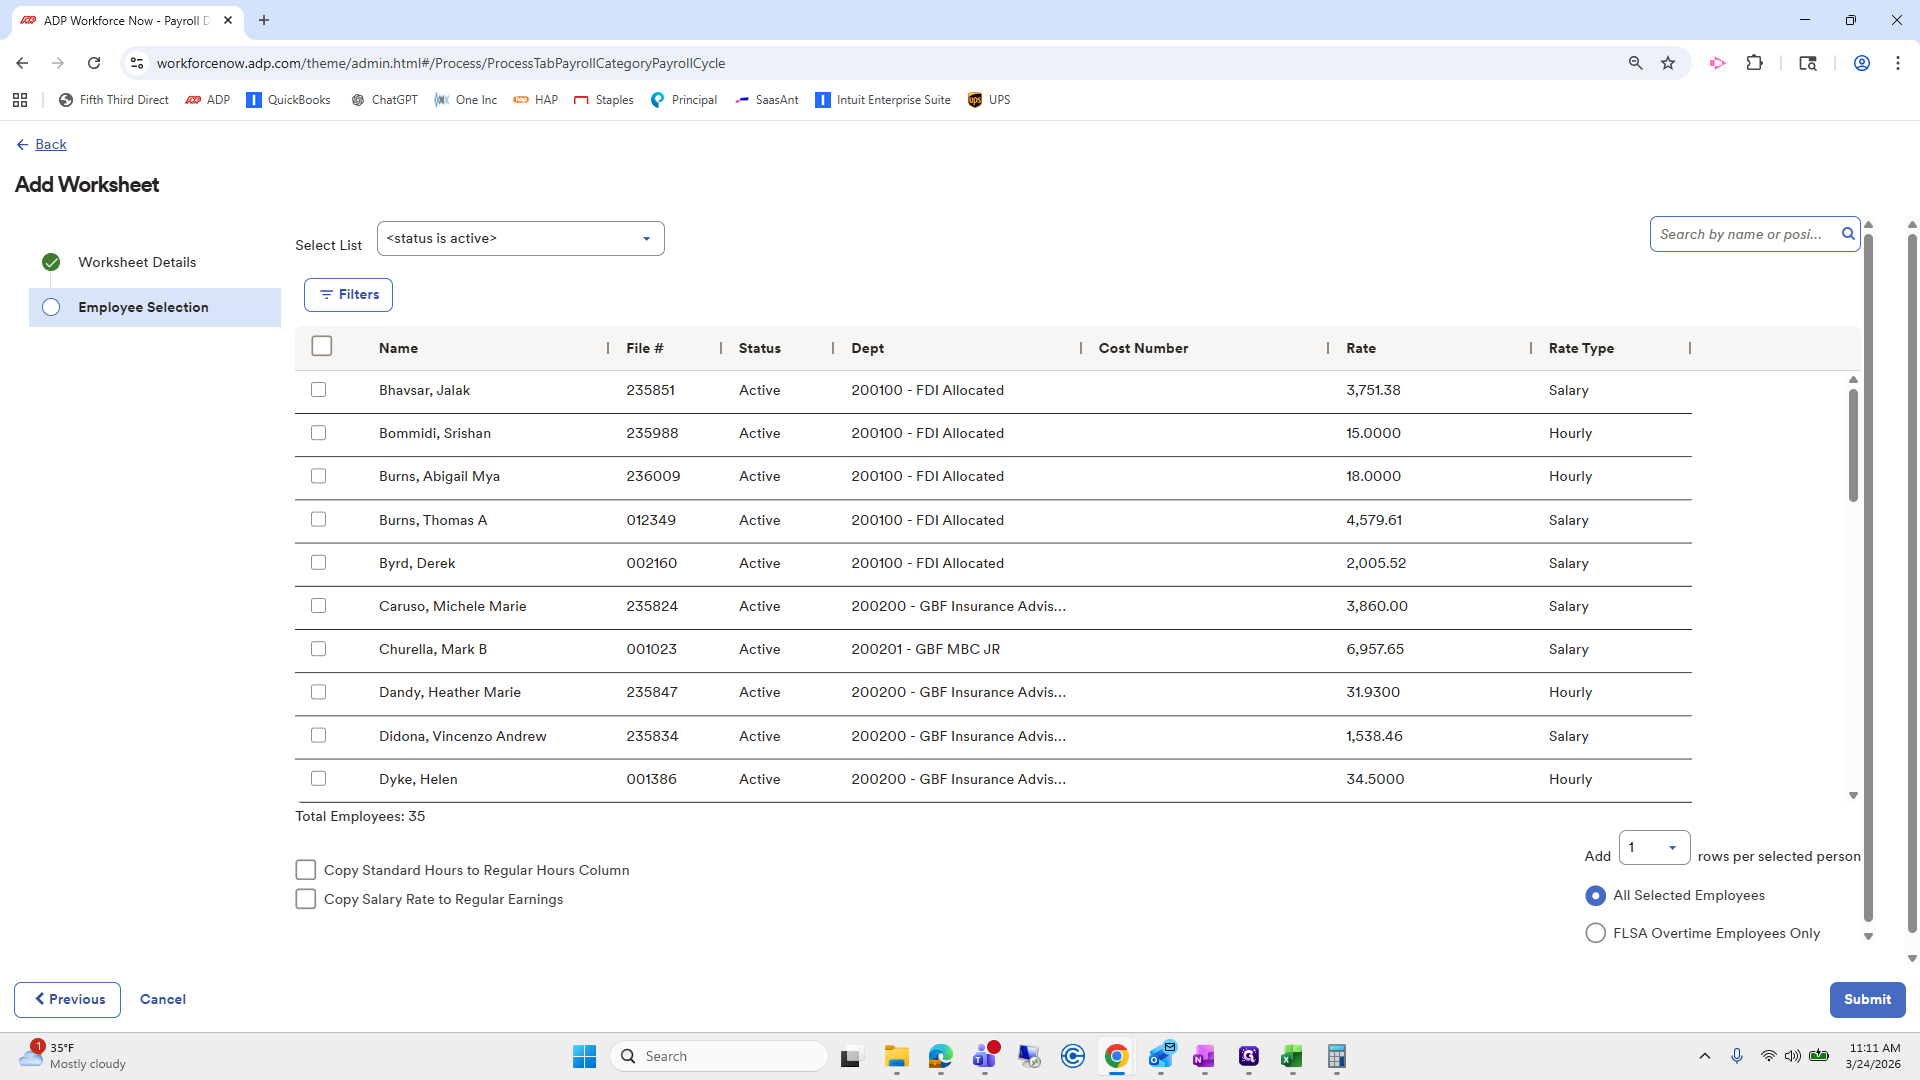
Submit.
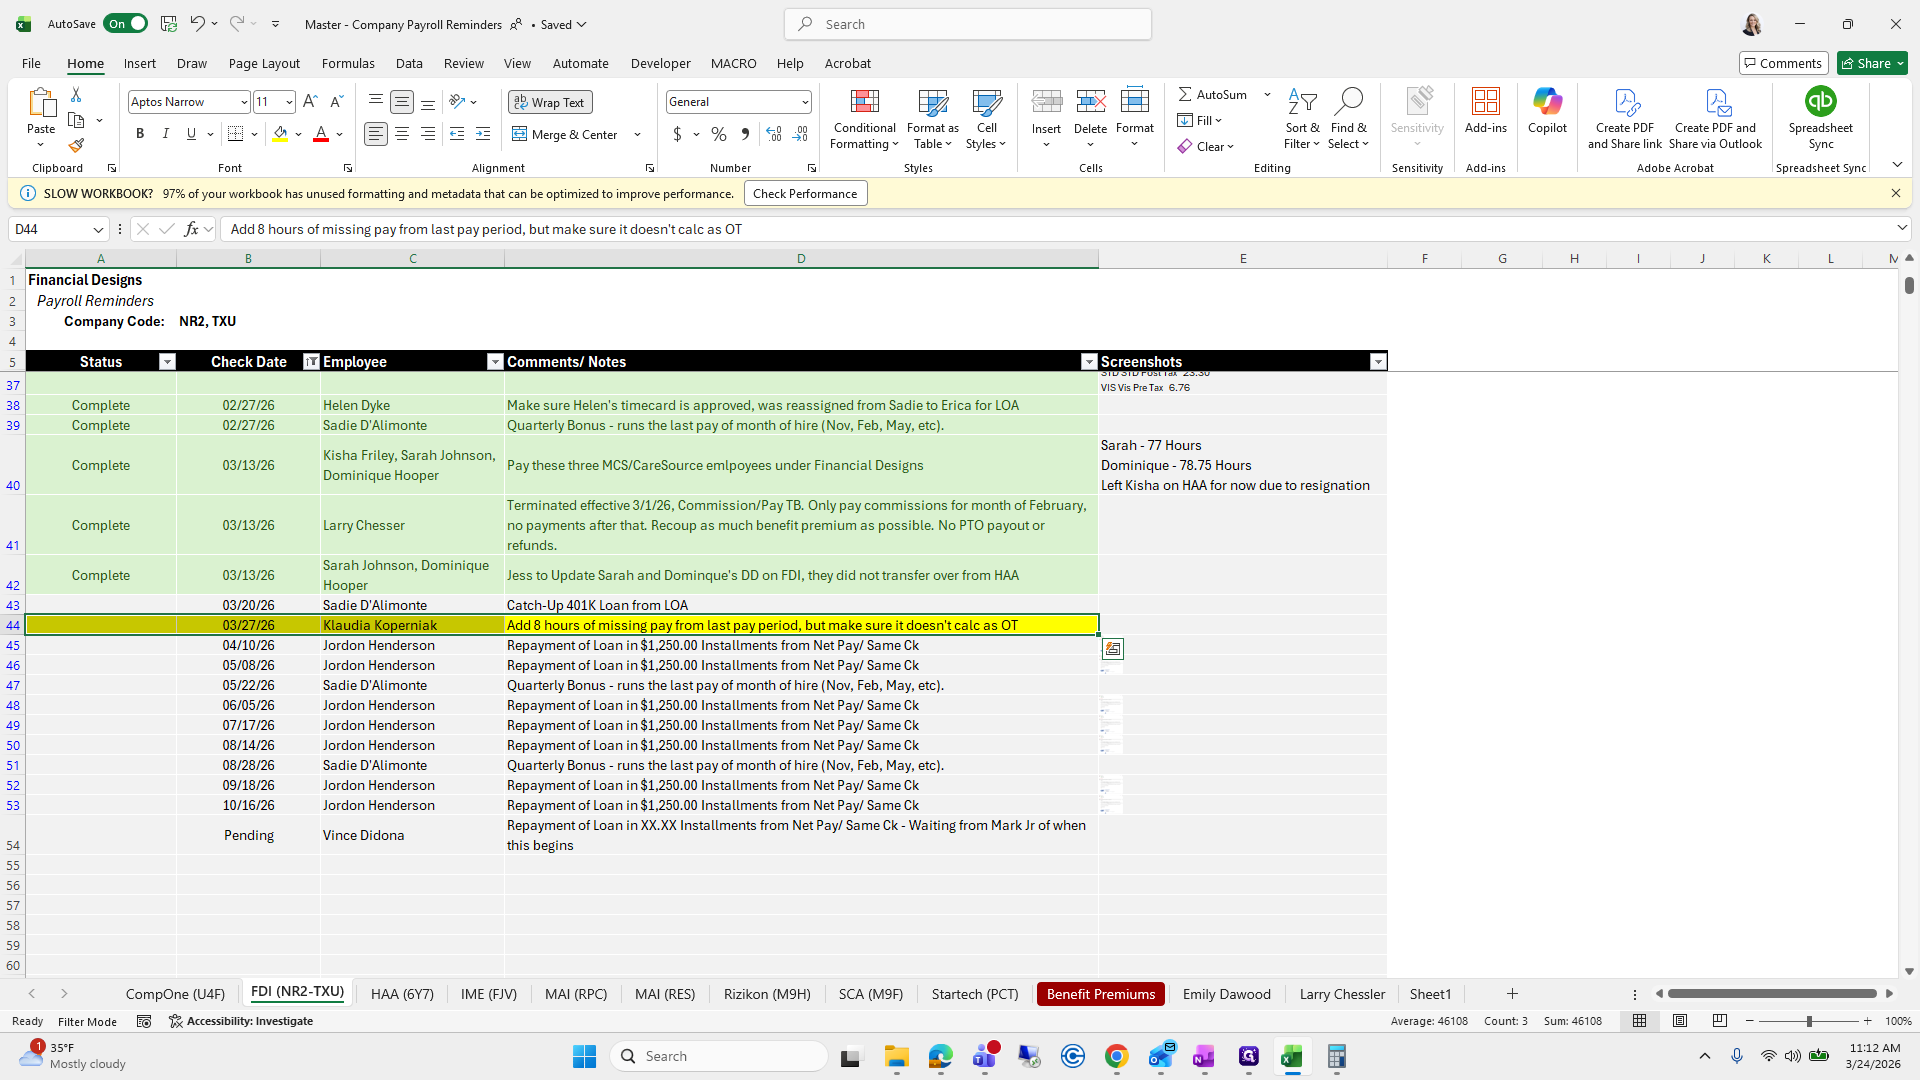
Add eight hours, auto balance, and done.

I will highlight it in yellow again.
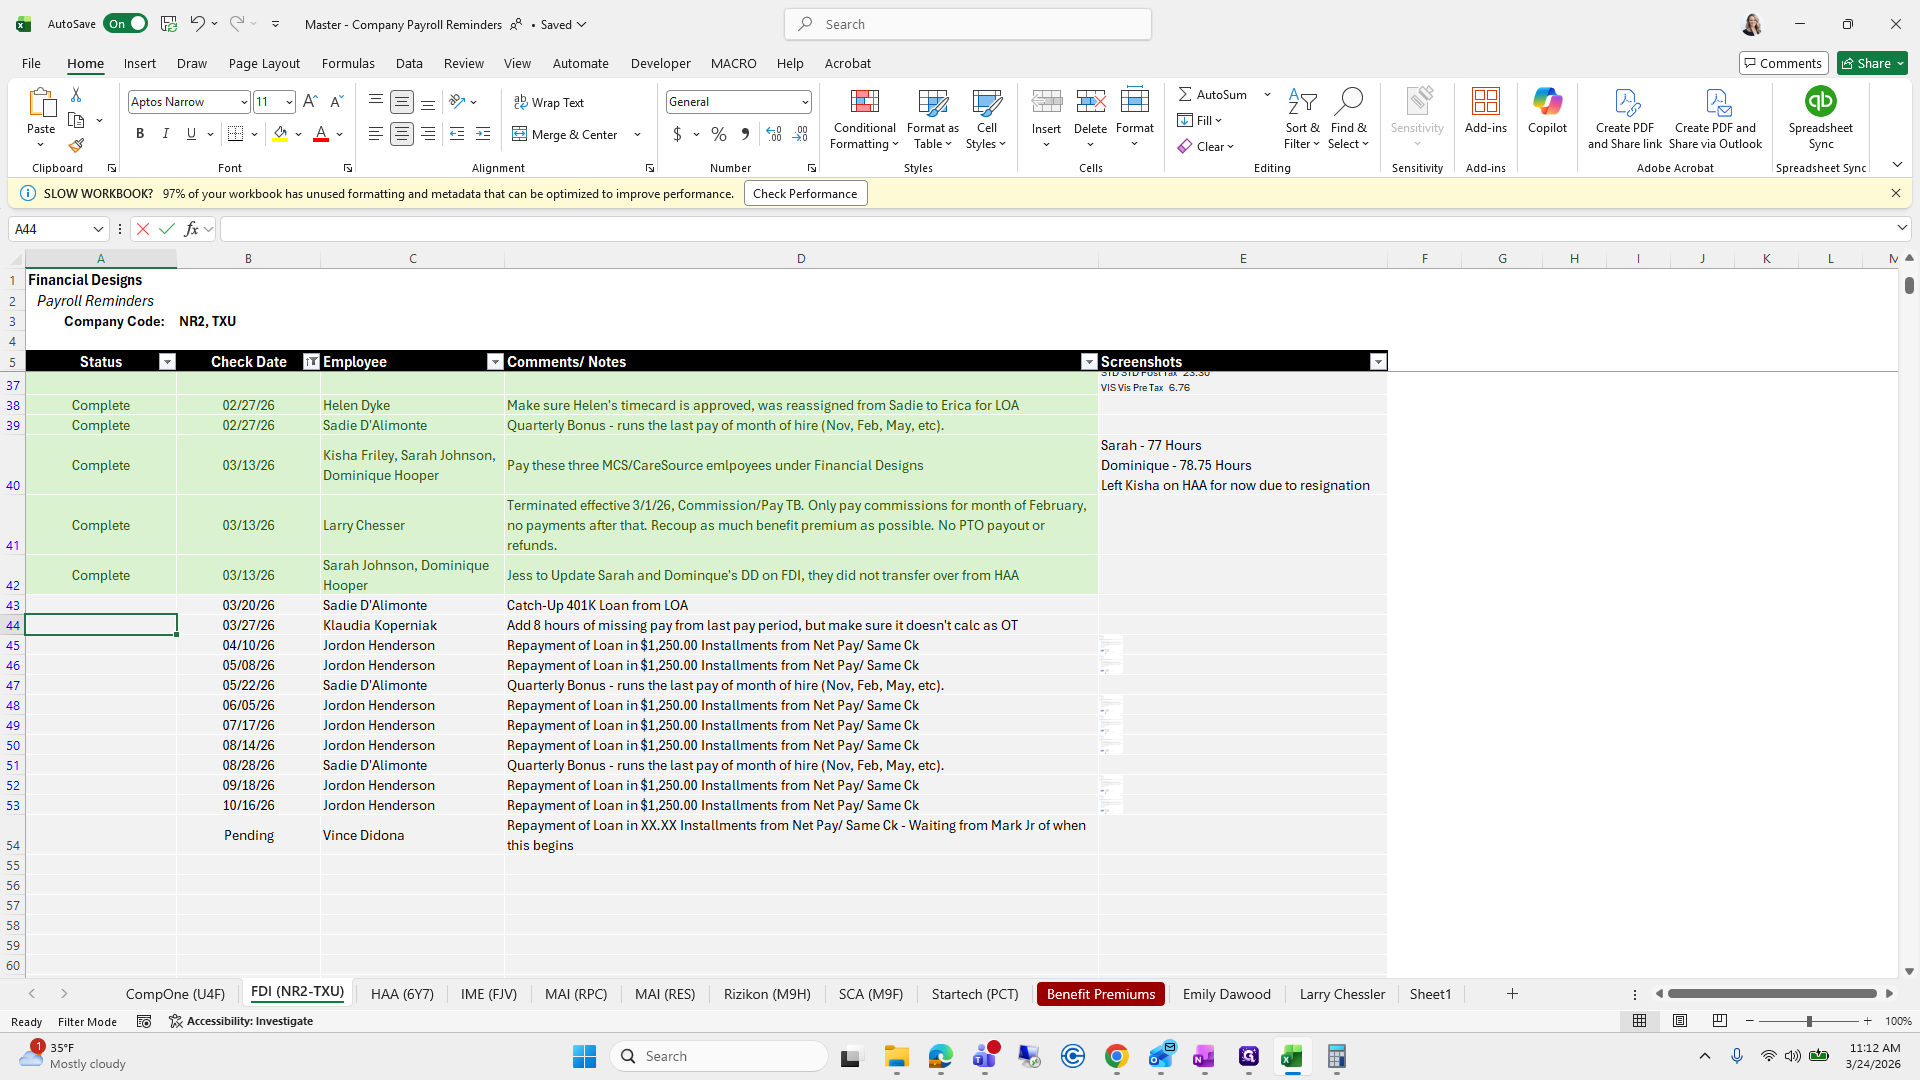

I don't recall doing a 401 loan catch-up for the last one, so I will reach out to Erica.
I'll reach out to her via Teams or comments to see what this looks like.
I will do that on the side. Now, let's move on to the next one. We completed all of them except manageability.


Where are...
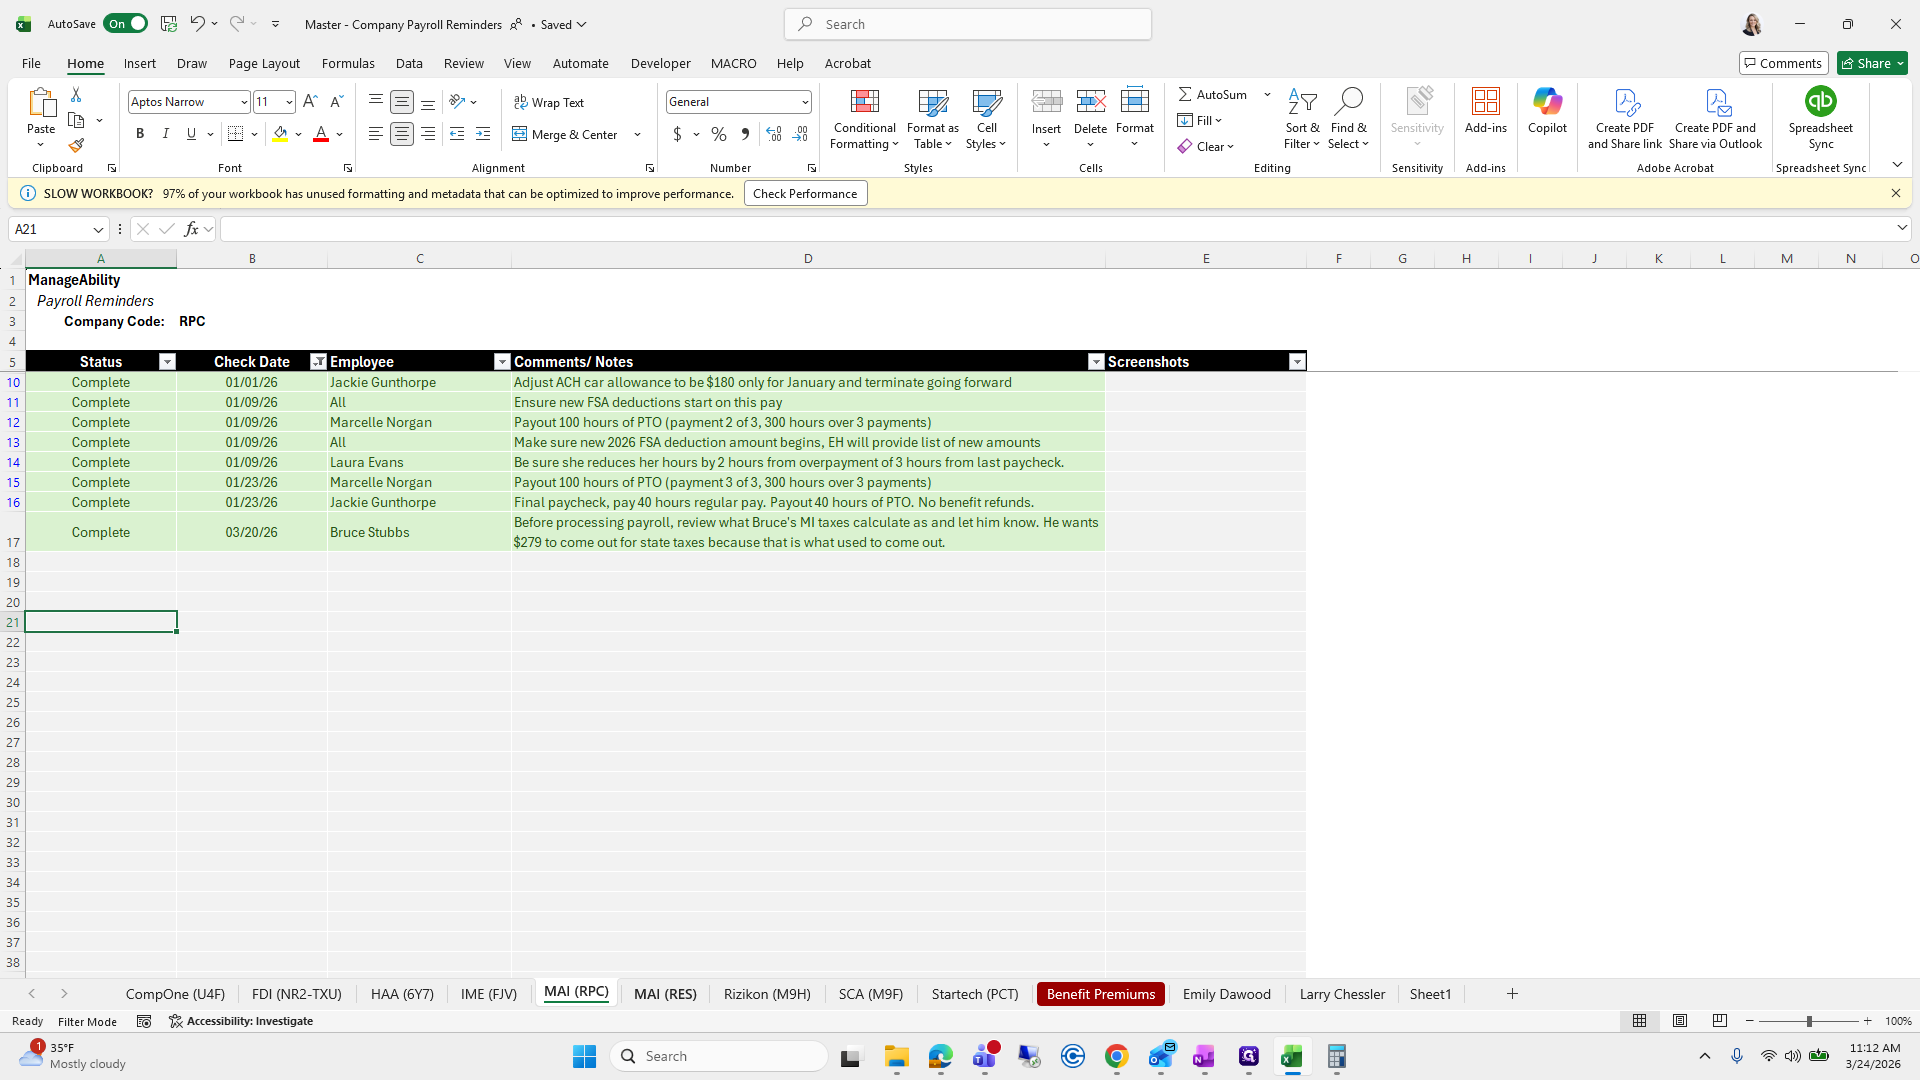
yes. Nothing for four.
That looks good.

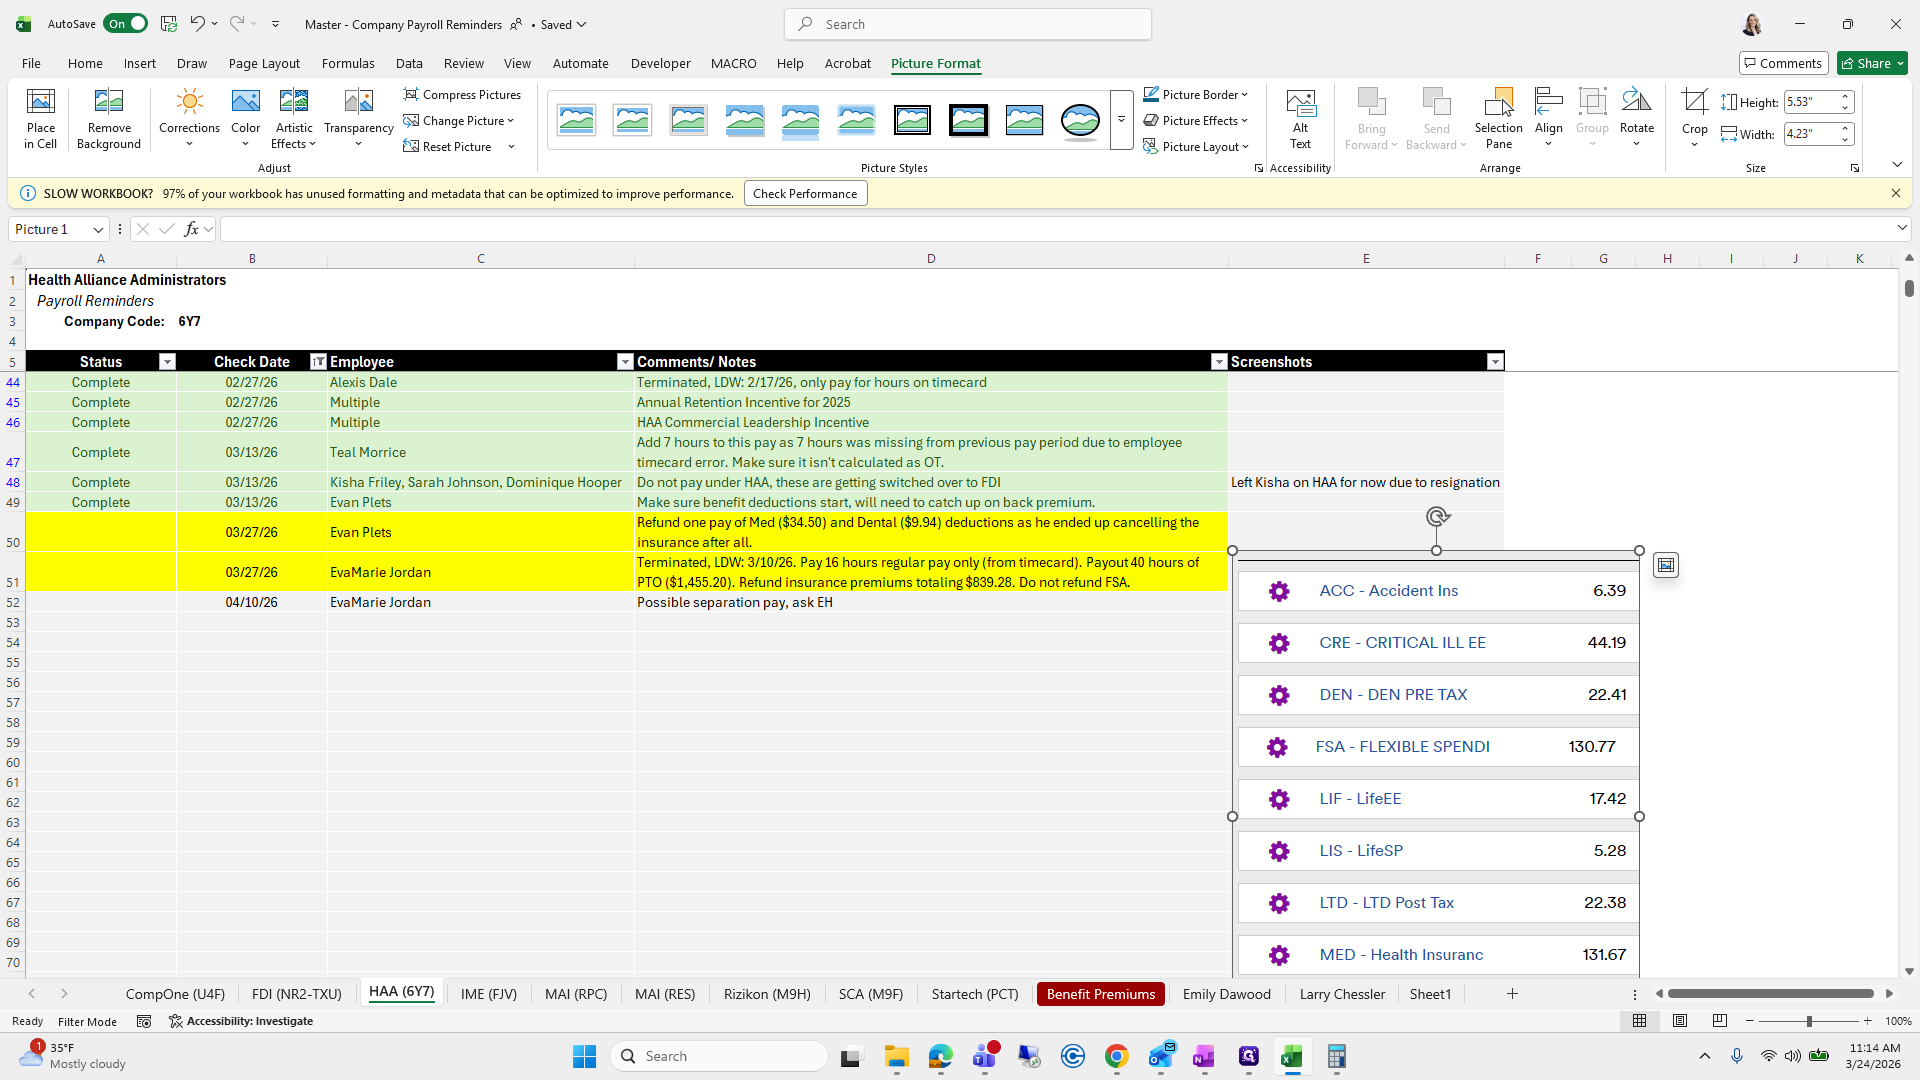
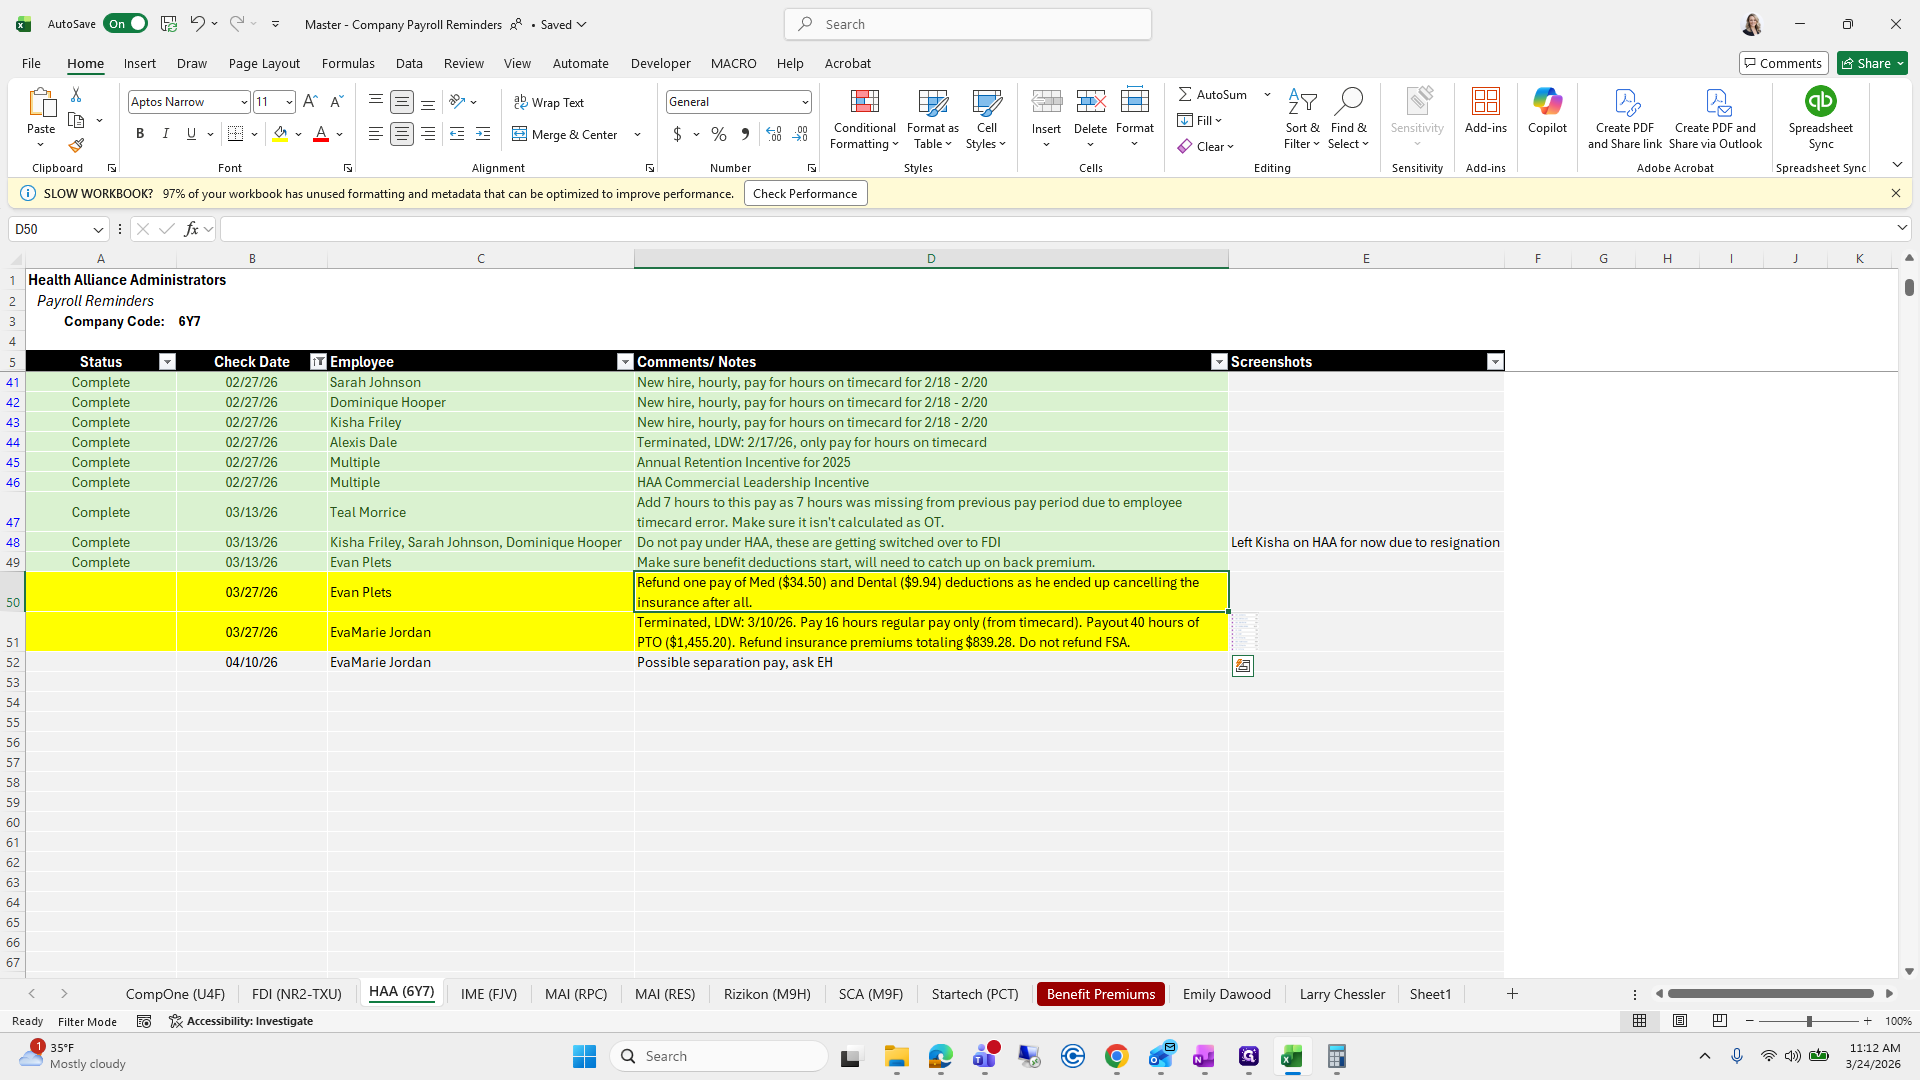
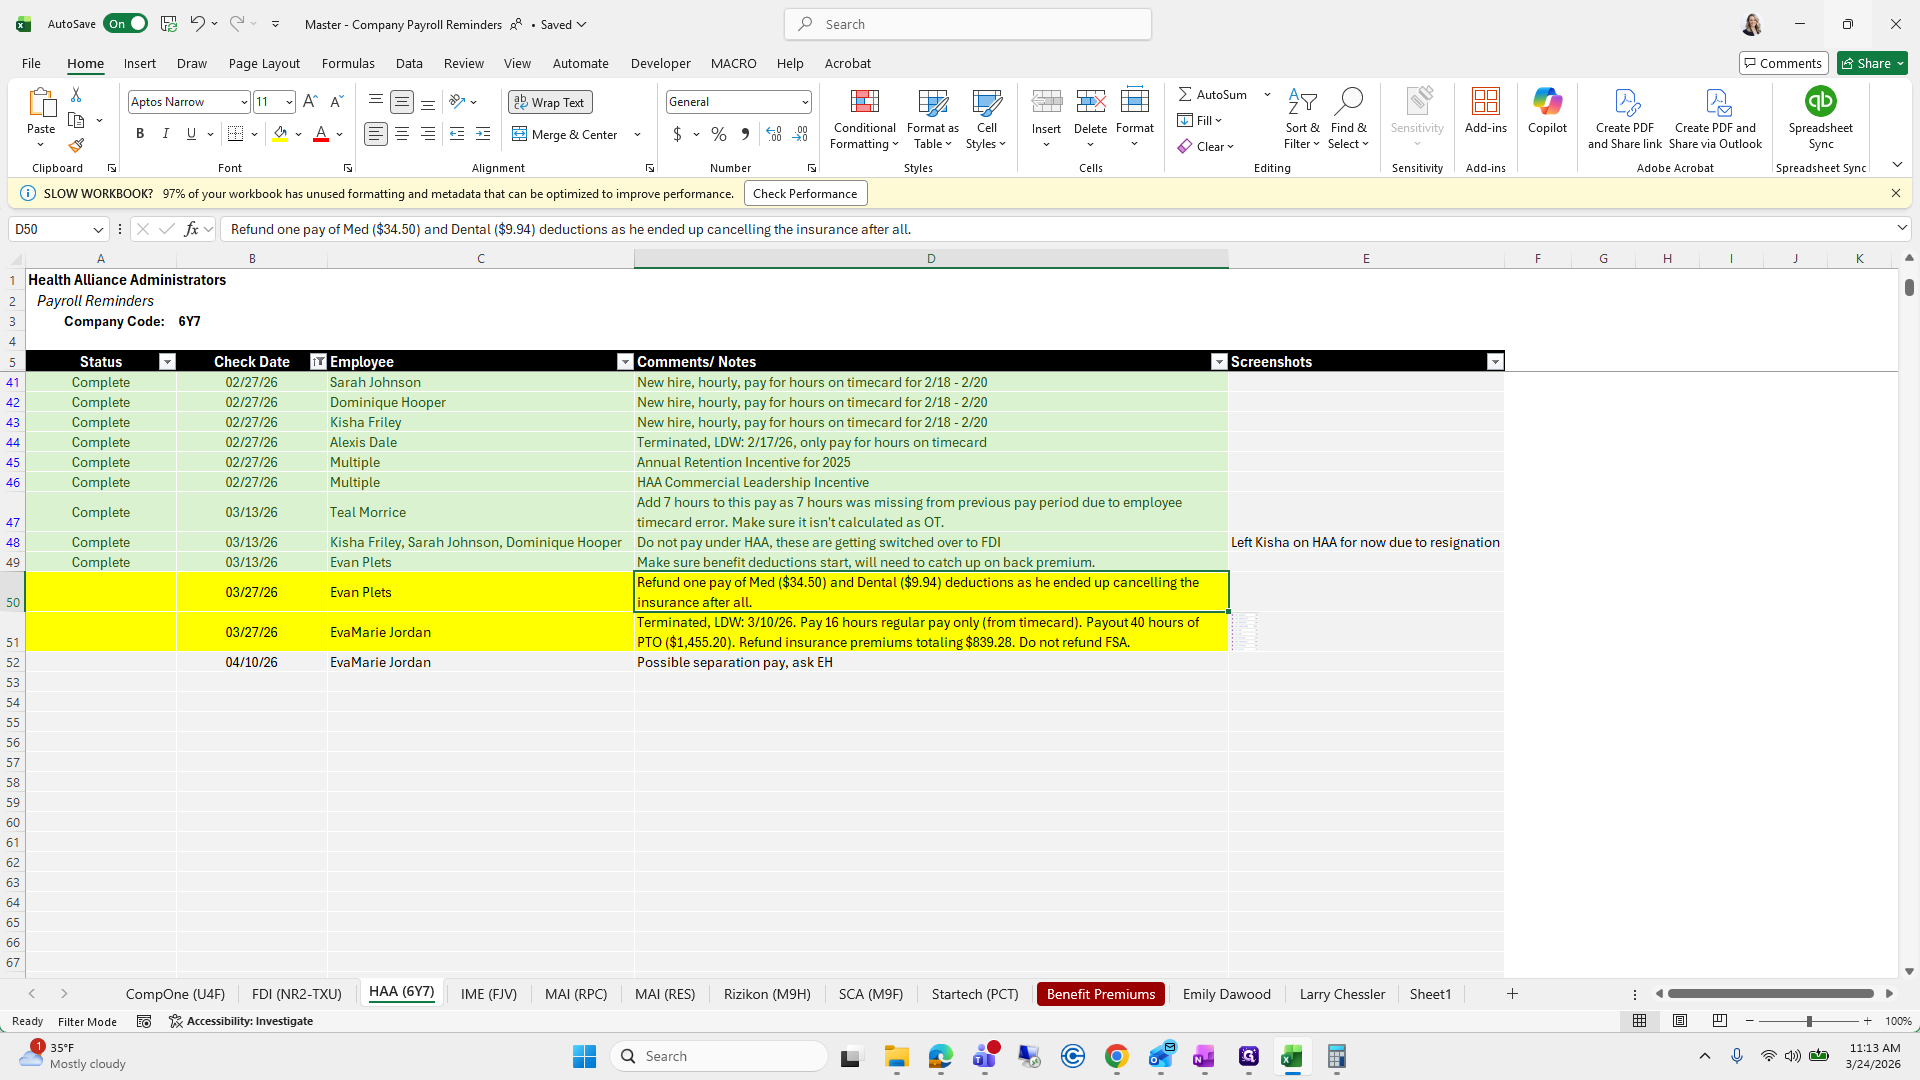
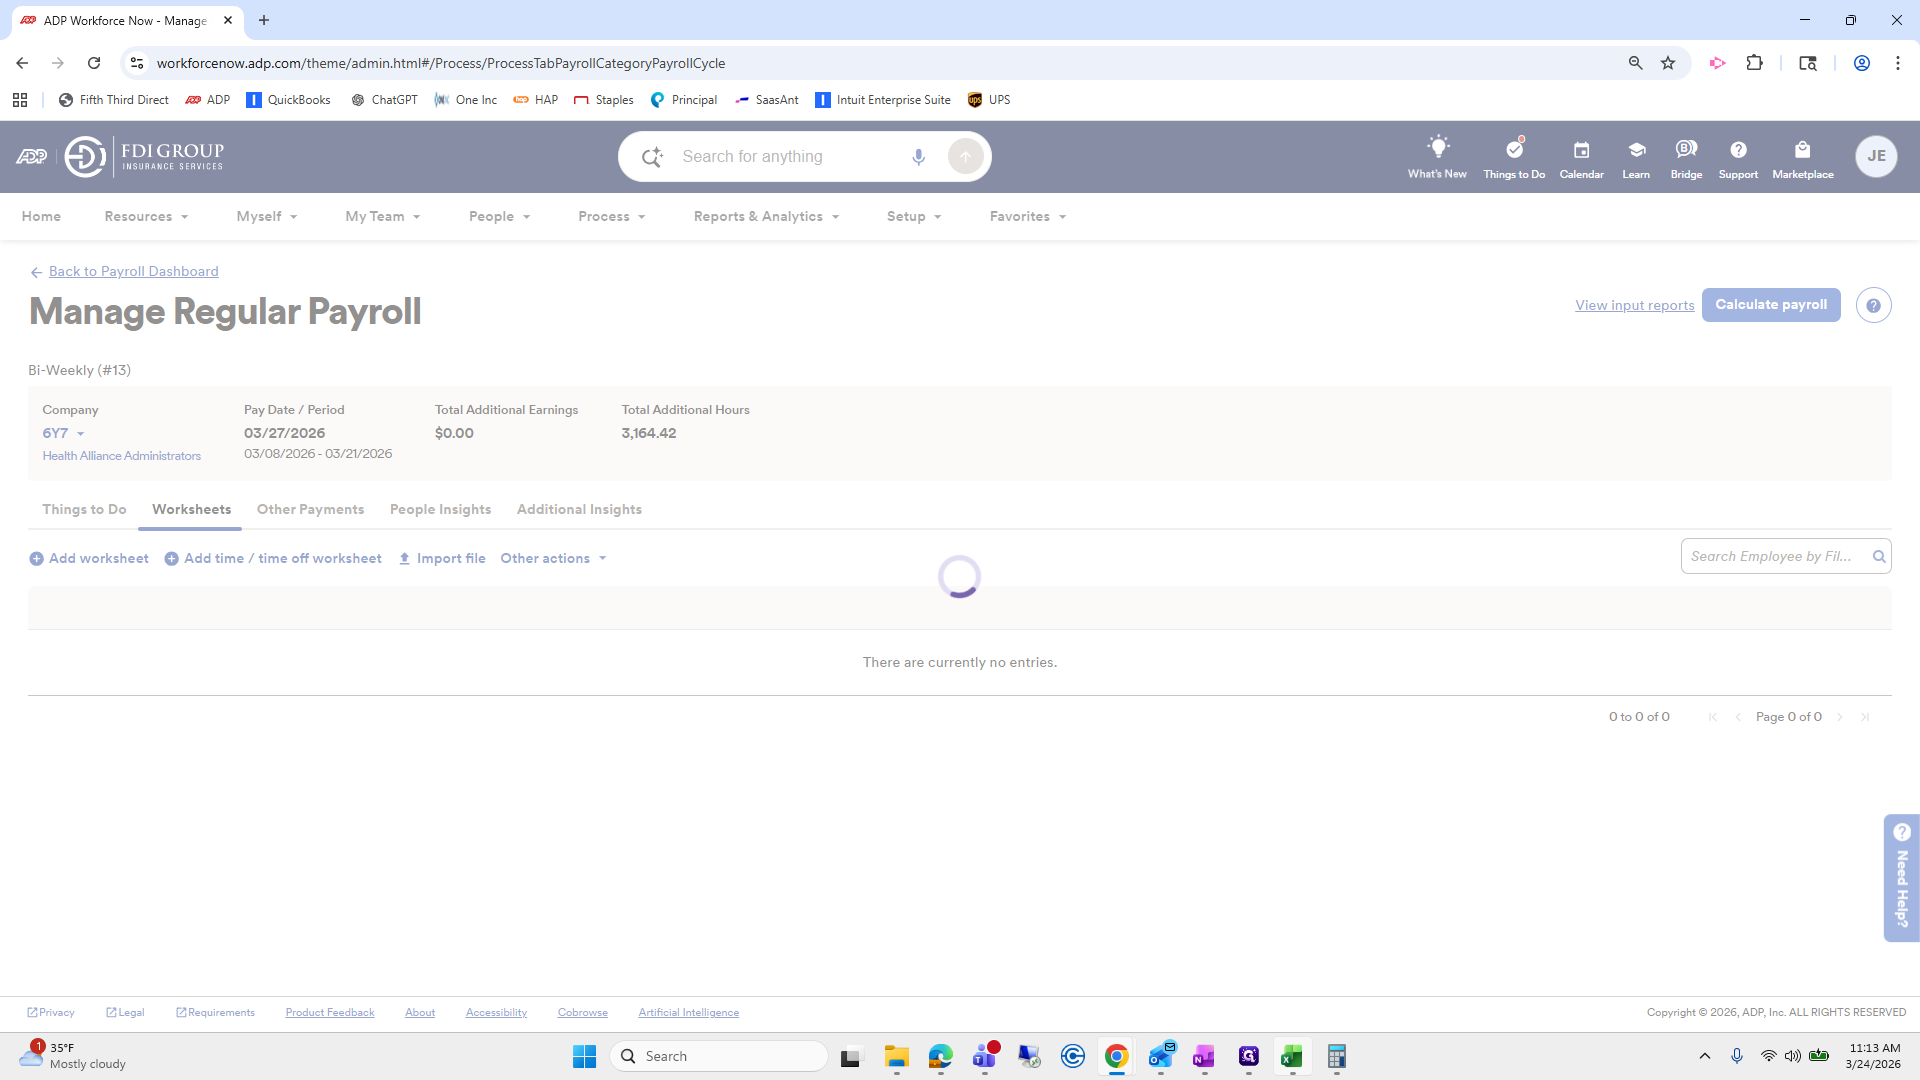
Let's look at Health Alliance.
Manage payroll. Review HAA. Take action as needed.


There are two here.
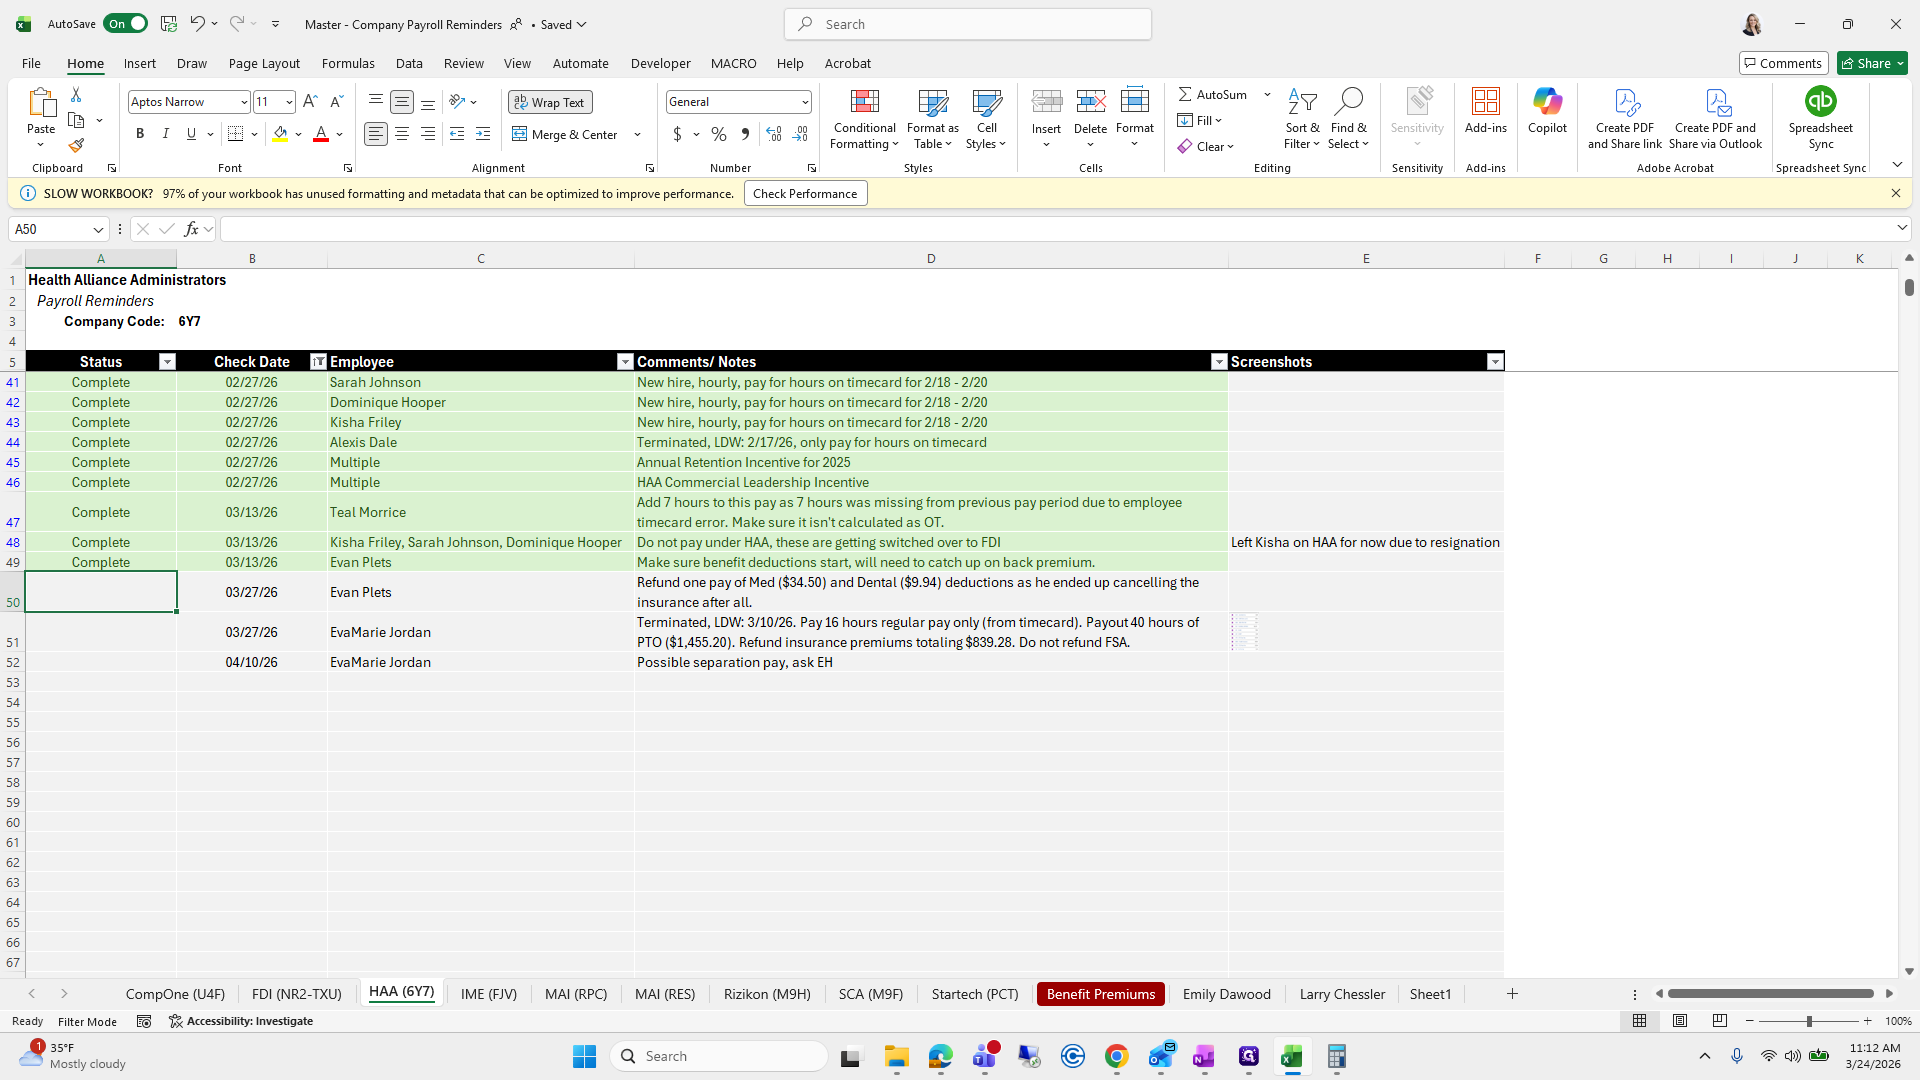
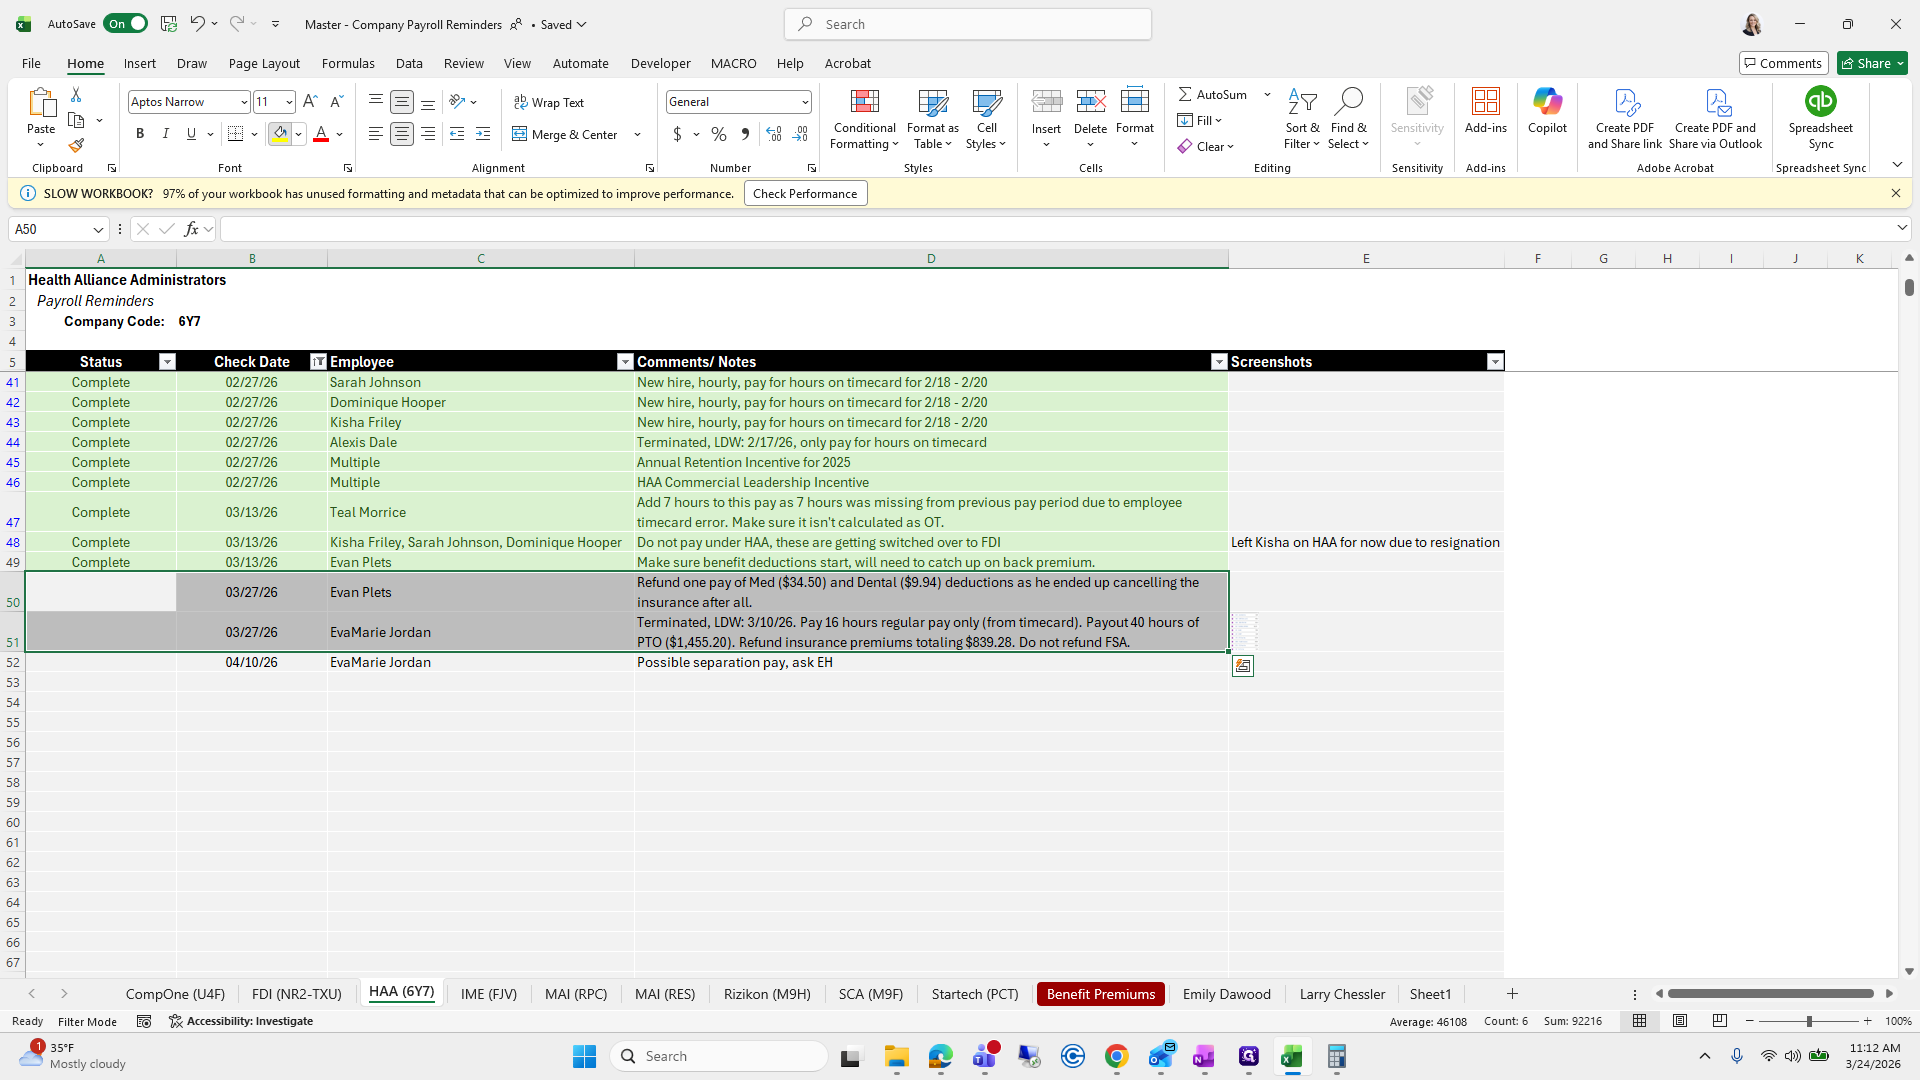
Refund a single payment of medical and dental deductions.
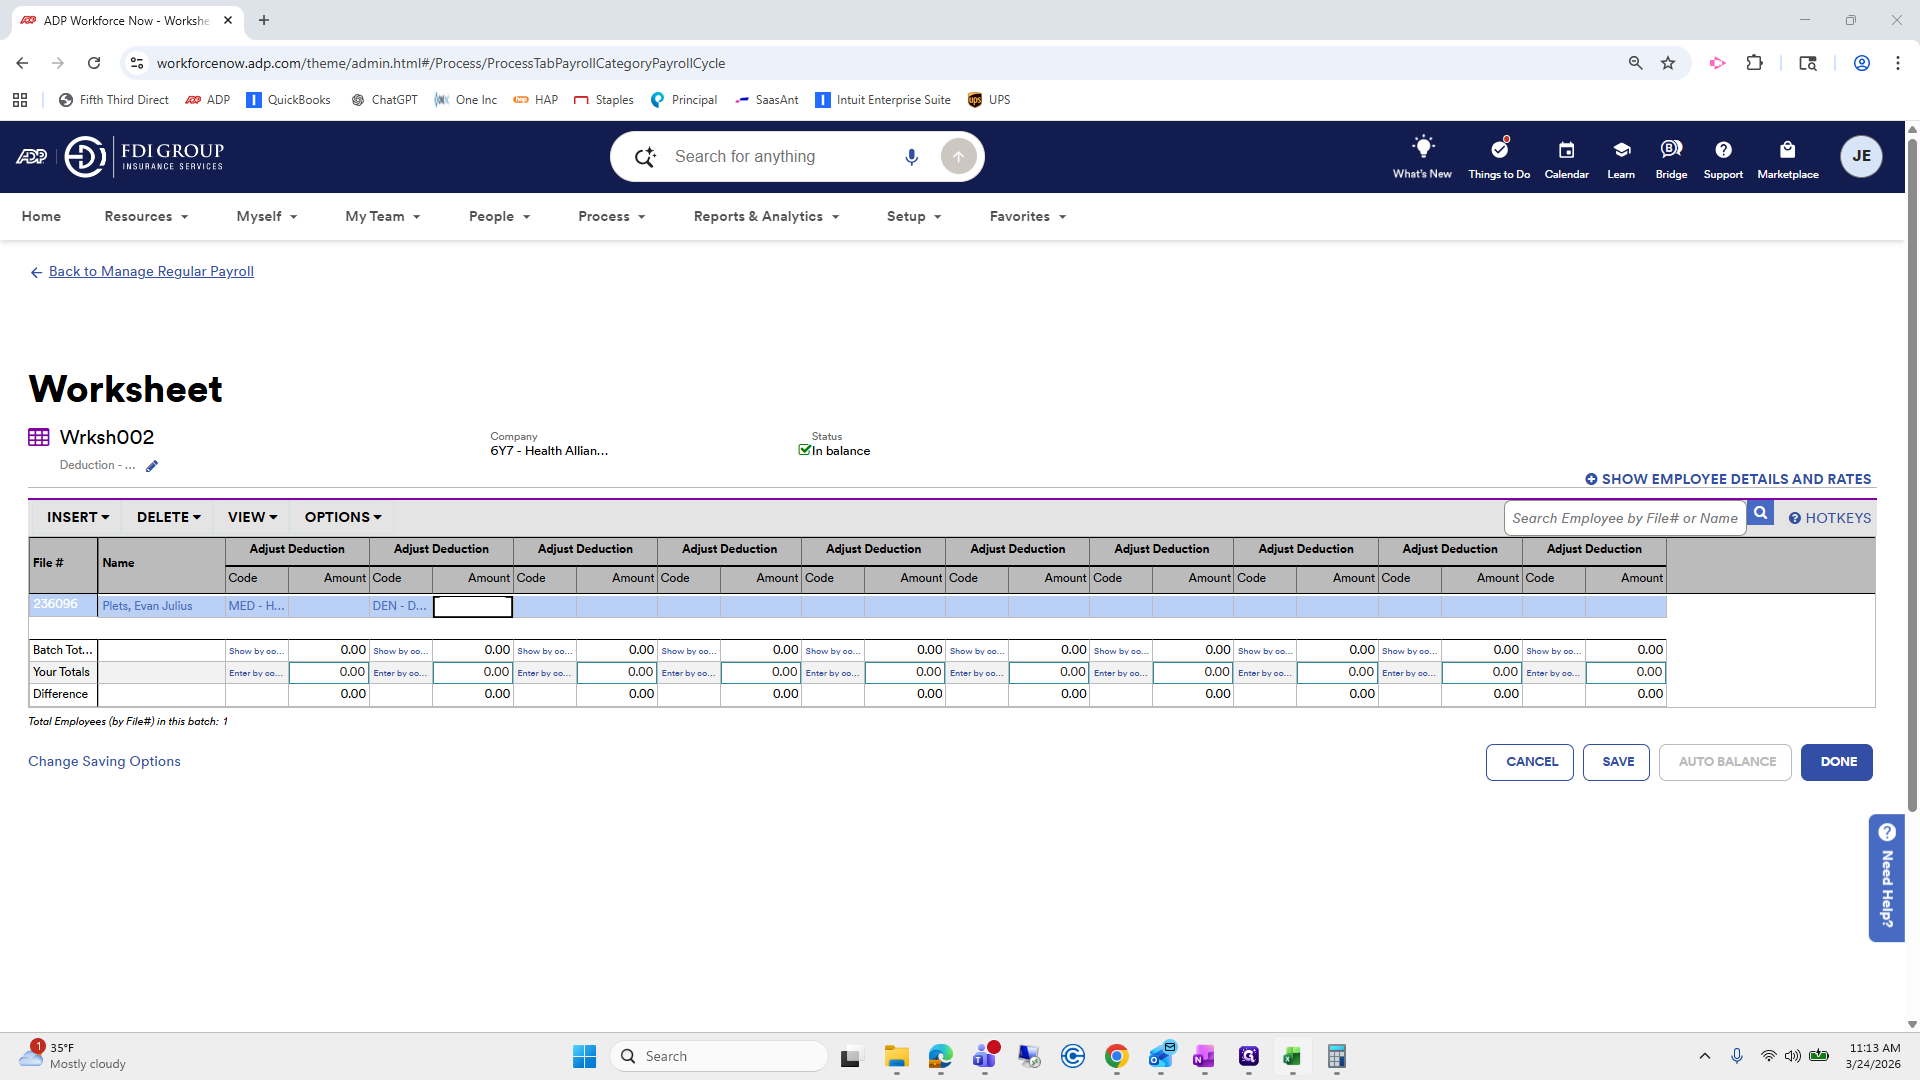
We will go to Add Worksheet, then select Deduction Adjust.


Next, we'll look up Evan.

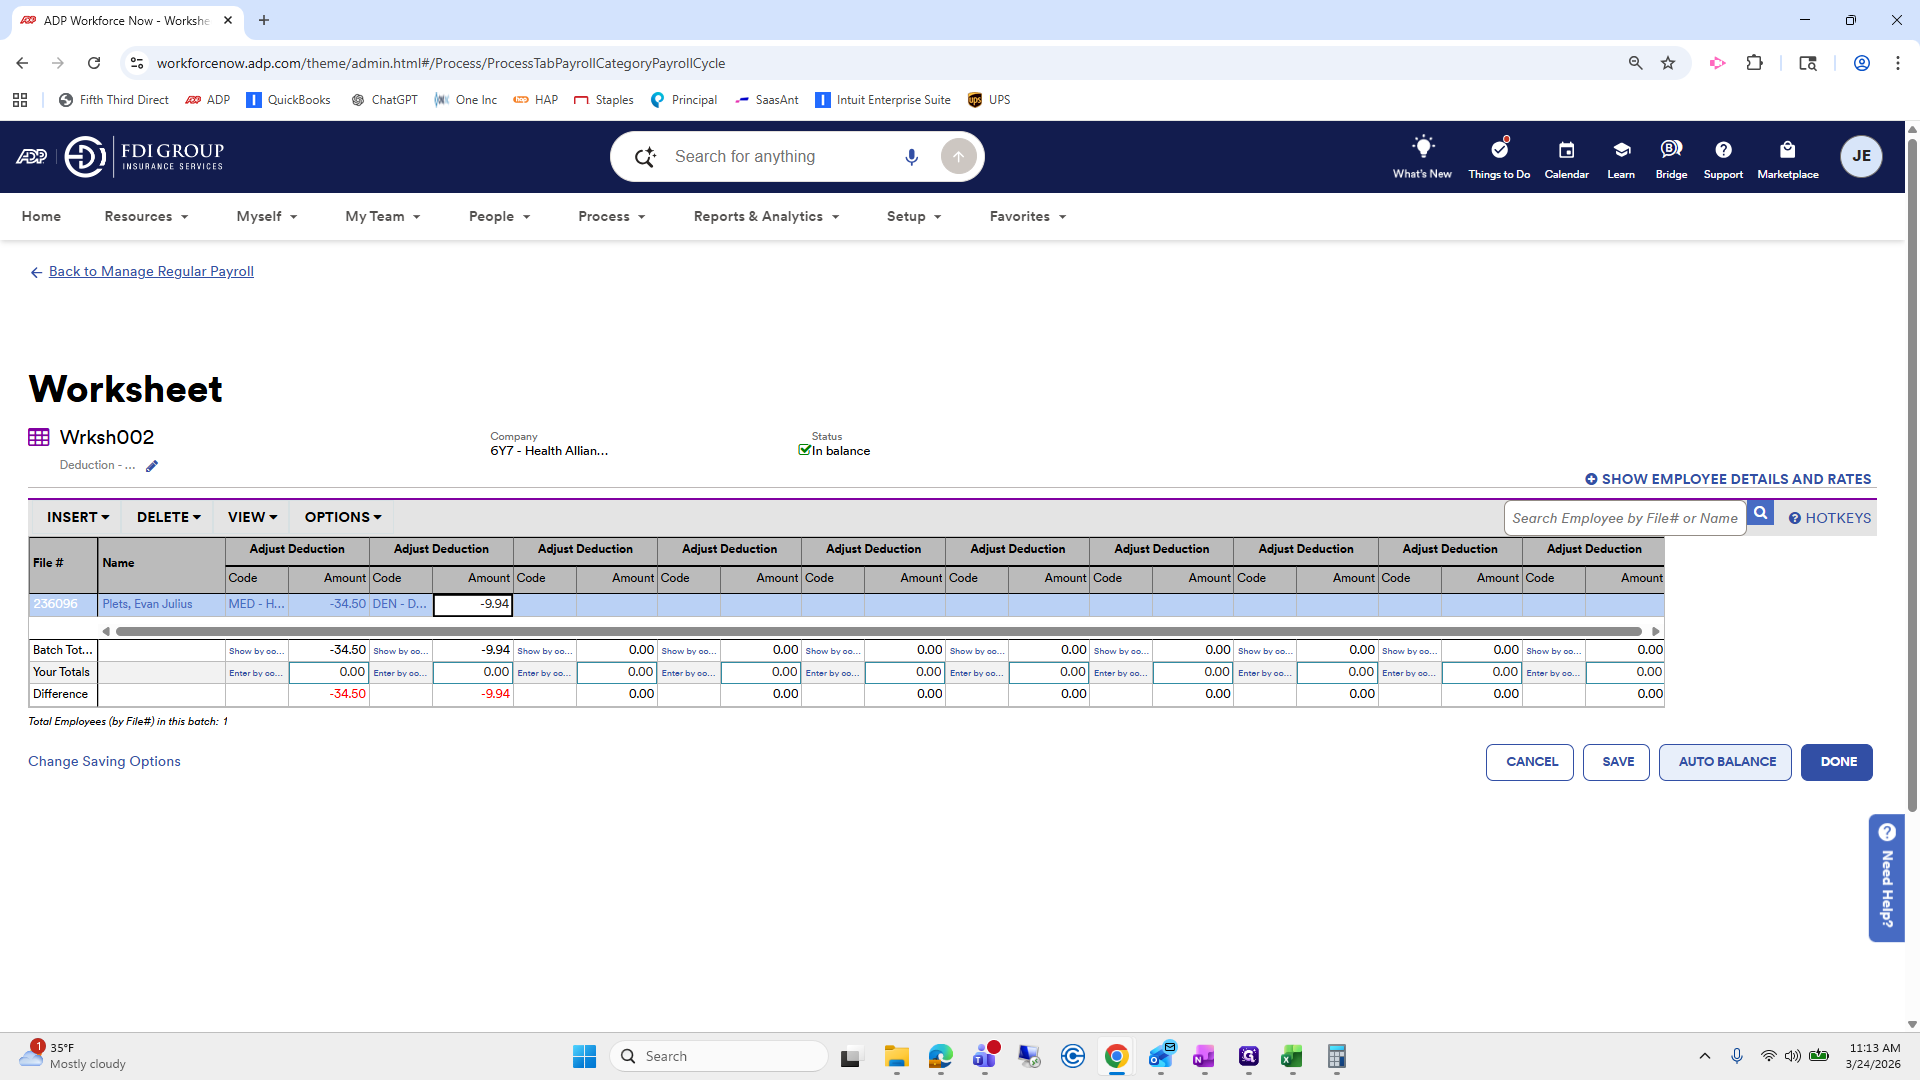
Click his name, submit, and select medical and dental.
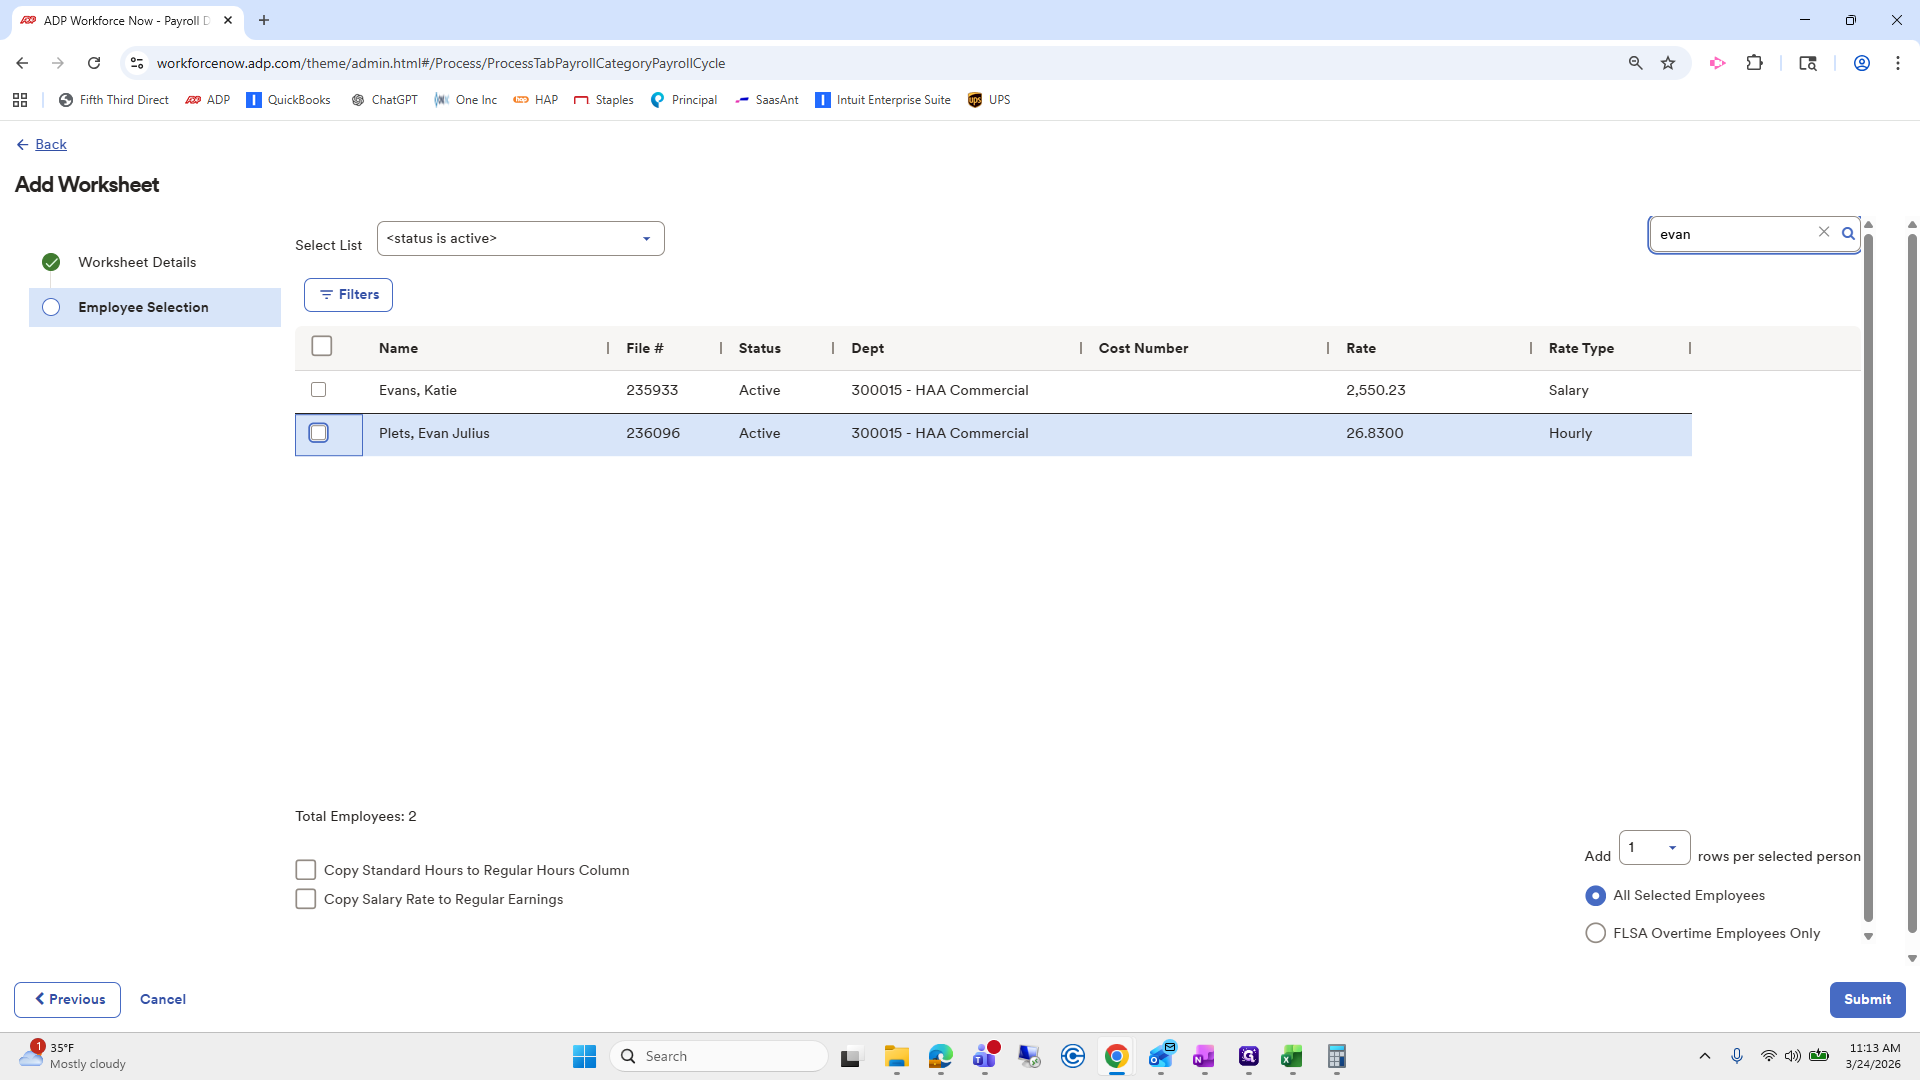
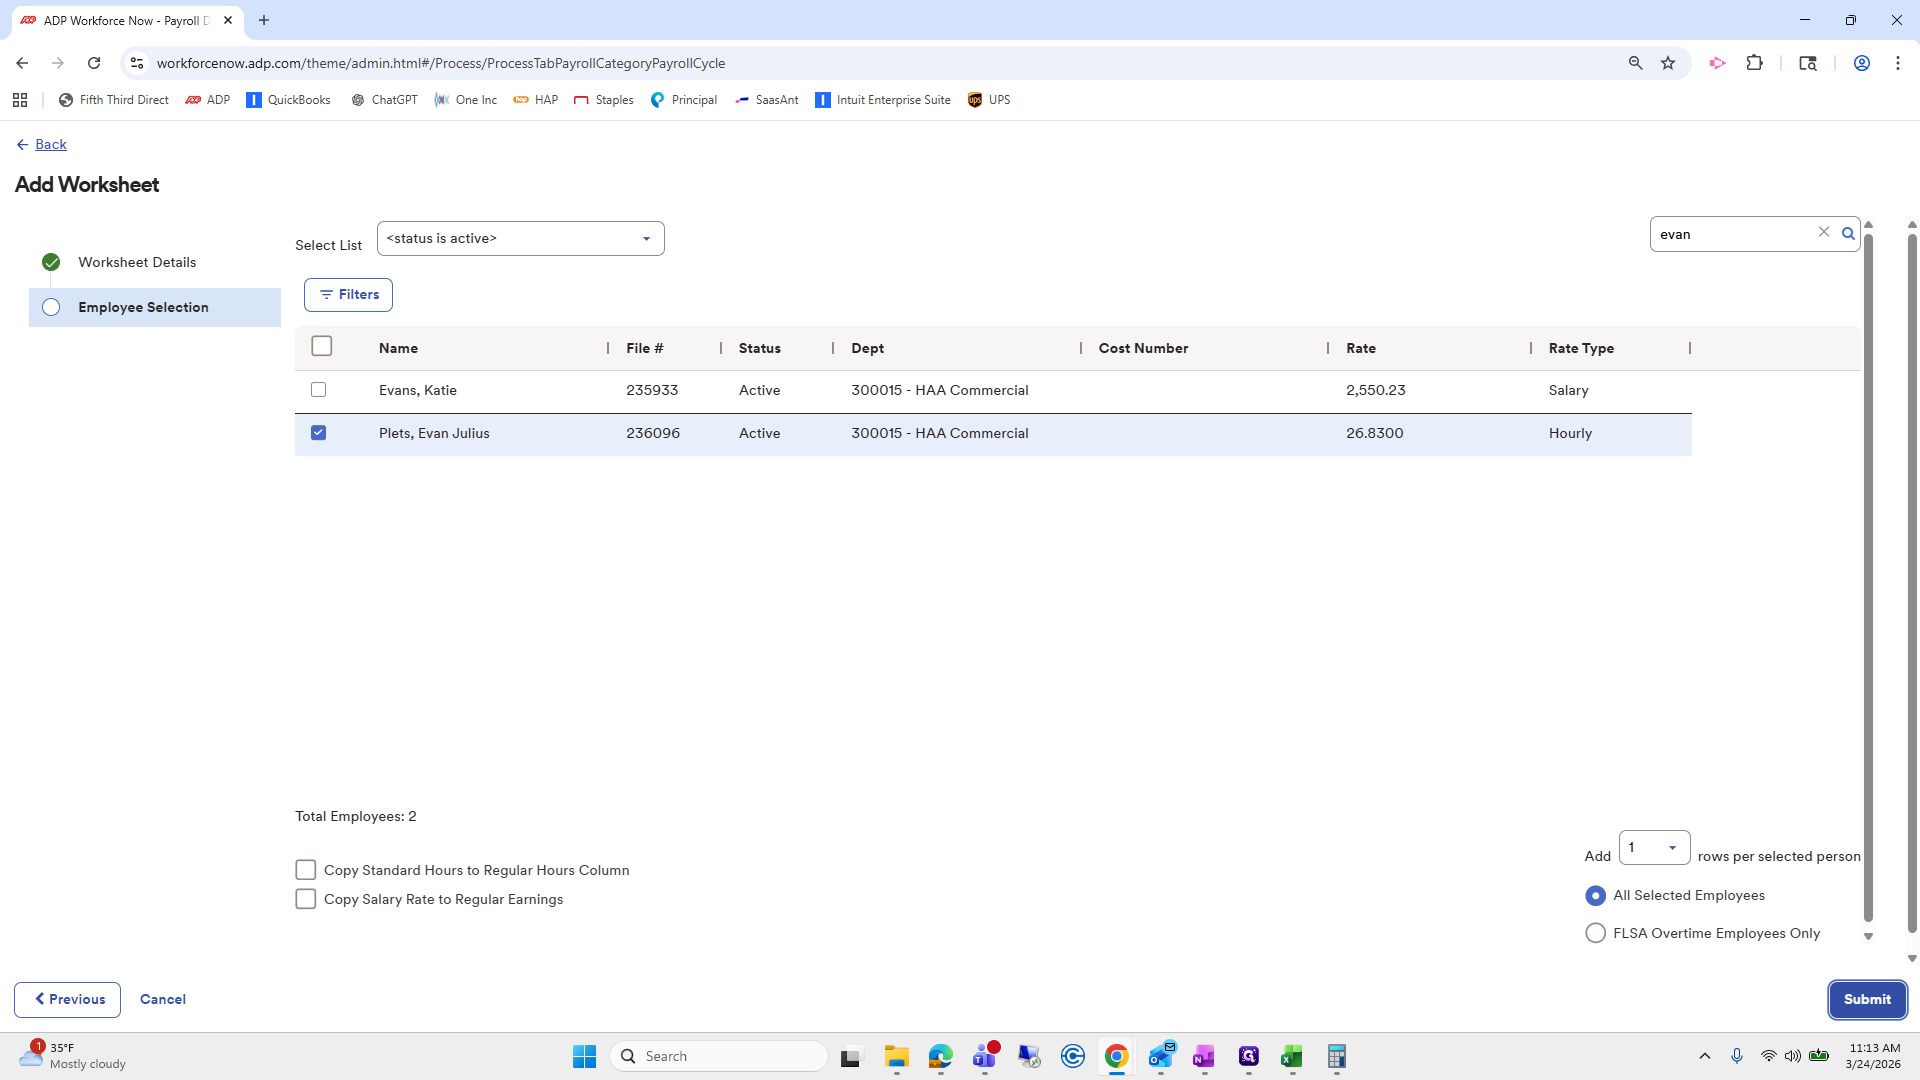
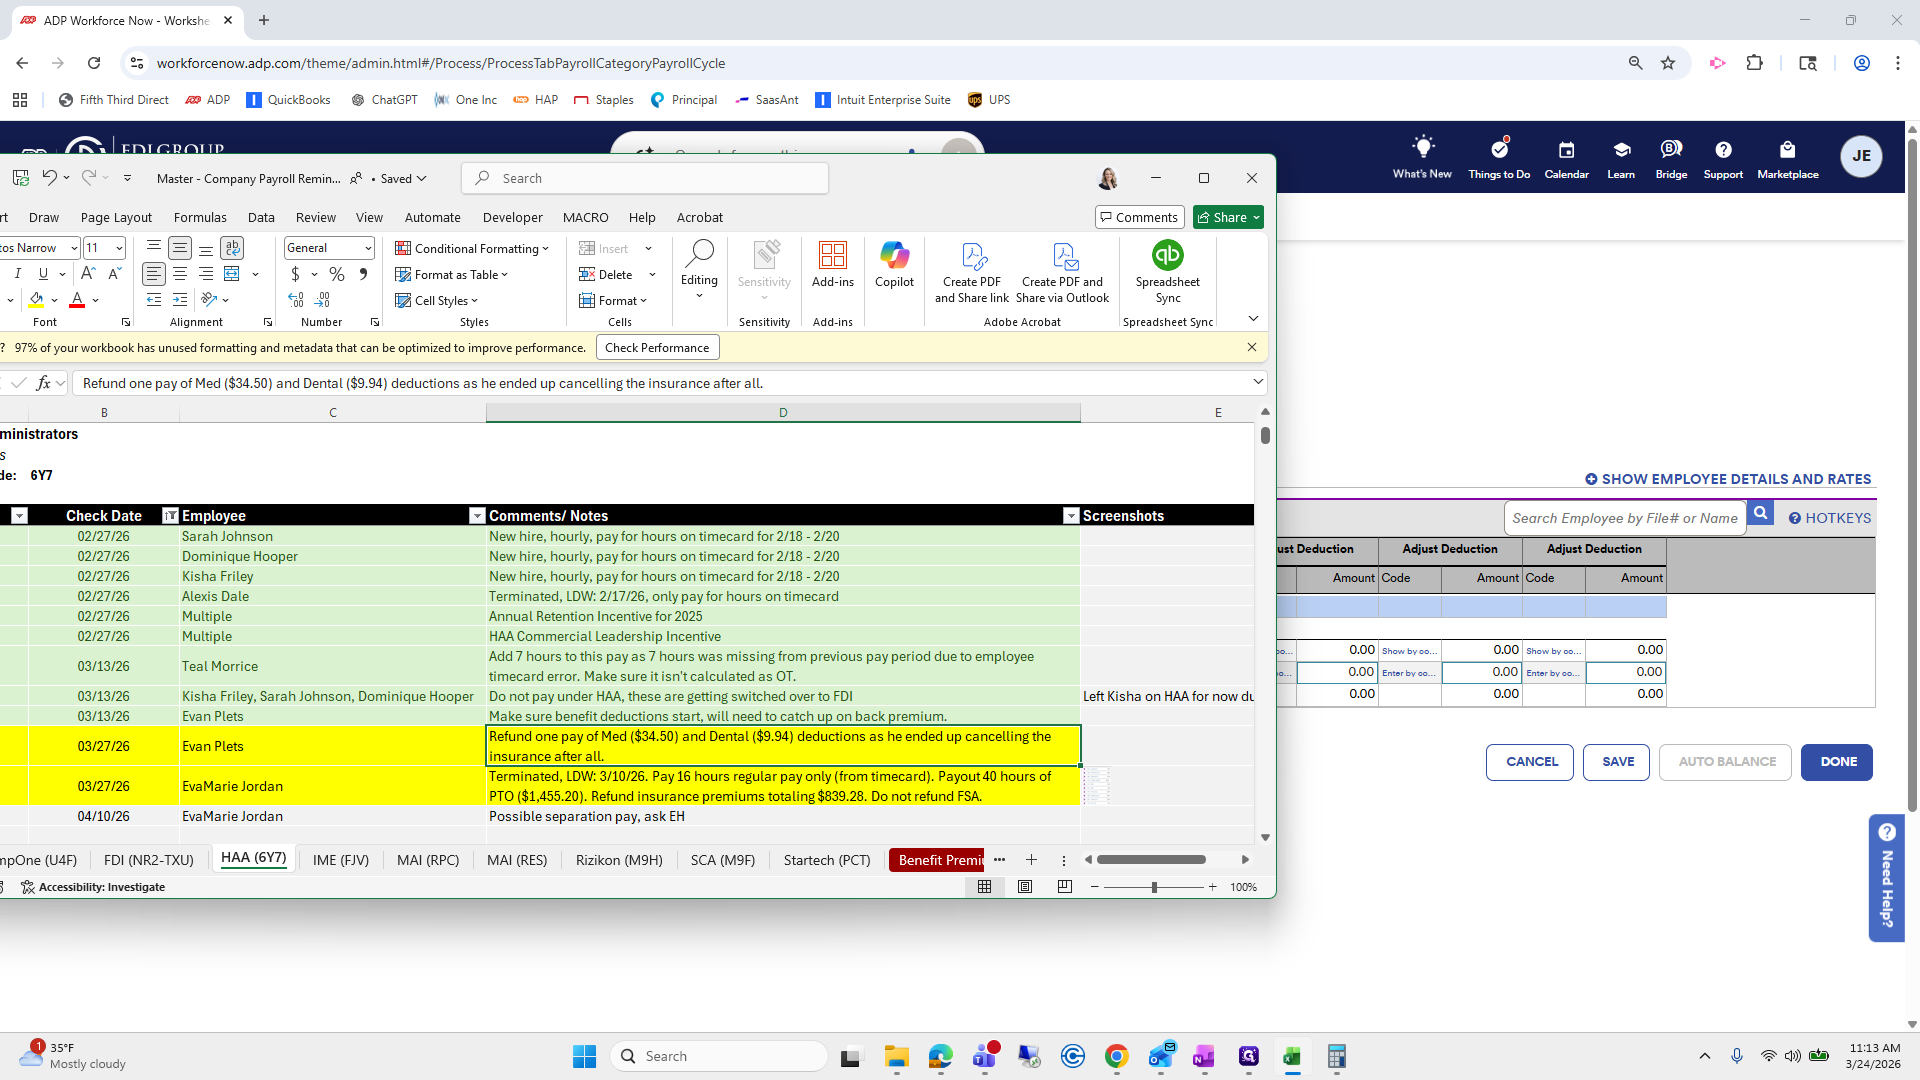
Medical and dental. Medical was $34.50, and dental was $9.94.


I will press auto balance. Done.

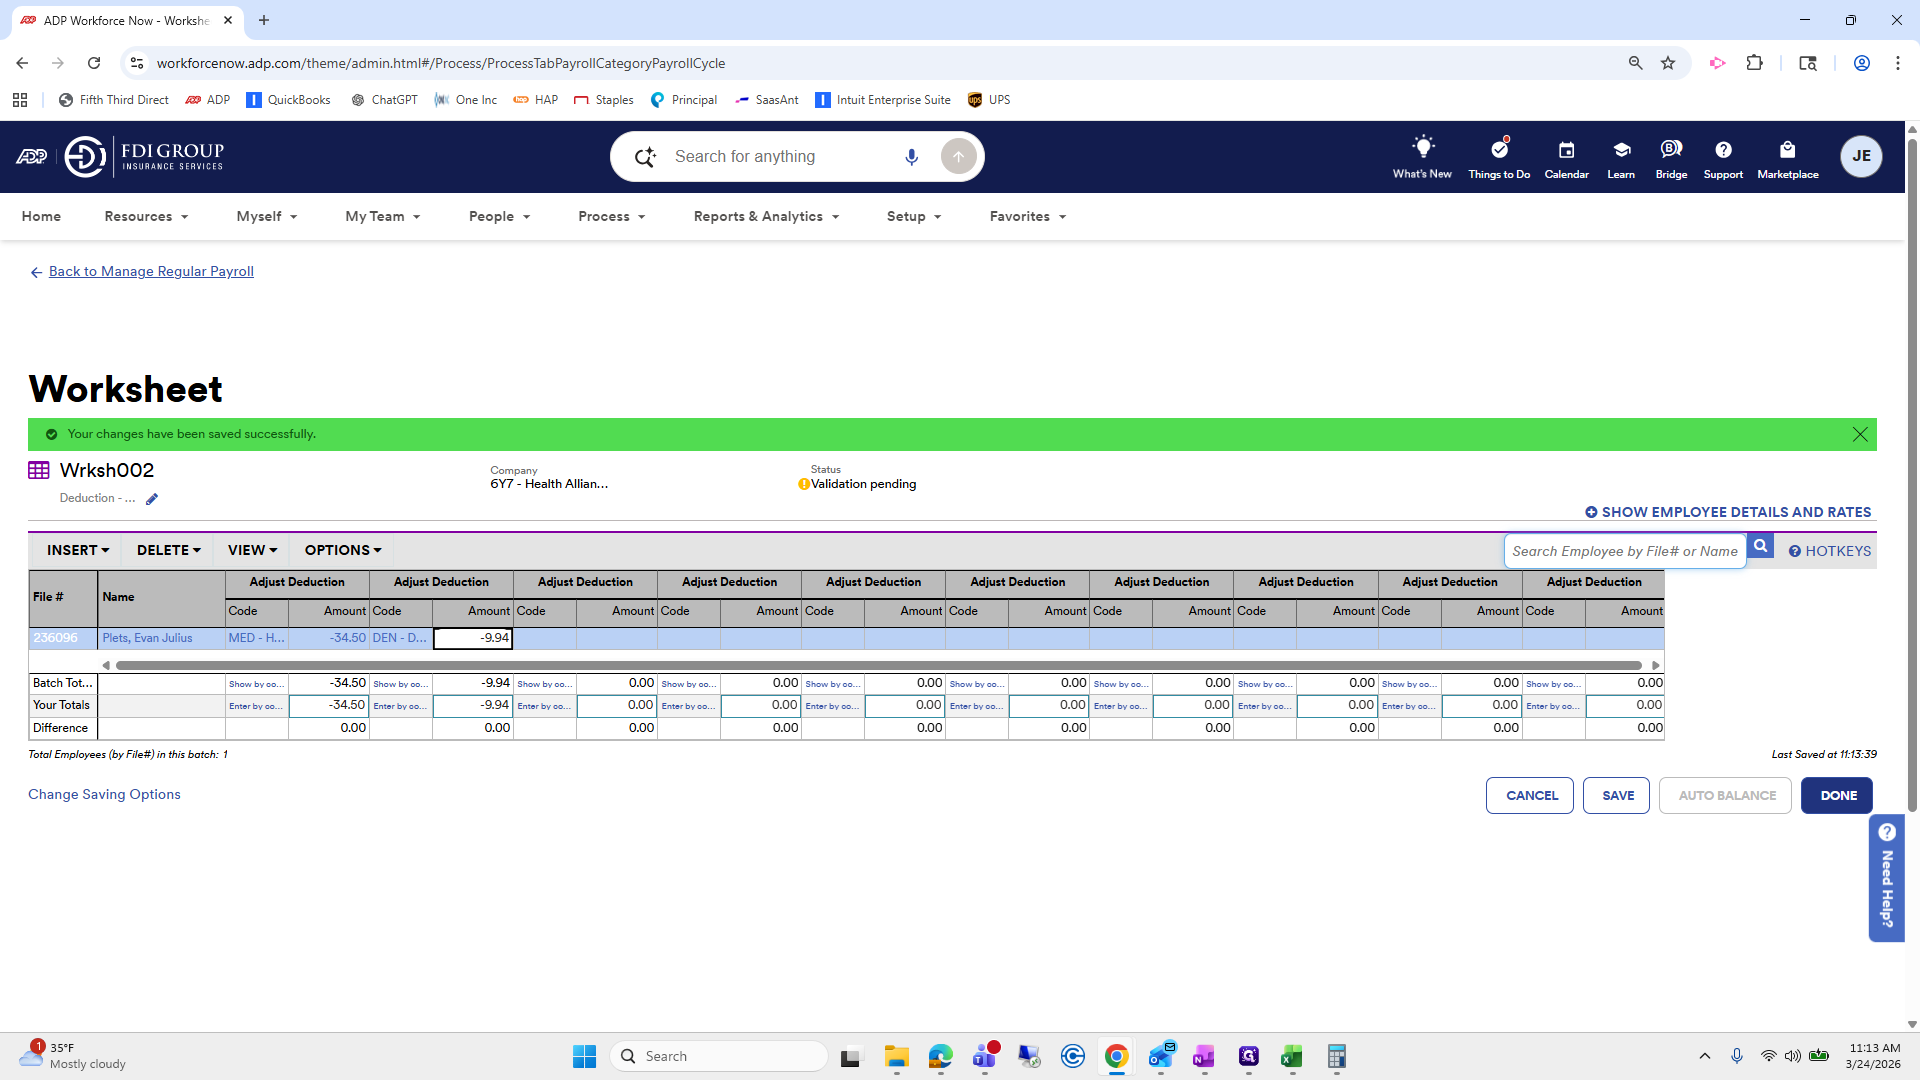
He is complete.
Ava Marie was terminated. We will pay her for 16 regular hours from her time card. We also need to pay out 40 hours of PTO.
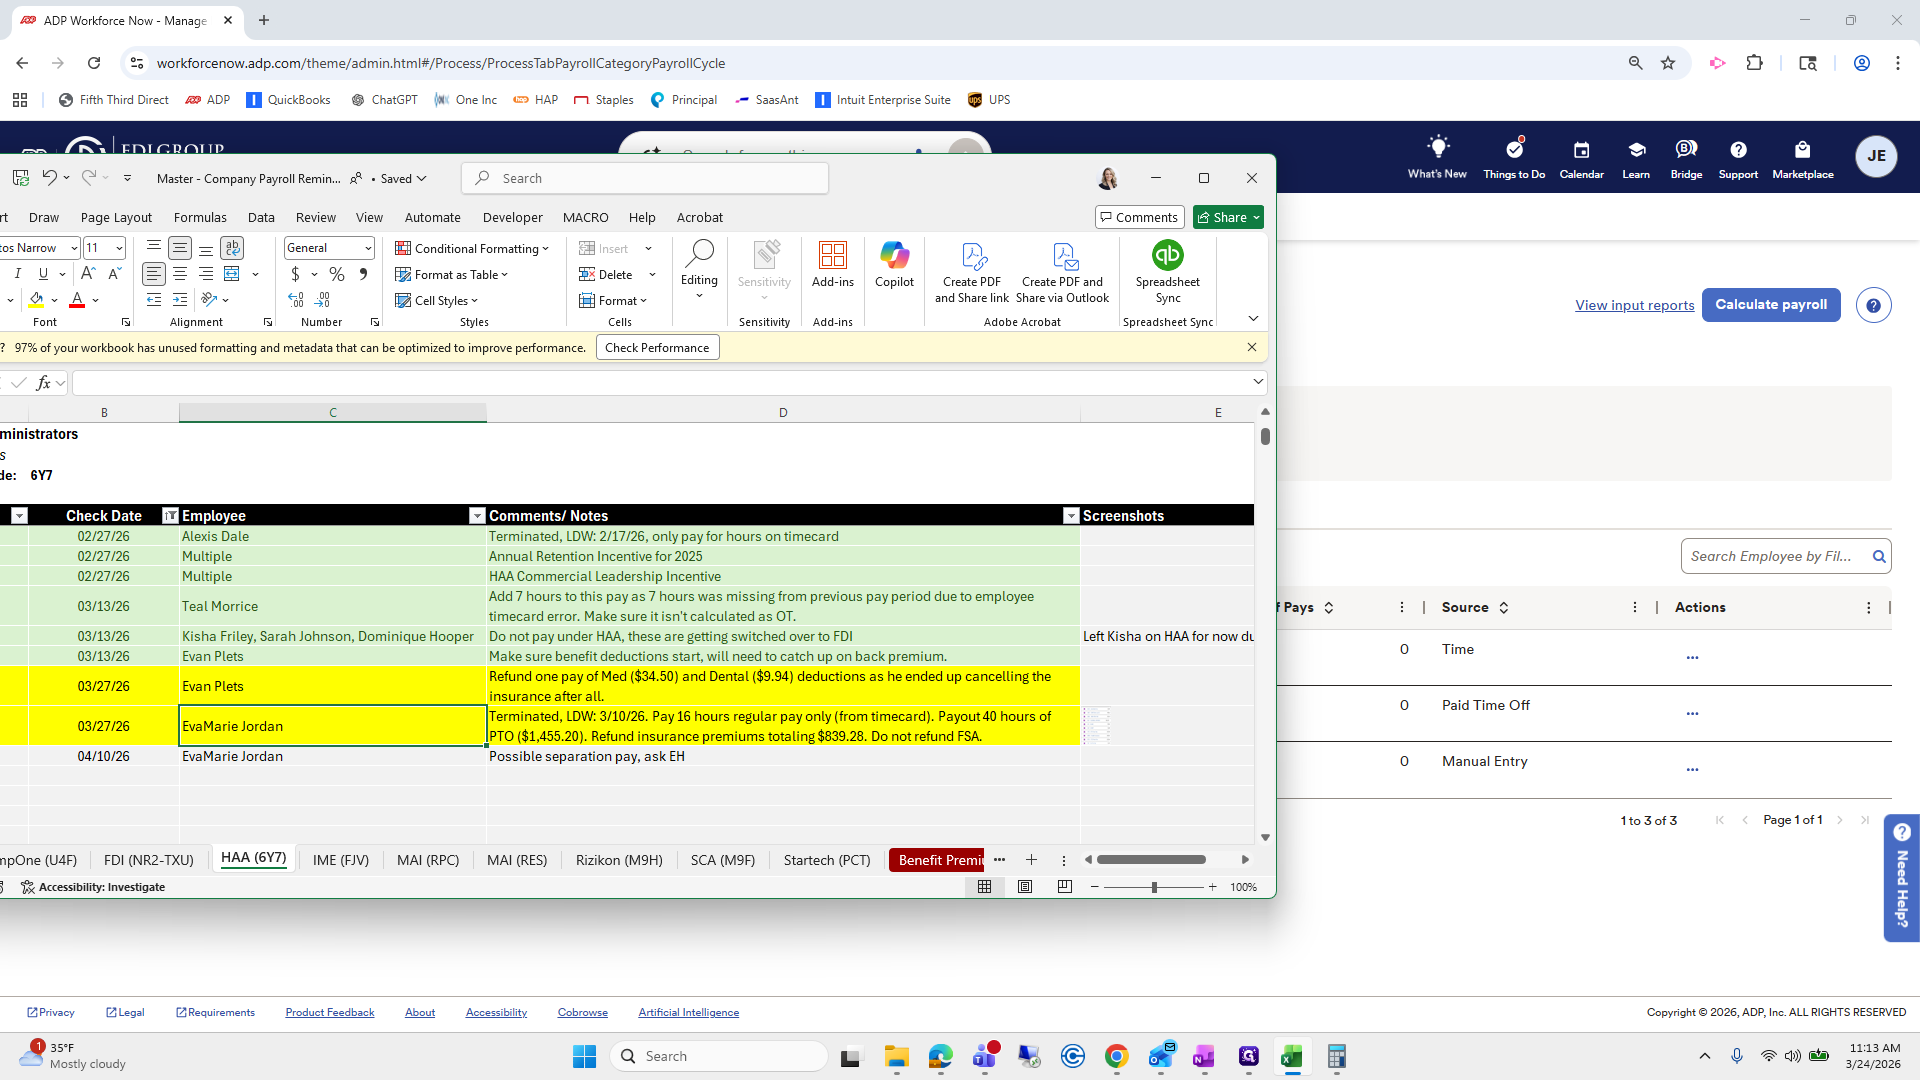
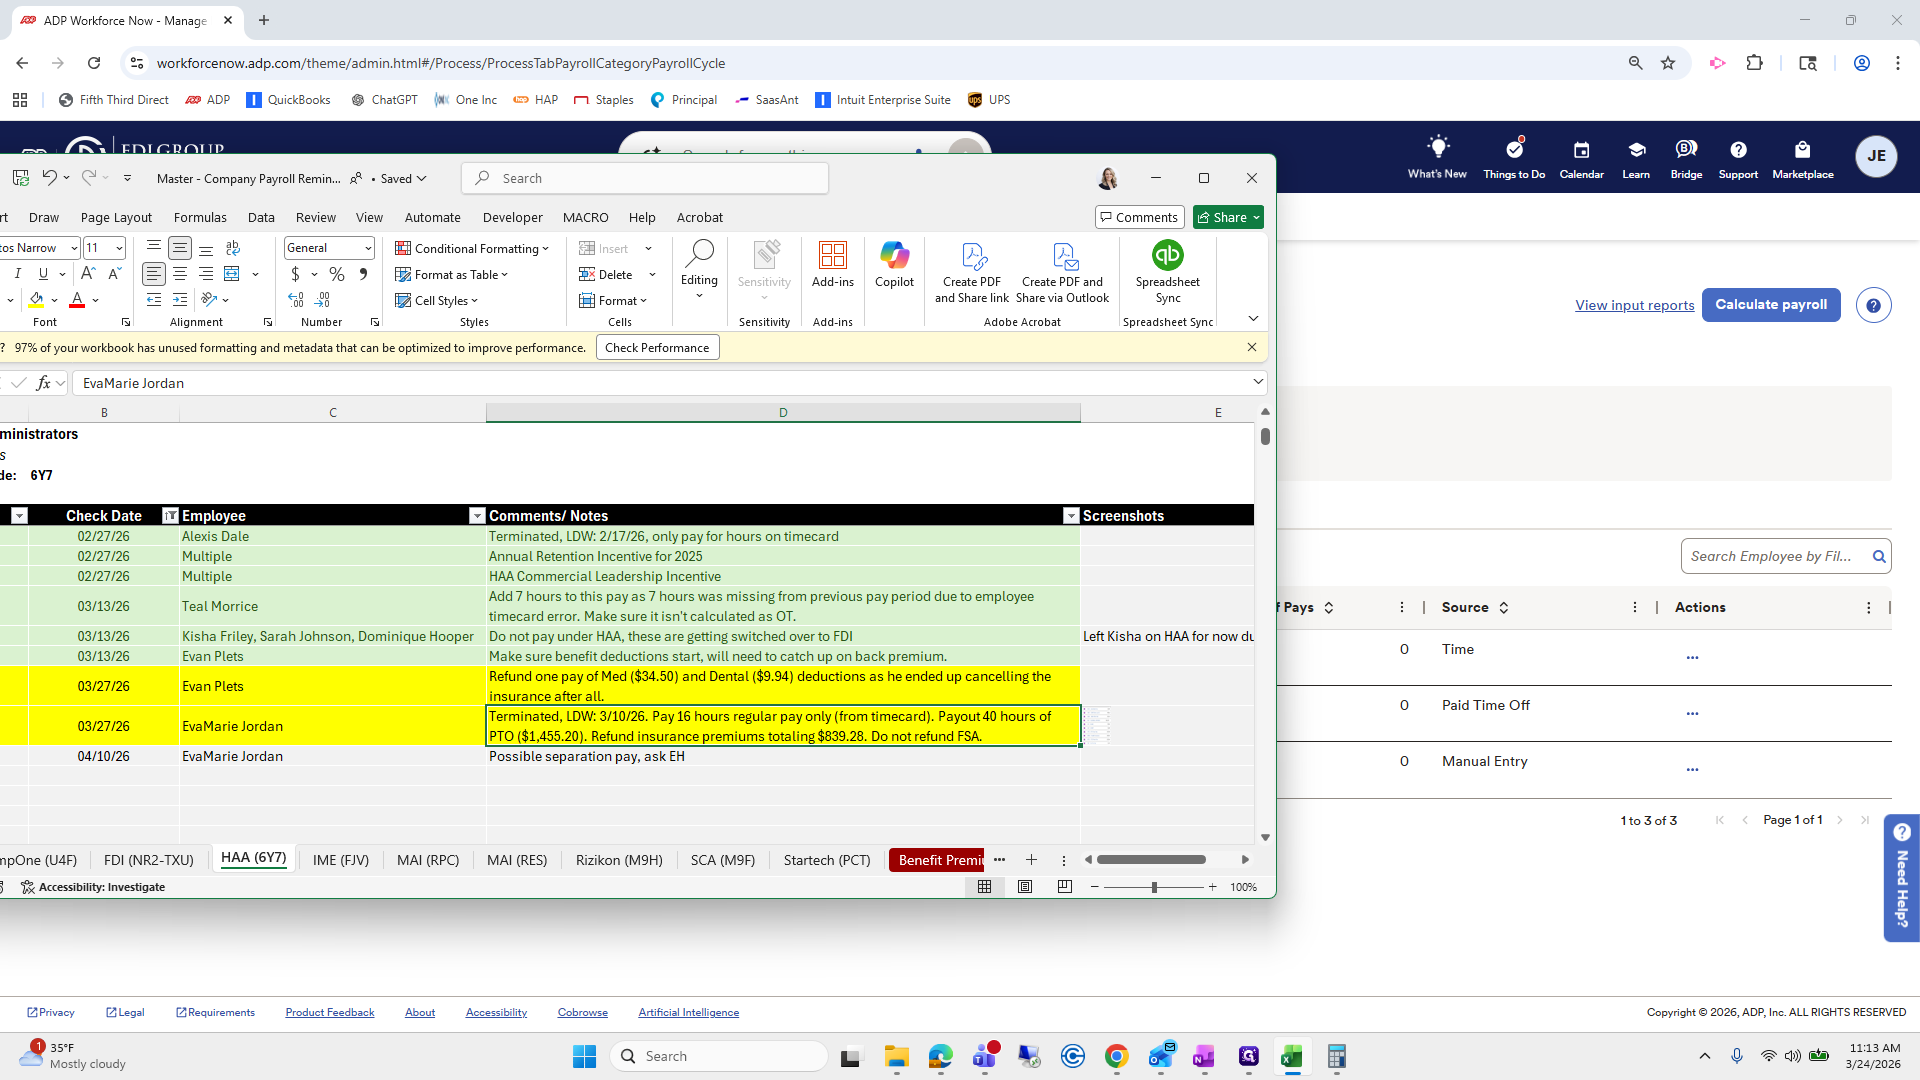
We will also refund her insurance premiums and ensure her FSA starts there.

We have all her insurance premiums here.

I'm running out of time, so we'll cover that and the next step in the following video.