Learn how to finalize your event details, AV equipment, catering, and submit your full booking request using the pre-populated client form.
By Heidi Badenhorst
This guide walks you through completing a full booking request form for an upcoming event. Because the form is accessed via a secure email link, much of your initial quick-quote information is pre-populated, allowing you to focus on finalizing setup, catering menus, and logistics.
This workflow applies to clients and event coordinators who are ready to confirm their venue requirements and transition an initial quote into a formal booking contract.
Client and Event Details
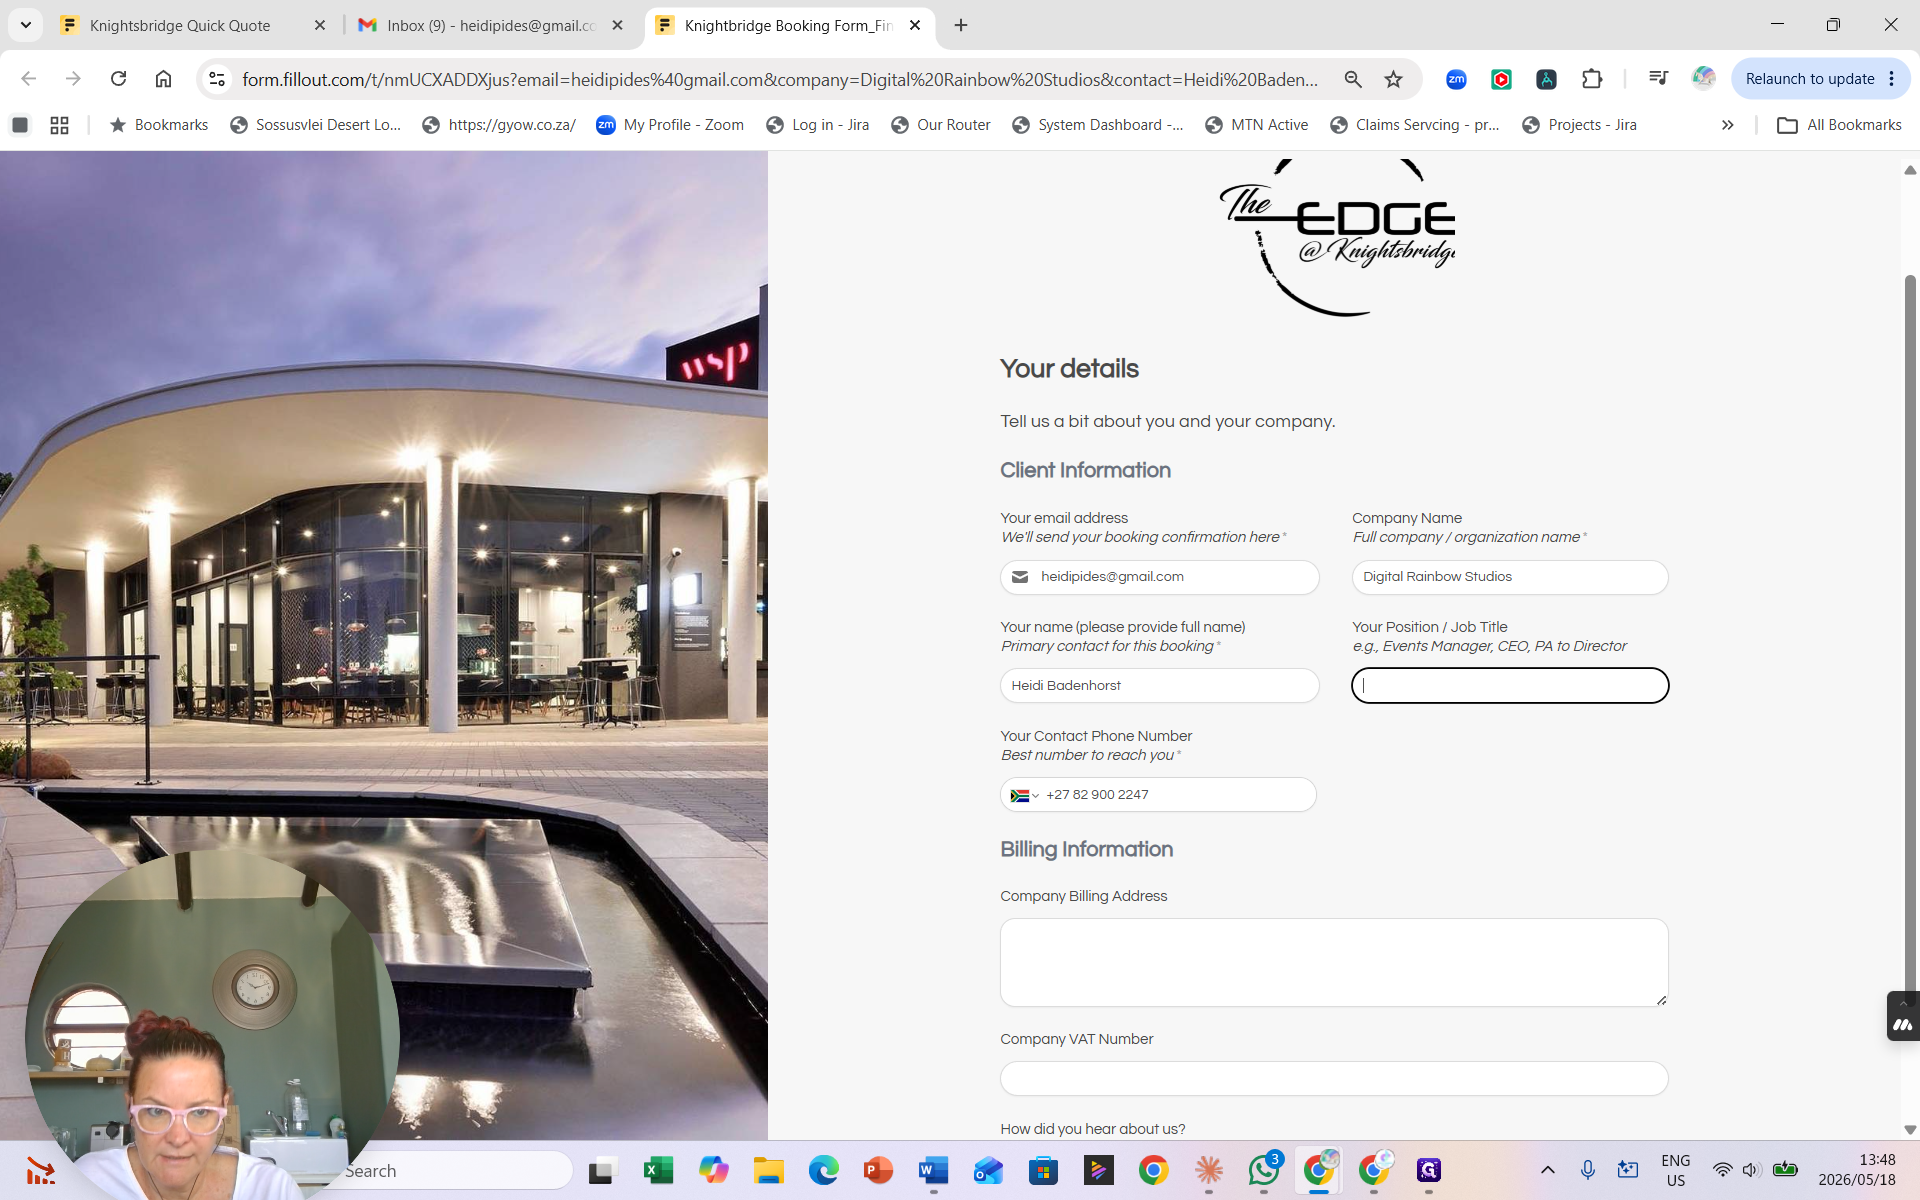
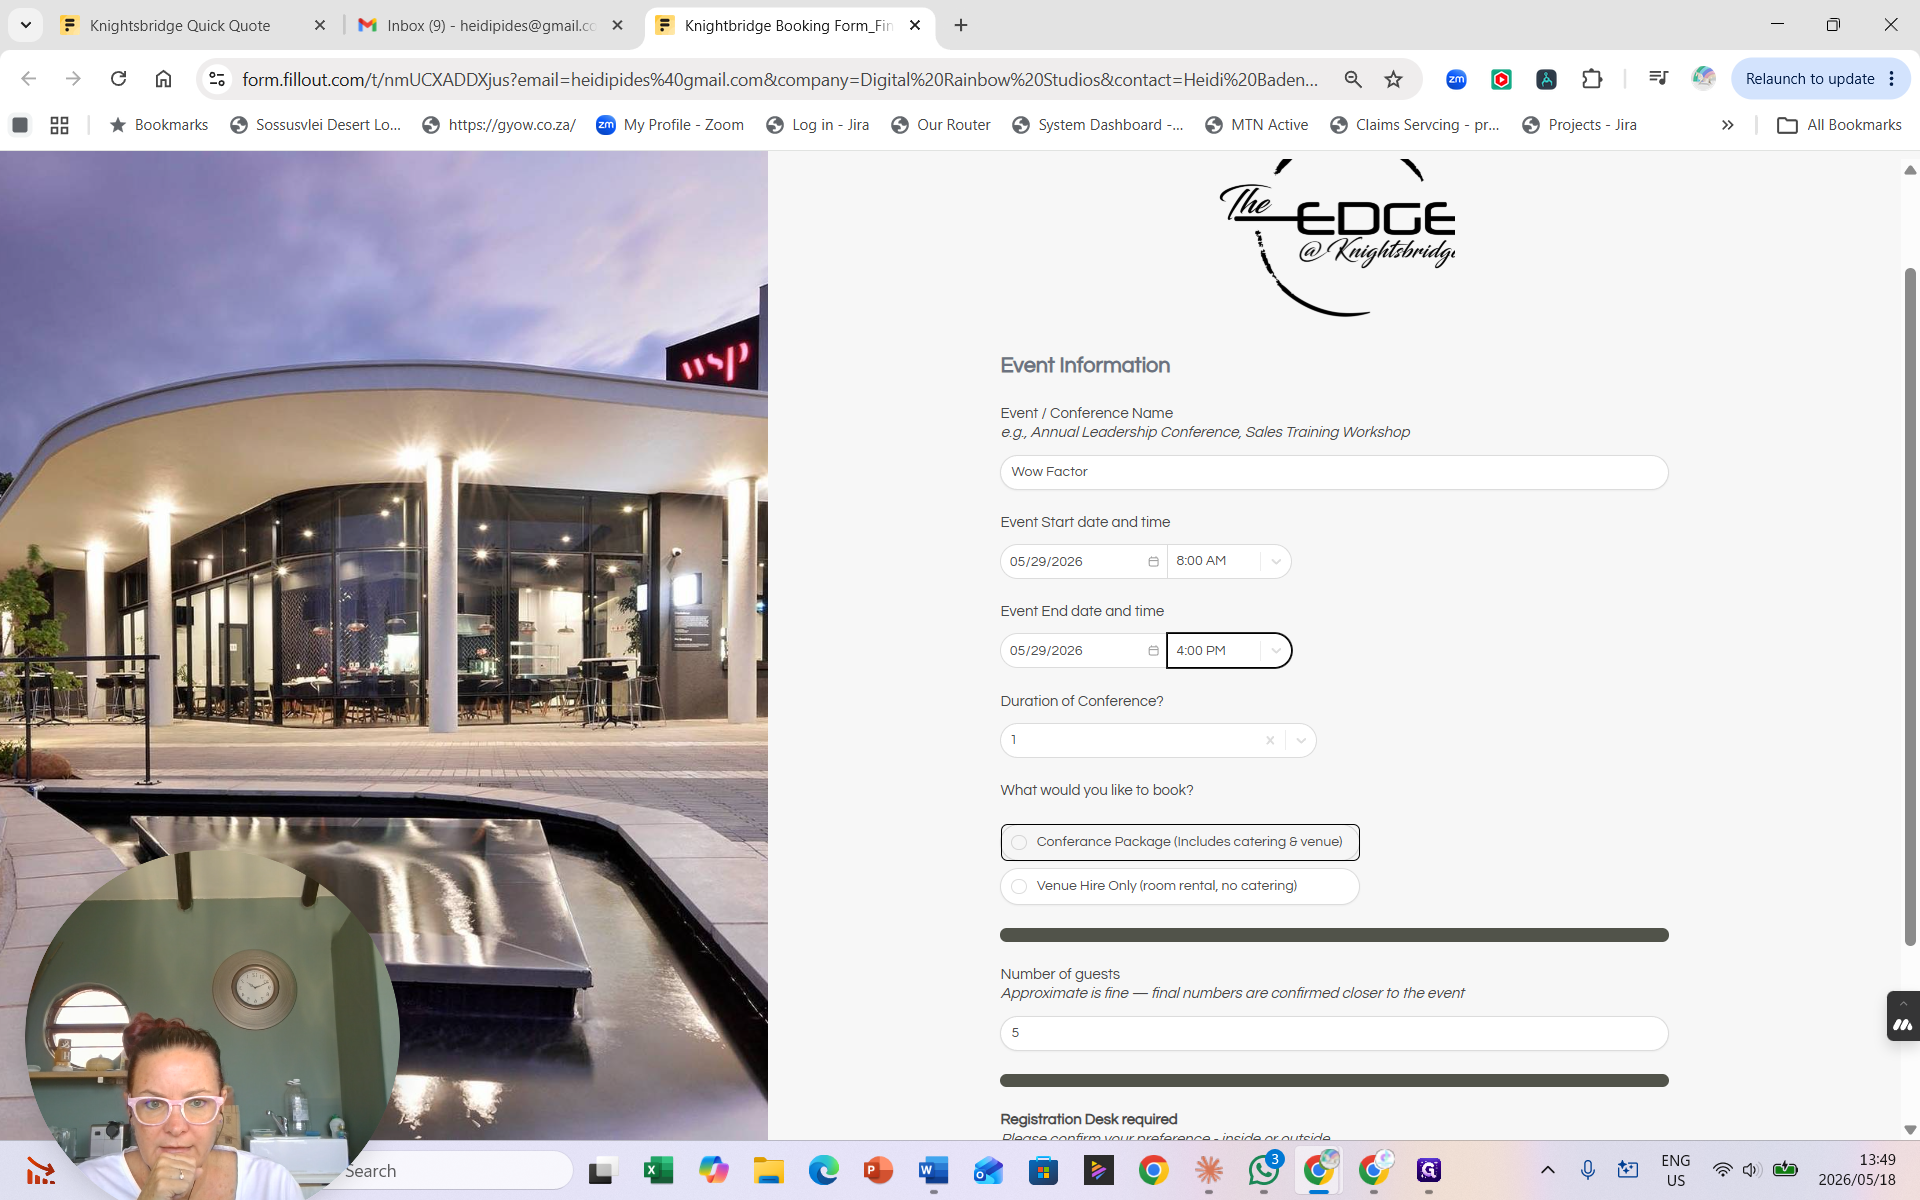
The first section collects any missing contact and billing information, along with the foundational details of the event.
1
Enter your Position / Job Title in the provided field.
2
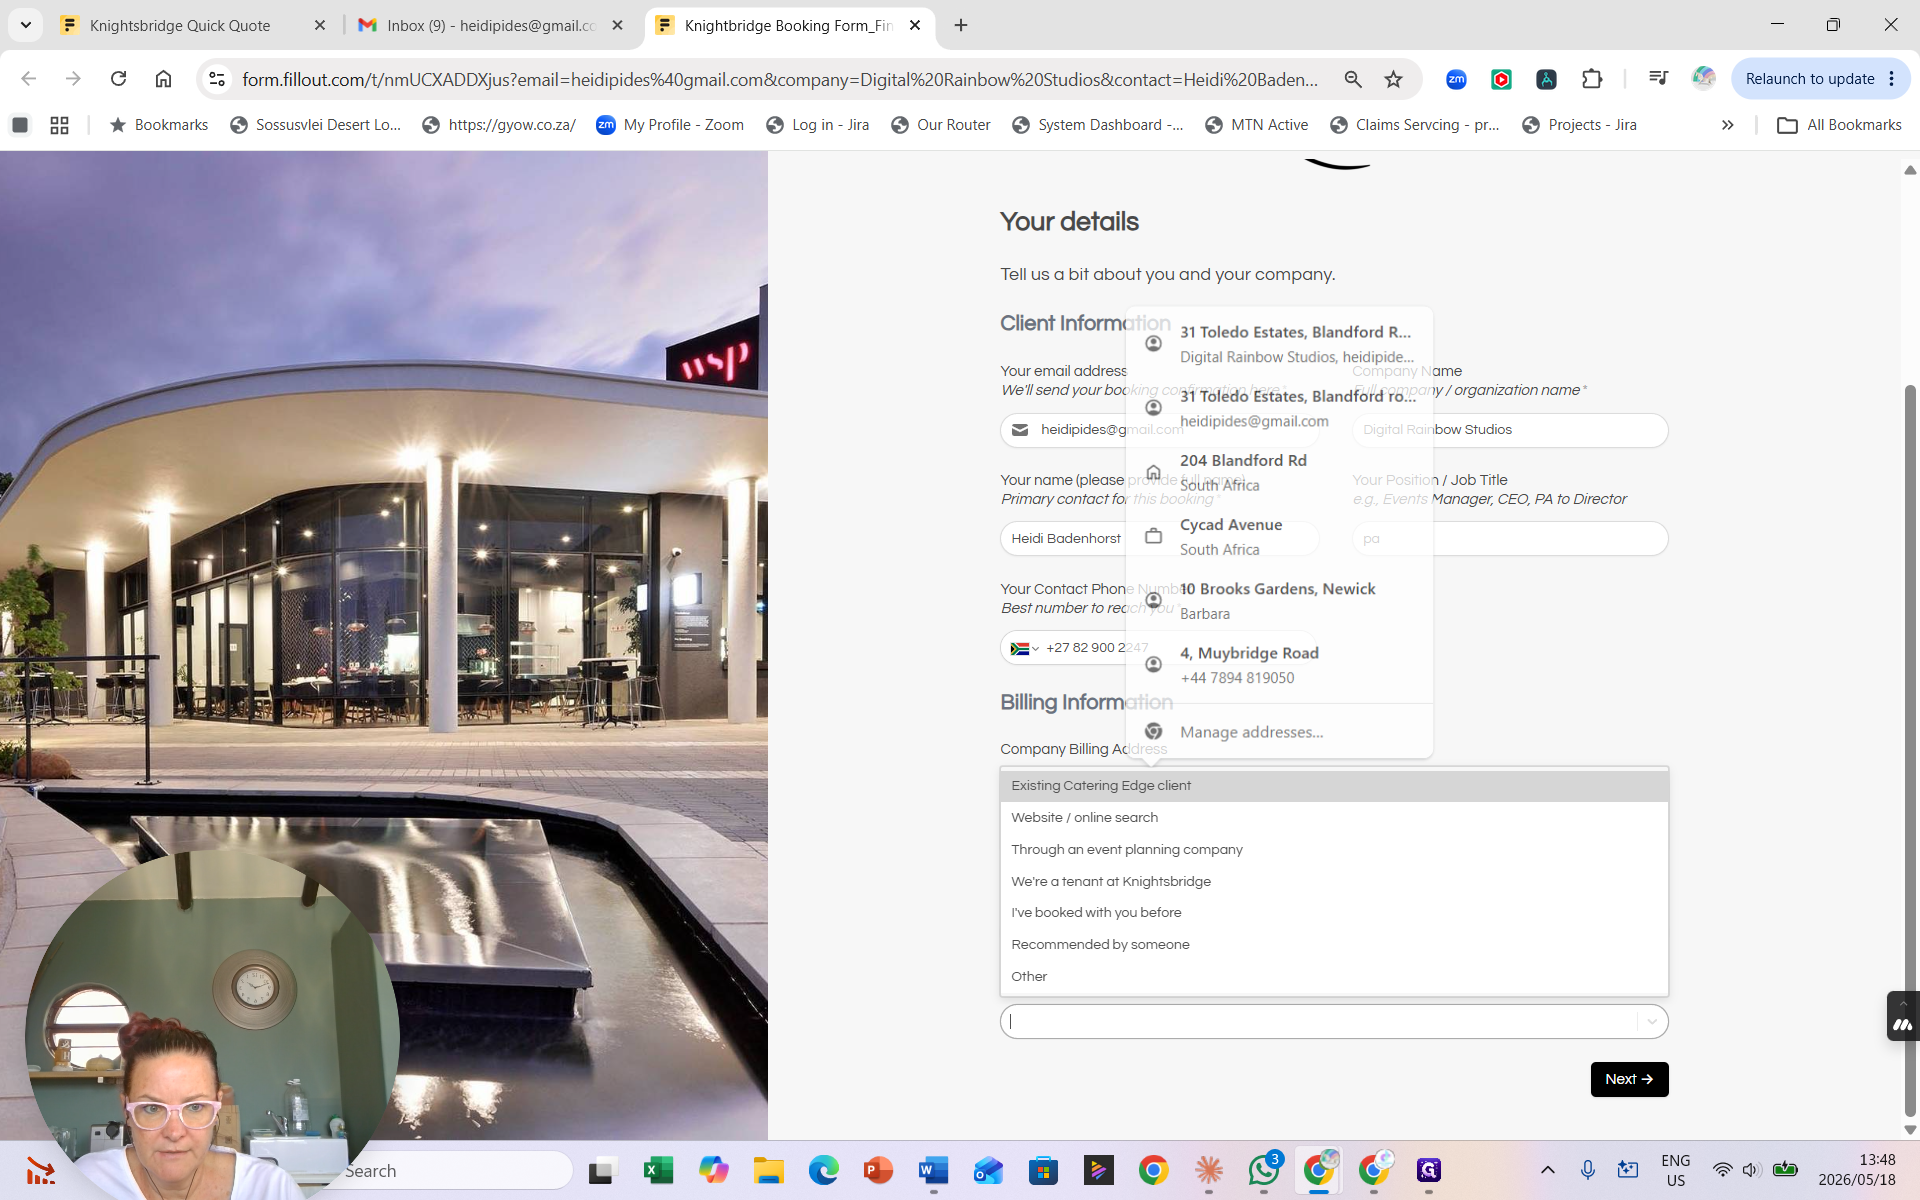
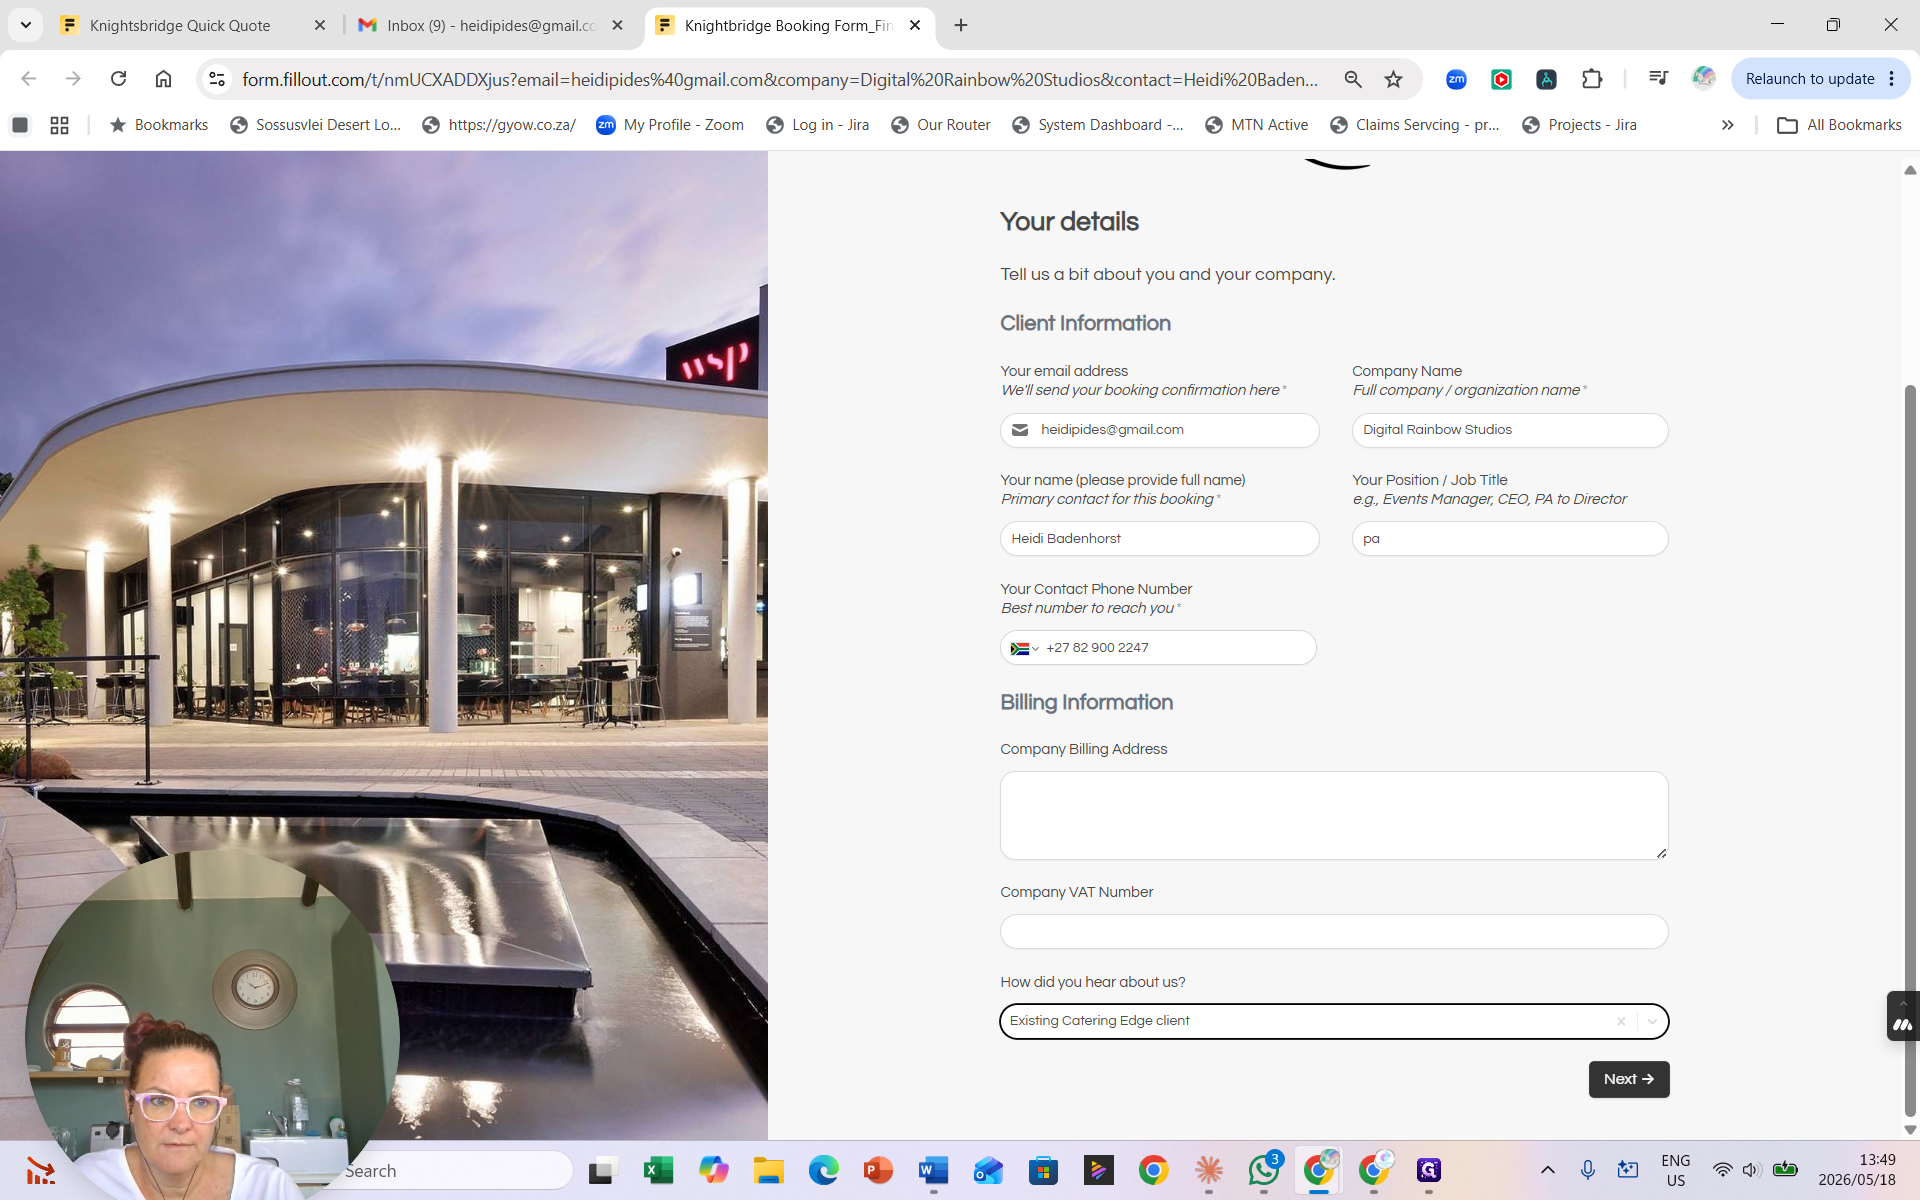
Use the browser autofill or dropdown to complete your basic contact details.
3
Under Billing Information, select how you heard about the venue from the dropdown menu.
4
Click Next → to proceed to the event scheduling.
5
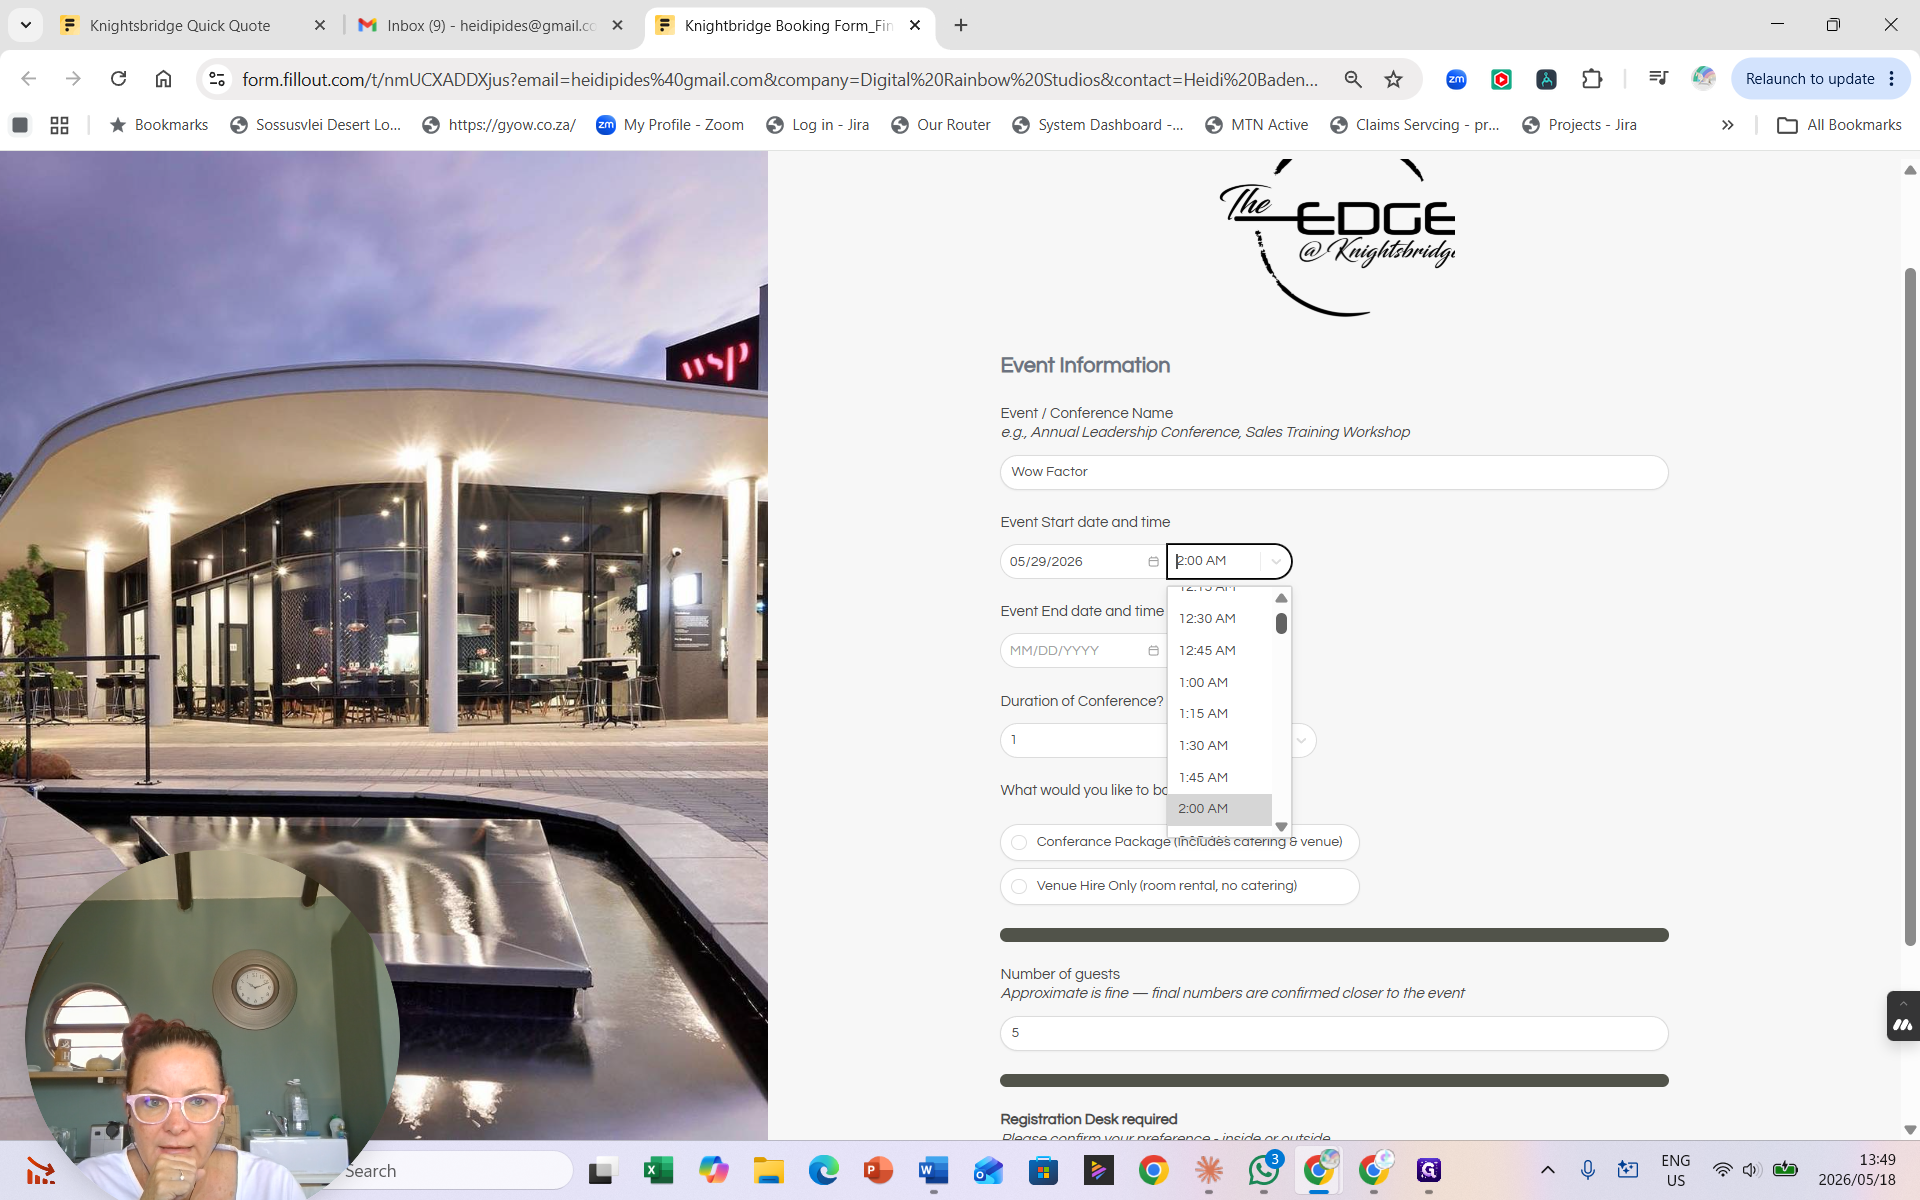
Enter your Conference Name or event title (e.g., Wow Factor).
6
Select your Event start date from the calendar picker.
7
Enter the total Number of guests attending.
8
Choose your Event start time from the dropdown list (e.g., 8:00 AM).
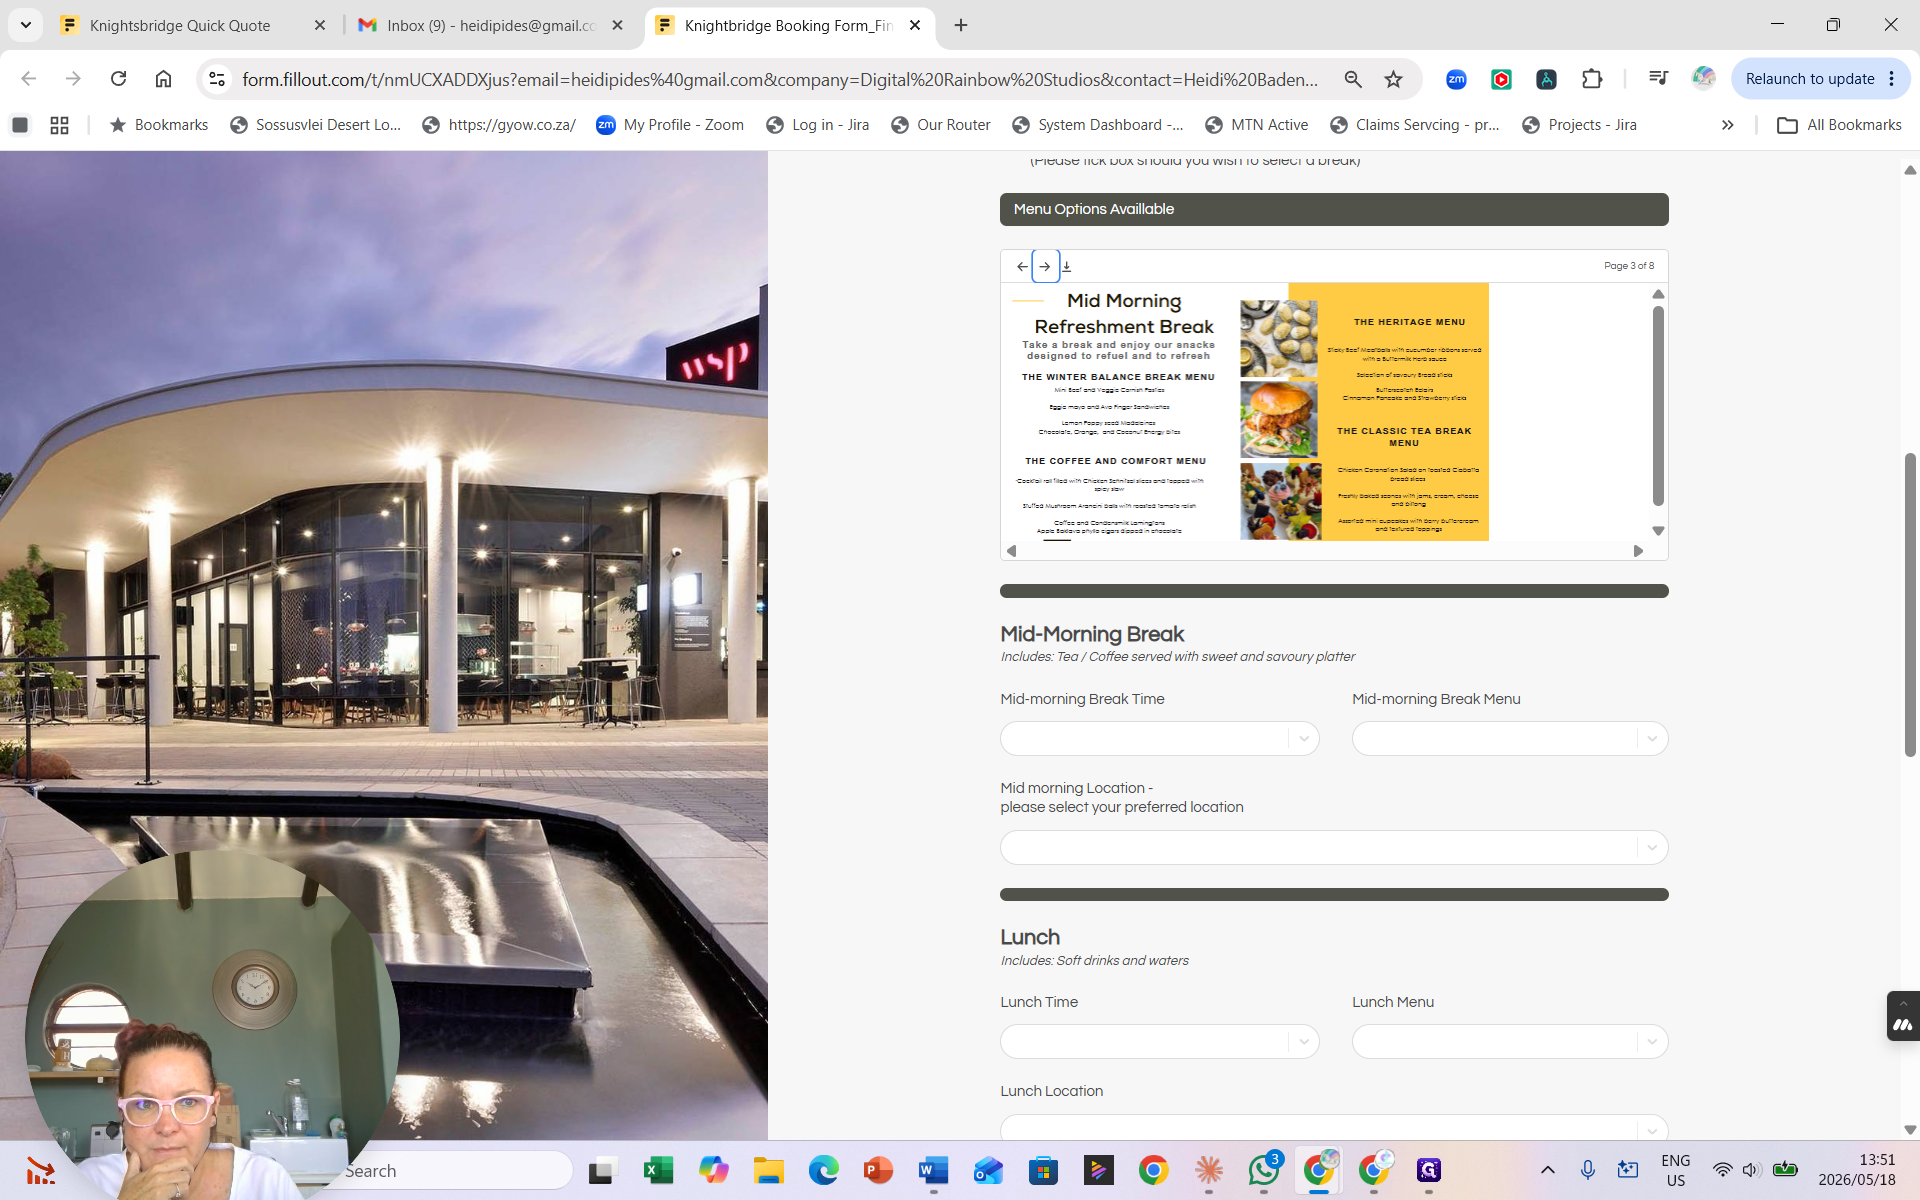
9
Select your Event end date and corresponding end time if the event spans multiple days.
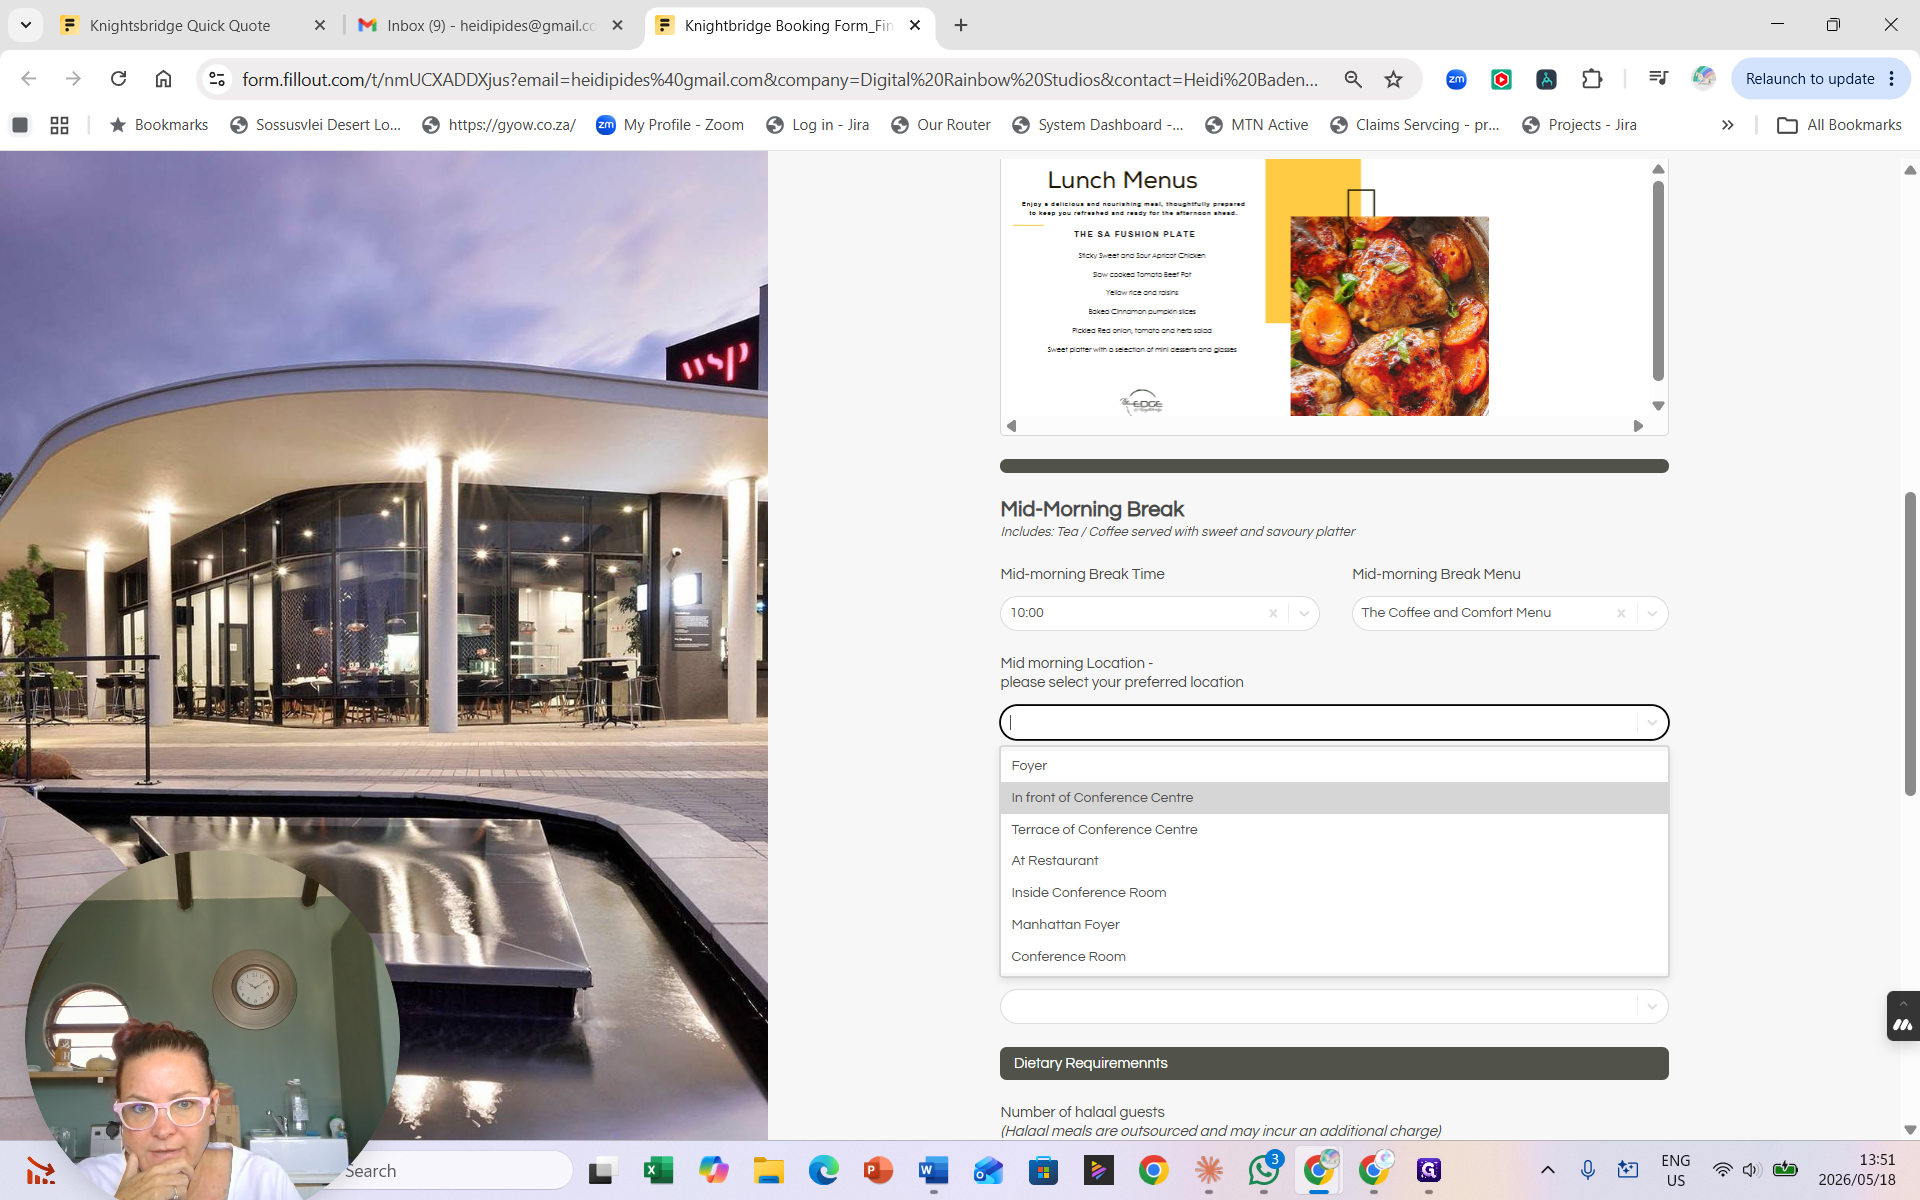
Venue setup and configuration
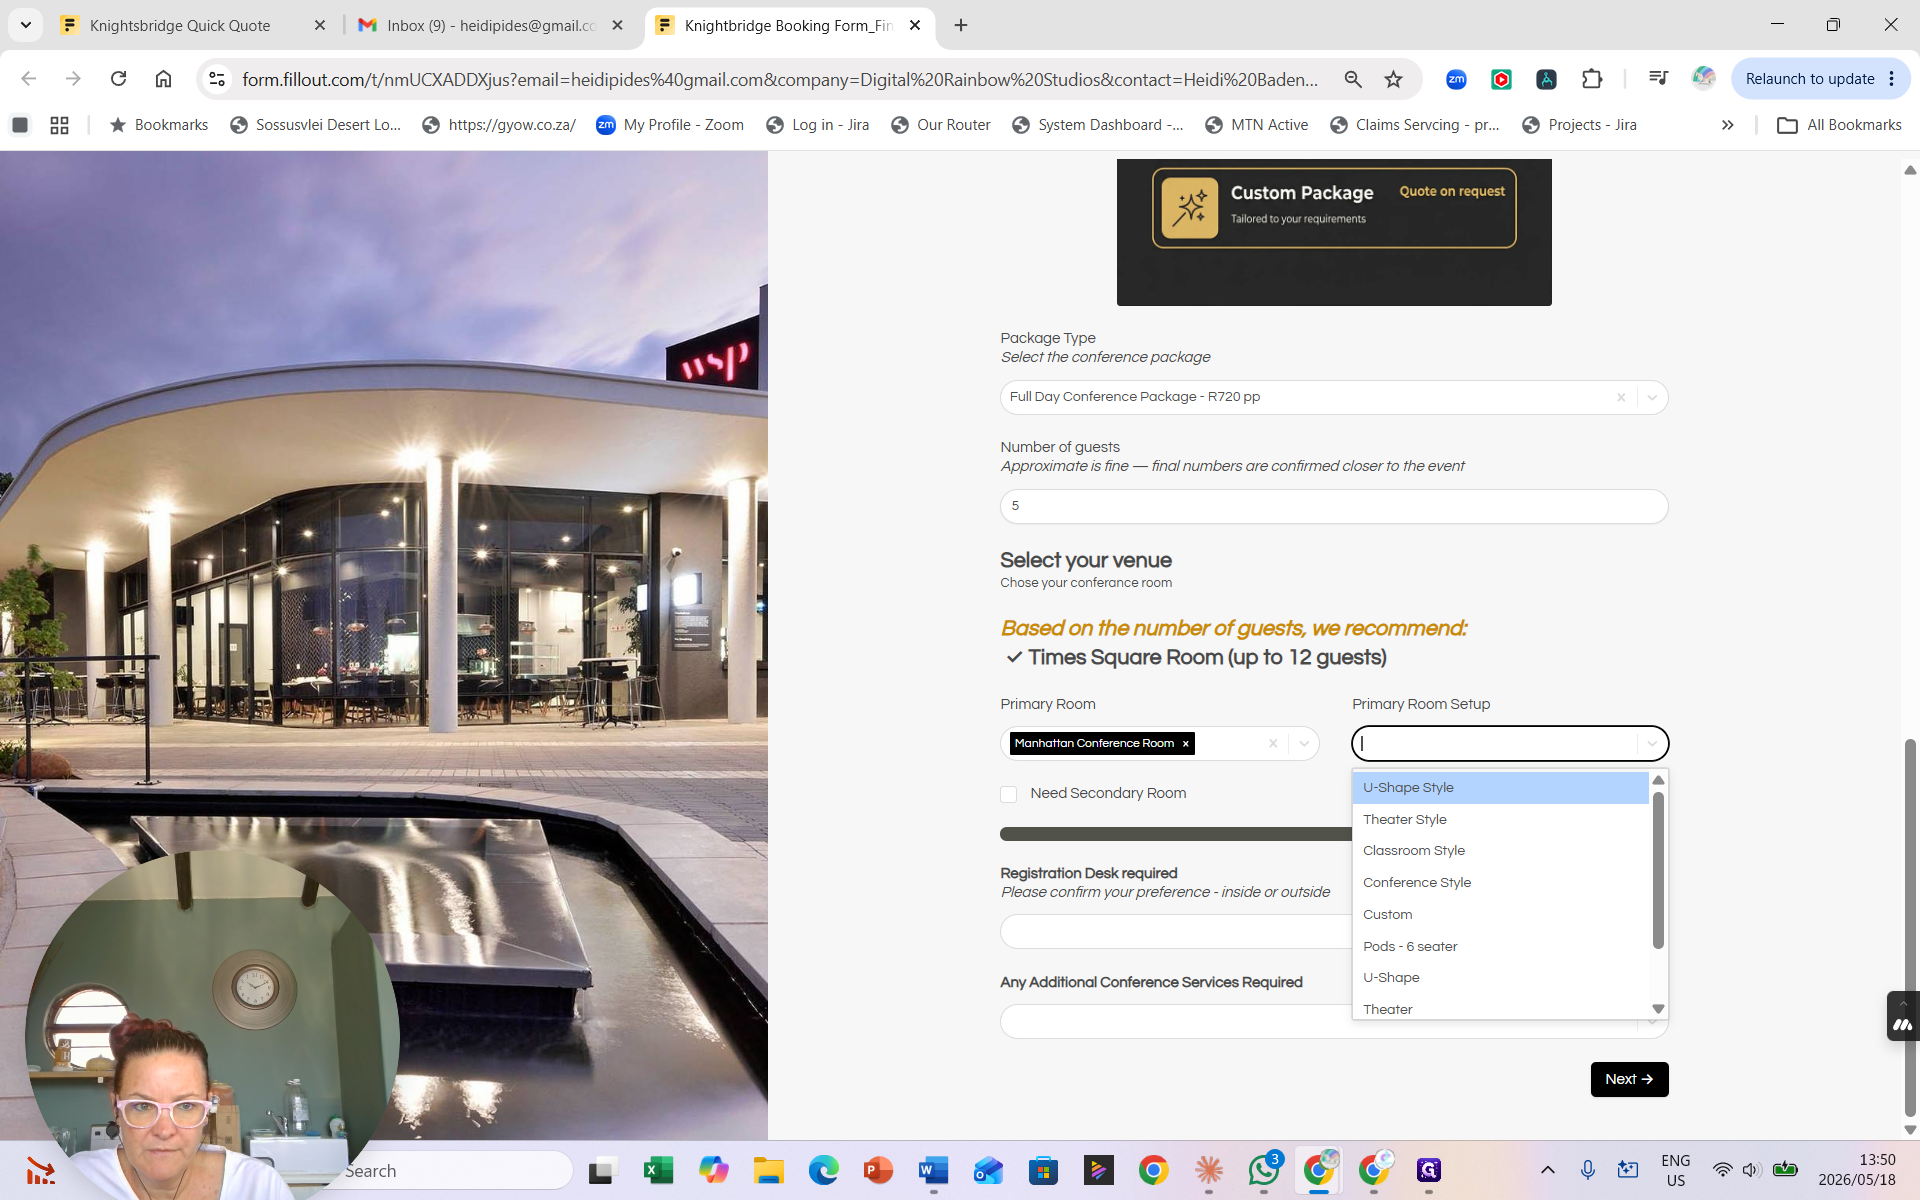
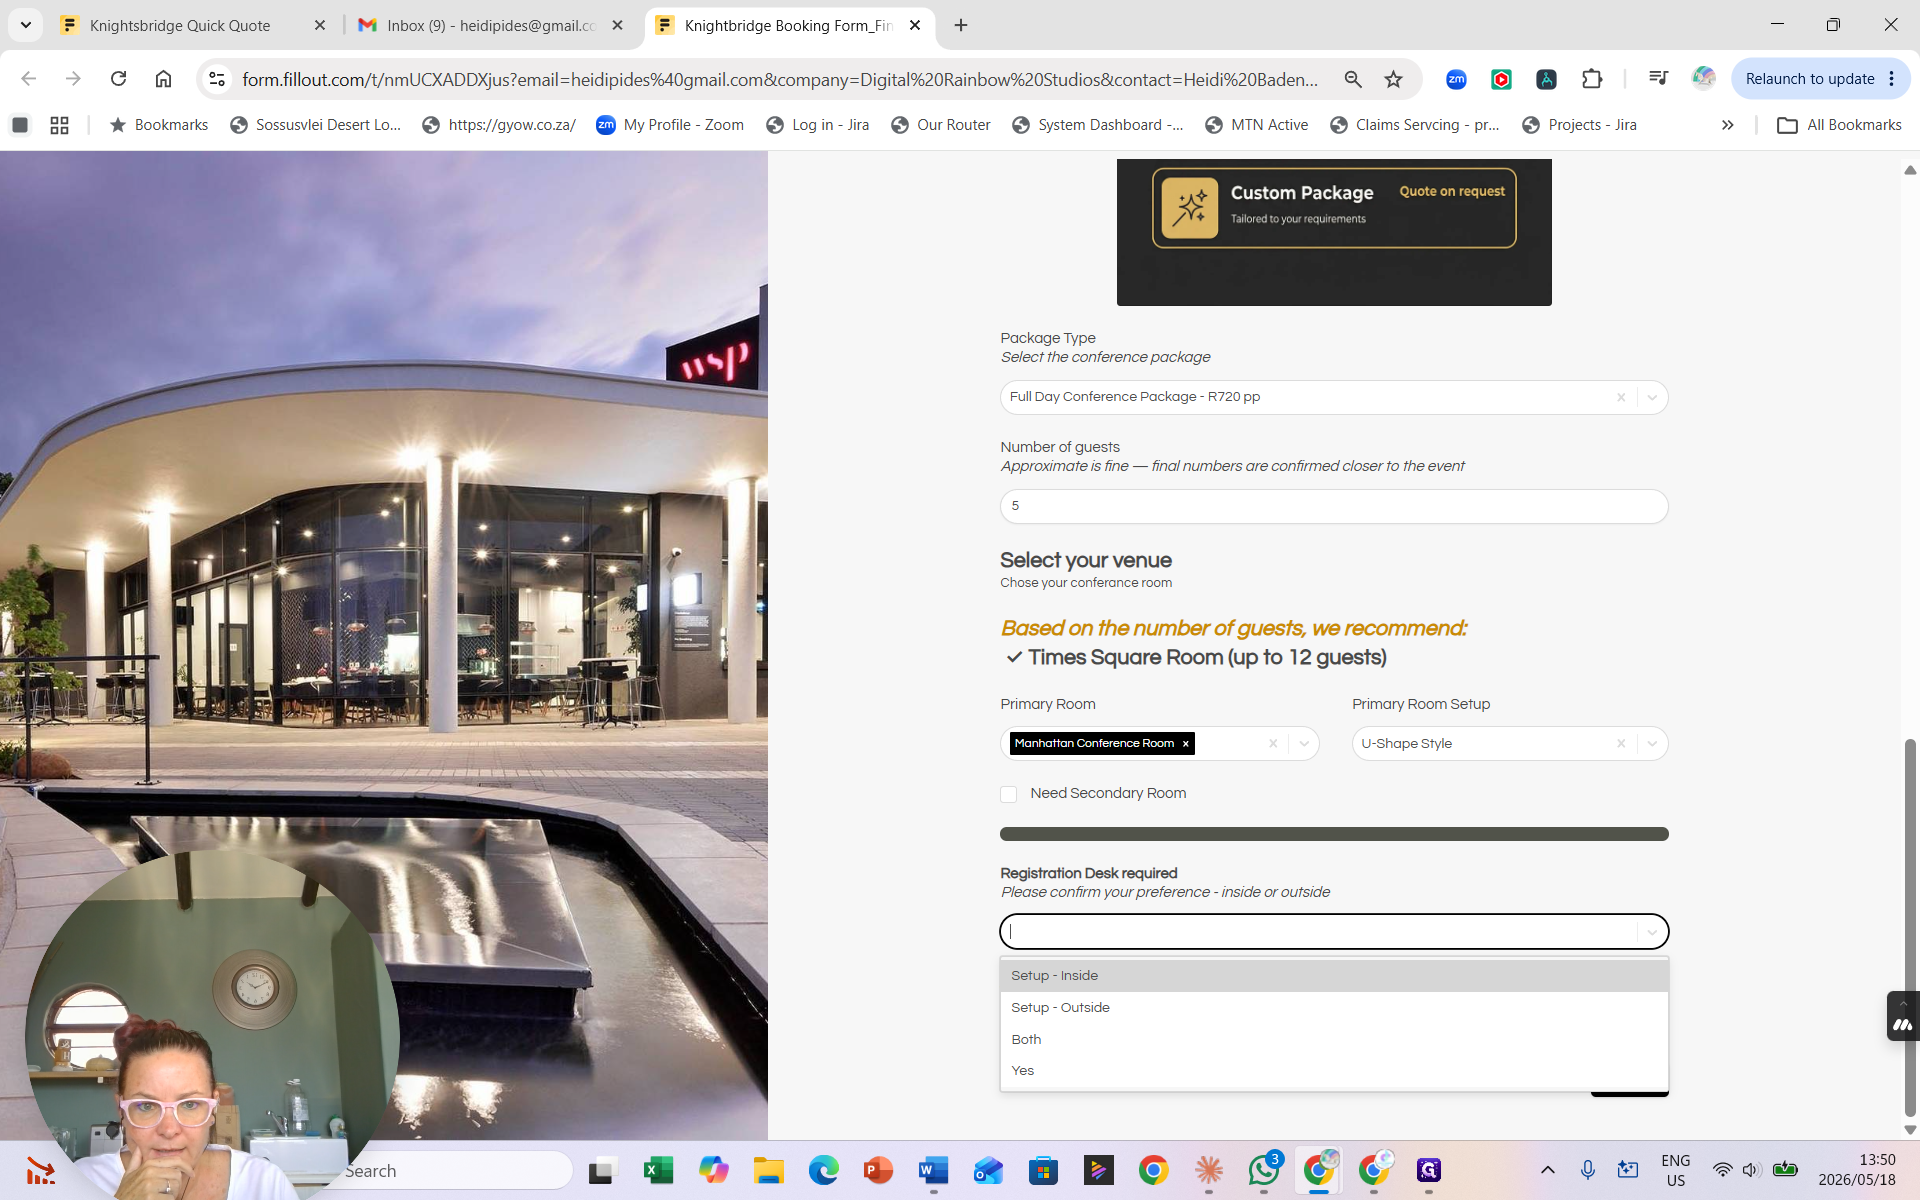
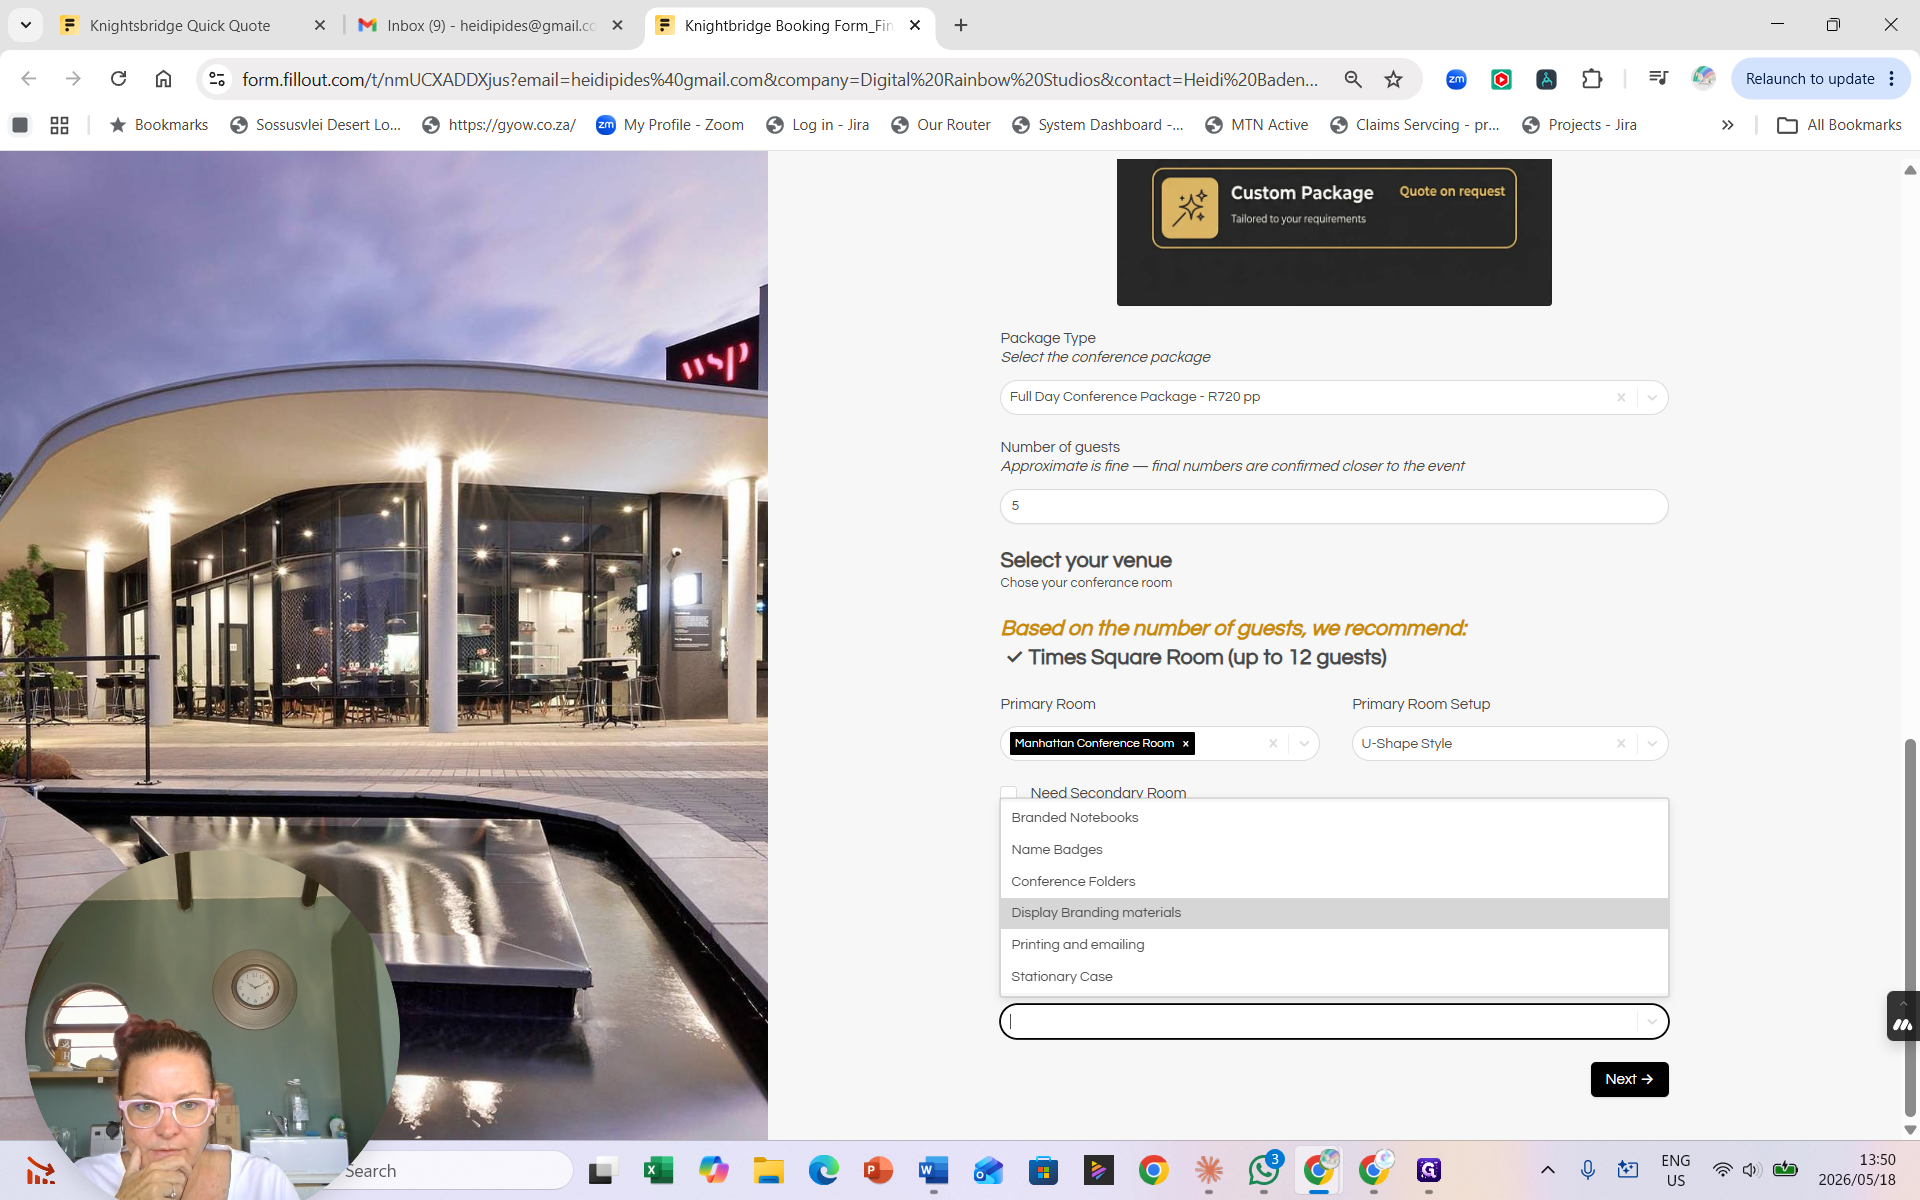
Next, define how you want the primary spaces arranged and what supplementary services you need on the day.
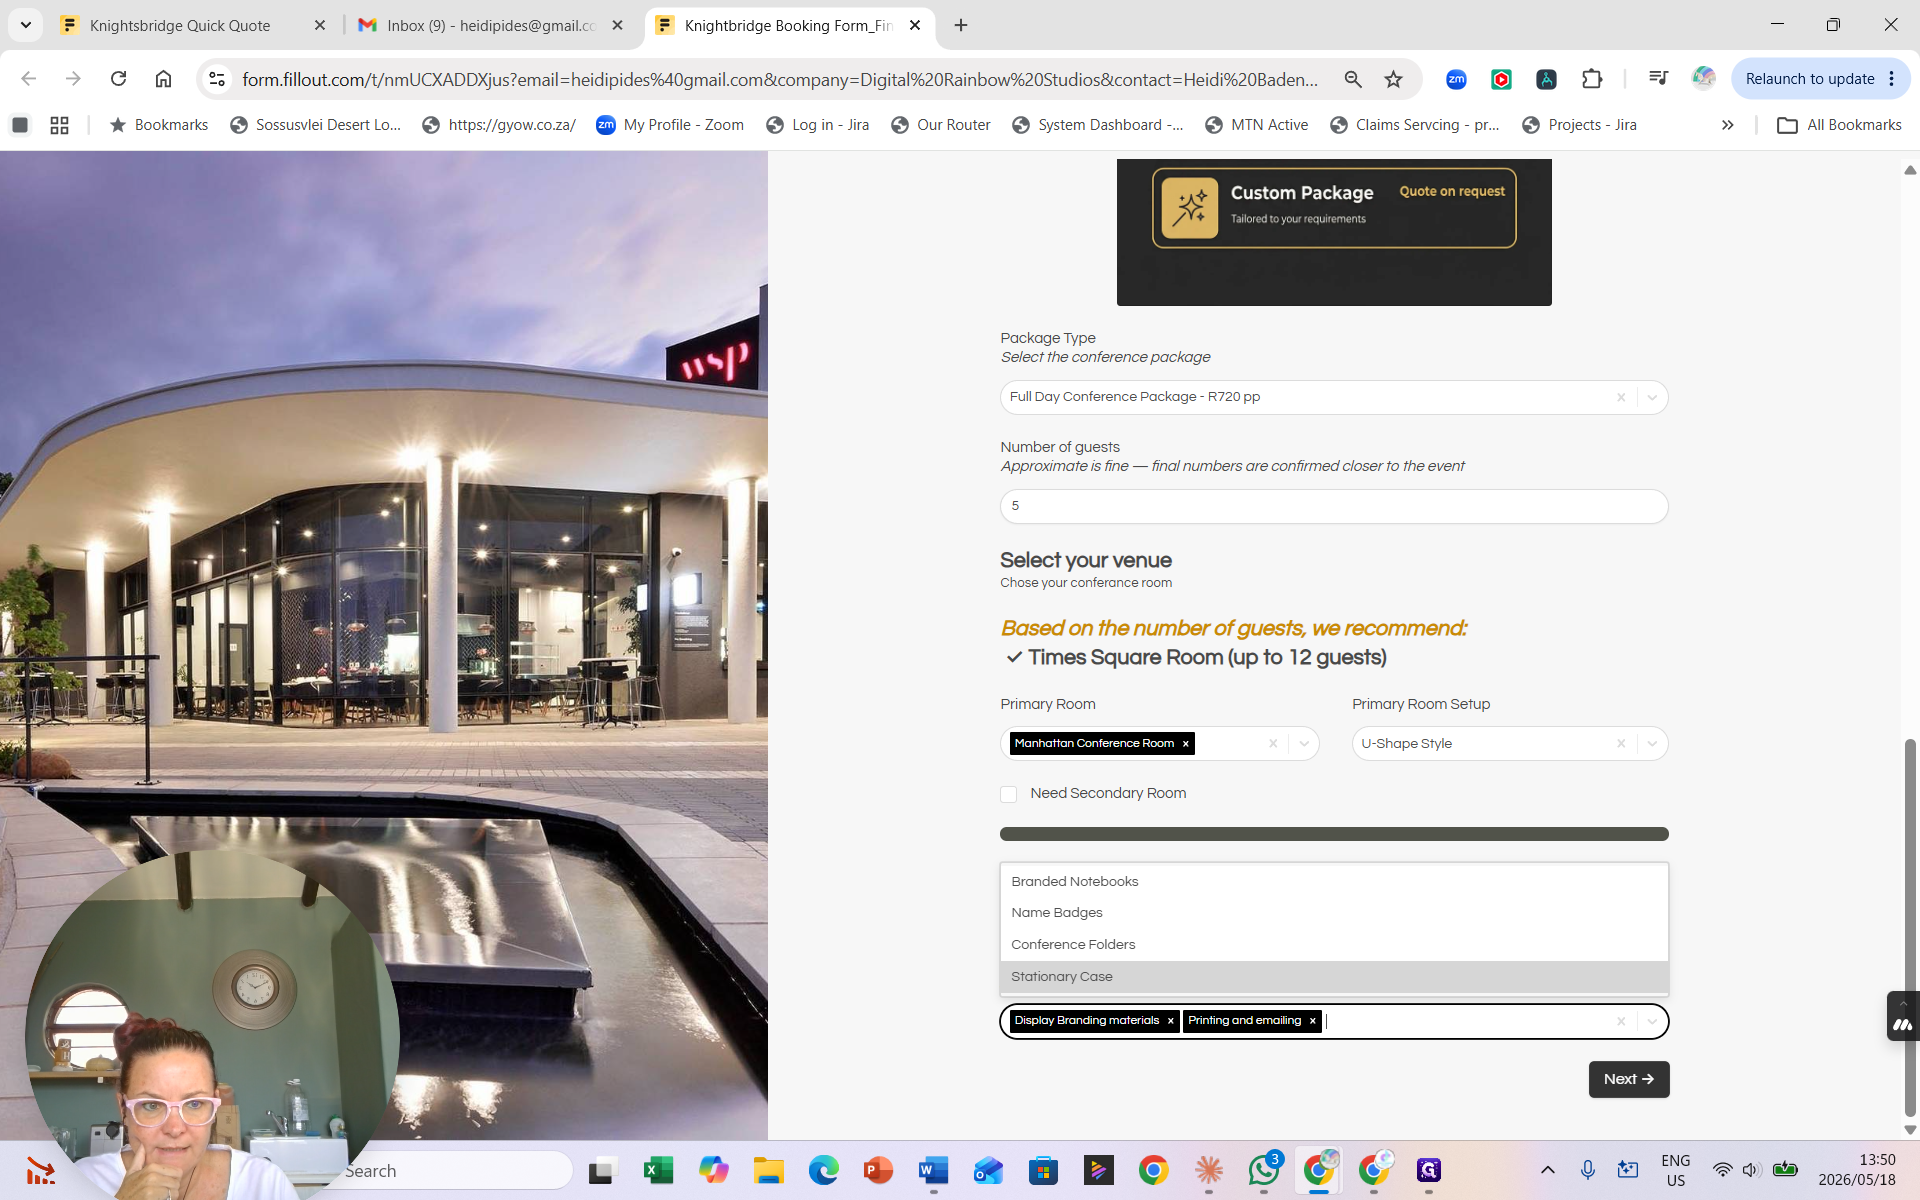
10
Select your booking type, such as a Conference Package.
11
Choose a Primary Room Setup from the dropdown menu (e.g., U - Shape Style).
12
If you require a registration desk, specify its location (e.g., Setup - Inside).
13
Select any Additional Conference Services you need, such as Display Branding materials or Printing and emailing.
14
Click Next → to open the AV configuration screen.
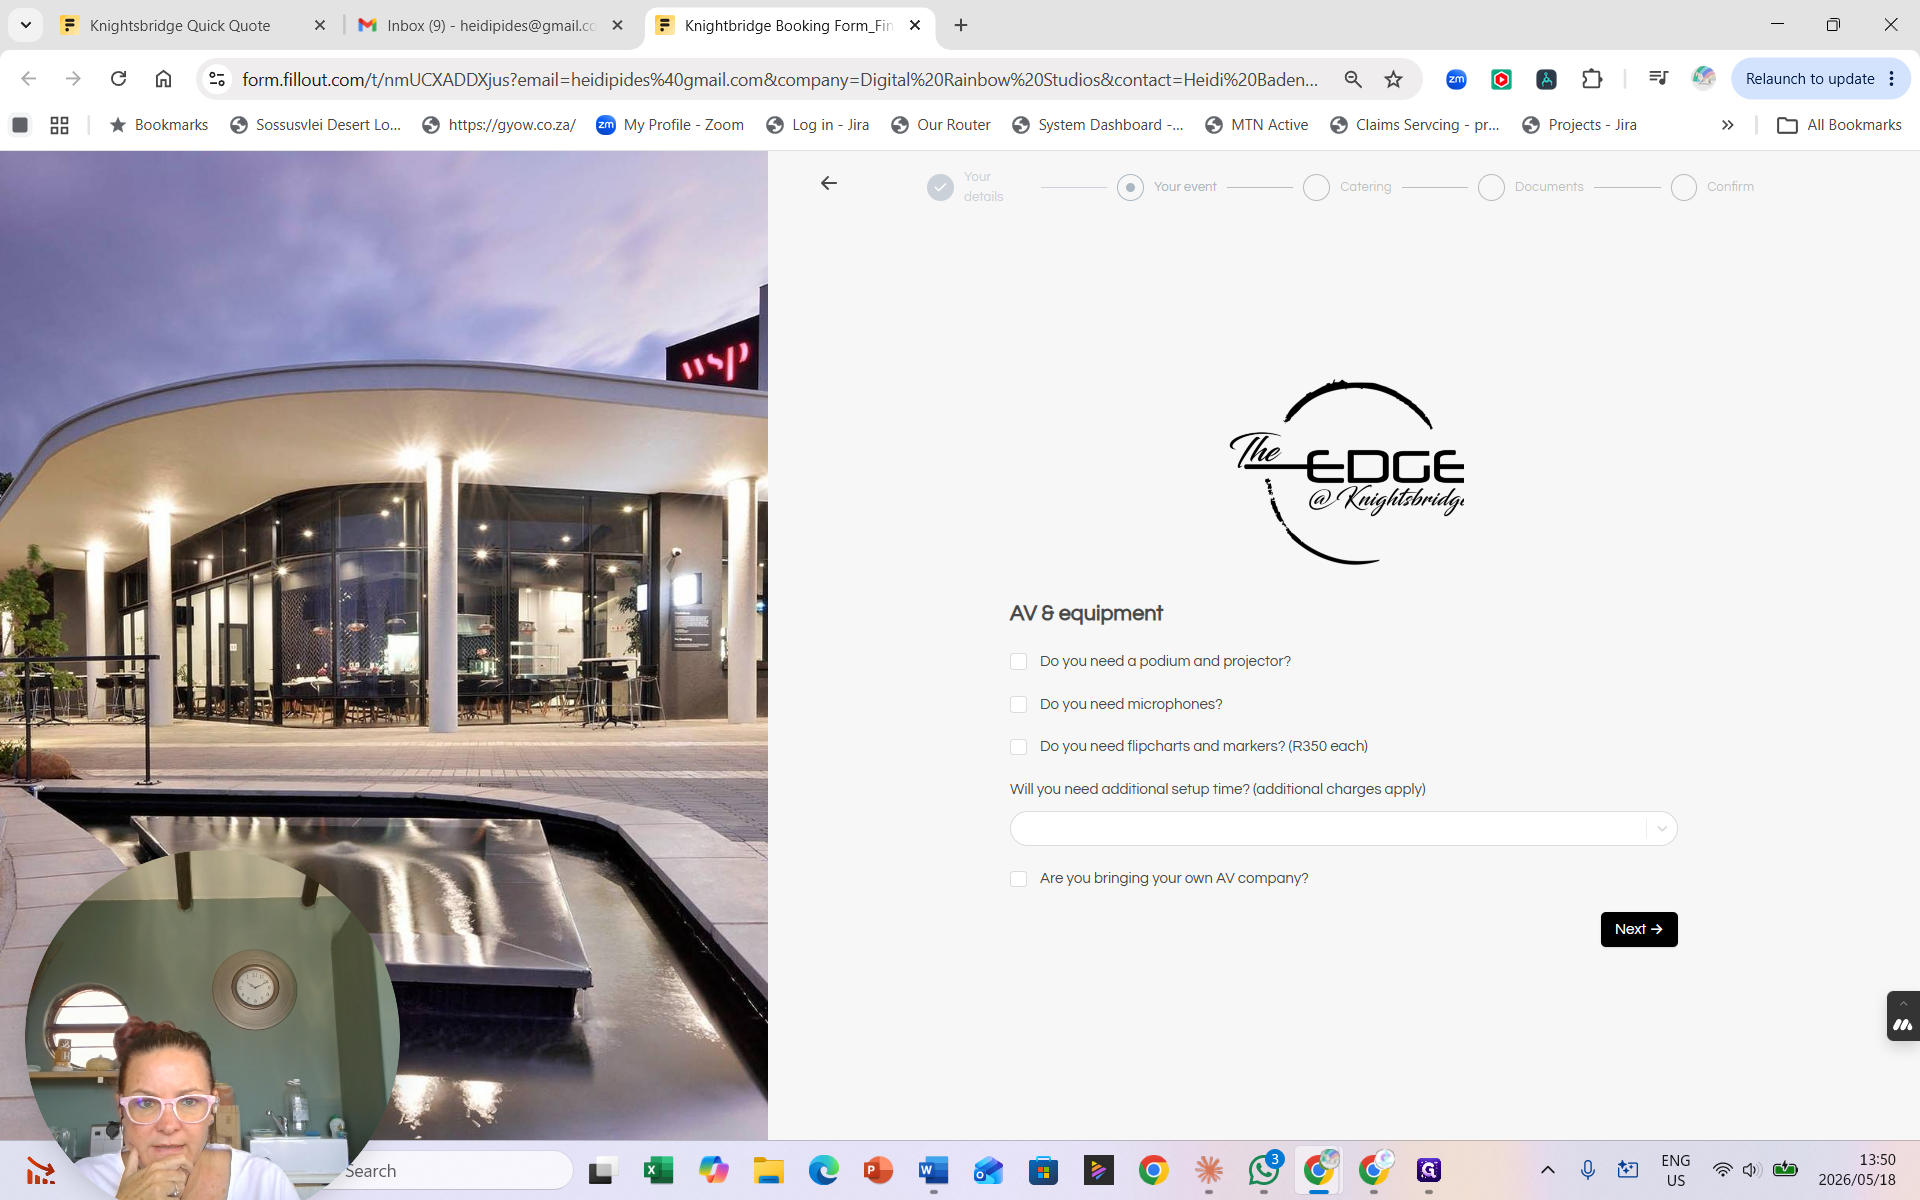
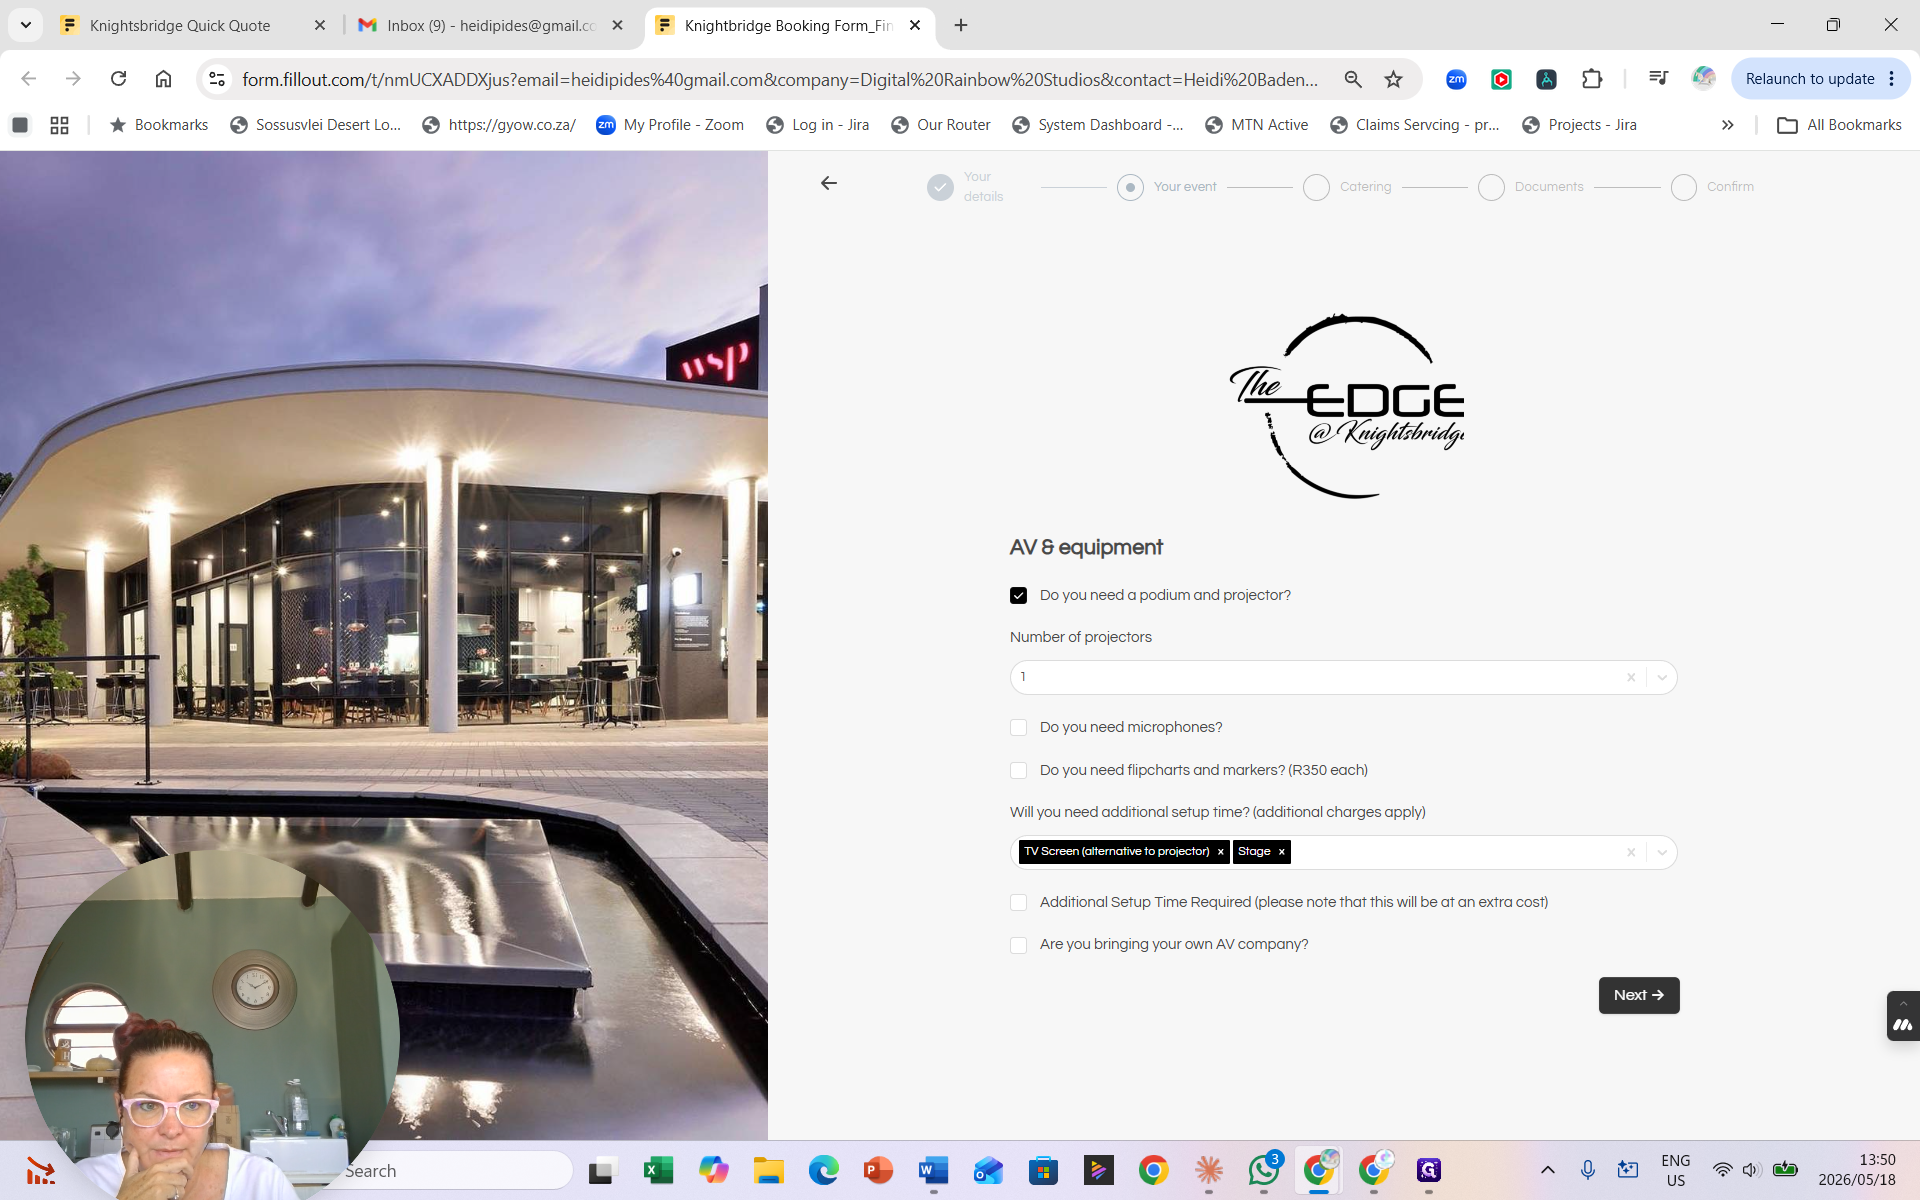
AV and Equipment
The form uses conditional logic. When you request a piece of equipment, follow-up fields will appear asking for quantities or specific configurations.
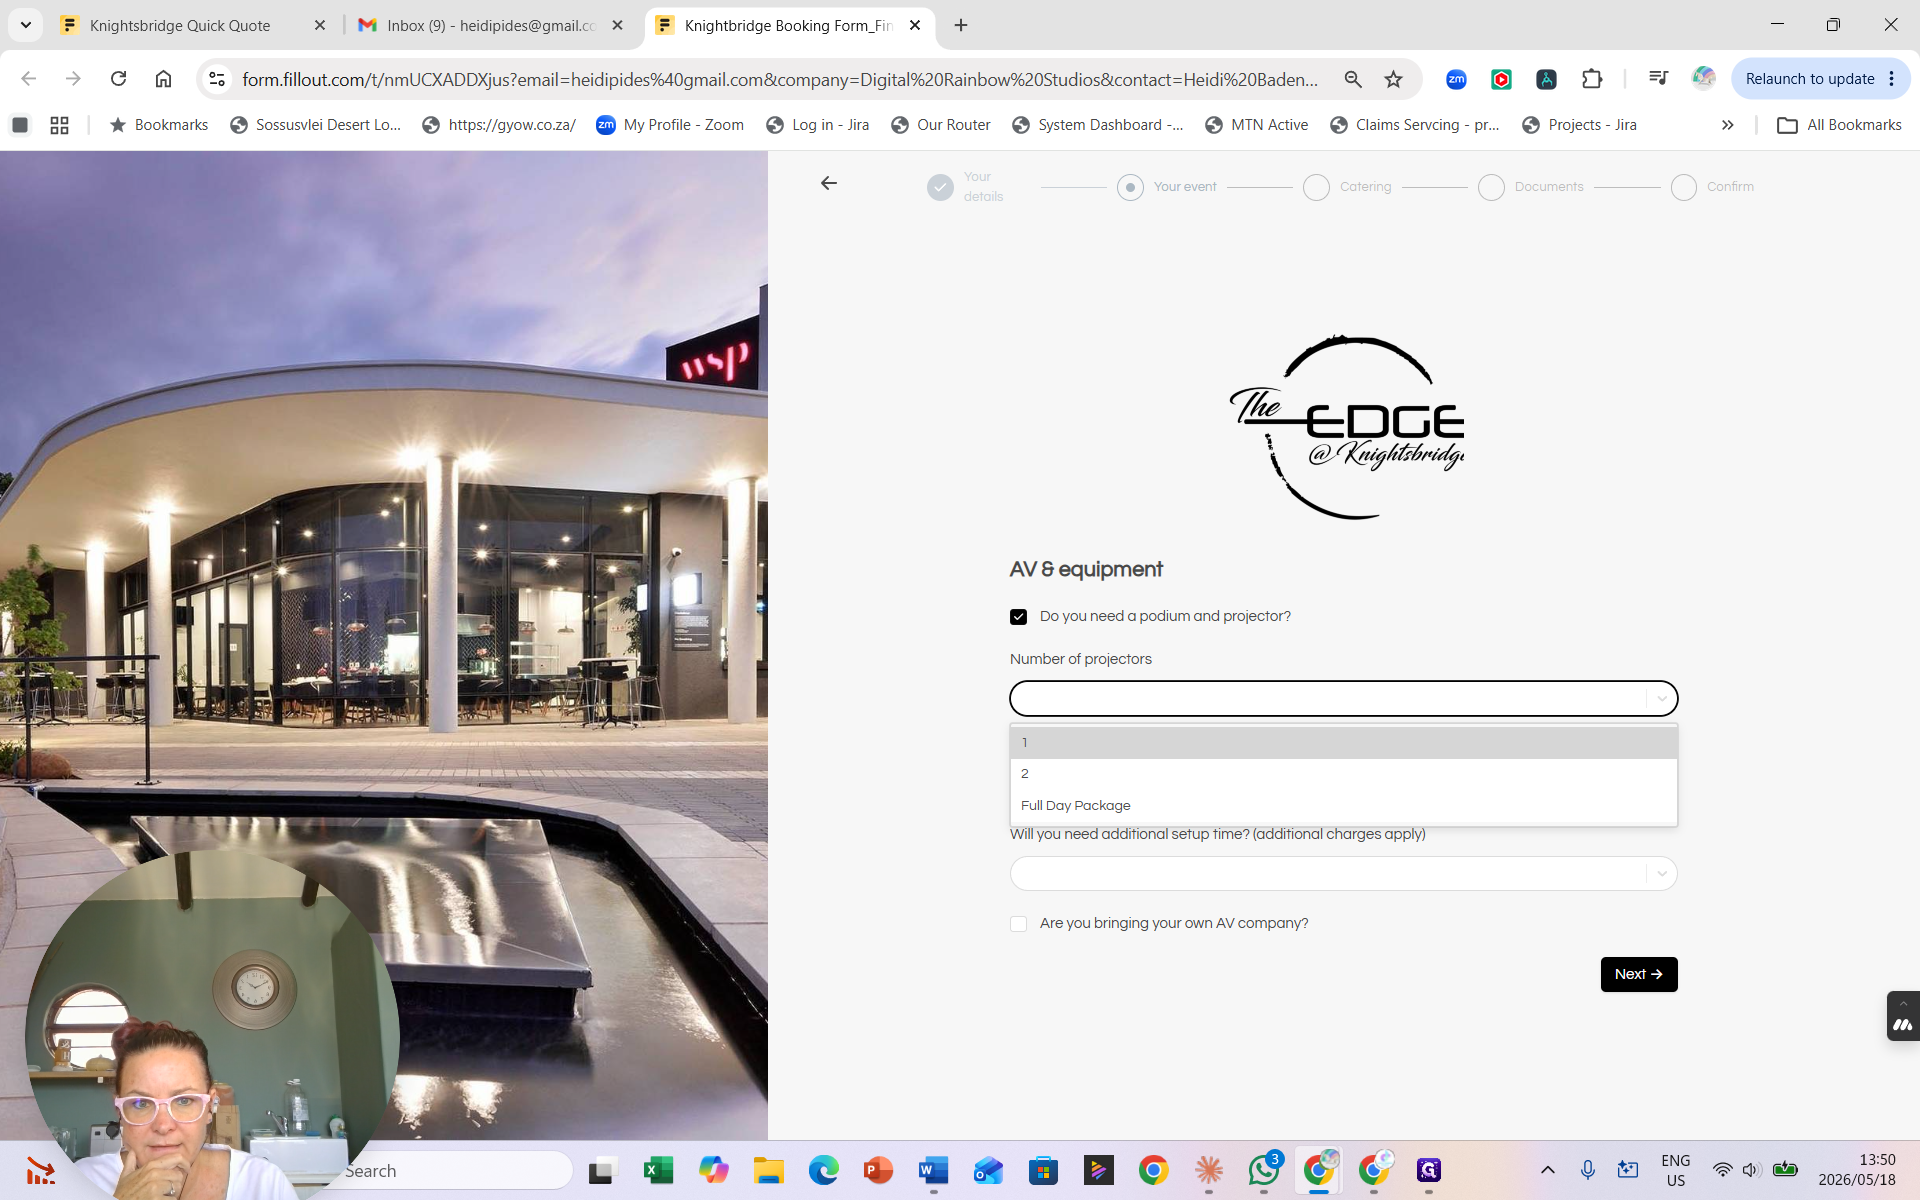
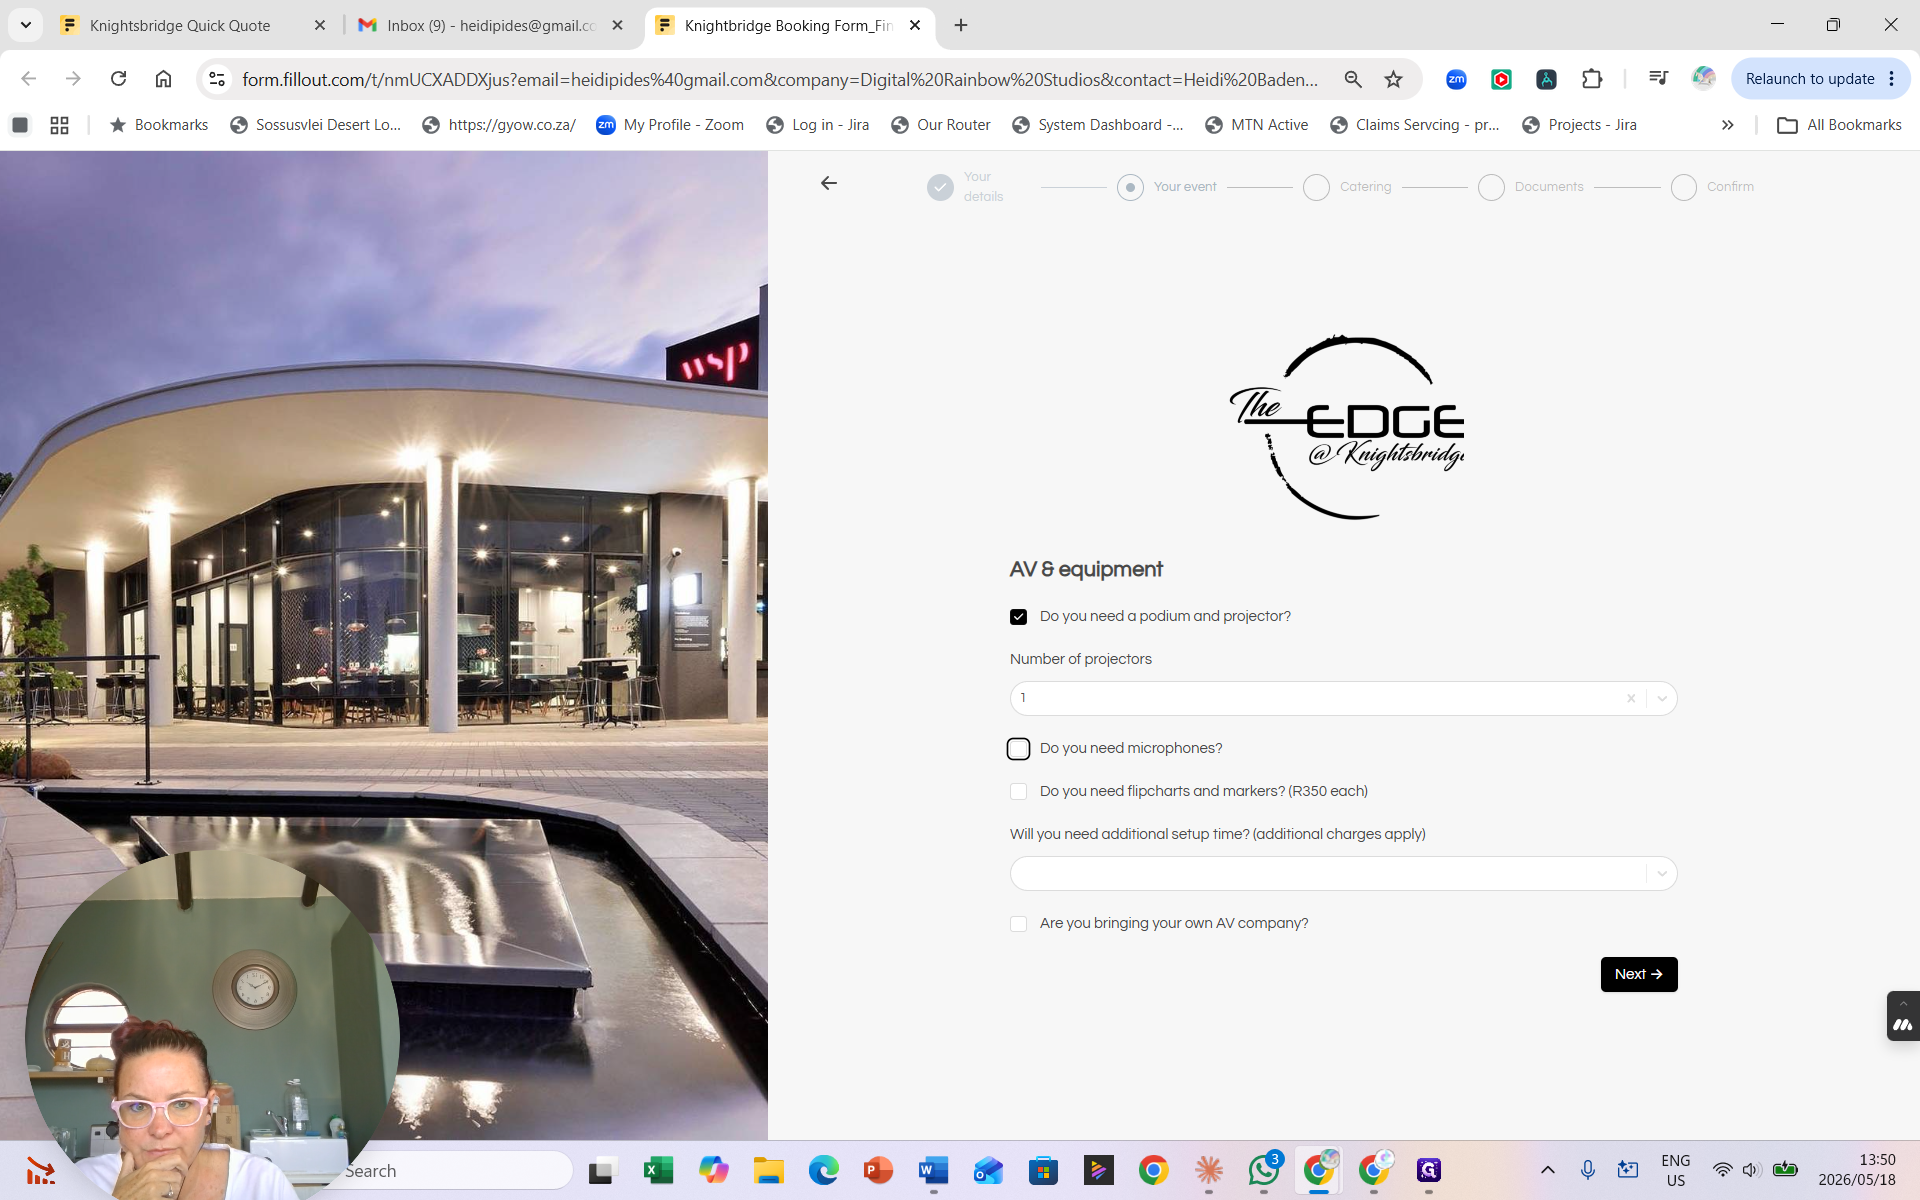
15
Check the box if you need a podium and projector.
16
Specify the number of projectors required.
17
Check the corresponding box if you require flipcharts and markers.
18
Select any alternative AV requirements from the dropdown, such as a TV Screen or a Stage.
19
Click Next → to move to the catering section.
Additional complex setups, or requests to bring in an external AV company, may incur extra setup times or costs. Ensure you indicate these clearly in the form.
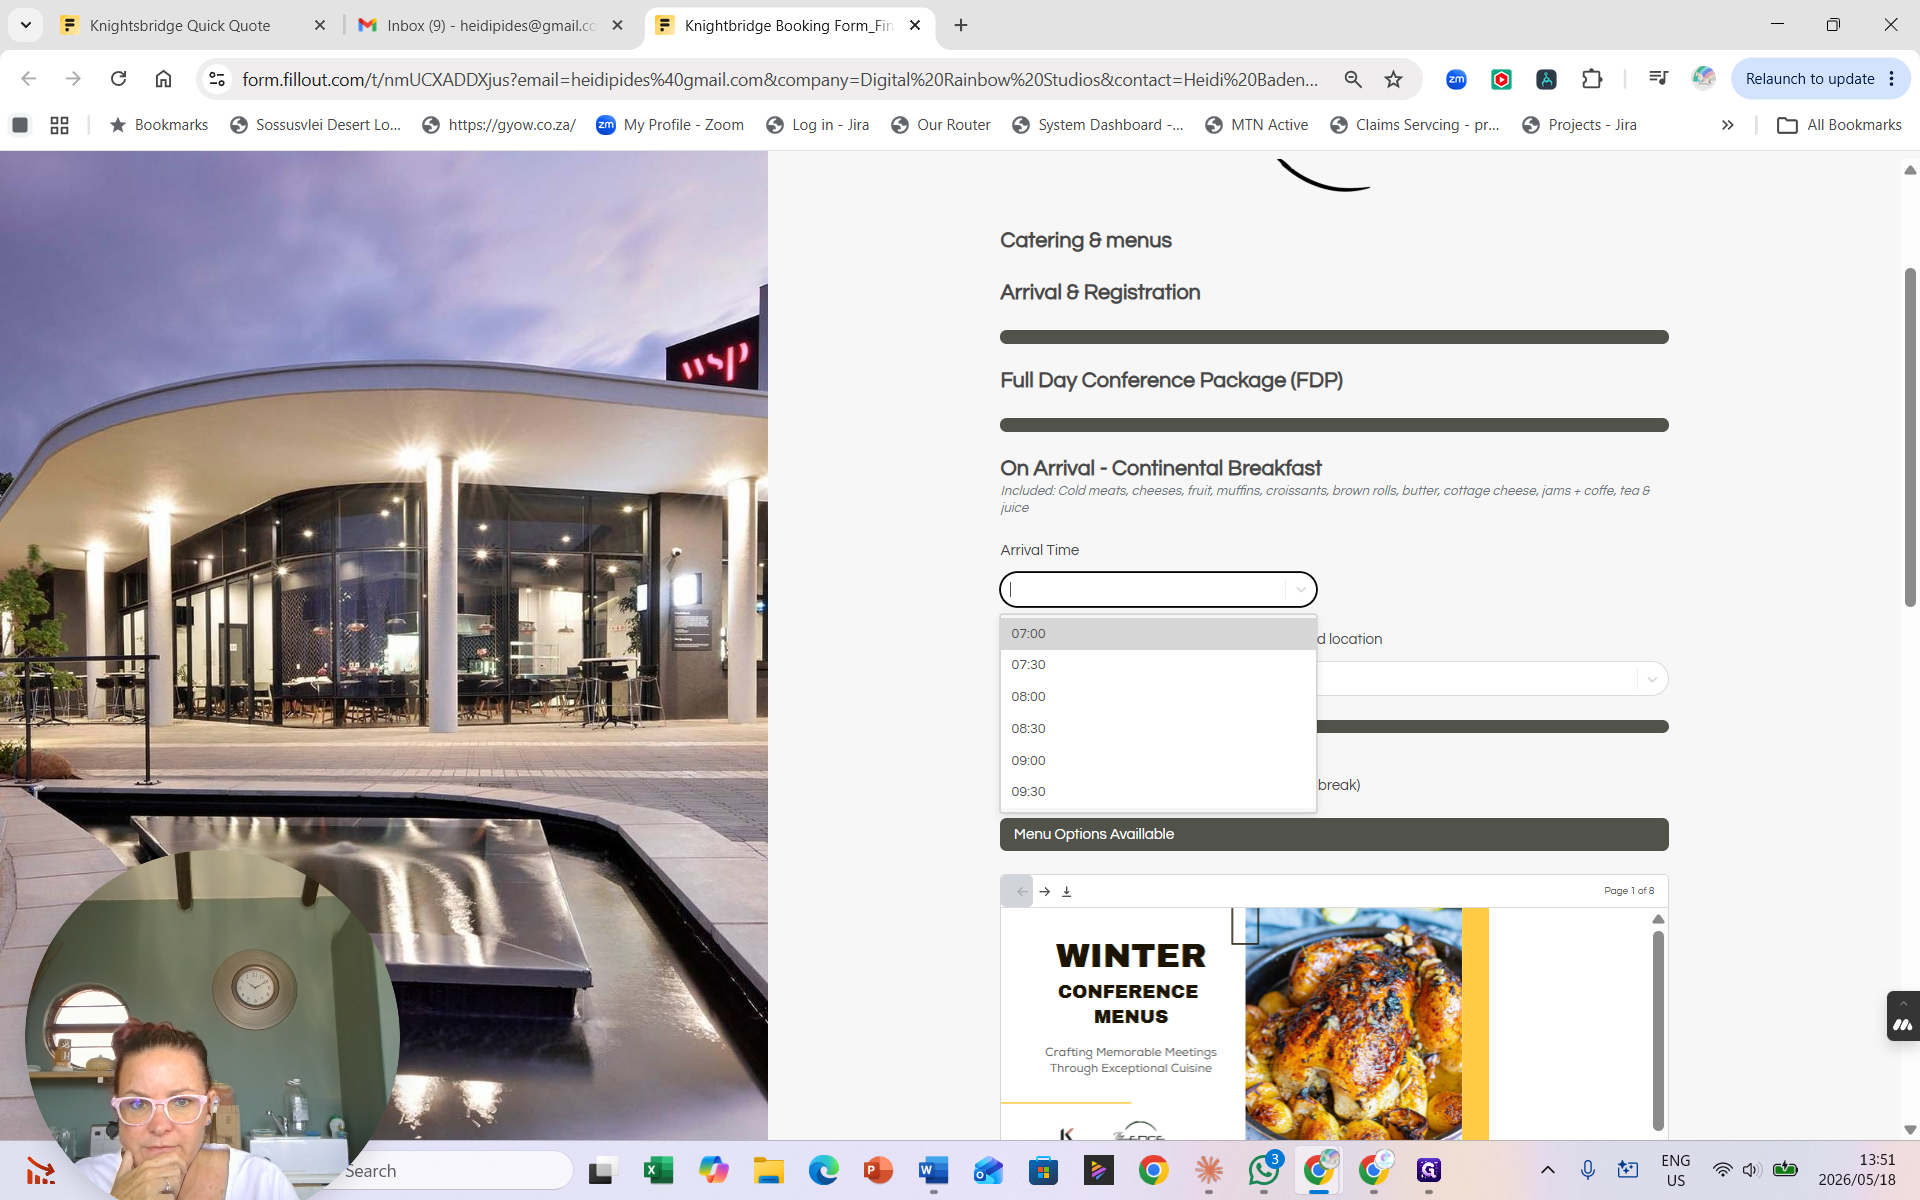
Catering, Menus, and Dietary Needs
Because you selected a full-day package, the form prompts you to choose menus and timings for multiple catering phases throughout the day.
Catering Phase
Details Required
Arrival
Time, Location
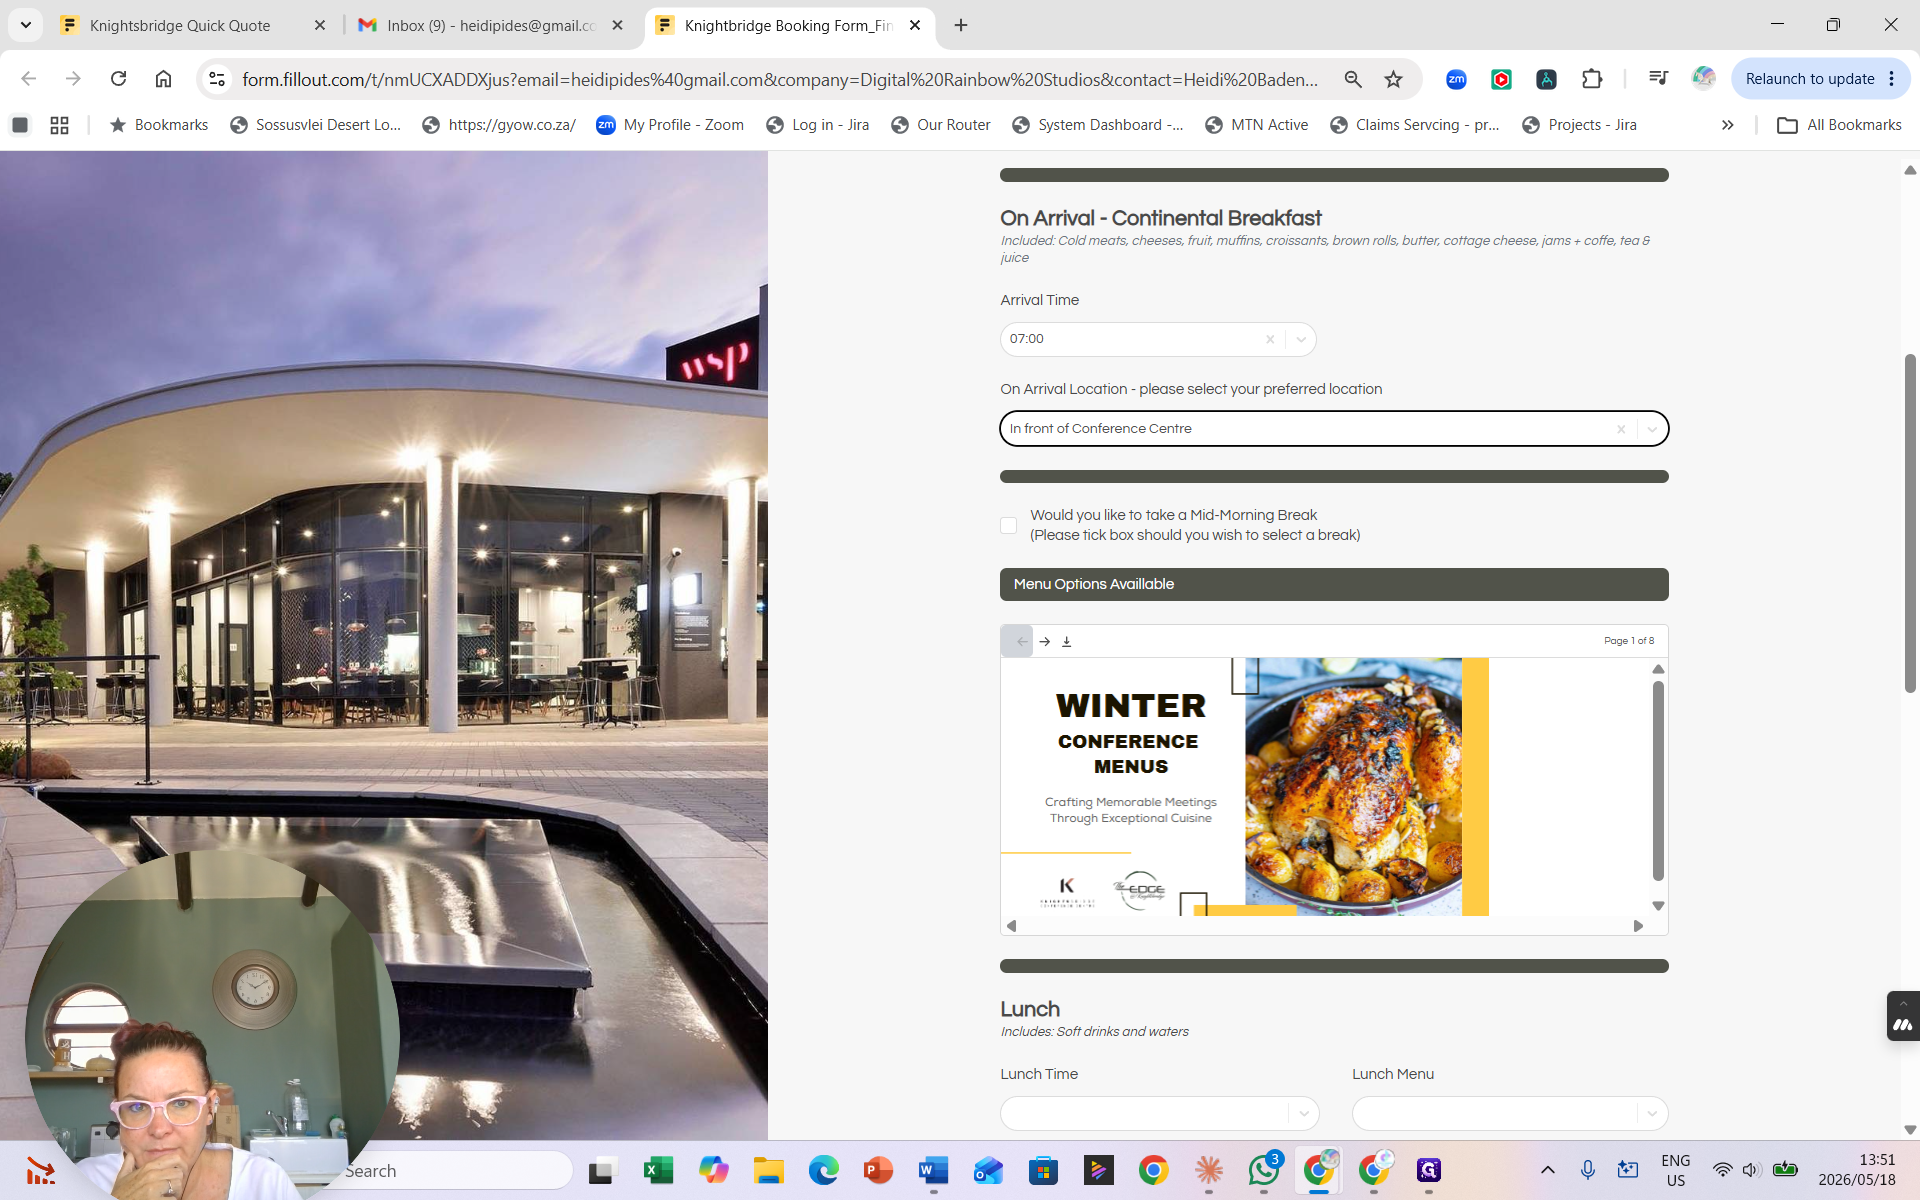
Mid-morning Break
Time, Menu selection, Location
Lunch
Time, Menu selection, Location
Beverages / Bar
Beverage types, Budget allocation (per person)
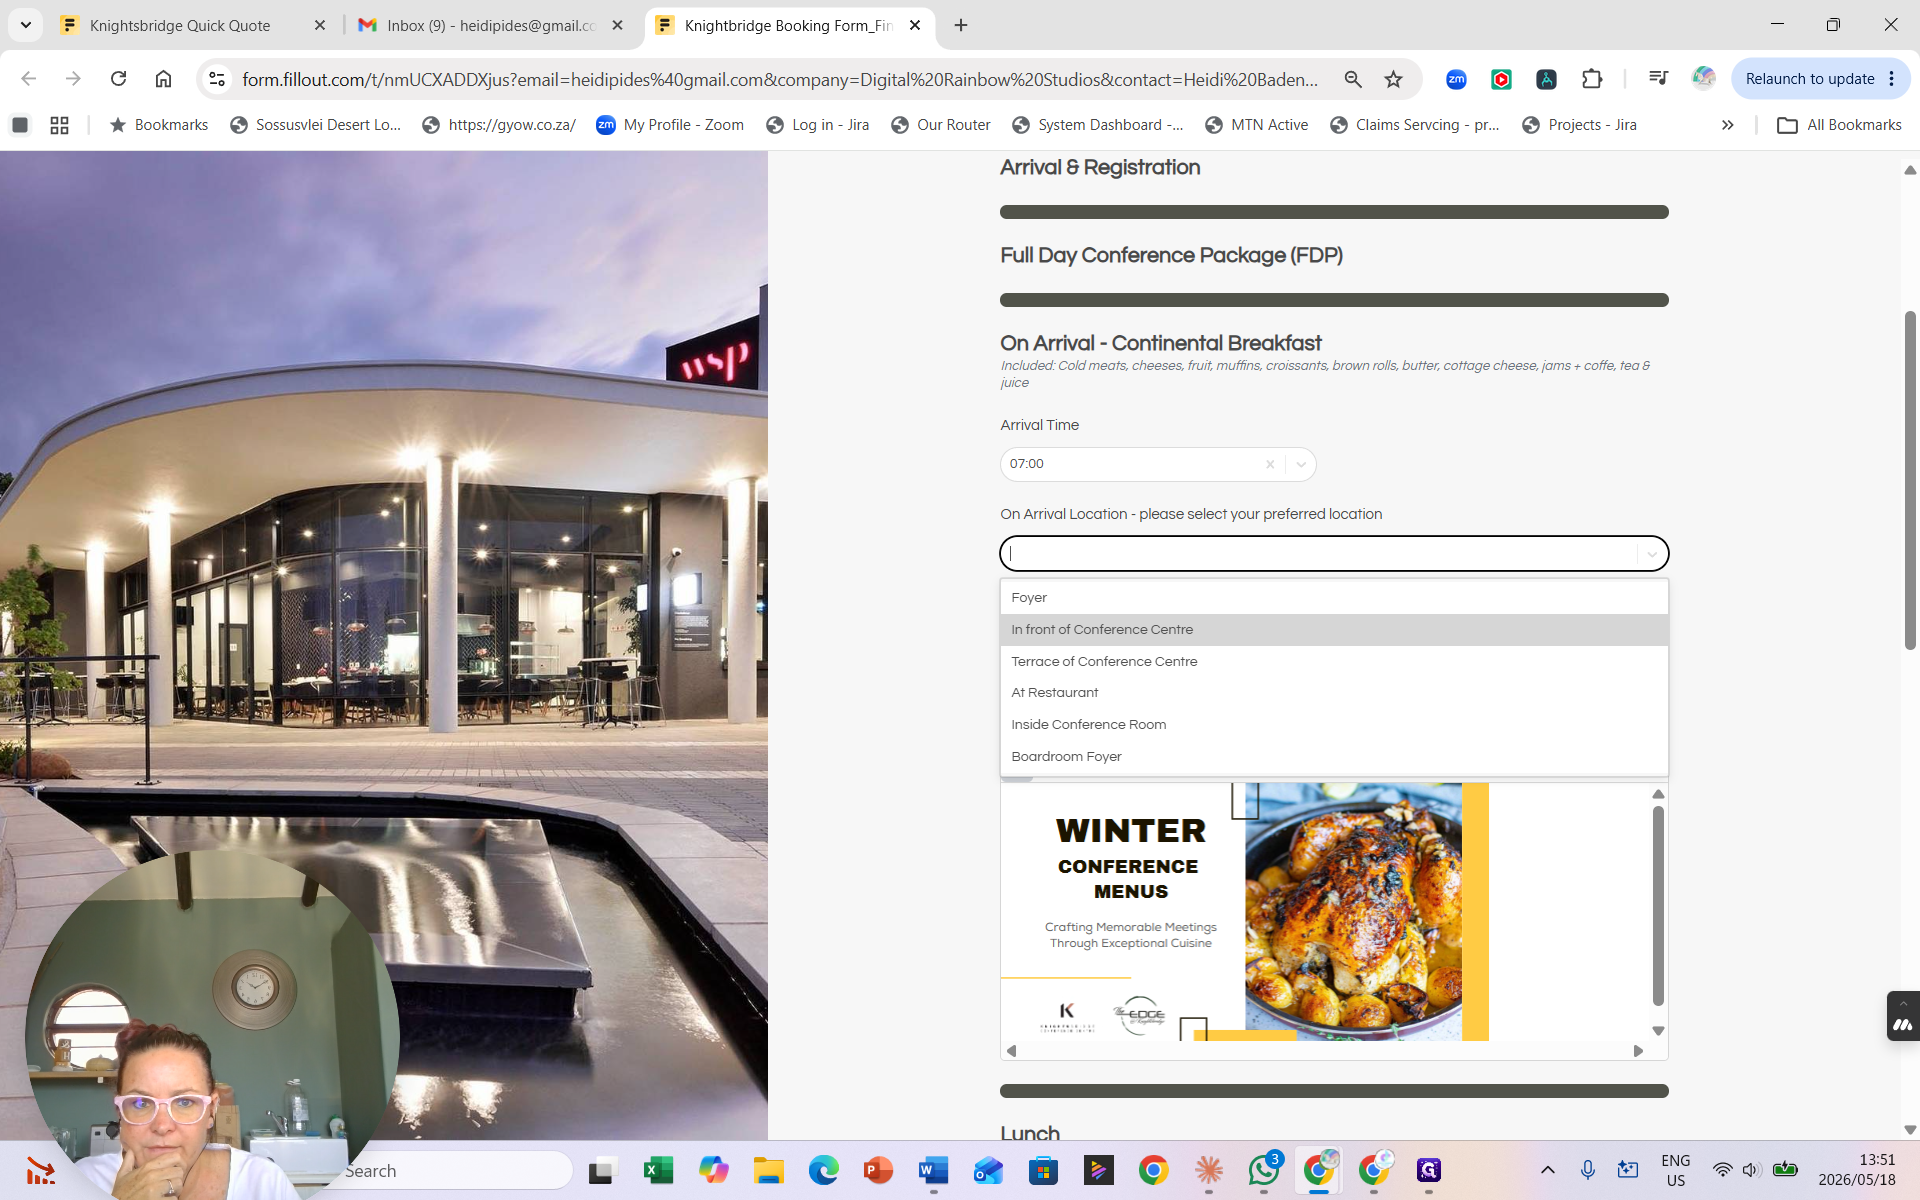
20
Select the Arrival Time for morning refreshments.
21
Choose the Arrival Location (e.g., In front of Conference Centre).
22
Use the embedded document viewer to scroll through the seasonal menu options.
23
Select the Mid-morning Break Time.
24
Choose your preferred Mid-morning Break Menu (e.g., The Coffee and Comfort Menu).
25
Select the location for the mid-morning break.
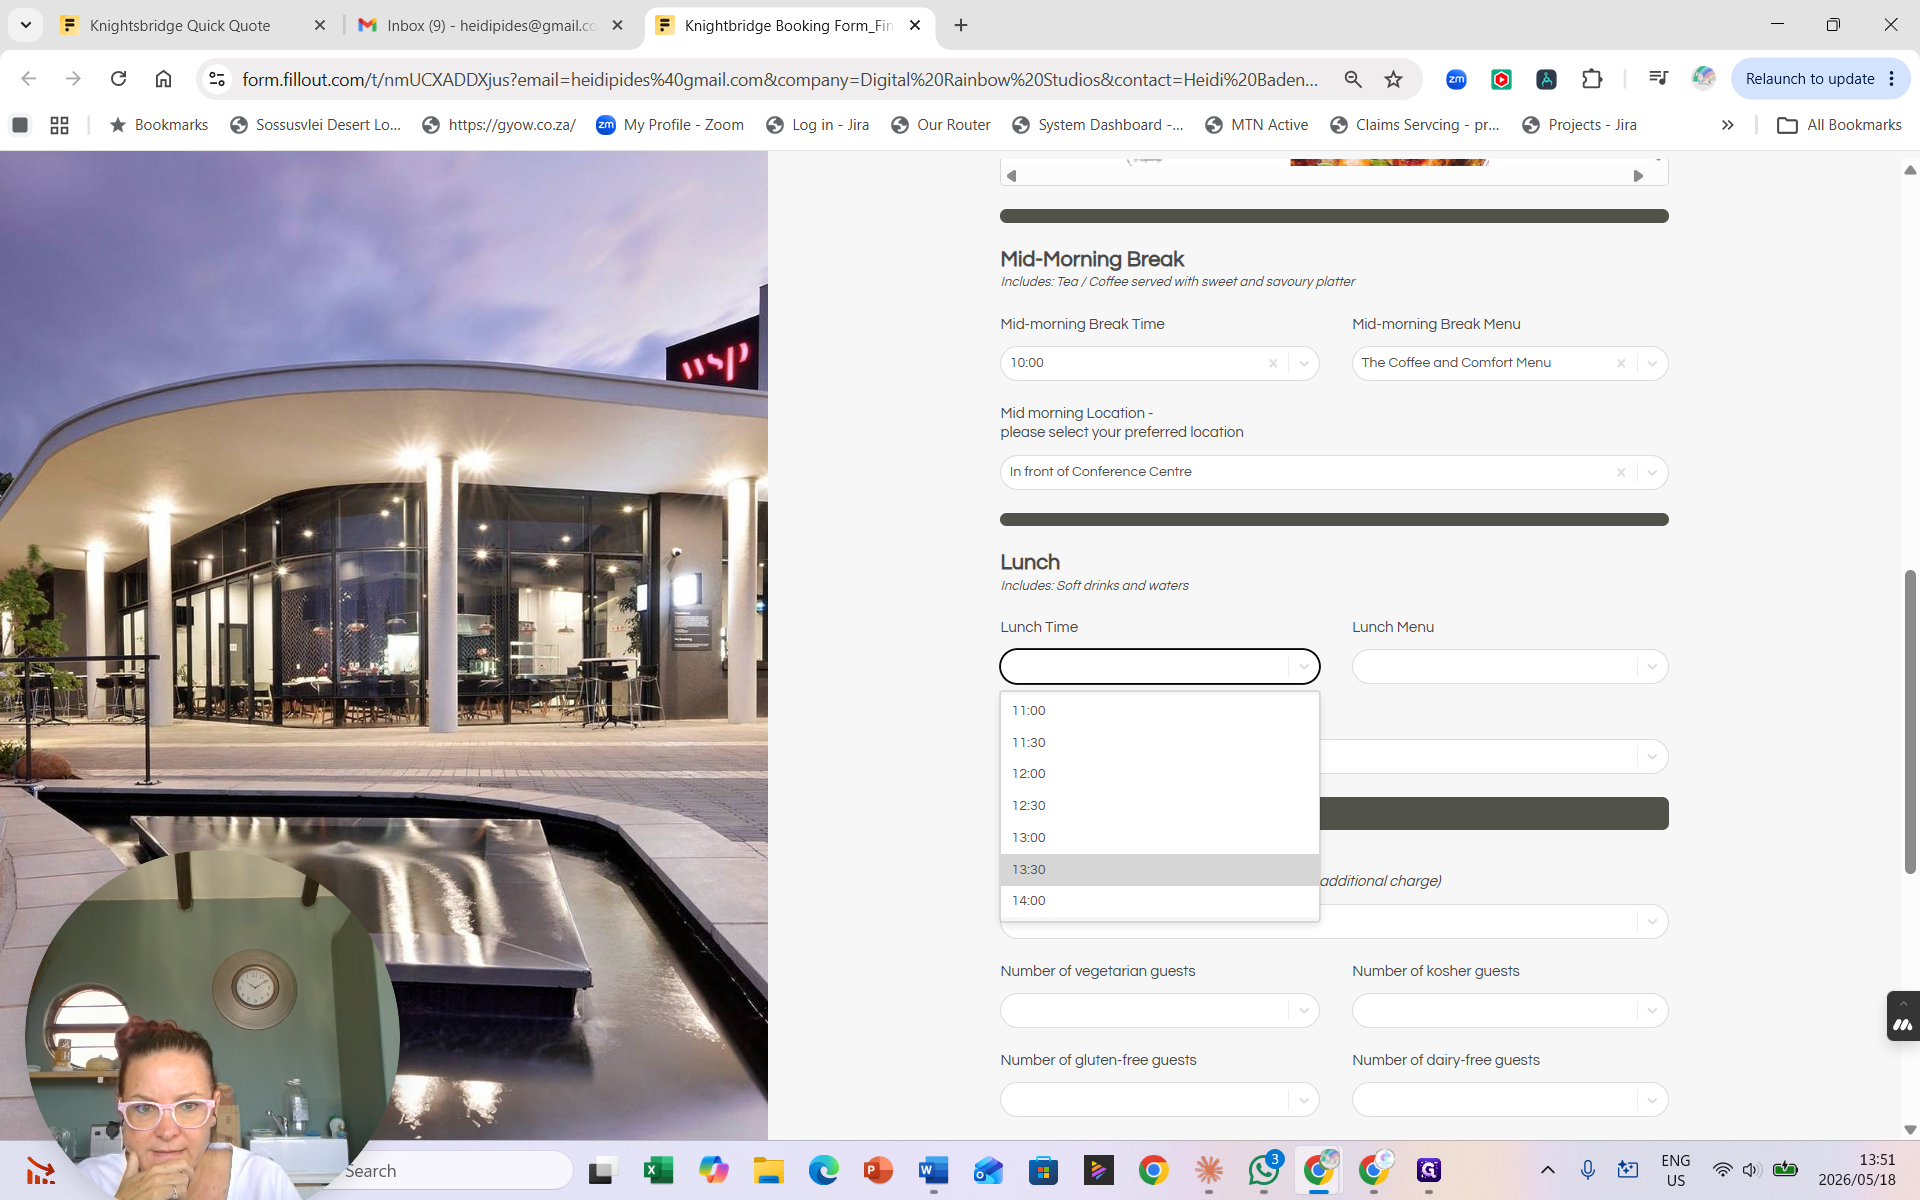
26
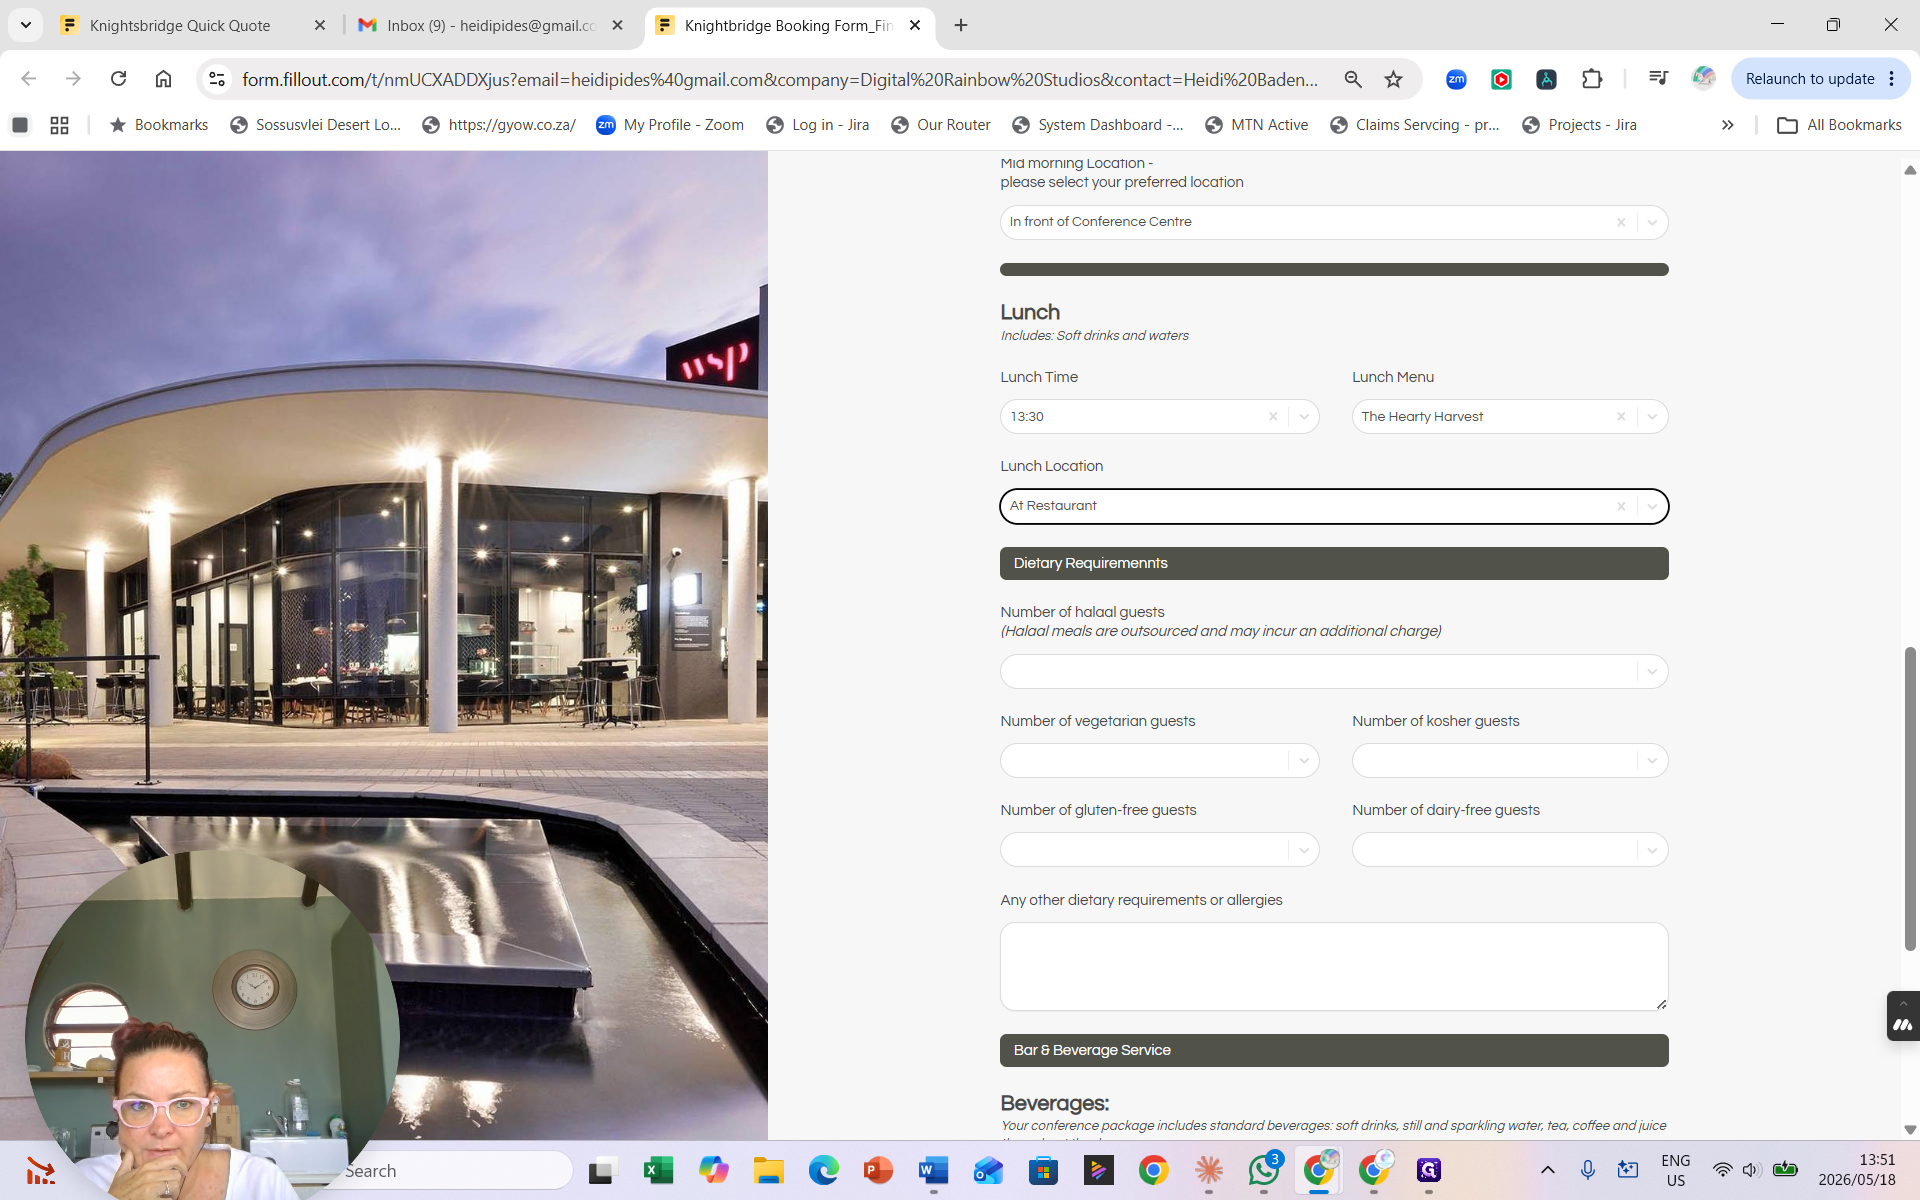
Repeat this process to configure your Lunch Time, Lunch Menu (e.g., The Hearty Harvest), and Lunch Location.
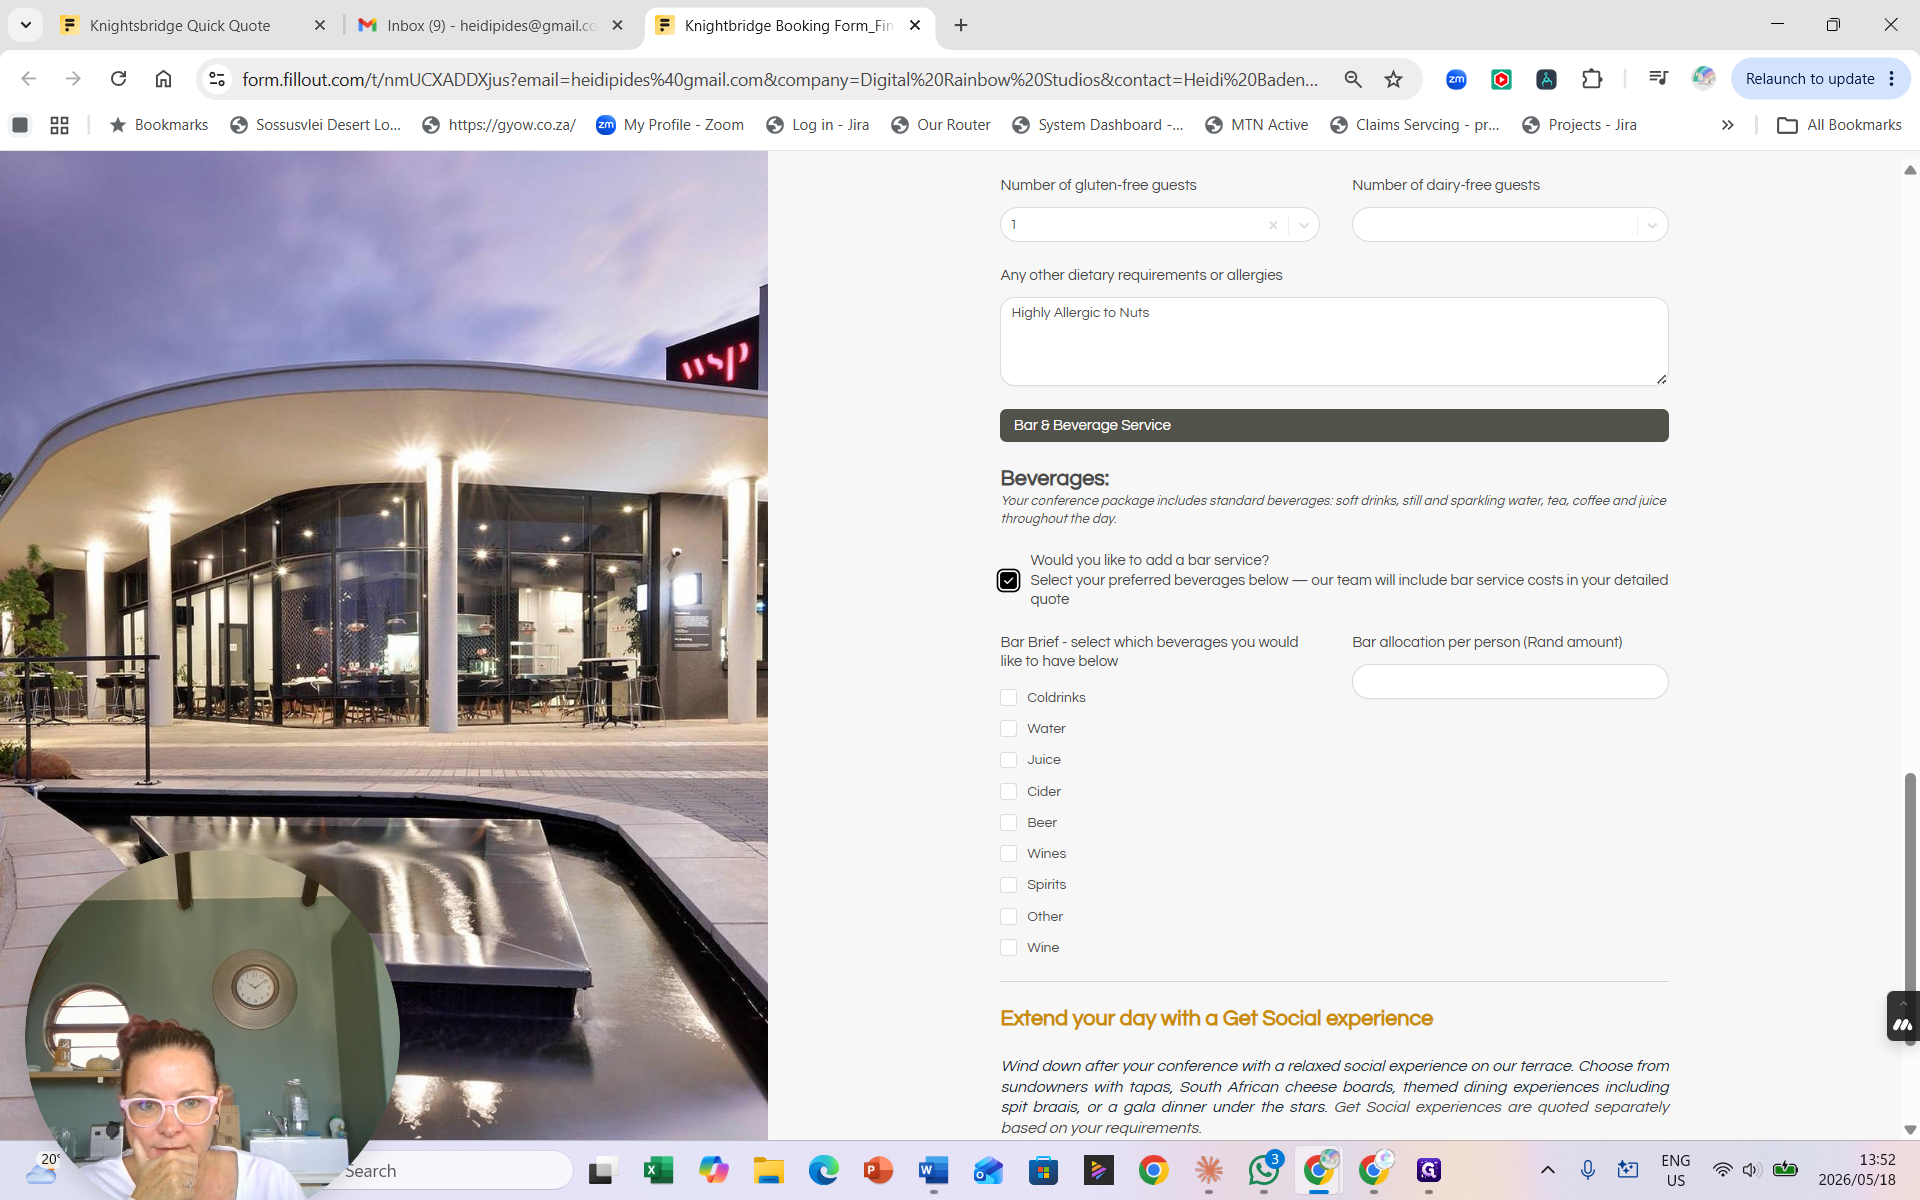
Dietary Requirements
27
Enter the exact number of guests requiring specific meals (Halaal, Vegetarian, Kosher, Gluten-free, etc.) in the provided dropdown fields.
28
Type in any highly specific allergies or additional dietary needs in the text box (e.g., Highly Allergic to Nuts).
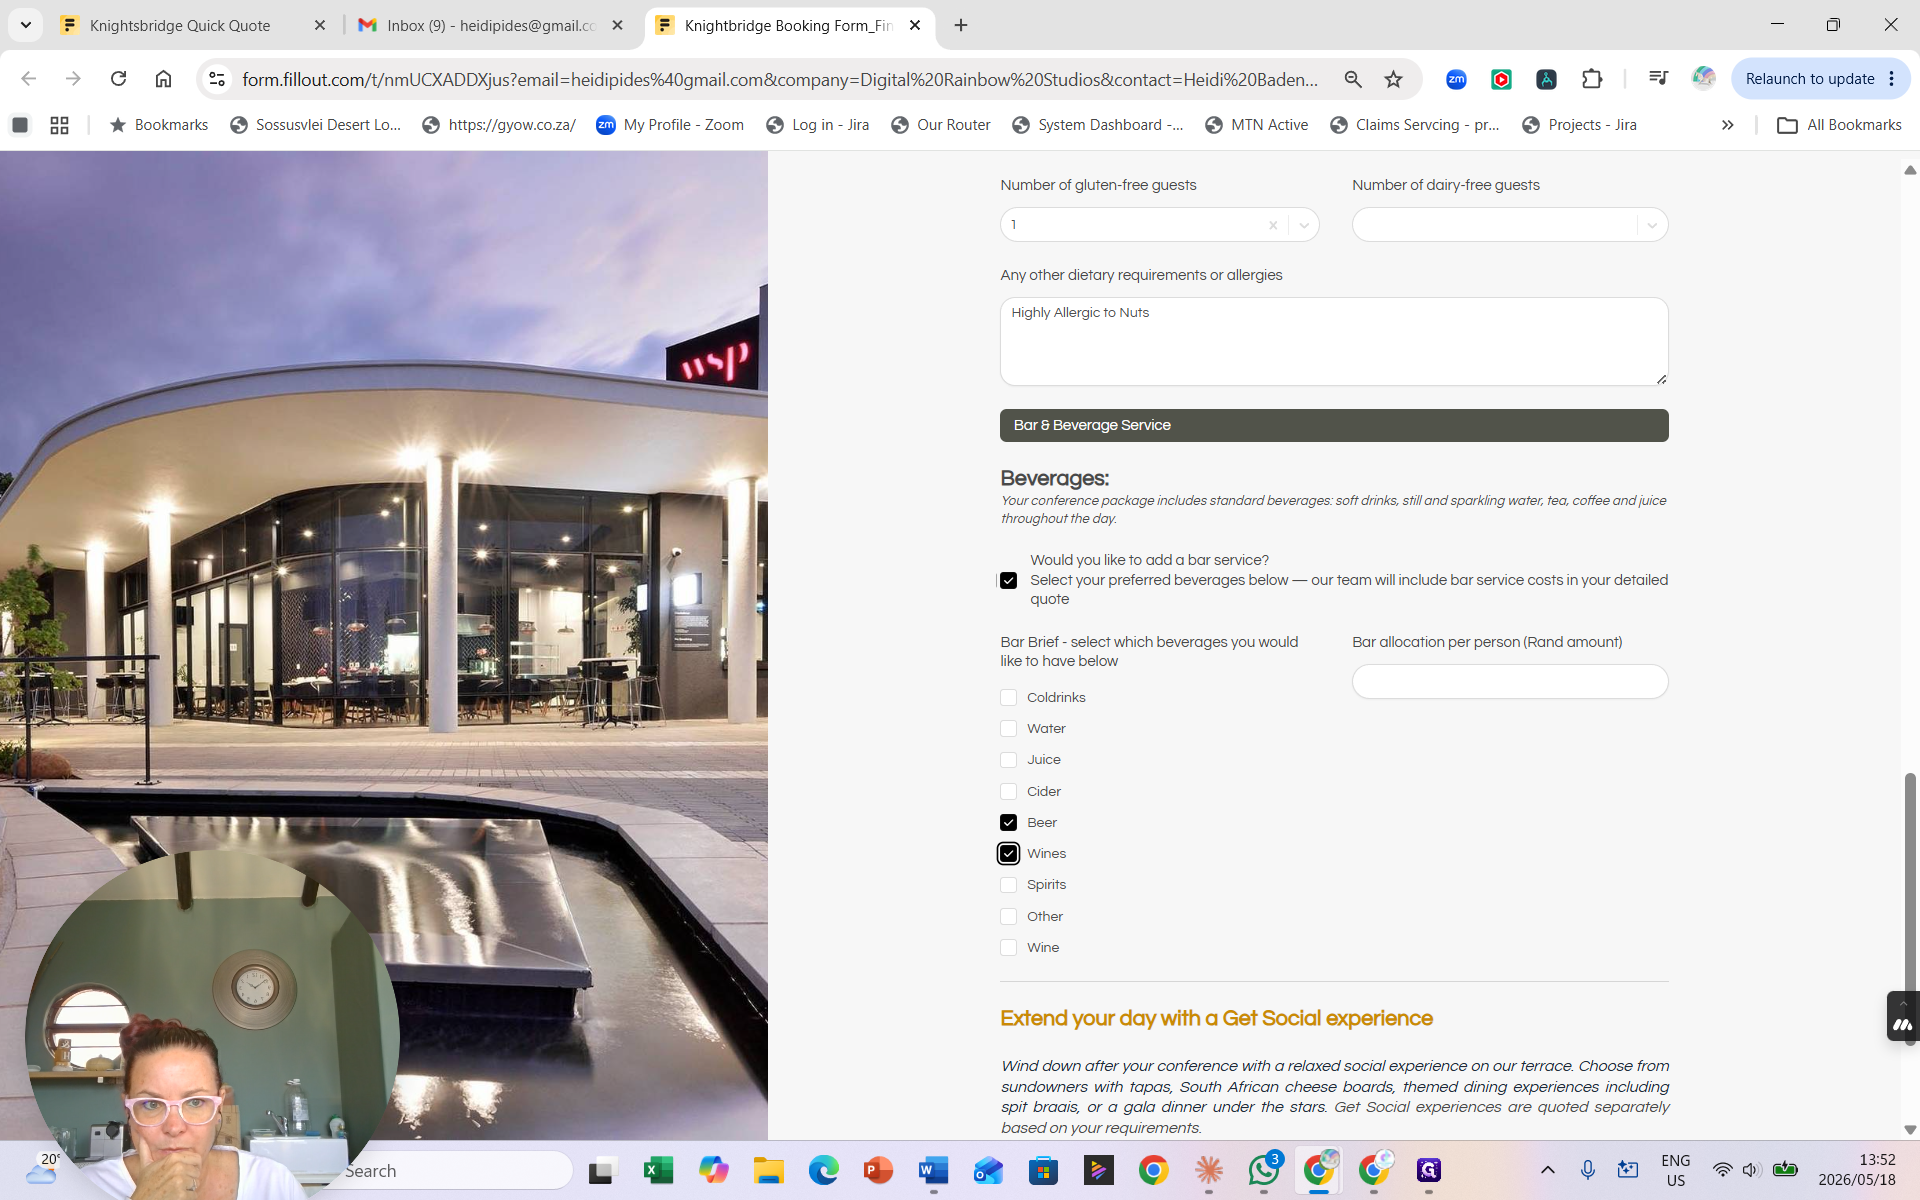
Bar Service (Optional)
29
Check the box to add a Bar & Beverage Service for post-event socializing.
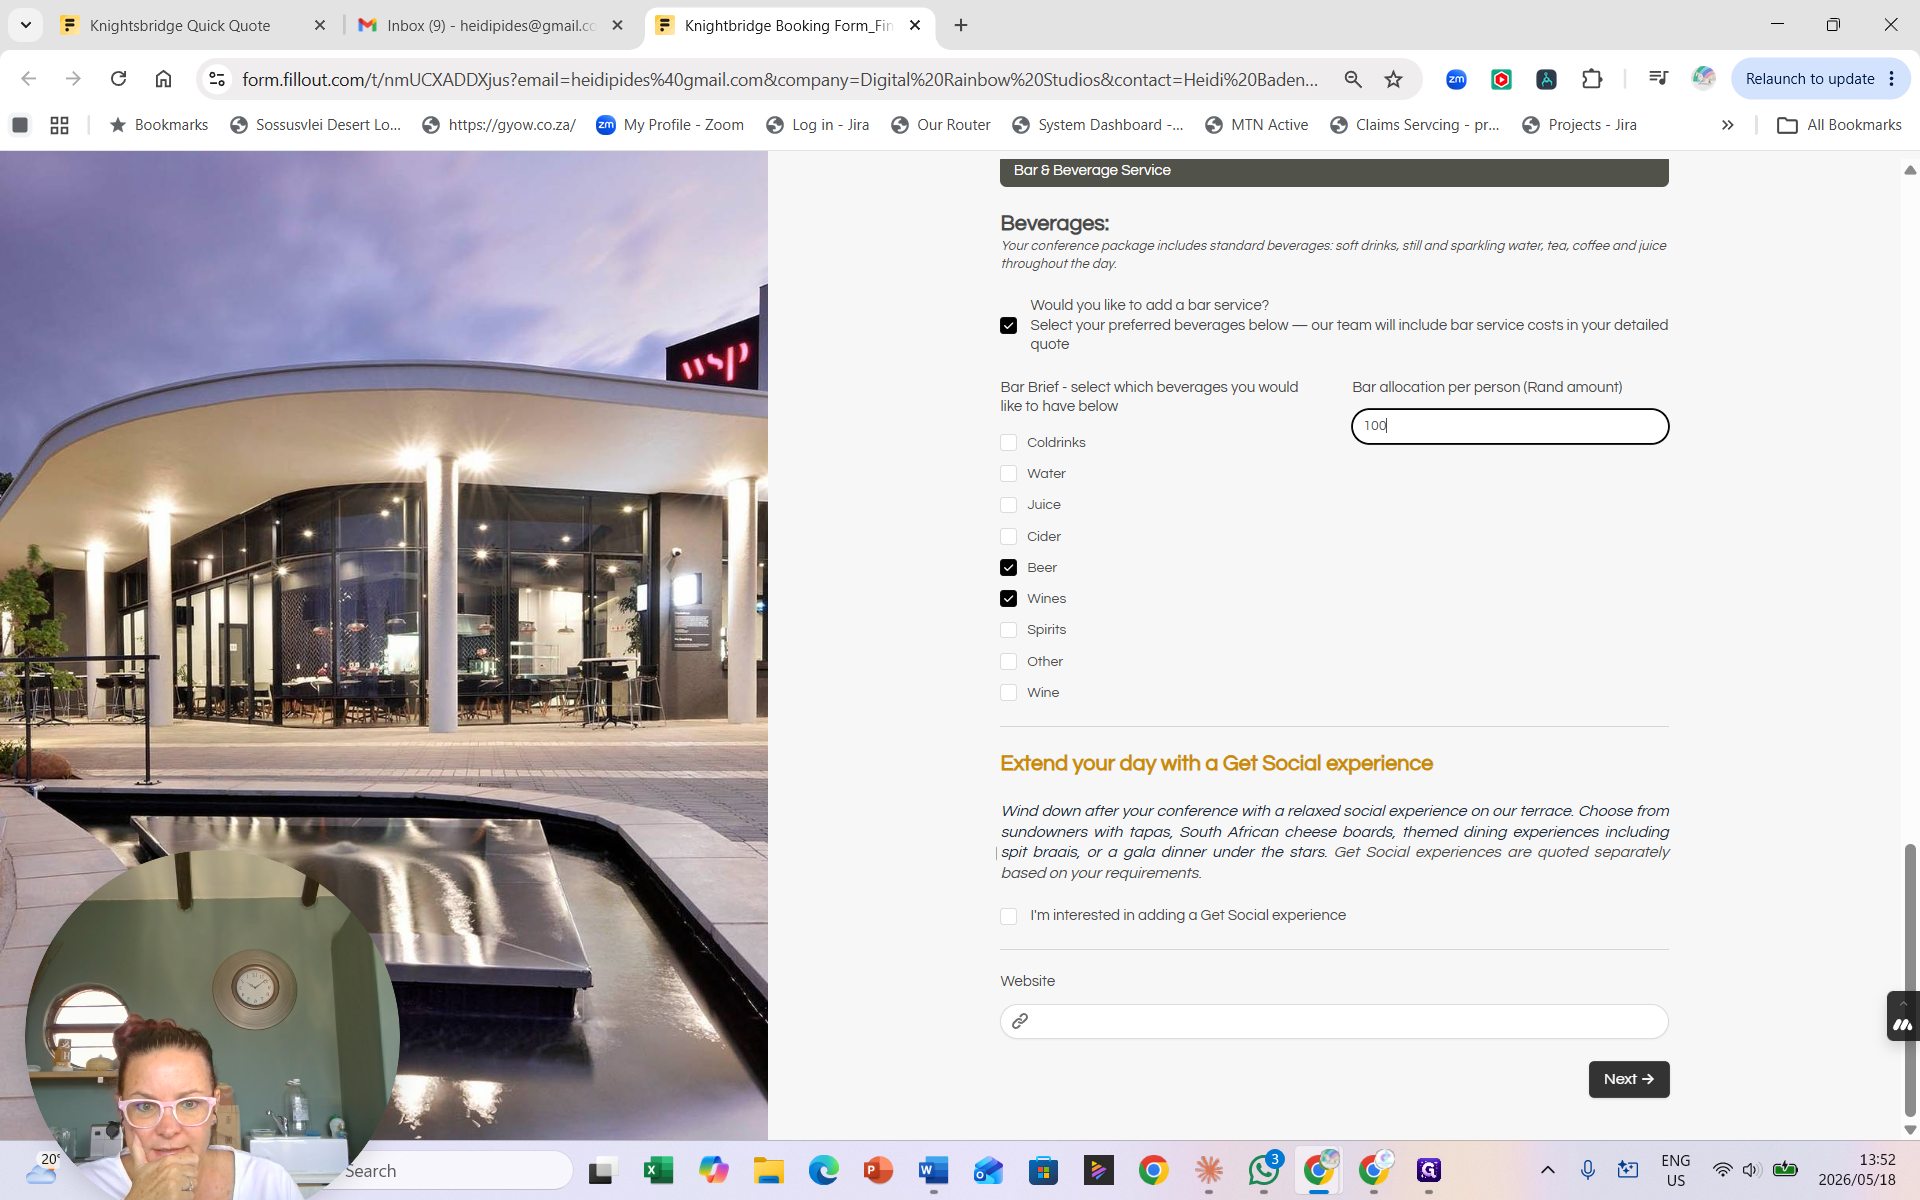
30
Select your preferred beverage categories (e.g., Wines, Beers).
31
Enter your preferred per-person budget for beverages (e.g., 100 Rand).
32
Click Next → to review logistics.
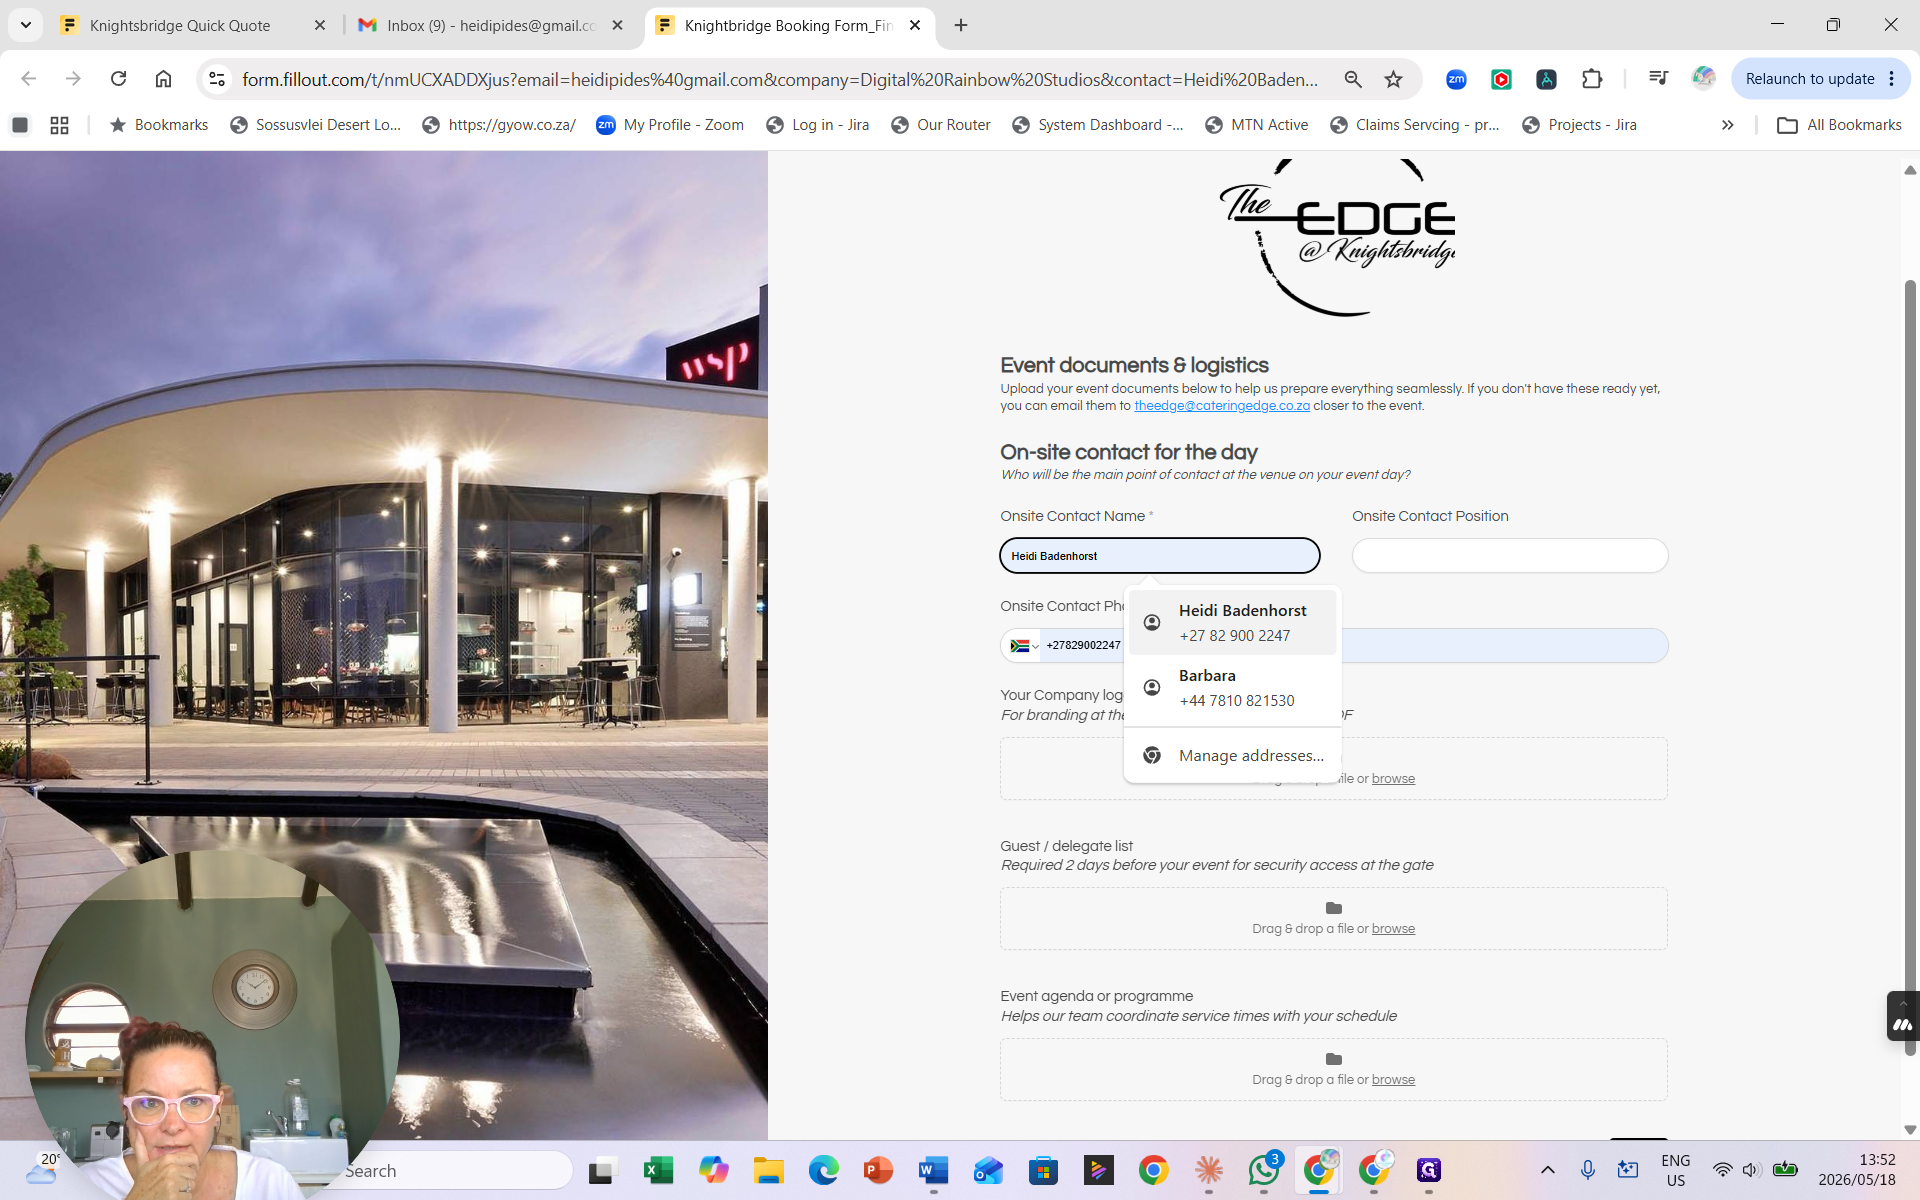
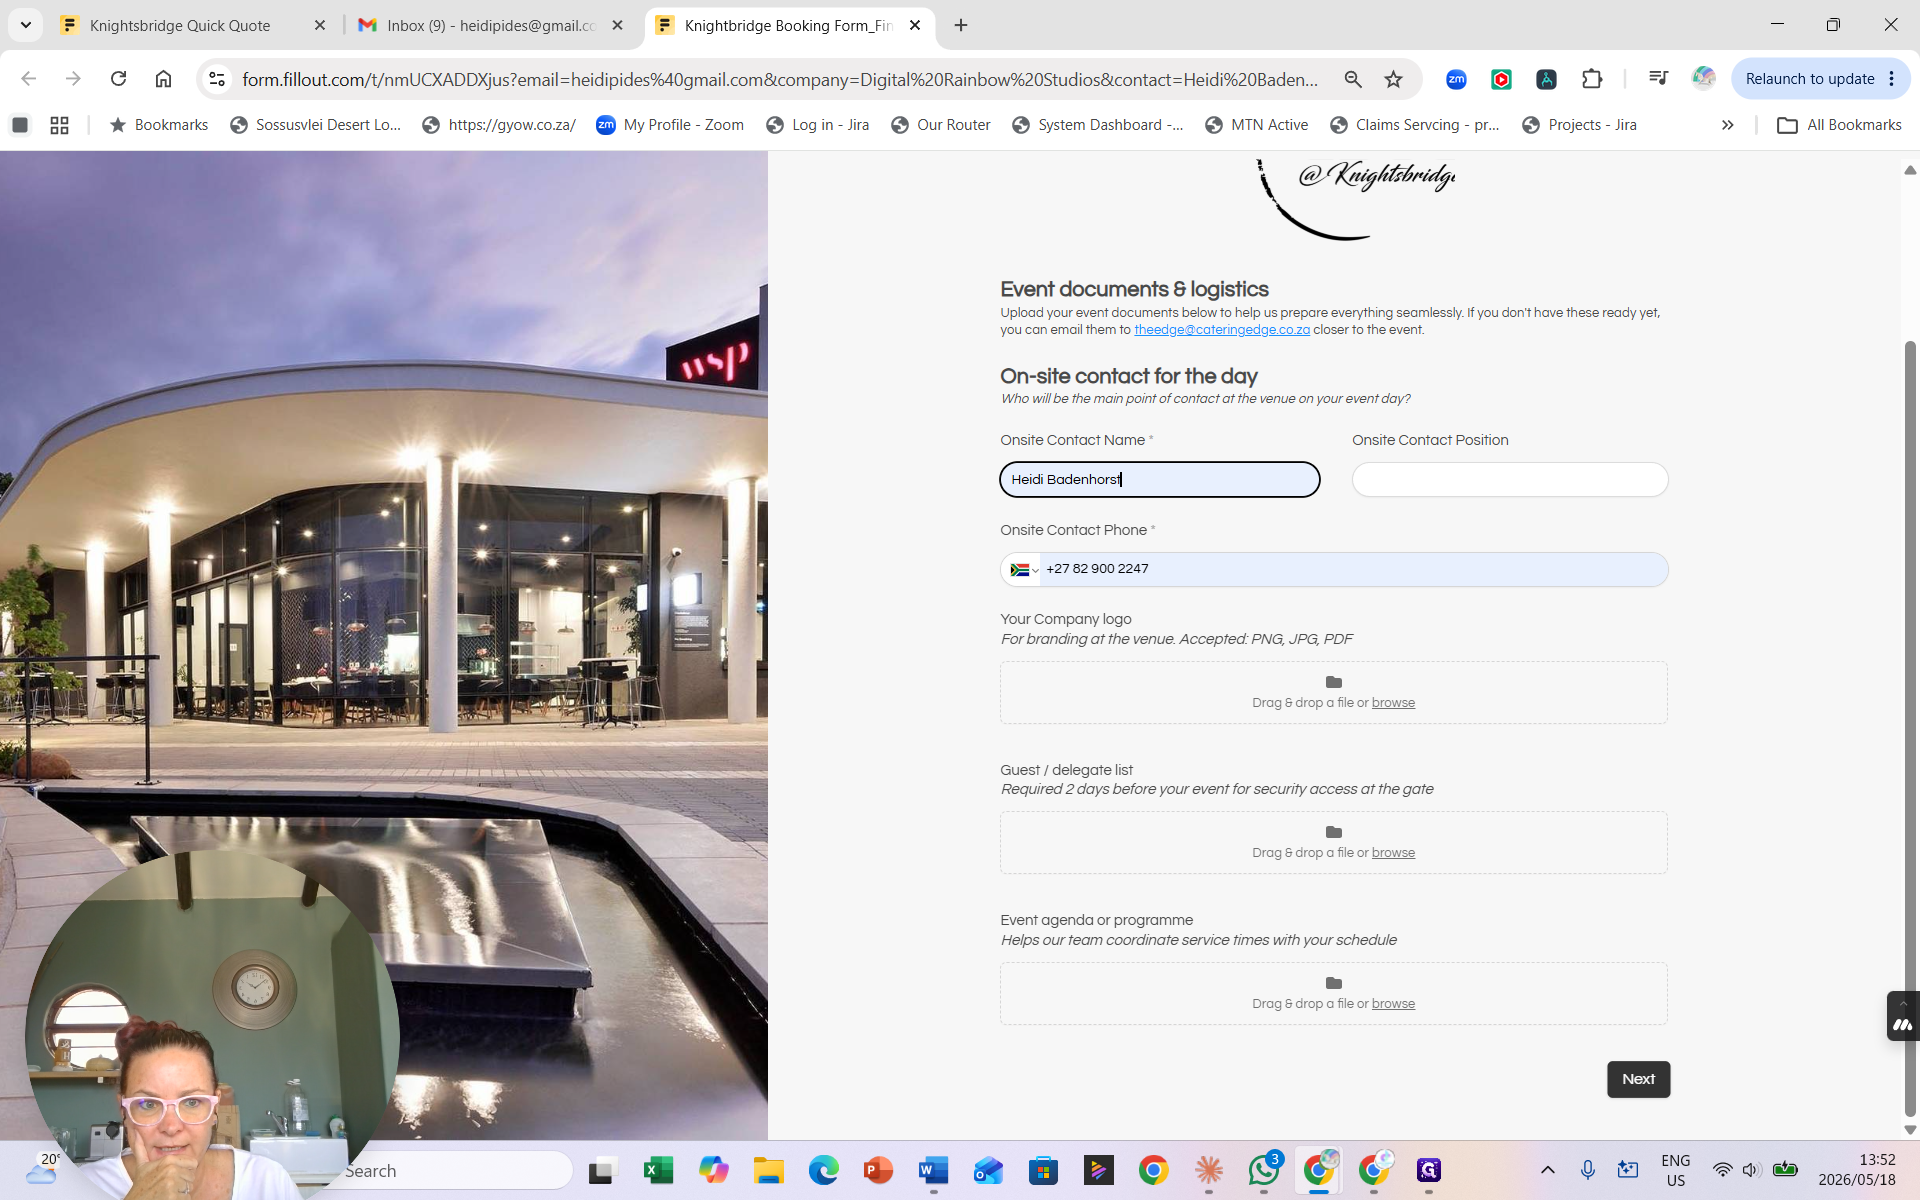
Documents and Logistics
33
Search for and select the Onsite Contact Name who will be managing the event on the day.
34
Upload any required event documents (such as an agenda, programme, or delegates list) and click Next.
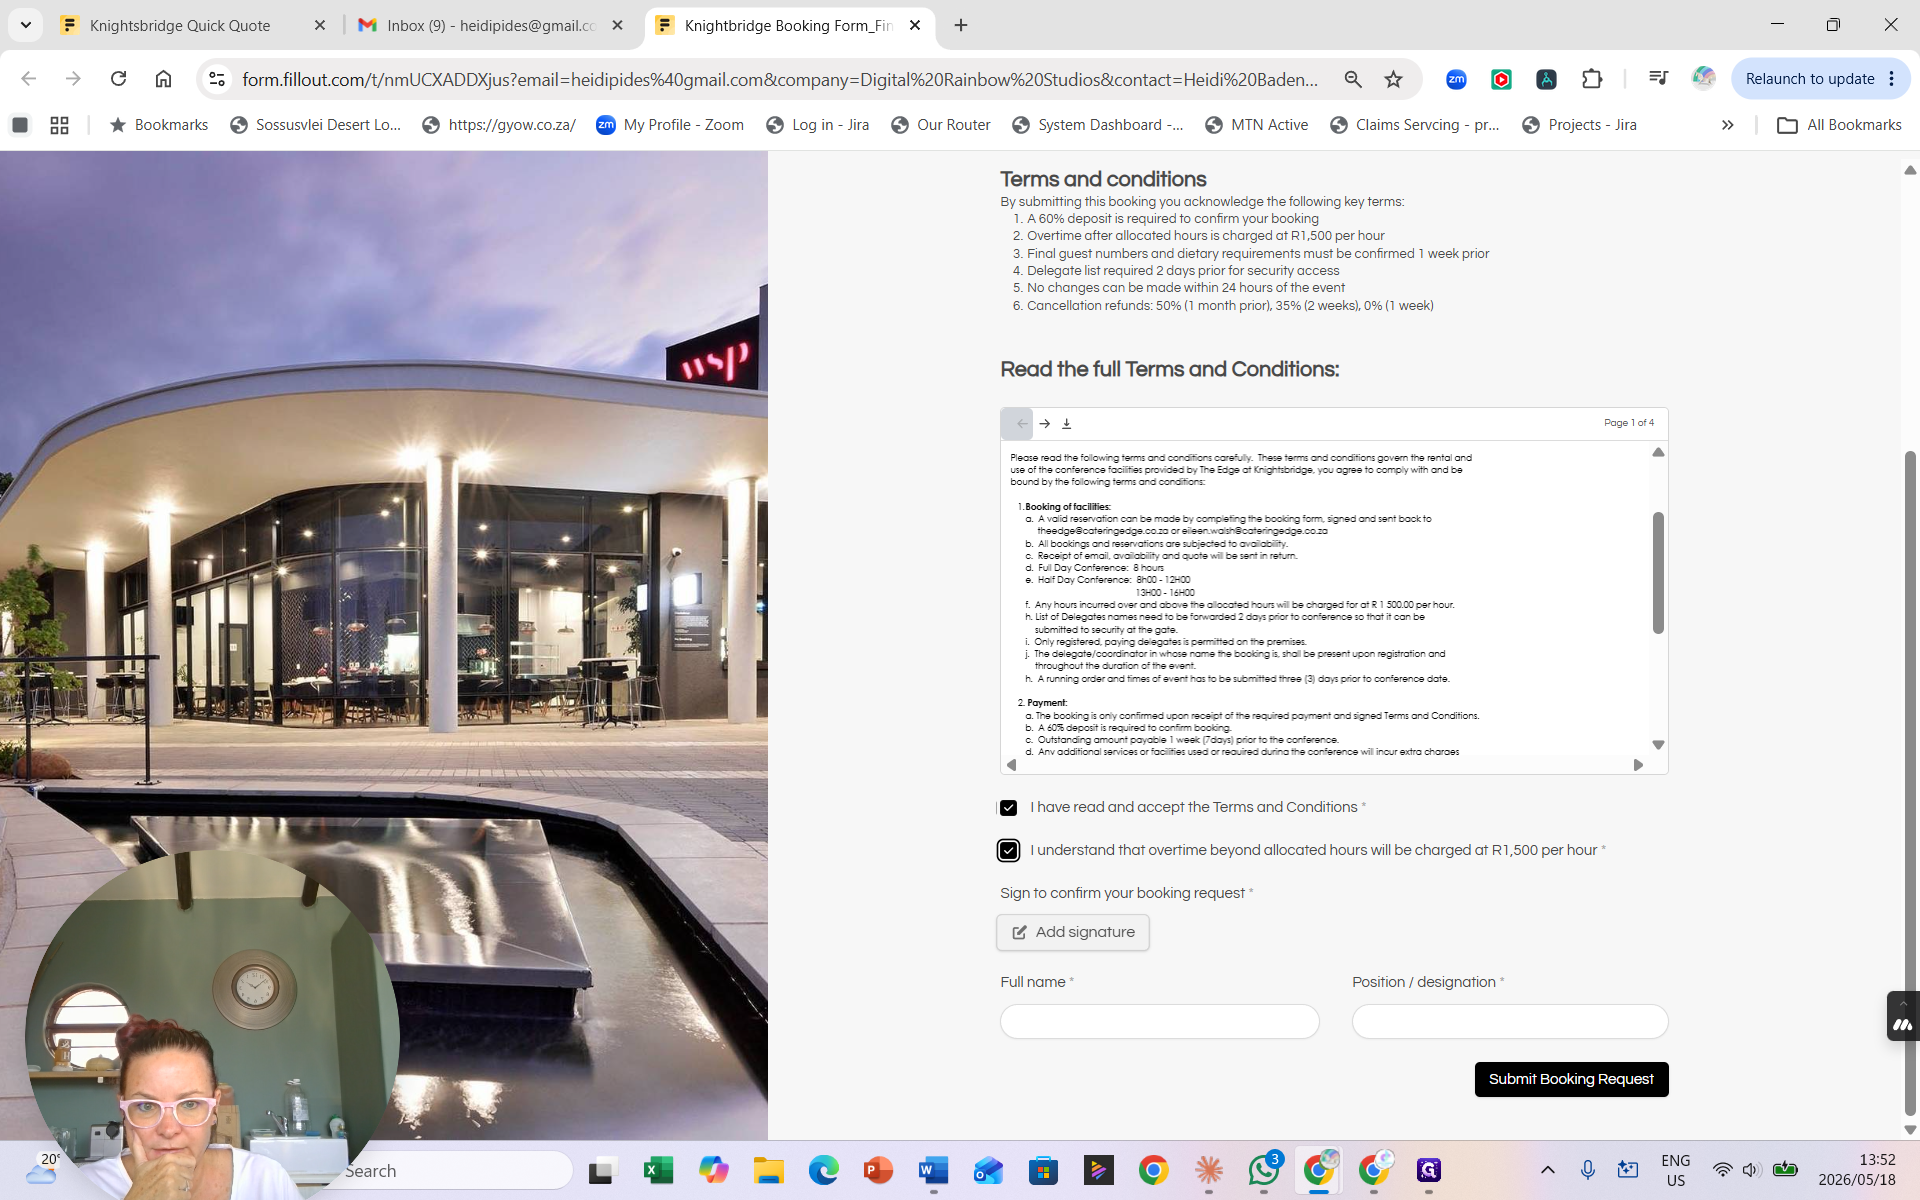
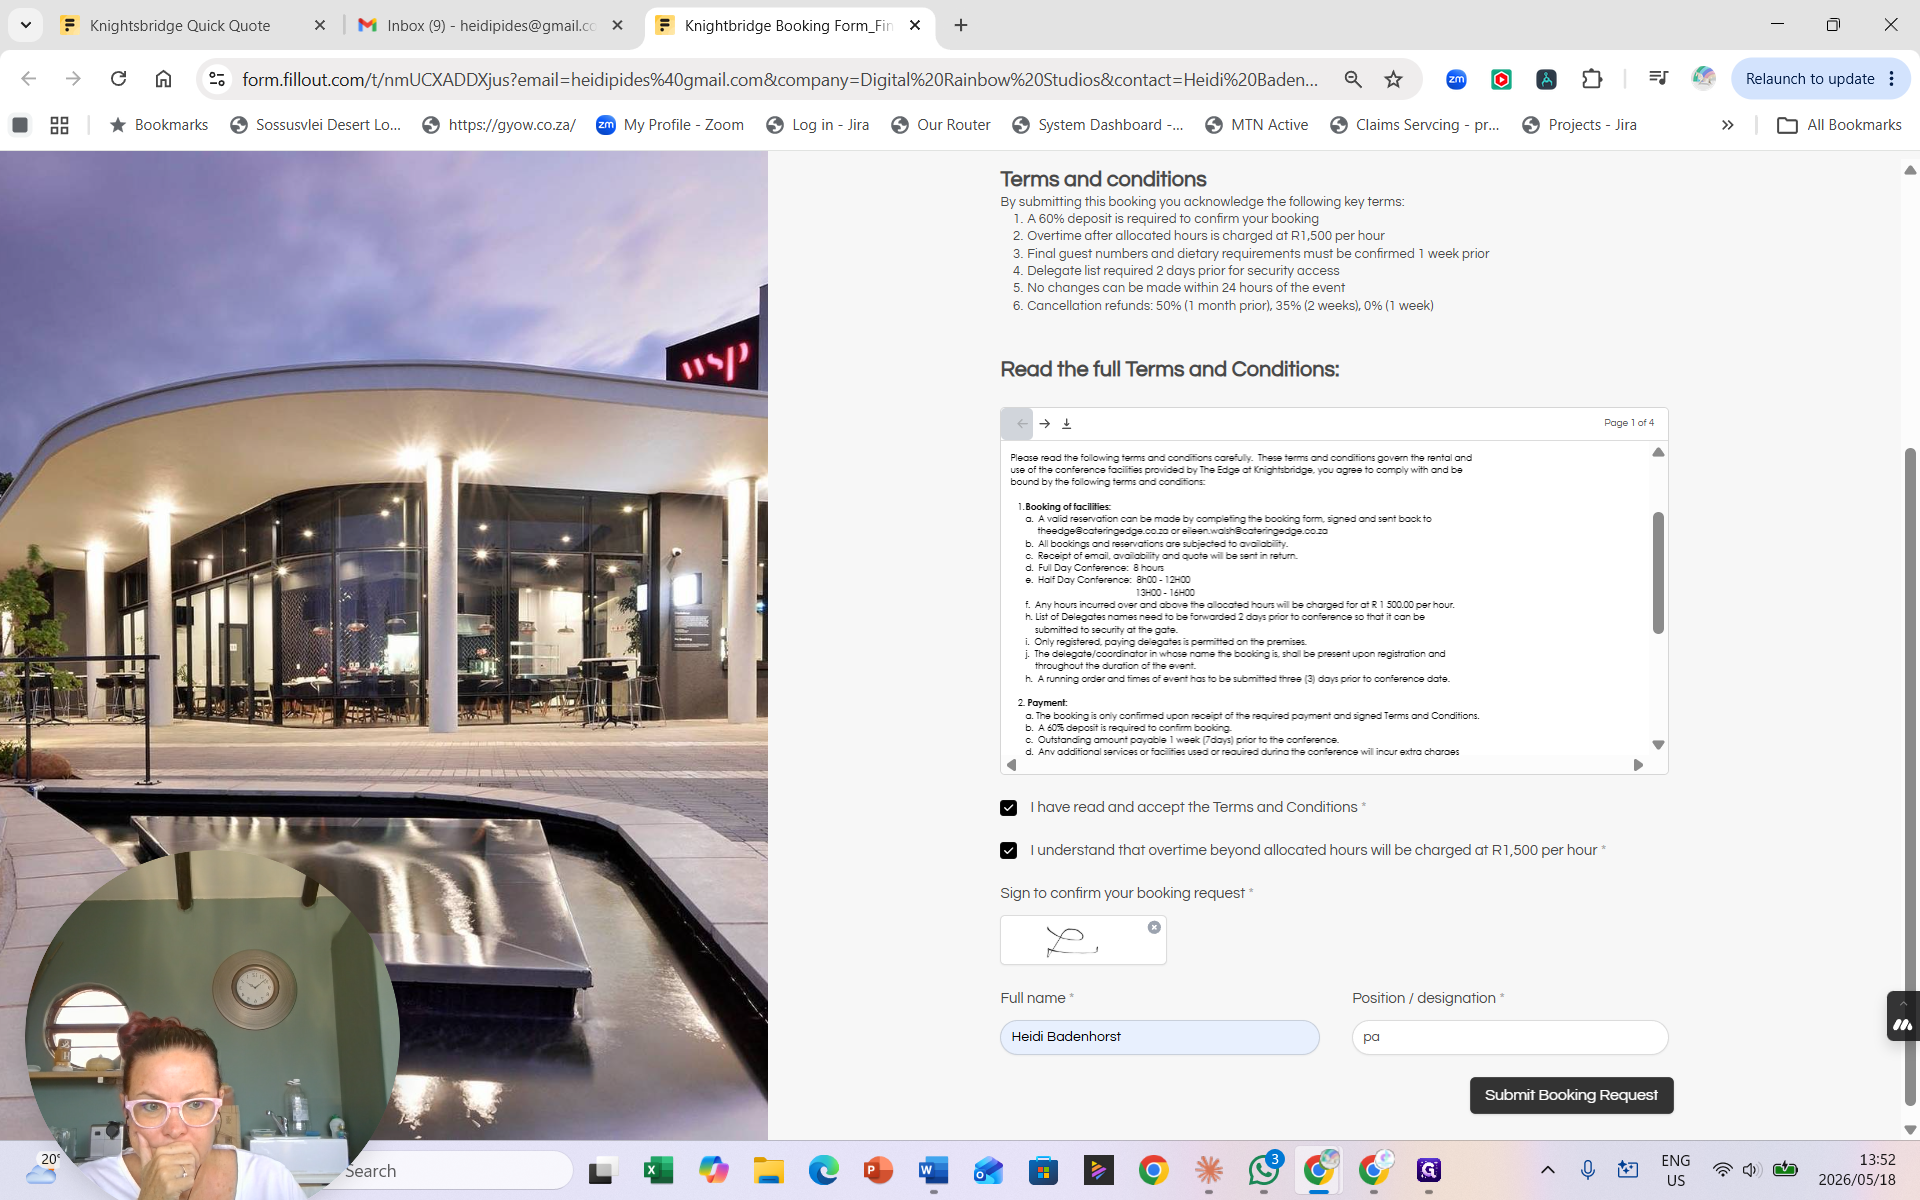
Terms, Conditions, and Submission
The final step is accepting the venue's operational terms and providing a digital signature.
35
Review the embedded Terms and Conditions, then check the box to agree.
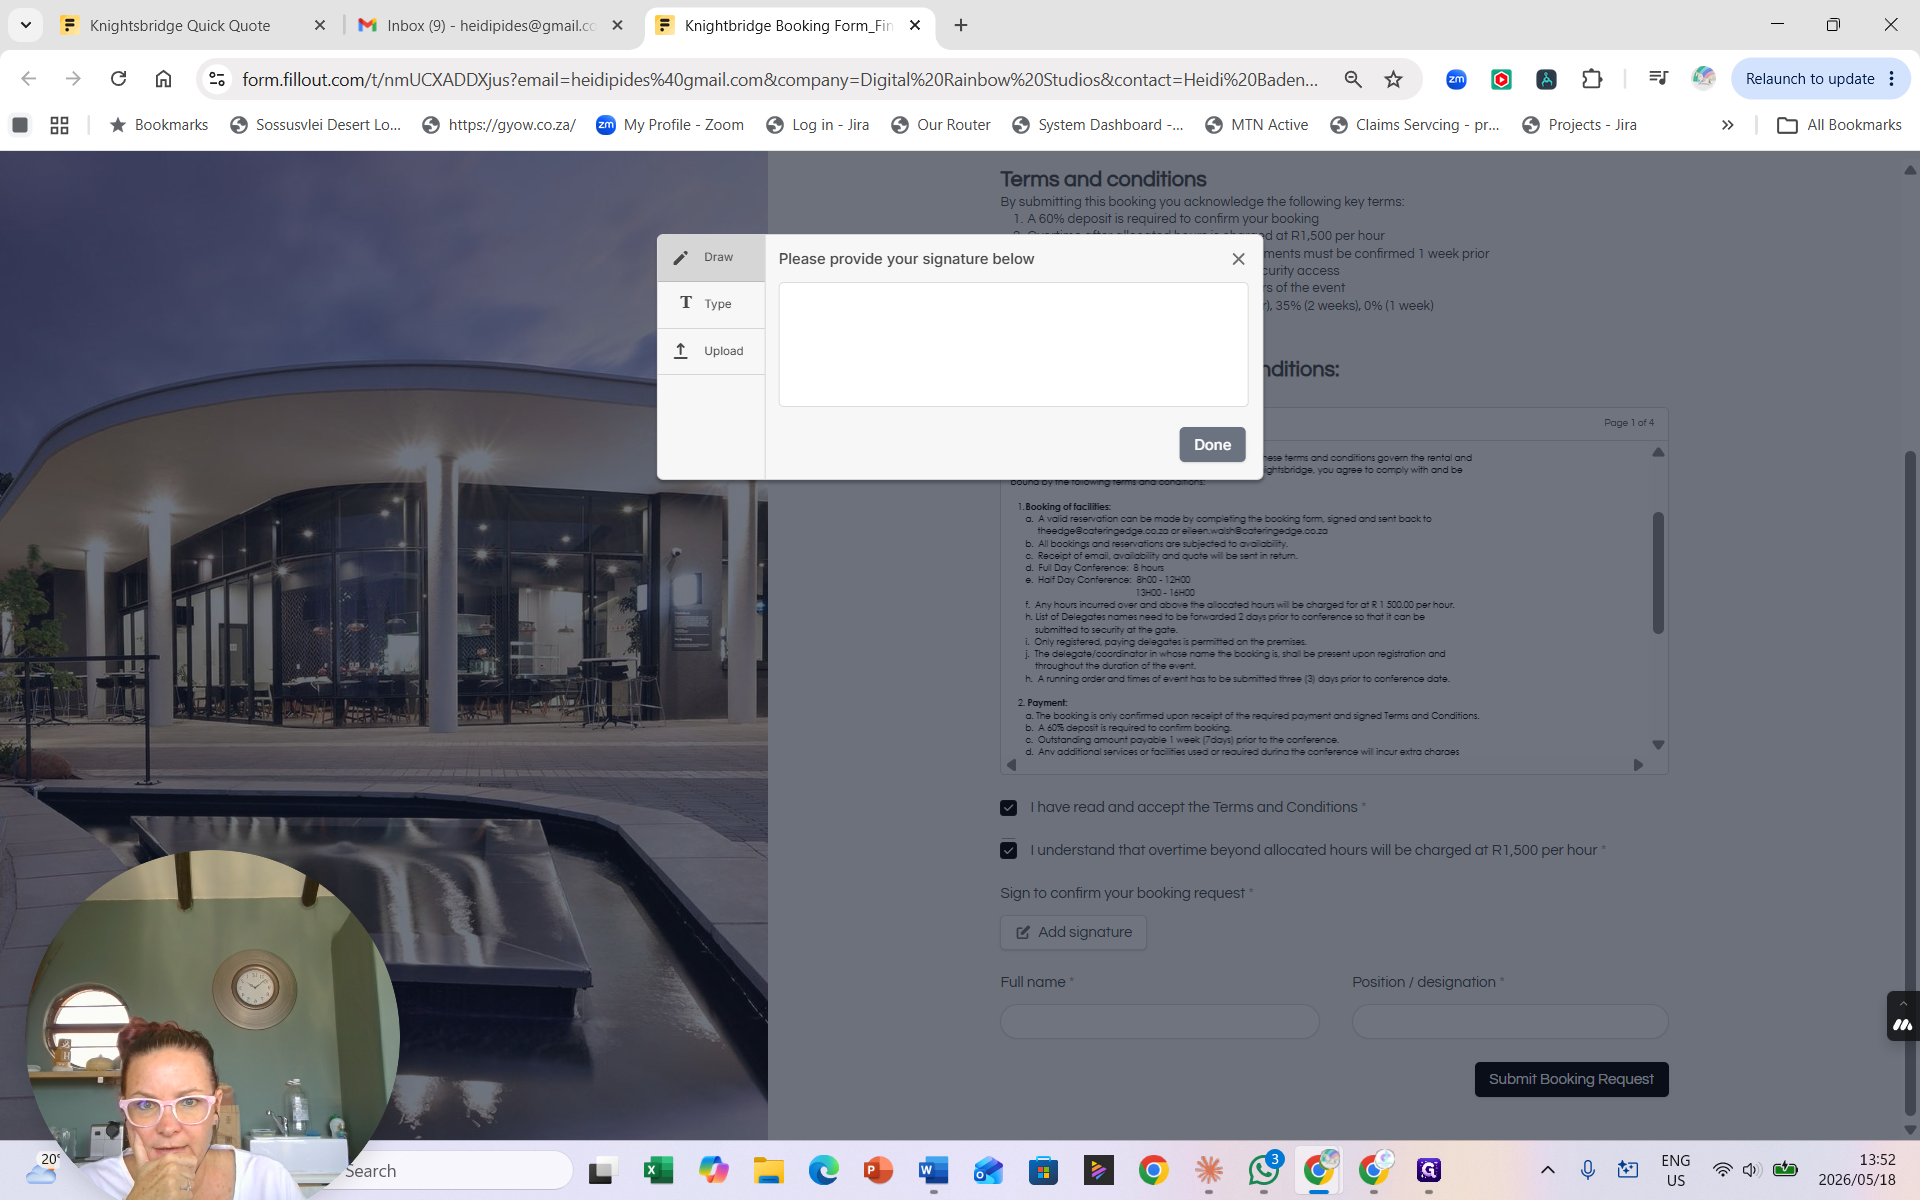
36
Click Add signature to open the signature pad.
37
Draw, type, or upload your signature.
38
Click Done to save the signature to the form.
39
Confirm or enter your Full name.
40
Click Submit Booking Request to securely transmit your finalized details to the events team.
FAQ
Q: What happens after I submit the booking request?
A: The events team immediately reviews your request. You will typically receive a formal quote and deposit invoice within 24 to 48 hours. Your booking is officially secured once the required 60% deposit is received.