
Turbo TMS Broker Flow: Step-by-Step Guide to Order Management
Learn the complete broker flow in Turbo TMS, from order creation to invoicing. Discover features like status updates, live order tracking and financial tracking for efficient transport order management.
In this guide, we'll have vanilla warkthrough of how to use Turbo TMS to manage the full order lifecycle as a broker. We will cover each step, from logging in and creating an order, to assigning carriers, dispatching, tracking, and invoicing. This process helps brokers organize shipments, track progress, and handle payments efficiently.
Let's get started
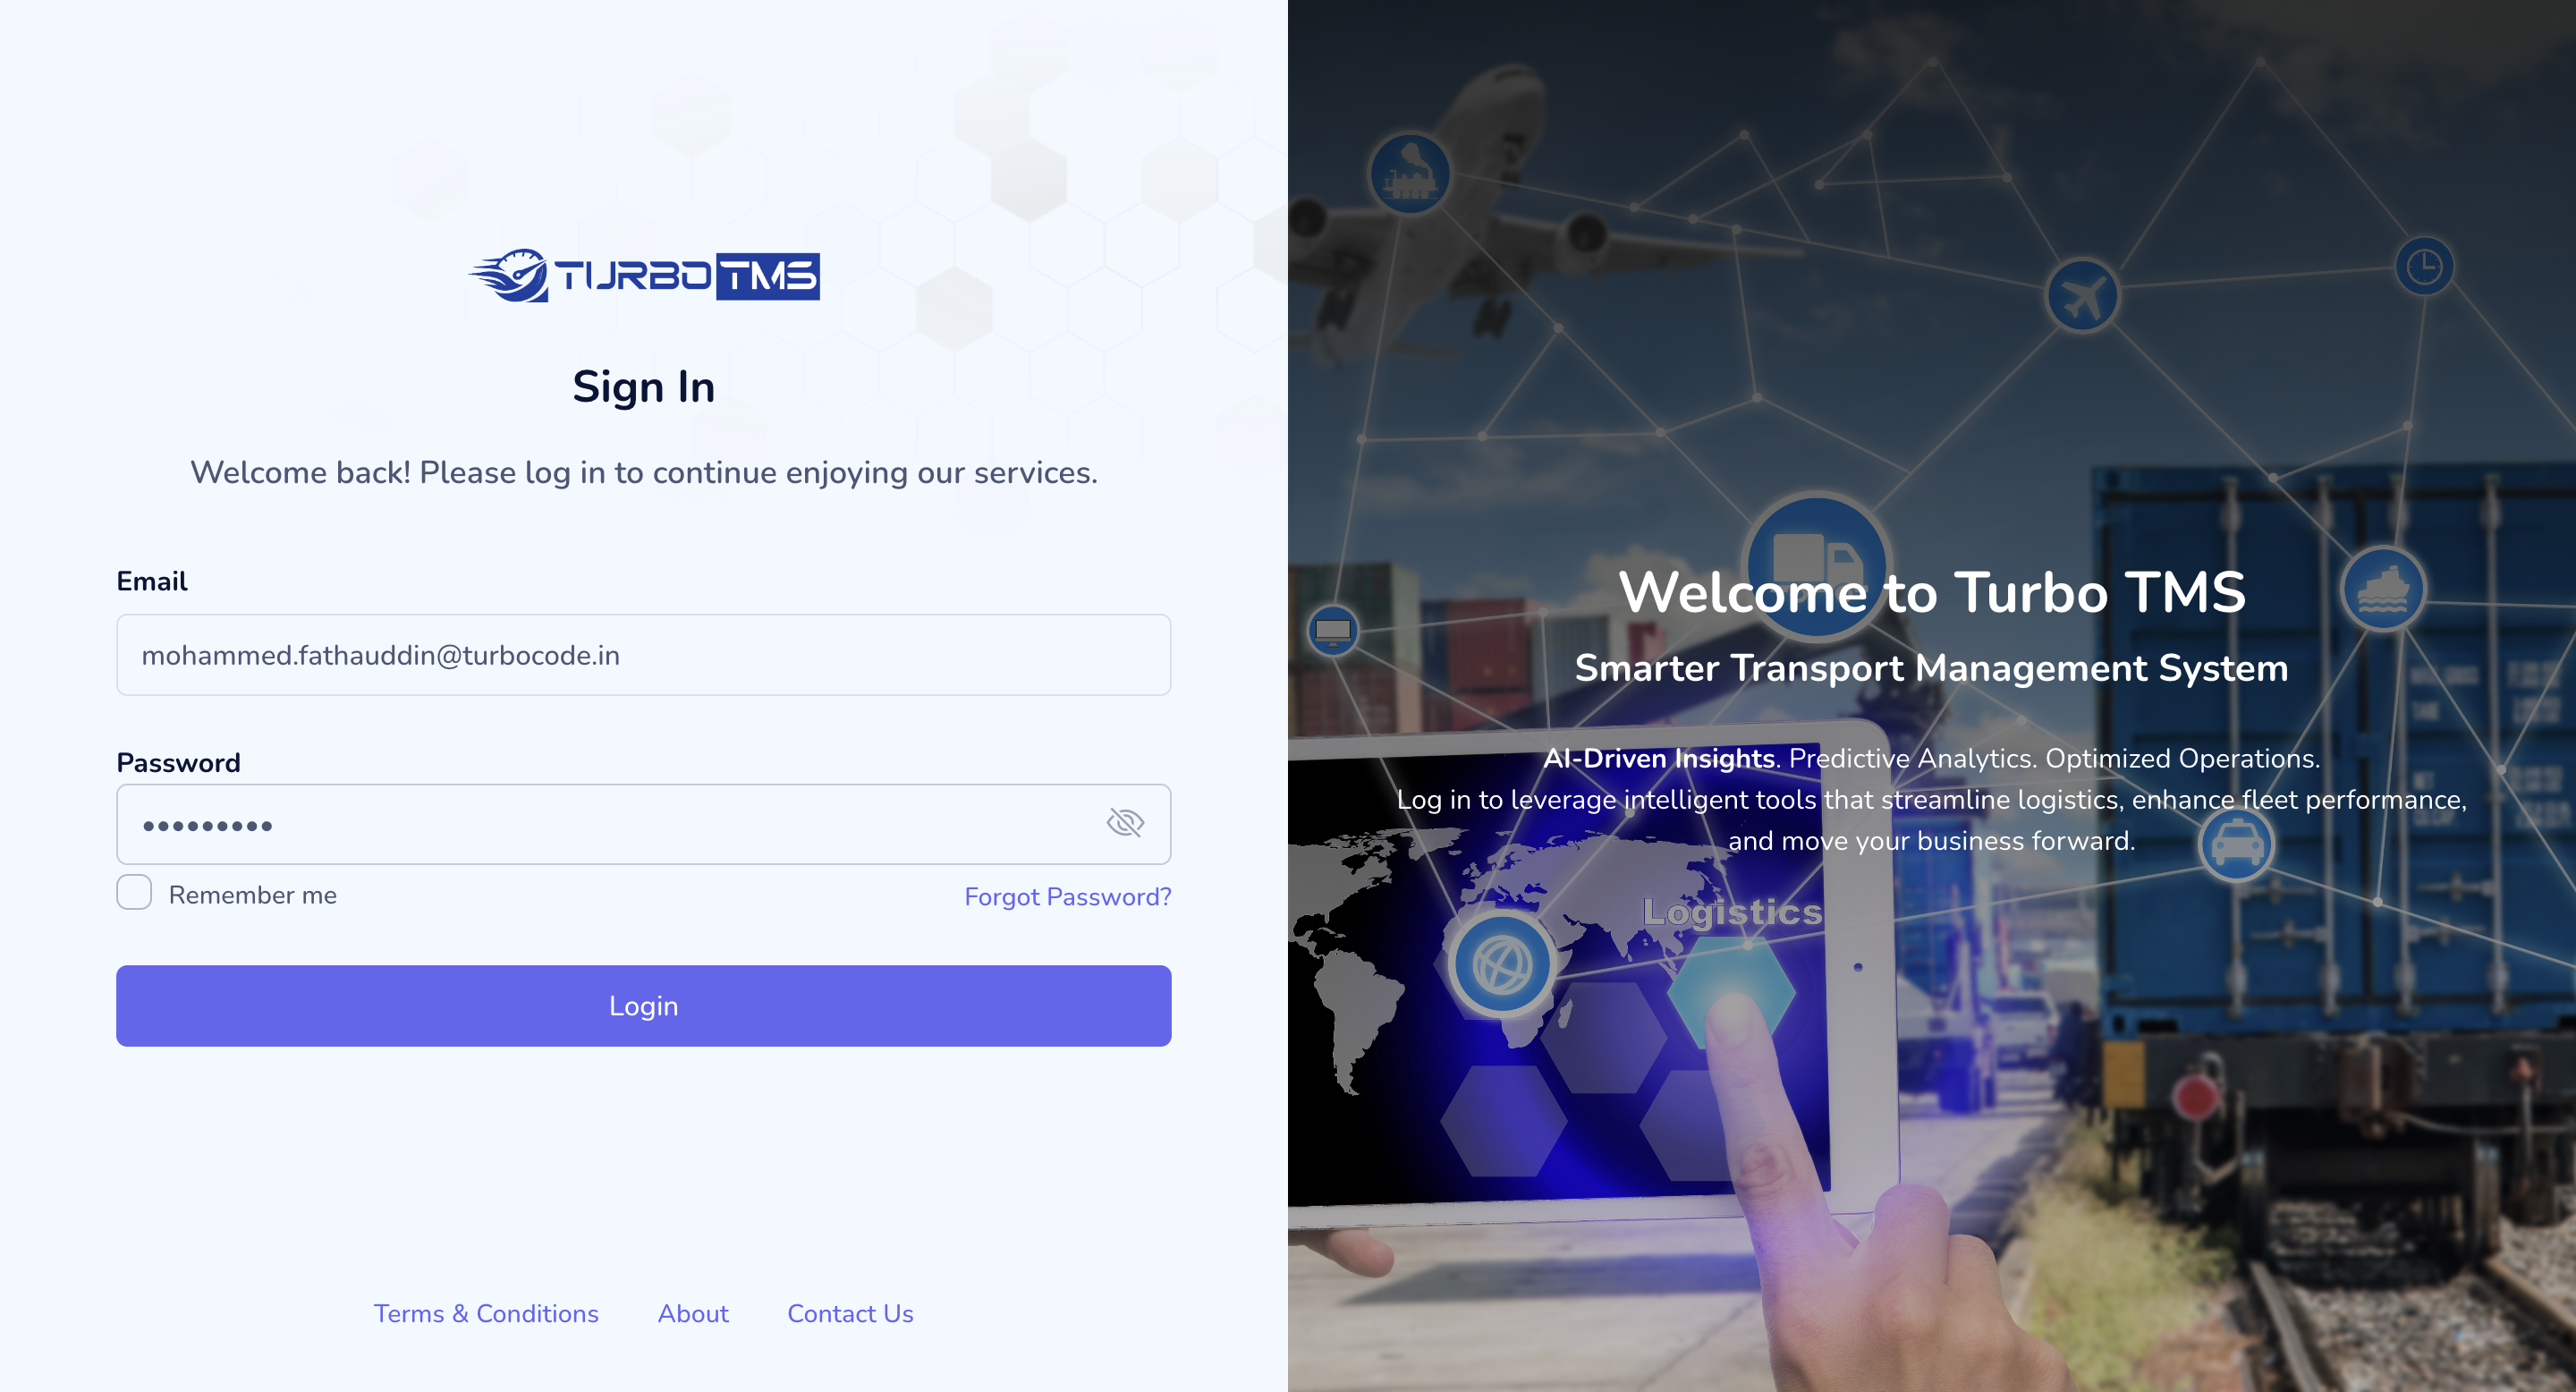
This is the initial flow of Turbo TMS. We will follow a standard, straightforward process for a Broker persona. Let's start with the Login into our Application.
Enter given user's email and password, to login into our application.
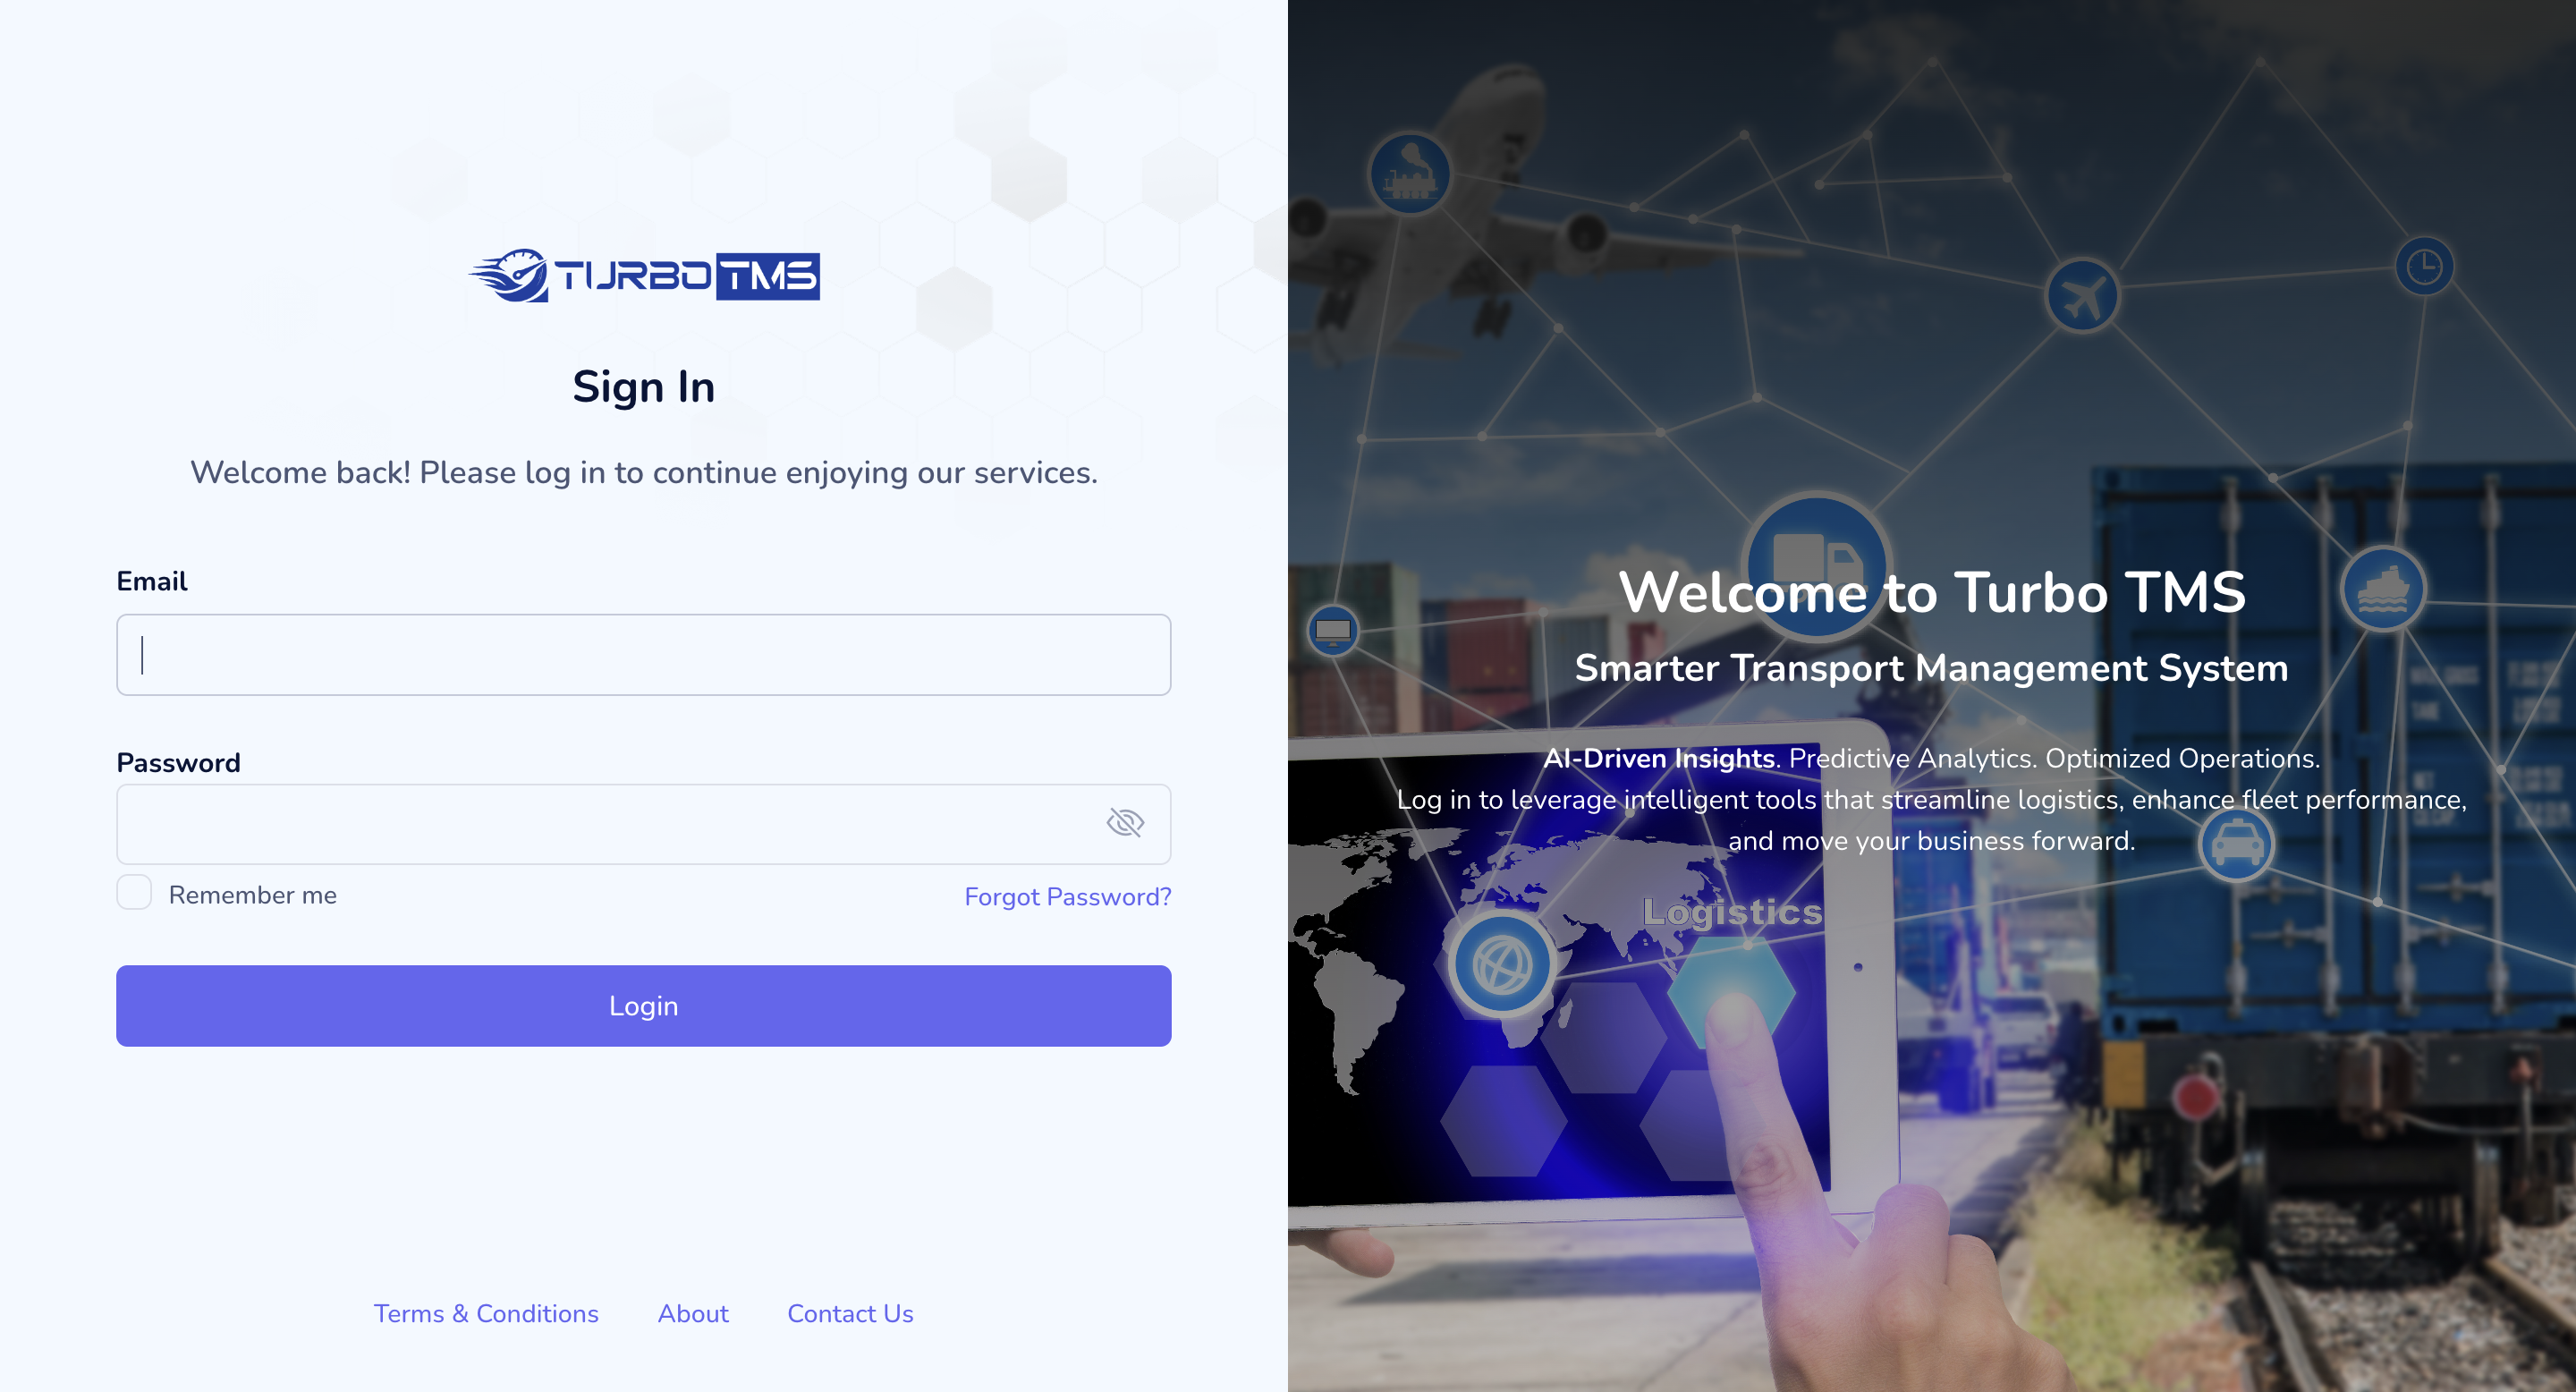
Remember me will save your user credentials in respective browser level password manager.
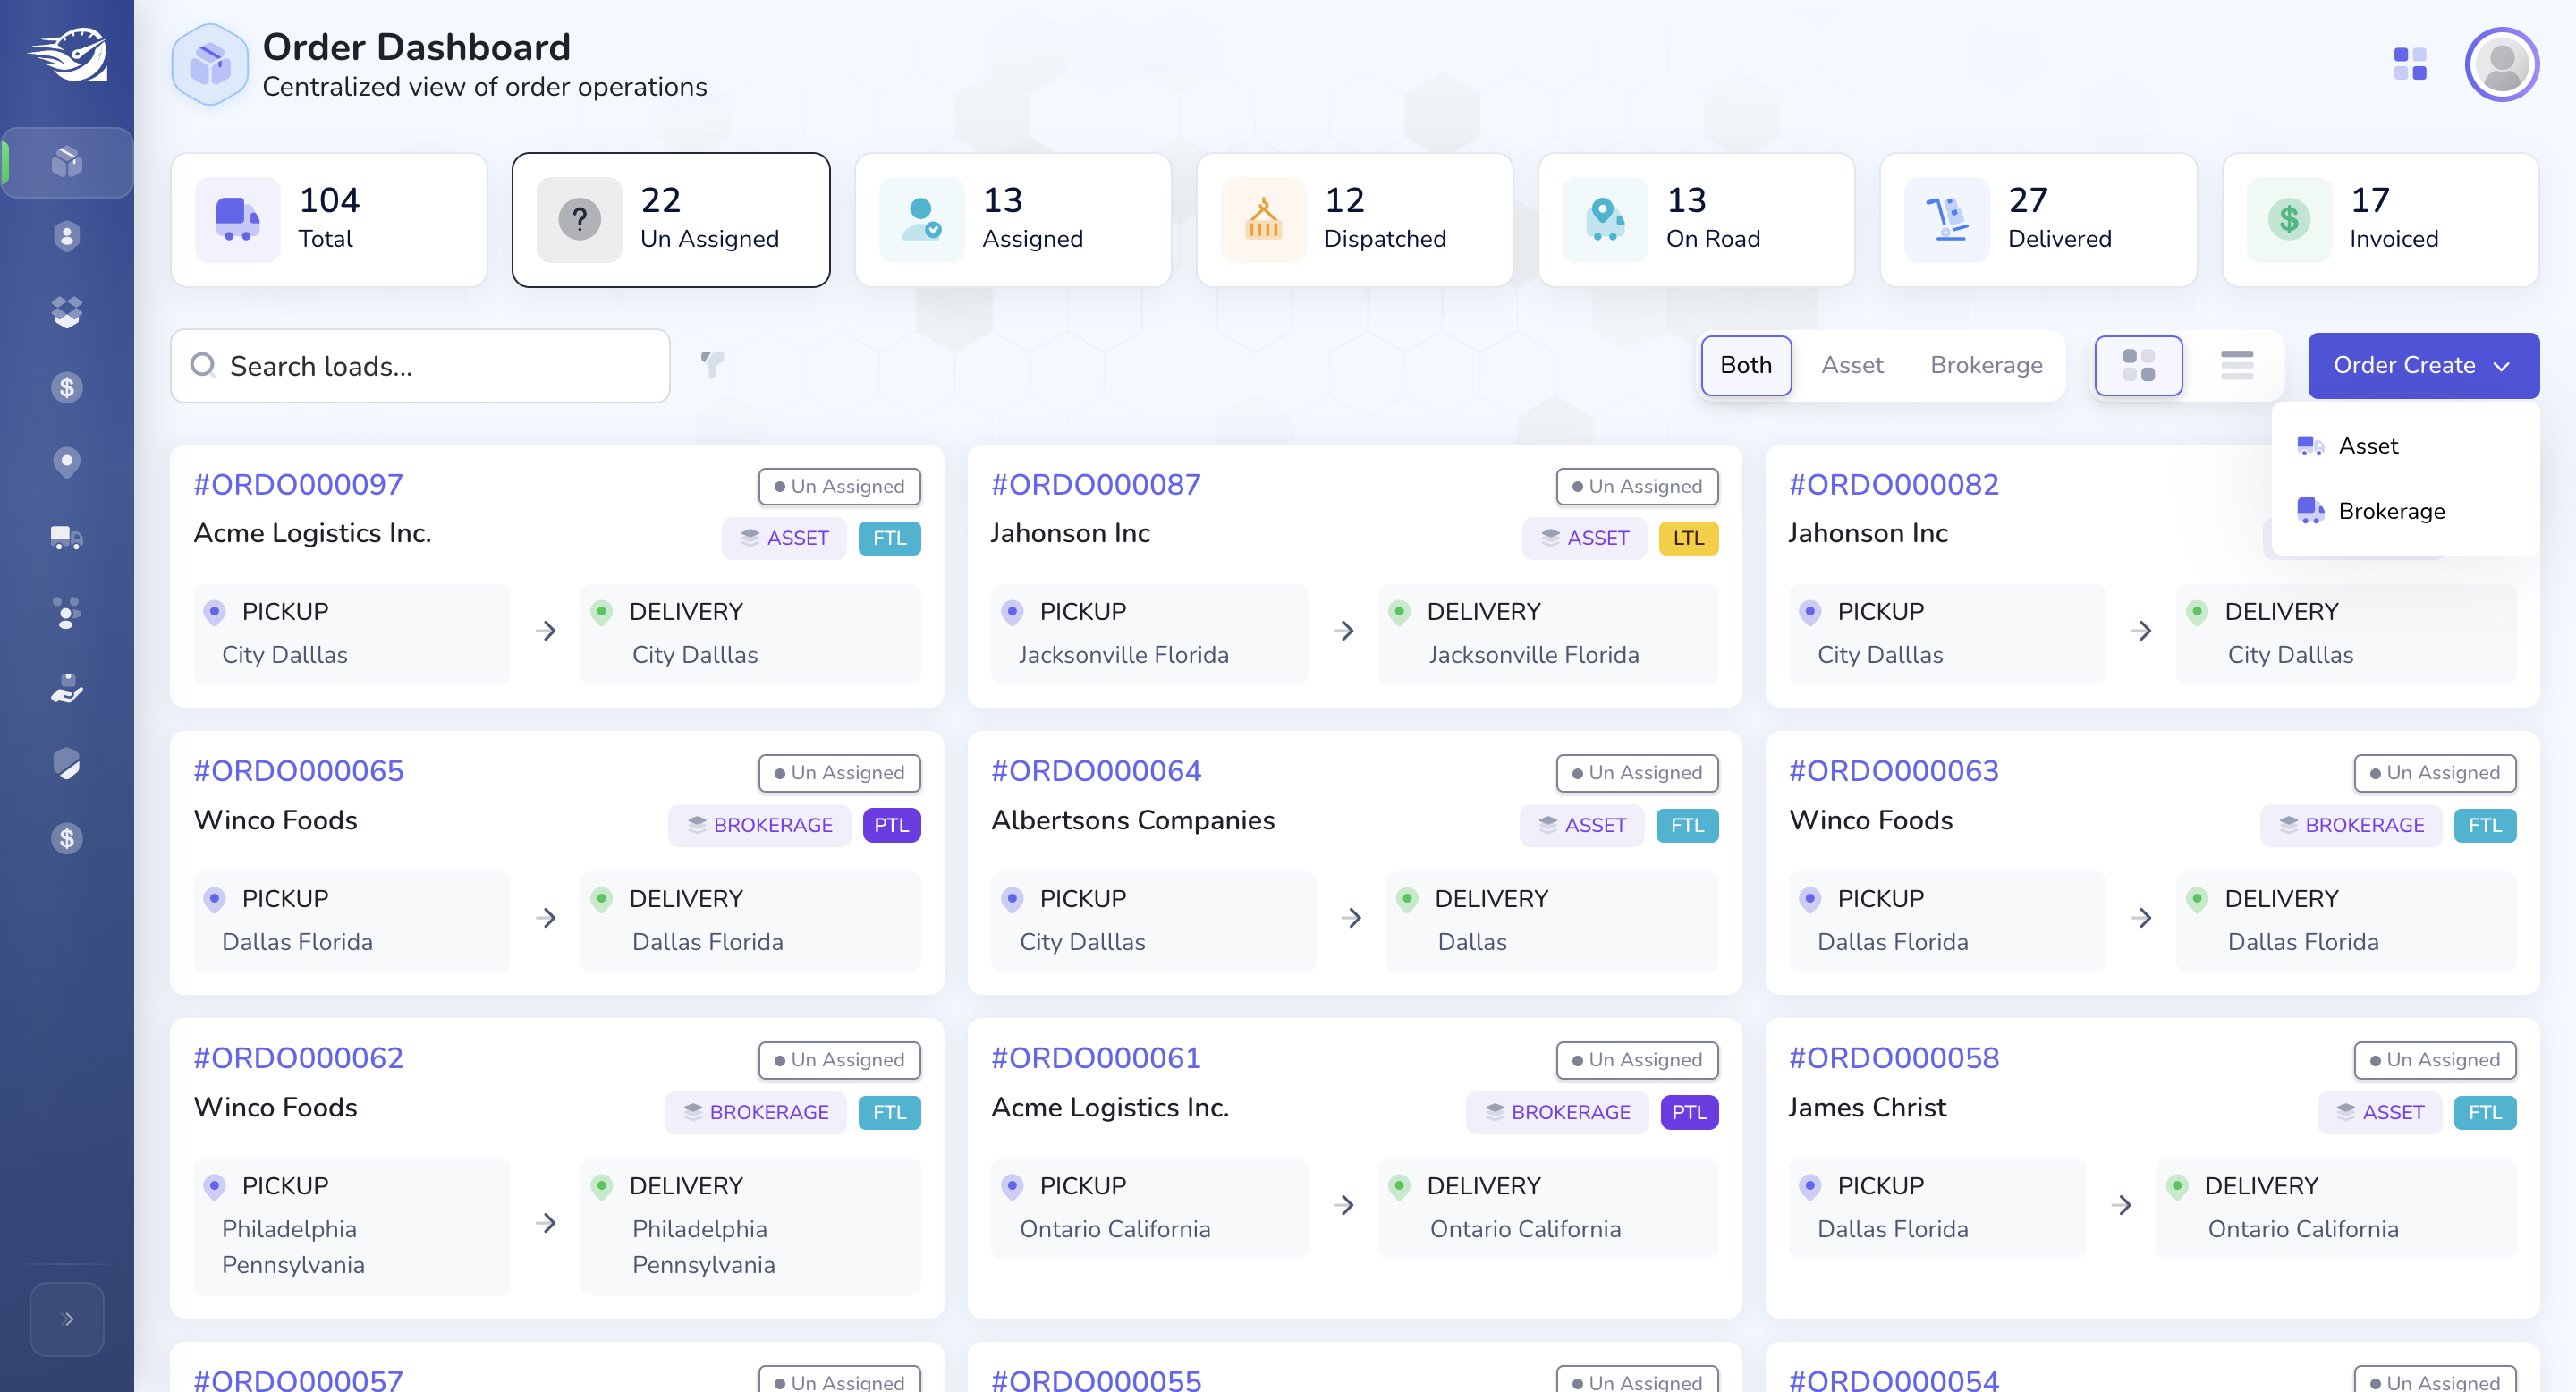
Once you log in, you will land on the order dashboard screen.

We have a Kanban board in our Order Dashboard, (Future we will enhance to user drag and drop option for smooth userflow in status updates. )
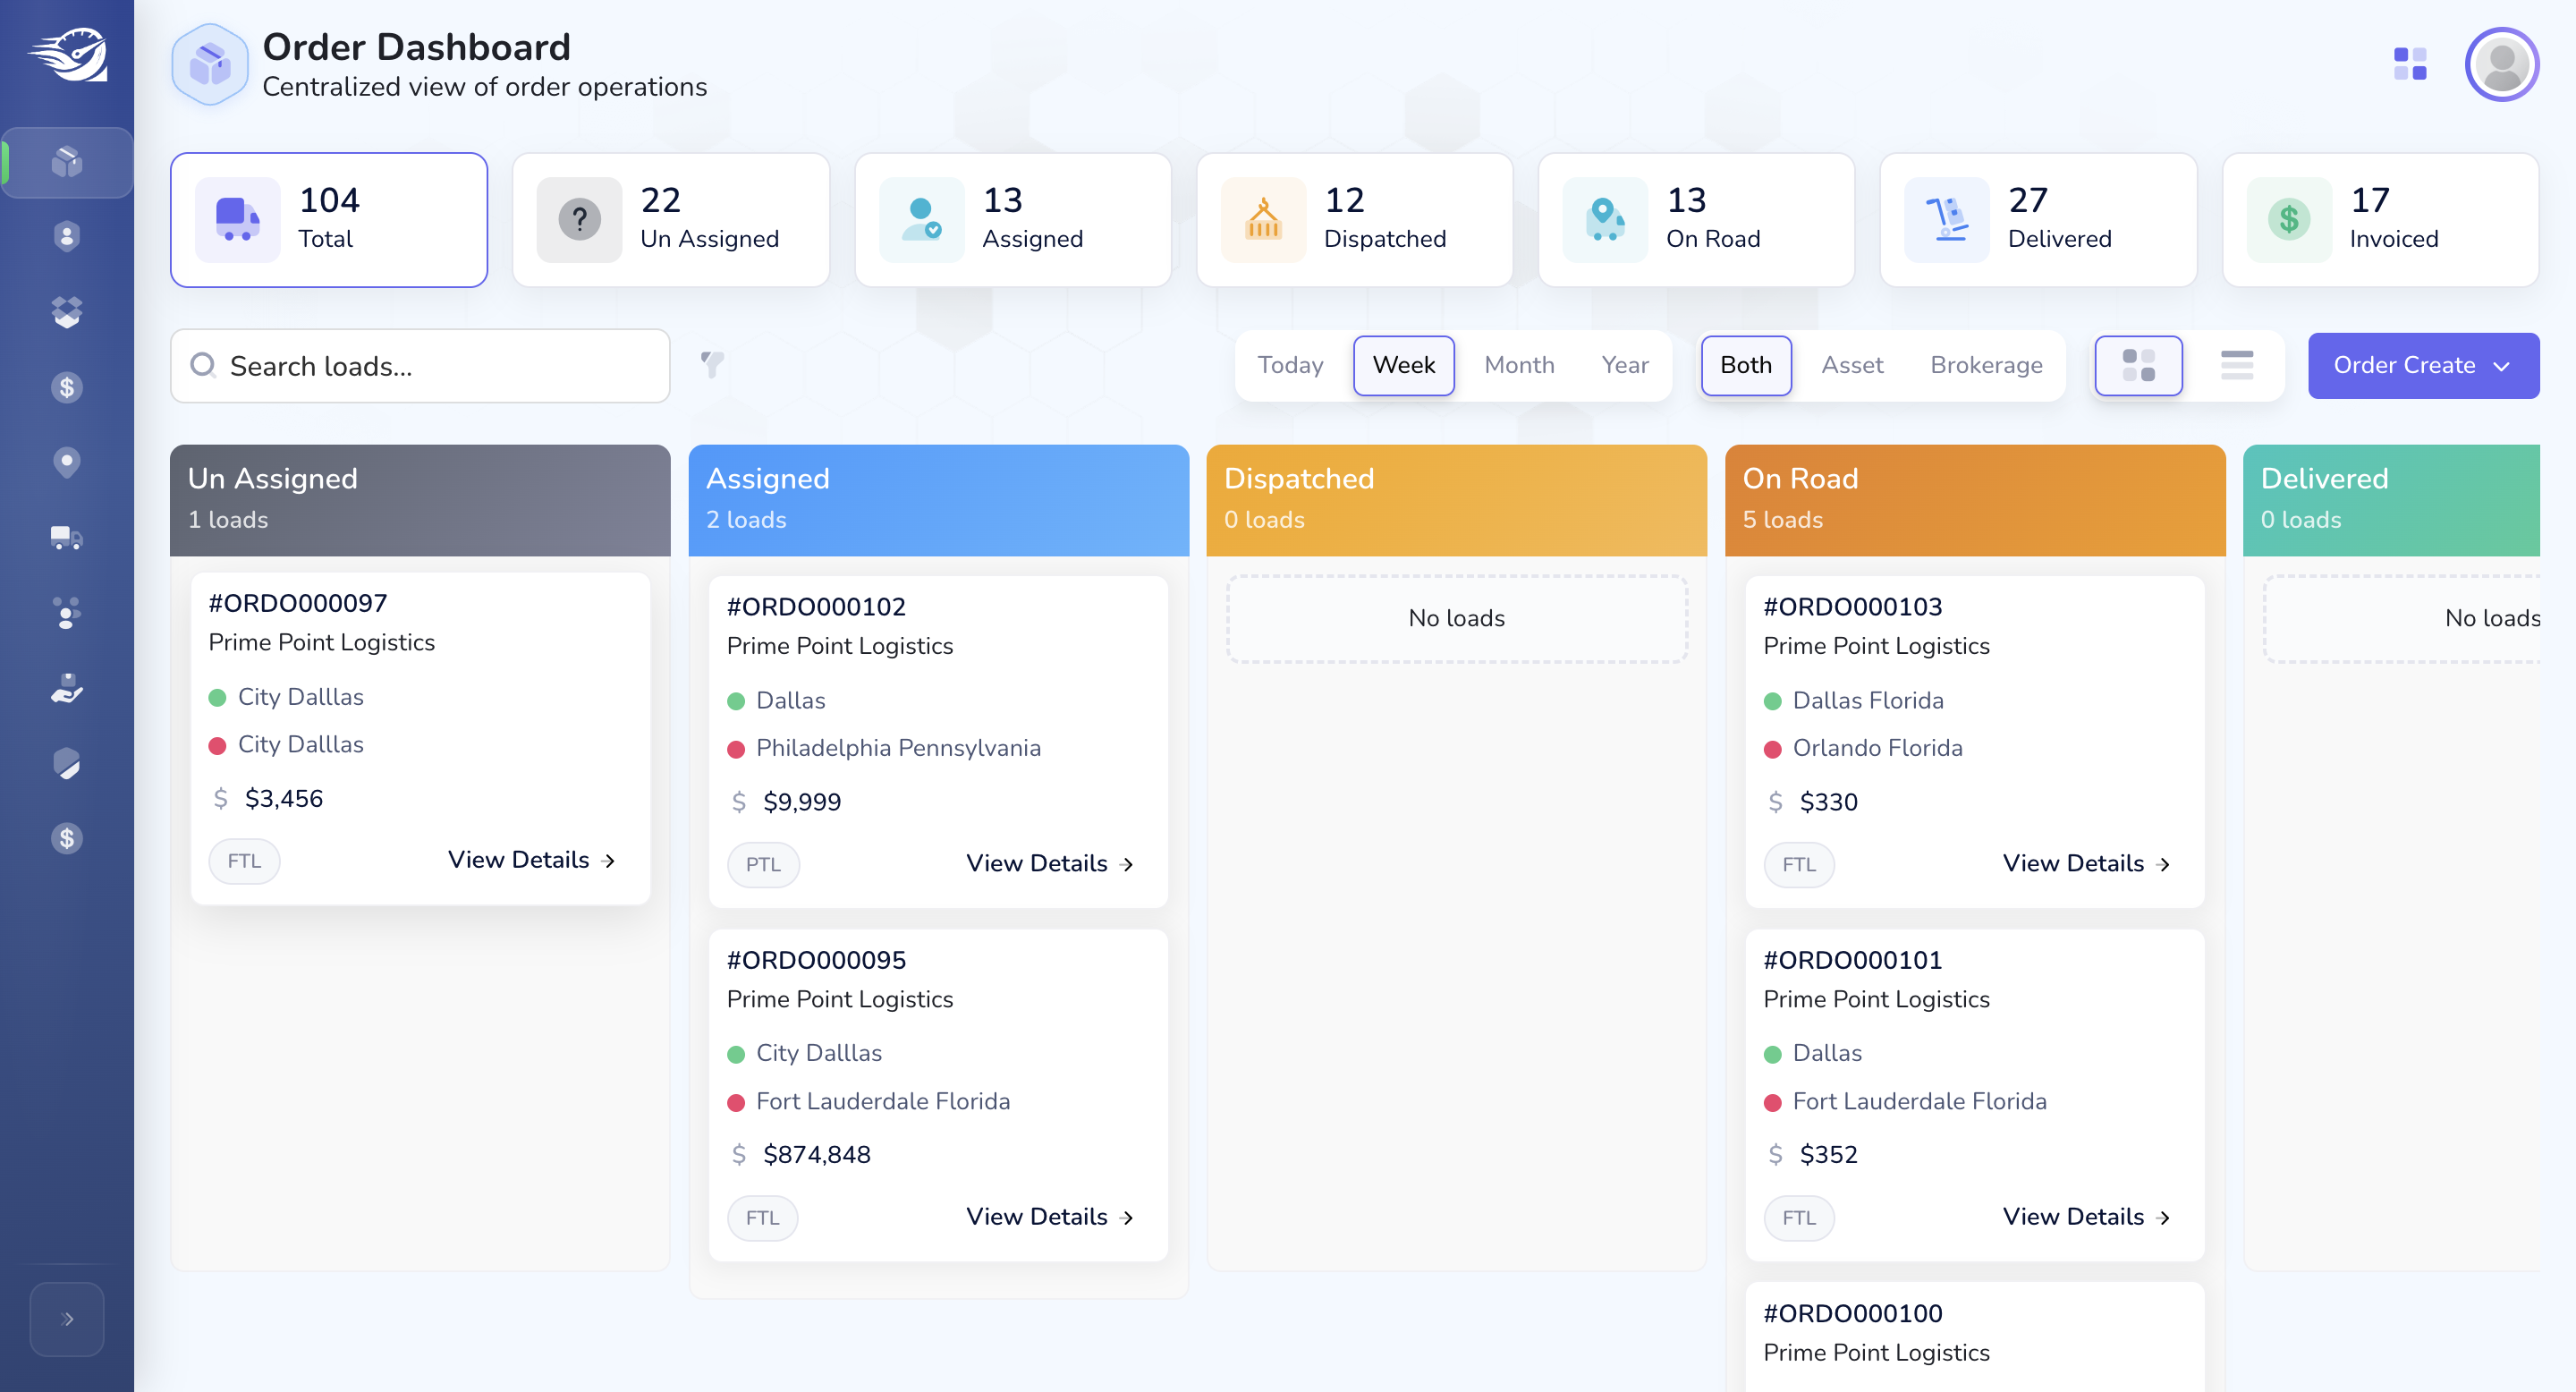
For now, Every Order has Status of. Un Assigned -> Assigned -> Dispatched -> On Road -> Delivered -> Invoiced.
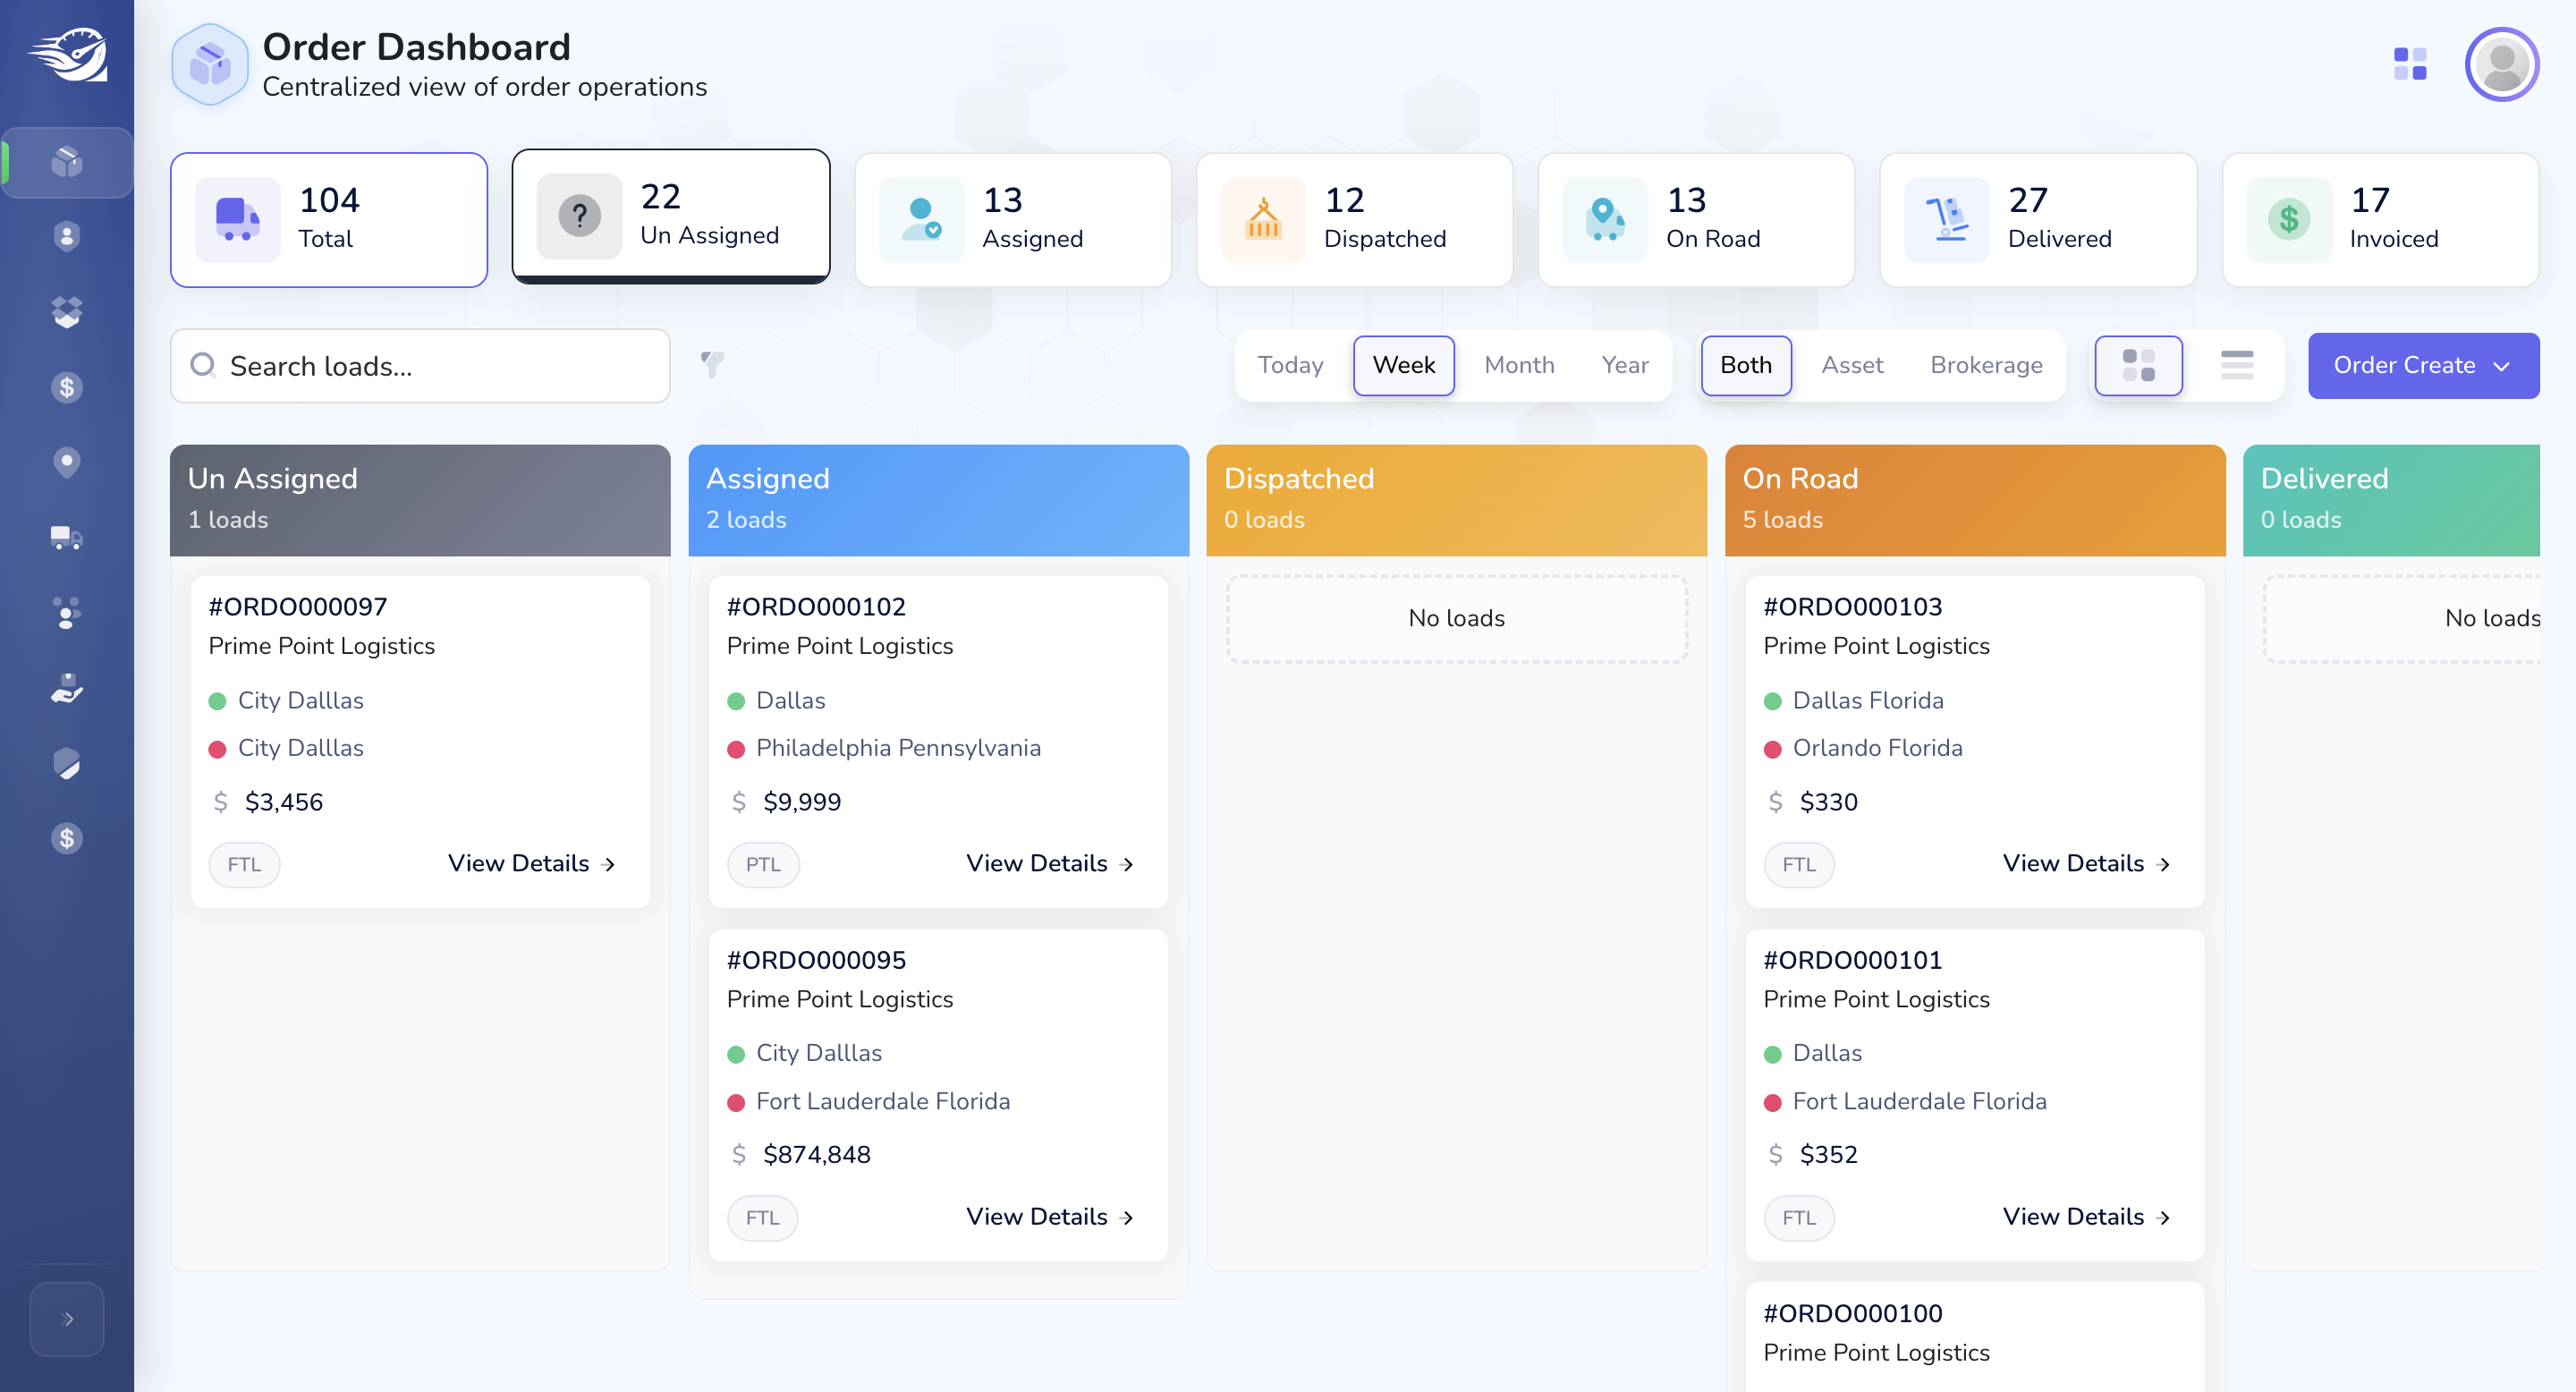
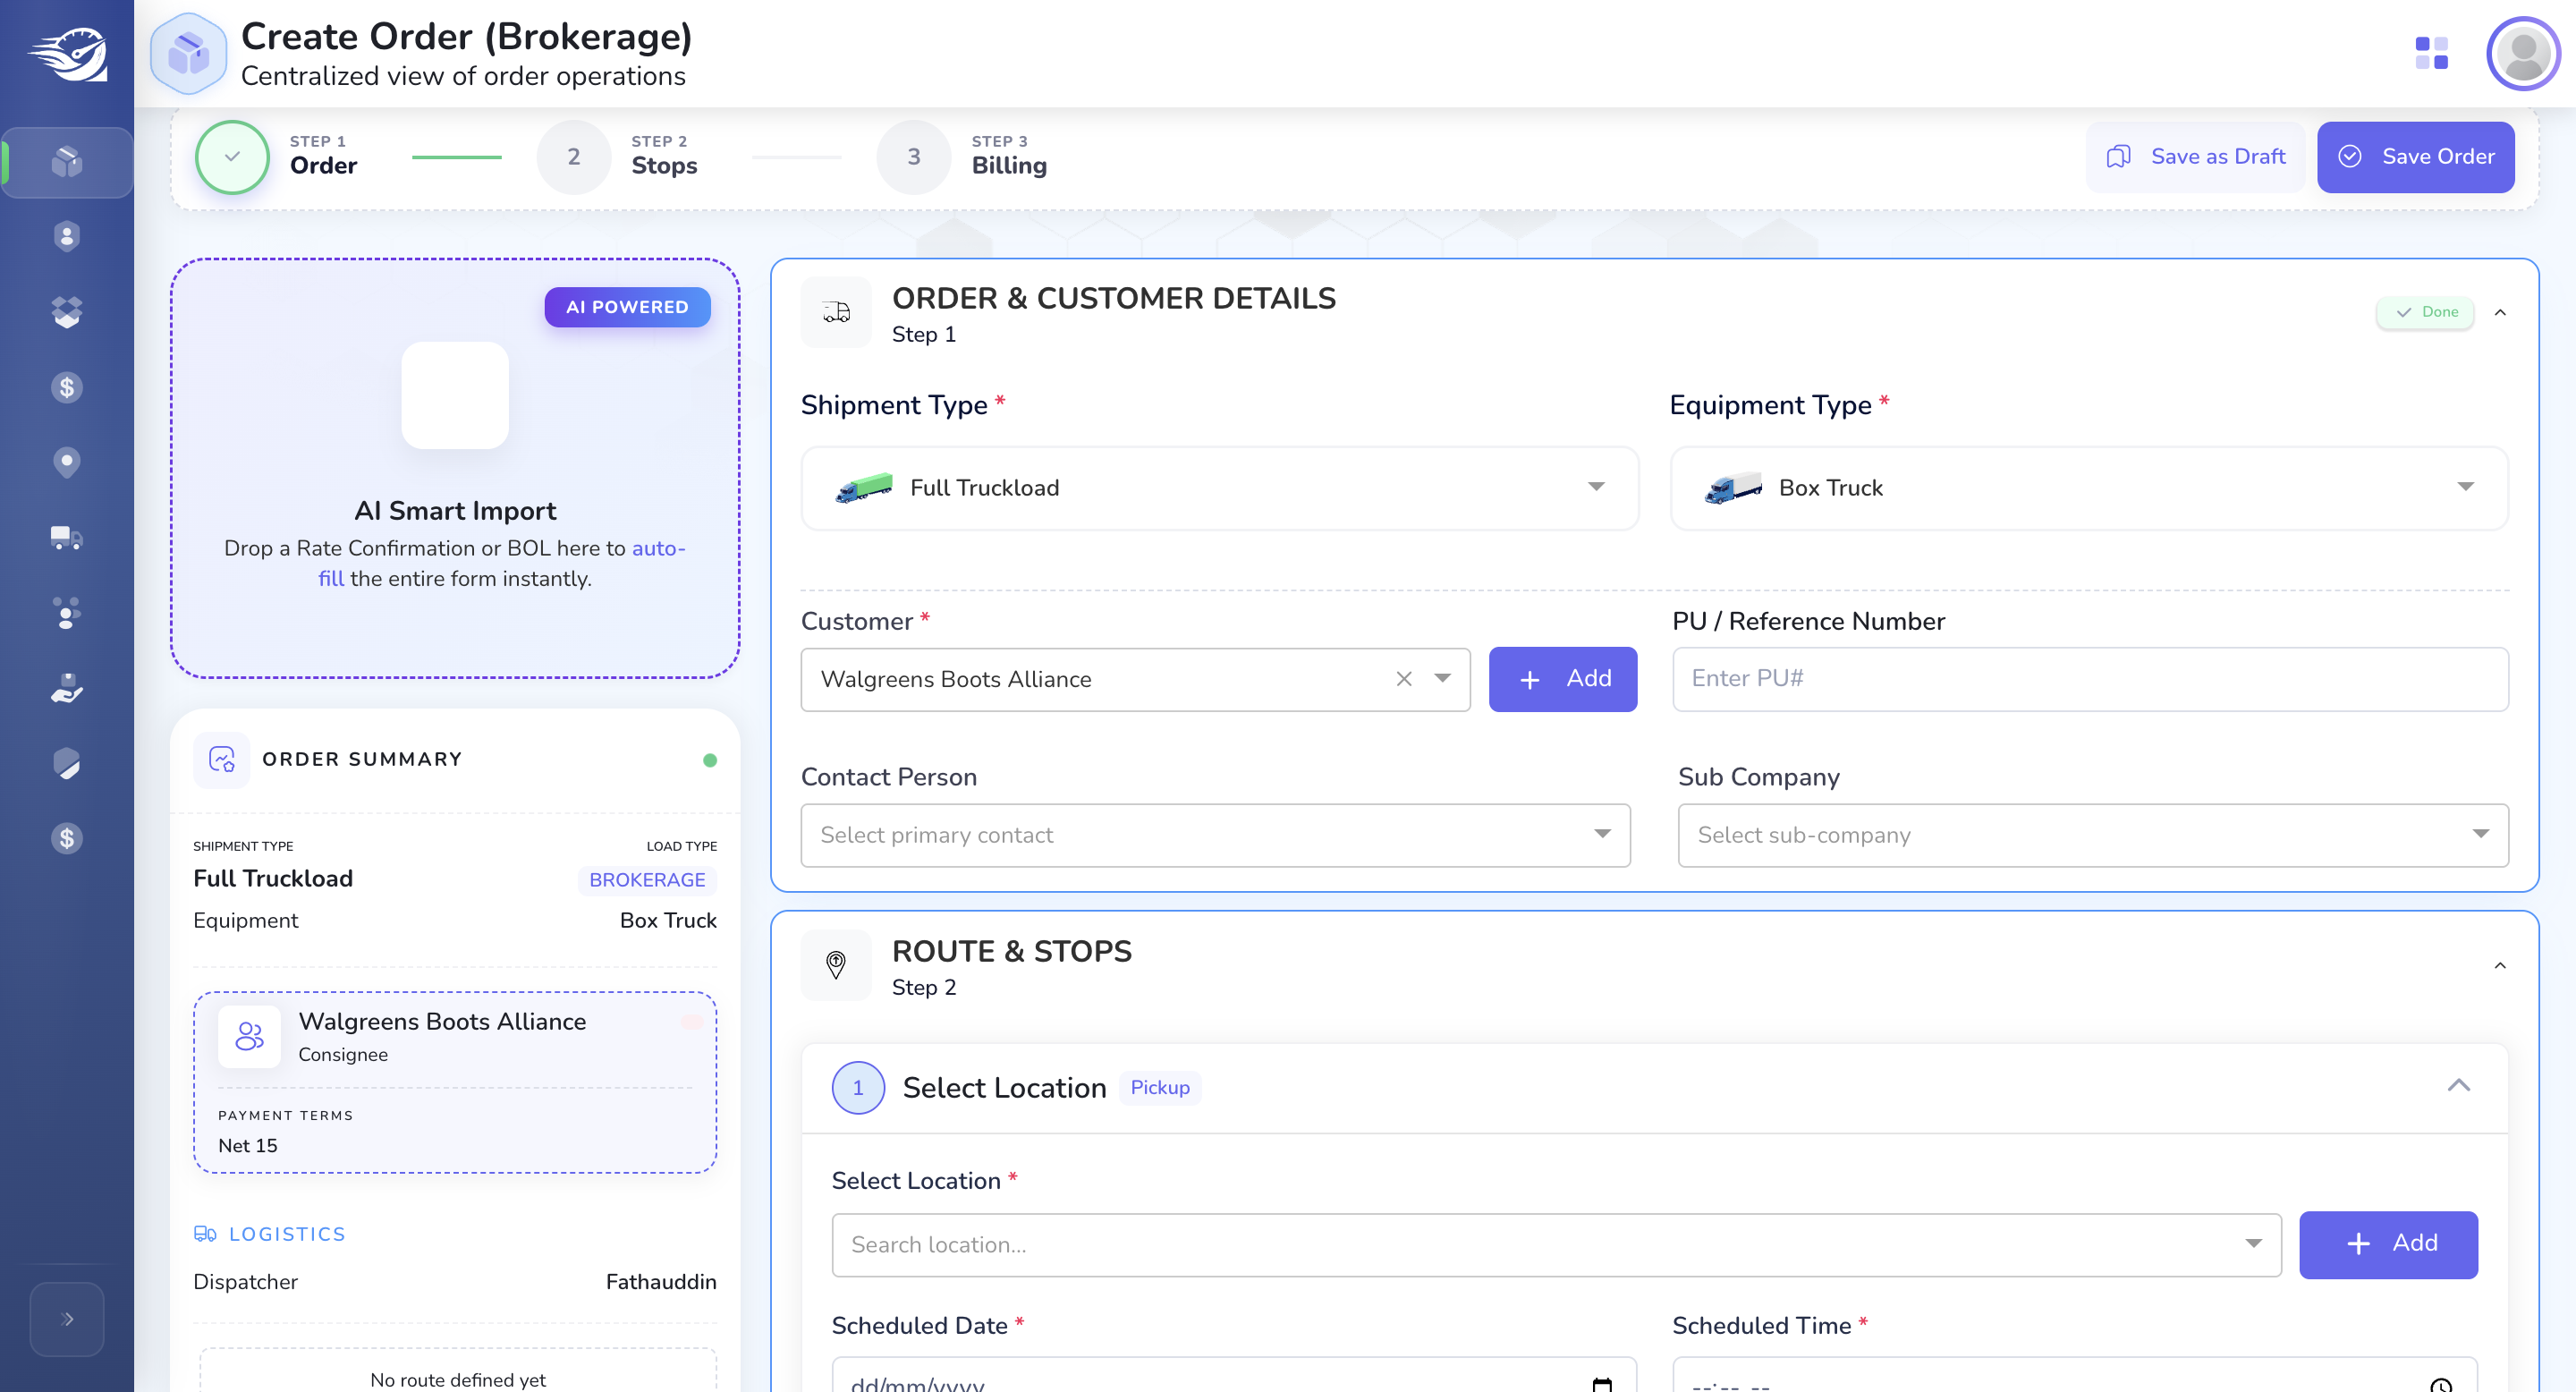
Let's begin with the initial process of creating an order.
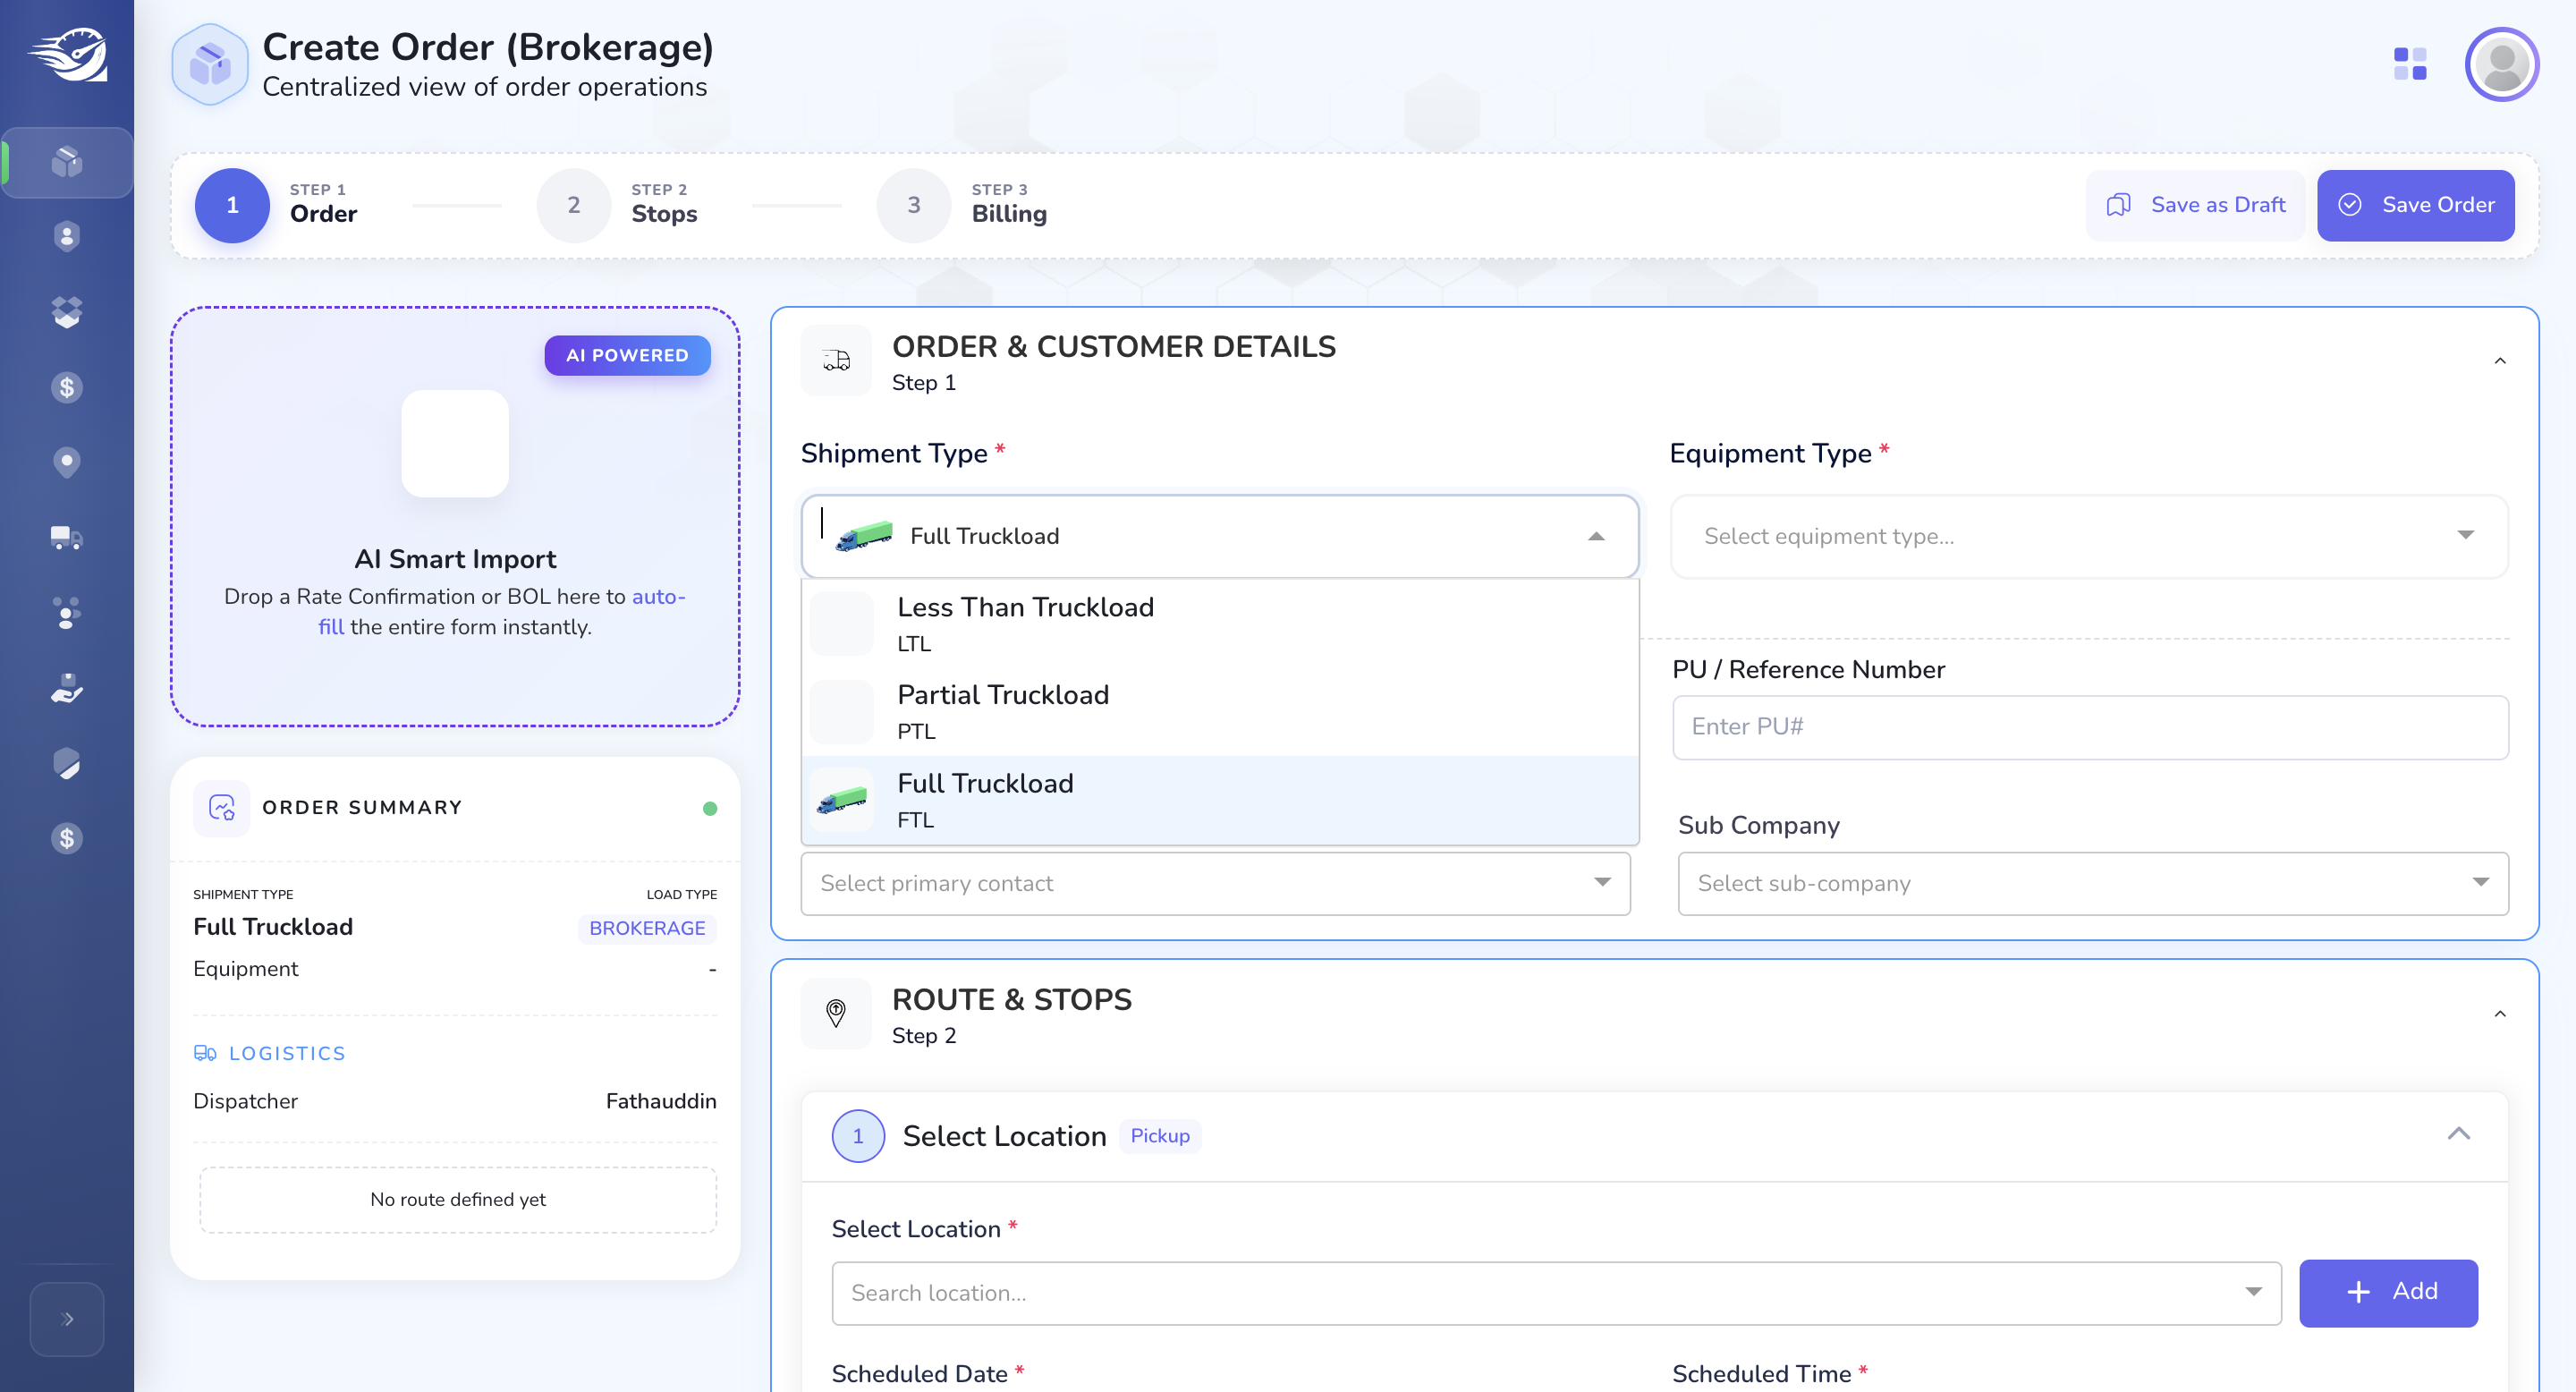
First, we will proceed with the broker persona. We will start with the broker flow: create order, broker.
1) We have these steps and guidance at the top of the header.
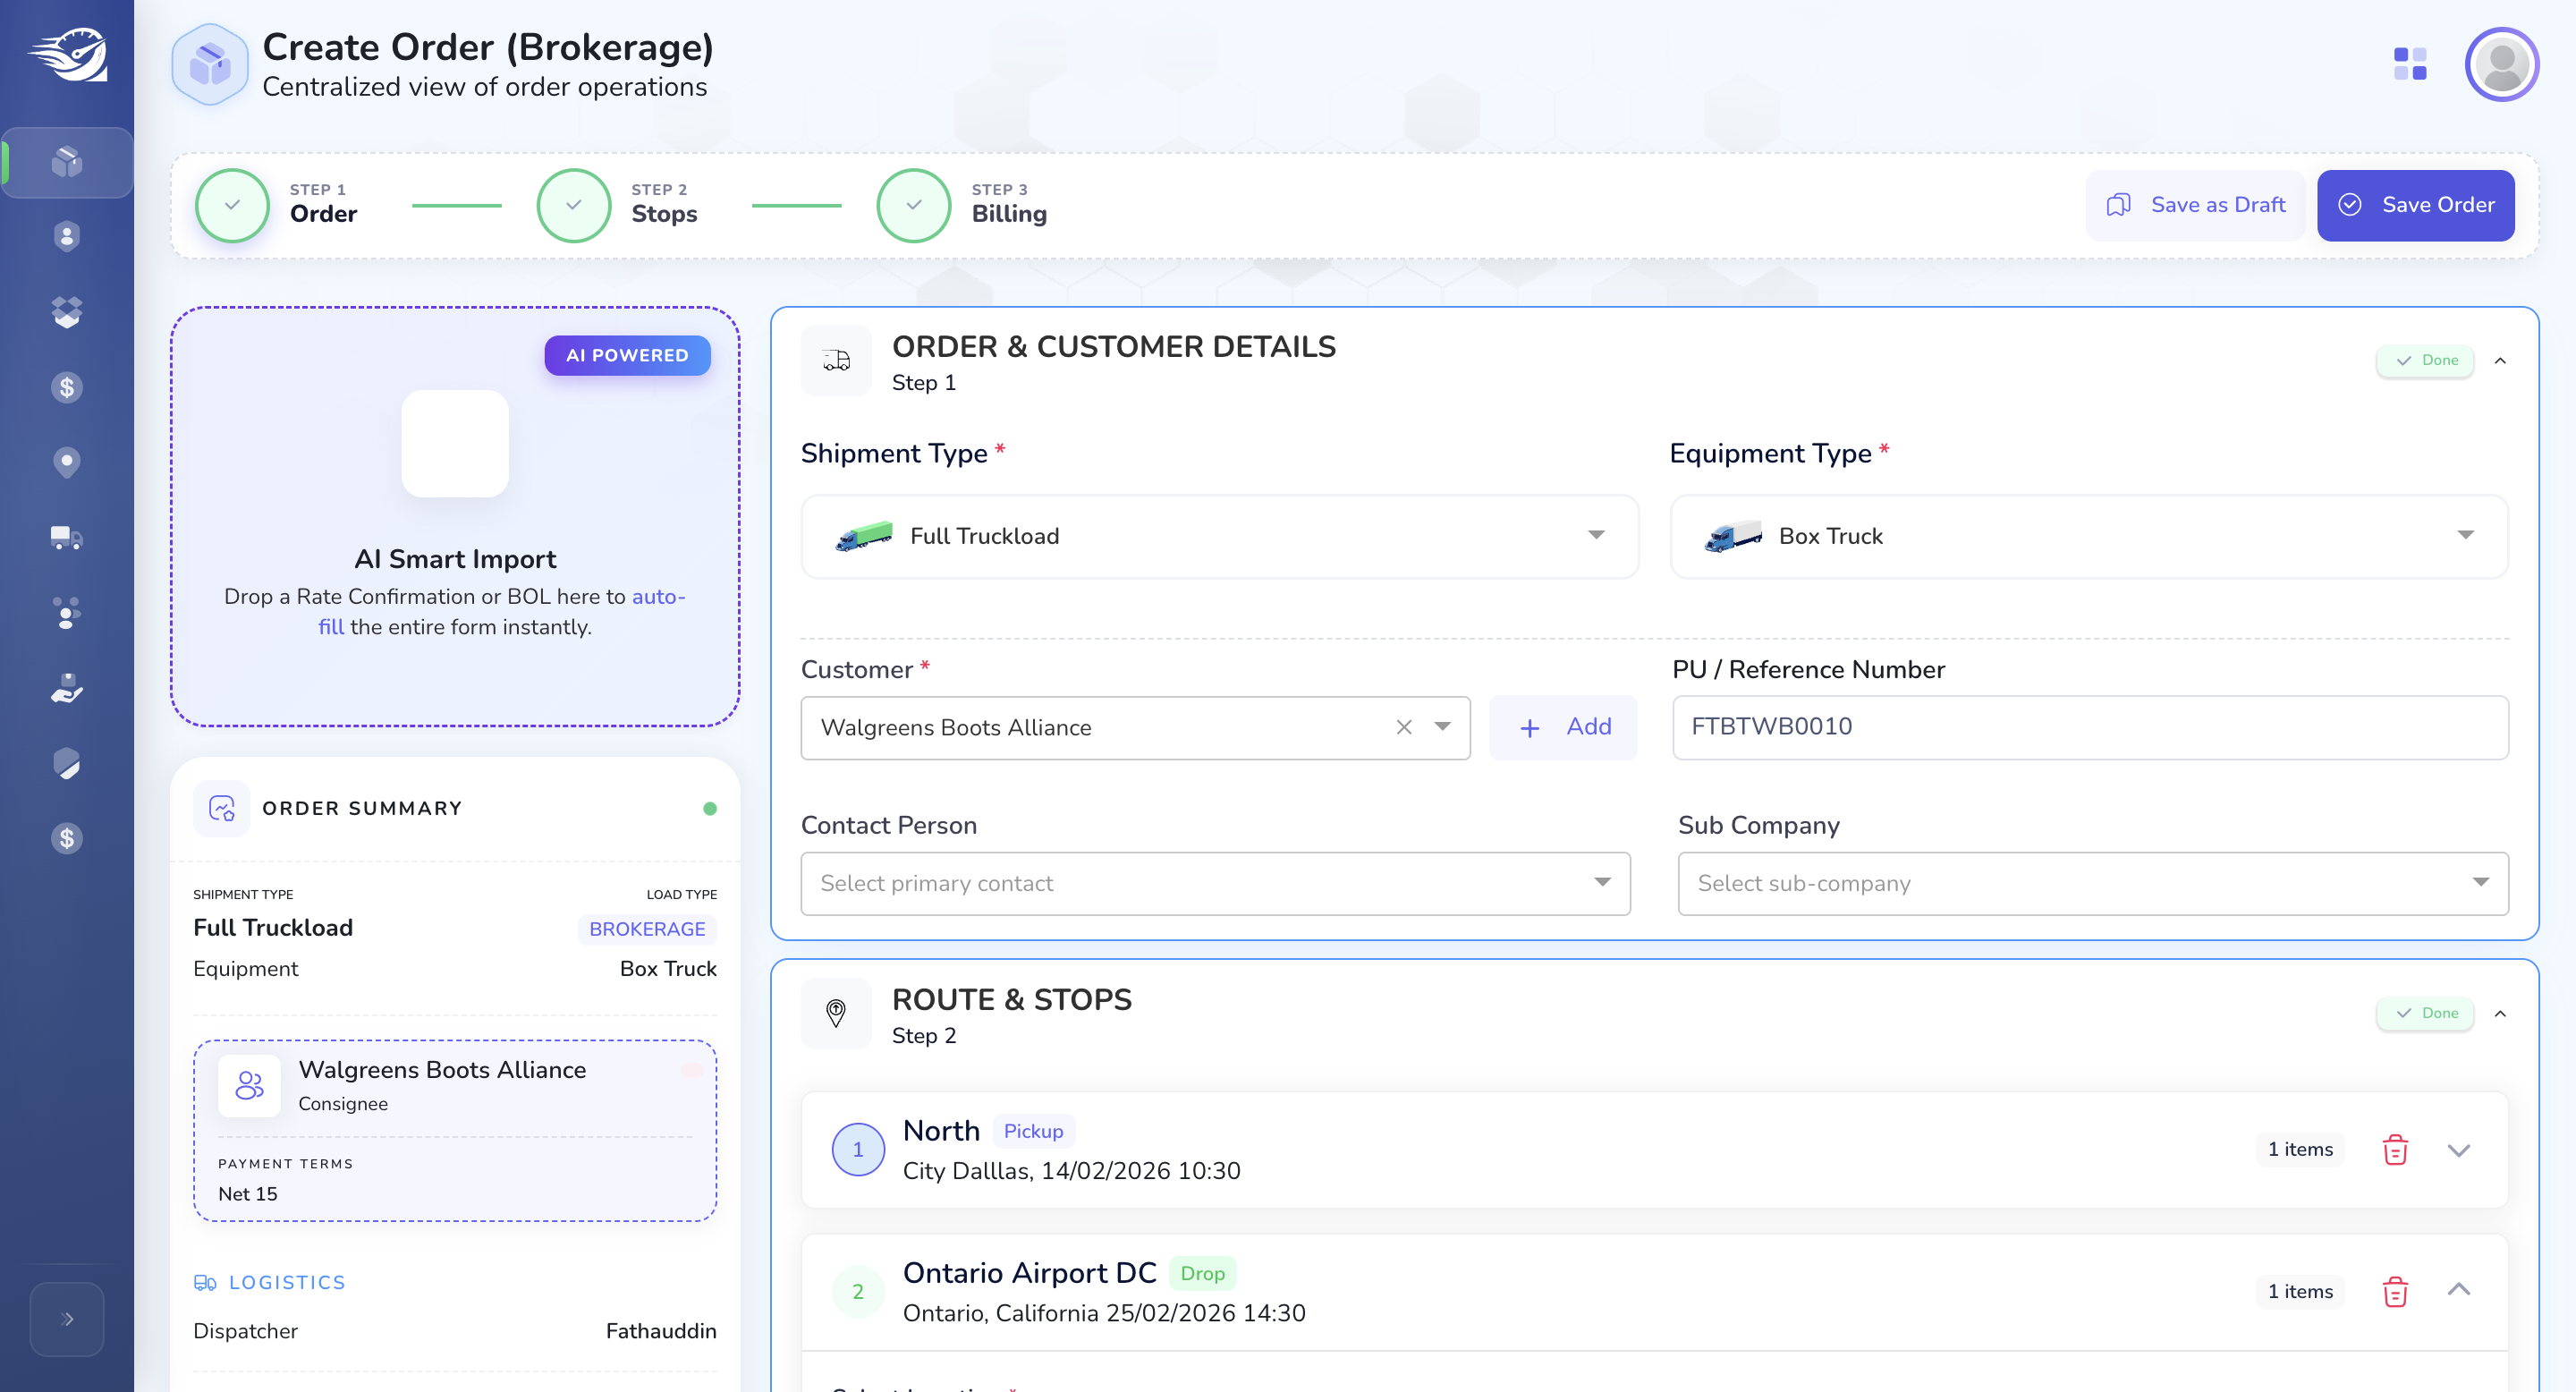
2) We have Start Import Section at left, (we will implement Ai integrated smart import feature in future.)
3) We will also have a live preview summary of the Order on the left side.
Let's begin creating an order.
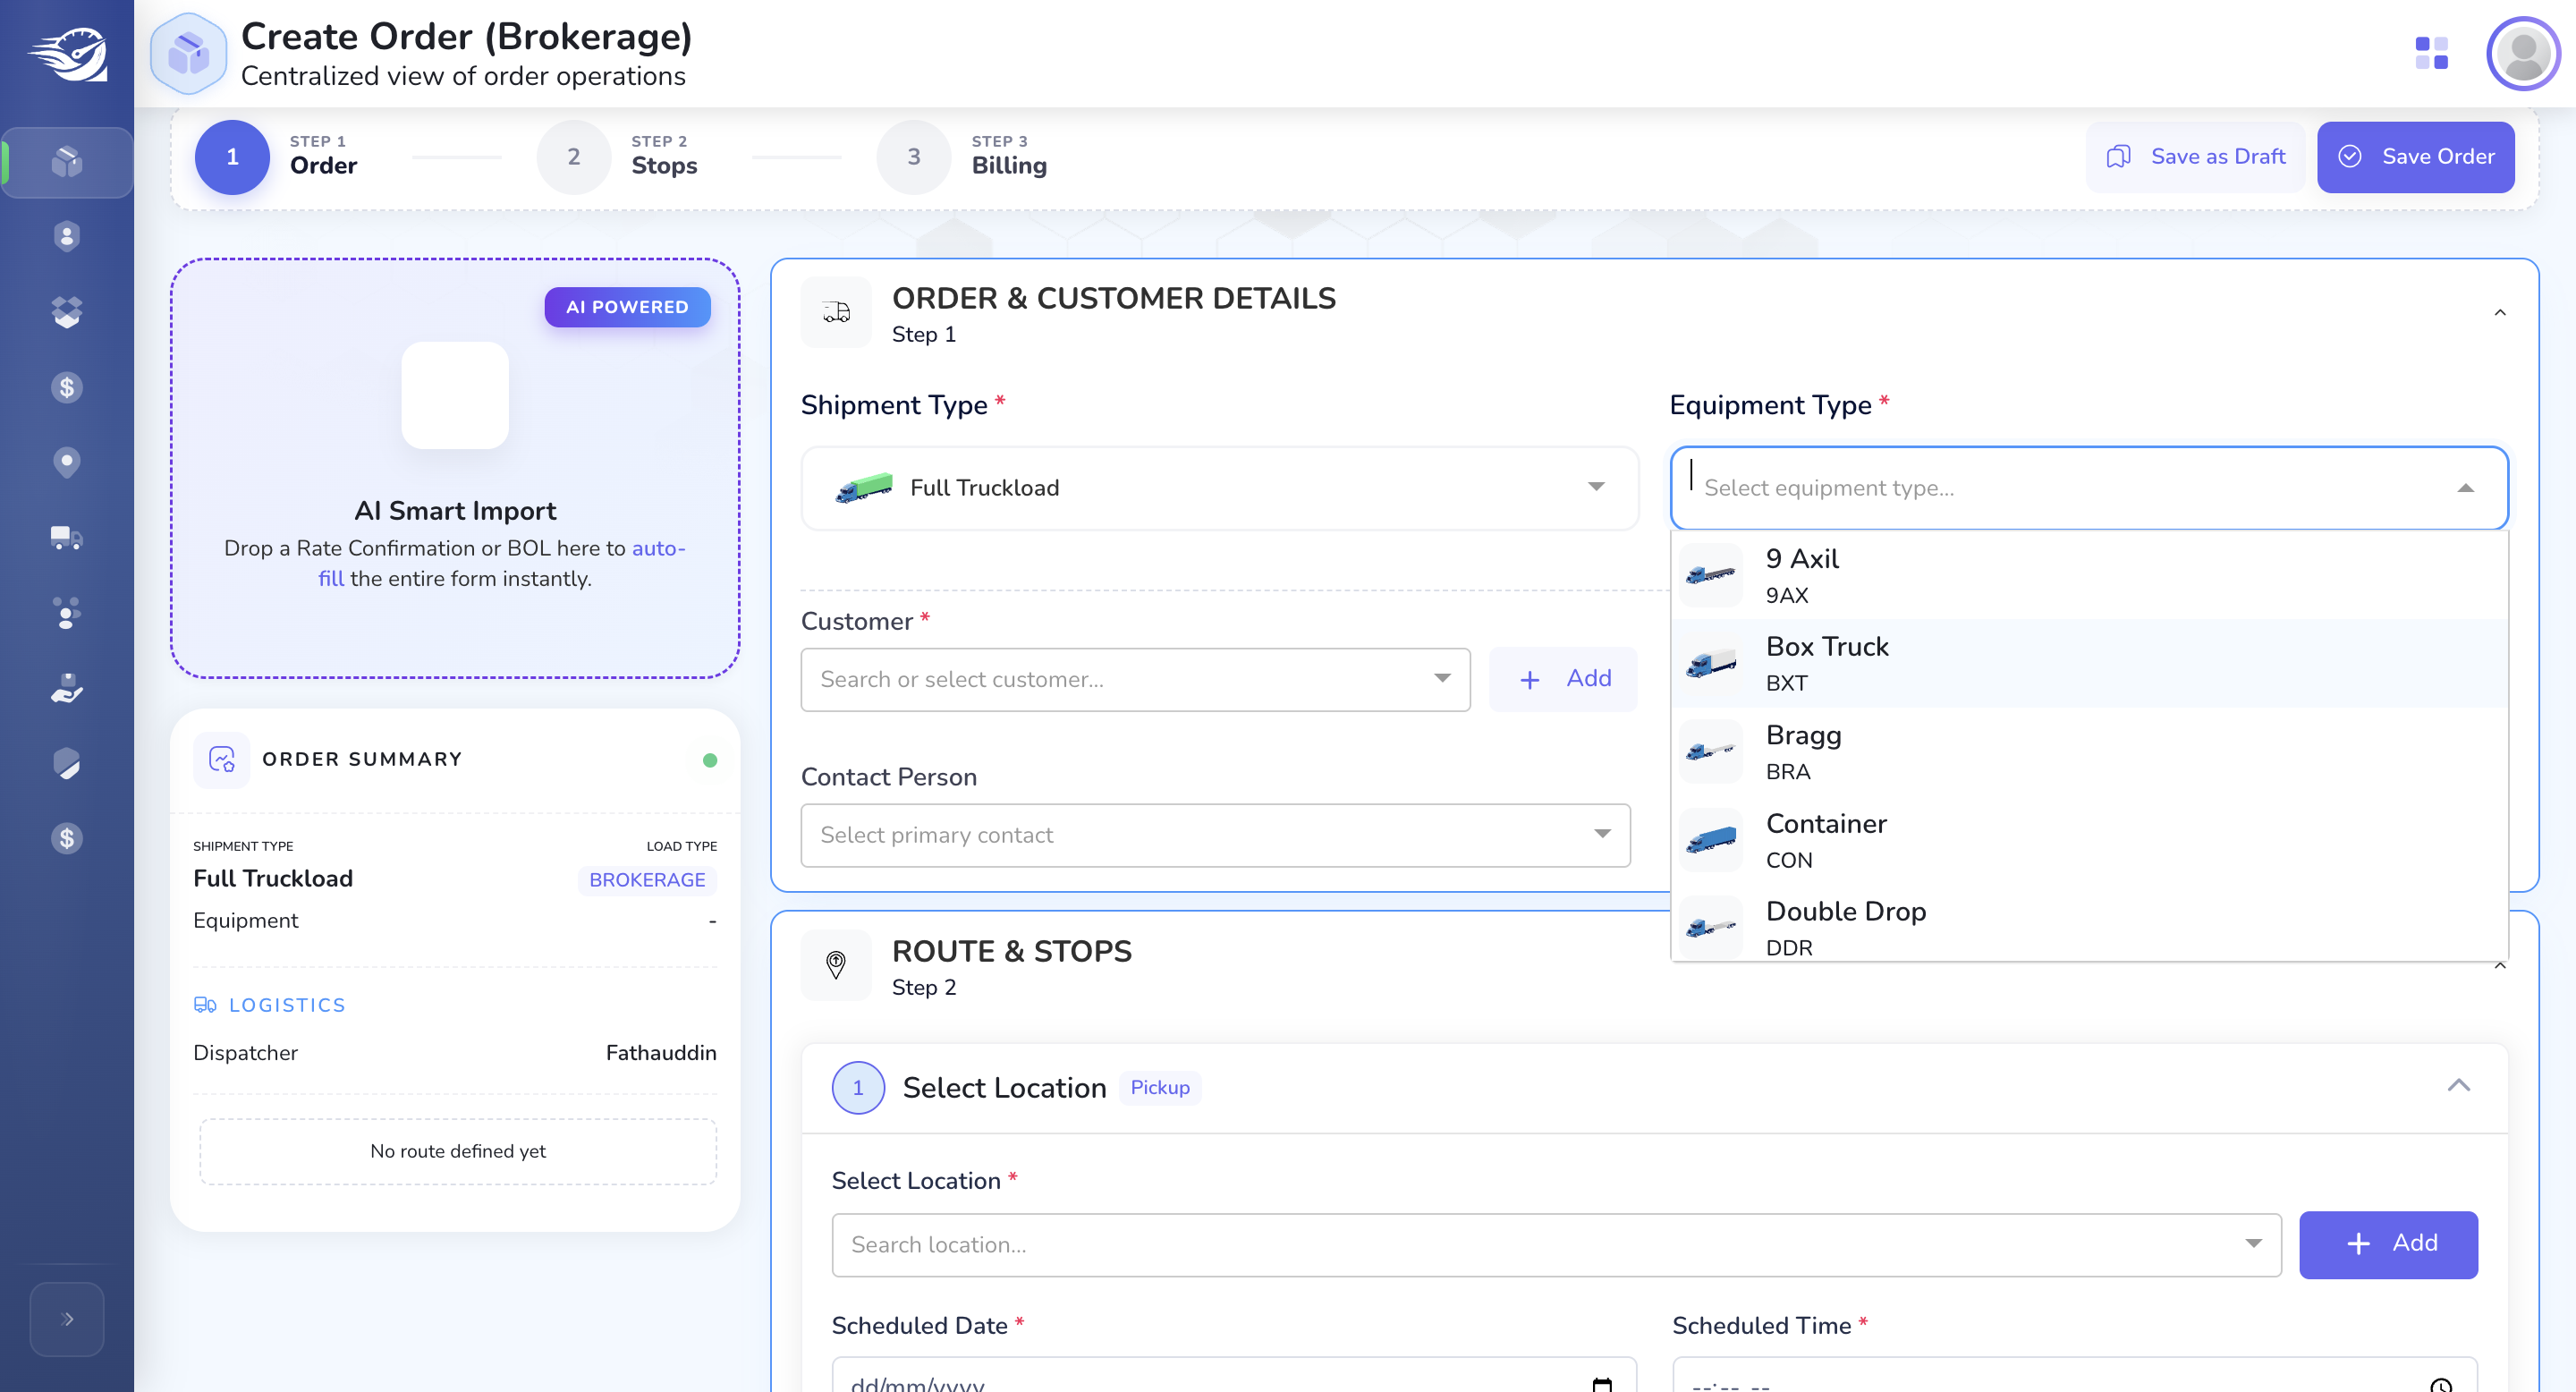
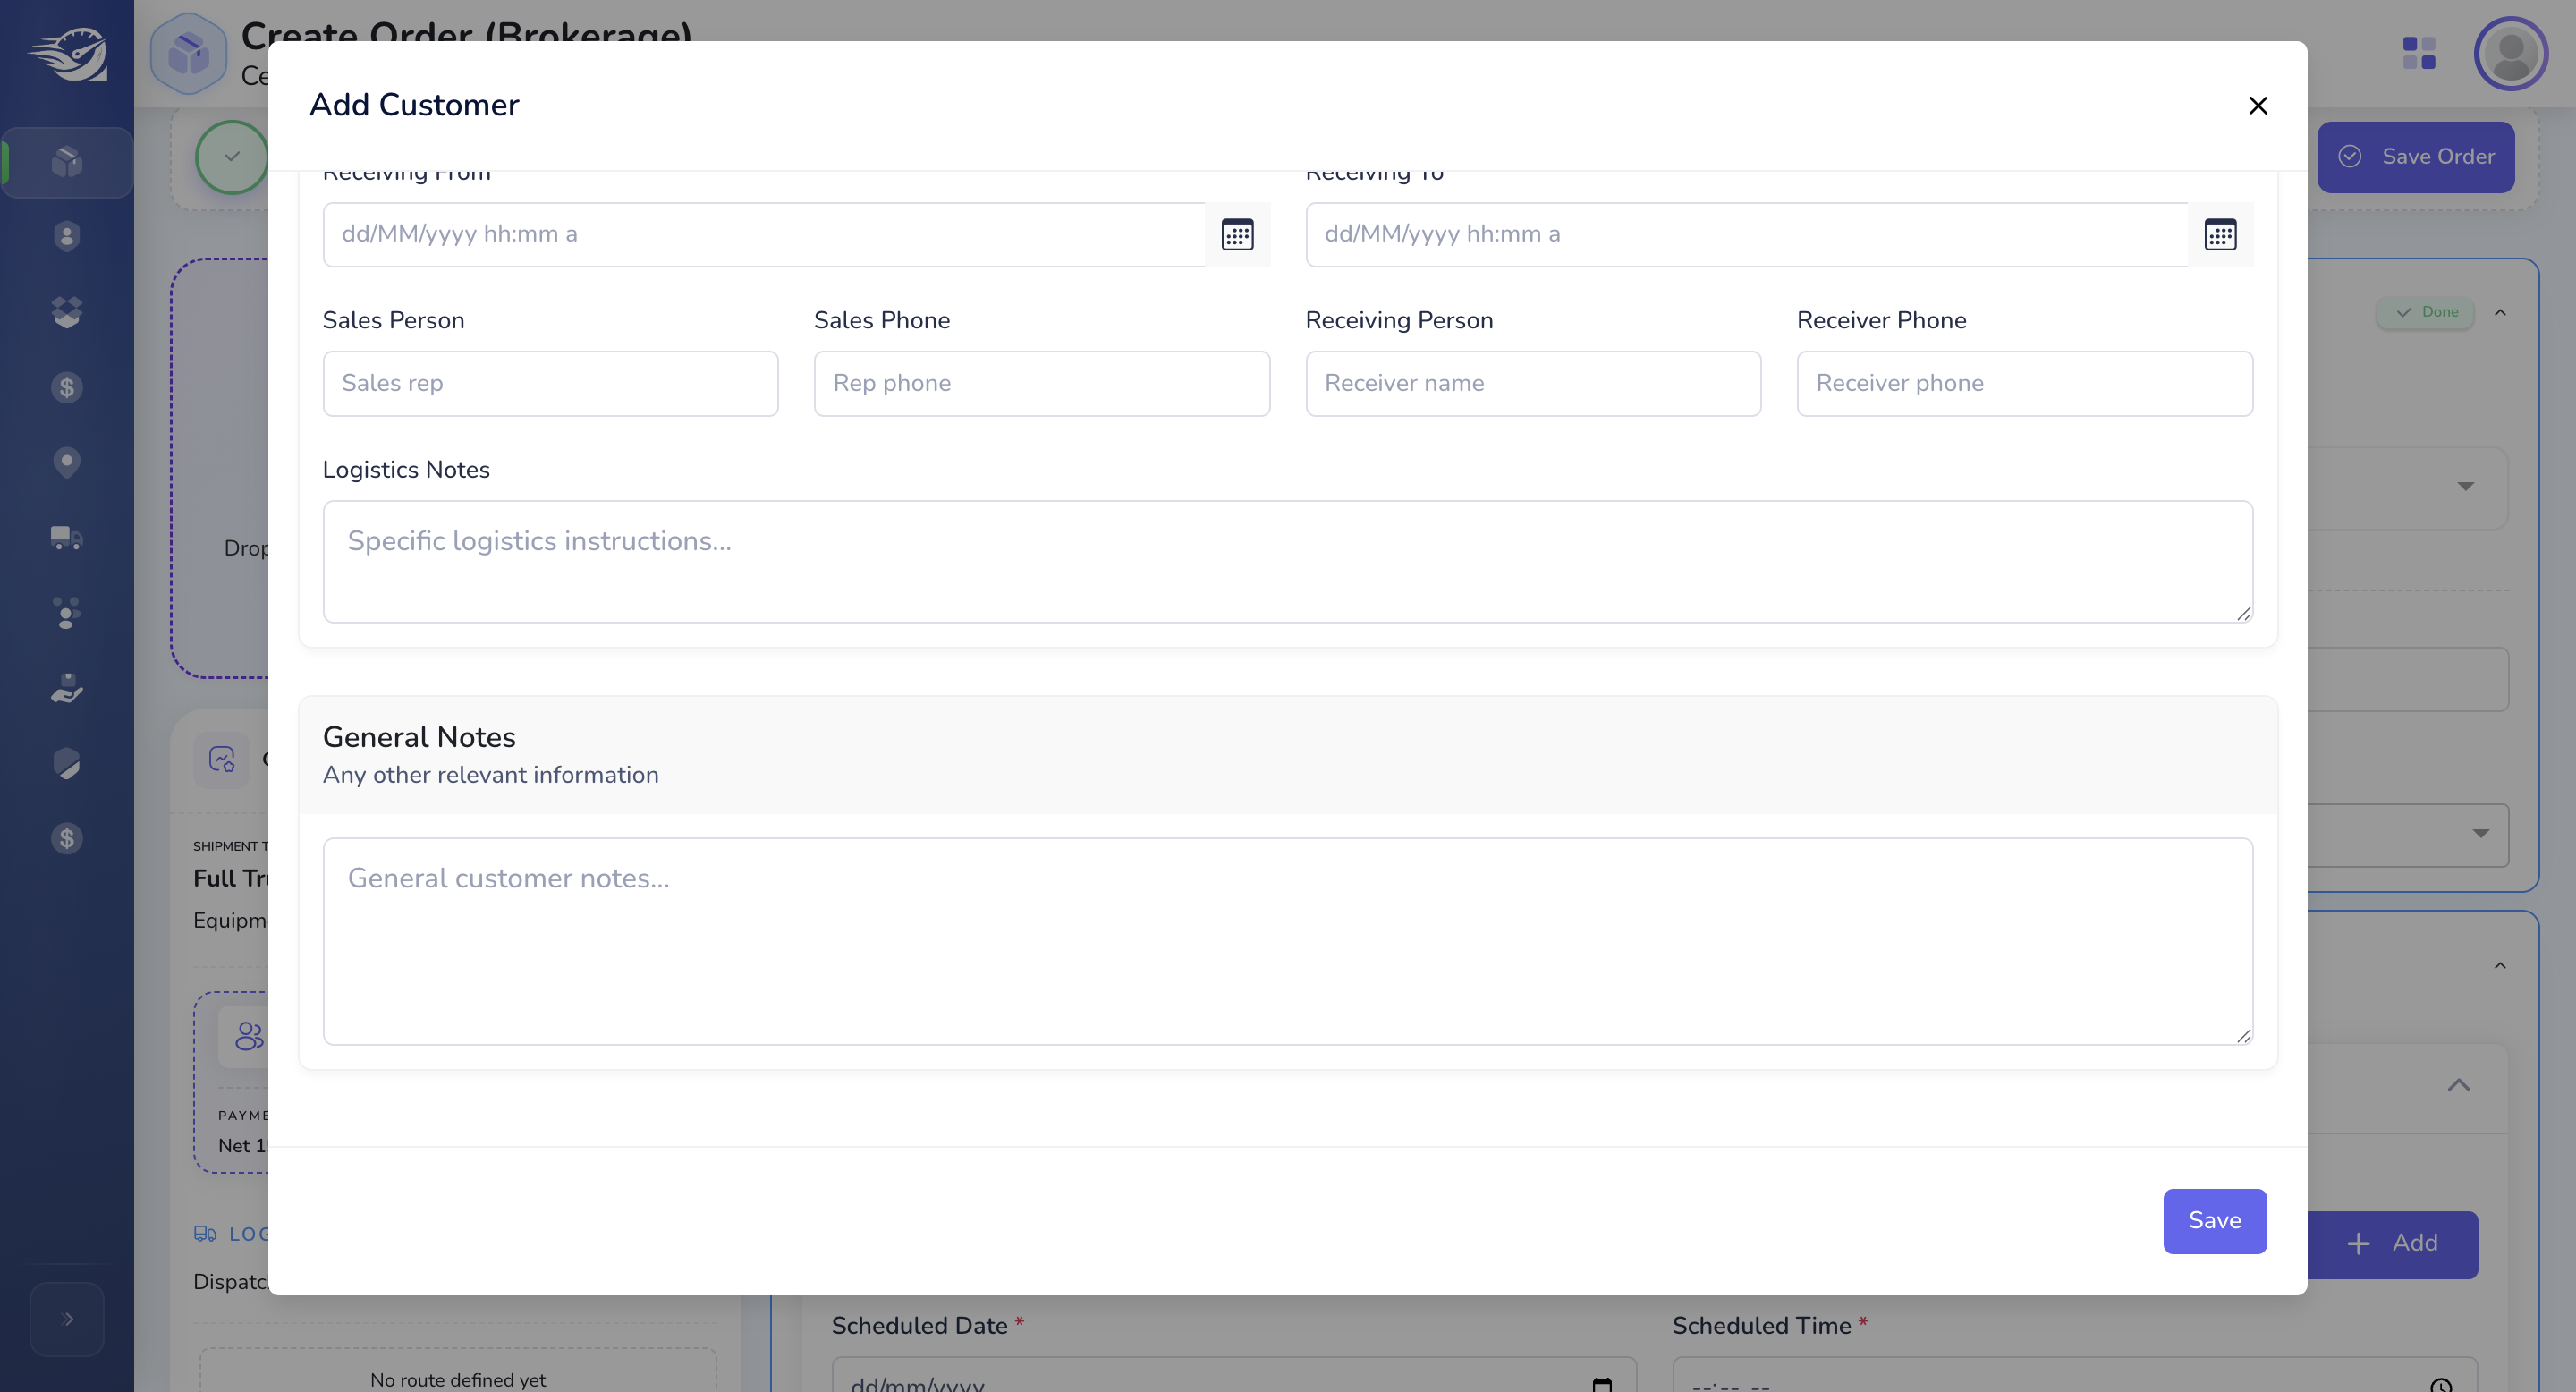
We will have the list of customers here. I will also show the screen where we can Add a new customer also.
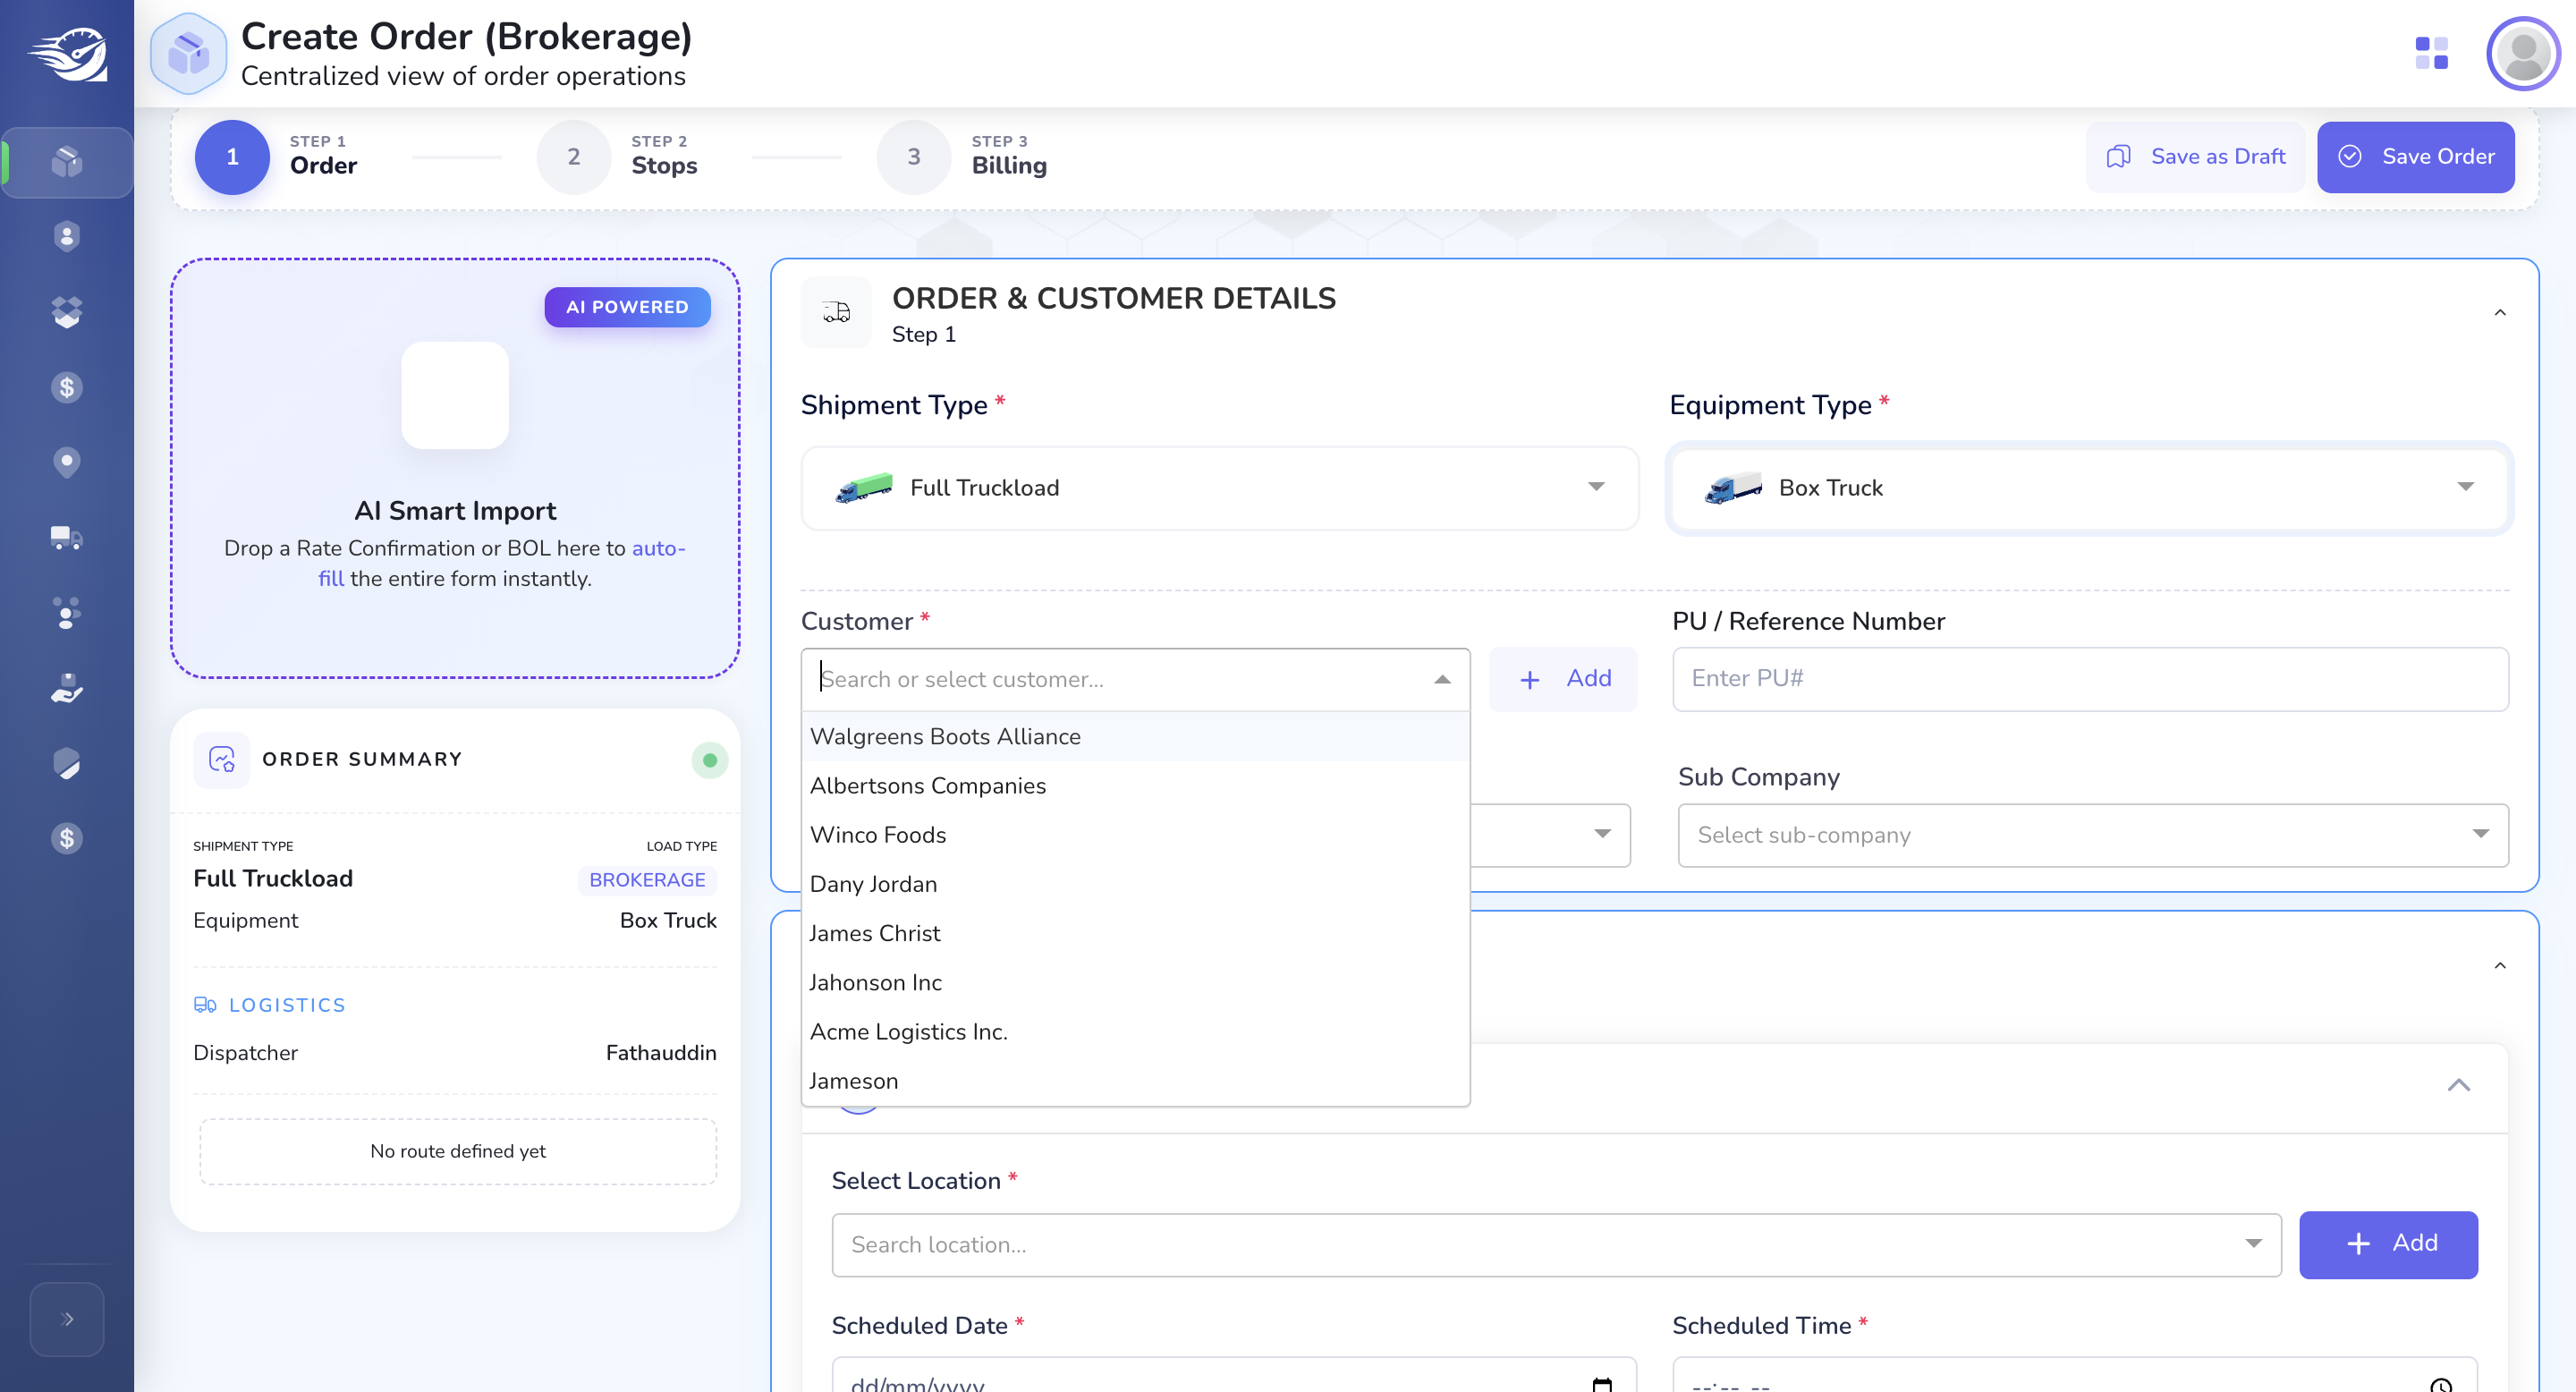
Here, you also have the option to create a customer.
If you click the add button, a pop-up will appear to create a customer.
Add Customer : We will include the customer name, type, payment type, and billing address.
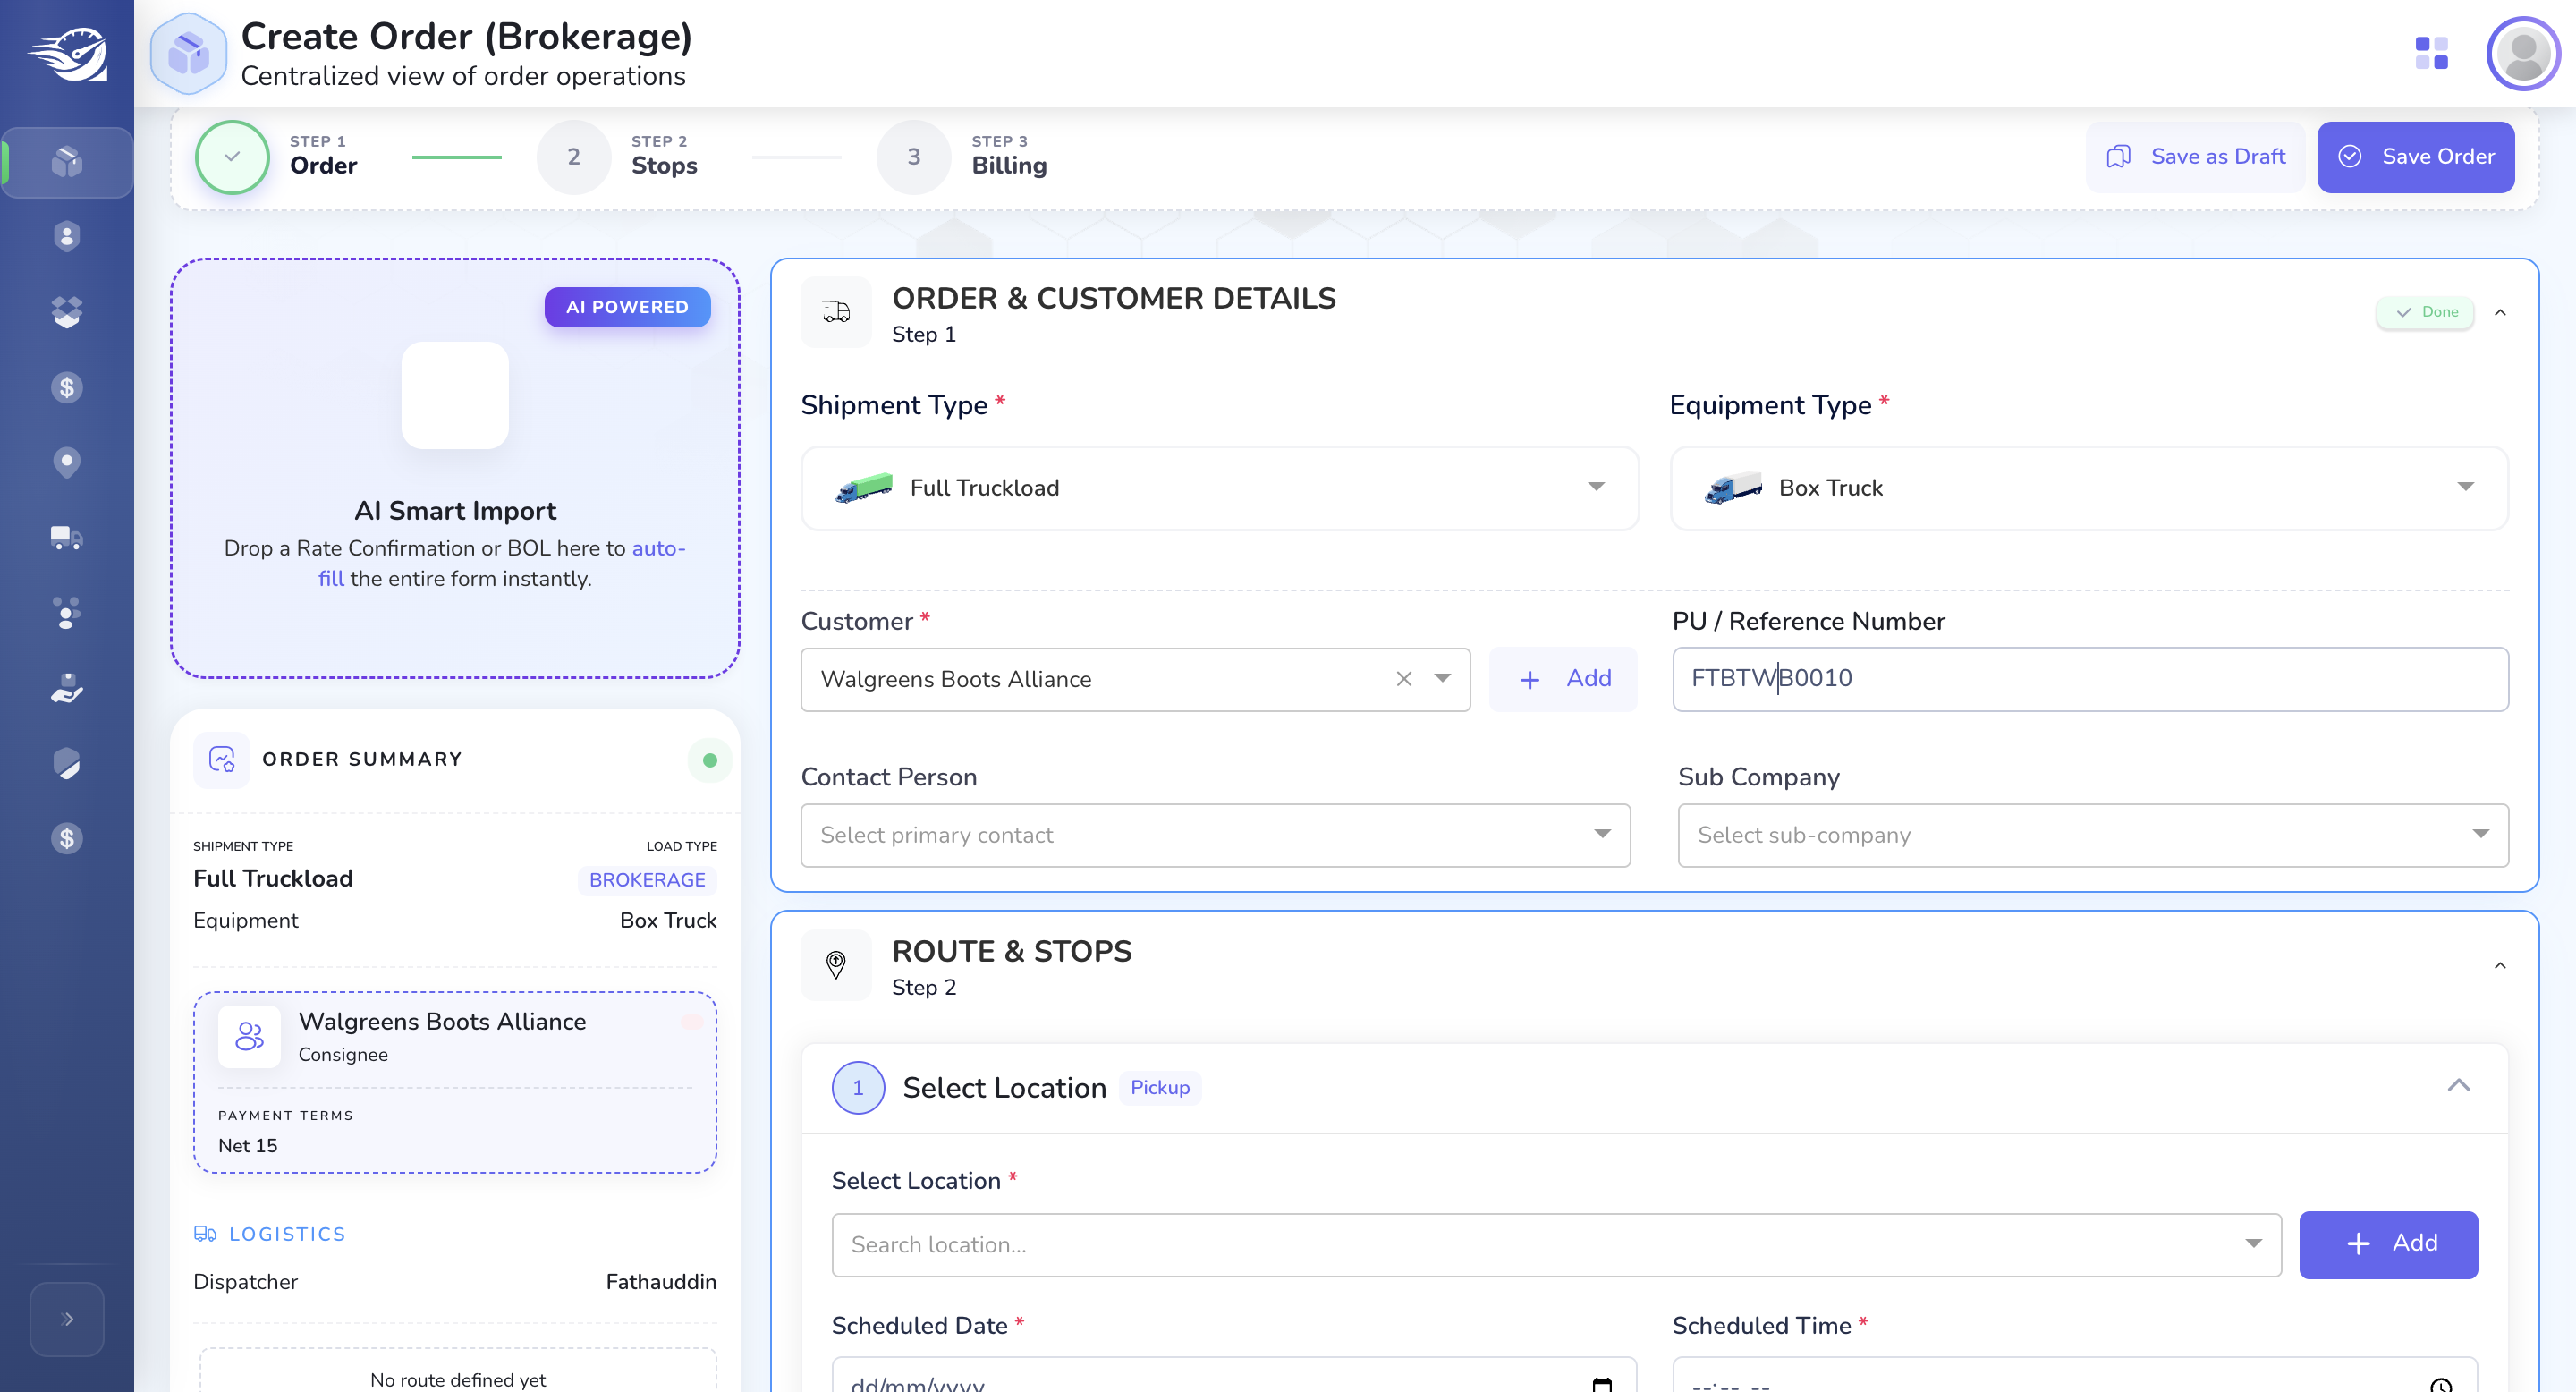
Enter the Order's PO reference number here.
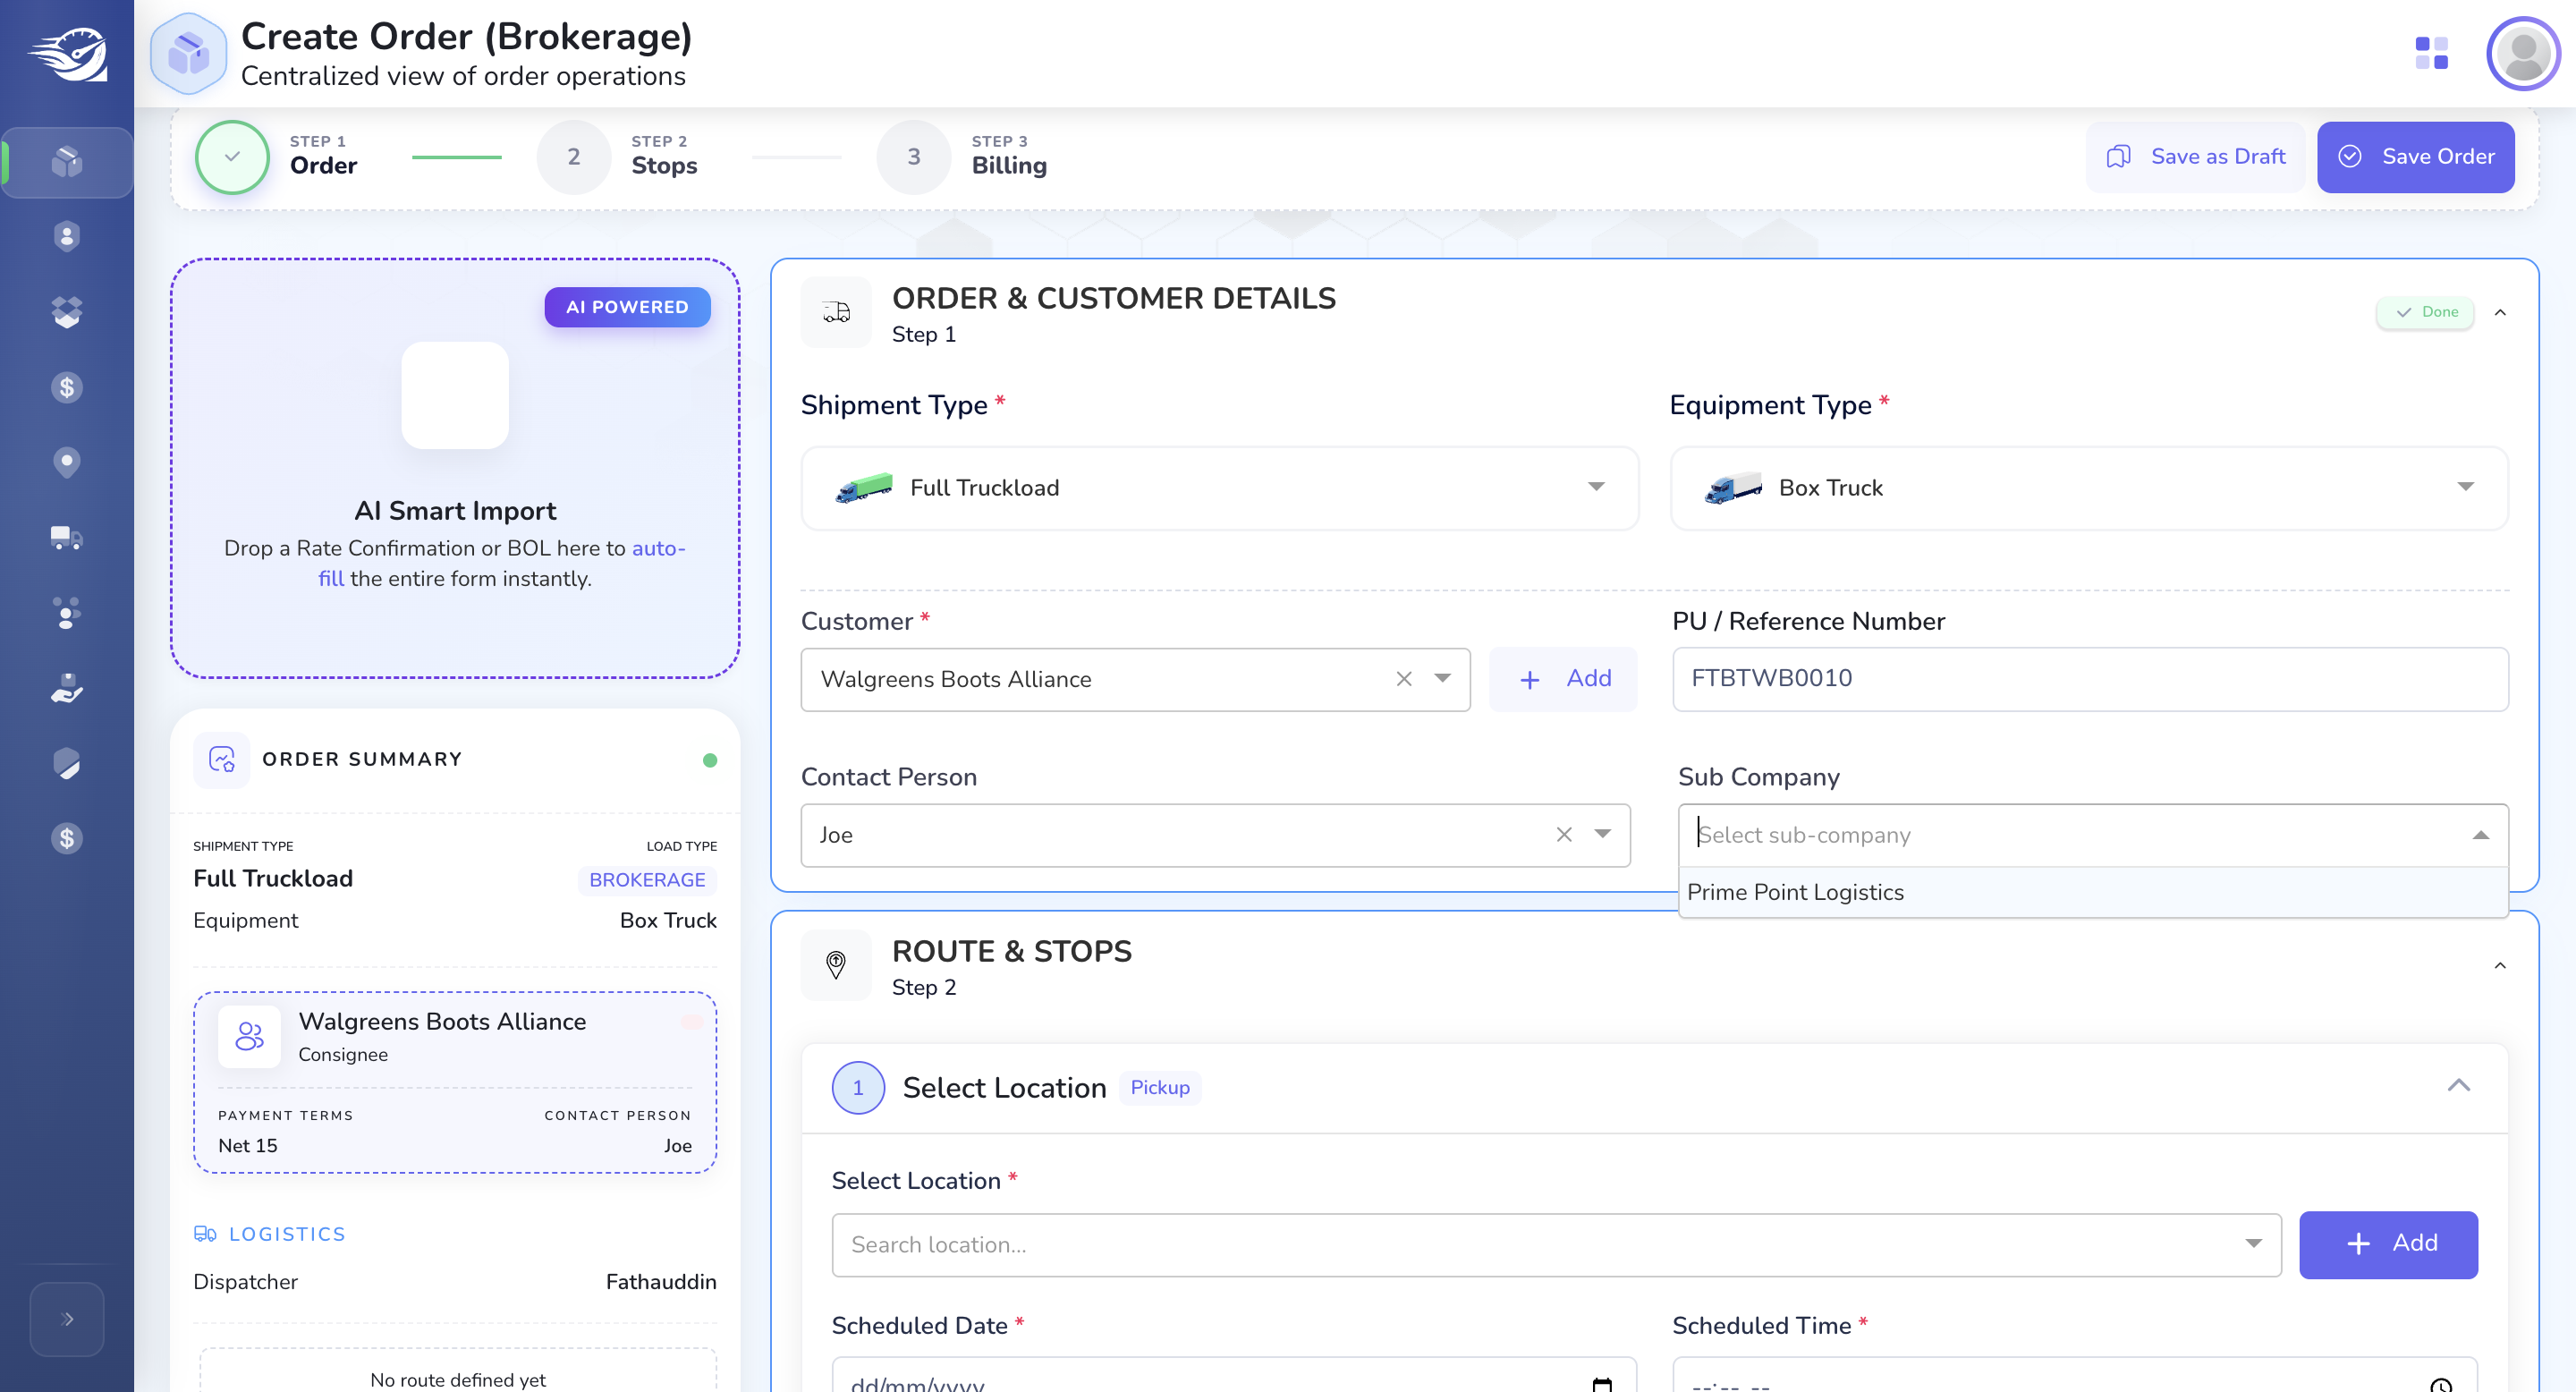
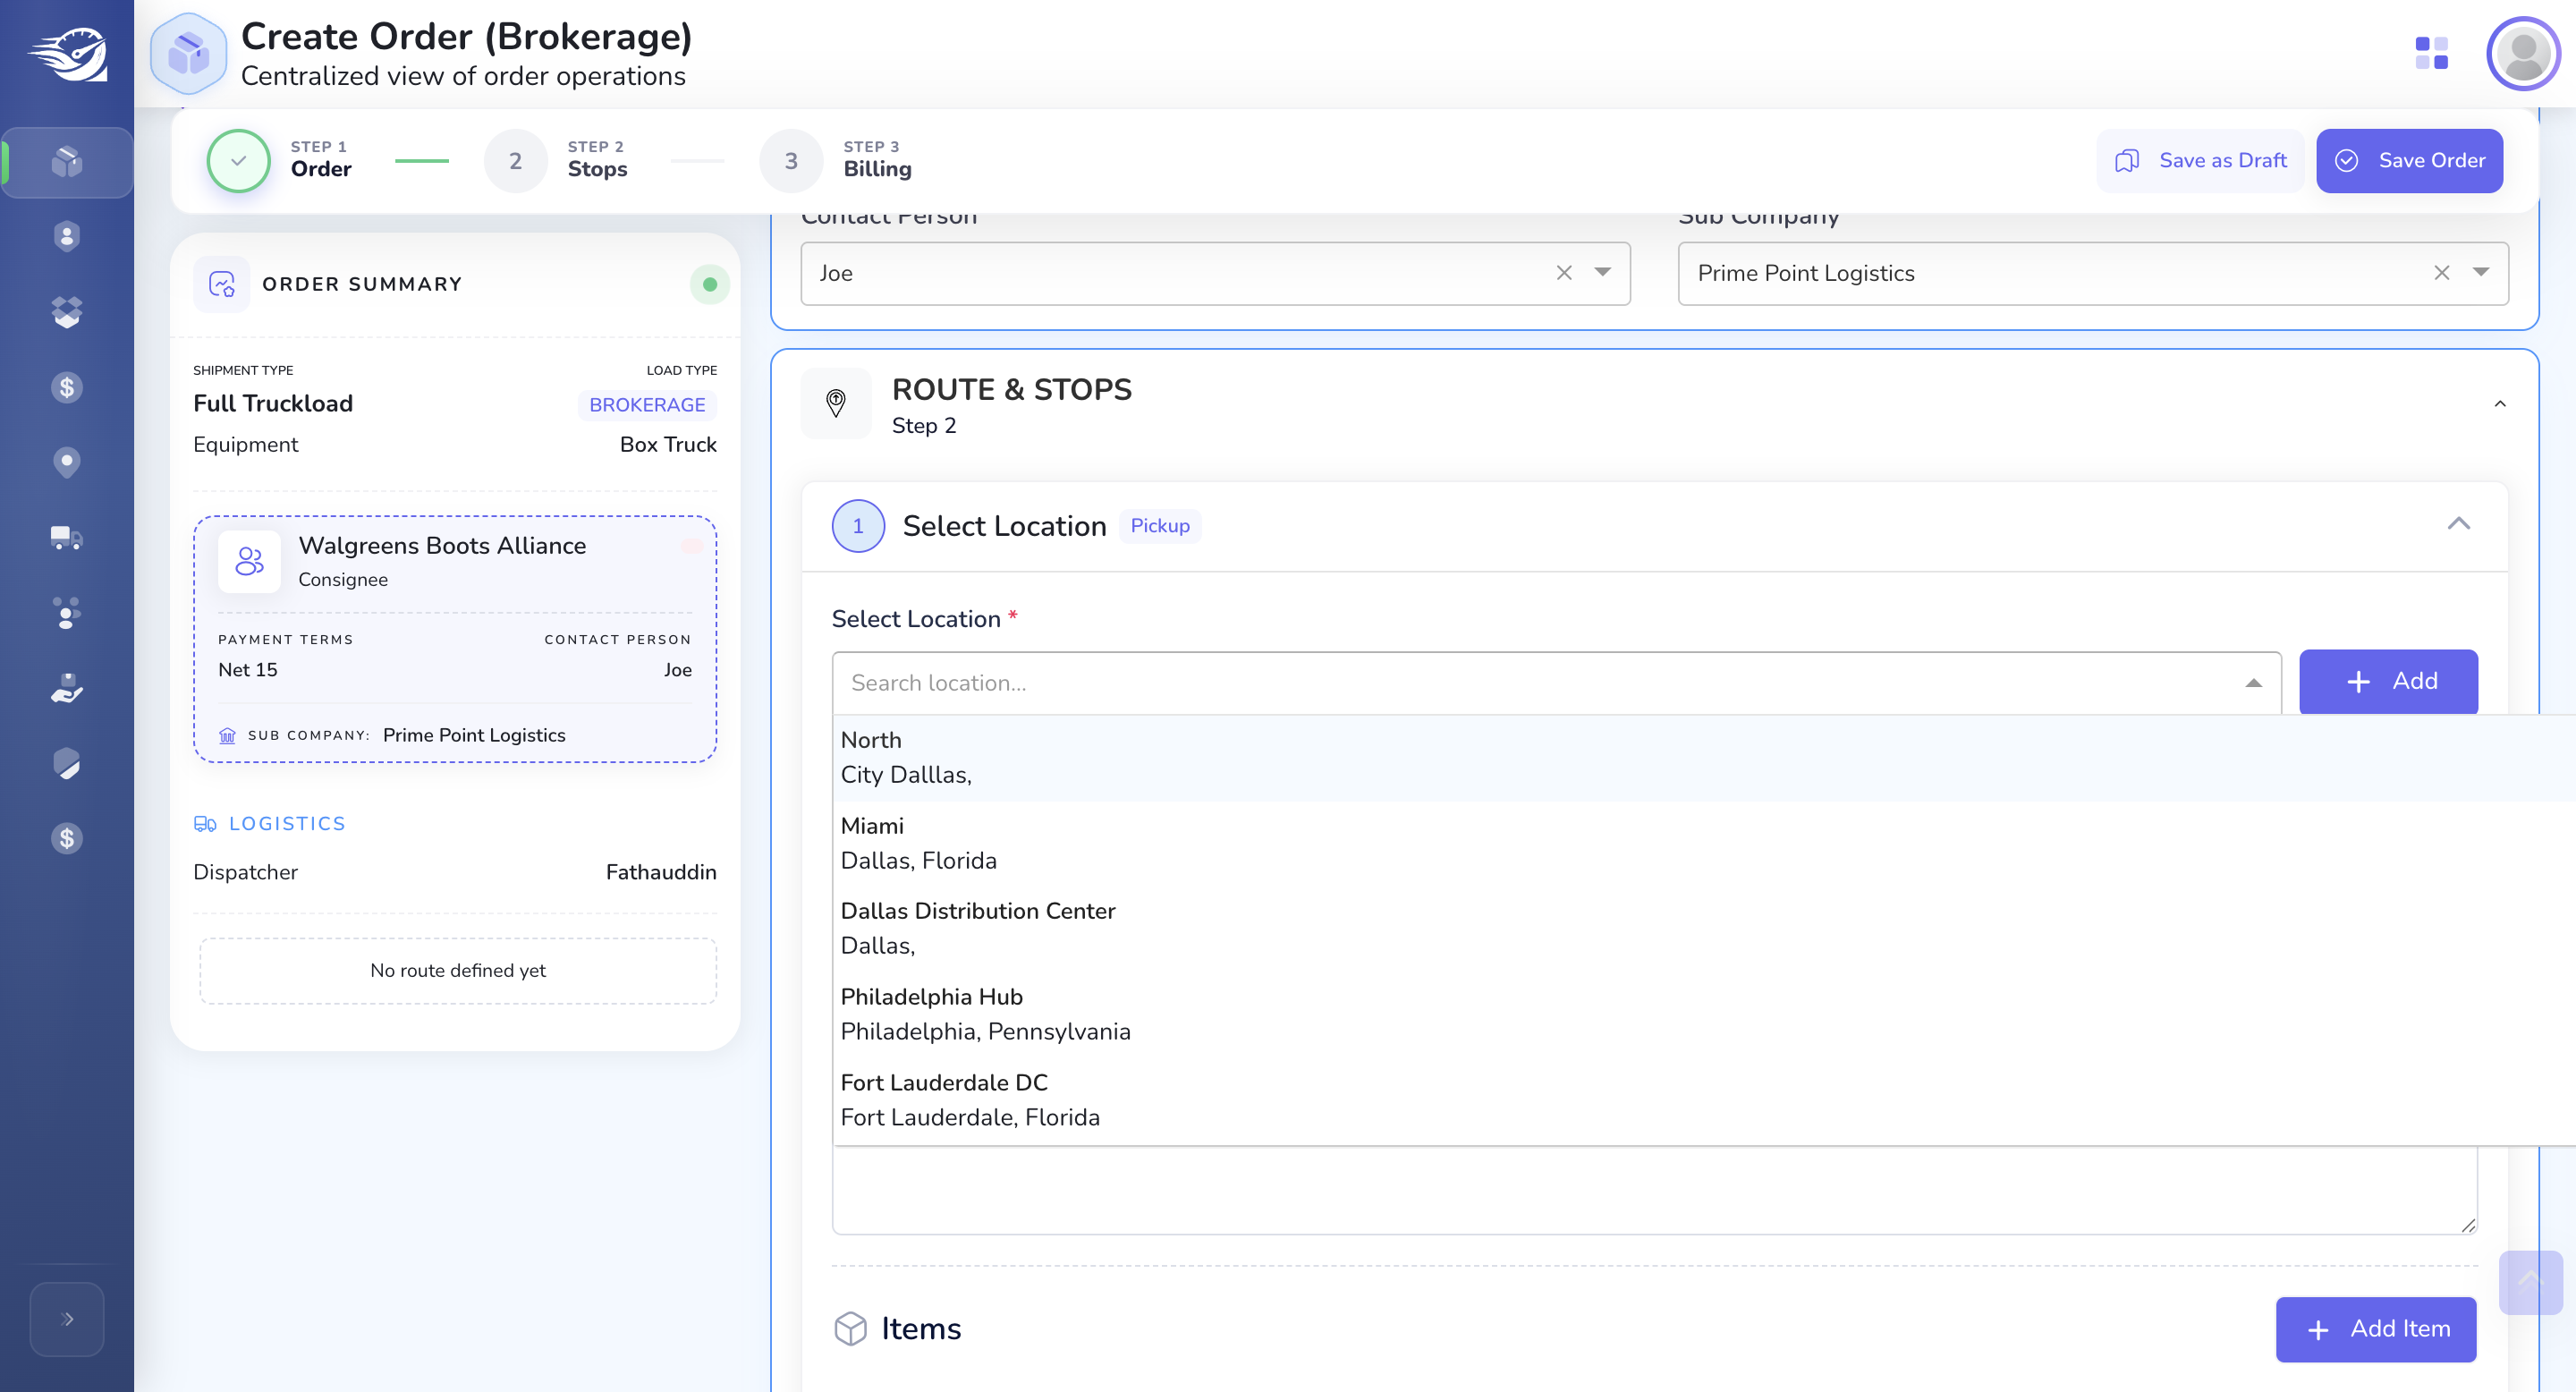
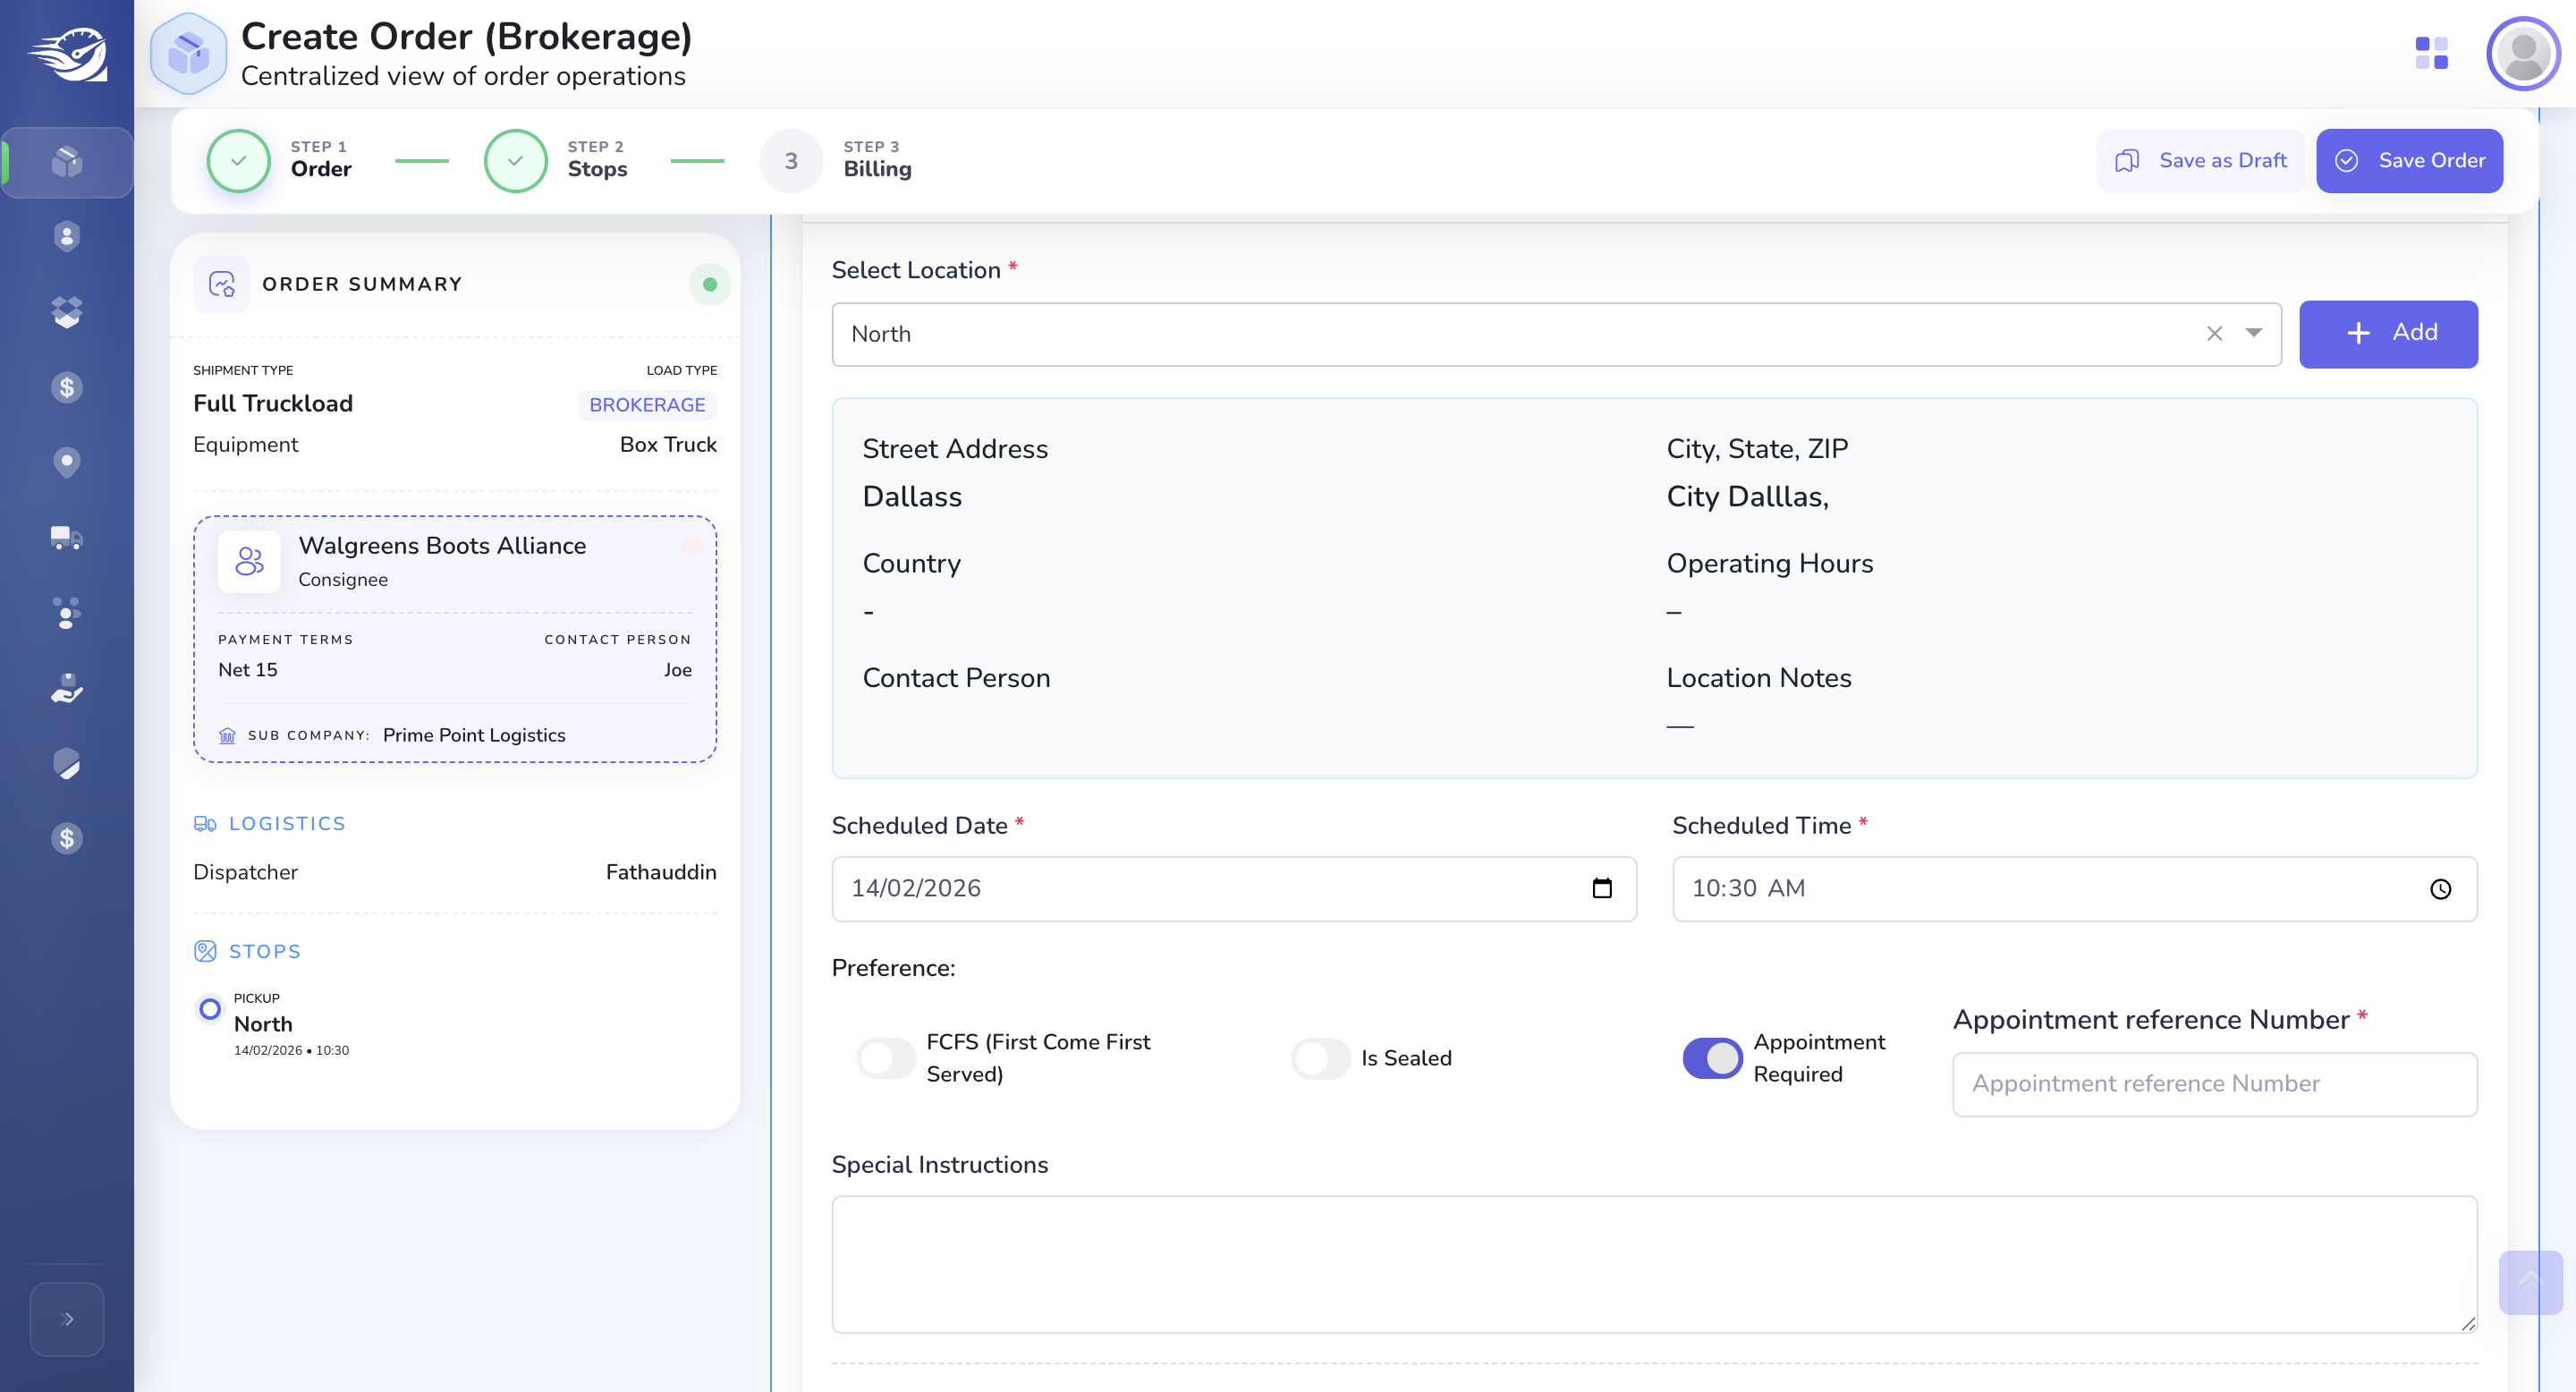
Route & Stops :
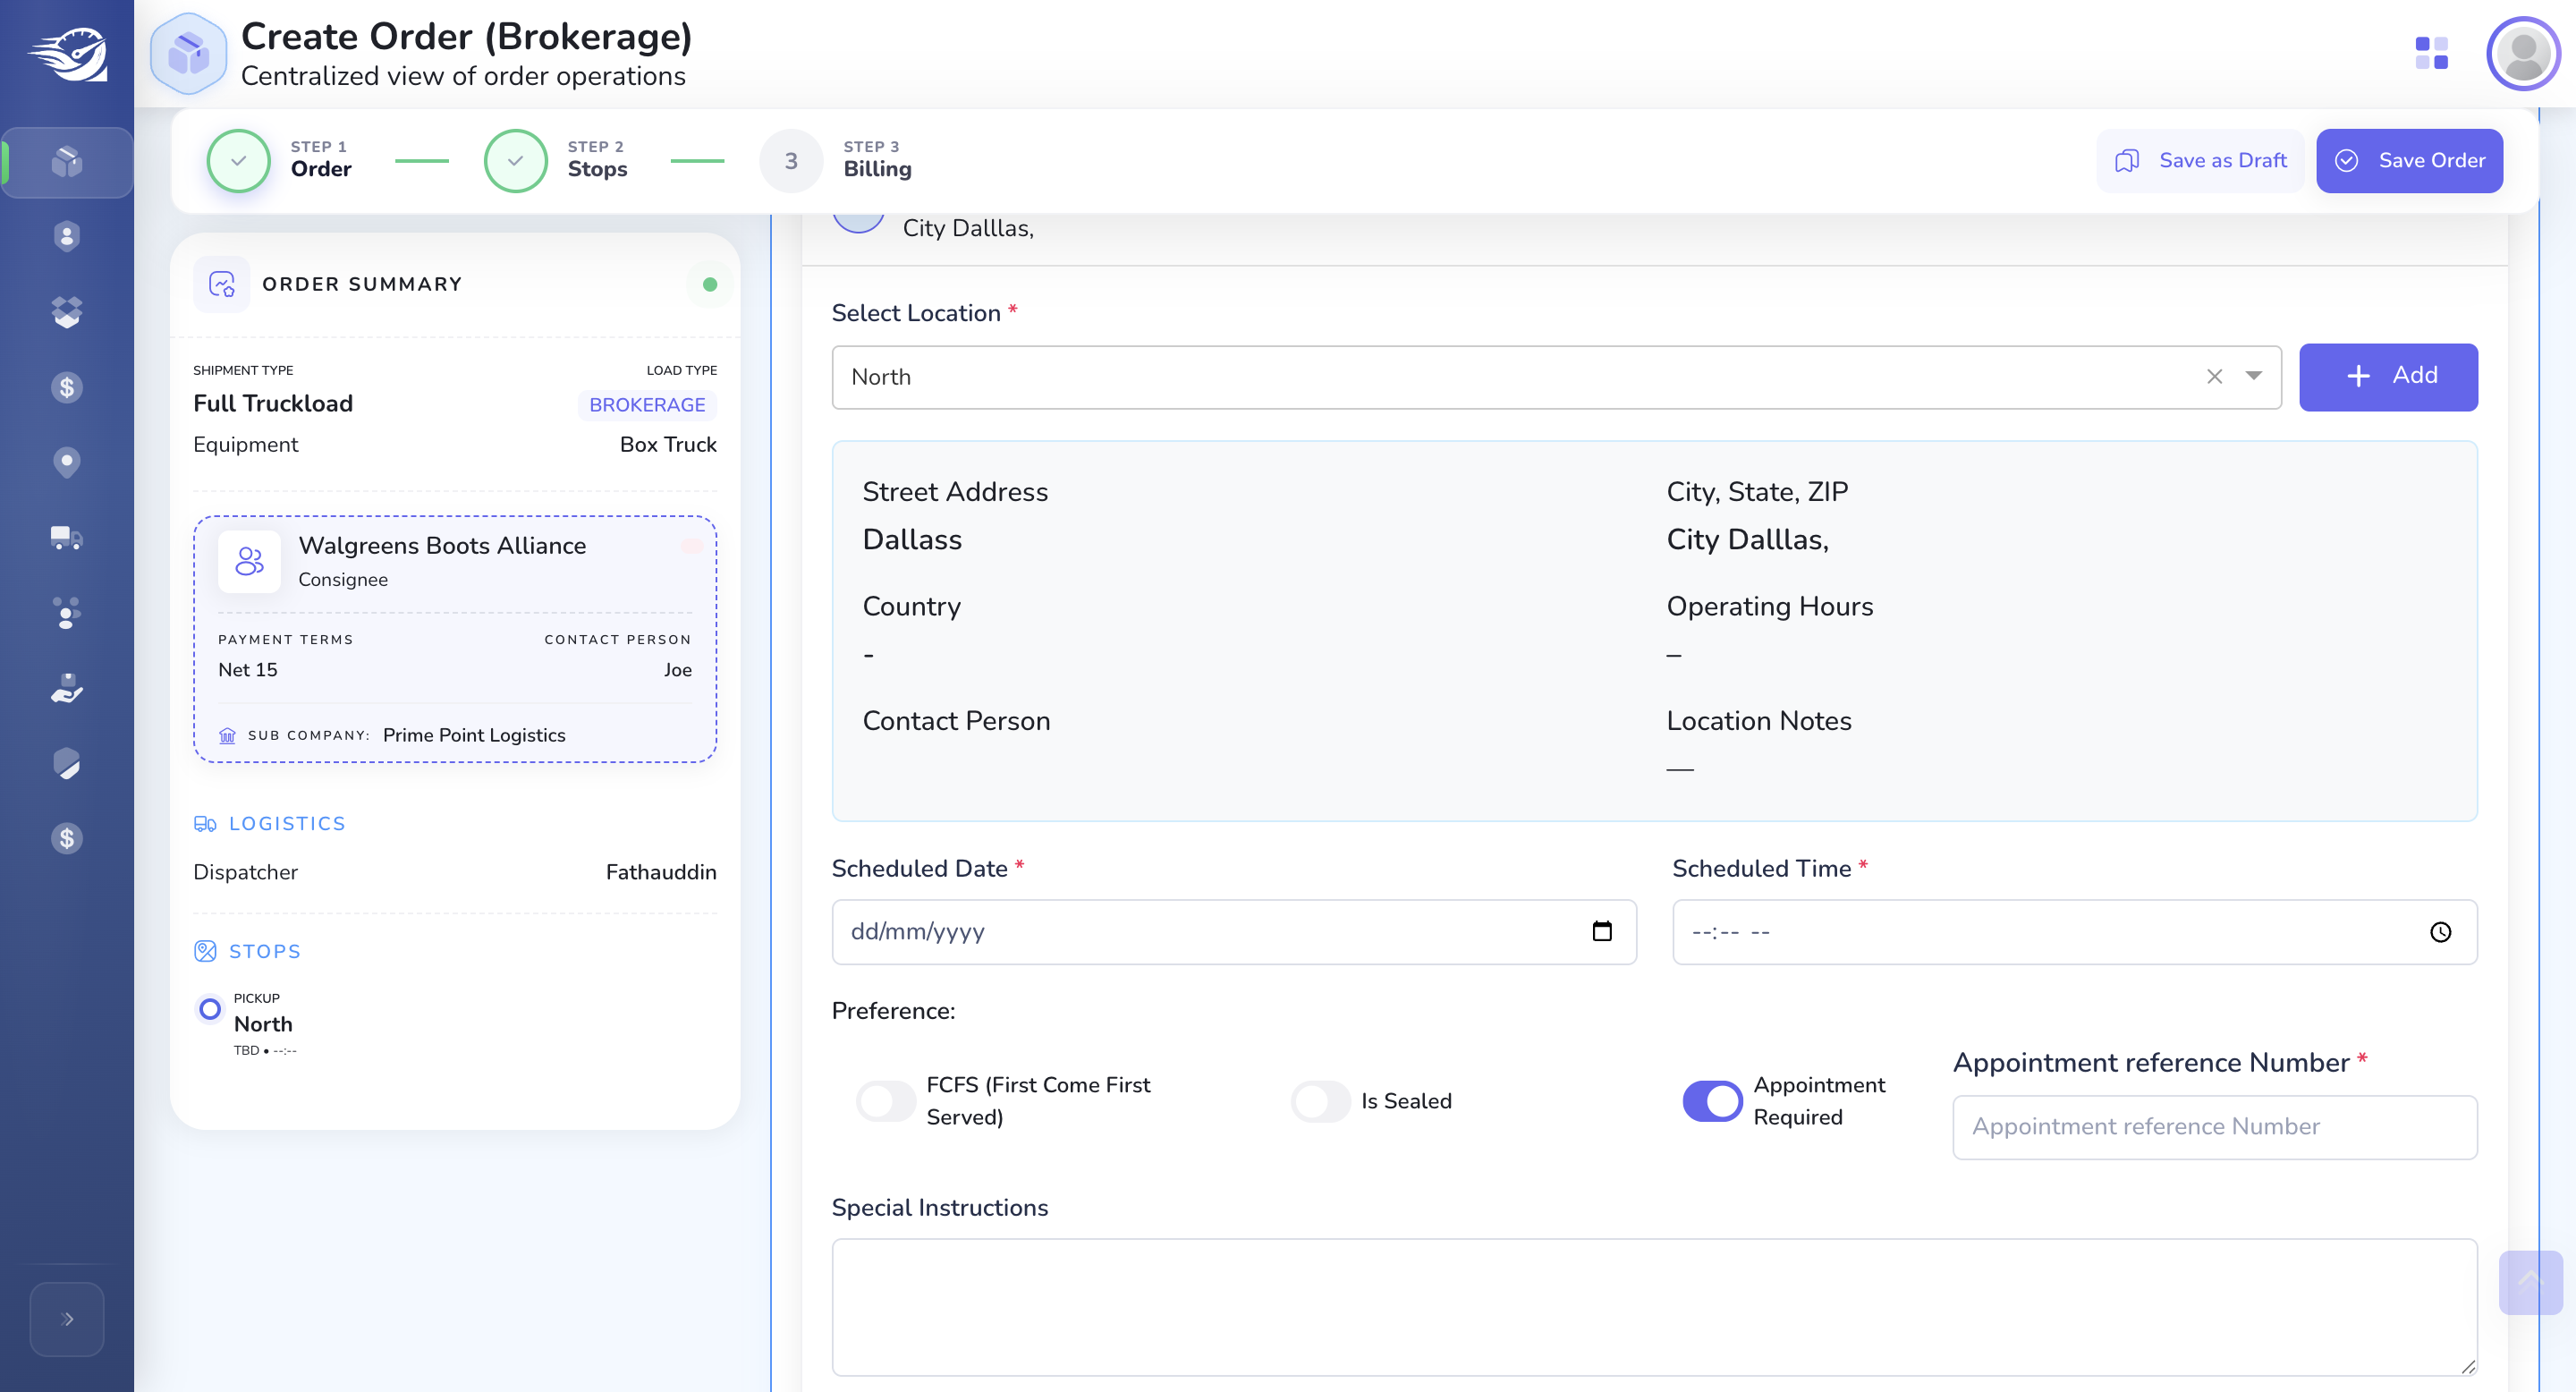
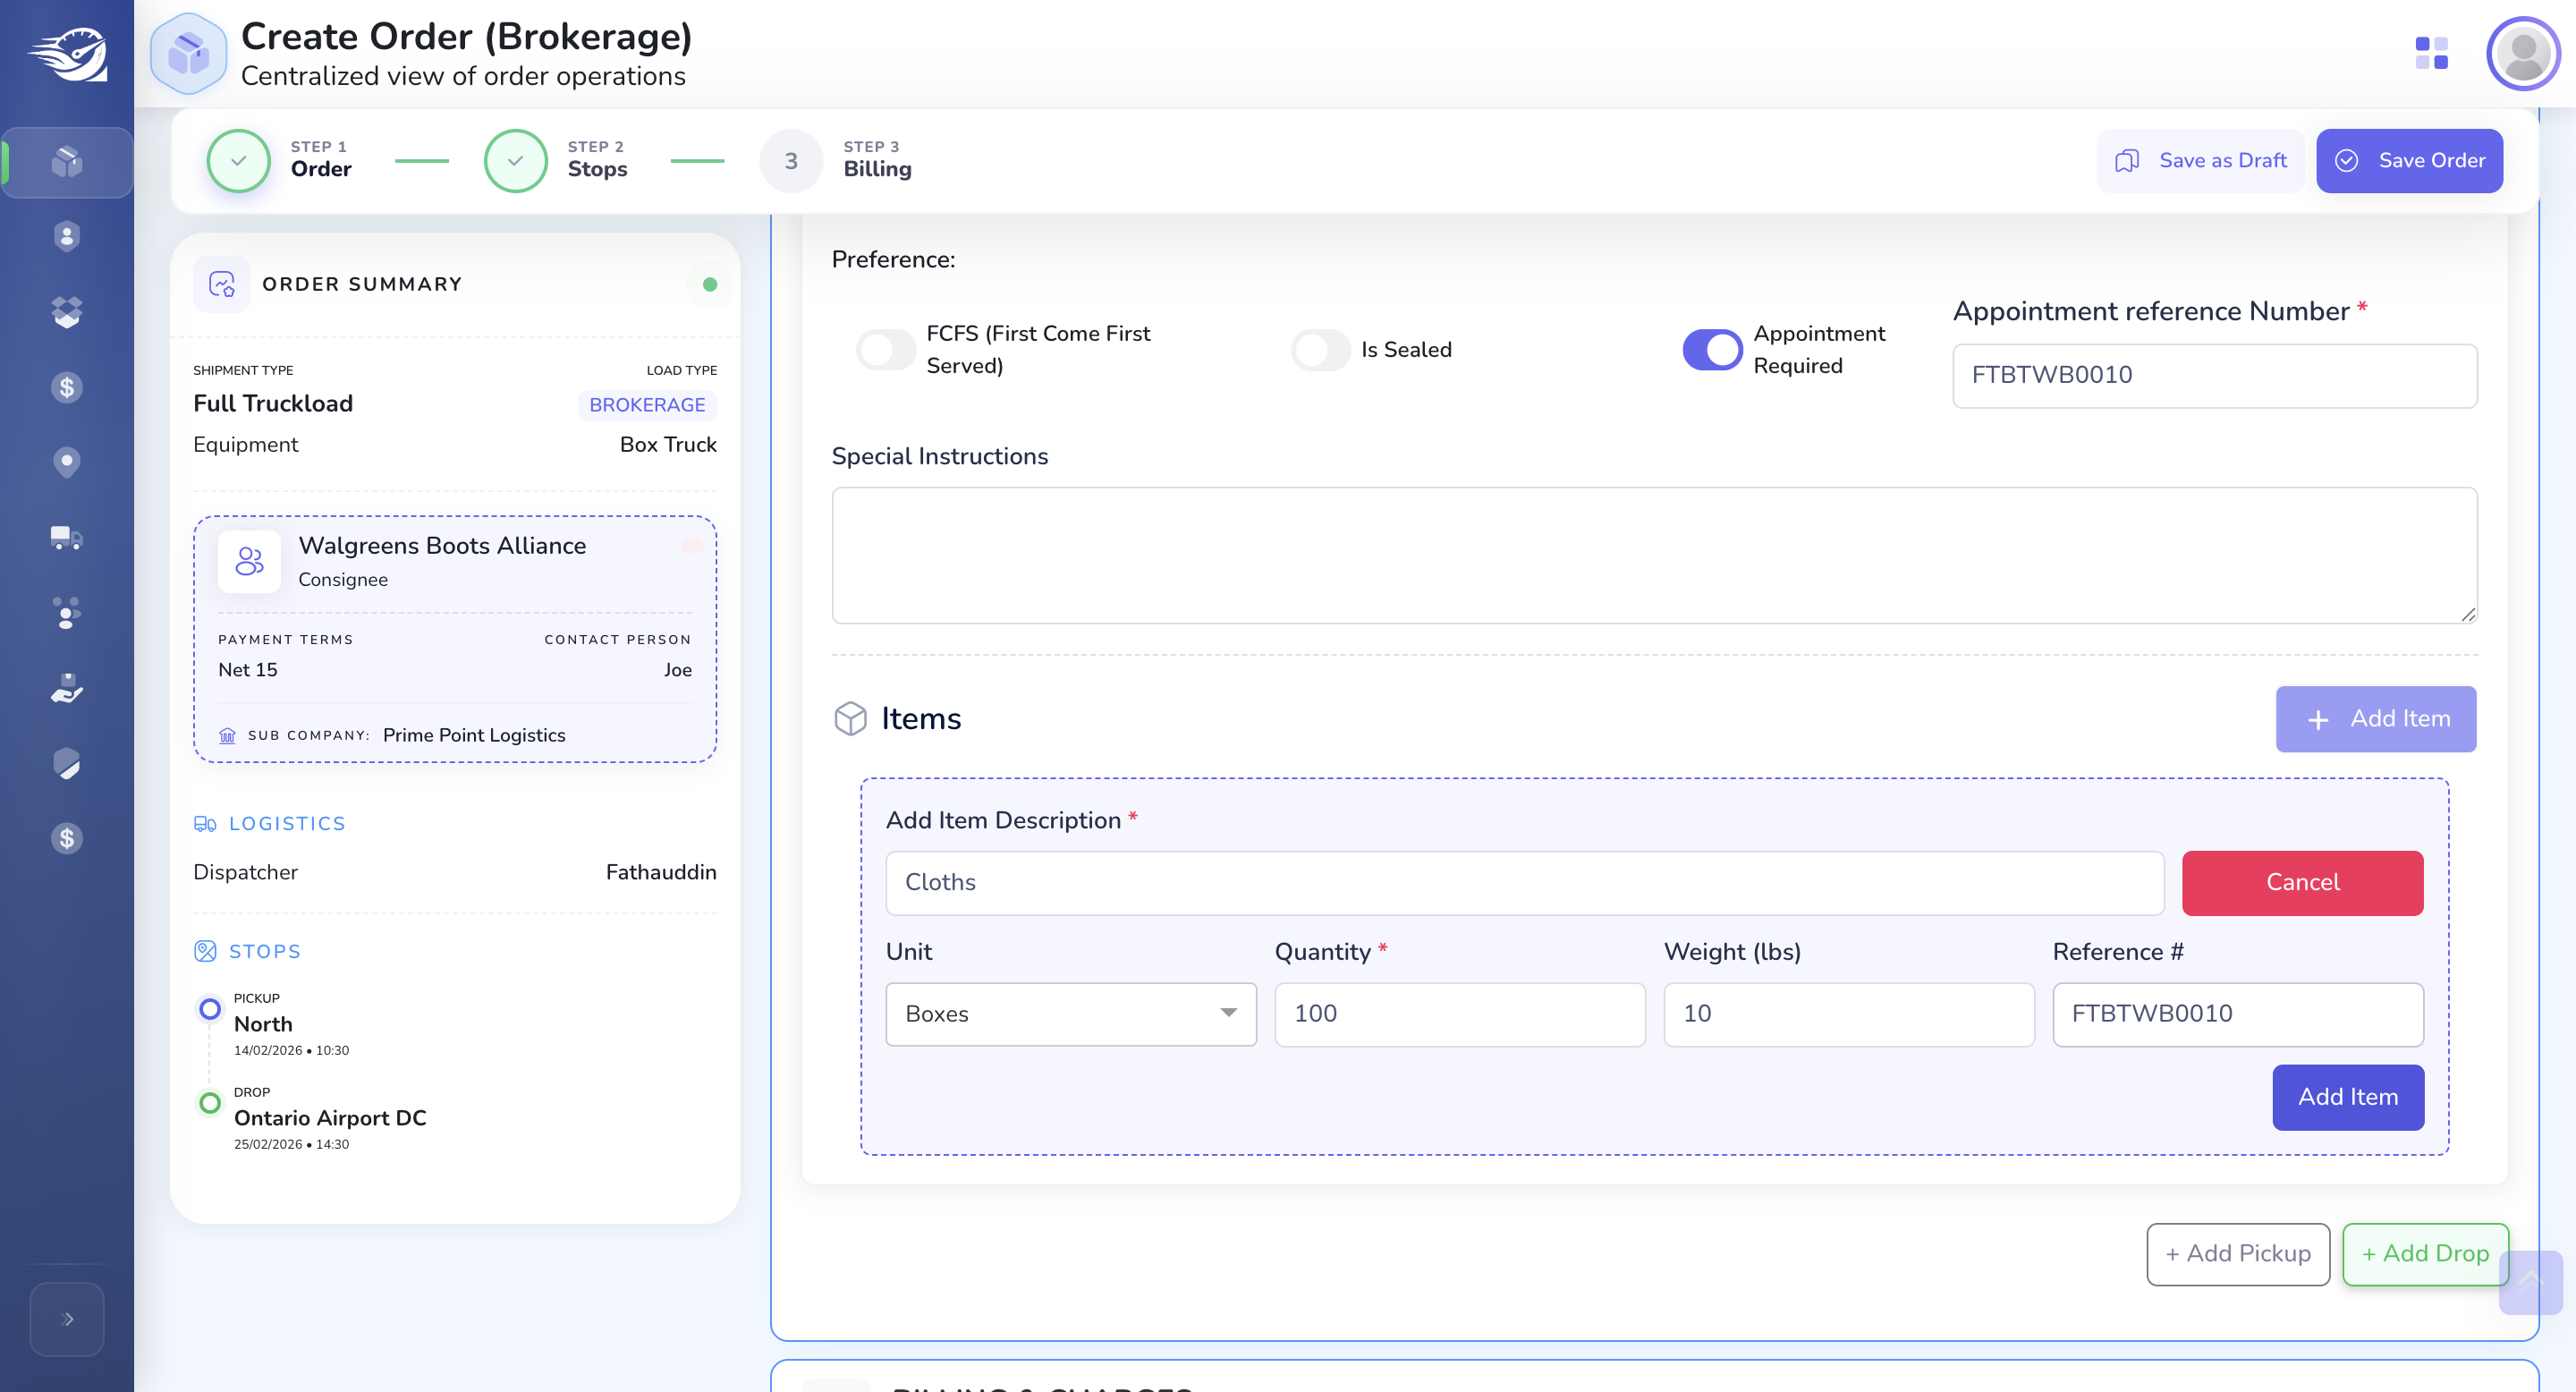
If an appointment is required, then we need to enter the Appointment reference number..

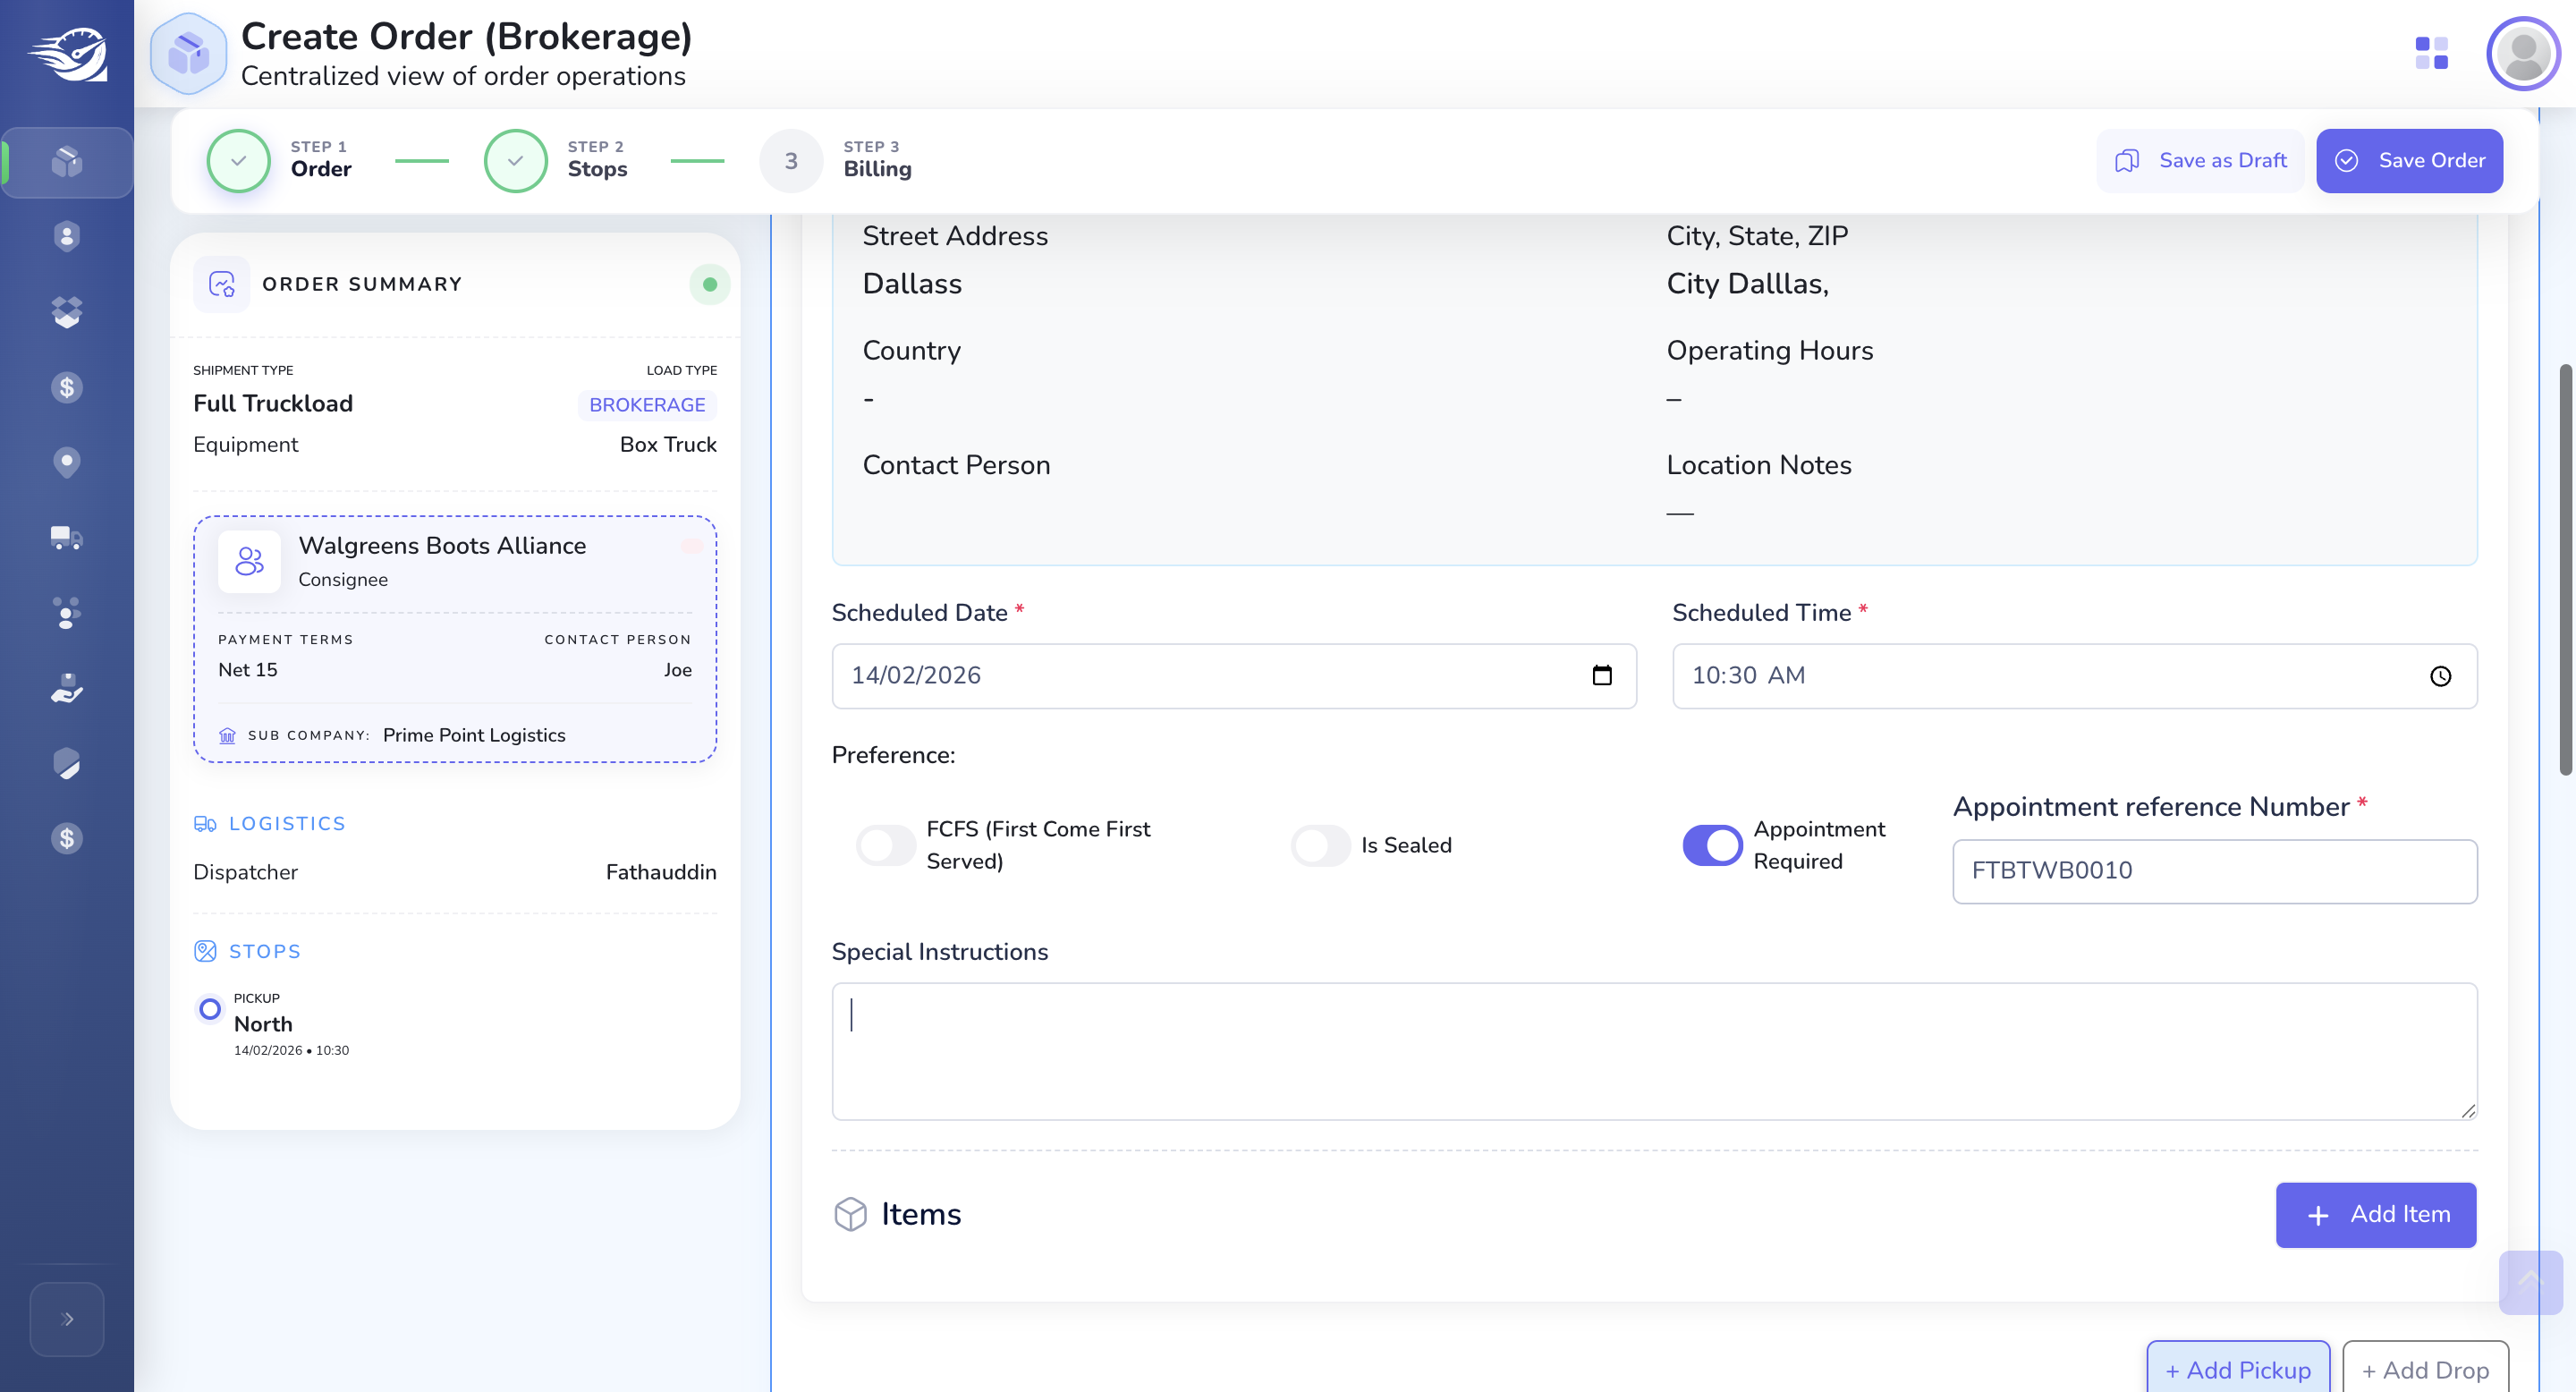
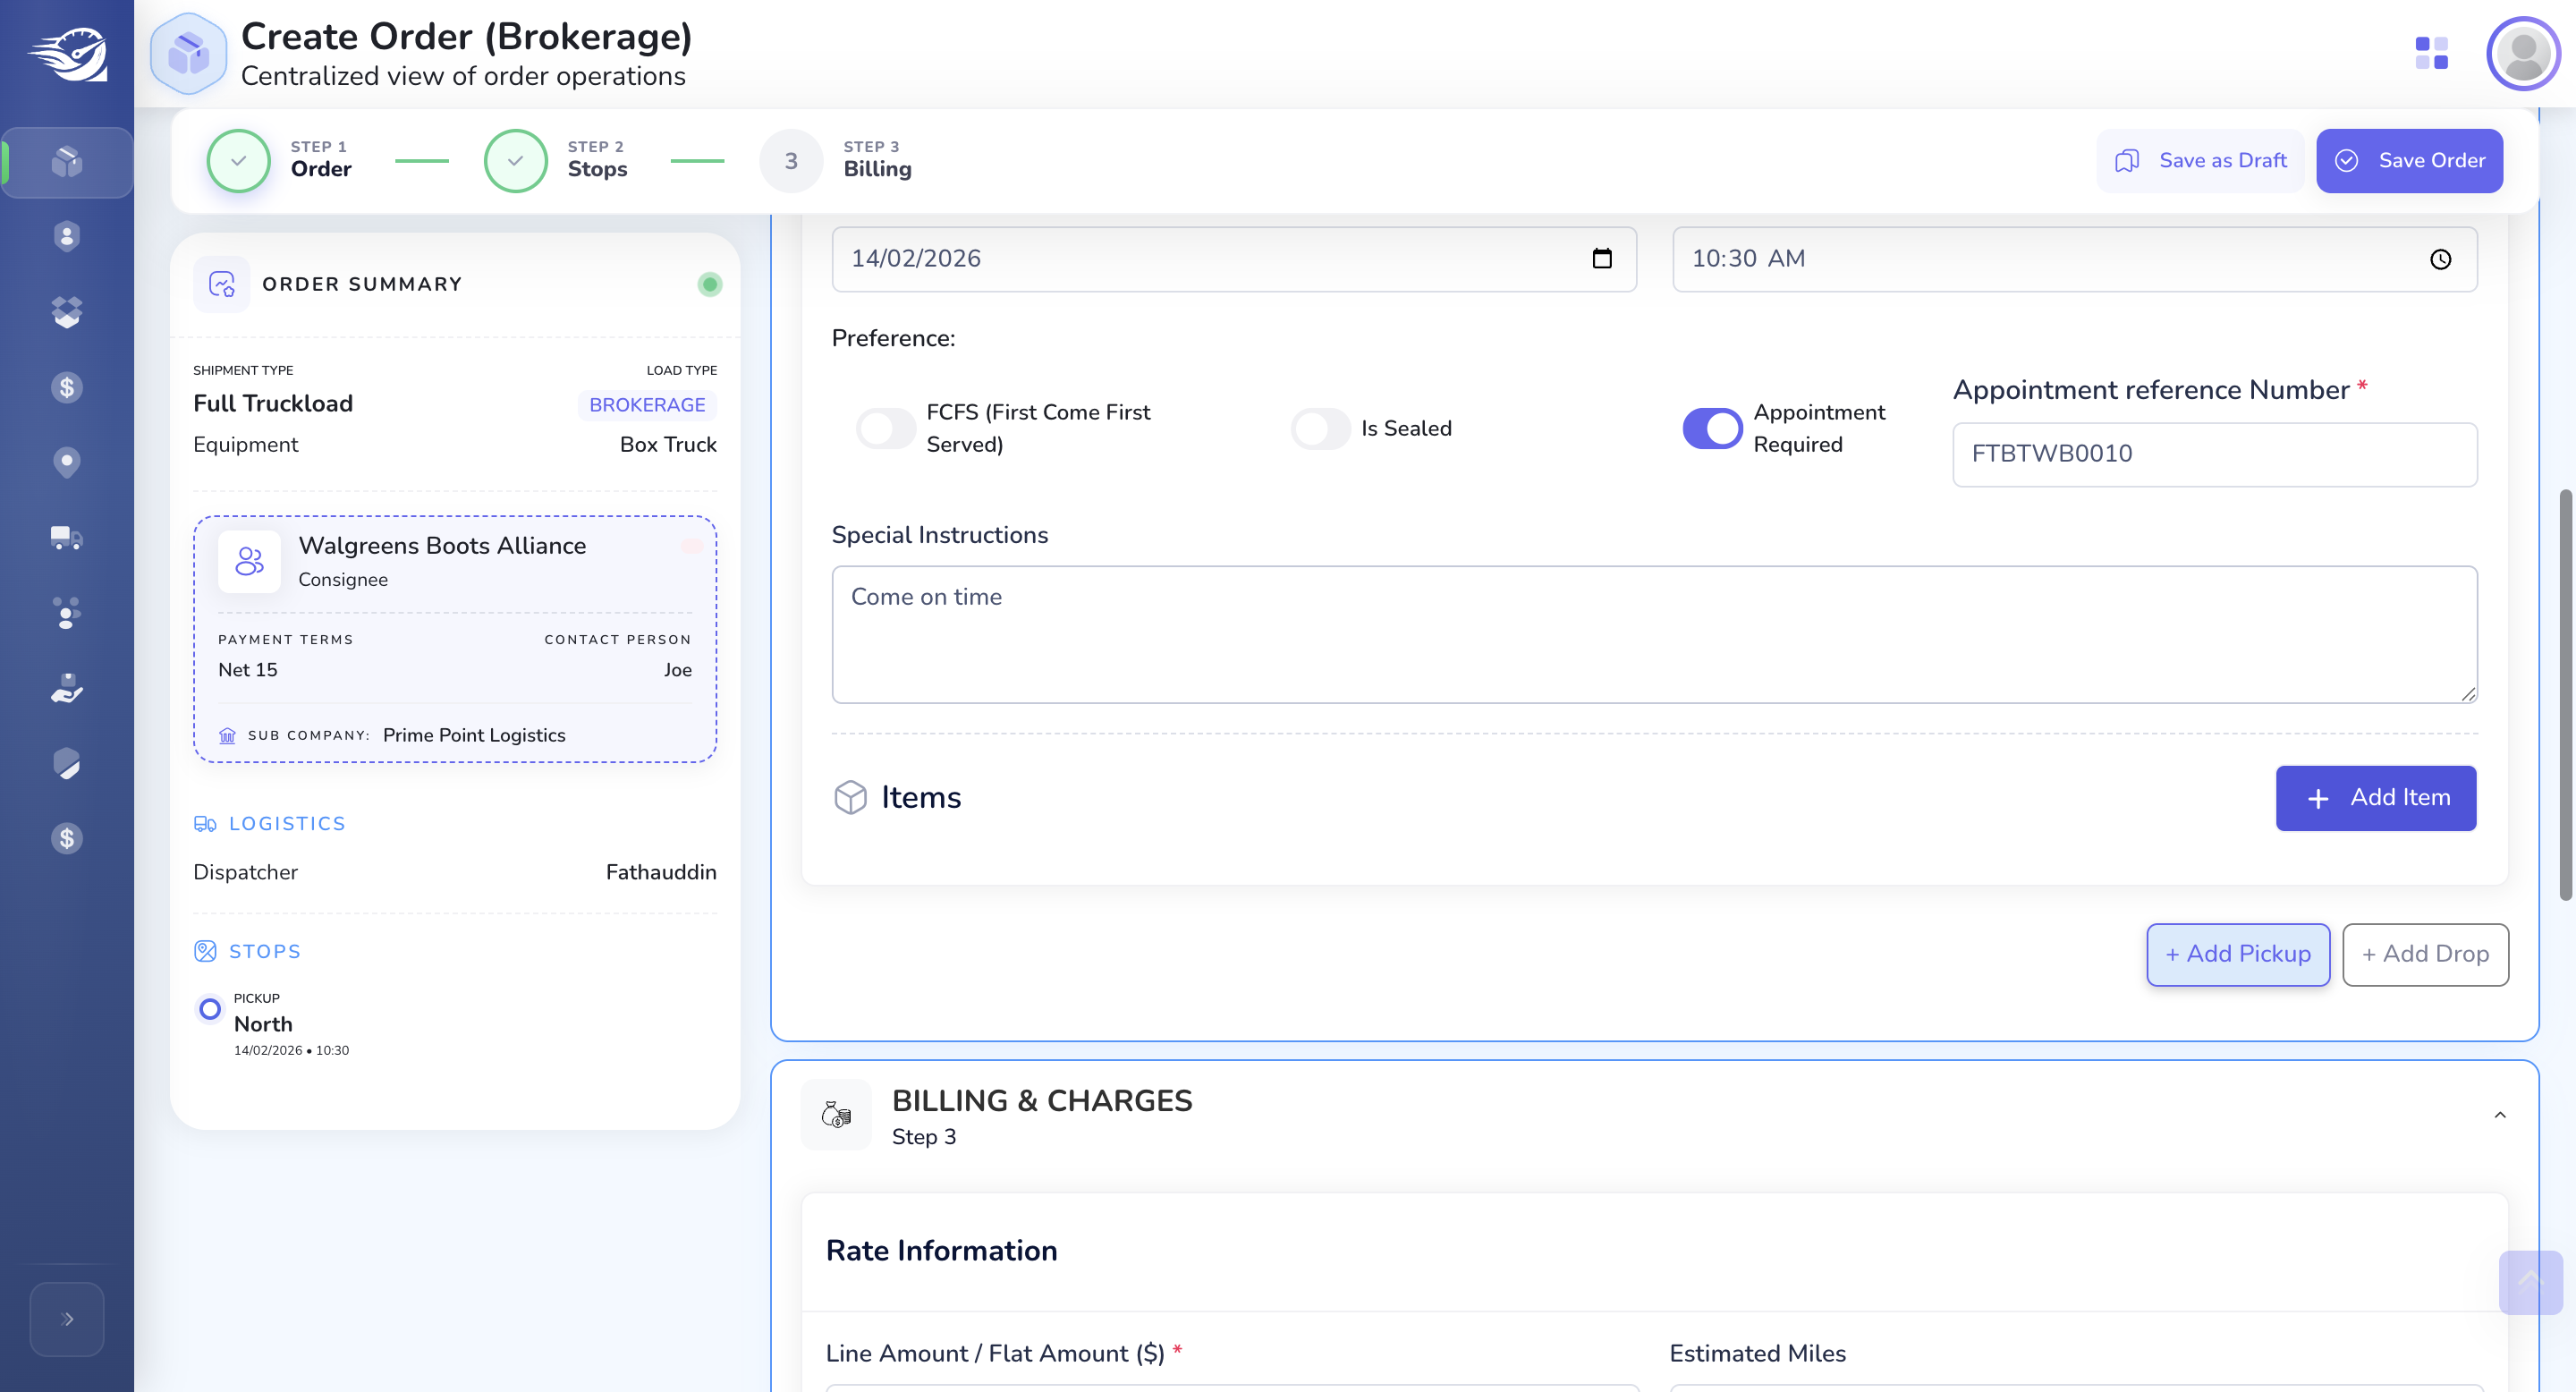
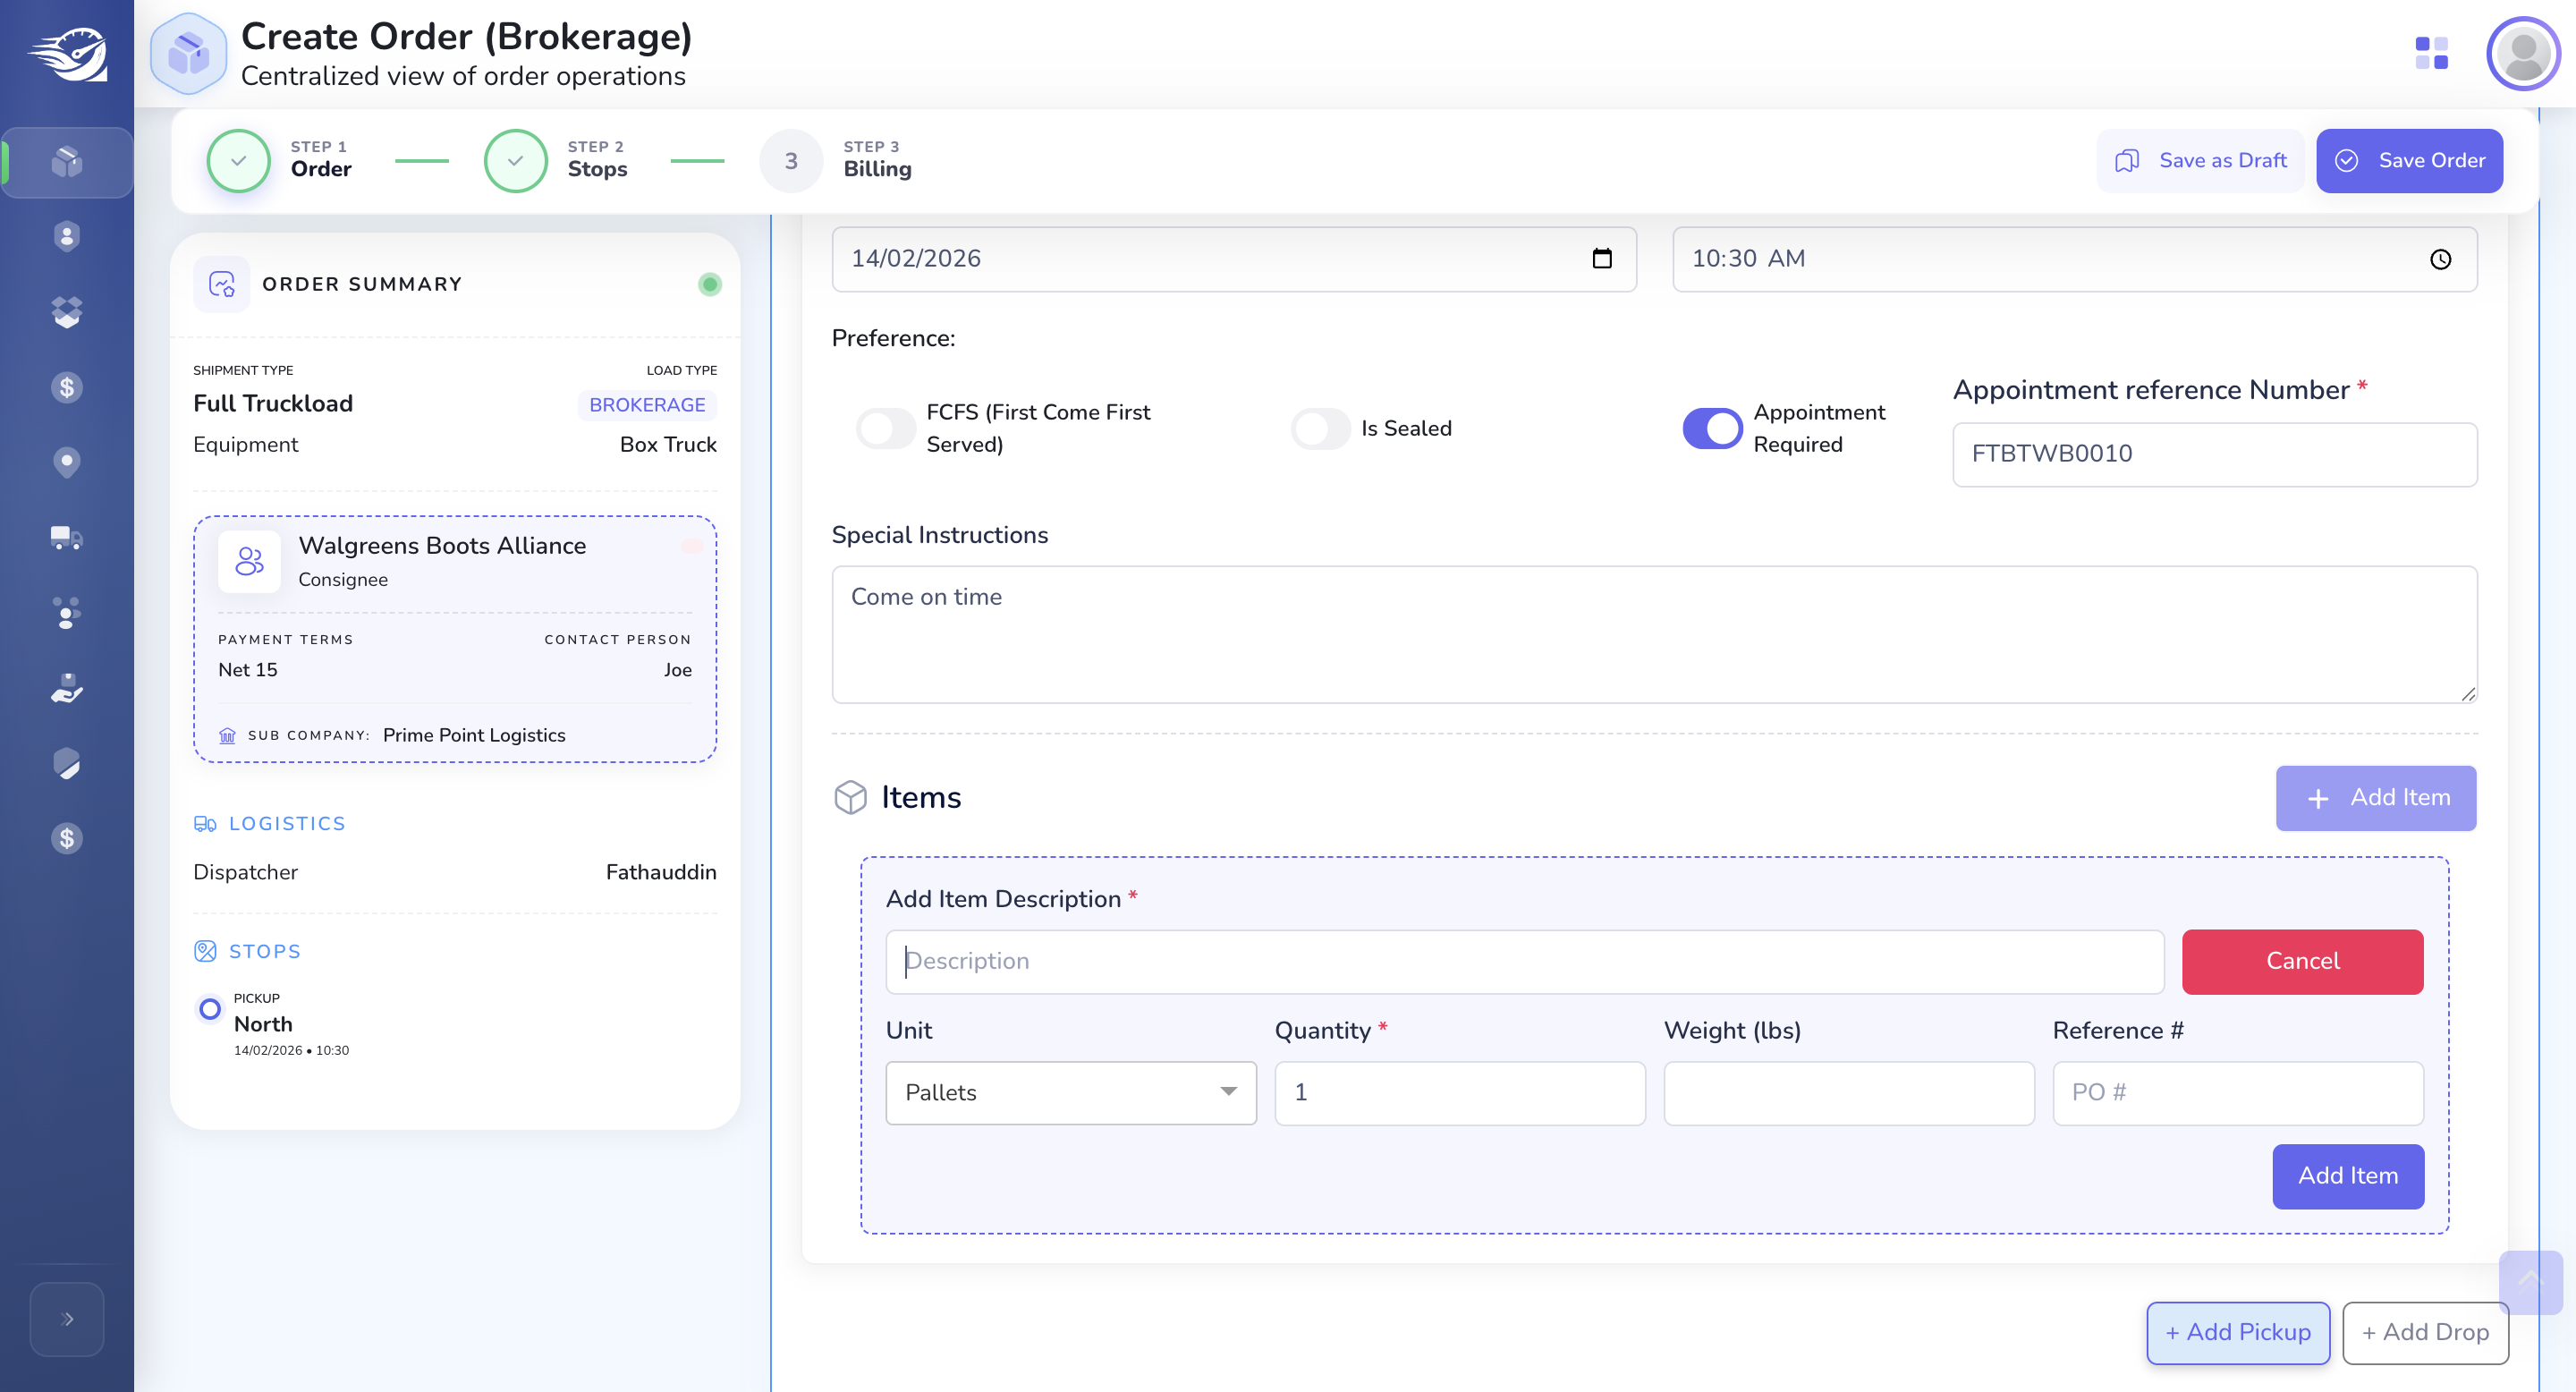
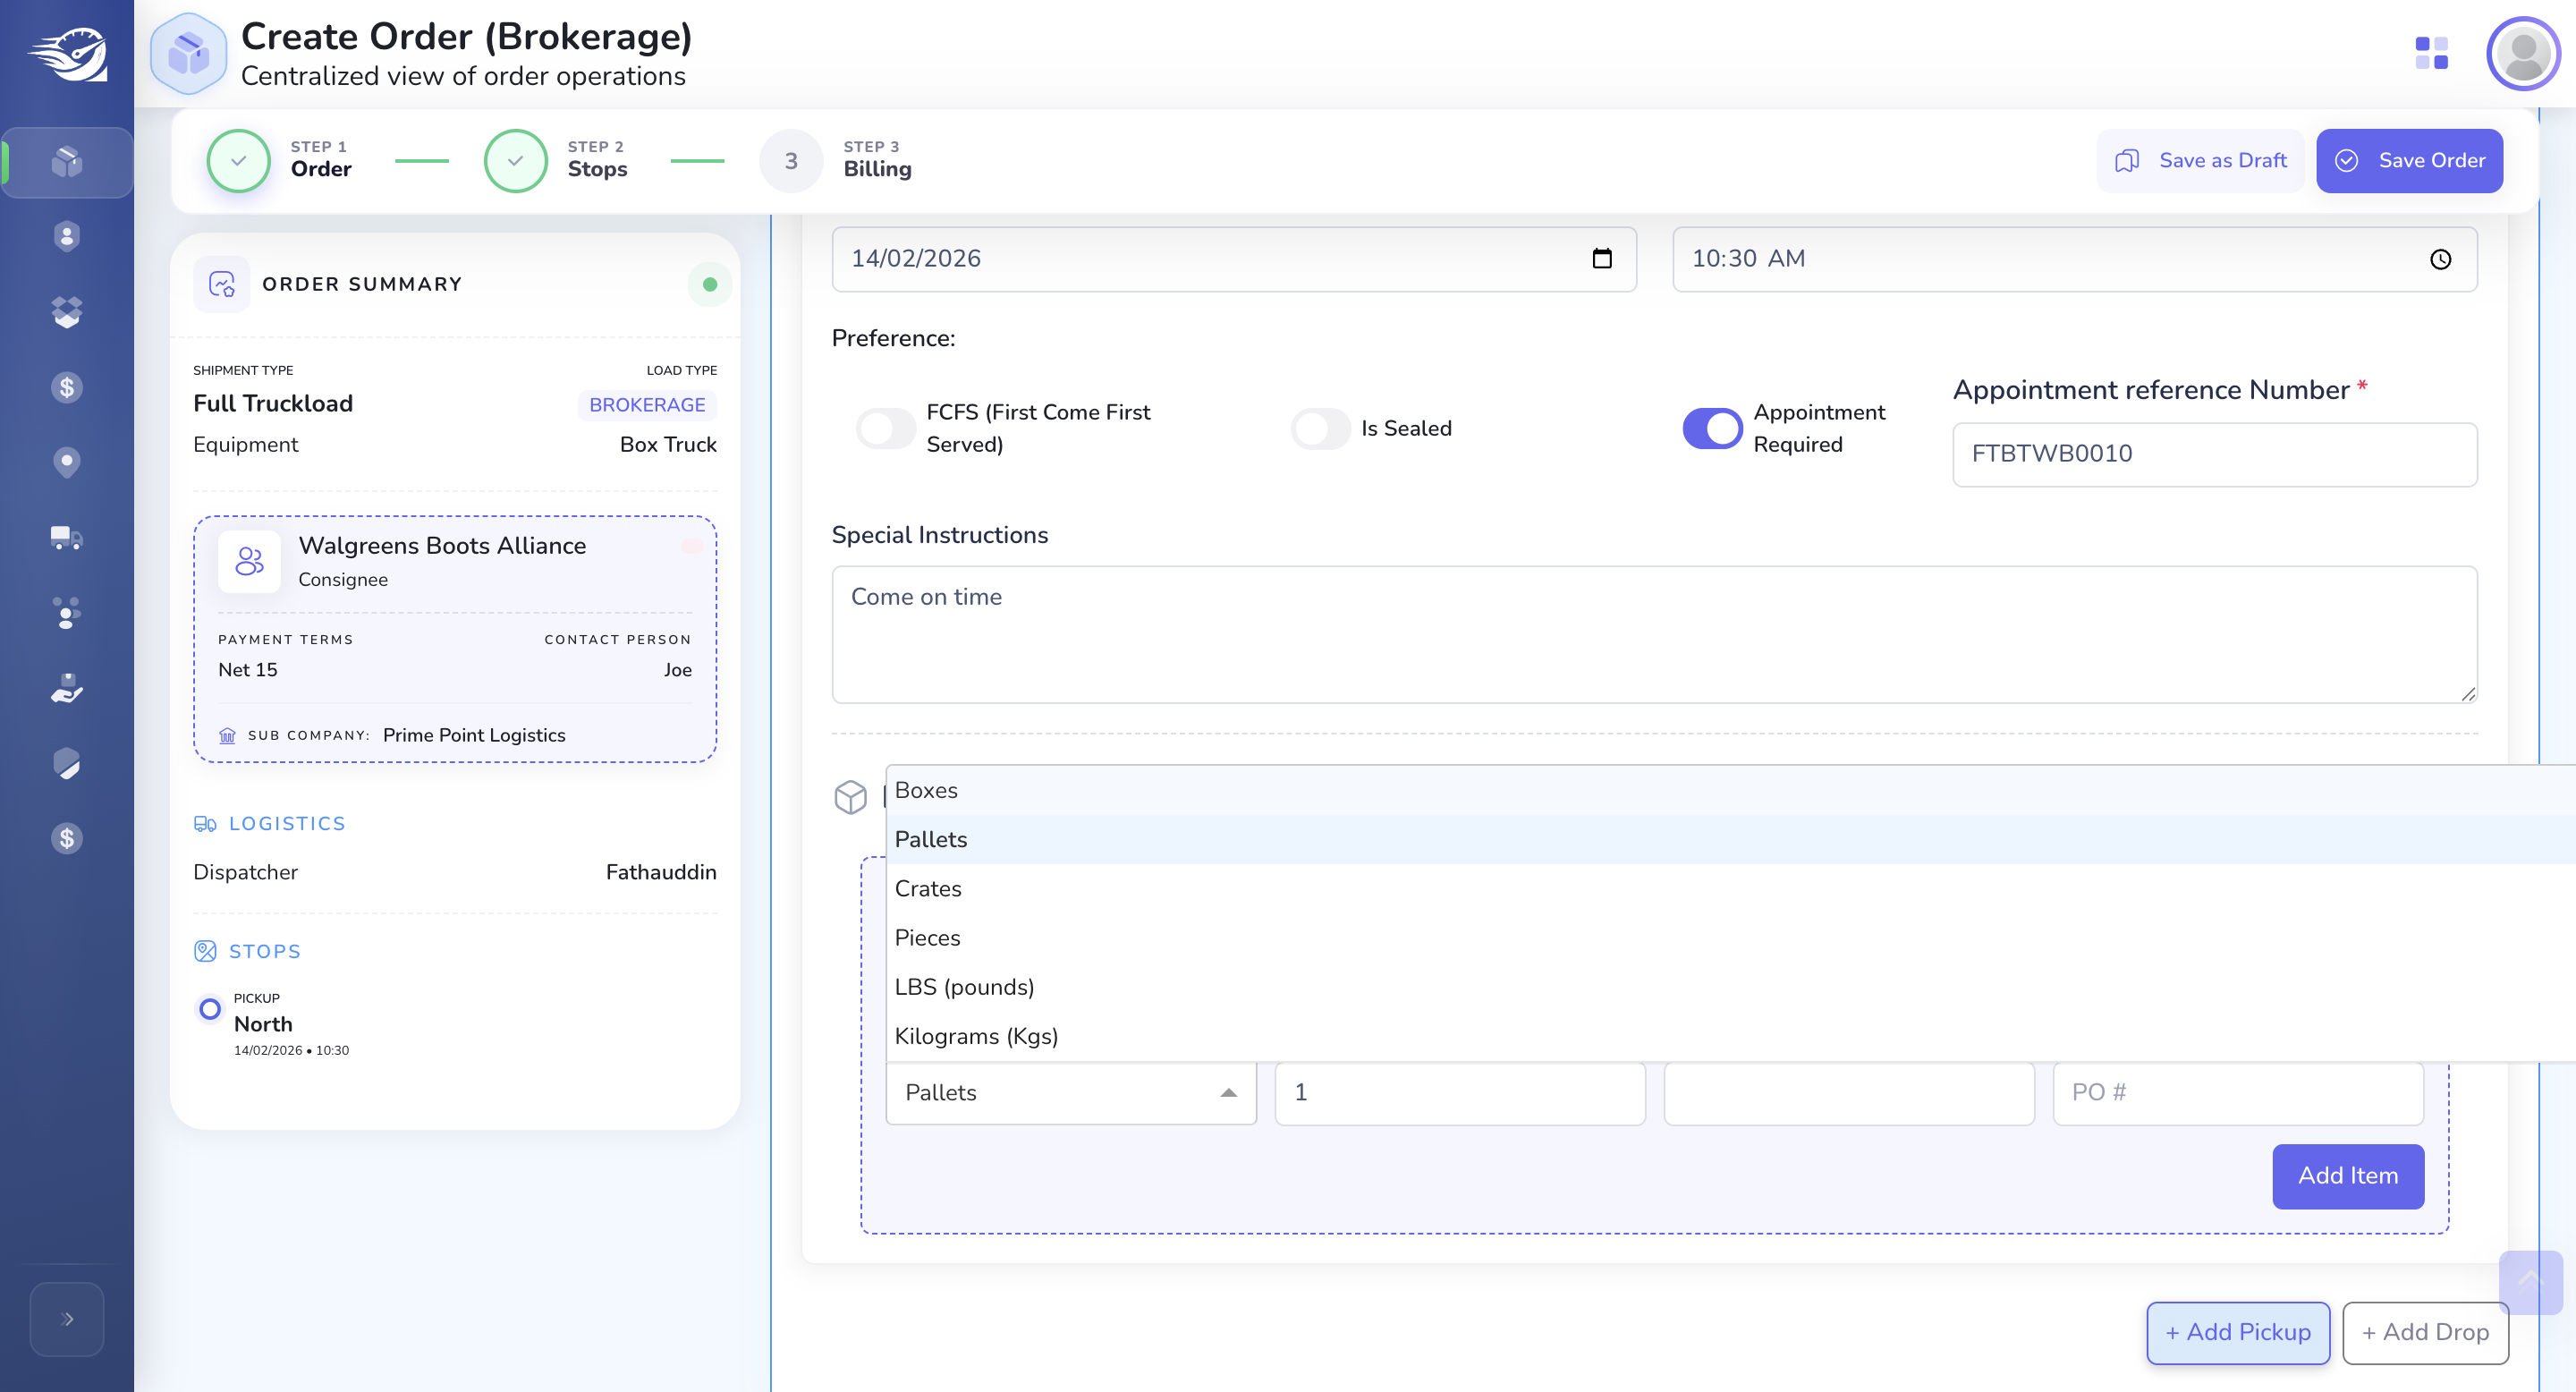
If items are required, we can provide them.

Same flow goes for Drop Location Also.
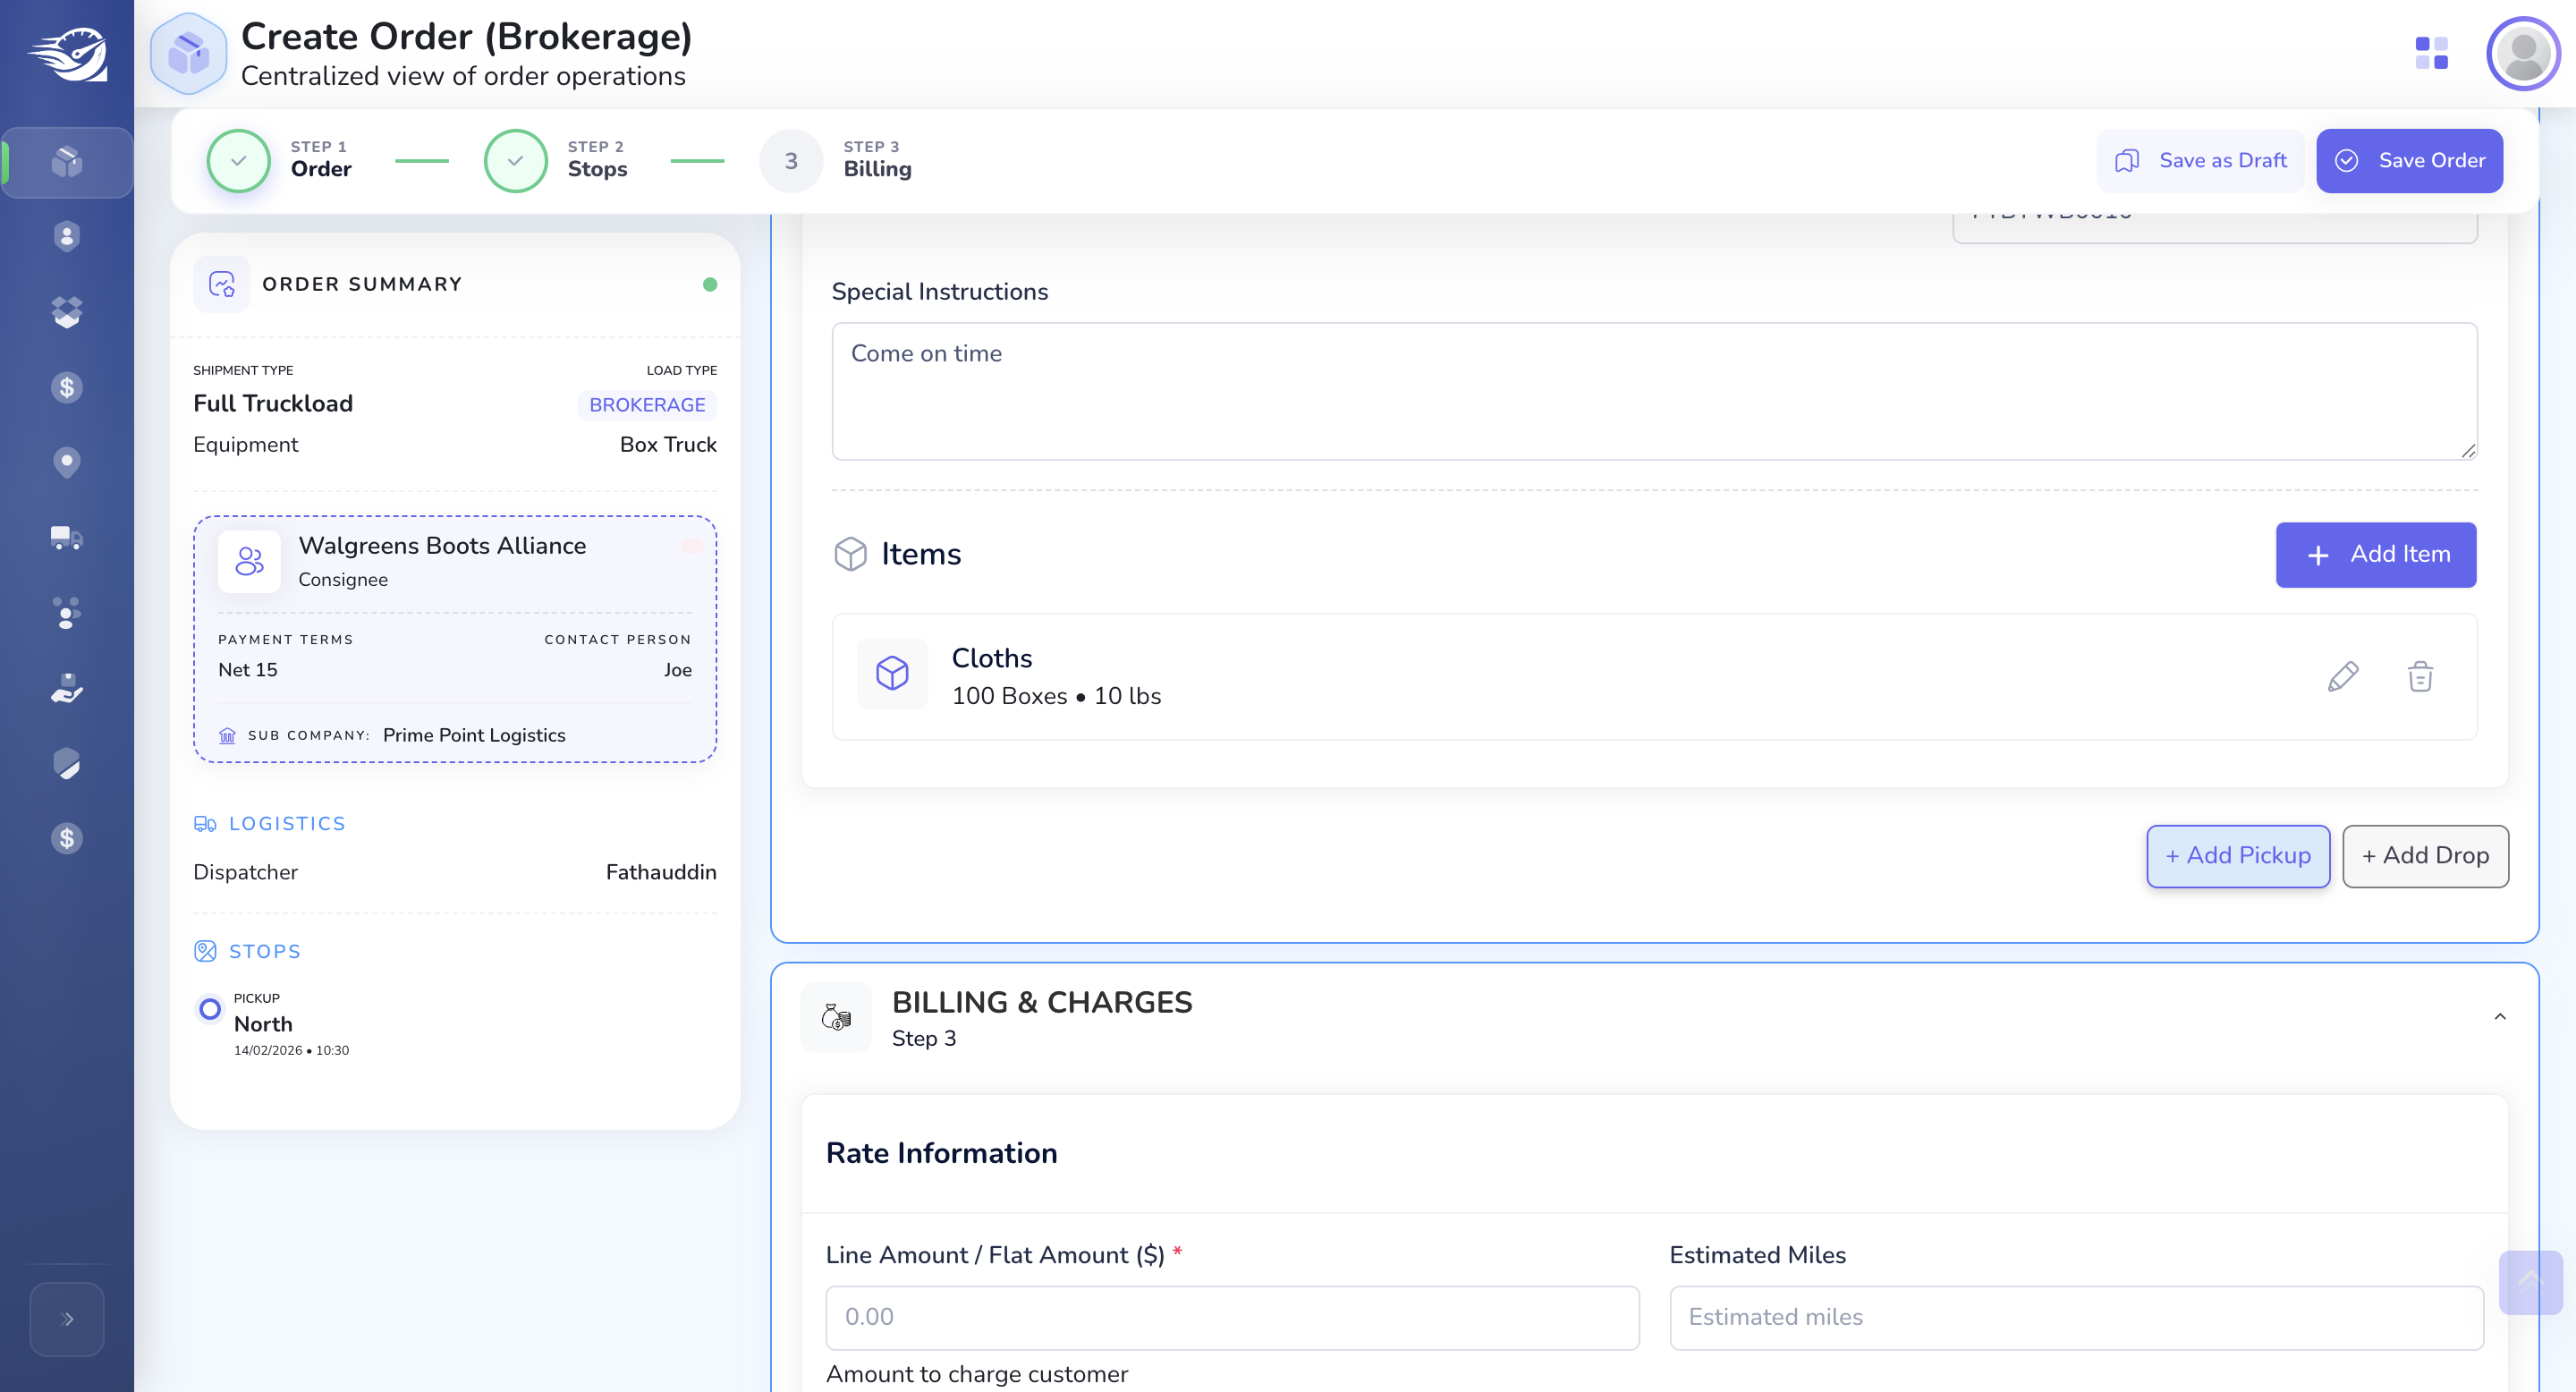

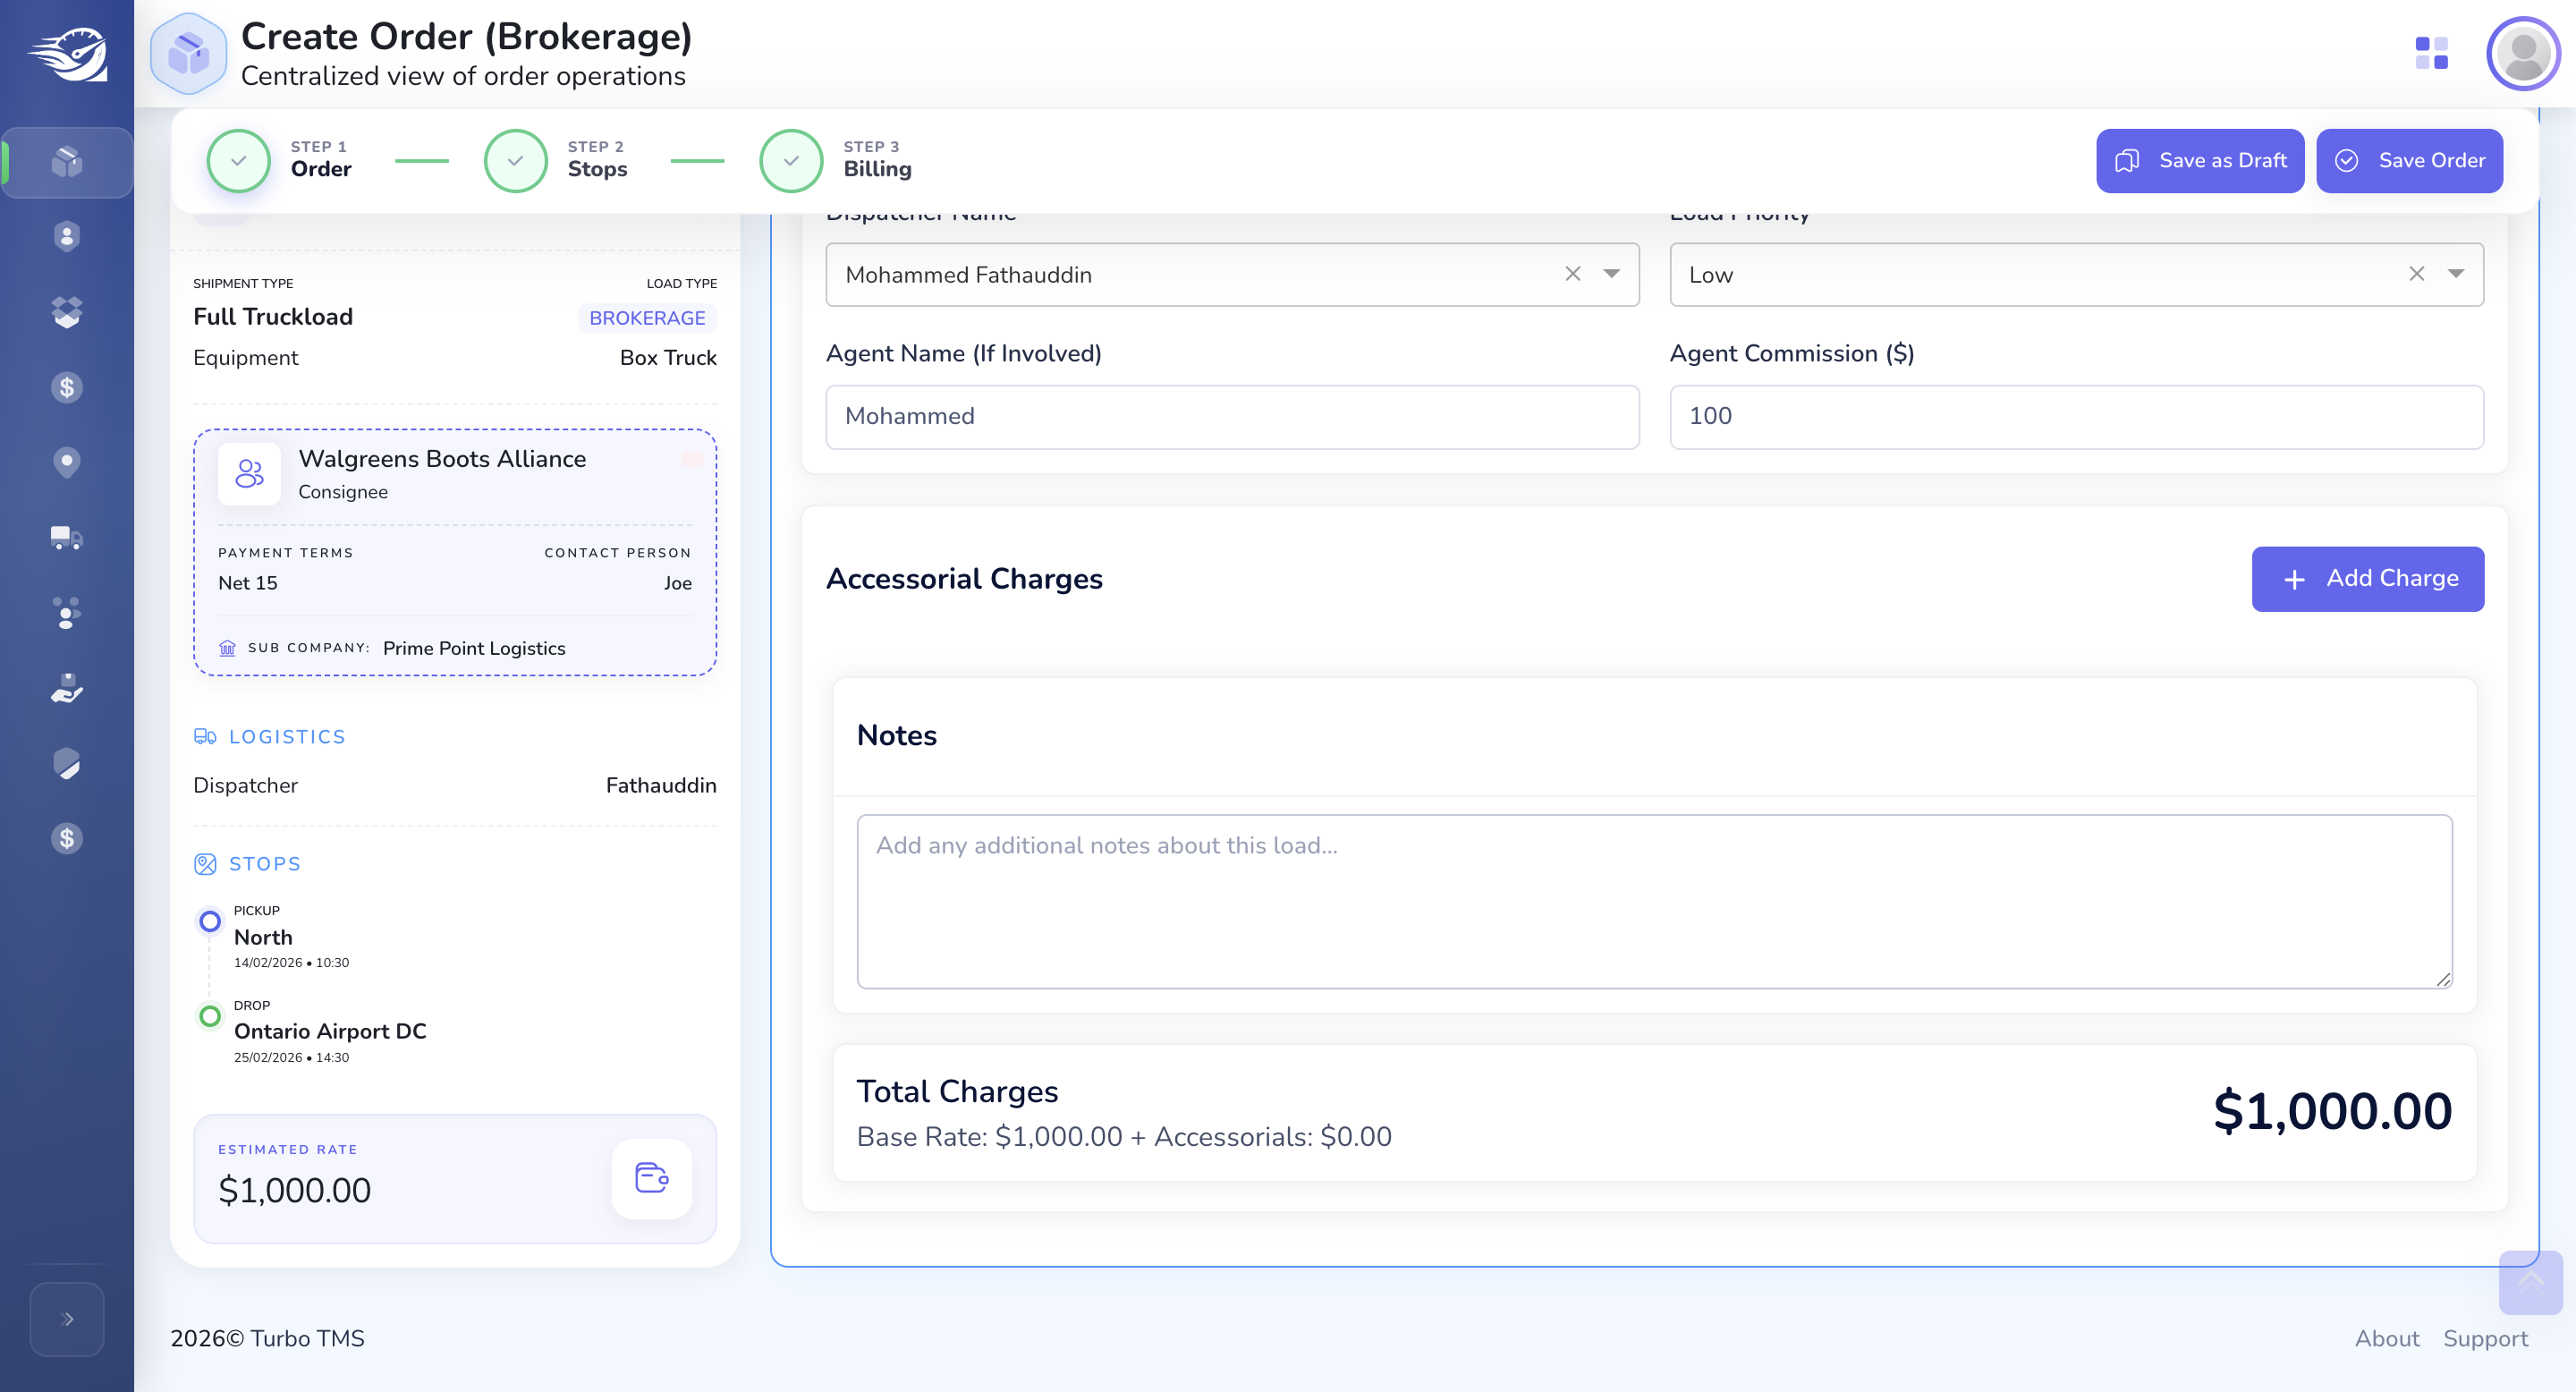
Billing and Charges :
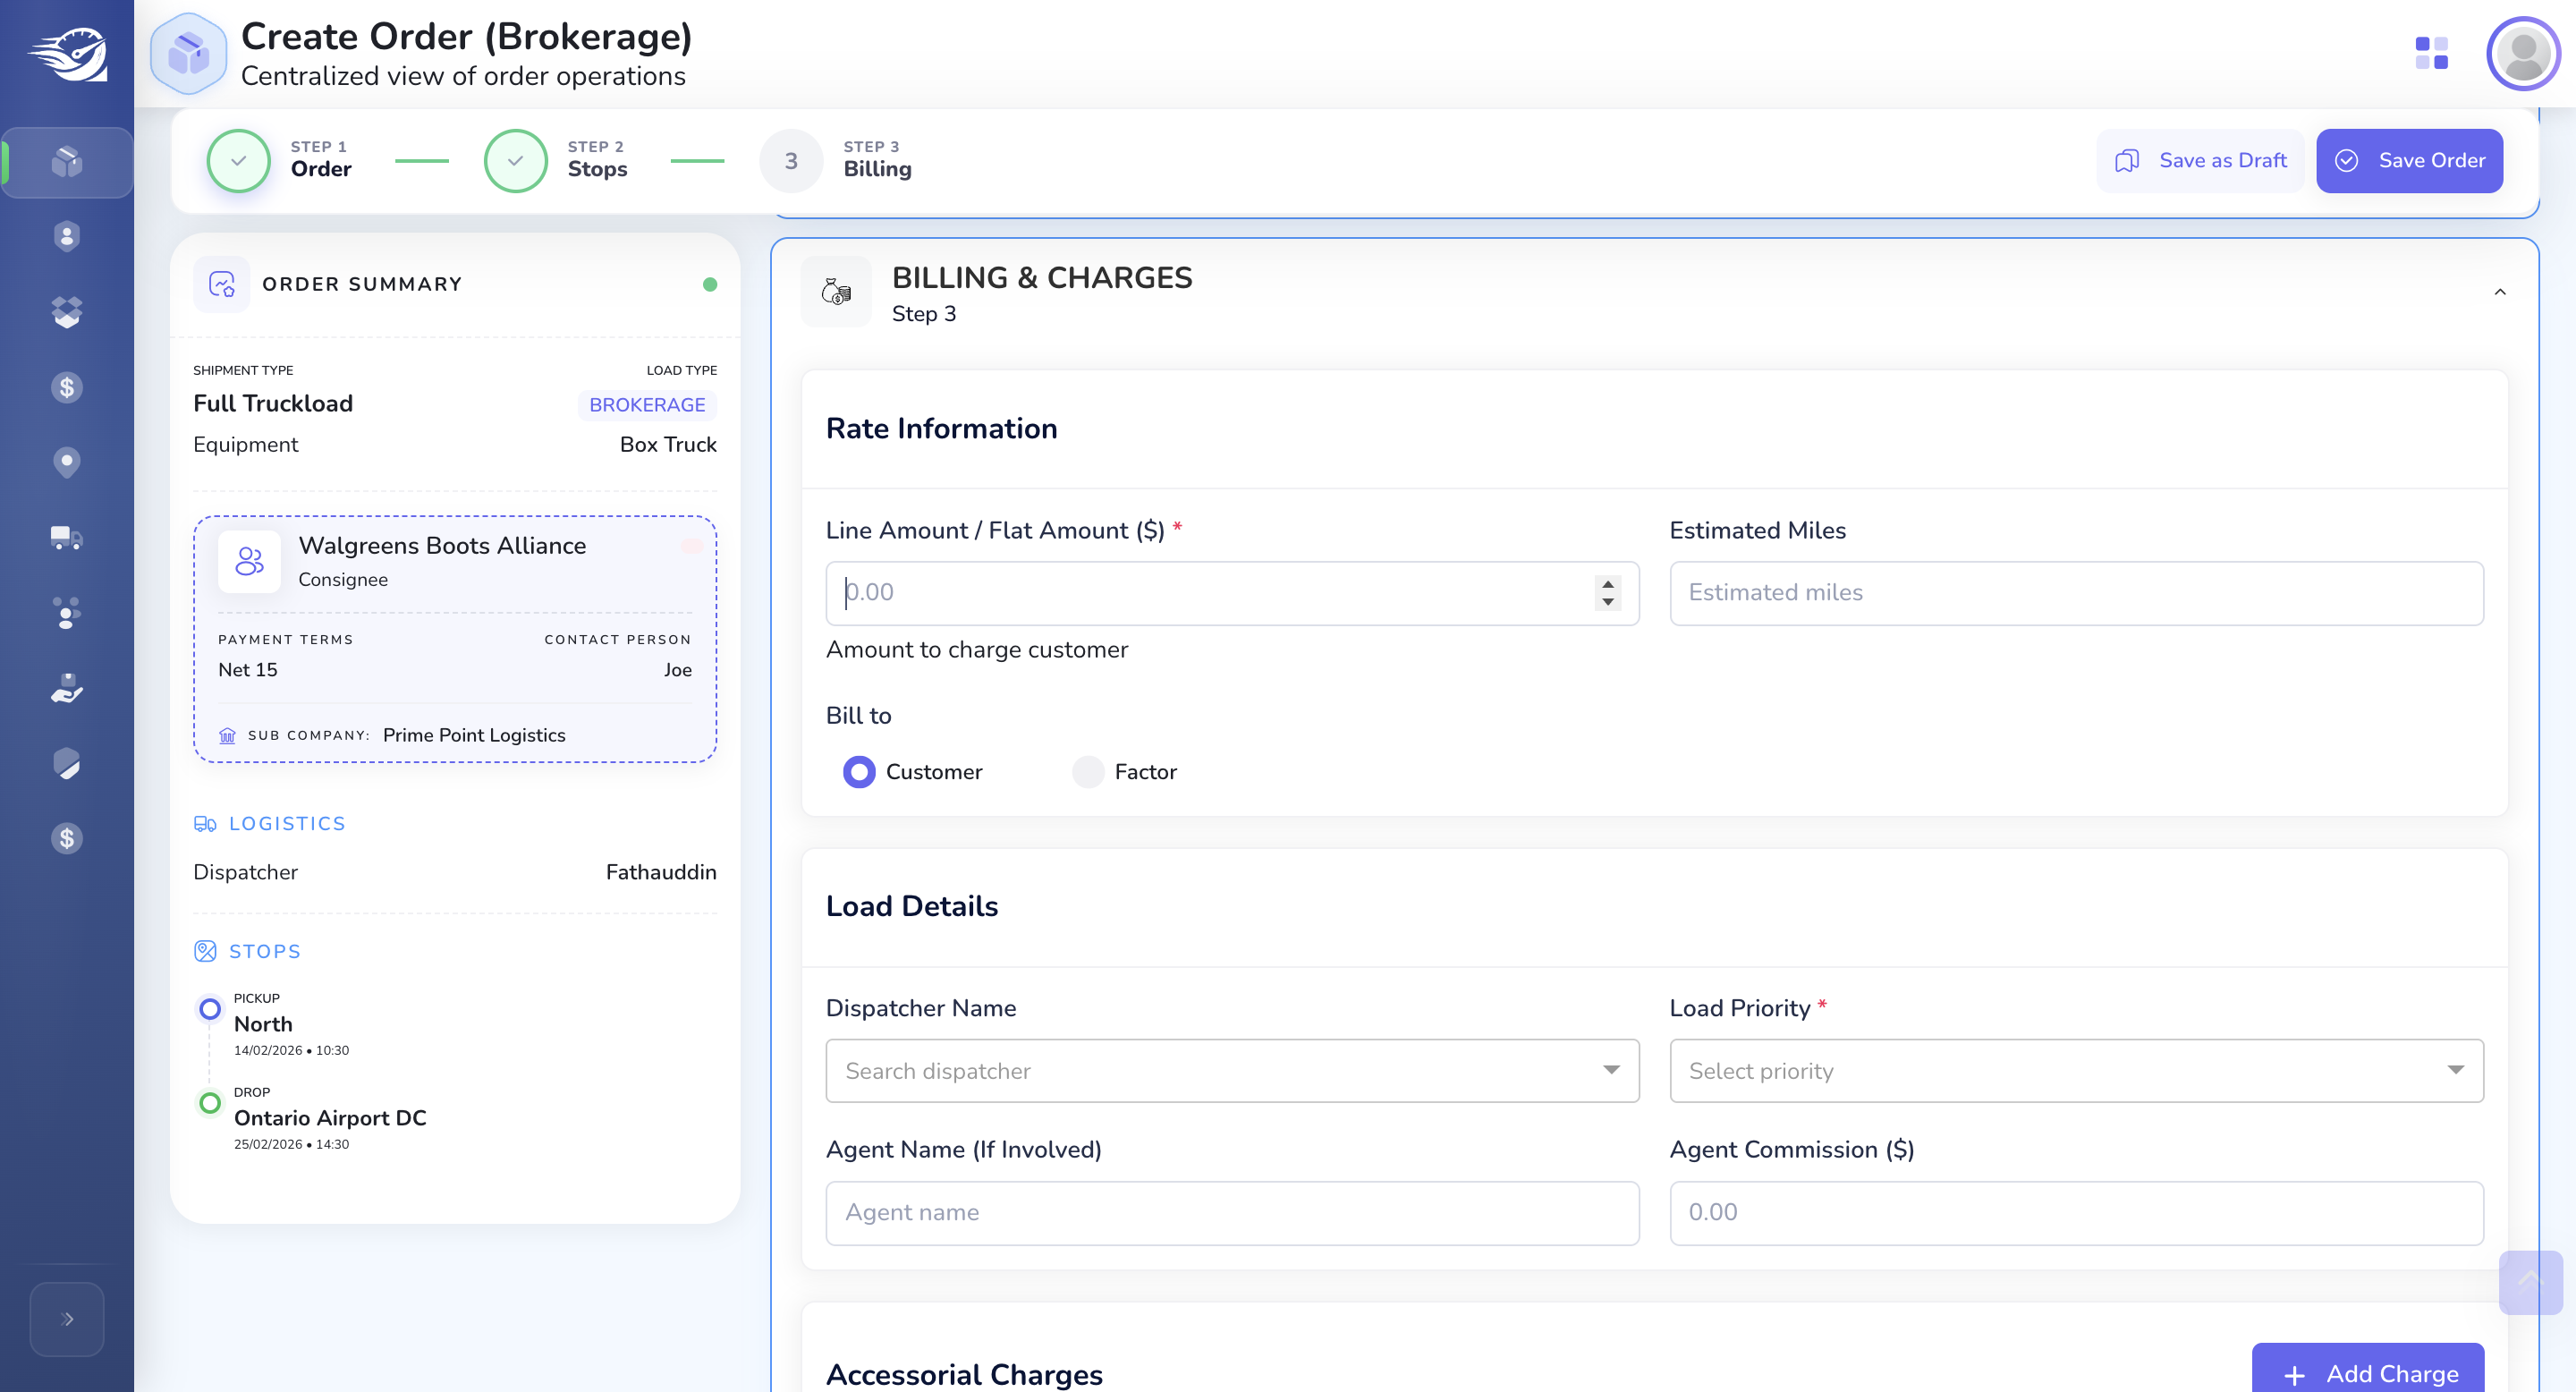
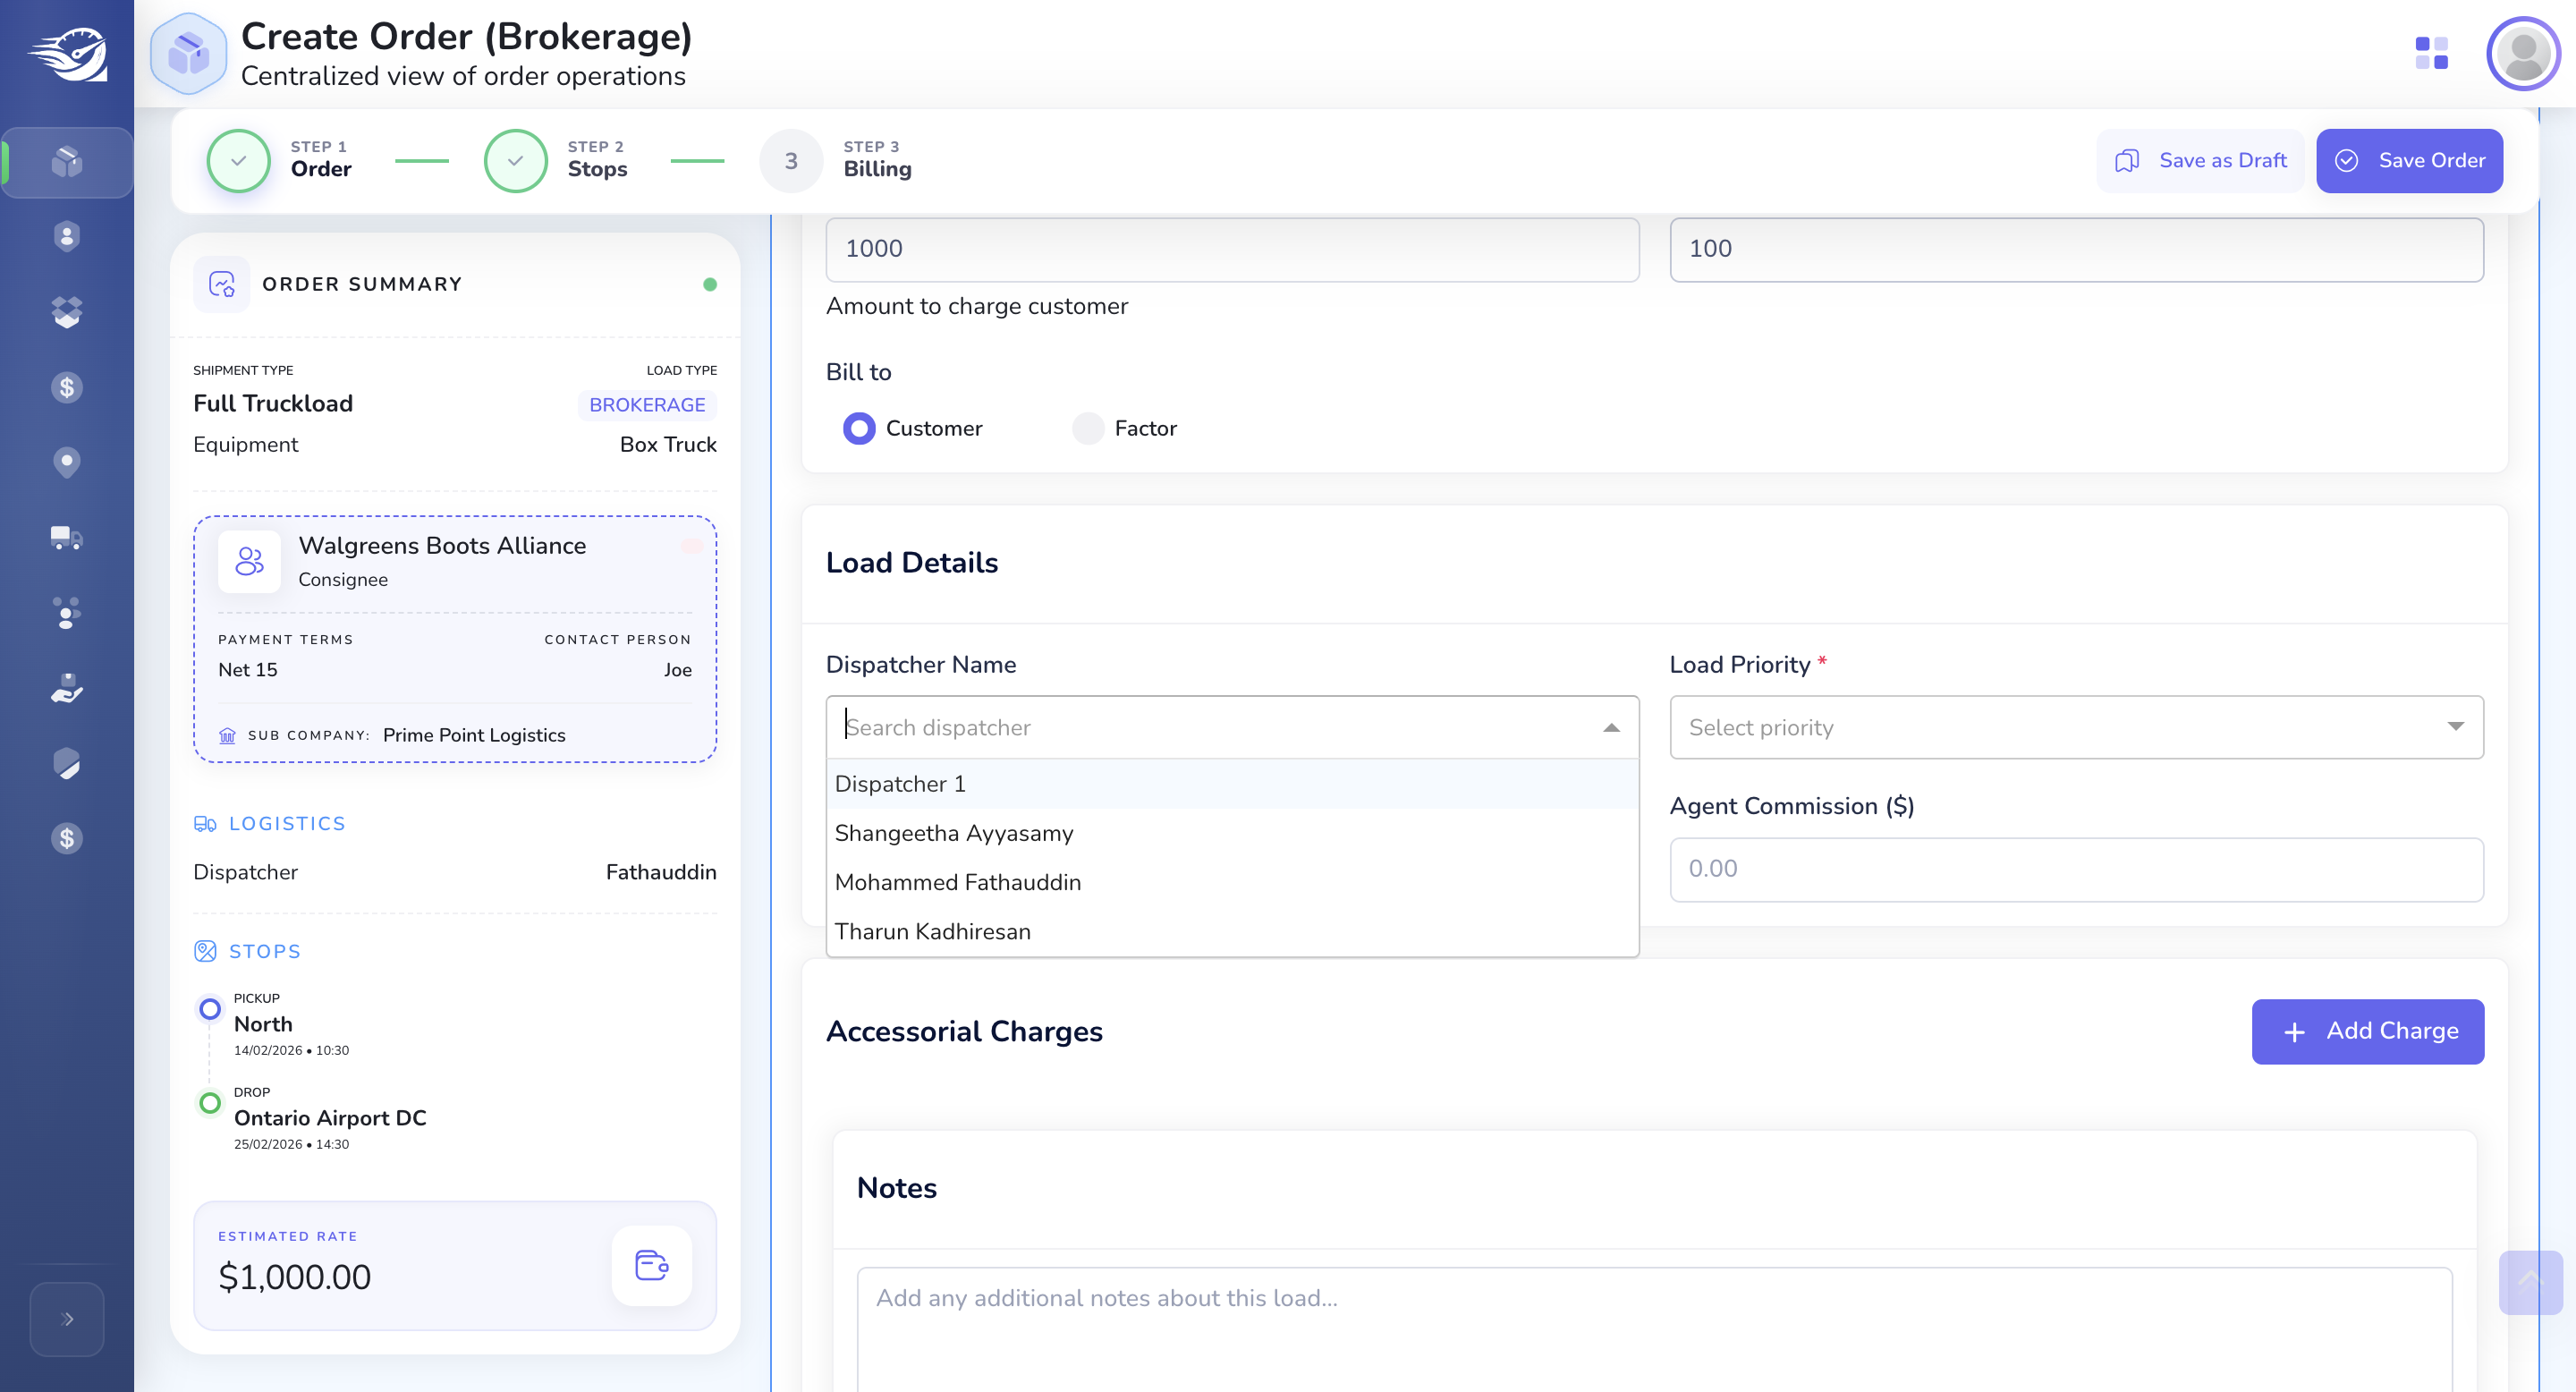
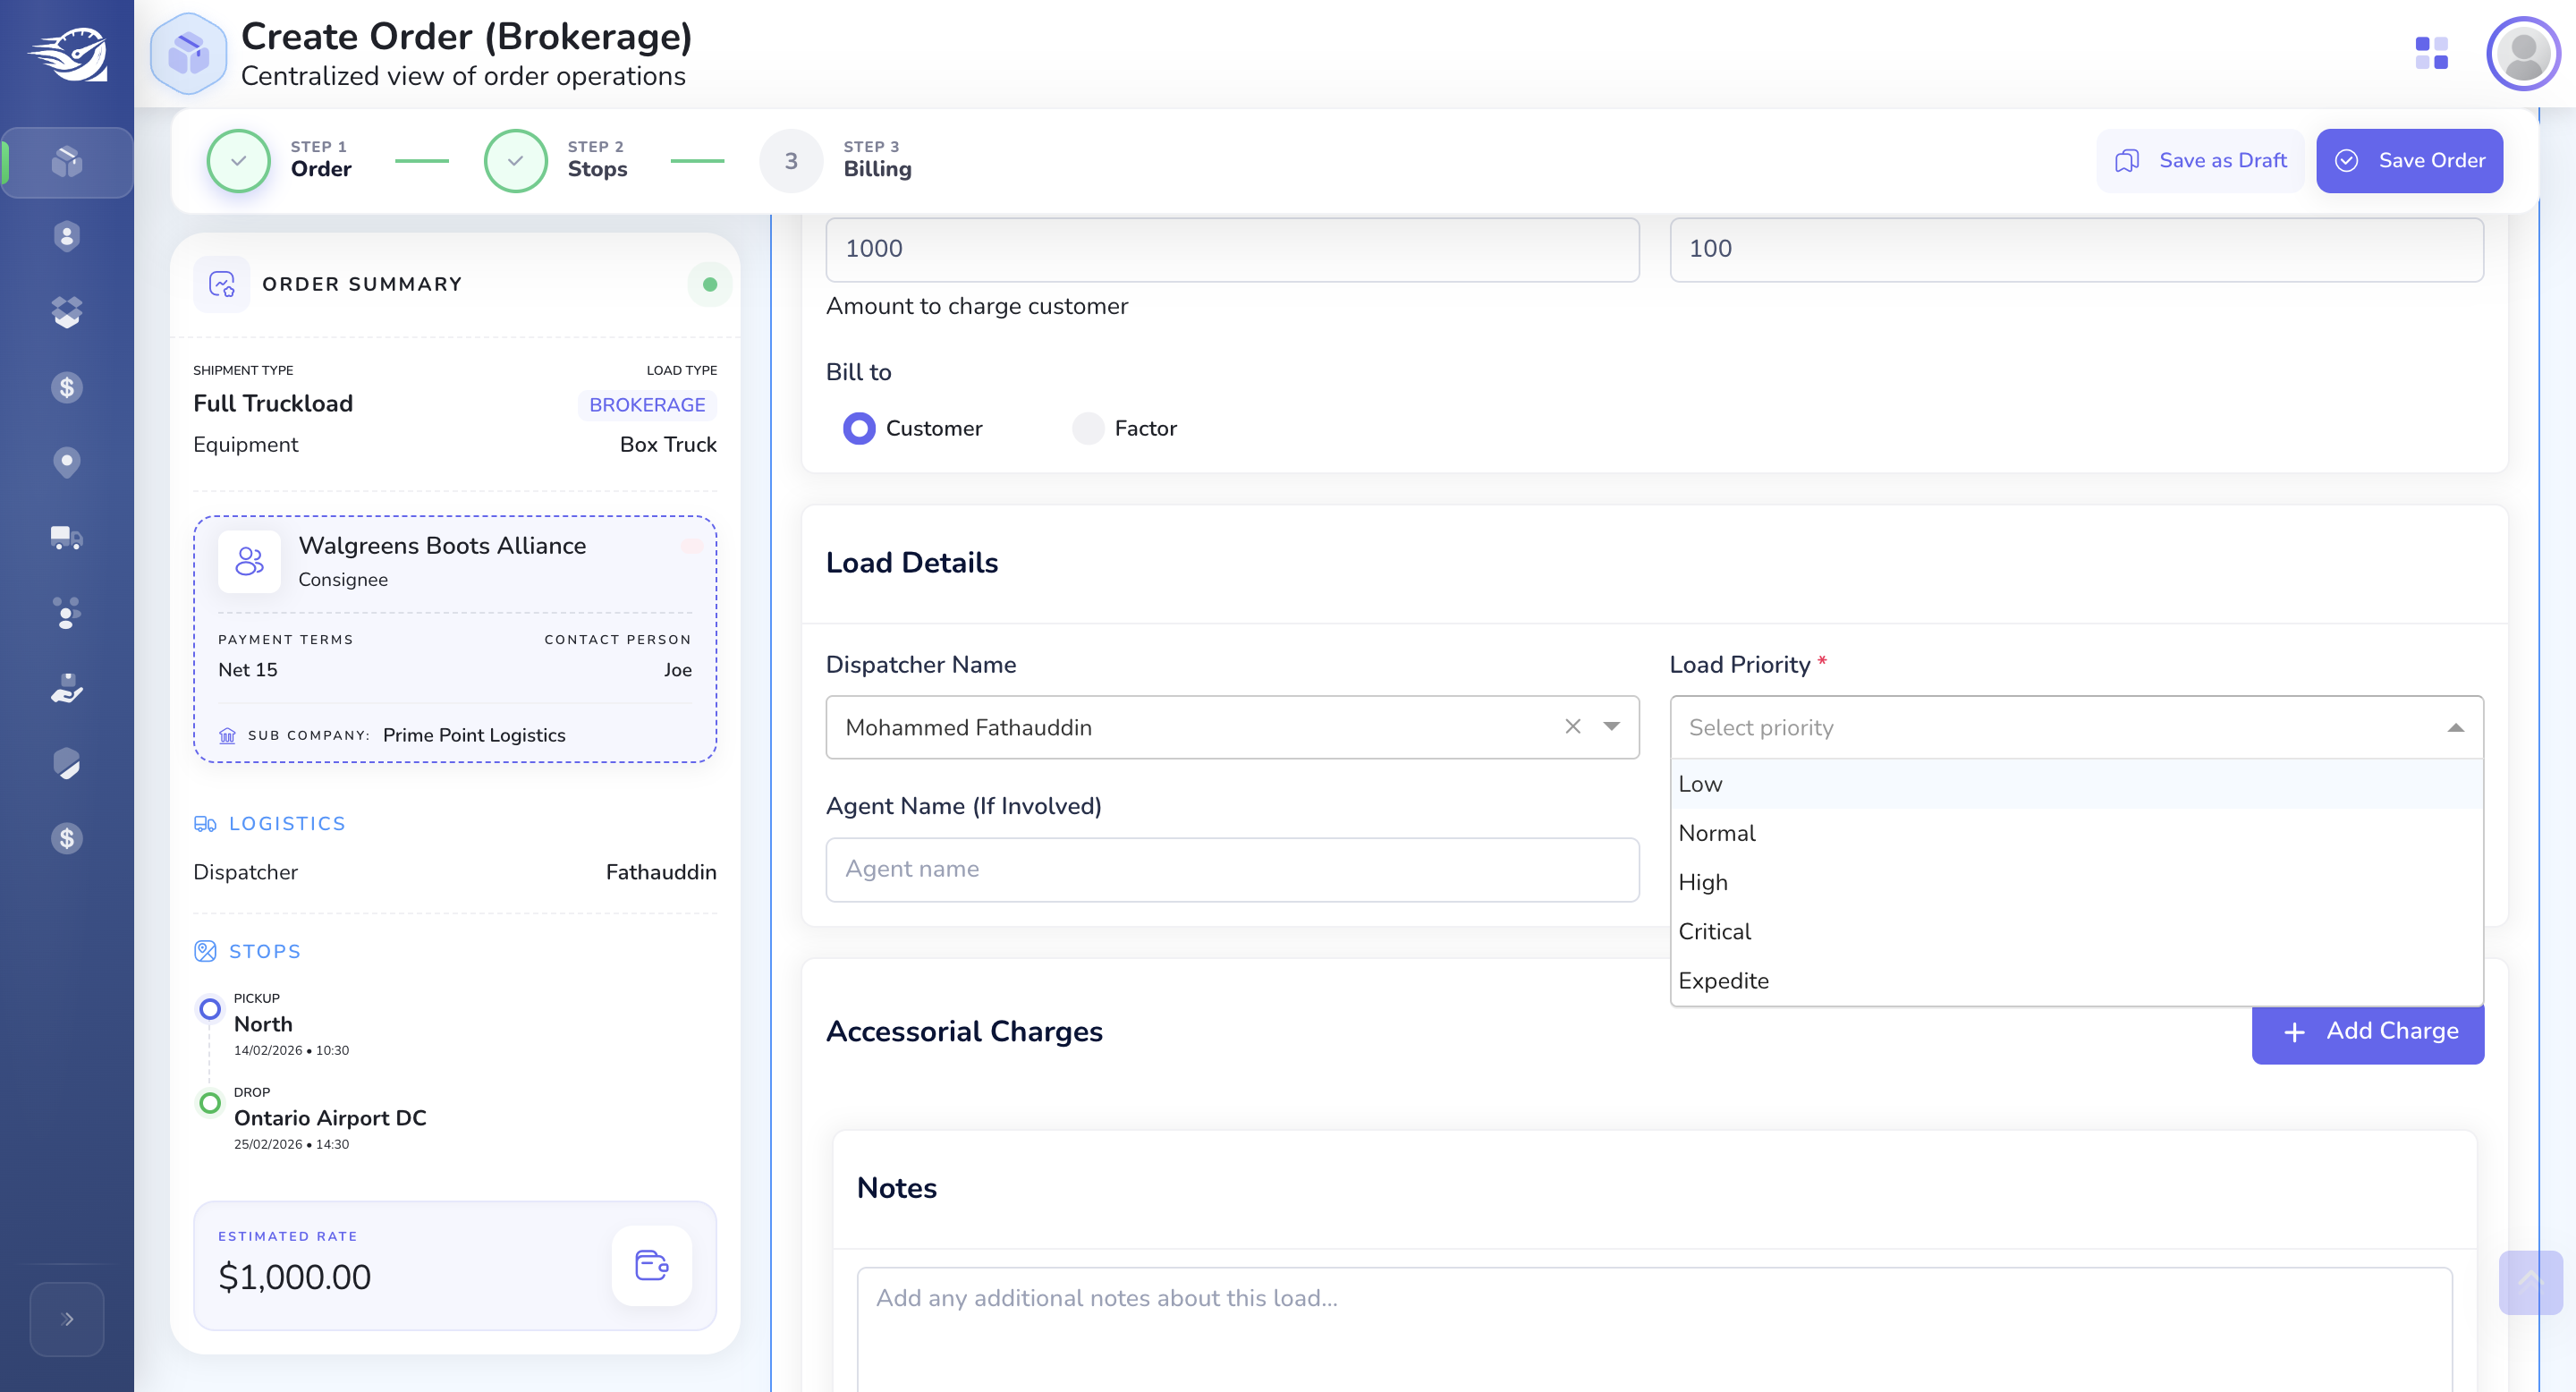
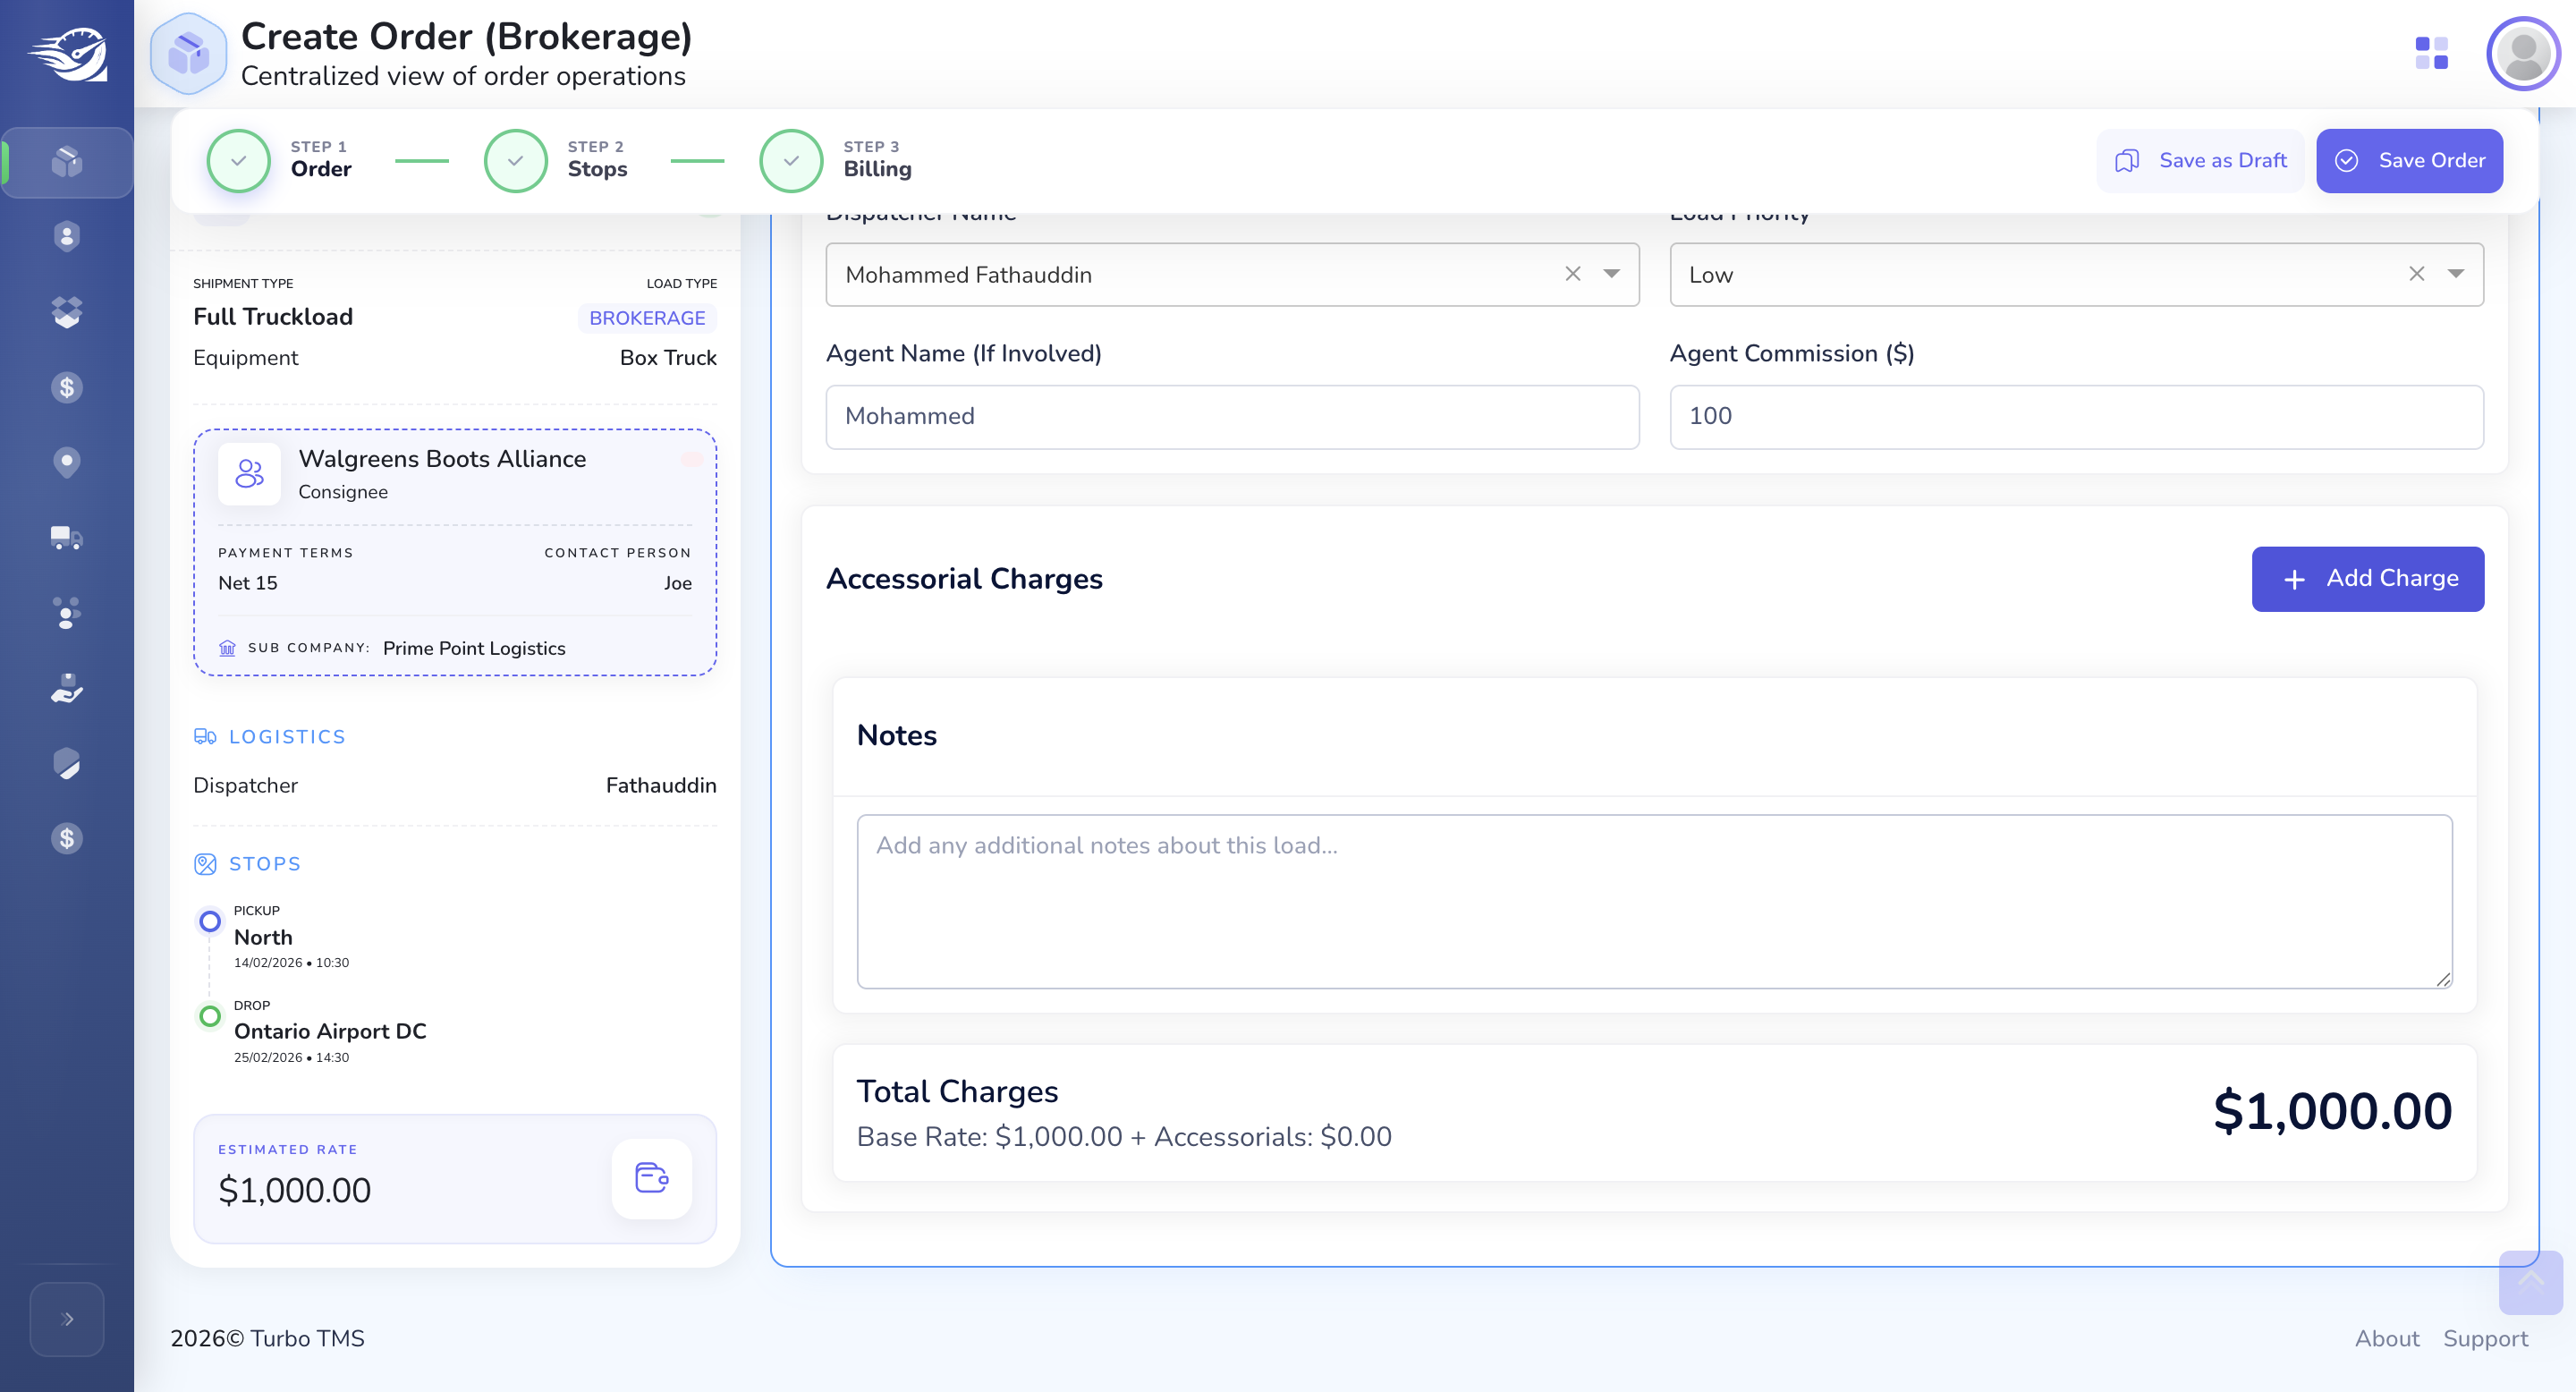
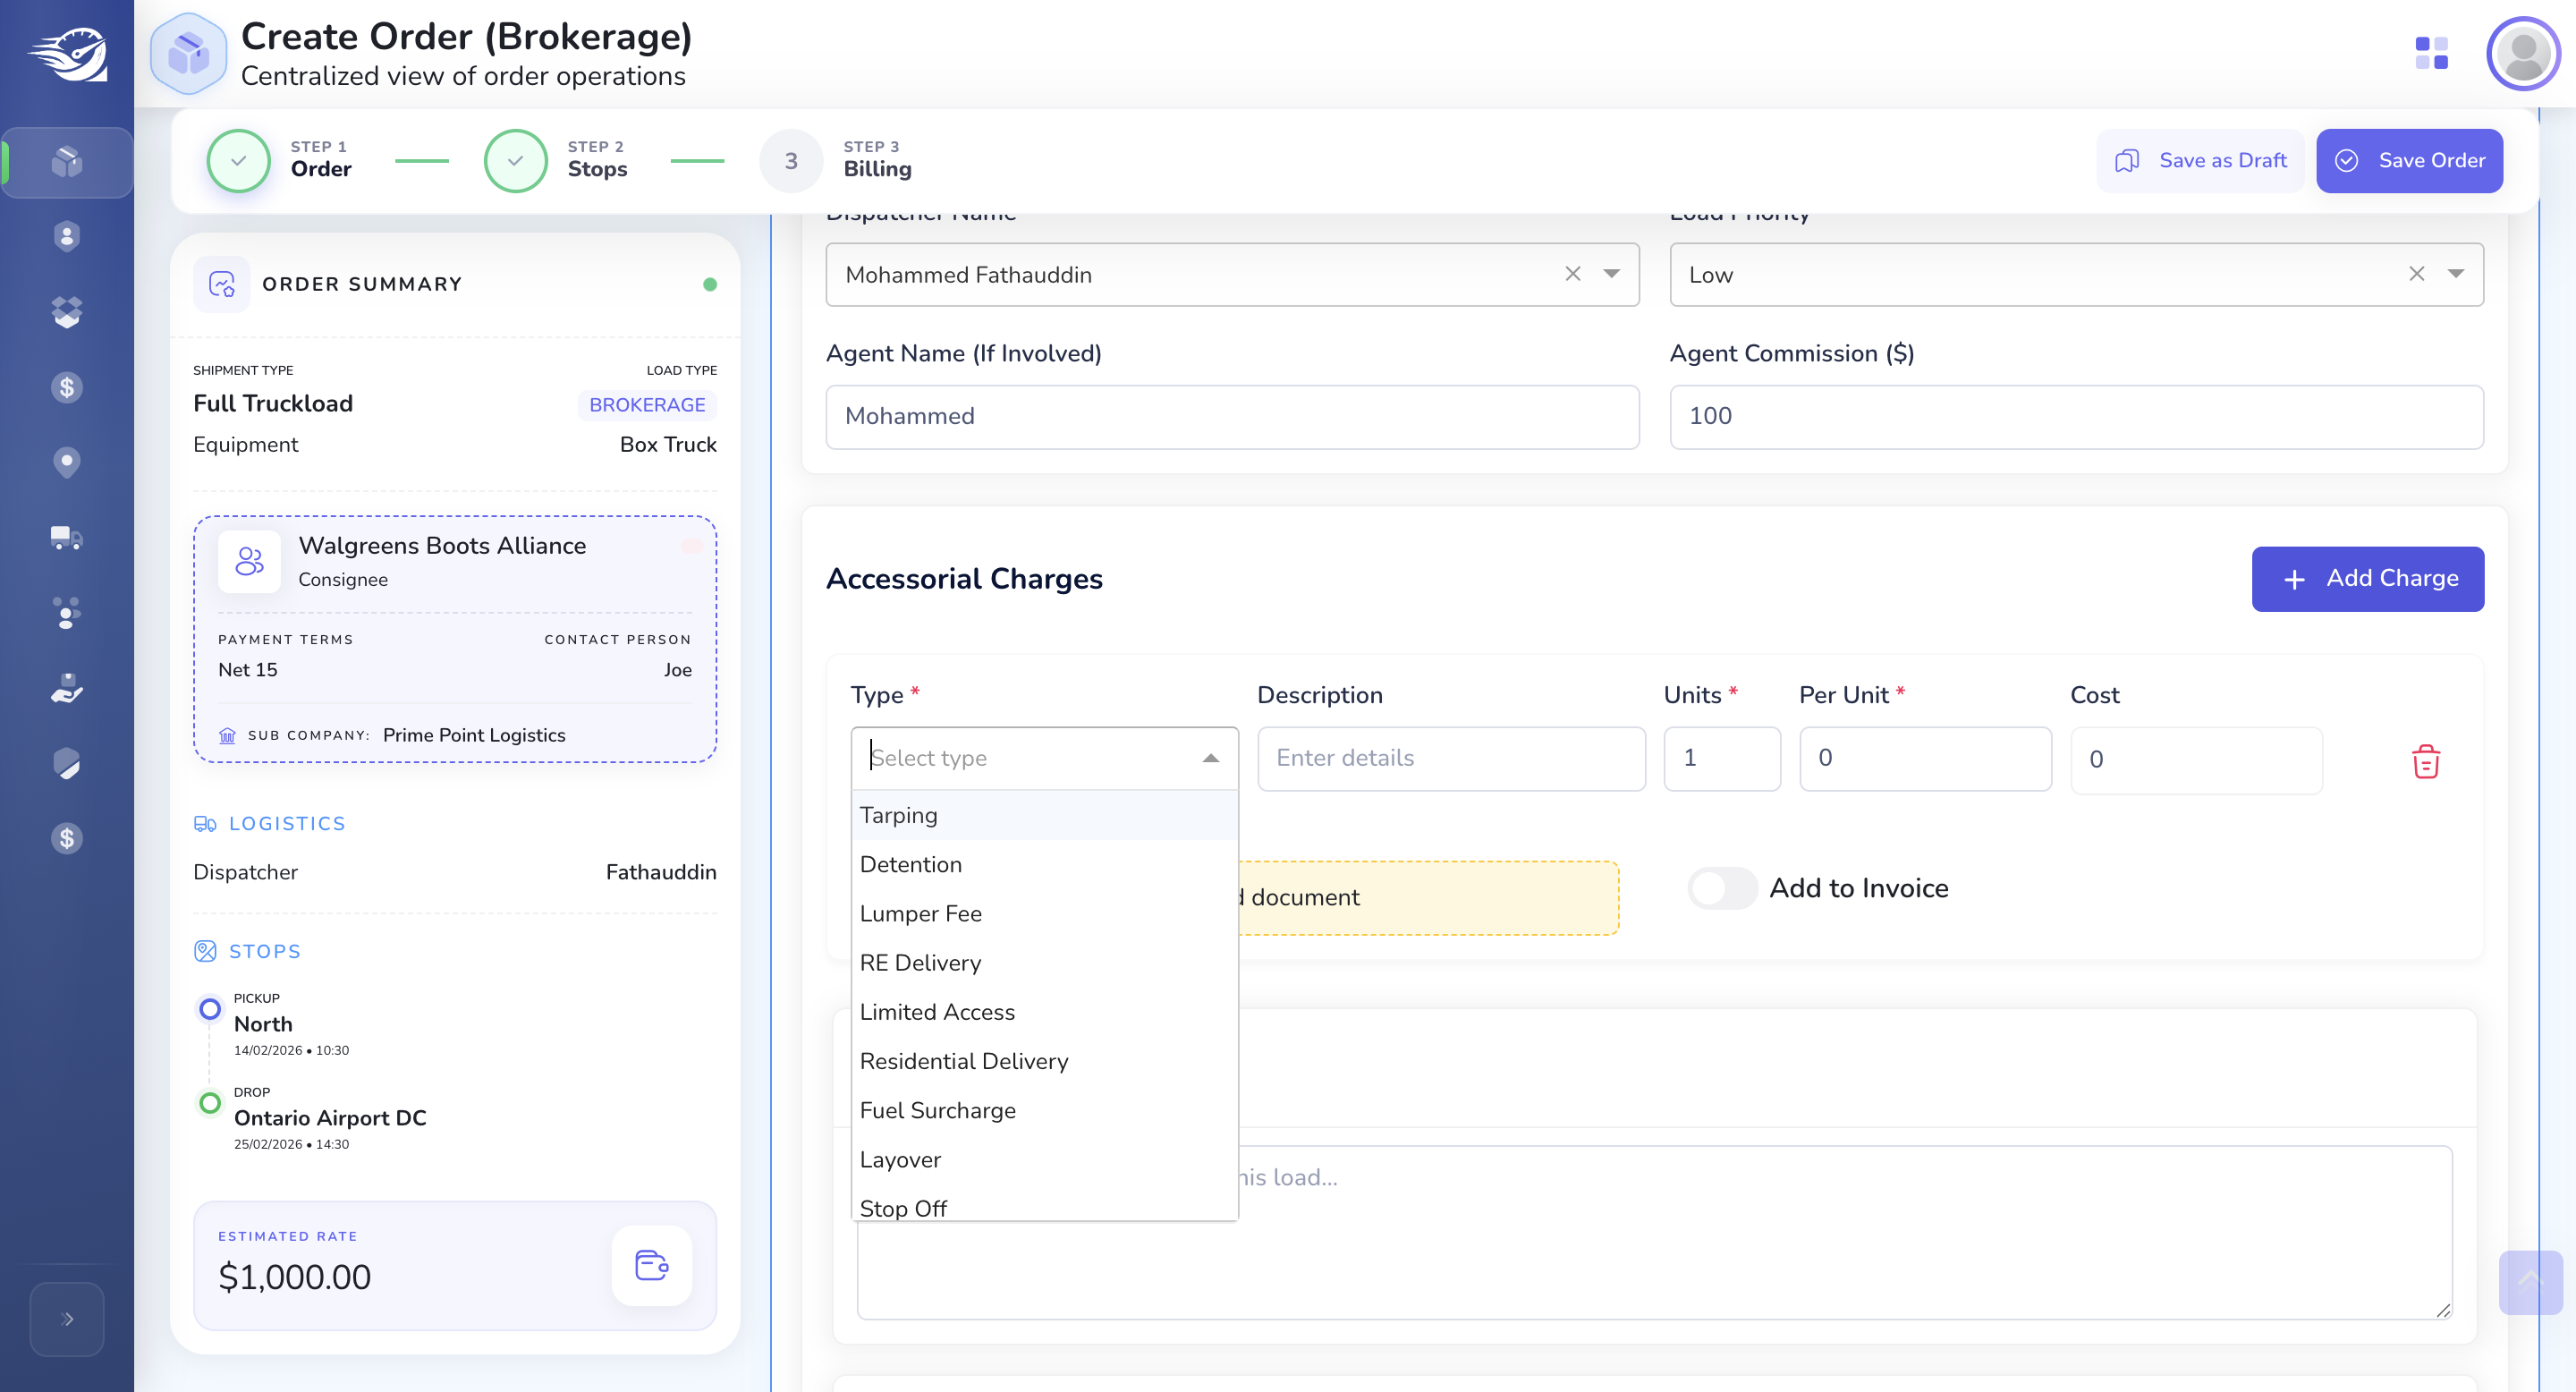
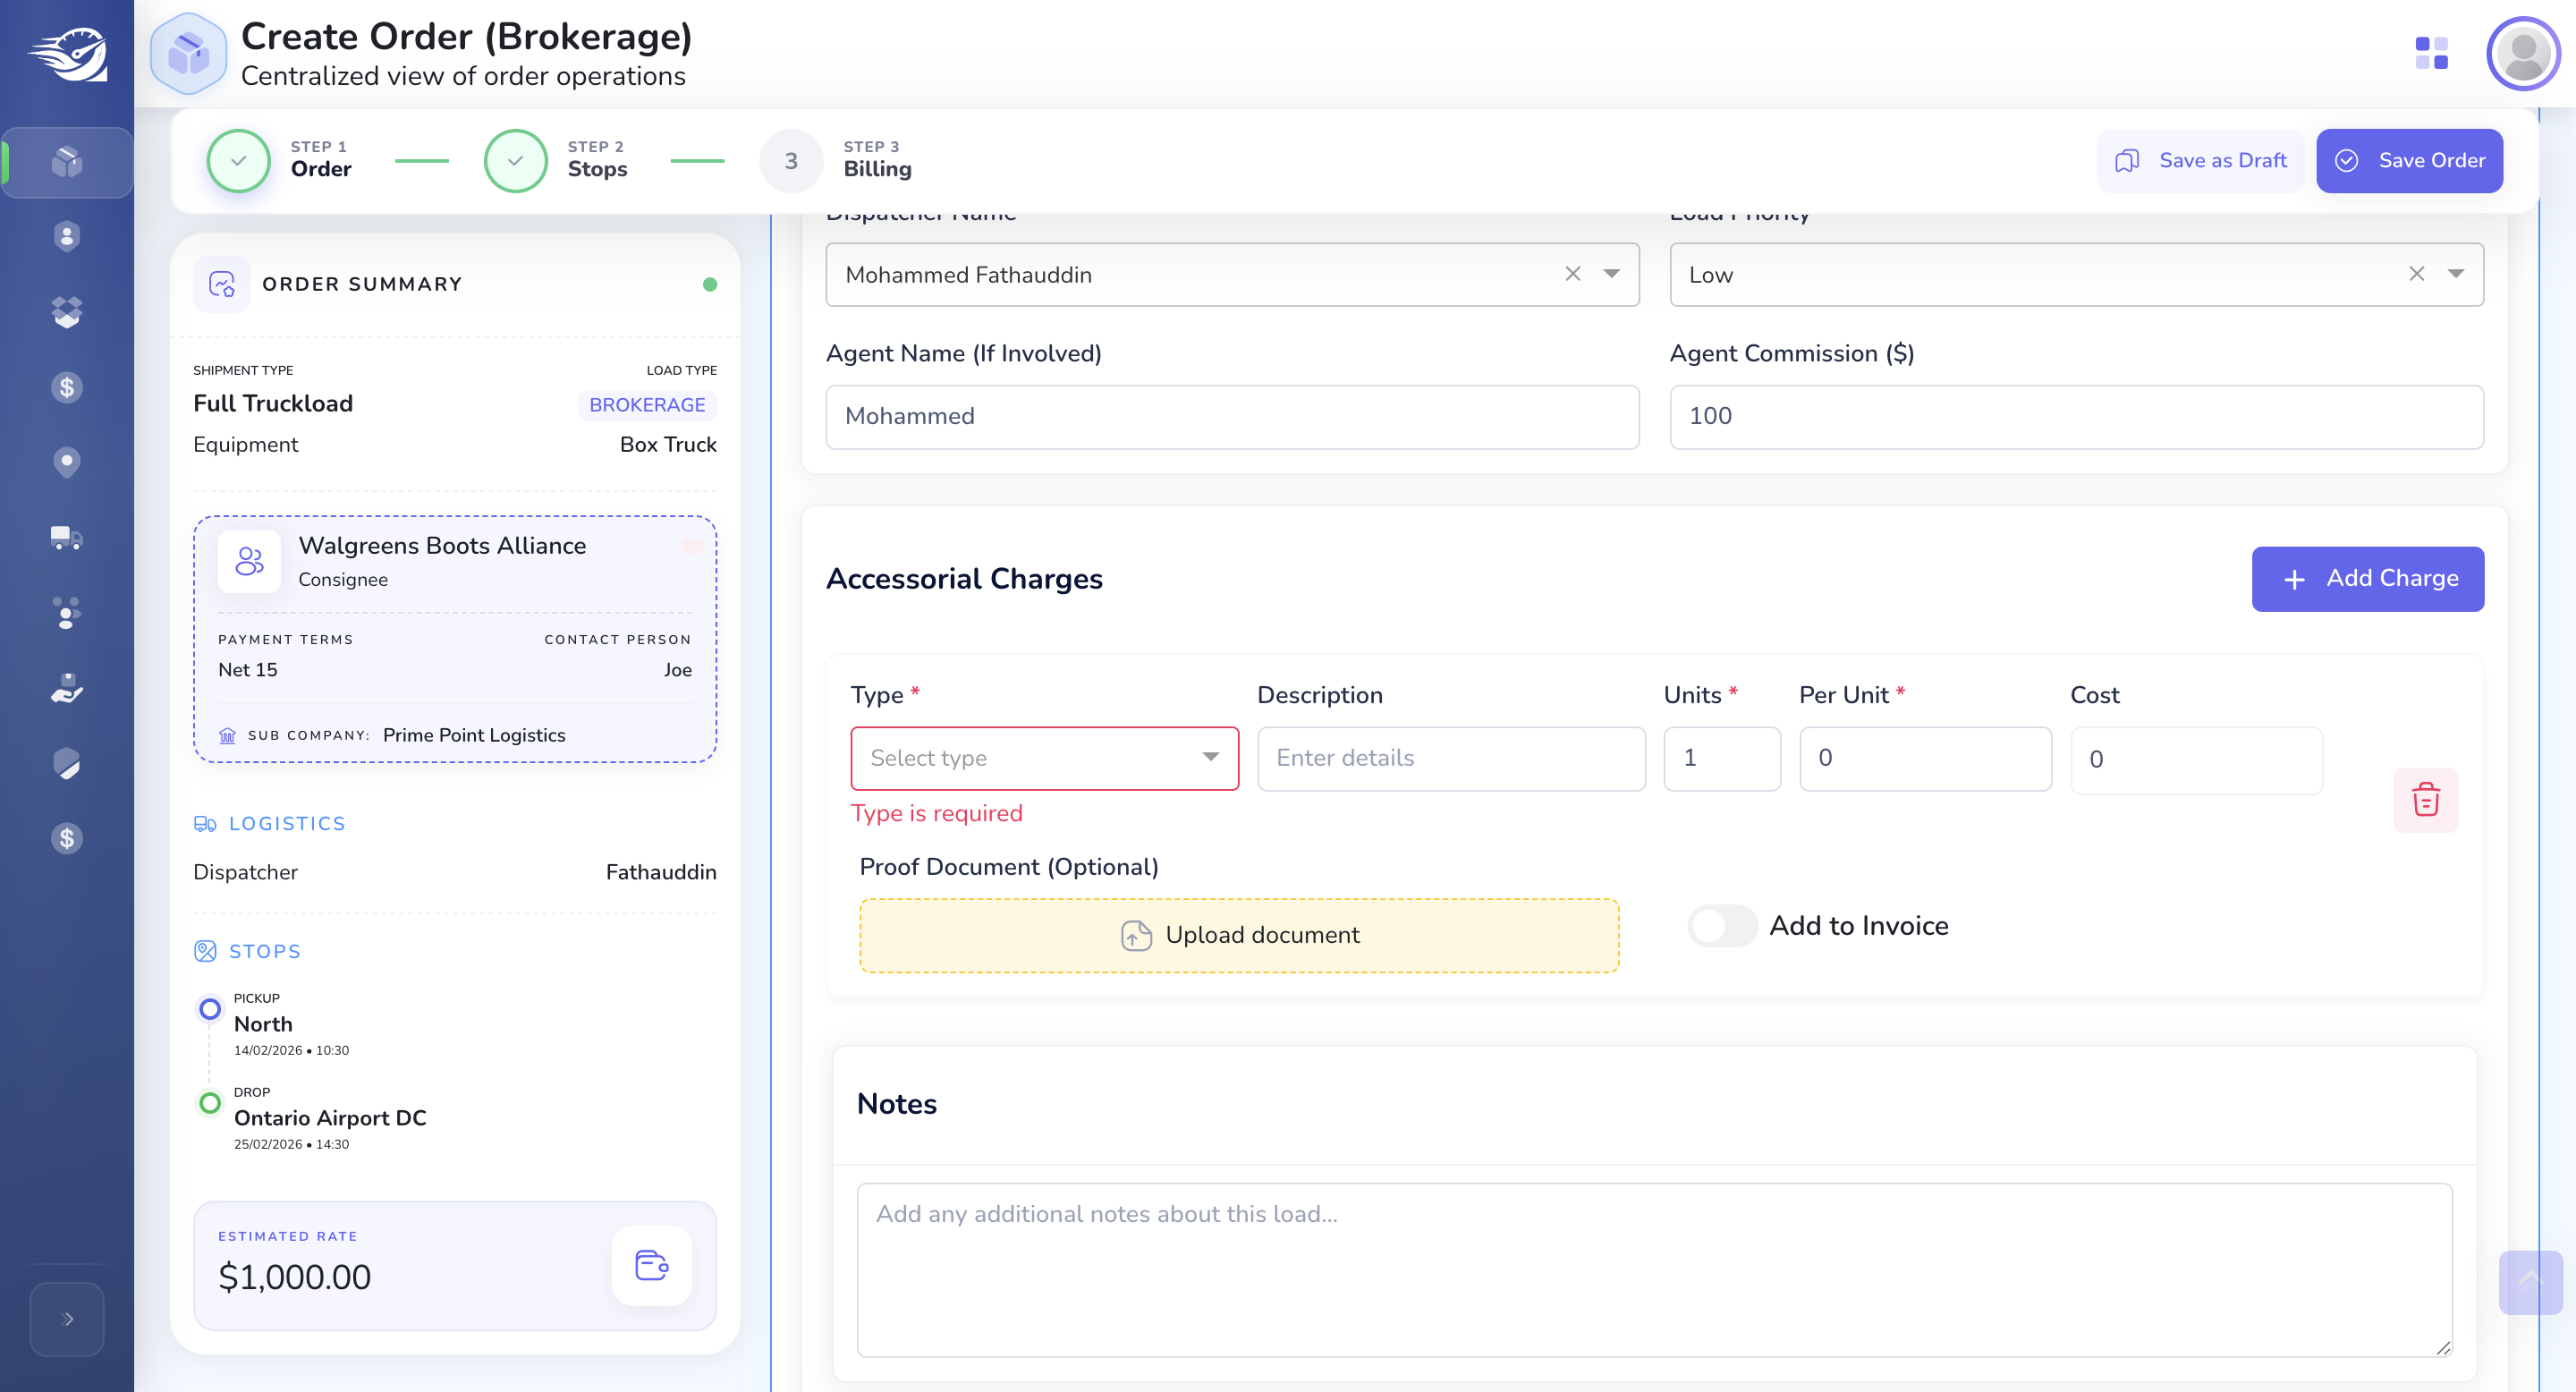
Accessory Charges
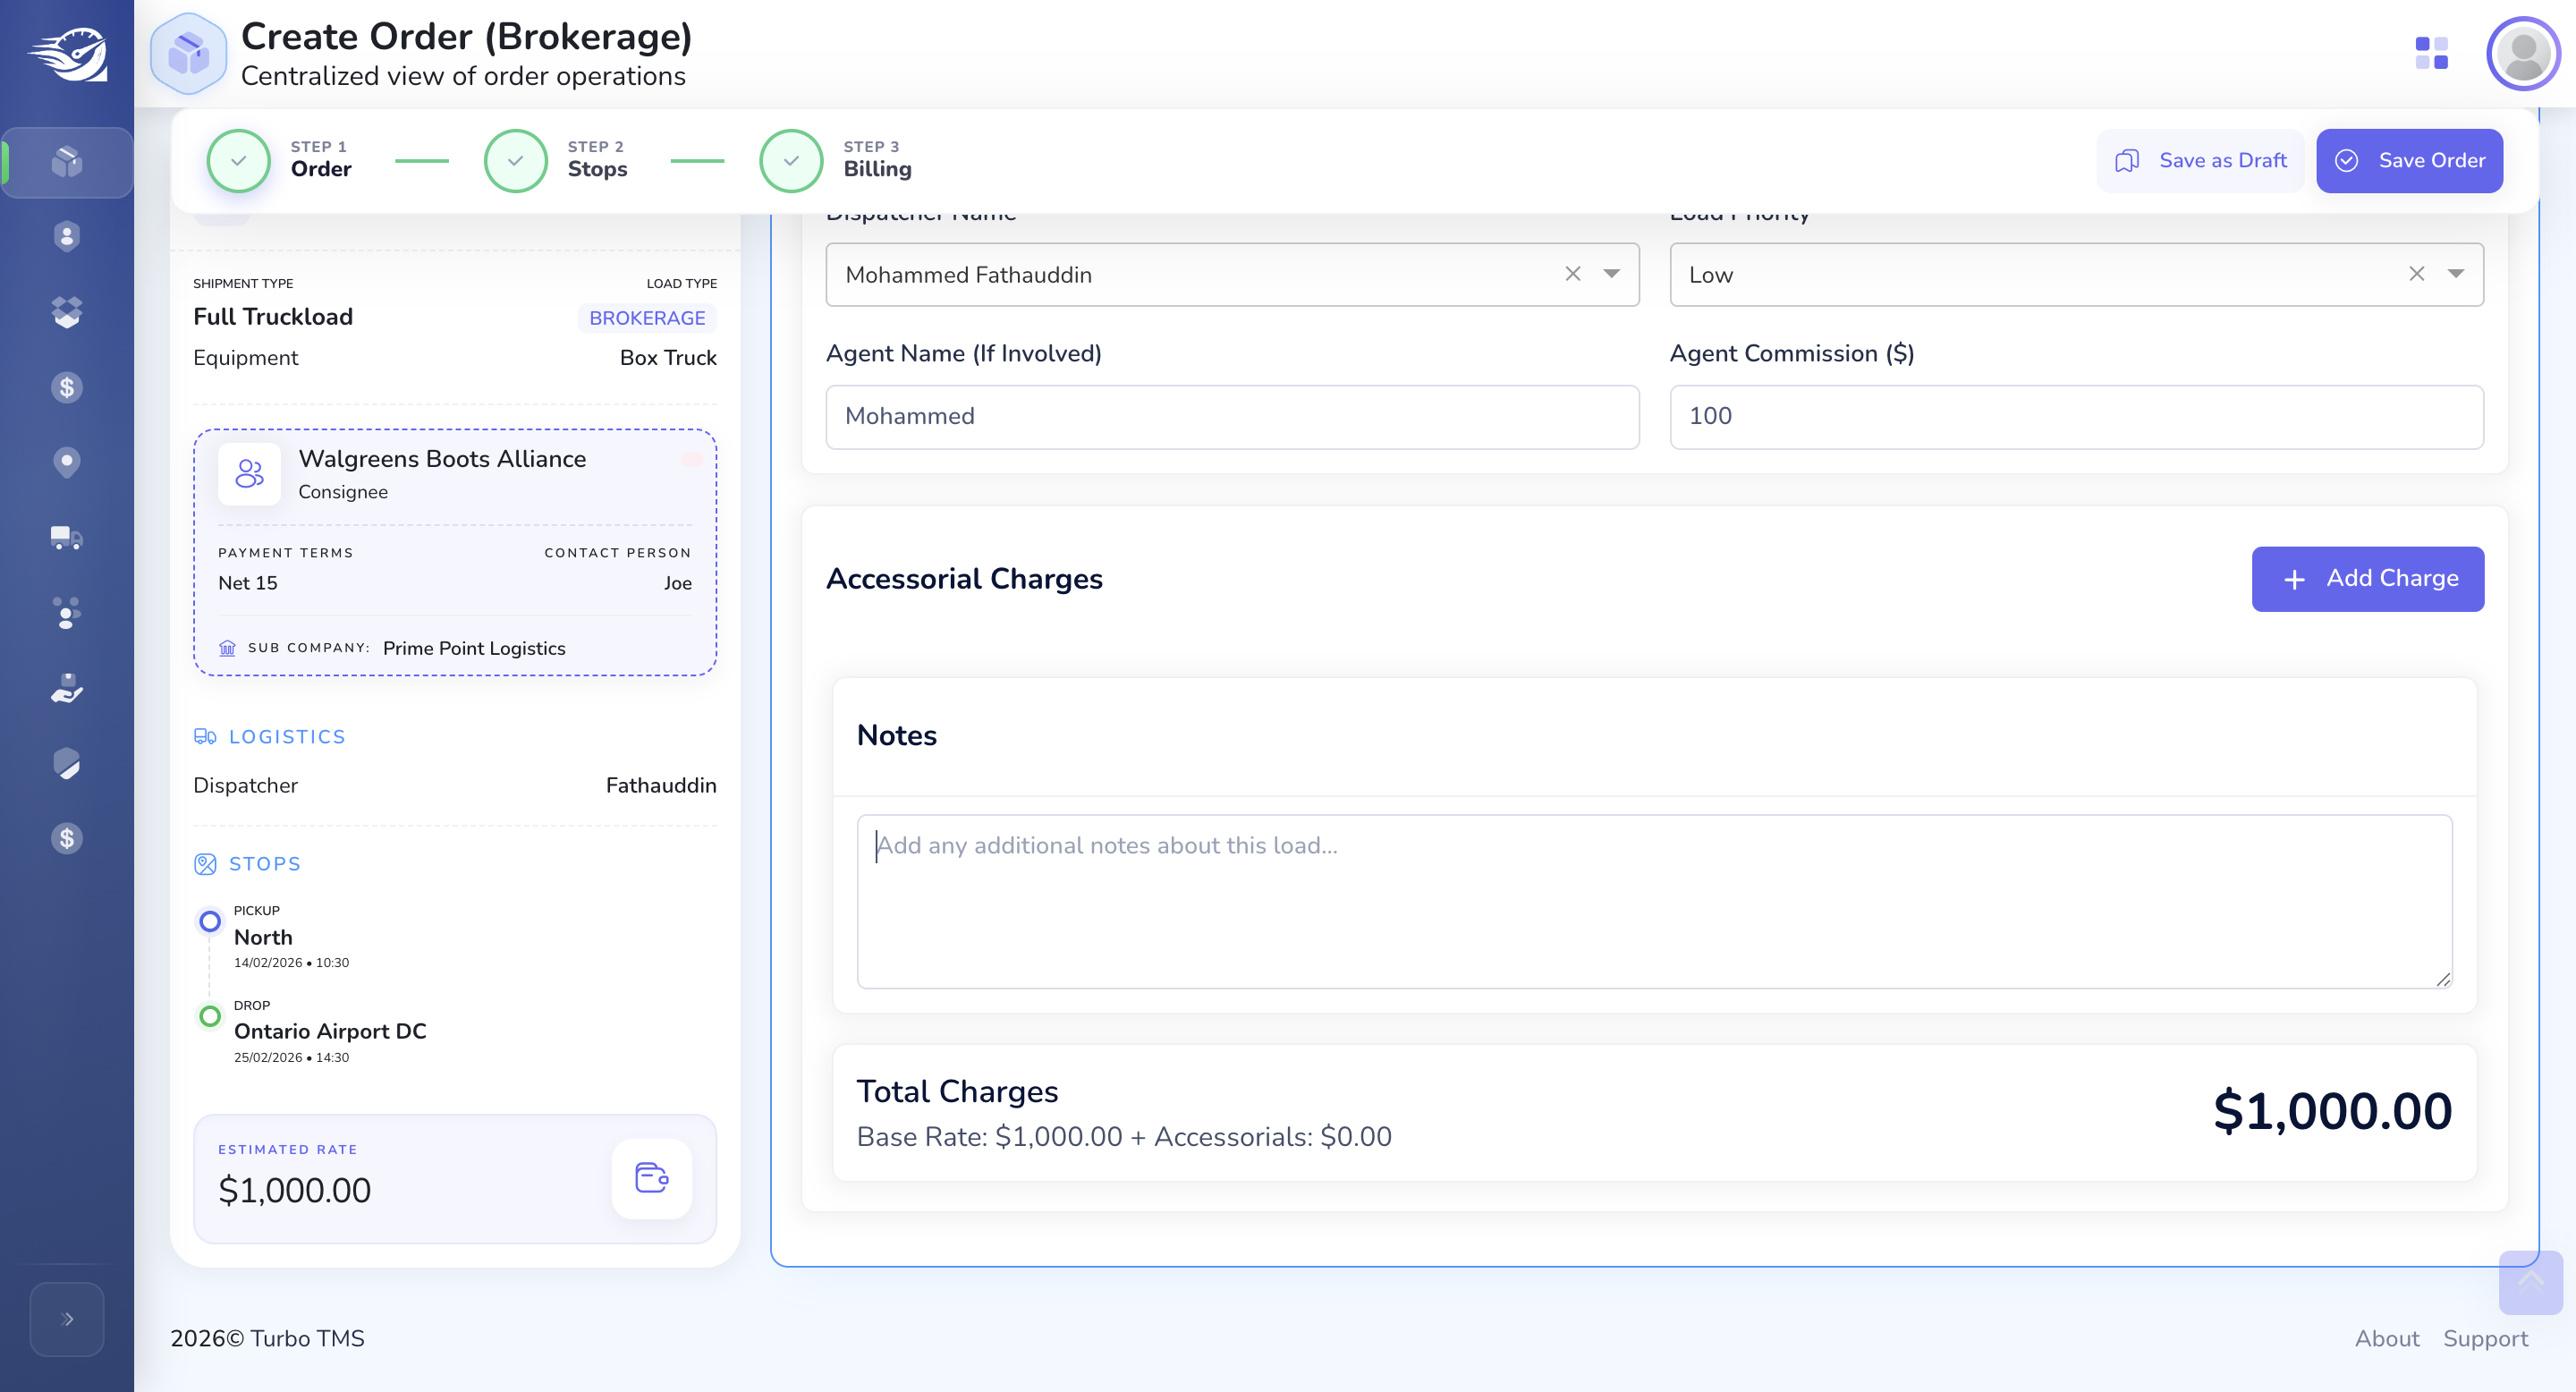
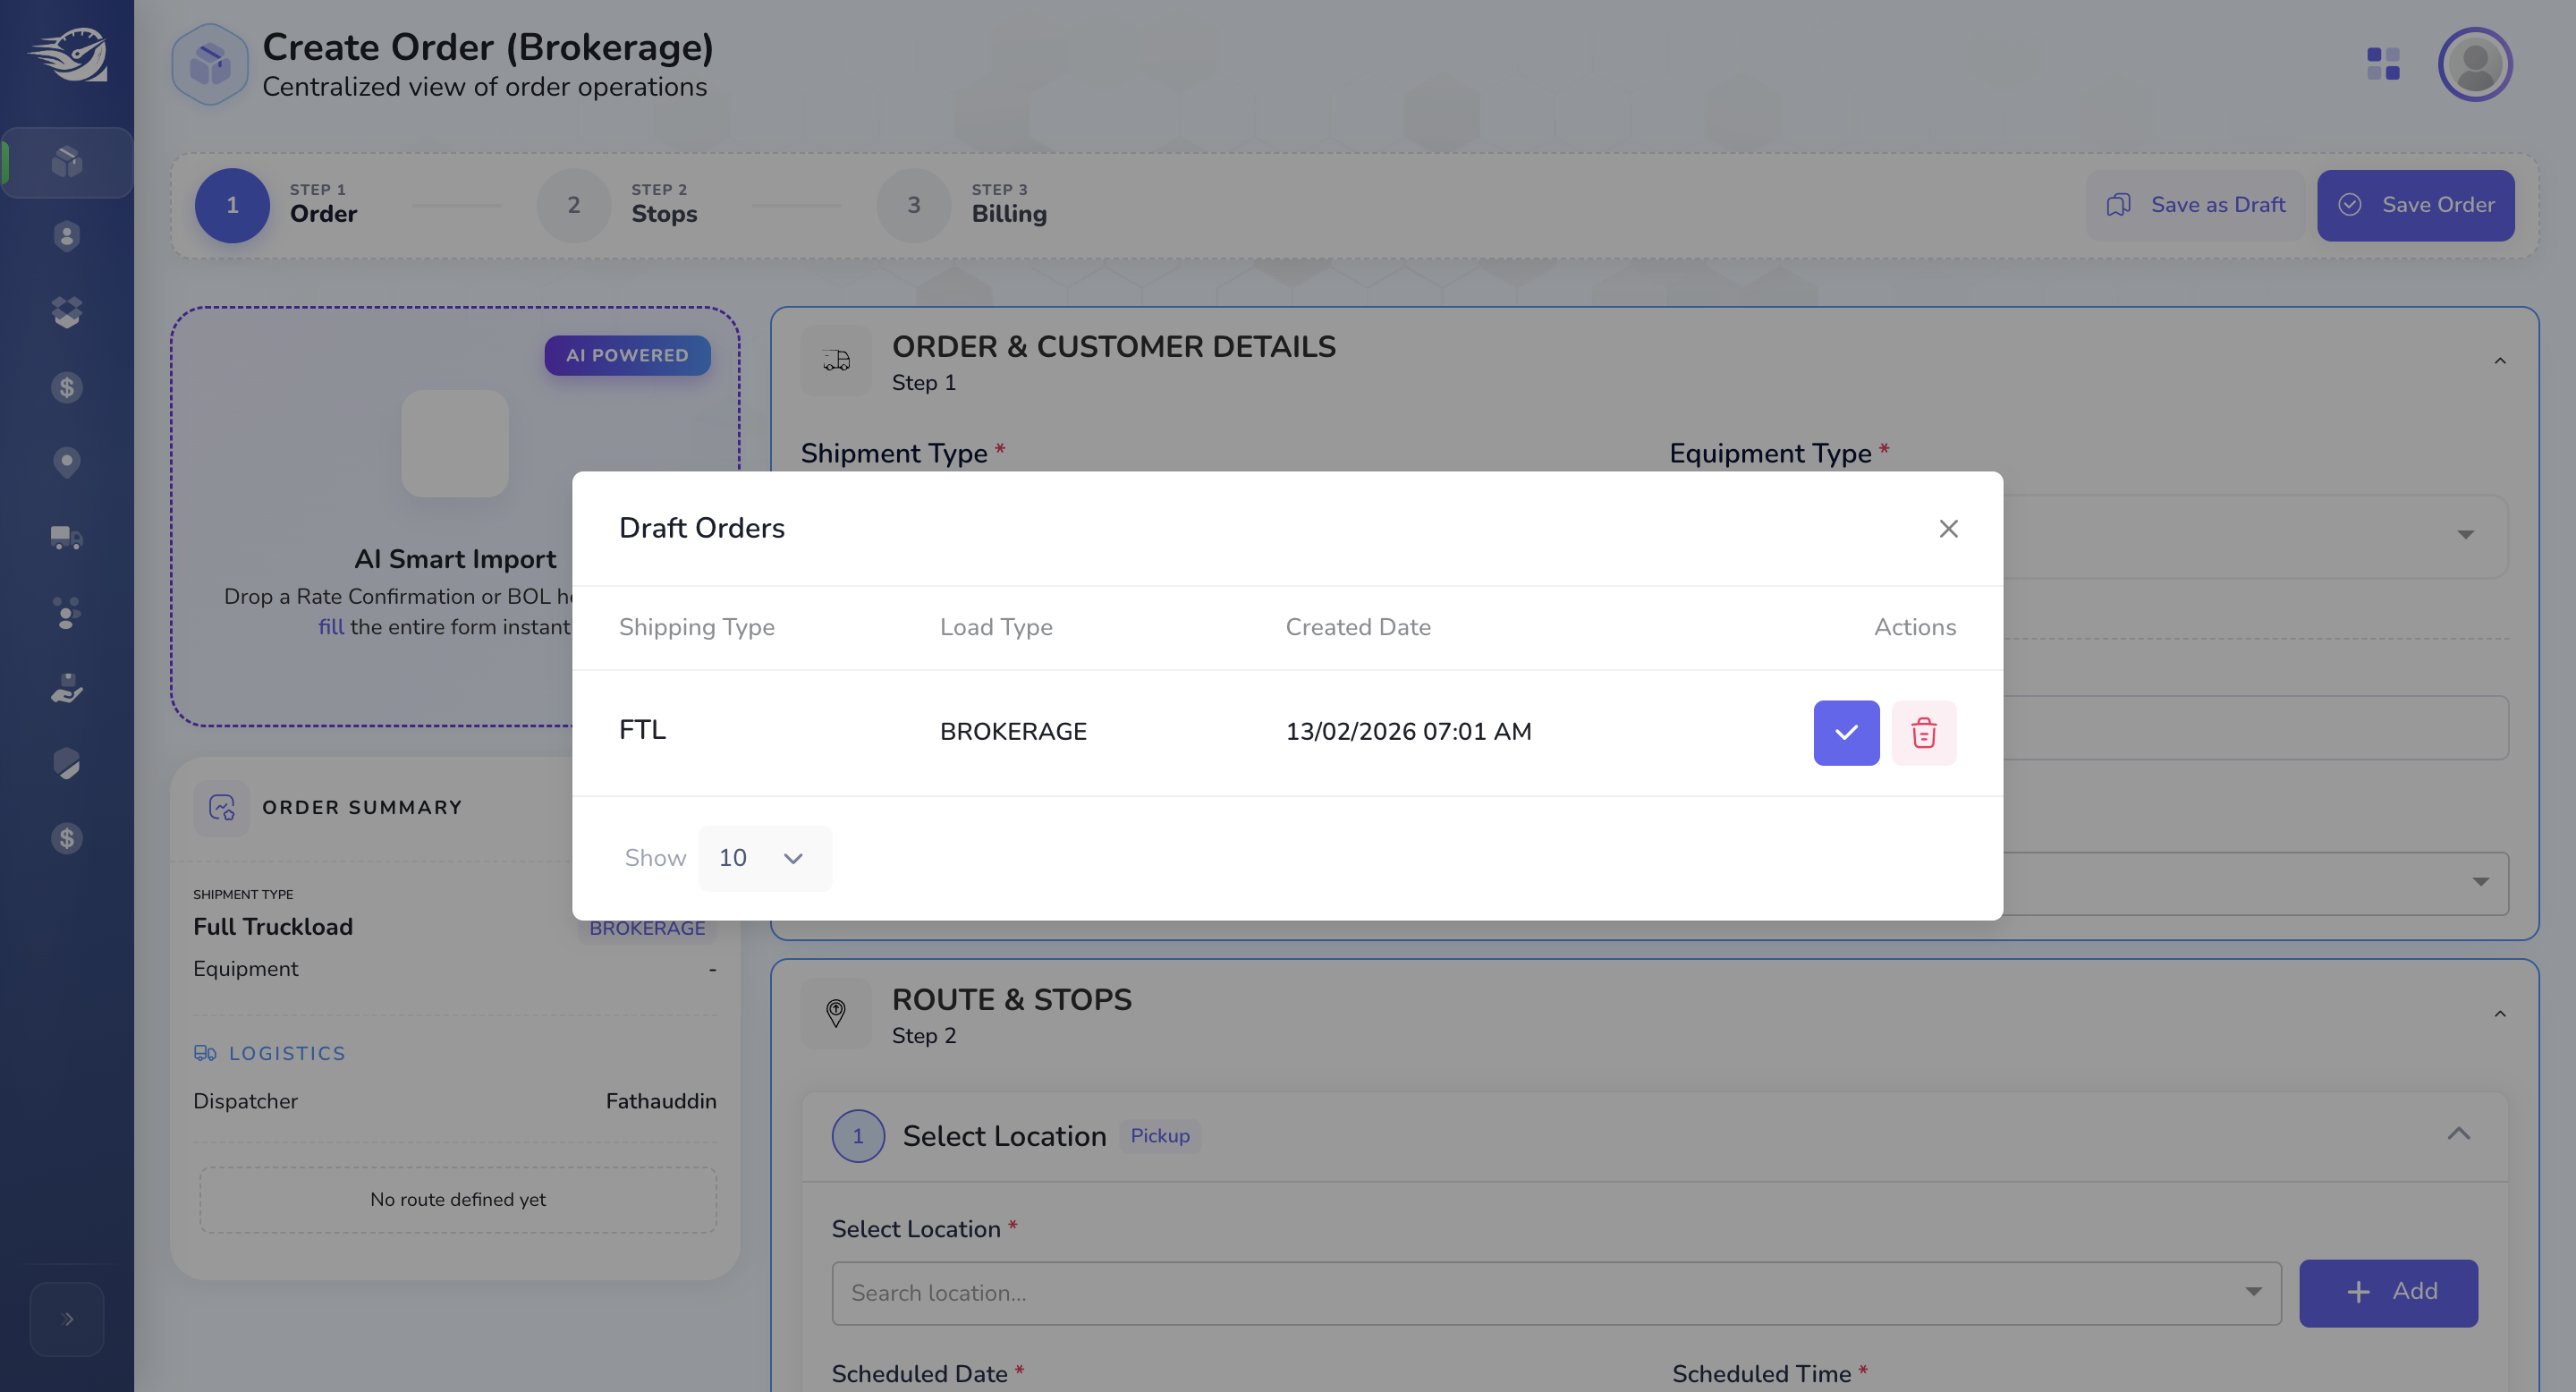
Save A Draft : So that Brokers can configure the orders later.
Draft Orders Pop-up: When users revisit the Order Creation Screen later , we will show it pop-up. On Selection of any of the Drafts, This will pre-fill all your previous configurations on the order creation screen automatically.
To Create a Order, Click on "Save Order" Button
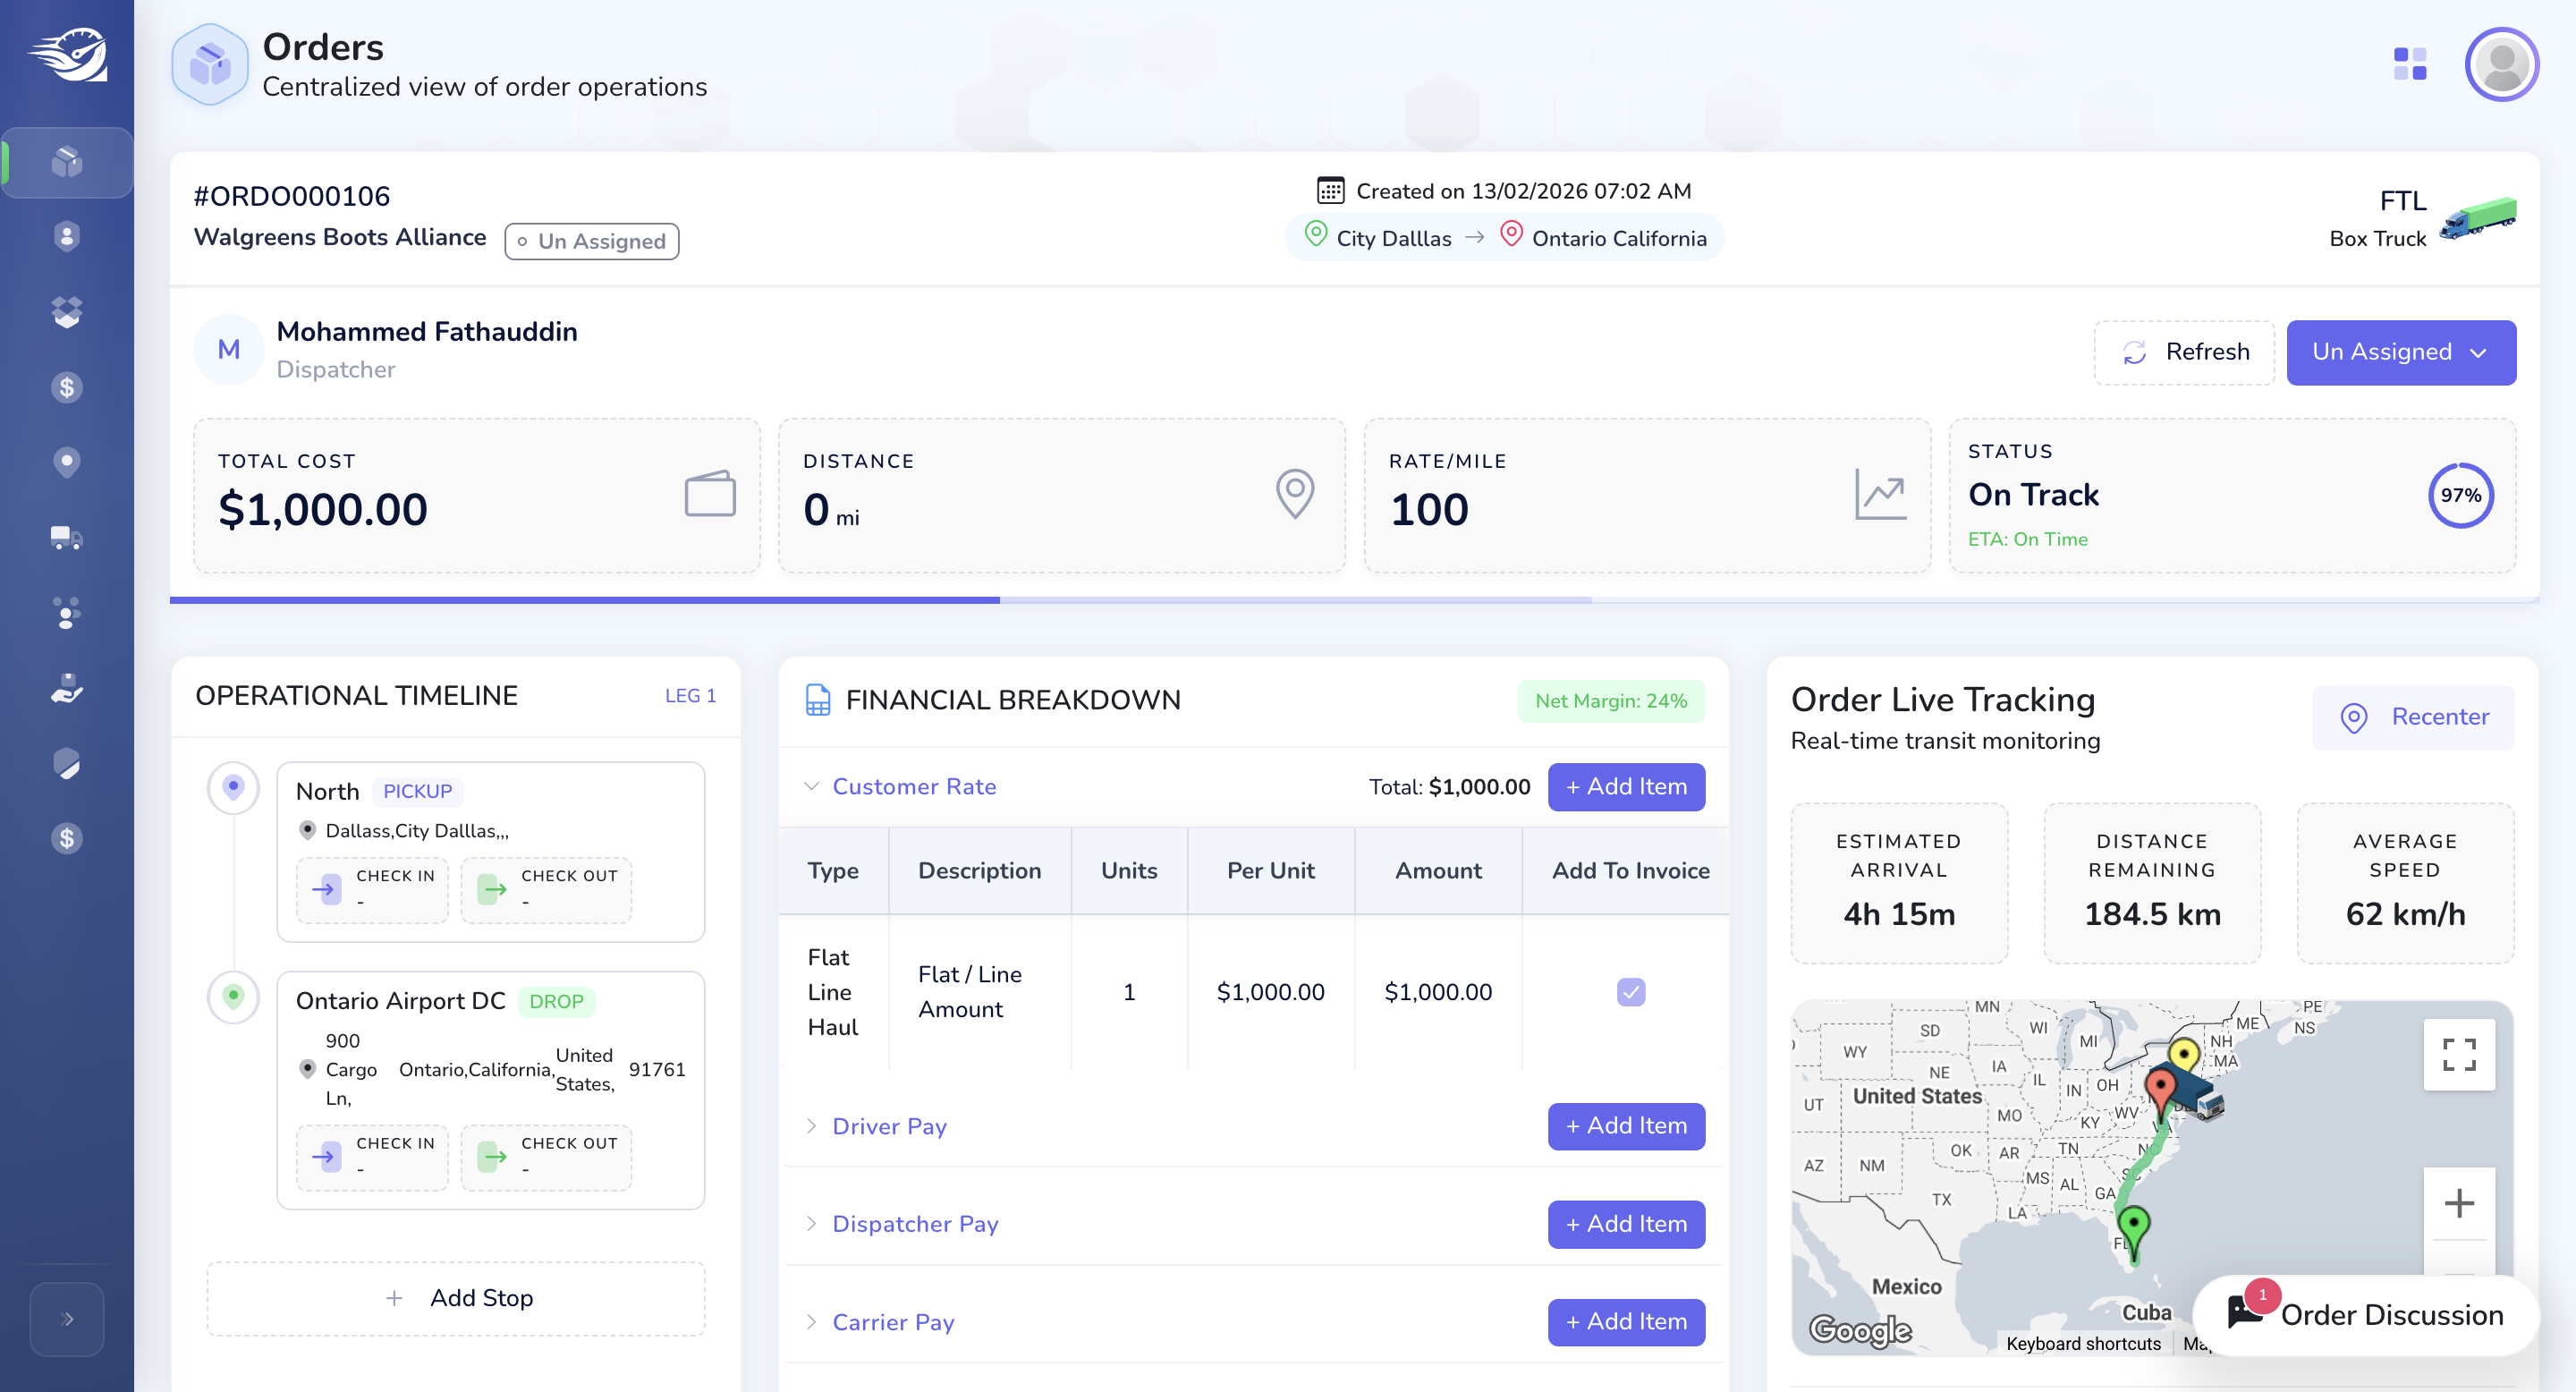
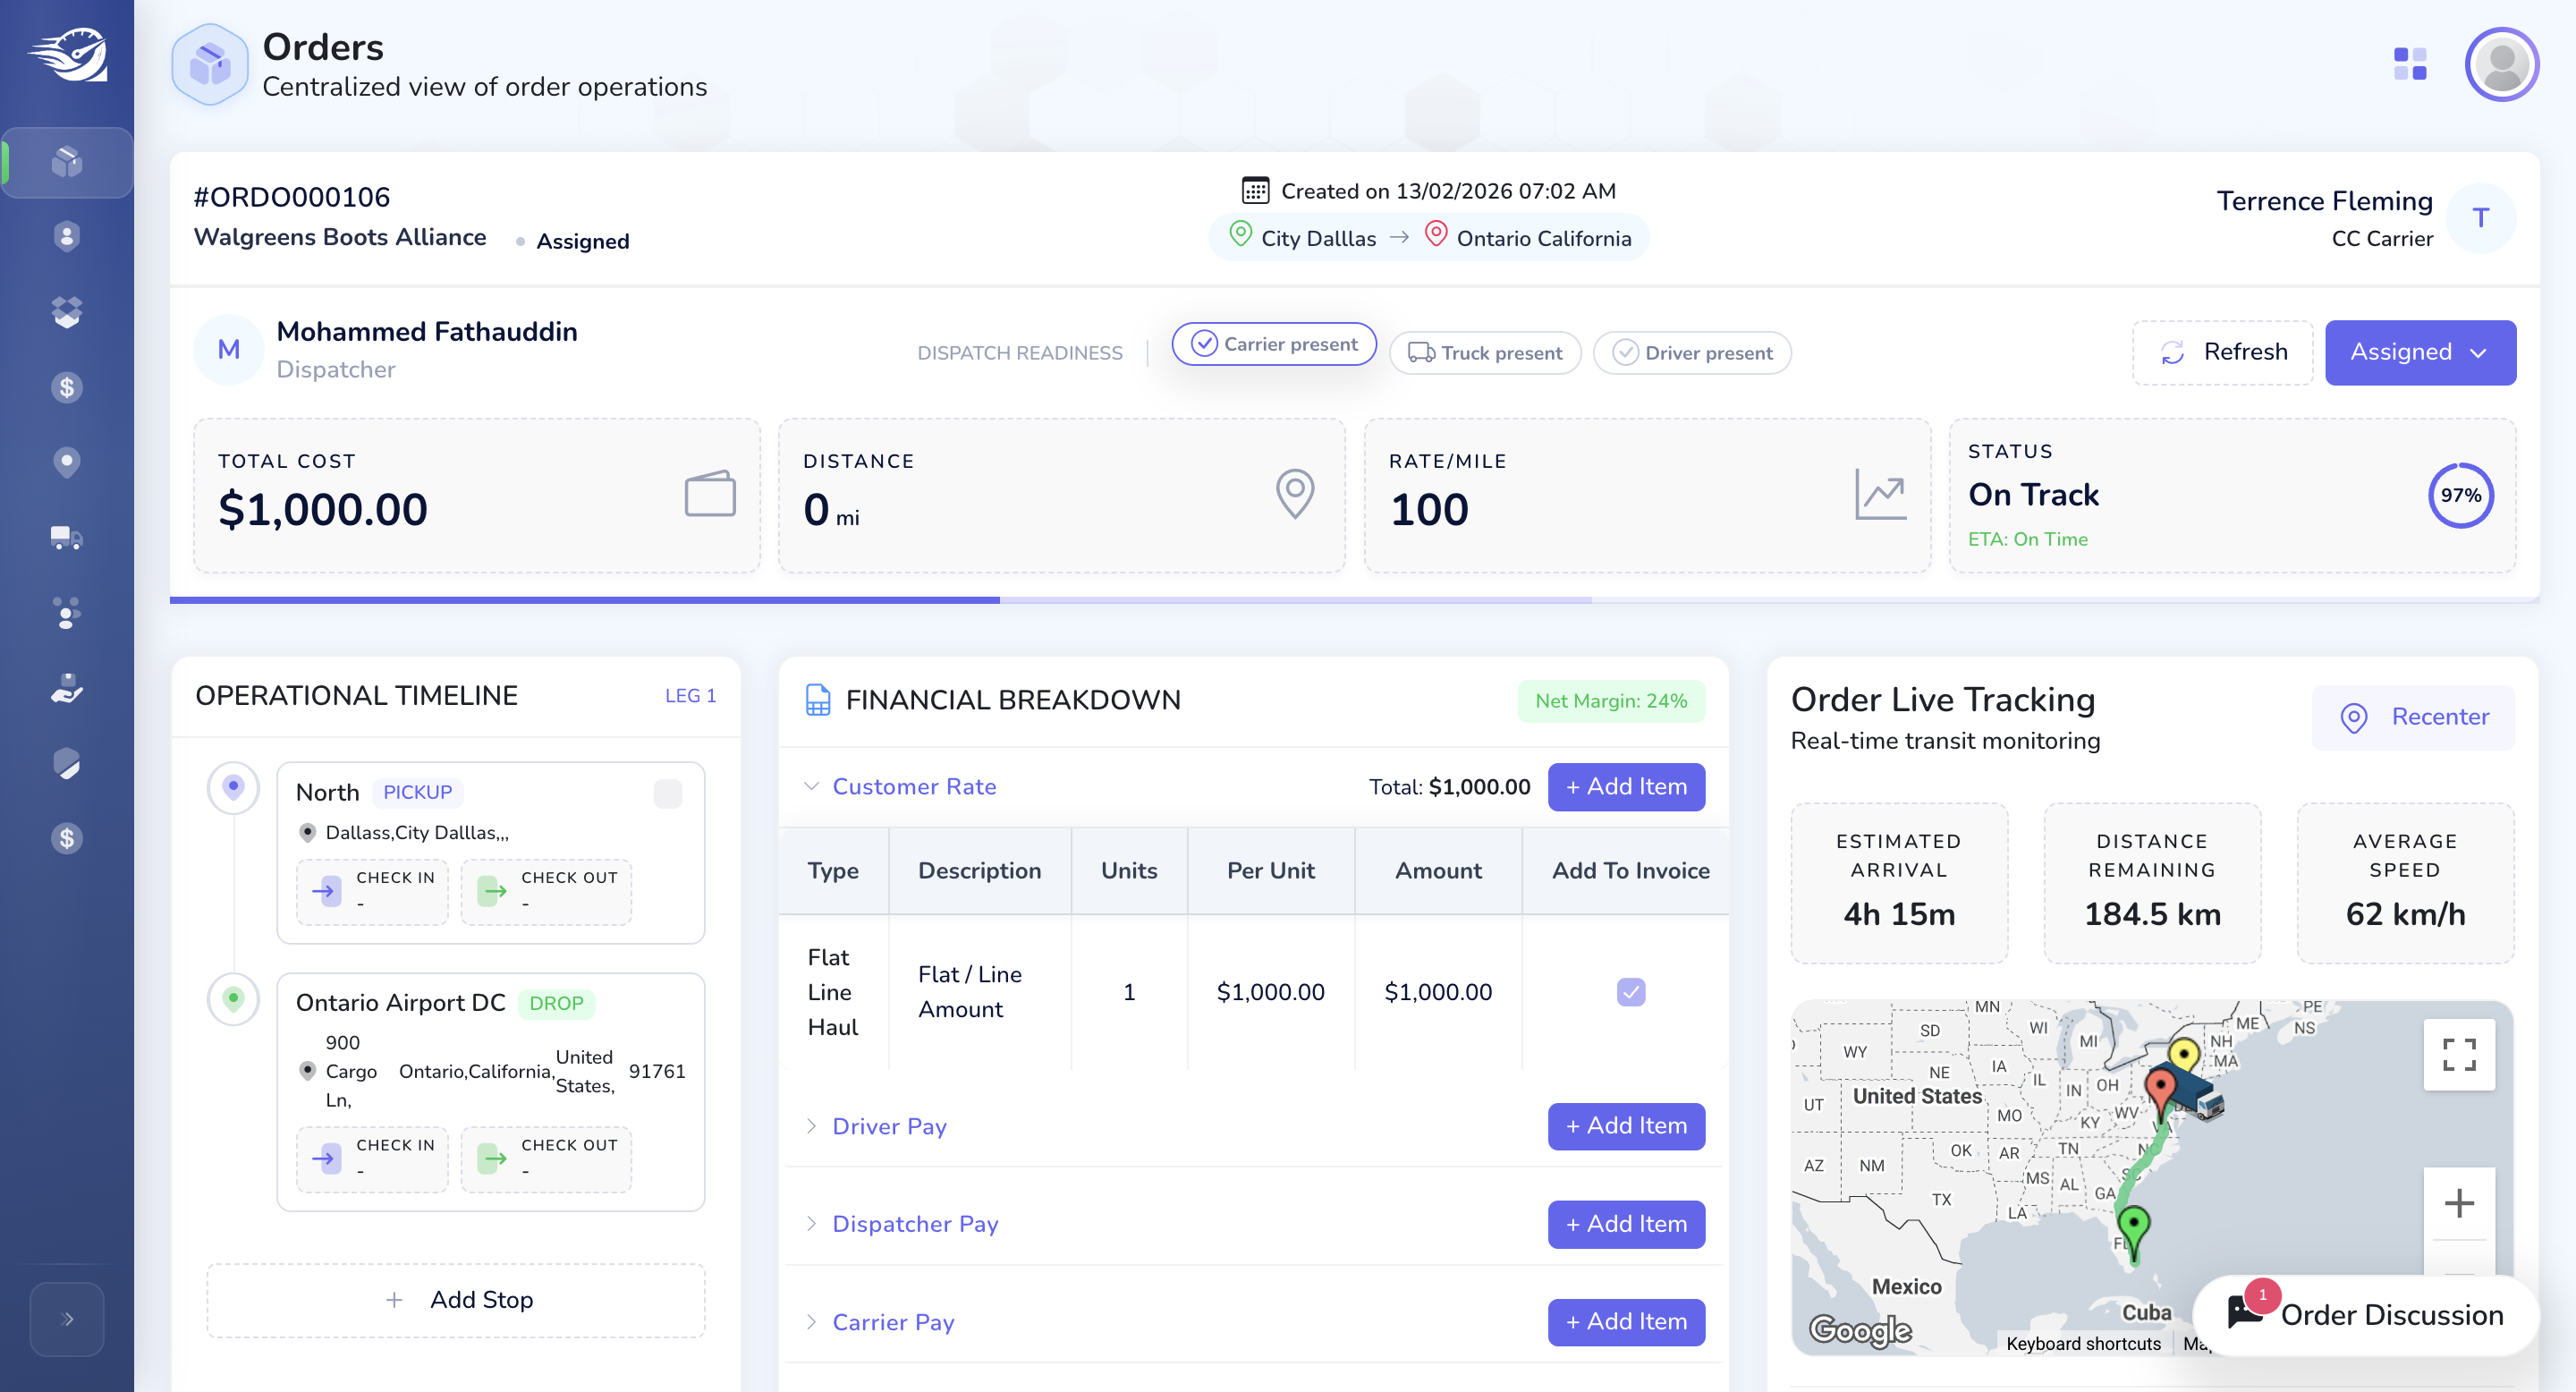
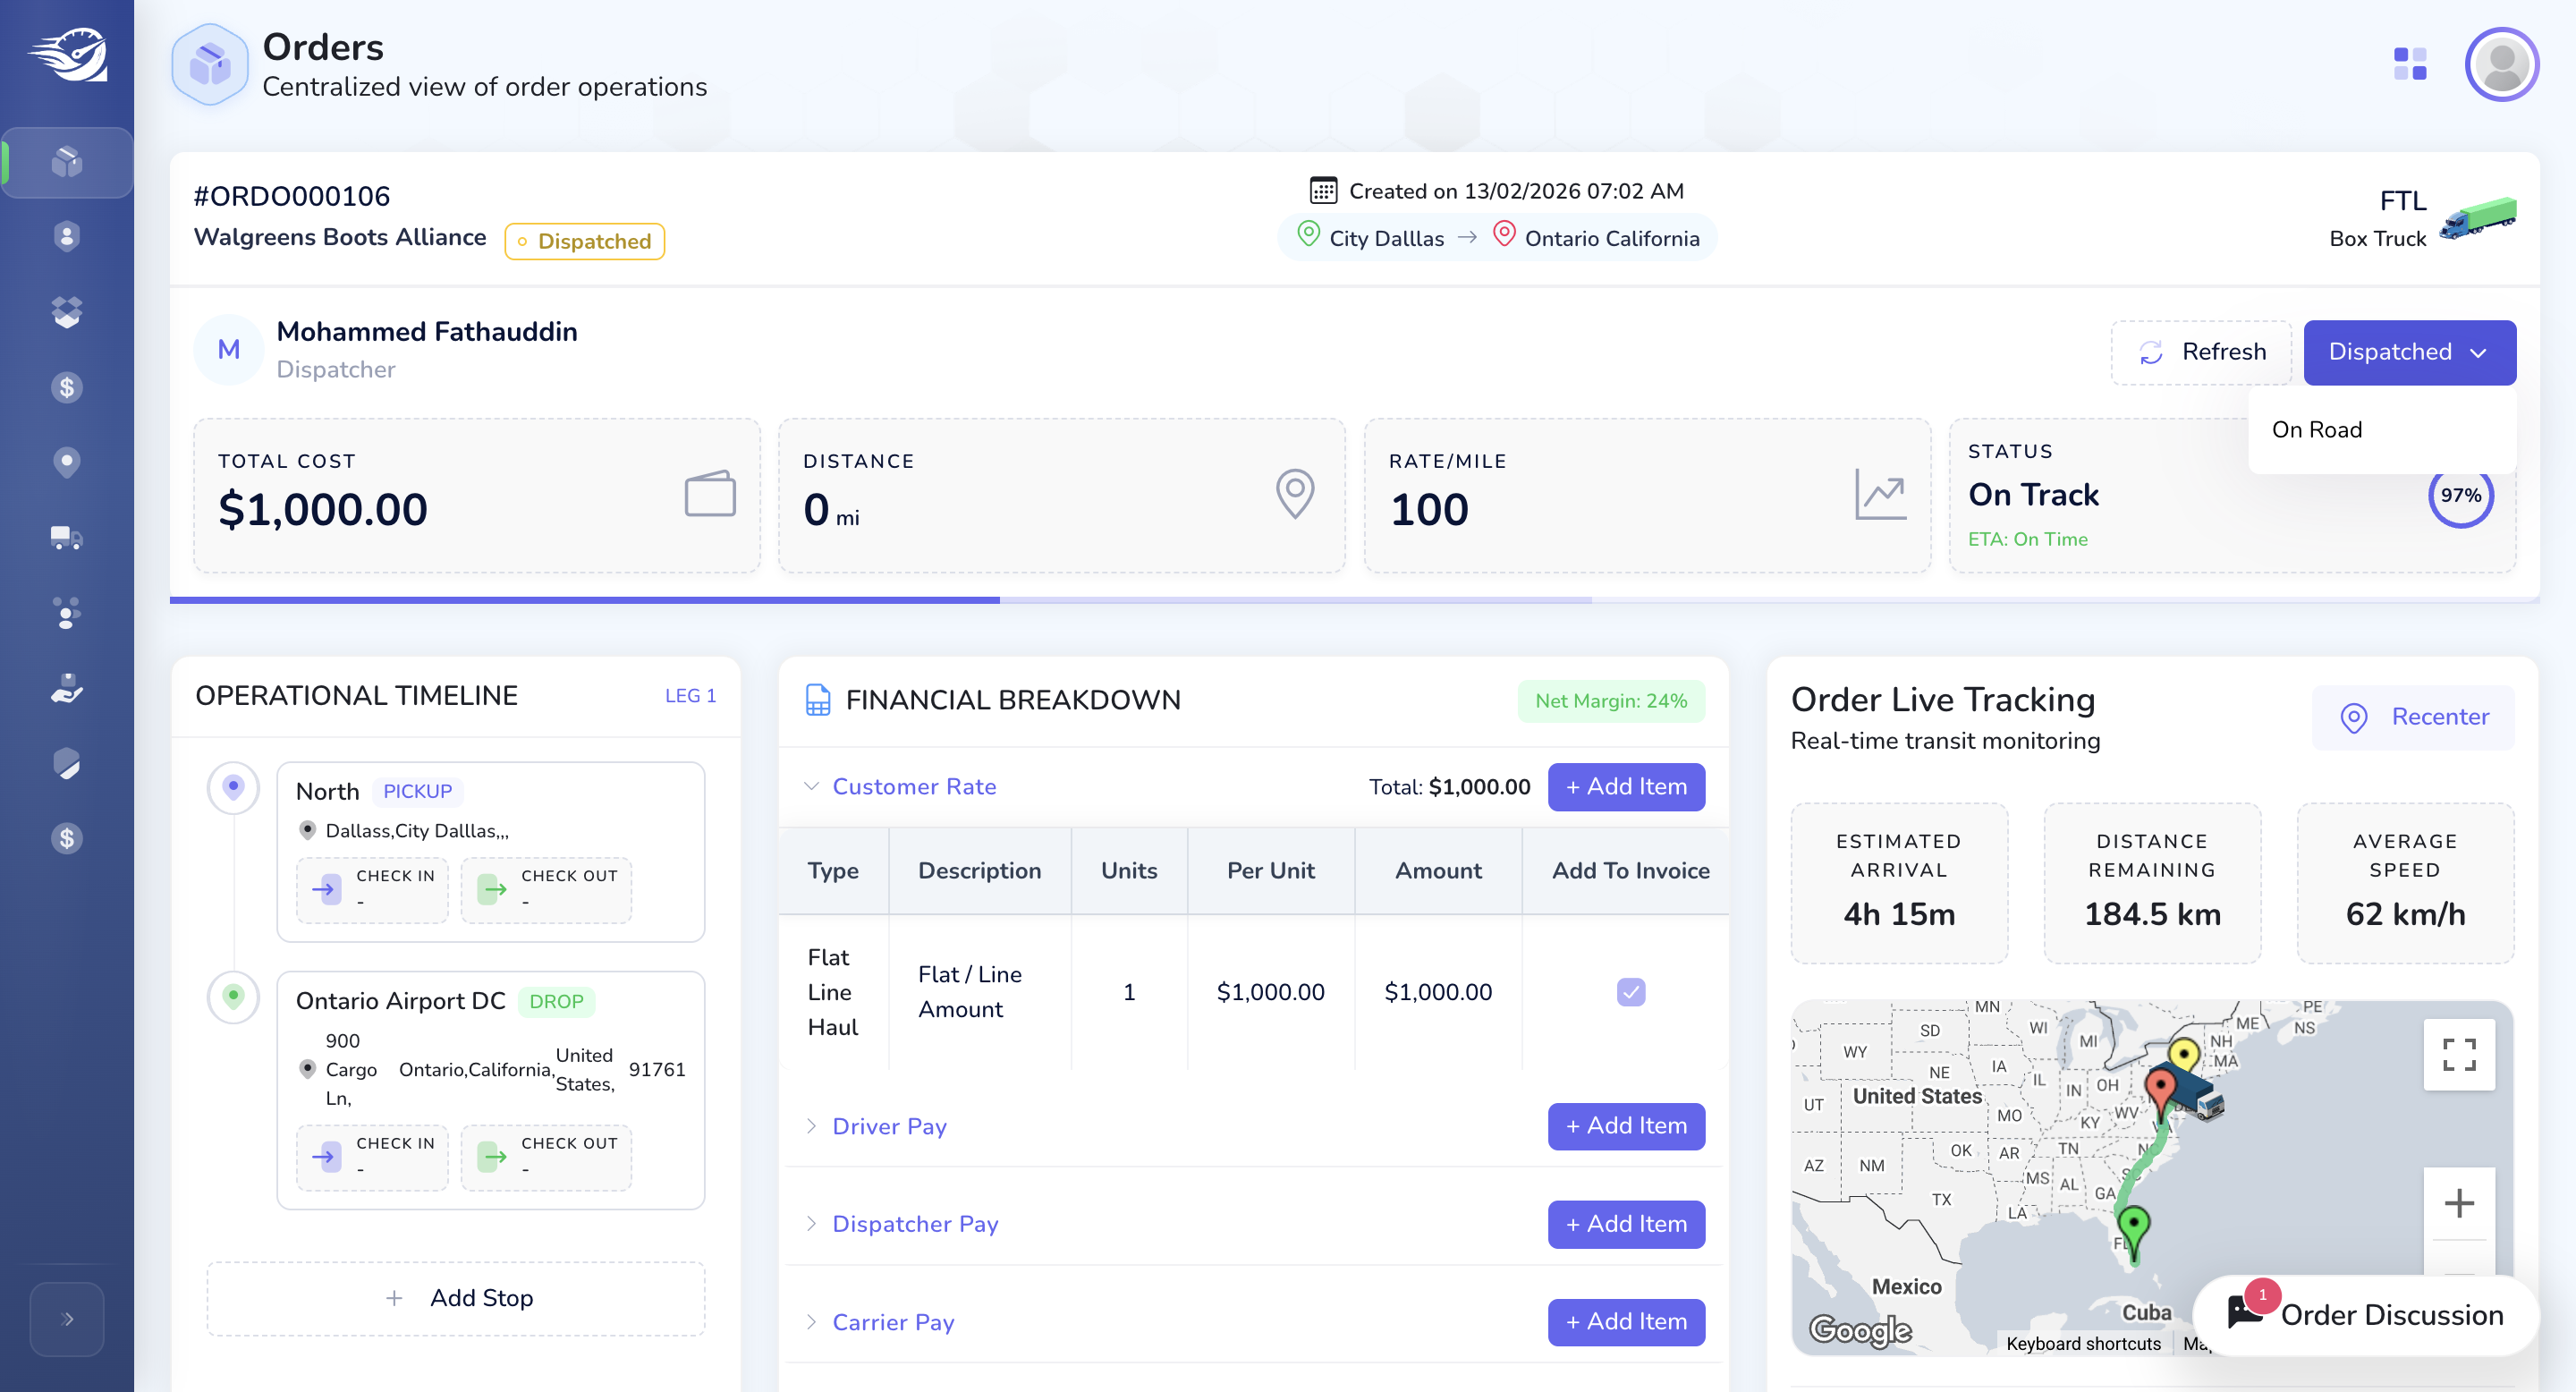
Order has been created. Initially, Order will start with Un Assigned status. Here we will show the blow following:
1) Order basic info : OrderNumber, Customer name, Order crated Date, Initial Pick up and final Drop Location, Carrier and Truck Type at the Header Section.
2) Dispatcher Name, Current Status (with option to change the Status).
3) Stats Card : Total Cost , Distance, Rate/ Mile , Current Status.


From Un Assigned -> Assigned
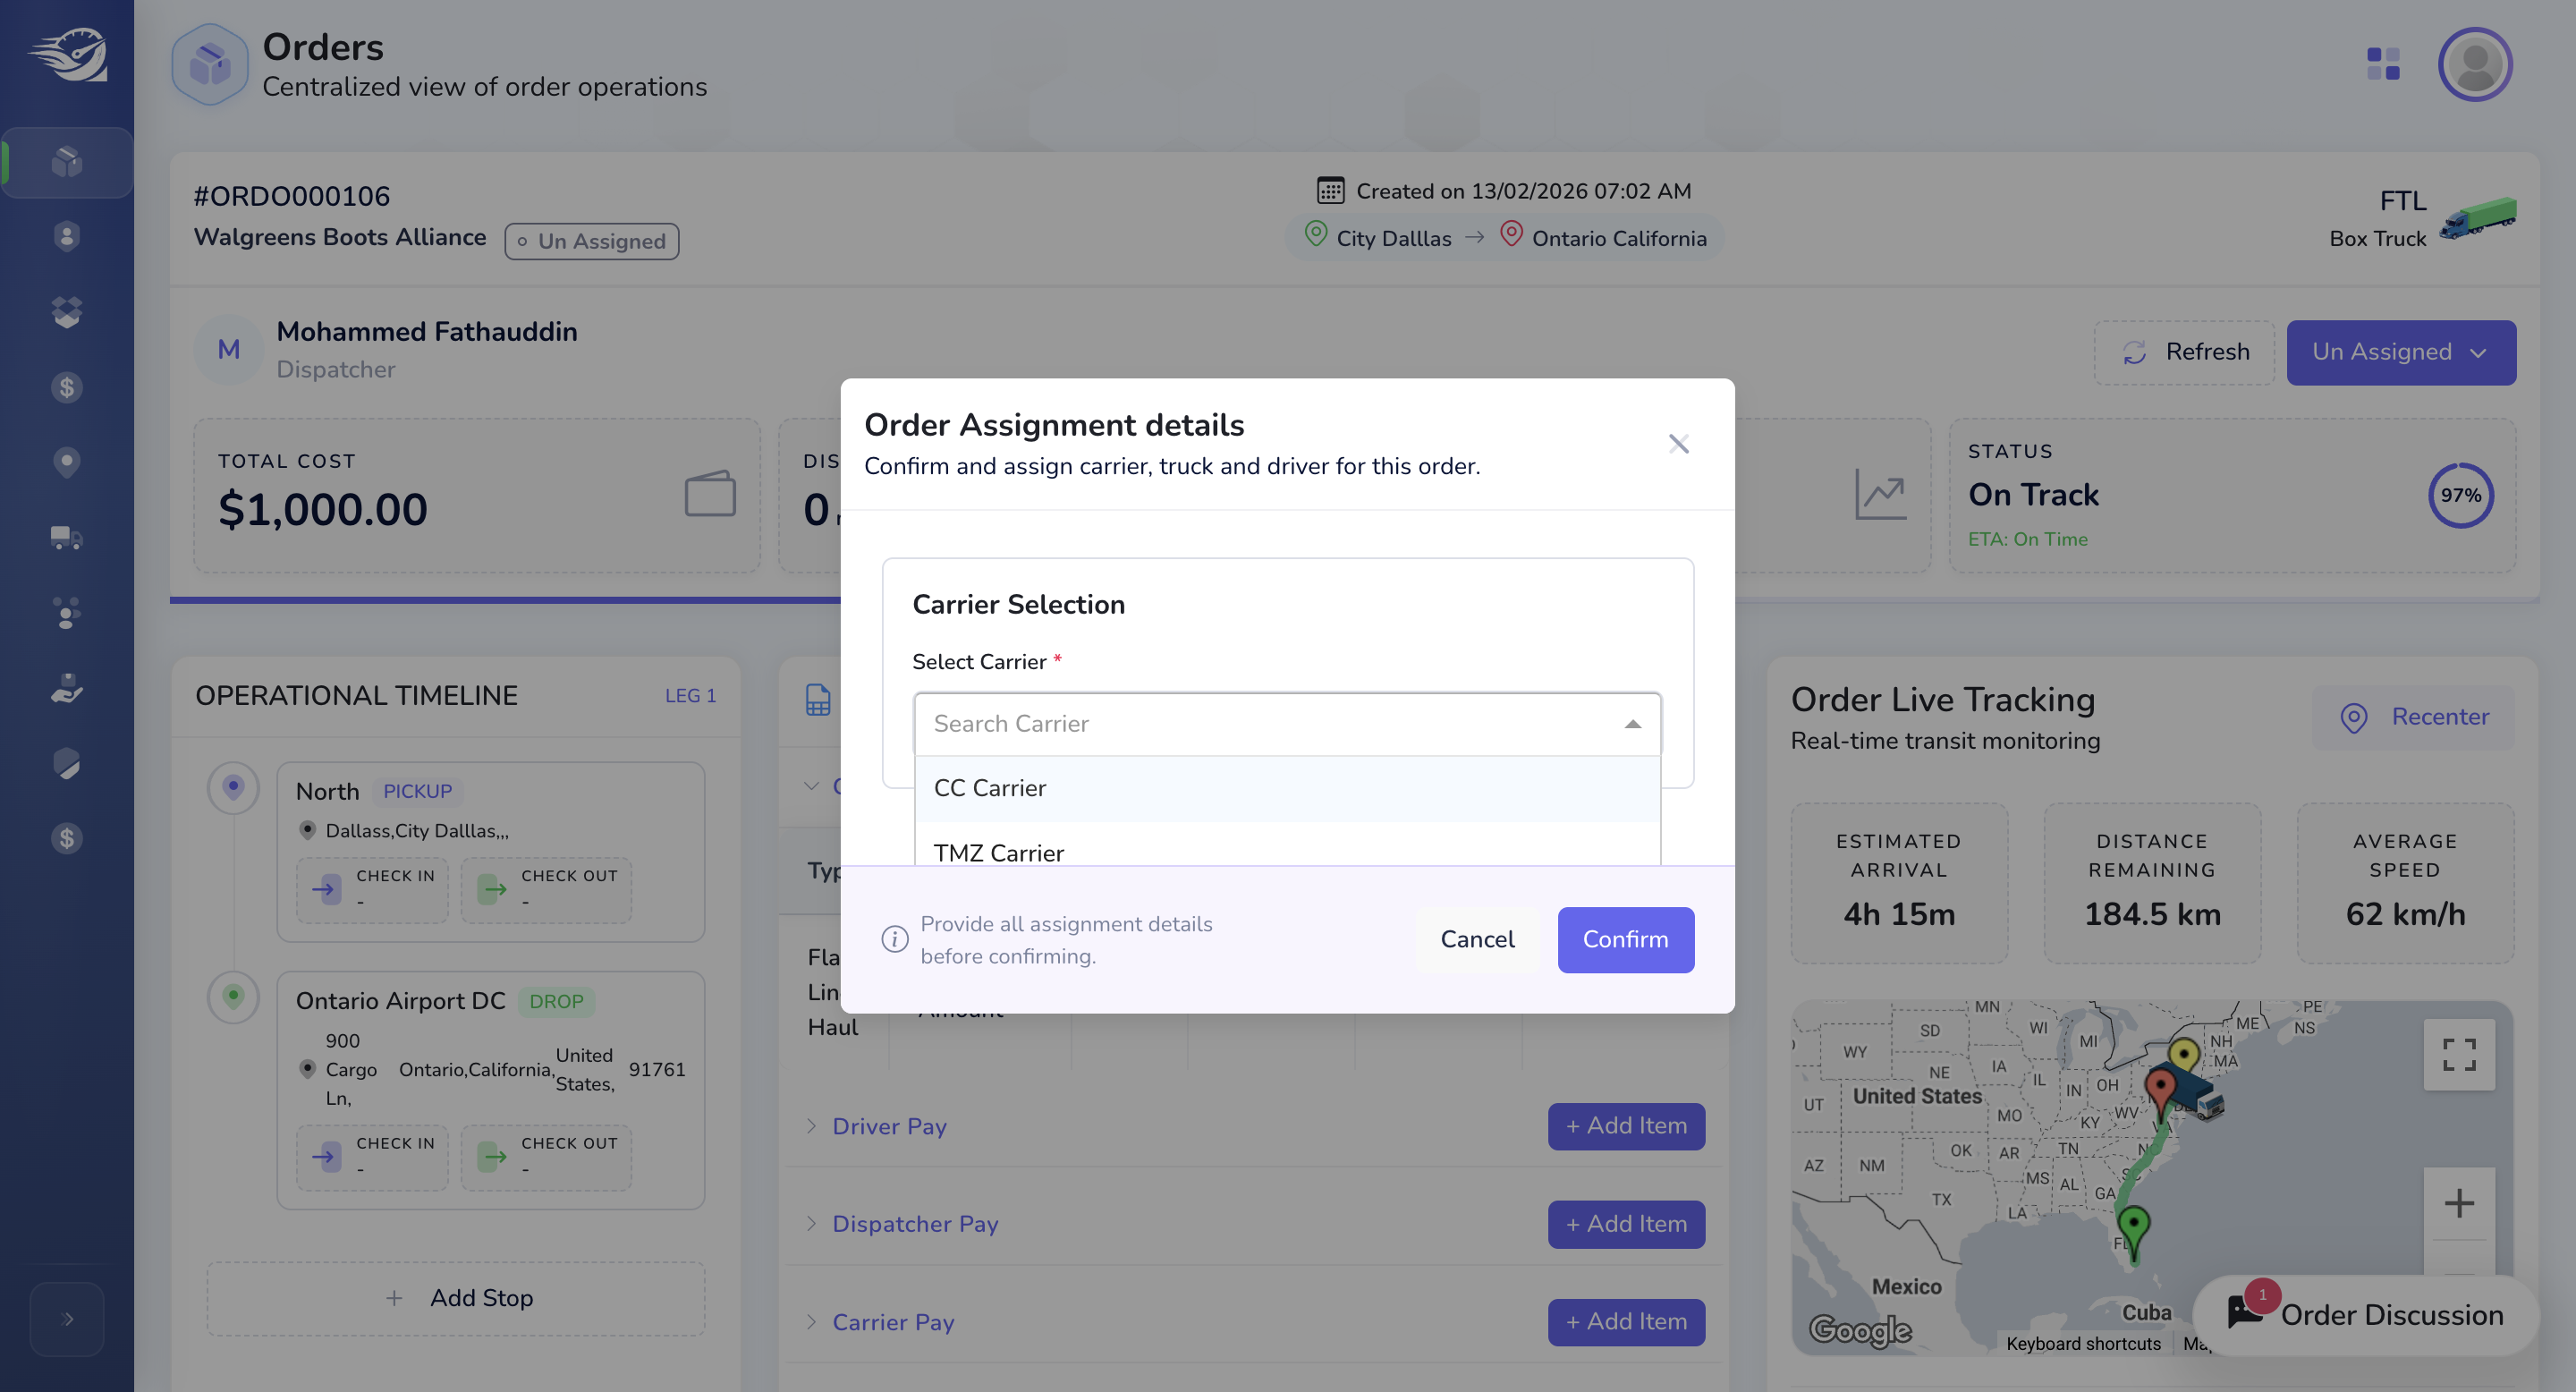
You will have the option to select Carrier, Trucks, Drivers and trailers by their numbers.
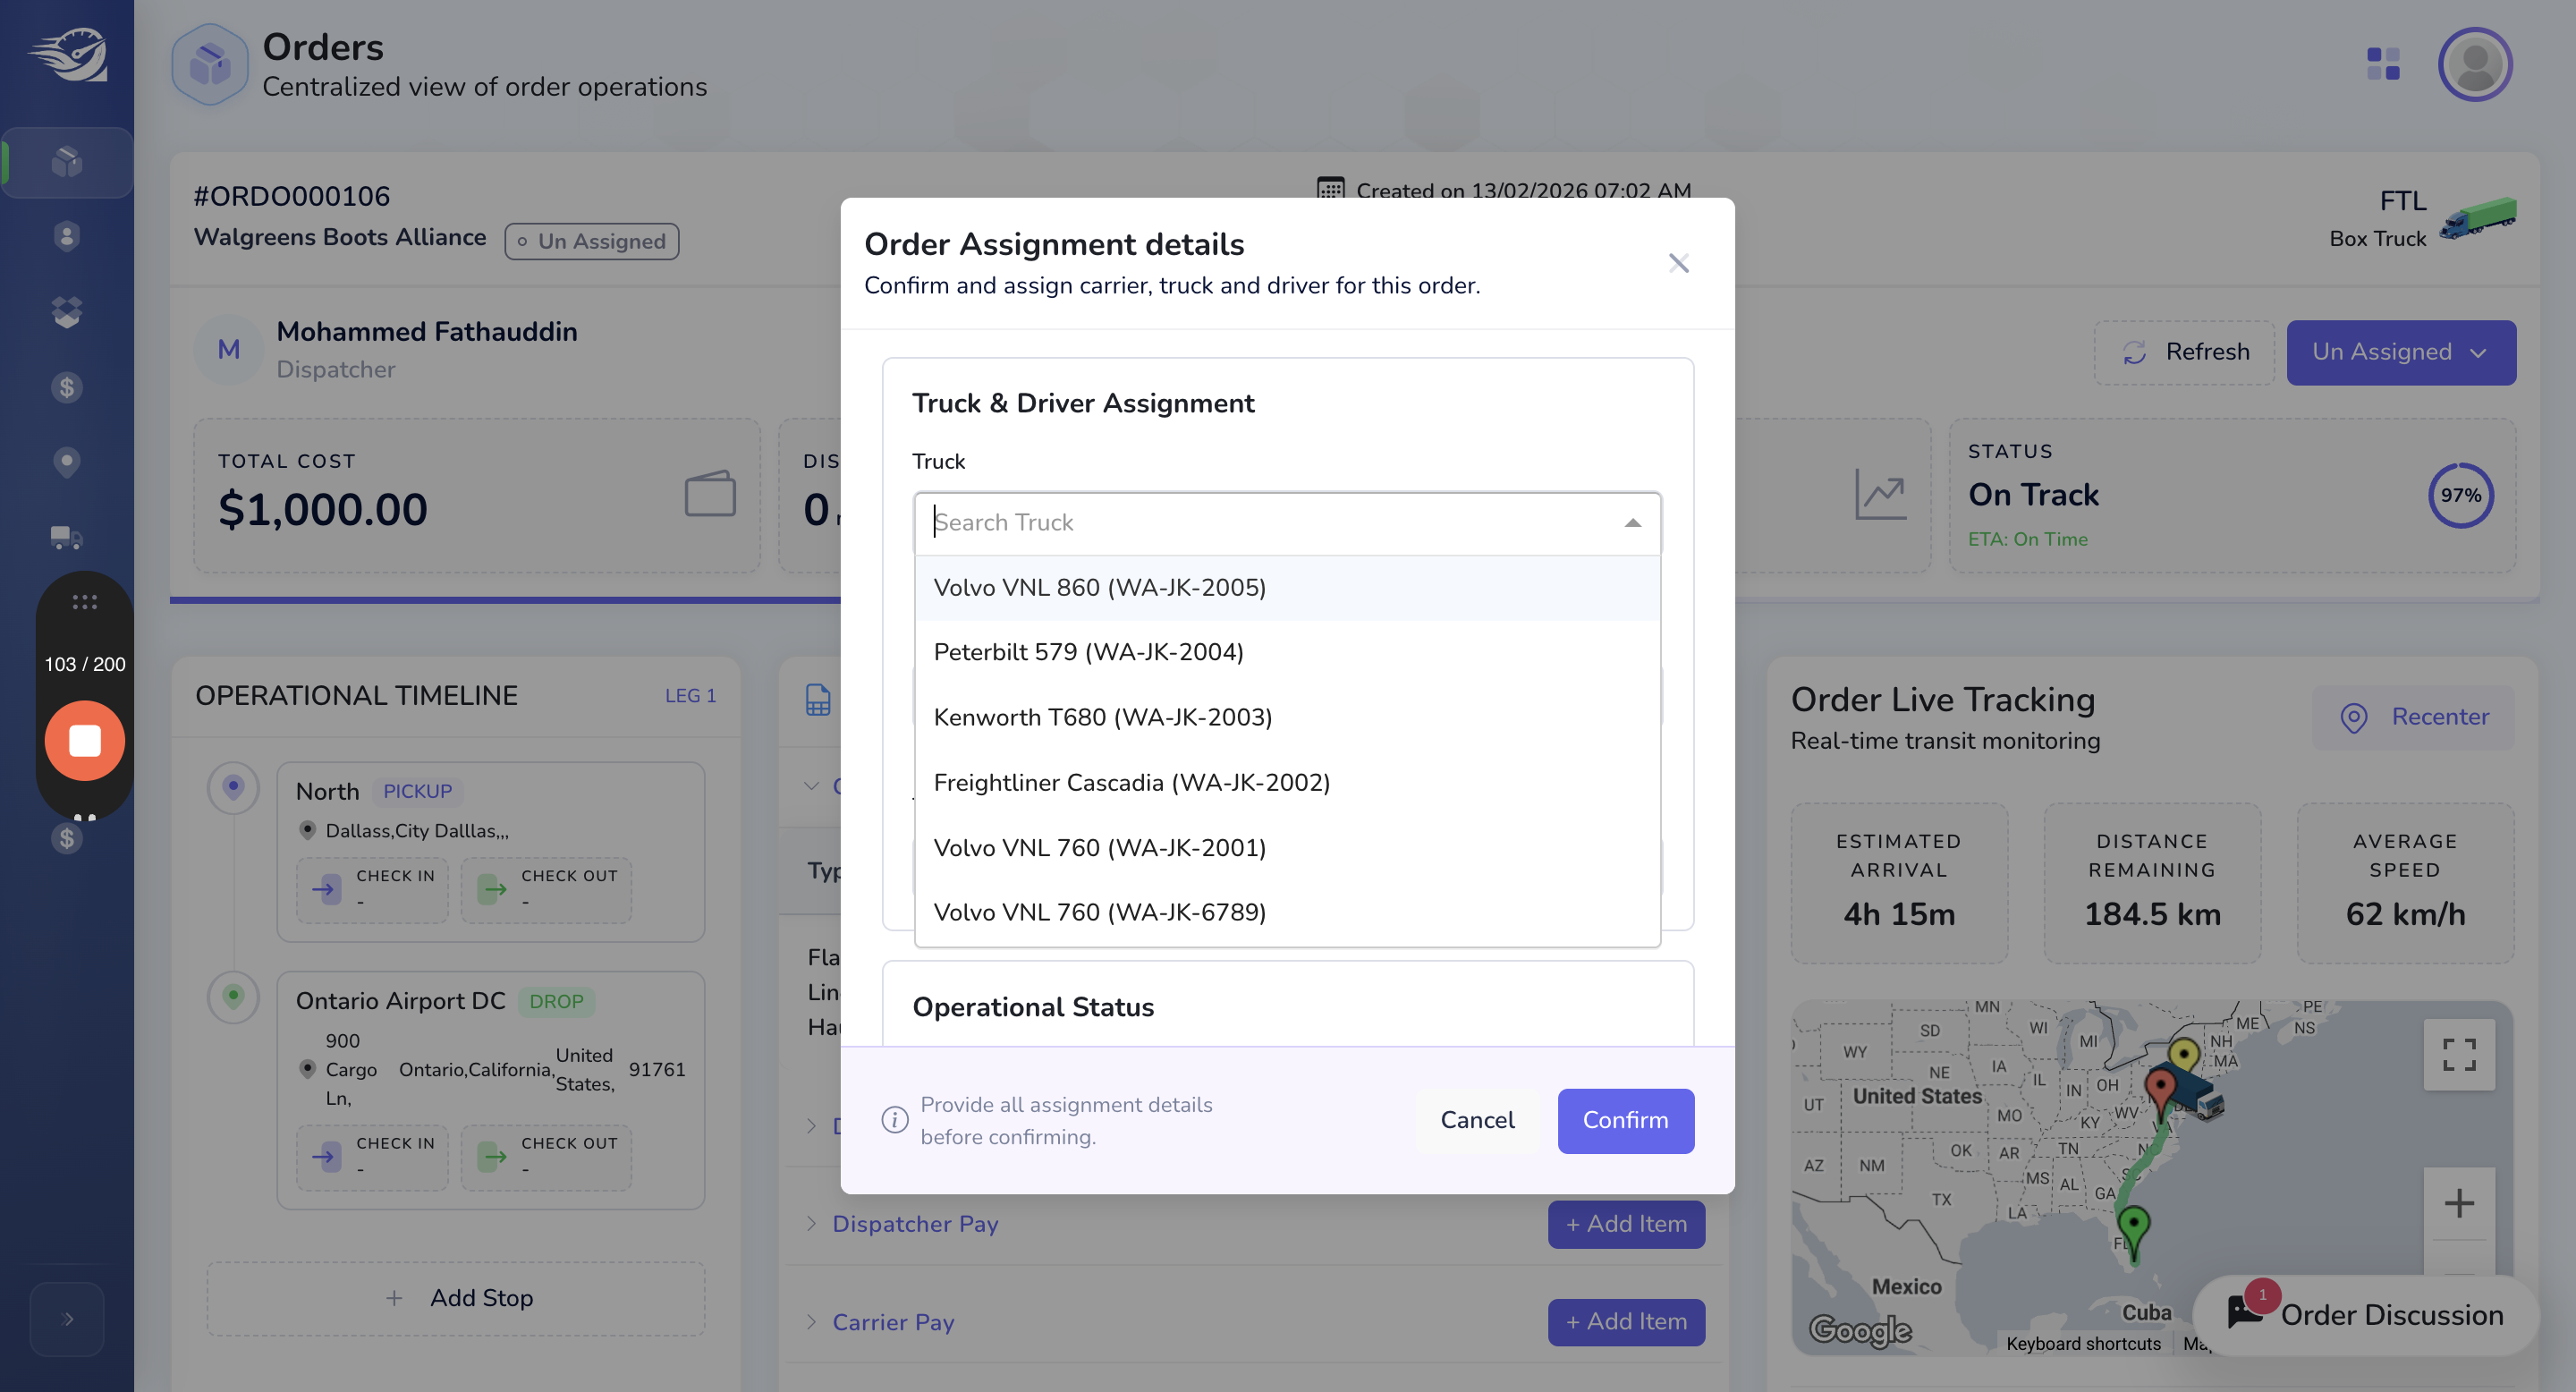
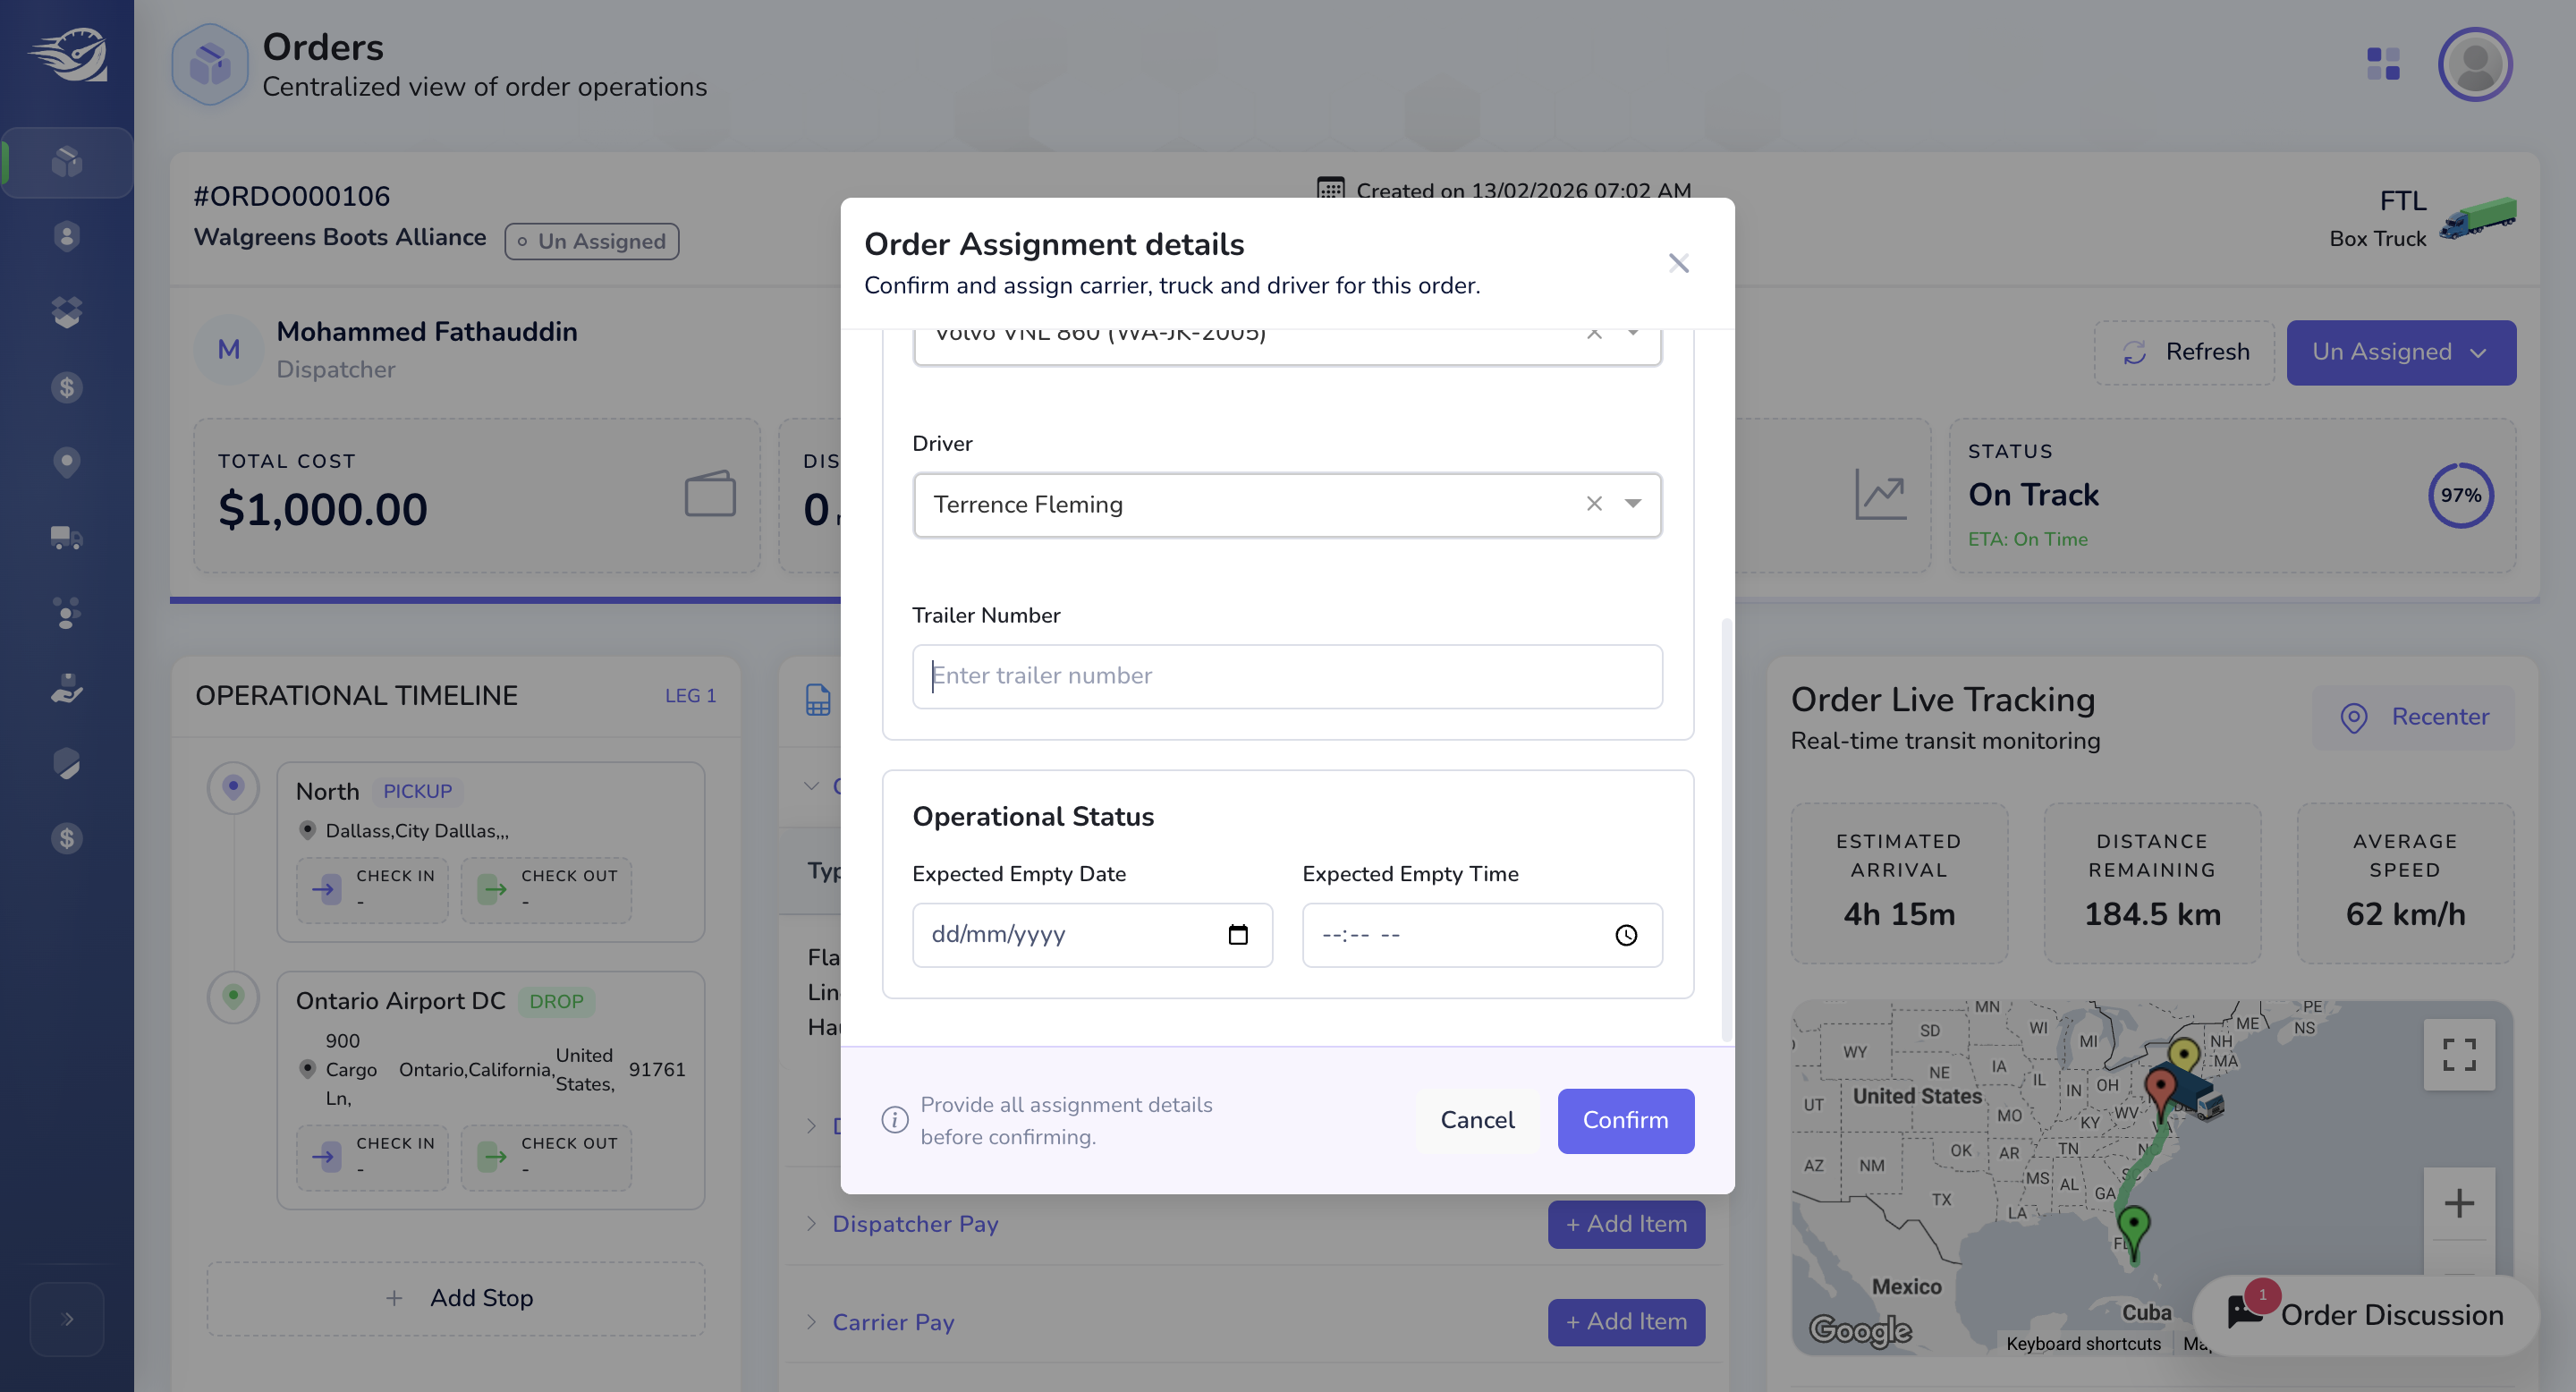
These fields are not mandatory.


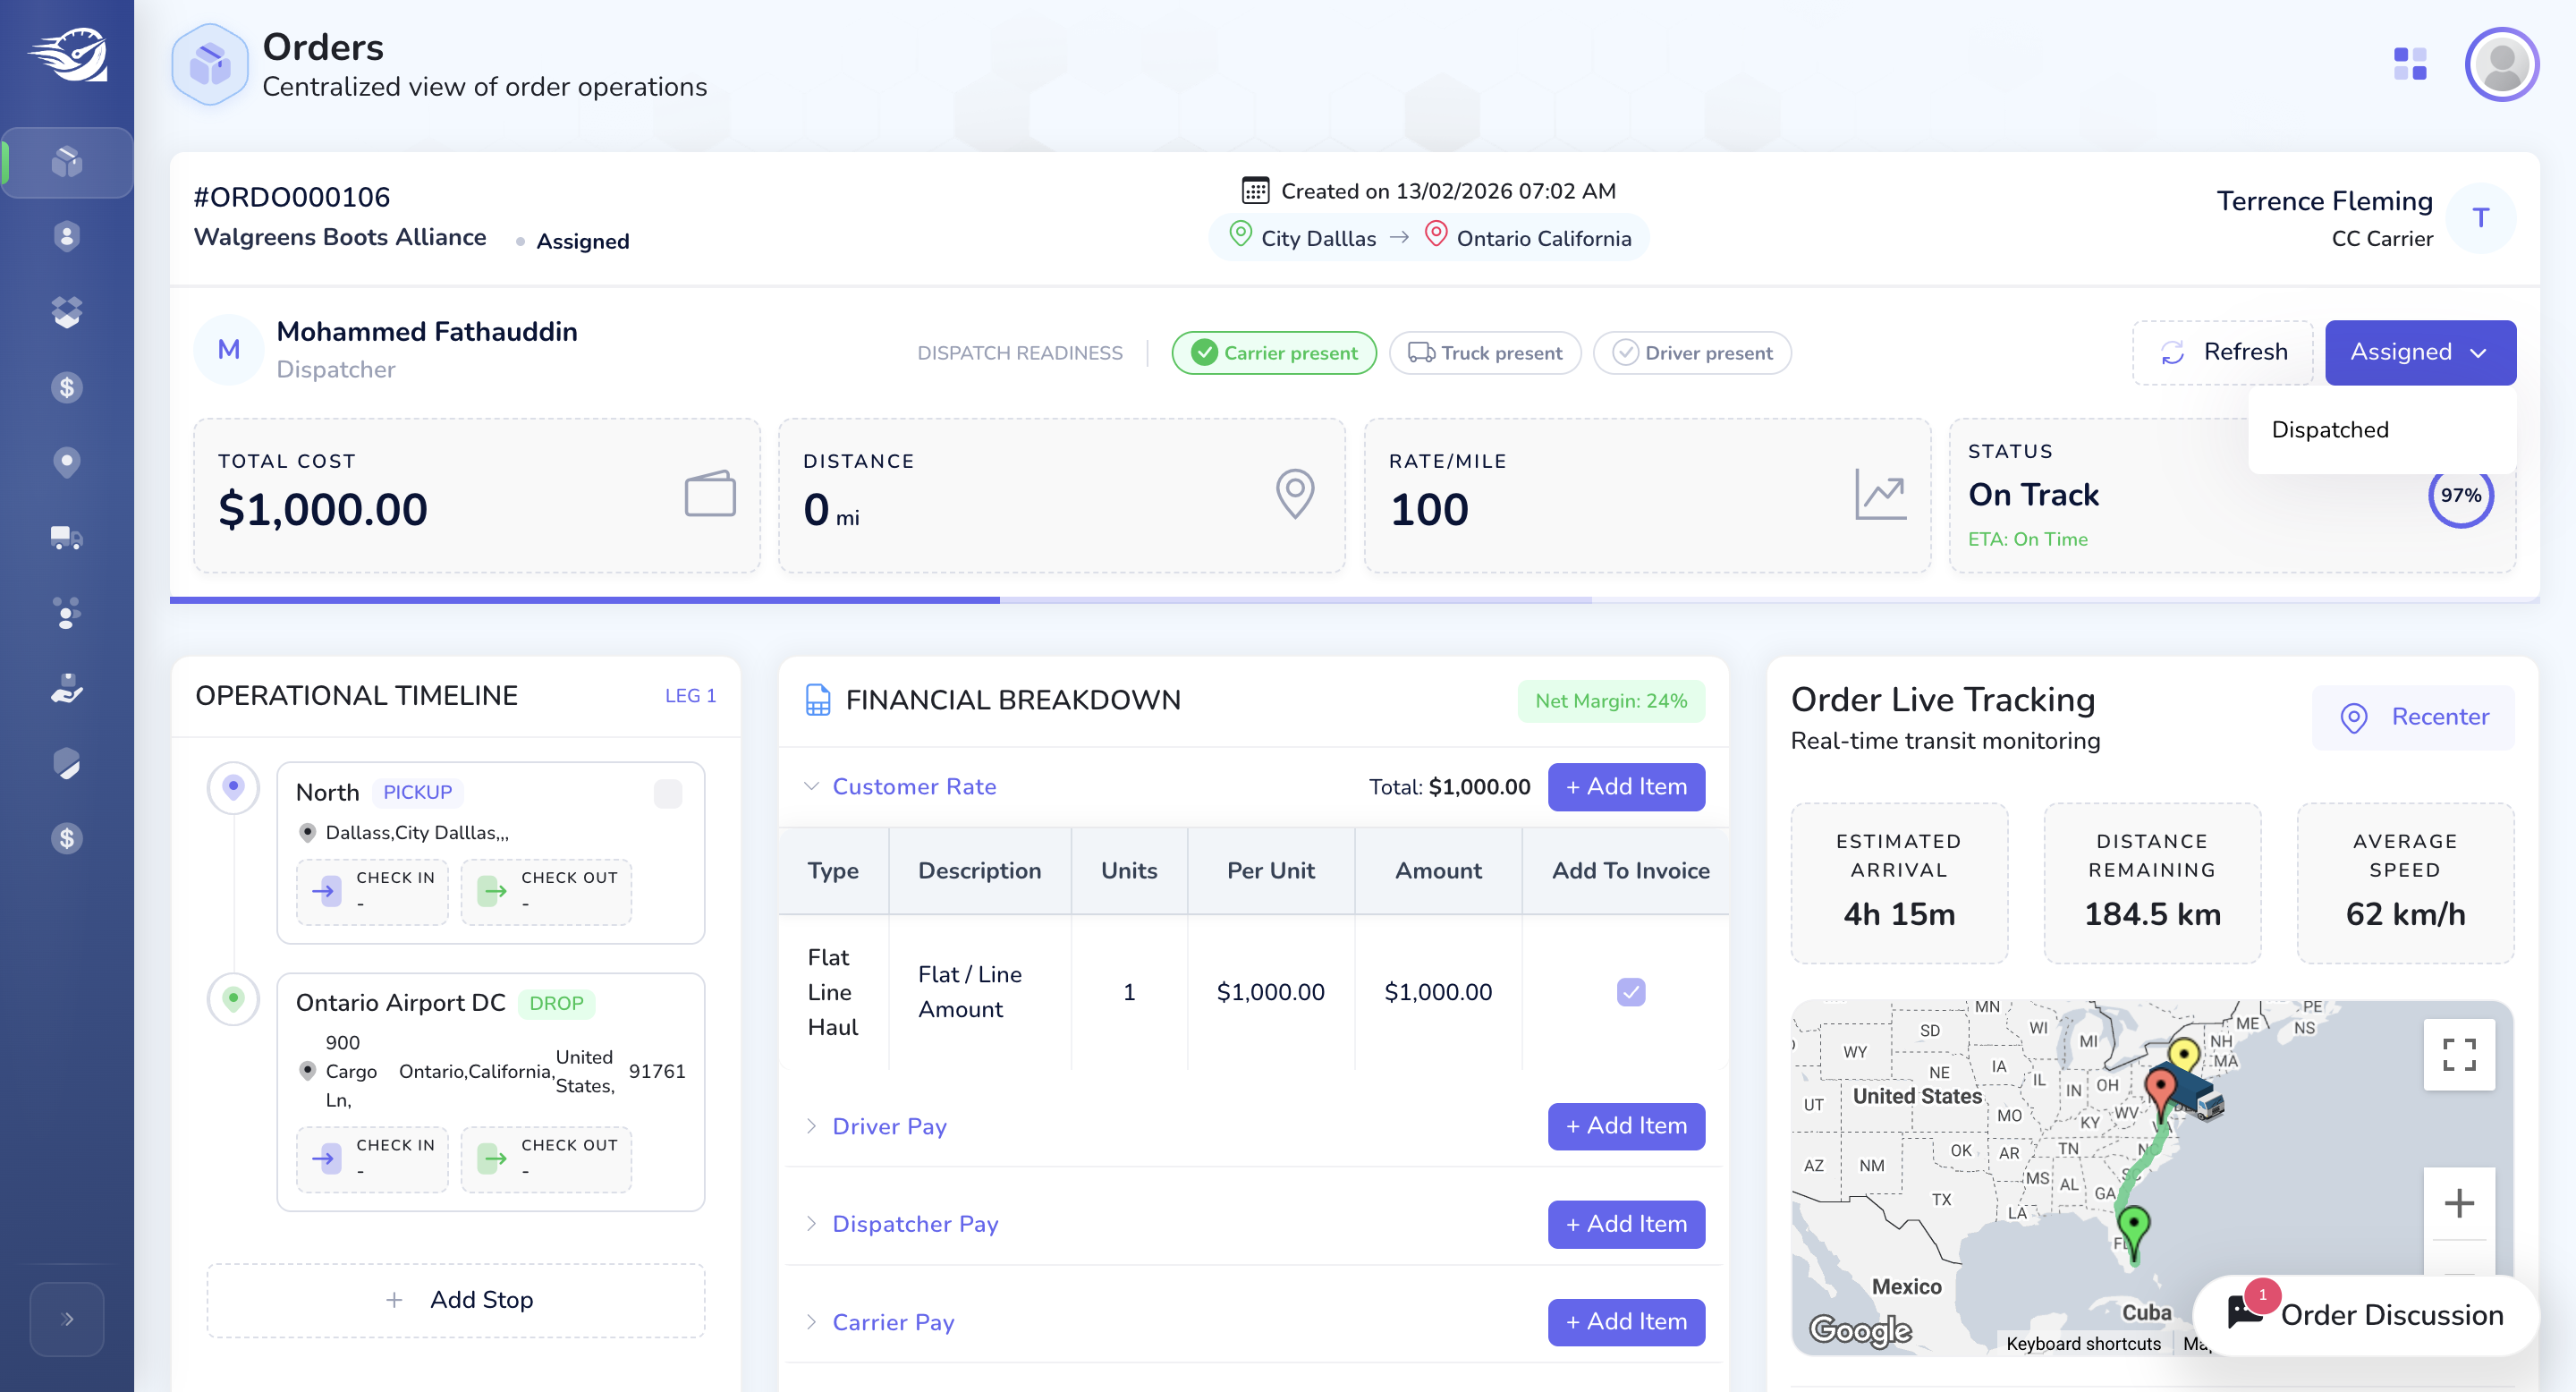
The status has now changed from unassigned to assigned. During this state, the next status will be dispatched. Since we selected a carrier here, we will display the selected carrier, the selected truck, and the dispatcher information.

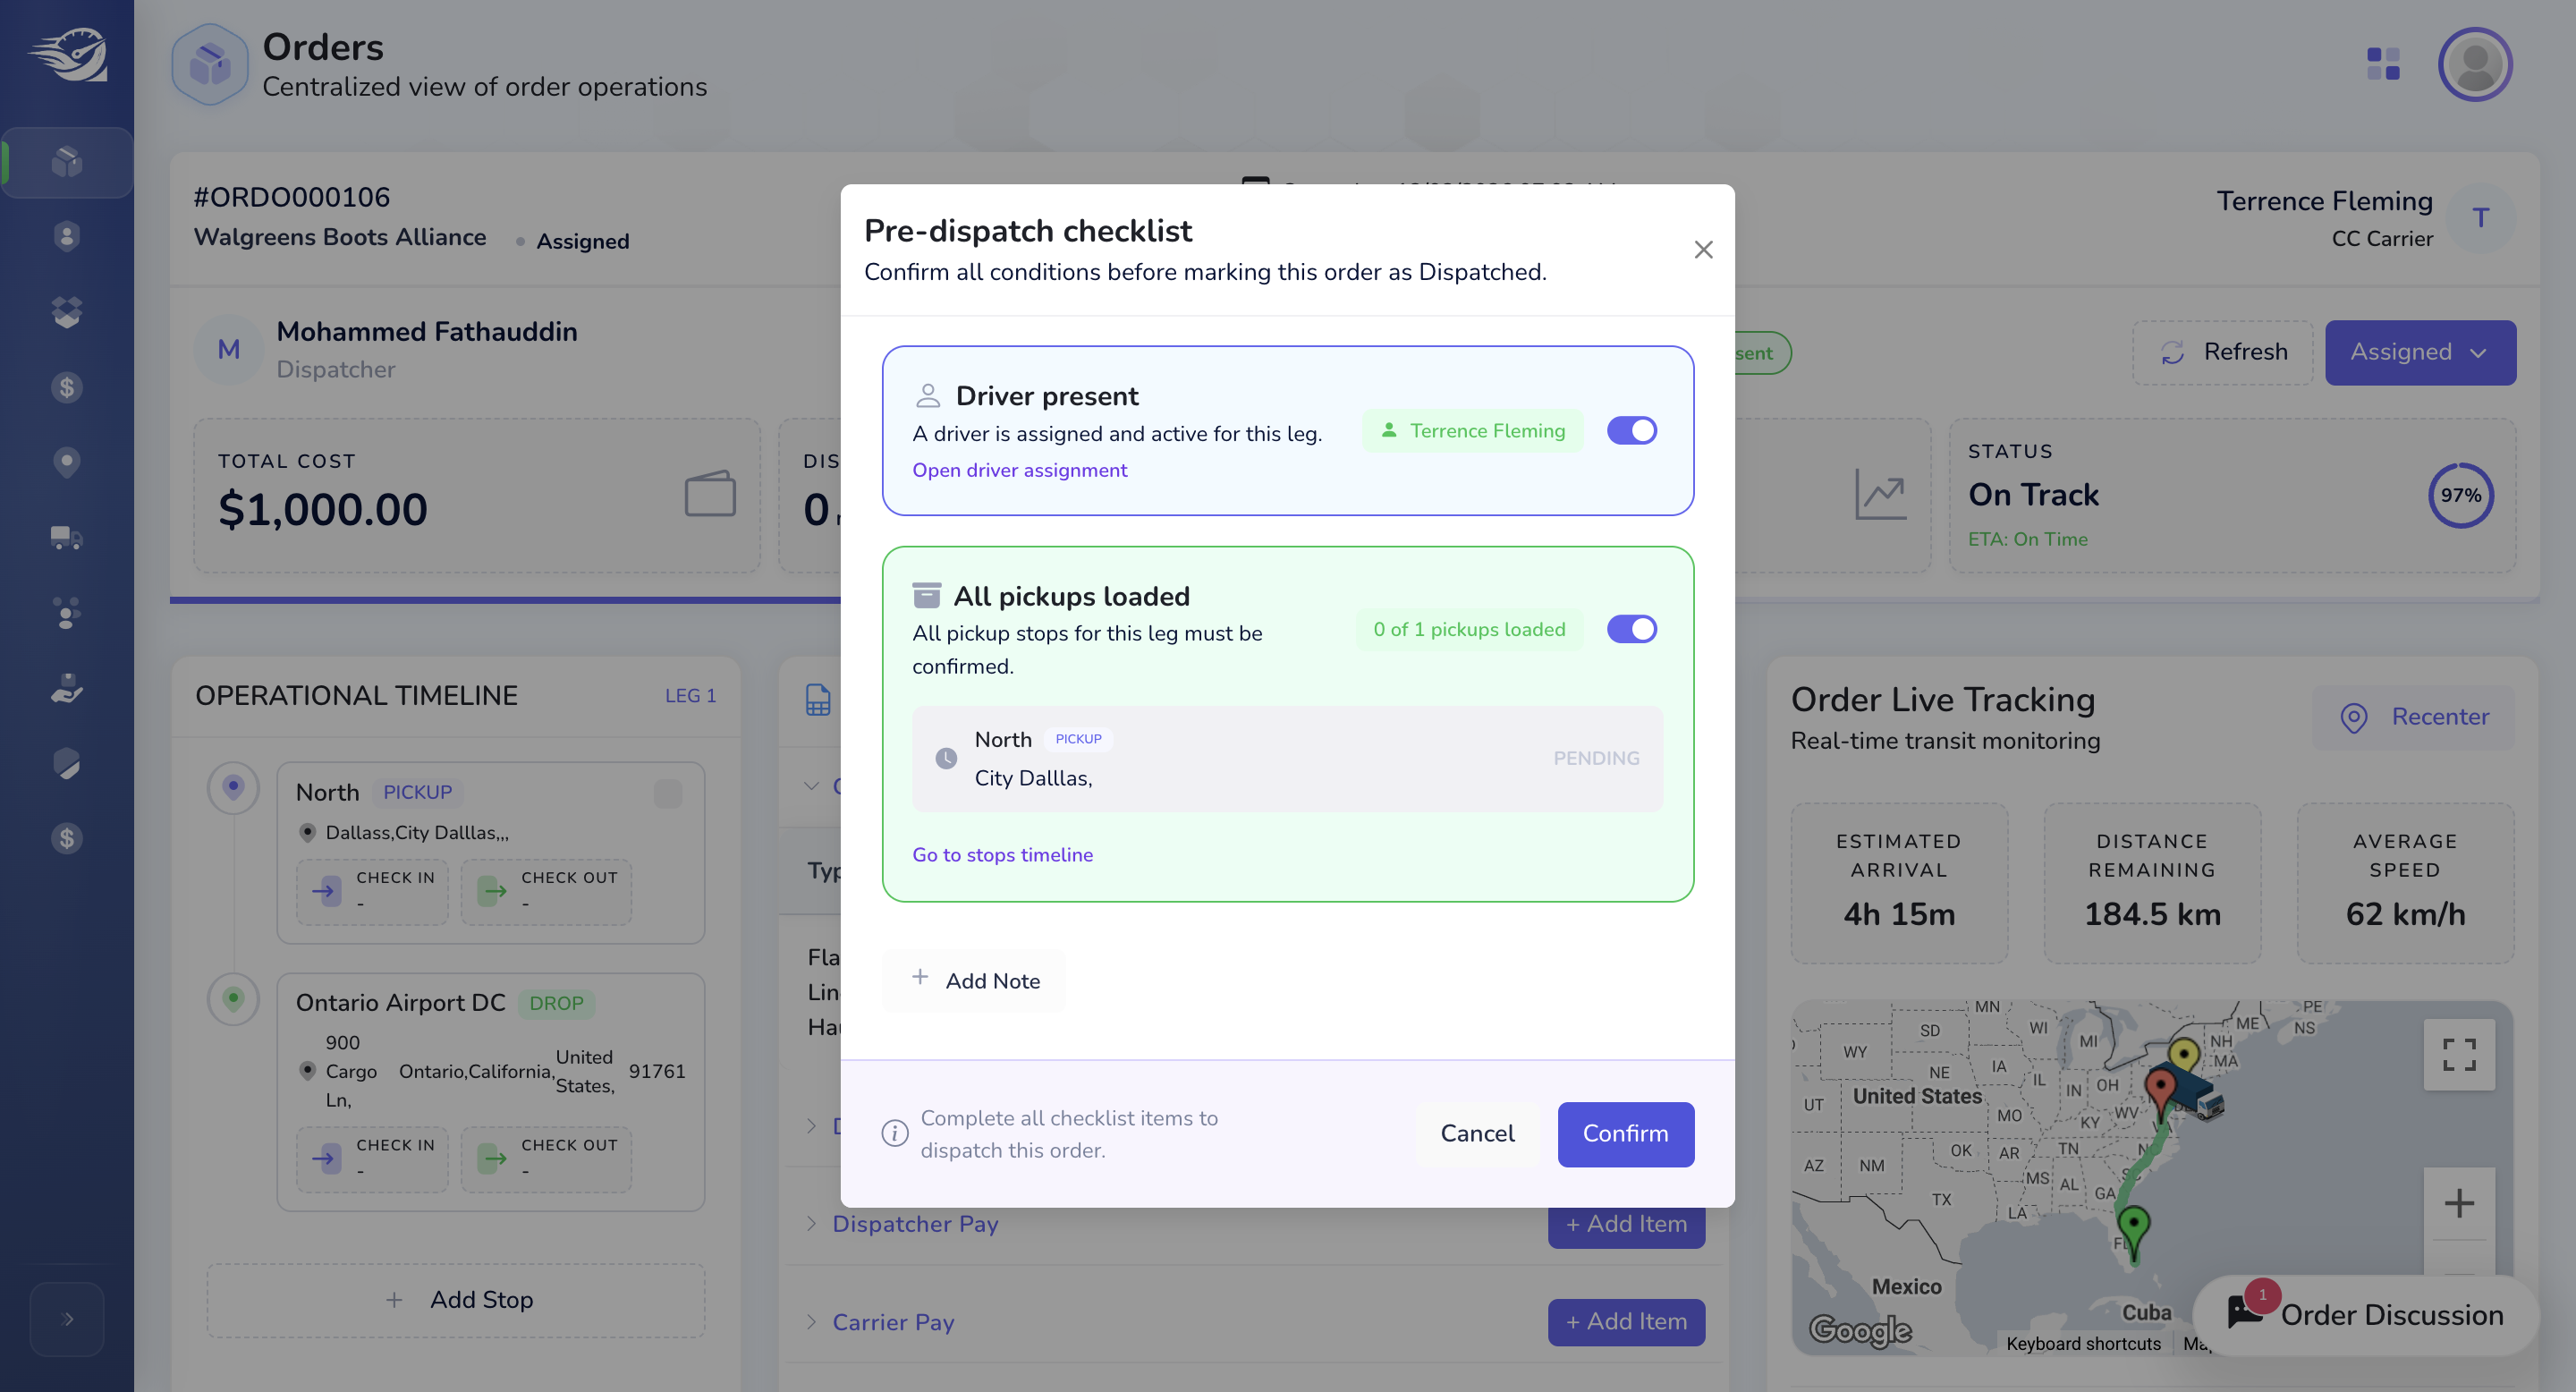
For dispatch readiness, ensure these options are selected. The carrier, truck, and driver must be present to update the status. You have two options. Either by click the badges directly or by click on the Assigned -> Dispatched (dropdown button), which will indeed open the
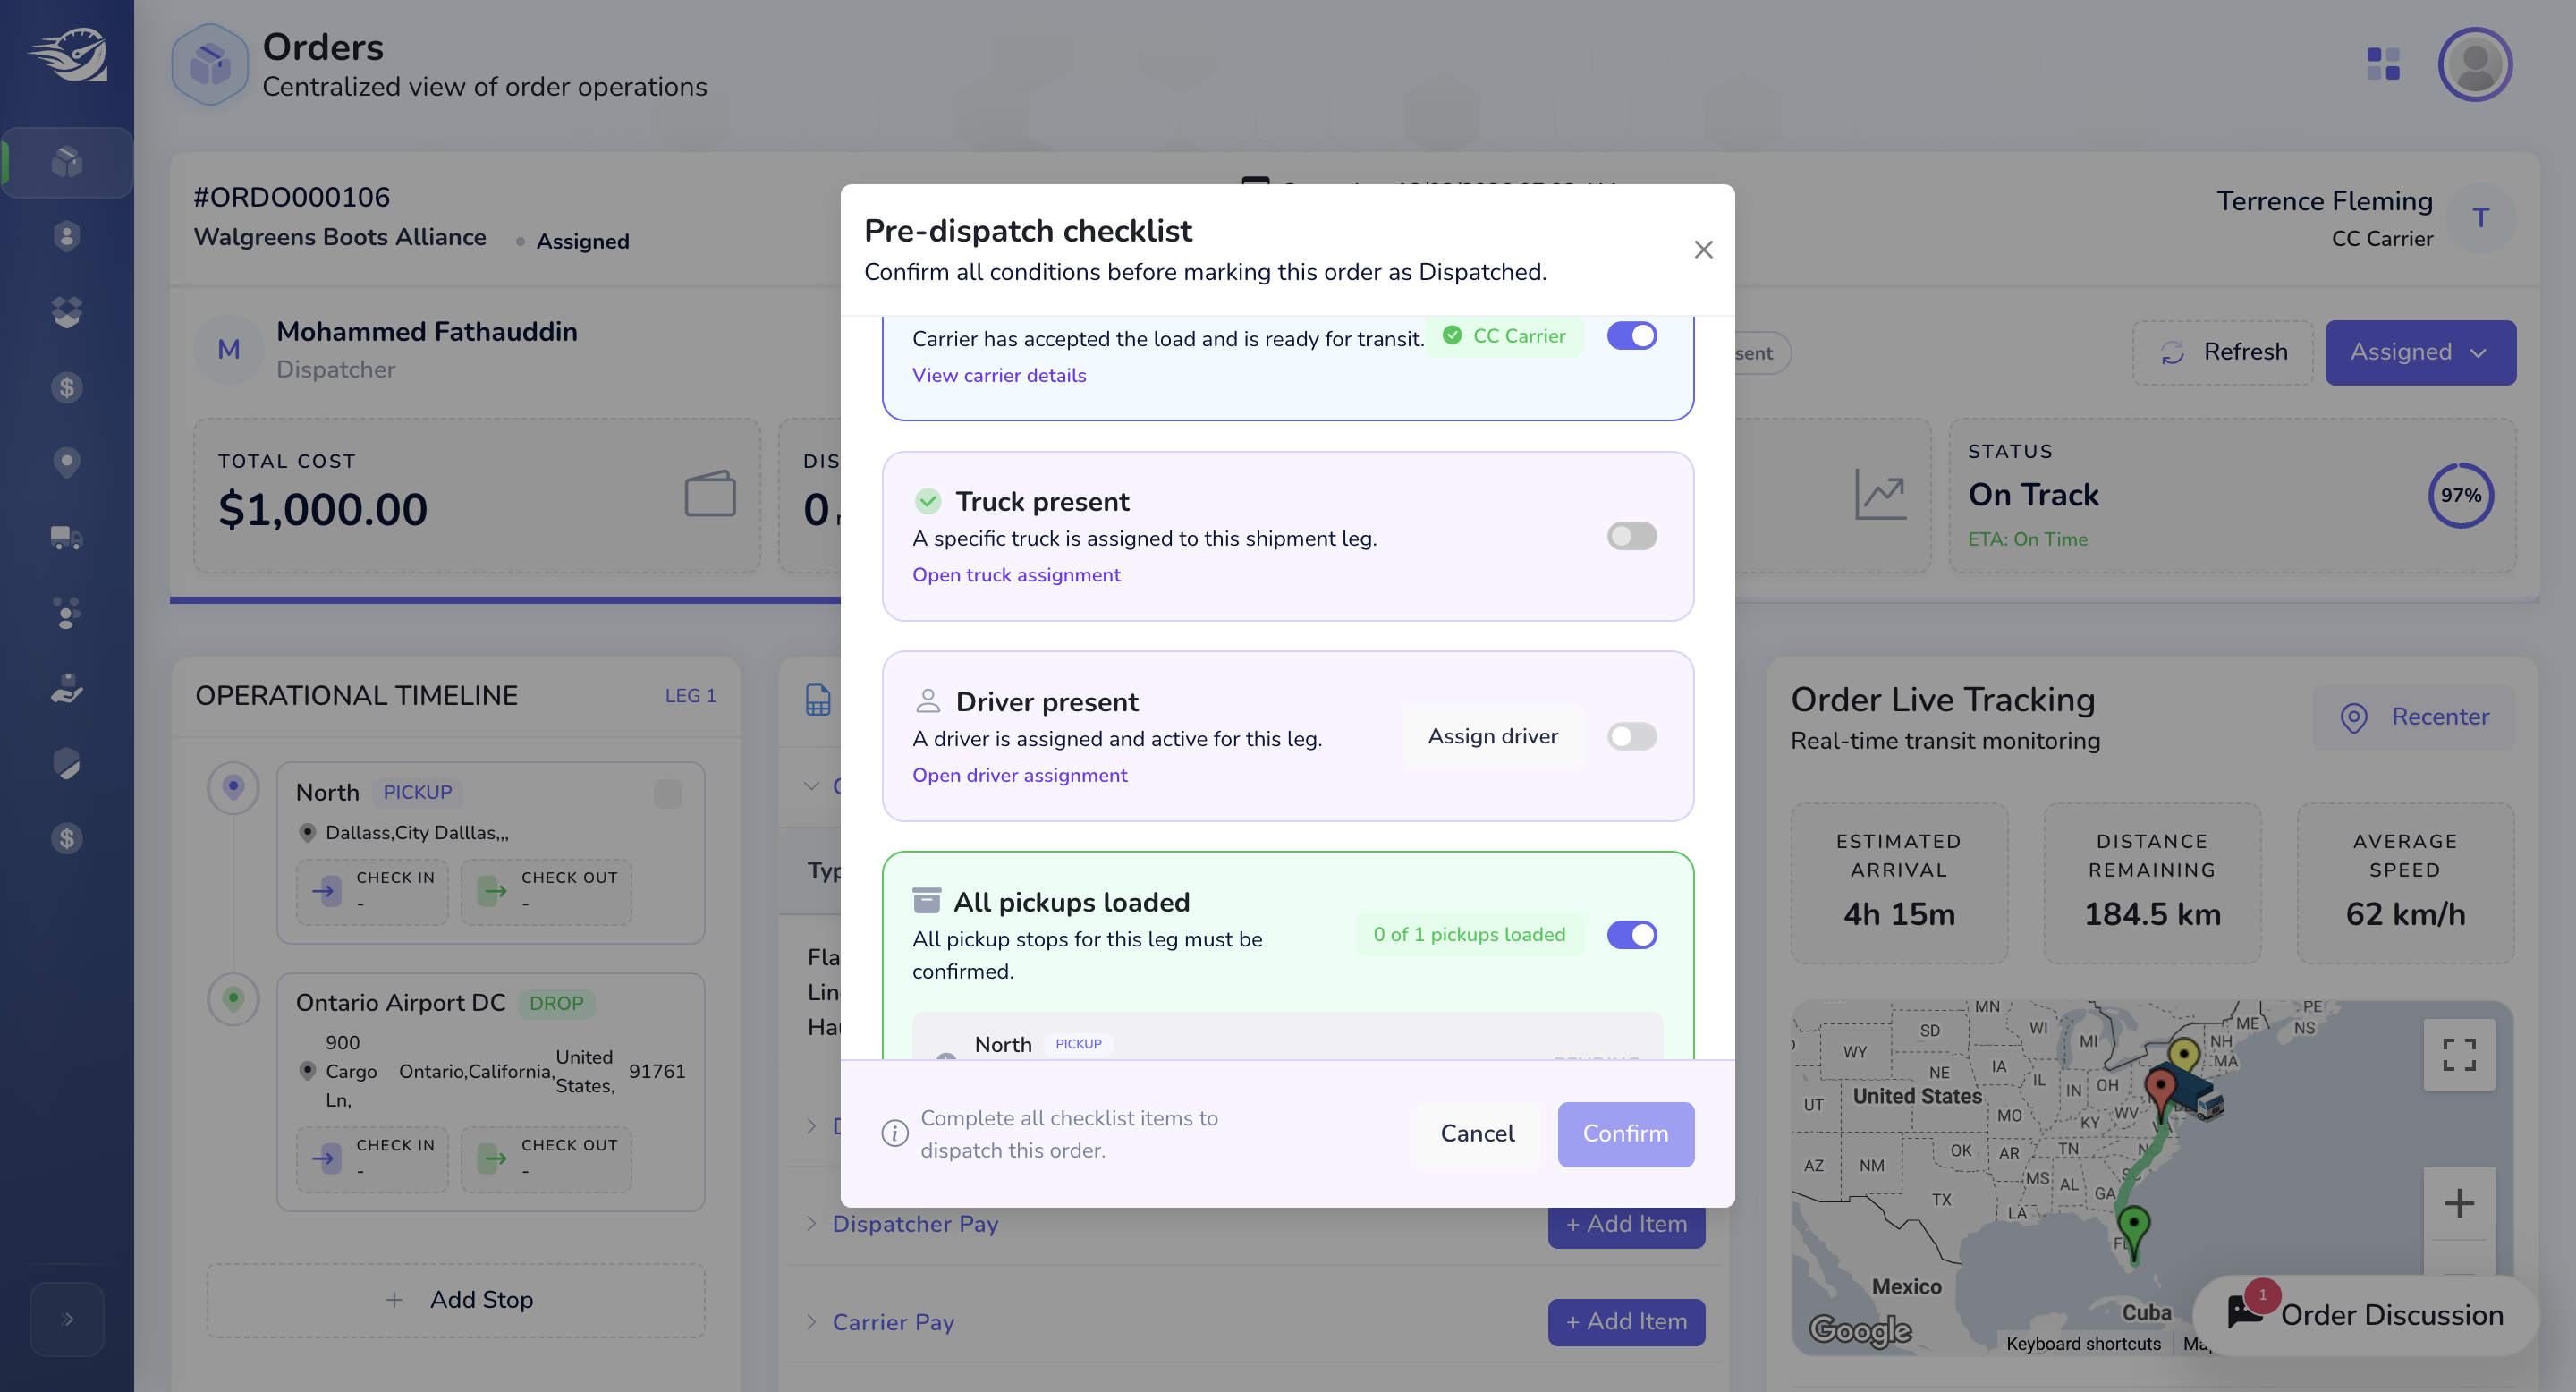
We will ensure the truck and driver are present, and that the pickup location and all appointments are confirmed.
If you want, we can add notes here as well.

Click "Confirm" to move the status from Assigned to Dispatched Status.
The status has now been changed to dispatched. The next status will be "on Road."
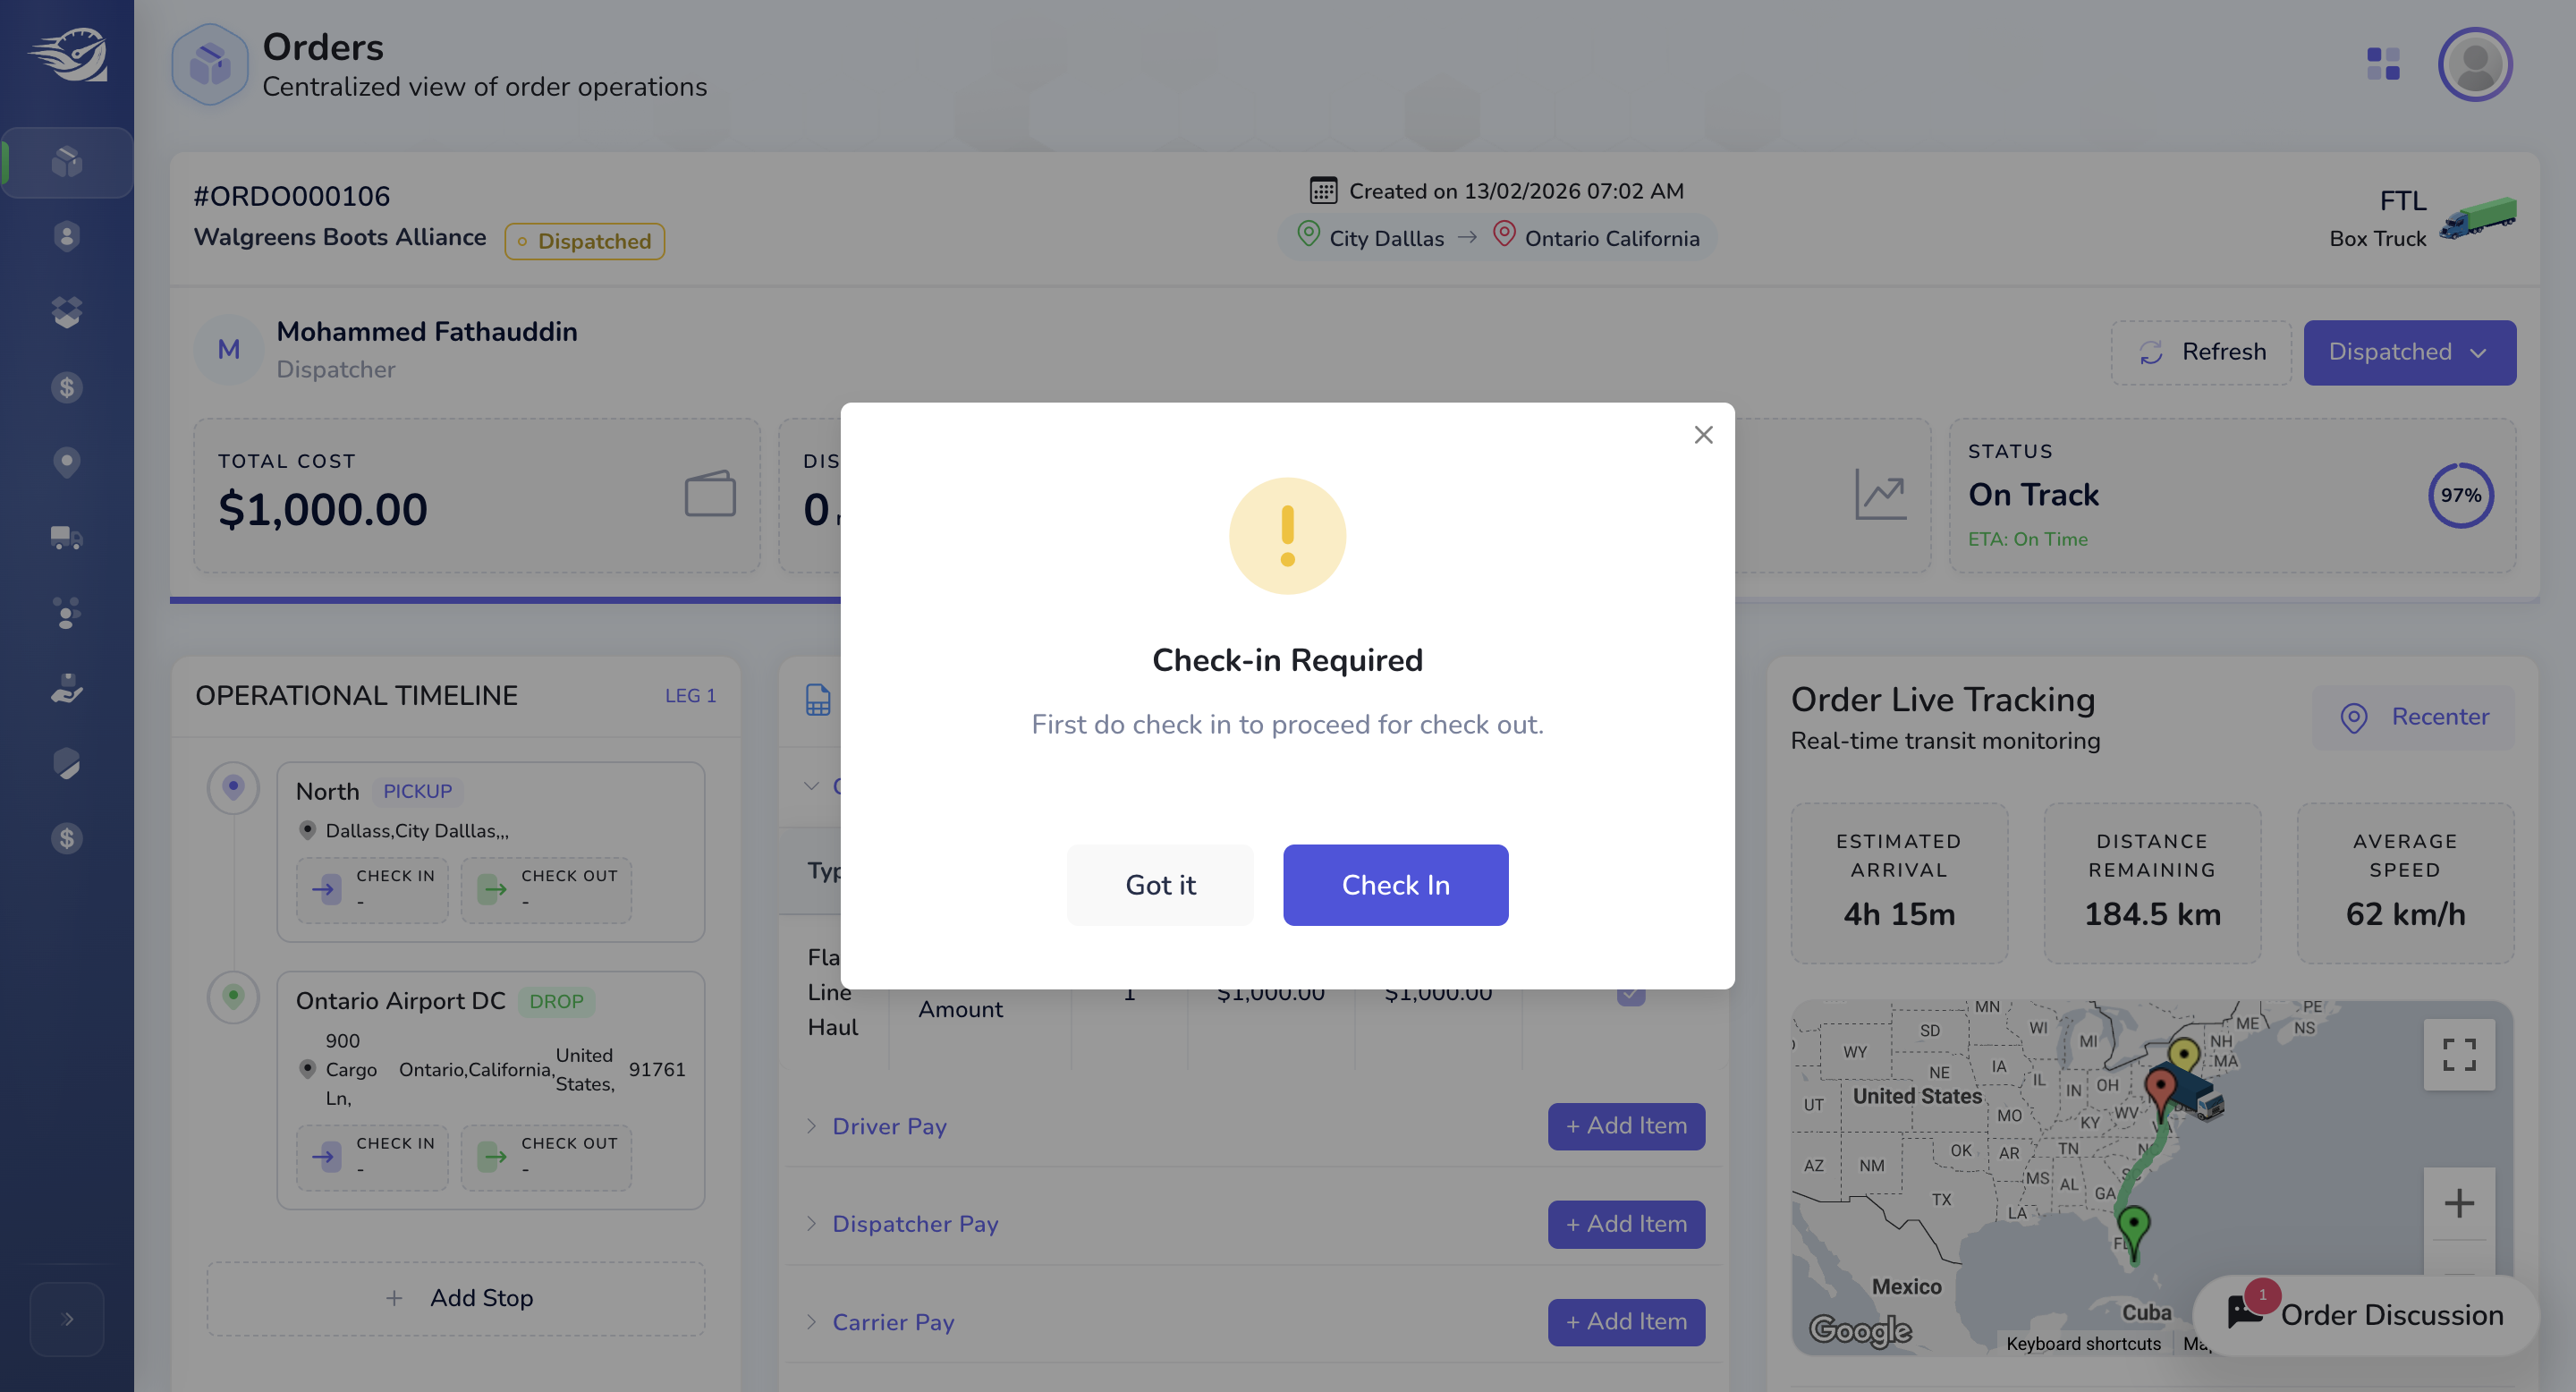
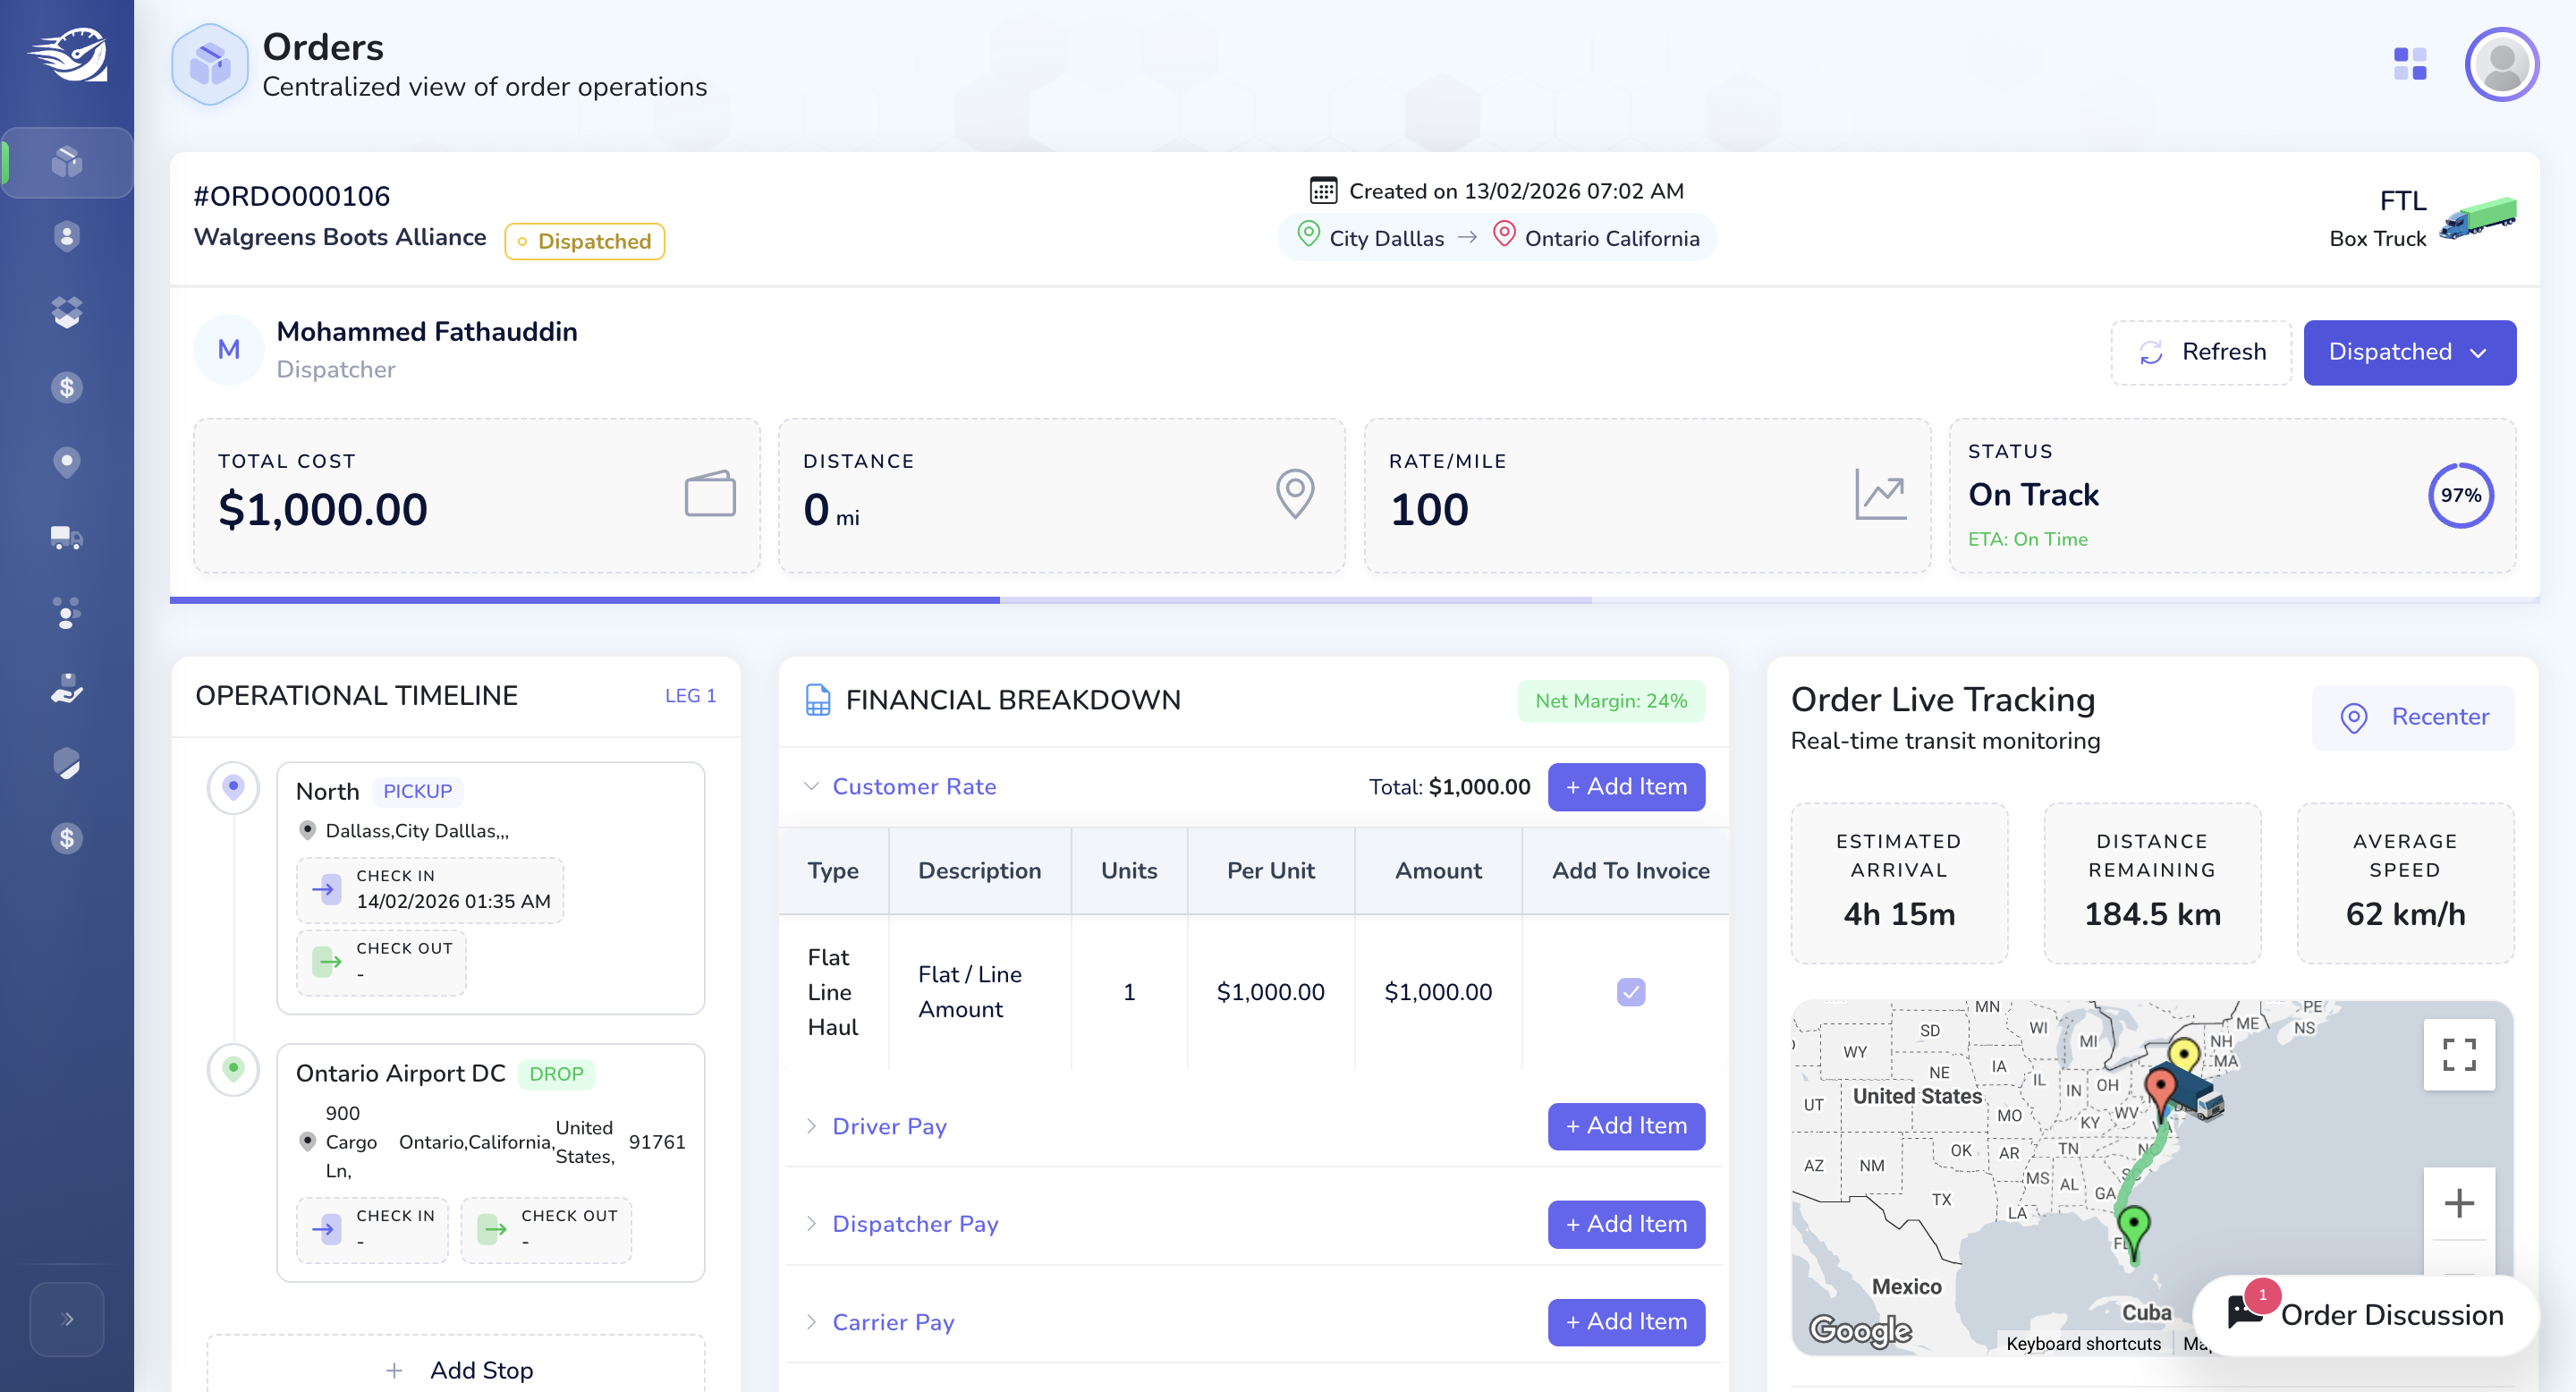
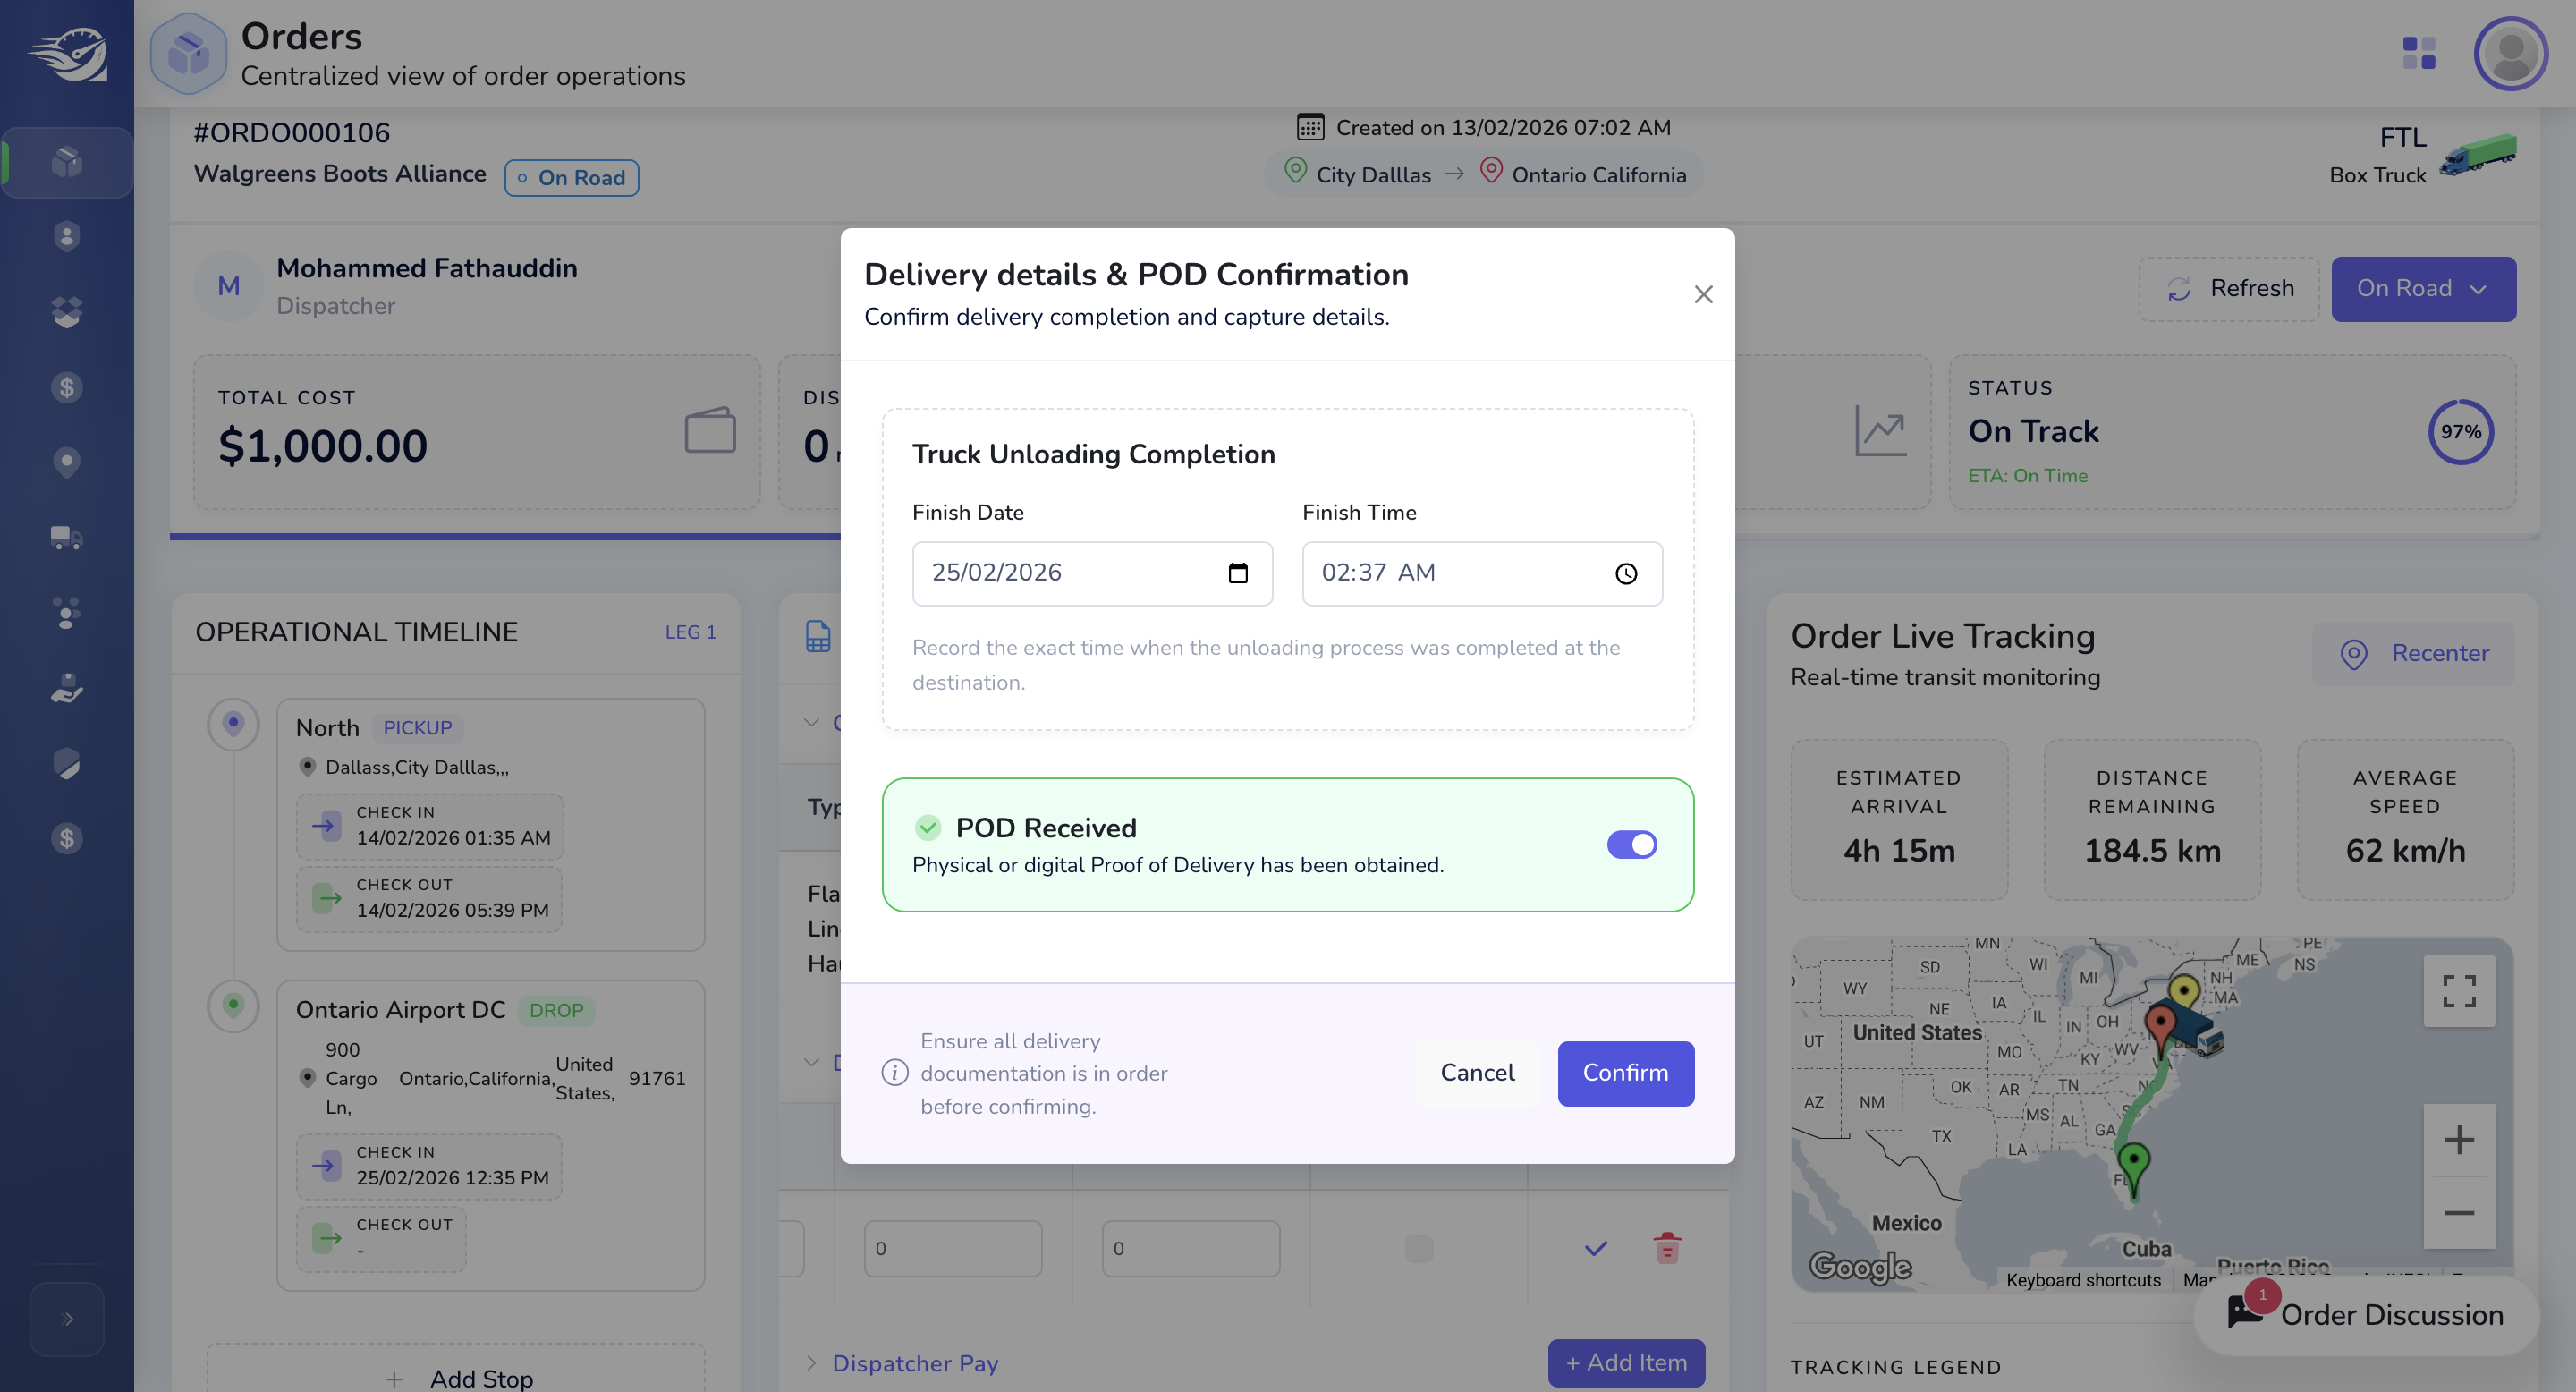
For on-road use, we have ensured that pick up location it should be checked in & checked out.
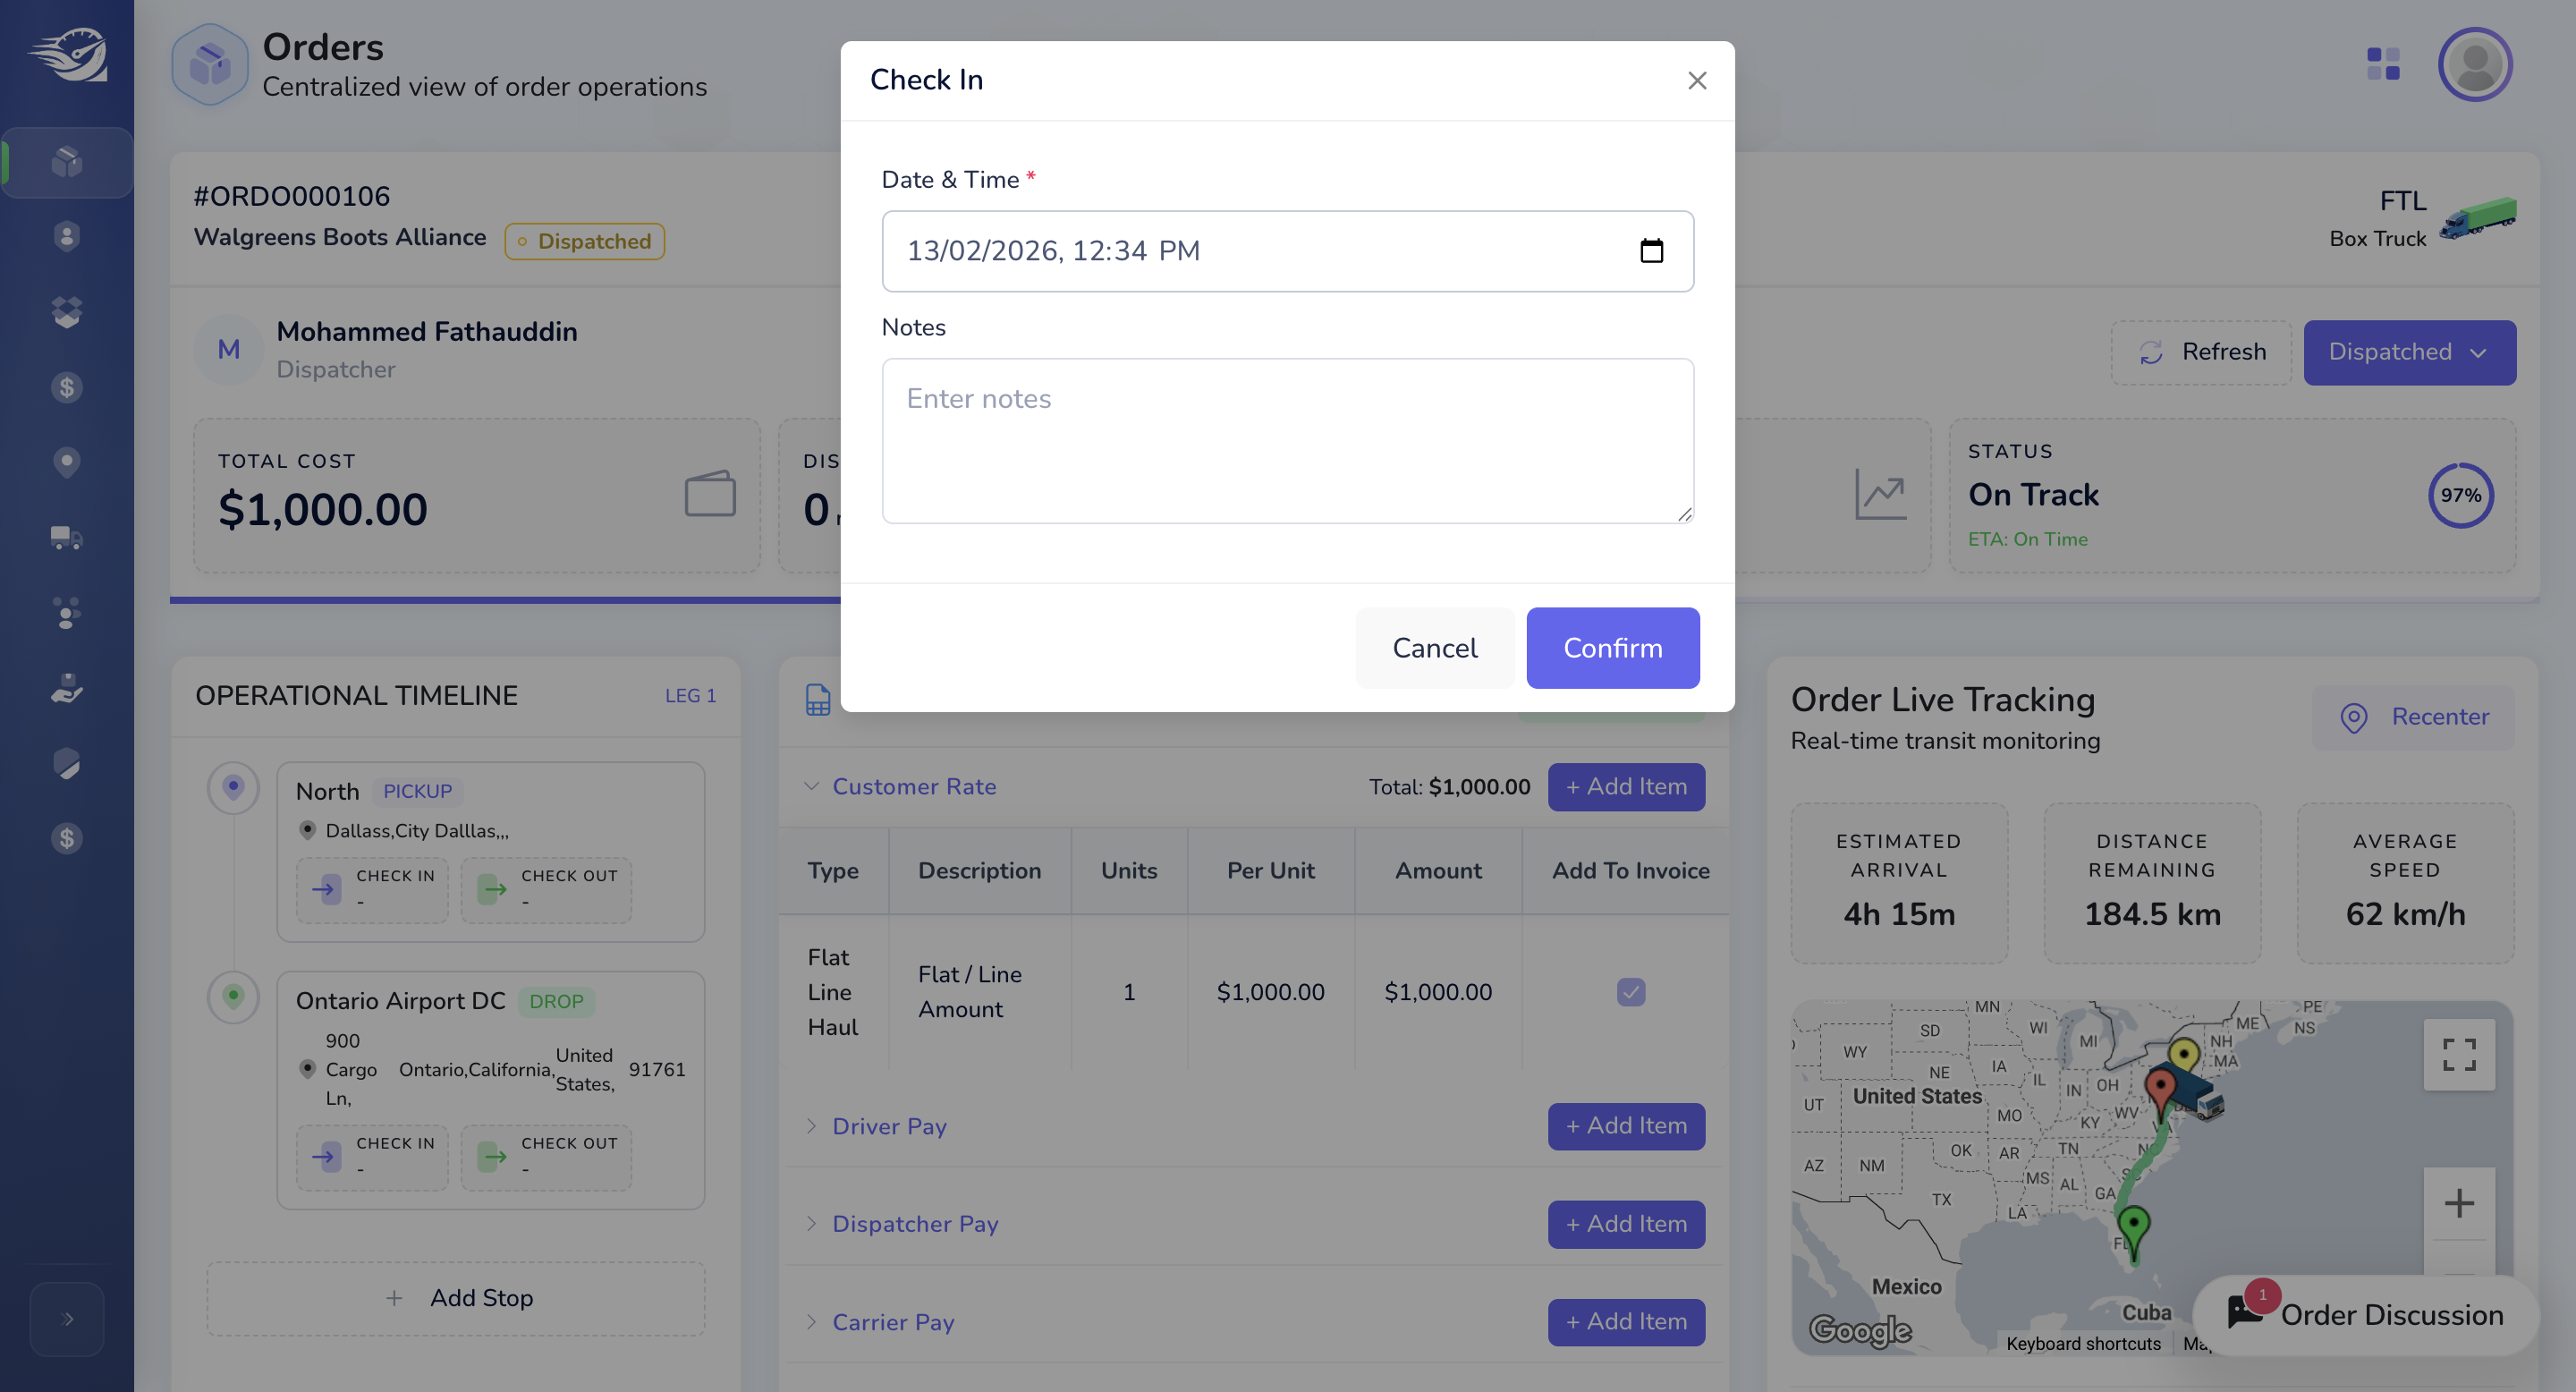
You can add check-in here from the selected pickup location. Alternatively, the user can update the status directly, and a pop-up will appear if check-in is required.


Based on this, he can update the location and other related information.
Same flow when user clicks on "Dispatched" button to update the status to "On Road"

Now the status will automatically change to "on road."
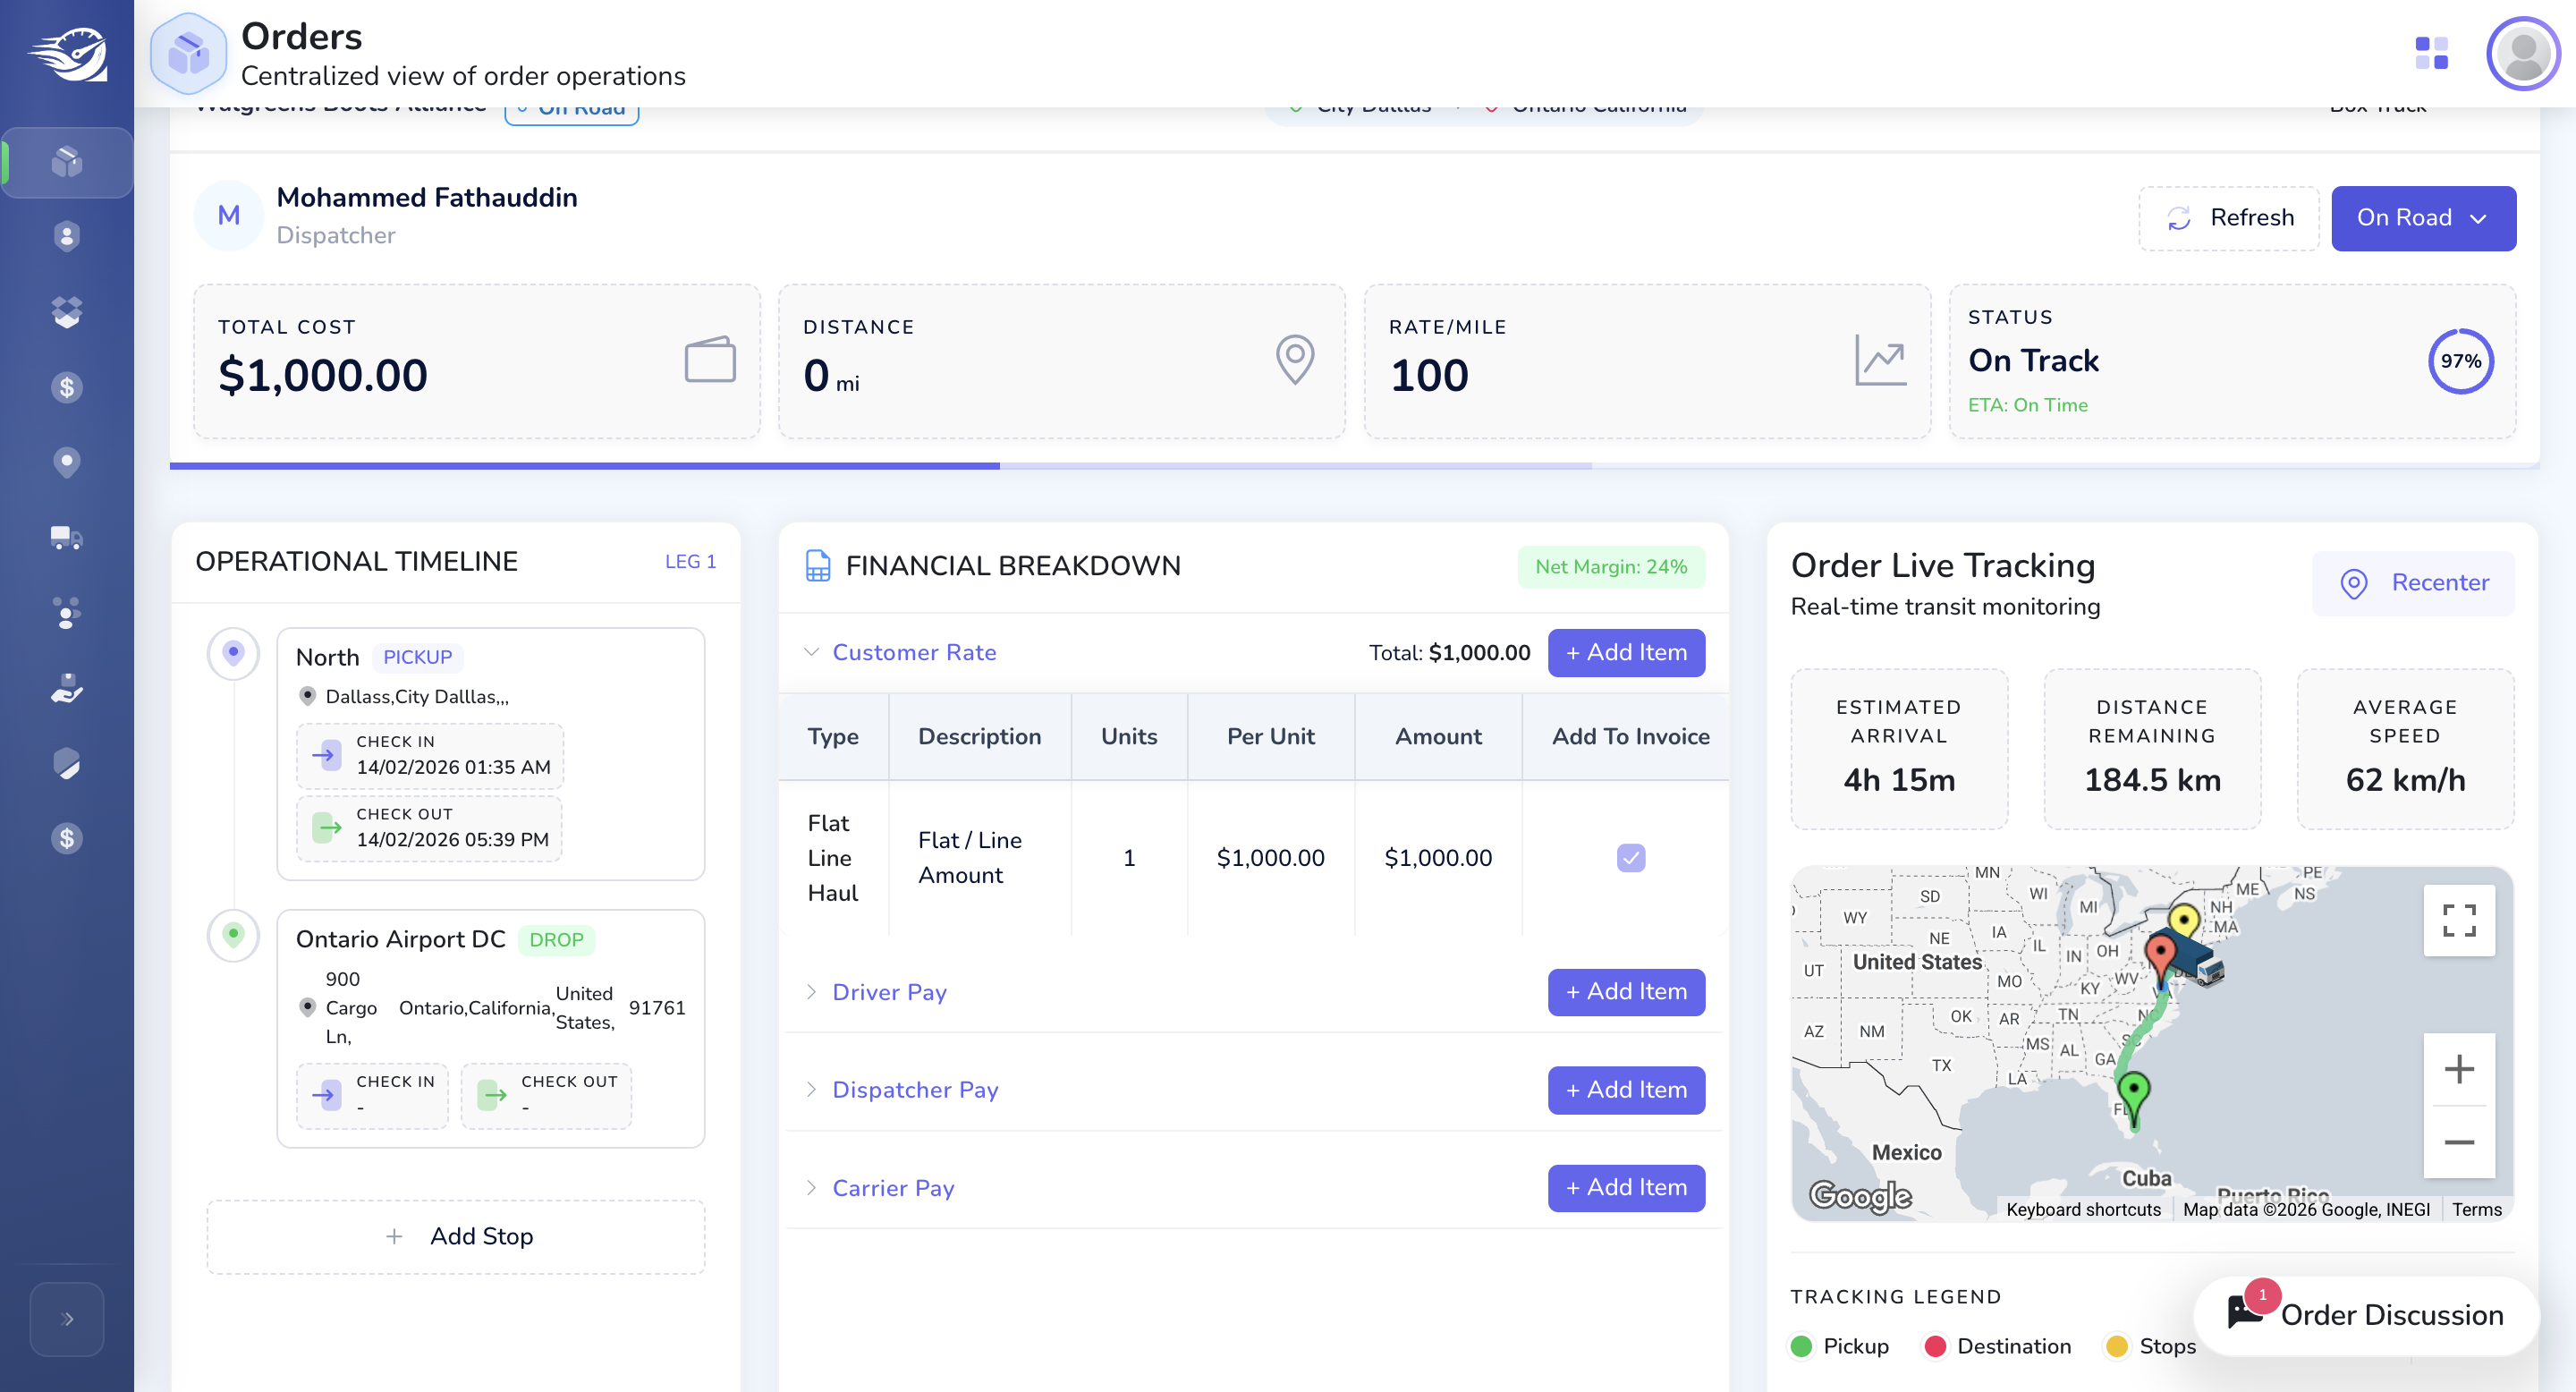
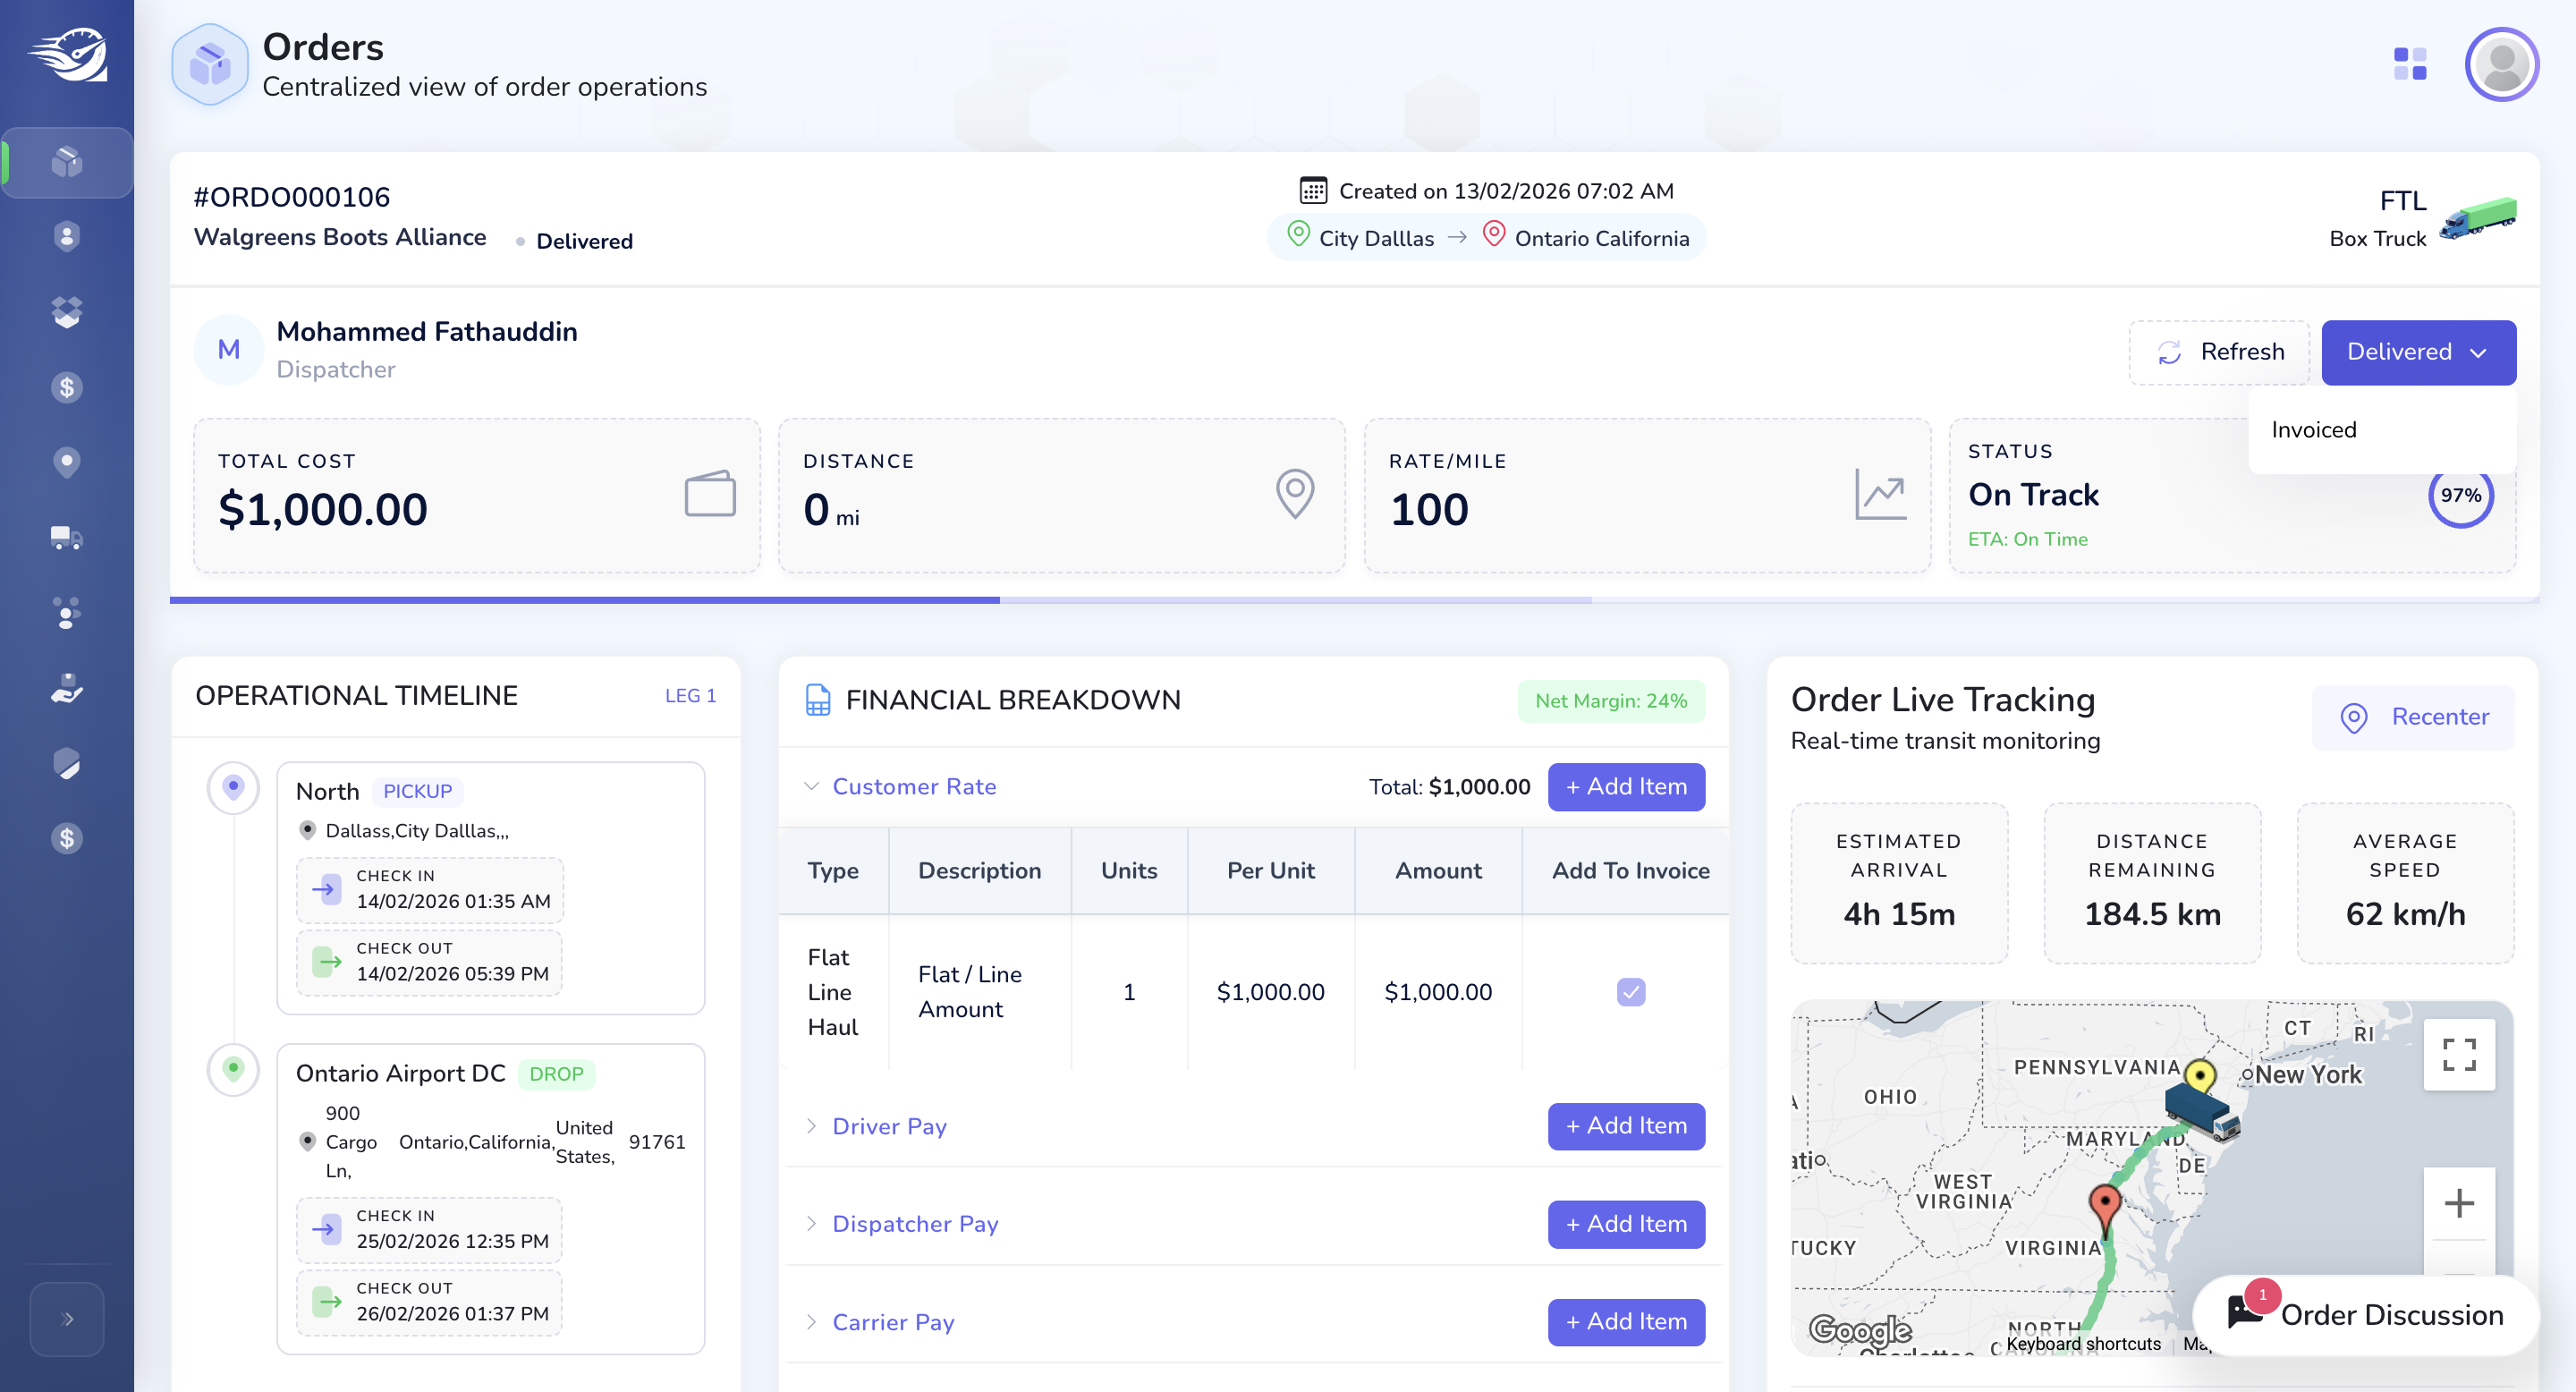
Financial Breakdown card :
Next On-Road -> Delivered Status.
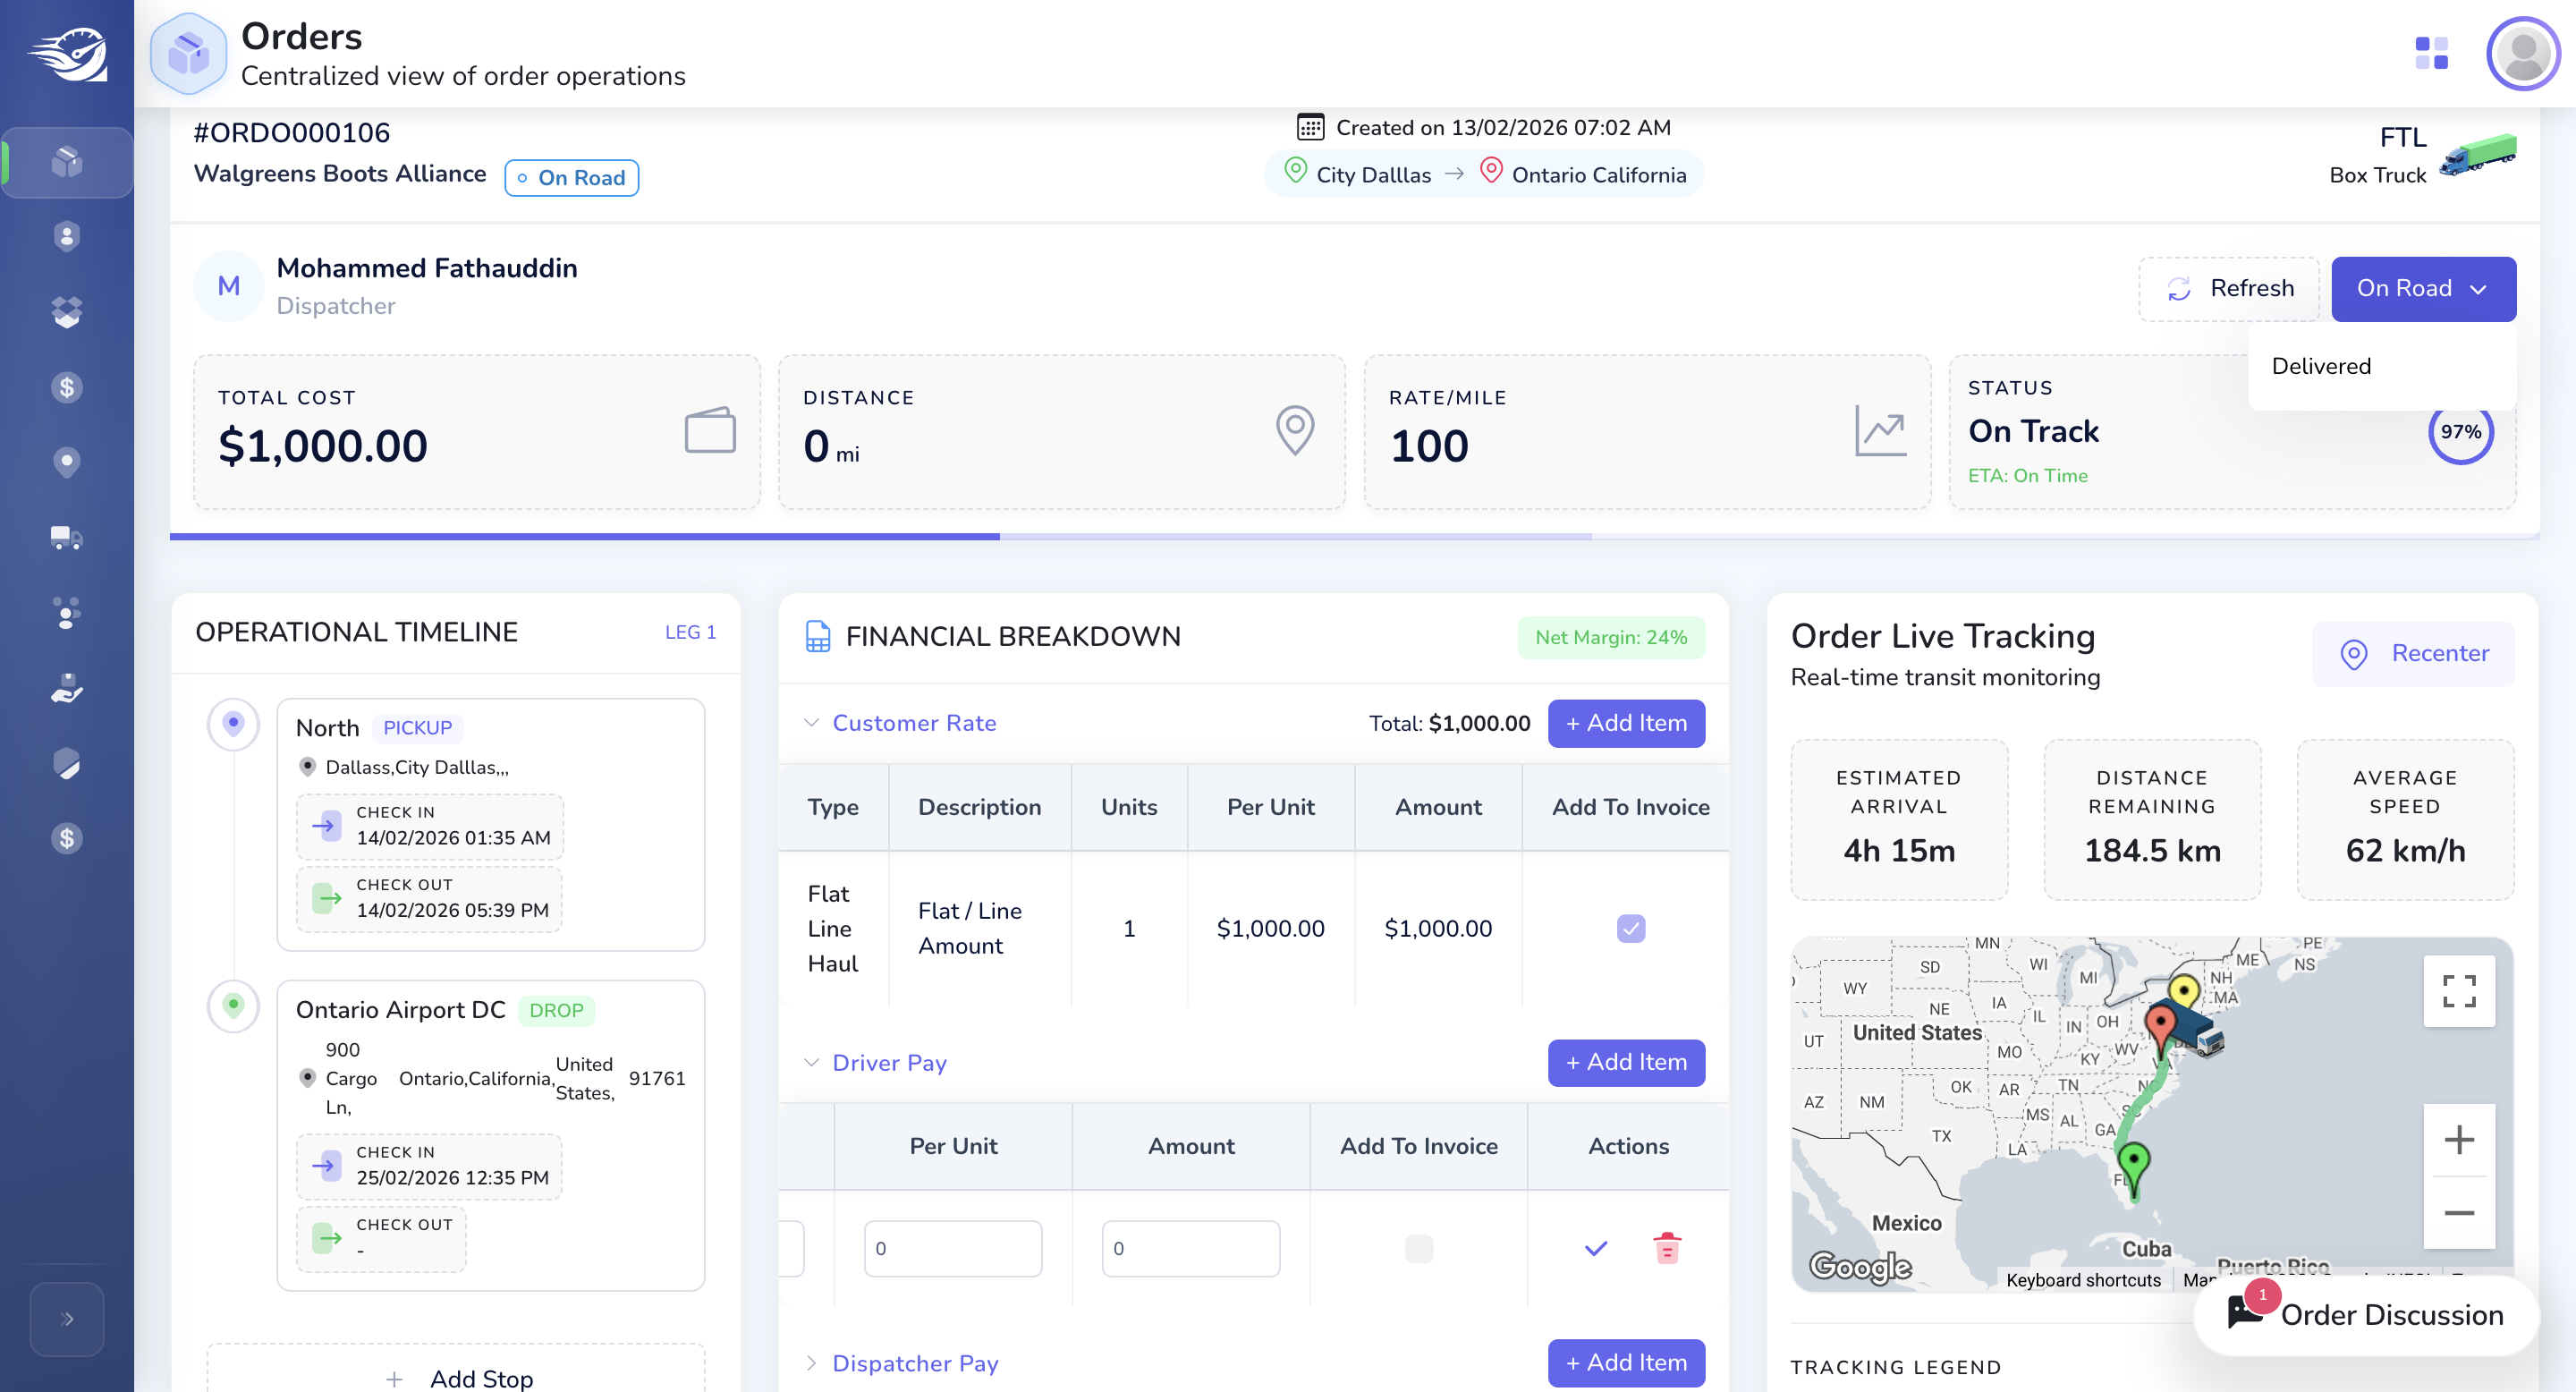
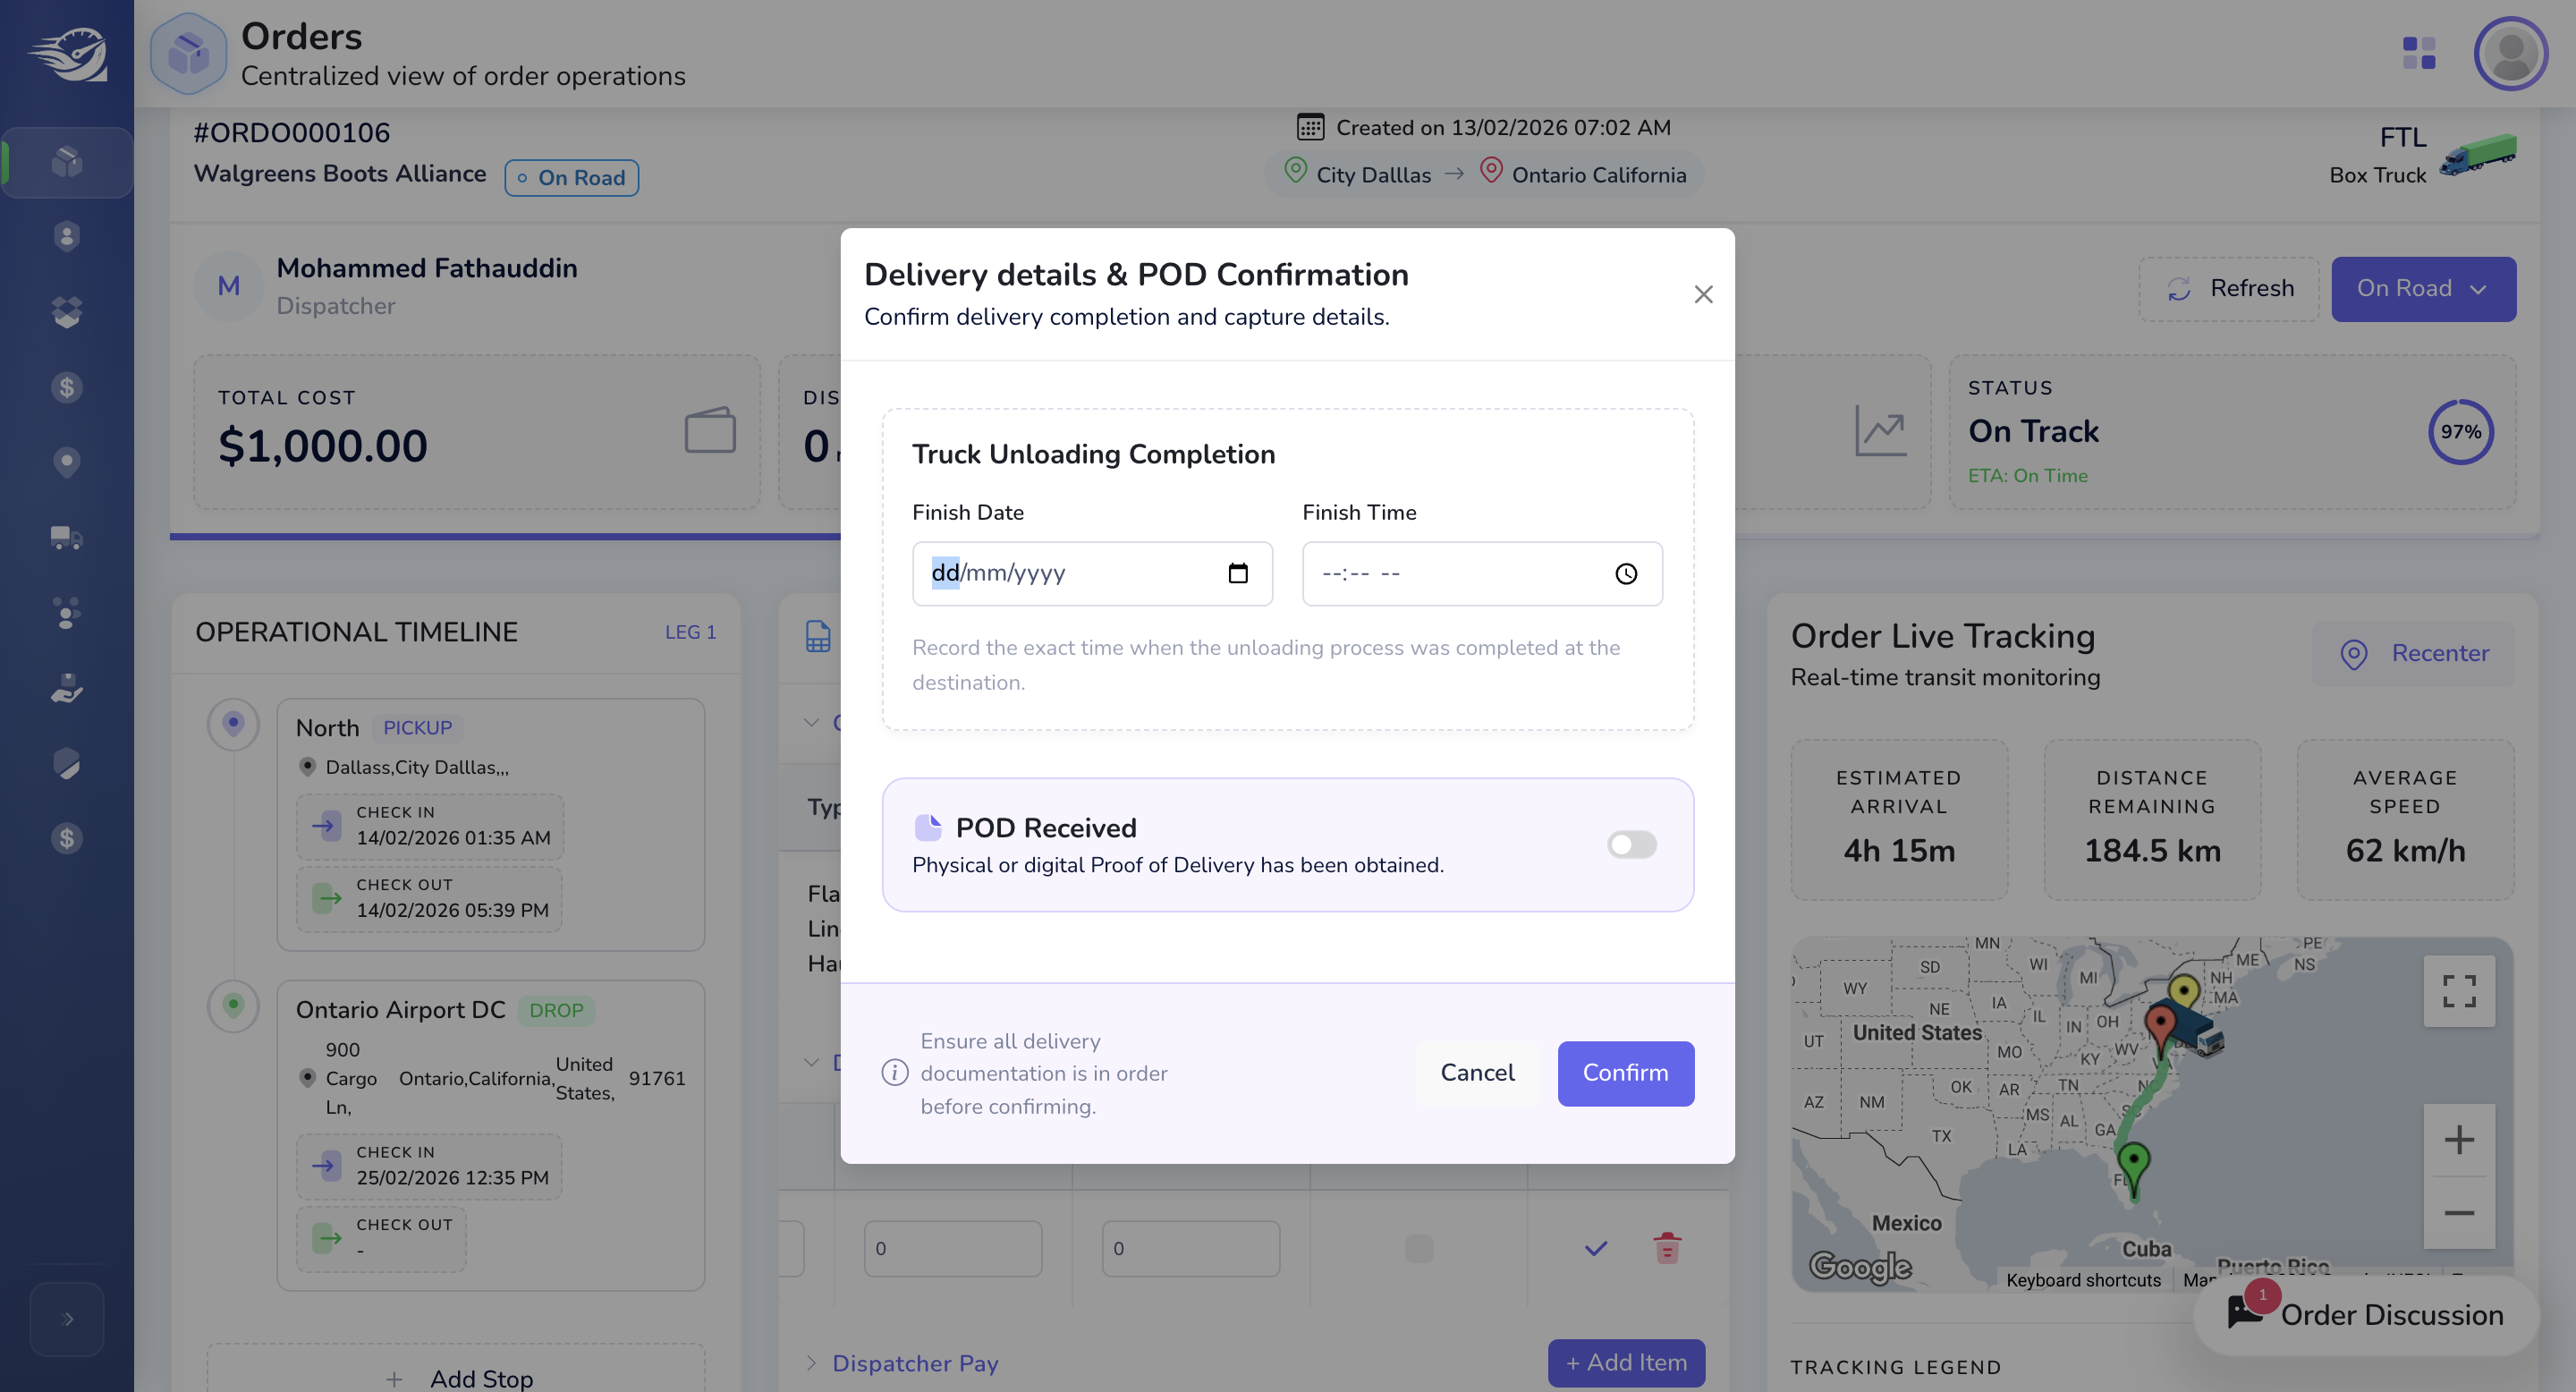
Please confirm. to update the status to Delivered.
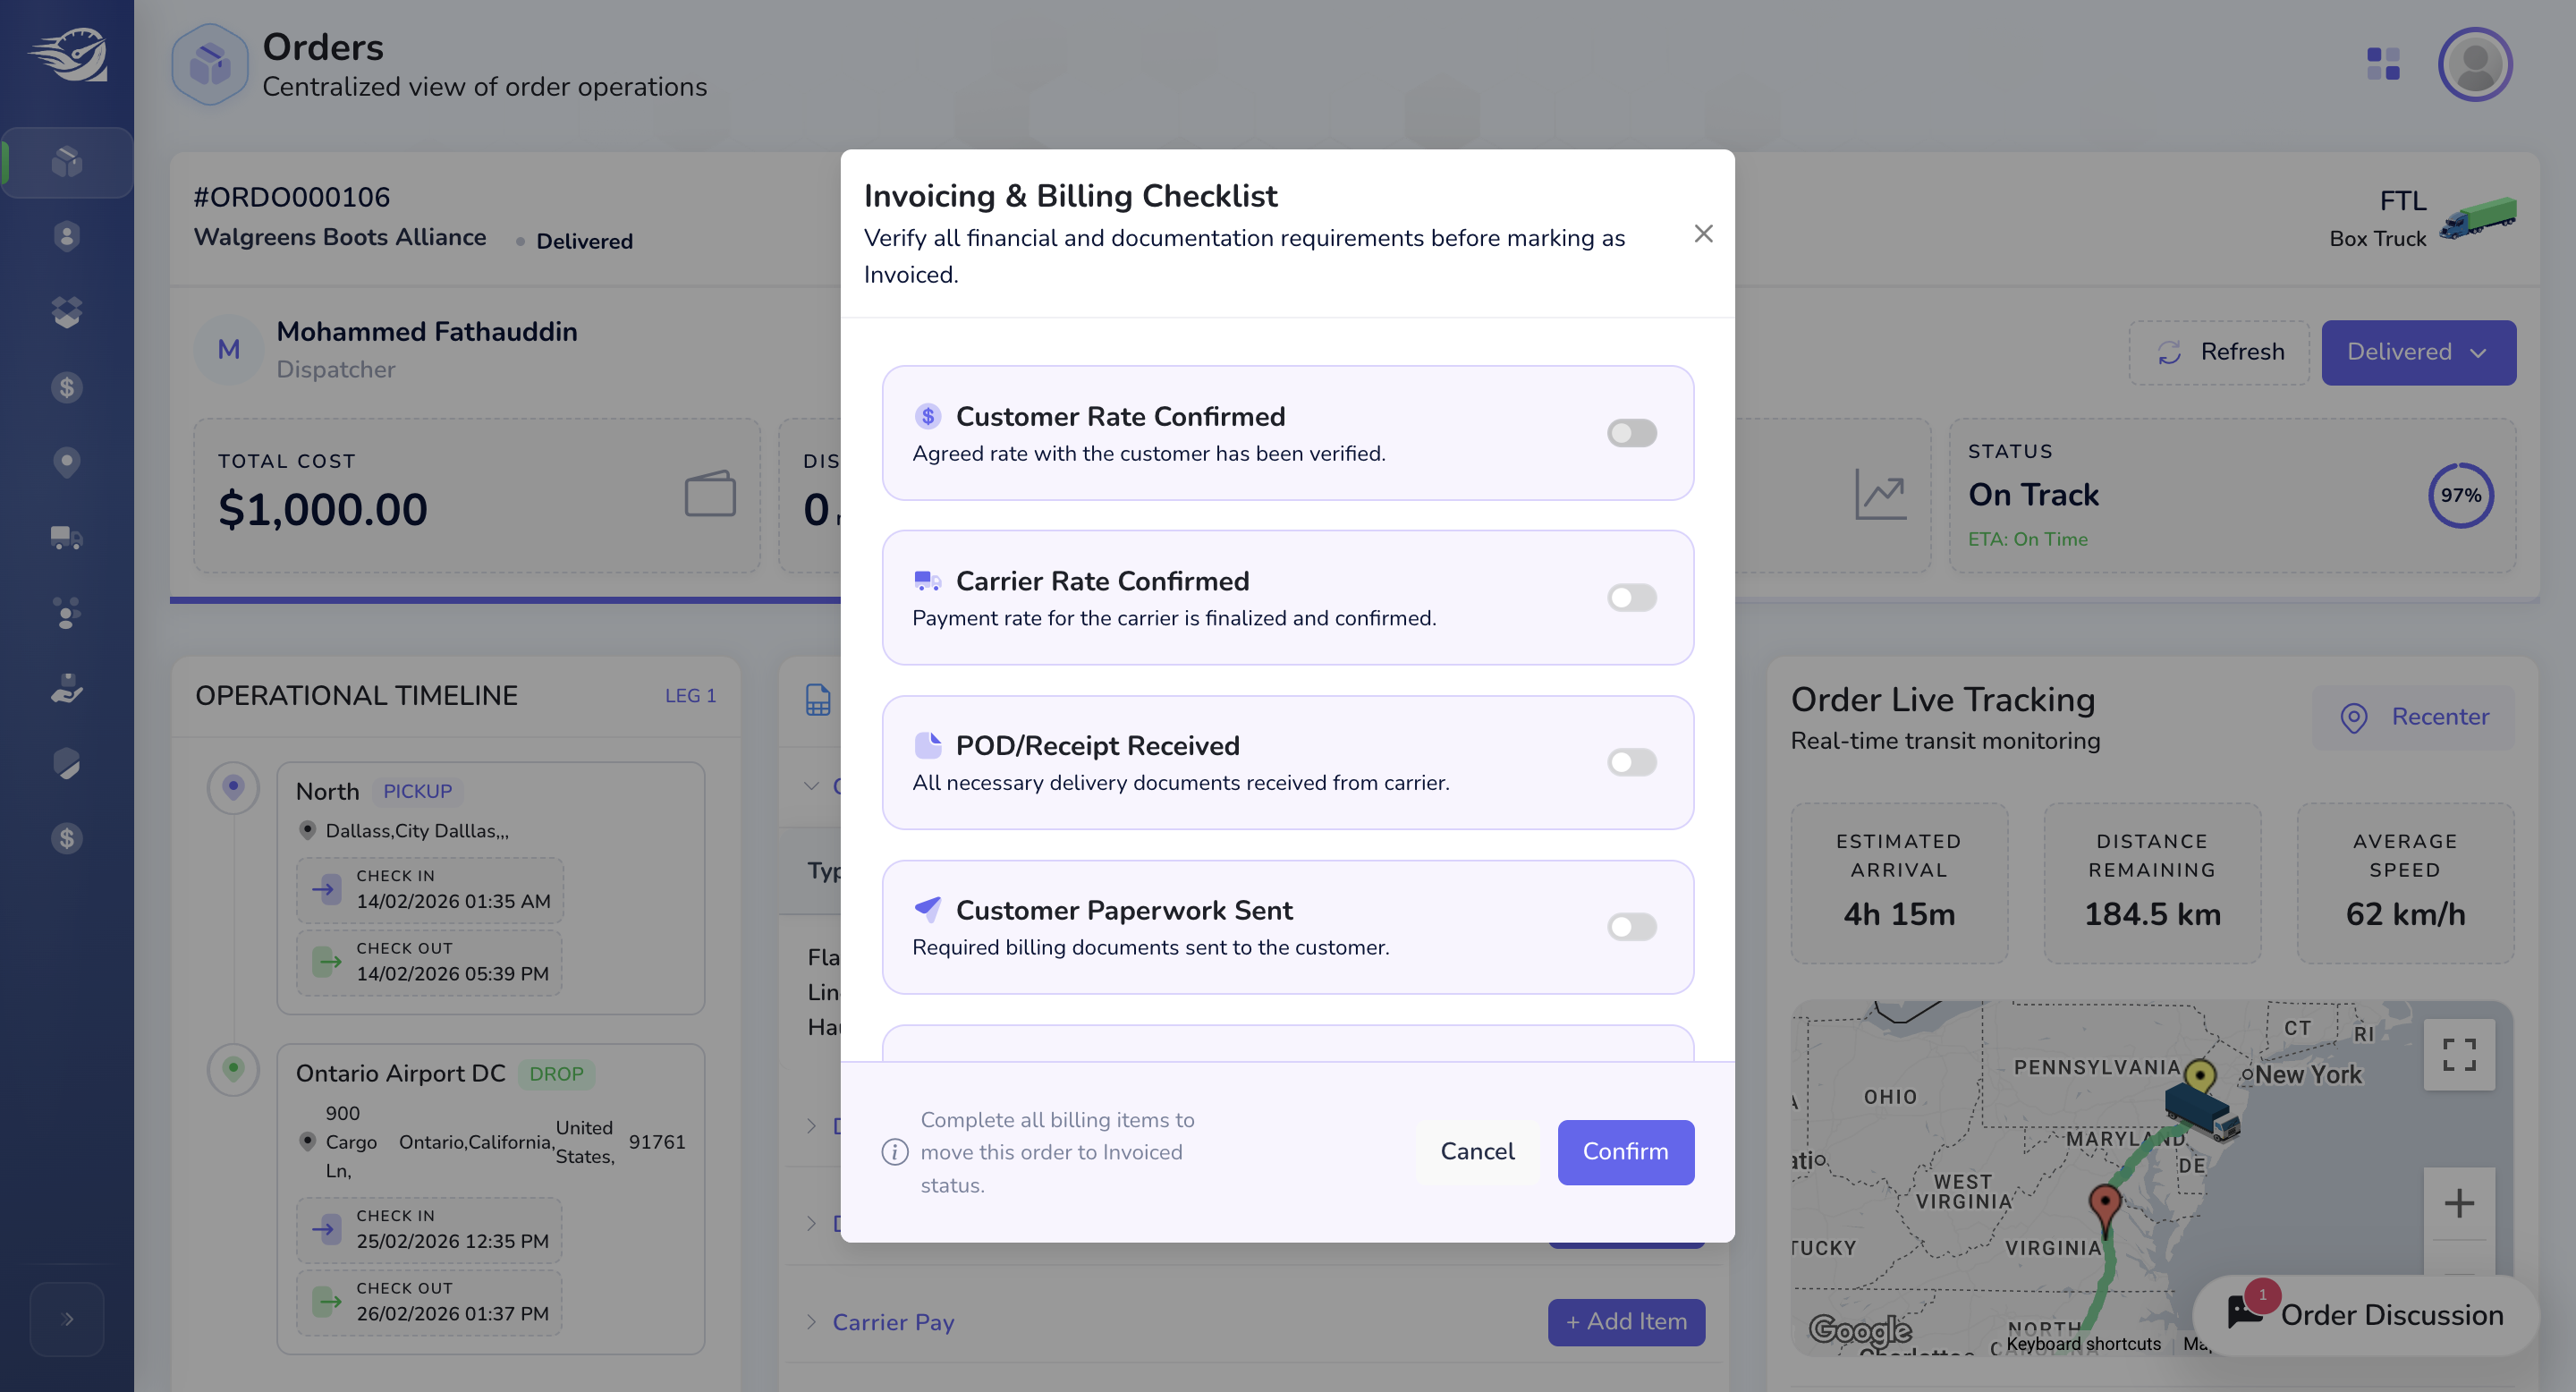
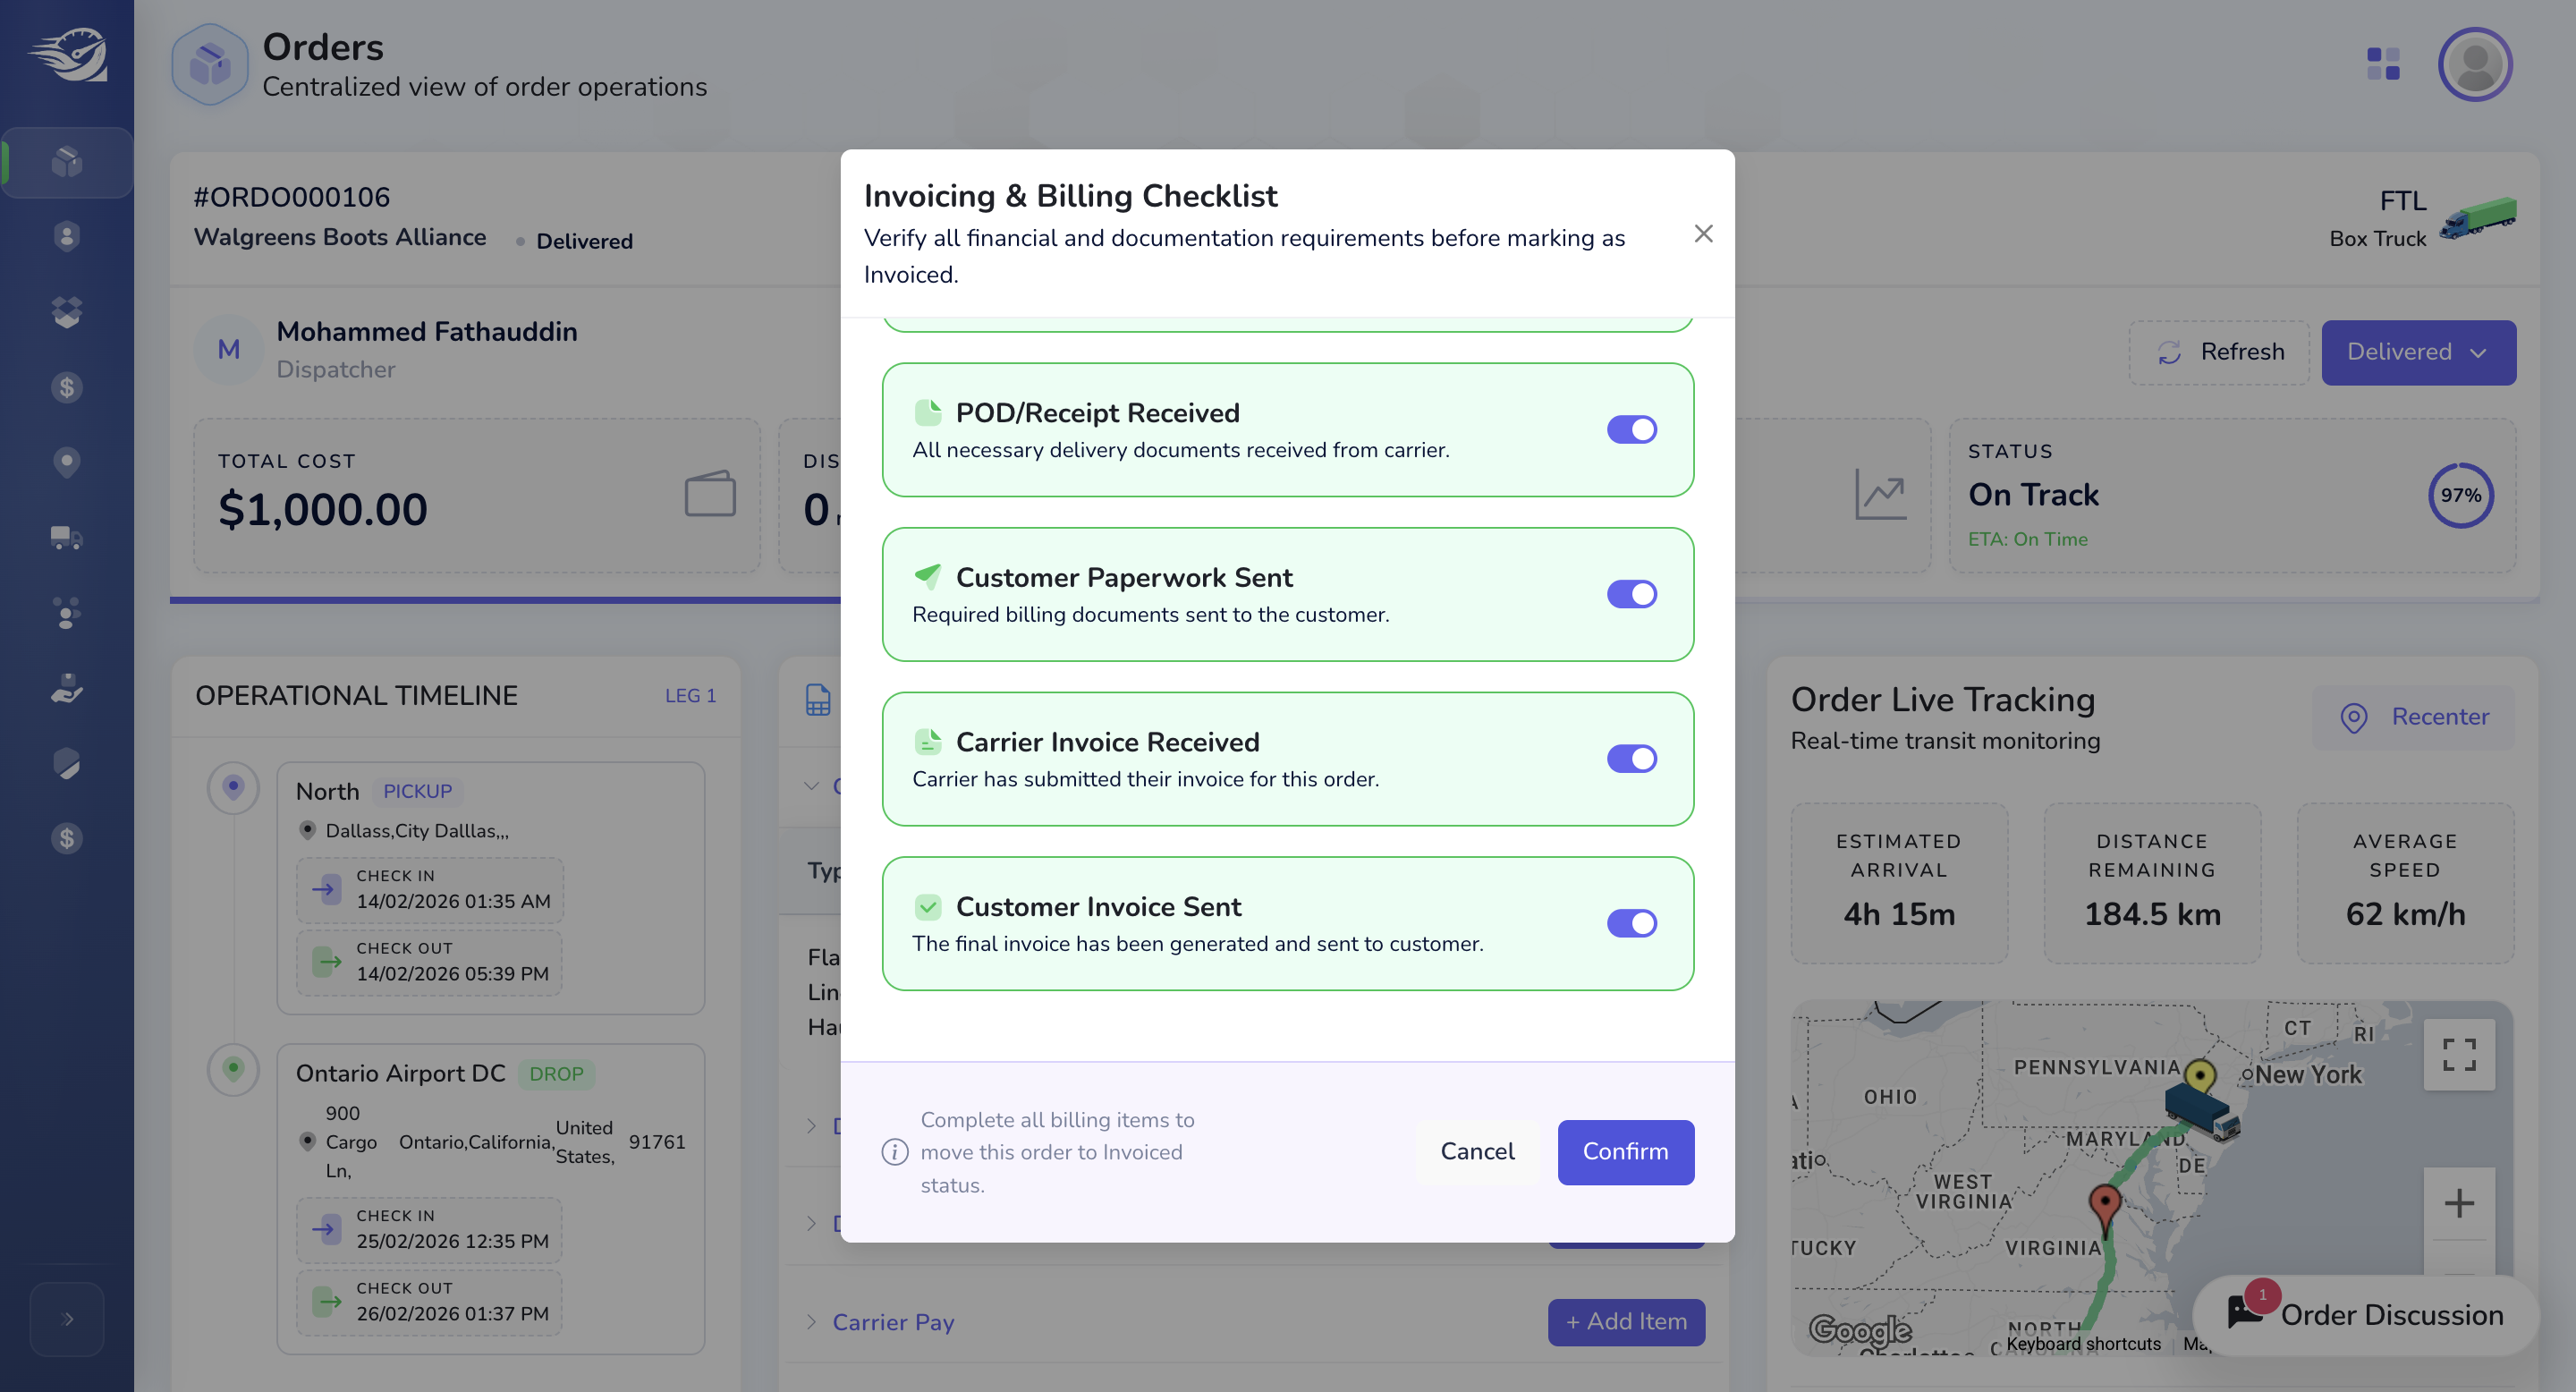
Next : Delivered -> Invoiced Status Update
For invoicing, ensure the customer rate and carrier rate are confirmed. Verify that all required PO documents have been received. Confirm all necessary steps for the order are completed from delivery to the invoice stage.
The order has been updated to invoice Status. Later, on the invoice screen, we can see all these details. Apart from this, in the order details screen, we have
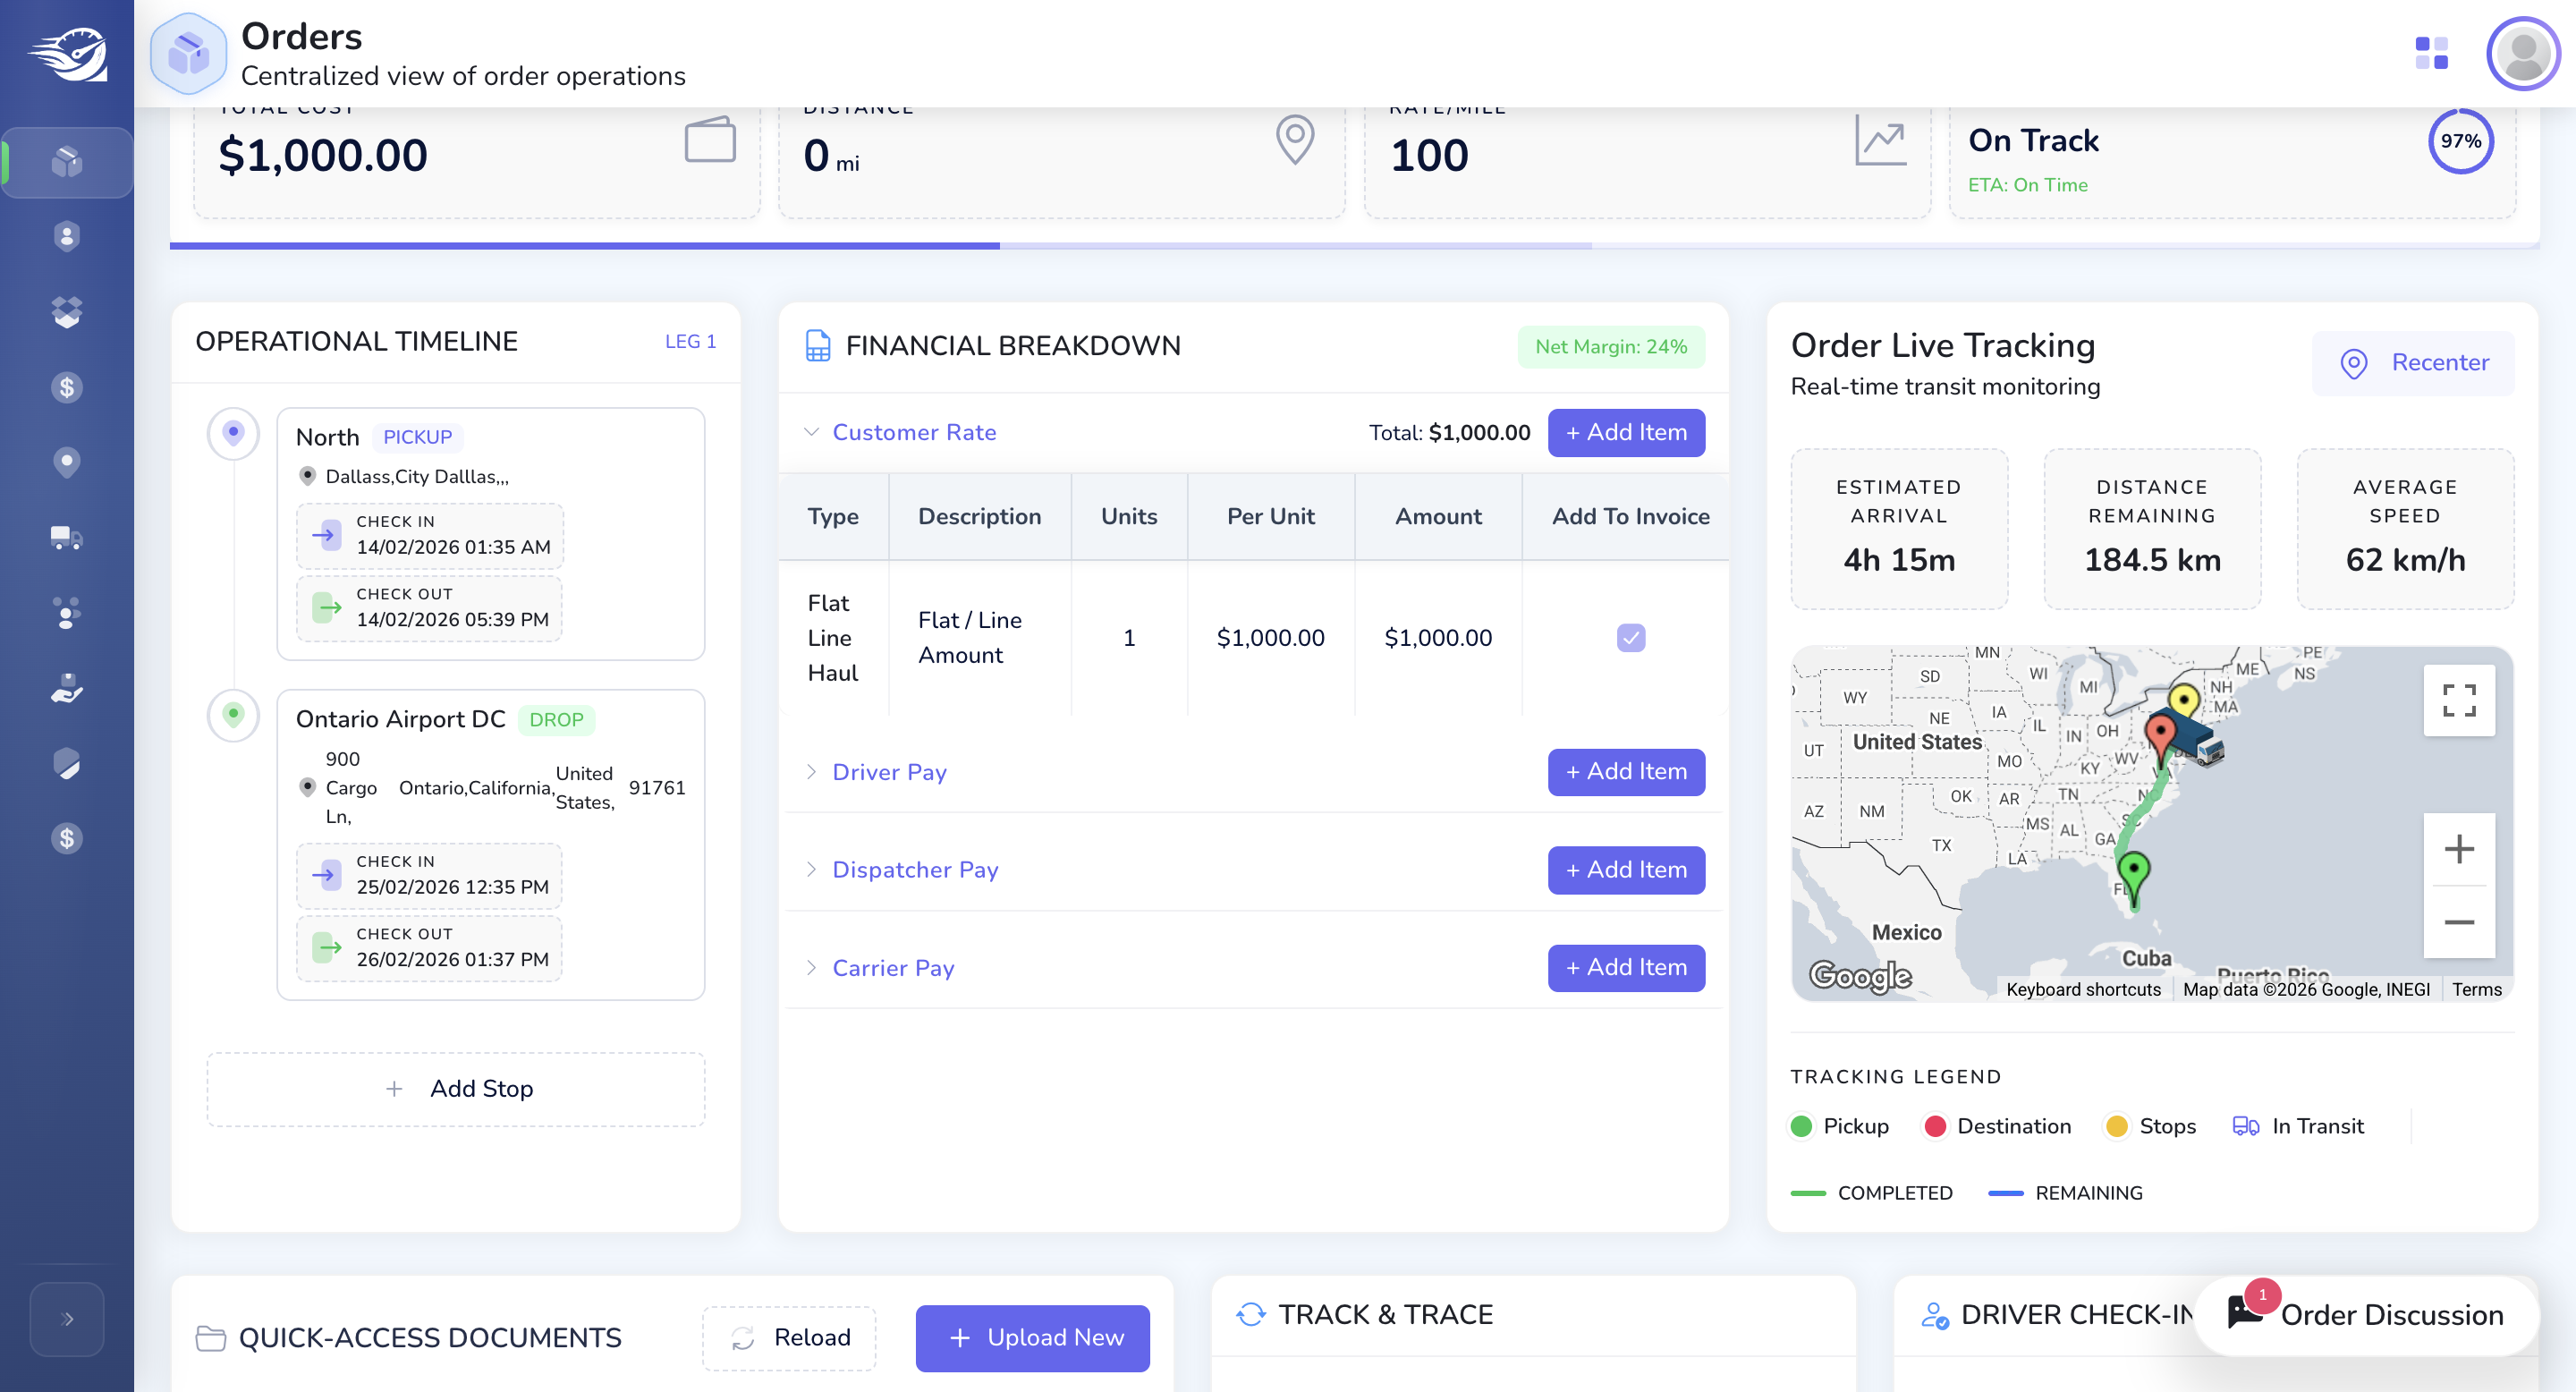
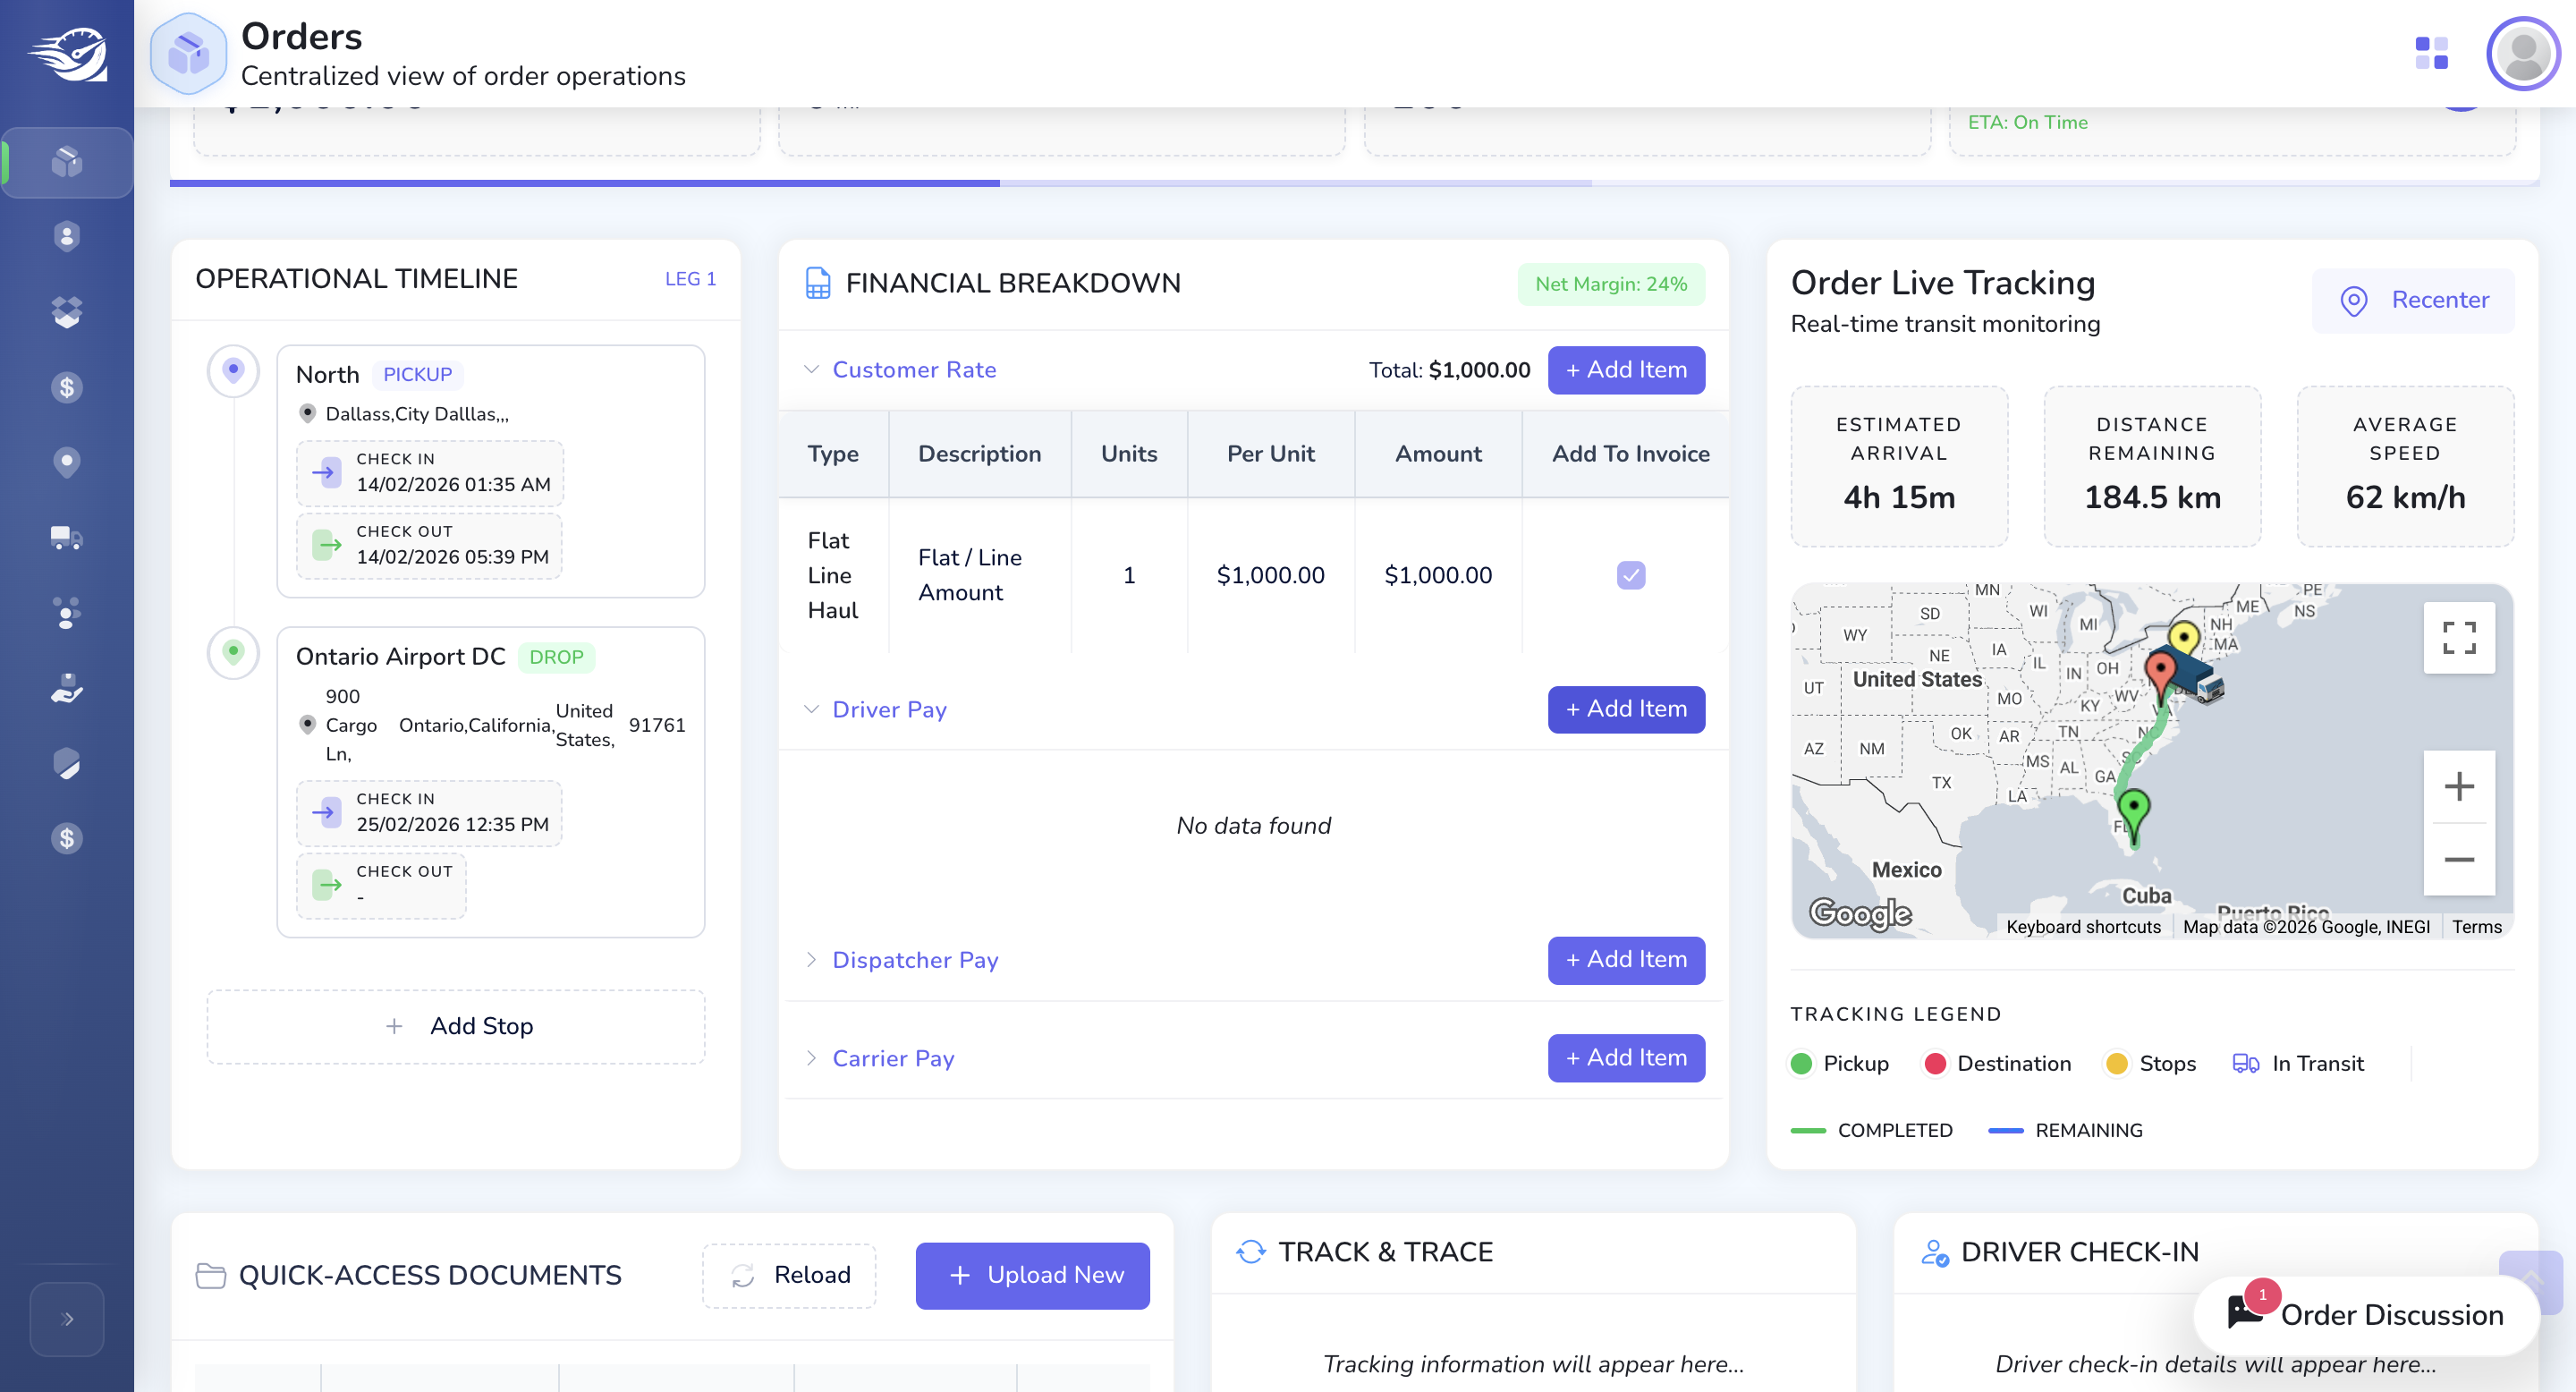
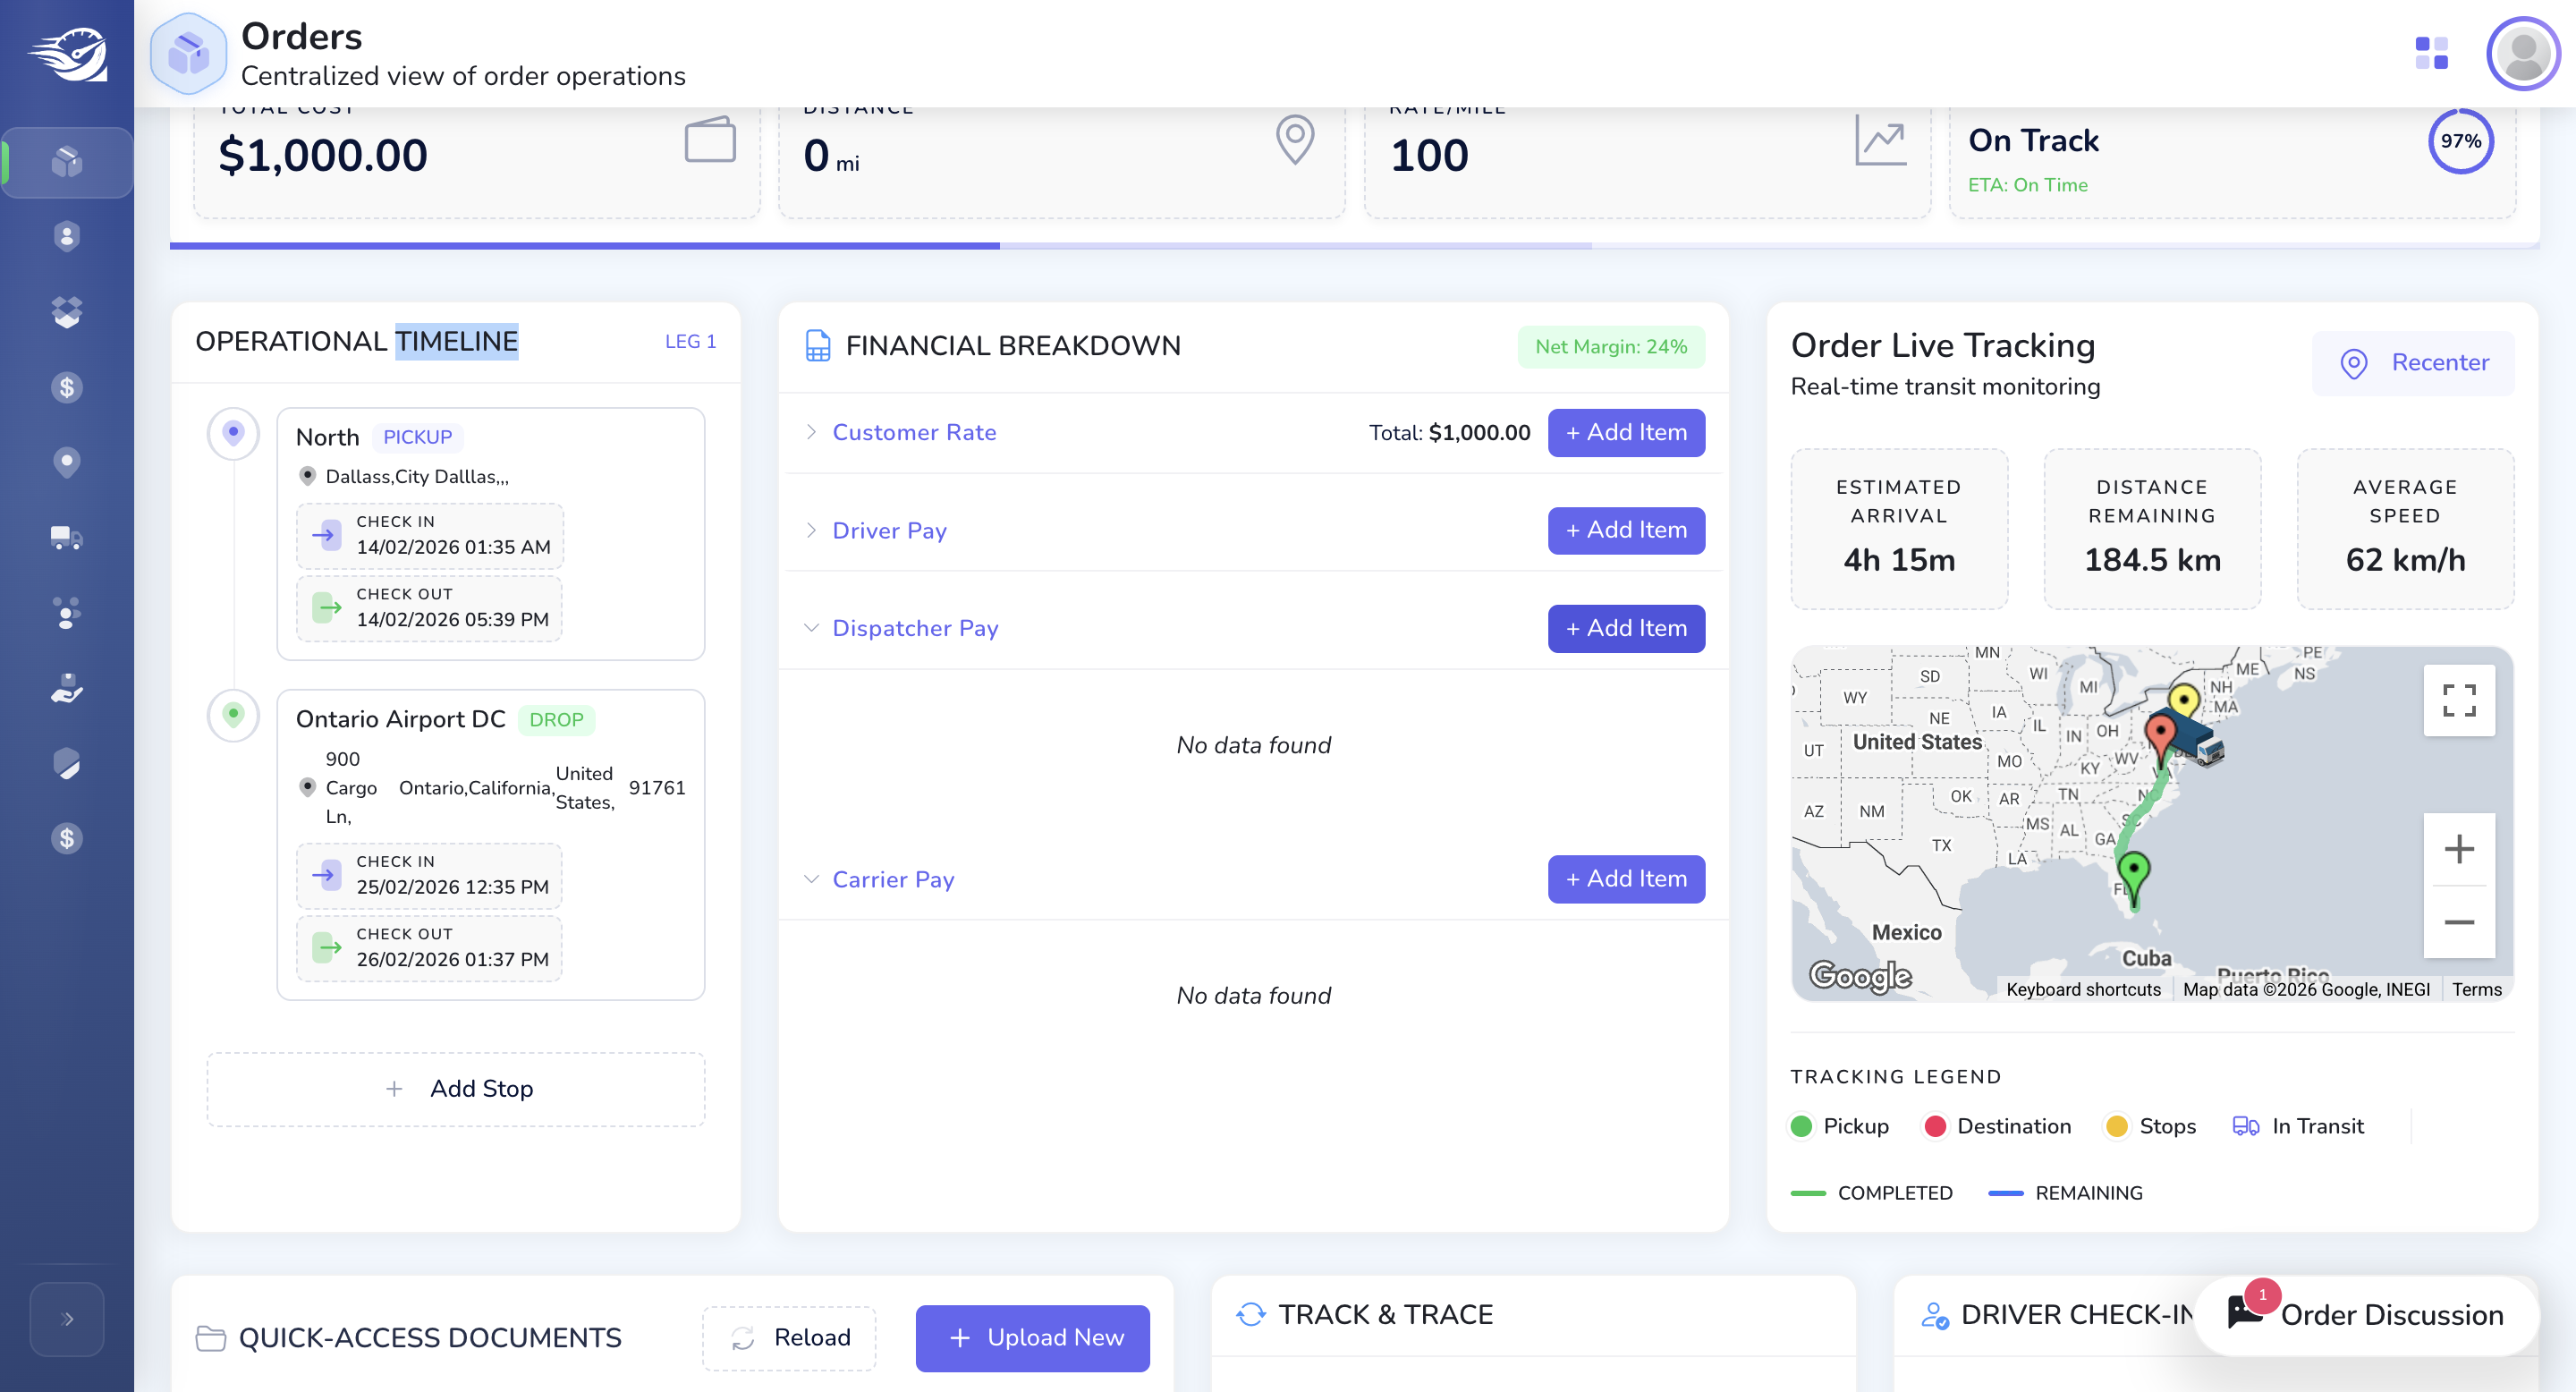
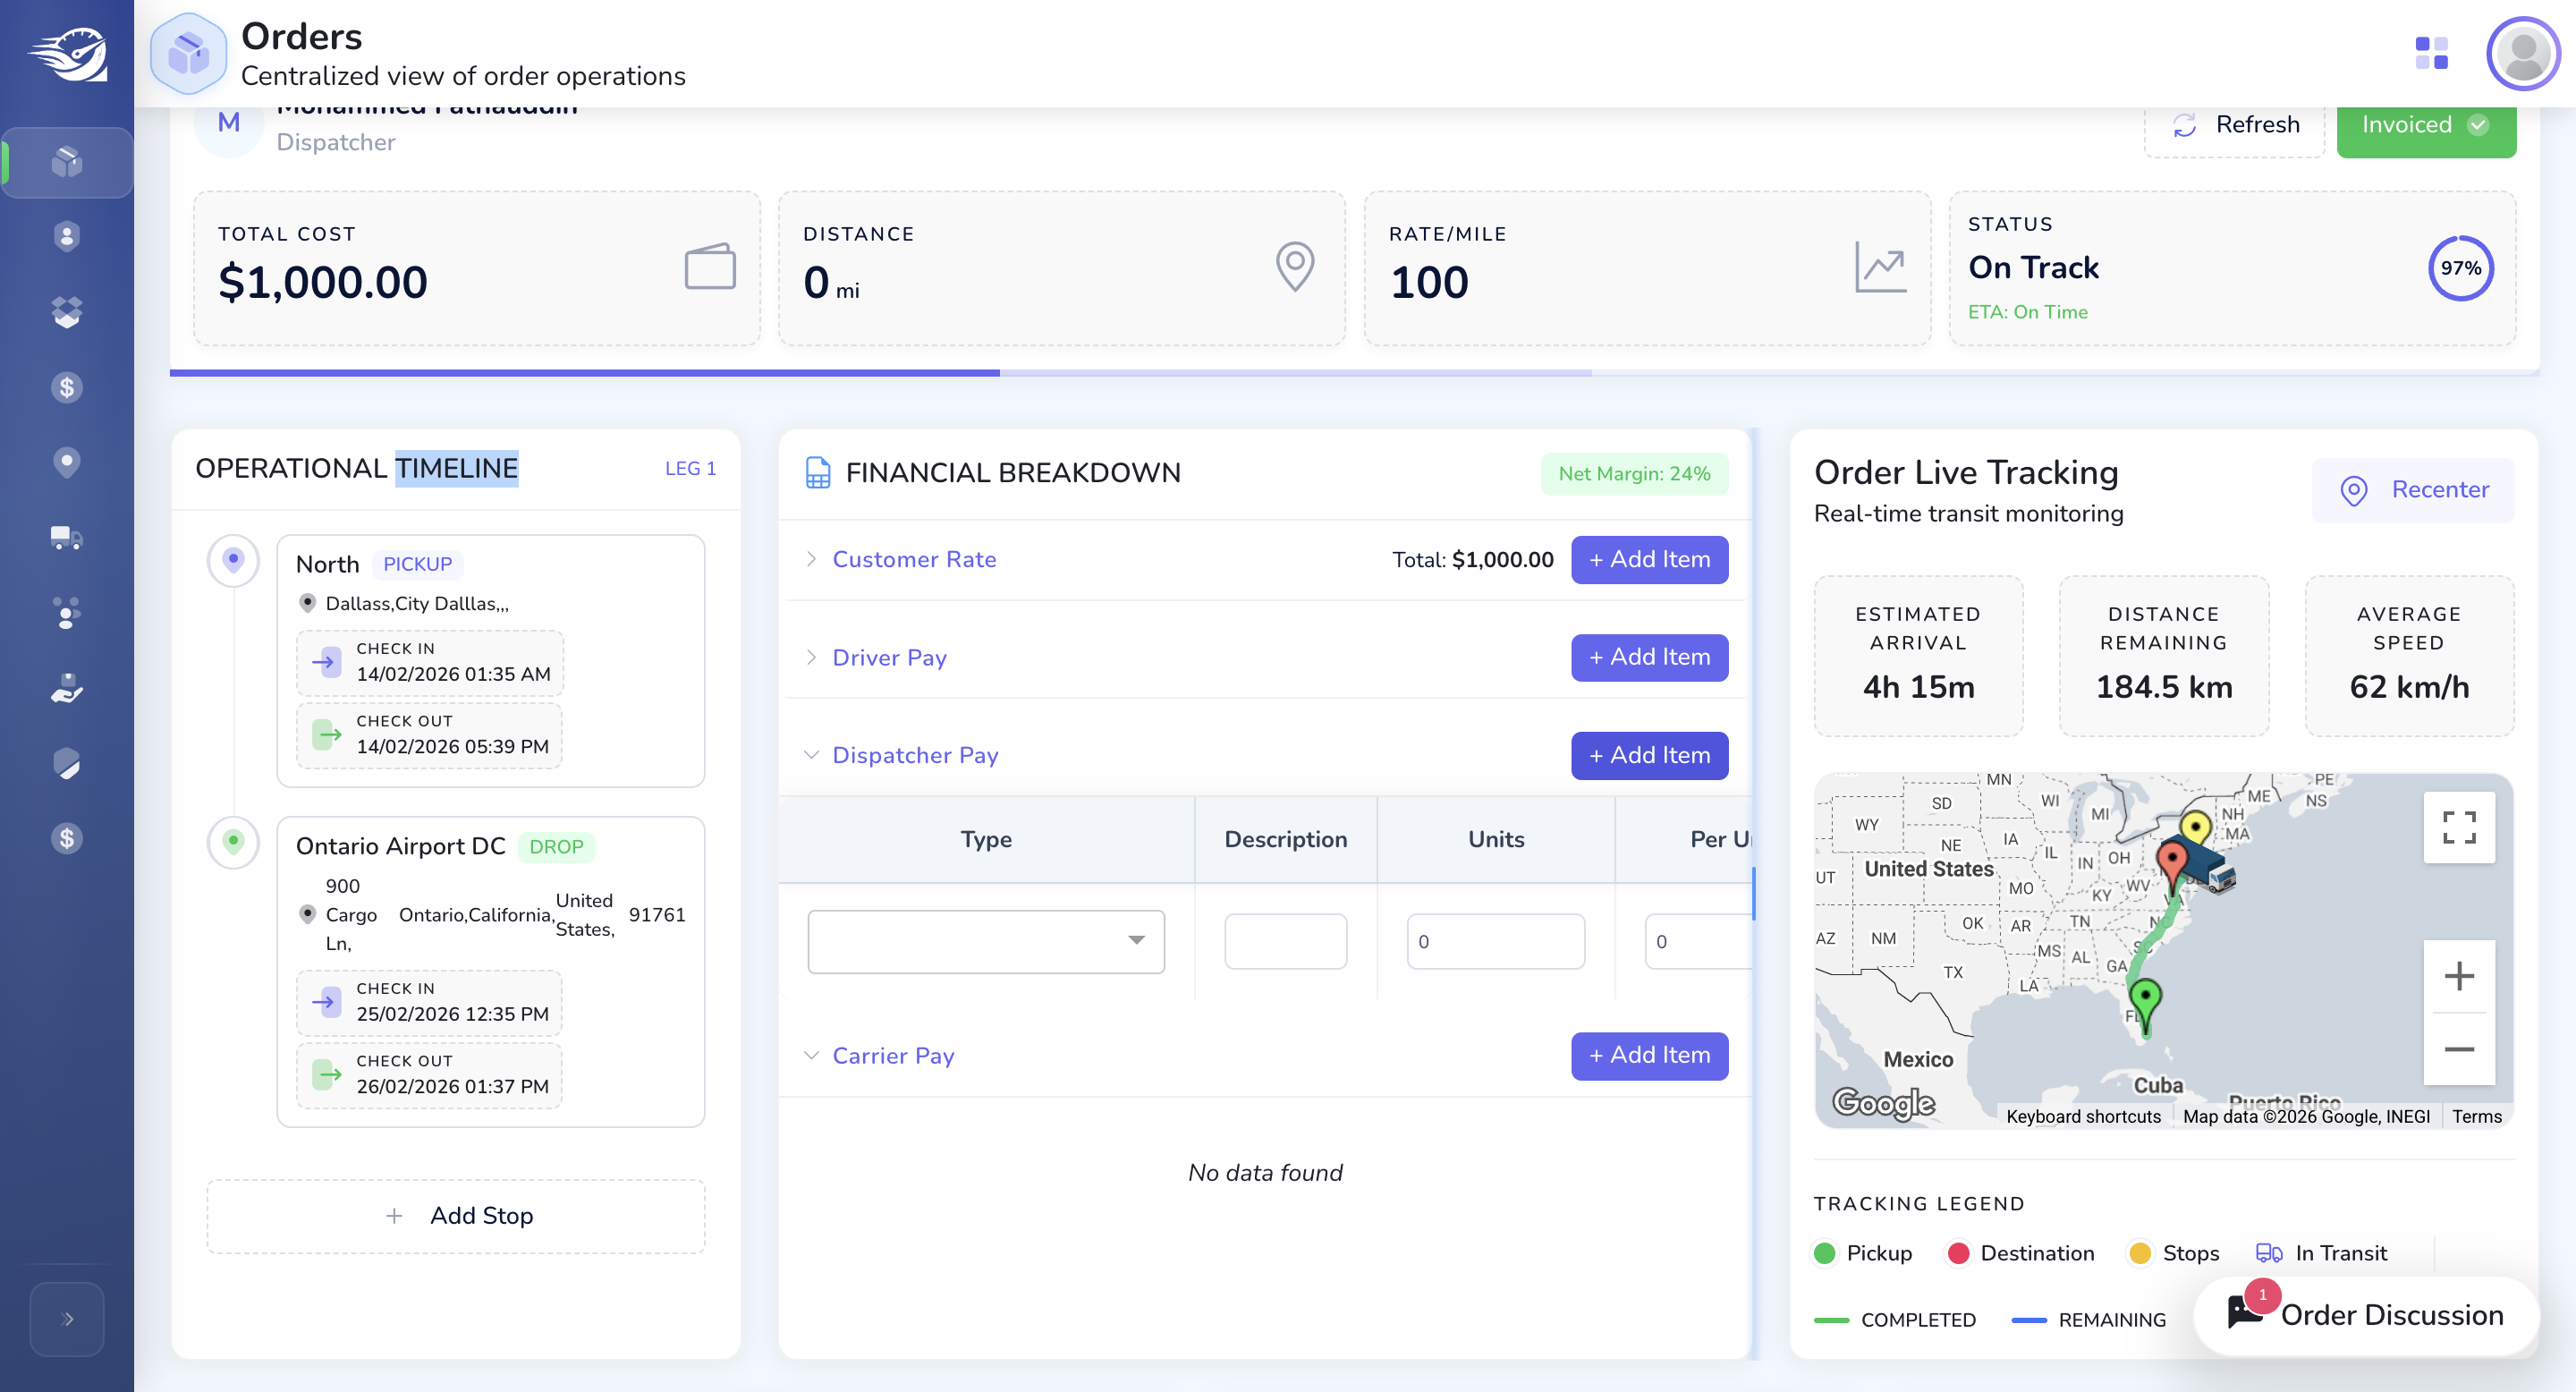
In the operation timeline, we include the pickup and drop-off locations, as well as the check-in and checkout times. In the financial breakdown, any additional rates required from the customer or payments for the deliverer, dispatcher, or courier can be added here.
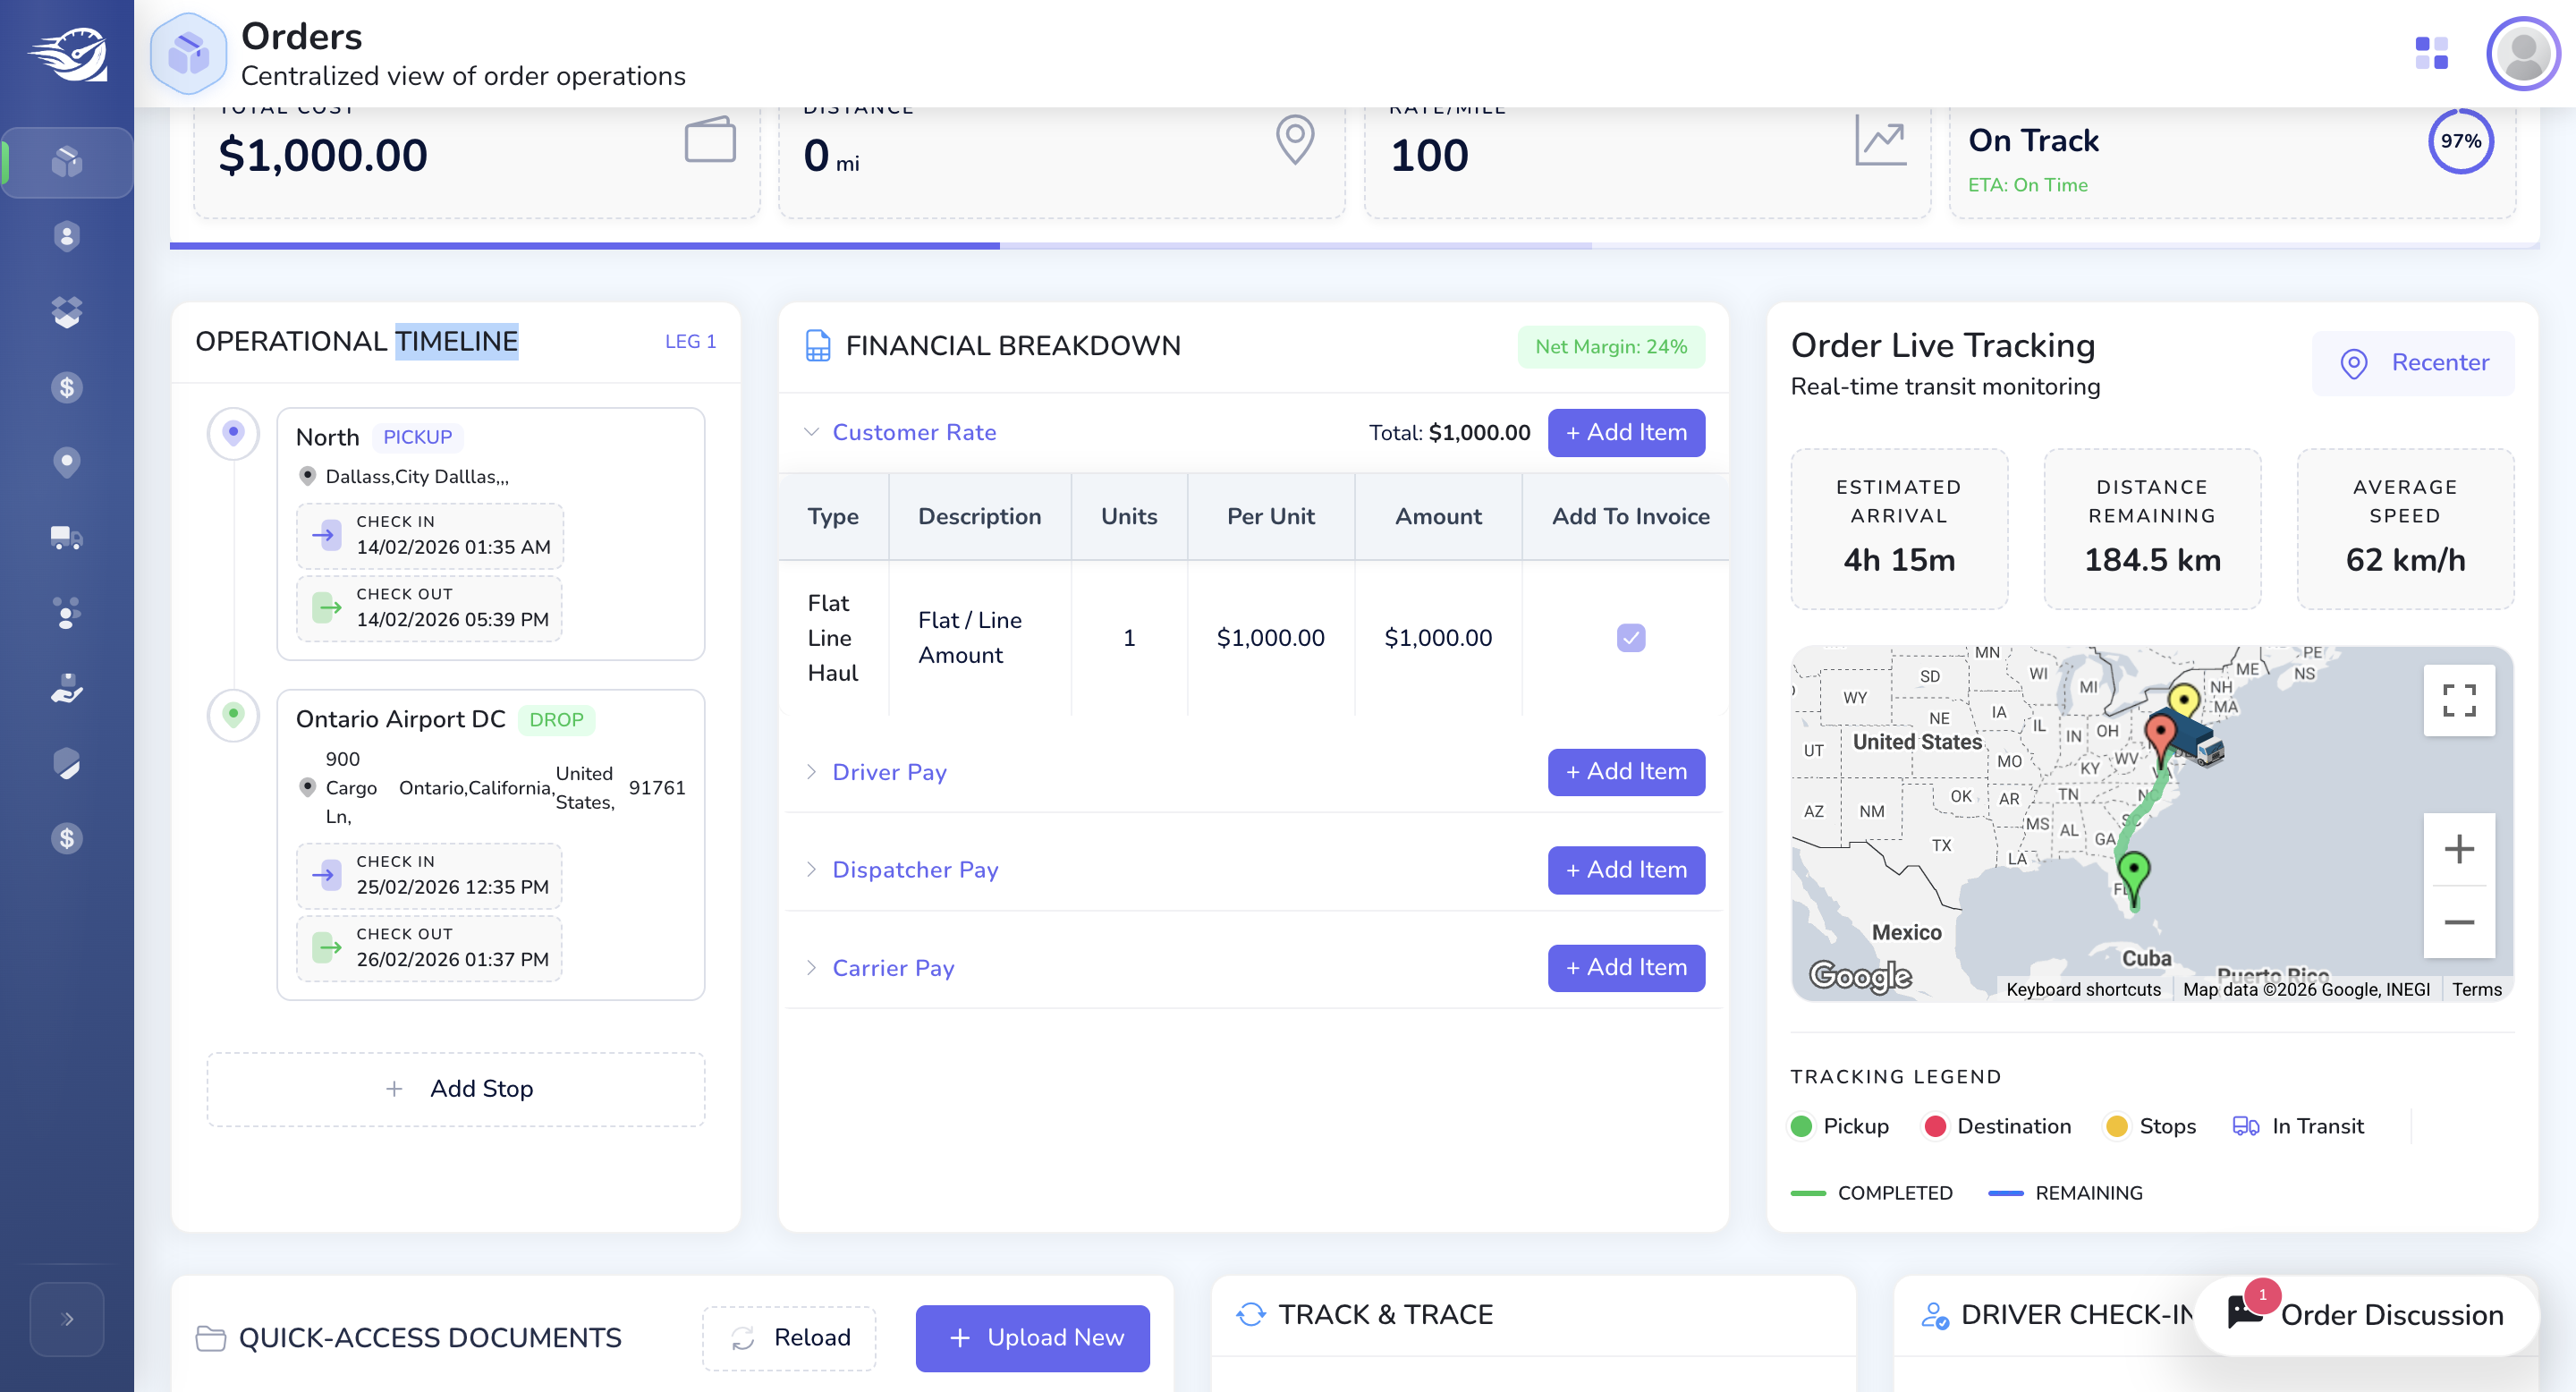
If you click on "Add Item," the corresponding column will be added here.
This entire screen is dynamically configured from the UI perspective.
We can adjust the window here by dragging the container width. Each container on this screen is adjustable and can be fixed according to user preferences.
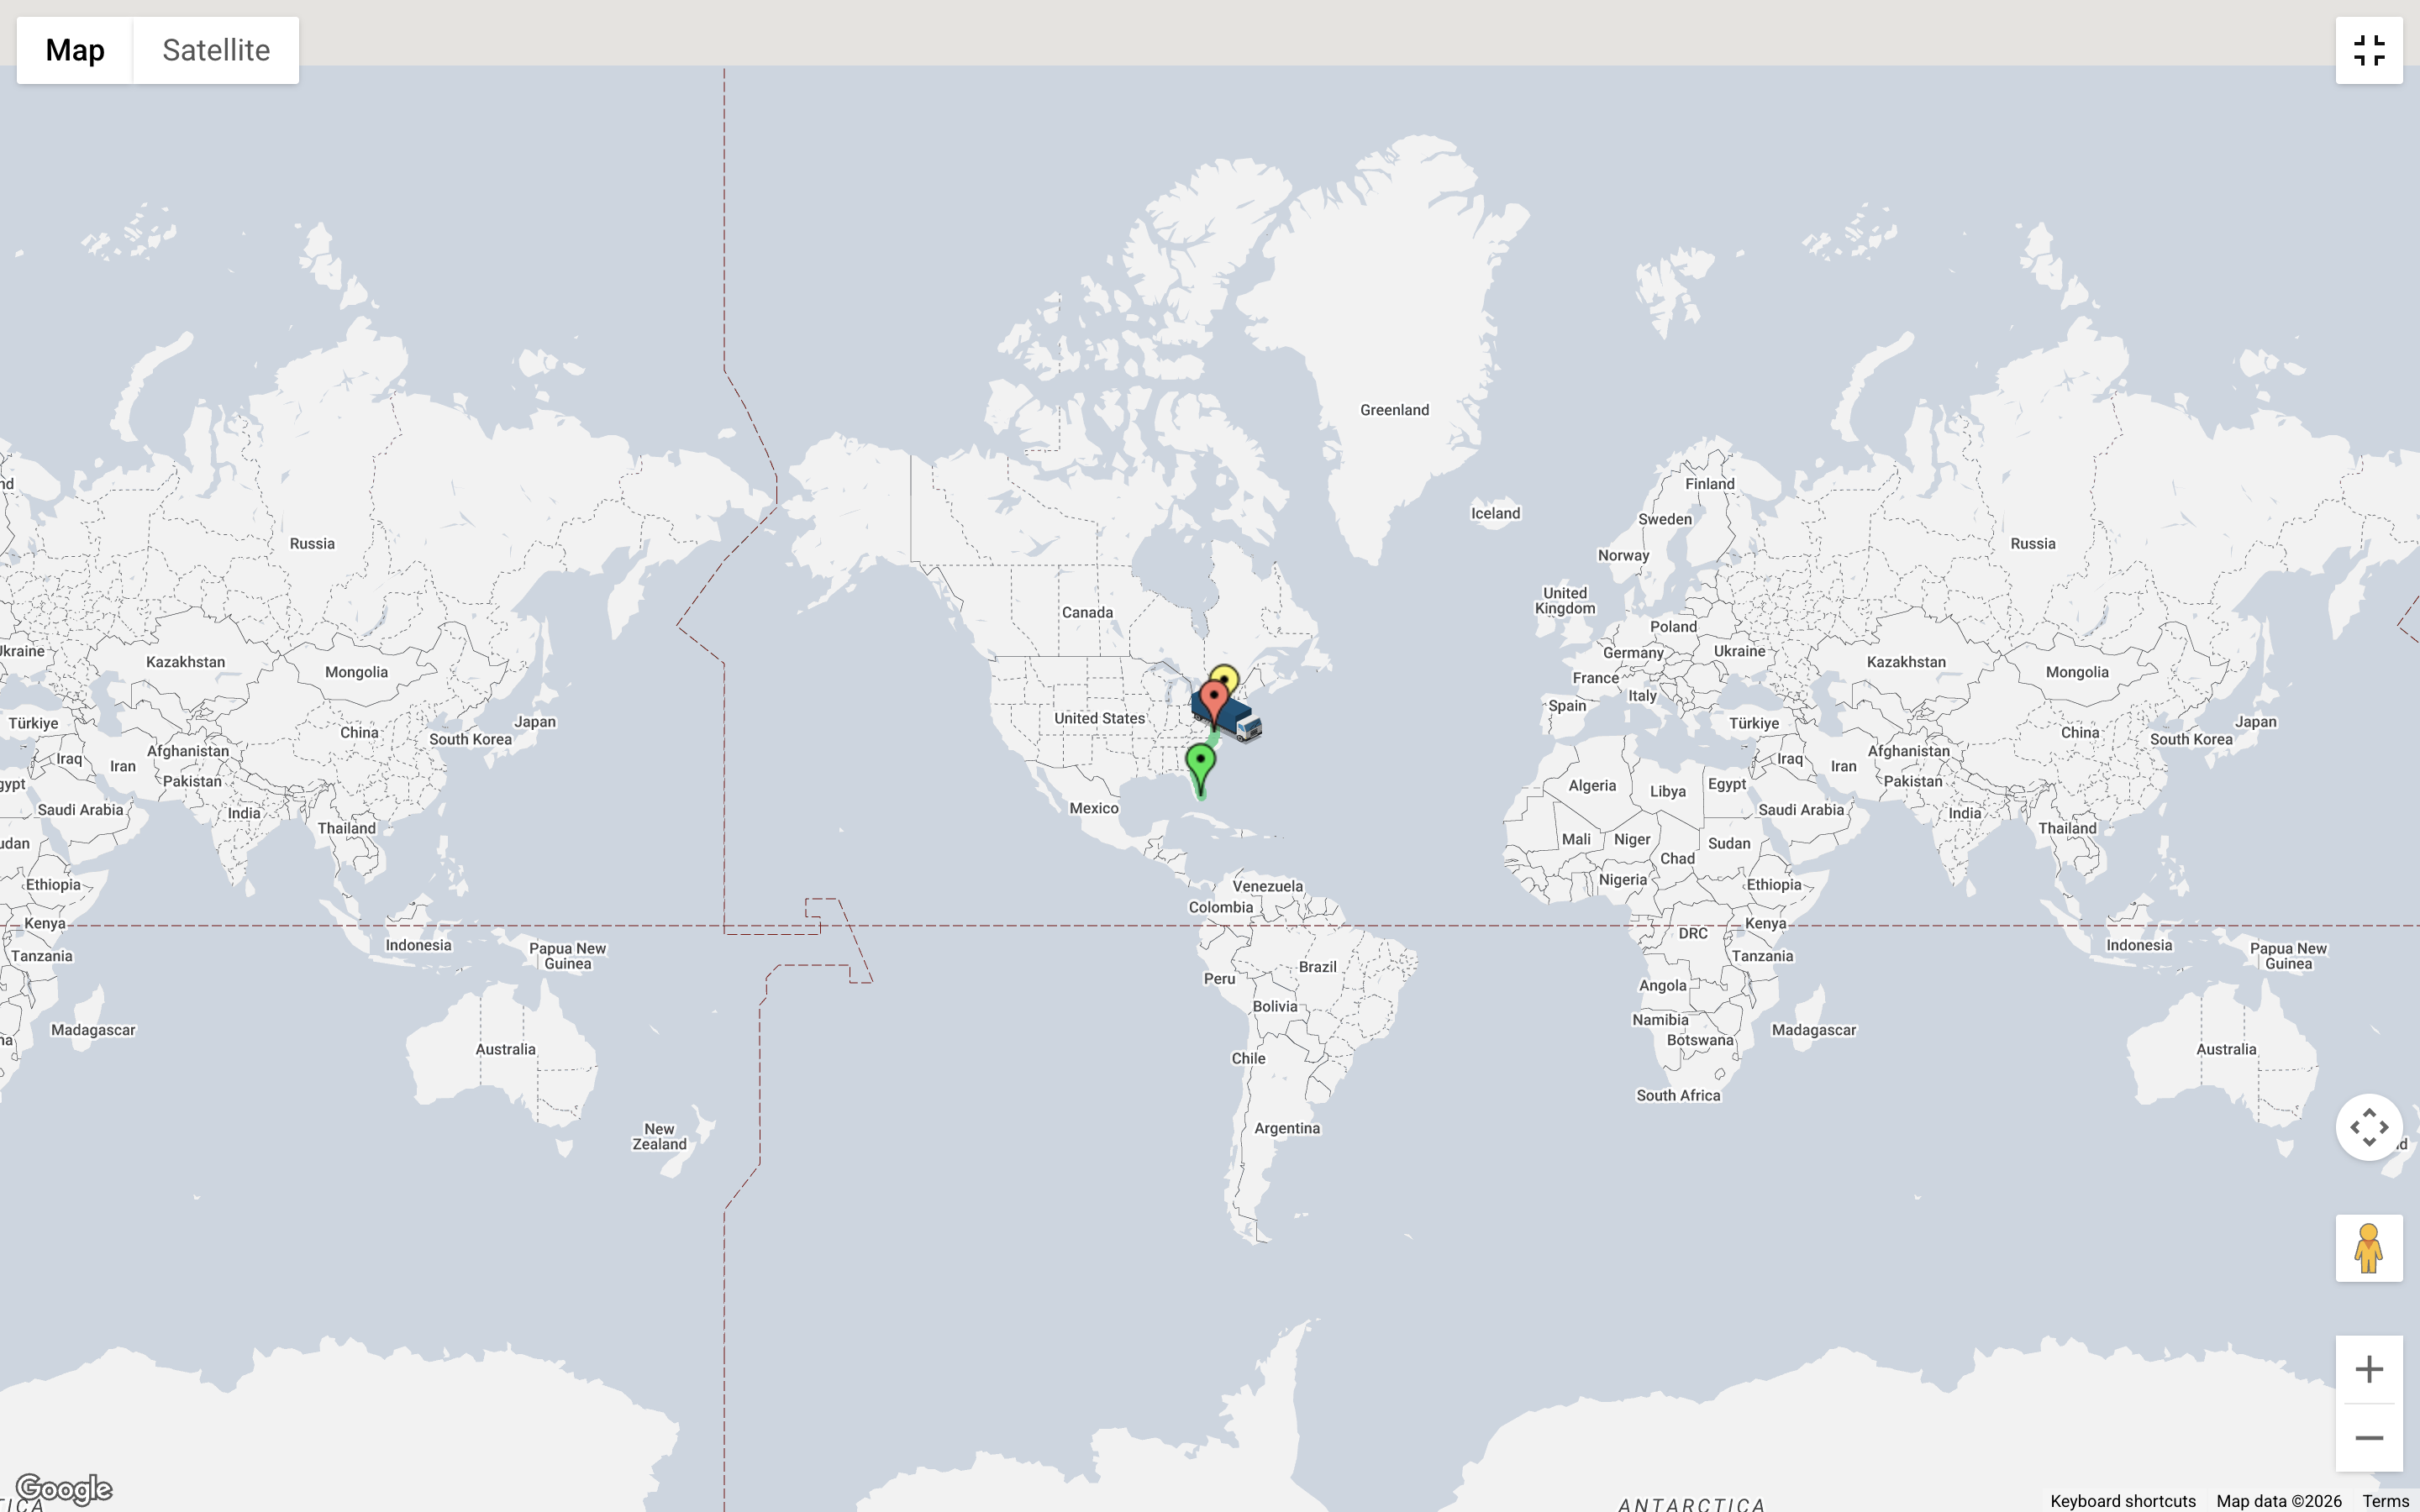
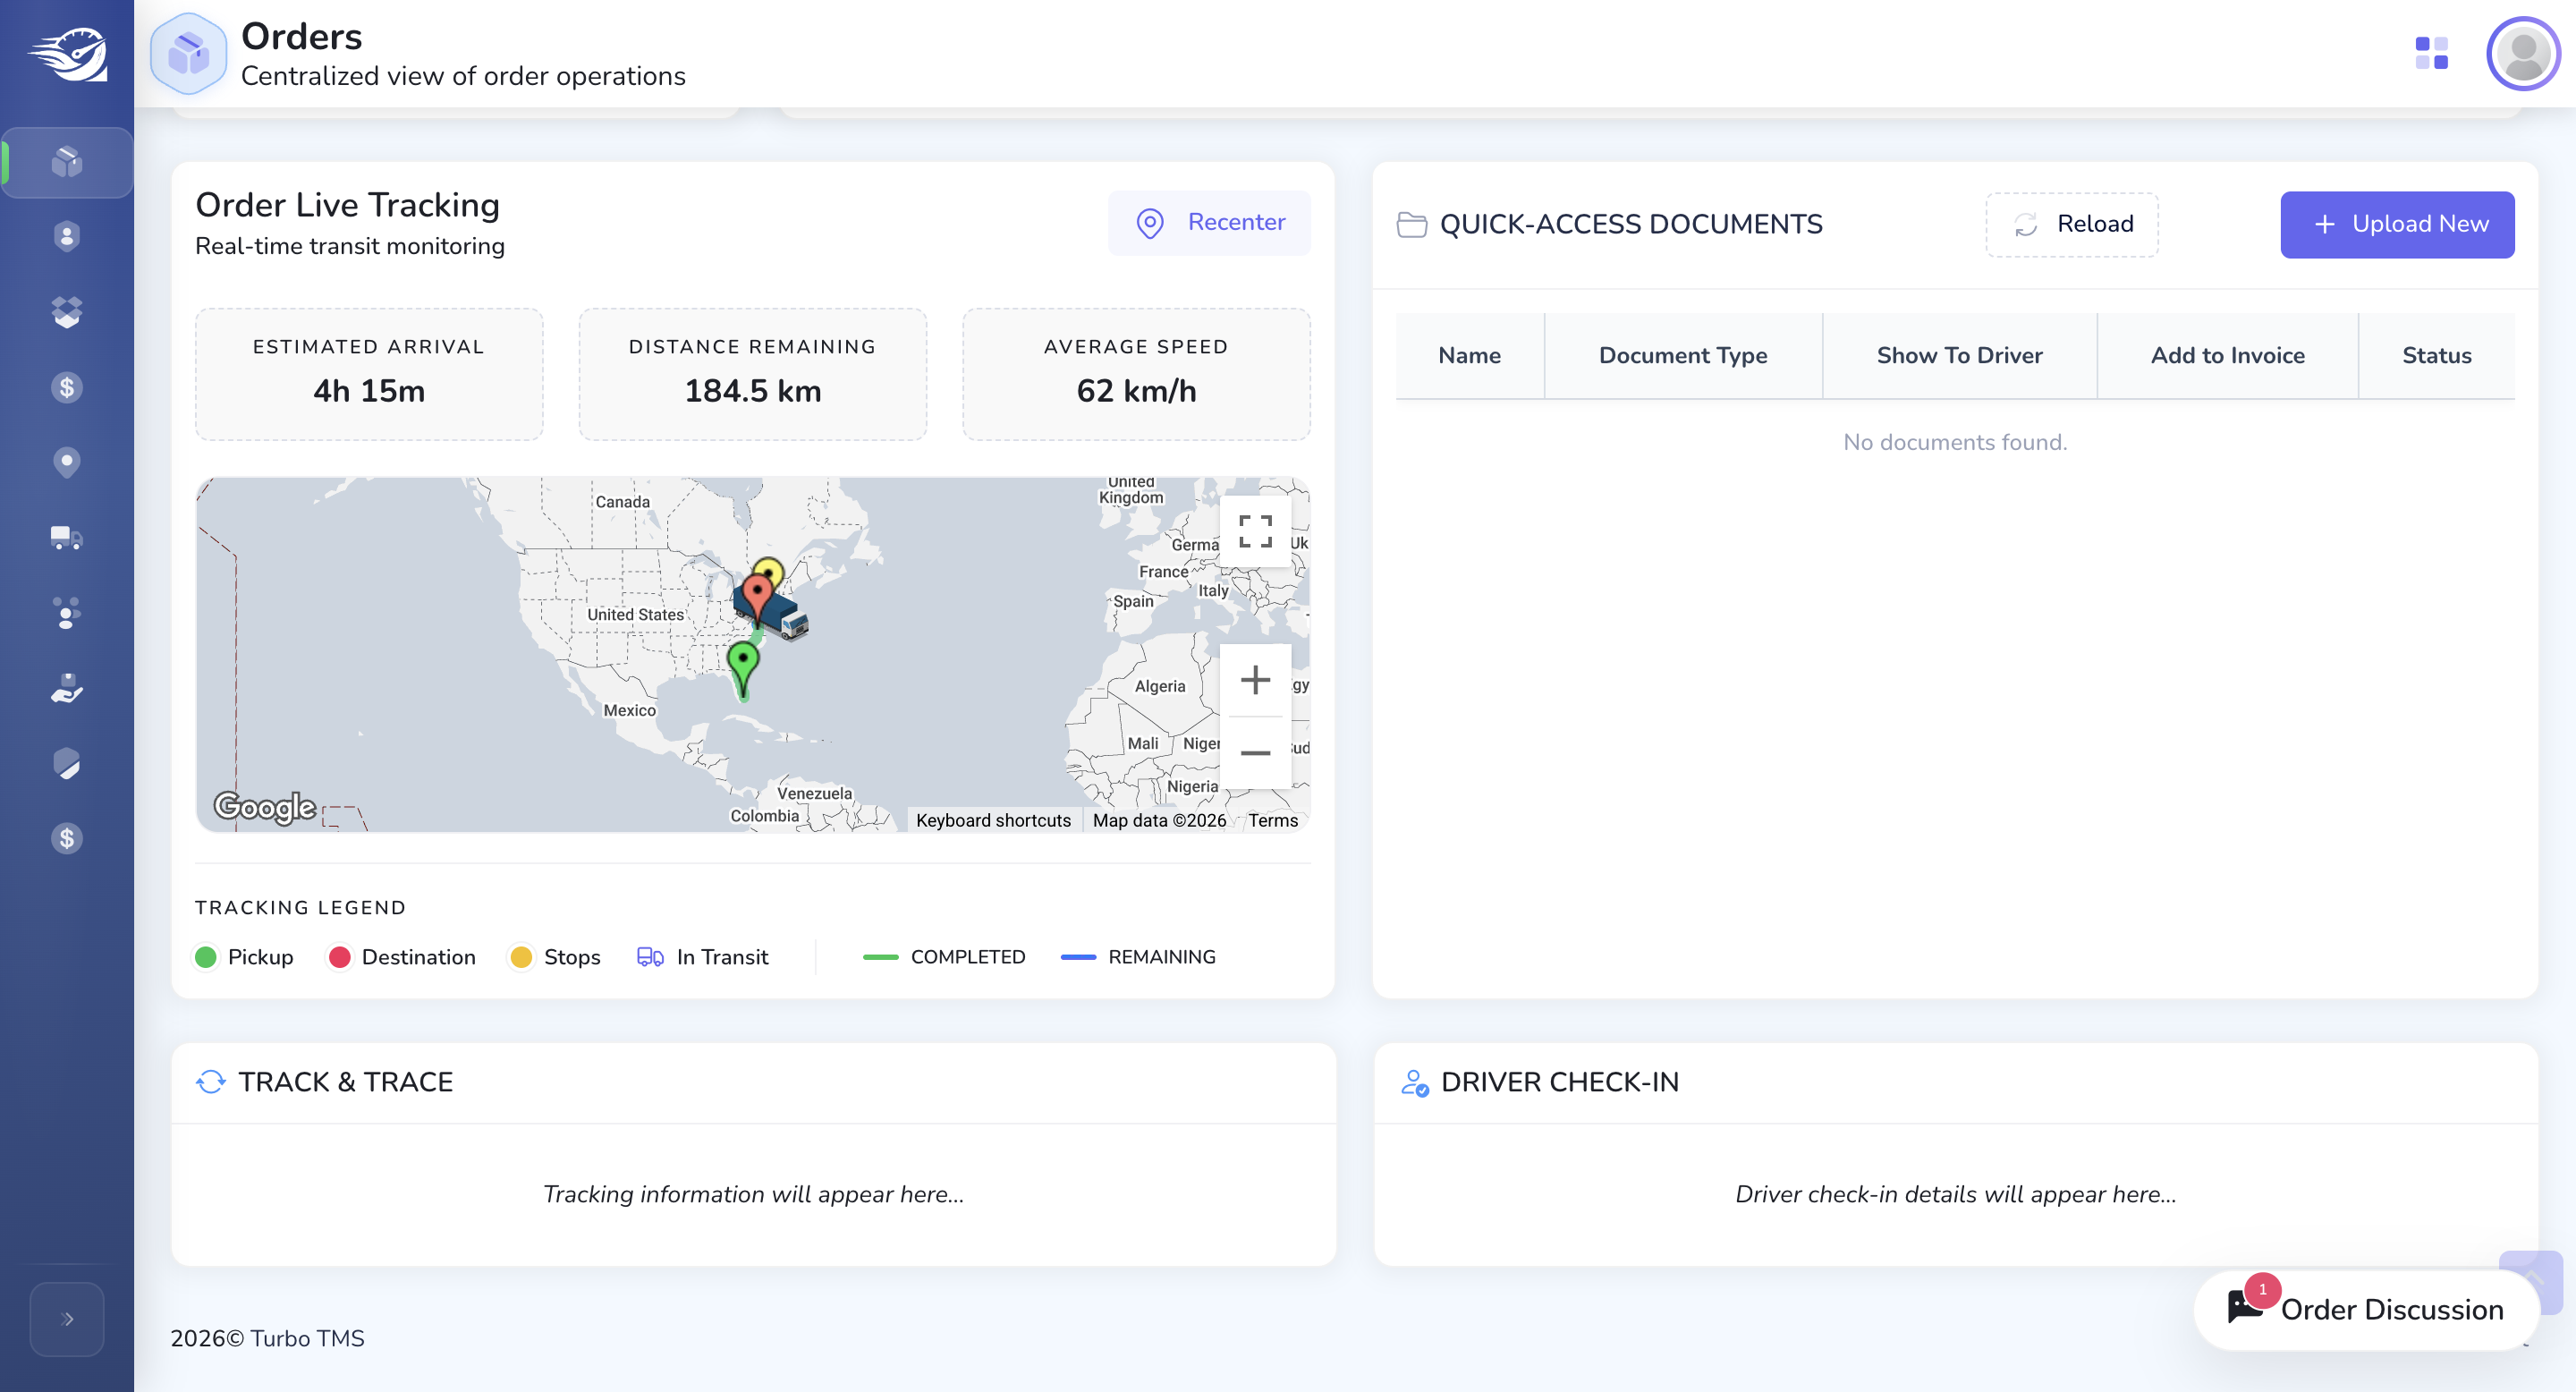
In this live order tracking session, we can see the truck's location. If you click the expanded button, the entire screen will switch to the overview.
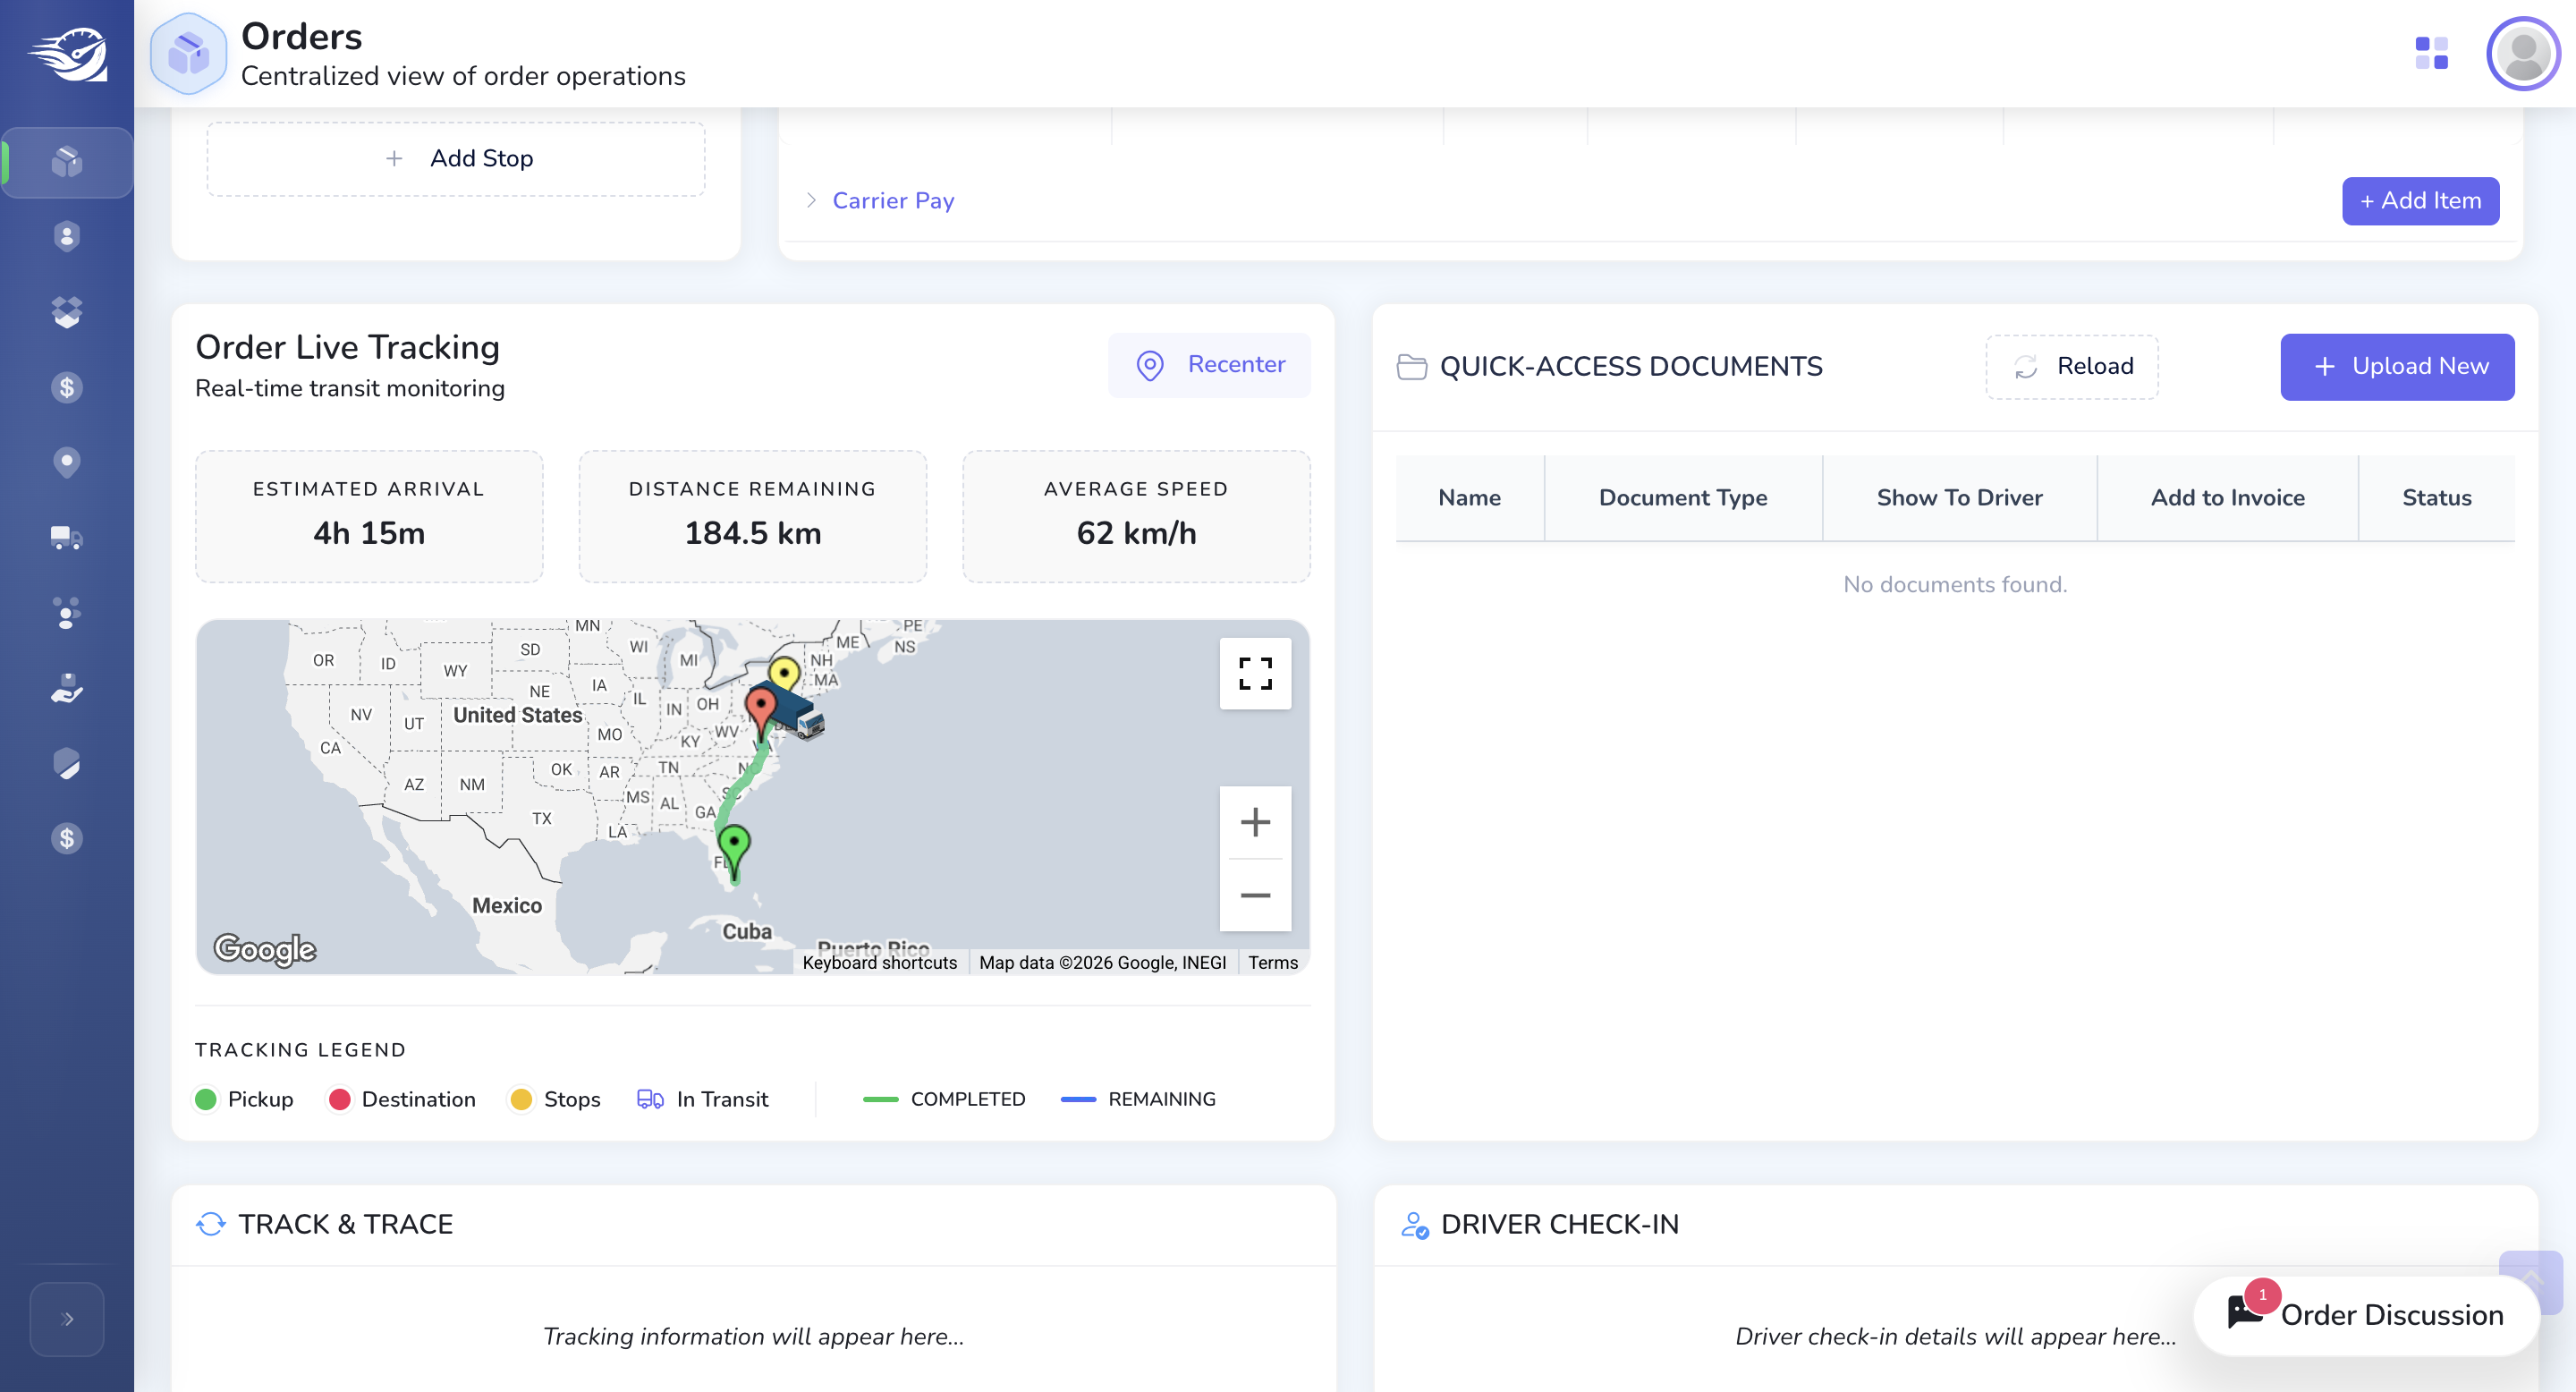
Track and trace will be enhanced in the future to log activity here. Once check-in and checkout are complete, use the truck information from dispatch. If there are any additional stops, all this information will be recorded in the track and trace activity log.
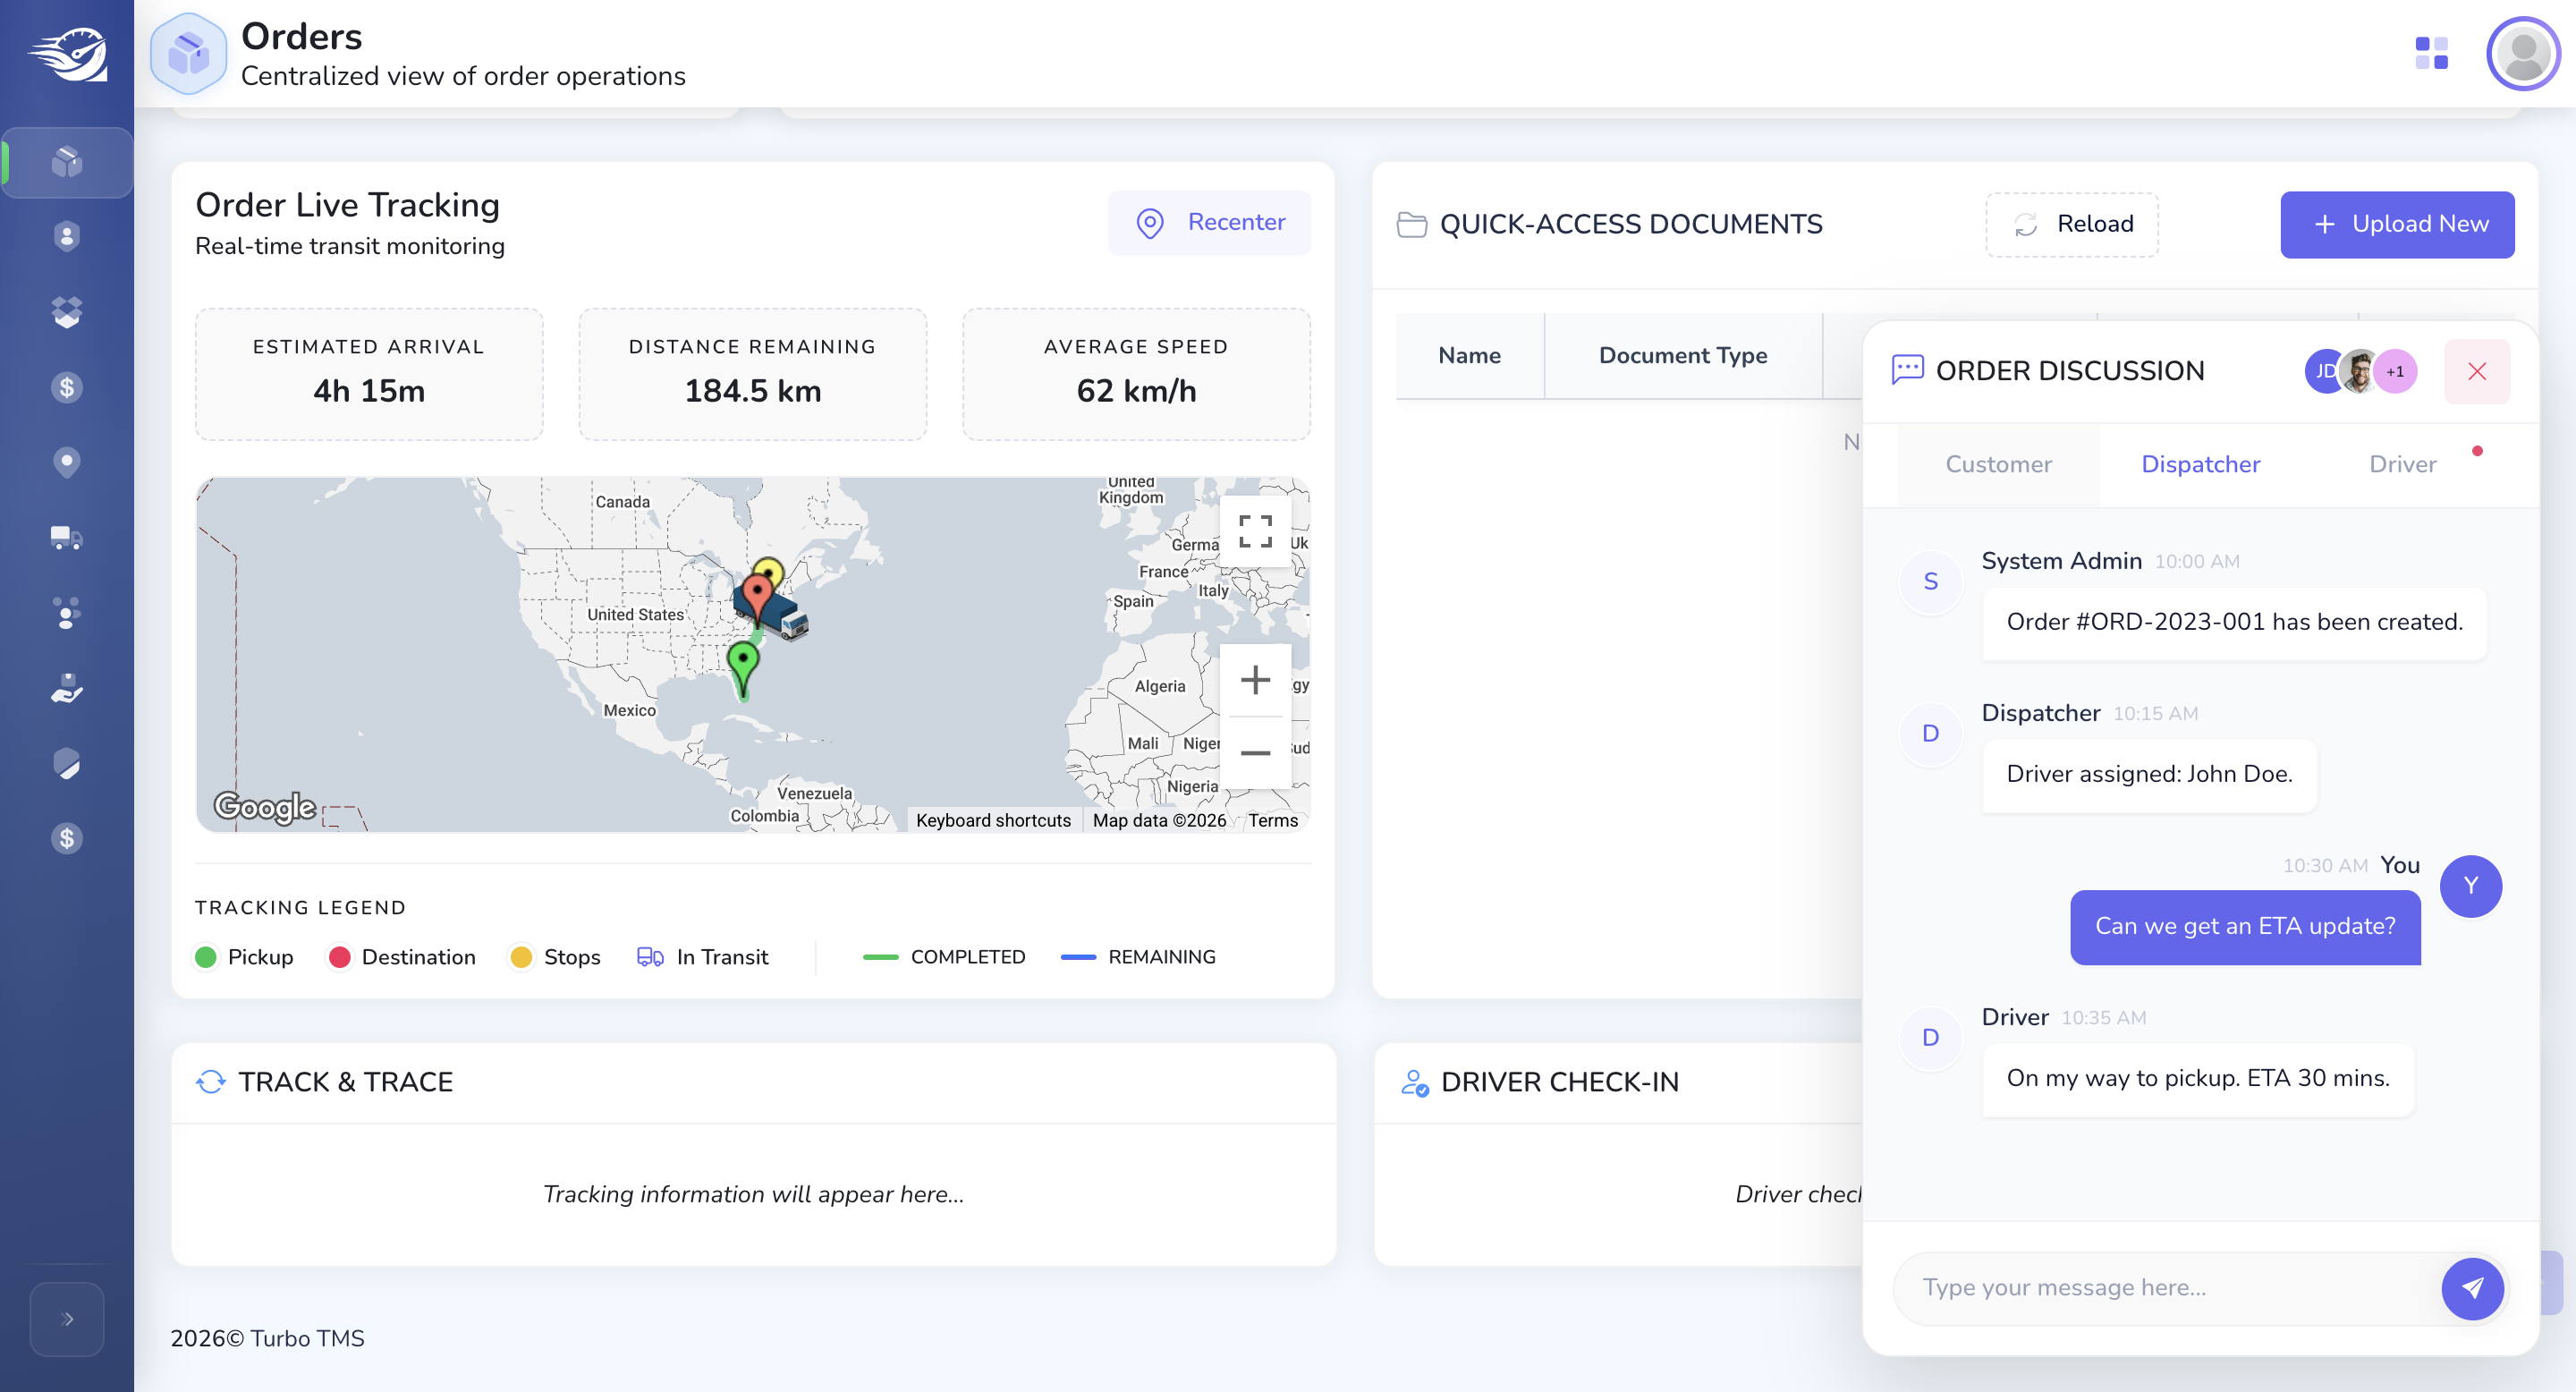
In the future, we will integrate everything with SMS and Firebase notifications to improve communication channels and workflows.
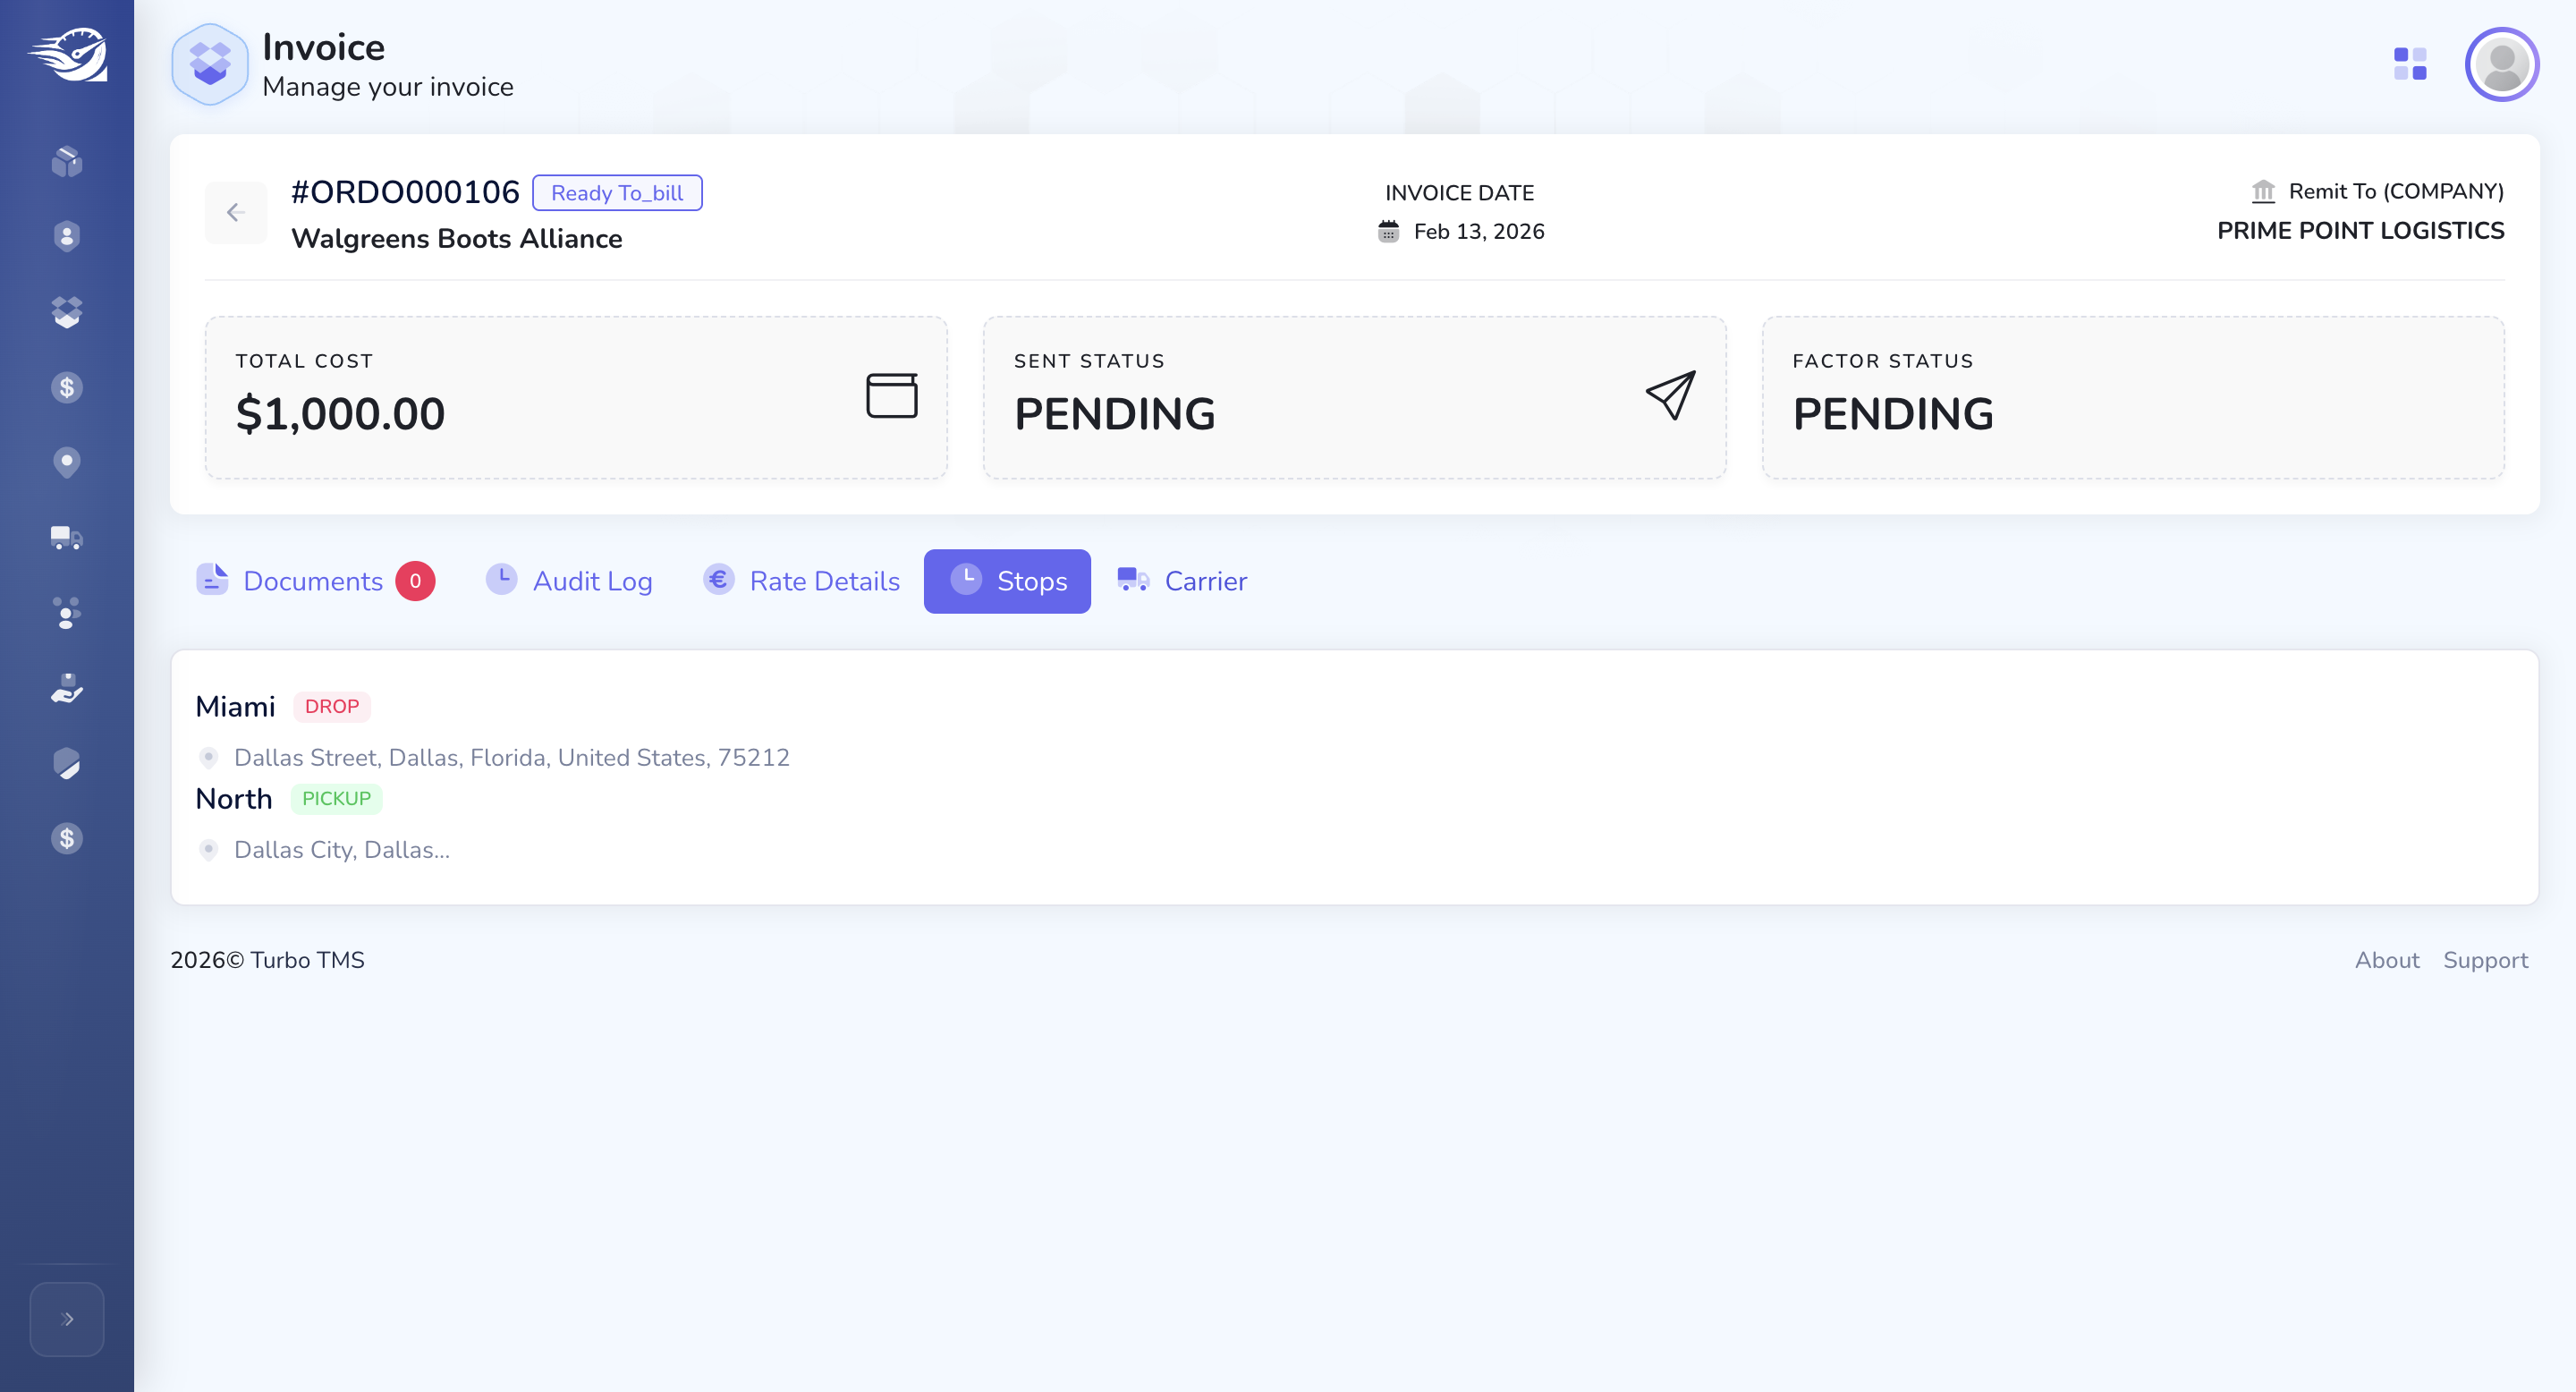
Once an order is invoiced, all relevant information appears on the invoice screen.
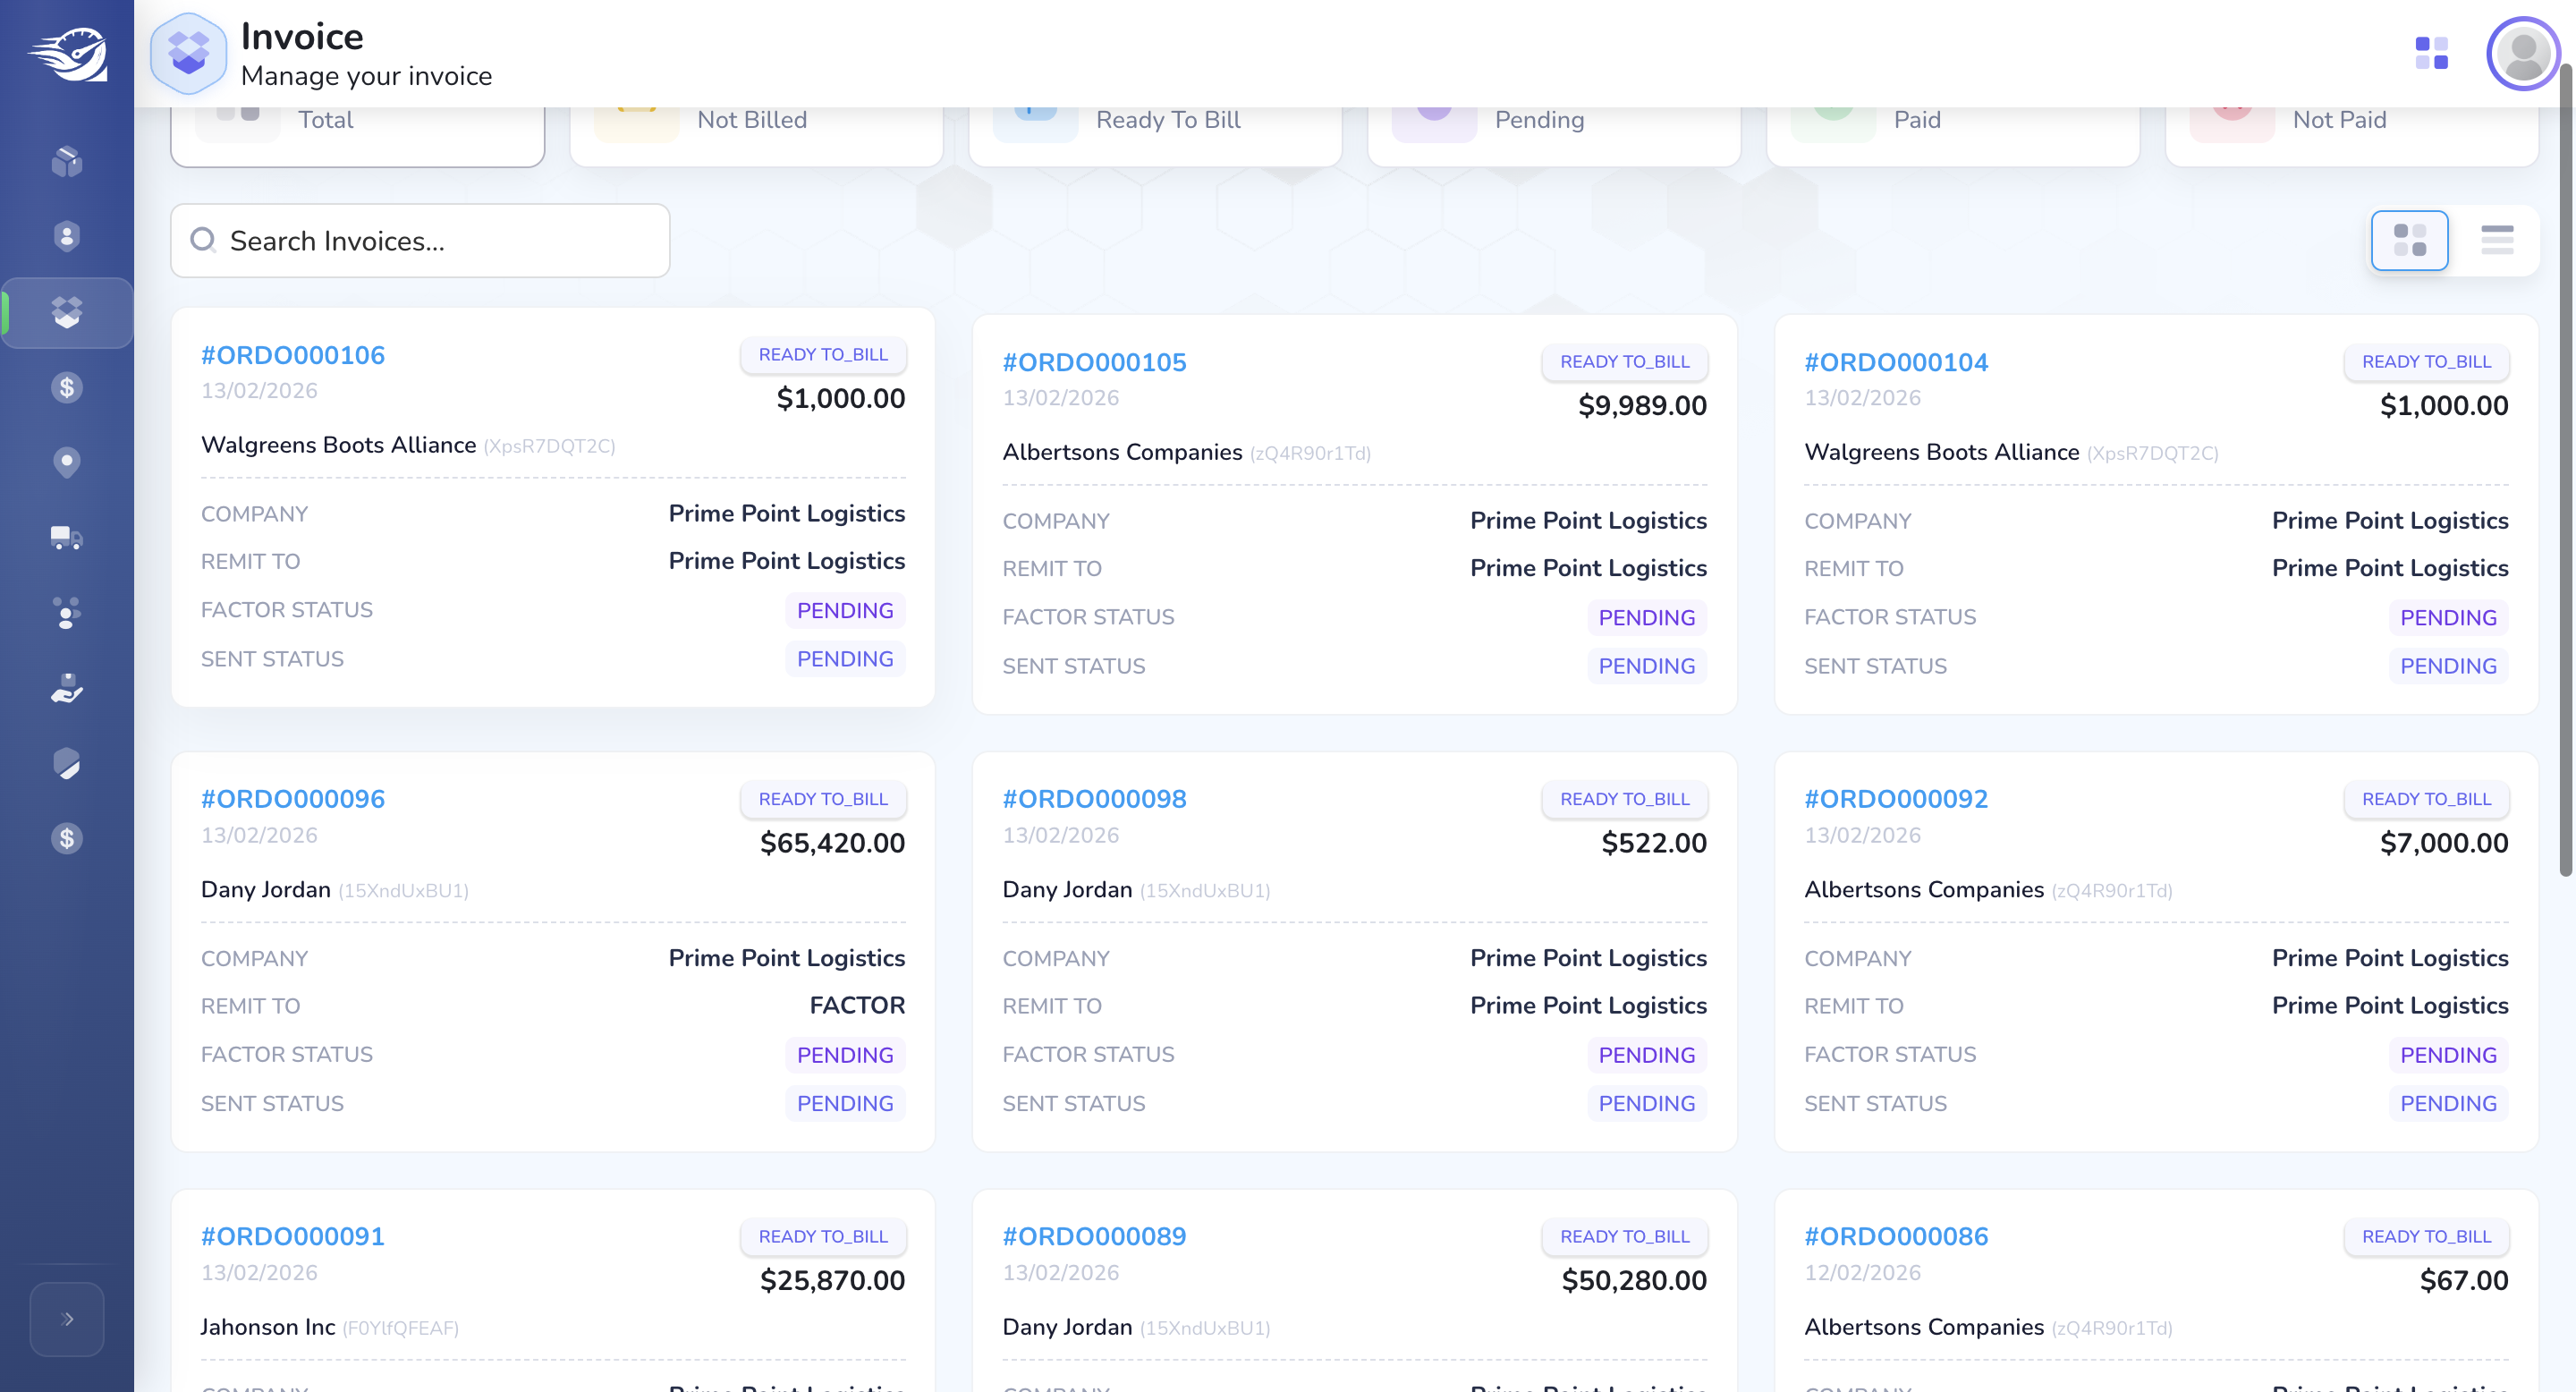
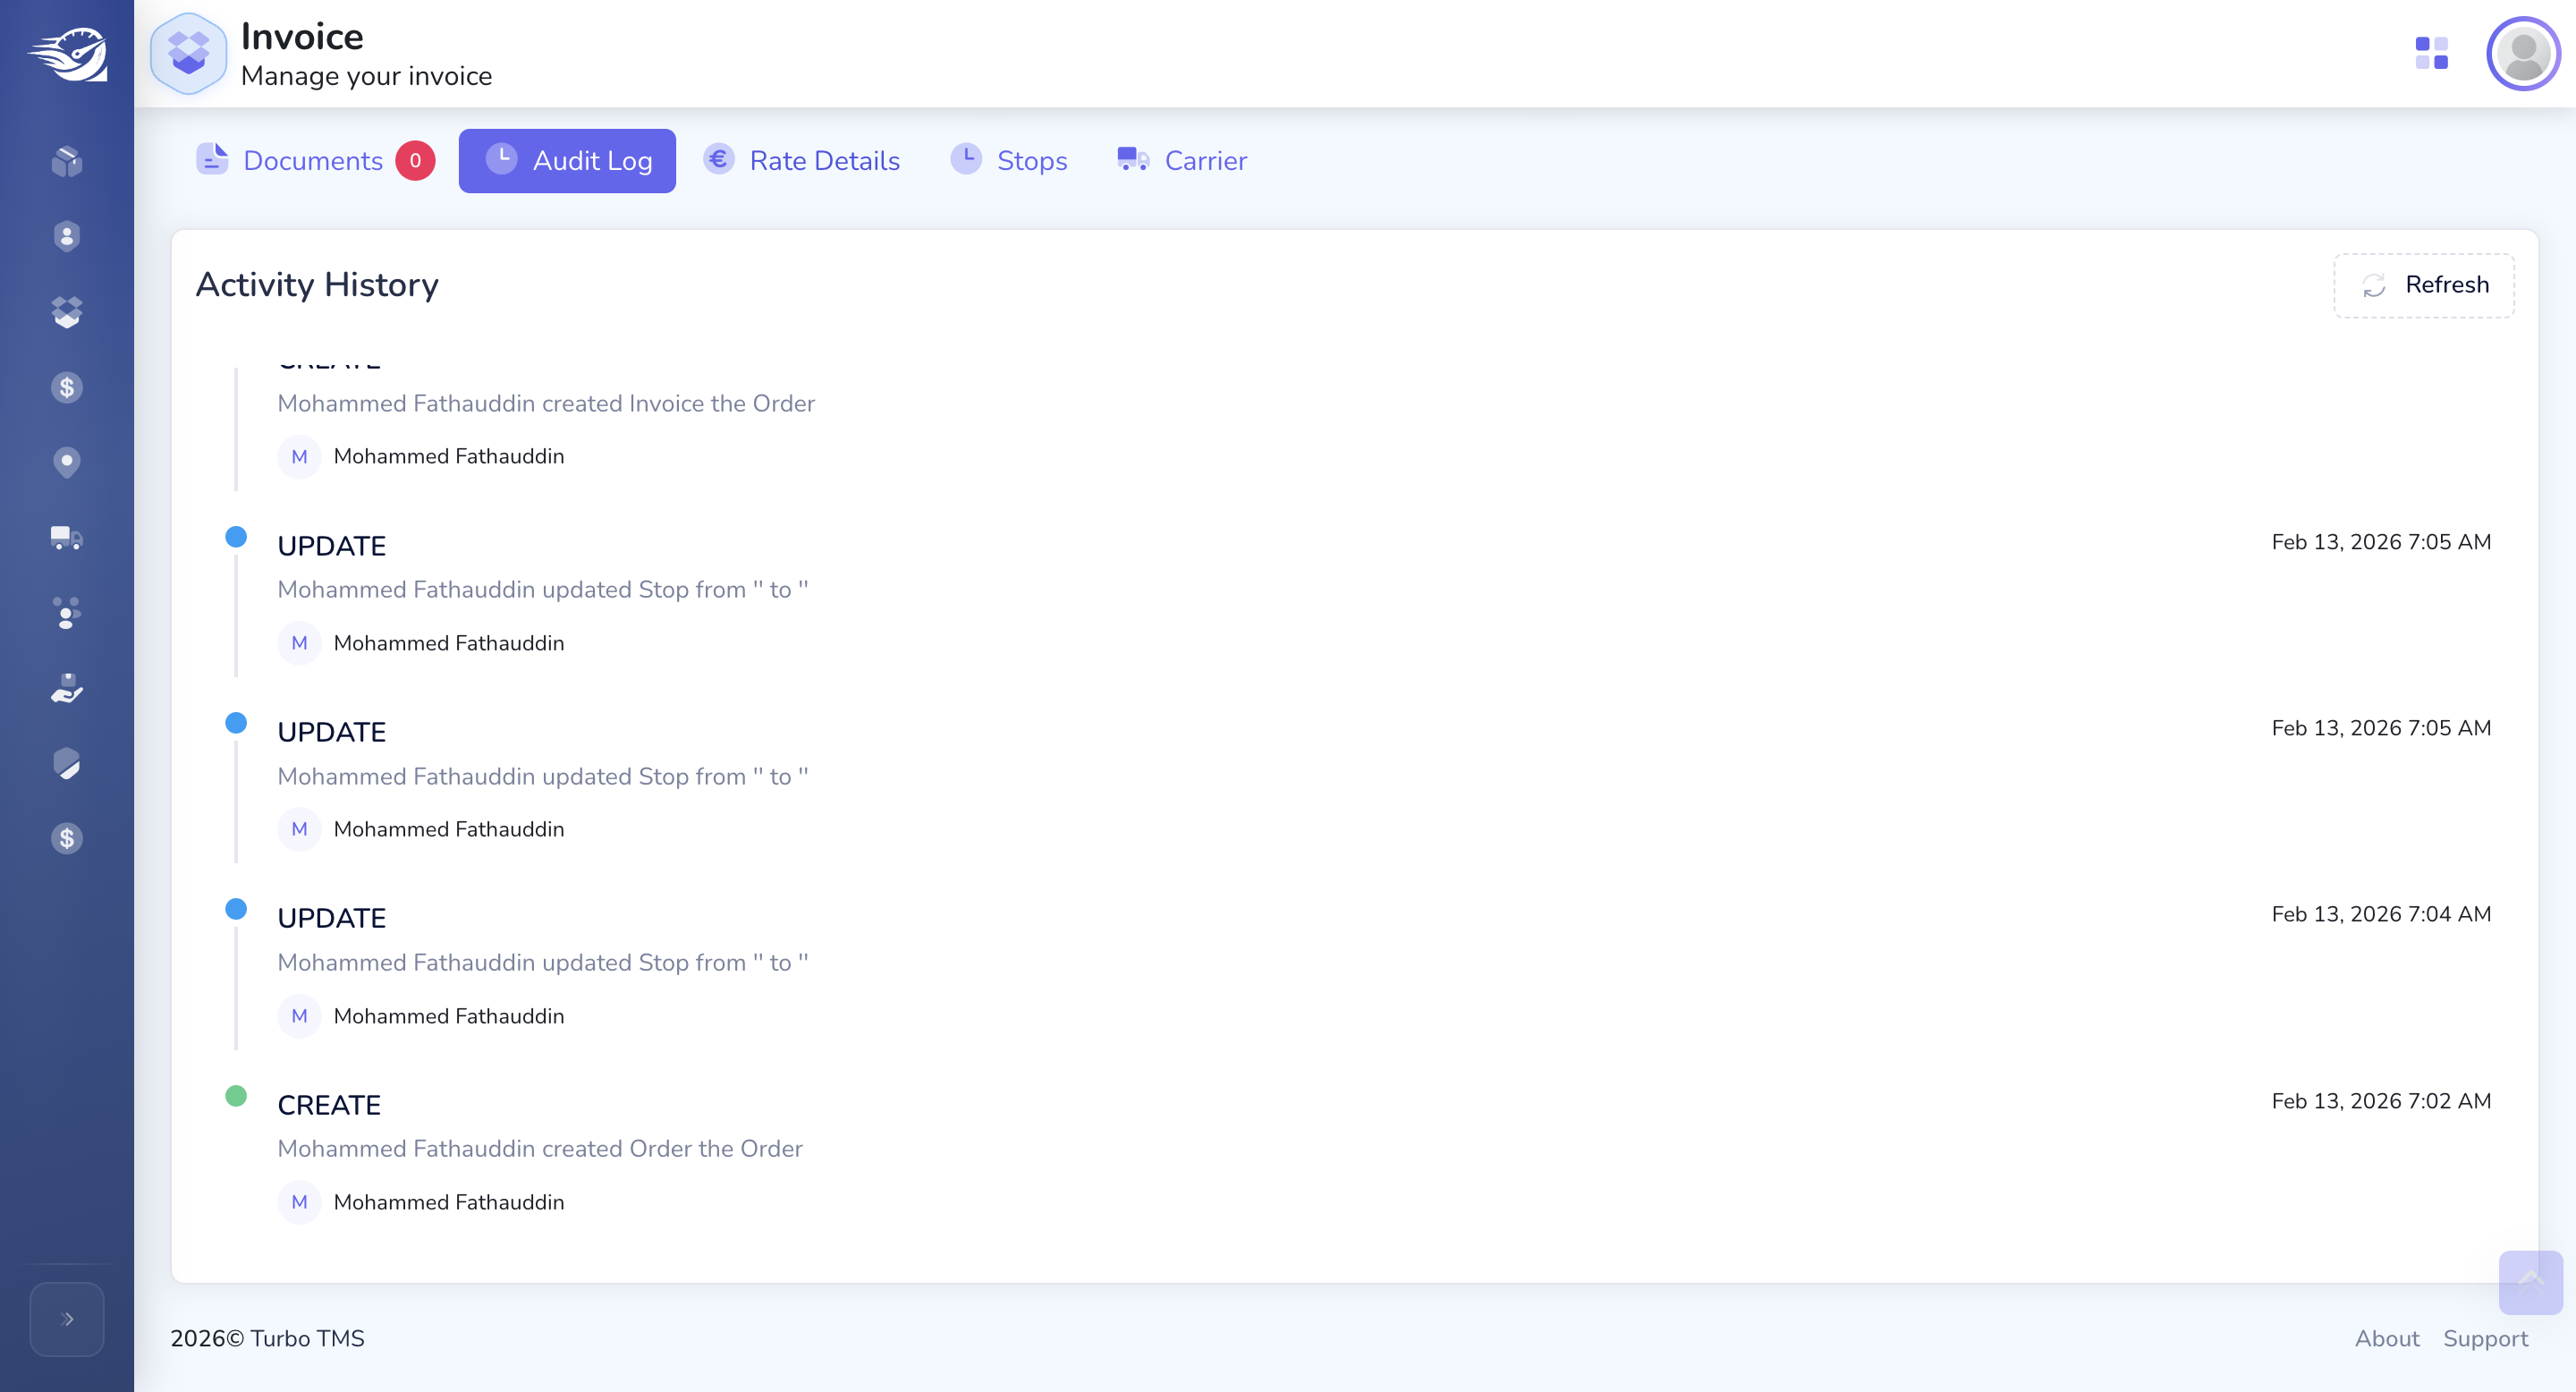
We have the total payment. Documents that were attached, along with the activity log, will all be tracked in respective Order Invoice Detail screen.
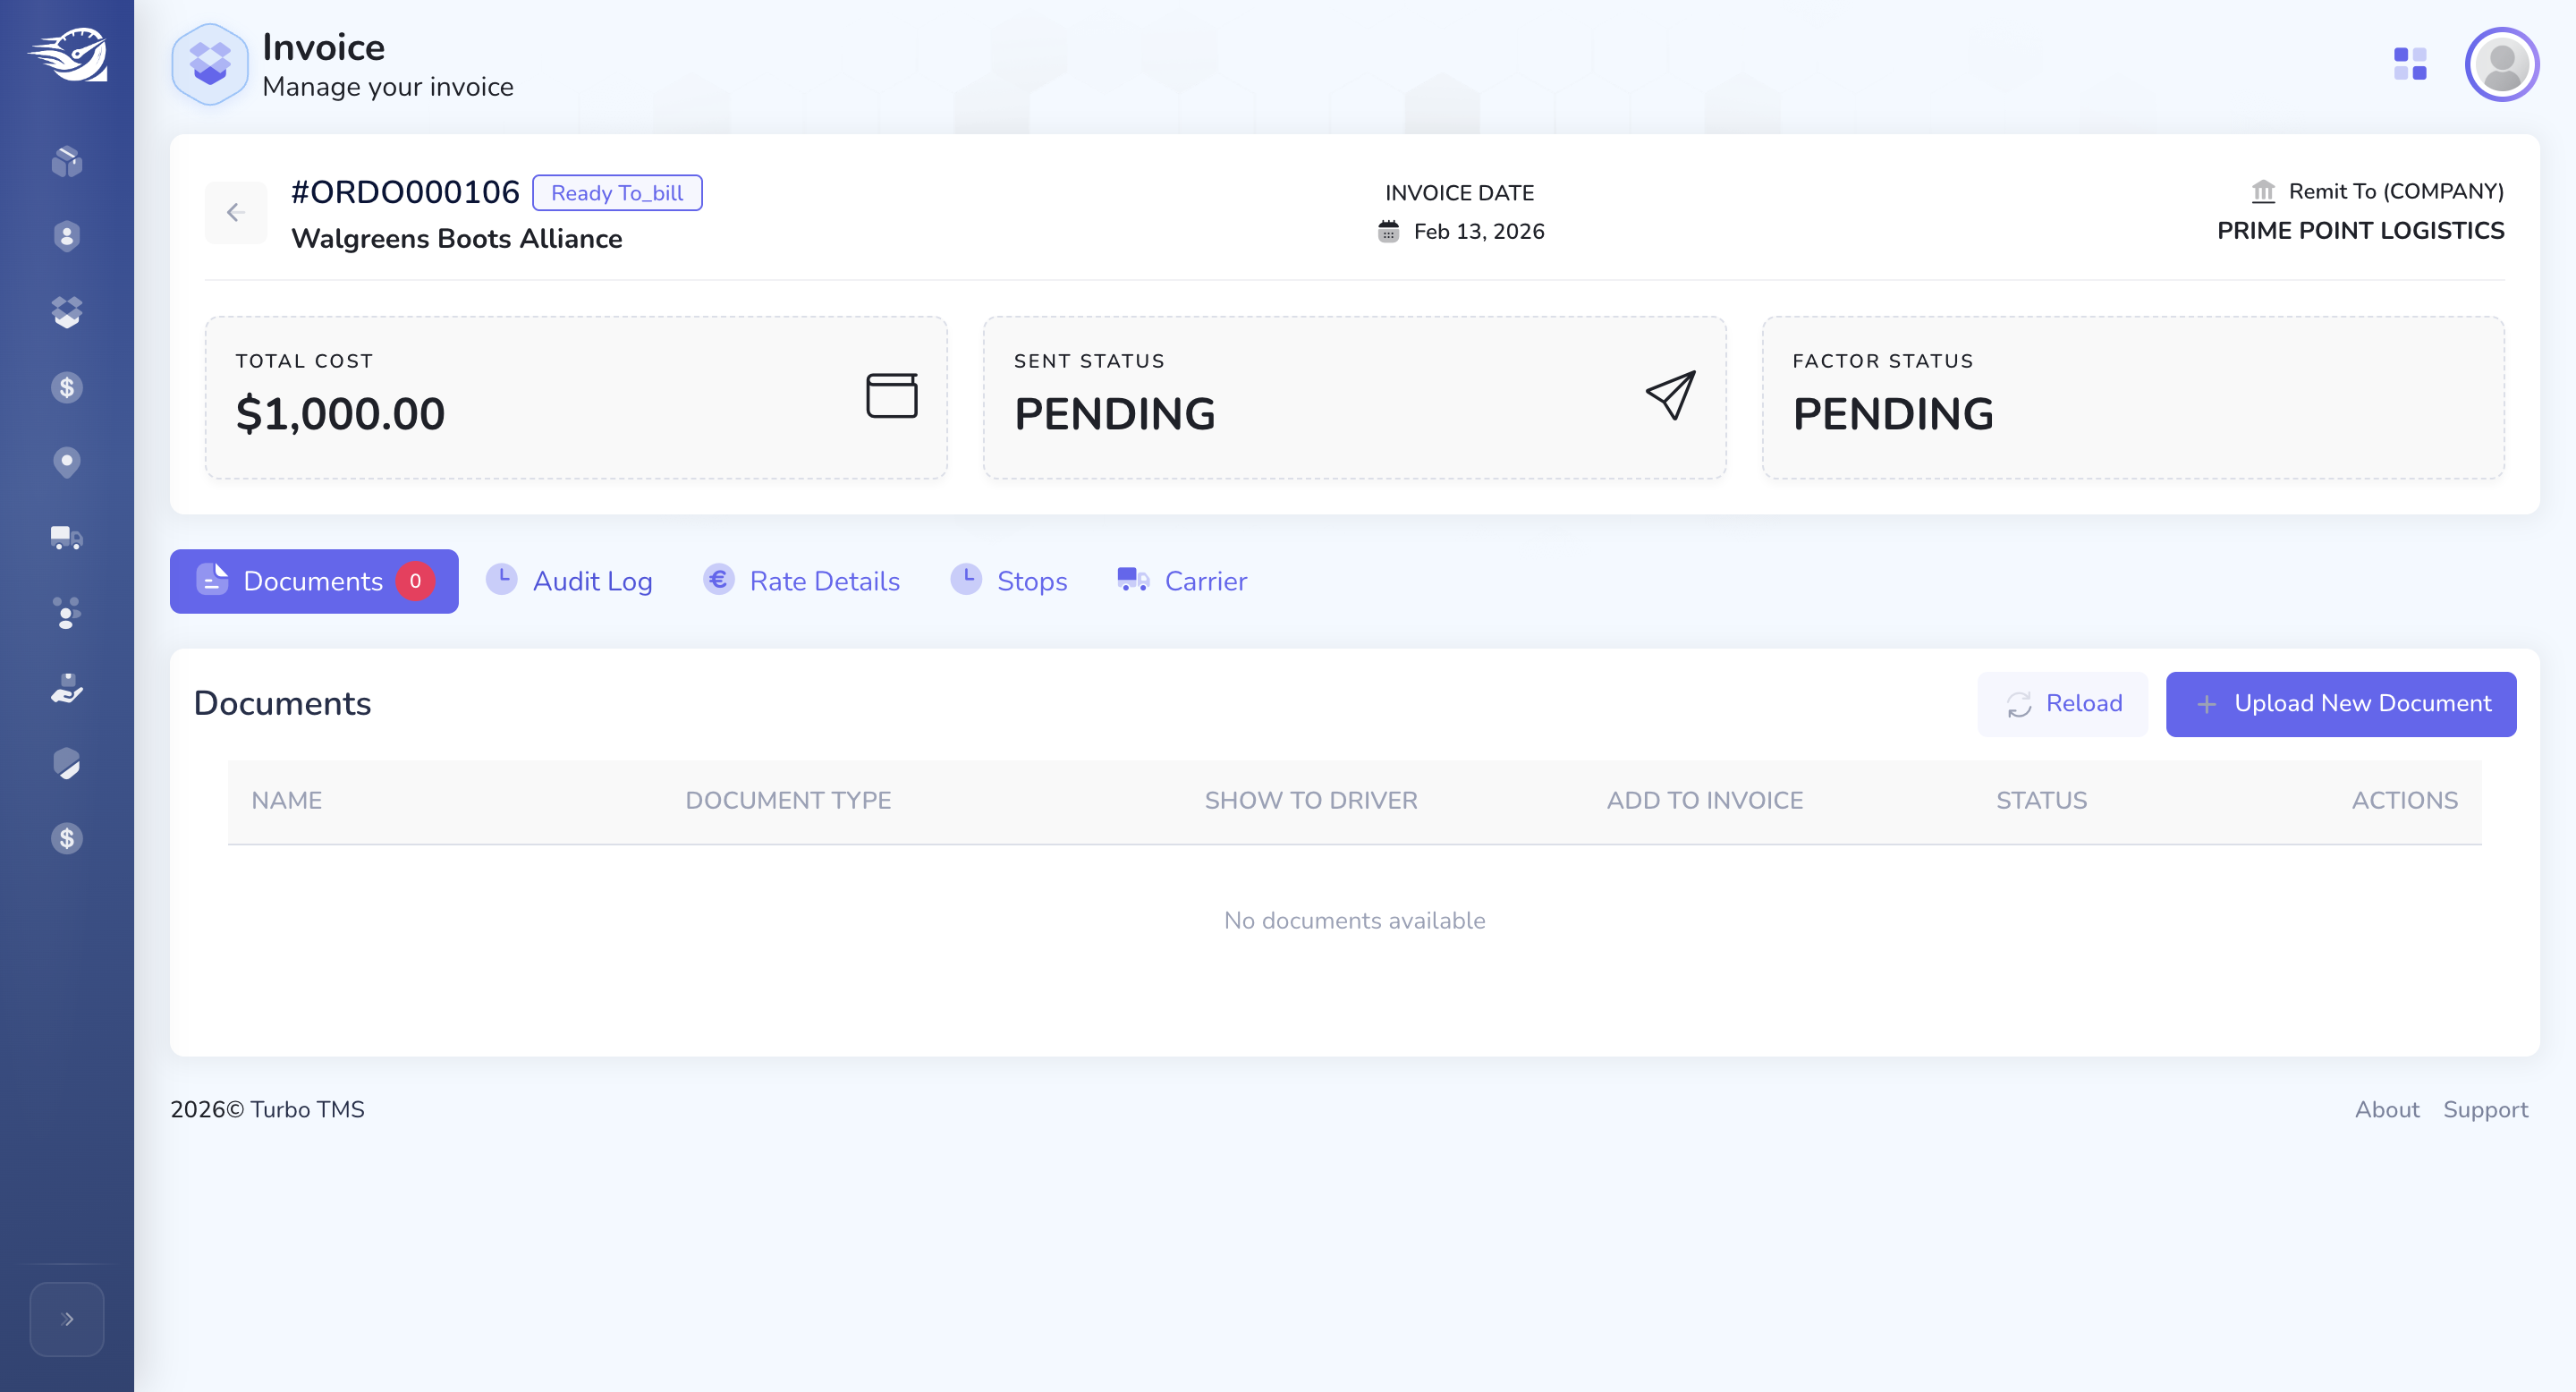
The rate information provided by the broker will also be updated here. Stops and other details will be updated, and the carrier information will appear here.
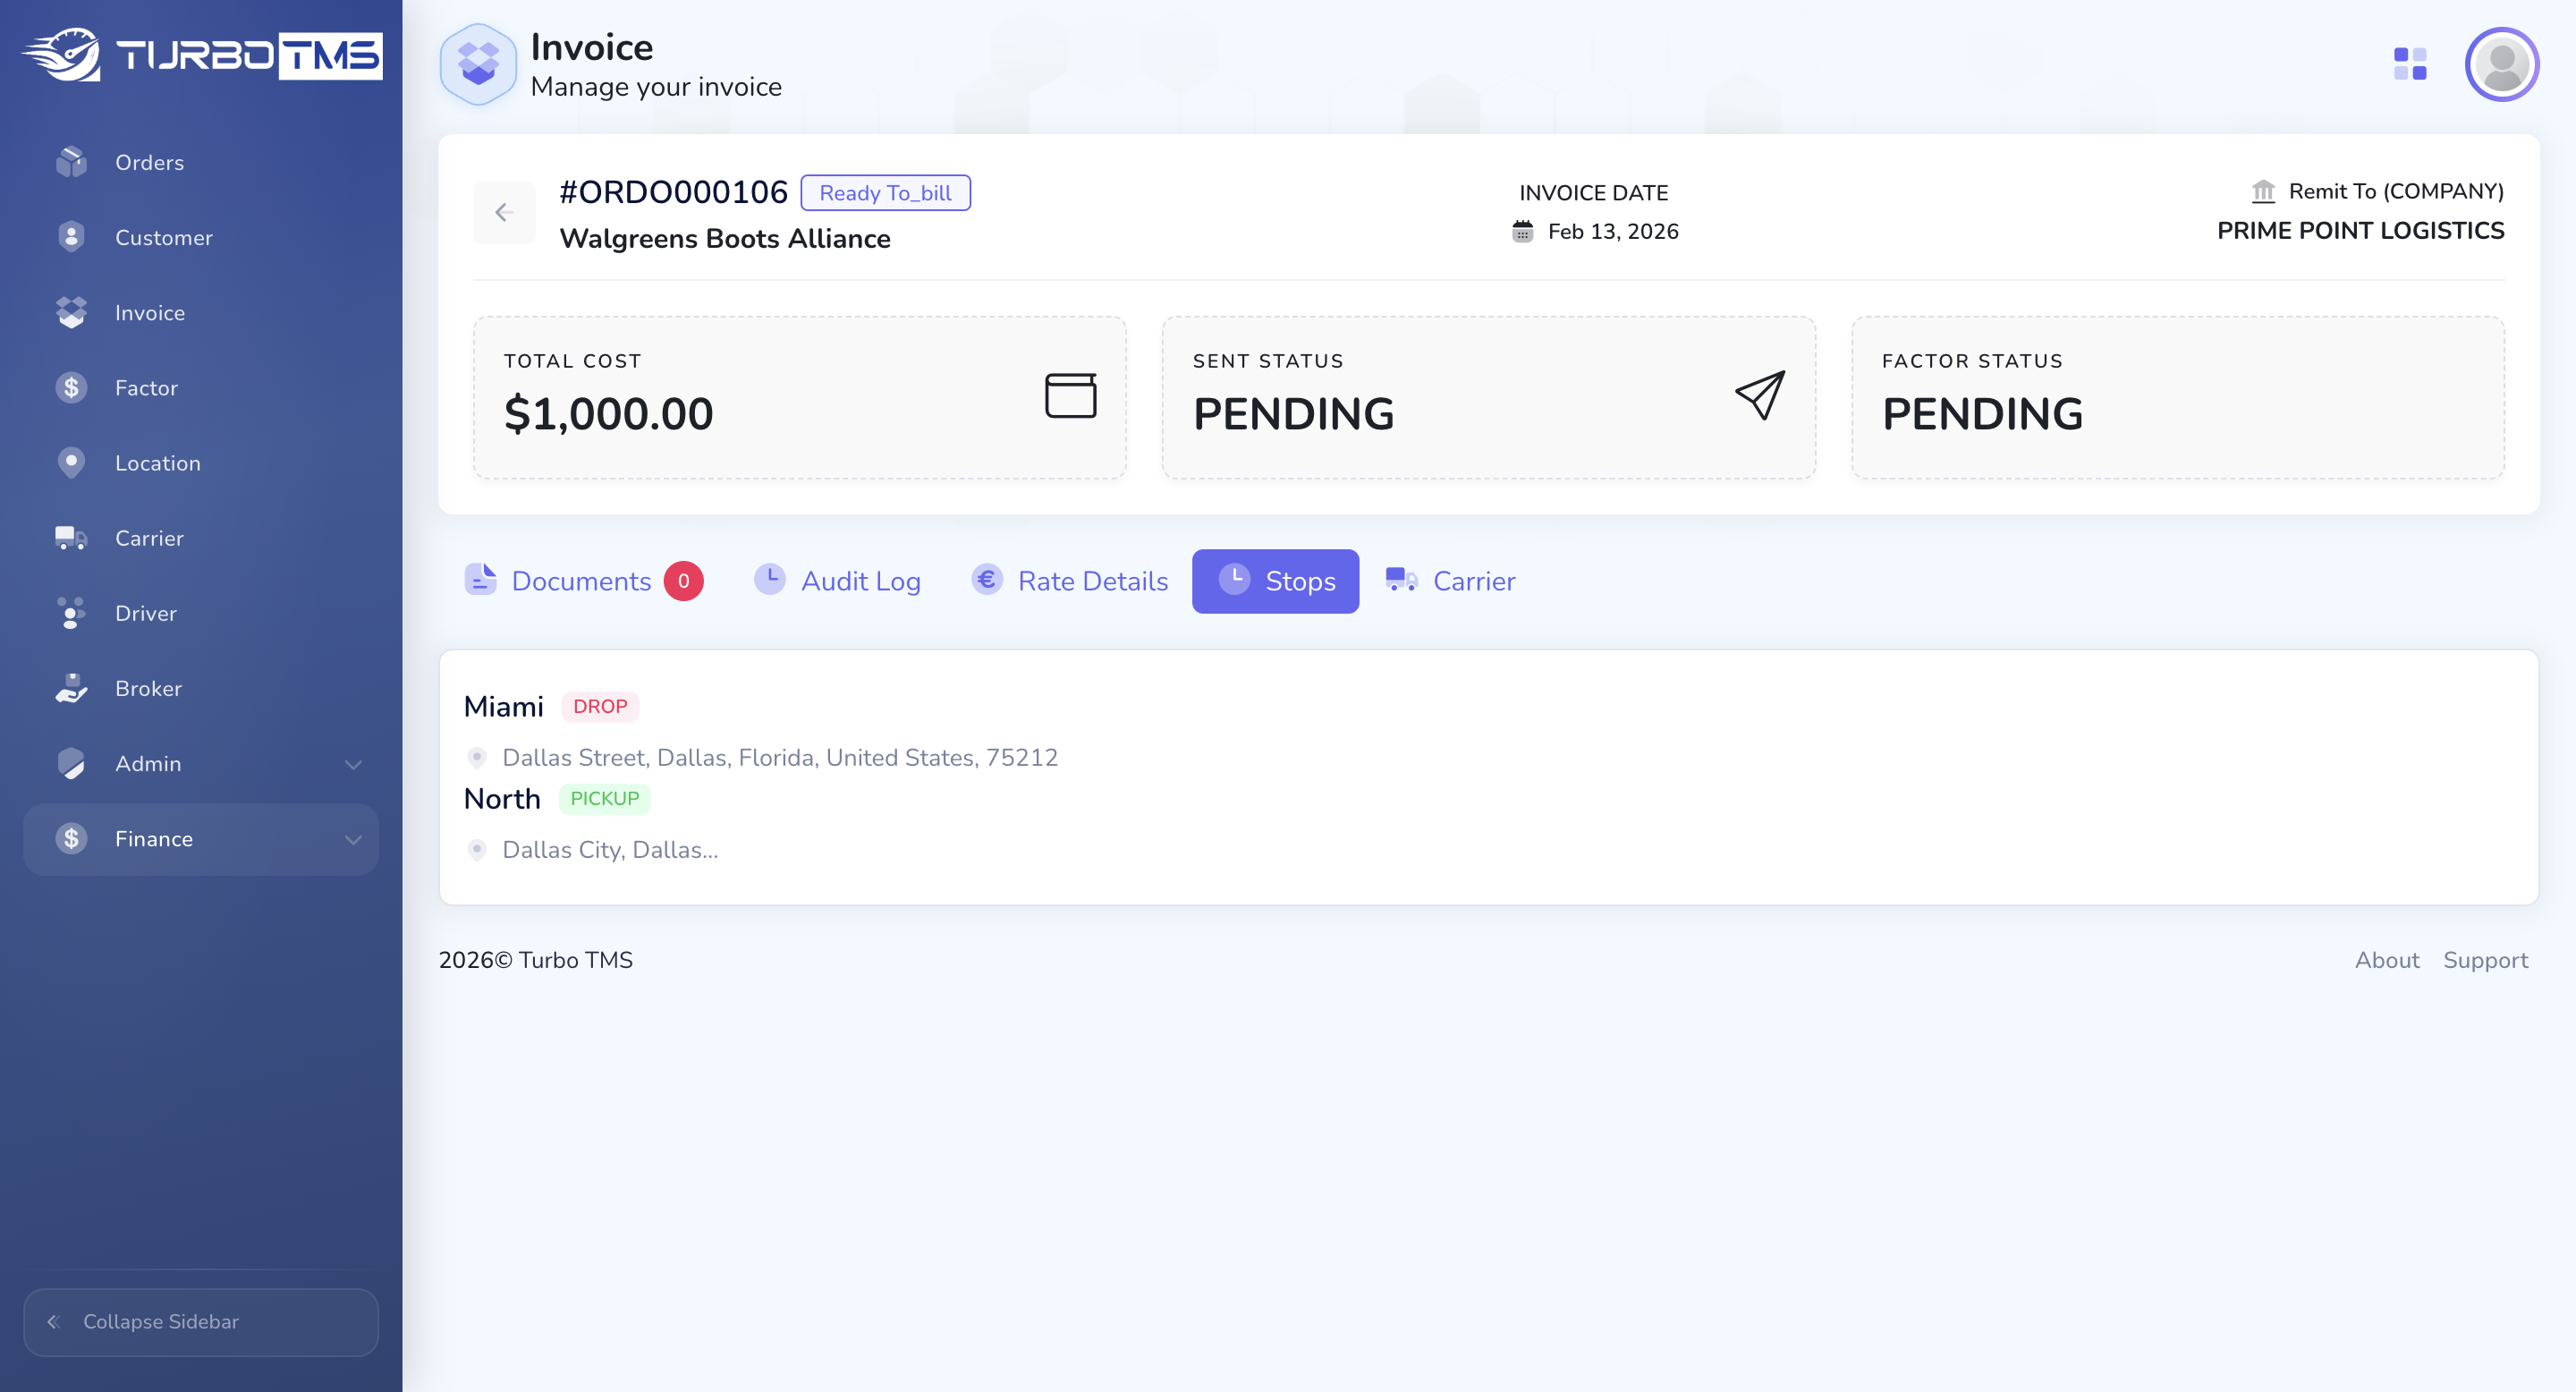
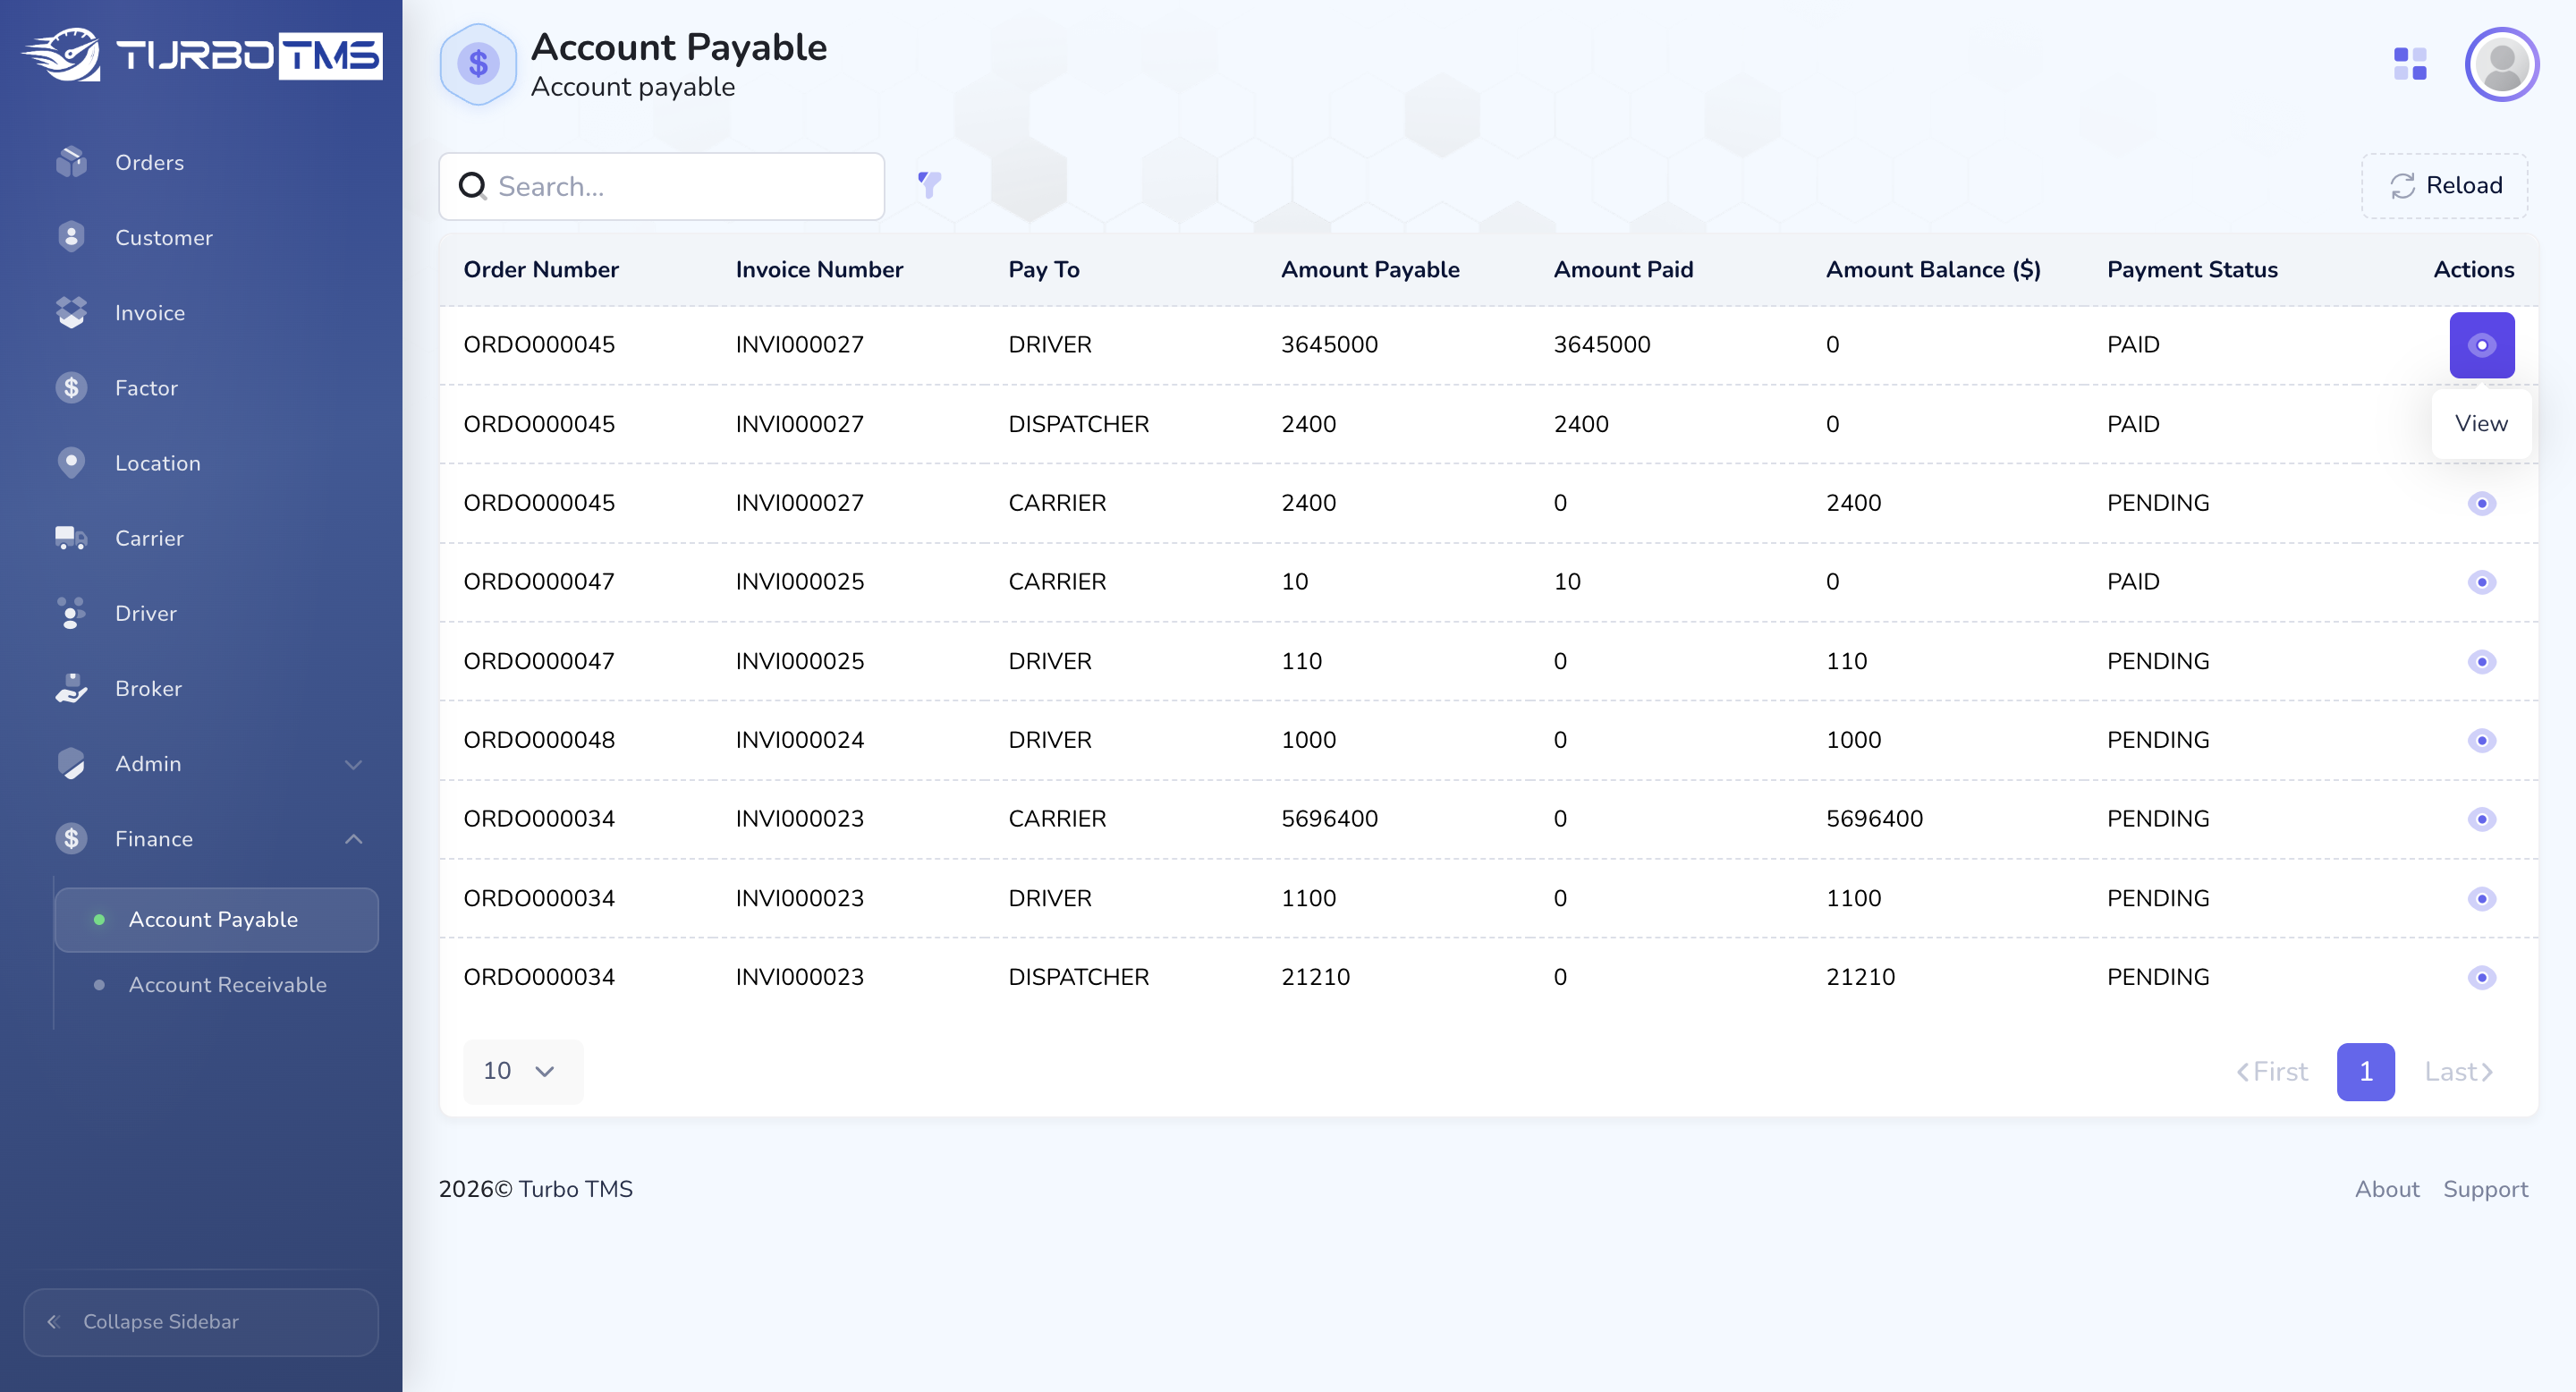
We also have a Finance section where we can track payables and receivables.
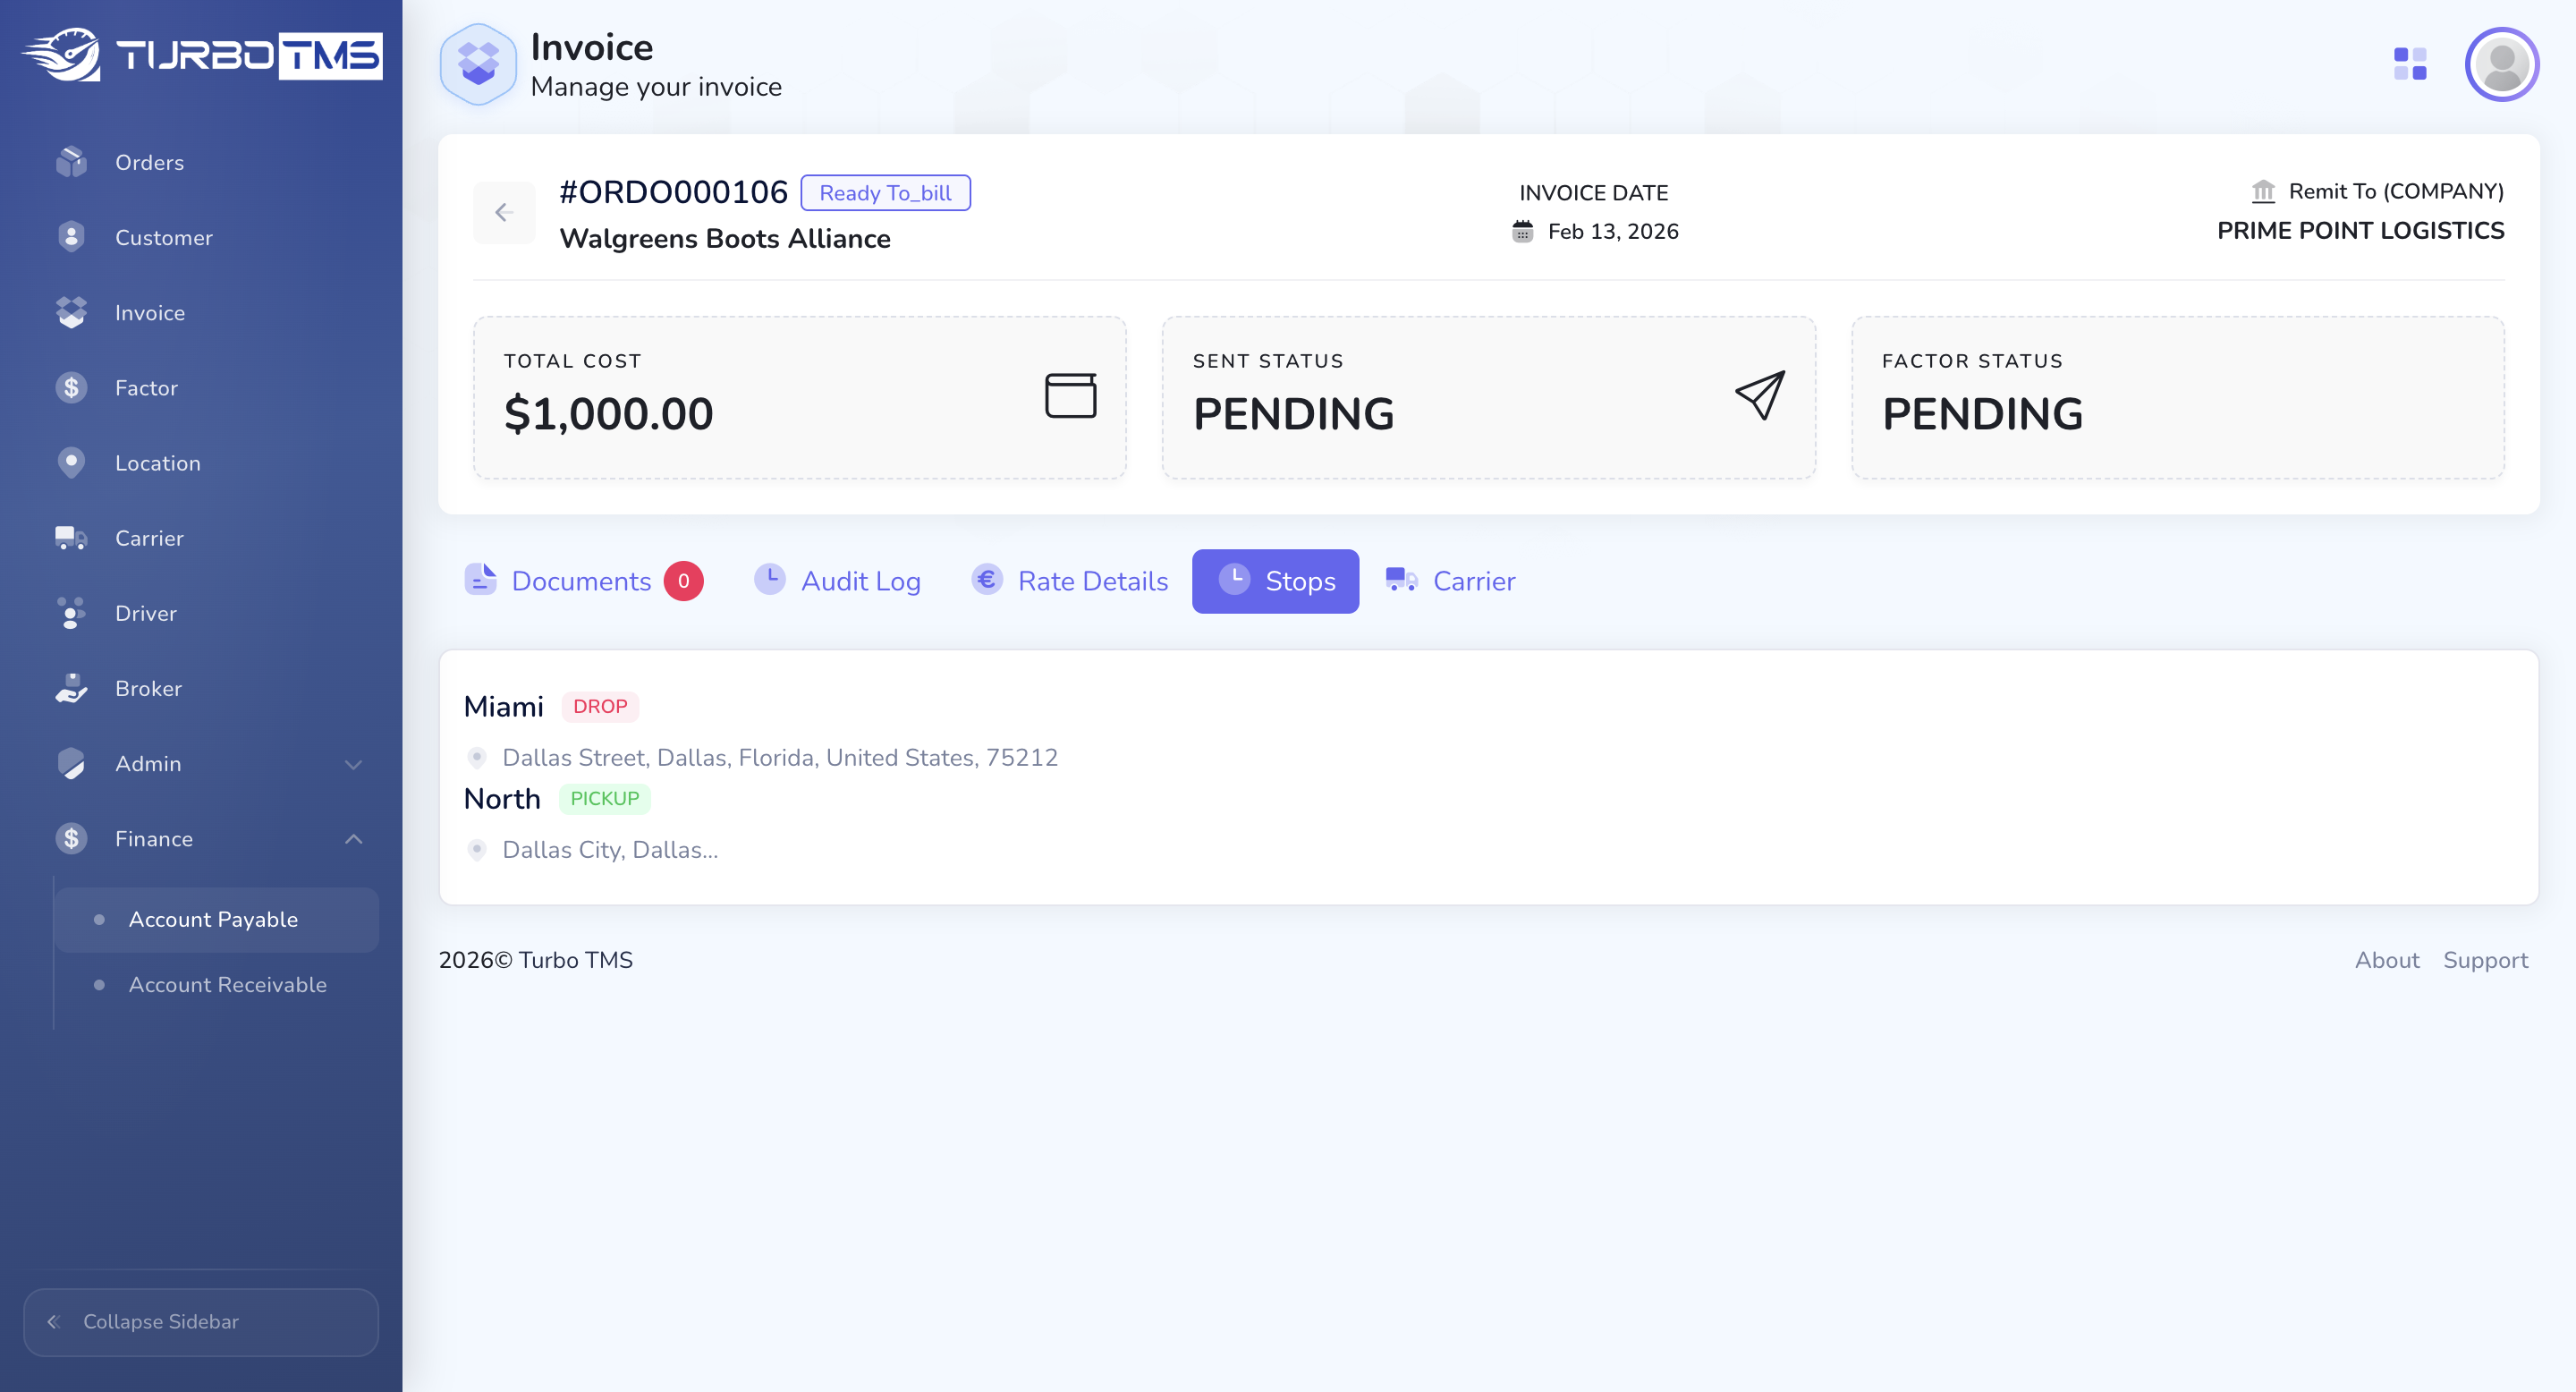
If the broker needs to pay the driver or dispatcher, all these updates will appear here. The required amount the broker needs to receive from the customer or factory will be recorded here.
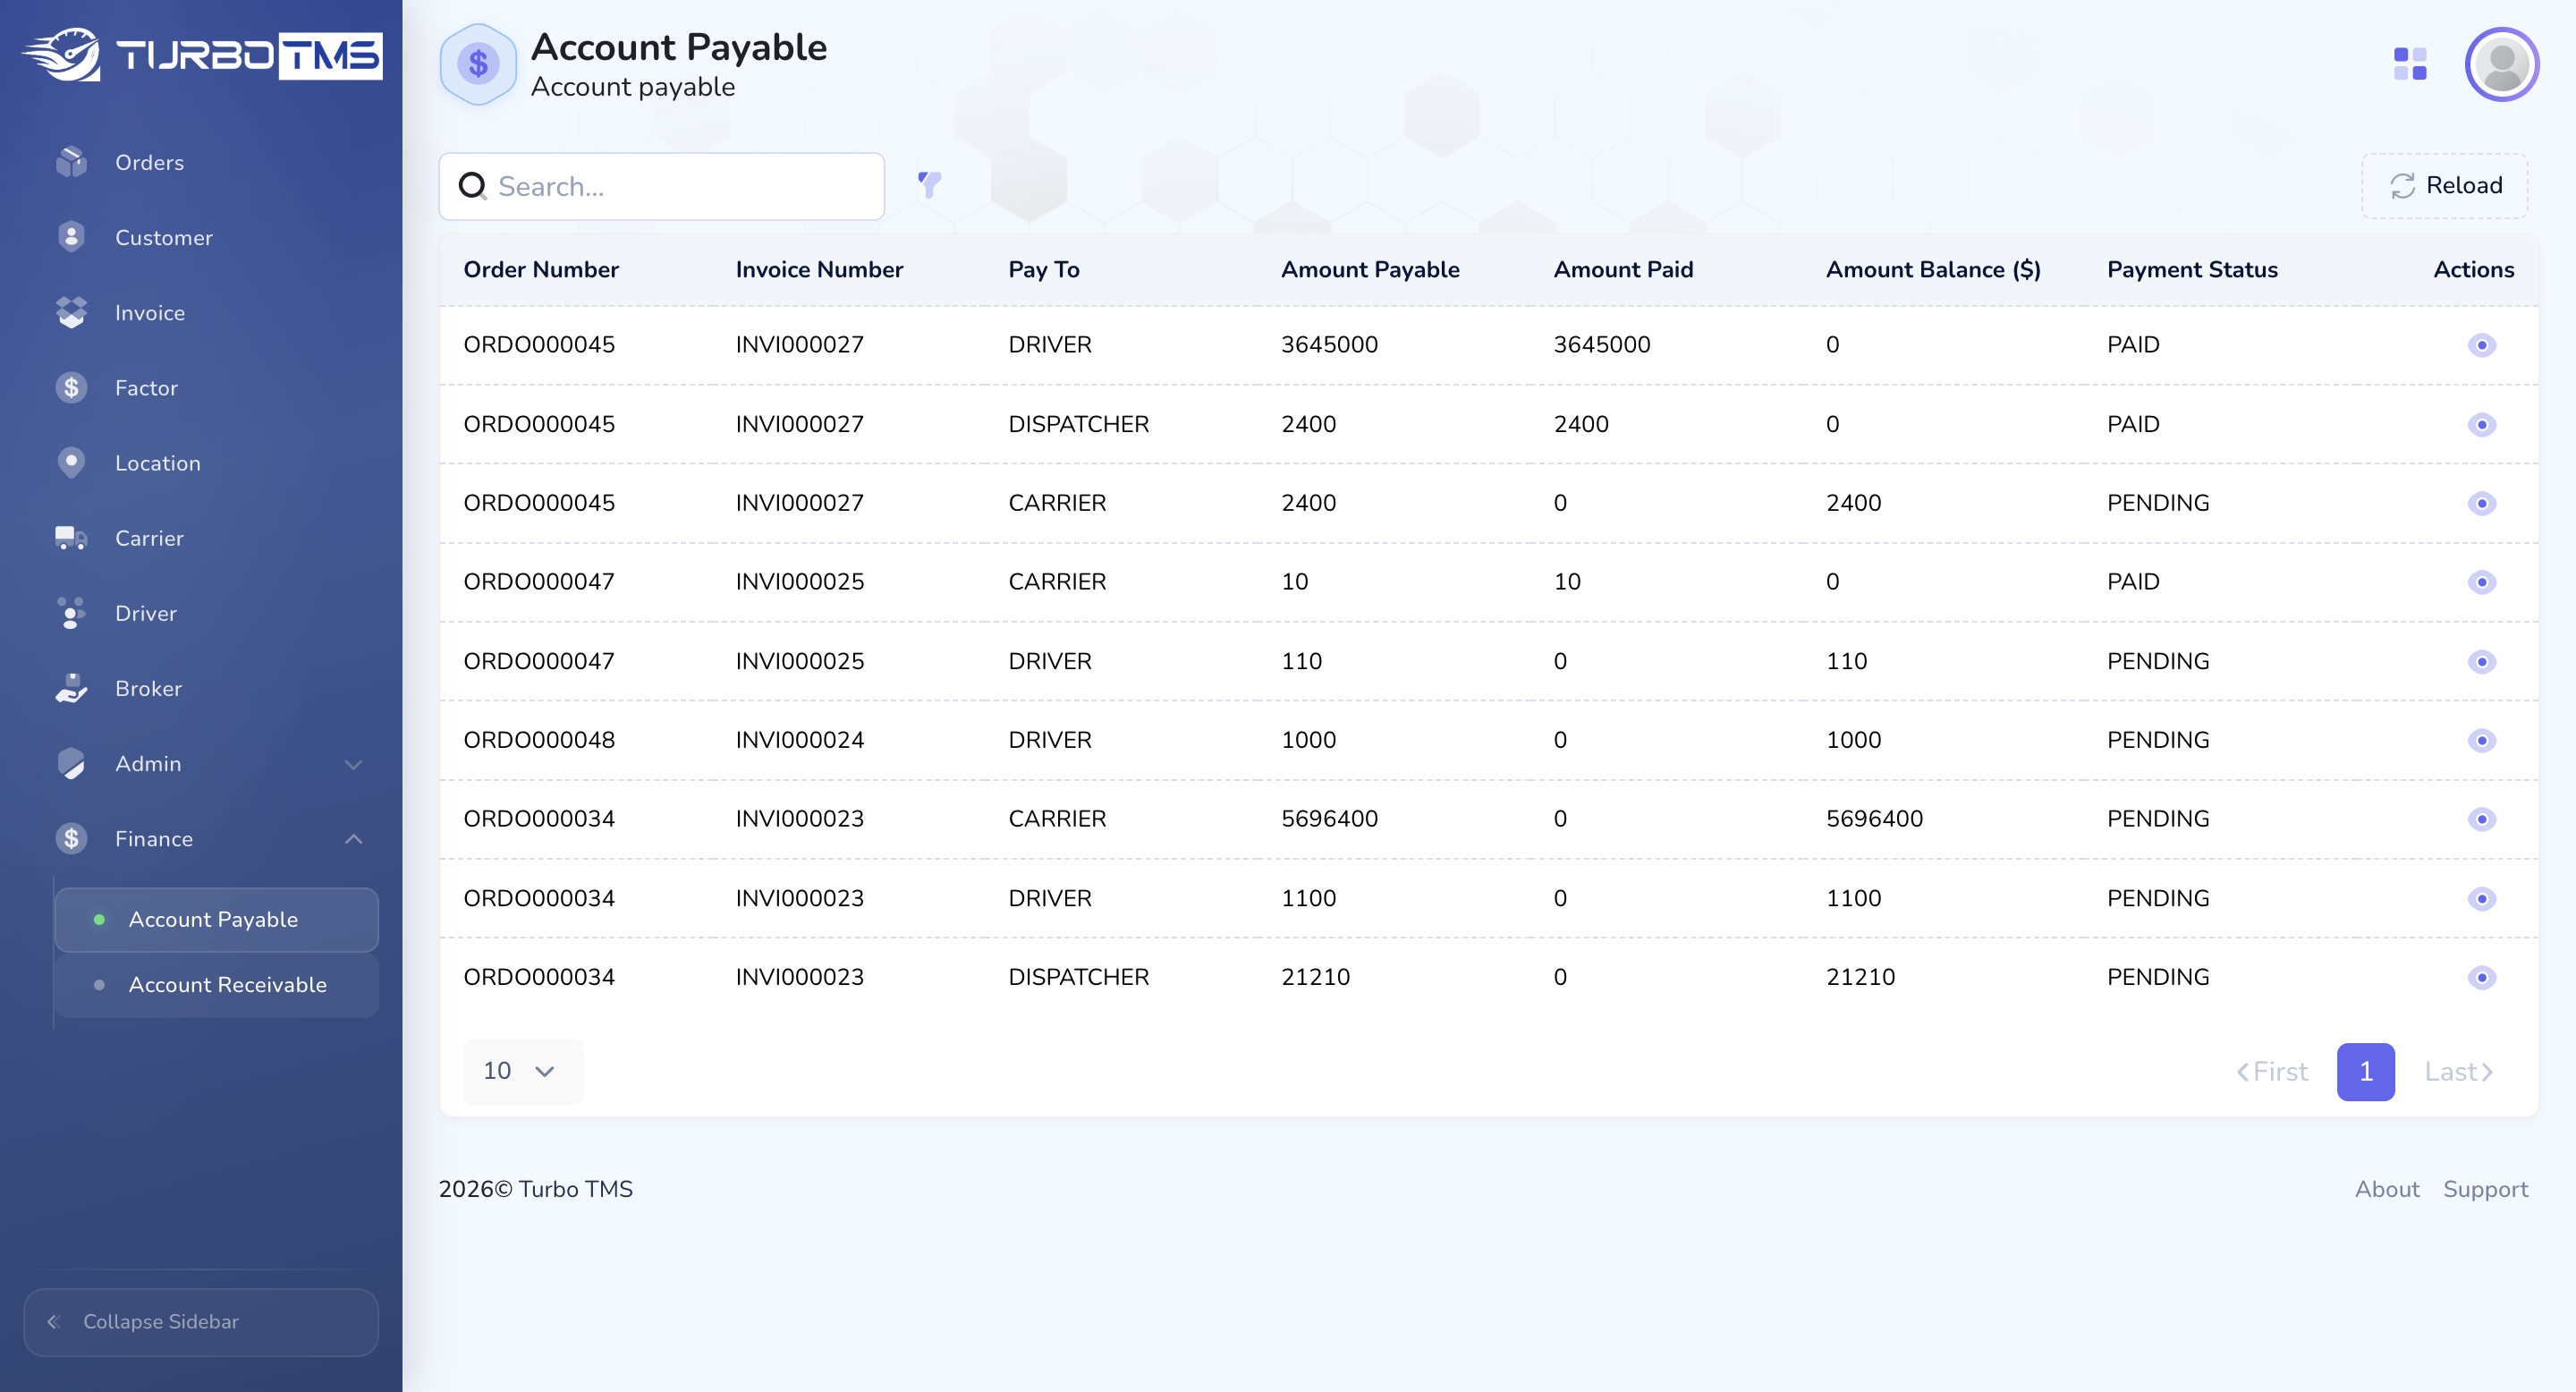
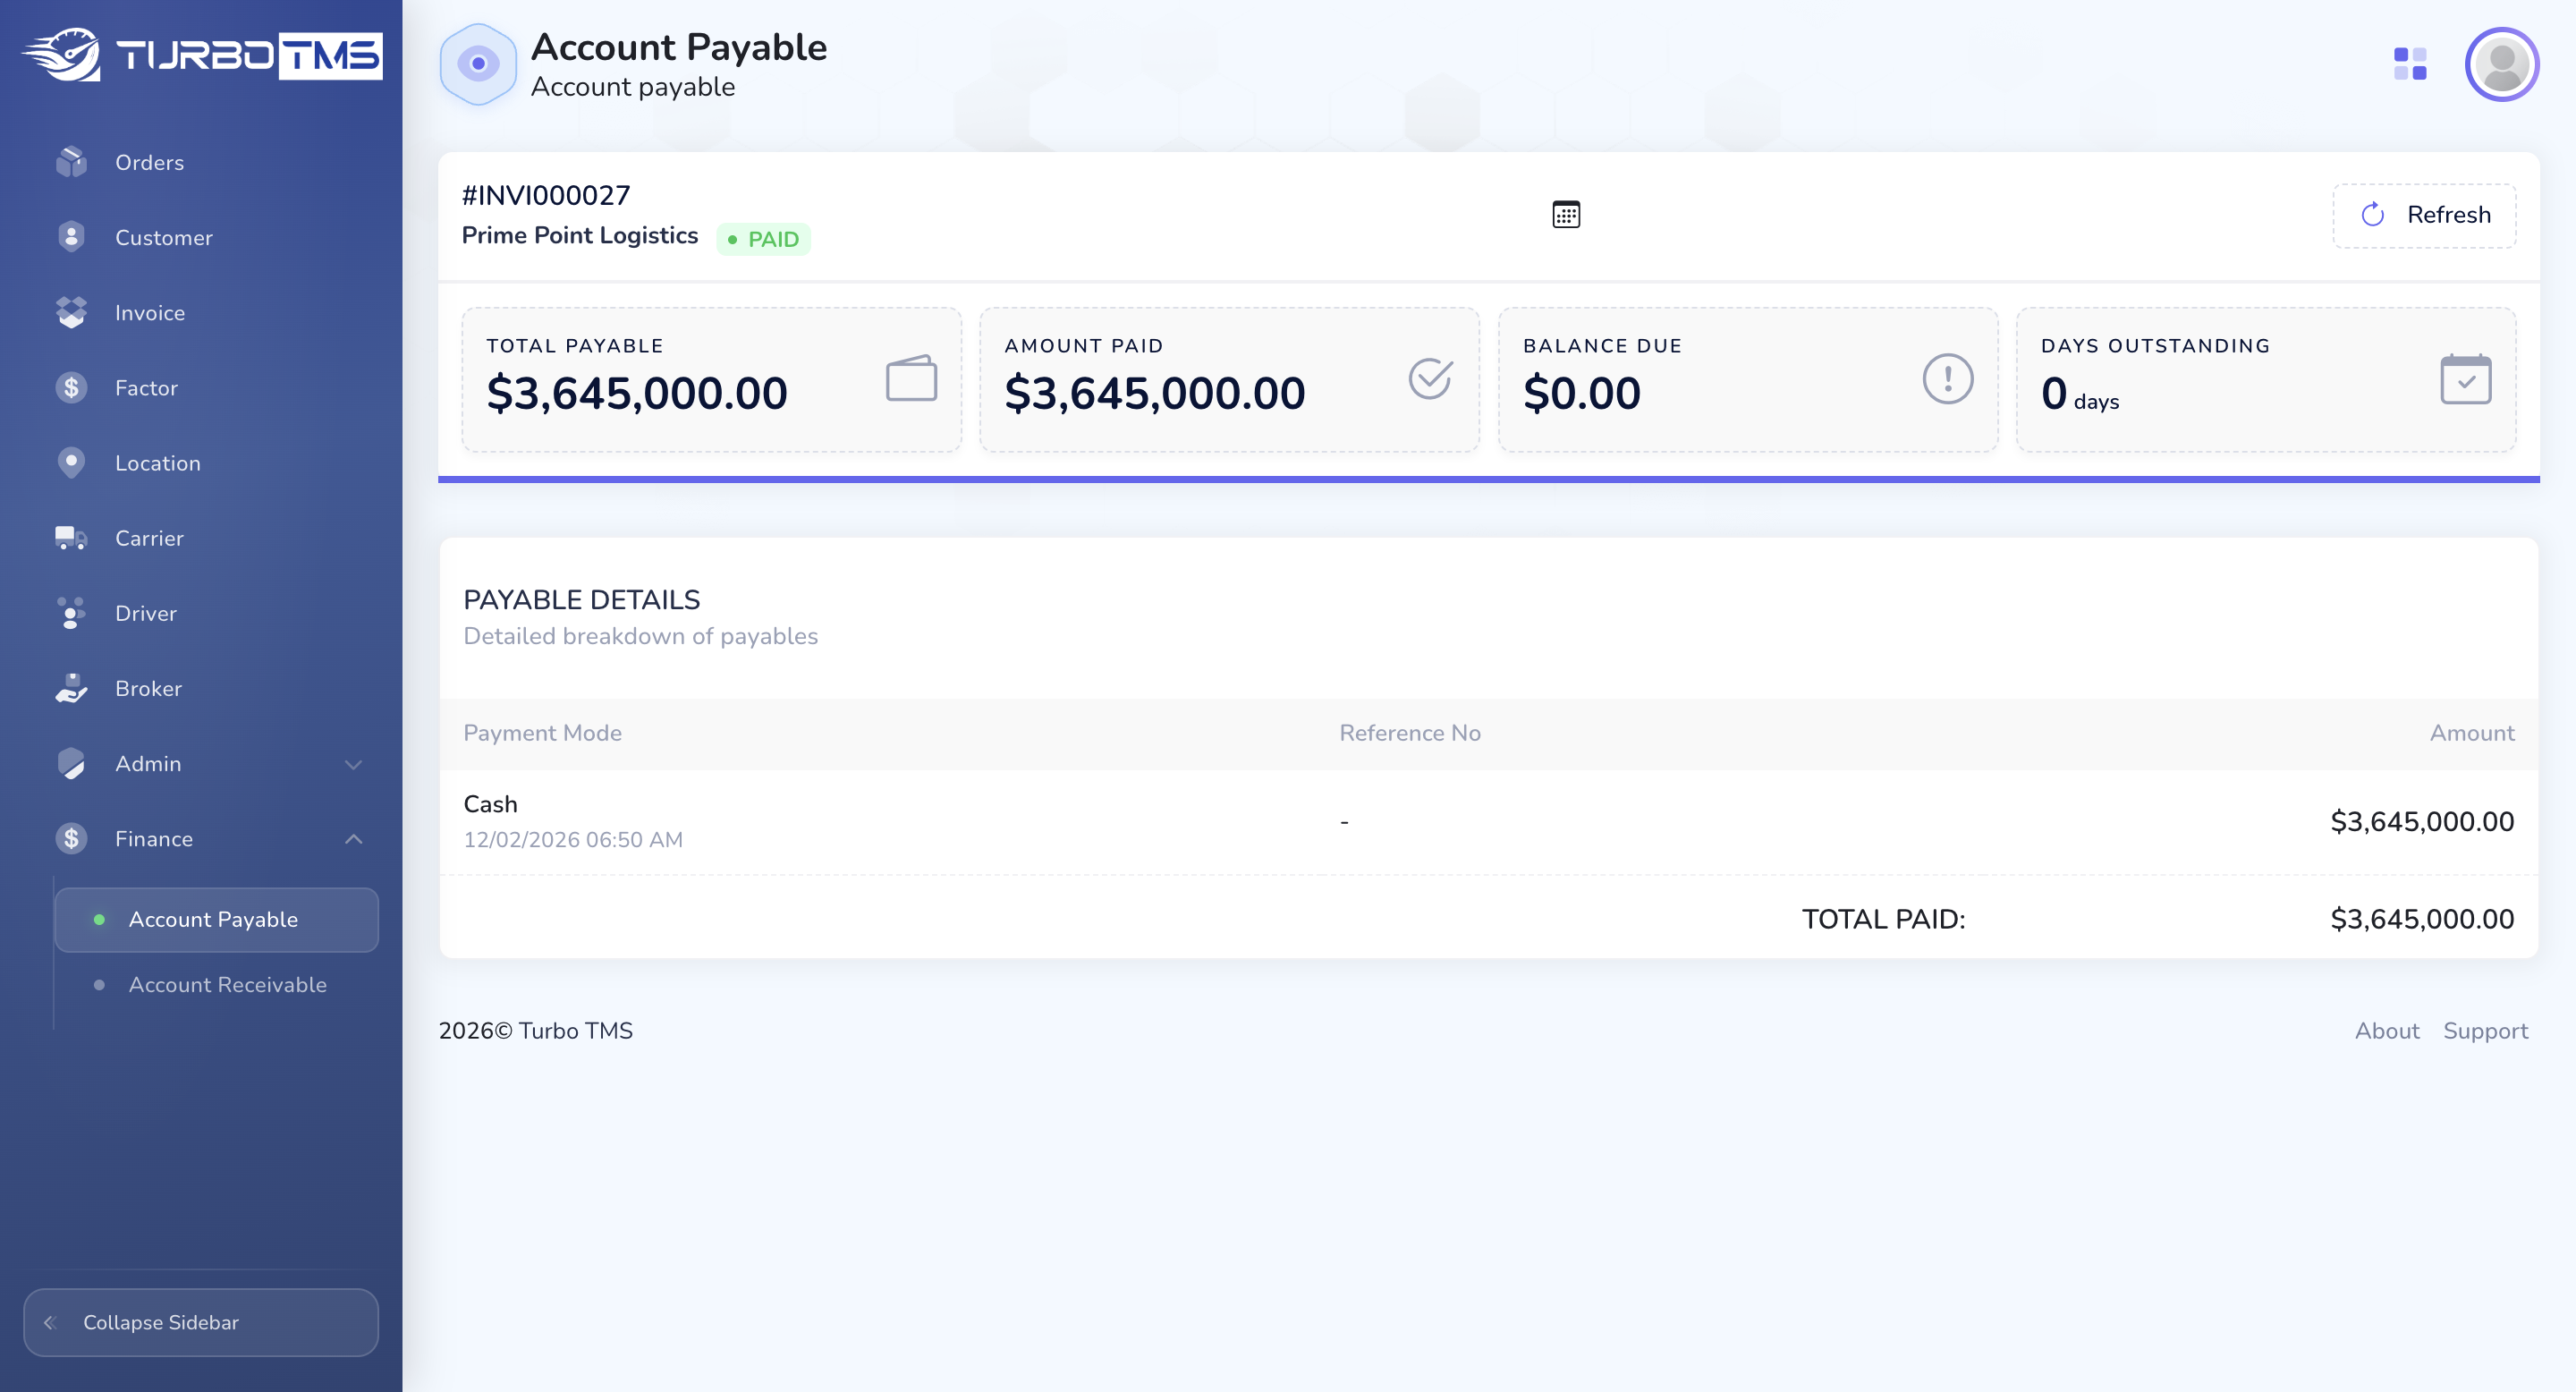
Let's proceed with accounts payable. Clicking on this action view shows detailed information about the order. Here, you can see the amount to be paid or received and other related details.
You can also collapse or expand the sidebar for a better view.
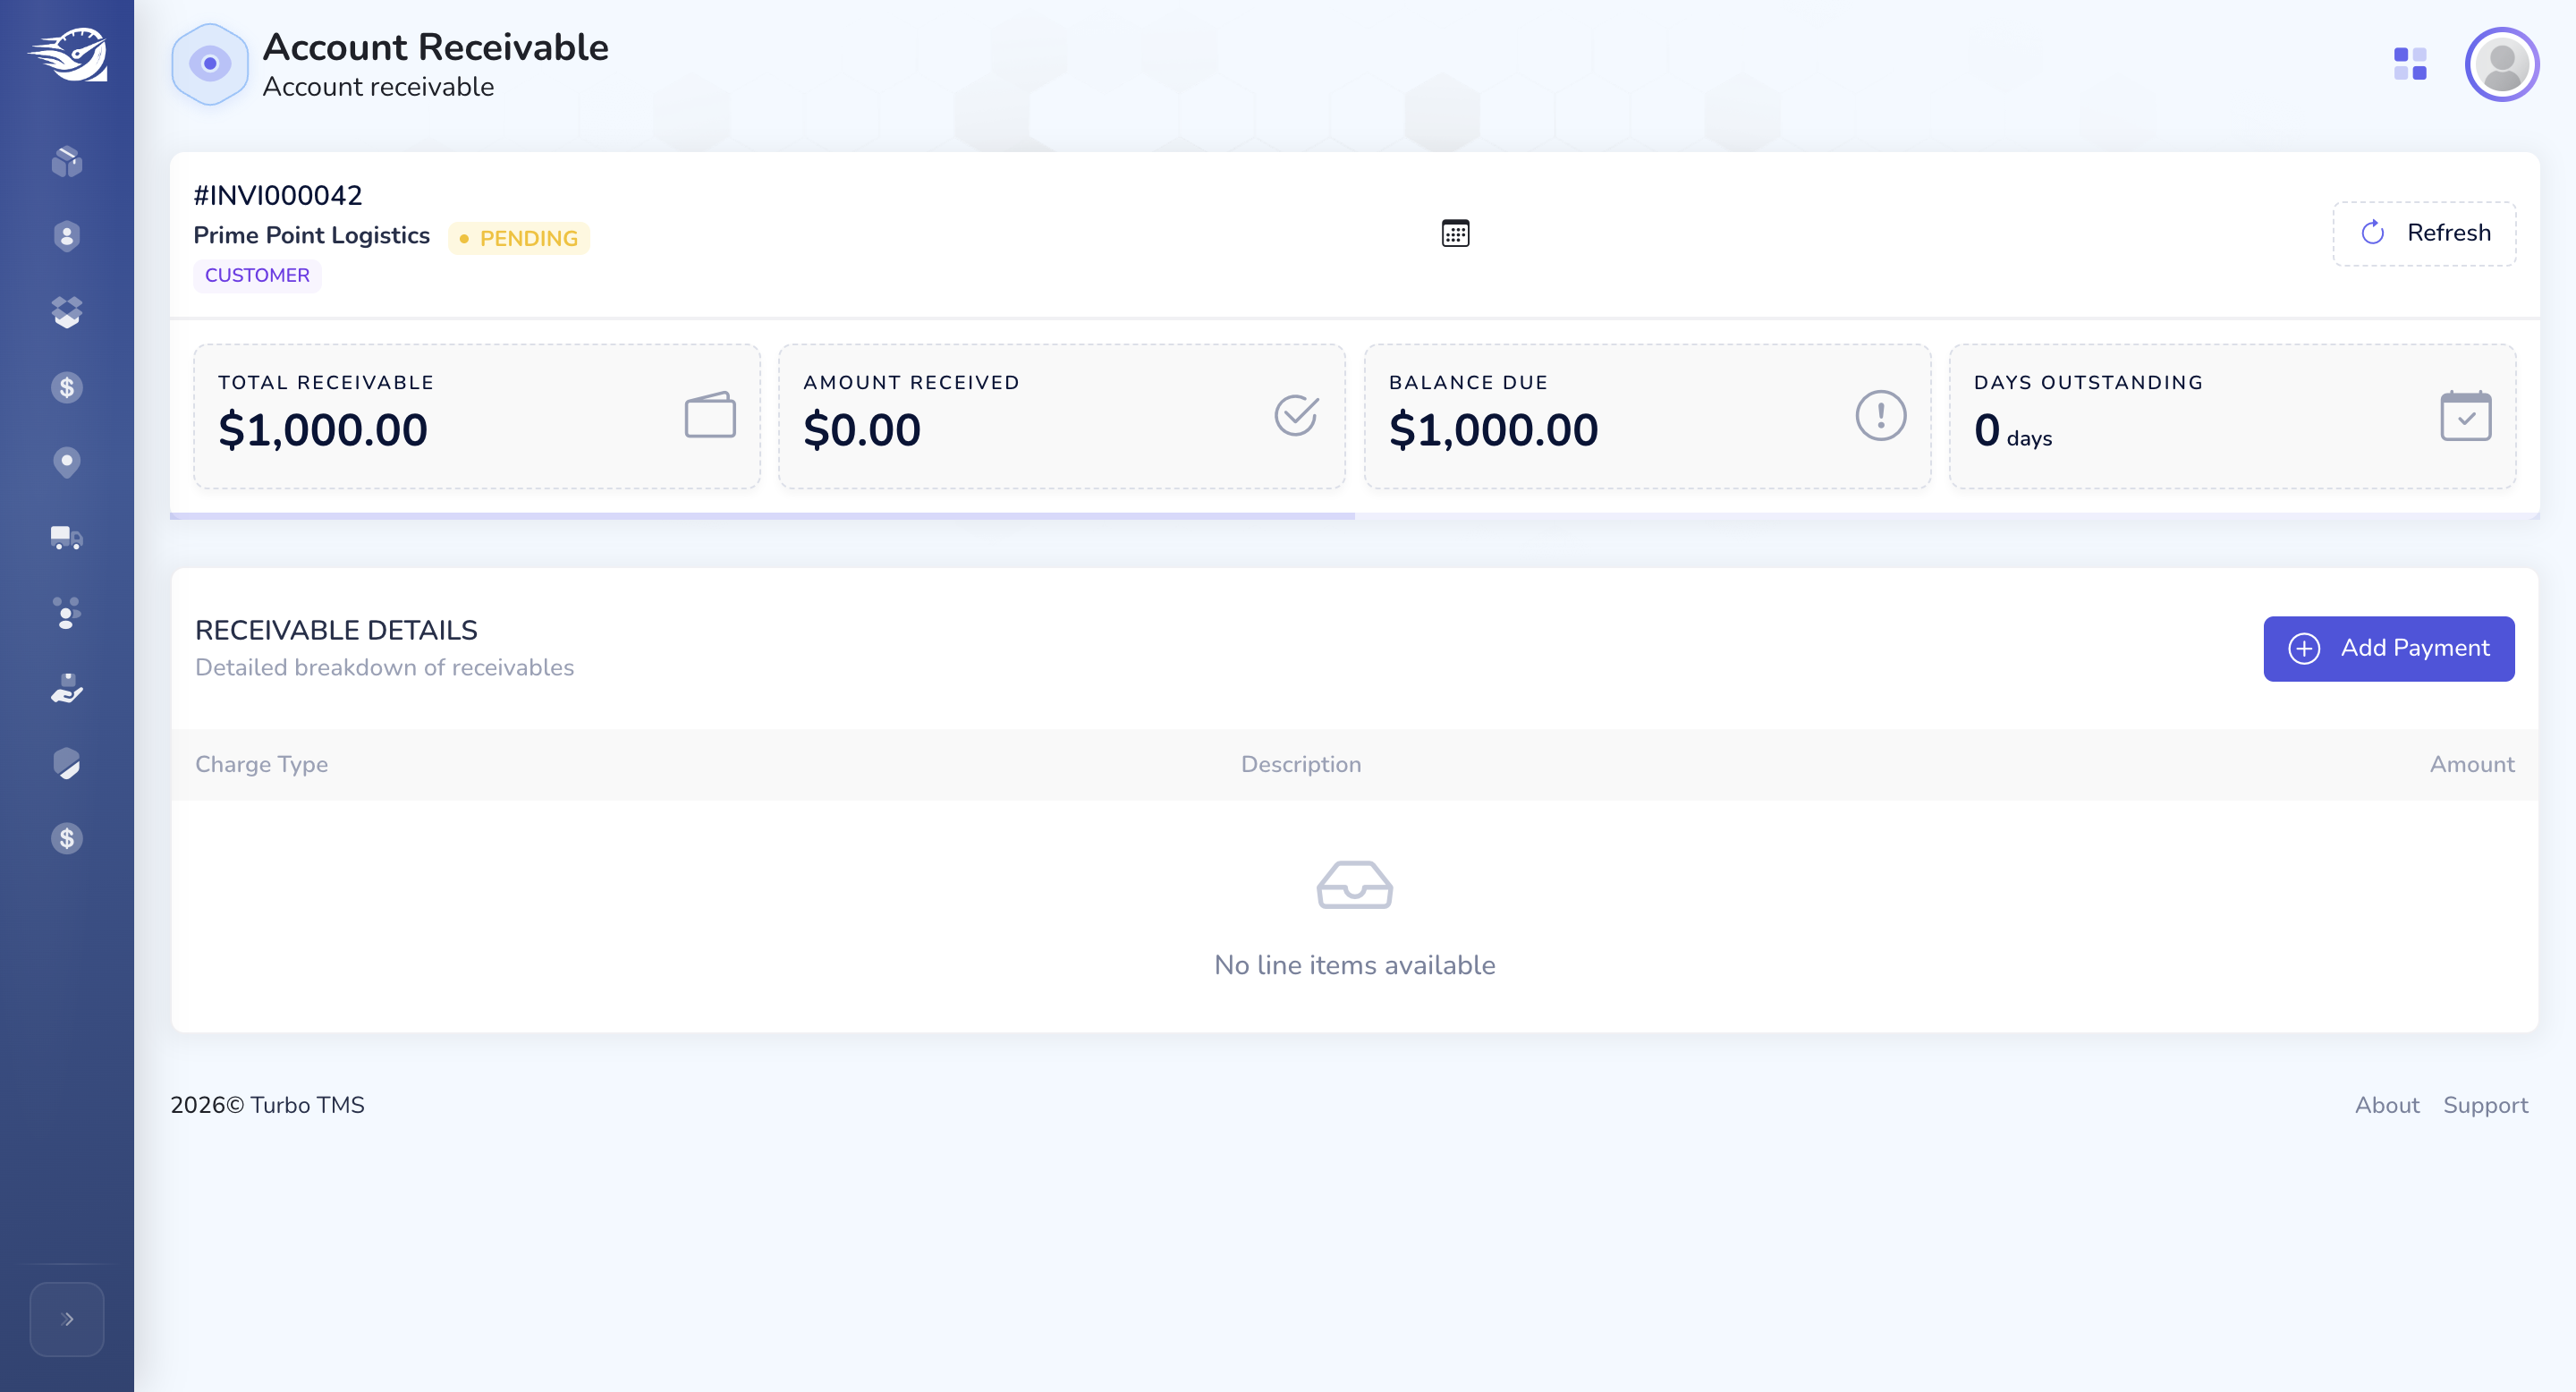
The same applies to receivables as to the amount.
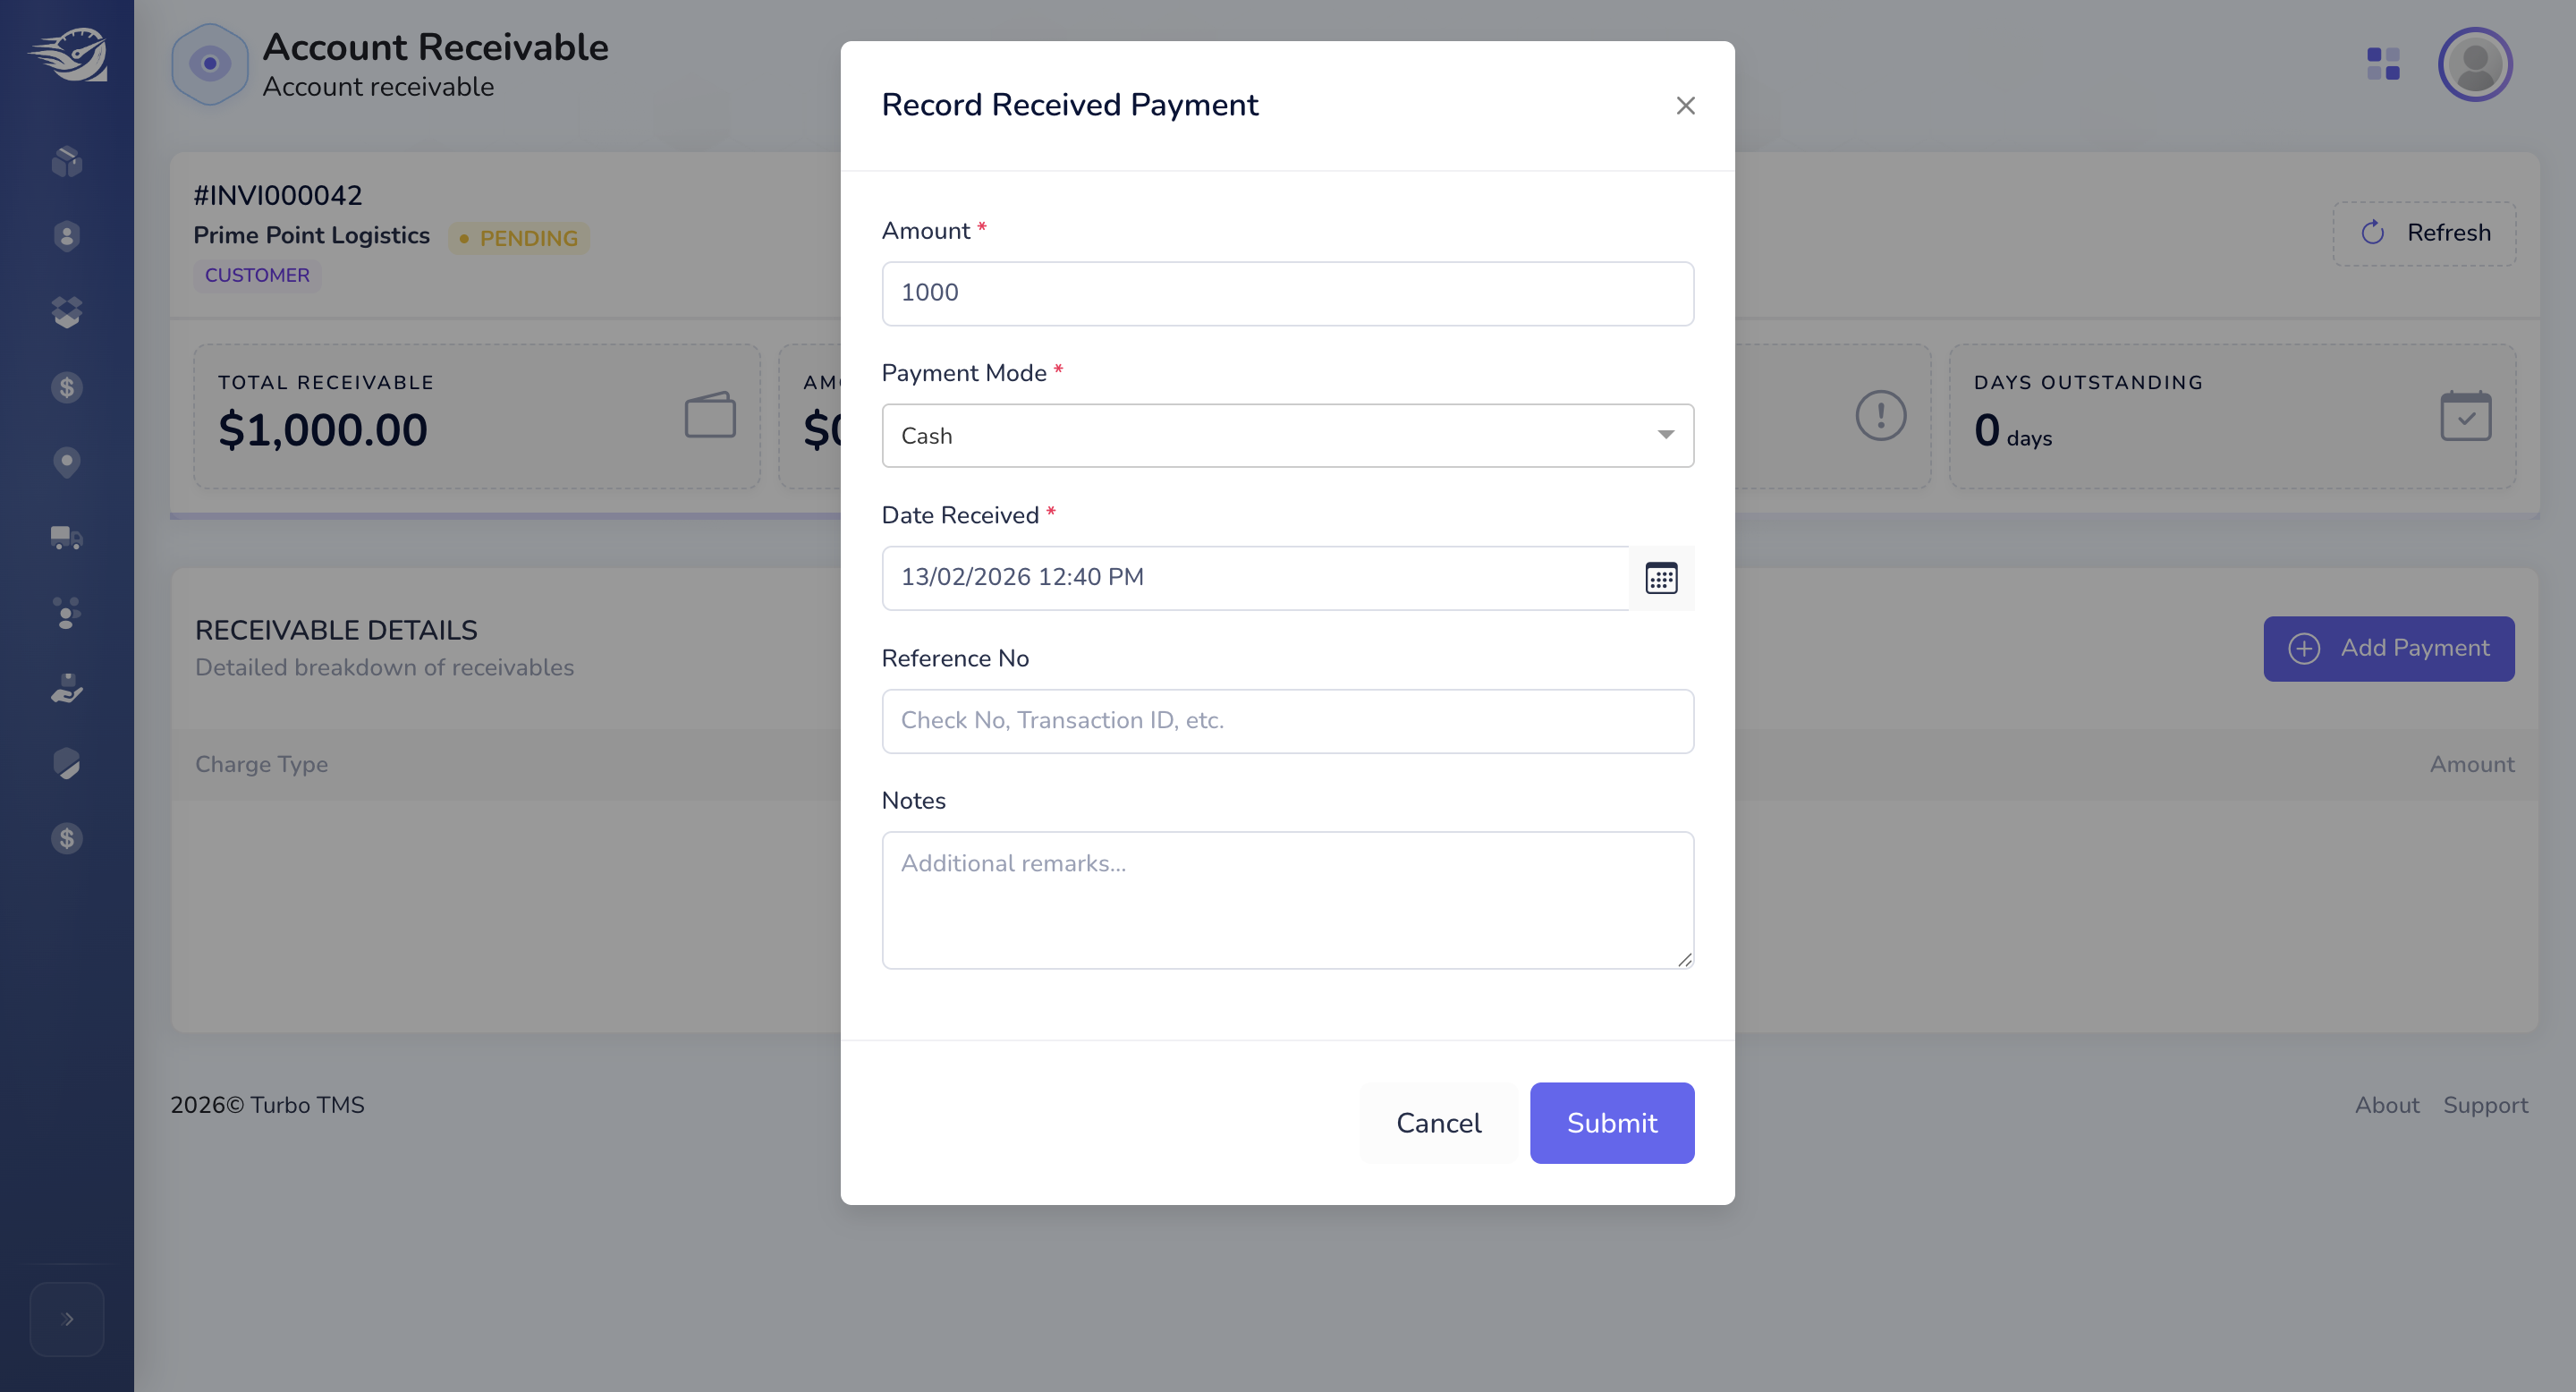
To add a payment, click the Add Pay button. Enter the required amounts, then submit to log the payment.
This is the standard process for order management in a transport management system.