
Understanding Roles and Permissions in Glitter: A Comprehensive Guide
This article provides a detailed guide on understanding roles and permissions in Glitter, including how to share guides with people both inside and outside your organization.
In this guide, we'll learn how to manage roles and permissions in Glitter. Glitter offers the flexibility to share guides both internally and externally. To begin, ensure you have editor or owner access to the guide you wish to share.
Sharing Externally
If you intend to invite someone outside your organization, simply enter their email address. You can optionally choose to invite them to your team, granting access to your team library, or send a direct invitation to the guide only. You can assign them as either a guide editor or guide viewer.
Sharing Internally
Sharing with someone inside your organization works the same way as with people outside of it, with one important difference - this person will be automatically invited to your team, and will be able to view existing guides in the team library and contribute their own.
Glitter automatically detects if someone is in your organization based on the domain name of the email address you sign up with. In other words, if you signed up with jenny@mycompany.com, and then add john@mycompany.com, Glitter detects that John is on your team.
Both types of sharing allow you to choose whether the person will be able to have edit access (in which case they will be able to edit the guide and invite people to it) or view-only access.
At a glance
Whether we're sharing a guide with other people in our organization, or with people outside of it, the process starts the same.
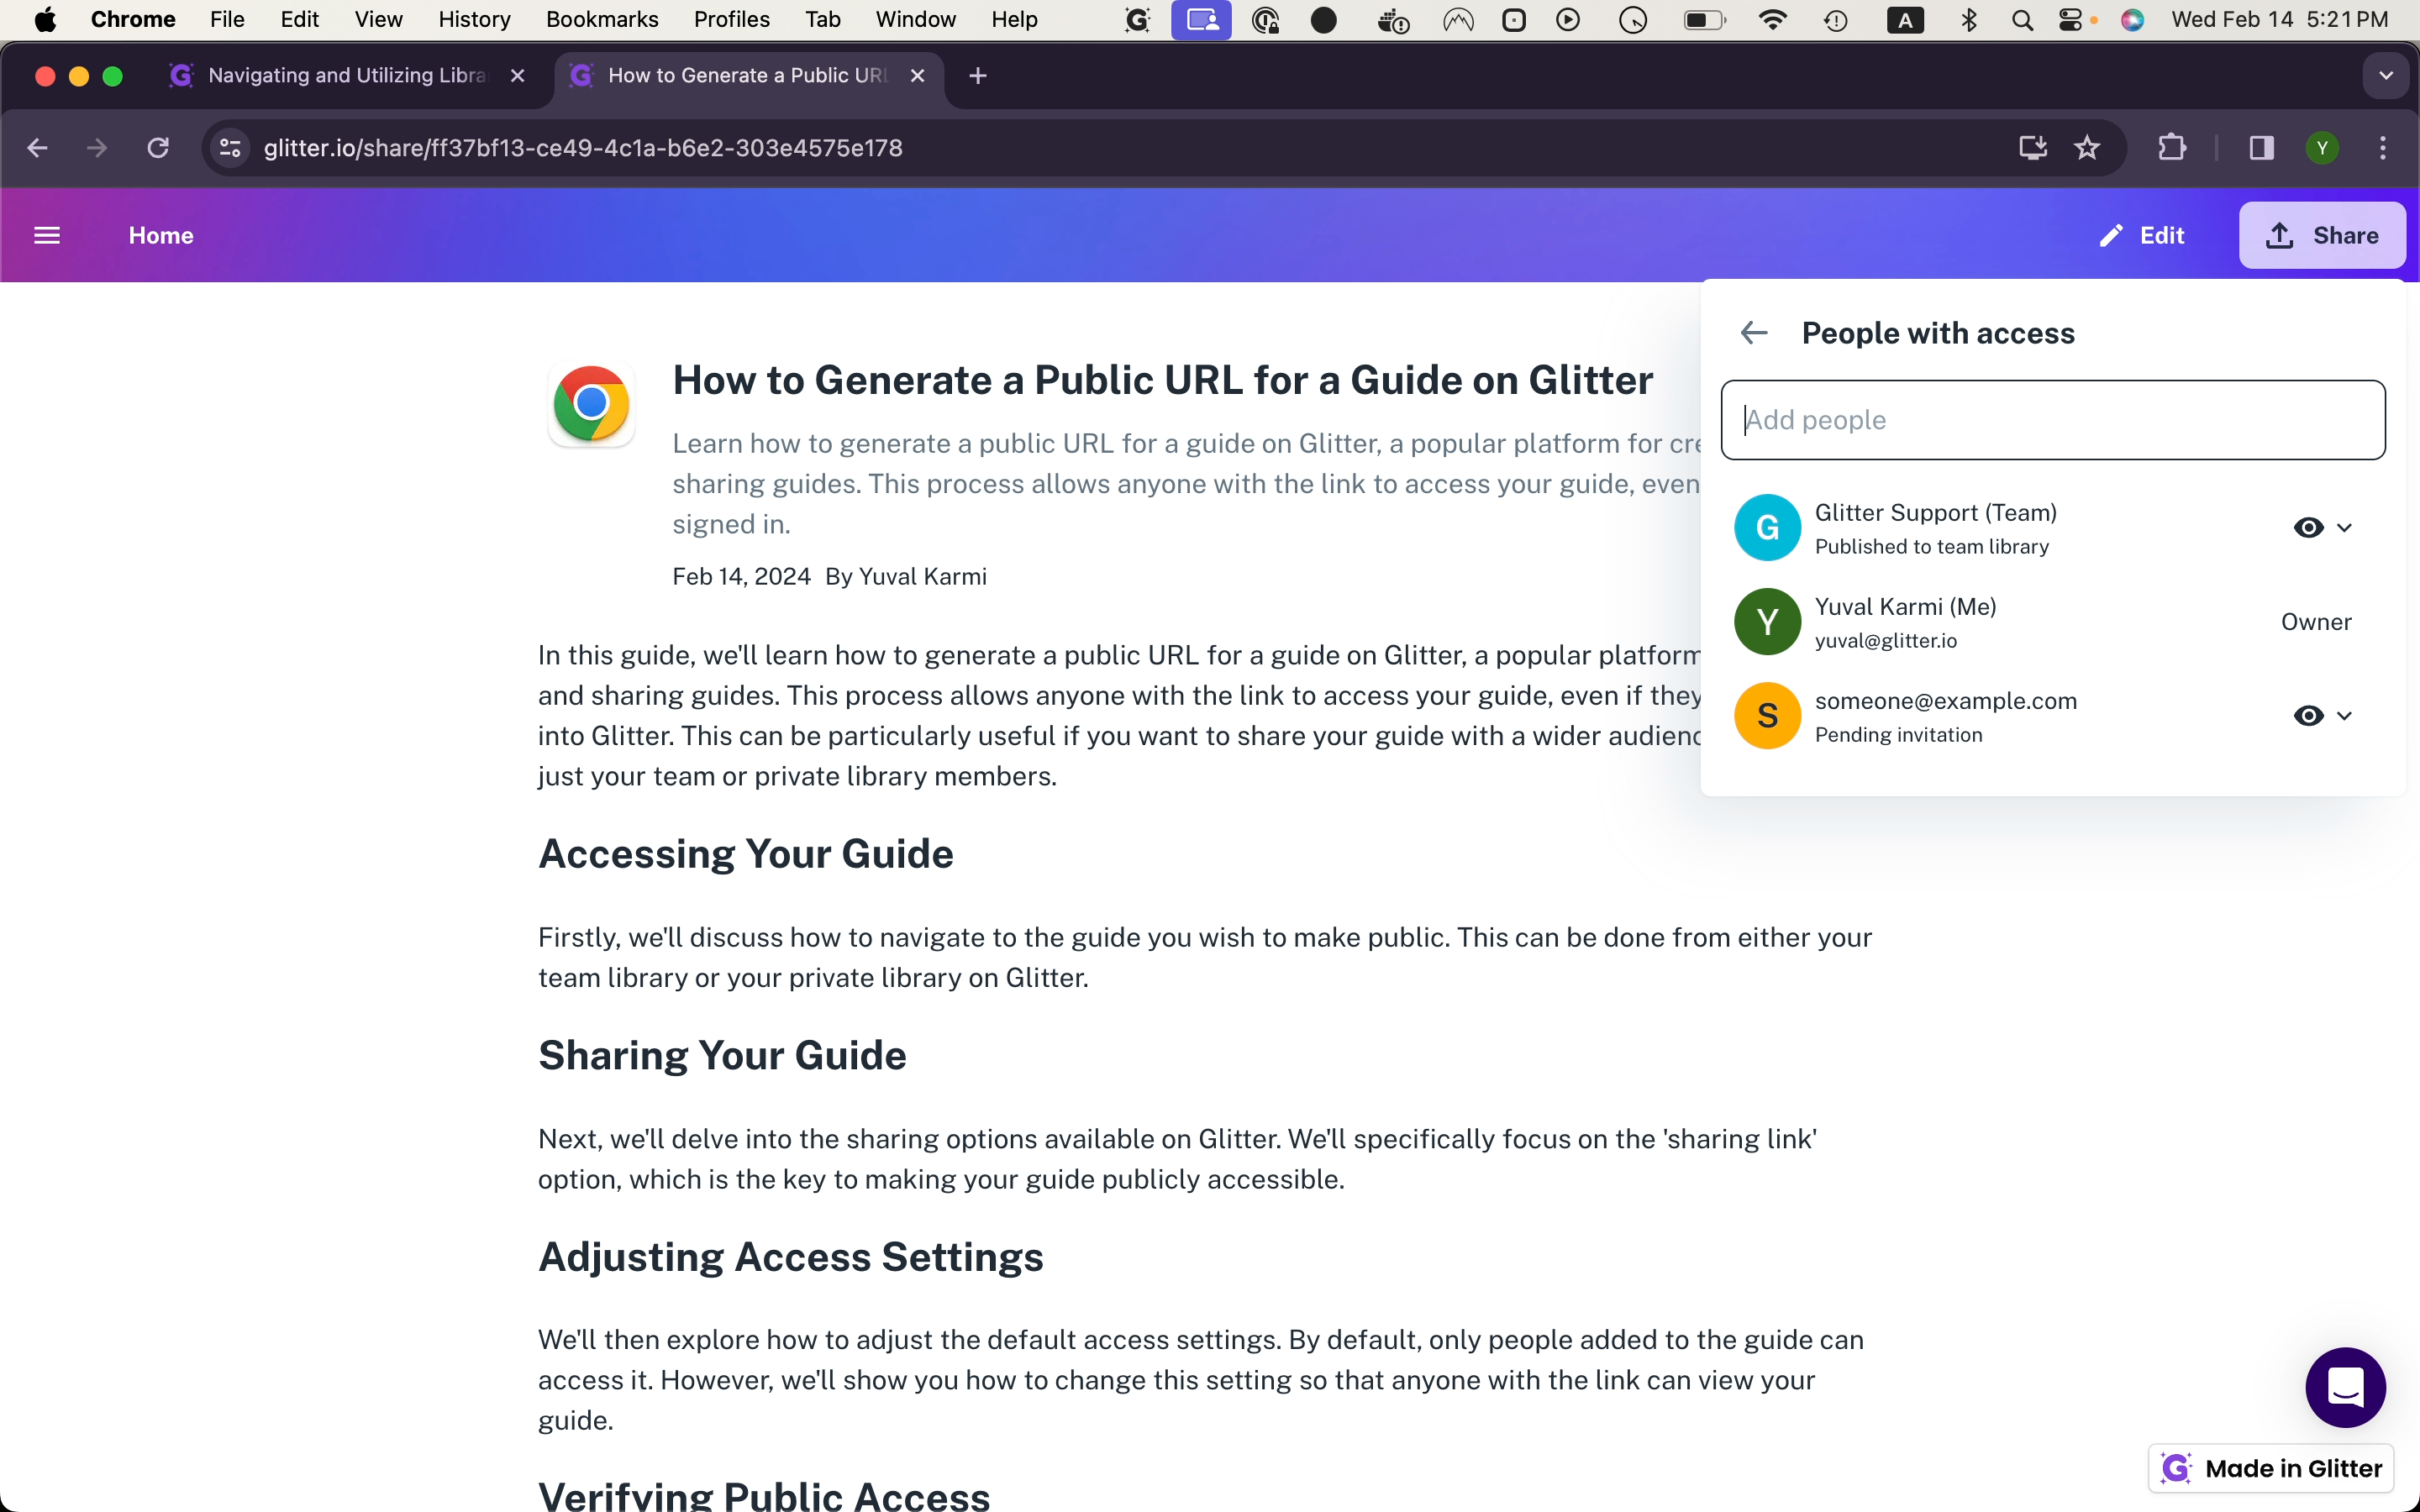
Start by selecting the guide you wish to share, and click on it.

To do so, click on "Share" at the top right hand side of the guide.

Under "People with access," click on the "Add people" text box and start typing the email of the person you want to share the guide with.

What happens when you share with someone outside of your organization:
When you share a guide with someone outside of your organization, you can choose to invite them the guide, and optionally, to your team.
To do so, just start typing their email address:
For instance: "someone@example.com"
When you begin typing, you'll notice the interface changes:

Optionally, you can choose to invite this person to your team as well as share the guide with them.
Choosing permissions for the invited person
On the right-hand side, you'll see that we can either make the person an editor or a viewer.

In this case, we will change their role to viewer only and then click on send.
This action will prevent them from editing our guide, and for inviting others to it.


What happens when you share with someone inside of your organization:
When you try to invite someone from within your organization, they receive an email inviting them to the guide and are also automatically invited to your team.
To begin, from the Share menu, click on "Add People".
address of a person who shares the same work email domain as us (glitter.io)


People on our team have access to our team library and can collaborate with us. By default, they will be team editors, allowing them to contribute to the team library (but not edit your contributed guides, unless you allow this explicitly).
Click on View.


When we click on "send." We can see that the person has been invited.
