
How to Update Initial and Ongoing Fees
Learn how to update initial and ongoing client fees in your financial management platform, including updating payment types, start dates, and fee statuses.
By Elliott Potter
Managing your client's fee records correctly ensures accurate reporting and timely billing. Once a plan is implemented, you need to review the draft fee records, assign correct payment types, establish a start date, and update their statuses to active or due.
Here is how to finalize both initial and ongoing fees.
Updating the Initial Fee
Start by finalizing any initial fees applied to the plan.
1
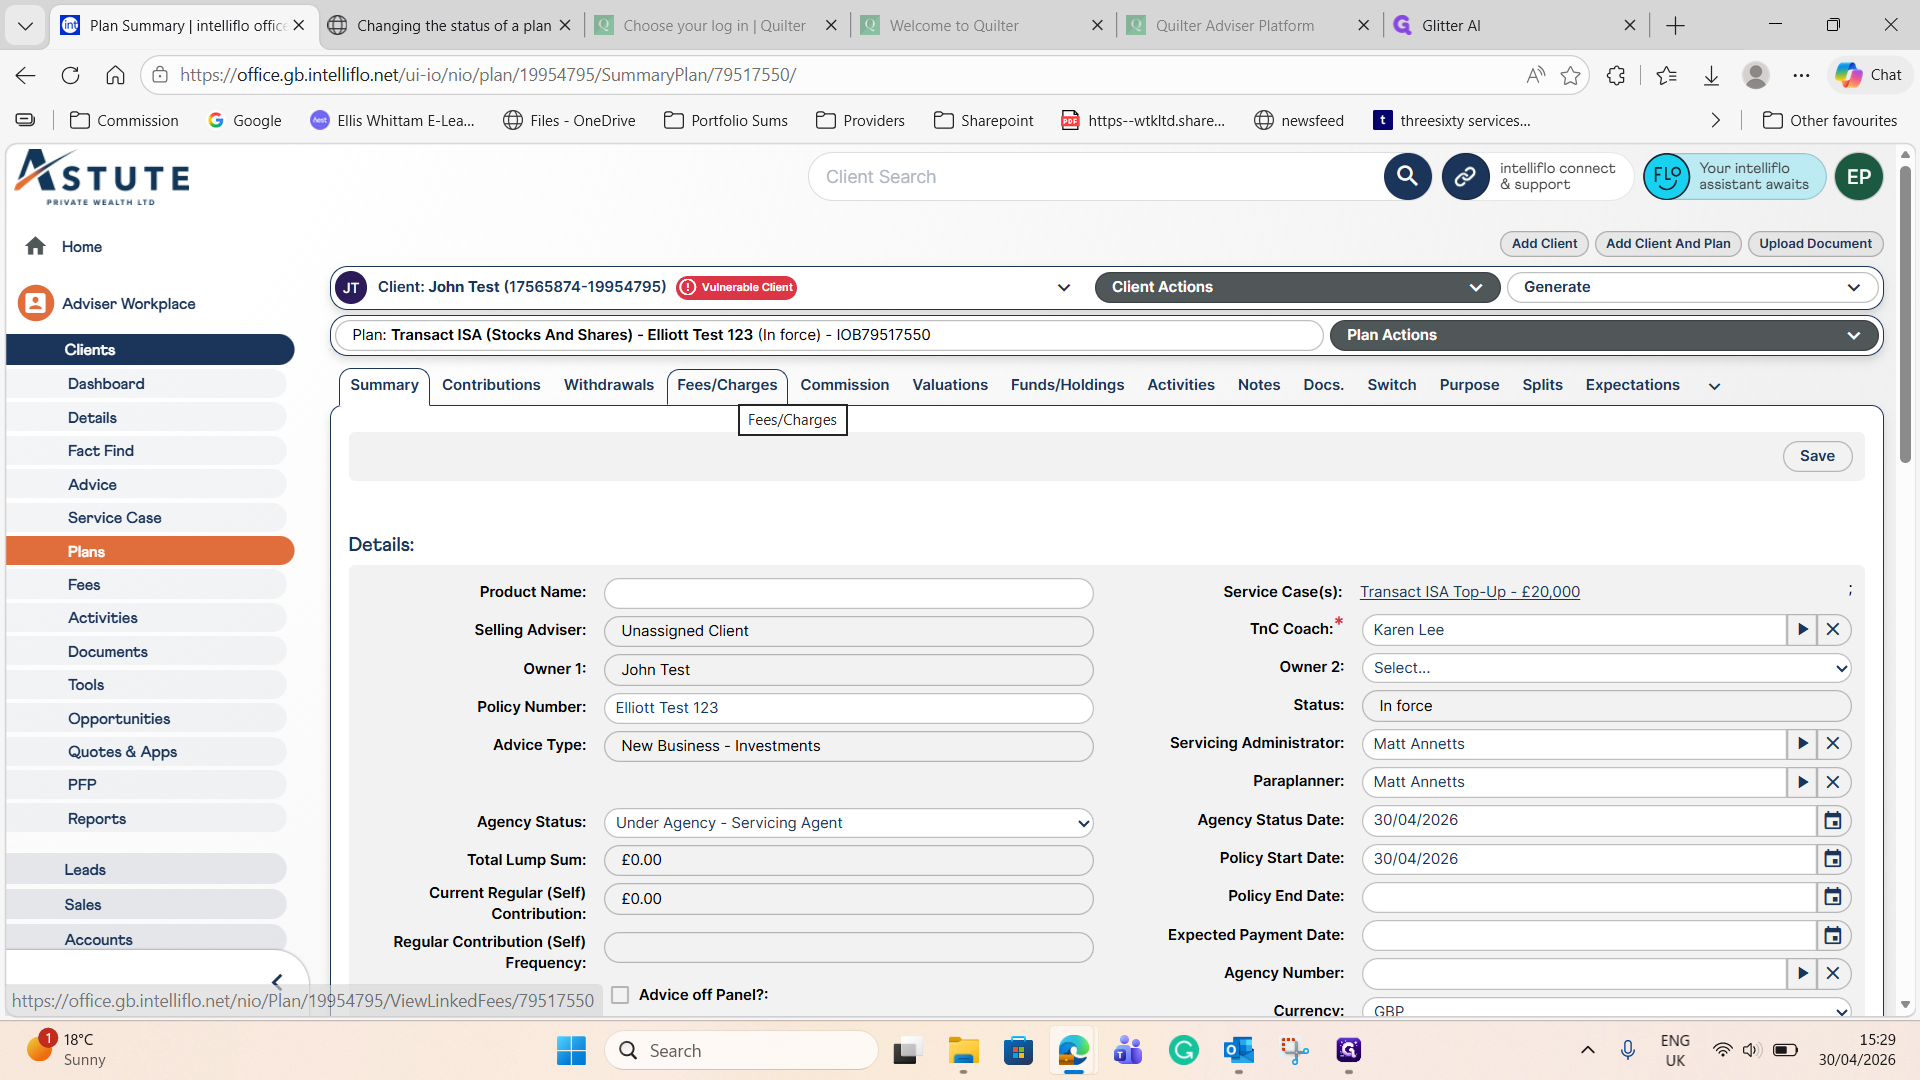
Navigate to the client's plan and click on the Fees / Charges tab.
2
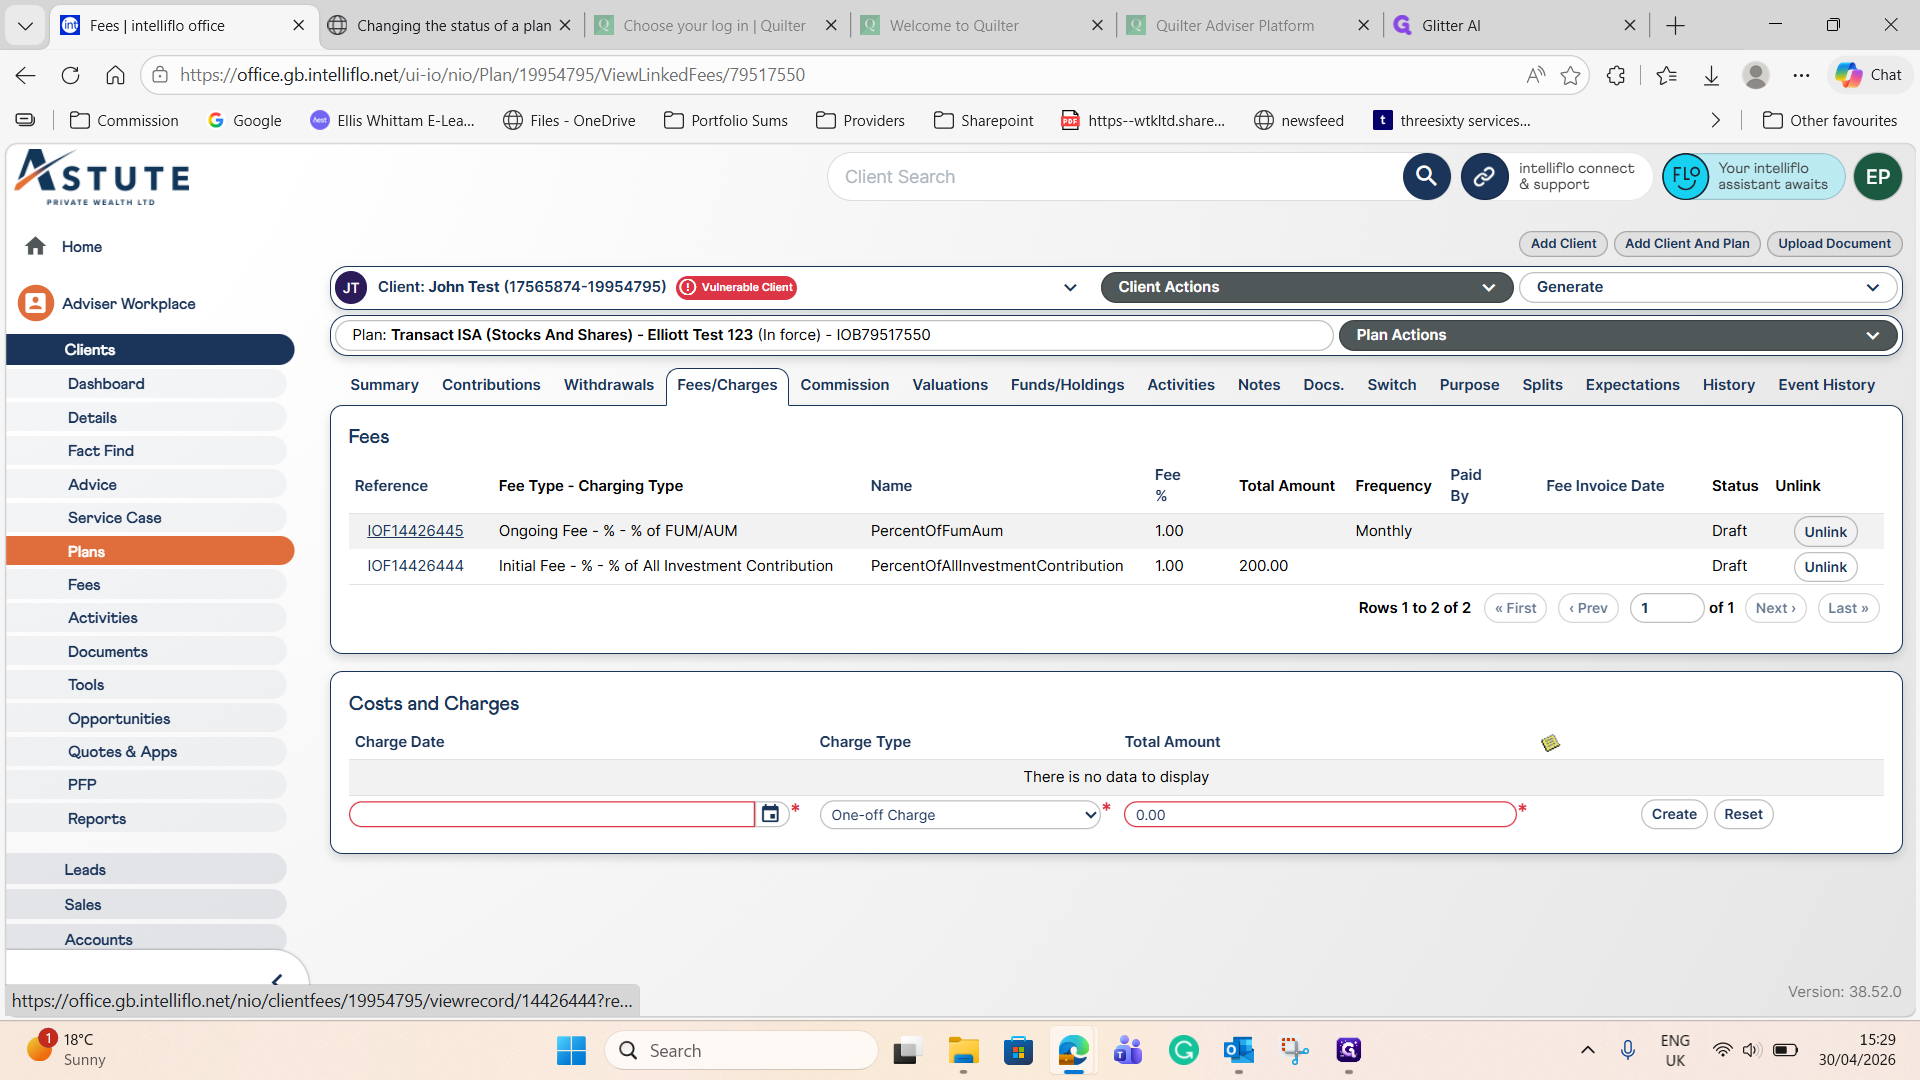
Select the draft initial fee from the list to edit its details.
3
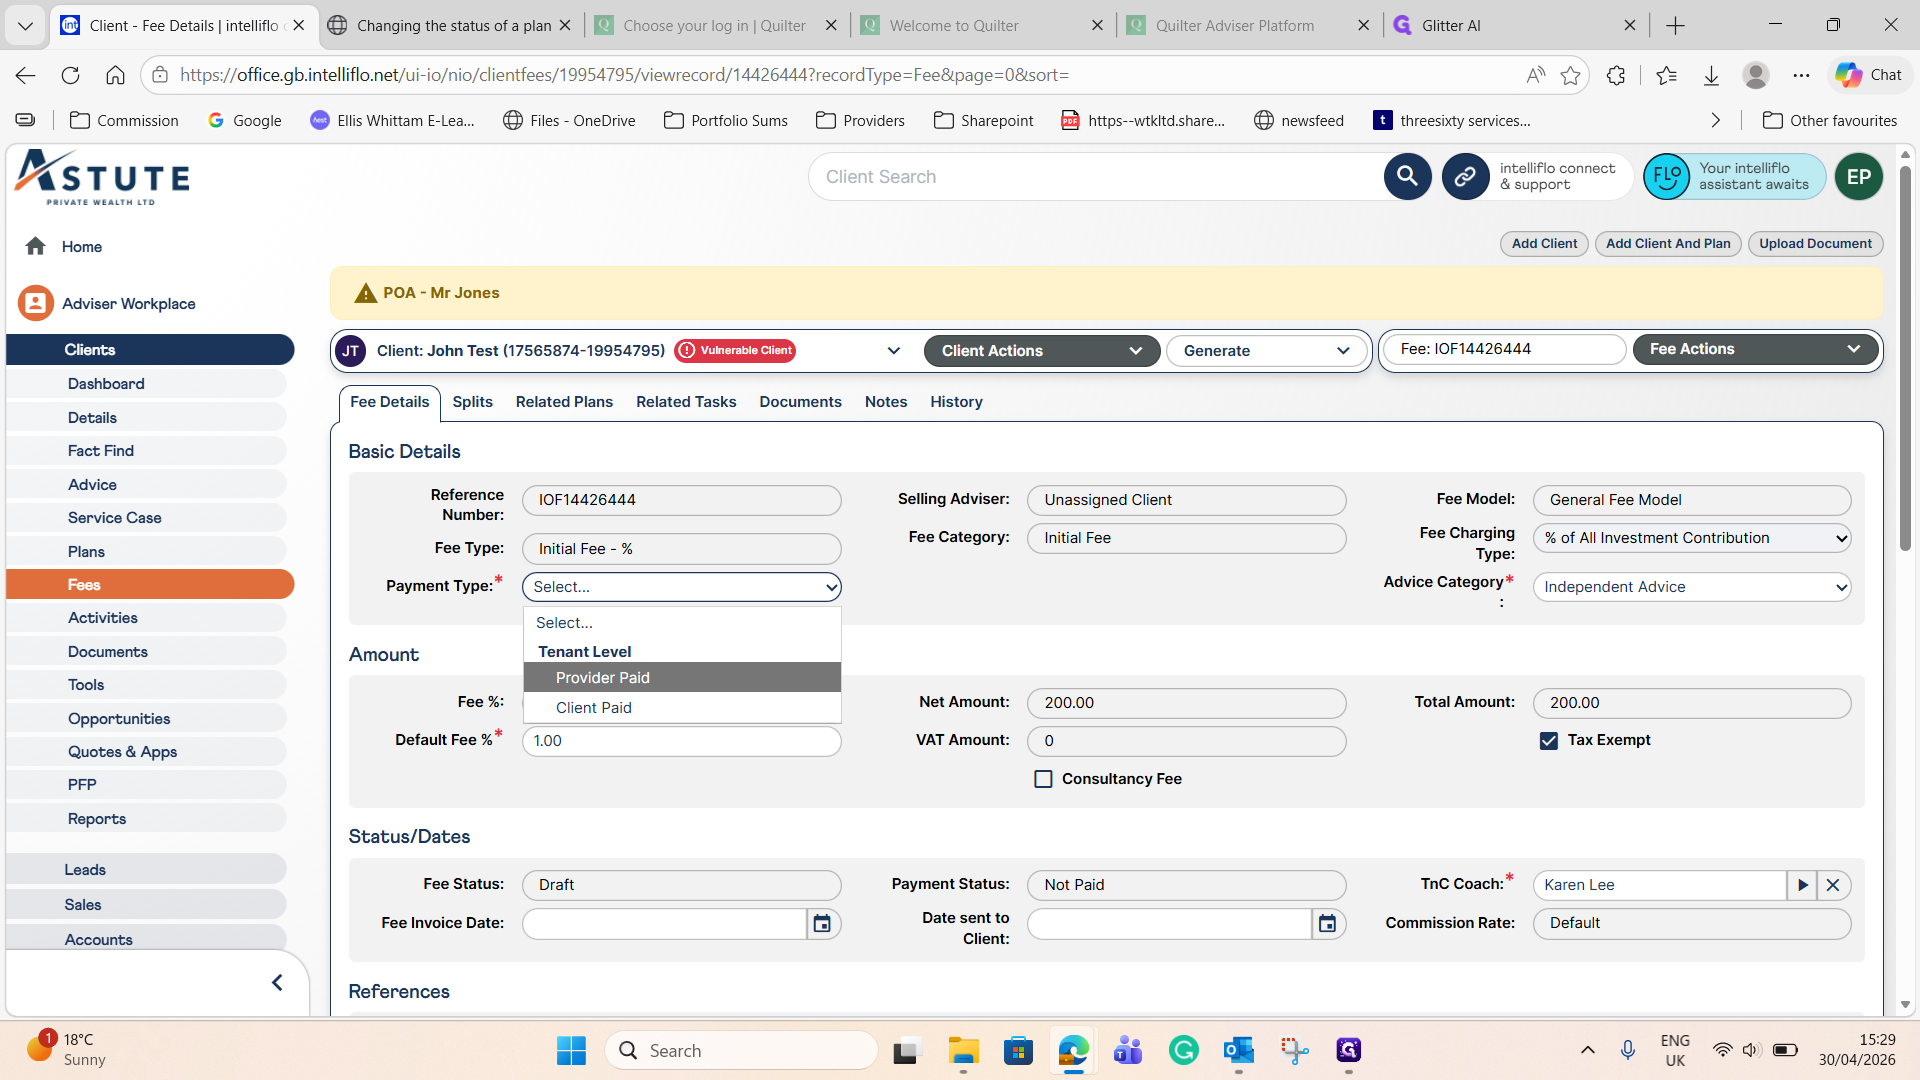
Change the Payment Type to match your arrangement (e.g., Provider Paid or Client Paid).
4
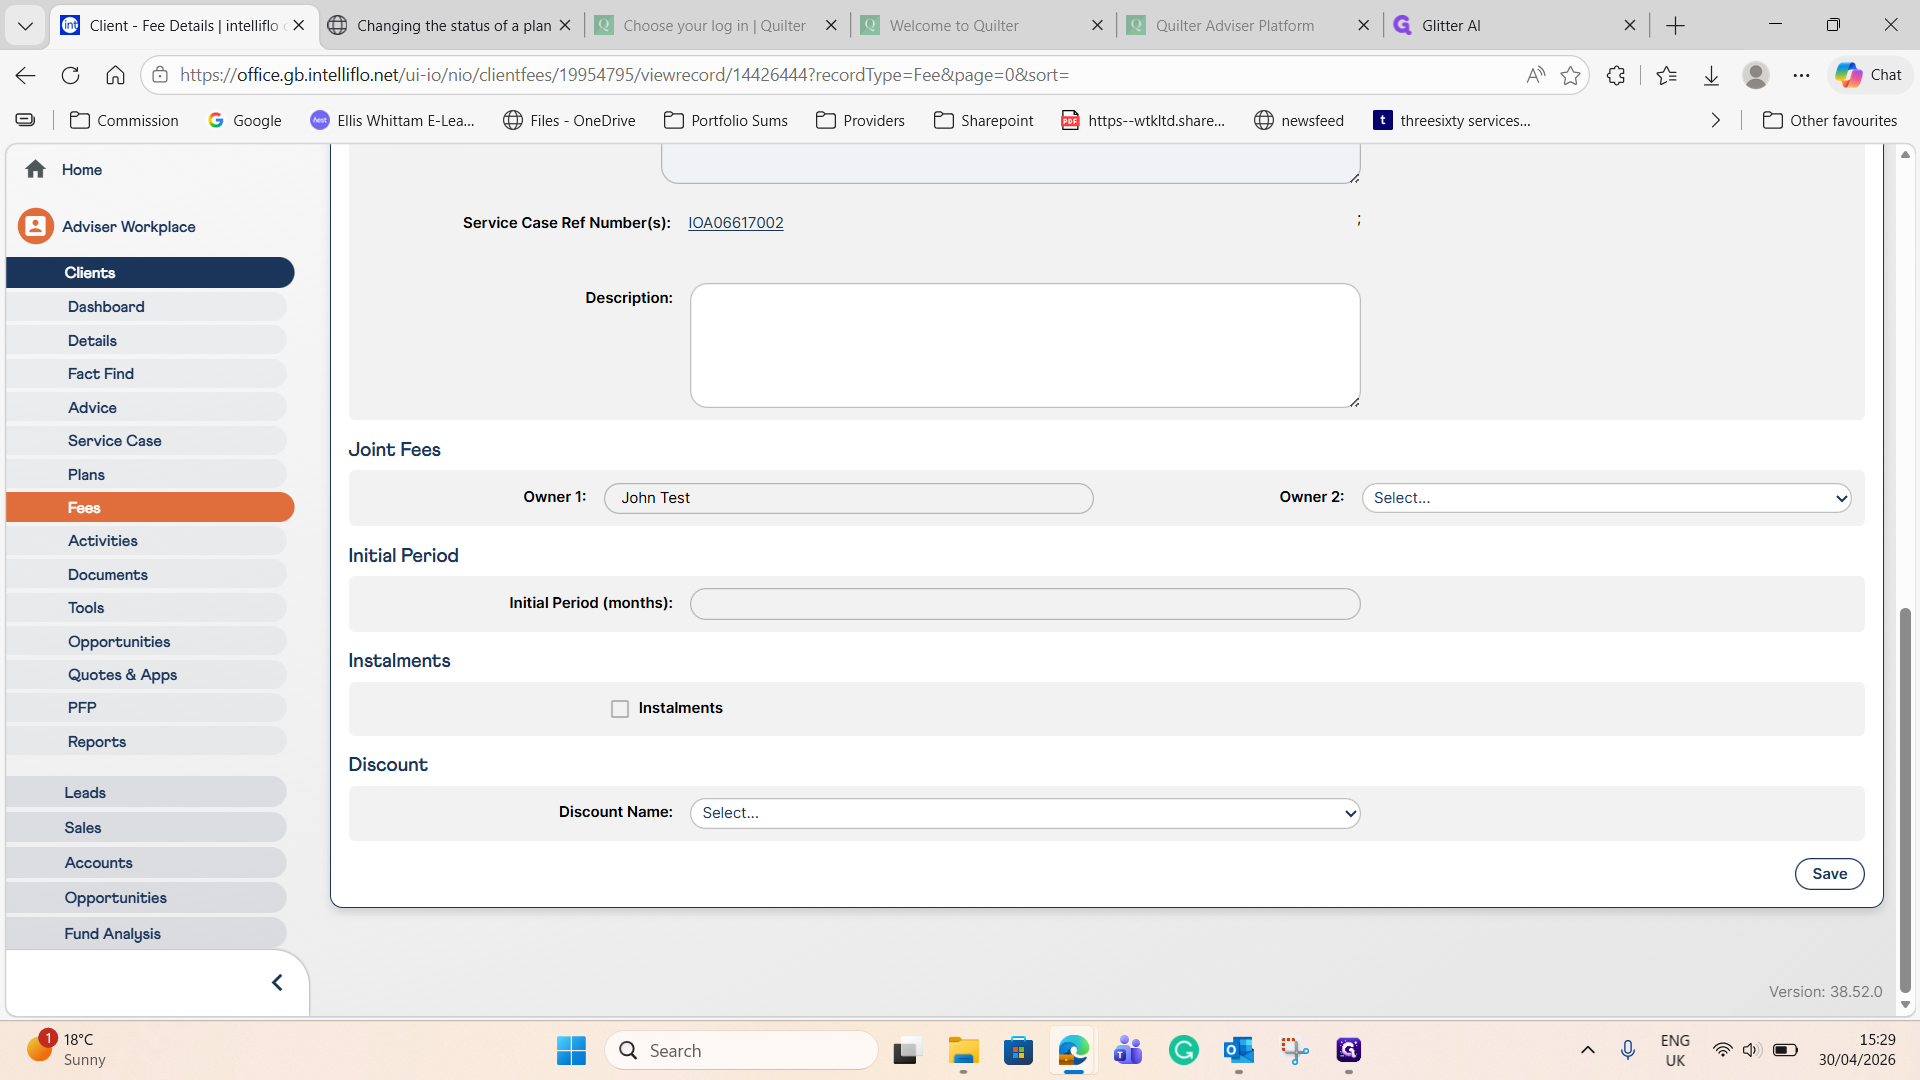
Click Save at the bottom of the form.
With the details confirmed, you can now change the status of the fee to make it due.
5
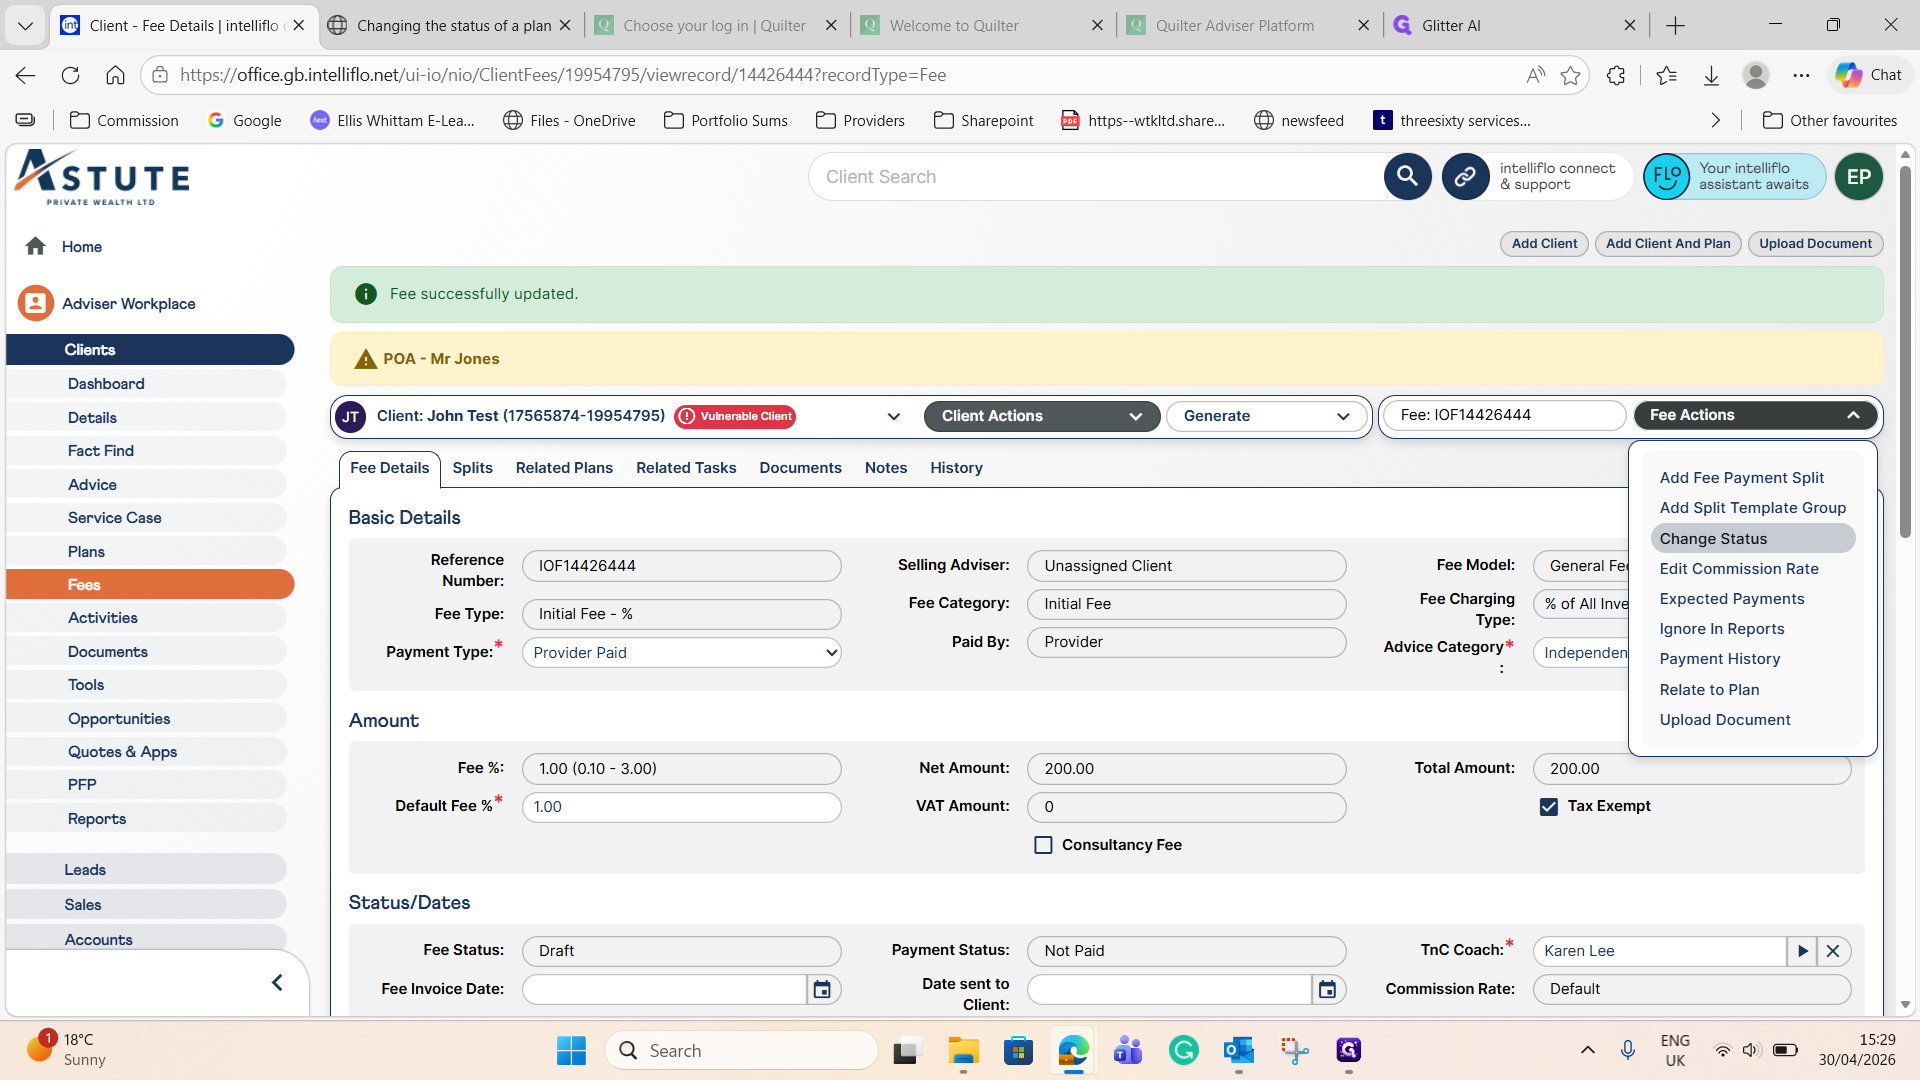
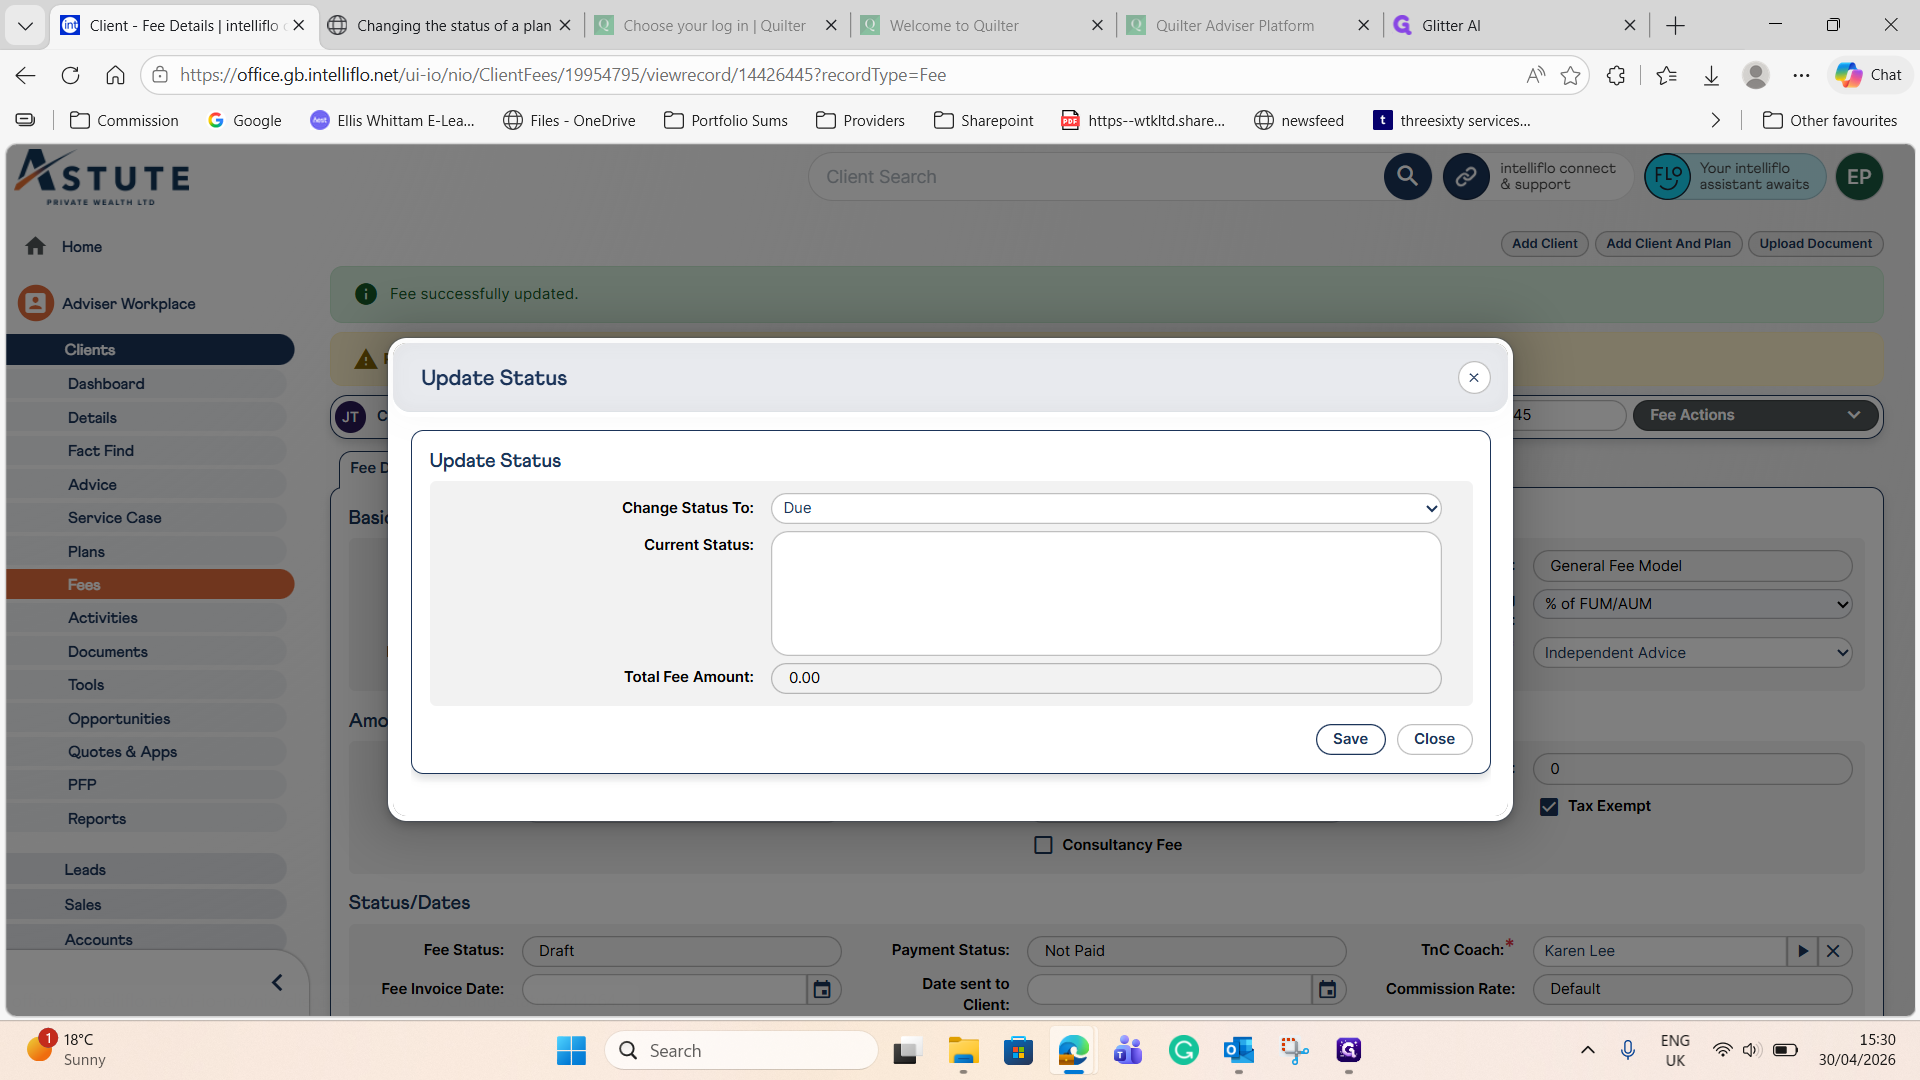
Click the Fee Actions dropdown menu and select Change Status.
6
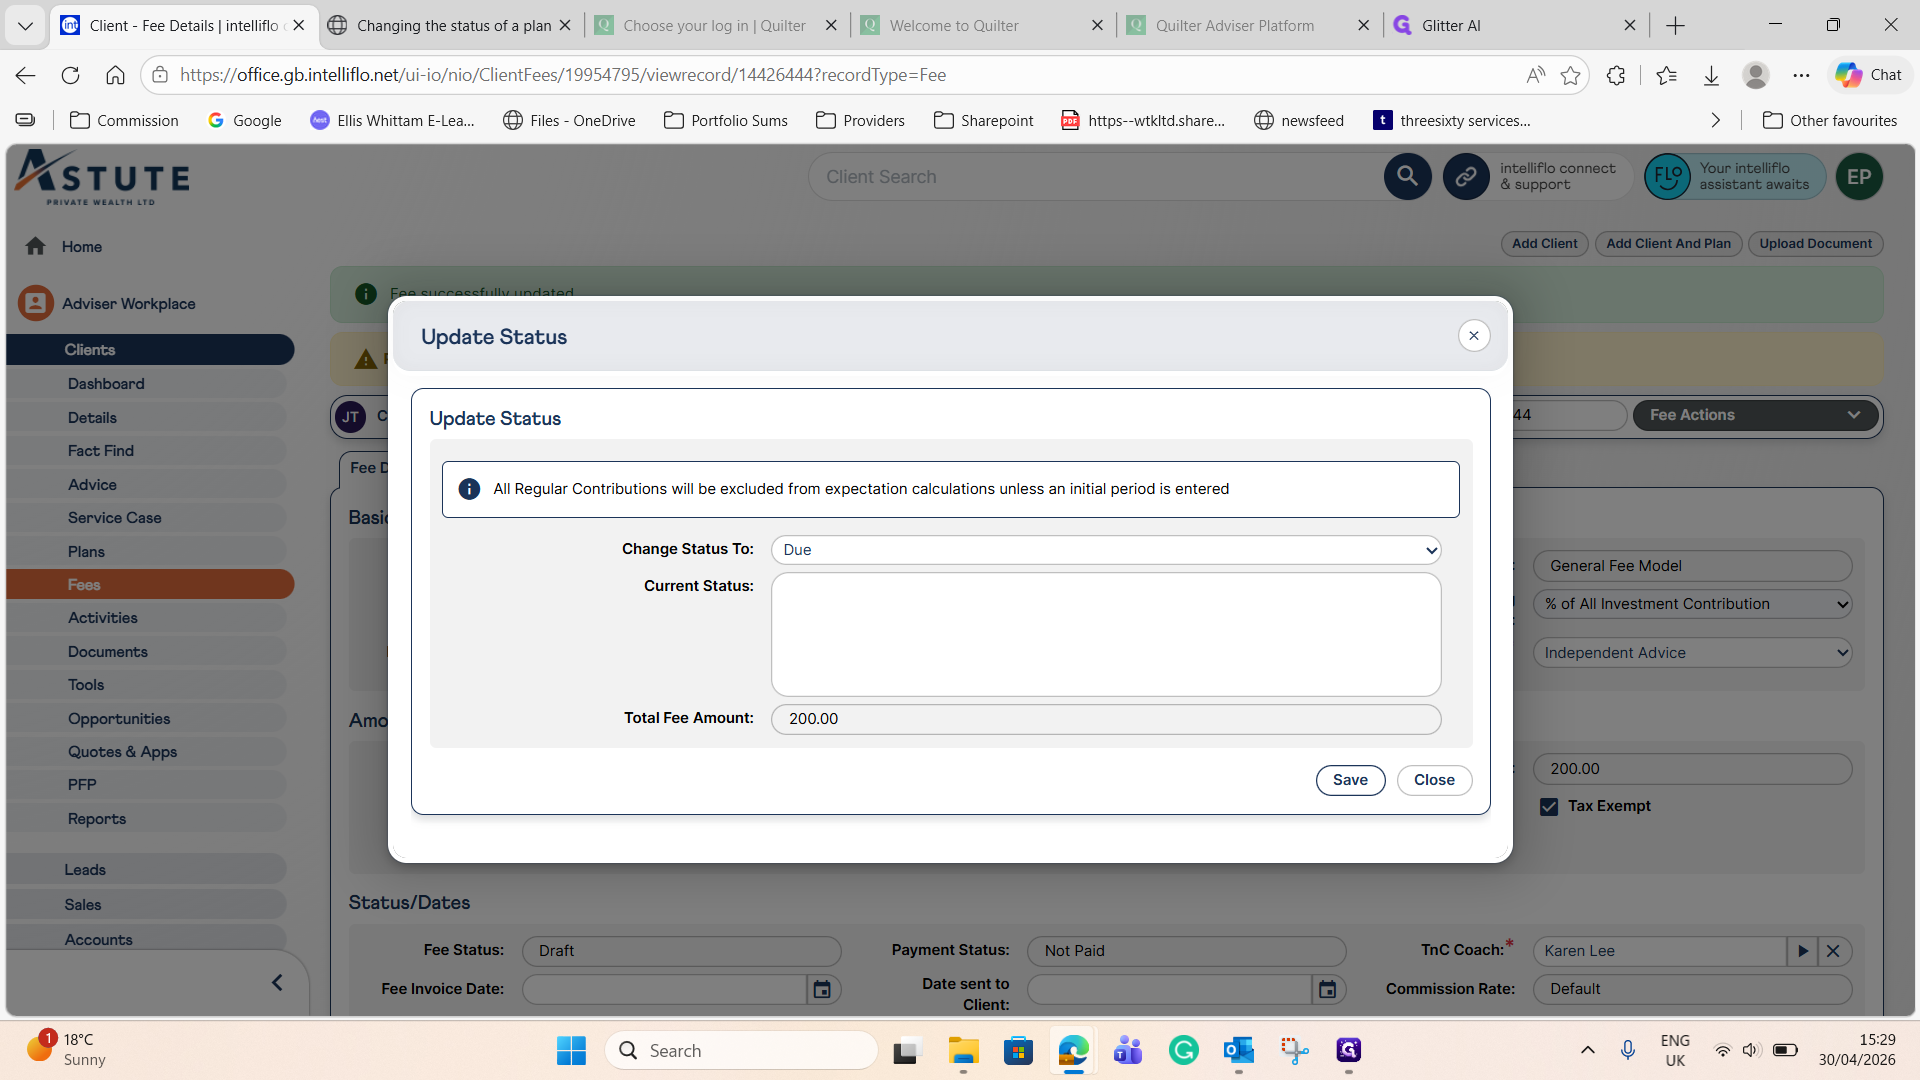
Update the status to Due and click Save in the modal window.
Updating the Ongoing Fee
Next, you will follow a similar workflow to update the ongoing fee.
7
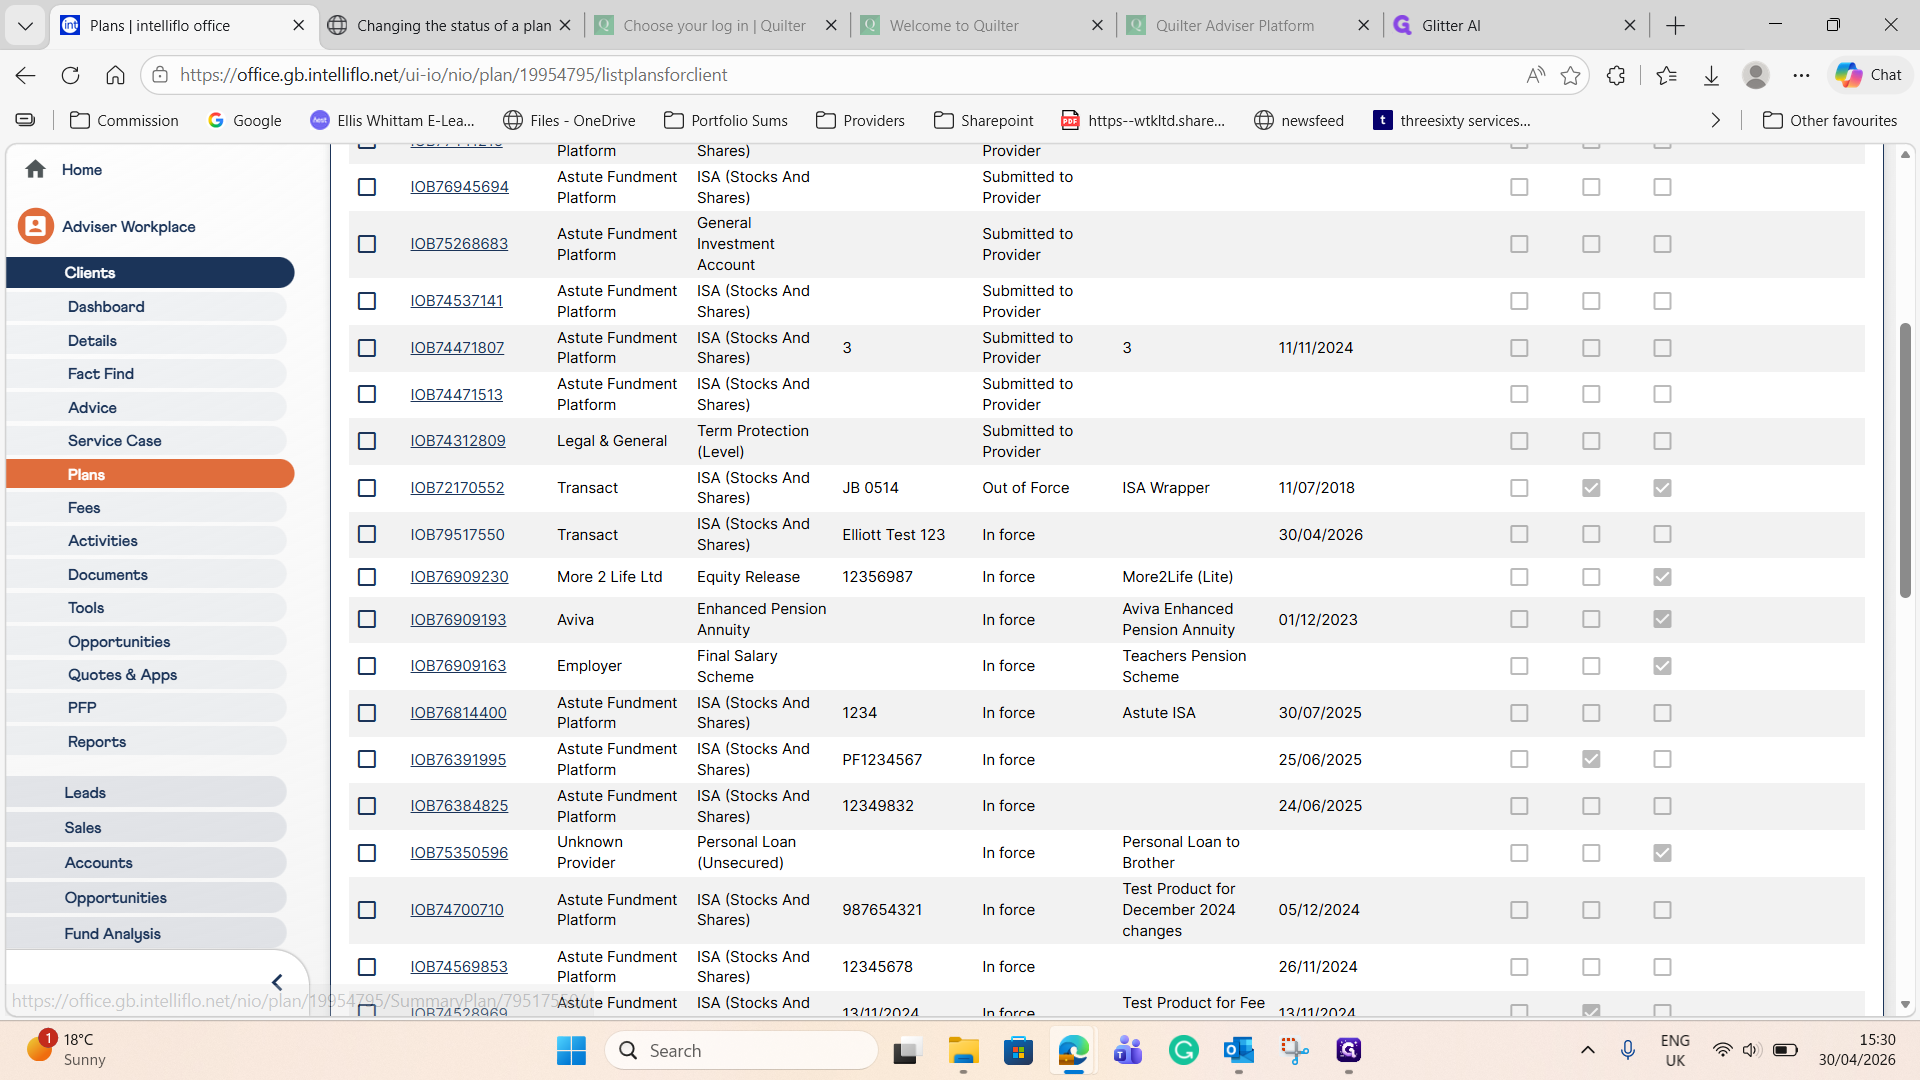
Go back to the client's plan list and click on the relevant plan to reopen it.
8
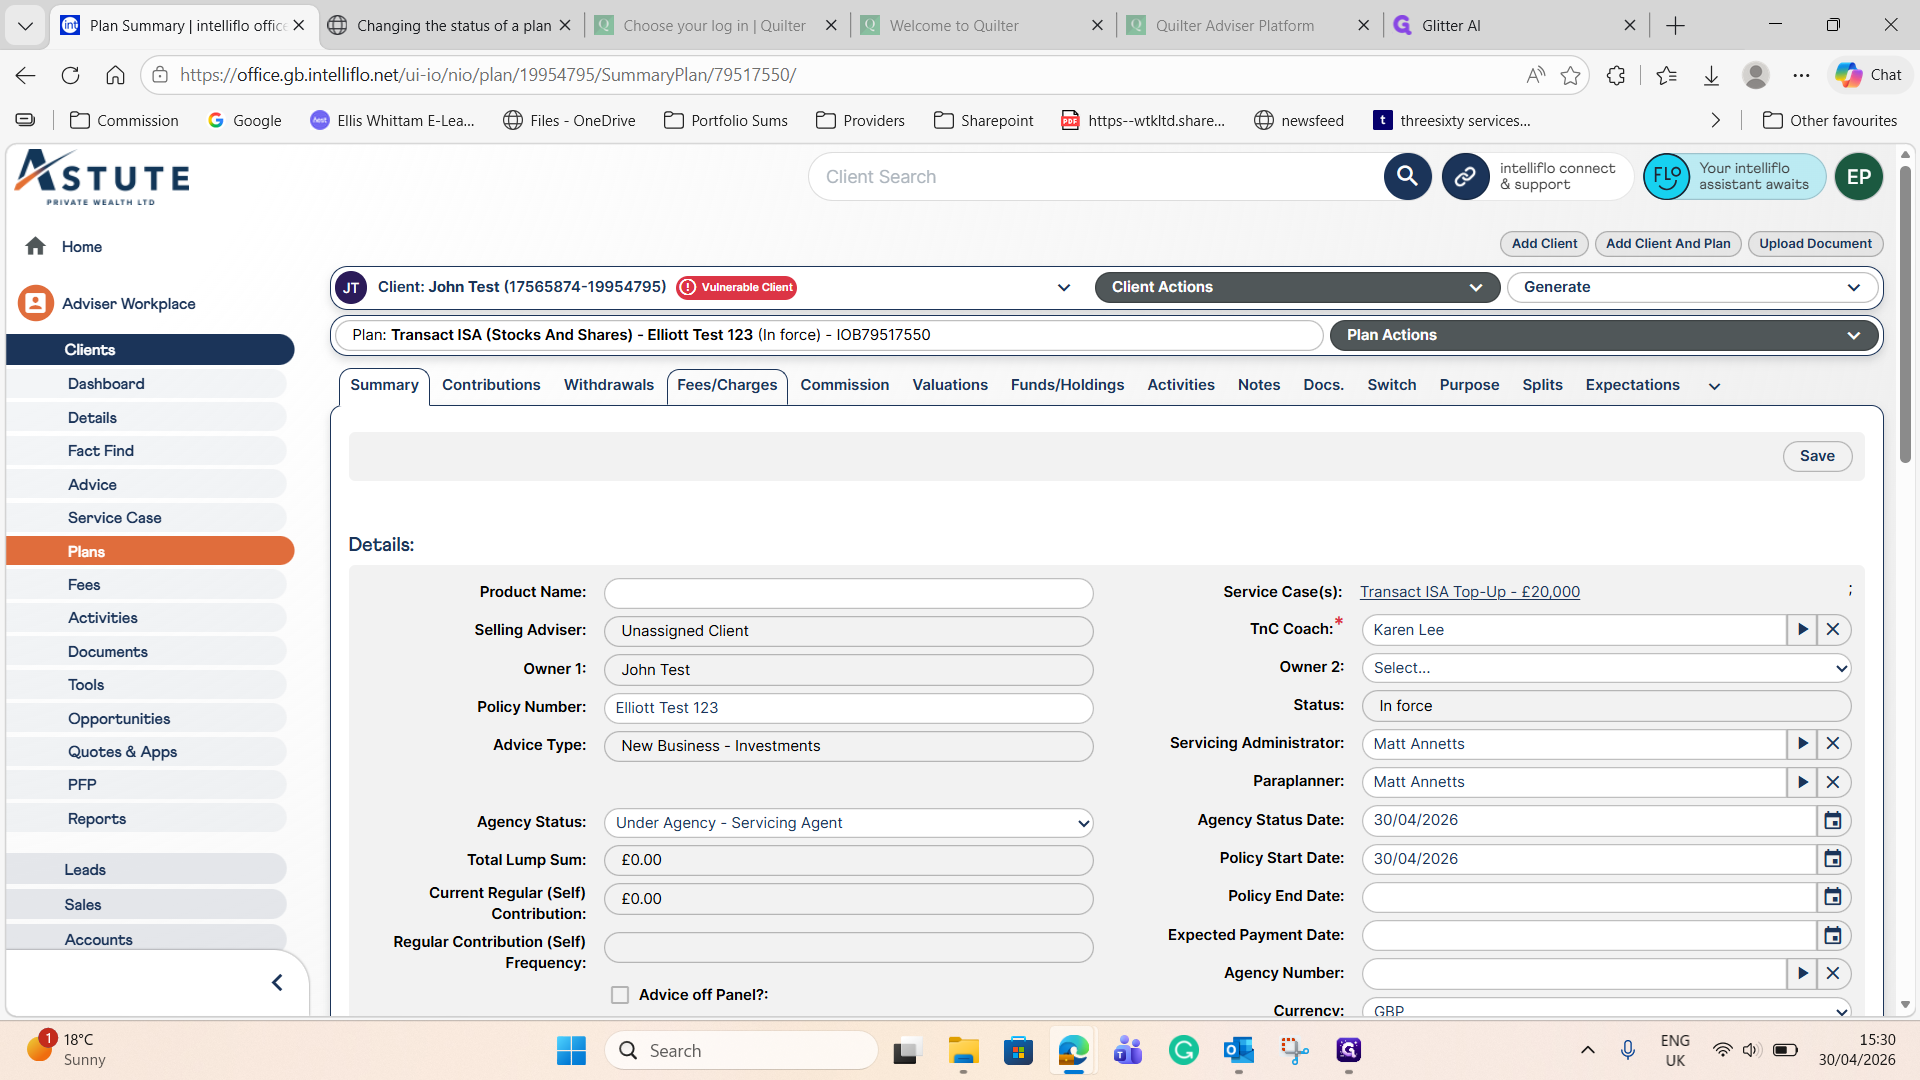
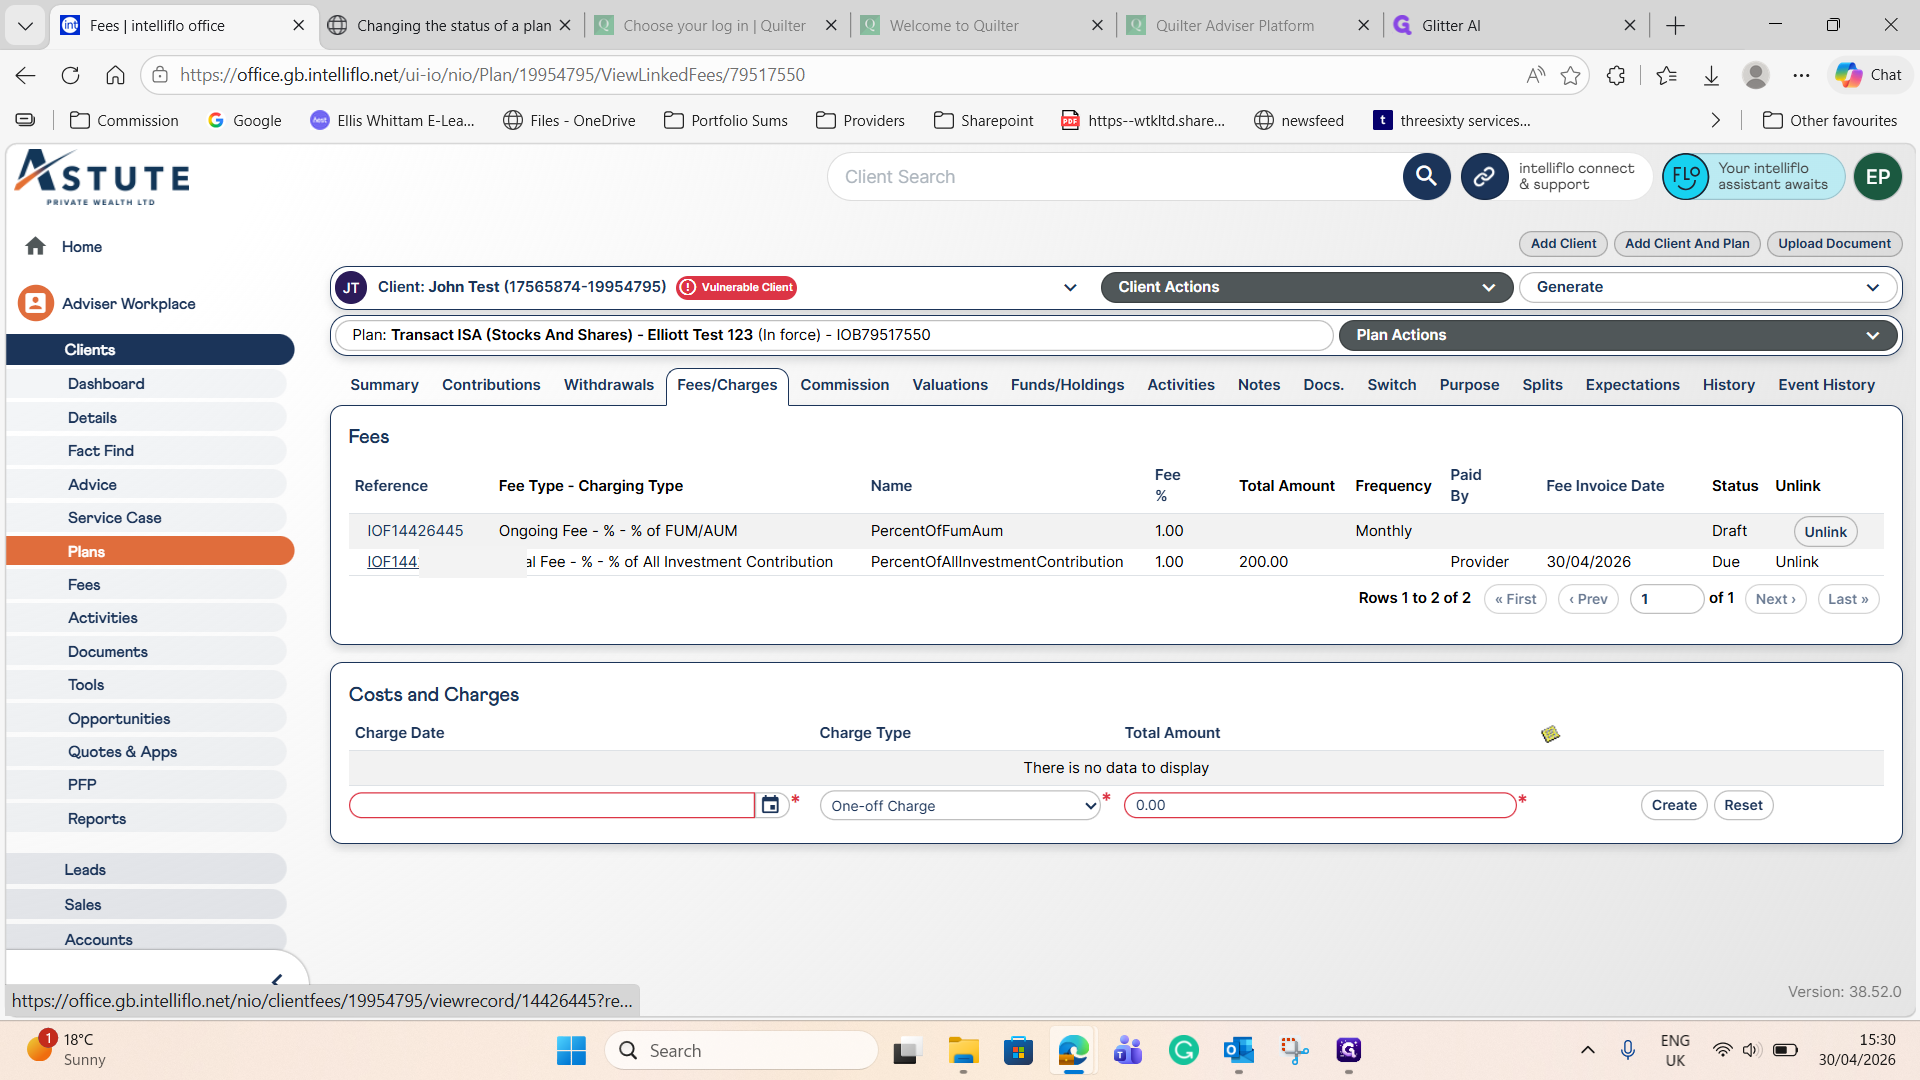
Click on the Fees / Charges tab again.
9
Select the draft ongoing fee from the list.
10
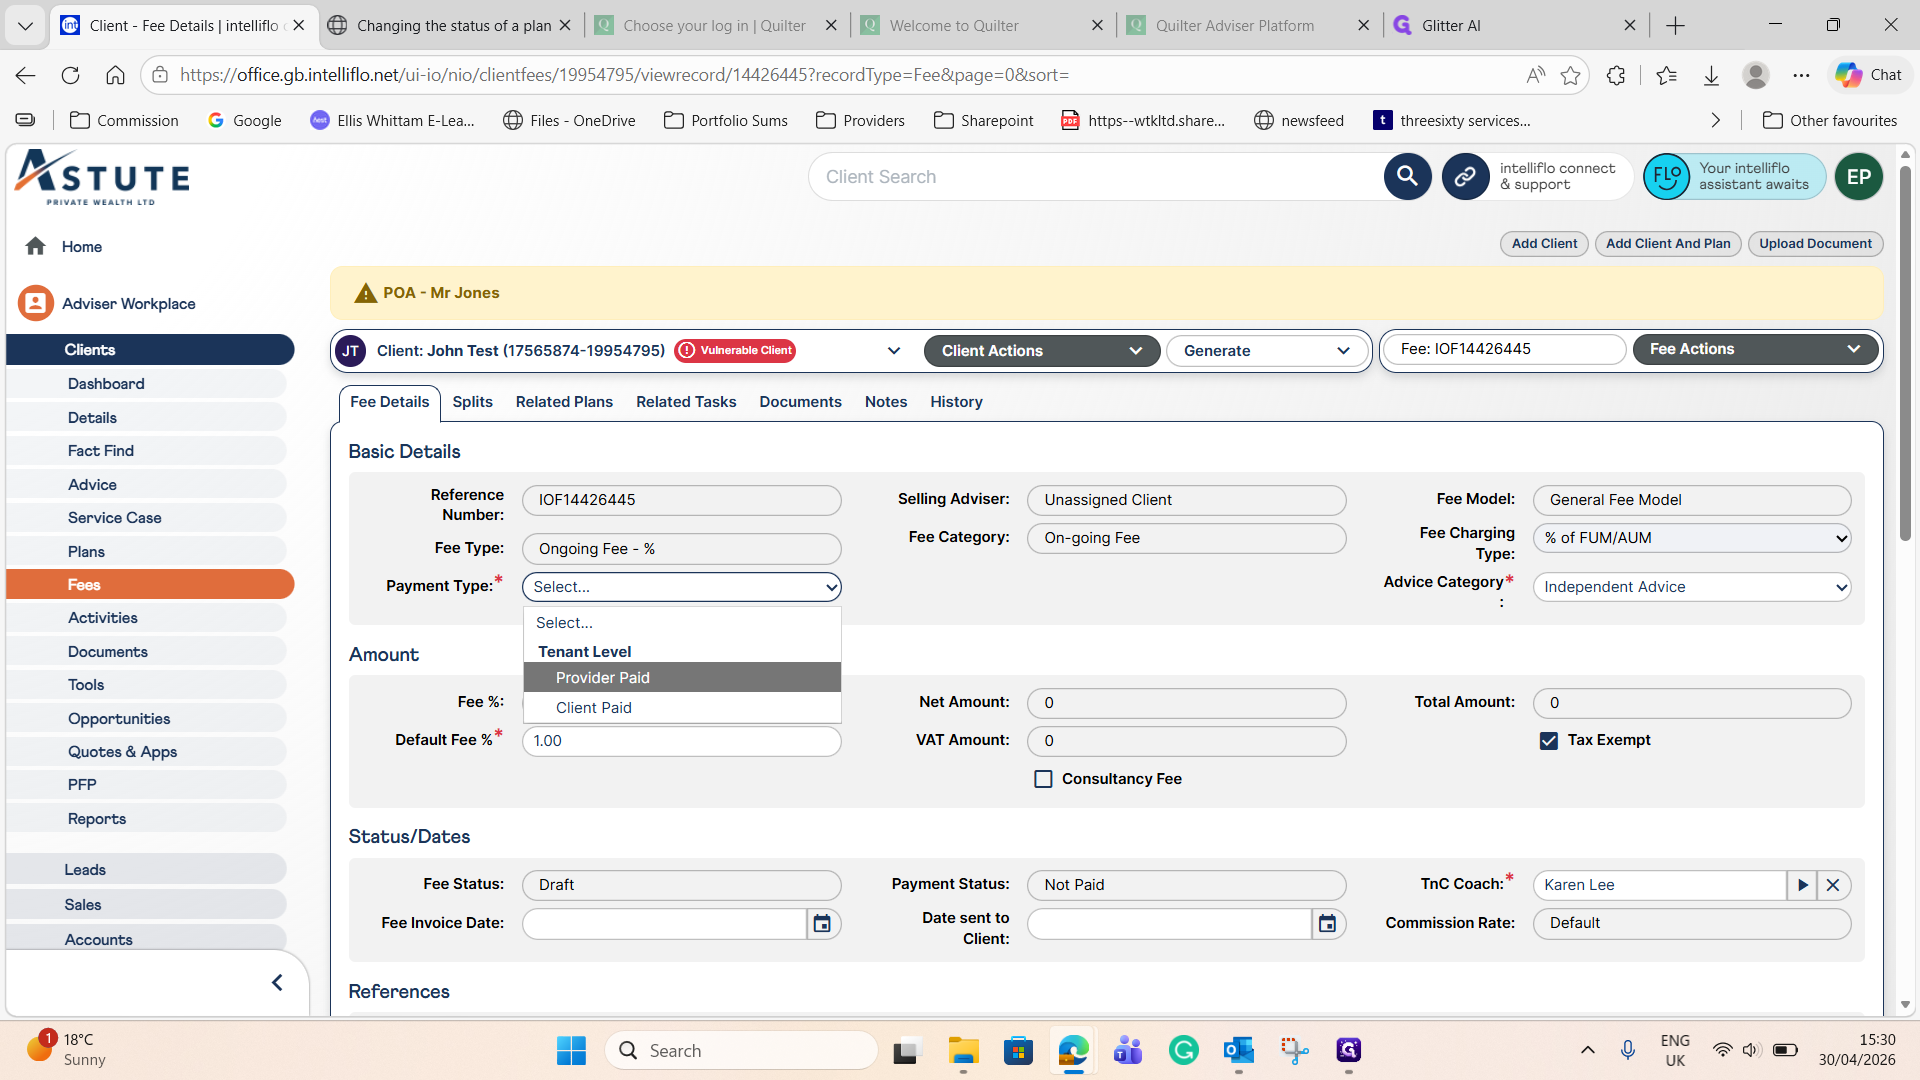
Change the Payment Type to Provider Paid (or another appropriate option).
11
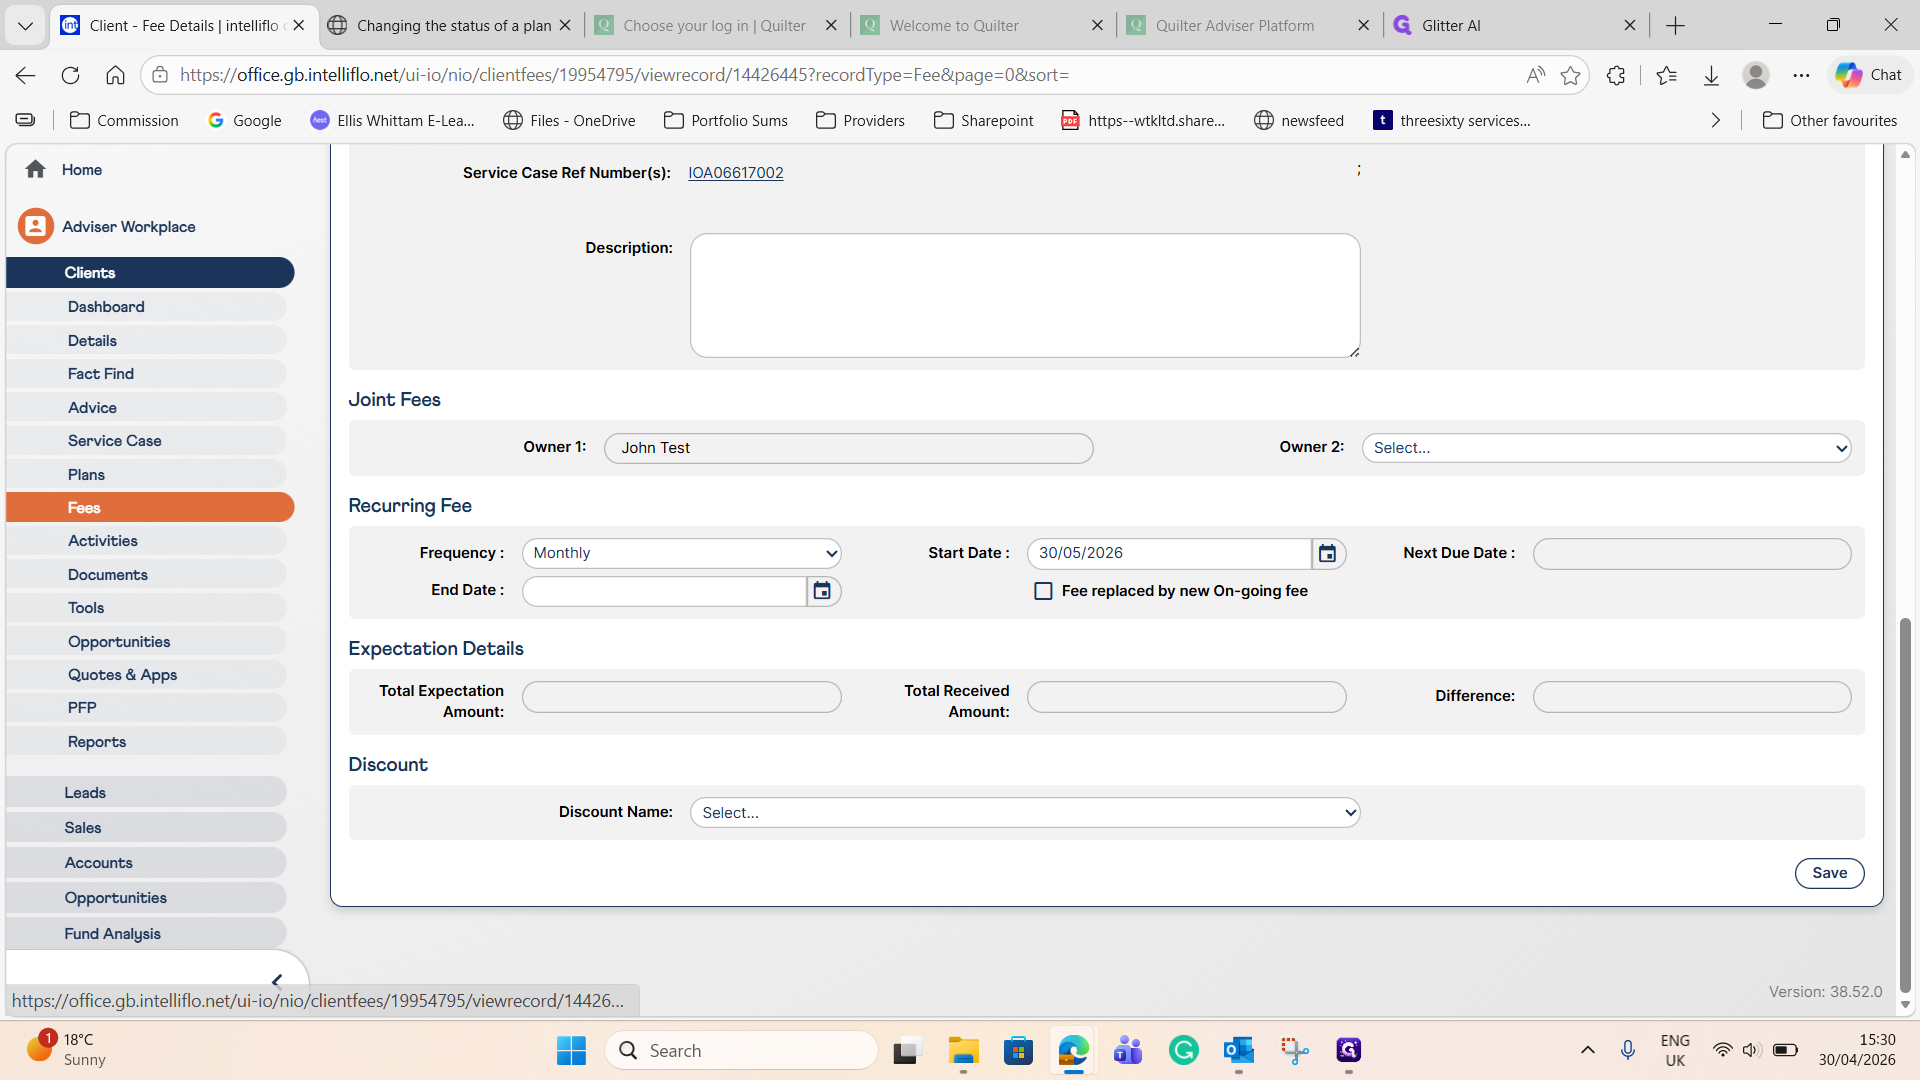
Enter the correct start date for the ongoing fee. This is usually set for the following month.
12
Click Save.
13
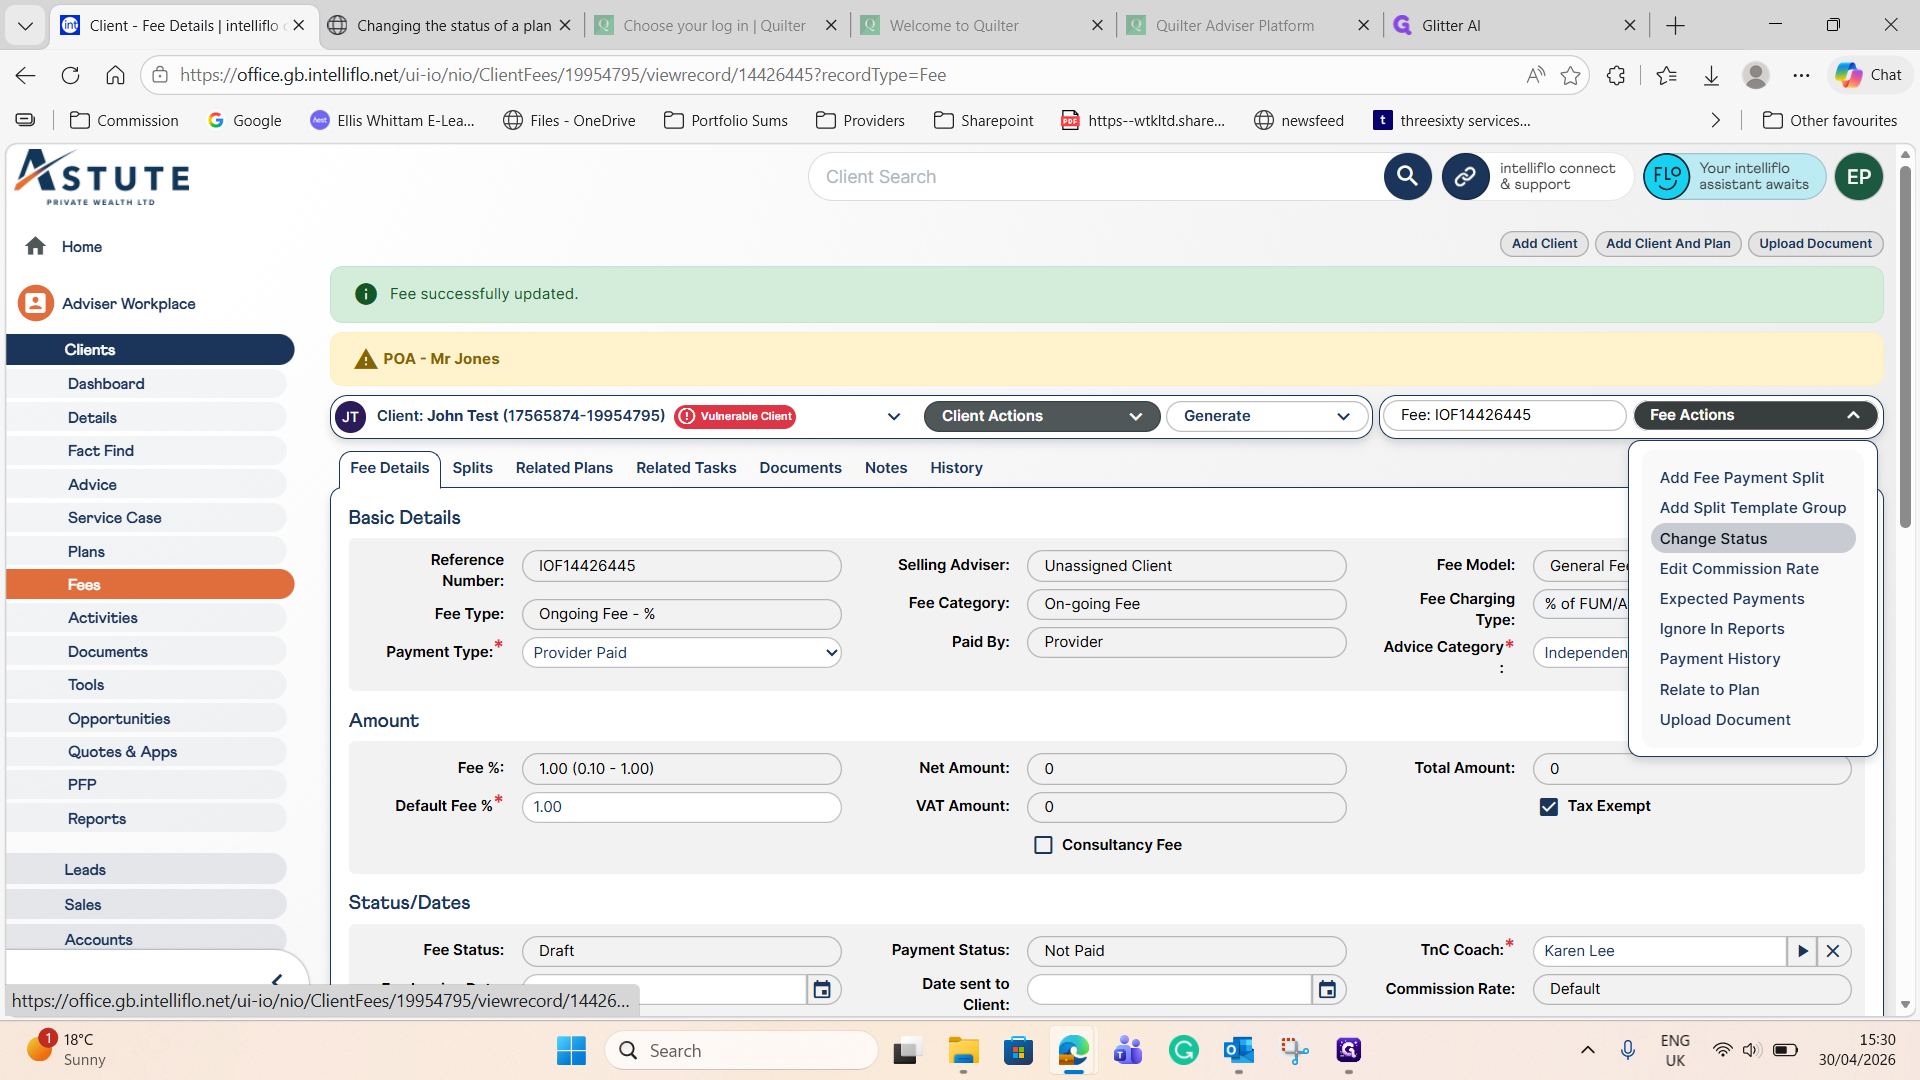
Click the Fee Actions dropdown menu and select Change Status.
14
Set the status to Due and click Save to finalize the ongoing fee.
Your fees are now active and will be tracked appropriately within the system.