Icon

How to Upload Digital Products to GoHighLevel

Learn step-by-step how to configure, format, and upload digital products, including Canva audio links, to your GoHighLevel product catalog.

By Rozette Kean Gaudan

This guide explains how to successfully upload digital products to the Digihive platform via GoHighLevel. By following these instructions, you will ensure that new audio storybooks and digital downloads are properly formatted, priced, and delivered to customers upon purchase.

This guide is intended for e-commerce managers and administrative team members managing product catalogs. It should be referenced whenever adding new digital inventory from the master product tracking spreadsheet into GoHighLevel.

1. Filter the Product Spreadsheet
1
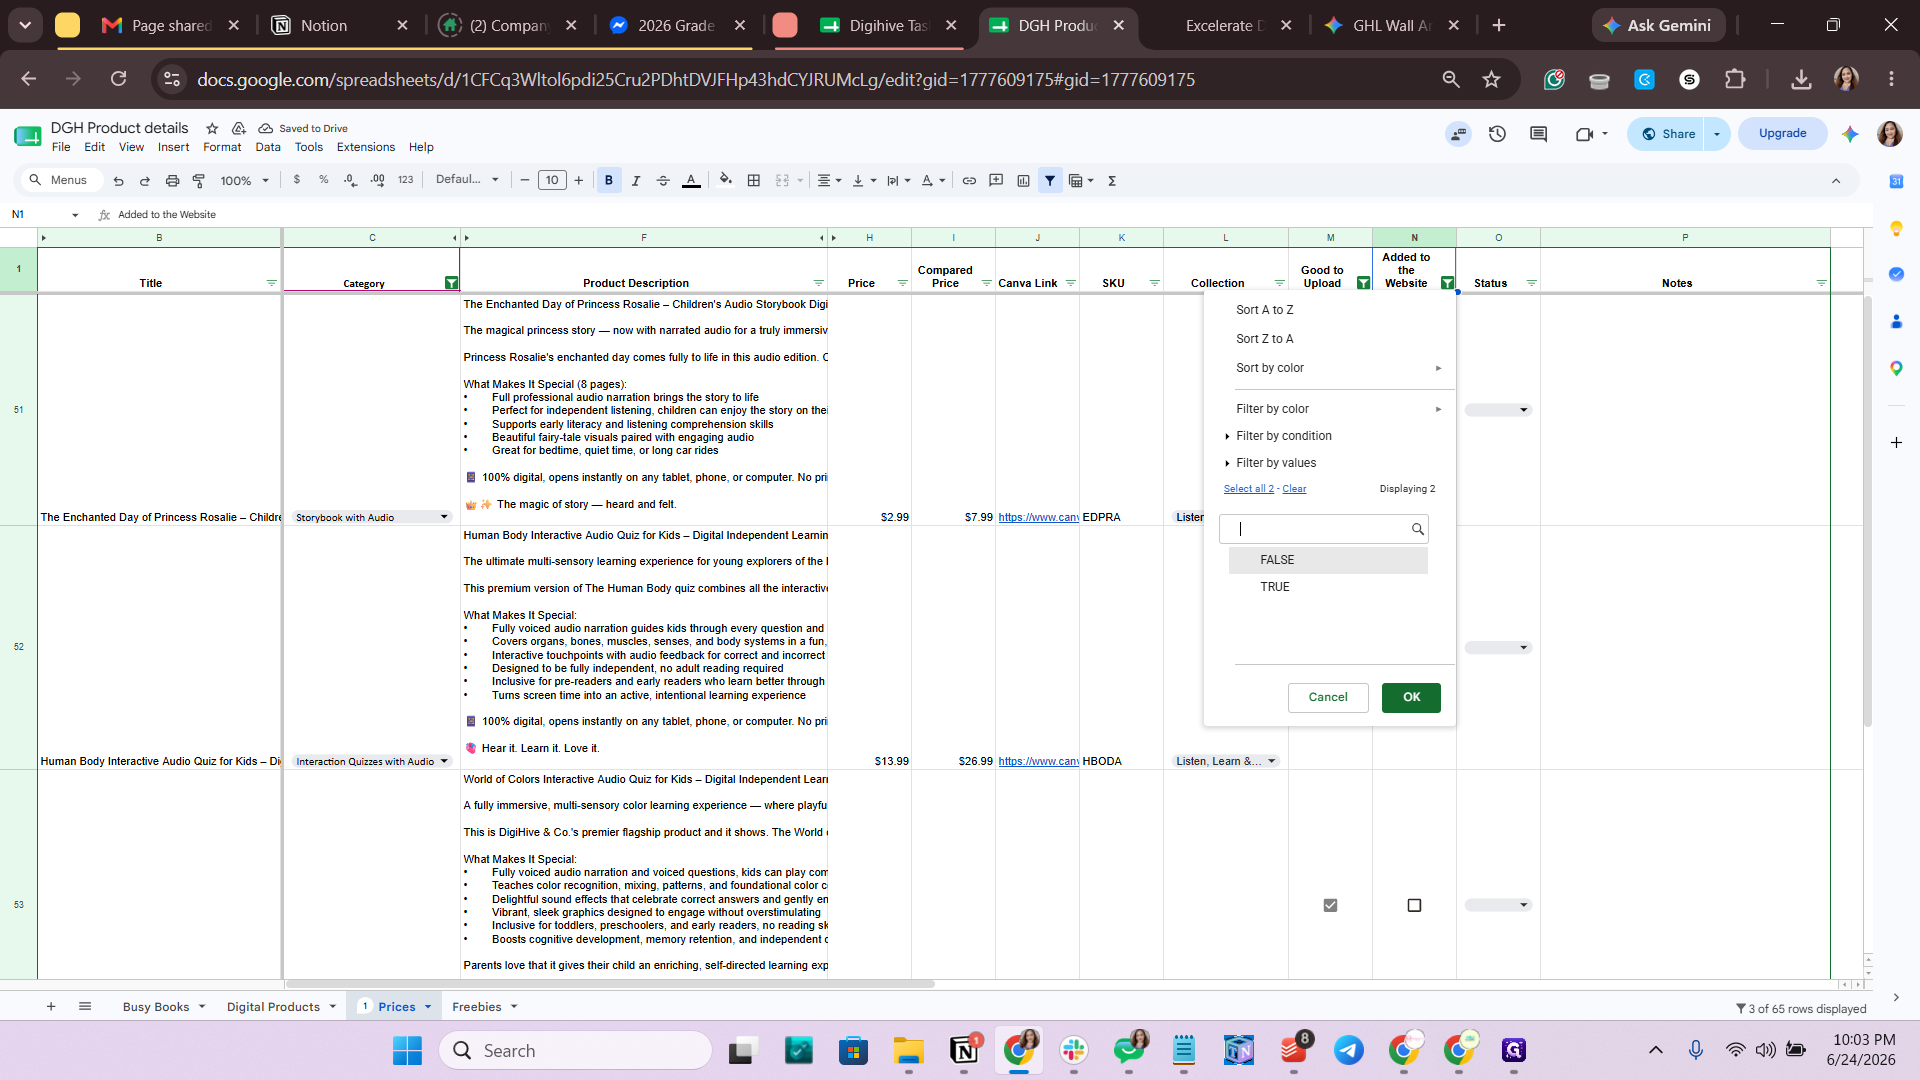
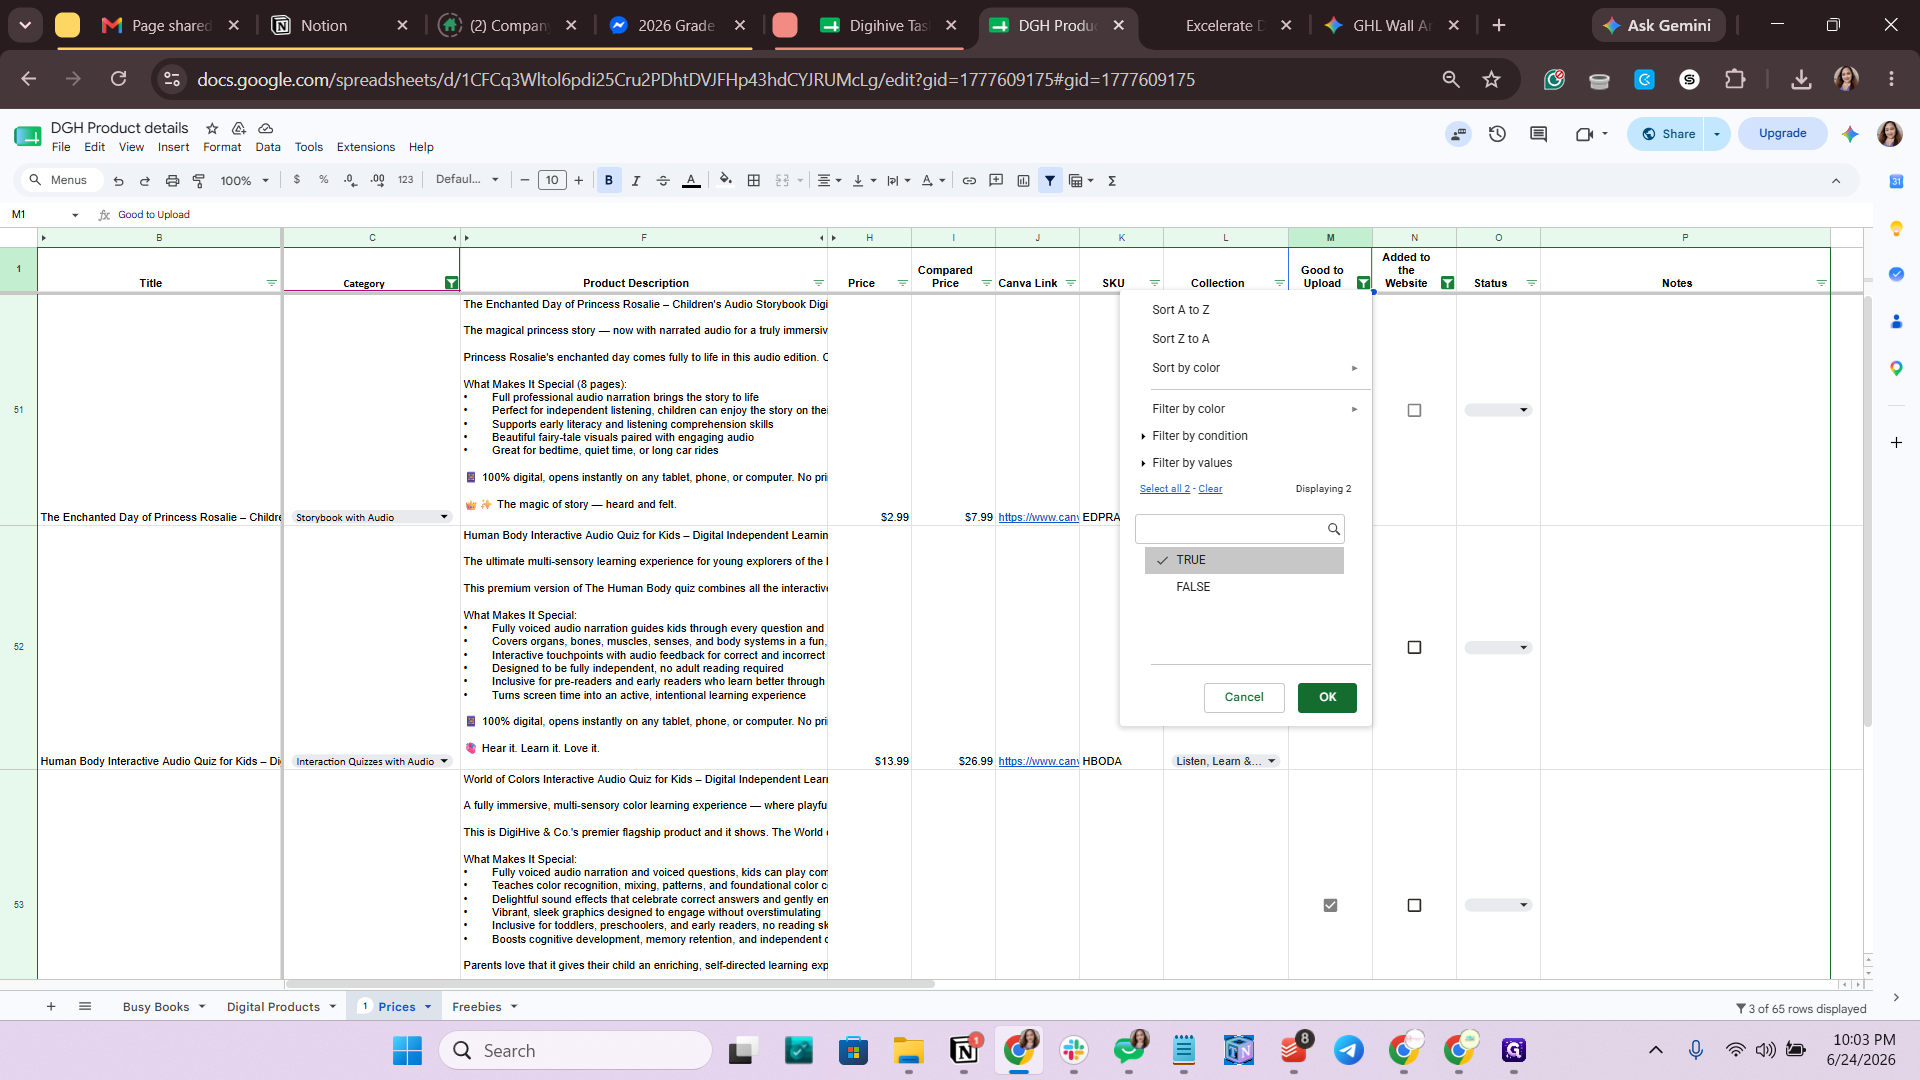
Click the filter for the Good to Upload column and select True.
Step #1: Click the filter for the Good to Upload column and select True.
2
Click the filter for the Added to the Website column and select False.
Step #2: Click the filter for the Added to the Website column and select False.

2. Create the Product in GoHighLevel
3
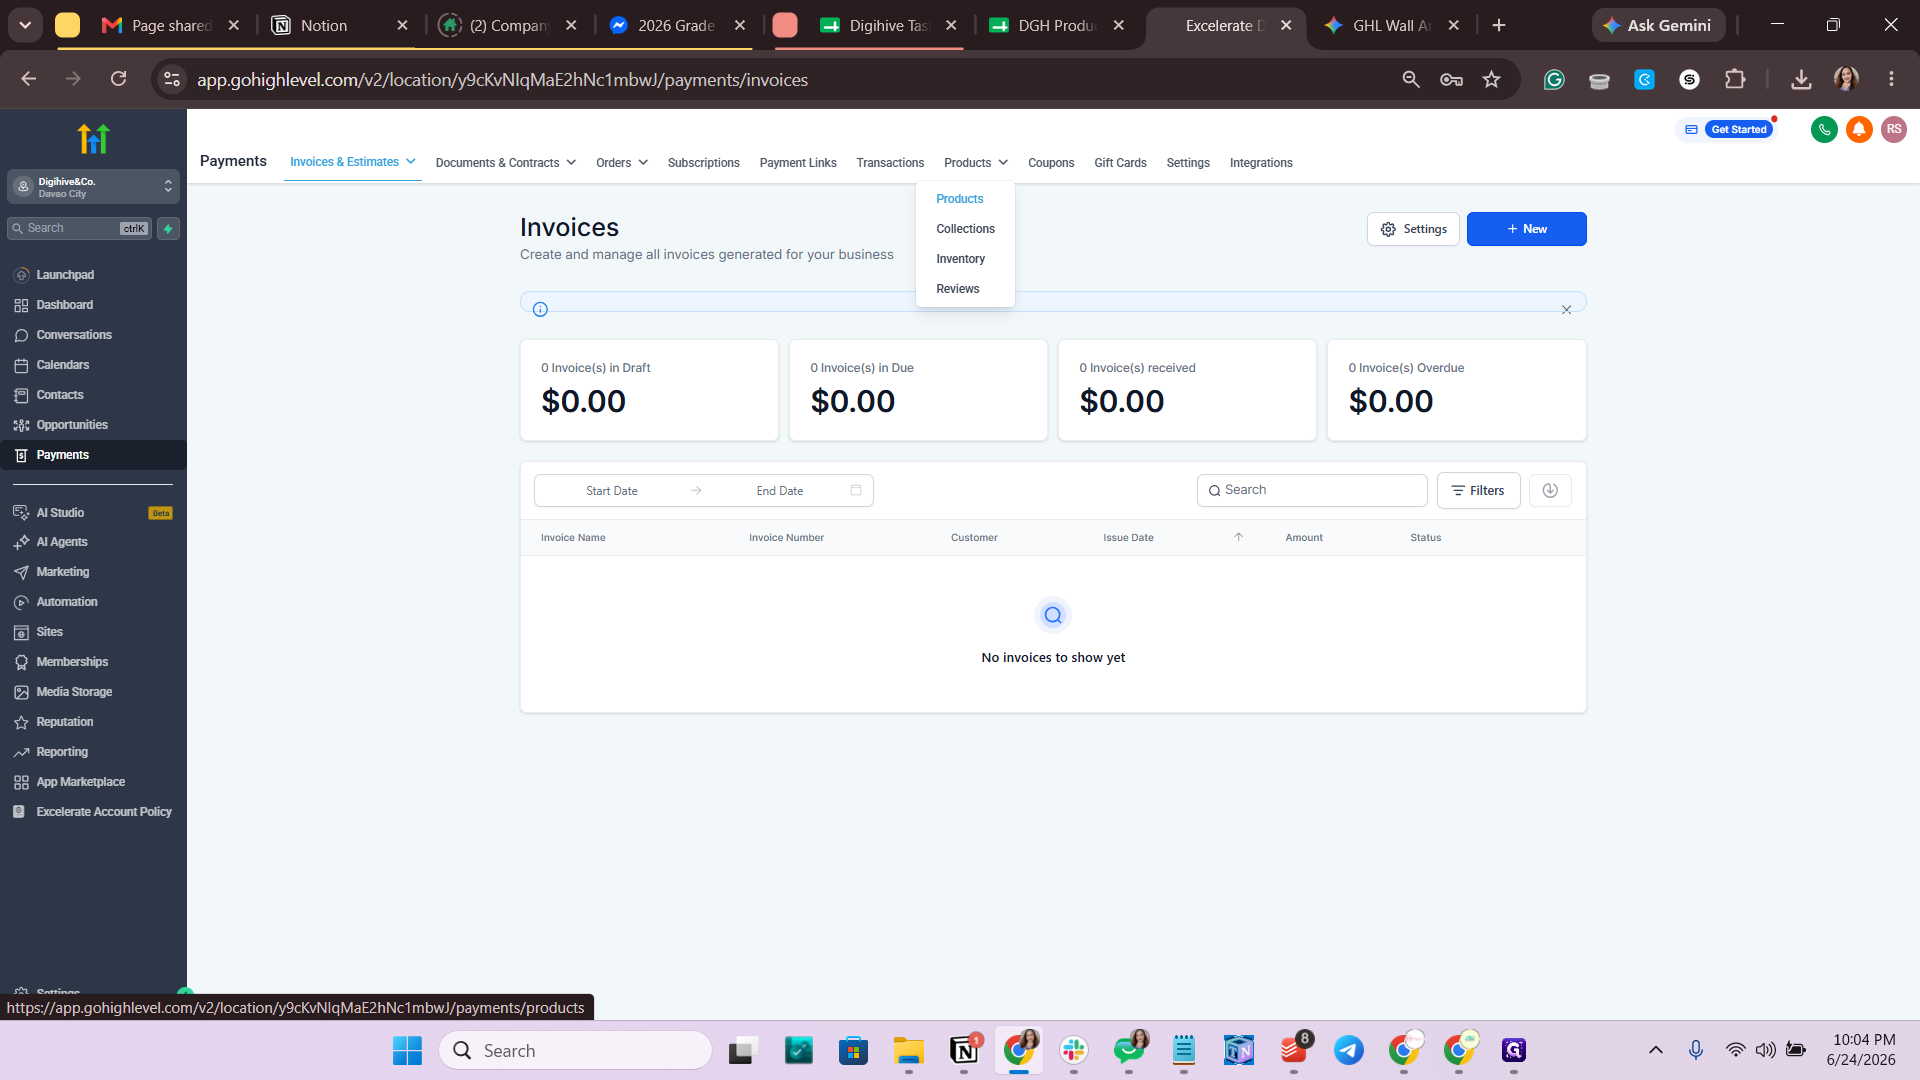
In GoHighLevel, navigate to Payments in the left sidebar.
Step #3: In GoHighLevel, navigate to Payments in the left sidebar.
4
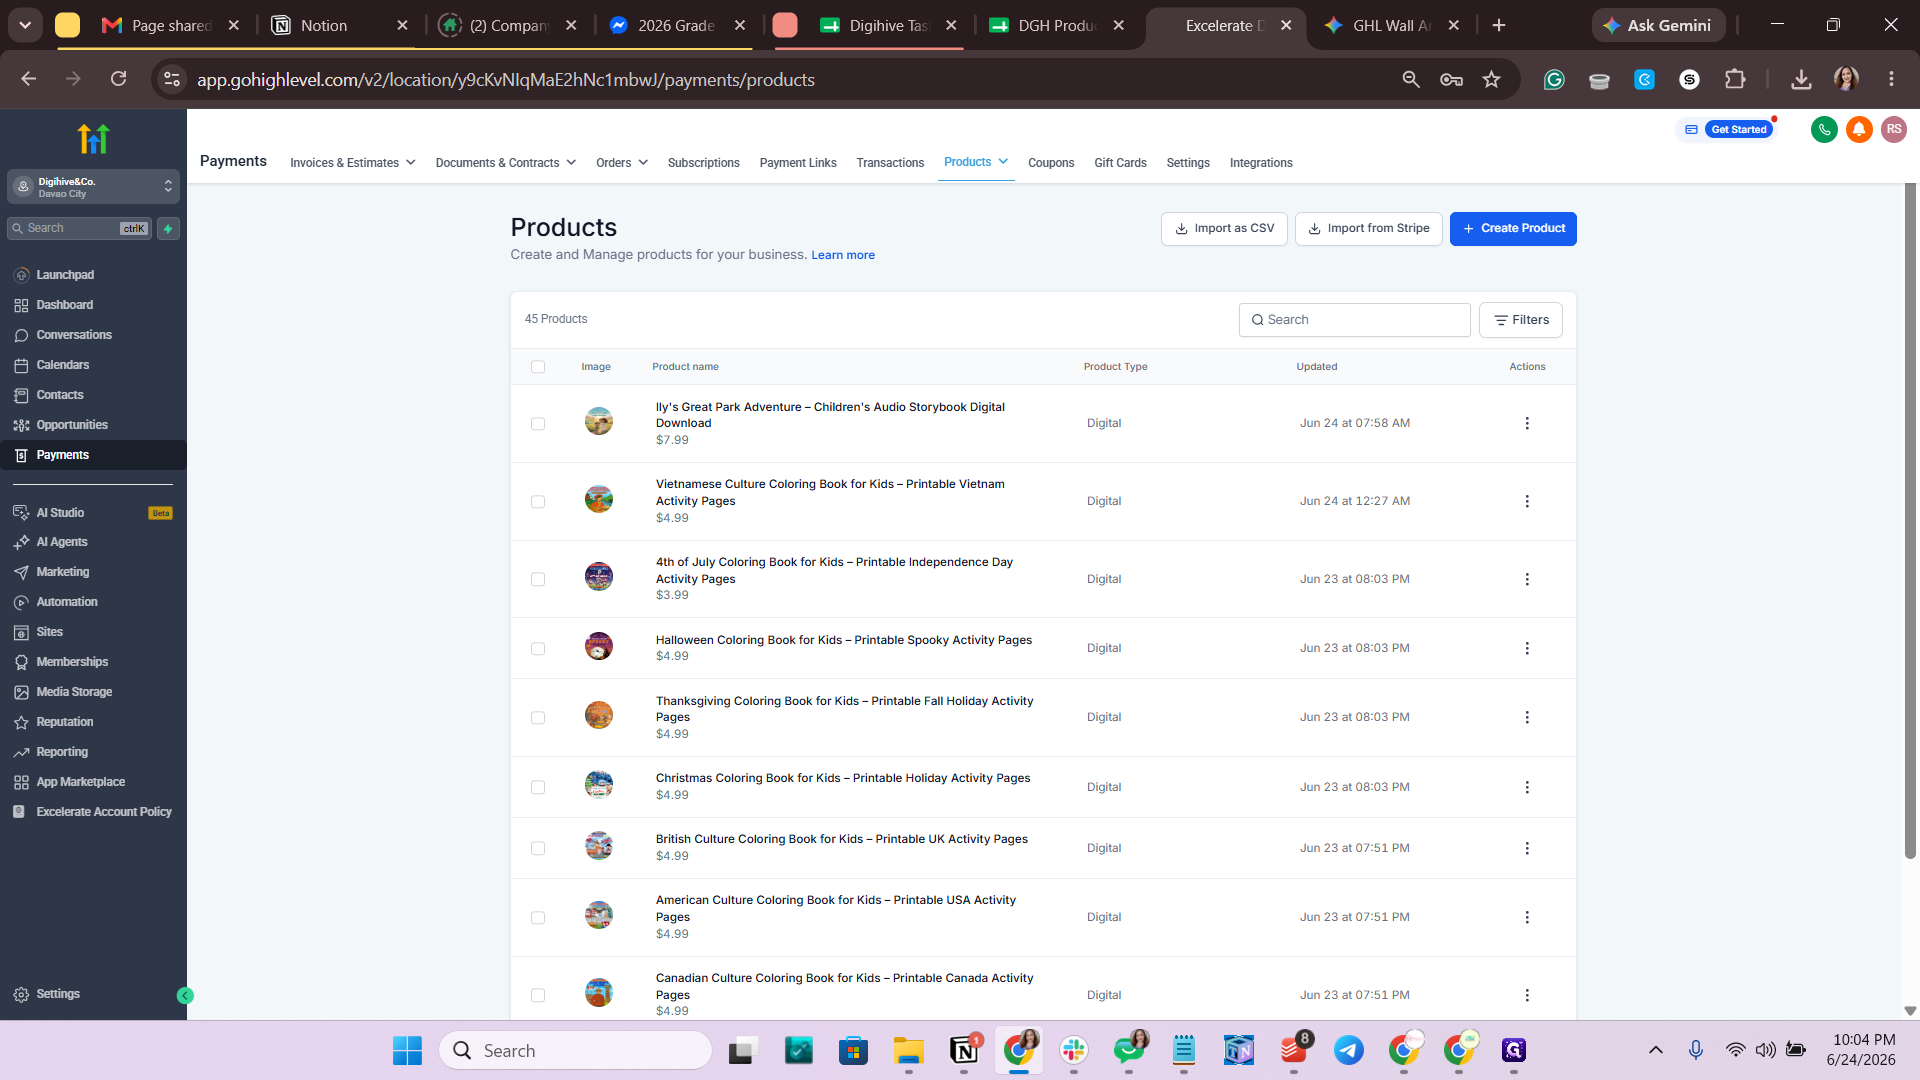
Click the Products tab at the top of the page.
Step #4: Click the Products tab at the top of the page.
5
Click + Create Product.
Step #5: Click + Create Product.
6
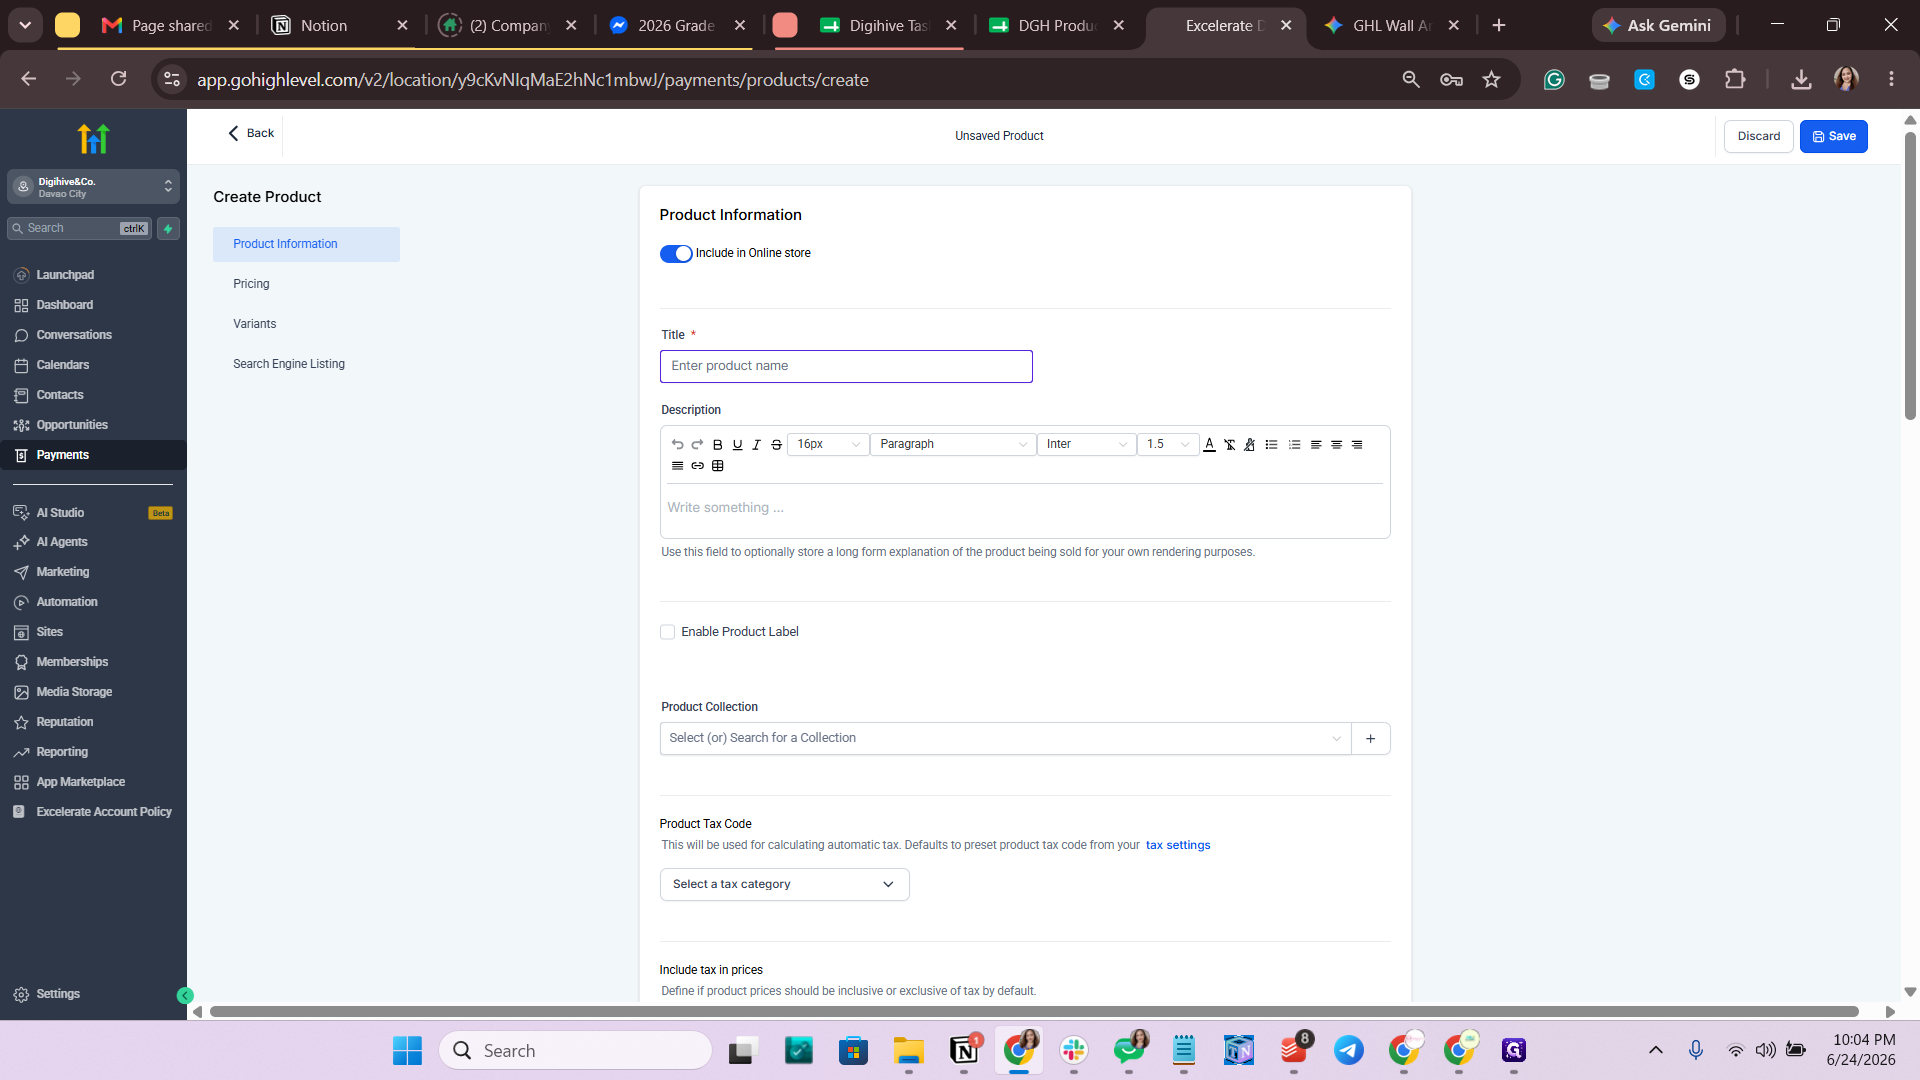
Copy the product title from the spreadsheet and paste it into the Product Name field.
Step #6: Copy the product title from the spreadsheet and paste it into the Product Name field.
7
Copy the product description from the spreadsheet and paste it into the rich text editor using Ctrl+Shift+V (or Cmd+Shift+V) to remove unwanted formatting.

3. Format the Description

8
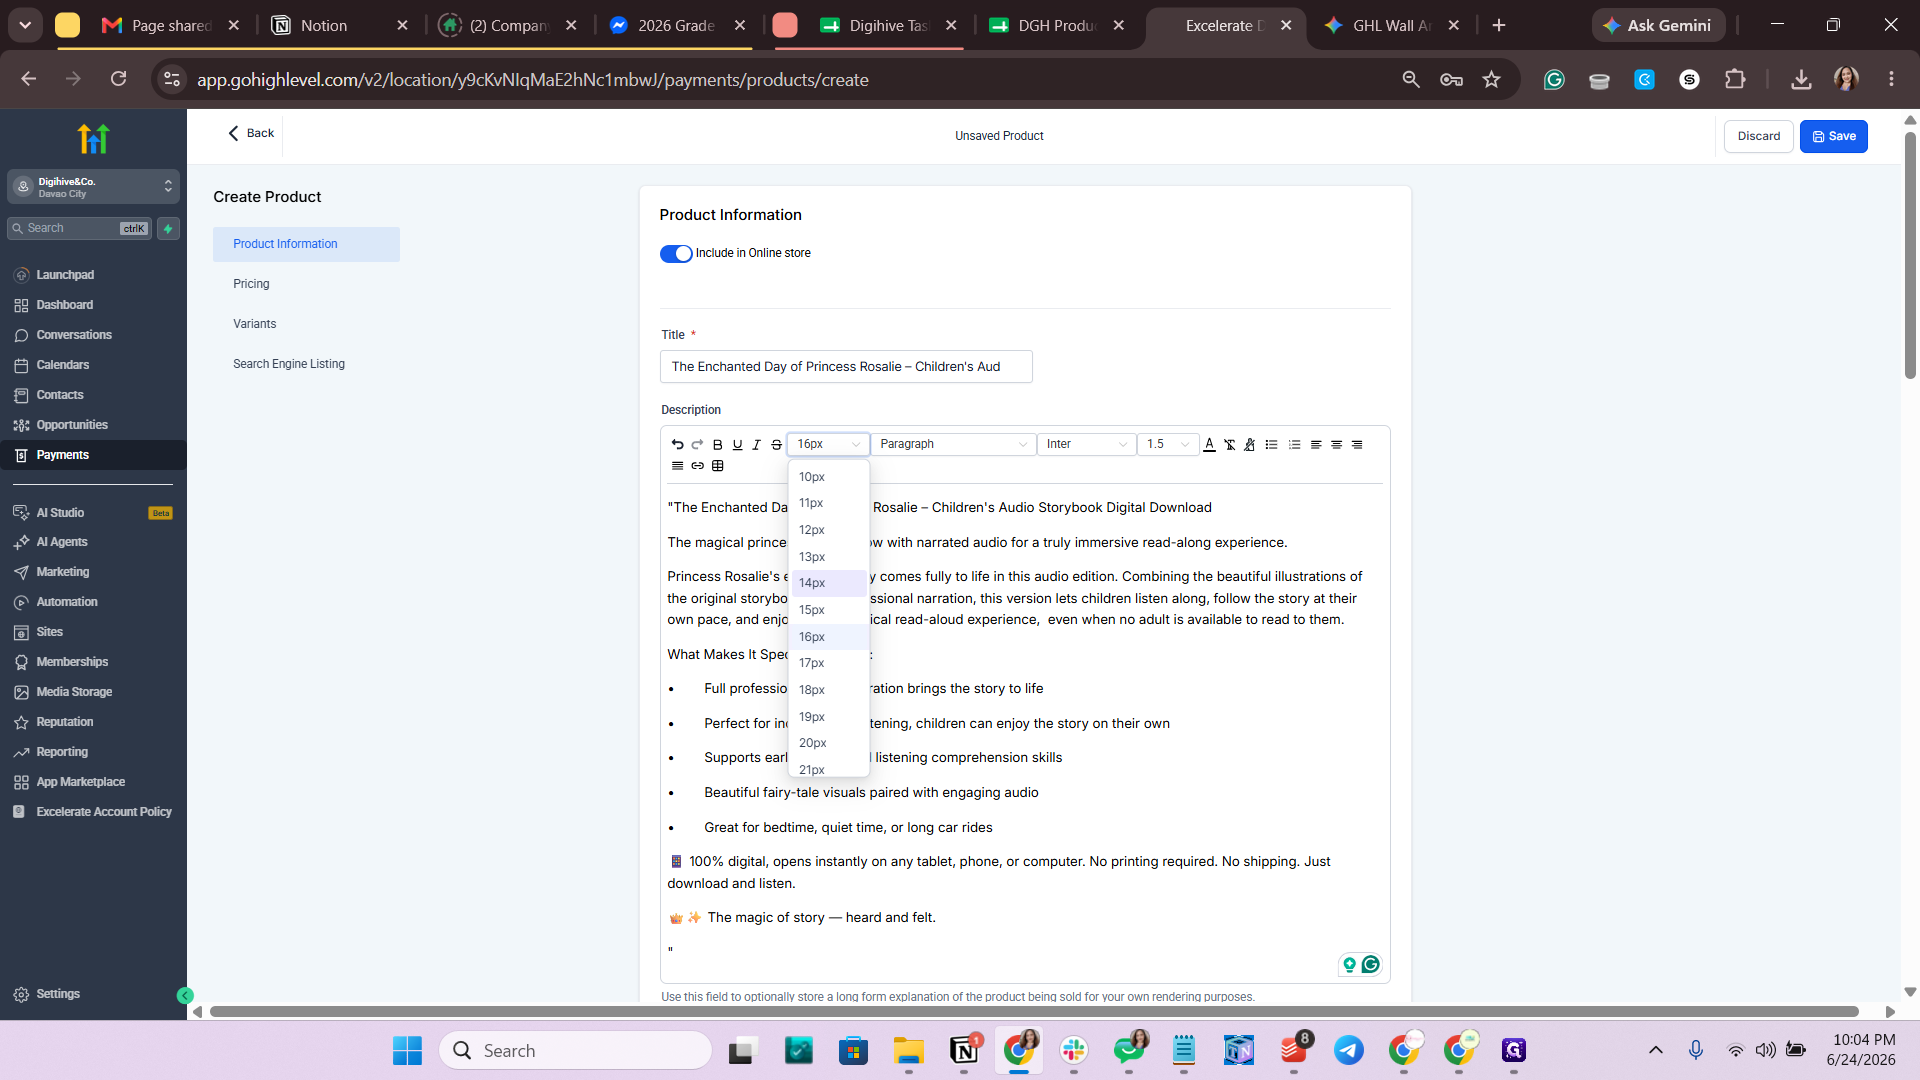
Select all text in the description and change the font size to 14px.
Step #8: Select all text in the description and change the font size to 14px.
9
Highlight and bold the first two lines, as well as the features header.
10
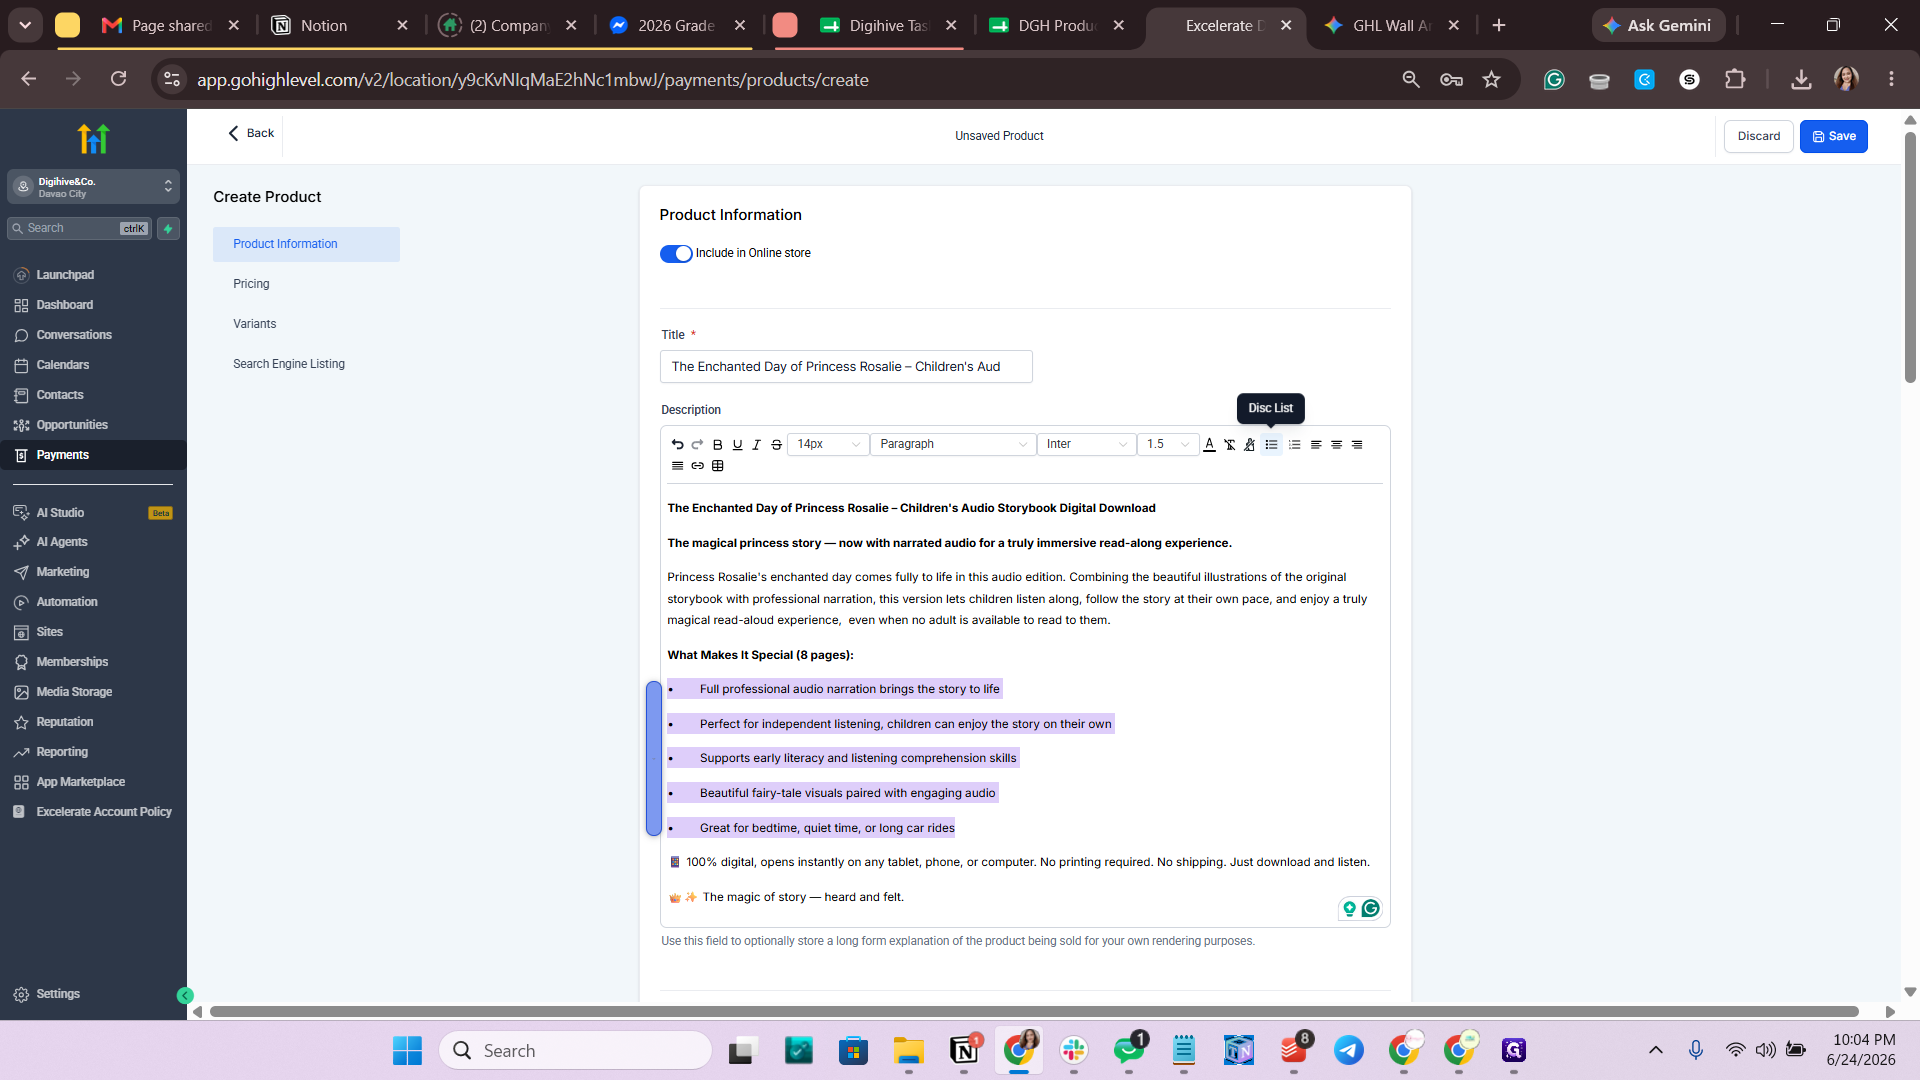
Select the feature points and apply the bulleted list format from the toolbar, deleting any extra spaces for a clean look.
Step #10: Select the feature points and apply the bulleted list format from the toolbar, deleting any extra spaces for a clean look.
11
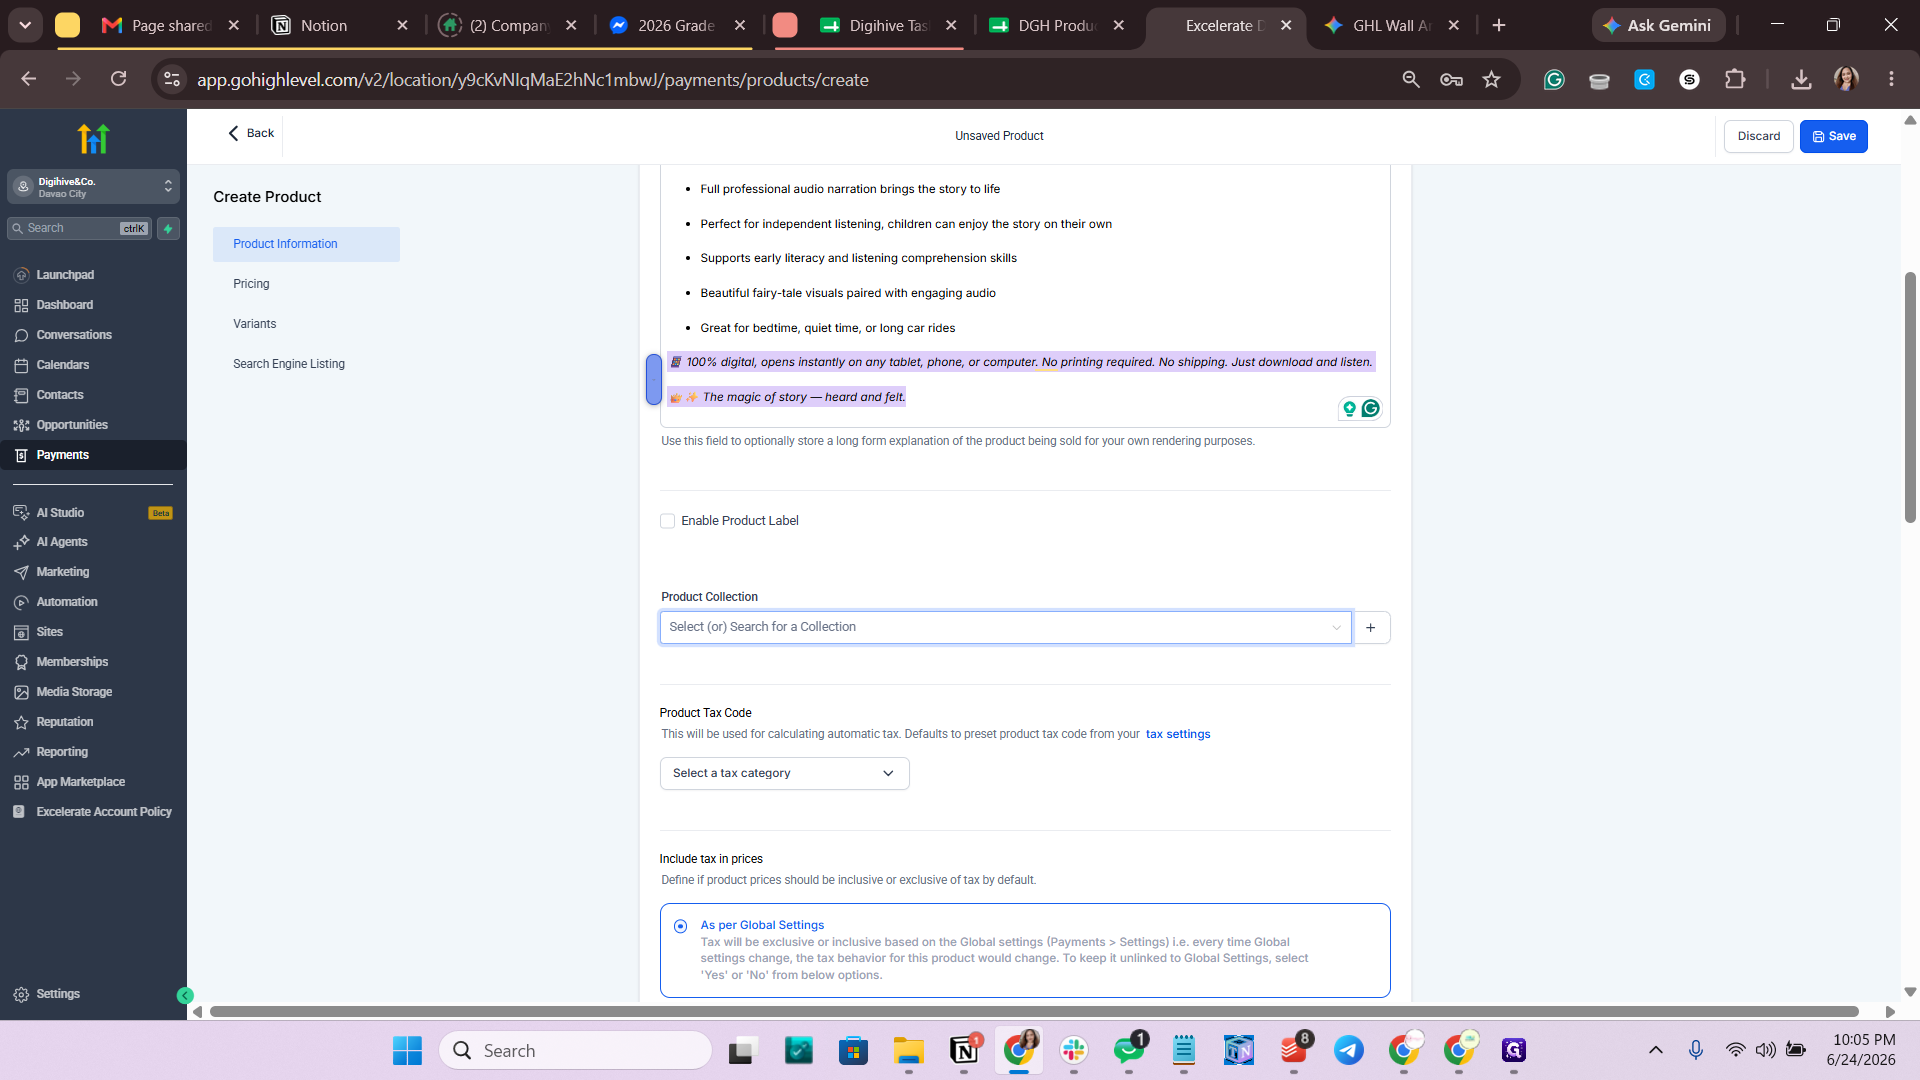
Highlight the last two lines of the description and apply italics.

4. Set Collection and Media

12
Click the Product Collection dropdown and select the appropriate collection, such as Listen, Learn & Play Collection.
Step #12: Click the Product Collection dropdown and select the appropriate collection, such as Listen, Learn & Play Collection.
13
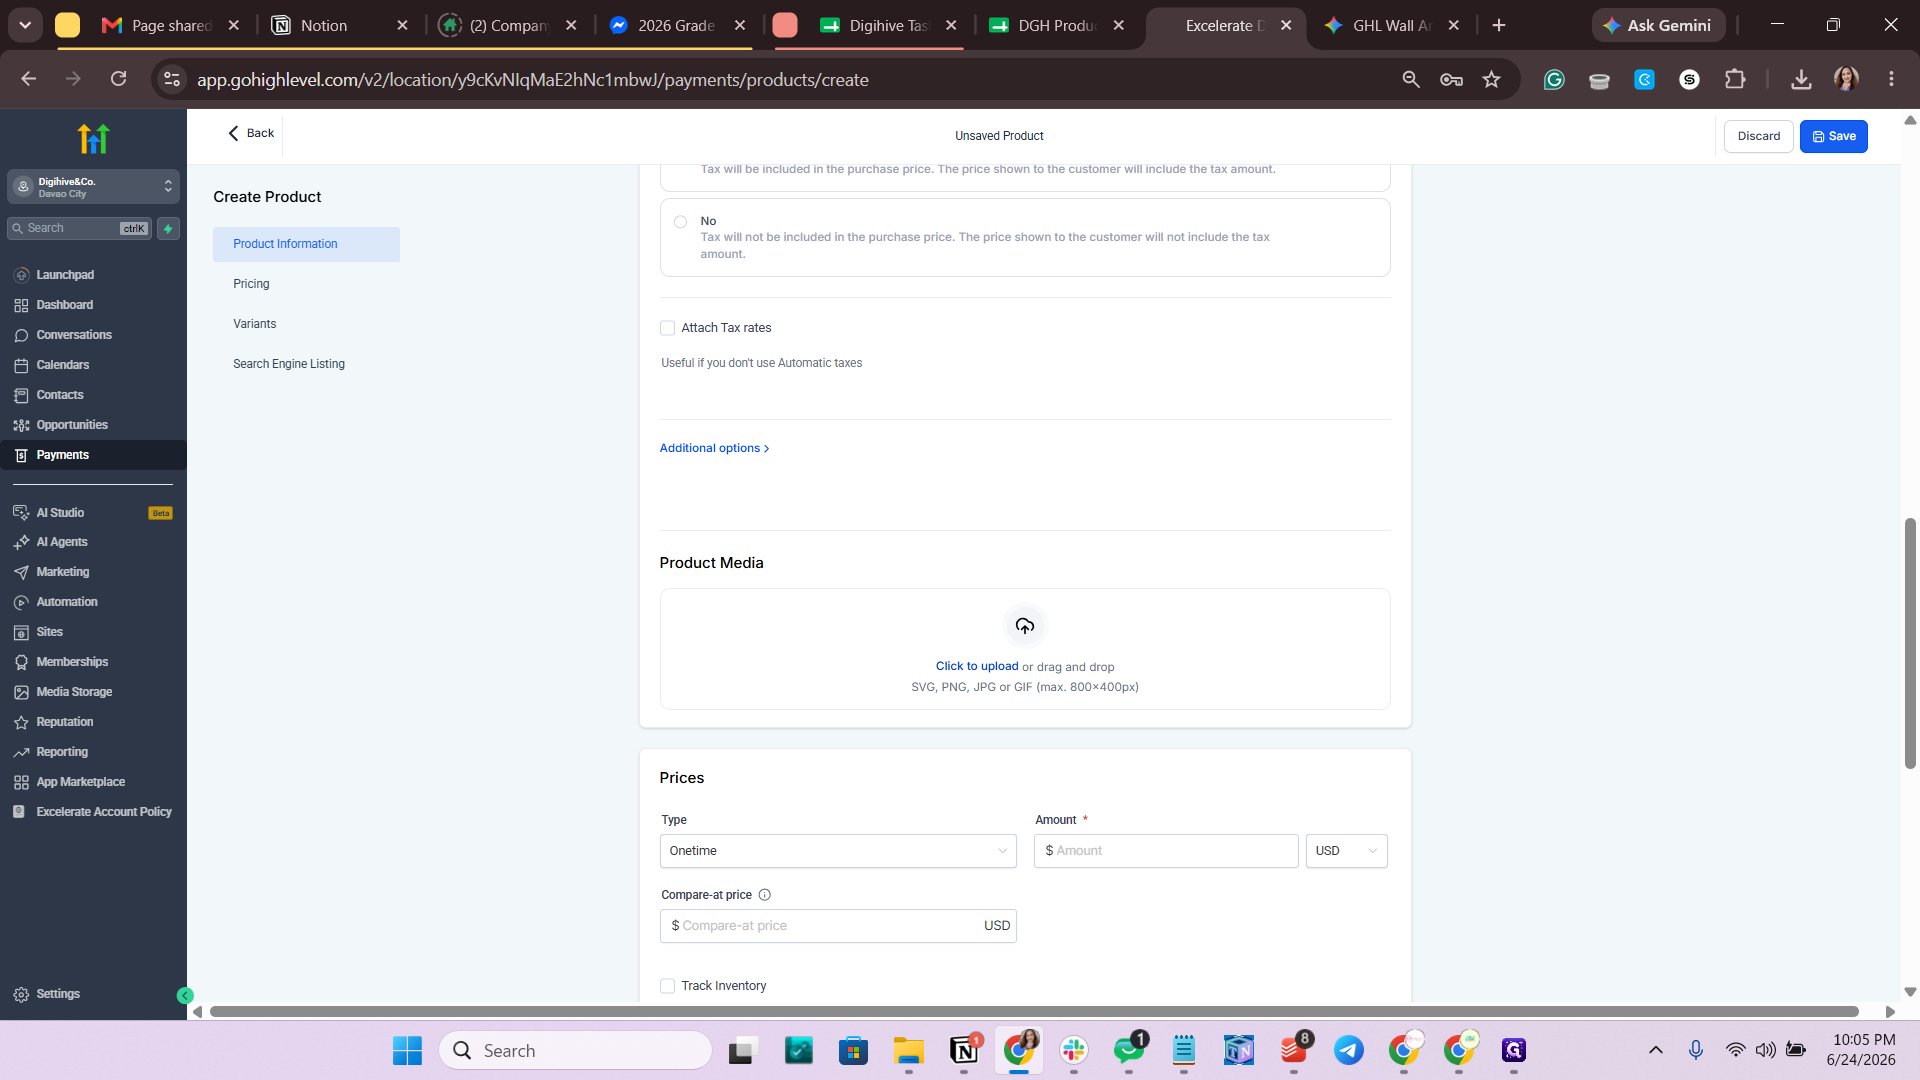
Under Product Media, click Upload to select and insert the main product image.
Step #13: Under Product Media, click Upload to select and insert the main product image.

5. Configure Pricing and Inventory

14
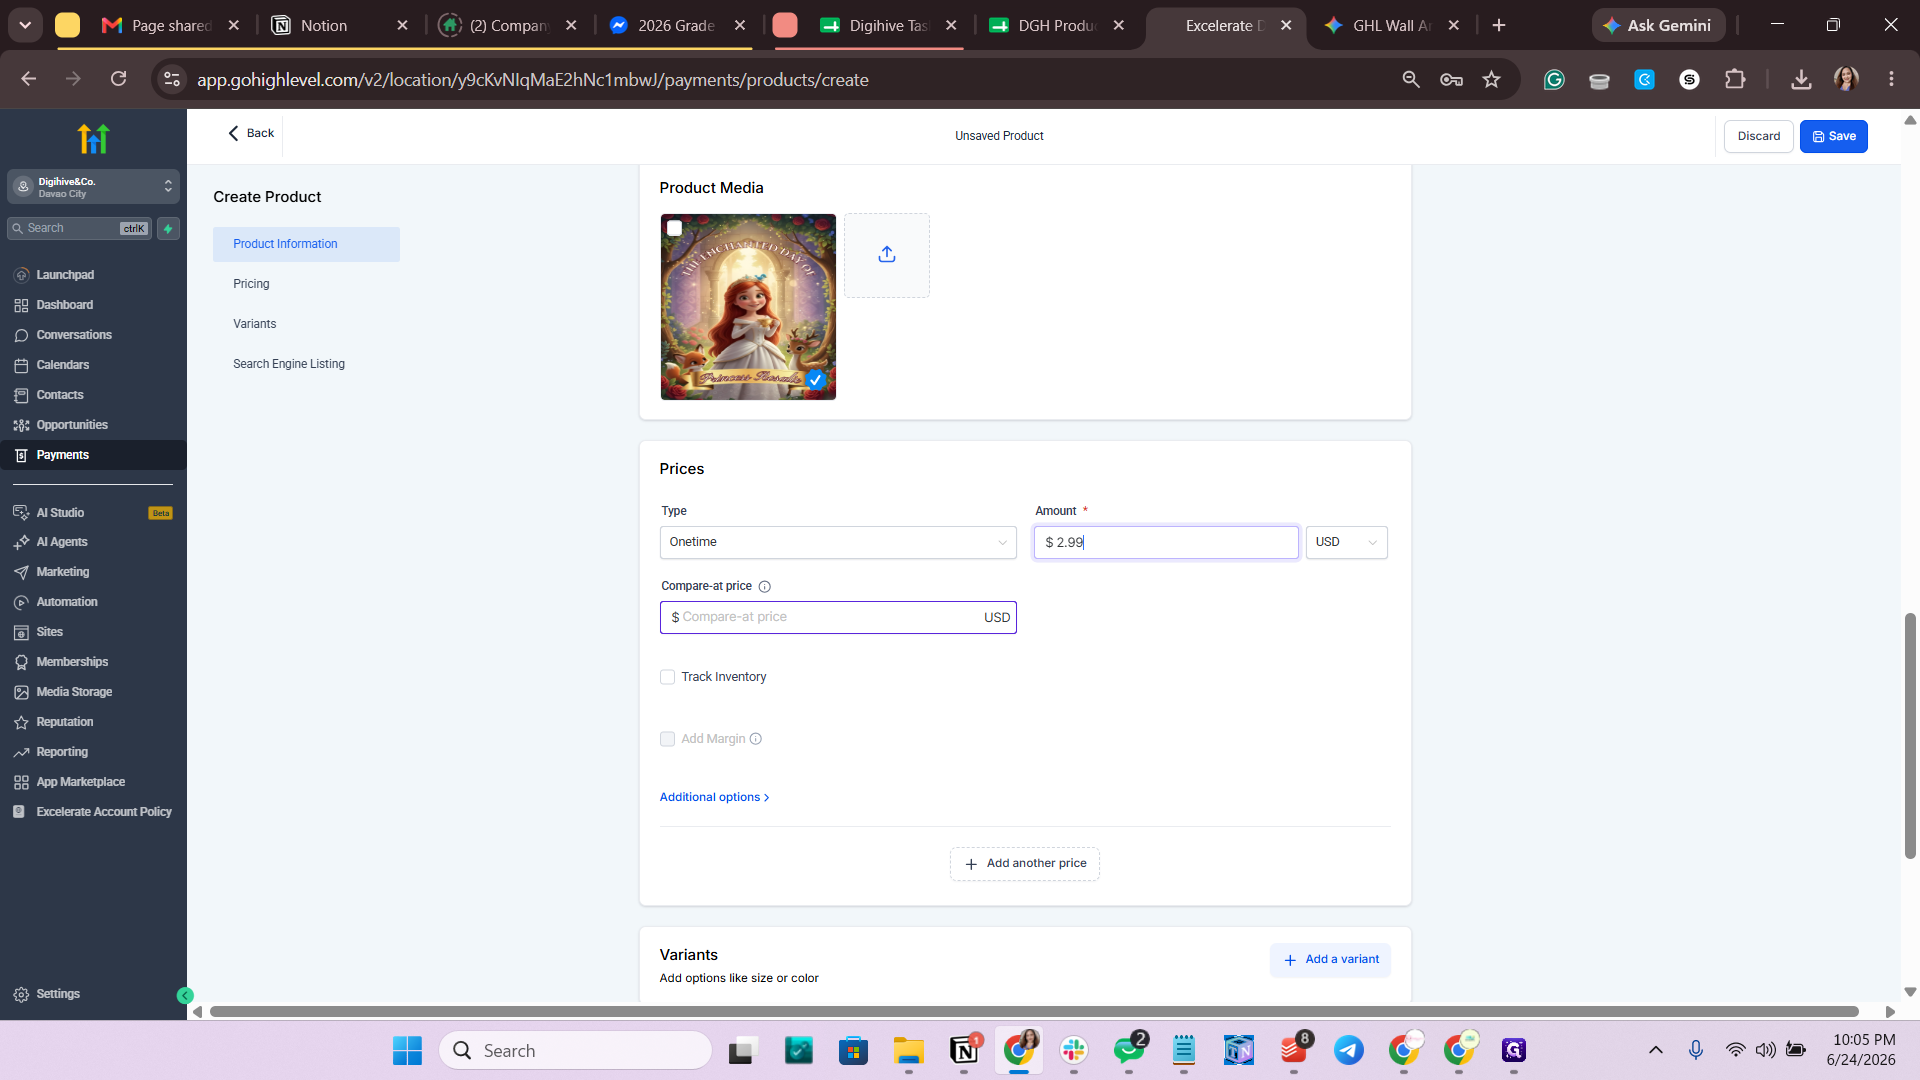
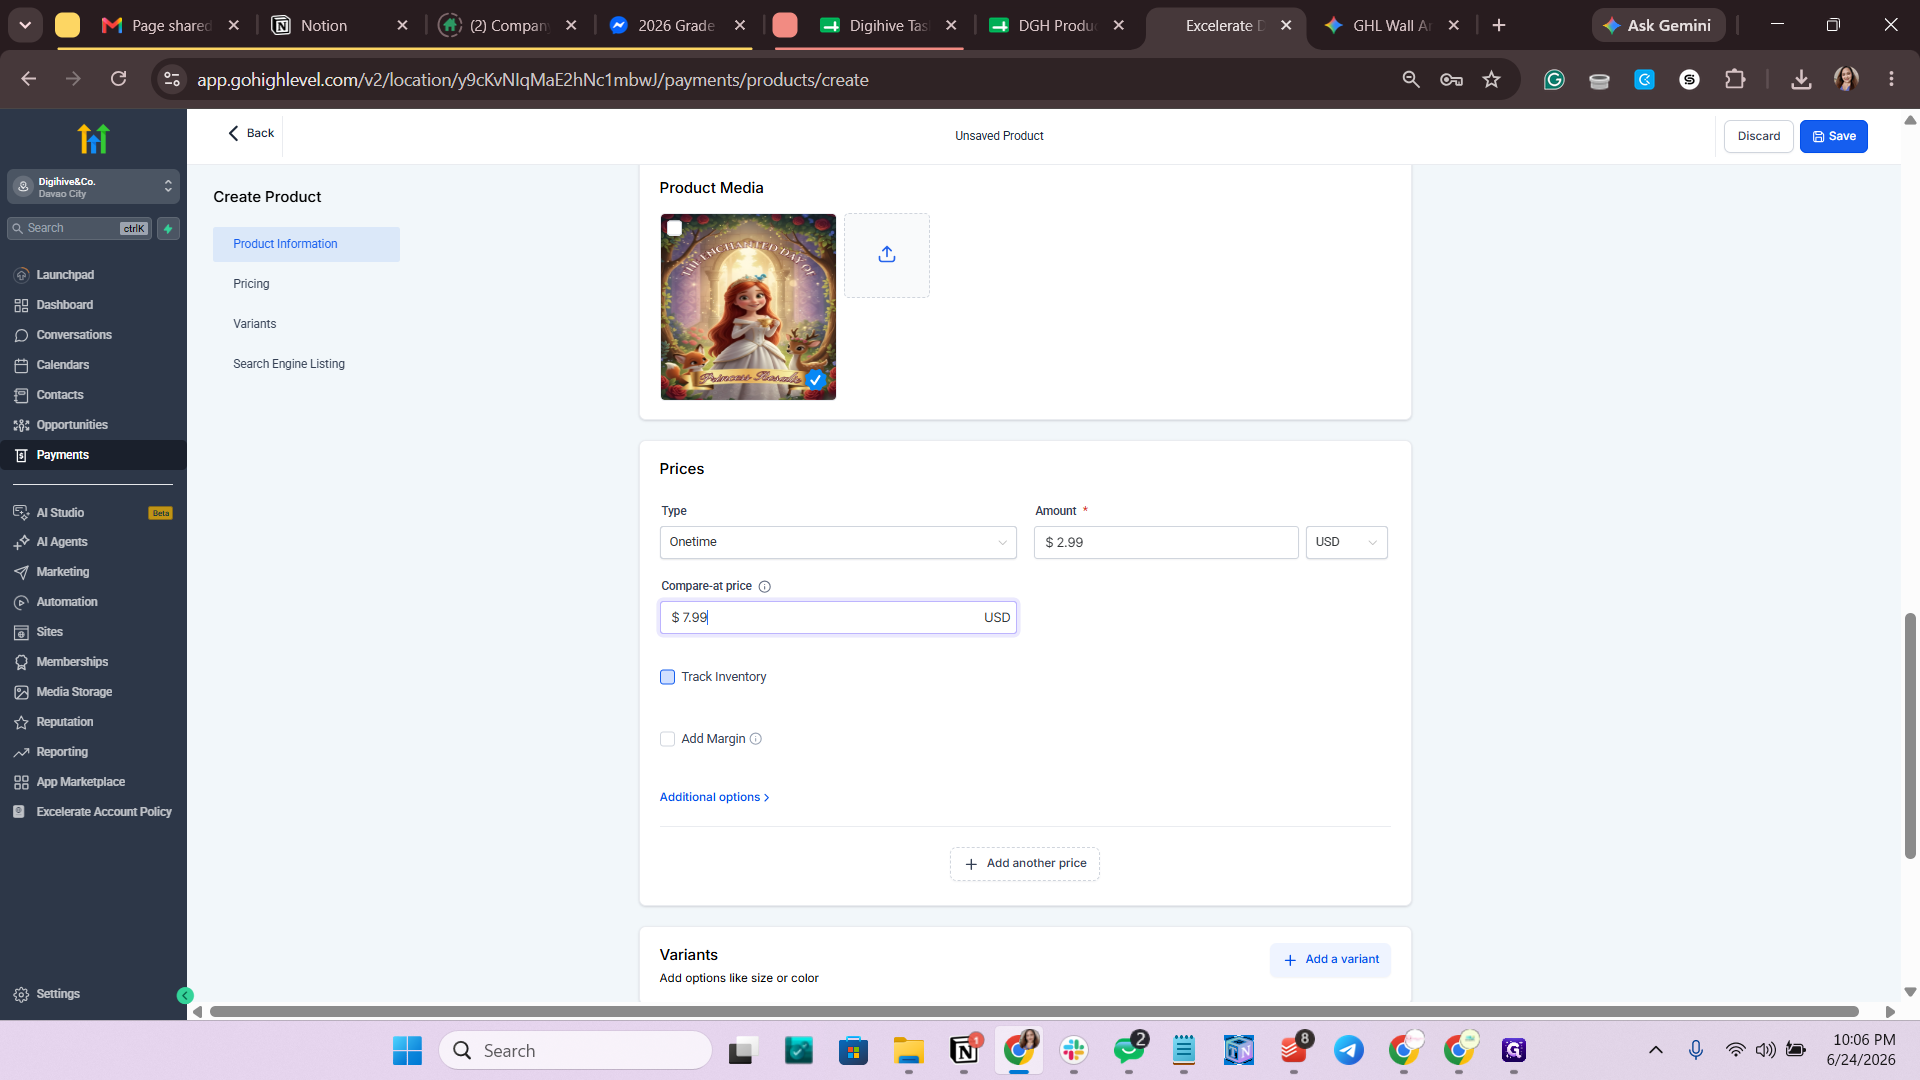
In the Prices section, enter the product's selling price in the Amount field and its original price in the Compare-at price field.
Step #14: In the Prices section, enter the product's selling price in the Amount field and its original price in the Compare-at price field.
15
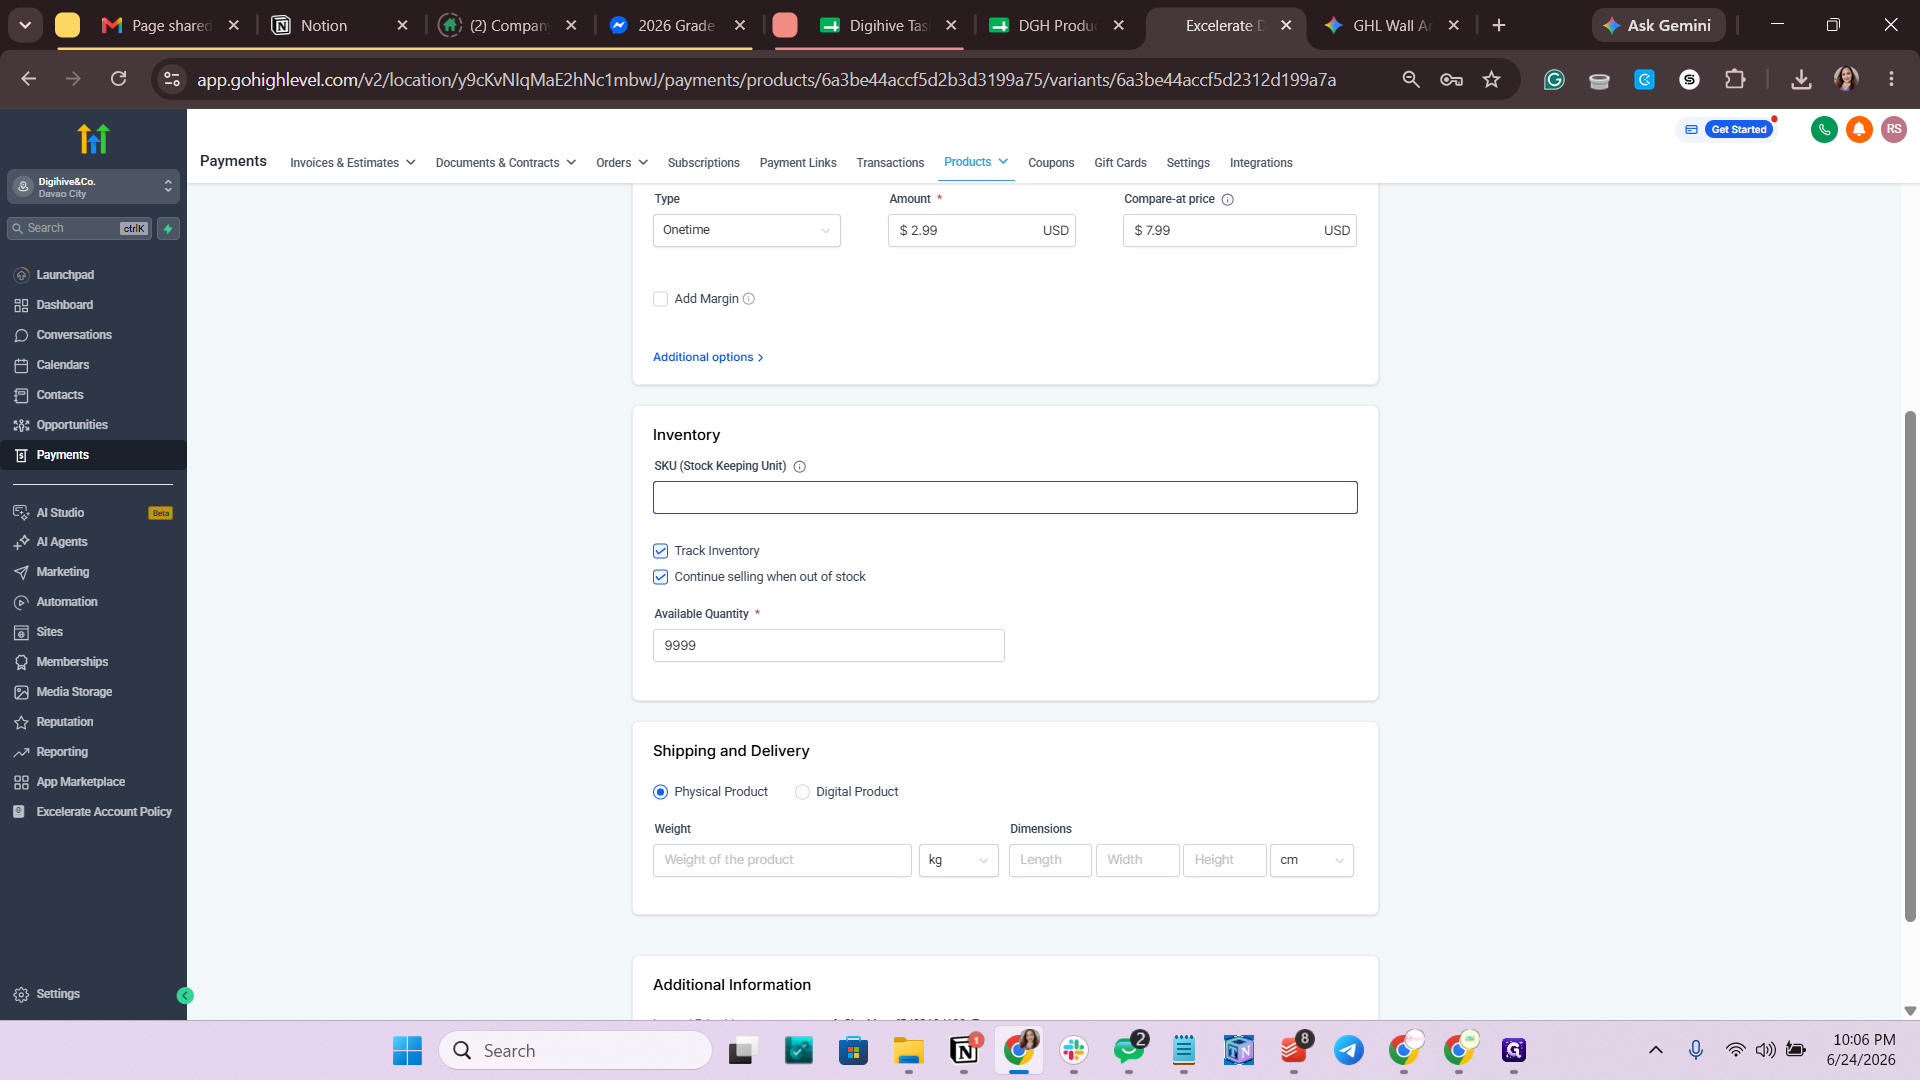
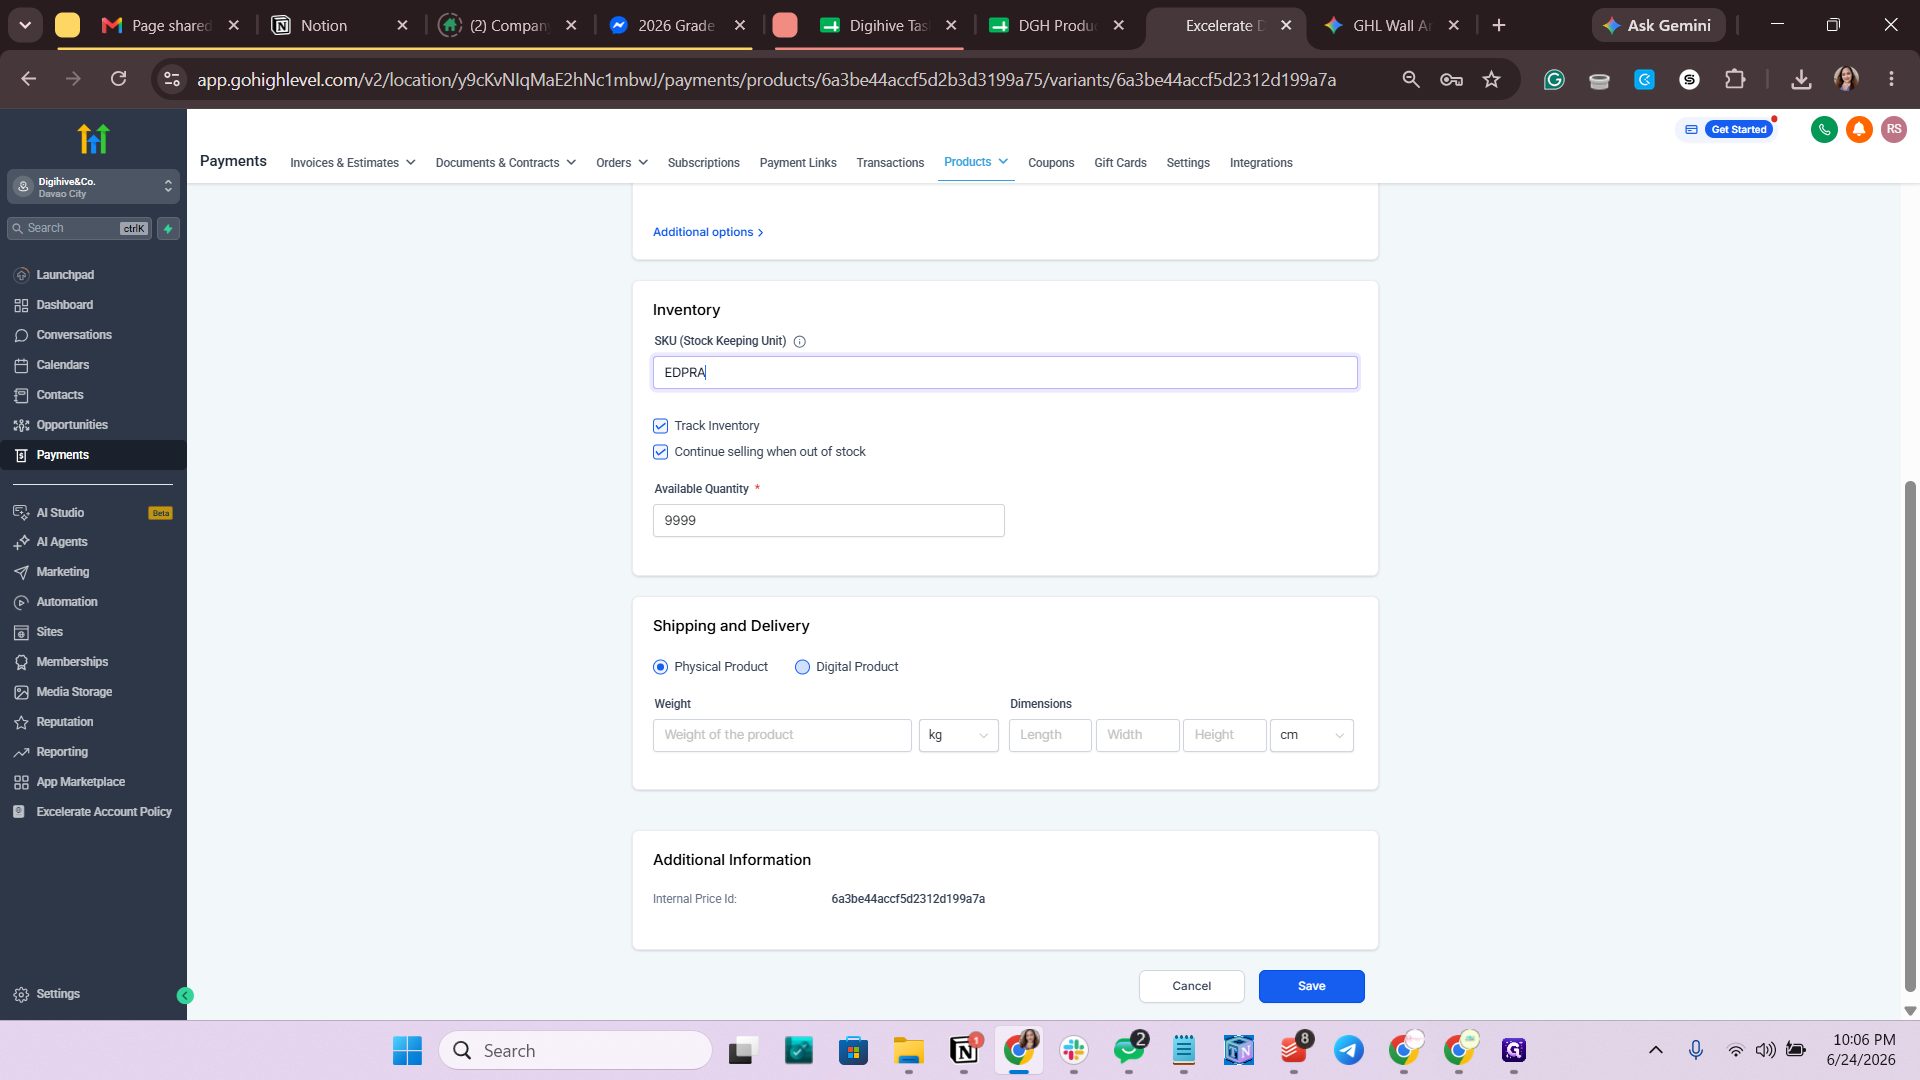
Check the Track Inventory and Continue Selling When Out of Stock checkboxes.
Step #15: Check the Track Inventory and Continue Selling When Out of Stock checkboxes.
16
Enter 9999 in the Available Quantity field.
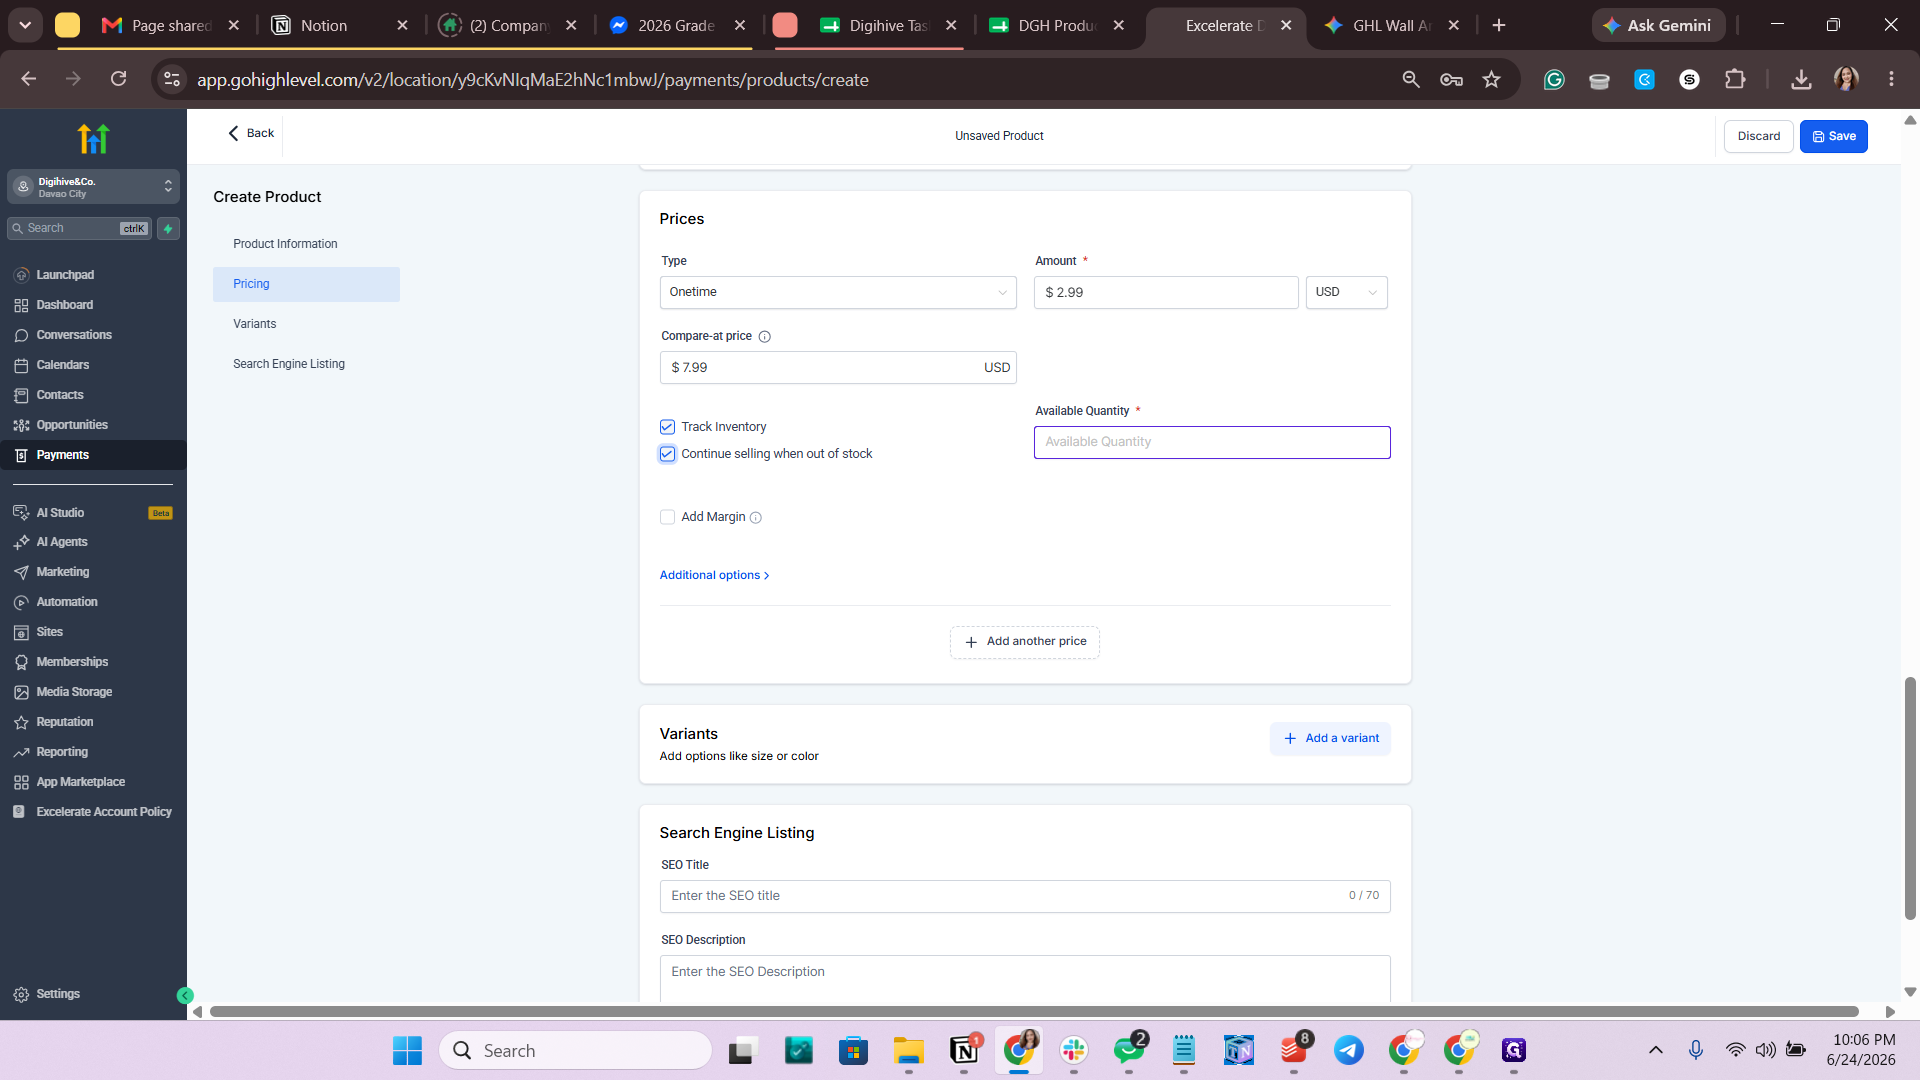
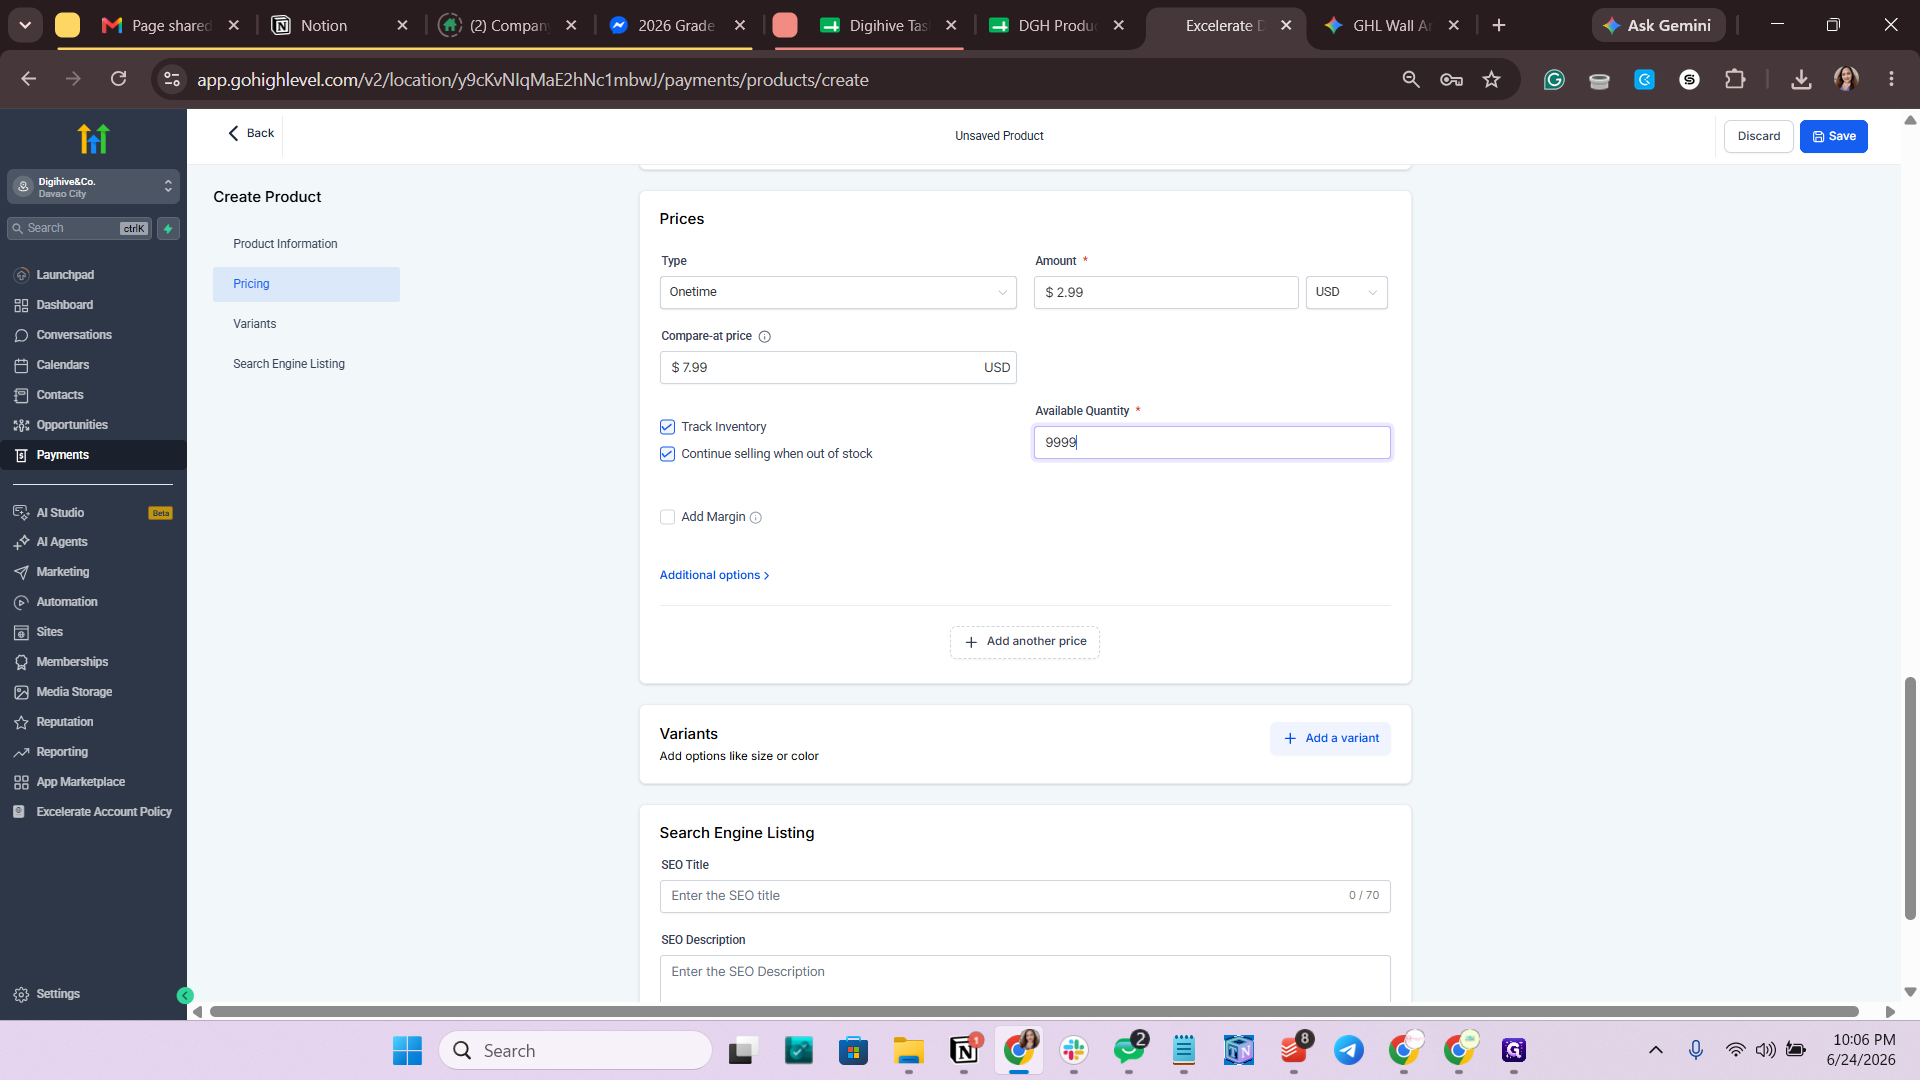
Step #16: Enter 9999 in the Available Quantity field.
17
Click Save at the bottom of the pricing block.
Step #17: Click Save at the bottom of the pricing block.
18
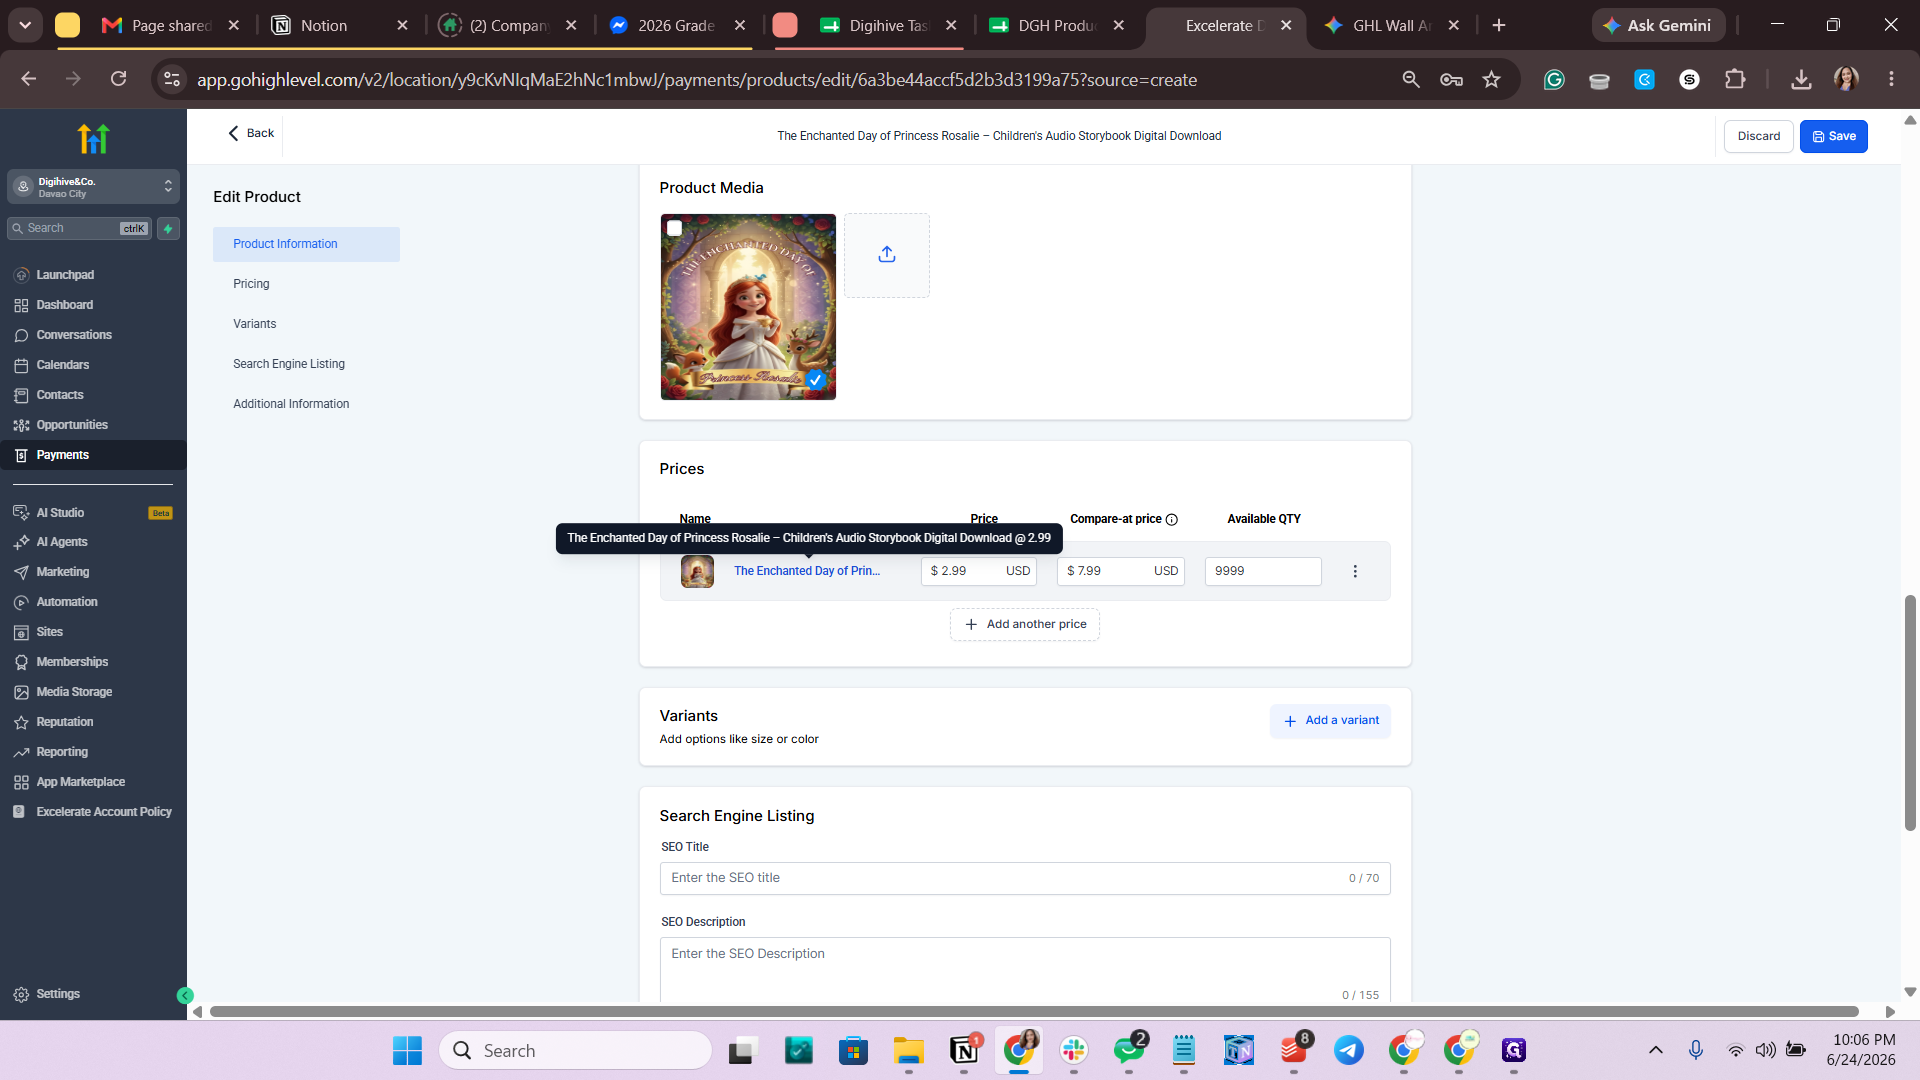
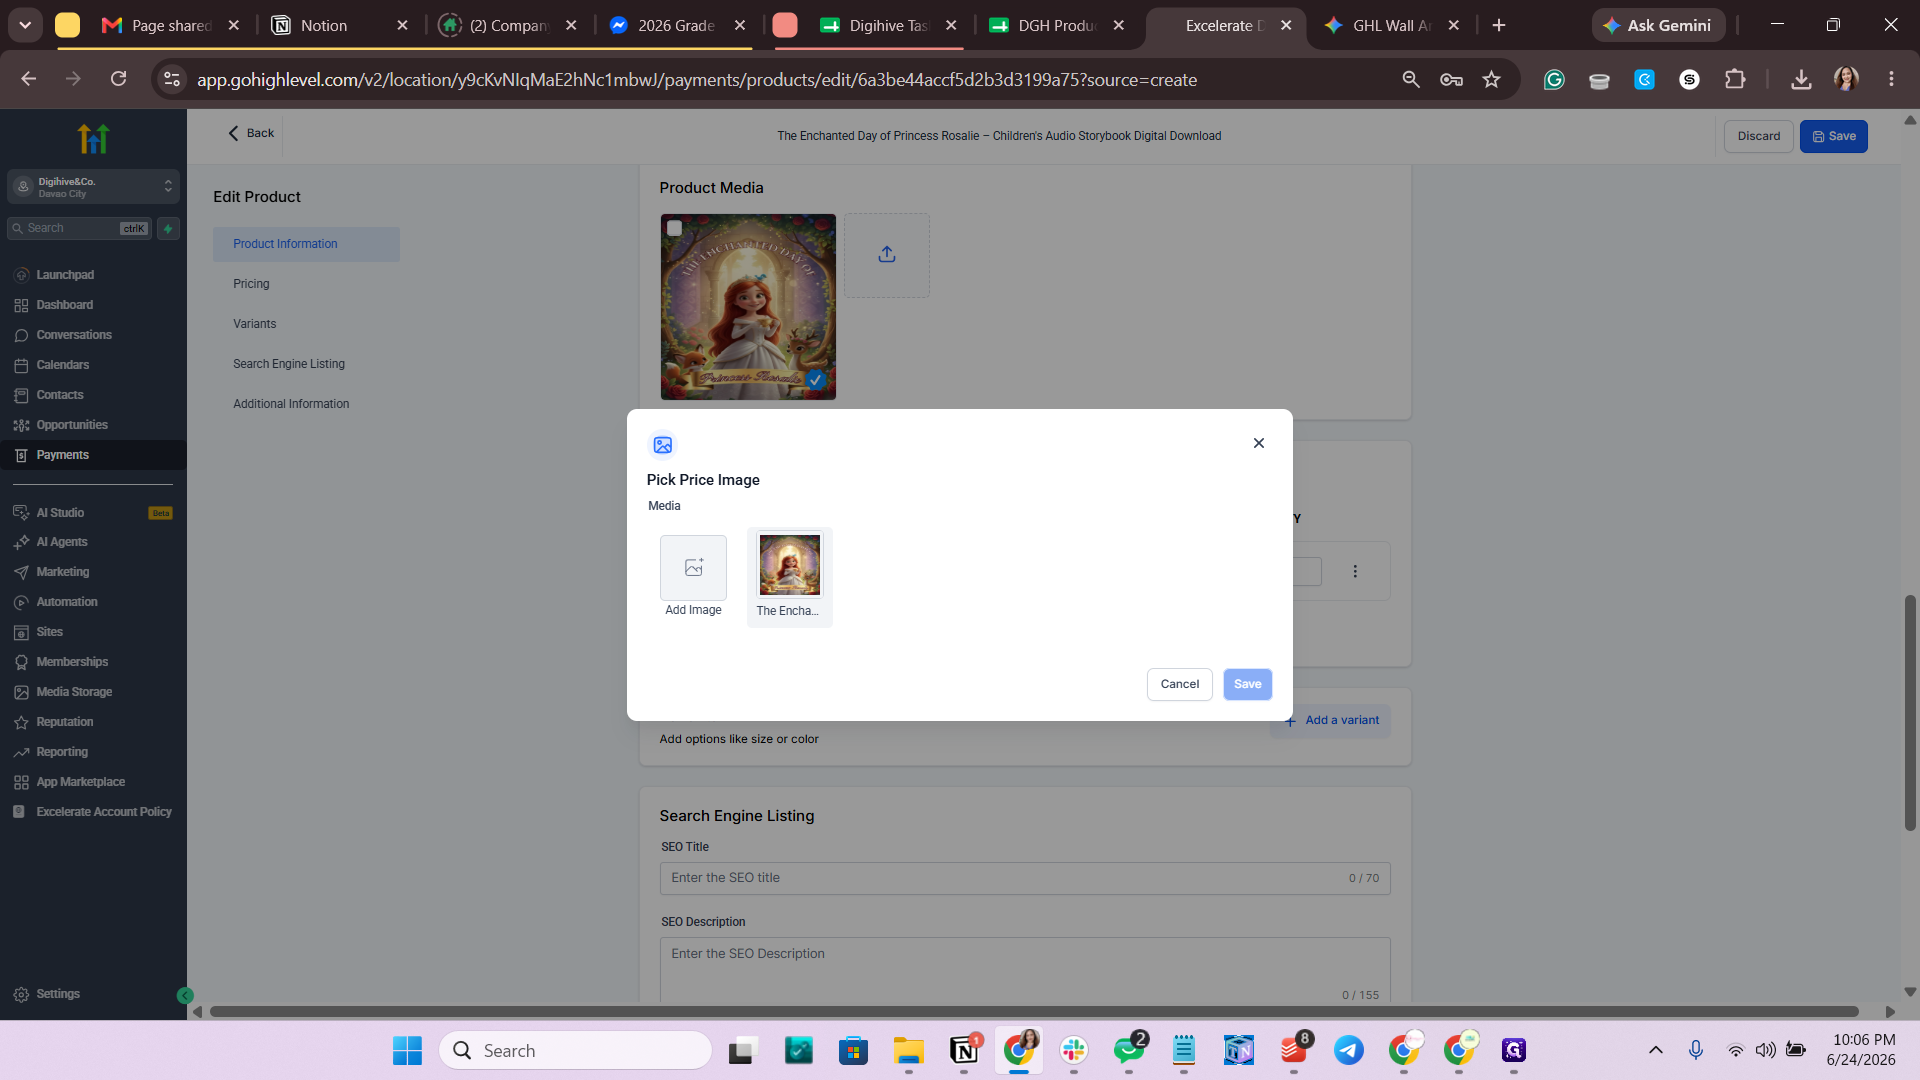
Click the image icon next to the saved price variant, select the same product image, and click Save.
Step #18: Click the image icon next to the saved price variant, select the same product image, and click Save.

6. Update Product Type and SKU

19
Click on the newly created product variant line item to edit its settings.
Step #19: Click on the newly created product variant line item to edit its settings.
20
Copy the SKU from the spreadsheet and paste it into the SKU field.
Step #20: Copy the SKU from the spreadsheet and paste it into the SKU field.
21
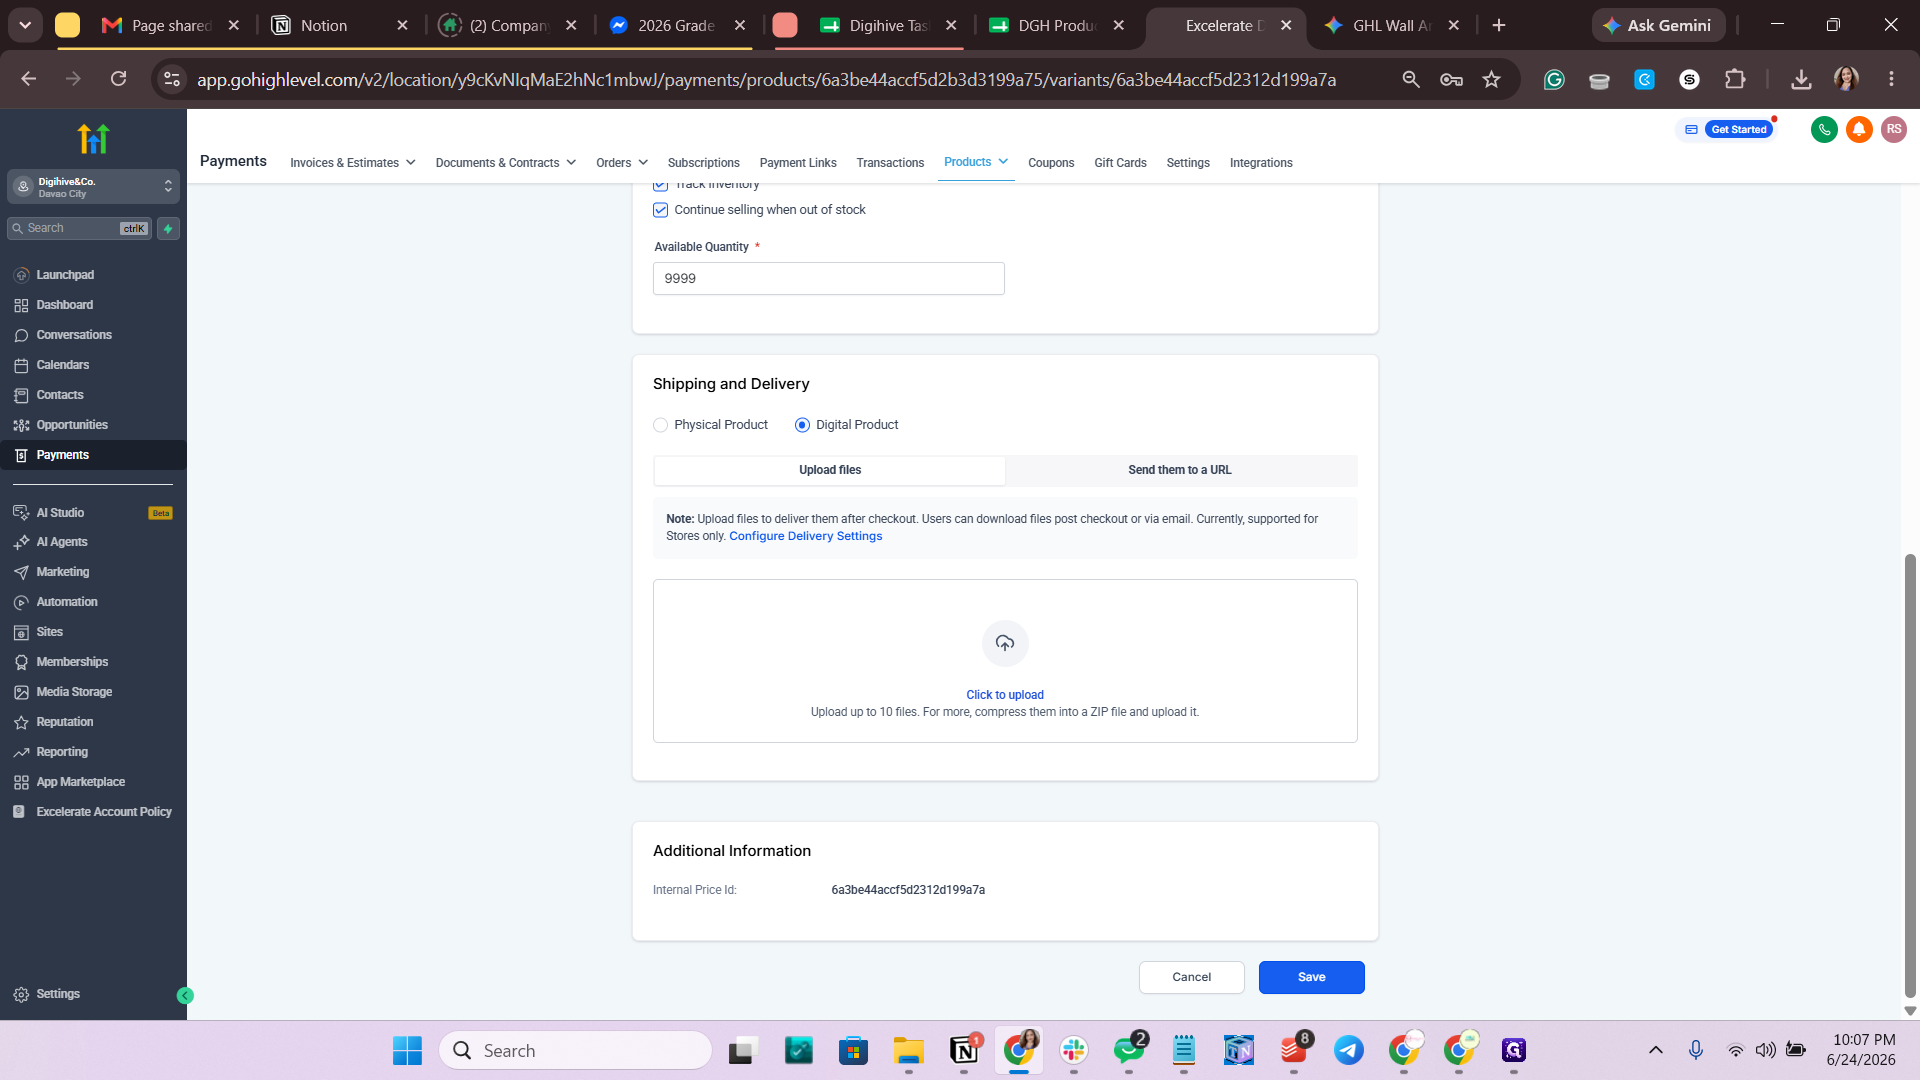
Under Shipping and Delivery, change the product type from Physical to Digital.
Step #21: Under Shipping and Delivery, change the product type from Physical to Digital.

7. Generate and Add Canva Delivery URL
22
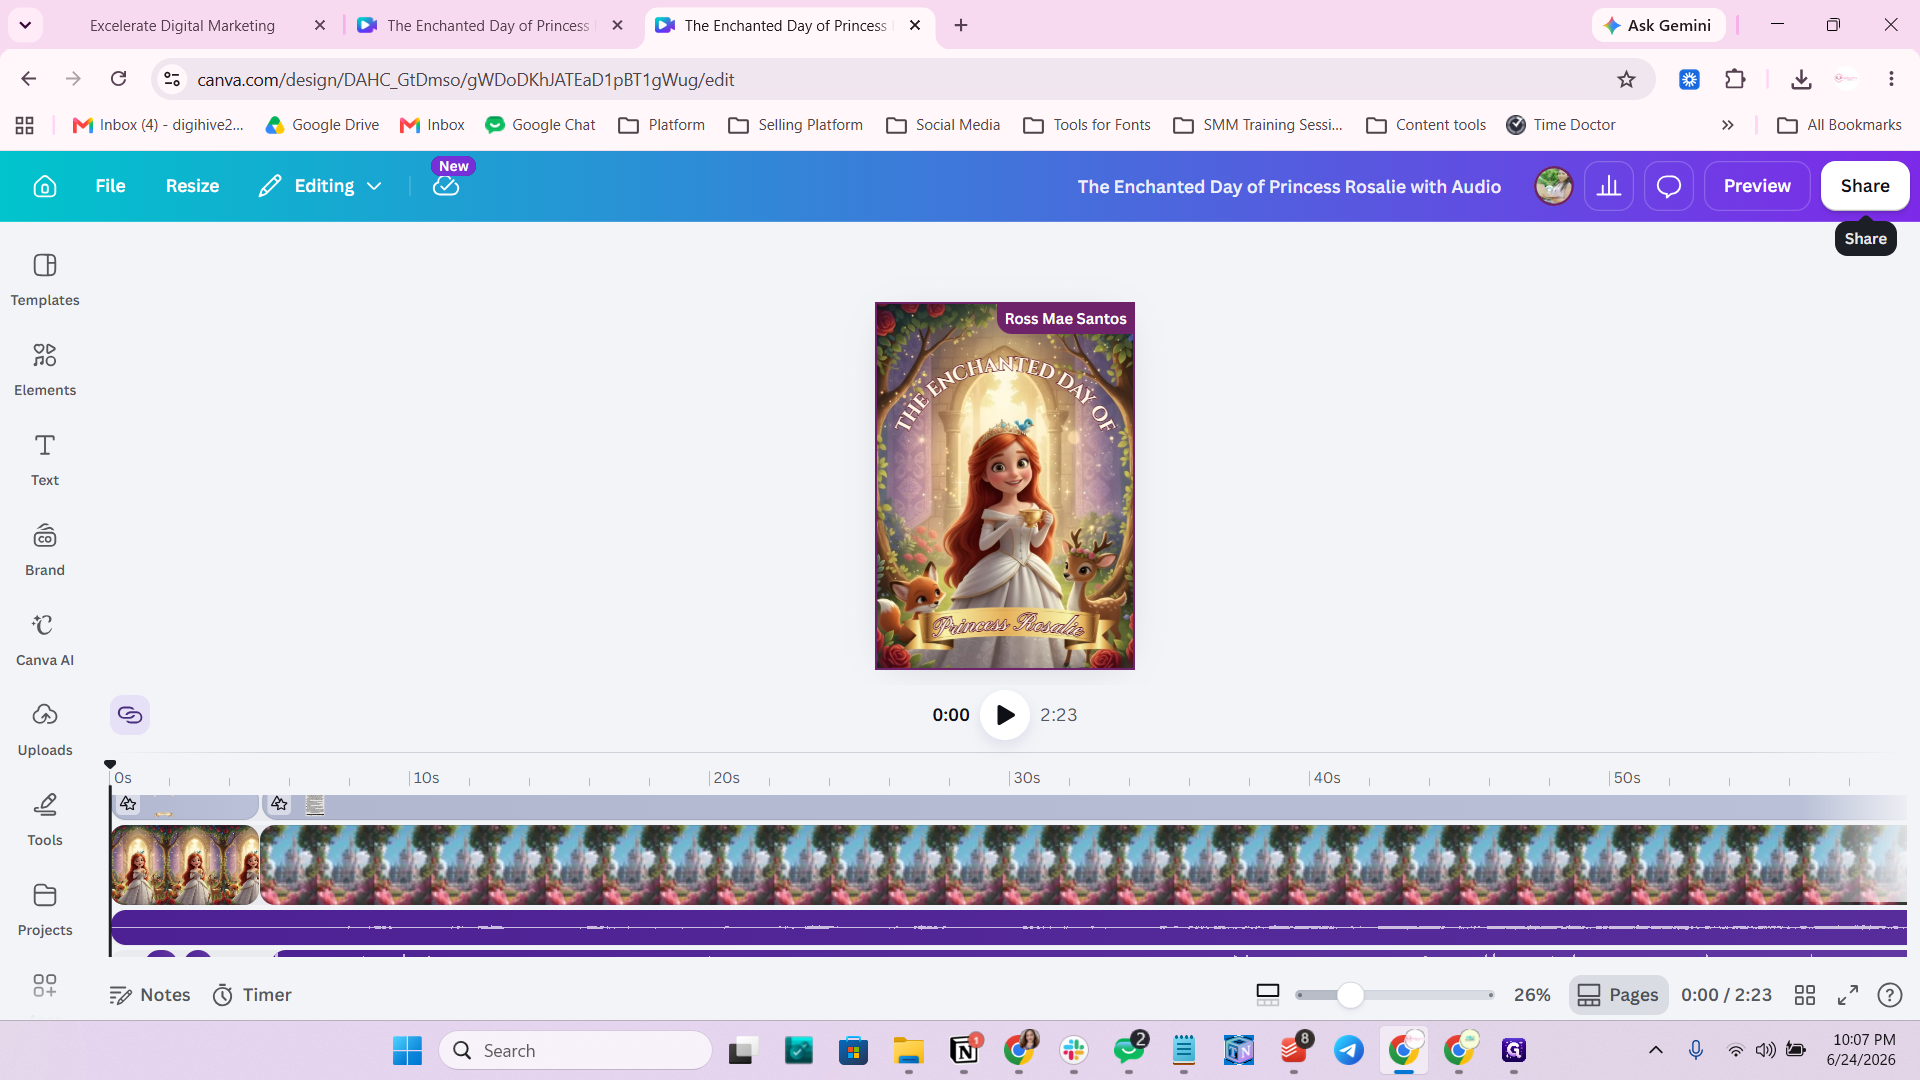
Open the Canva link from your spreadsheet, click Share, and select Public view link.
Step #22: Open the Canva link from your spreadsheet, click Share, and select Public view link.
23
Customize the URL path, then click Save and copy.
24
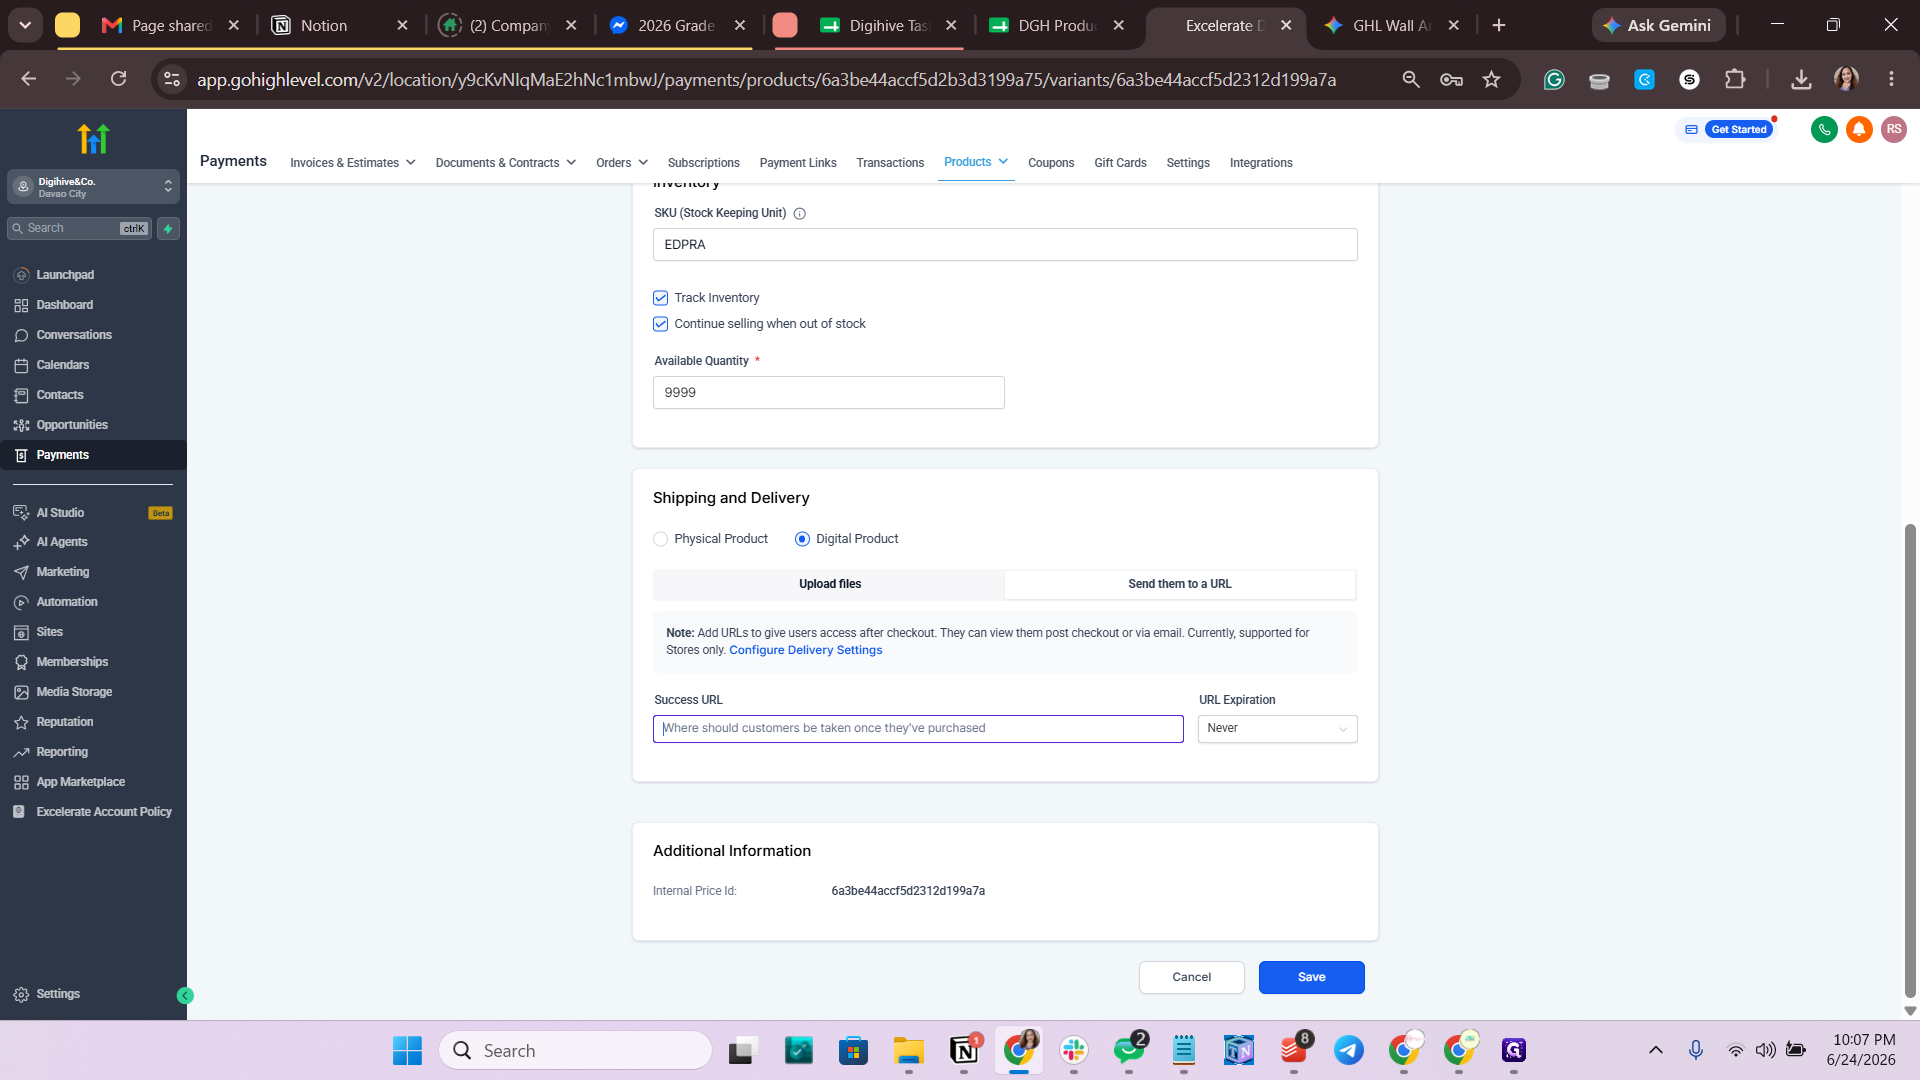
Return to GoHighLevel and select Send them to a URL as the delivery method.
Step #24: Return to GoHighLevel and select Send them to a URL as the delivery method.
25
Paste the Canva URL into the Success URL field, ensure the link expiration is set to Never, and click Save.
Step #25: Paste the Canva URL into the Success URL field, ensure the link expiration is set to Never, and click Save.

Q: What is the delivery method difference between an audio product and a standard digital product?

A: Standard digital products can be uploaded directly to GoHighLevel as a file. Products with audio must be delivered using a "Send them to a URL" method that points to a Canva public view link.

Q: Why do we need to format the product description manually after pasting?

A: Pasting content from the spreadsheet carries over raw or unformatted text. You must manually apply font sizing, bolding, italics, and GoHighLevel's bullet points to ensure the product page renders professionally.

Q: What inventory settings should be used for these digital products?

A: You should track inventory, enable "Continue Selling When Out of Stock," and input an available quantity of 9999. This guarantees the digital product never shows as sold out to customers.

Term

Definition

SKU

Stock Keeping Unit, a unique identifier used to track inventory and manage product variants.

GoHighLevel (GHL)

A comprehensive marketing, sales, and CRM platform where the digital products are hosted and sold.

Canva Public View Link

A shareable URL generated by Canva that allows users to view a design (like an audio storybook) without needing a Canva account.

Compare-at Price

The original or retail price of a product shown alongside the actual selling price, typically used to display a discount.