Icon

How to Upload Wall Art Products to GoHighLevel

Learn how to efficiently upload and configure digital wall art products, format descriptions, add media files, set pricing, and create variants in GoHighLevel.

By Rozette Kean Gaudan

This guide walks you through uploading and configuring digital wall art products in GoHighLevel. By following this process, you will ensure products are accurately represented with correct formatted descriptions, high-quality media files, pricing, and variant options.

This procedure applies to digital product managers and e-commerce administrators responsible for updating the GoHighLevel storefront. Use this workflow when adding new wall art inventory sourced from a centralized product spreadsheet.

Locate and Copy Product Details

Start by filtering your product inventory spreadsheet to locate the specific wall art products you need to upload.
1
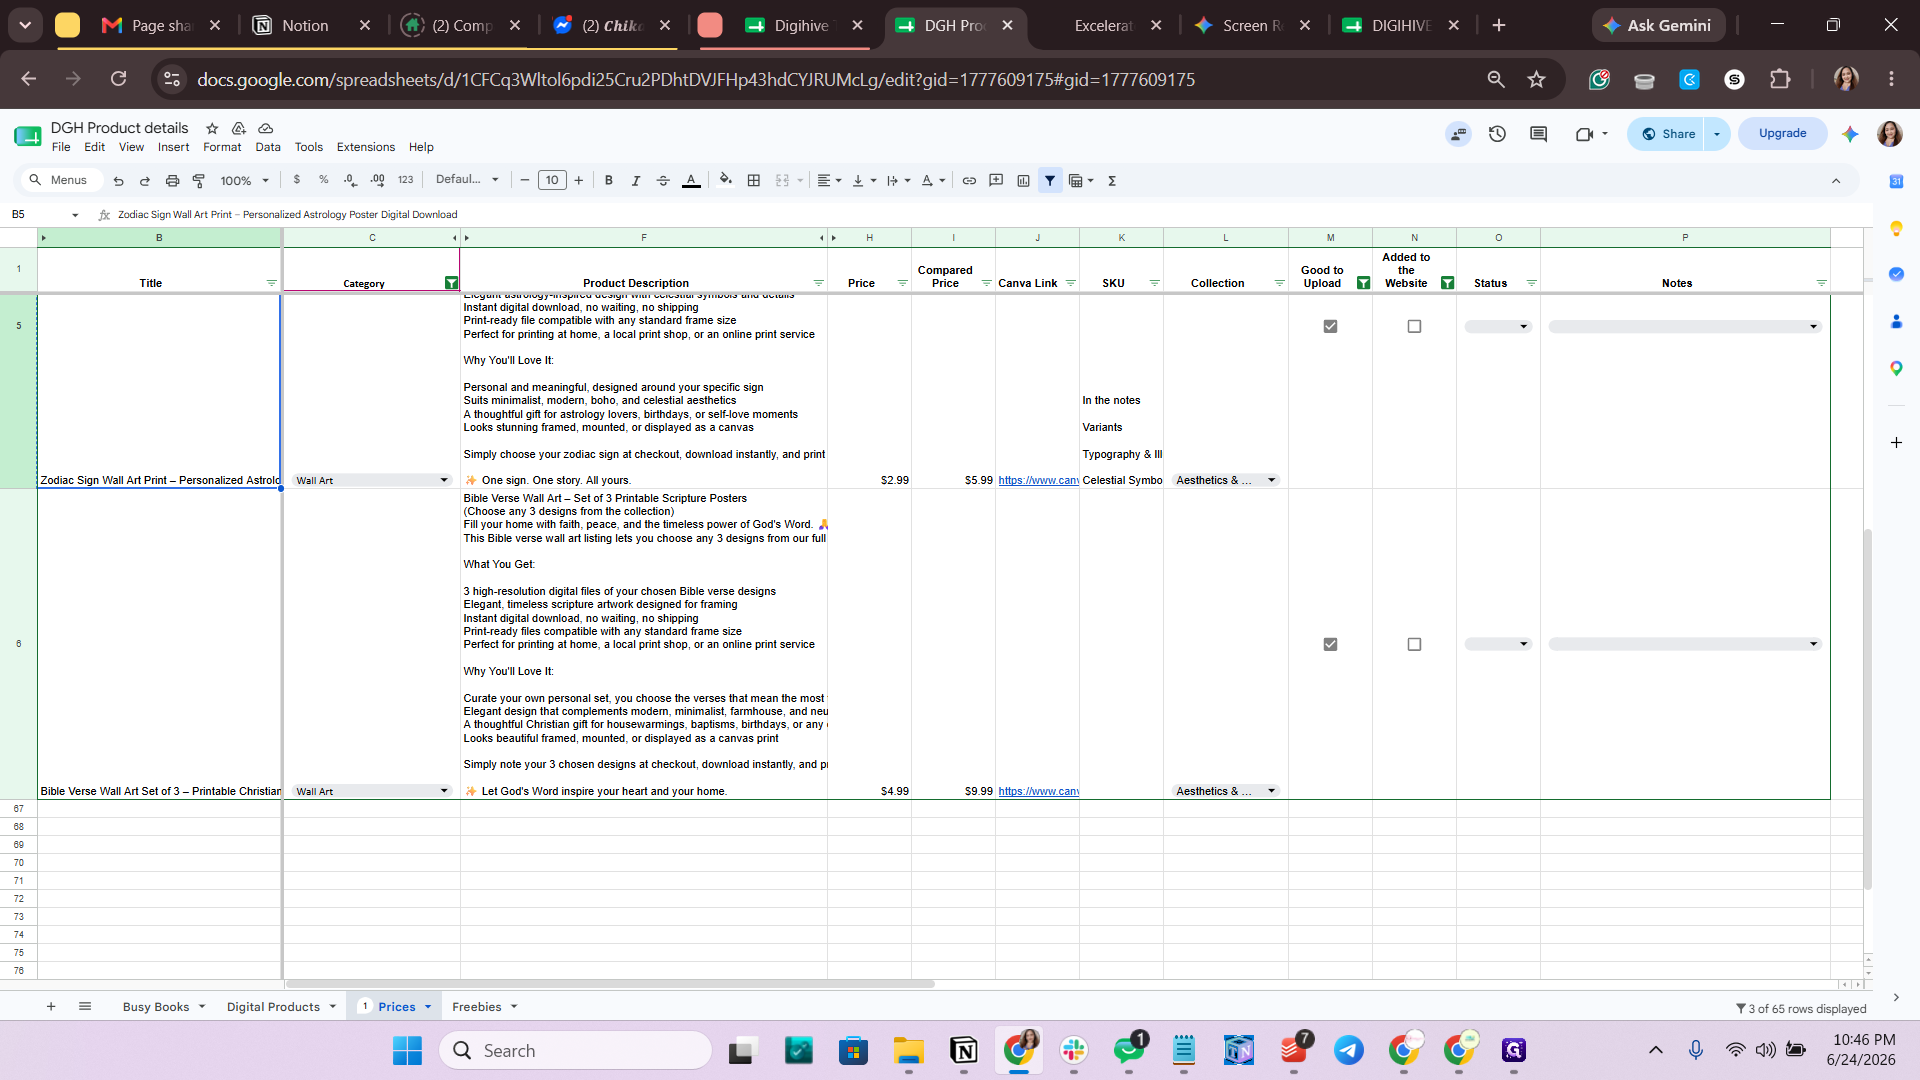
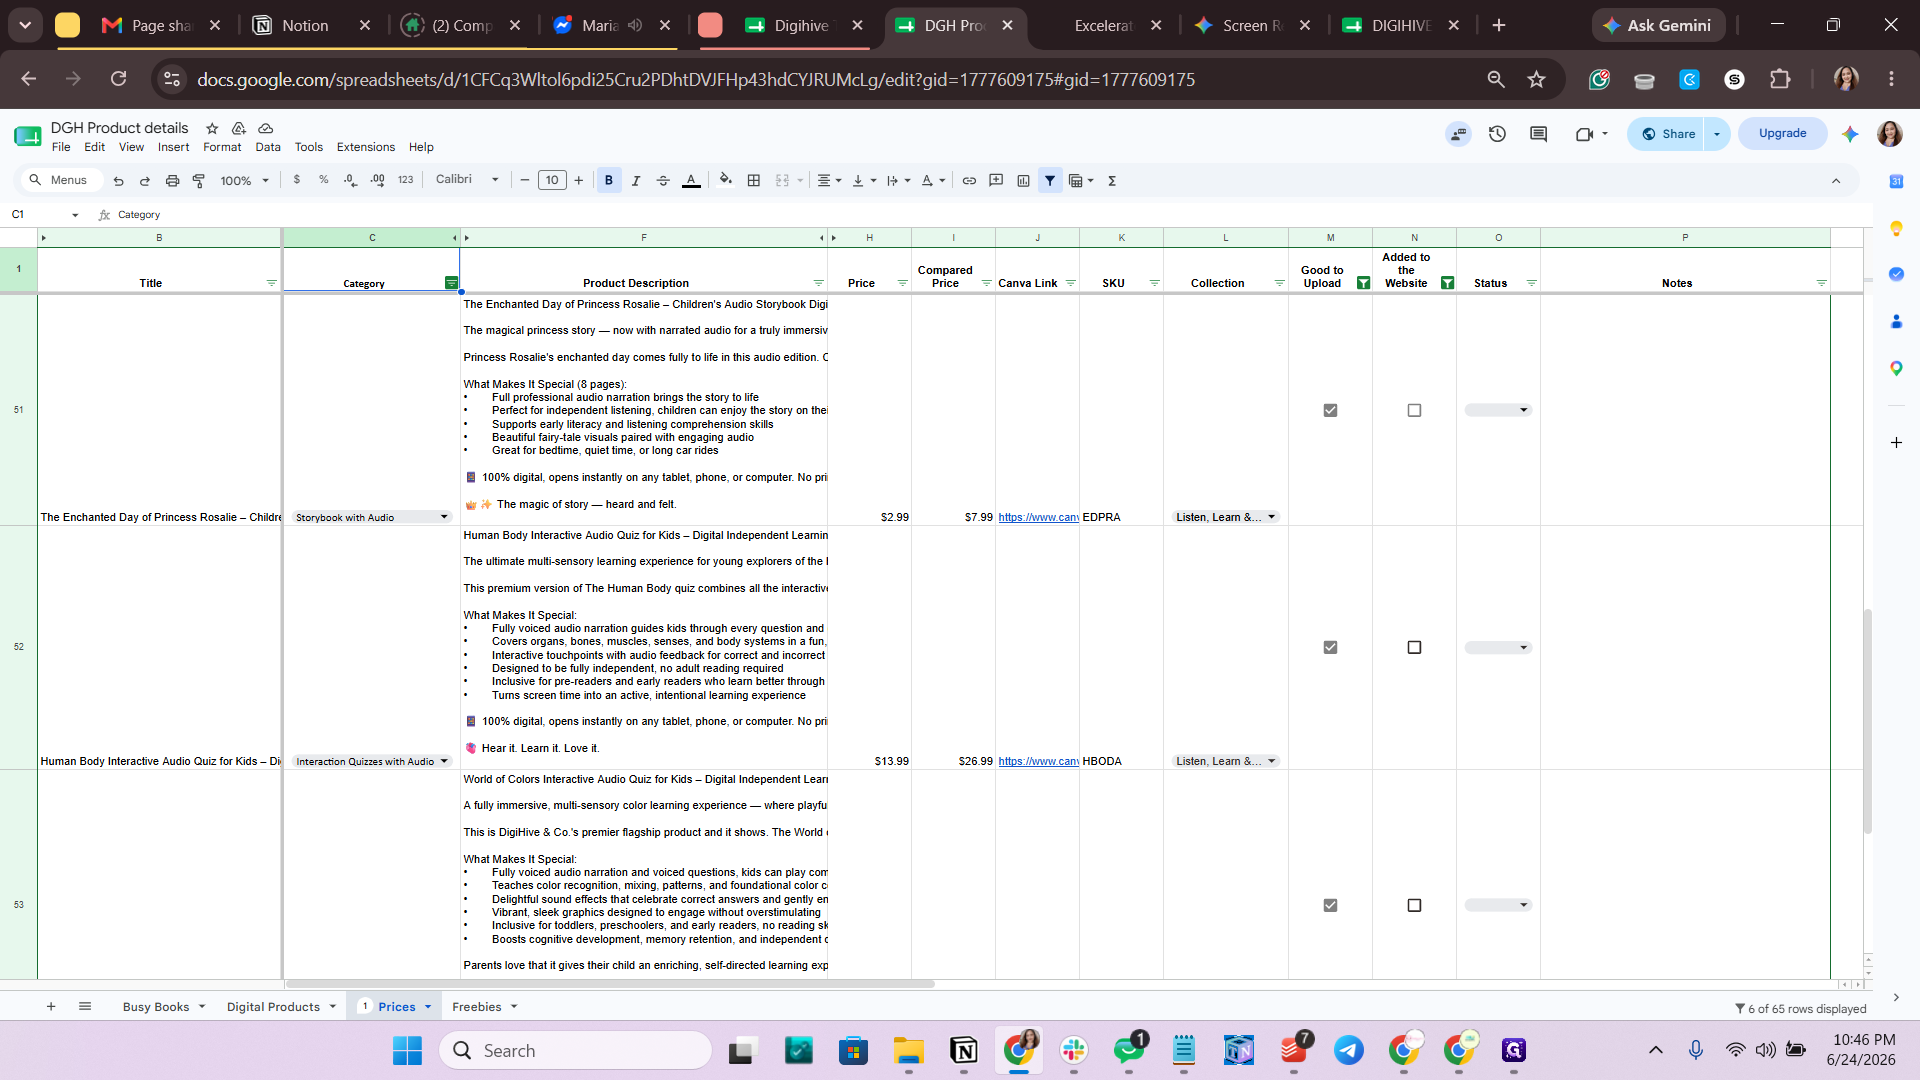
Open your product details tracking spreadsheet.
Step #1: Open your product details tracking spreadsheet.
2
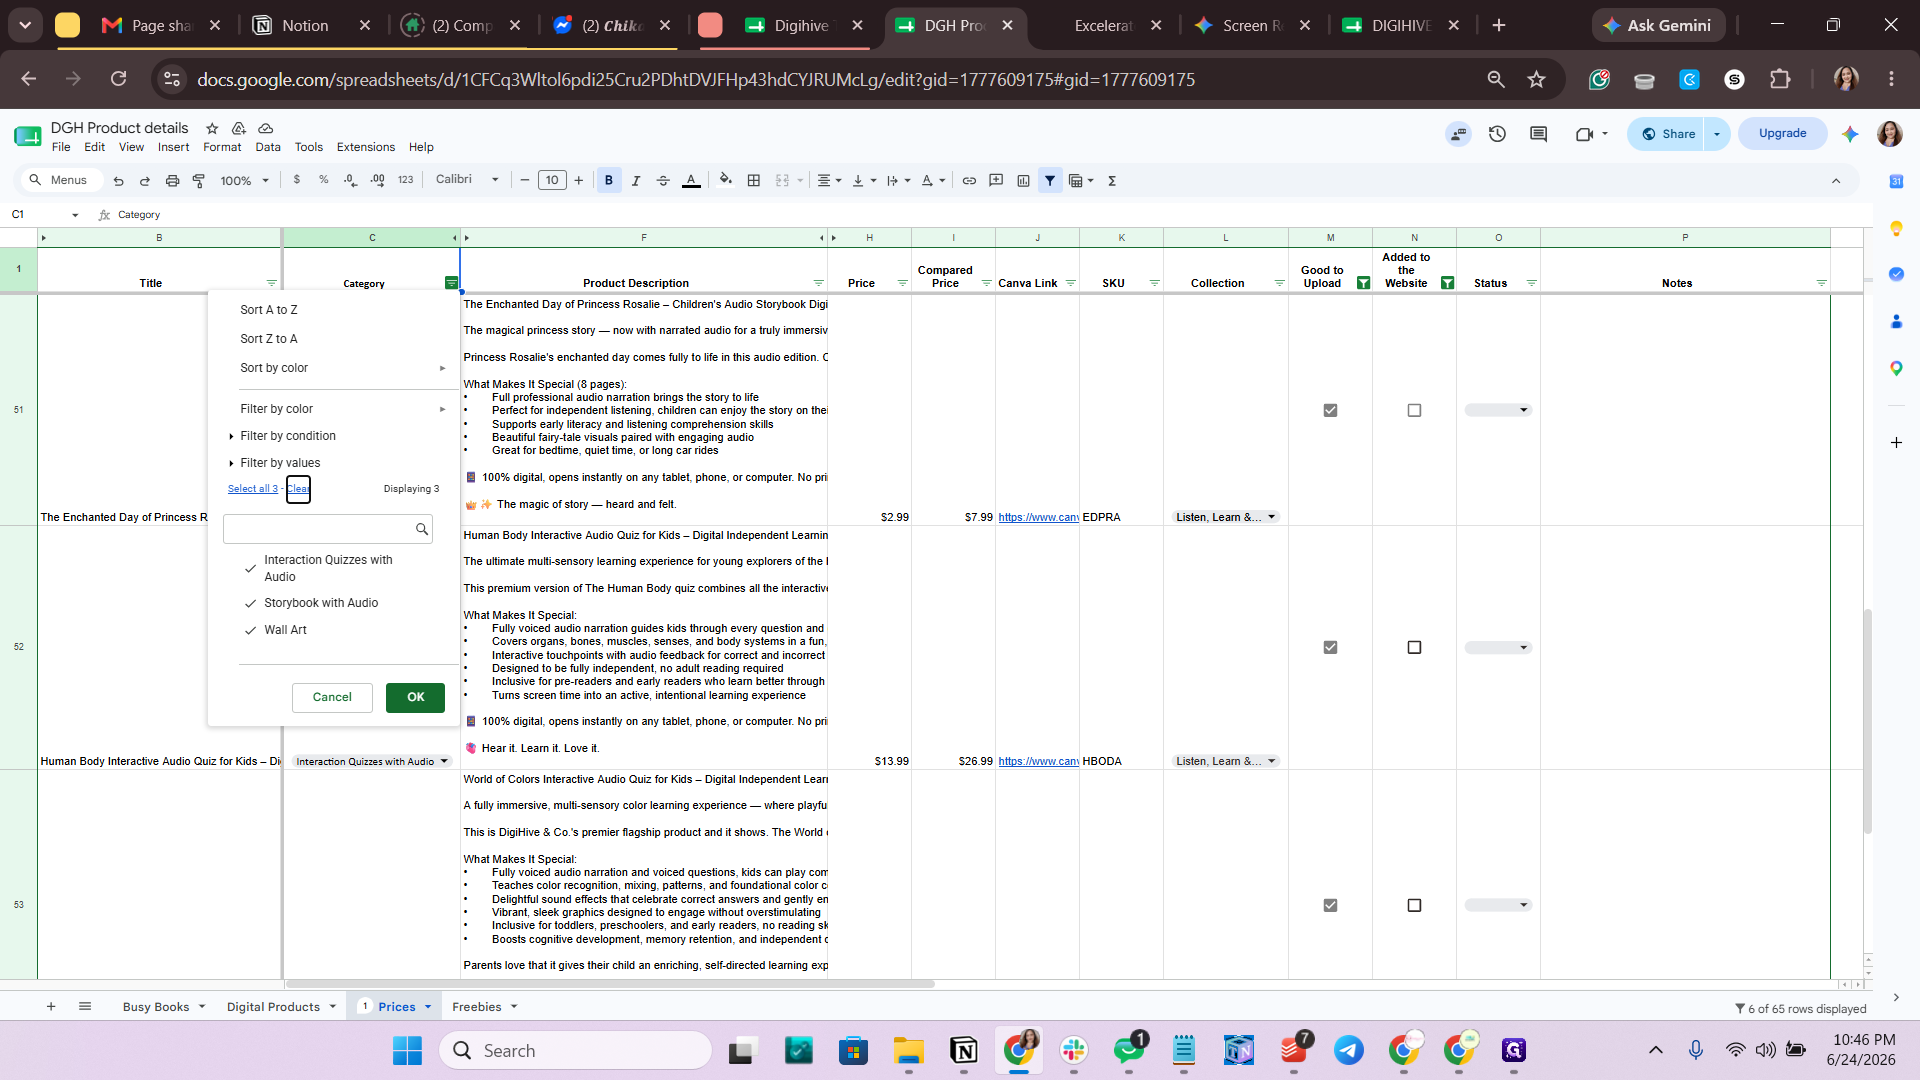
Click the filter icon on the Category column header.
Step #2: Click the filter icon on the Category column header.
3
Click Clear to deselect all categories.
Step #3: Click Clear to deselect all categories.
4
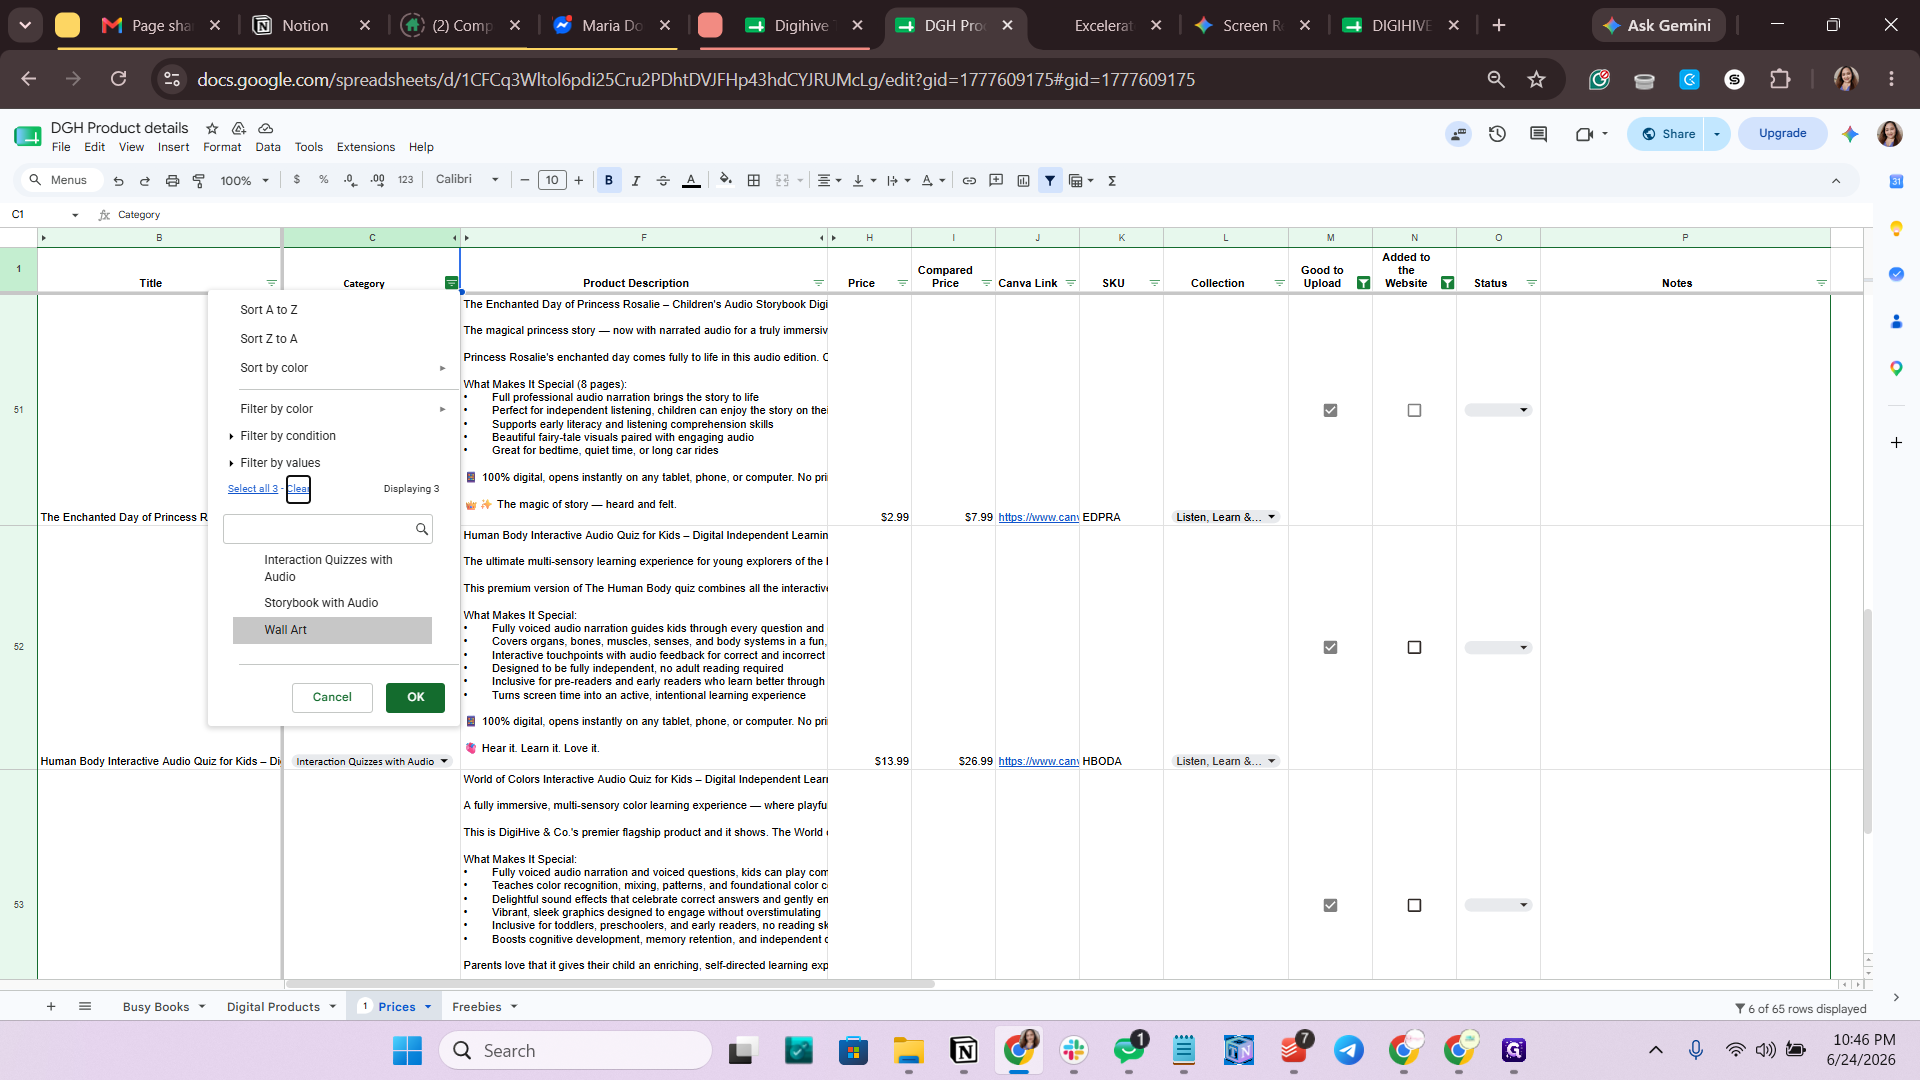
Select Wall Art from the list.
Step #4: Select Wall Art from the list.
5
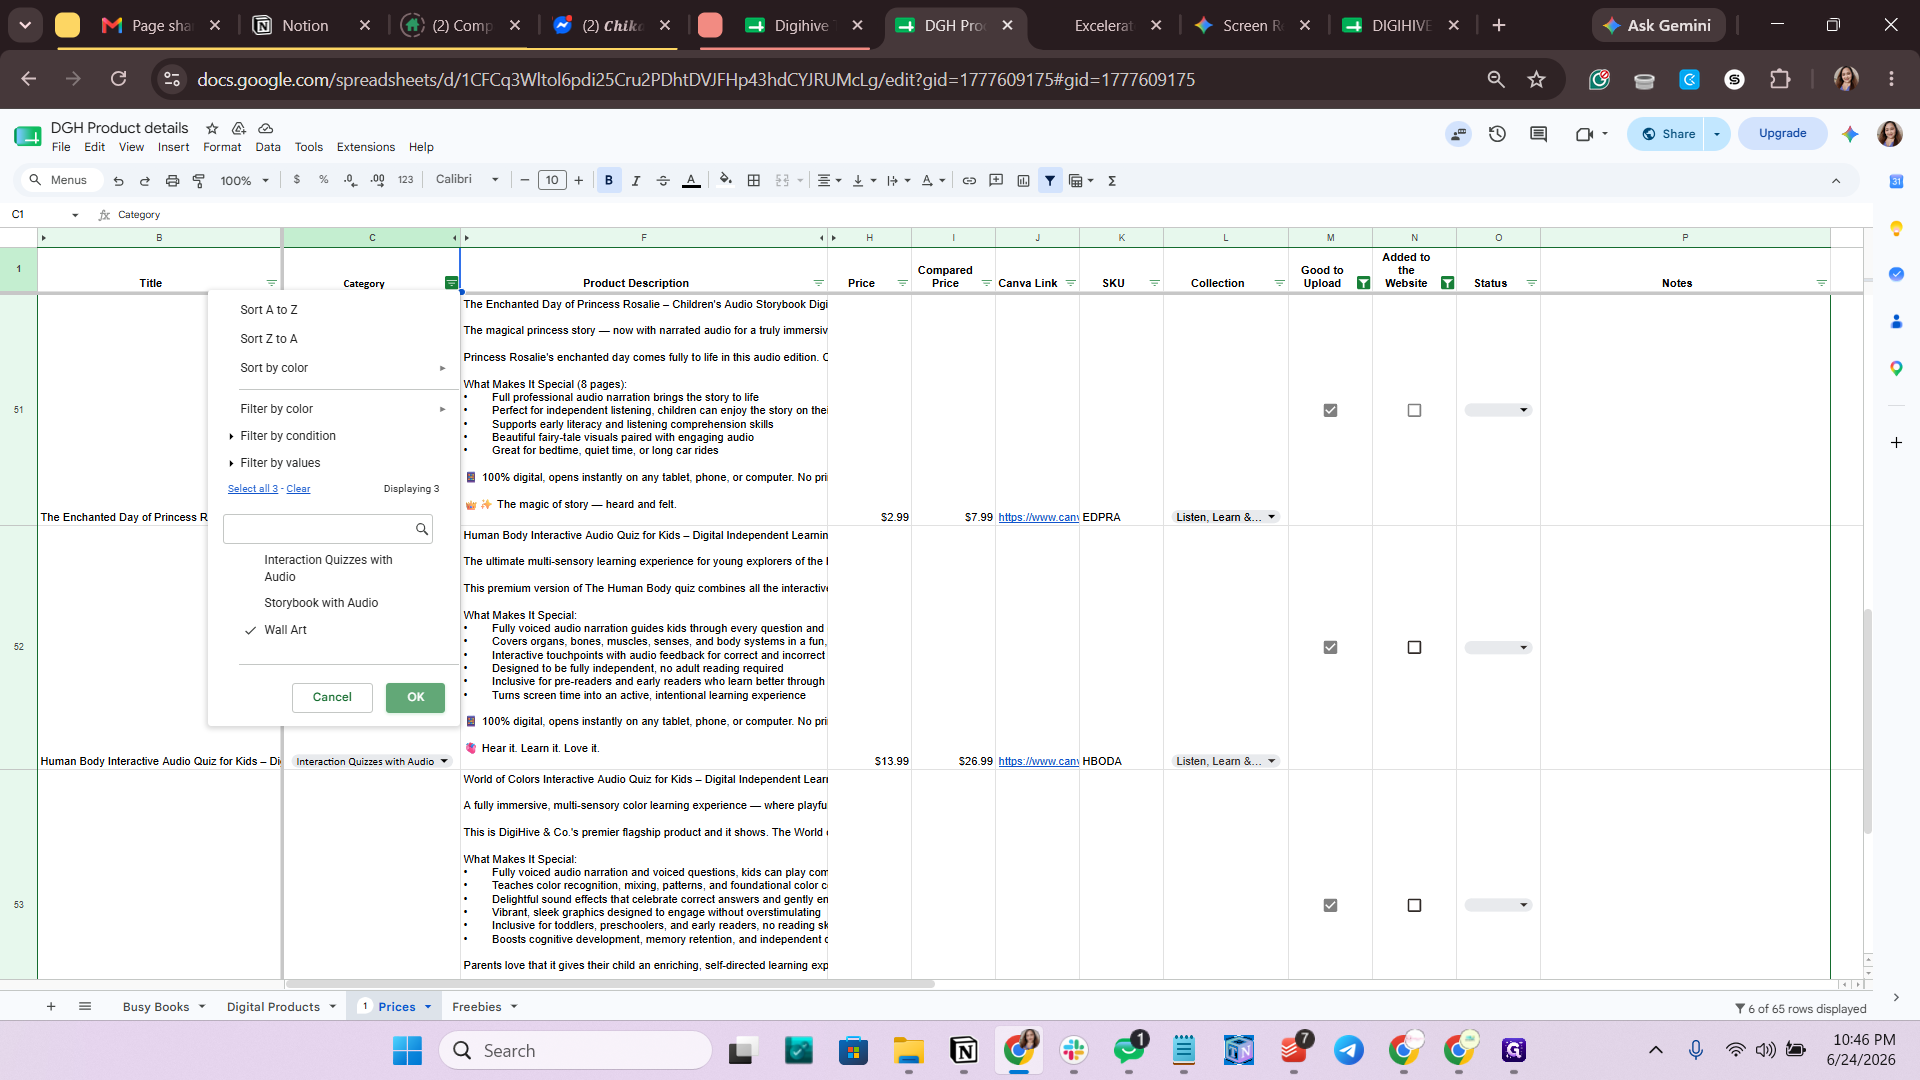
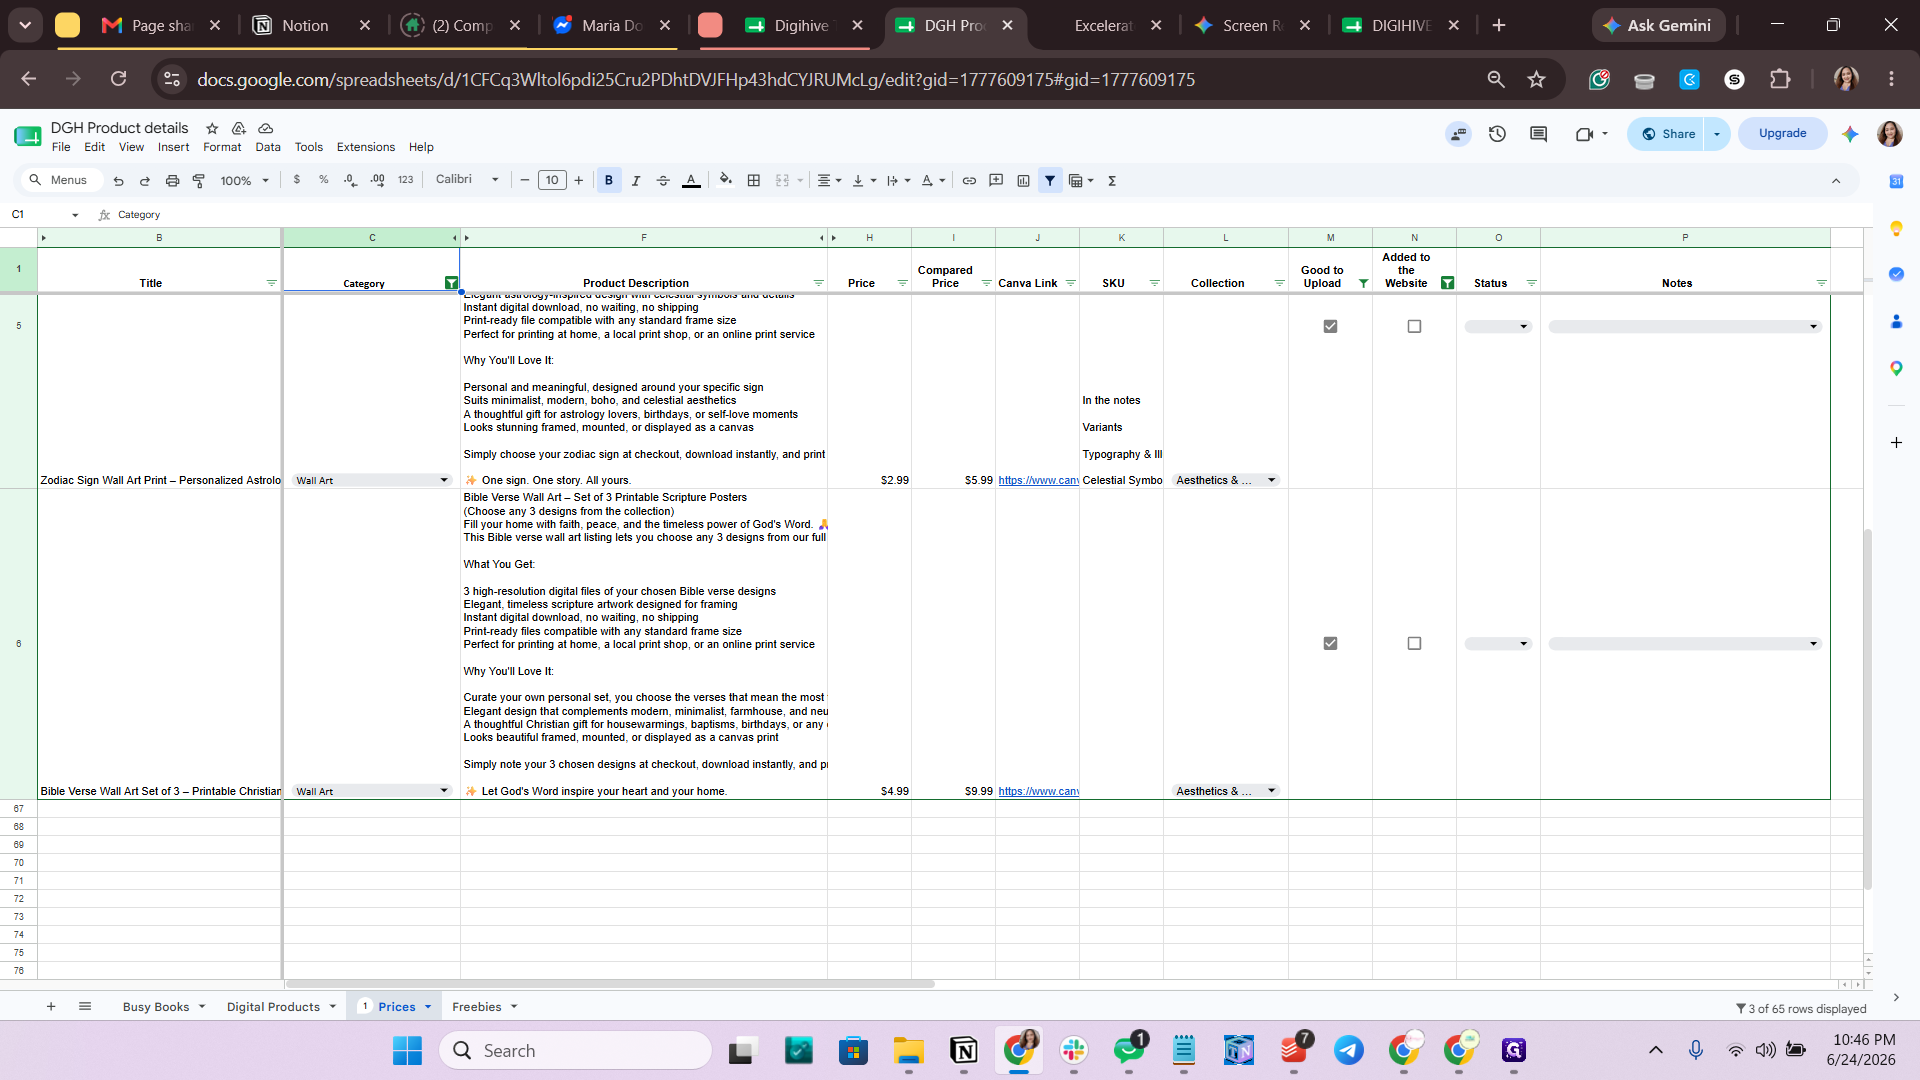
Click OK to apply the category filter.
Step #5: Click OK to apply the category filter.
6
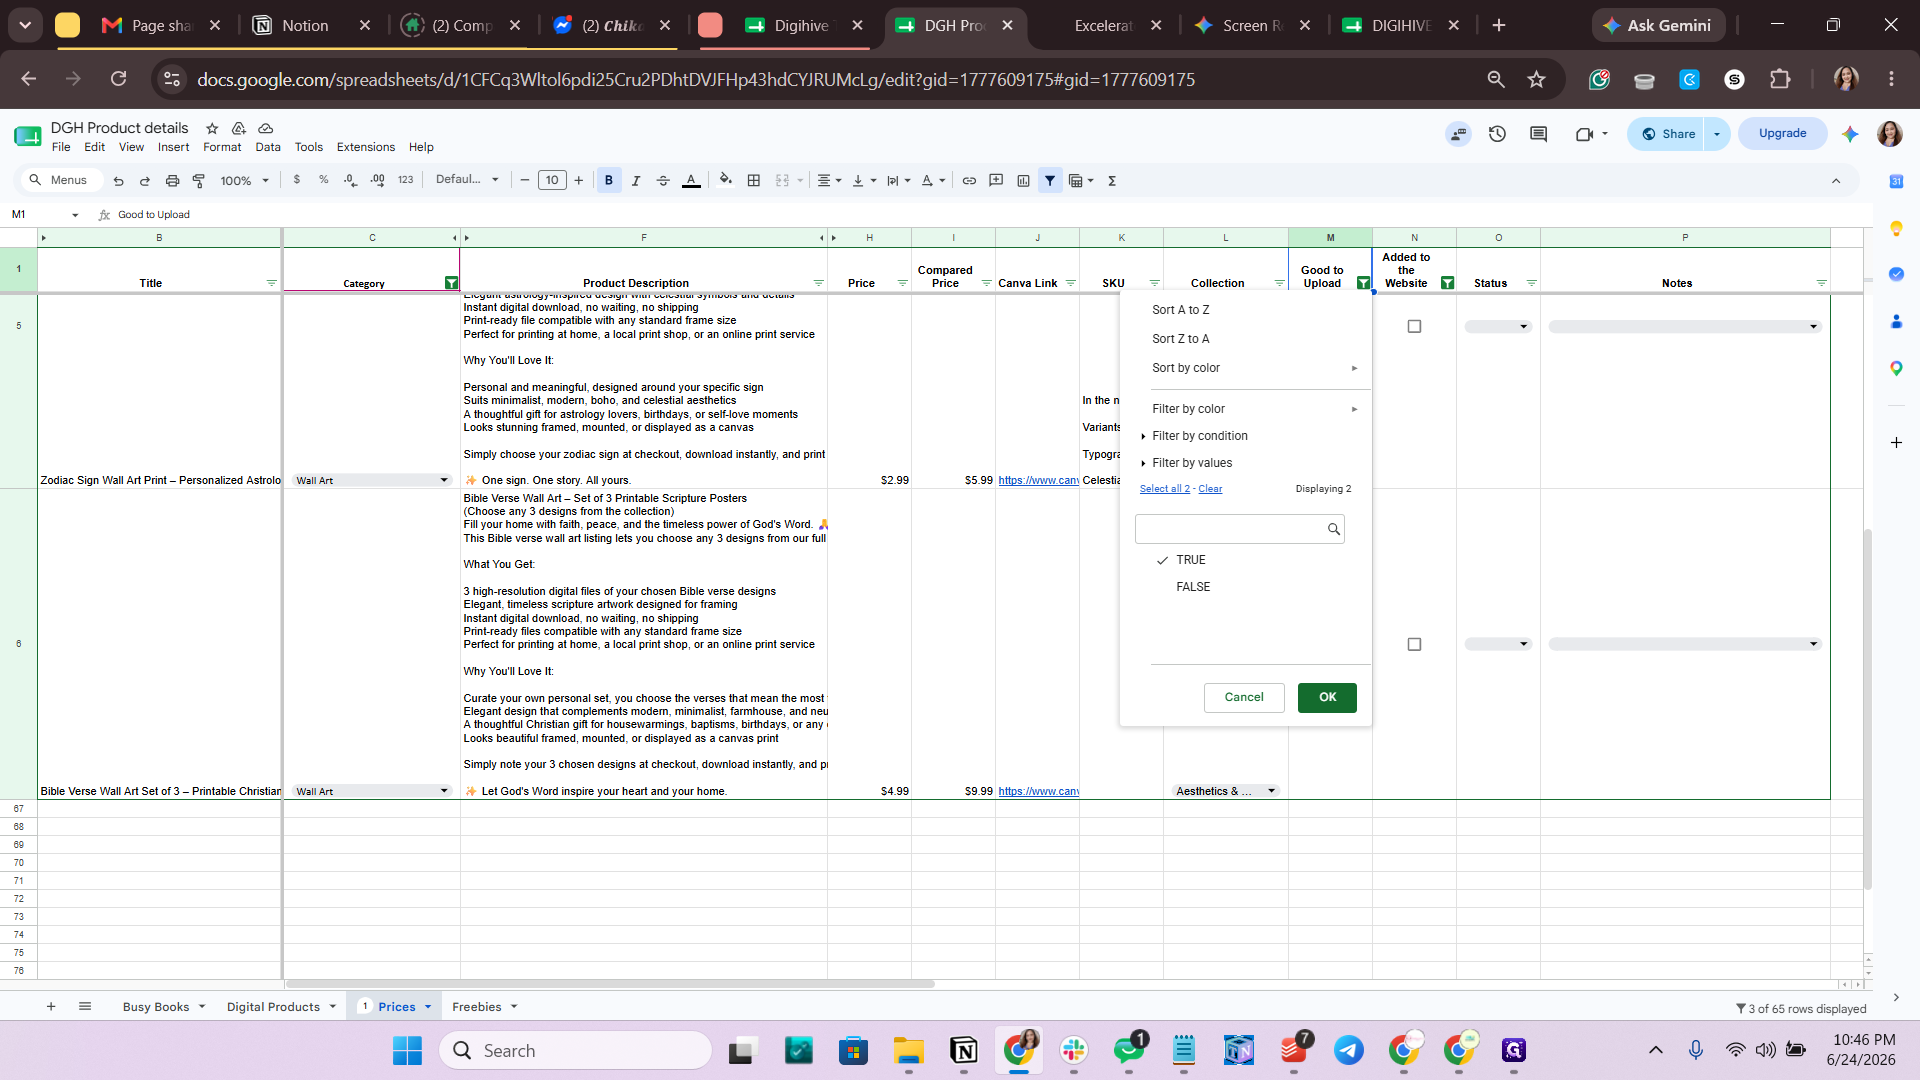
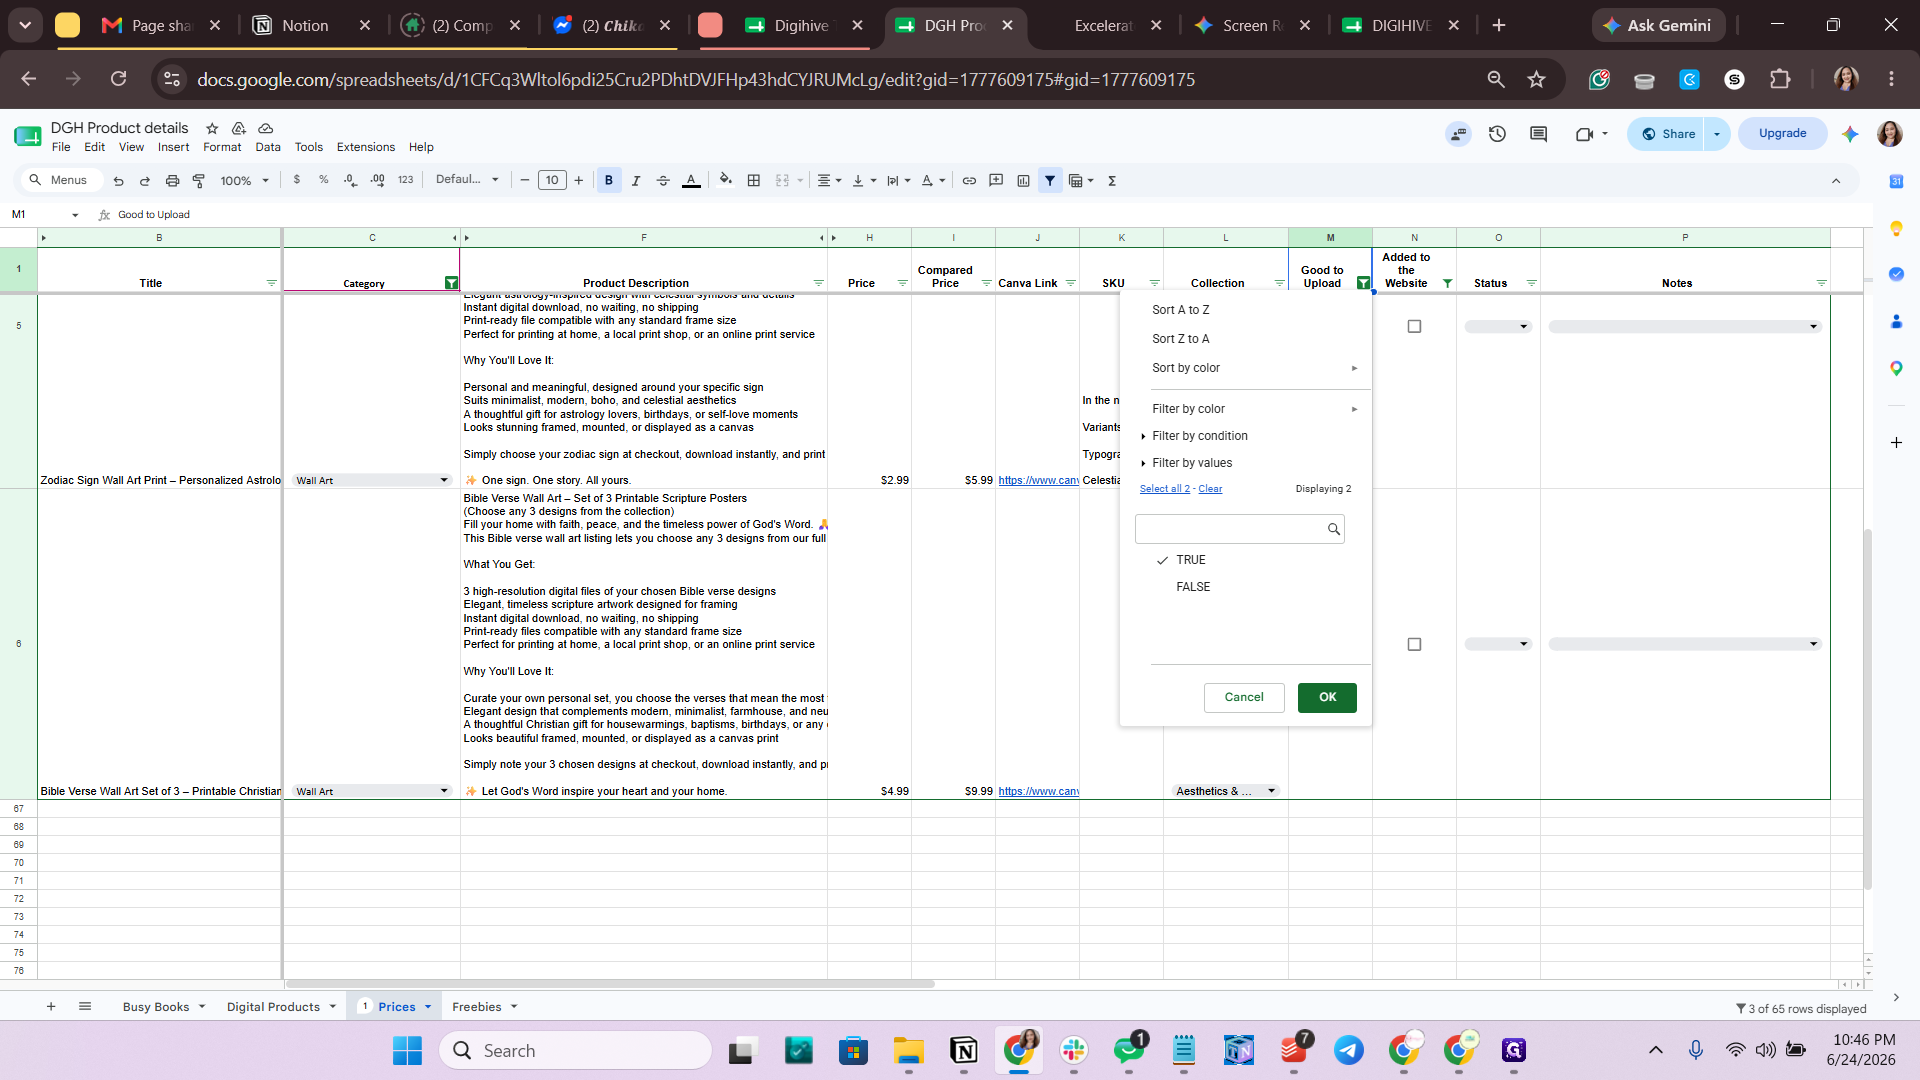
Open the filter for the Good to Upload column.
Step #6: Open the filter for the Good to Upload column.
7
Select TRUE so you only see products ready for upload.
Step #7: Select TRUE so you only see products ready for upload.
8
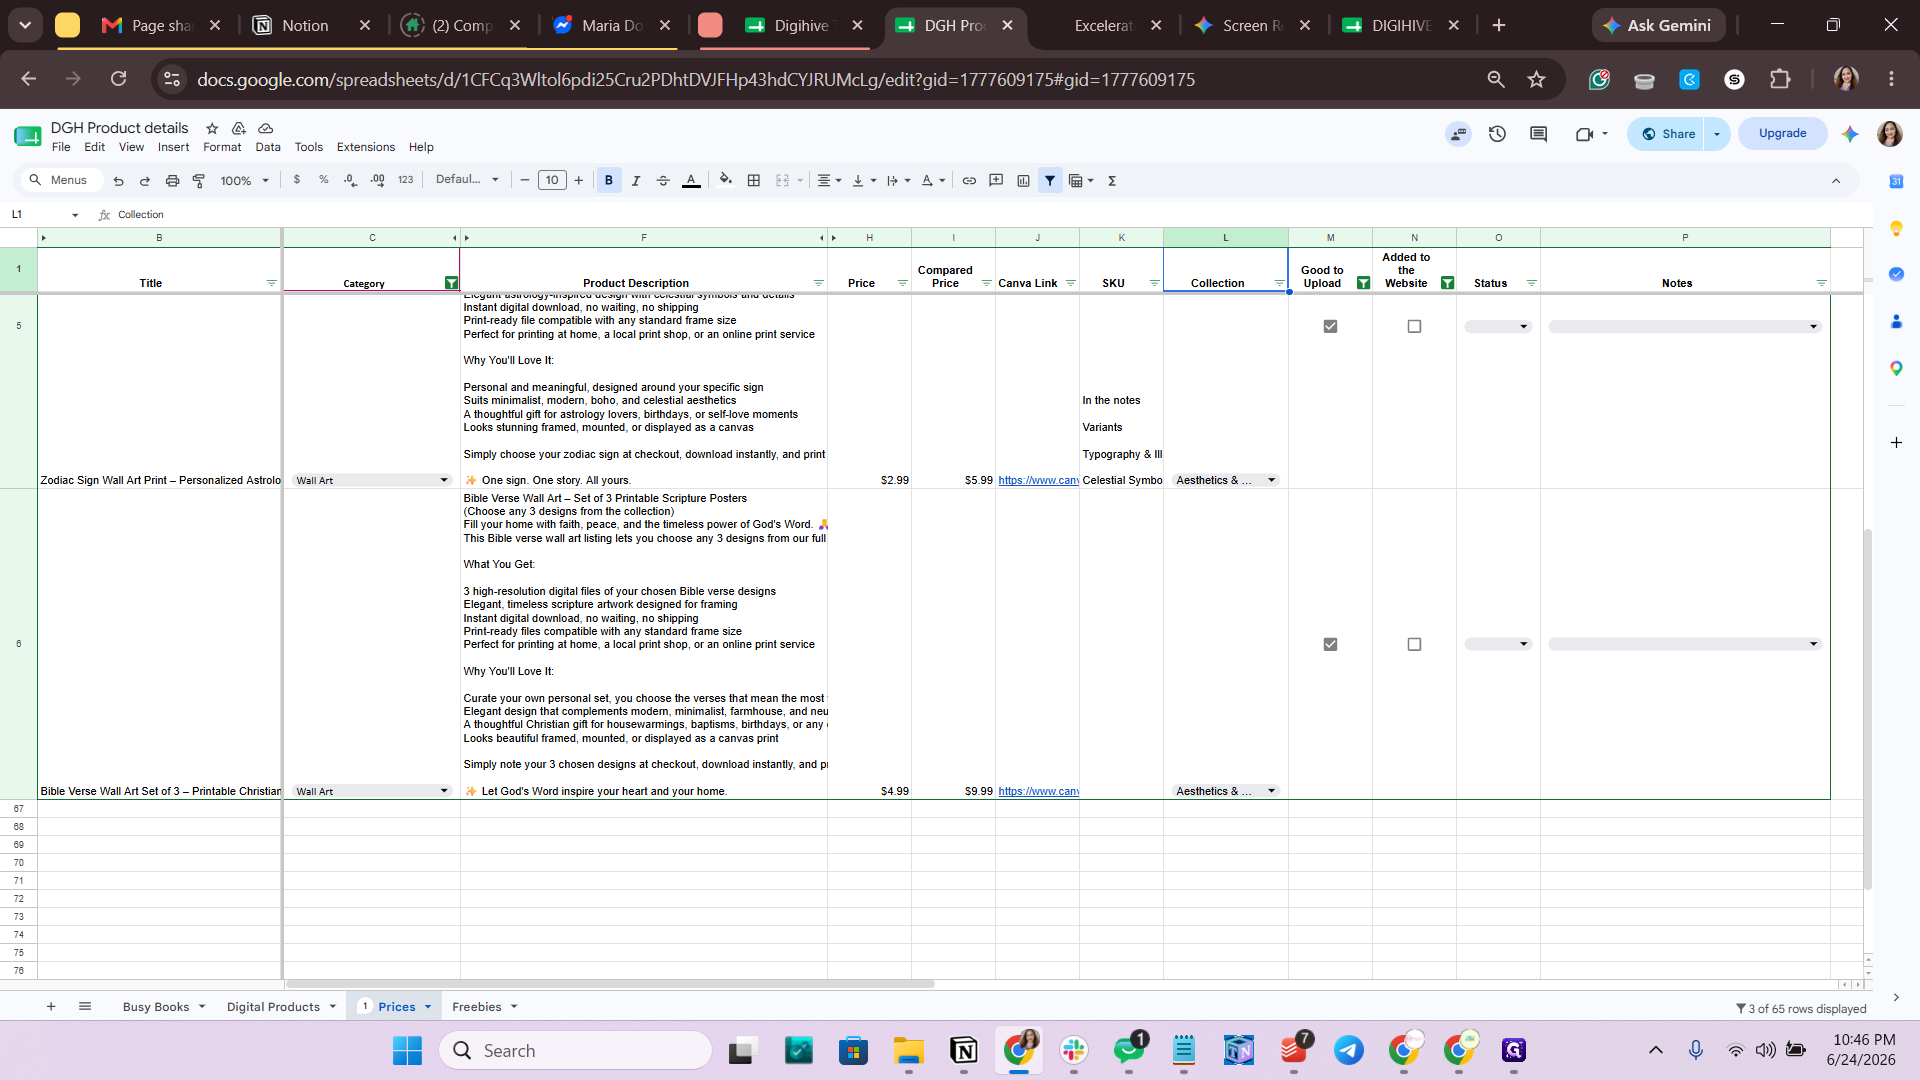
Ensure the Added to Website column is filtered to FALSE.
Step #8: Ensure the Added to Website column is filtered to FALSE.
9
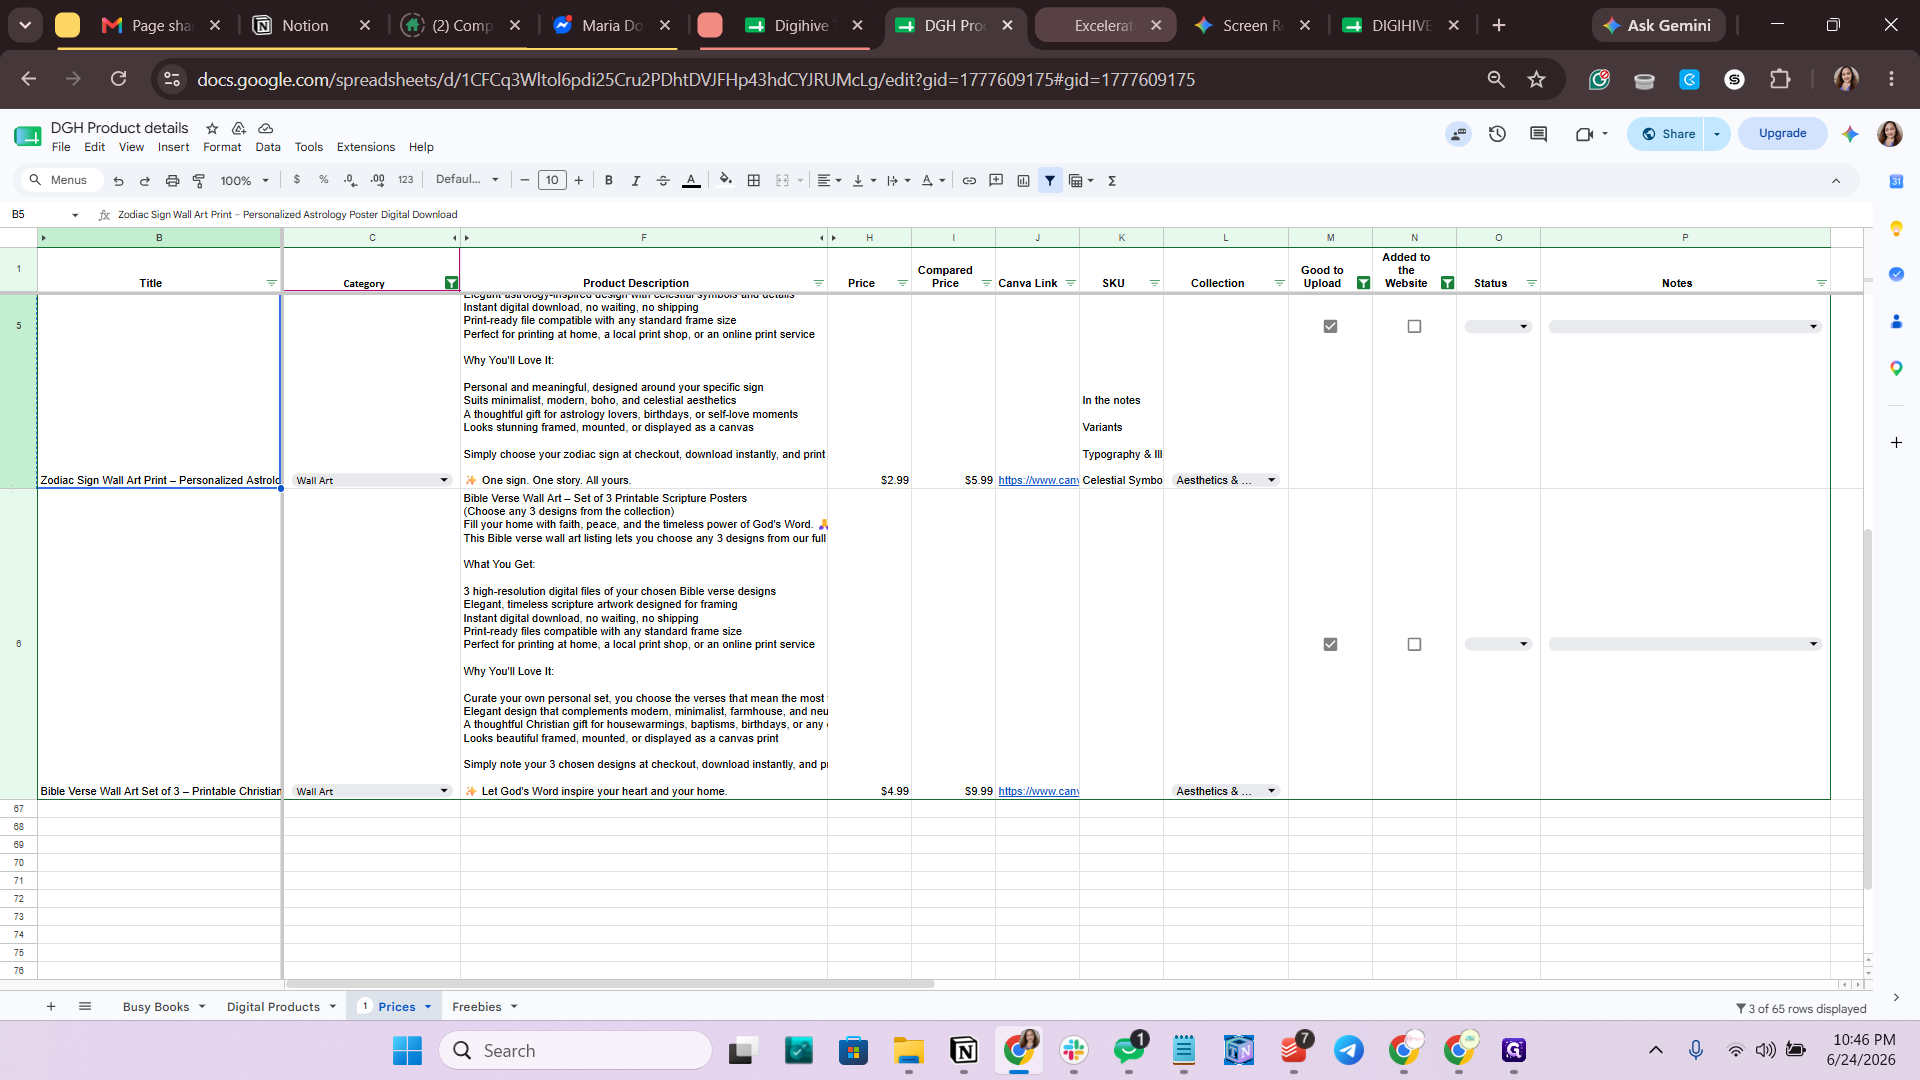
Select the cell containing the product's title.
Step #9: Select the cell containing the product's title.
10
Press Ctrl + C to copy the title.

Create the Product in GoHighLevel

11
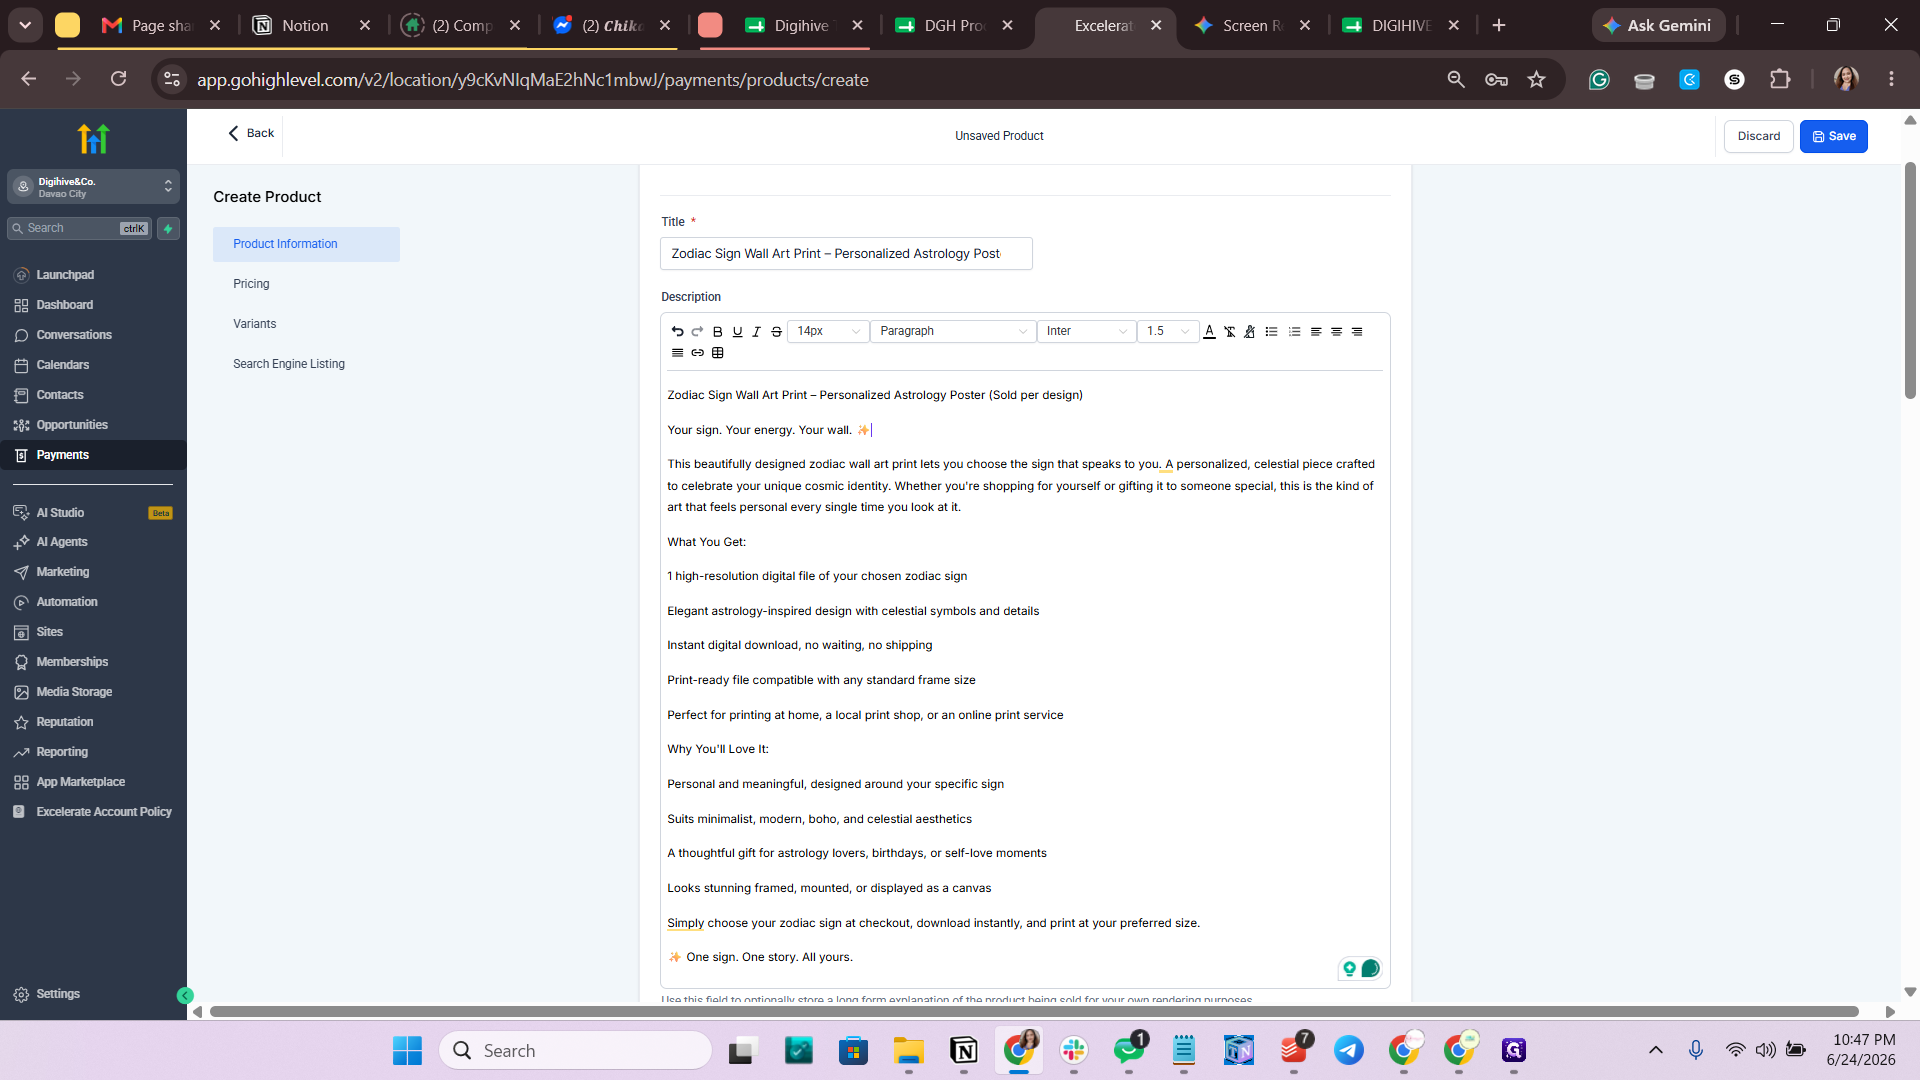
Switch to your GoHighLevel dashboard.
Step #11: Switch to your GoHighLevel dashboard.
12
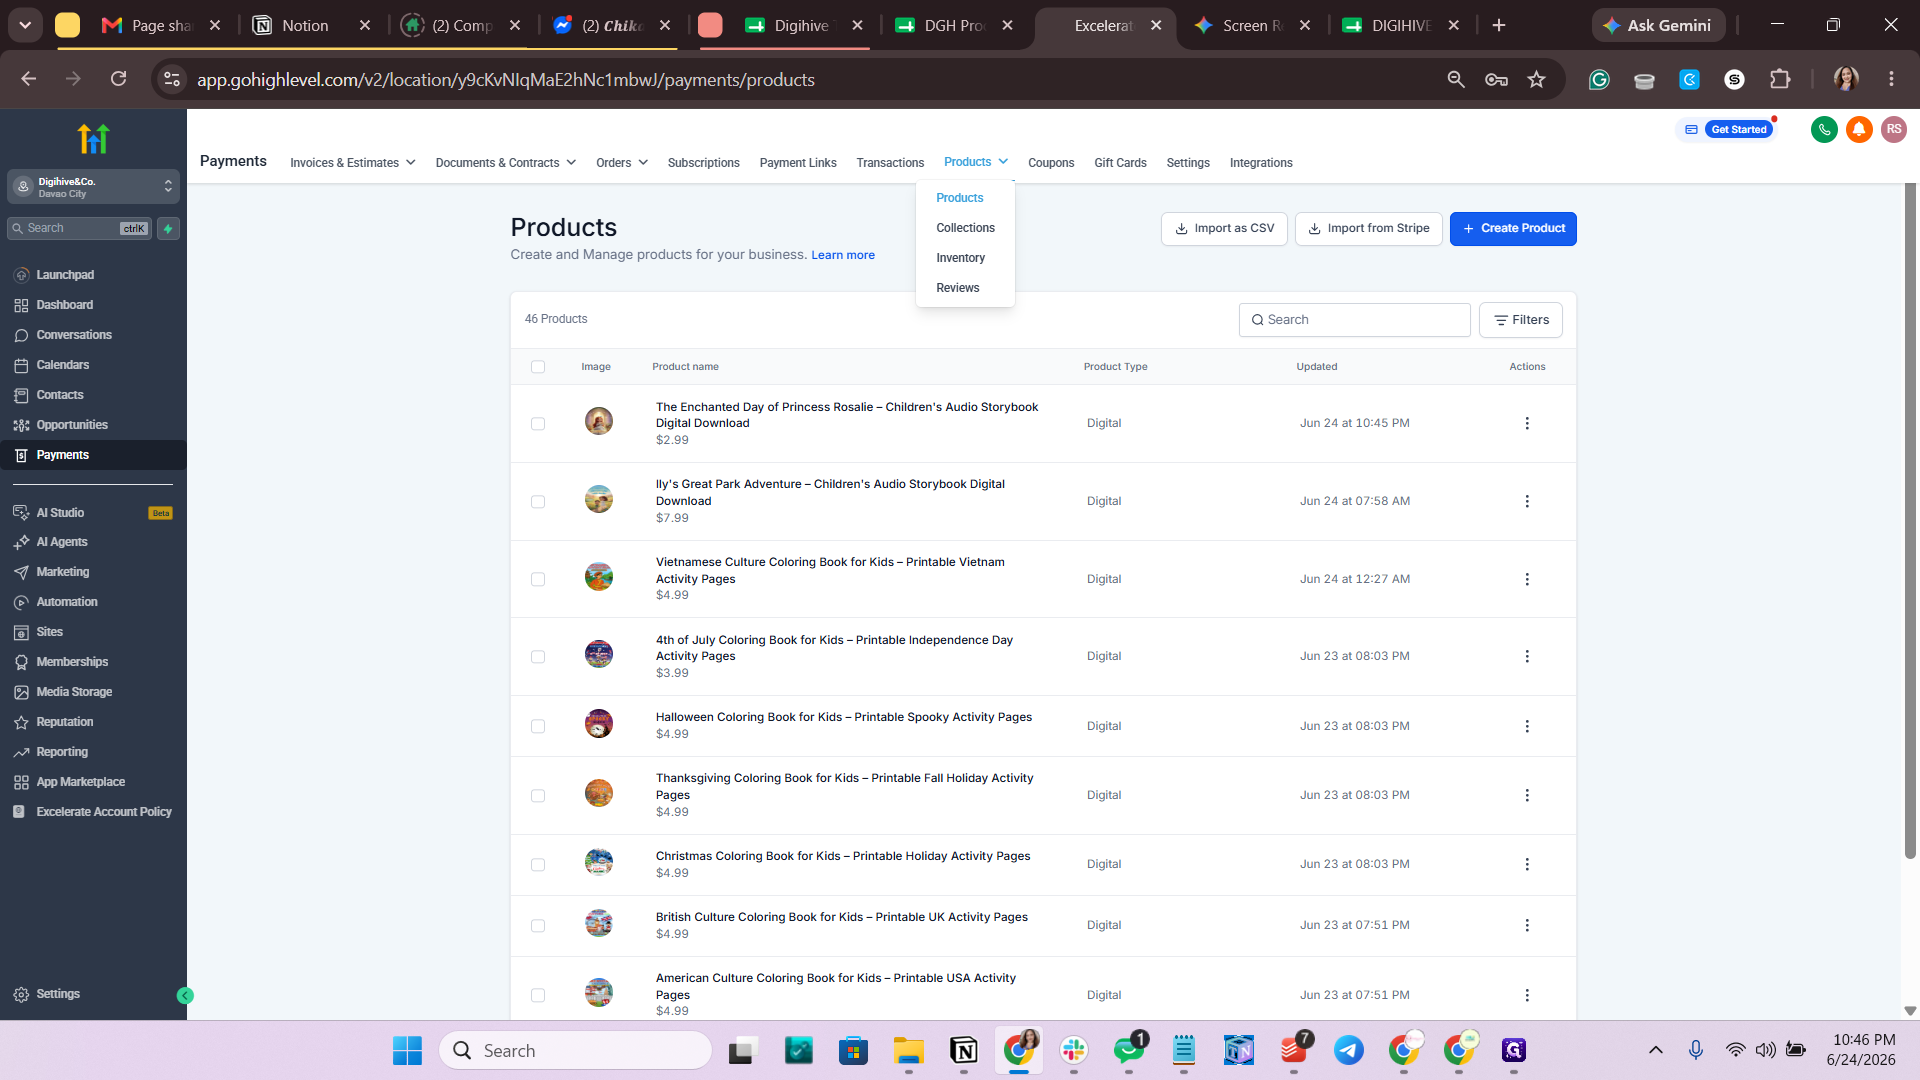
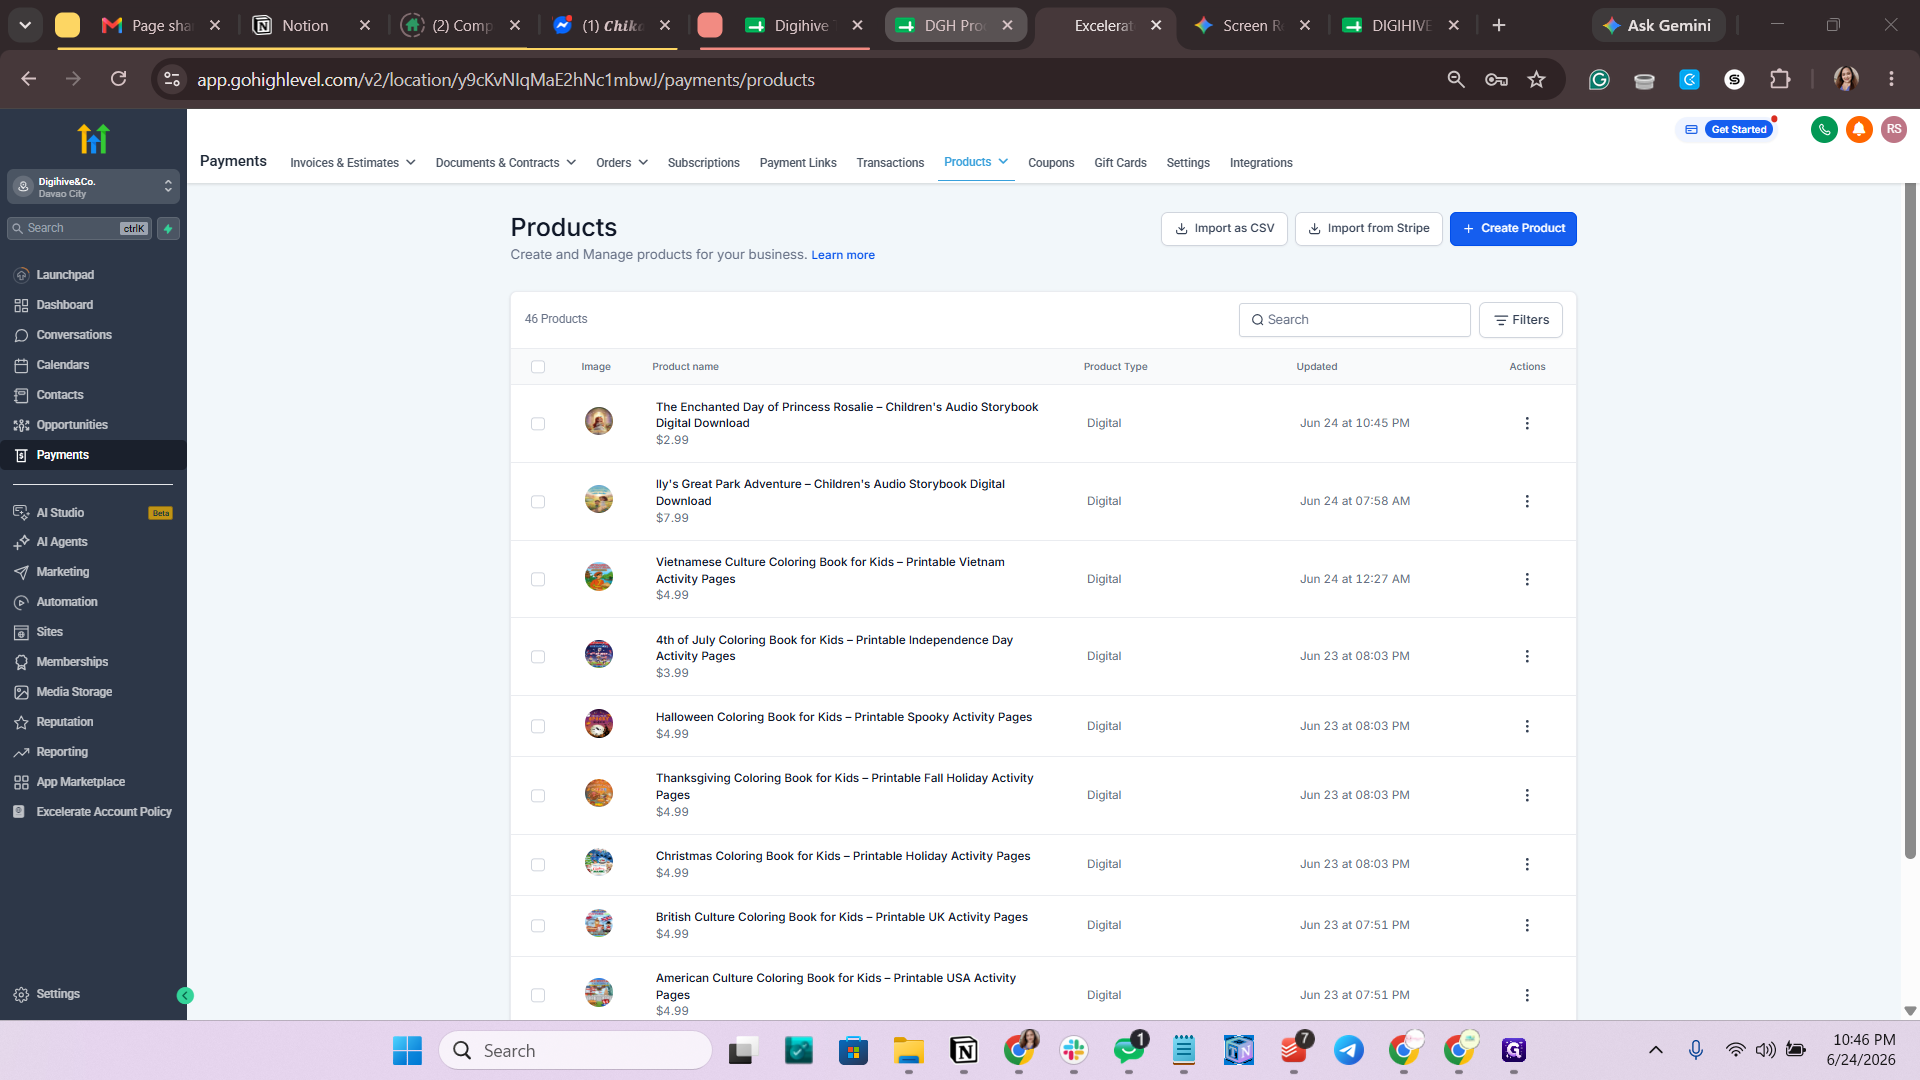
Navigate to the Payments section and click Products in the top menu.
Step #12: Navigate to the Payments section and click Products in the top menu.
13
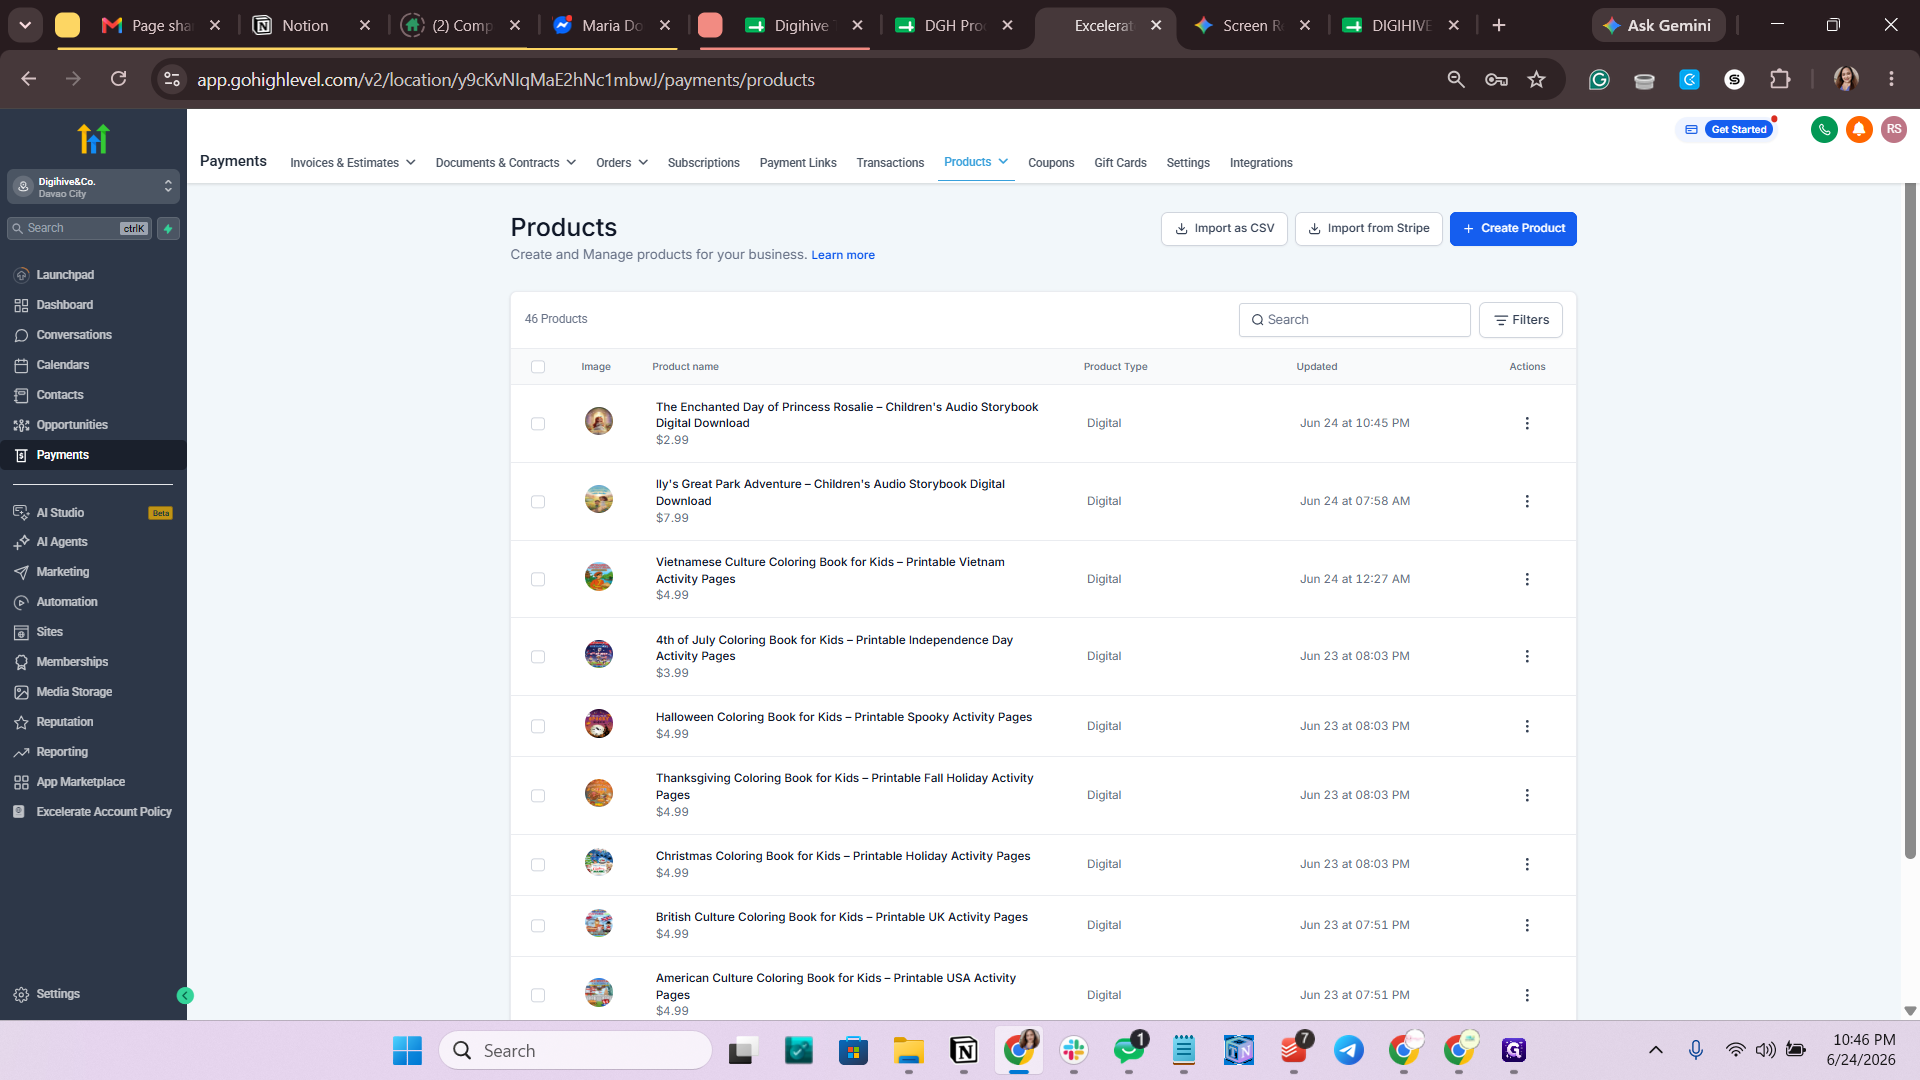
Click + Create Product.
Step #13: Click + Create Product.
14
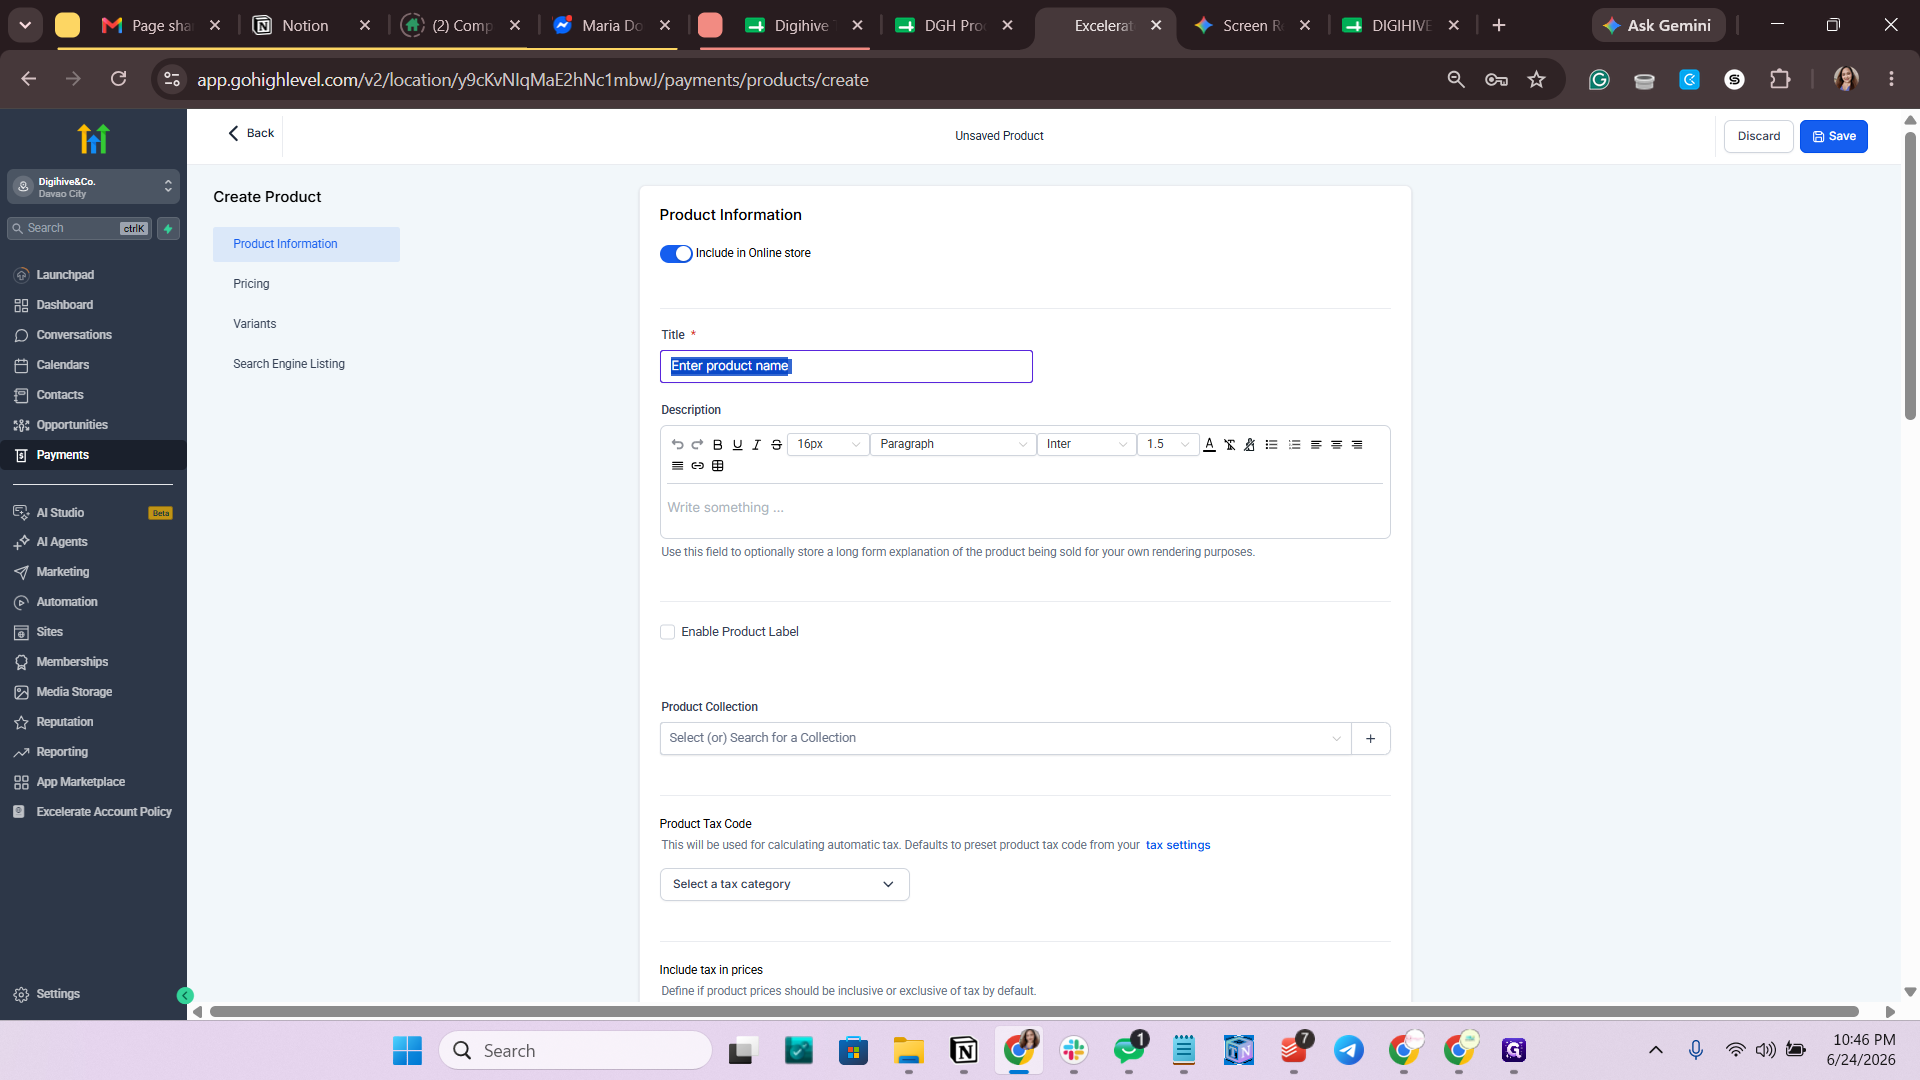
Click inside the Product Name input field.
Step #14: Click inside the Product Name input field.
15
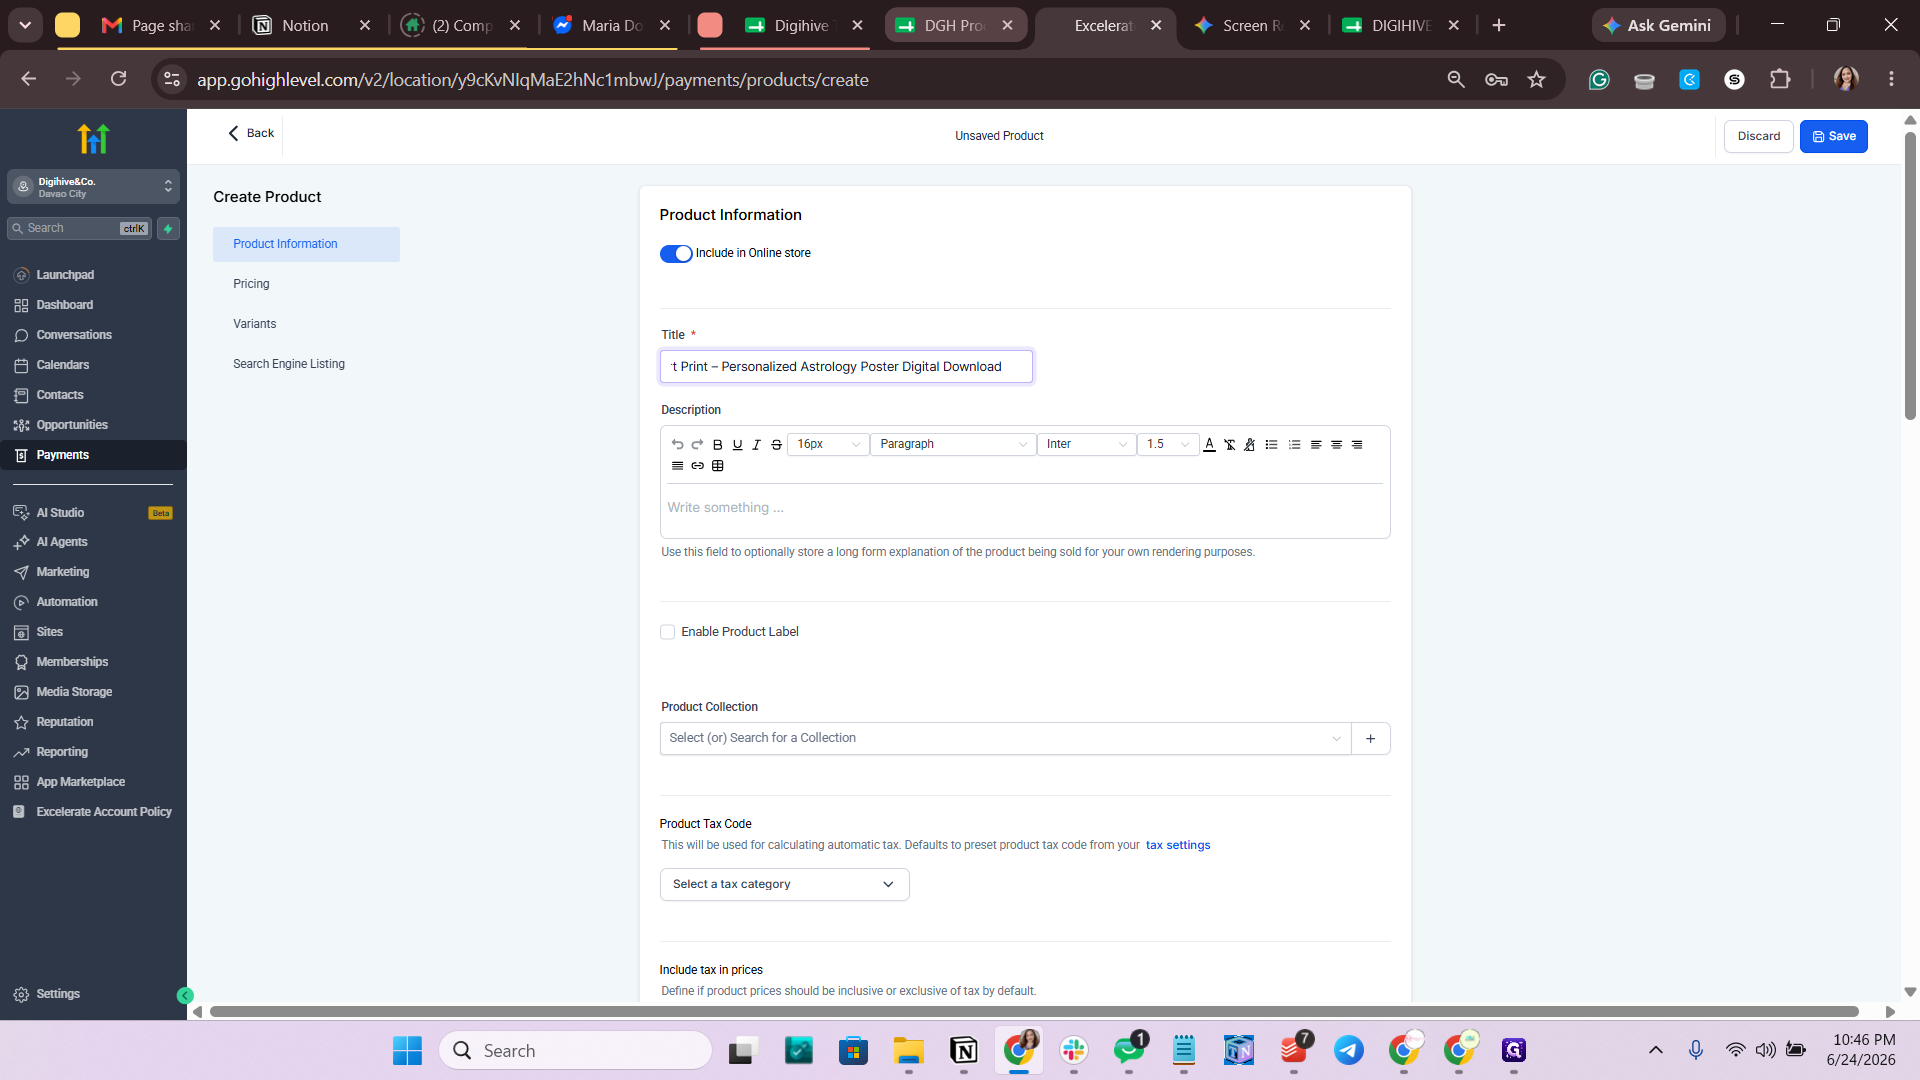
Press Ctrl + V to paste the product title.

Format the Product Description

16
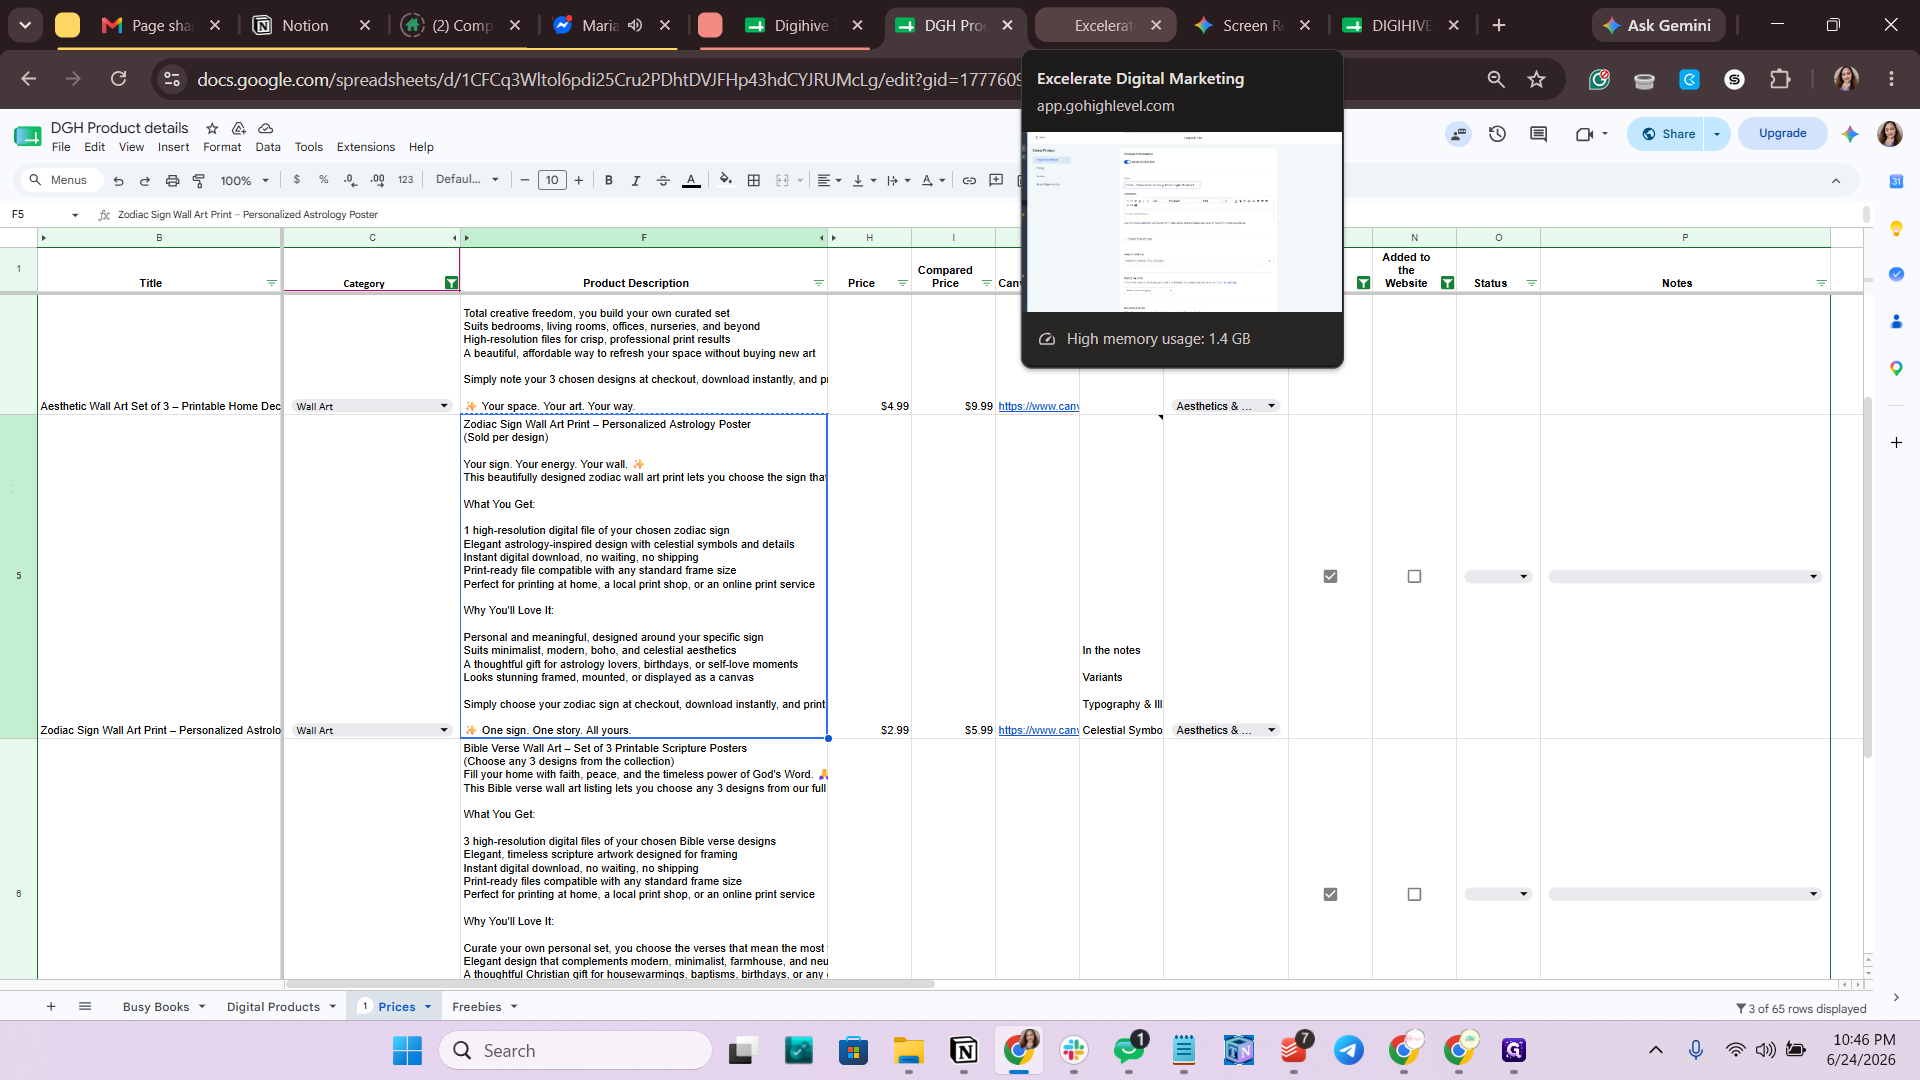
Return to your product details spreadsheet.
Step #16: Return to your product details spreadsheet.
17
Select the cell containing the product description.
Step #17: Select the cell containing the product description.
18
Press Ctrl + C to copy the description text.
19
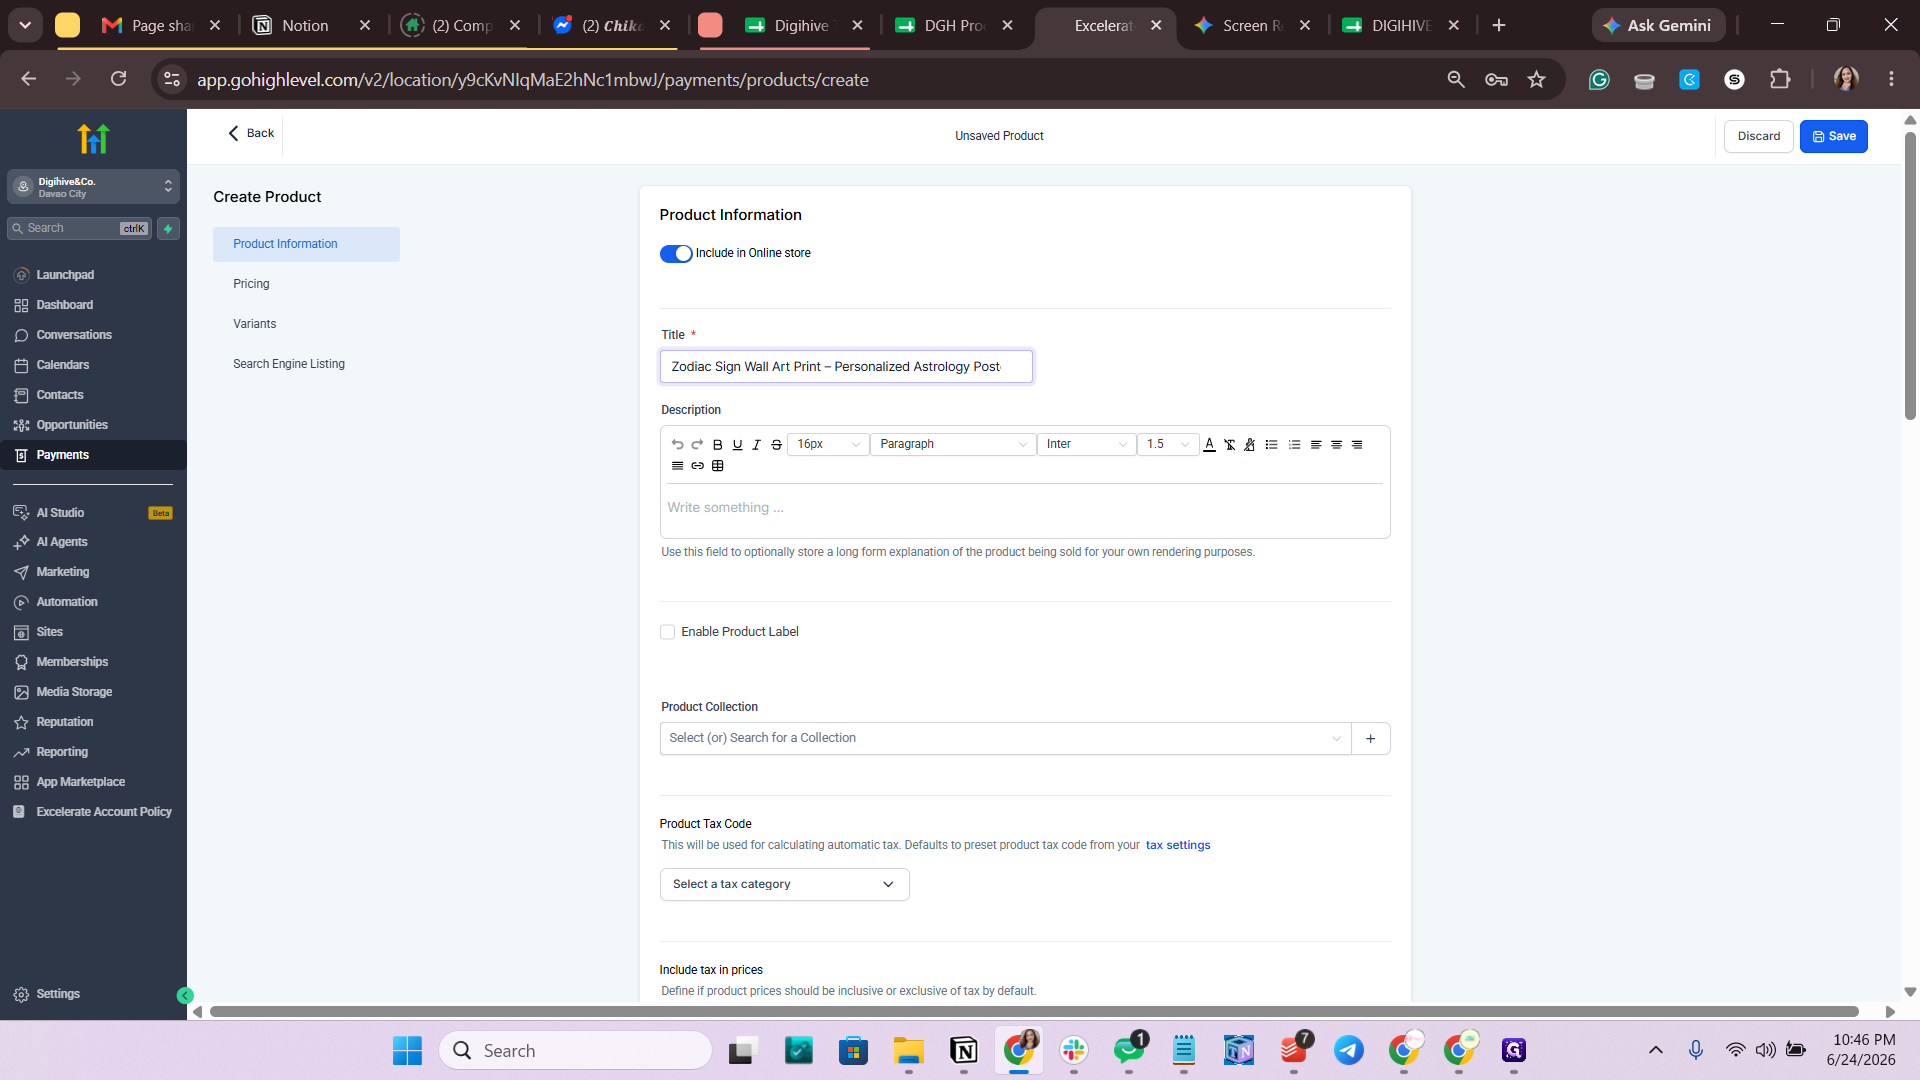
Switch back to GoHighLevel.
Step #19: Switch back to GoHighLevel.
20
Click inside the product description editor block.
Step #20: Click inside the product description editor block.
21
Press Ctrl + Shift + V to paste the text without bringing over spreadsheet formatting.
22
Press Ctrl + A to select all text in the description block.
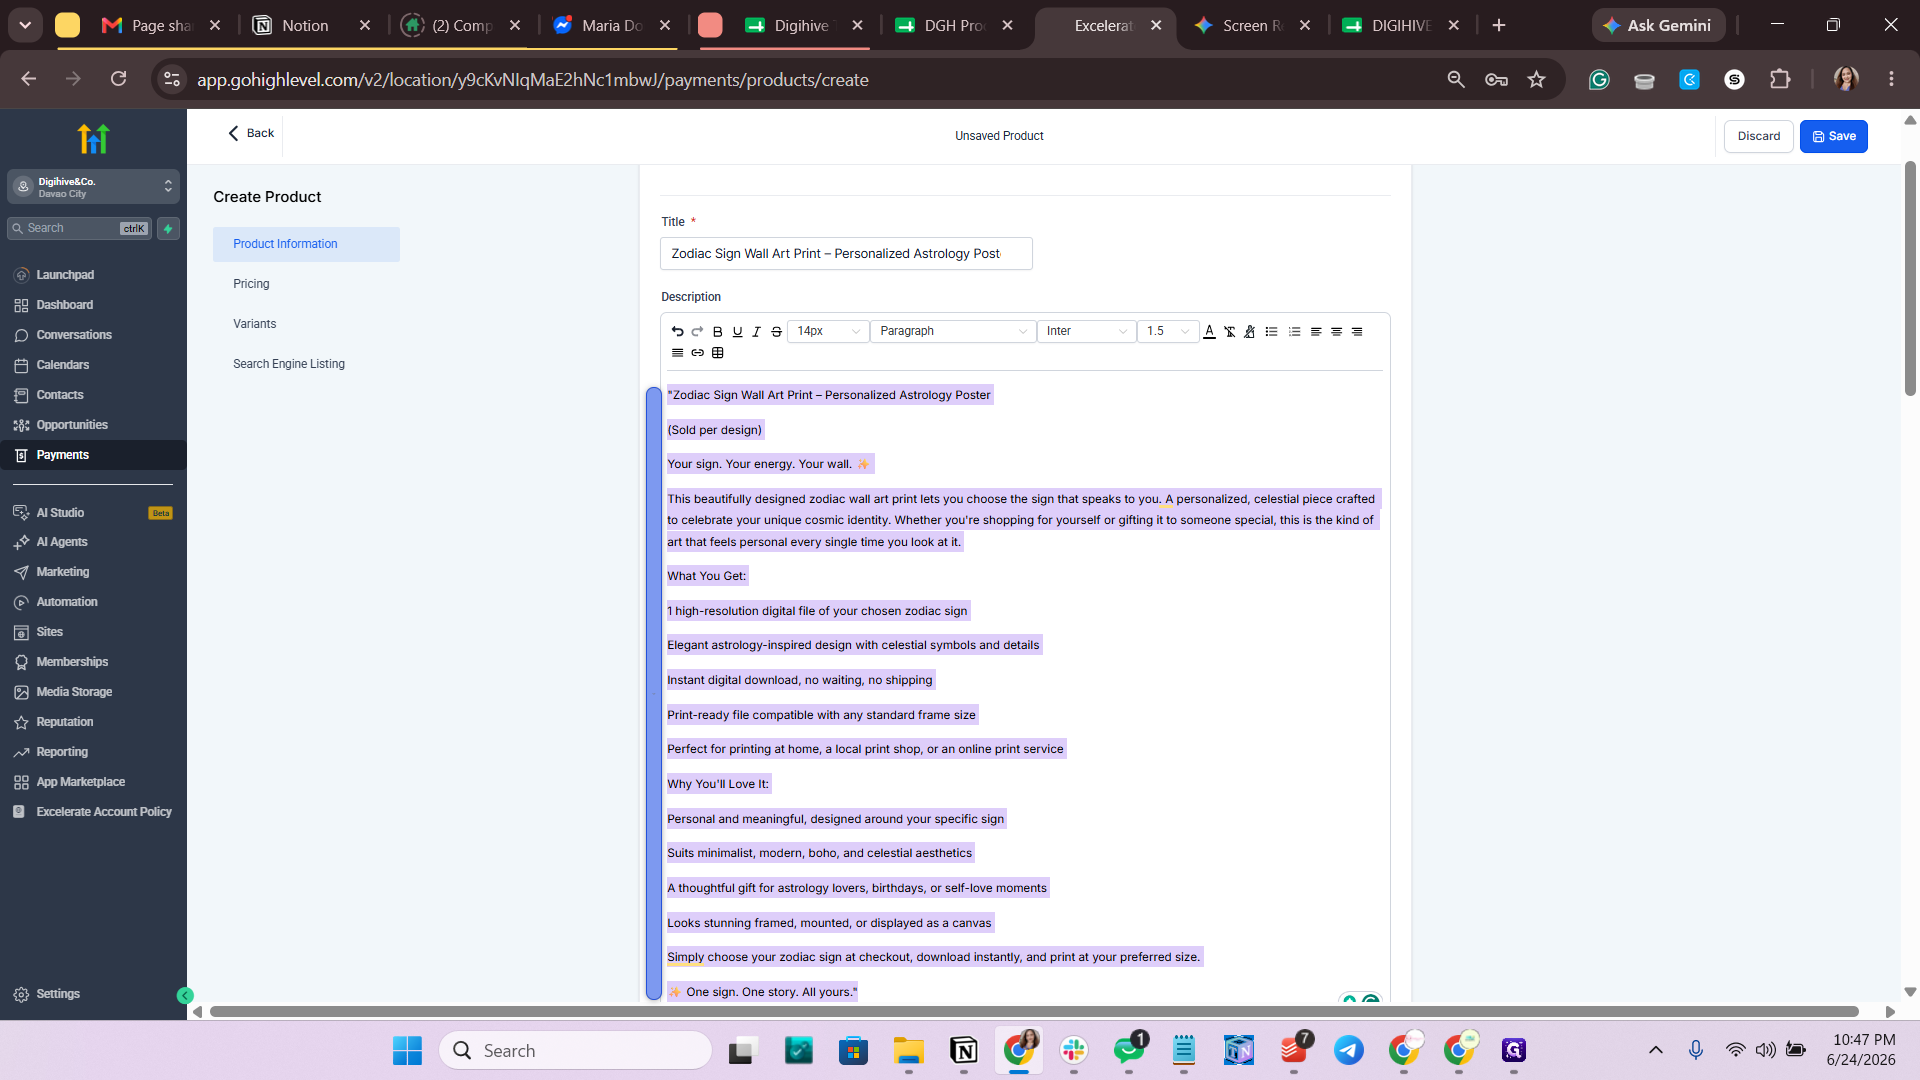
23
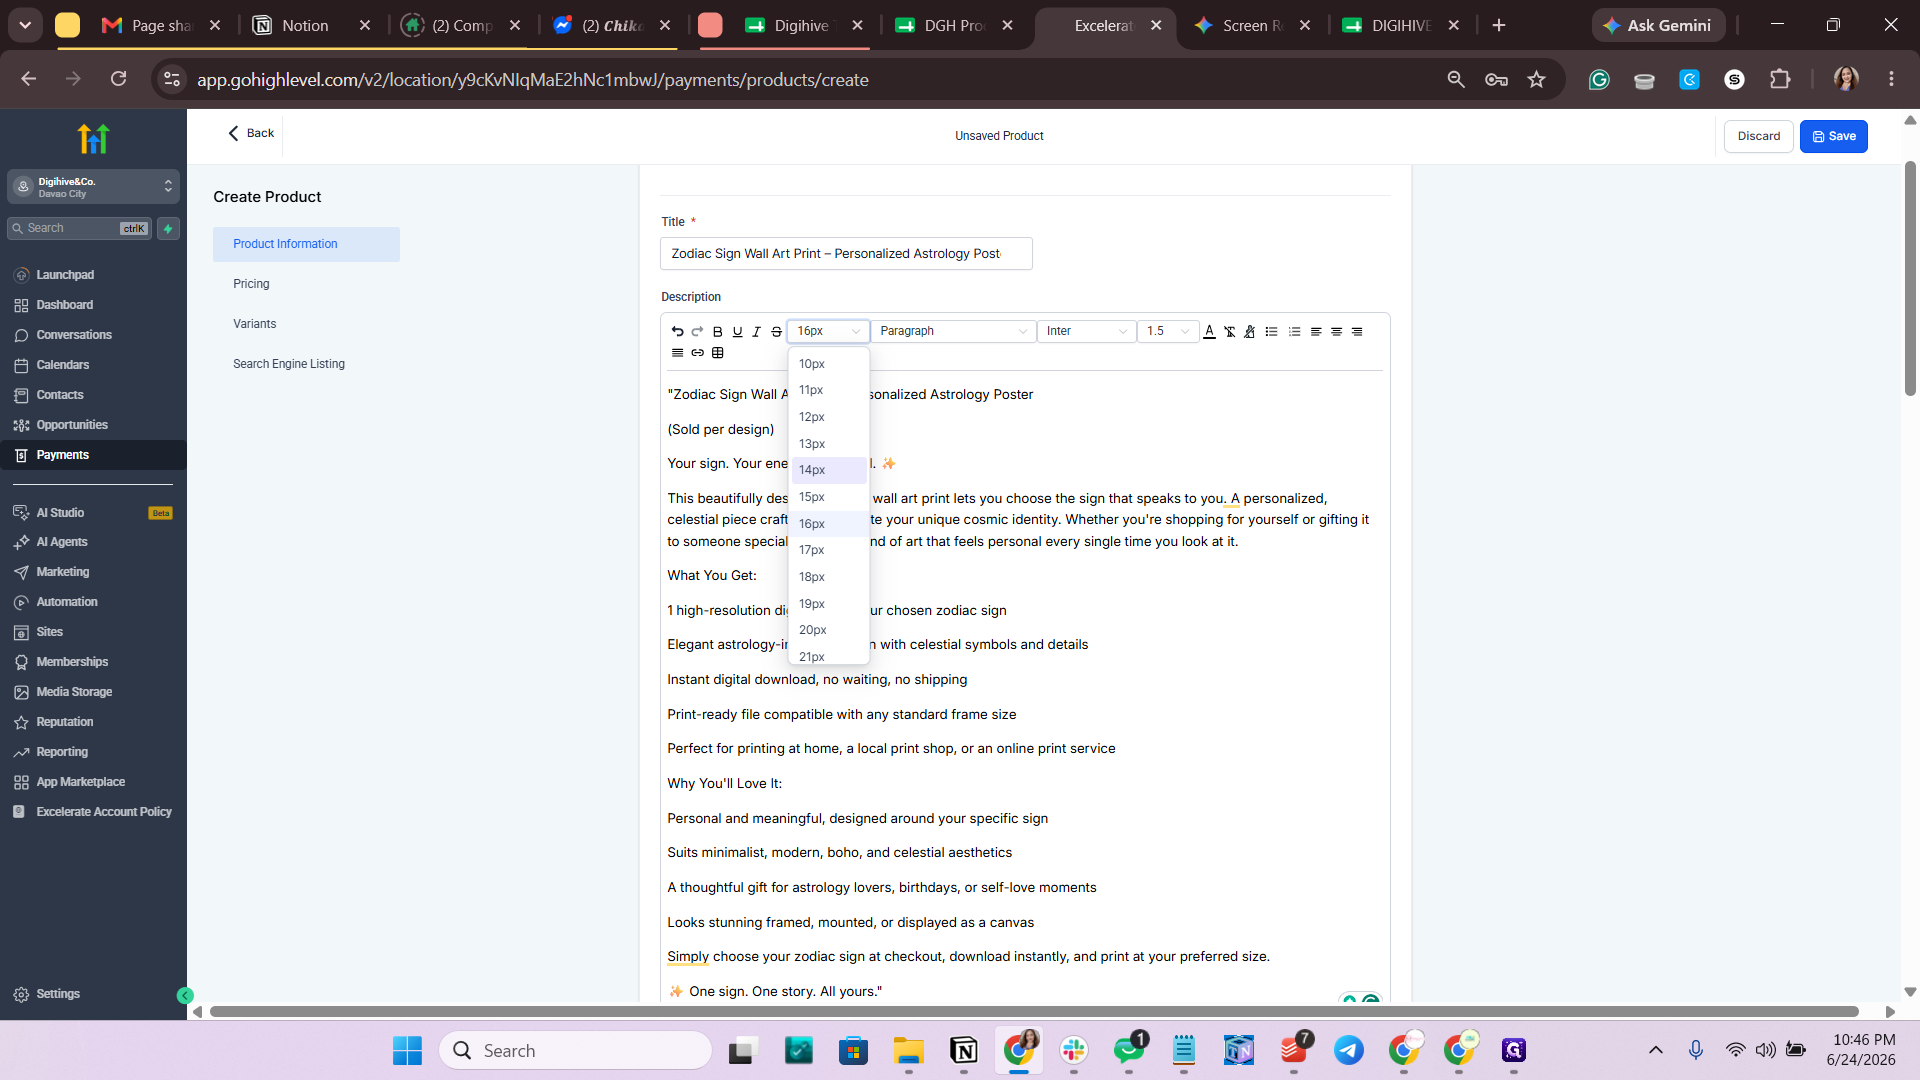
Click the font size dropdown in the toolbar and select 14px.
Step #23: Click the font size dropdown in the toolbar and select 14px.
24
Delete any duplicated title lines or unnecessary whitespace at the beginning of the text.
Step #24: Delete any duplicated title lines or unnecessary whitespace at the beginning of the text.
25
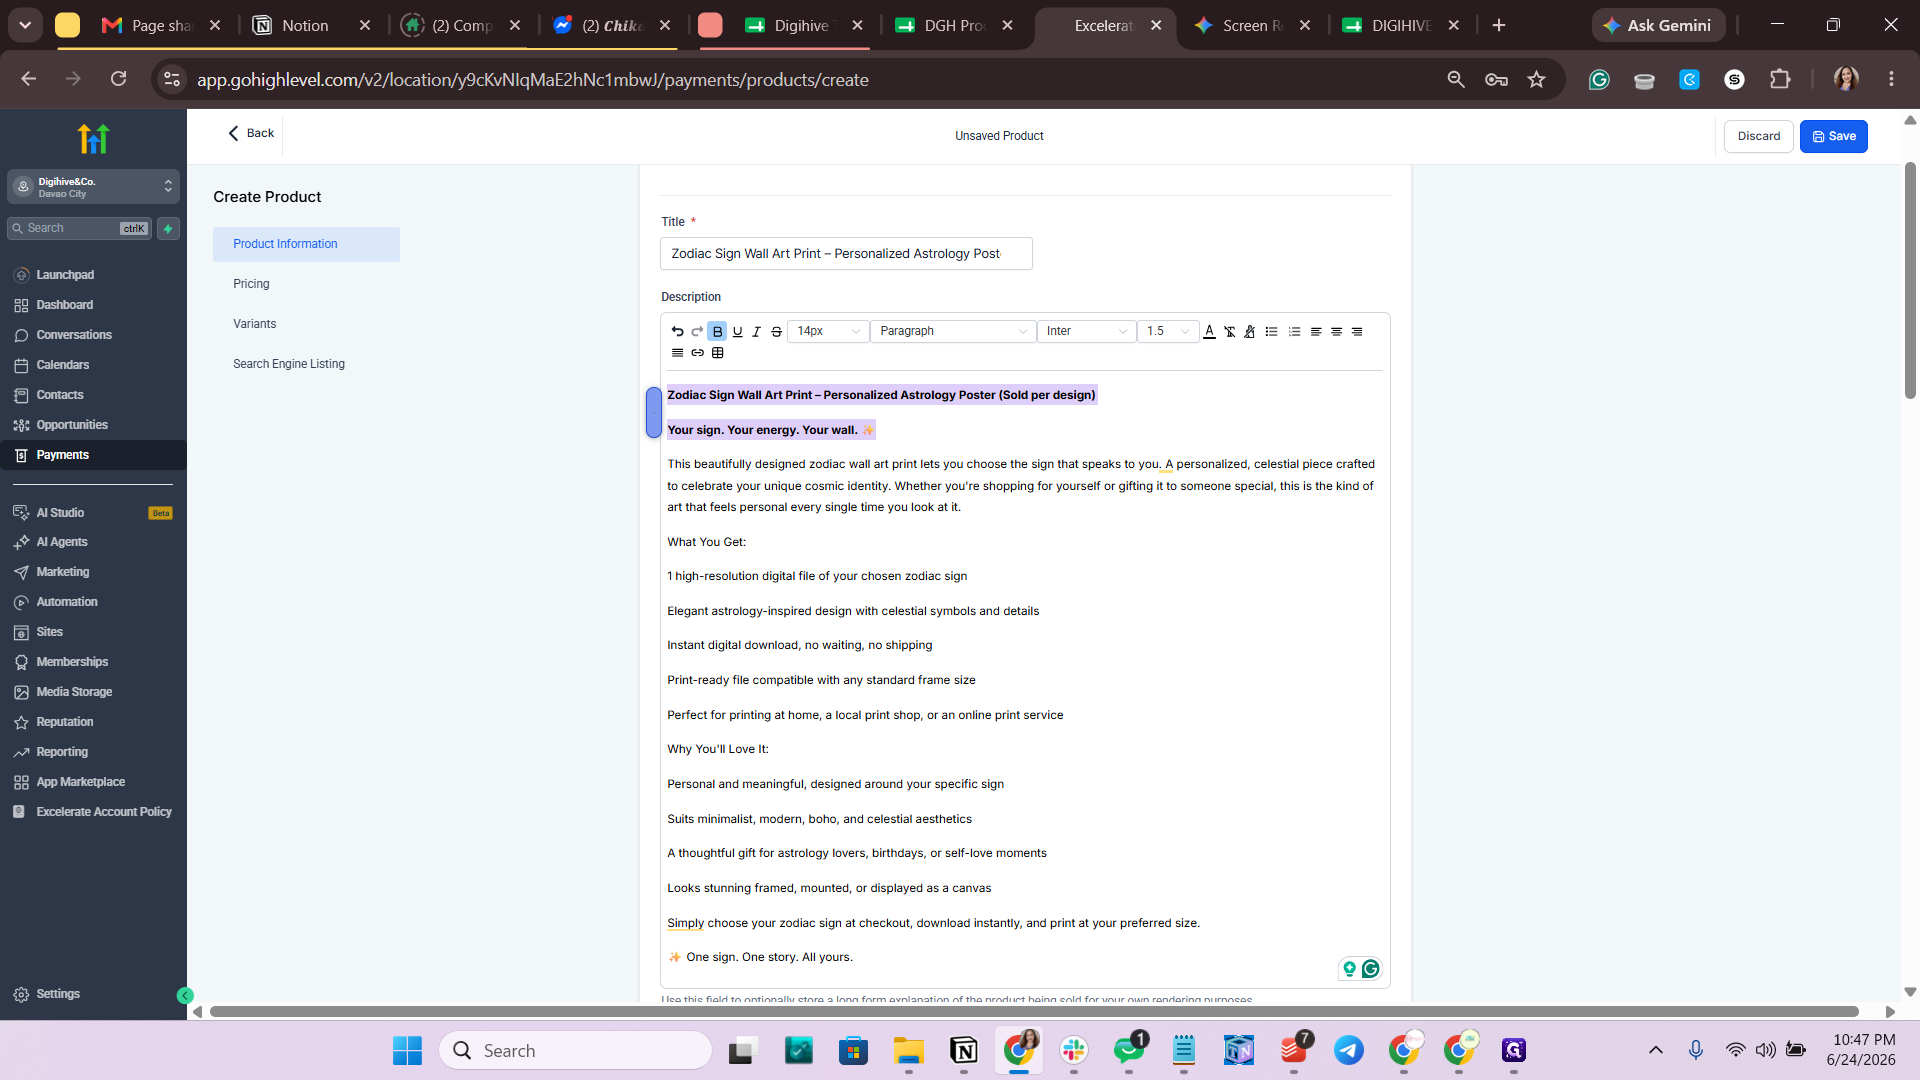
Highlight the section header "What You Get:".
Step #25: Highlight the section header "What You Get:".
26
Press Ctrl + B to bold the header.
27
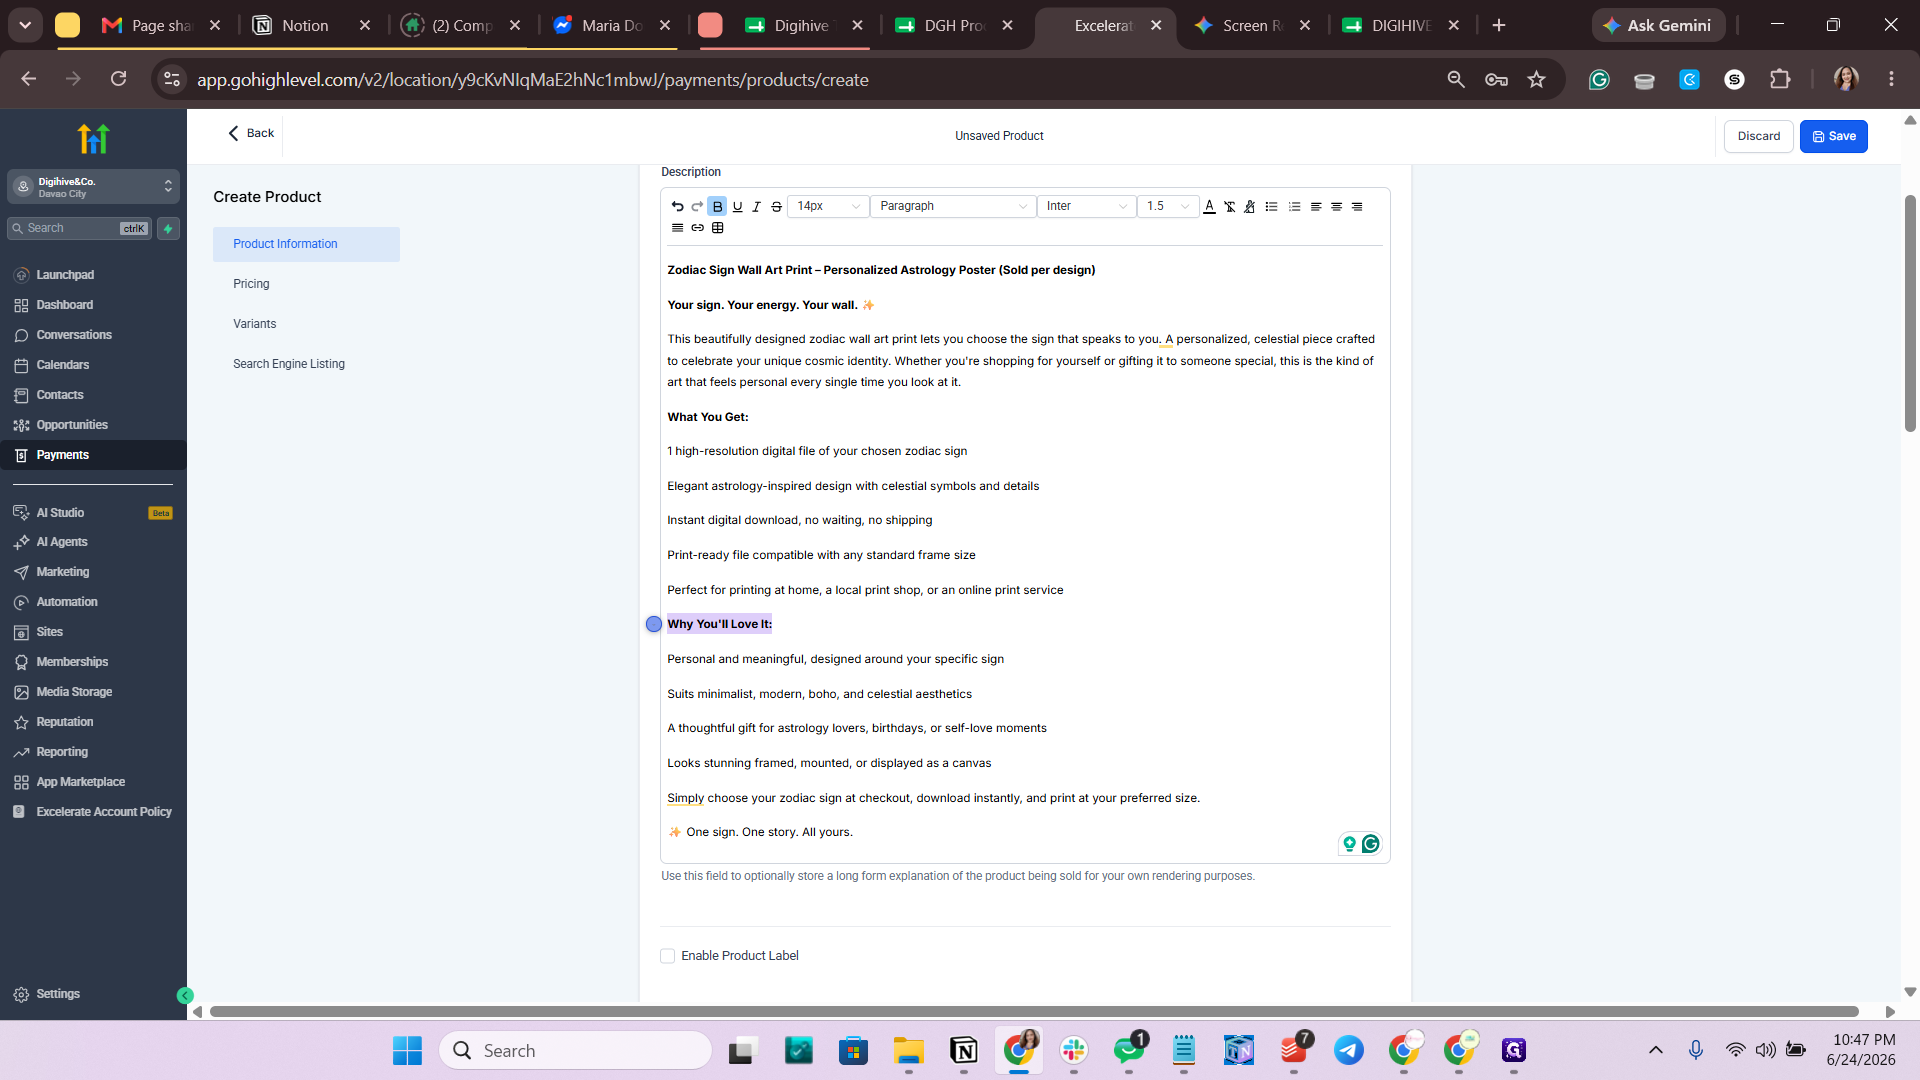
Highlight the section header "Why You'll Love It:".
Step #27: Highlight the section header "Why You'll Love It:".
28
Press Ctrl + B to bold the header.
29
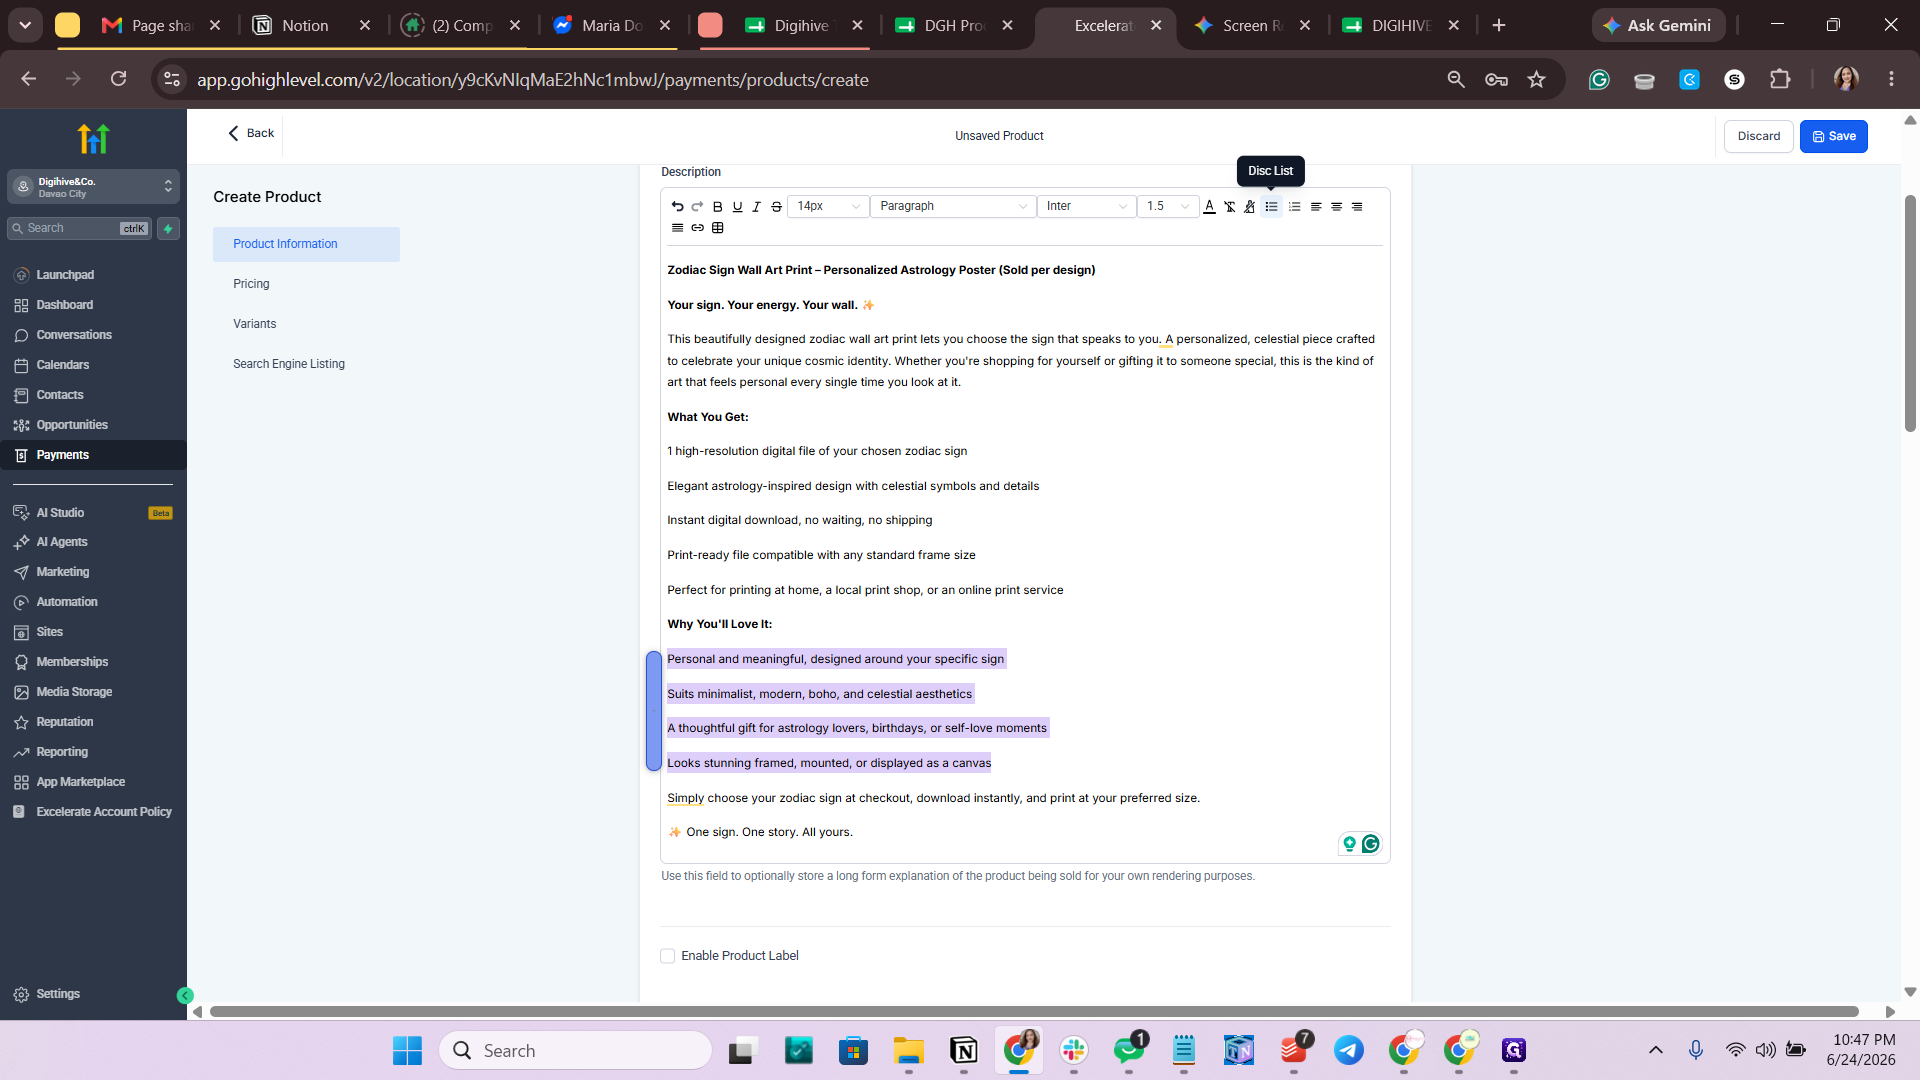
Highlight the list of features under "Why You'll Love It:".
Step #29: Highlight the list of features under "Why You'll Love It:".
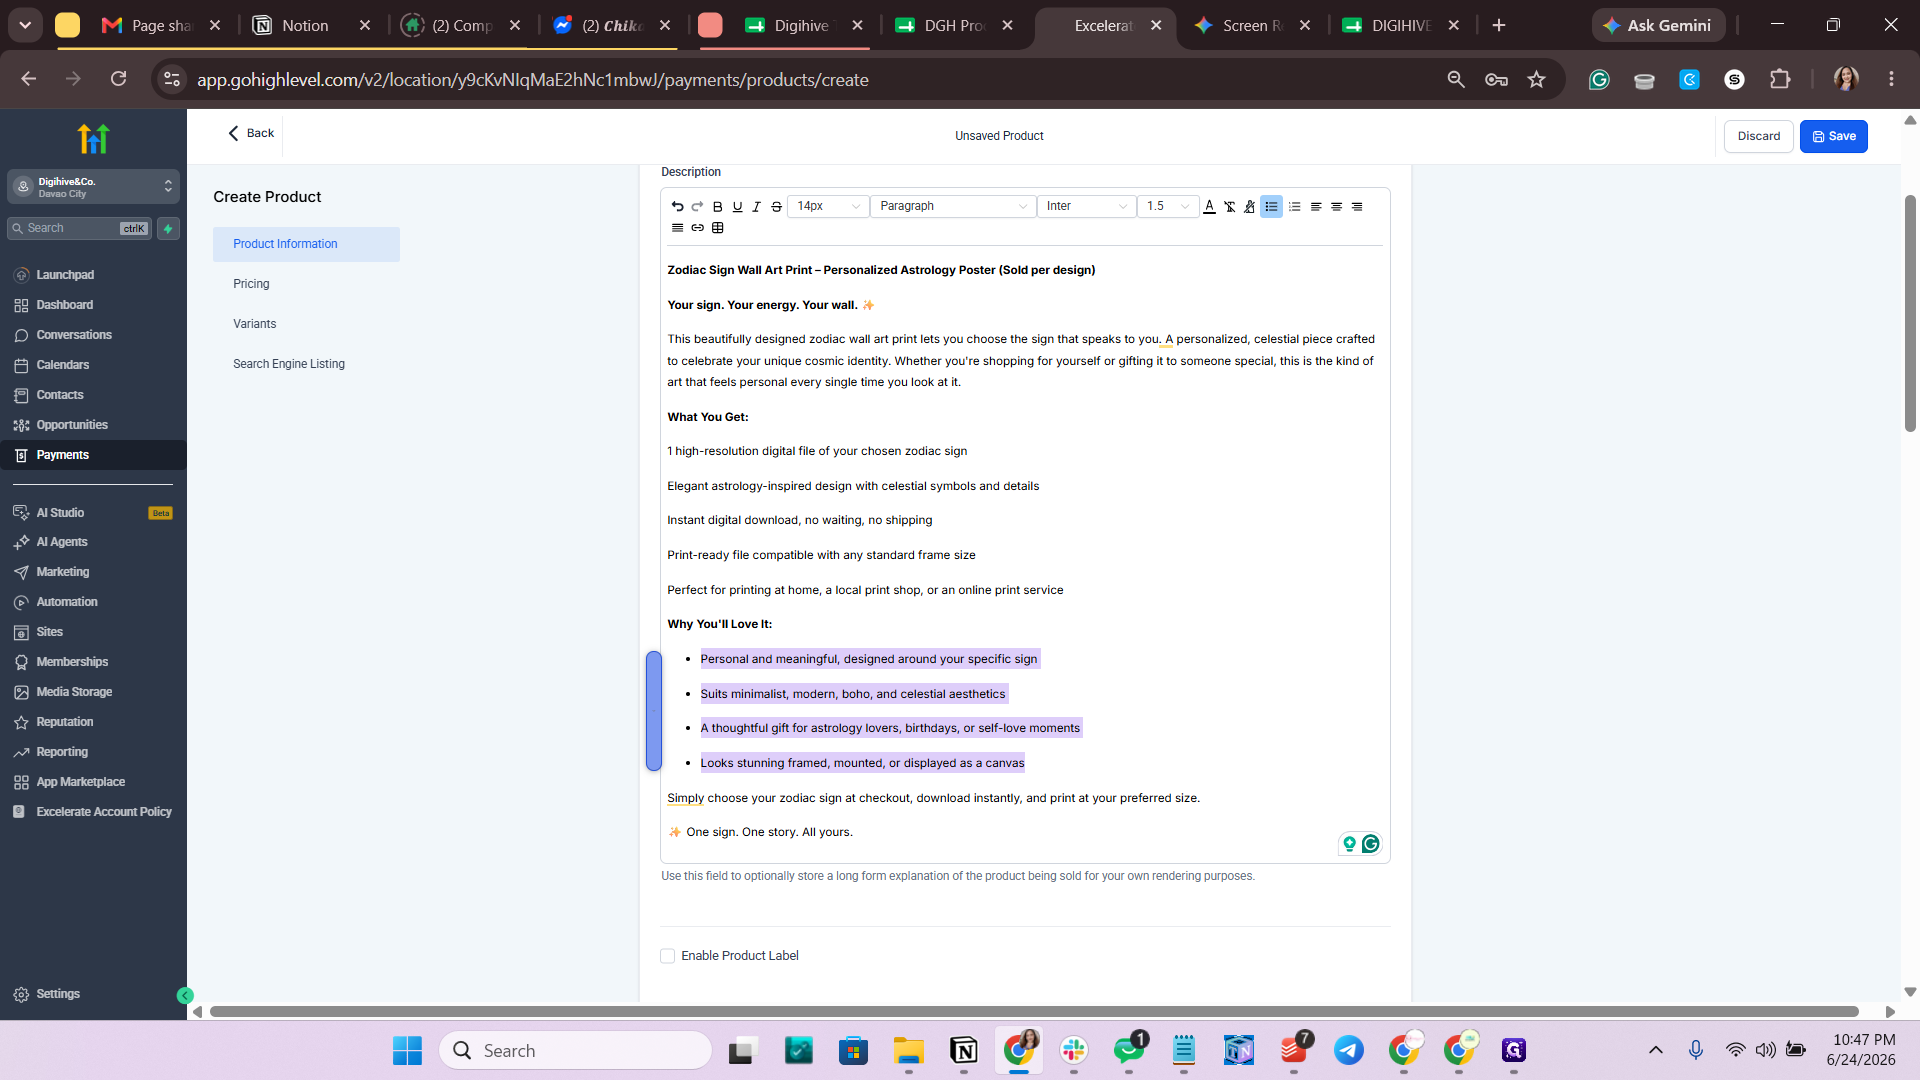
30
Click the Bulleted List icon in the rich text toolbar.
Step #30: Click the Bulleted List icon in the rich text toolbar.
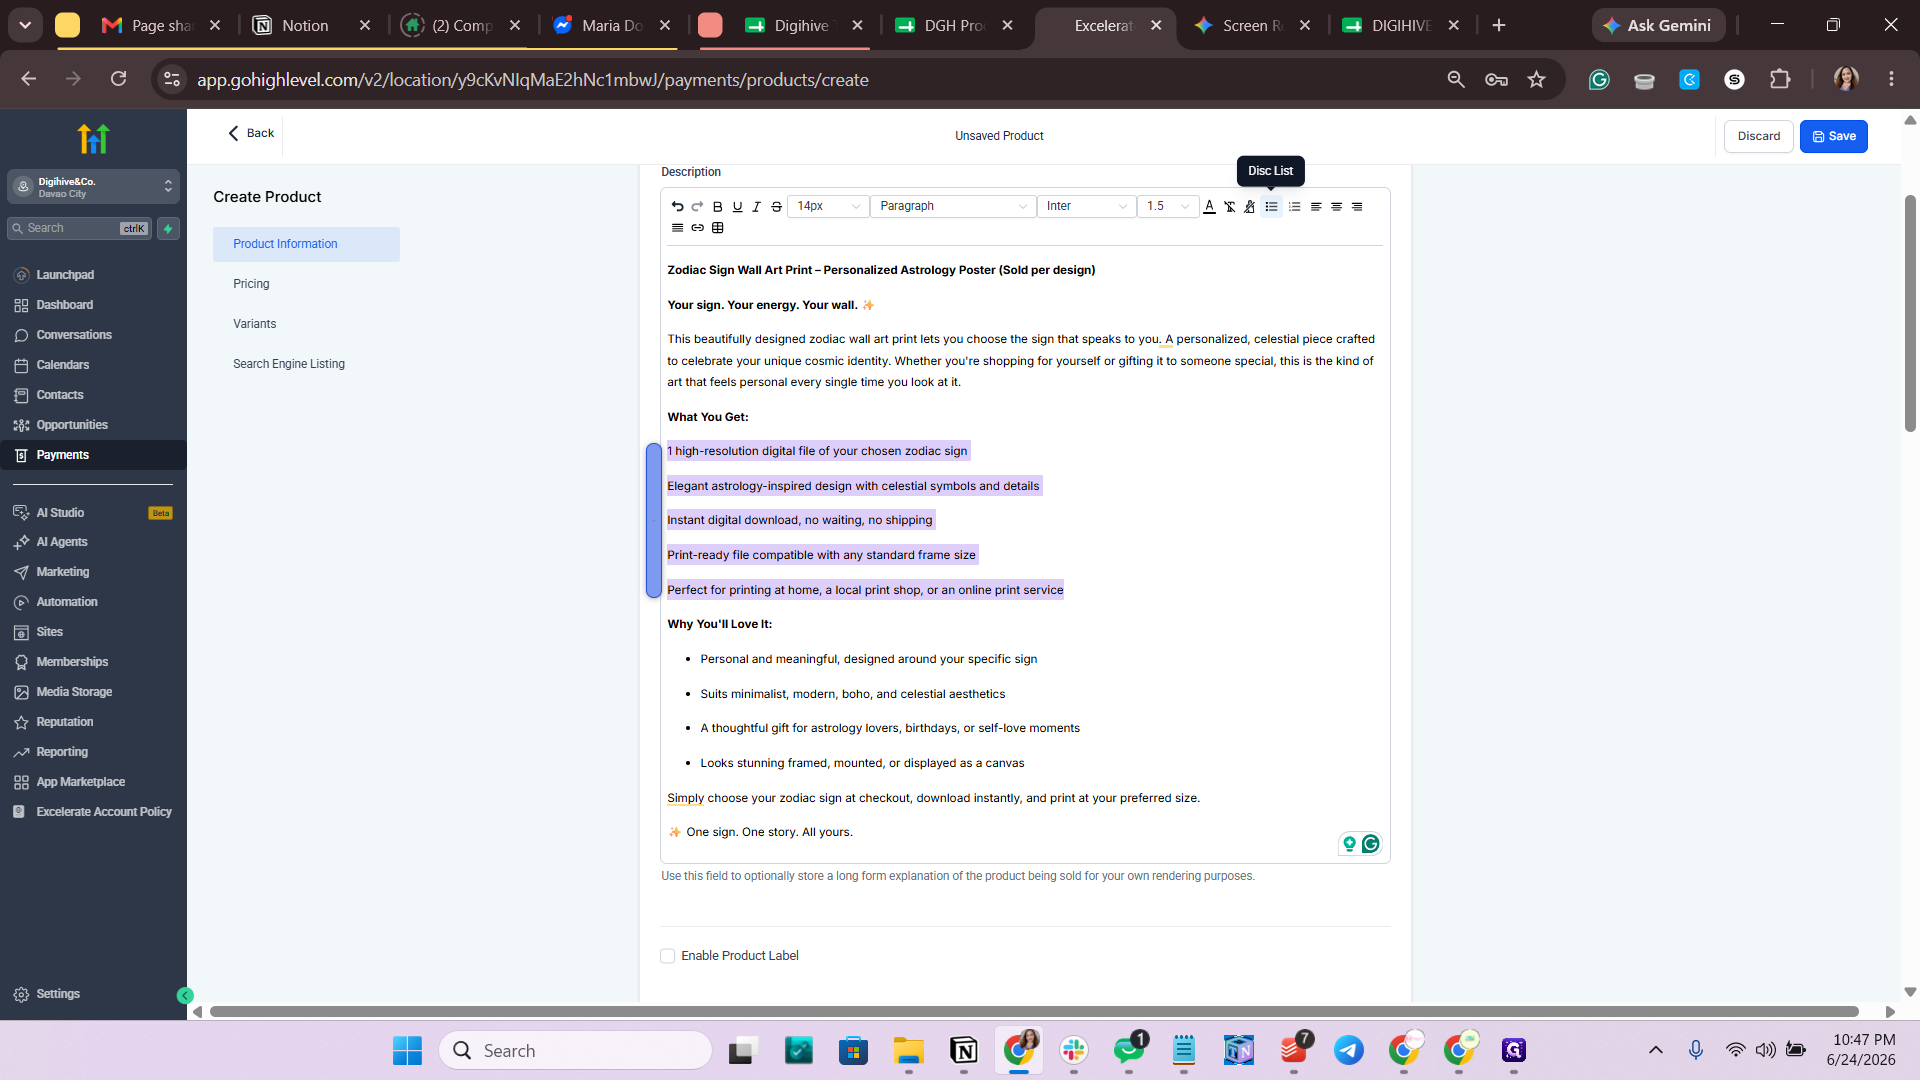
31
Highlight the list of items under "What You Get:".
Step #31: Highlight the list of items under "What You Get:".
32
Click the Bulleted List icon to format them.
Step #32: Click the Bulleted List icon to format them.
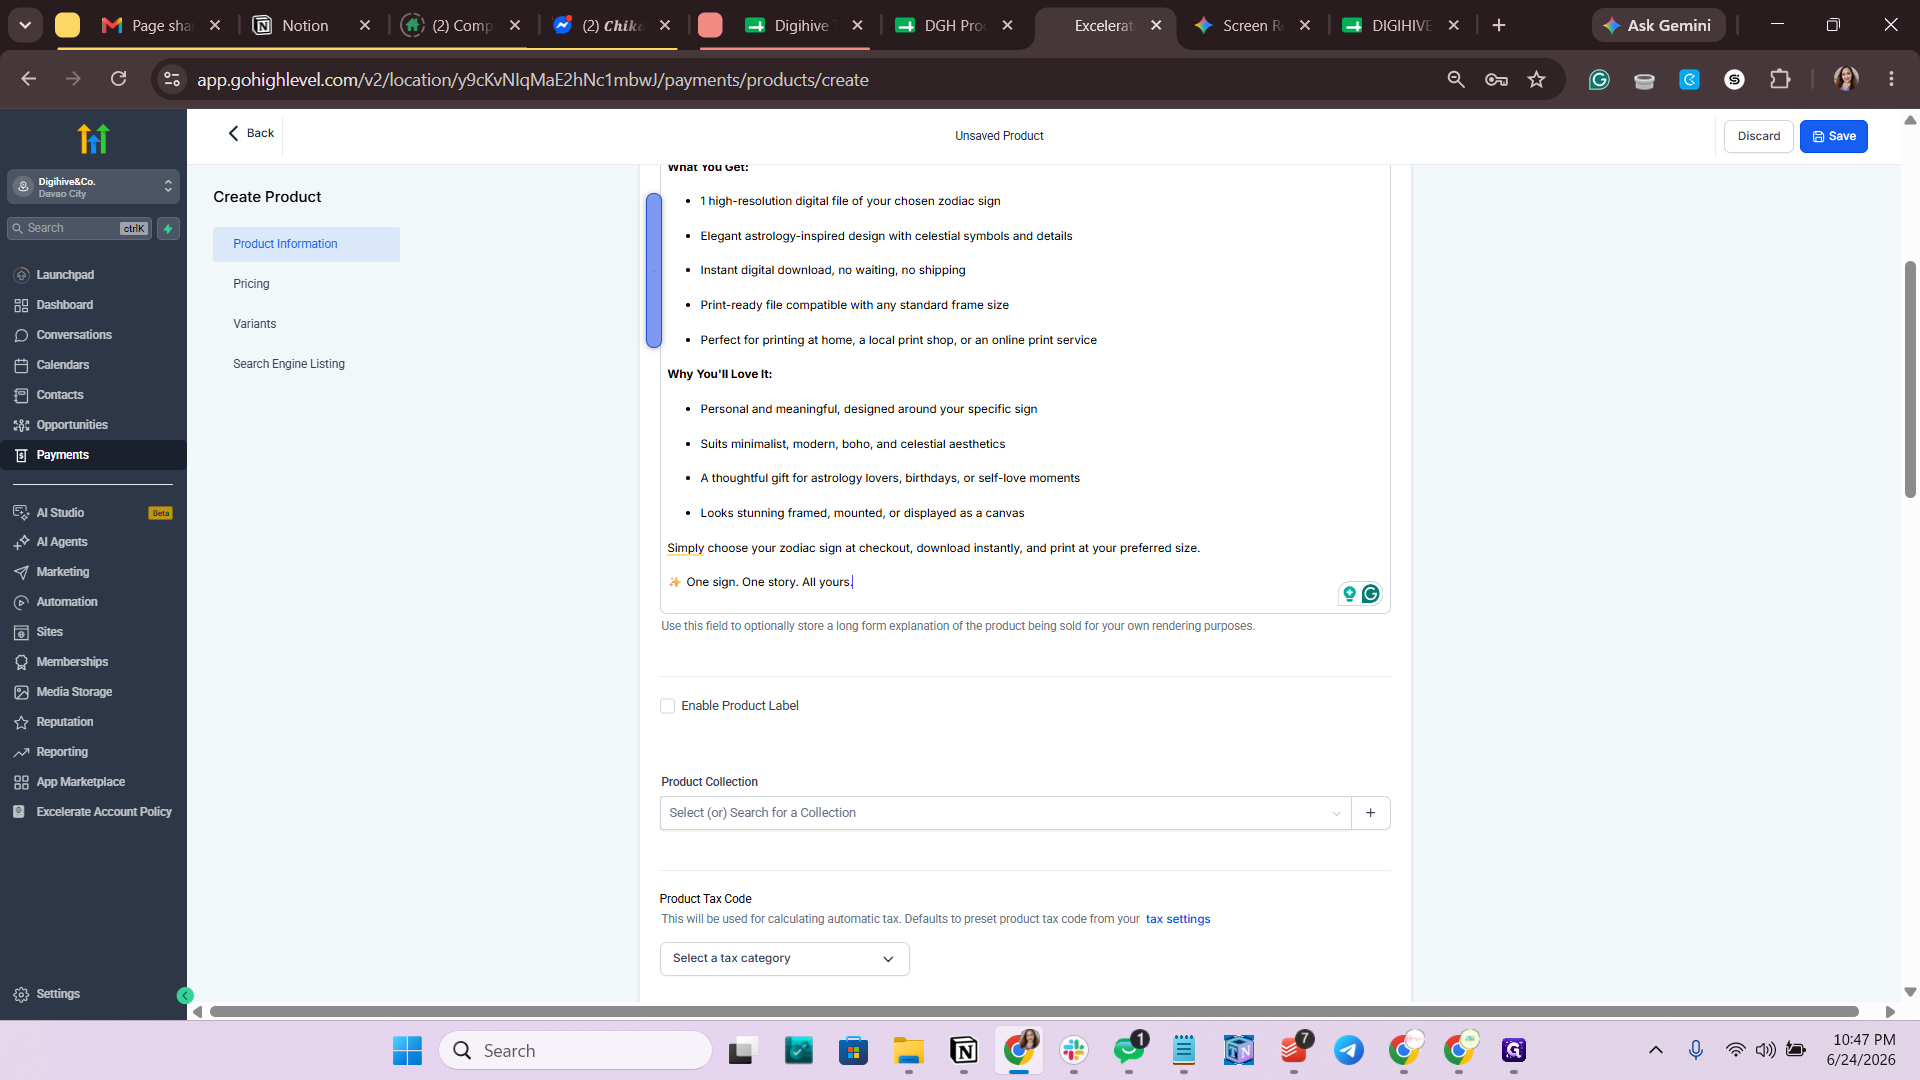
33
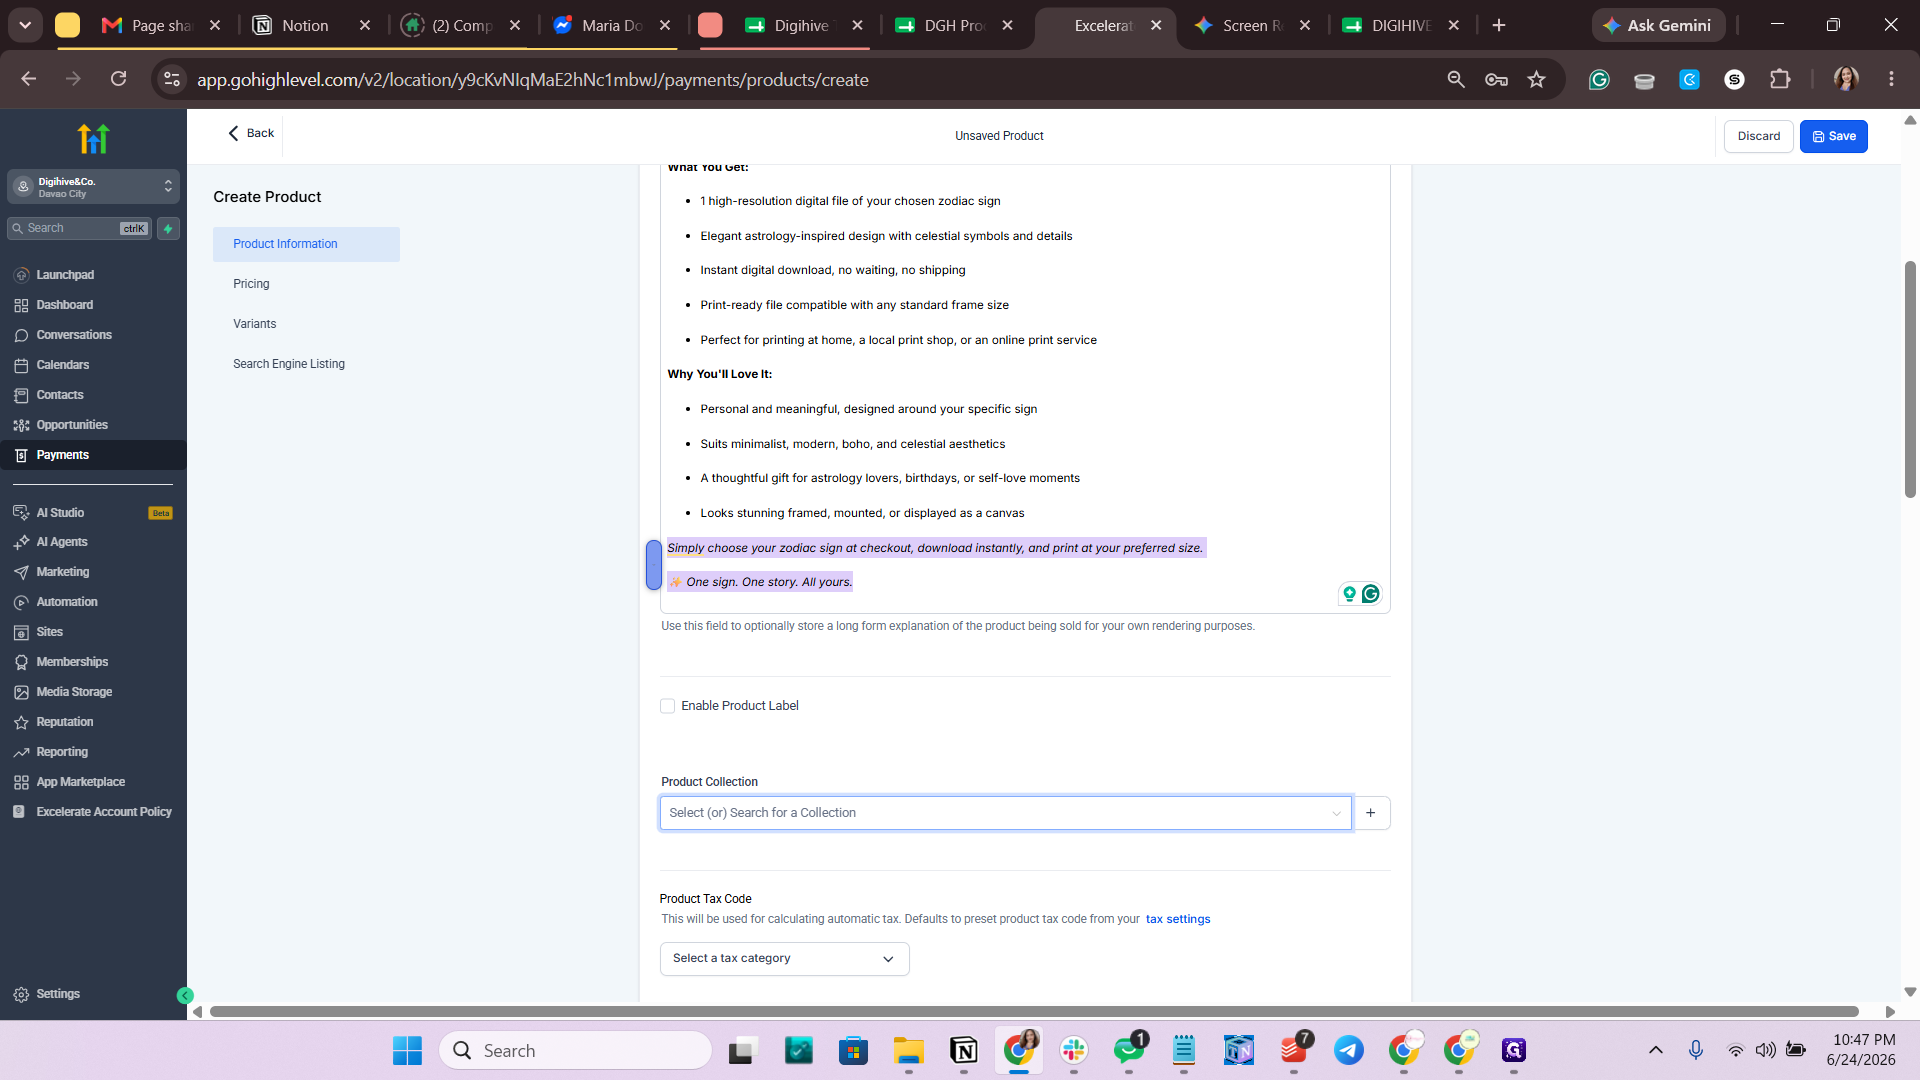
Highlight the closing sign-off or footer lines at the bottom of the description.
Step #33: Highlight the closing sign-off or footer lines at the bottom of the description.
34
Press Ctrl + I to italicize the text.

Organize and Add Media

35
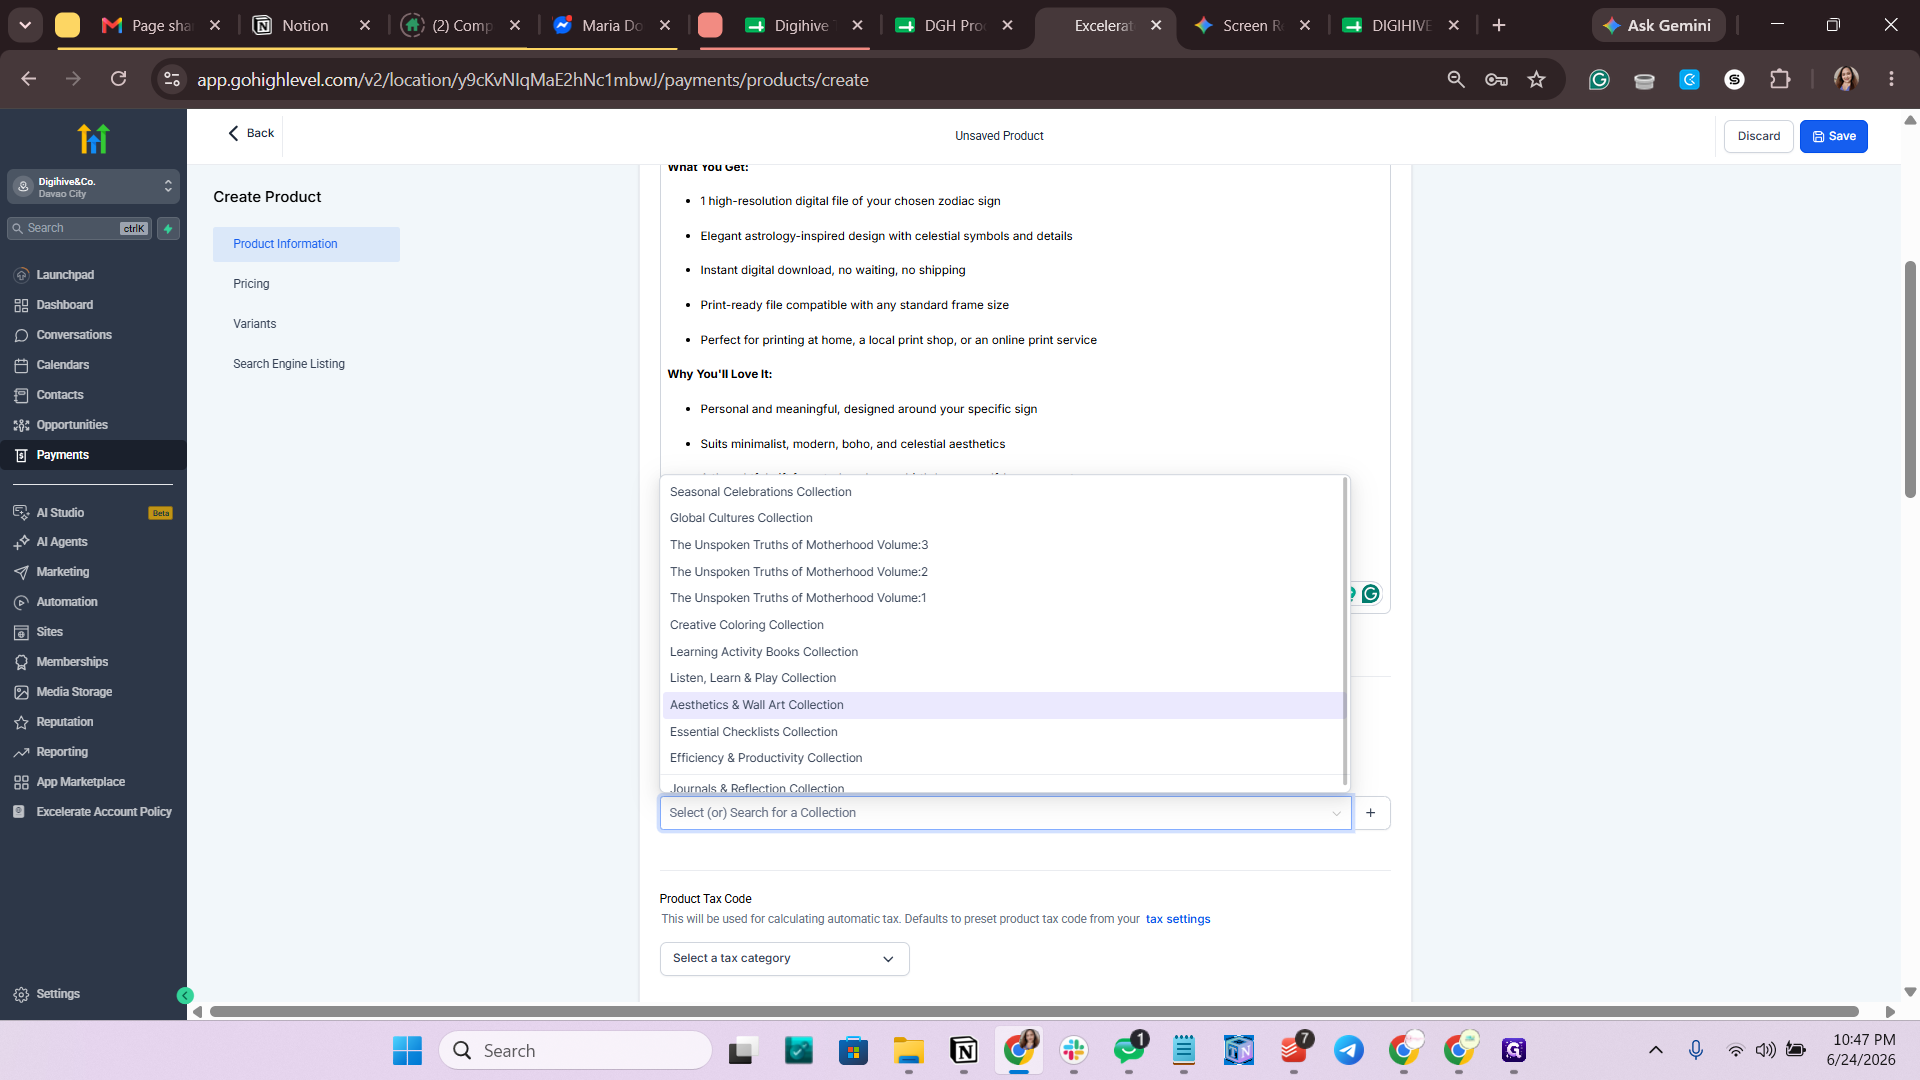
Click the Product Collection dropdown menu.
Step #35: Click the Product Collection dropdown menu.
36
Select Aesthetics & Wall Art Collection to categorize the product.
Step #36: Select Aesthetics & Wall Art Collection to categorize the product.
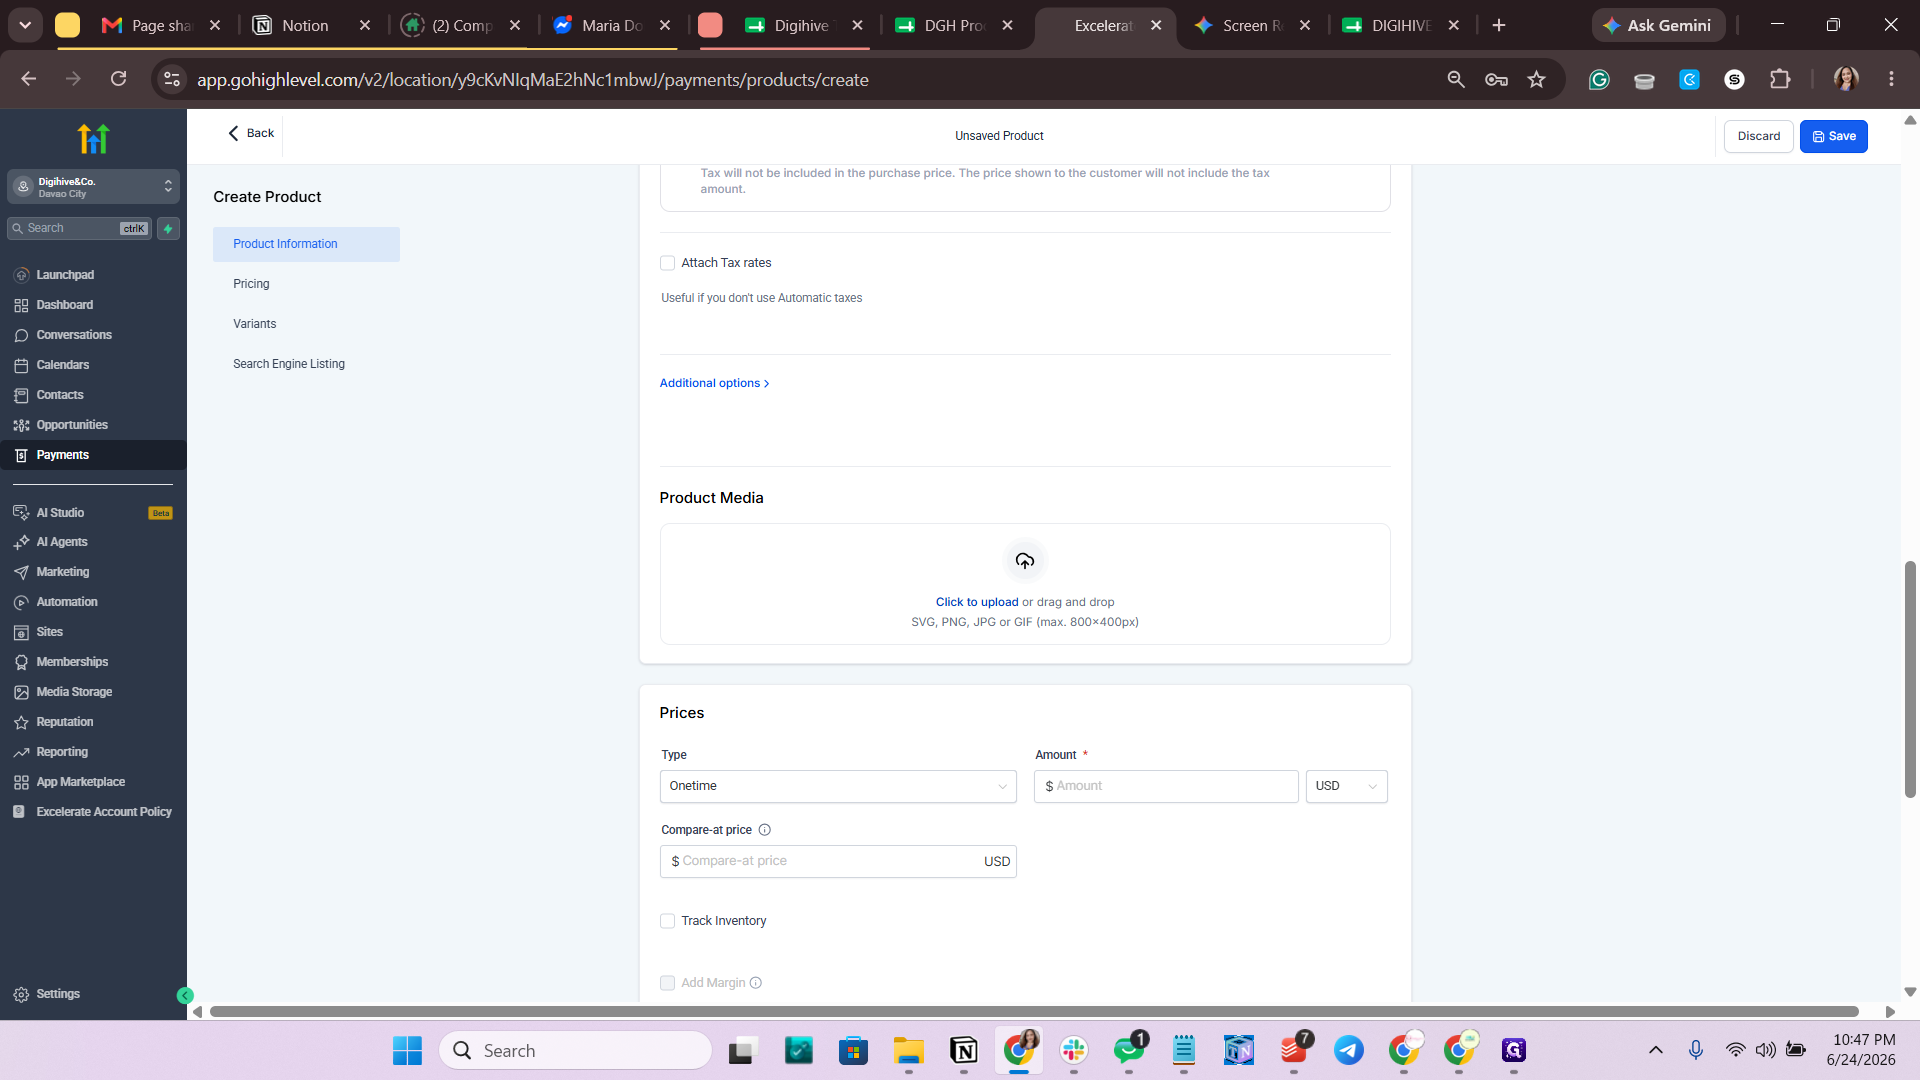
37
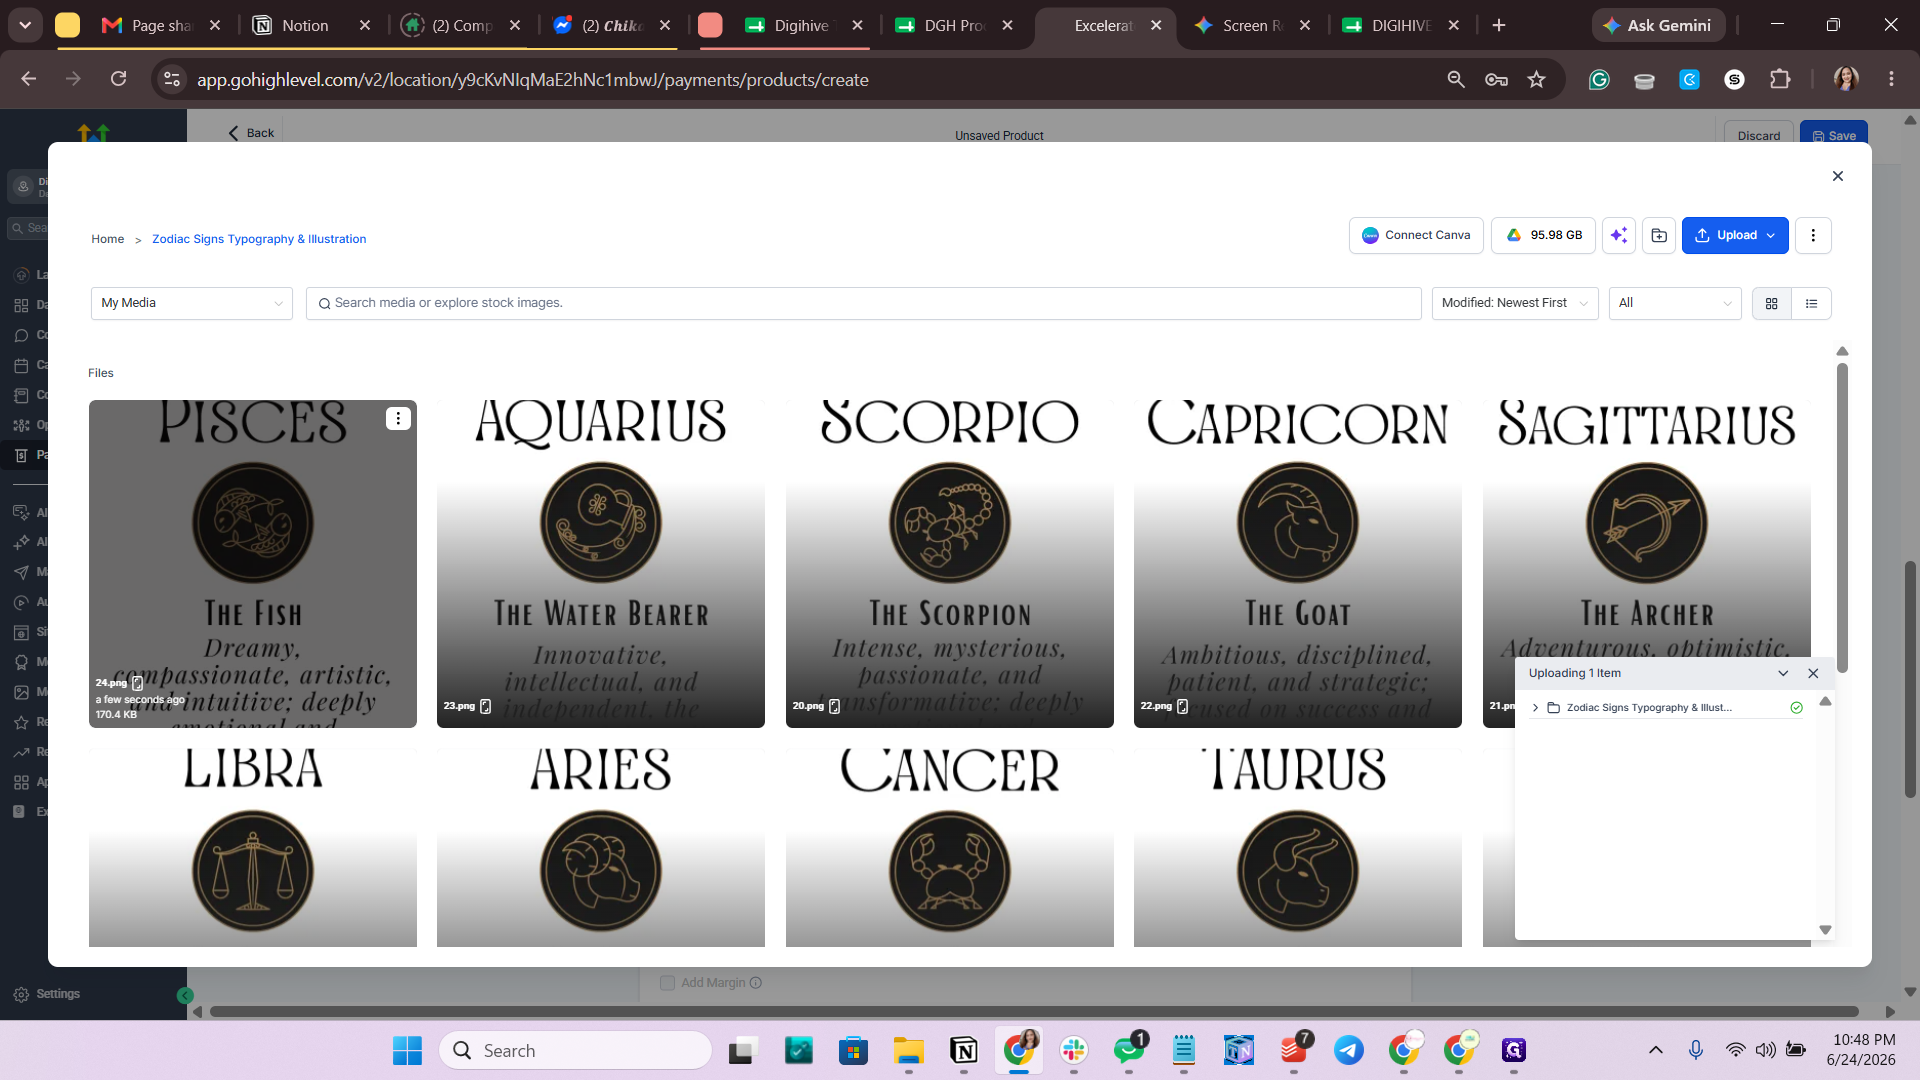
Click the Click to upload or drag and drop area under Product Media.
Step #37: Click the Click to upload or drag and drop area under Product Media.
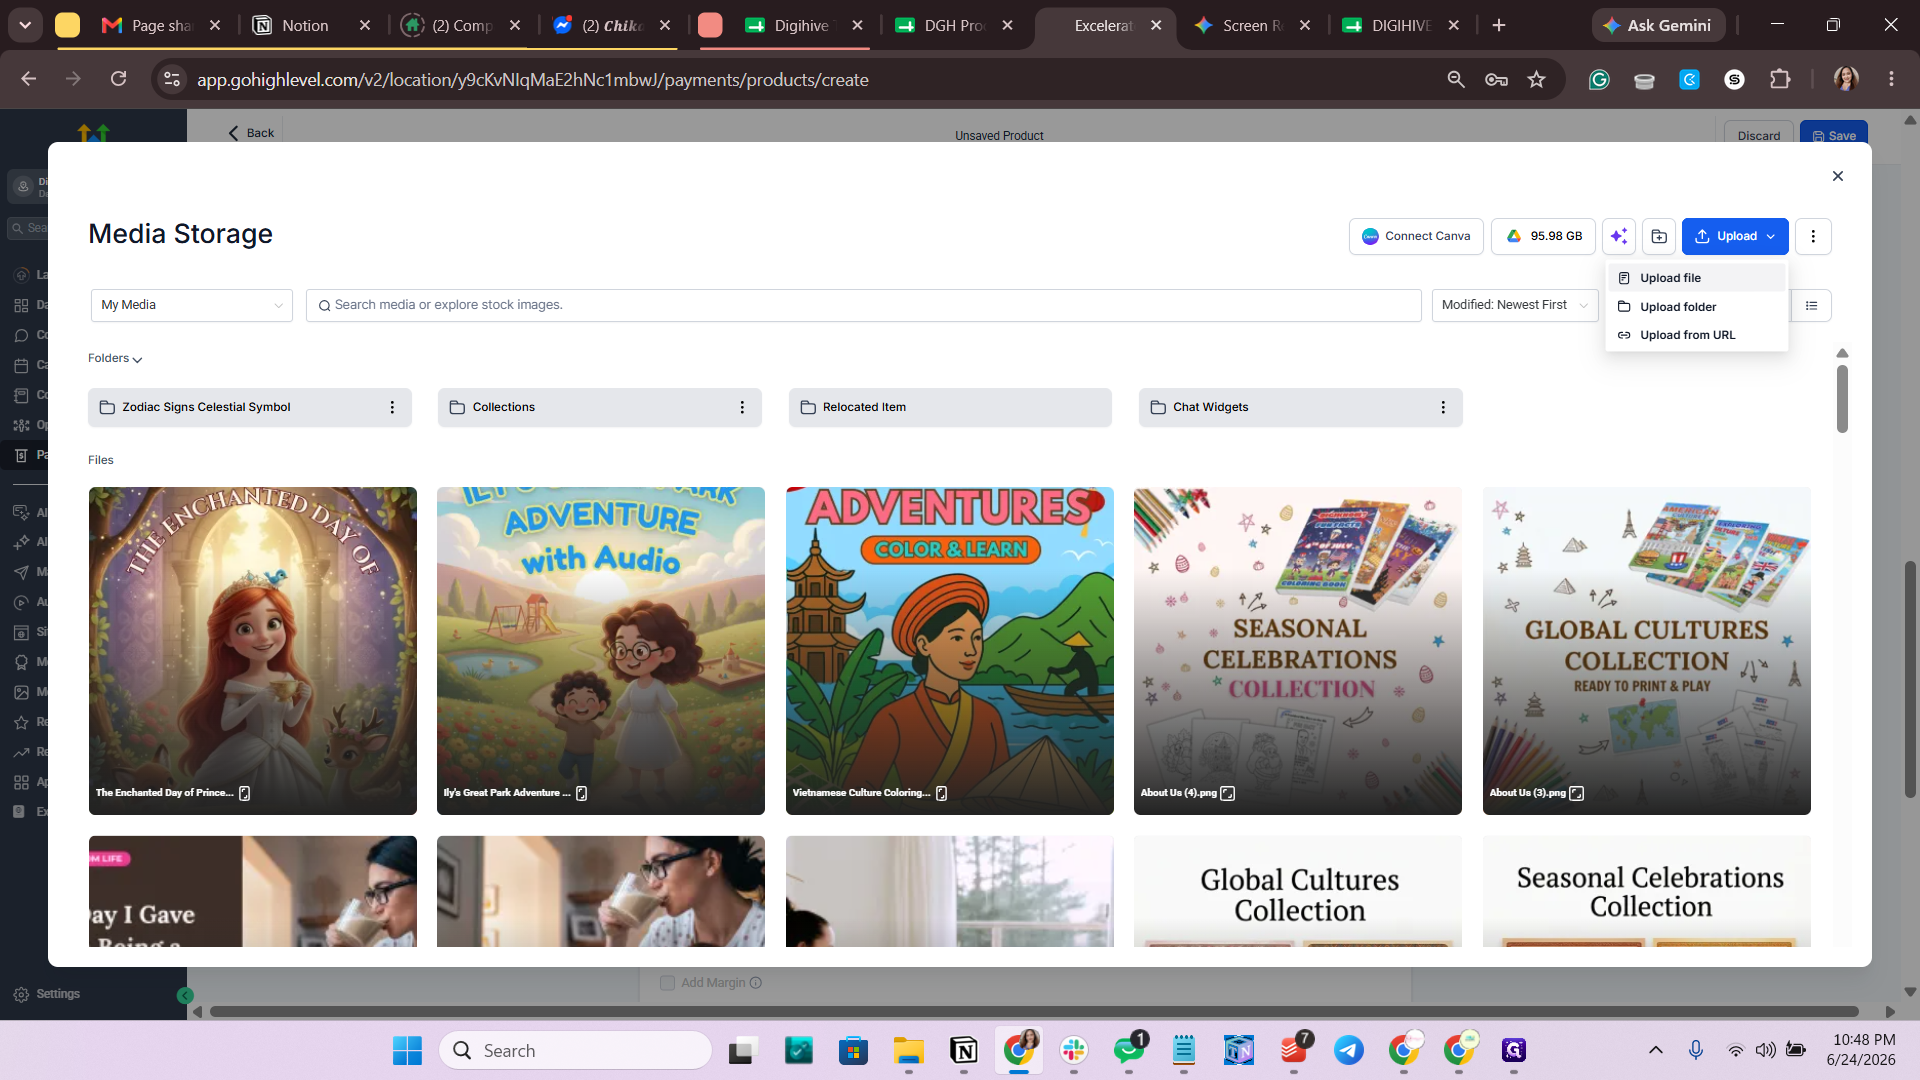
38
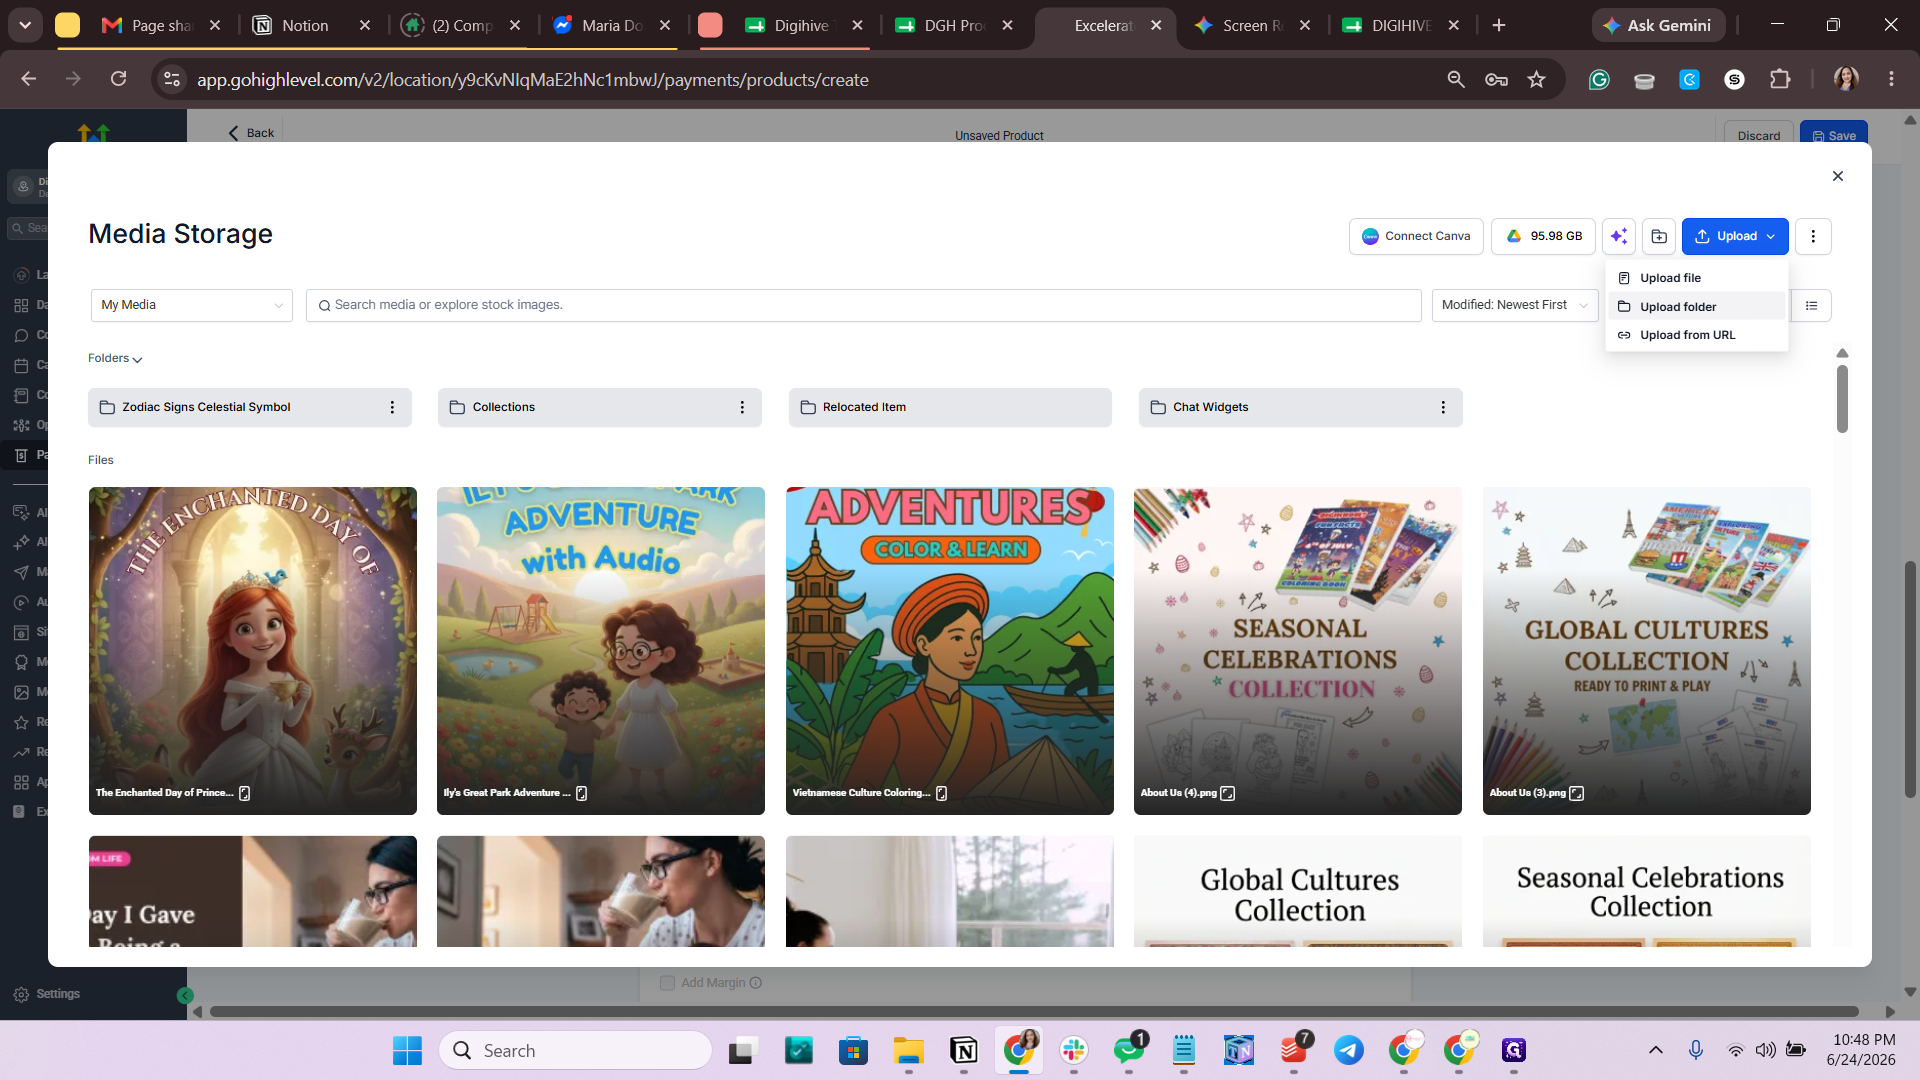
Click the Upload dropdown in the top right of the media storage window.
Step #38: Click the Upload dropdown in the top right of the media storage window.
39
Select Upload folder.
Step #39: Select Upload folder.
40
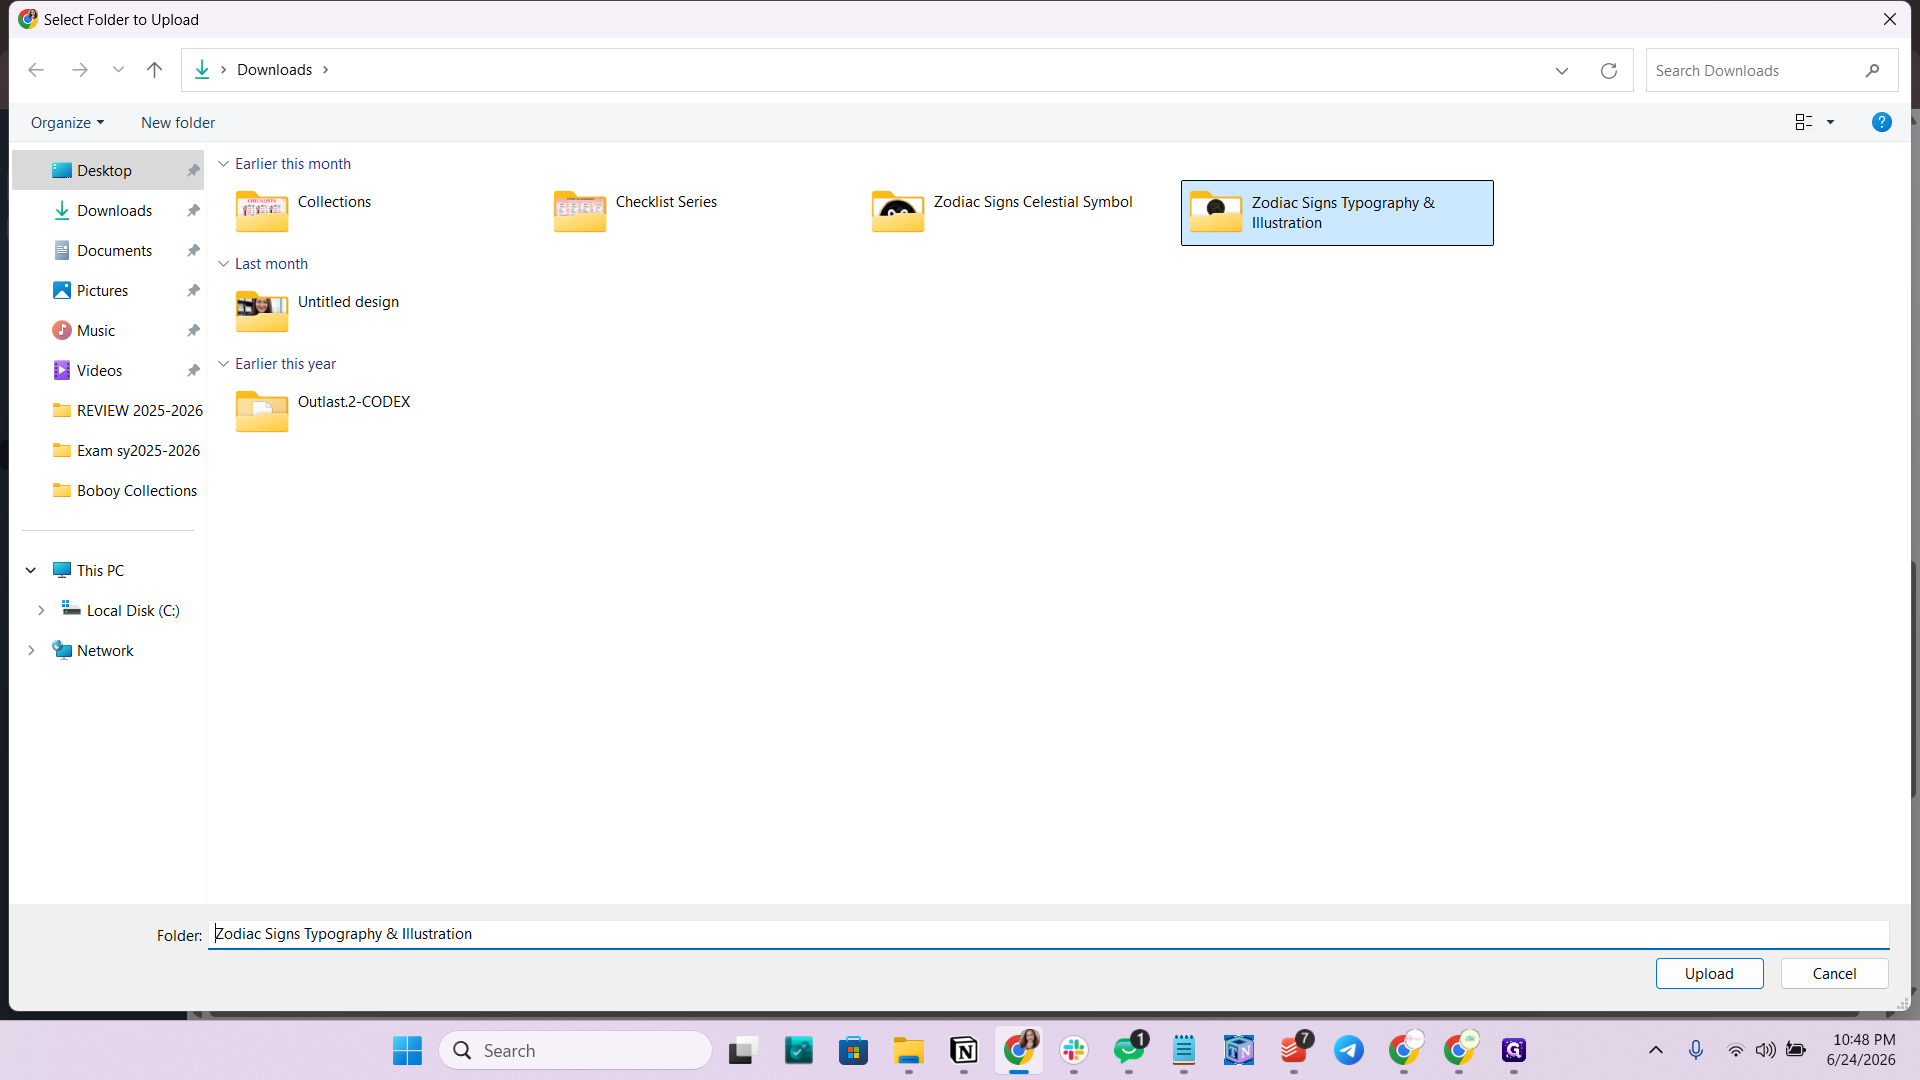
Select your local folder containing the product images.
Step #40: Select your local folder containing the product images.
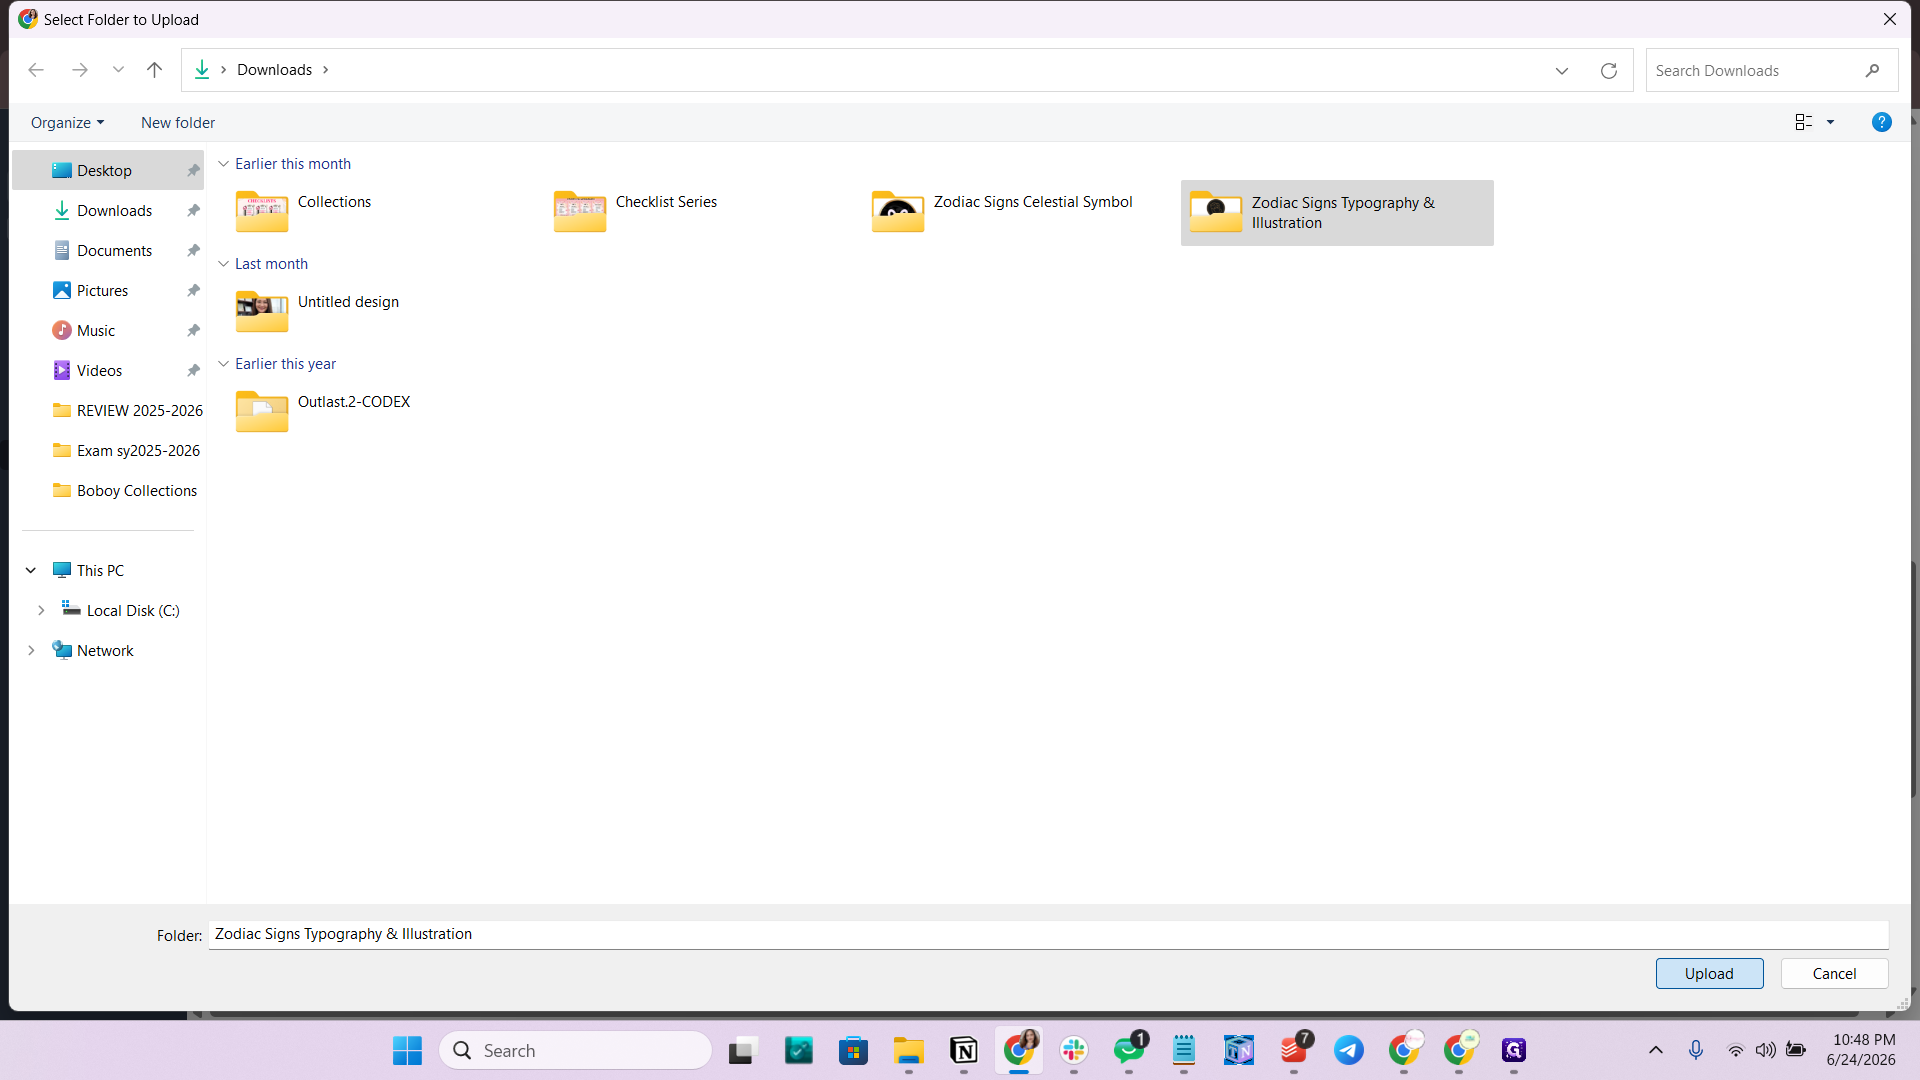
41
Click Upload to confirm the folder selection.
Step #41: Click Upload to confirm the folder selection.
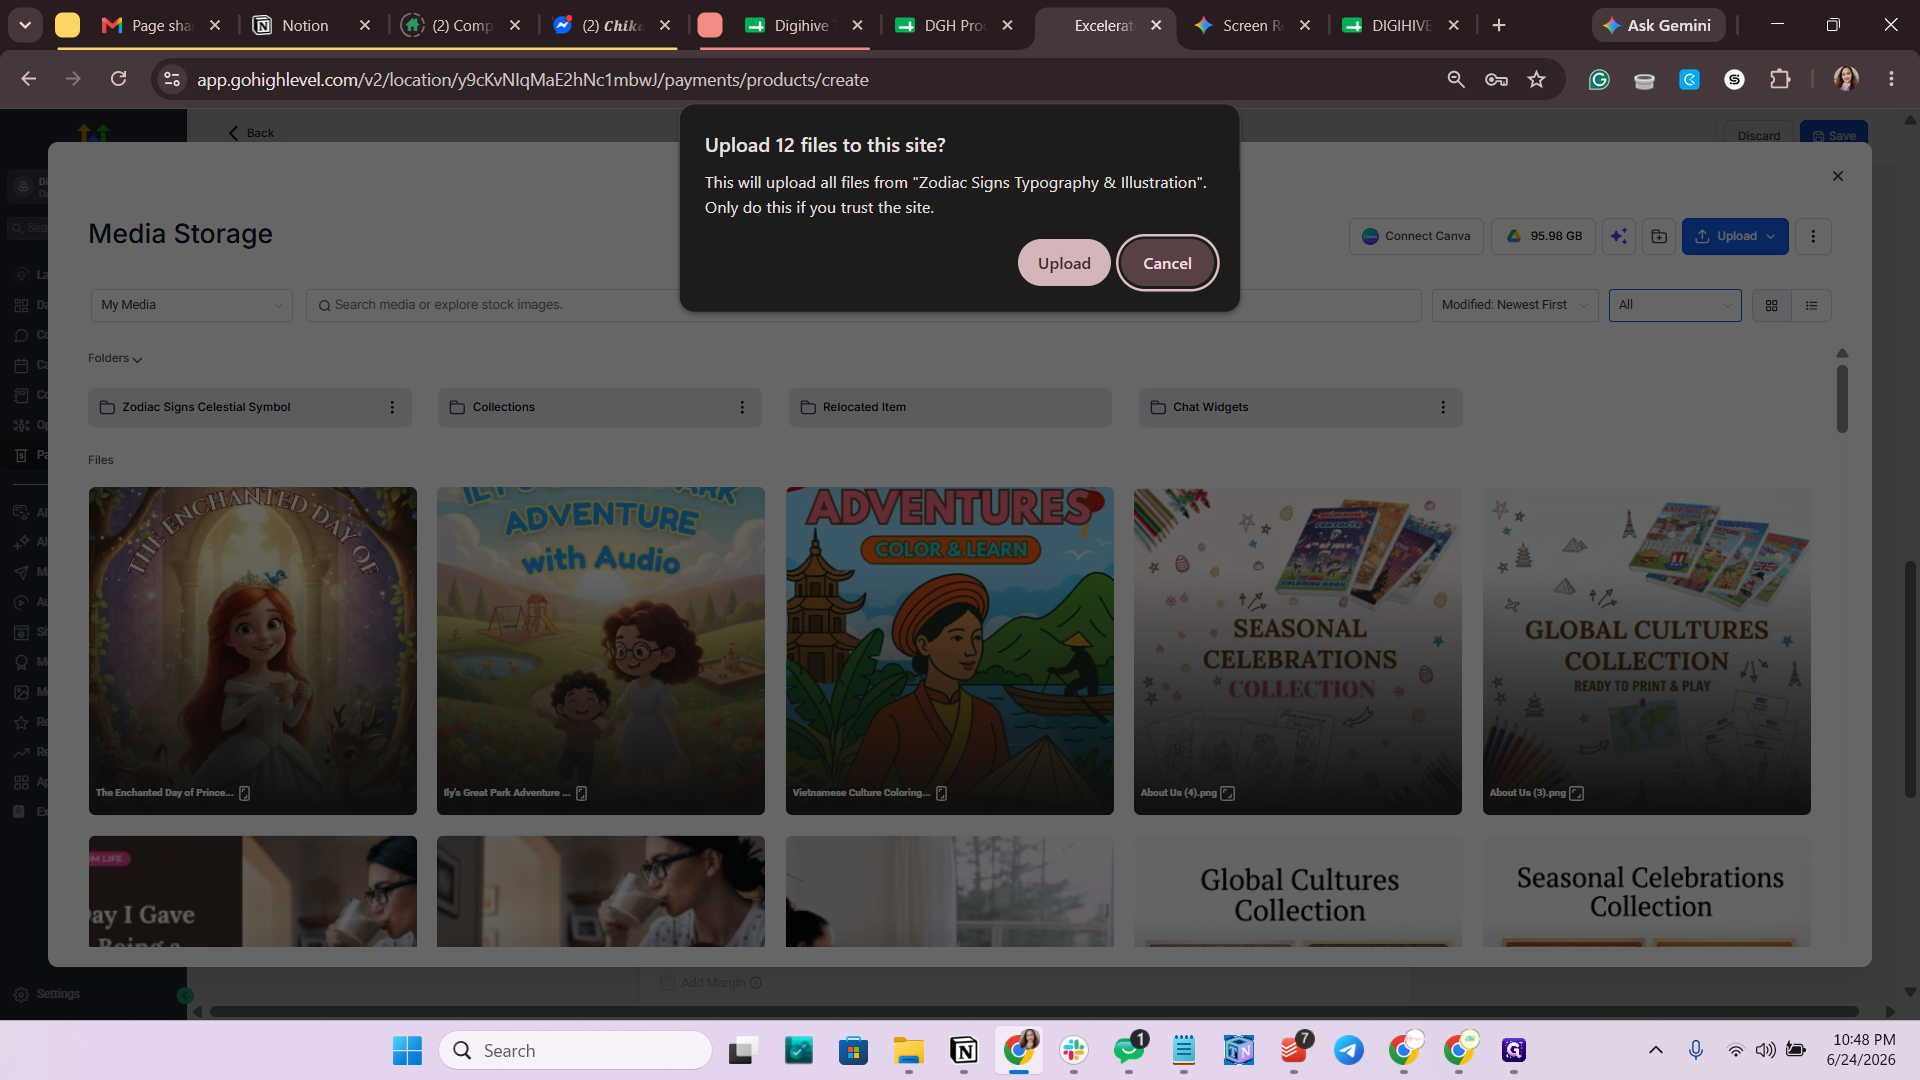
42
Click Upload again in your browser's prompt to begin the file transfer.
Step #42: Click Upload again in your browser's prompt to begin the file transfer.
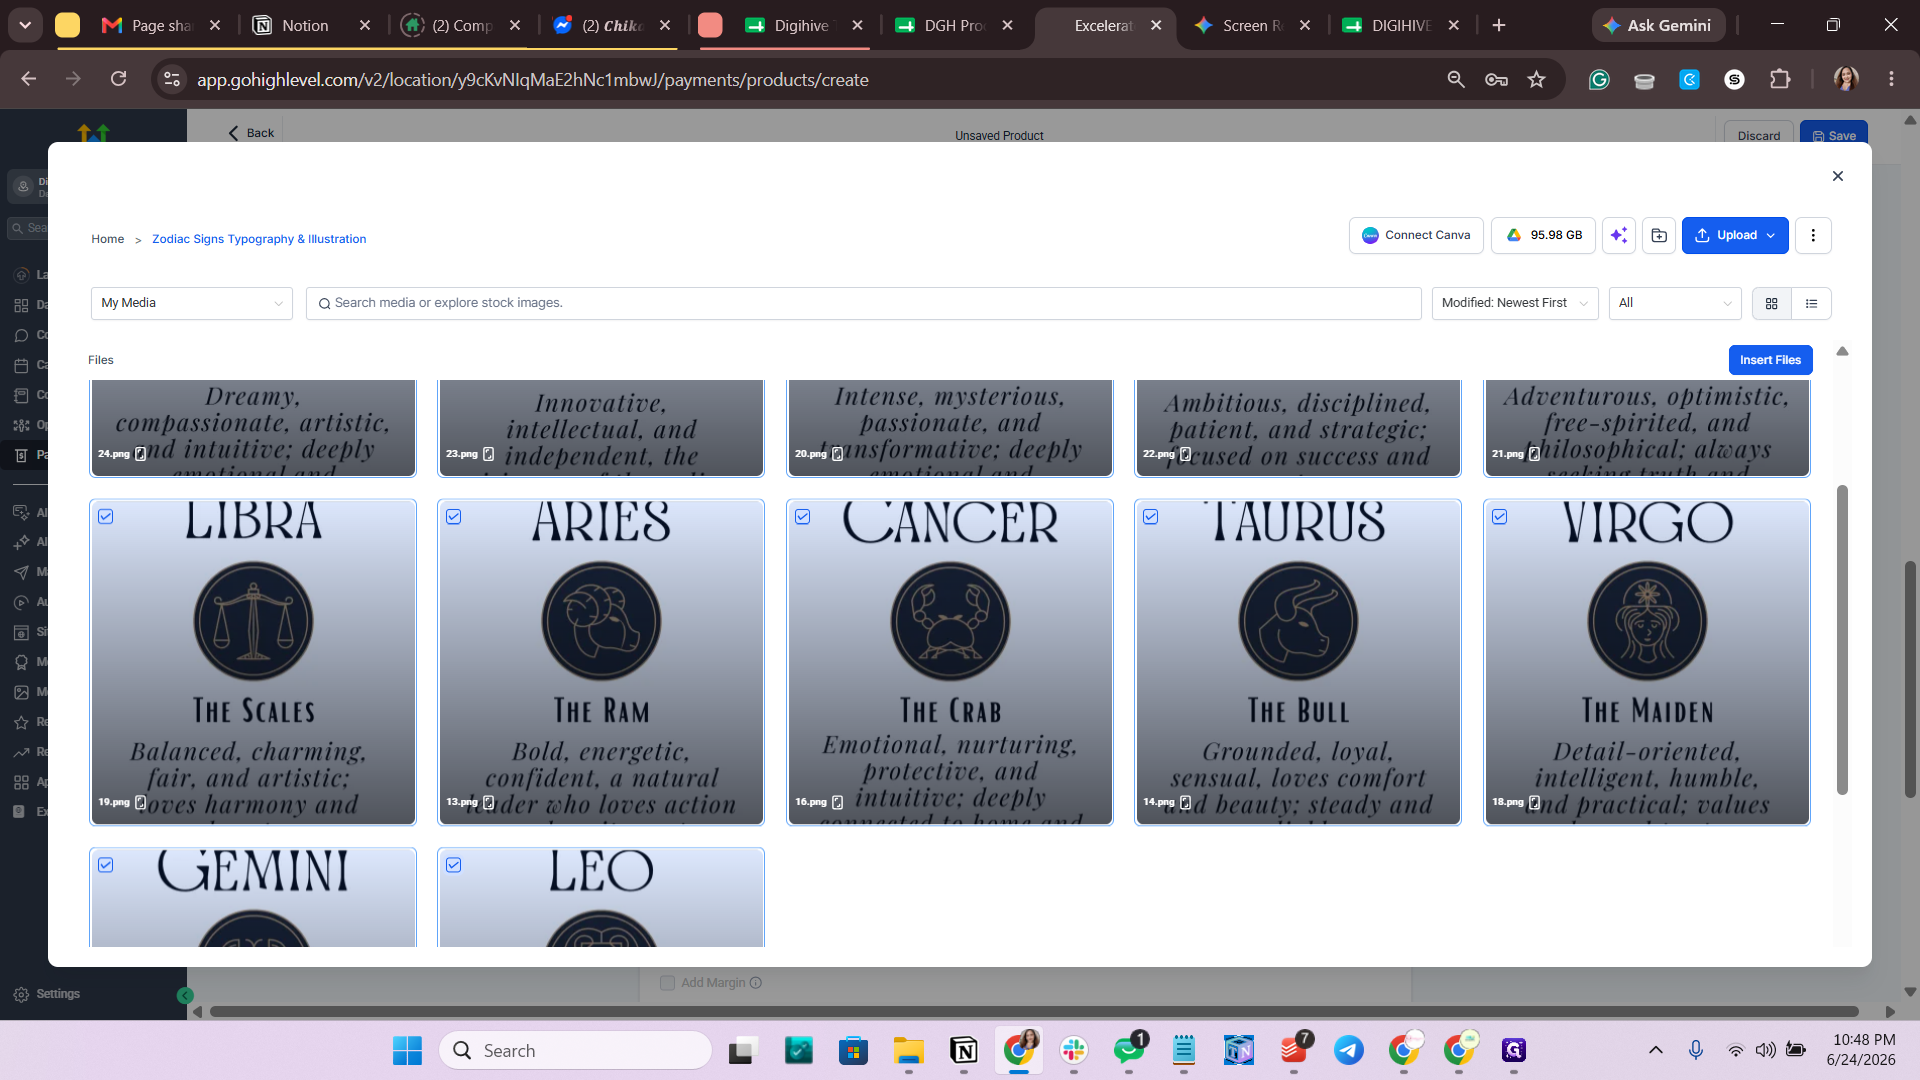
43
Once uploaded, check the box on every individual image you want to associate with the product.
Step #43: Once uploaded, check the box on every individual image you want to associate with the product.
44
Click Insert Files to add them to the product listing.
Step #44: Click Insert Files to add them to the product listing.

Configure Pricing and Inventory
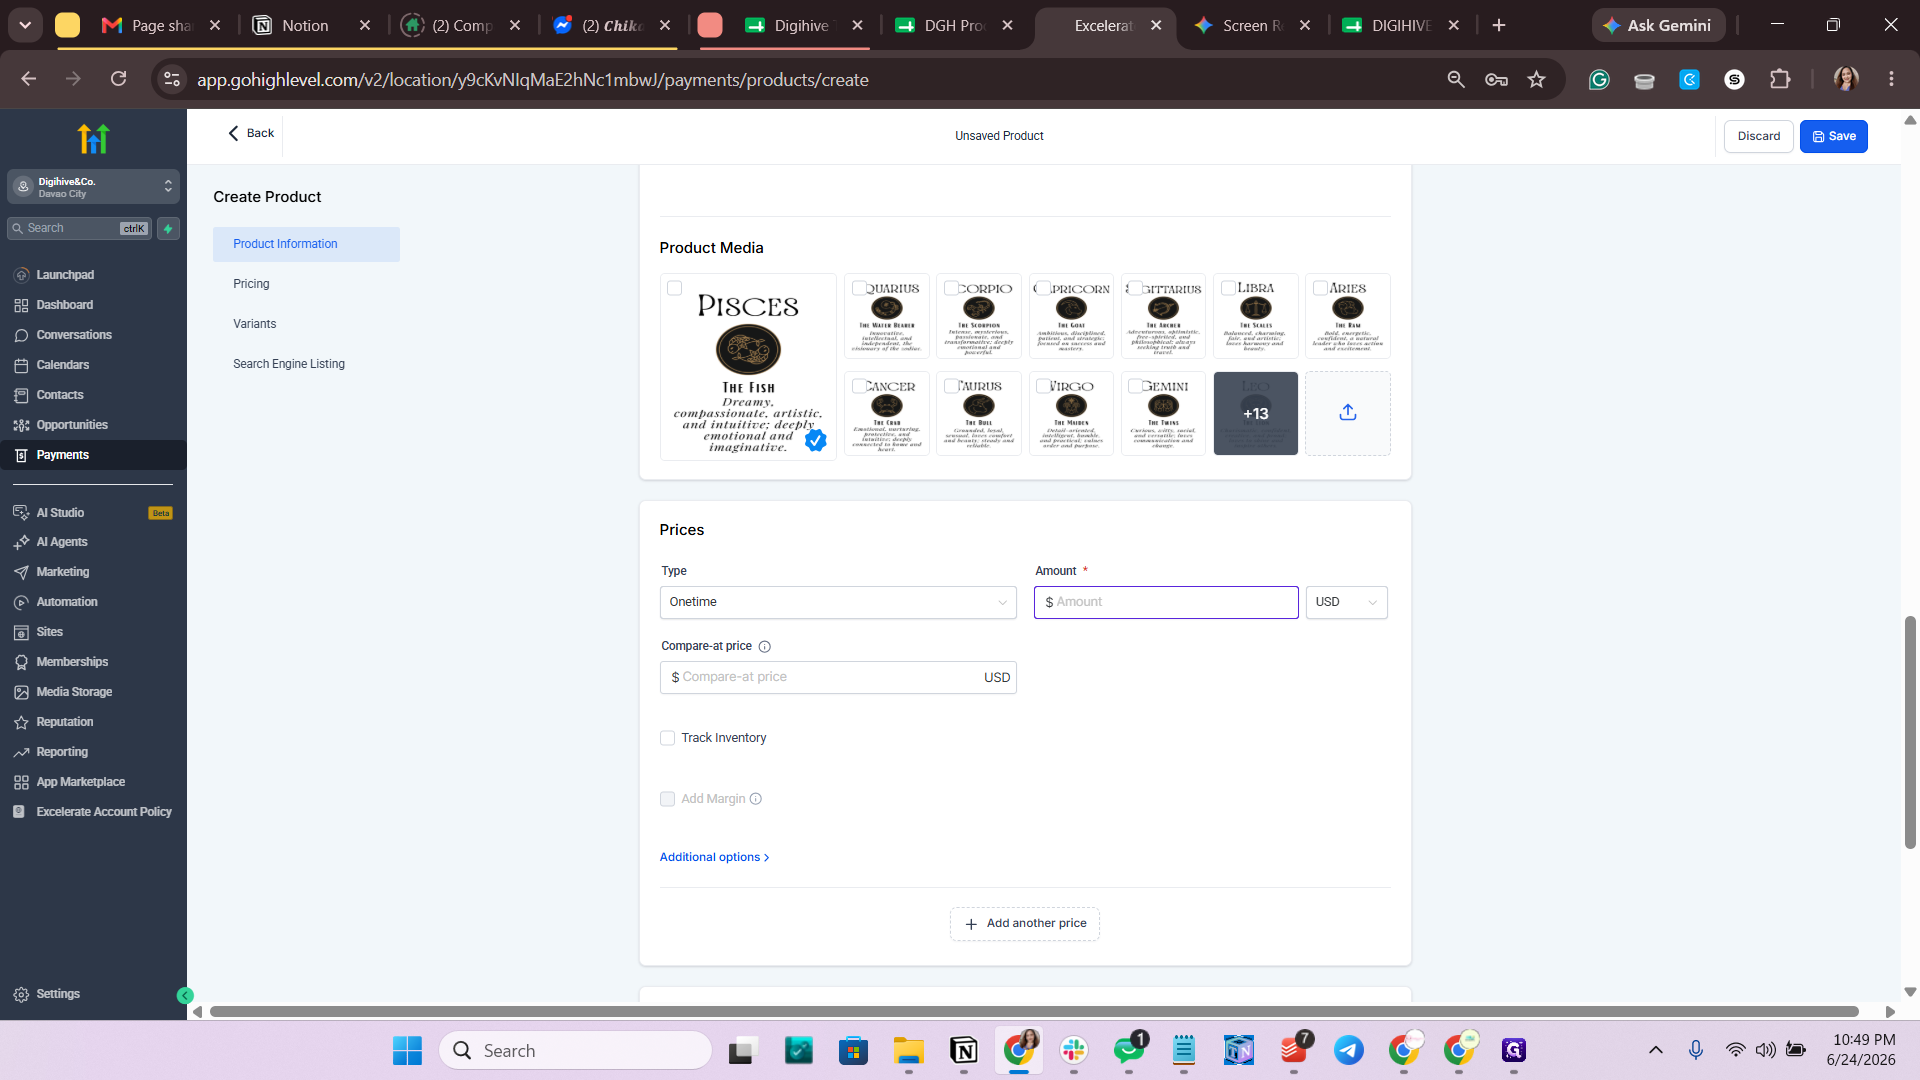
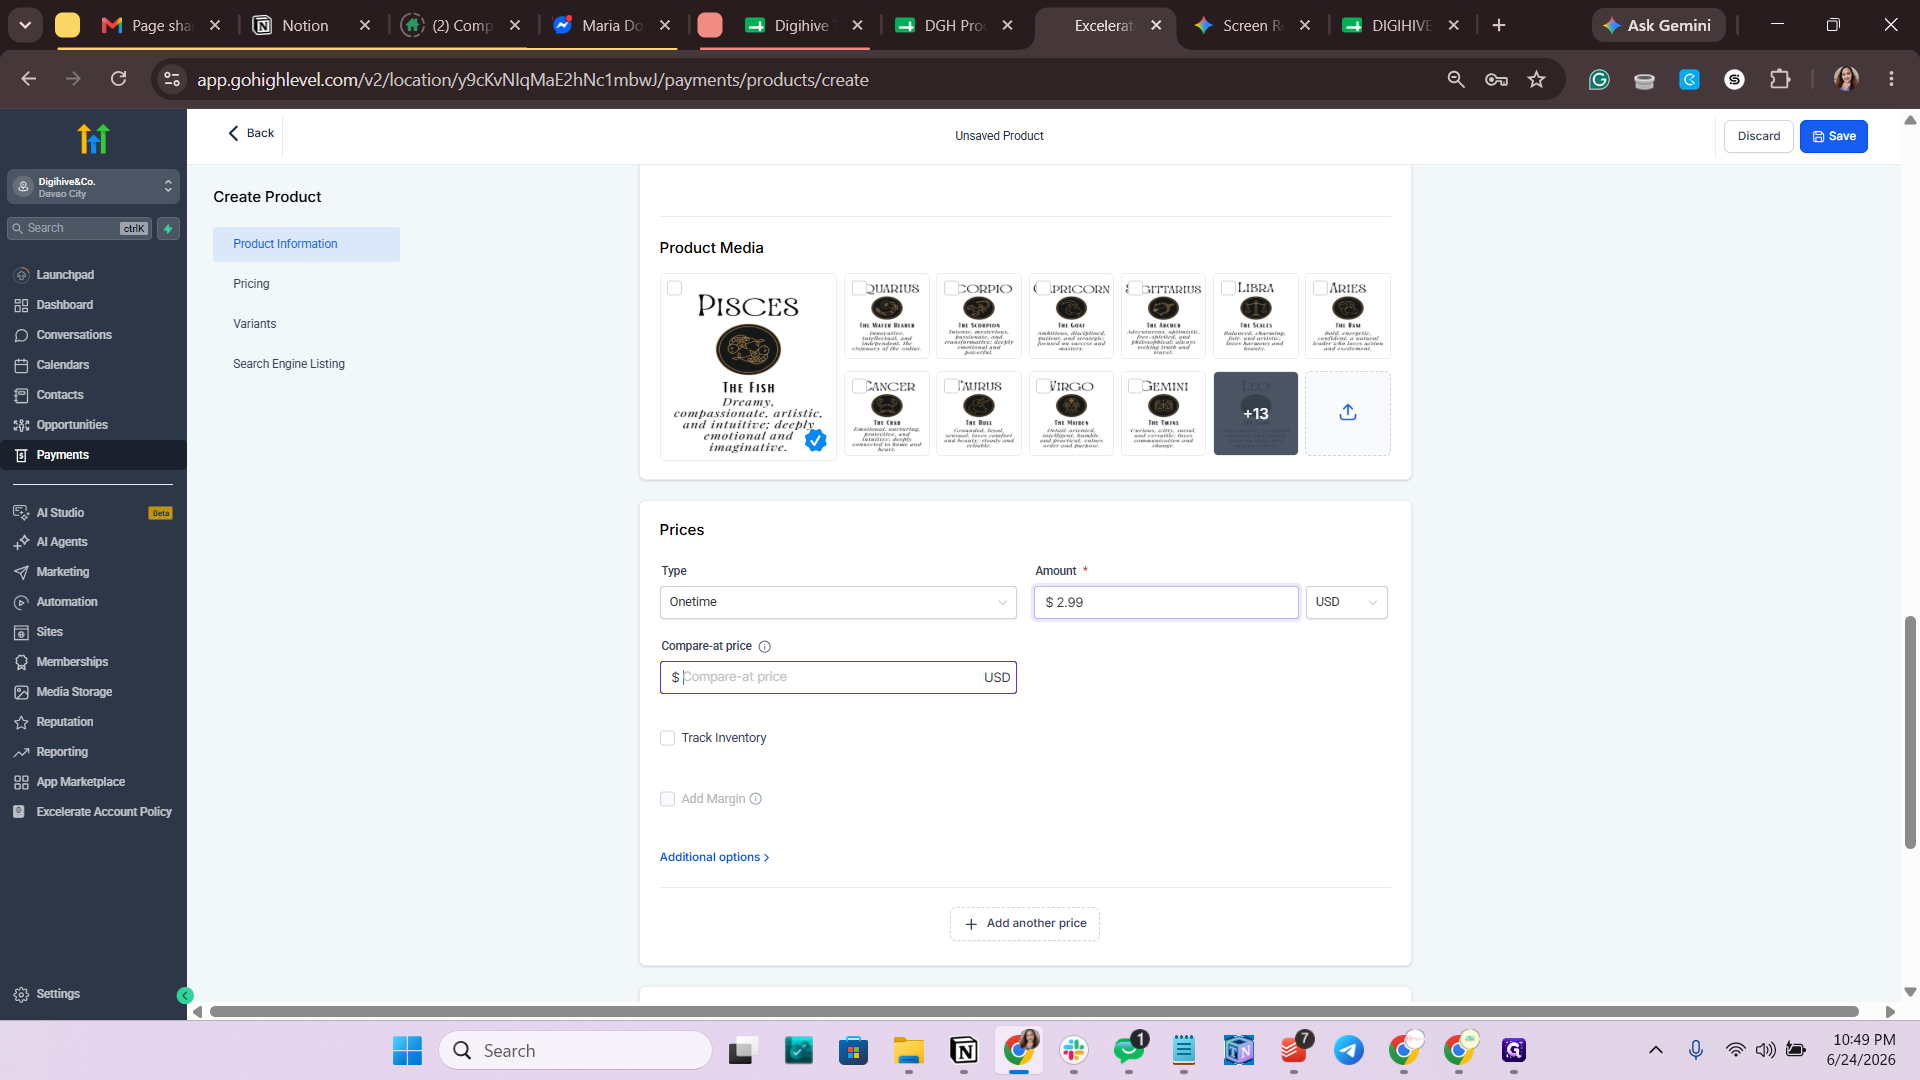
45
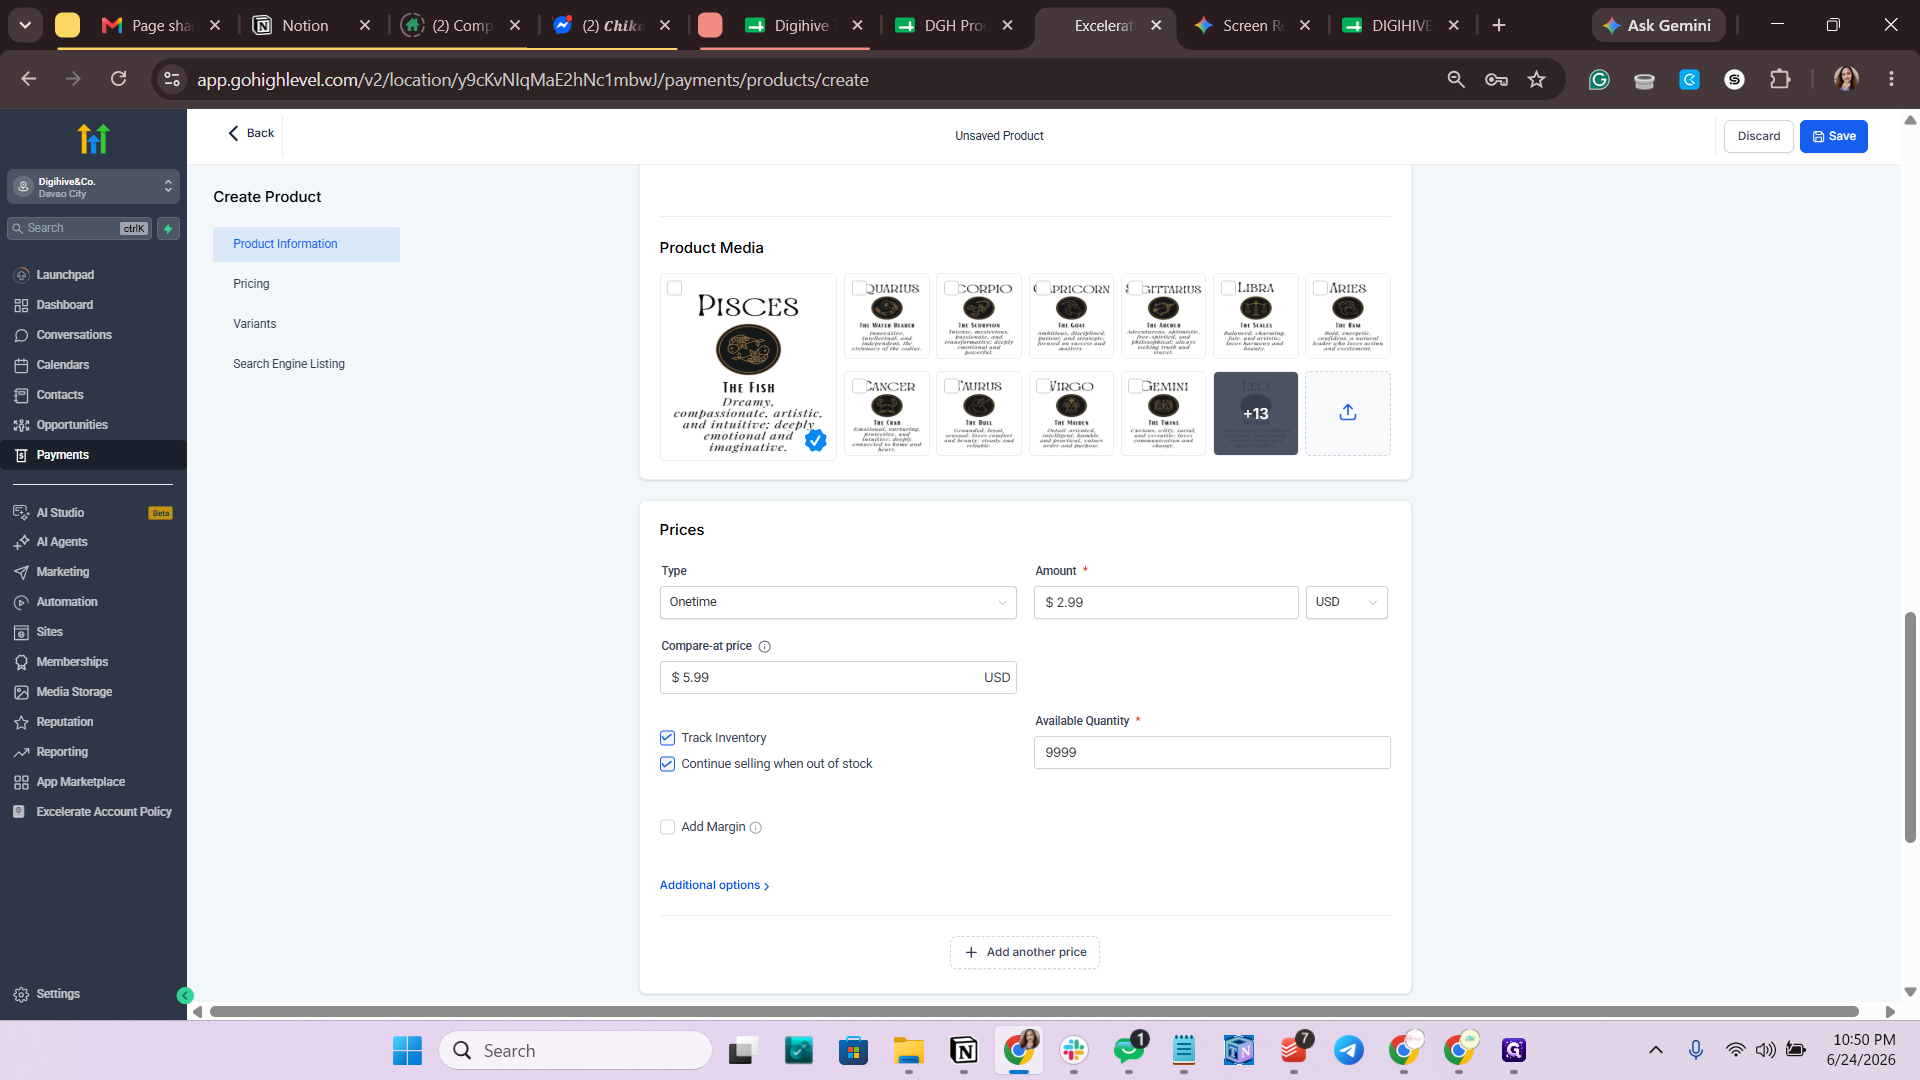
Scroll down to the Prices section and click the Amount field.
Step #45: Scroll down to the Prices section and click the Amount field.
46
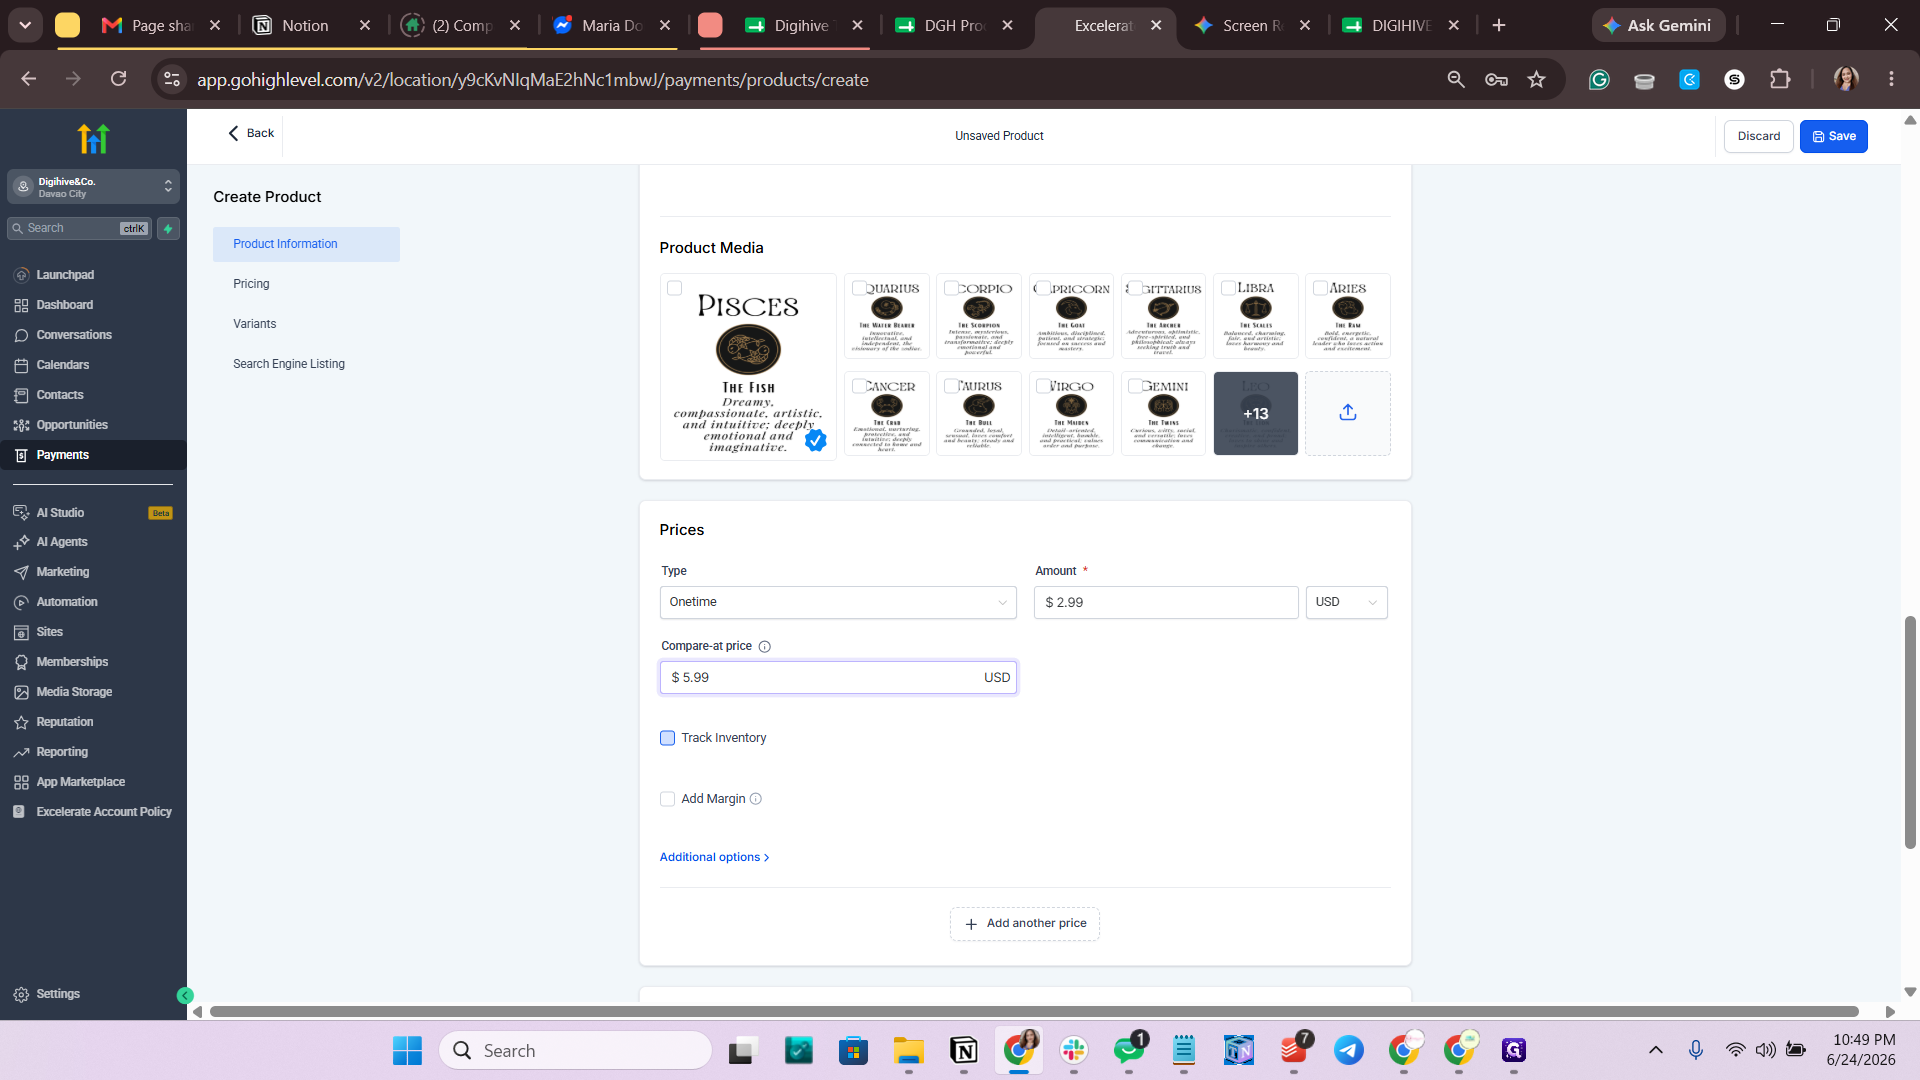
Type the selling price (e.g., 2.99).
47
Click the Compare-at price field.
Step #47: Click the Compare-at price field.
48
Type the original price (e.g., 5.99) to display a discount to the customer.
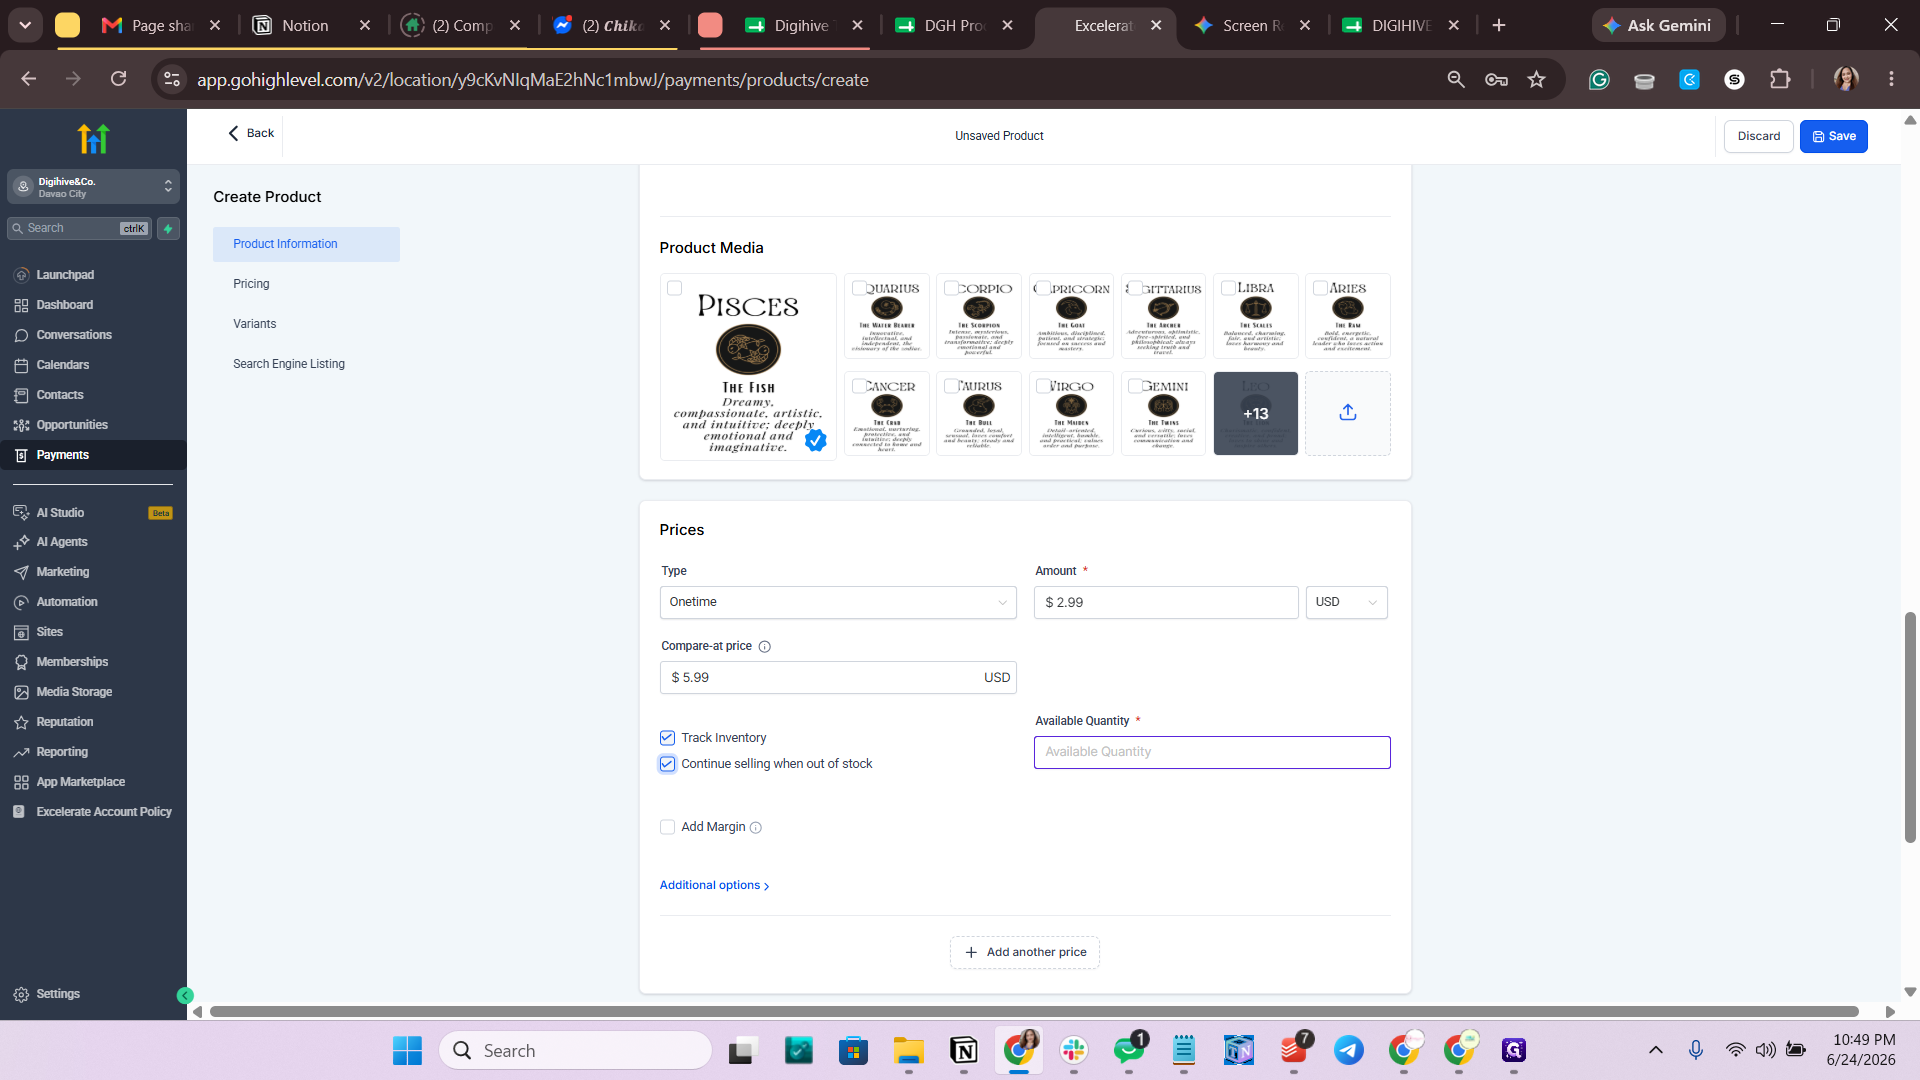
49
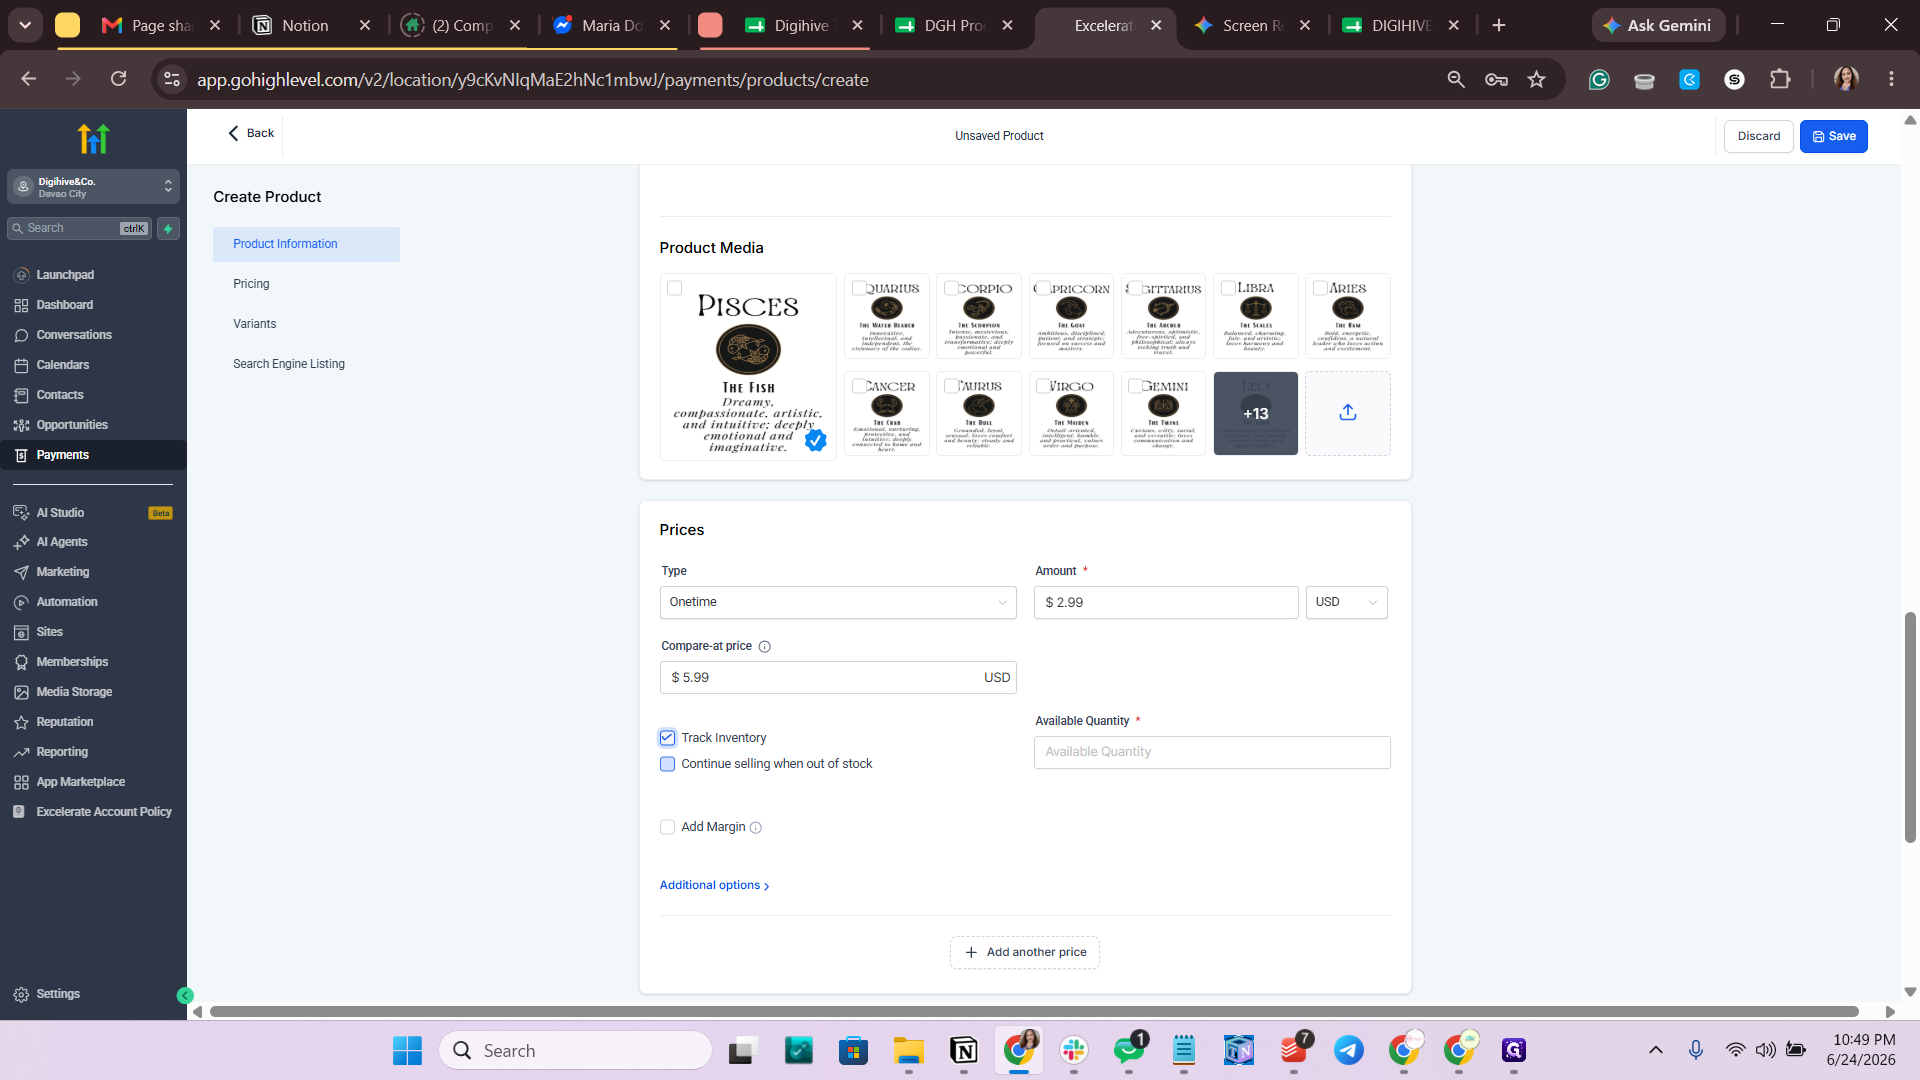
Toggle on Track Inventory.
Step #49: Toggle on Track Inventory.
50
Check the box to Continue selling when out of stock.
Step #50: Check the box to Continue selling when out of stock.
51
Click the Available Quantity field.
Step #51: Click the Available Quantity field.
52
Type 9999 for digital products.
53
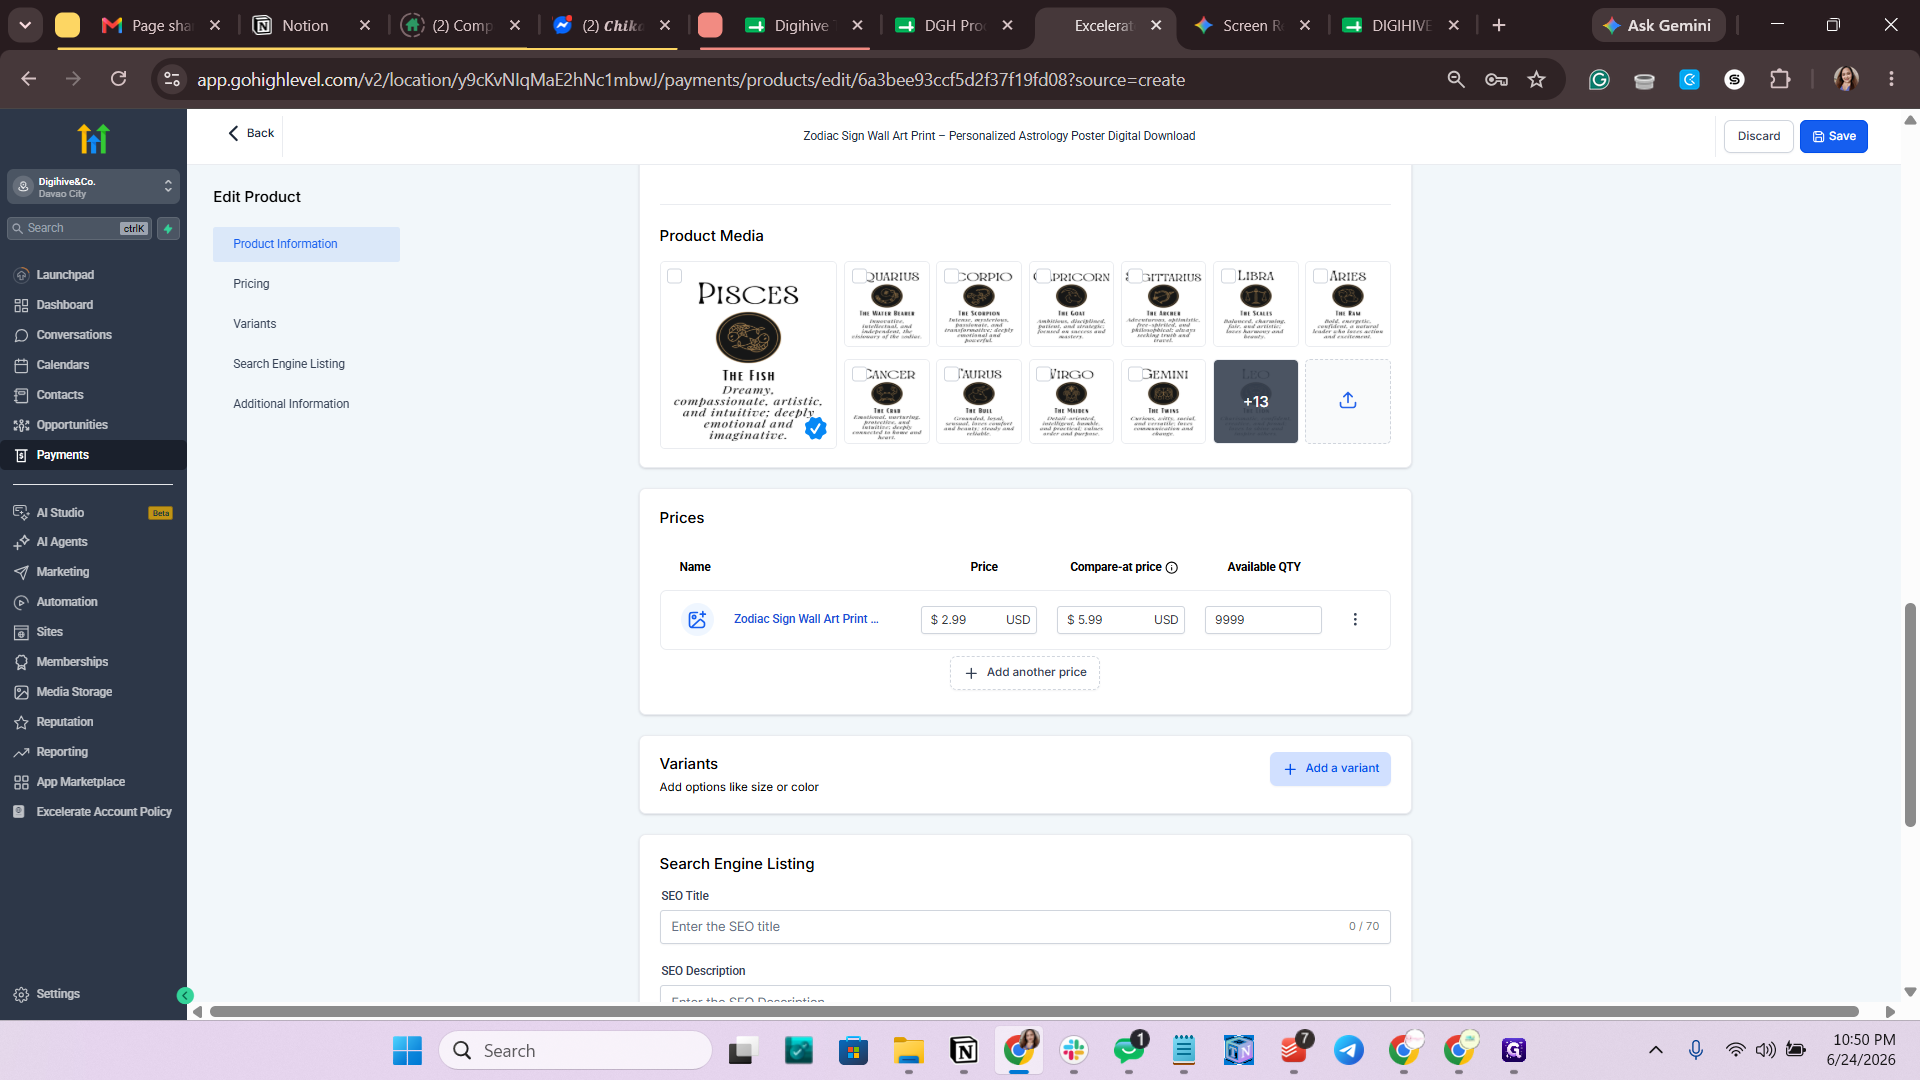
Click Save to confirm your product configurations.
Step #53: Click Save to confirm your product configurations.

Add Product Variants

54
After saving, scroll to the Variants section and click + Add a variant.
Step #54: After saving, scroll to the Variants section and click + Add a variant.
55
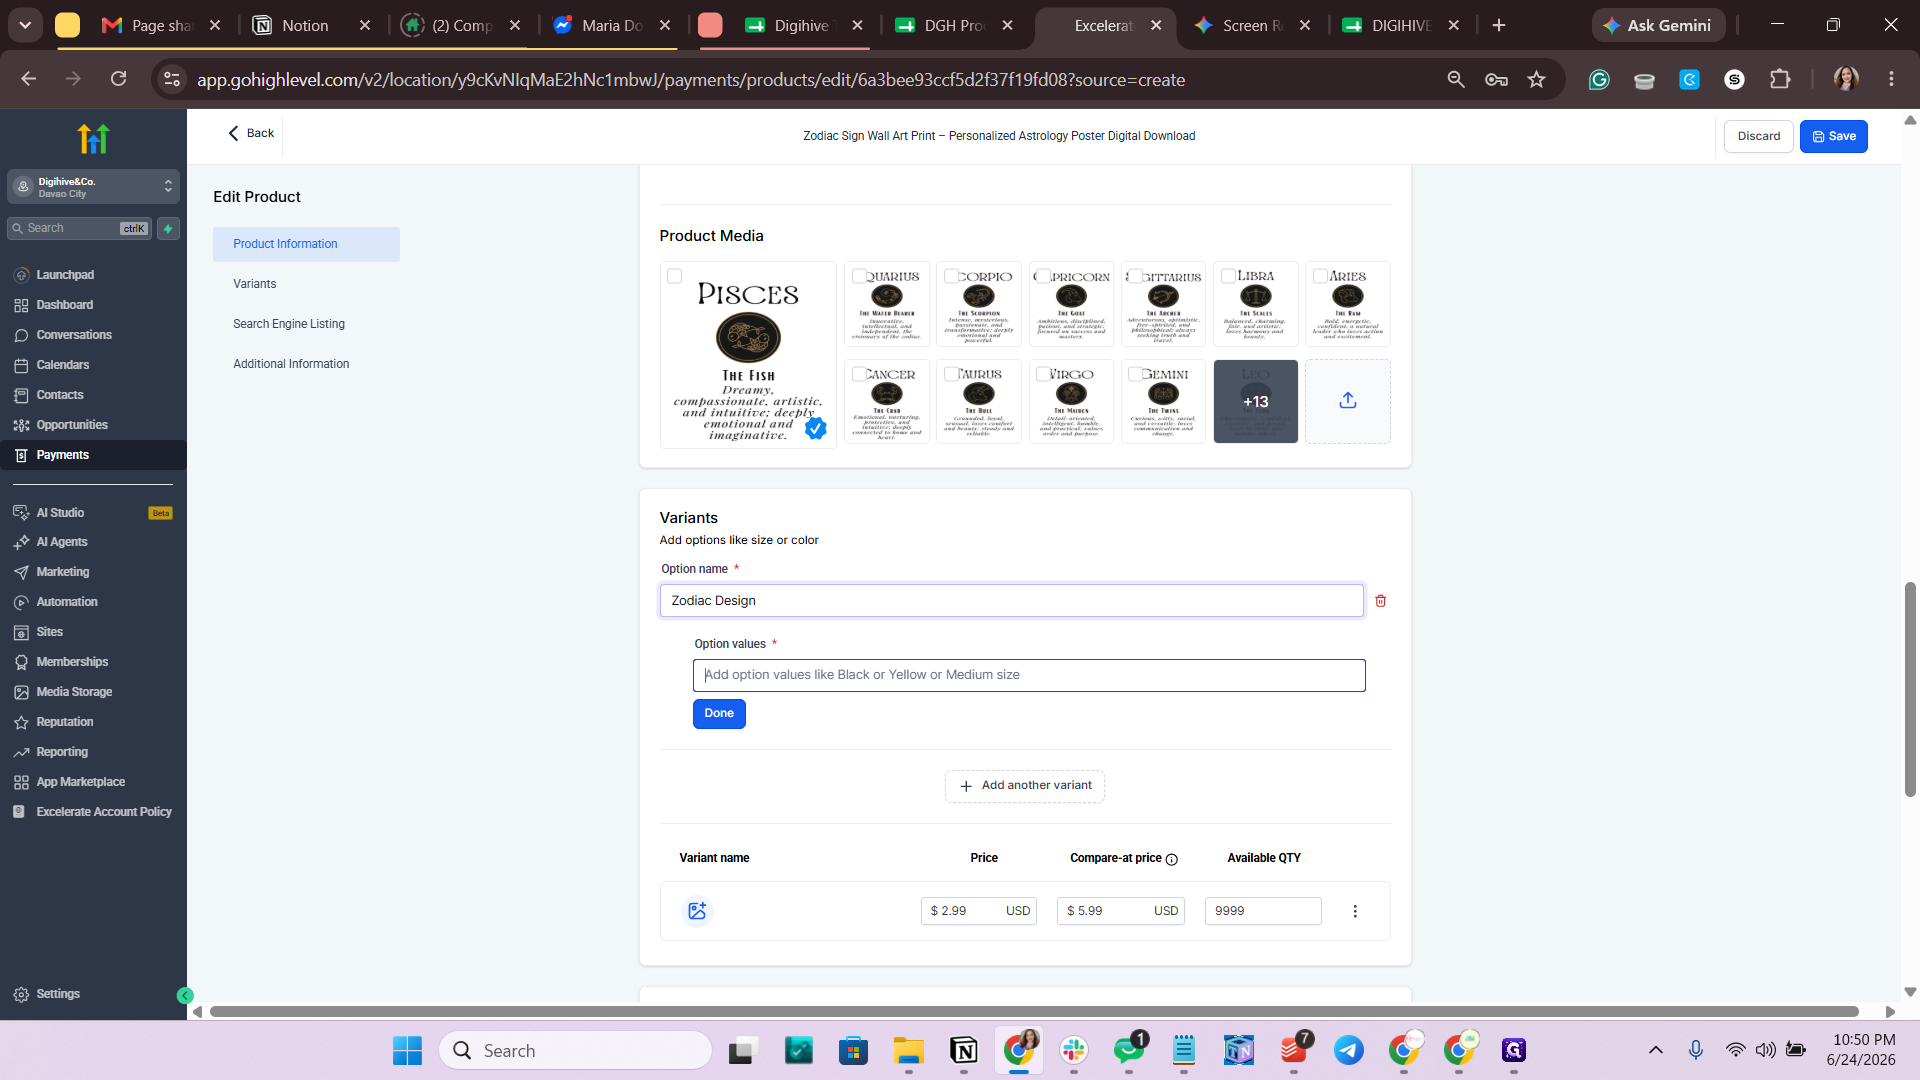
In the Option Name field, type a descriptor like Zodiac Design.
56
Click into the Option values box and type or paste your variant names (e.g., Typography & Illustration).
Step #56: Click into the Option values box and type or paste your variant names (e.g., Typography & Illustration).
57
Press Enter after pasting the text to lock in the variant option.

Q: Why do I paste the description using Ctrl + Shift + V?

A: Pasting with Ctrl + Shift + V pastes the text as plain text, stripping out any table borders, fonts, or cell styling from Google Sheets so you can format it cleanly inside GoHighLevel.

Q: How do I handle inventory limits for digital art?

A: Because digital files do not physically run out, toggle on "Track Inventory", check "Continue selling when out of stock", and set your Available Quantity to a high number like 9999.

Q: Do I need to upload product images one by one?

A: No, GoHighLevel allows you to use the "Upload folder" option to bulk upload entire folders of imagery previously downloaded from Canva.

Term

Definition

Variant

A specific option of a product, such as a color, design style, or size, that a customer can select at checkout.

Compare-at Price

An original, higher price displayed alongside the current selling price with a strikethrough to visually demonstrate a discount.