Valpay Back Office Portal Setup & Management Guide
Learn how to use the Valpay back office portal to manage merchant accounts, review transactions, process Virtual Terminal payments, and configure users.
By Matt
This guide walks you through the Valpay back office portal, covering how to manage merchant accounts, review transaction ledgers, process payments via the Virtual Terminal, and configure user permissions.
This guide applies to Valpay partners, merchant administrators, and operational users who manage daily payment flows, reporting, and sub-merchant onboarding.
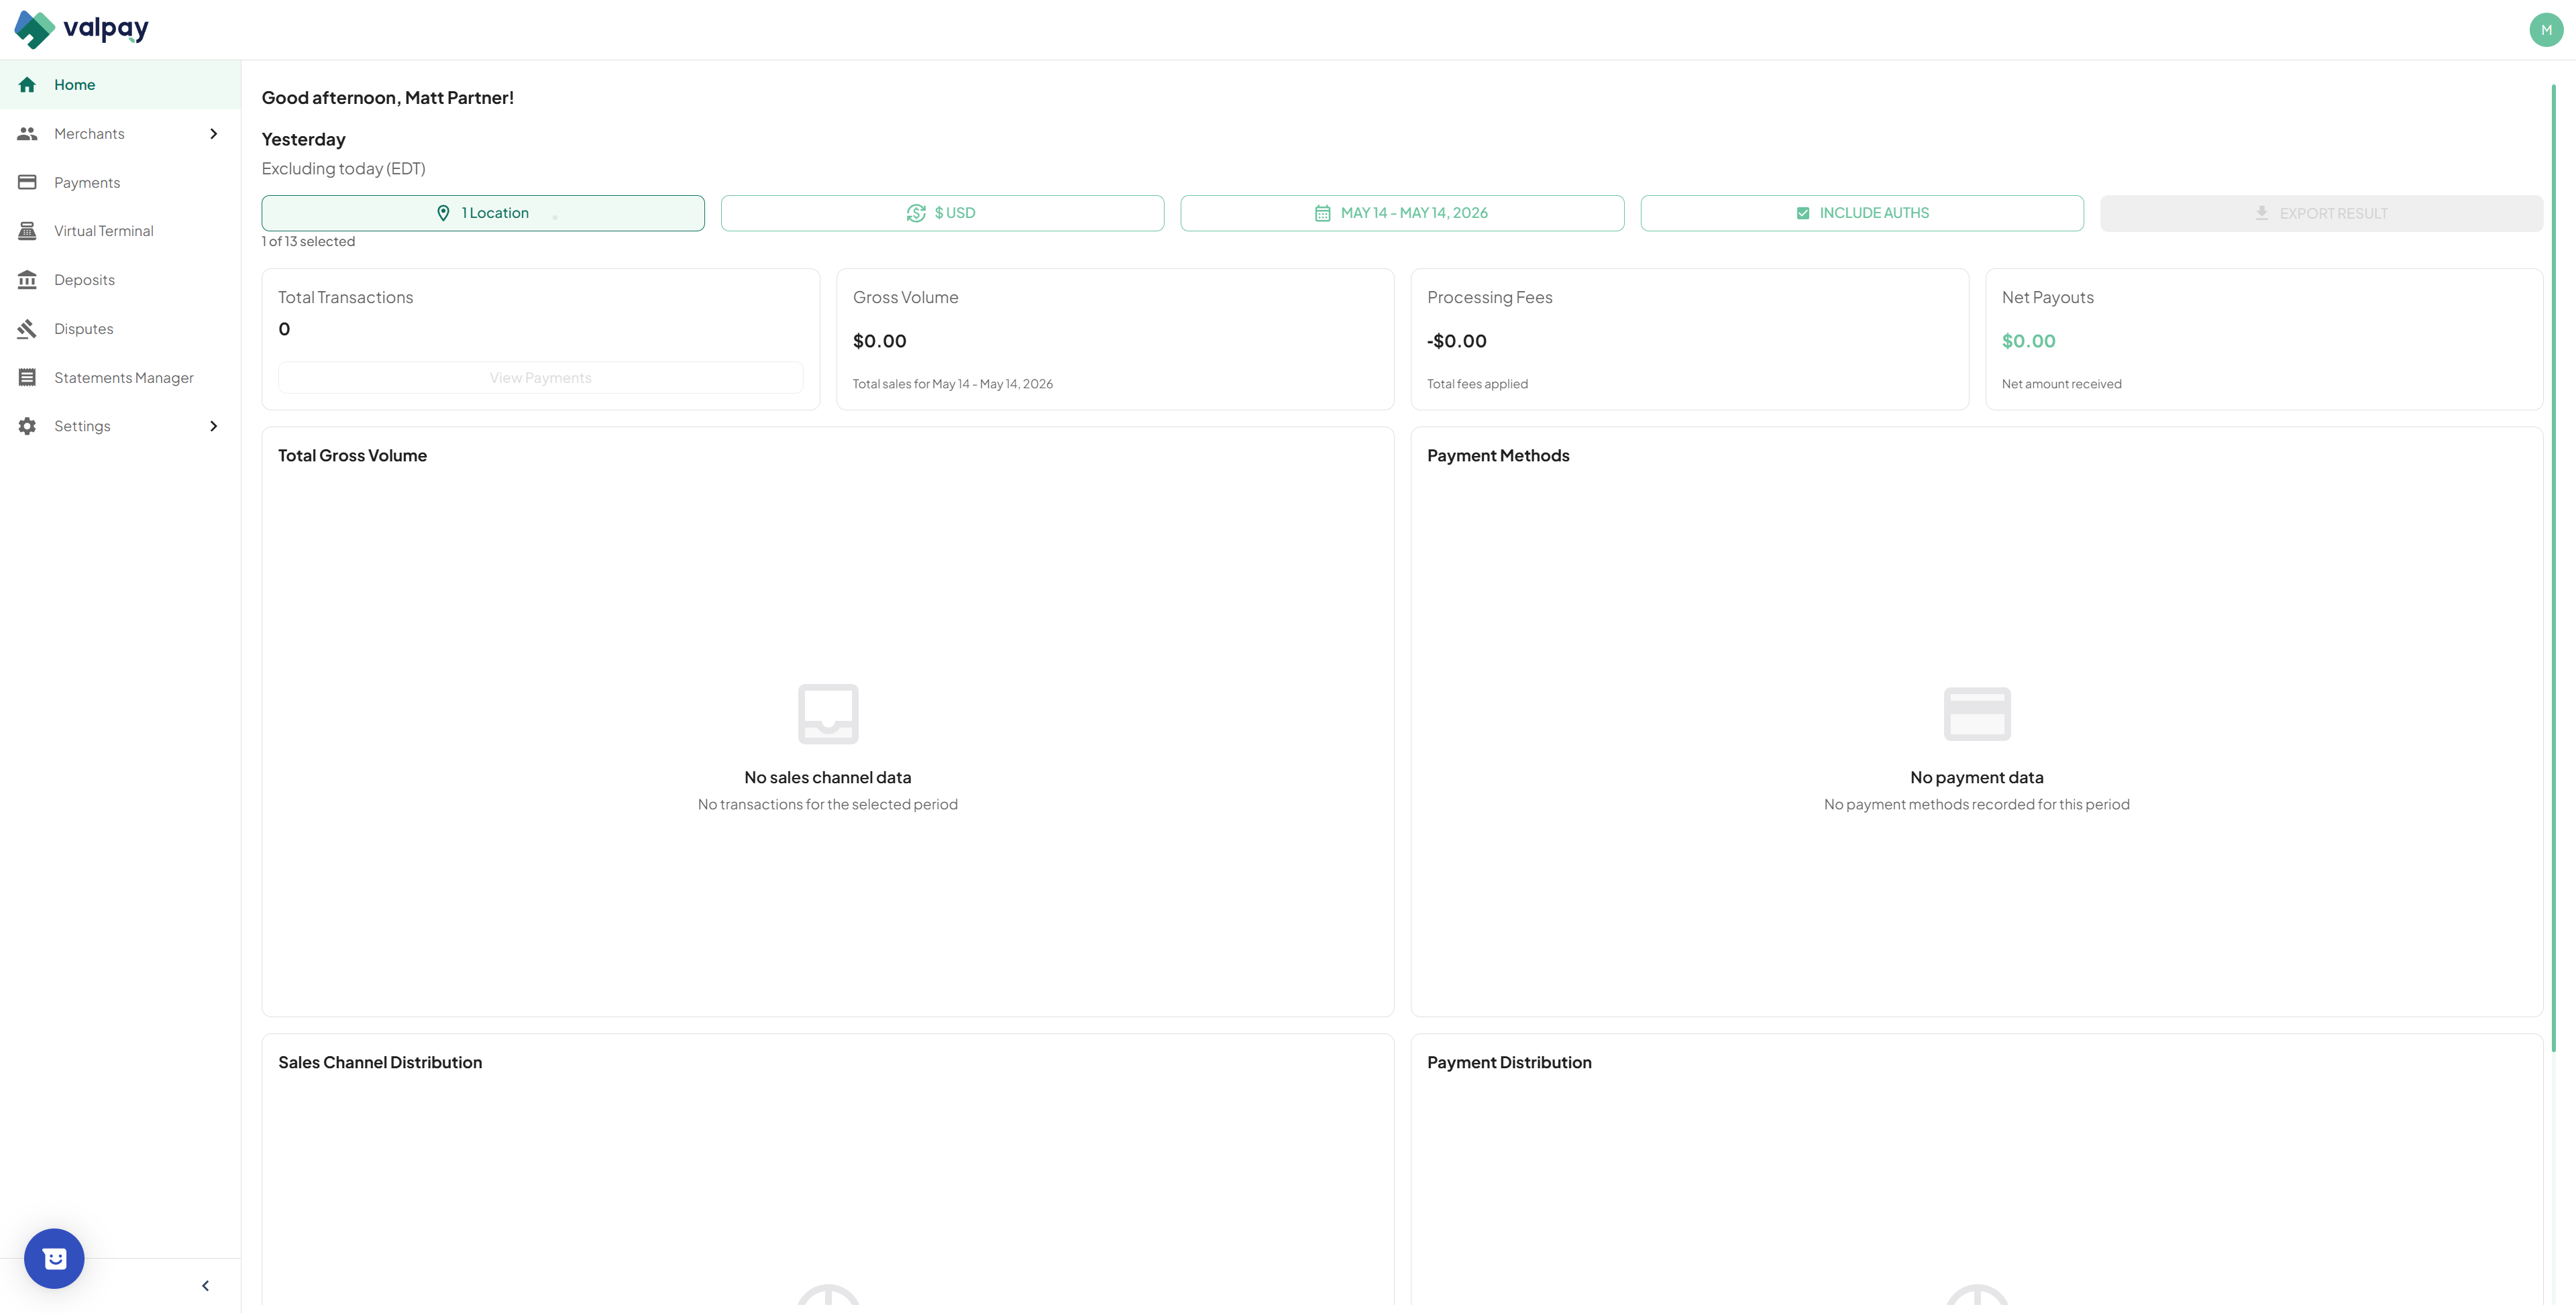
Dashboard and Key Metrics
The dashboard provides a real-time snapshot of your transaction activity.
1
Select your location from the top dropdown menu to load your analytics.
2
Set your currency if your business operates across multiple currencies.
You can select a specific date range and filter by various metrics. By default, leave the "Include authorizations" filter off so you only view successfully captured transactions. If you operate a hospitality business that frequently places holds on cards, you may want to toggle authorizations on.
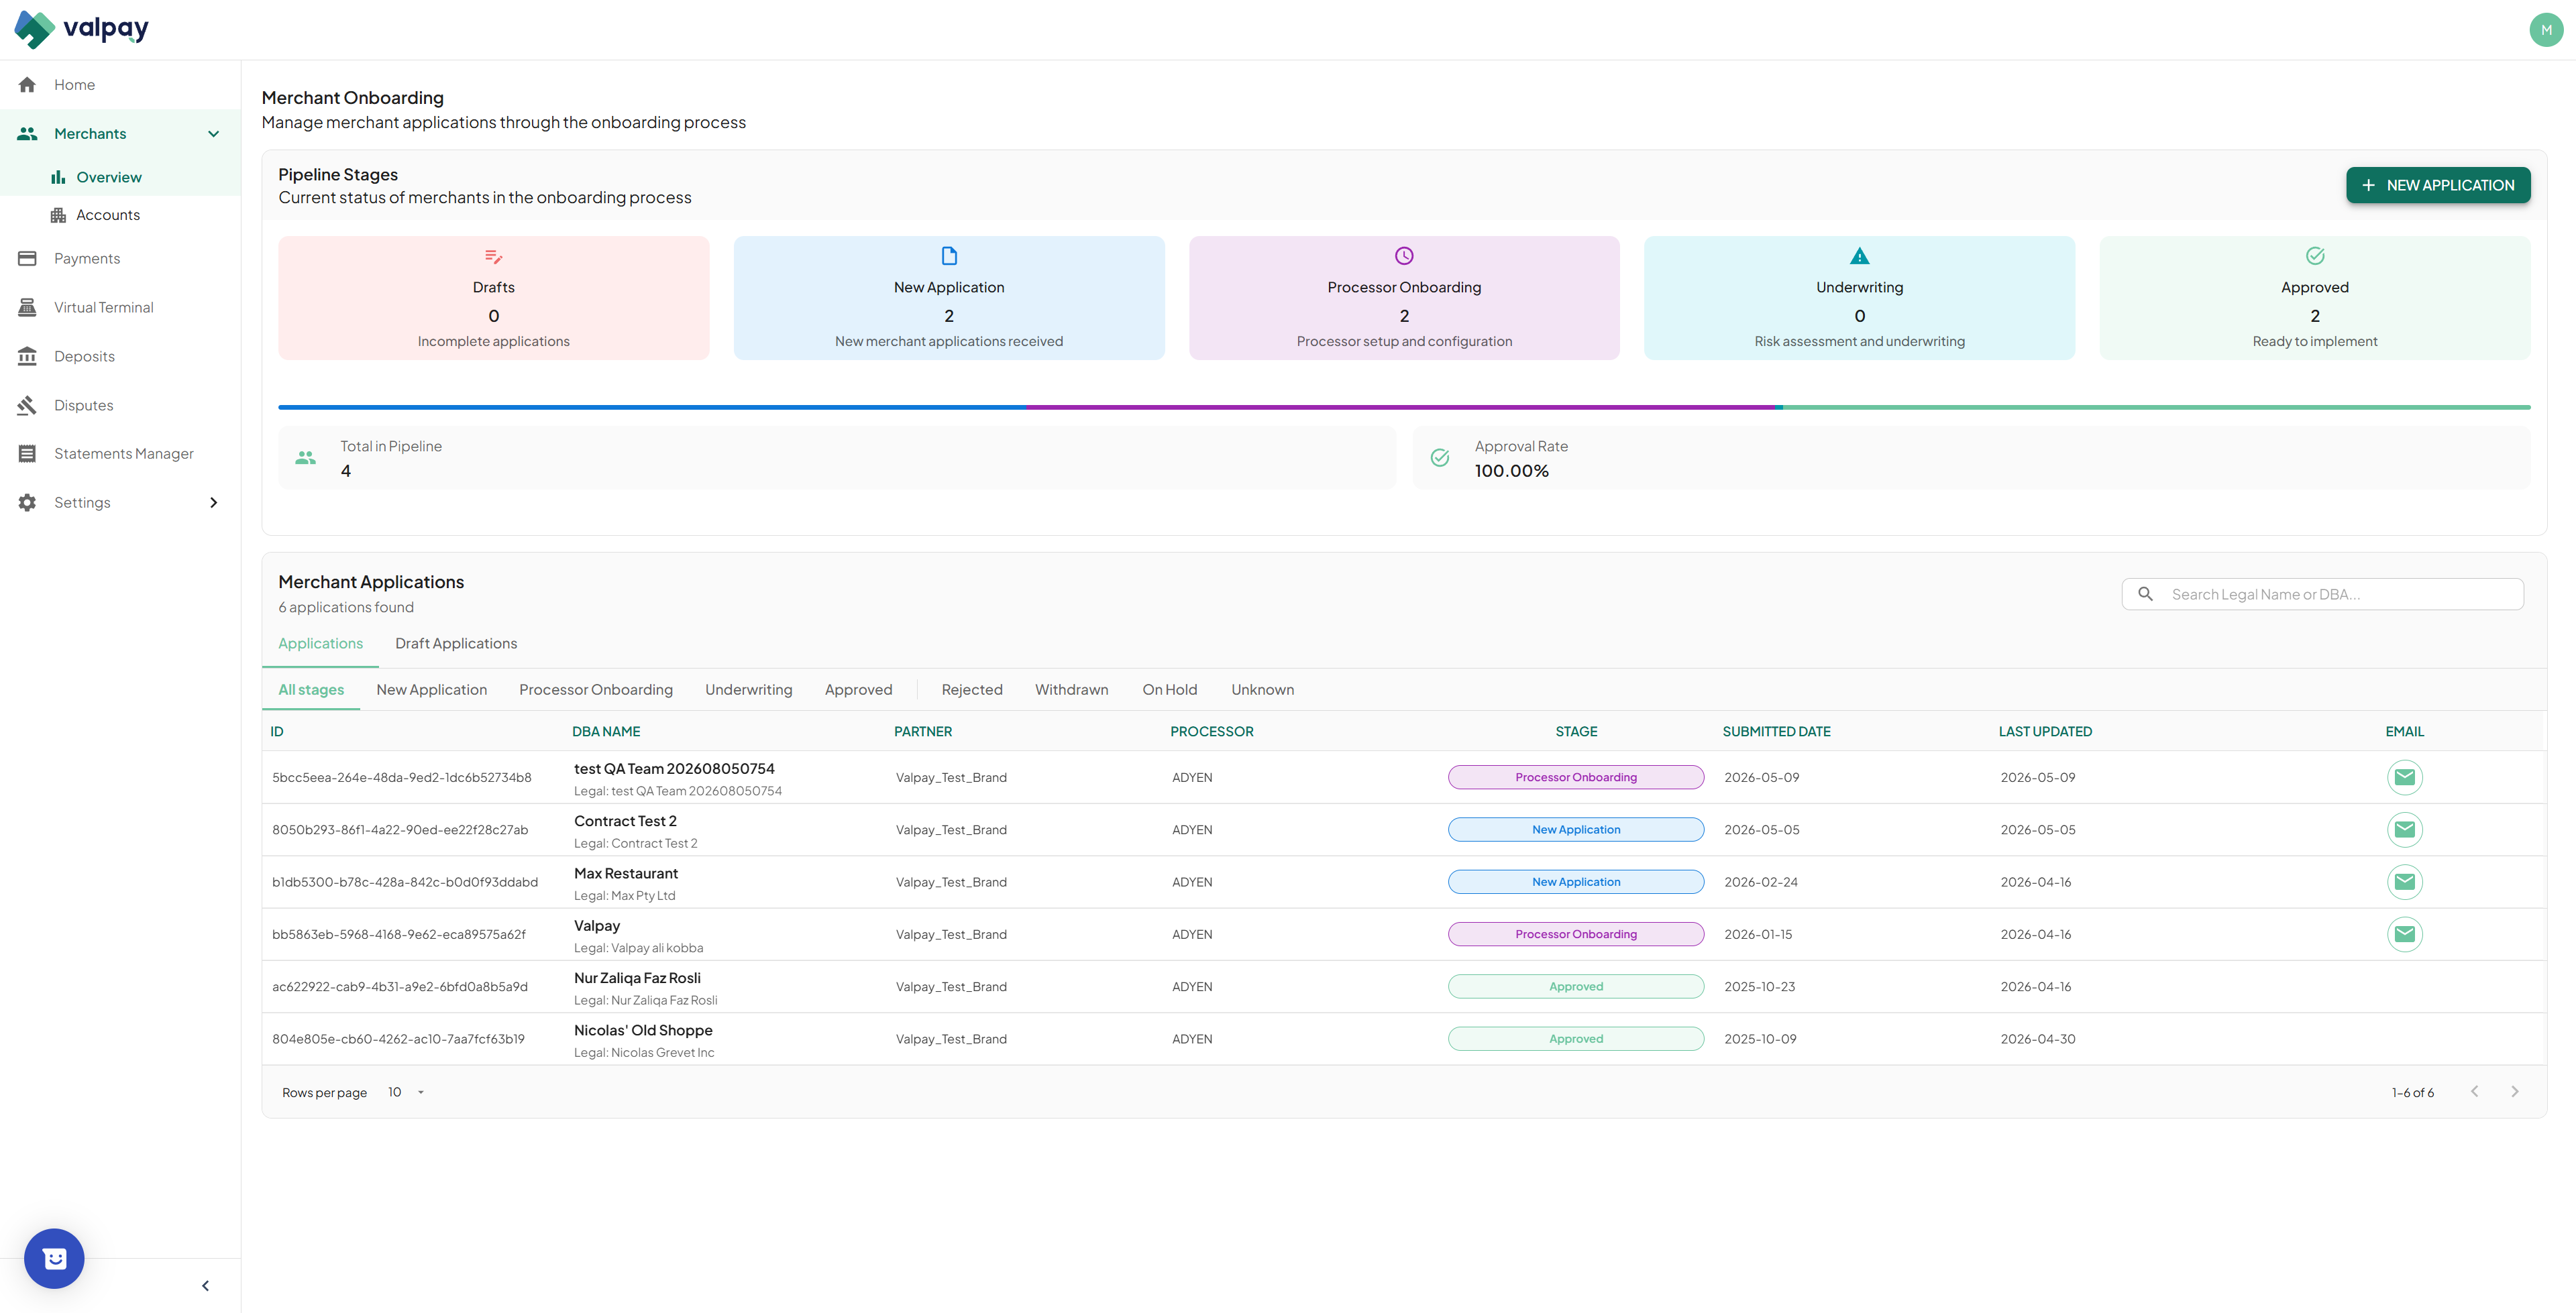
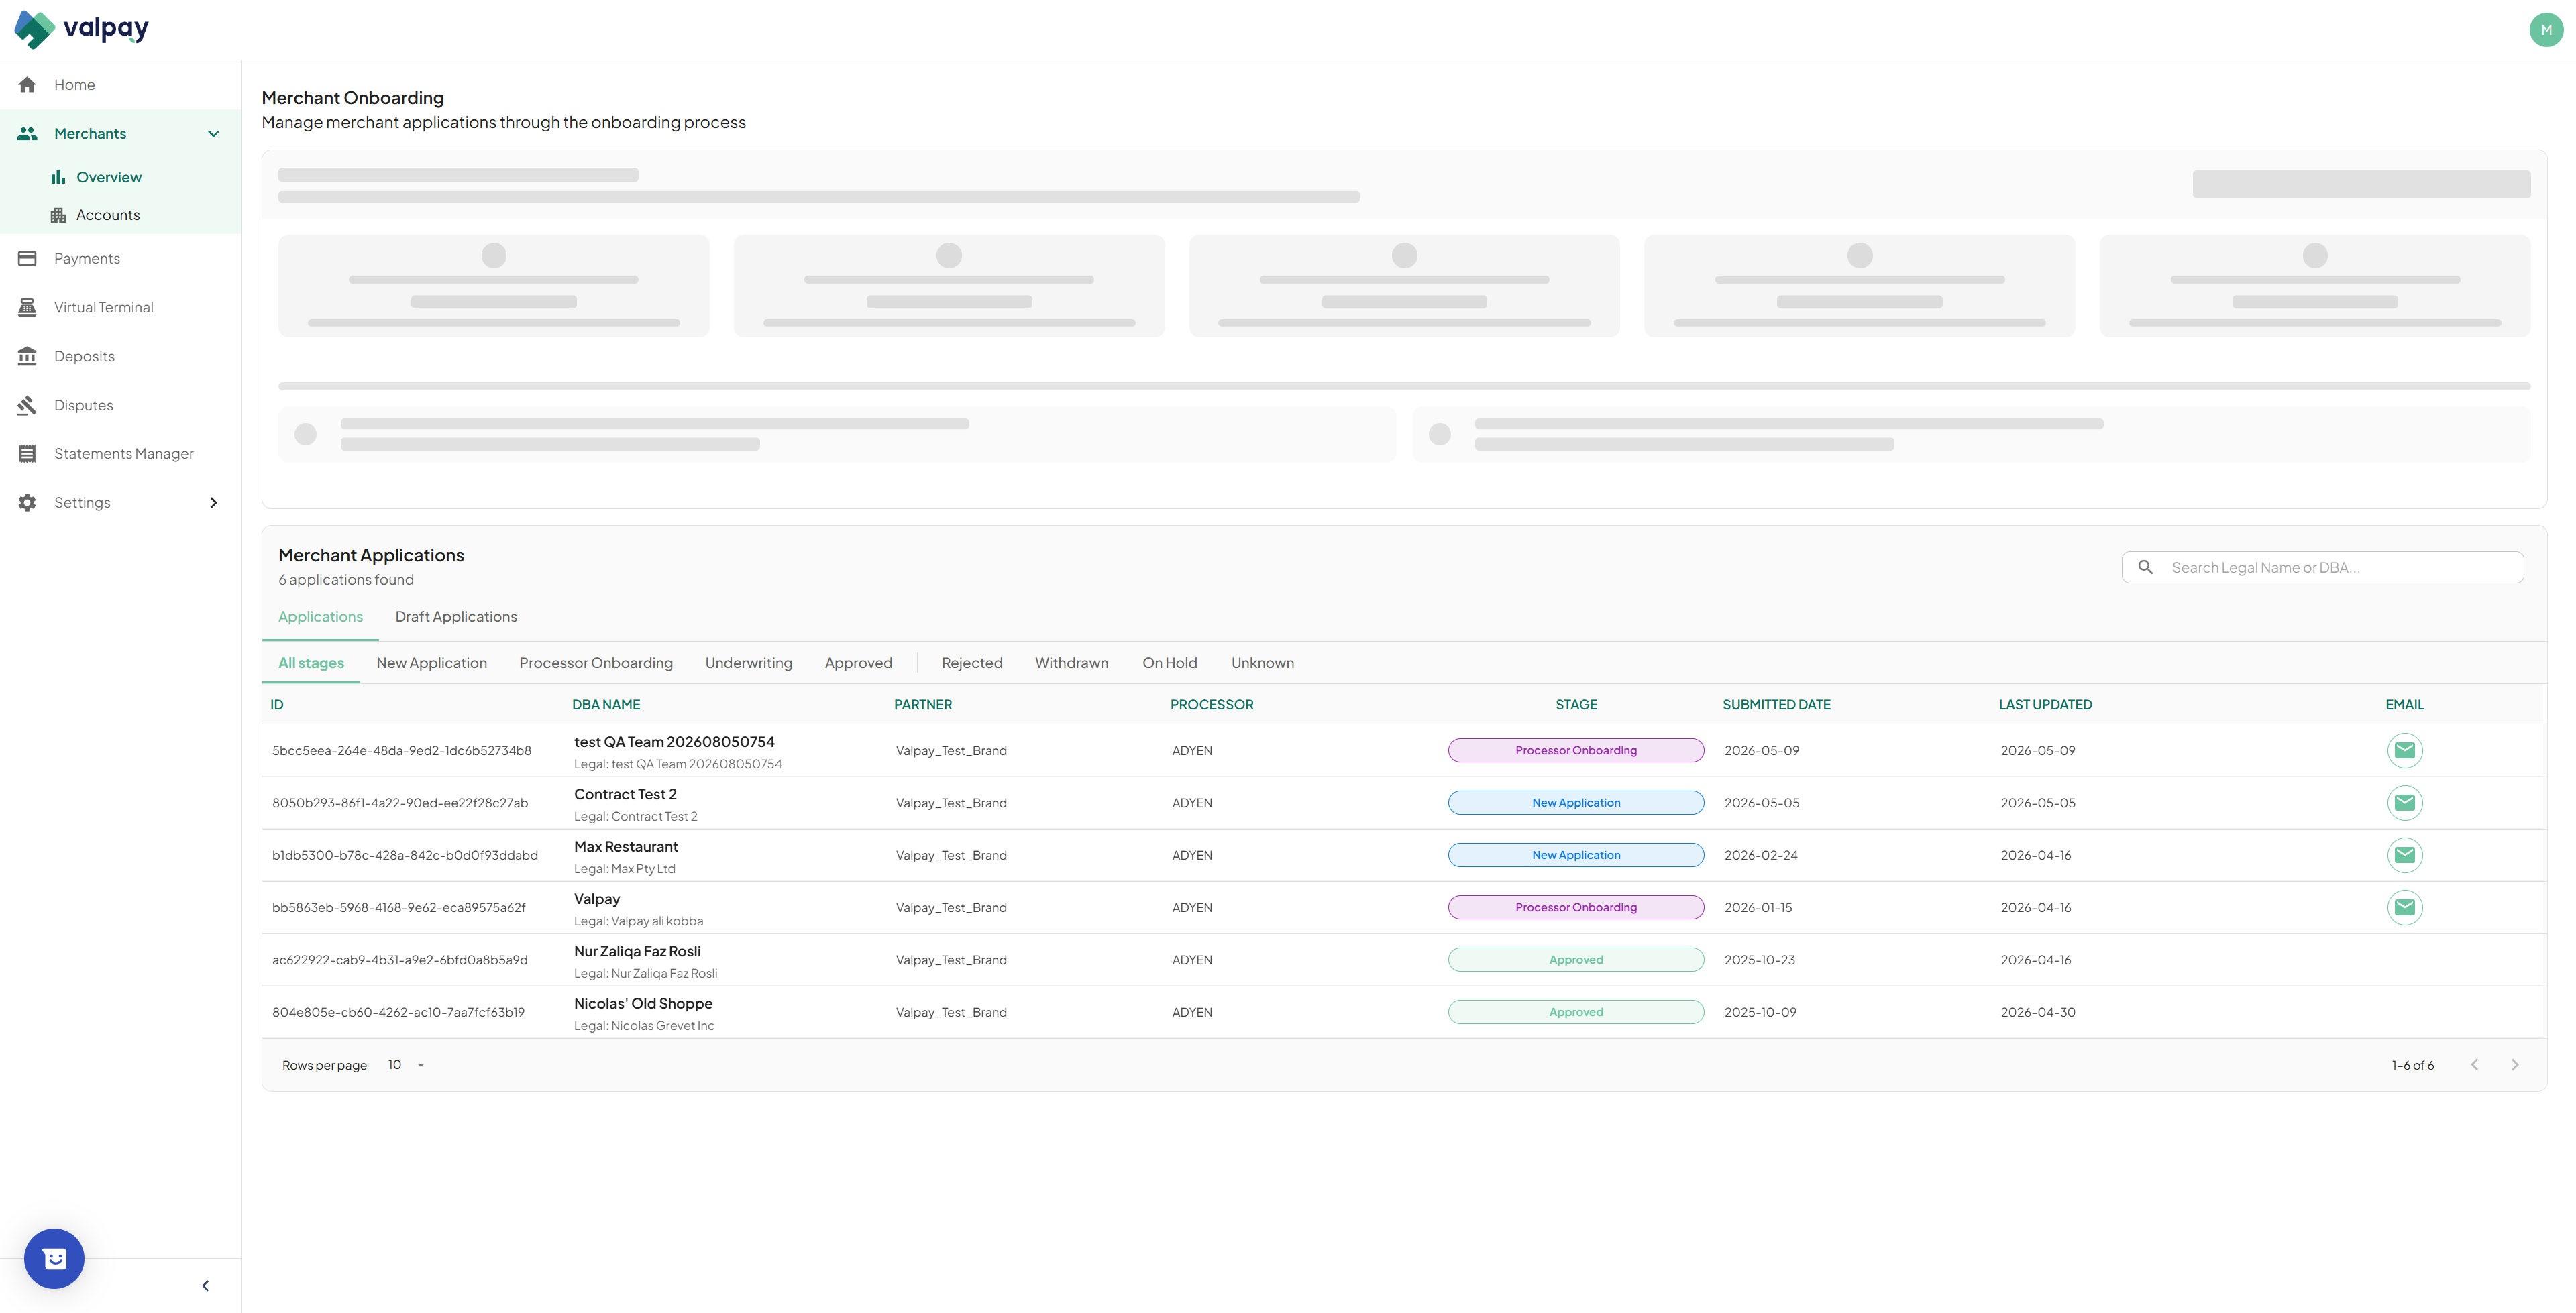
Merchant Pipeline and Onboarding
The Merchant tab acts as your hub for managing sub-merchant applications. Here, you can track your full application pipeline.
3
Click New Application to initiate onboarding for a new sub-merchant.
4
Use the quick filters to find applications that are in progress, approved, or waiting on underwriting.
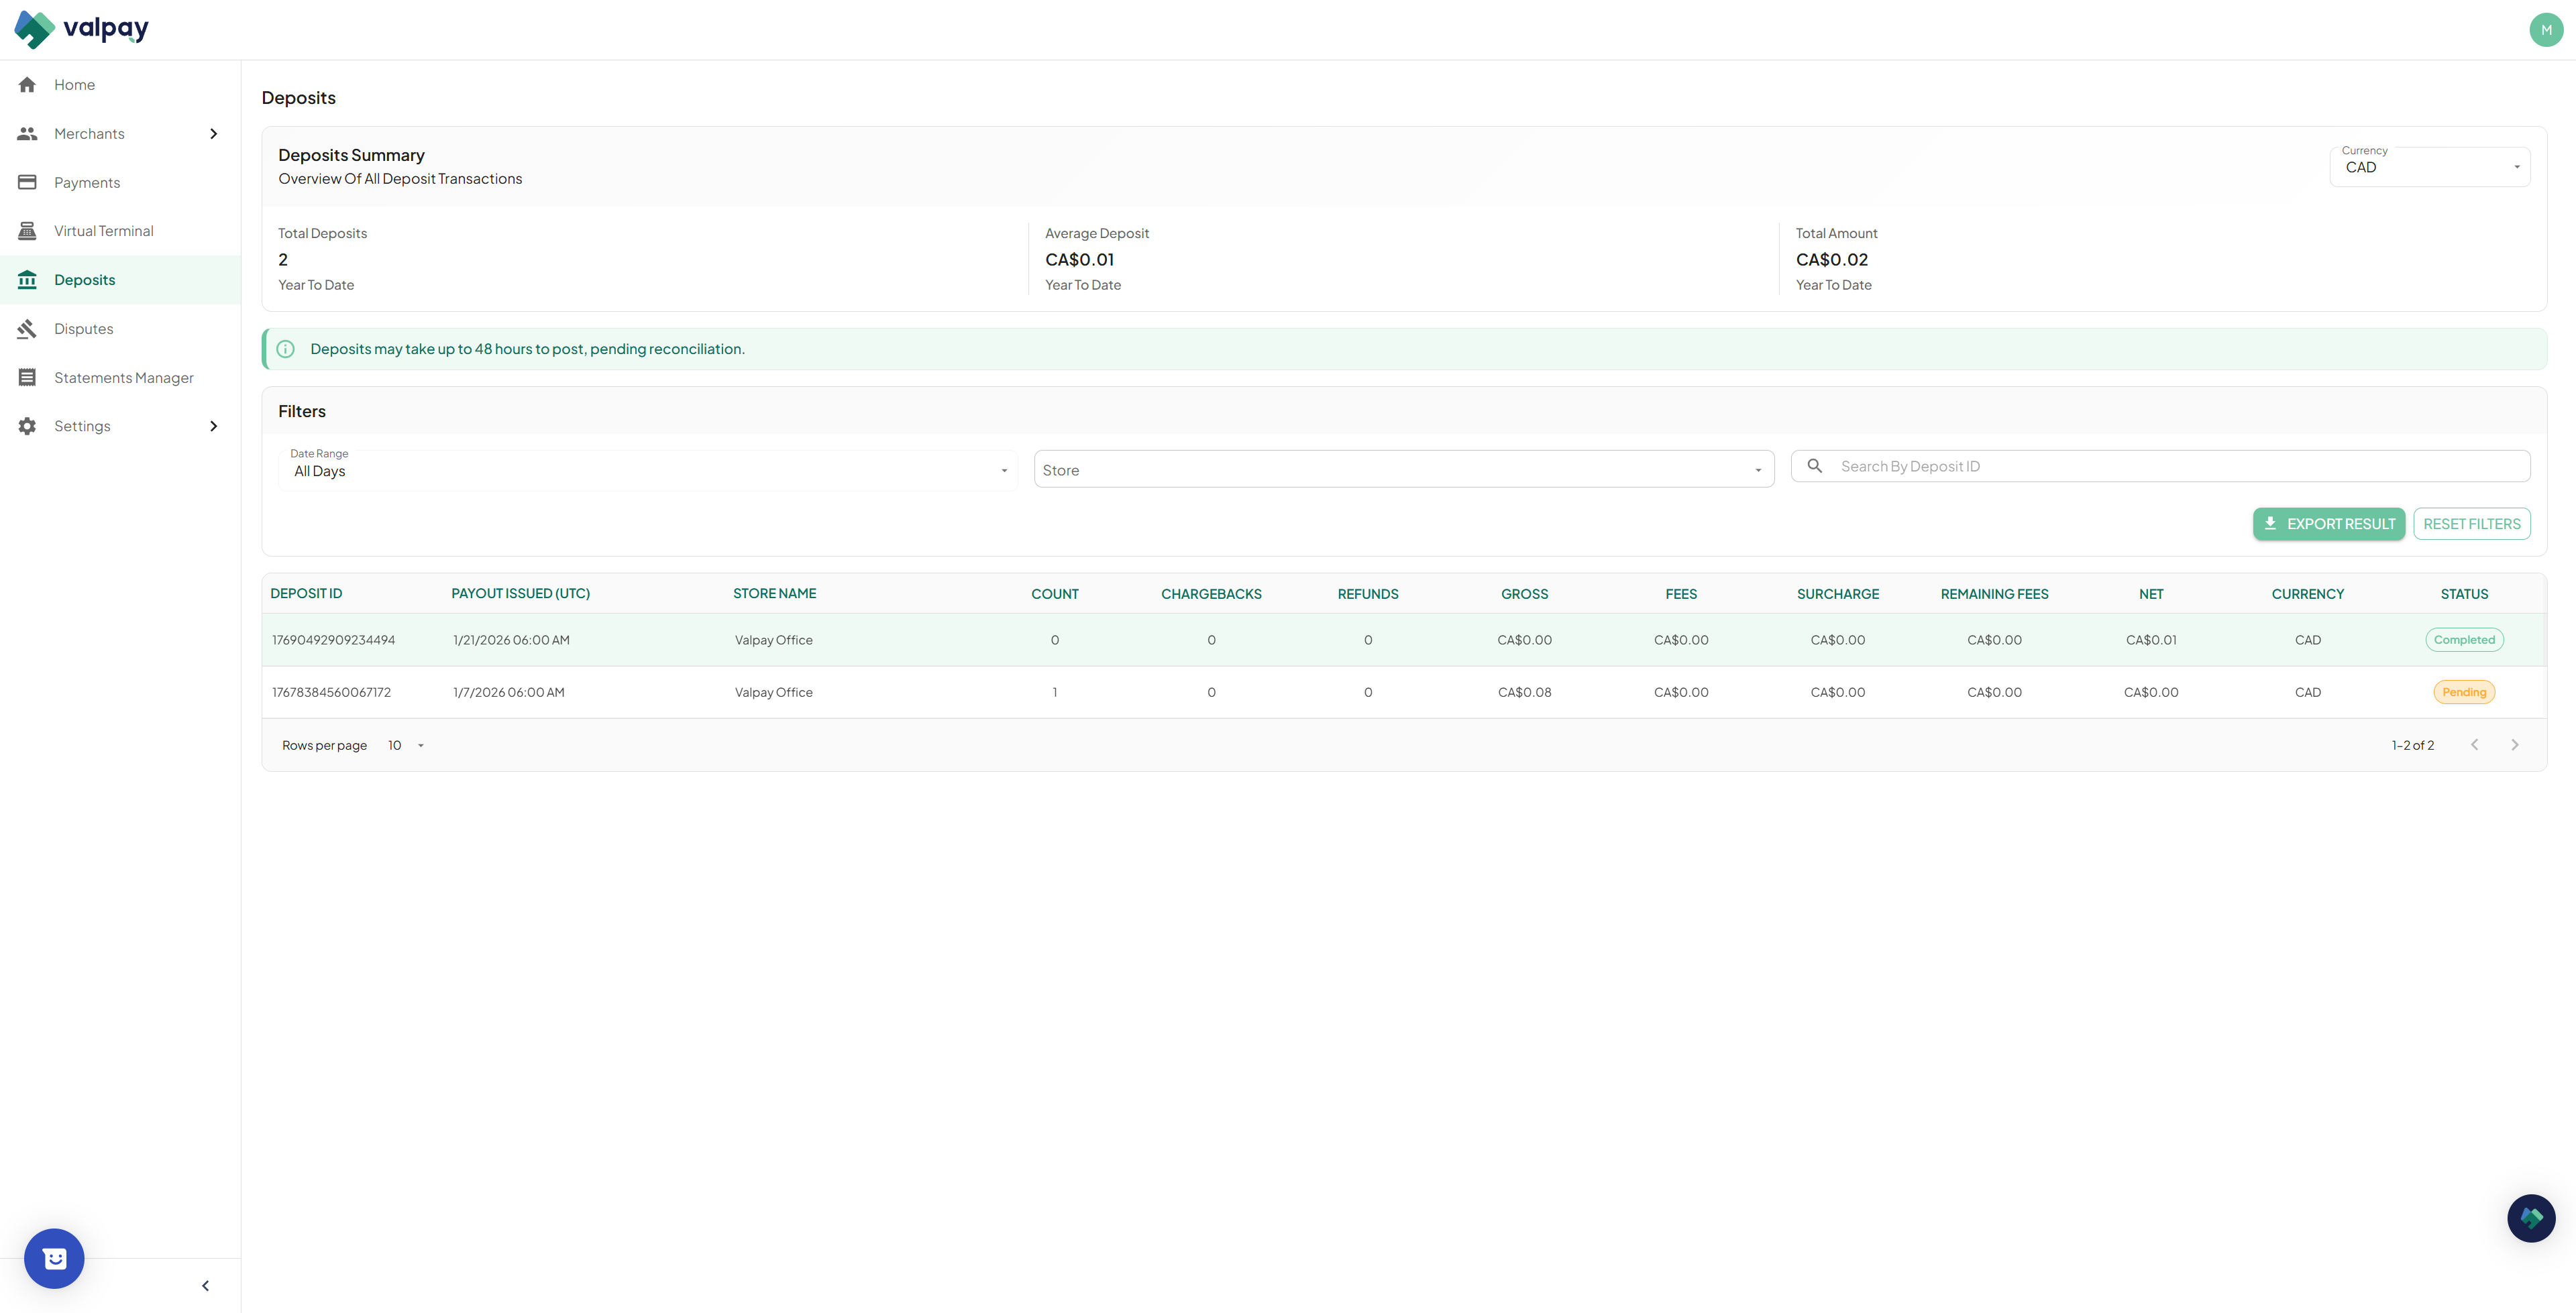
5
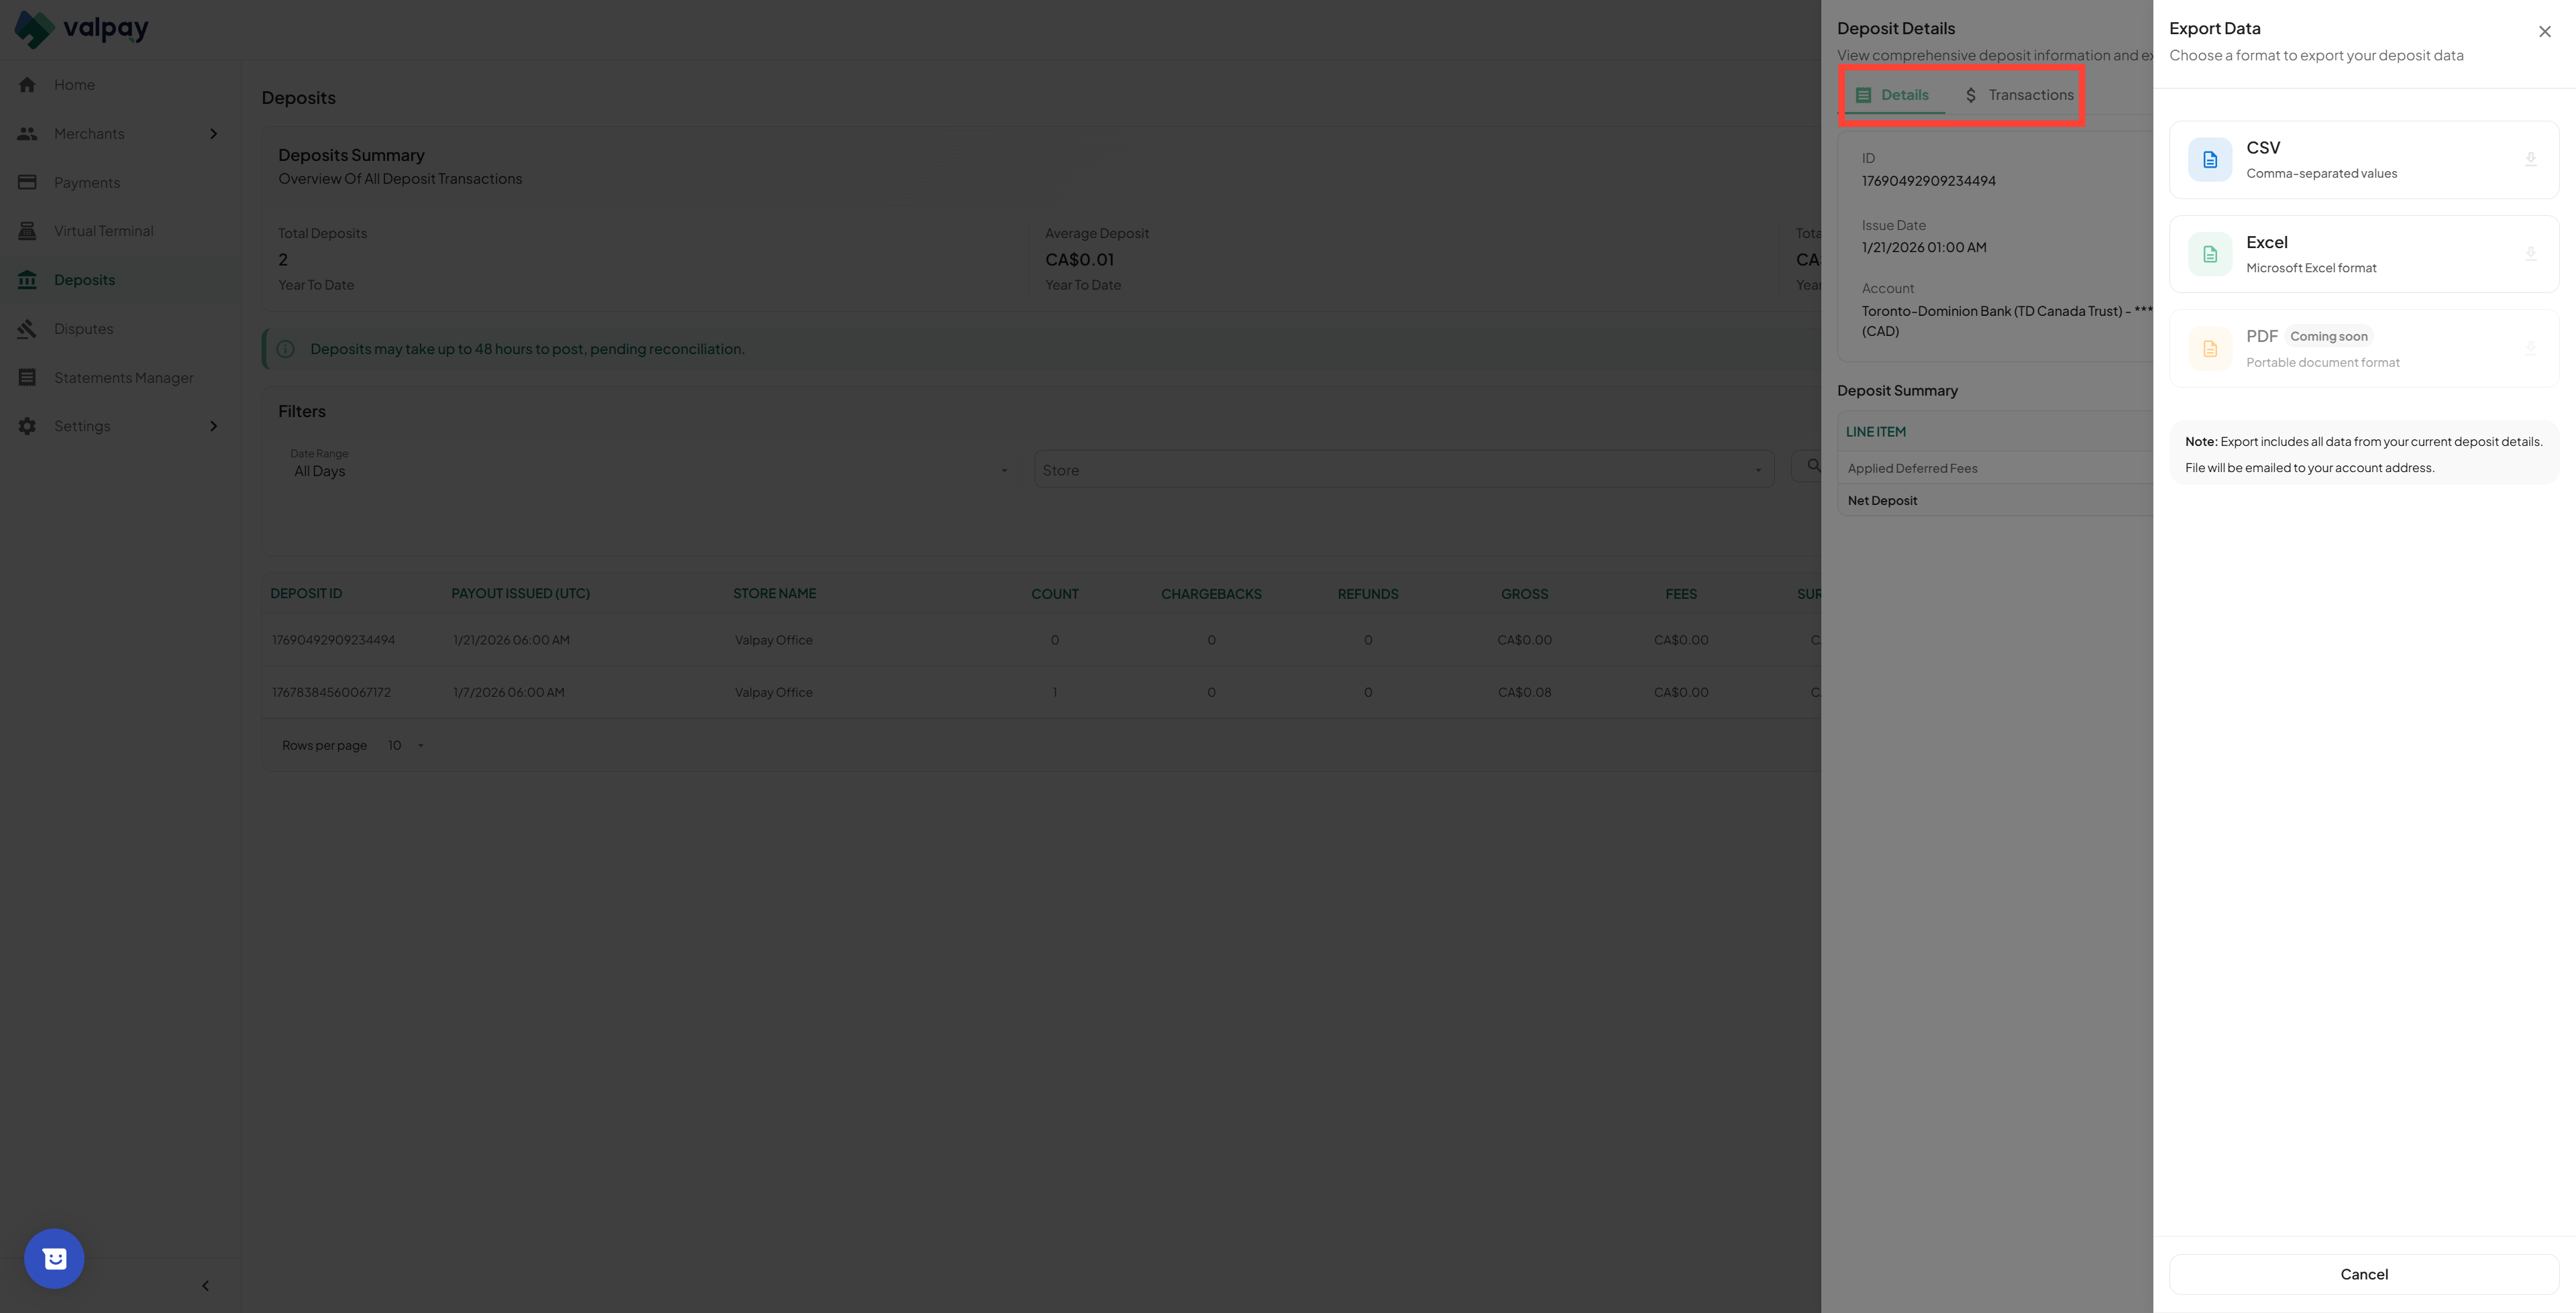
Click into a stuck application and go to the Onboarding tab to review pending documents and resend the service agreement link.
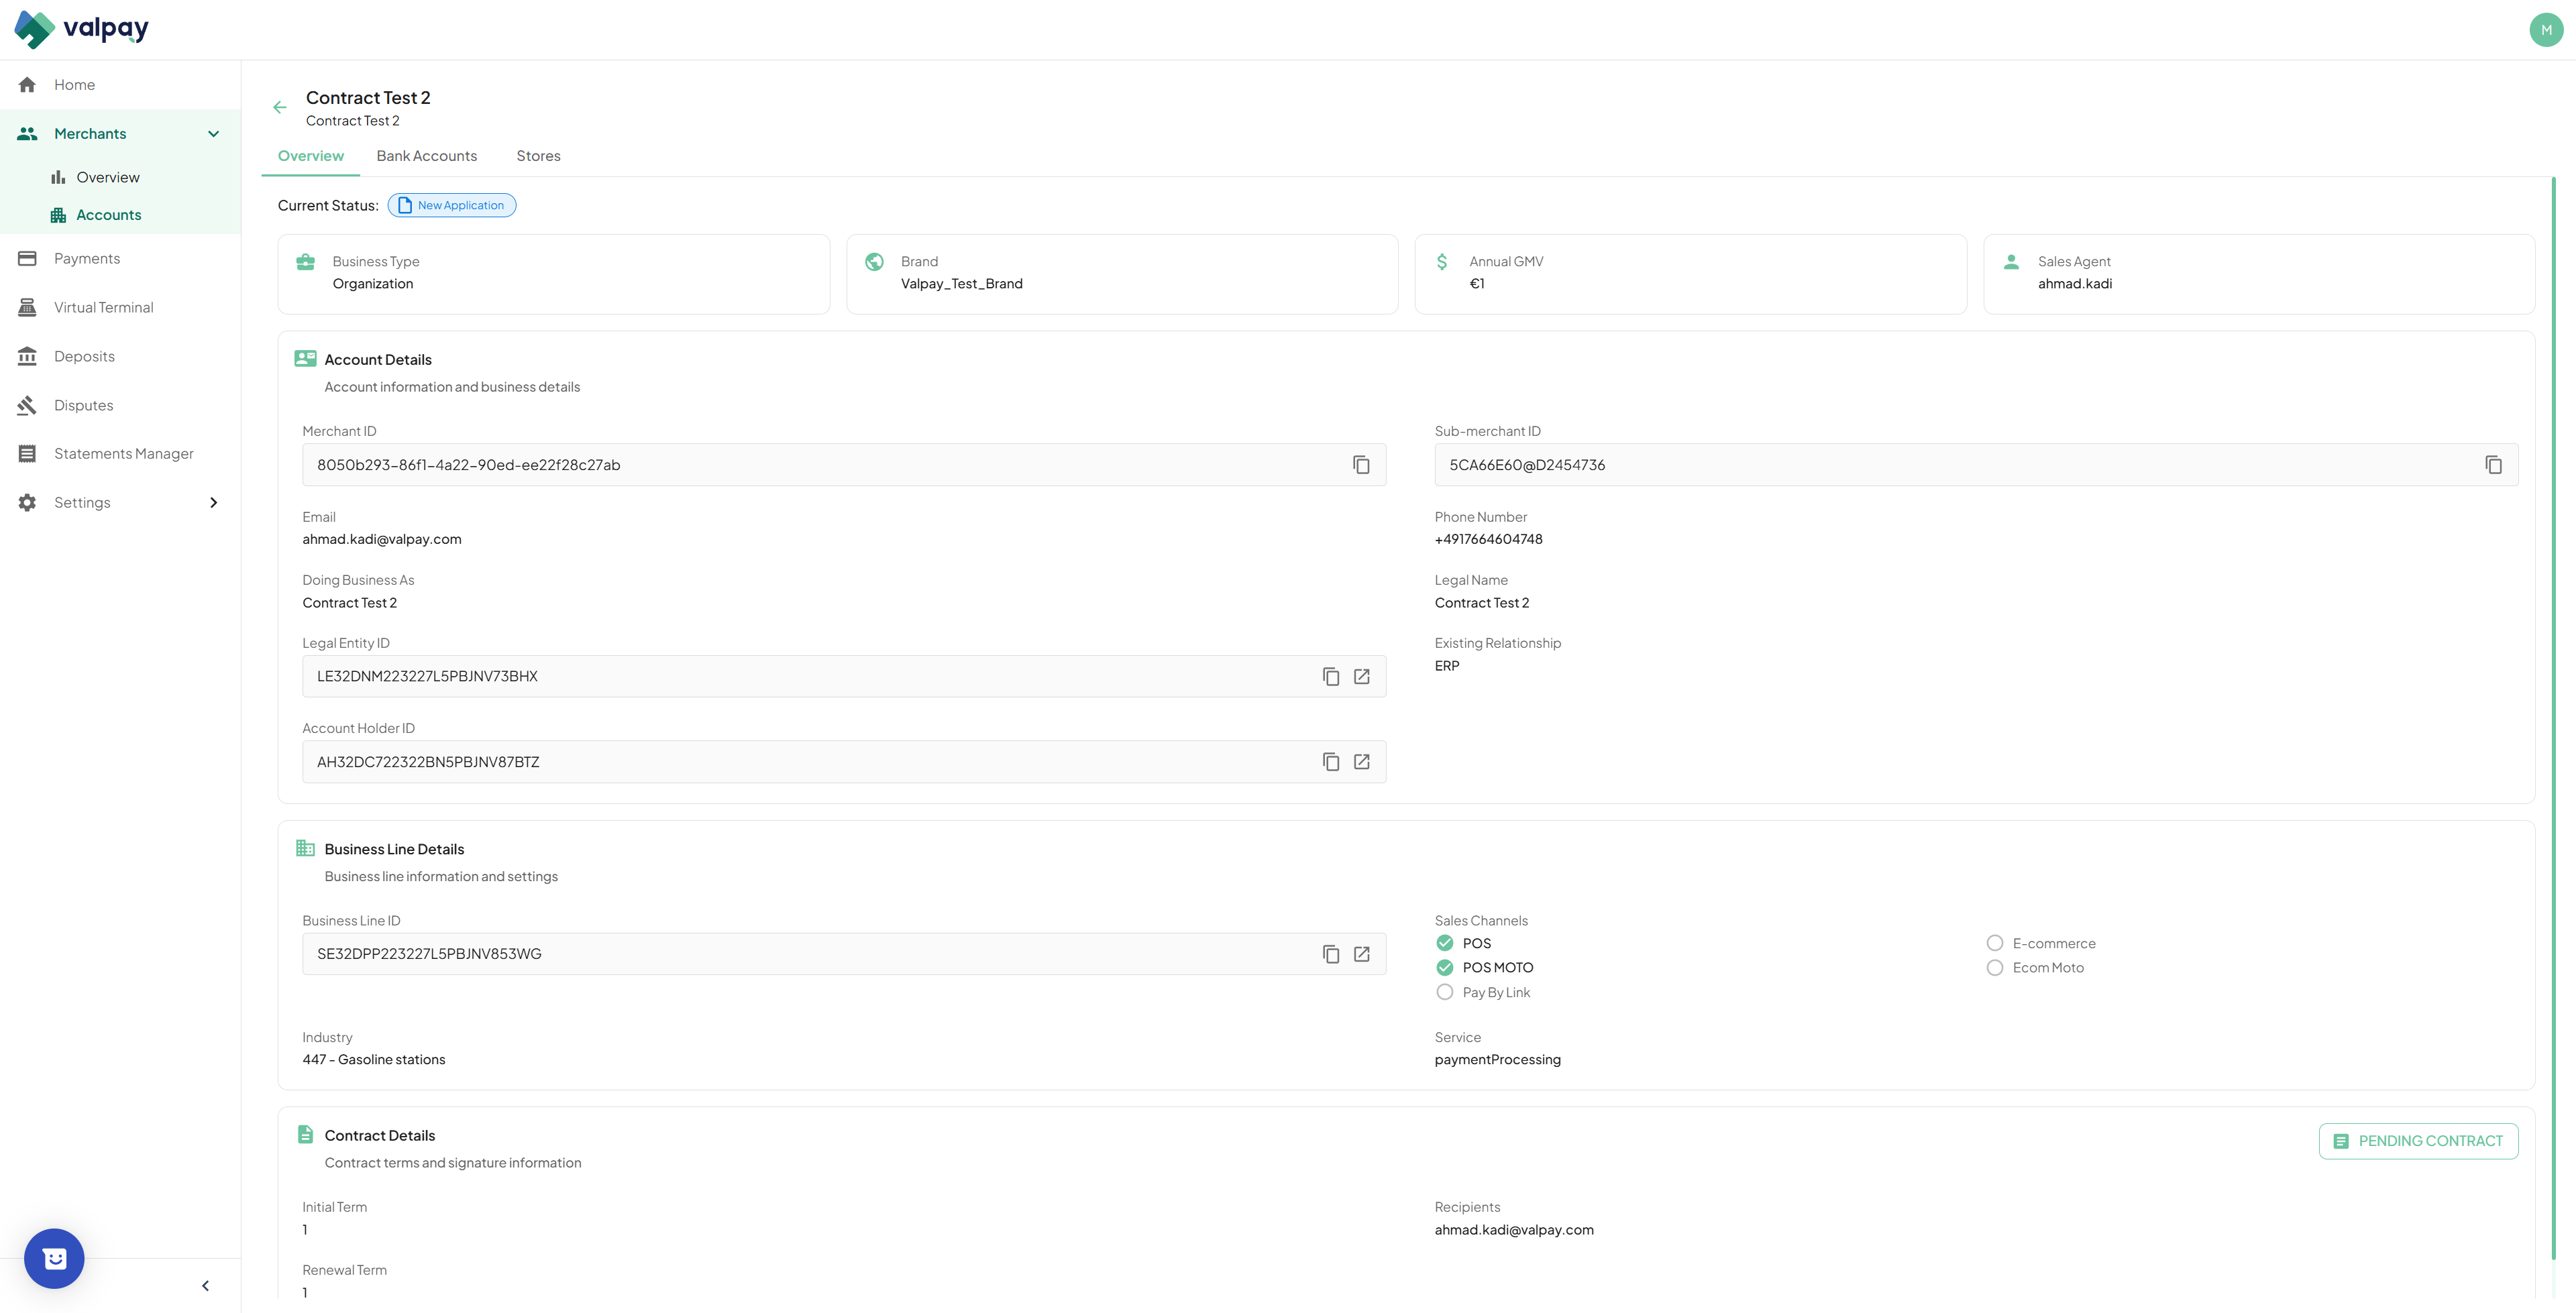
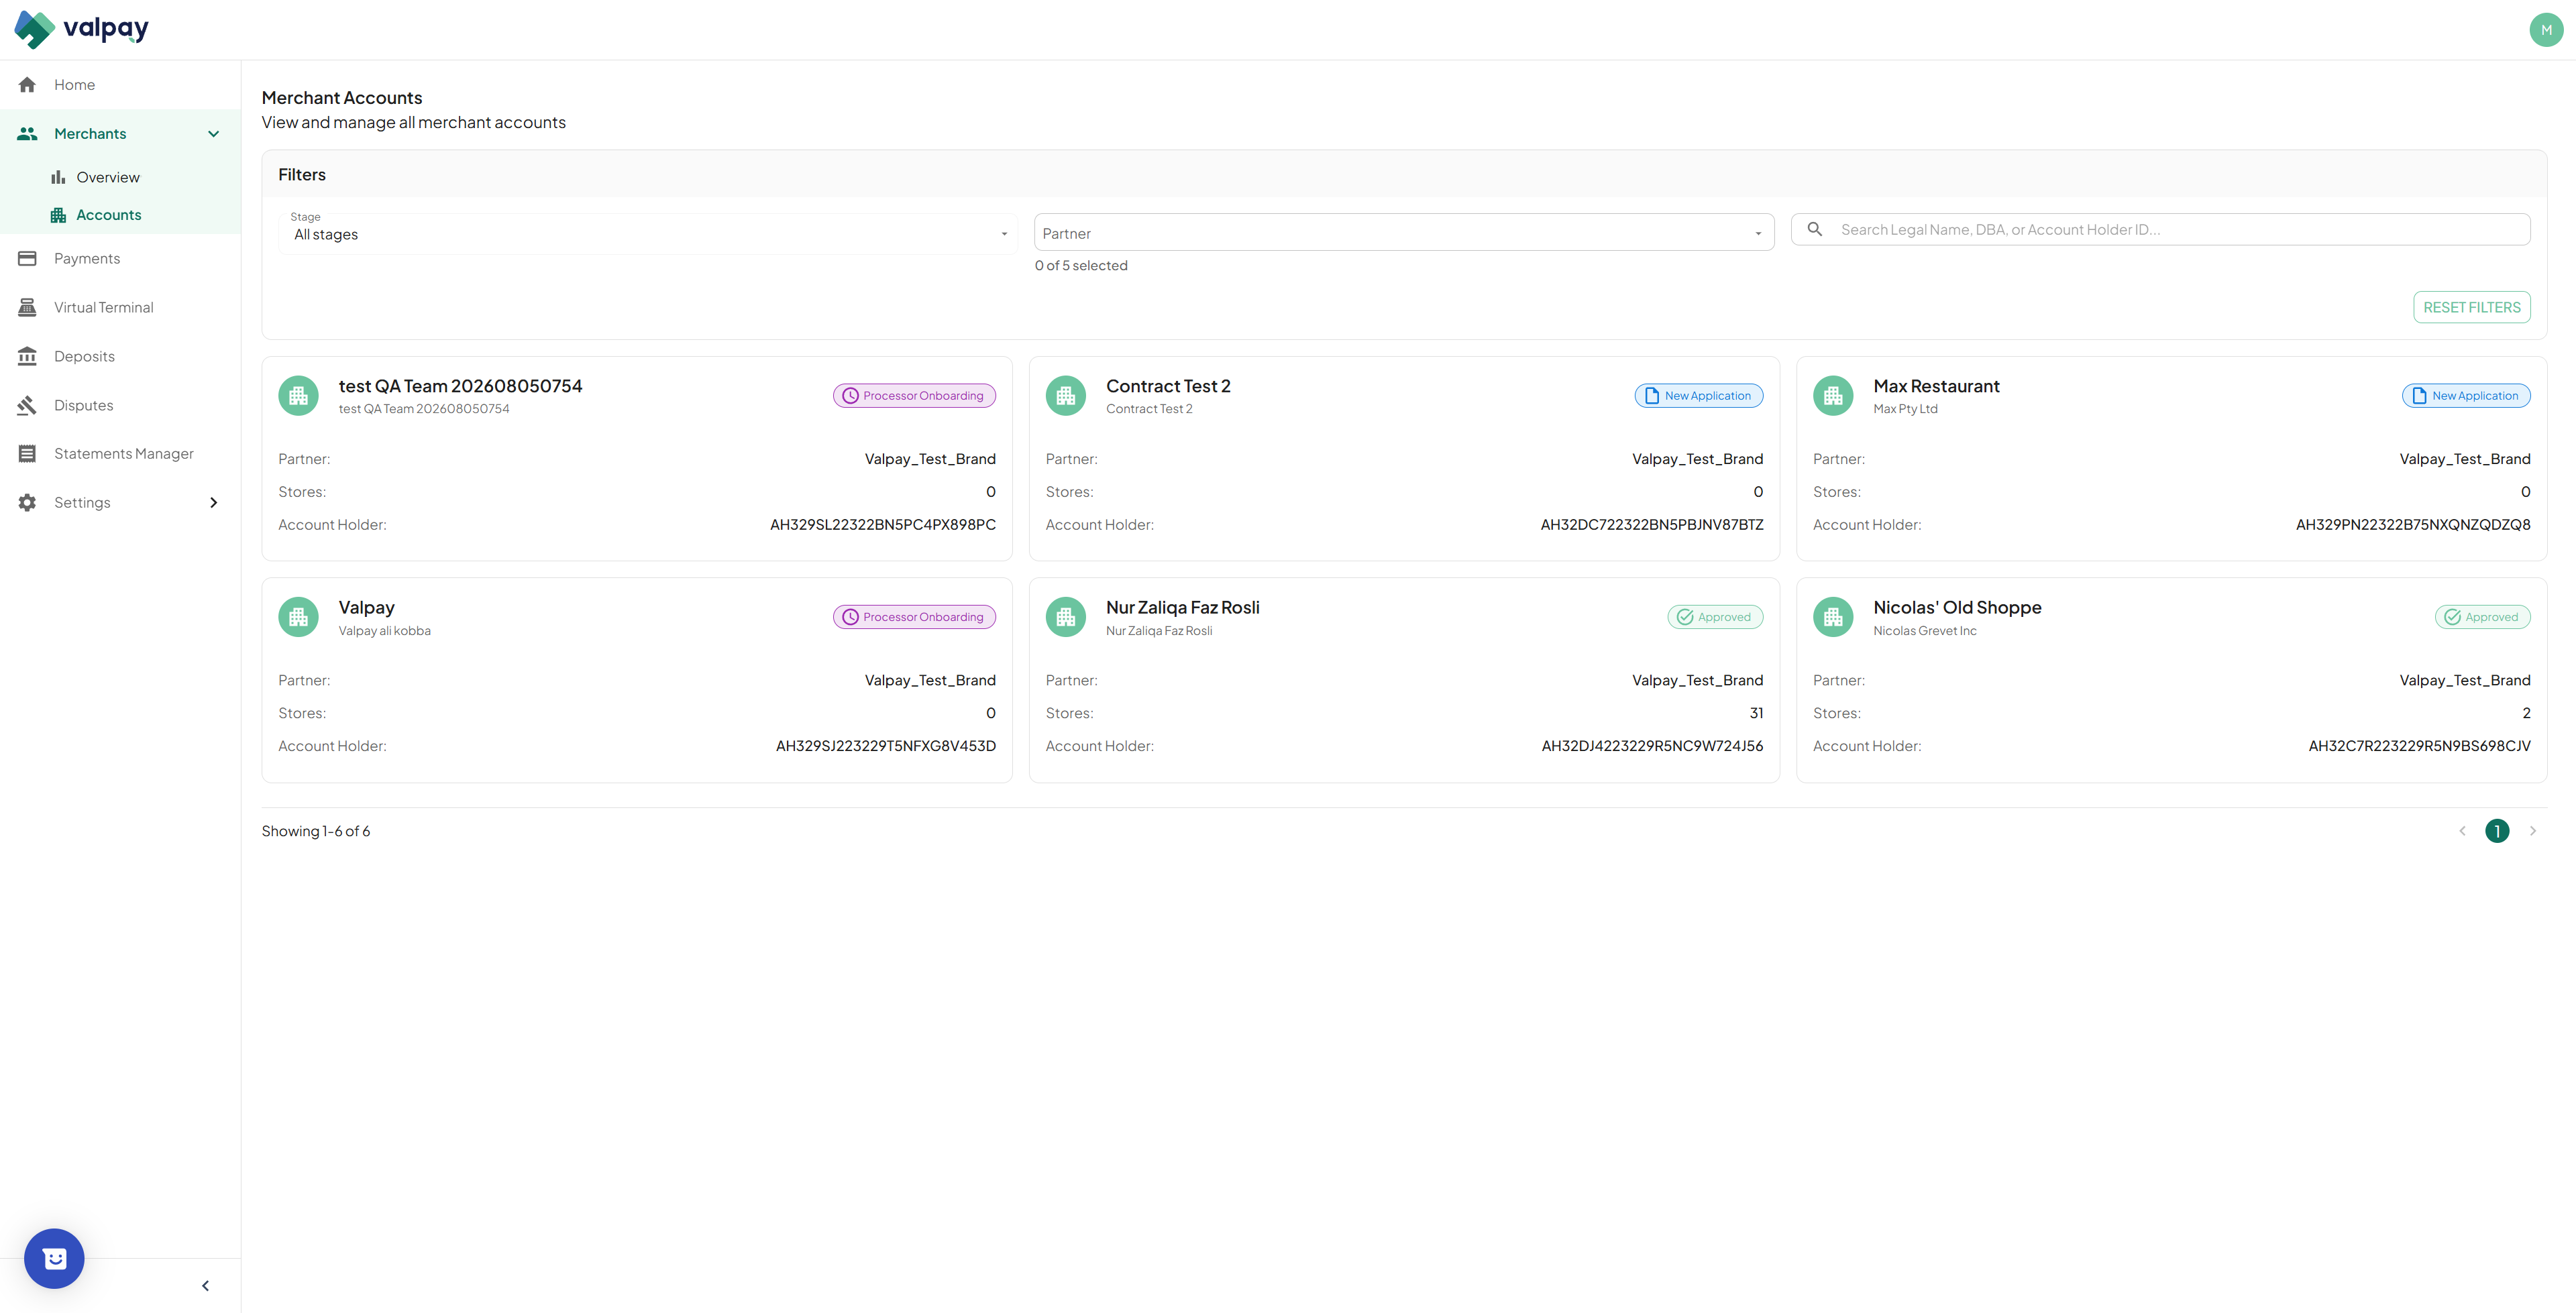
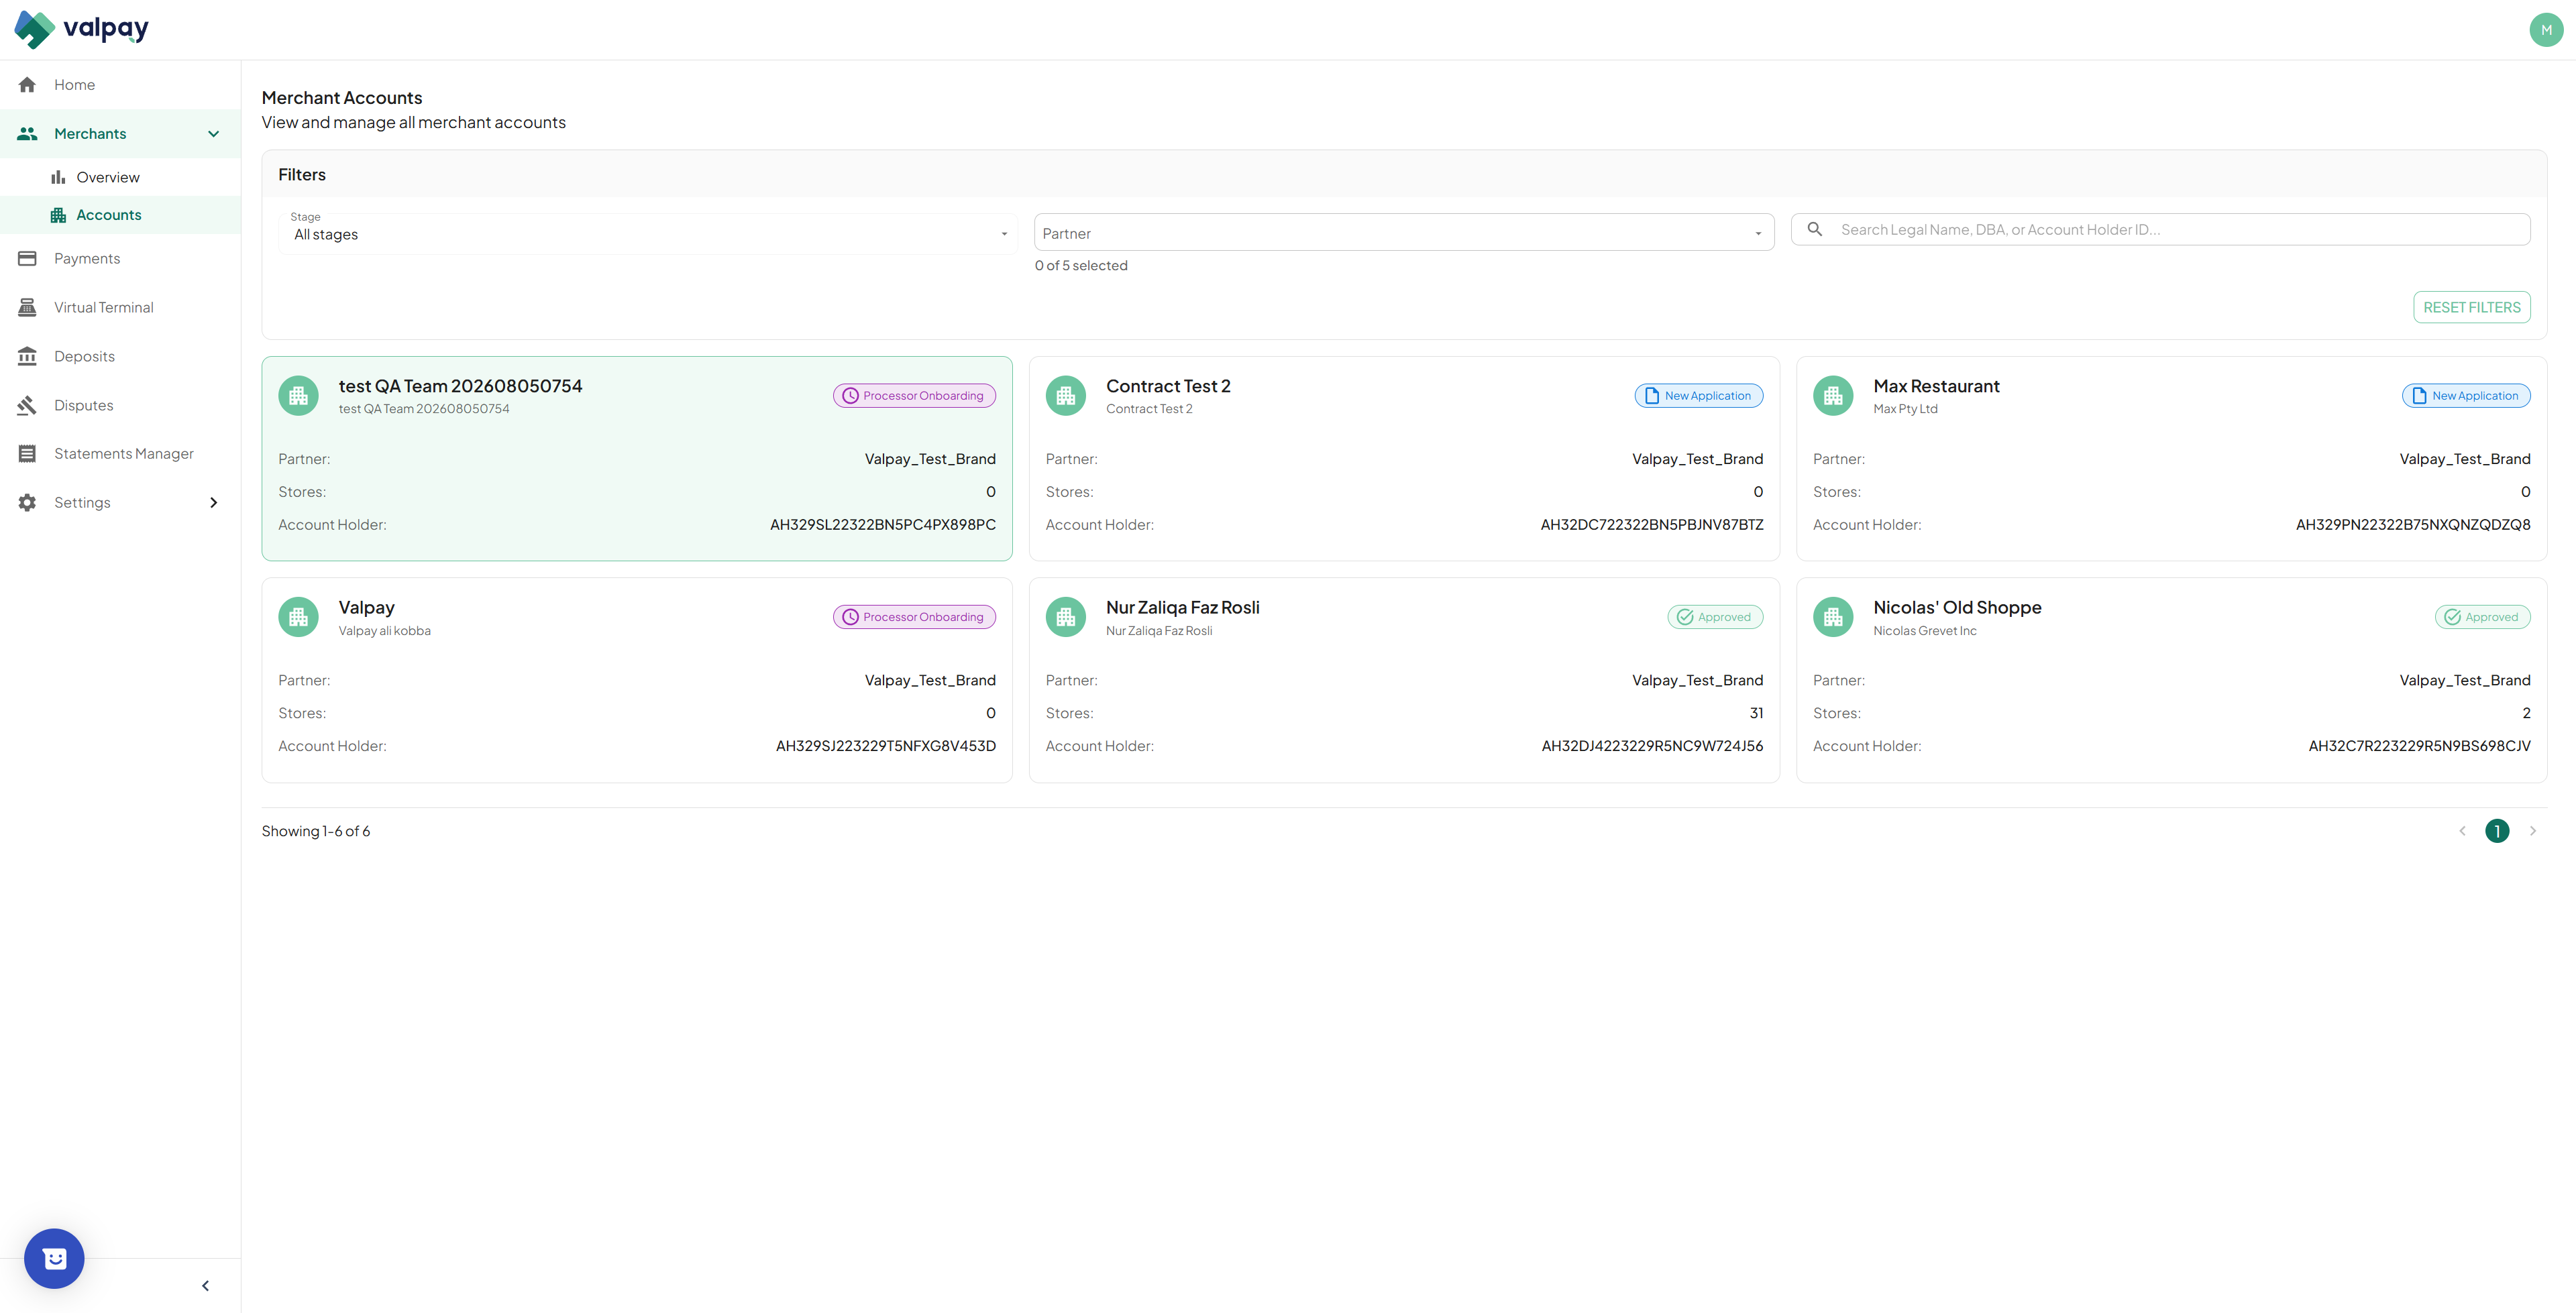
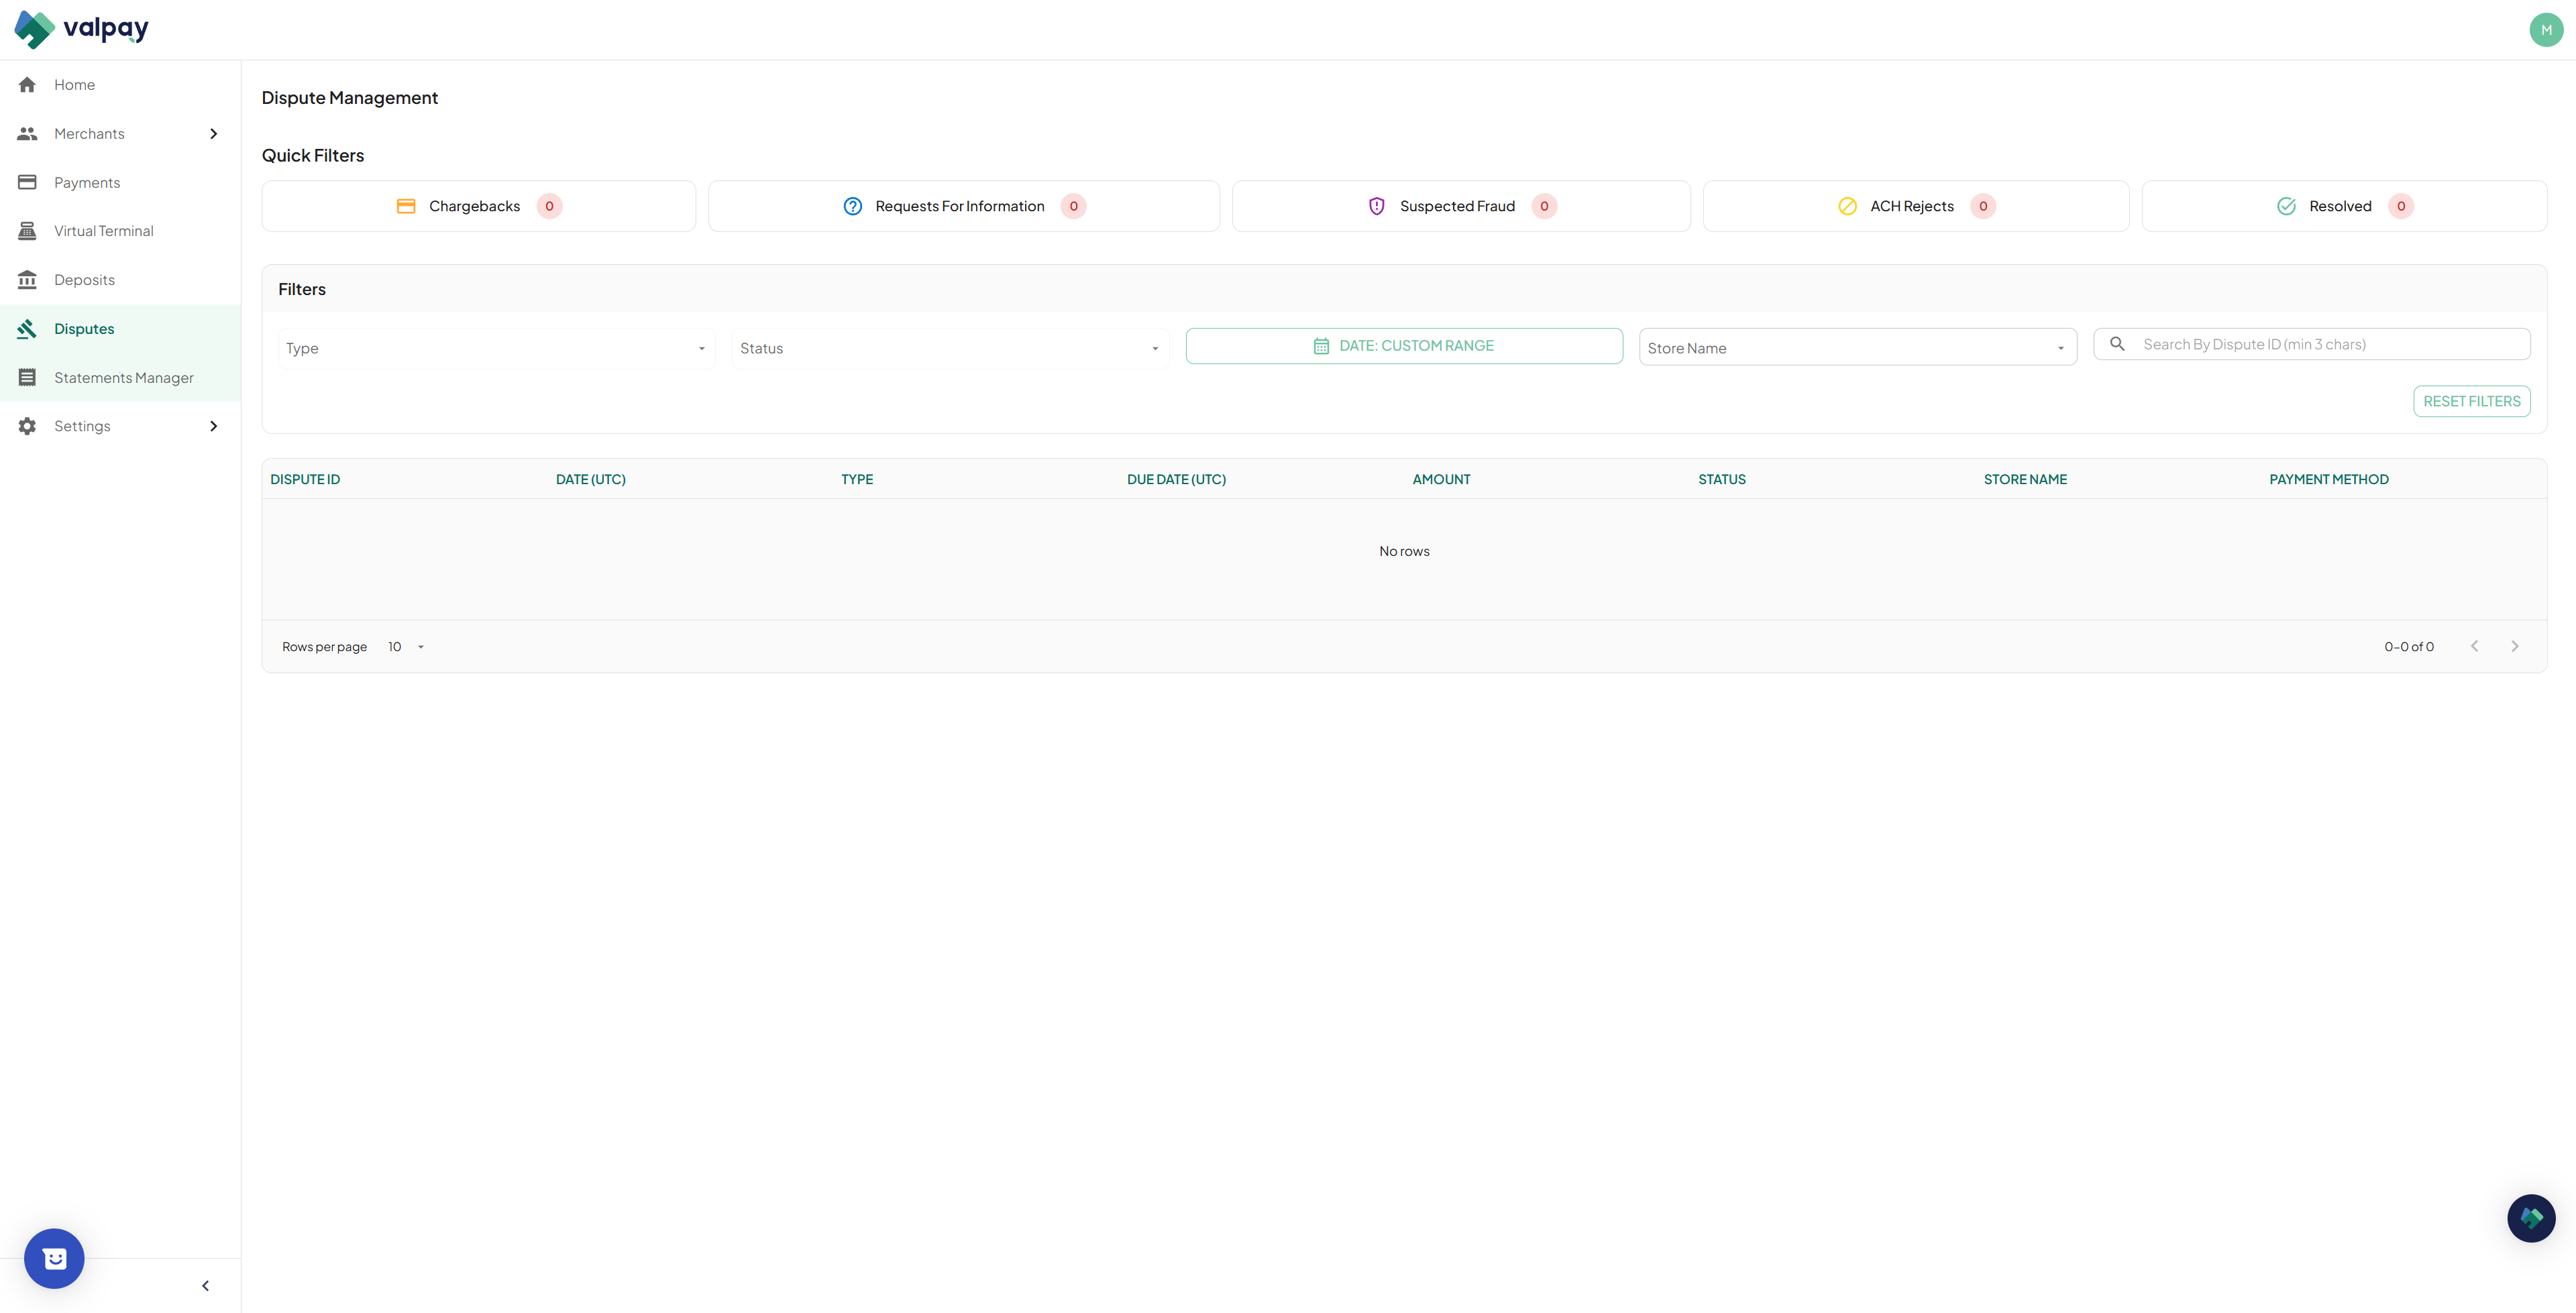
Accounts and Store Configuration
The Accounts tab contains your merchant accounts. From here, you can configure their specific stores, financial routing, and payment methods.
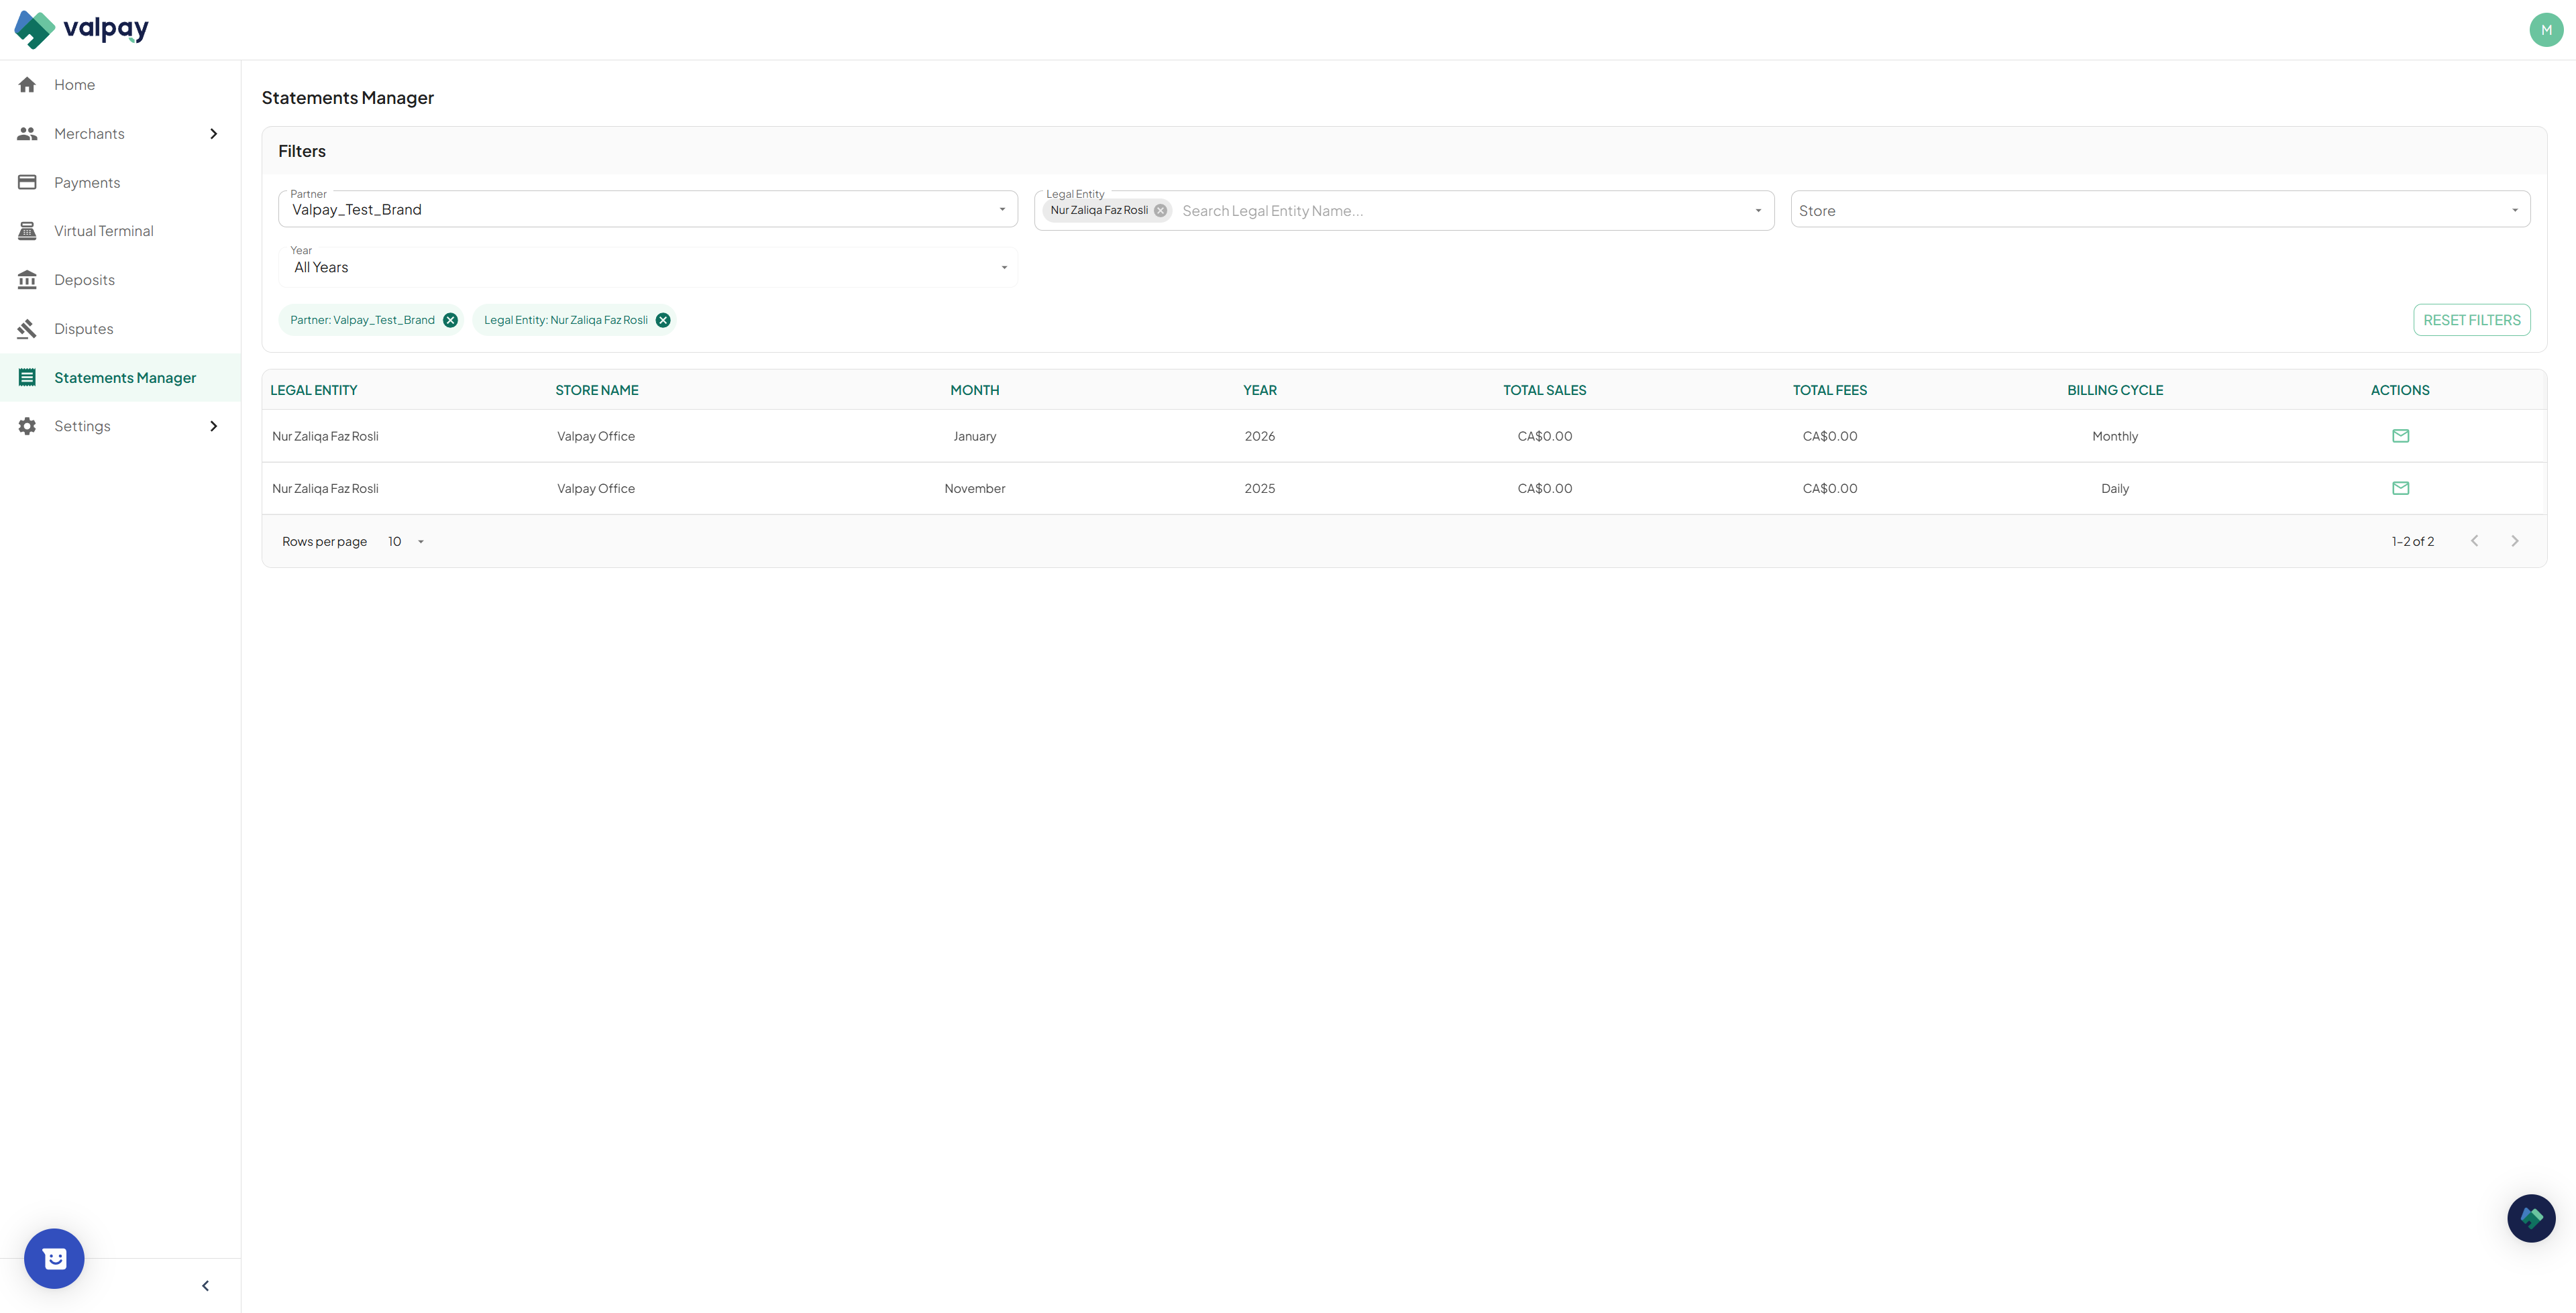
6
Navigate to the Accounts tab to view your full list of merchant accounts.
7
Filter the accounts by stage, select a partner, or search by legal name, DBA, or account holder ID.
8
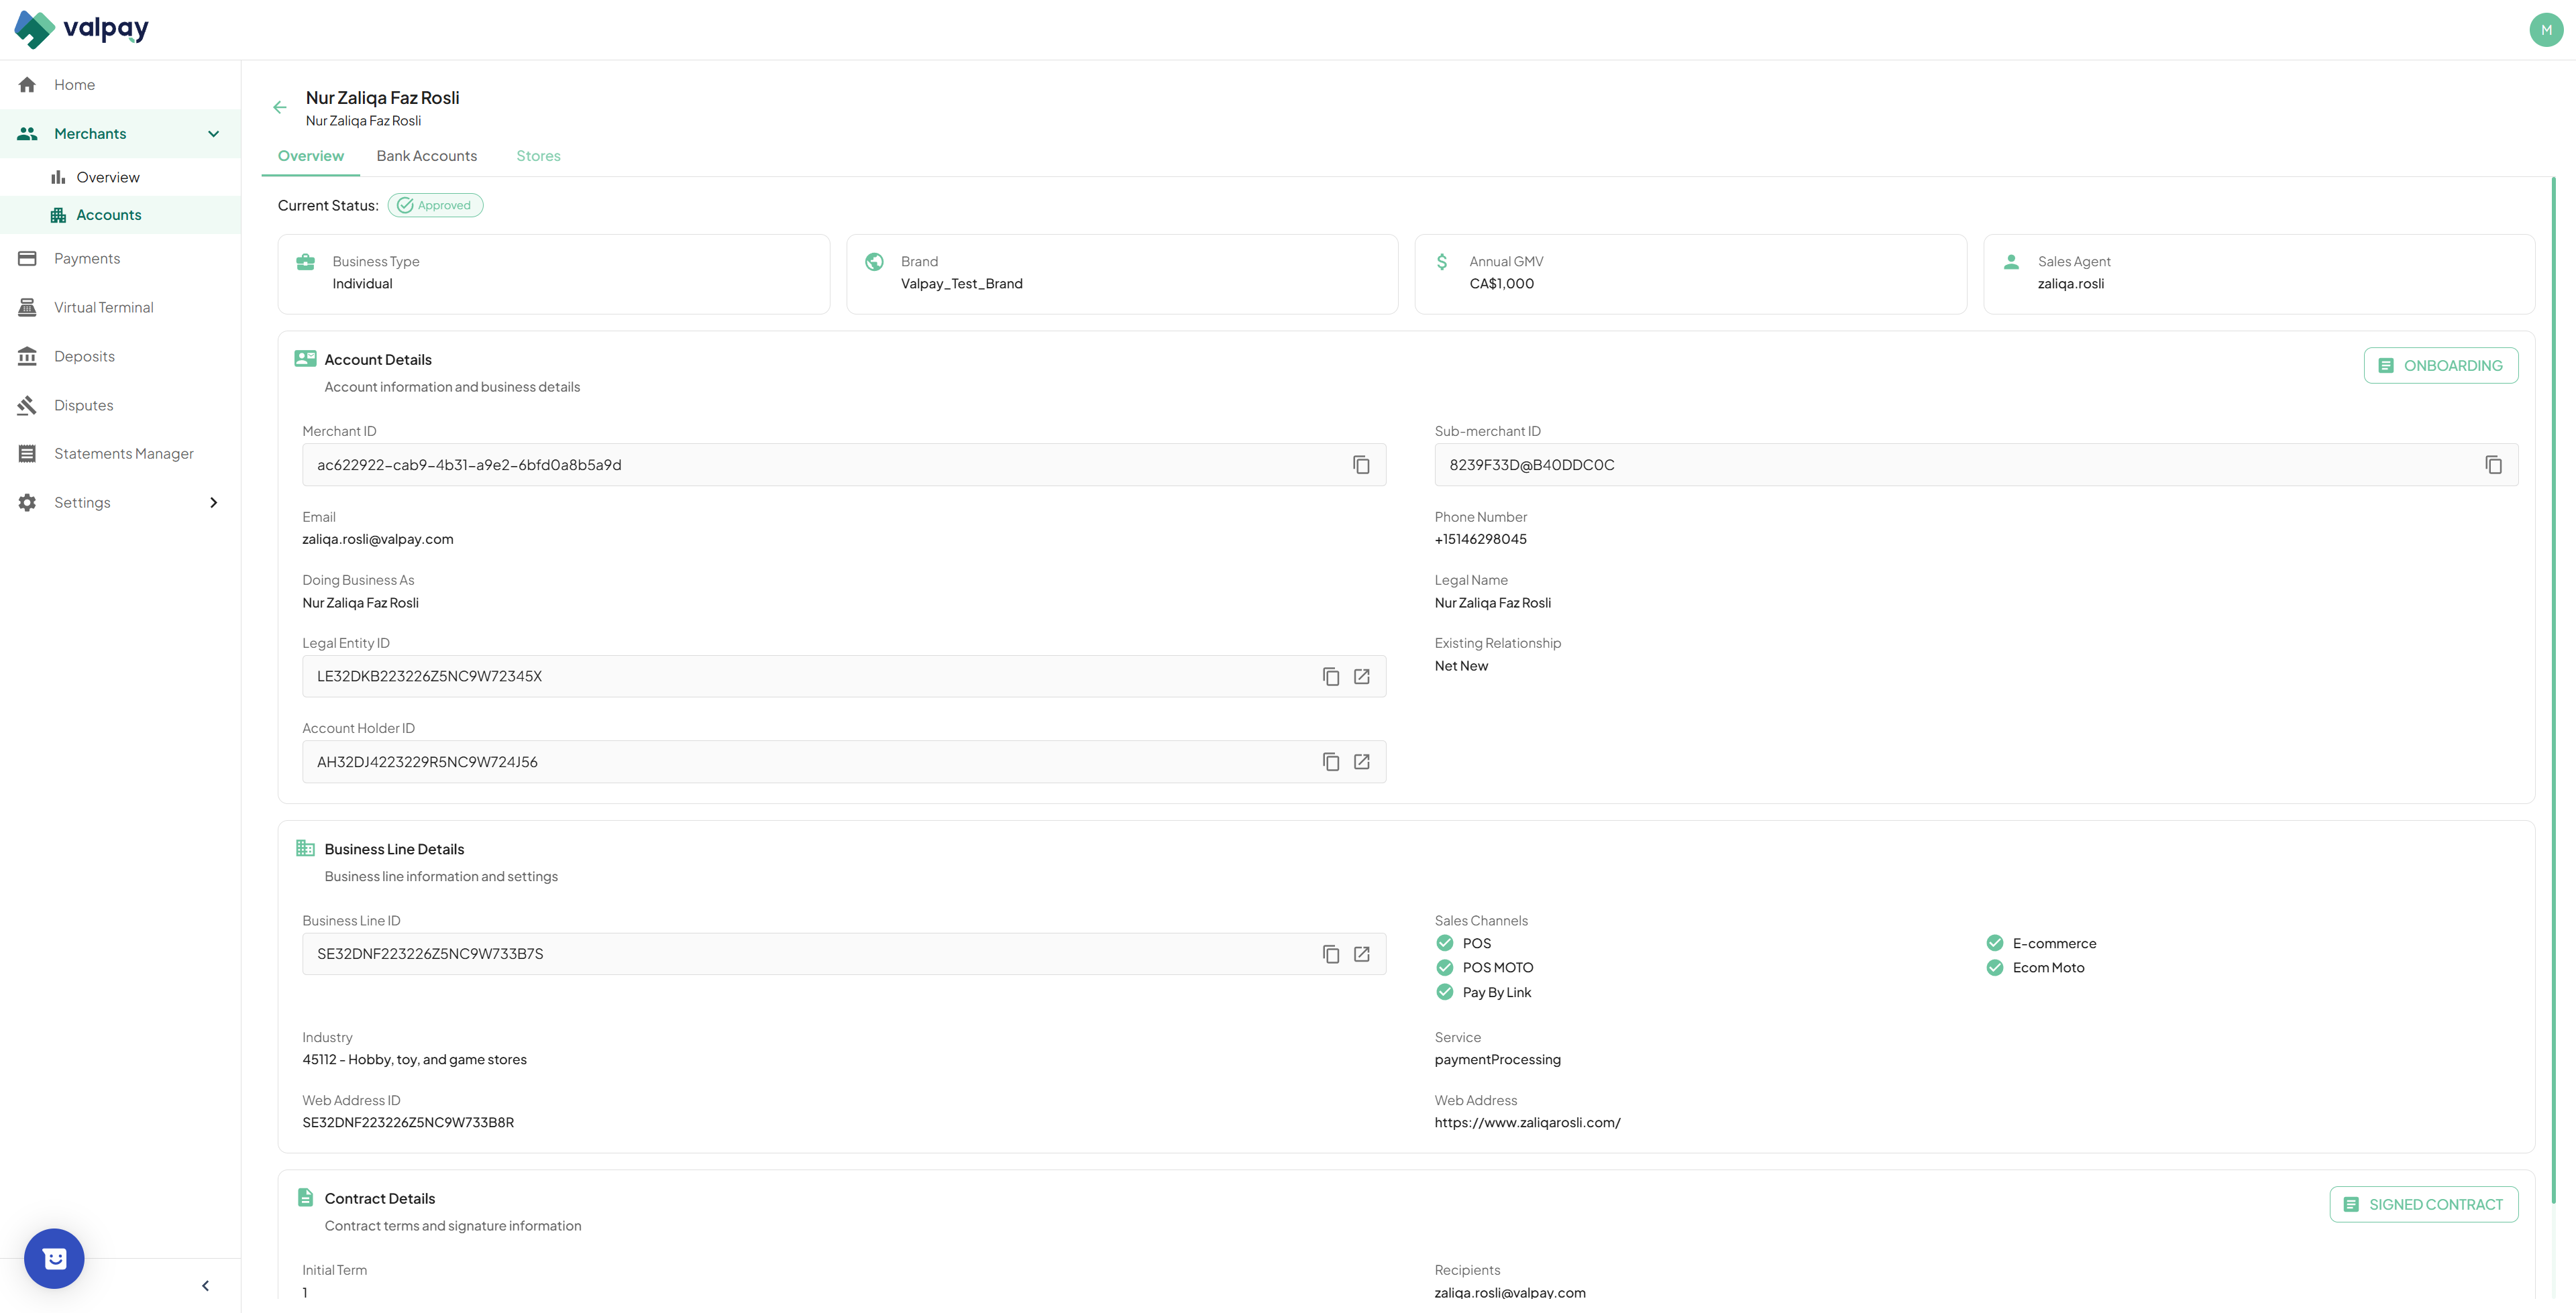
Click an account card to view its onboarding status, assigned bank accounts, and linked stores.
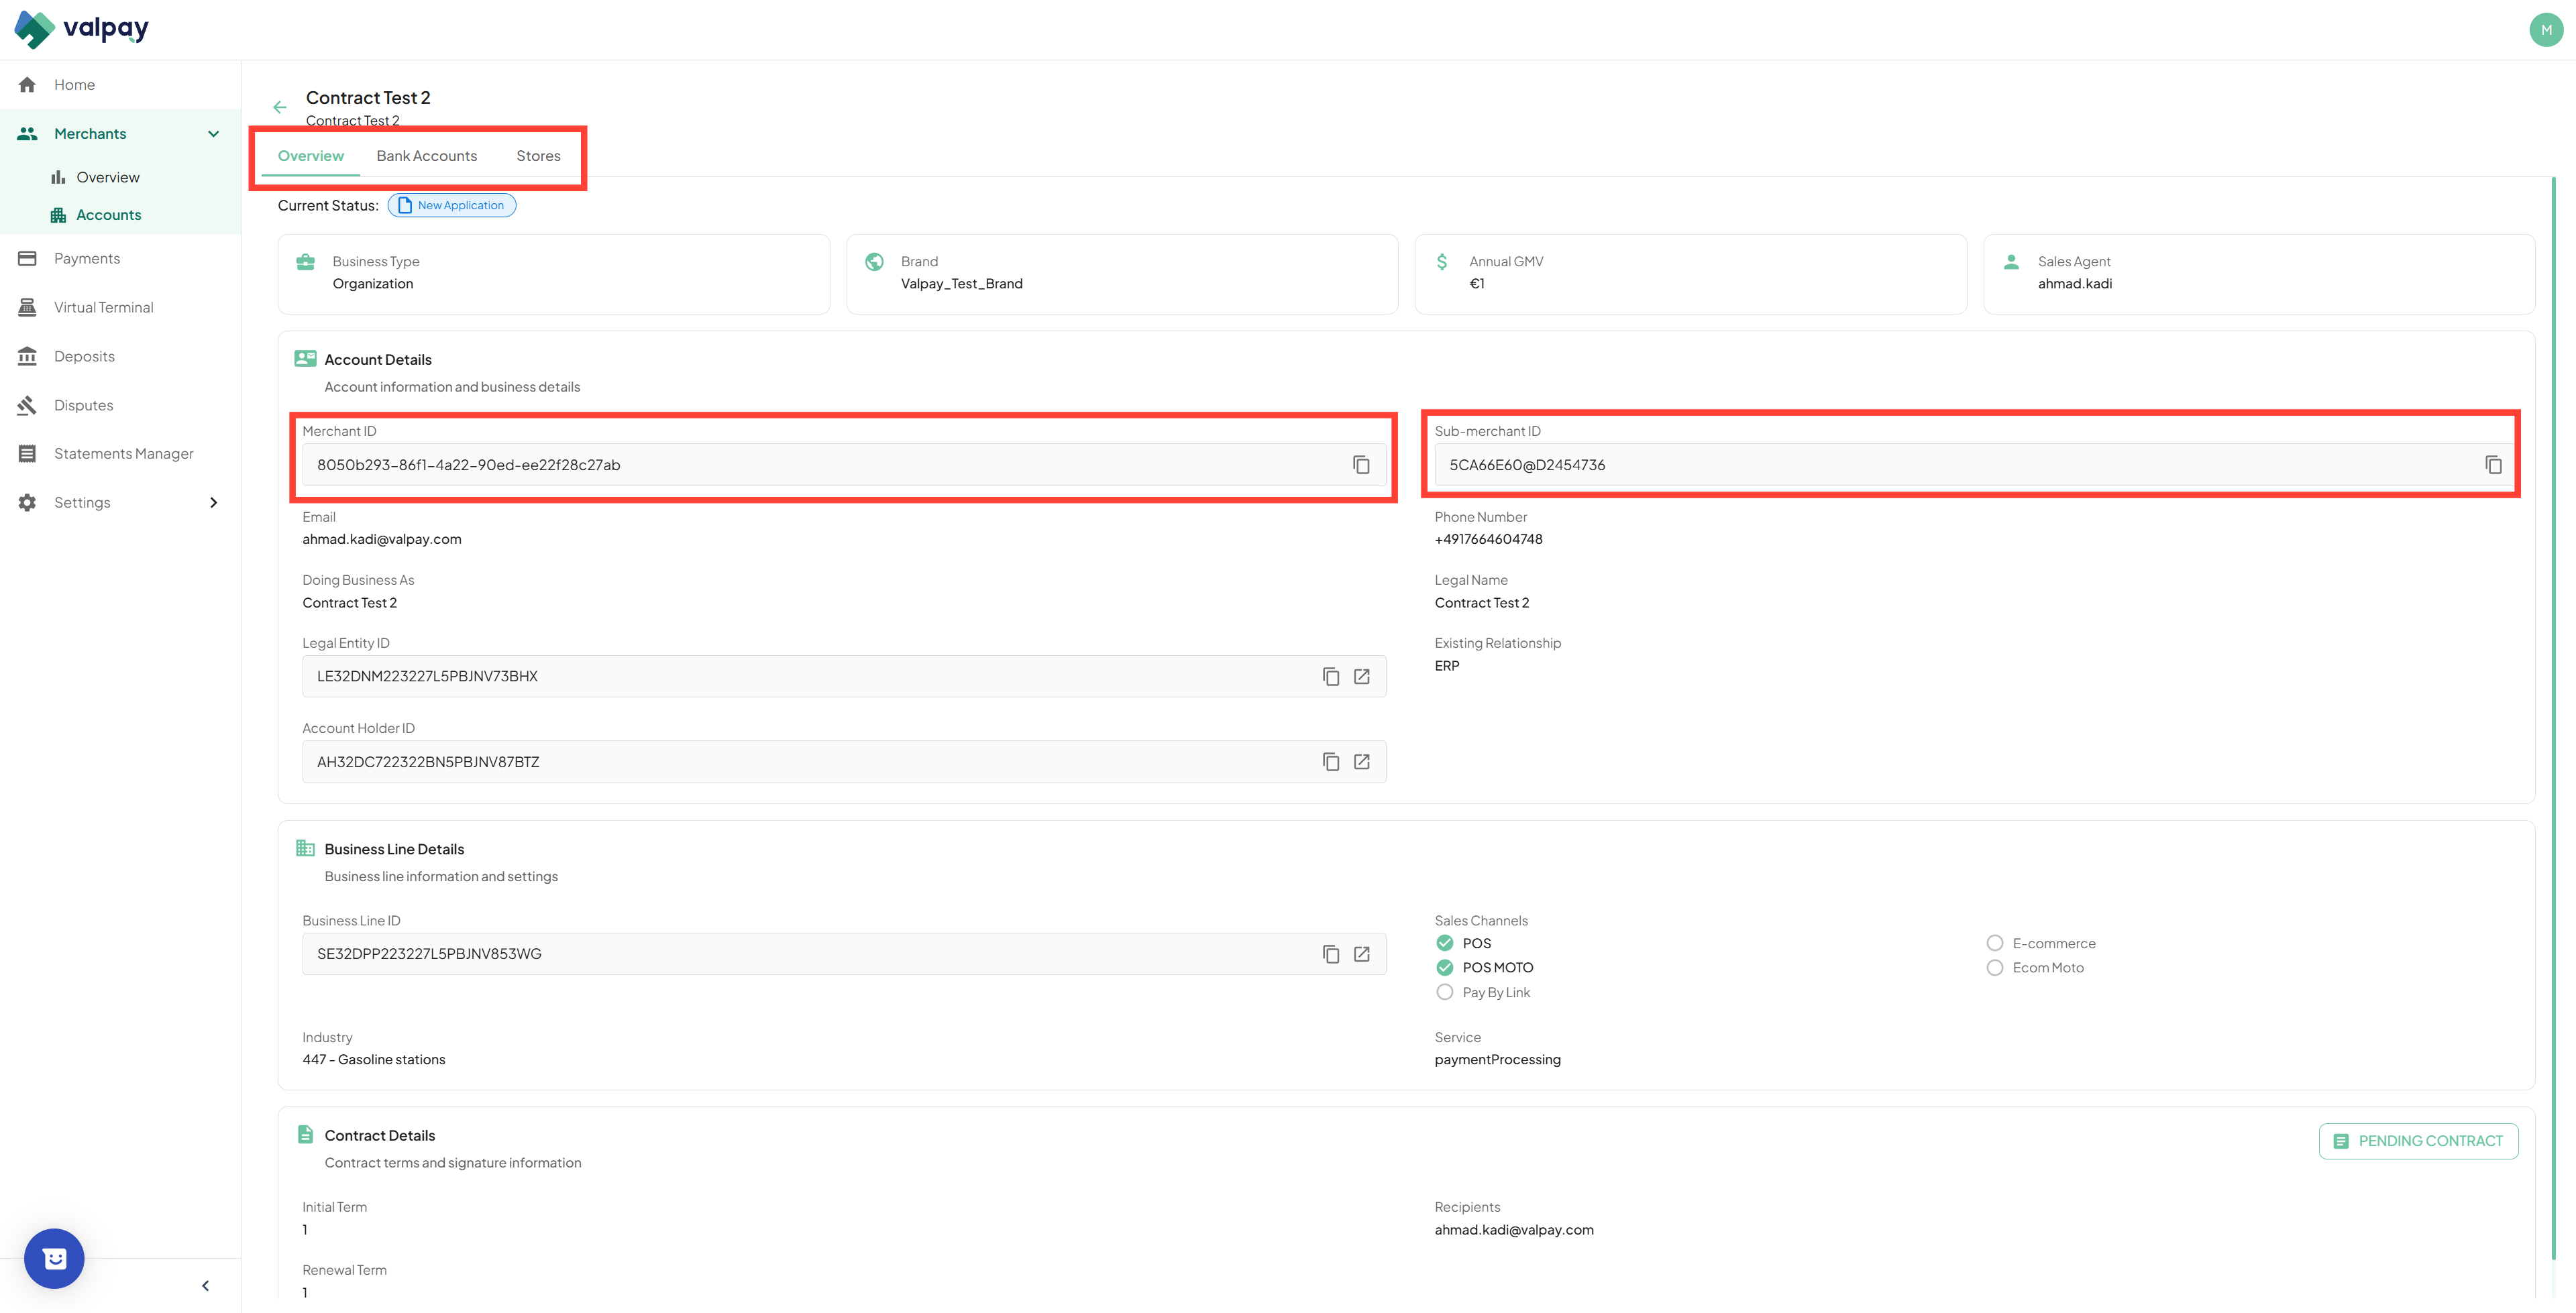
9
At the top of each merchant you can see their Overview which will show their contract and Onboarding shortcut, Bank accounts and Stores. For support requests, remember to share your Merchant ID and Sub-Merchant ID.
10
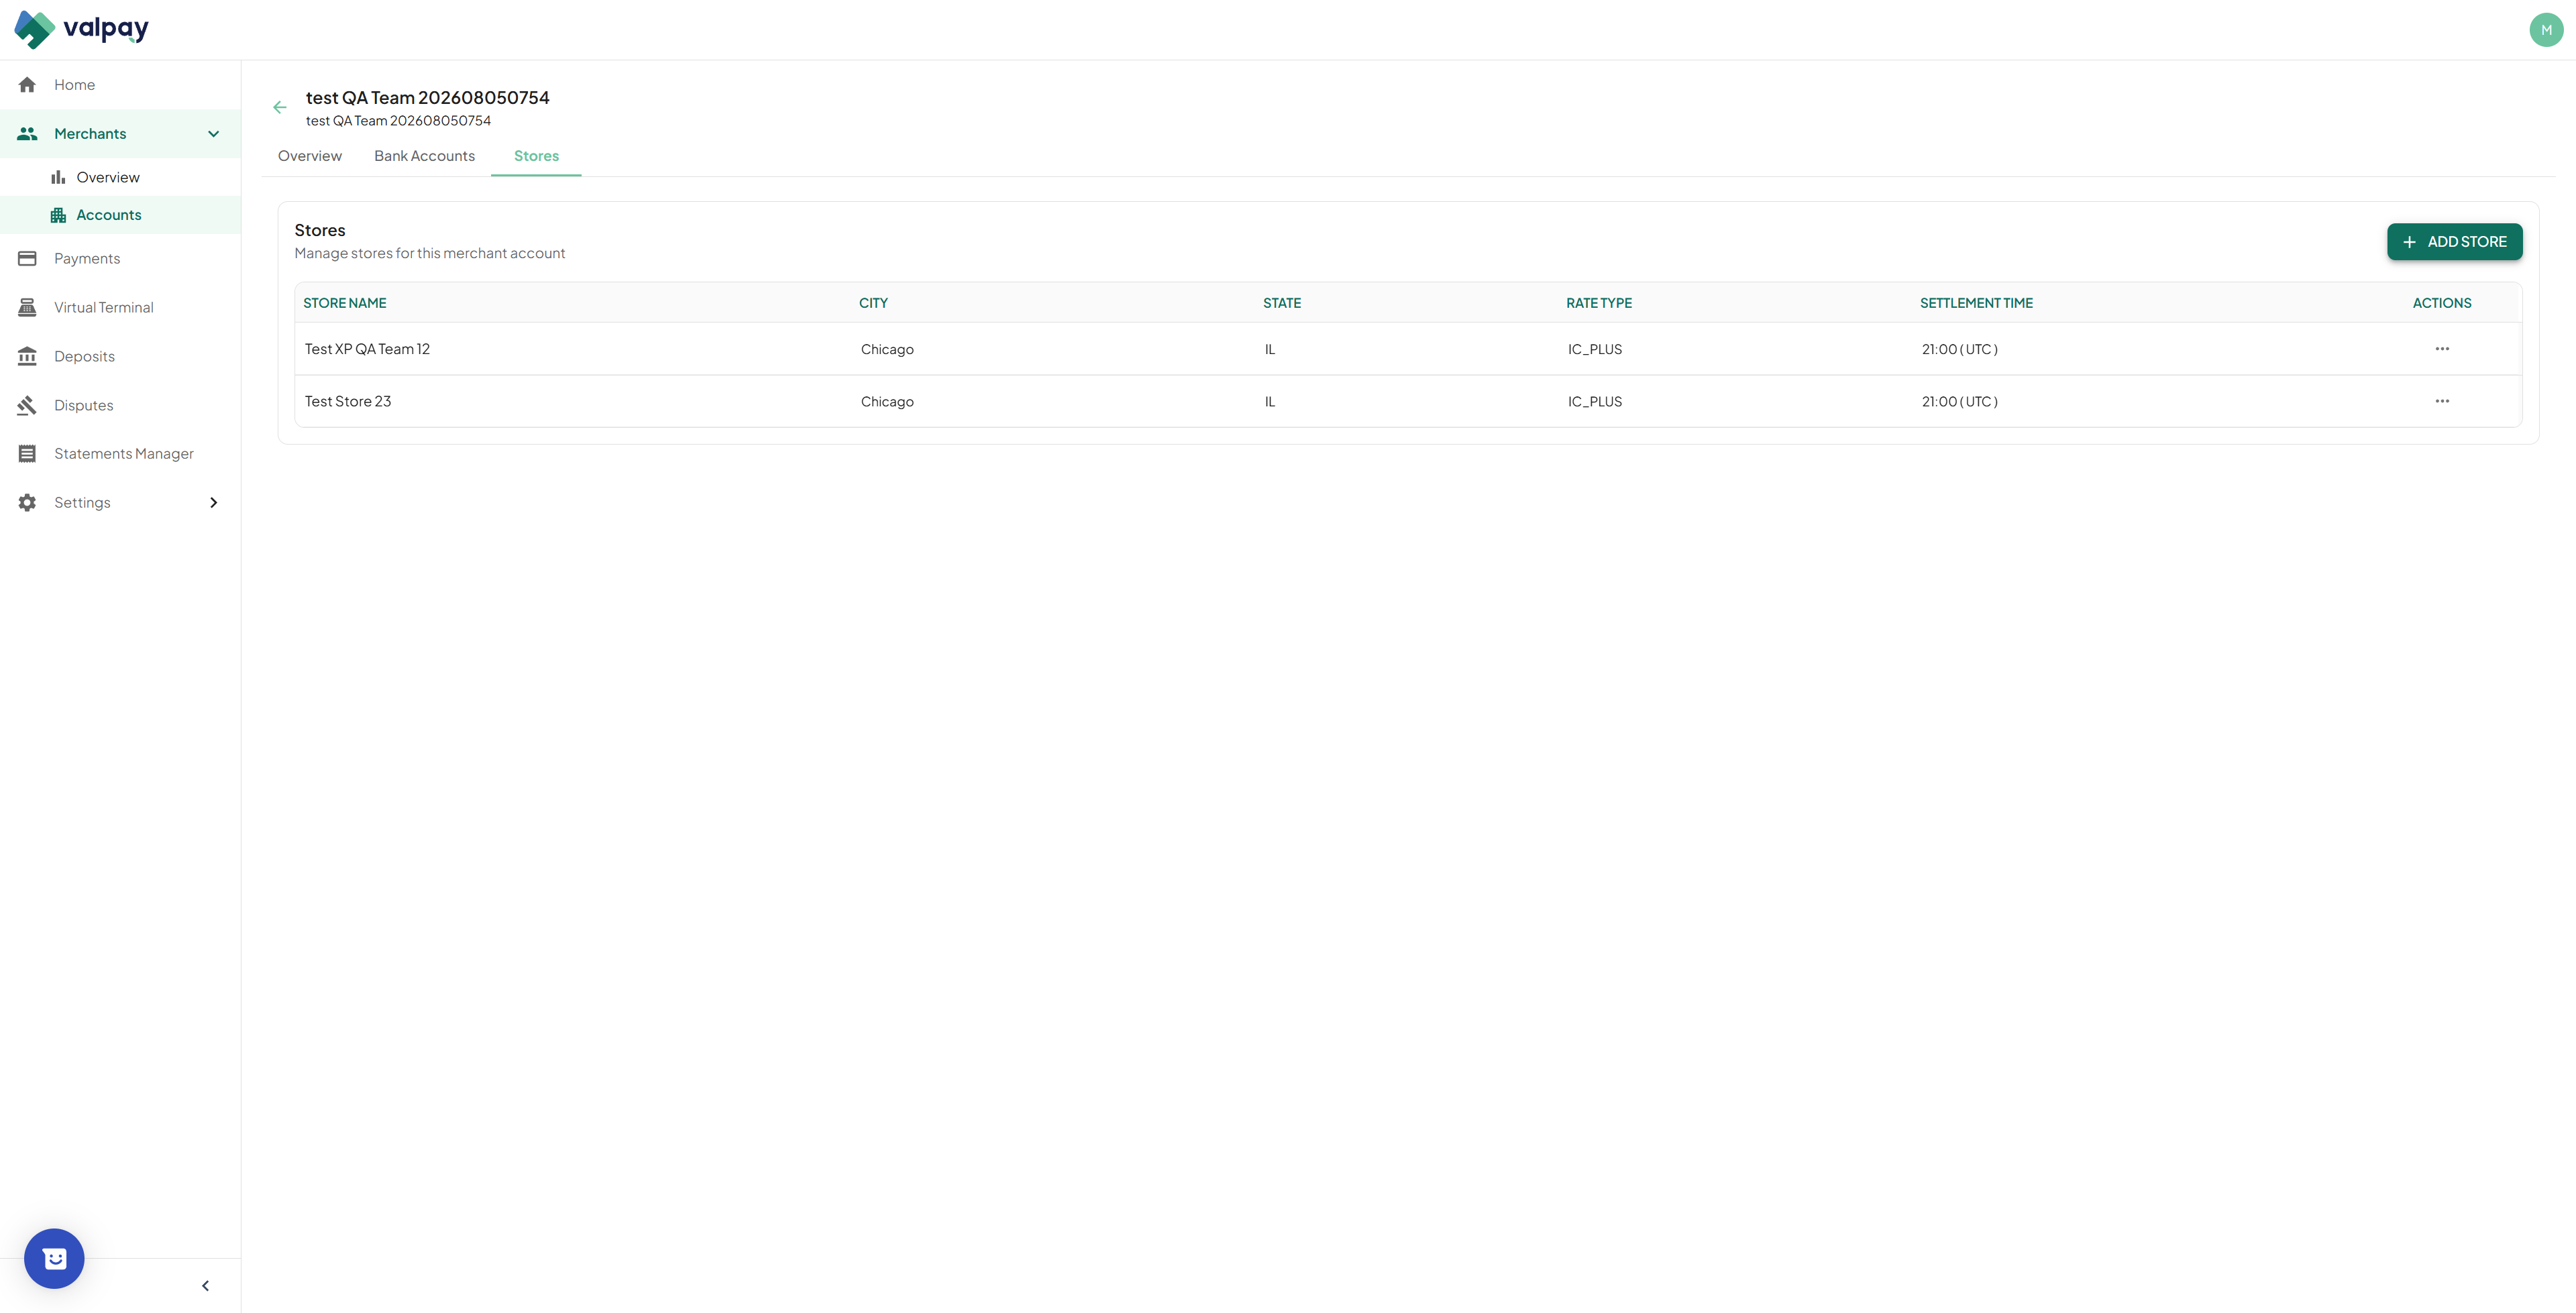
Click Add Store to create a new store entity and fill in the details.
11
Select a specific store to review its settlement time, rate profile, and associated bank account.
12
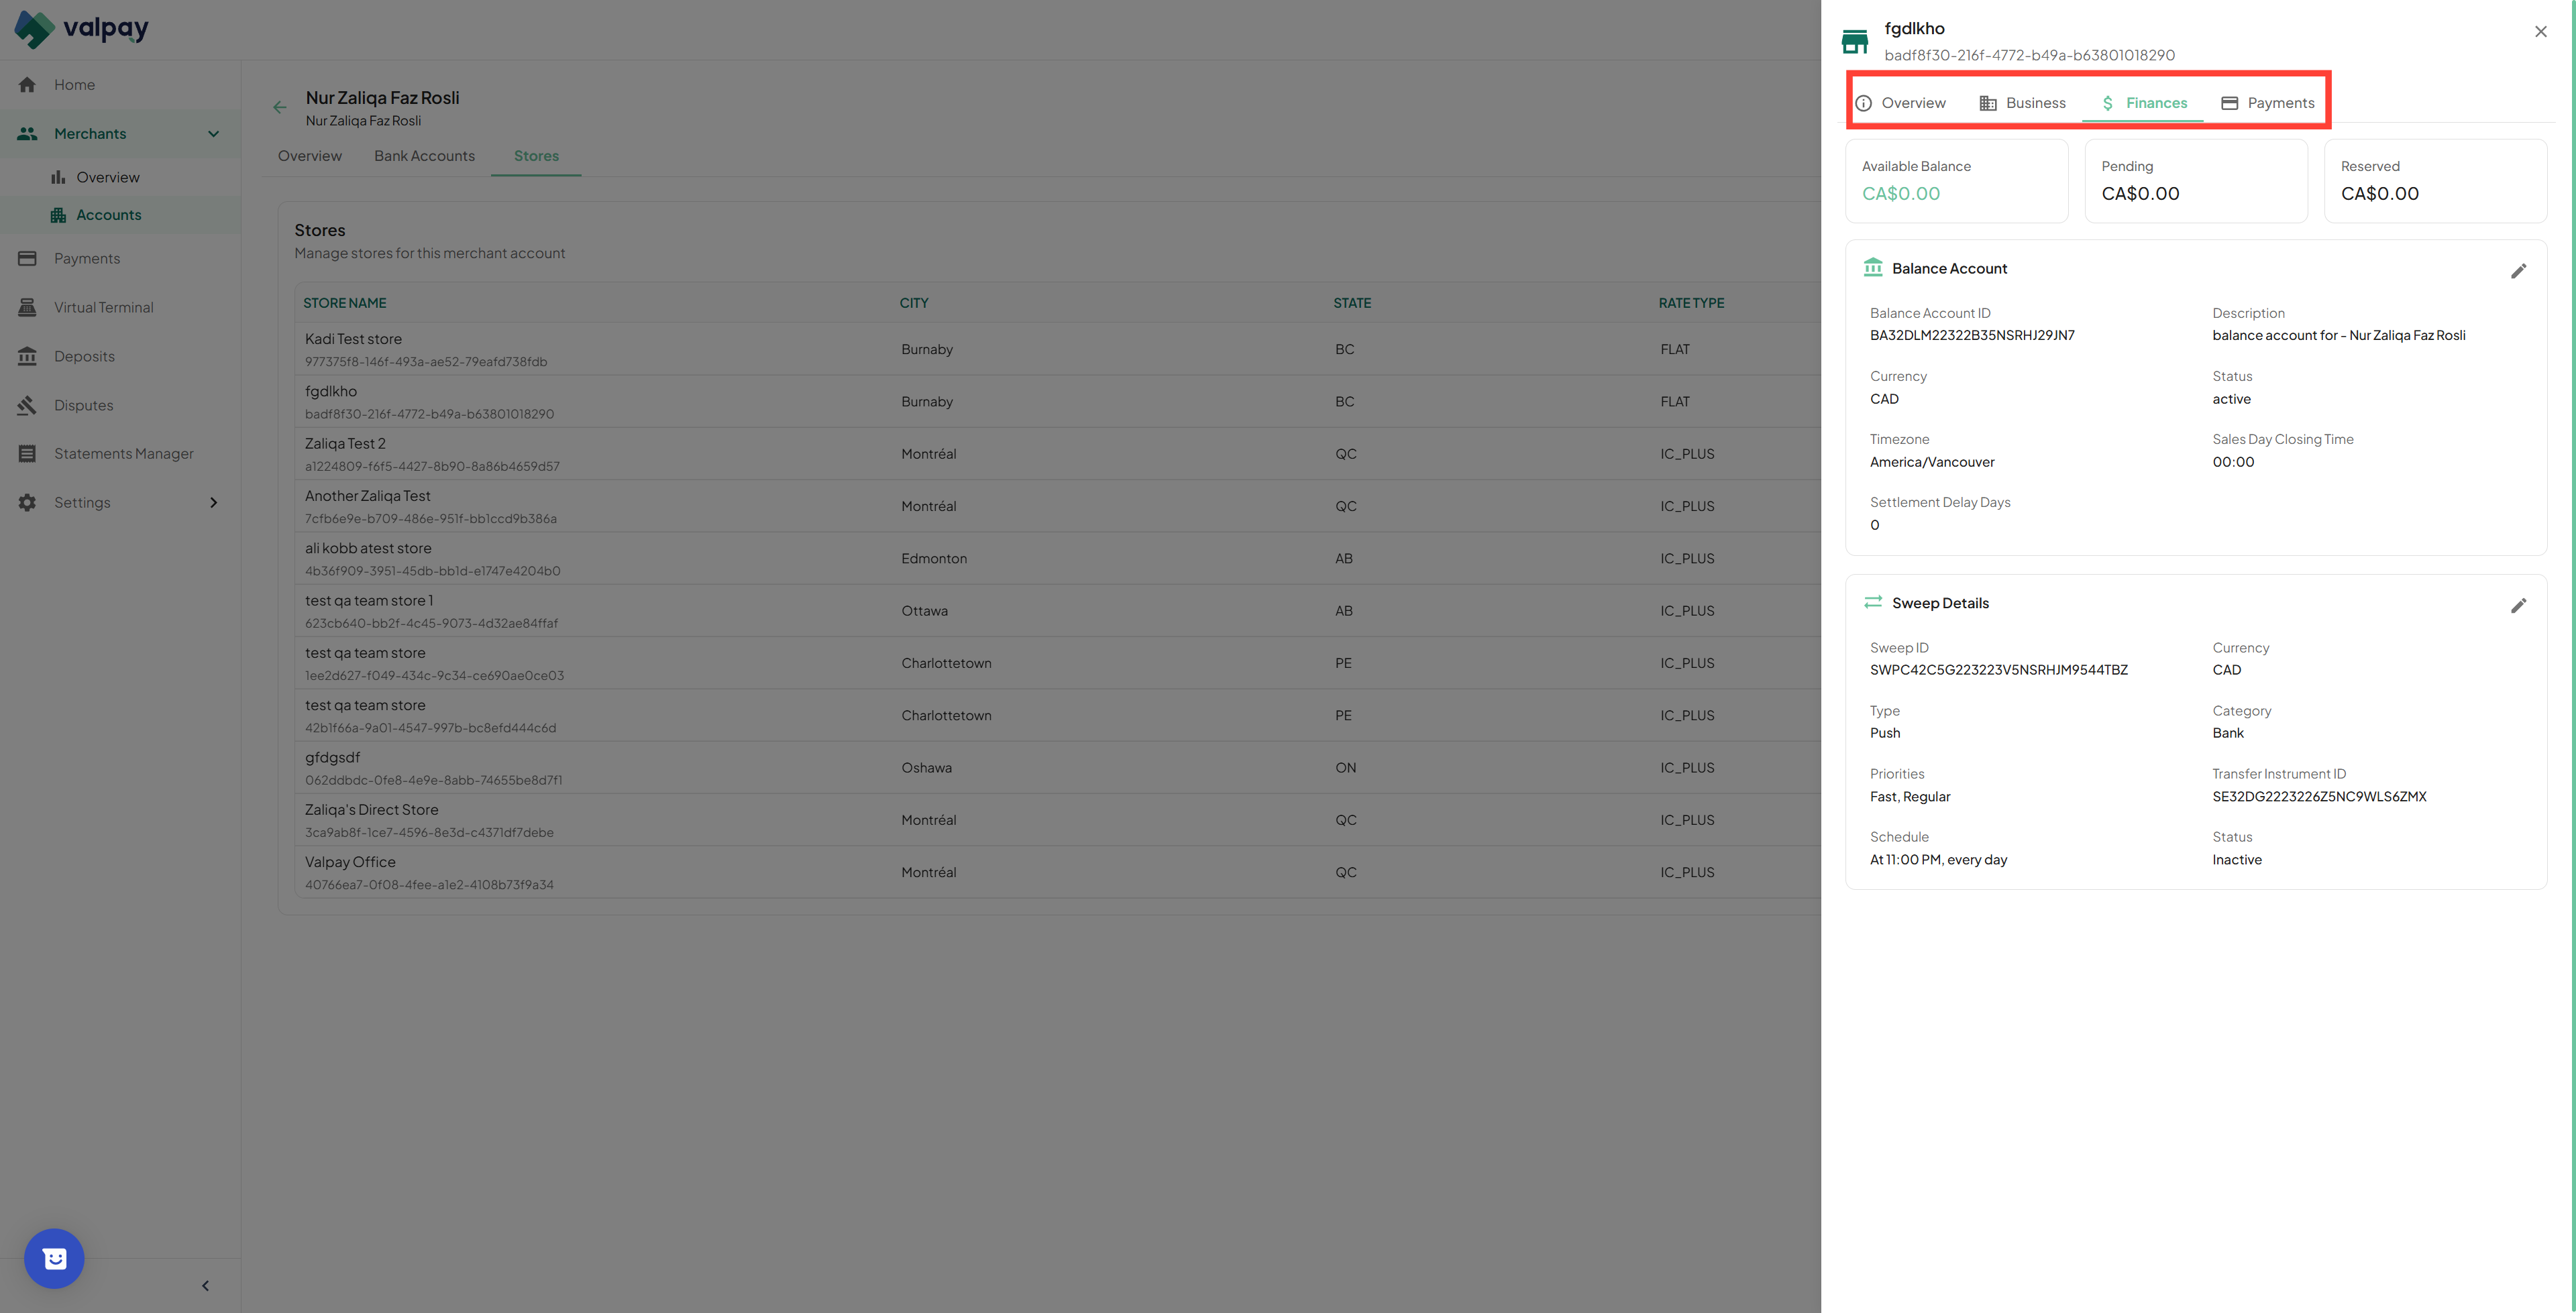
Open the Finances section to view the available balance, pending funds, and the sweep schedule.
13
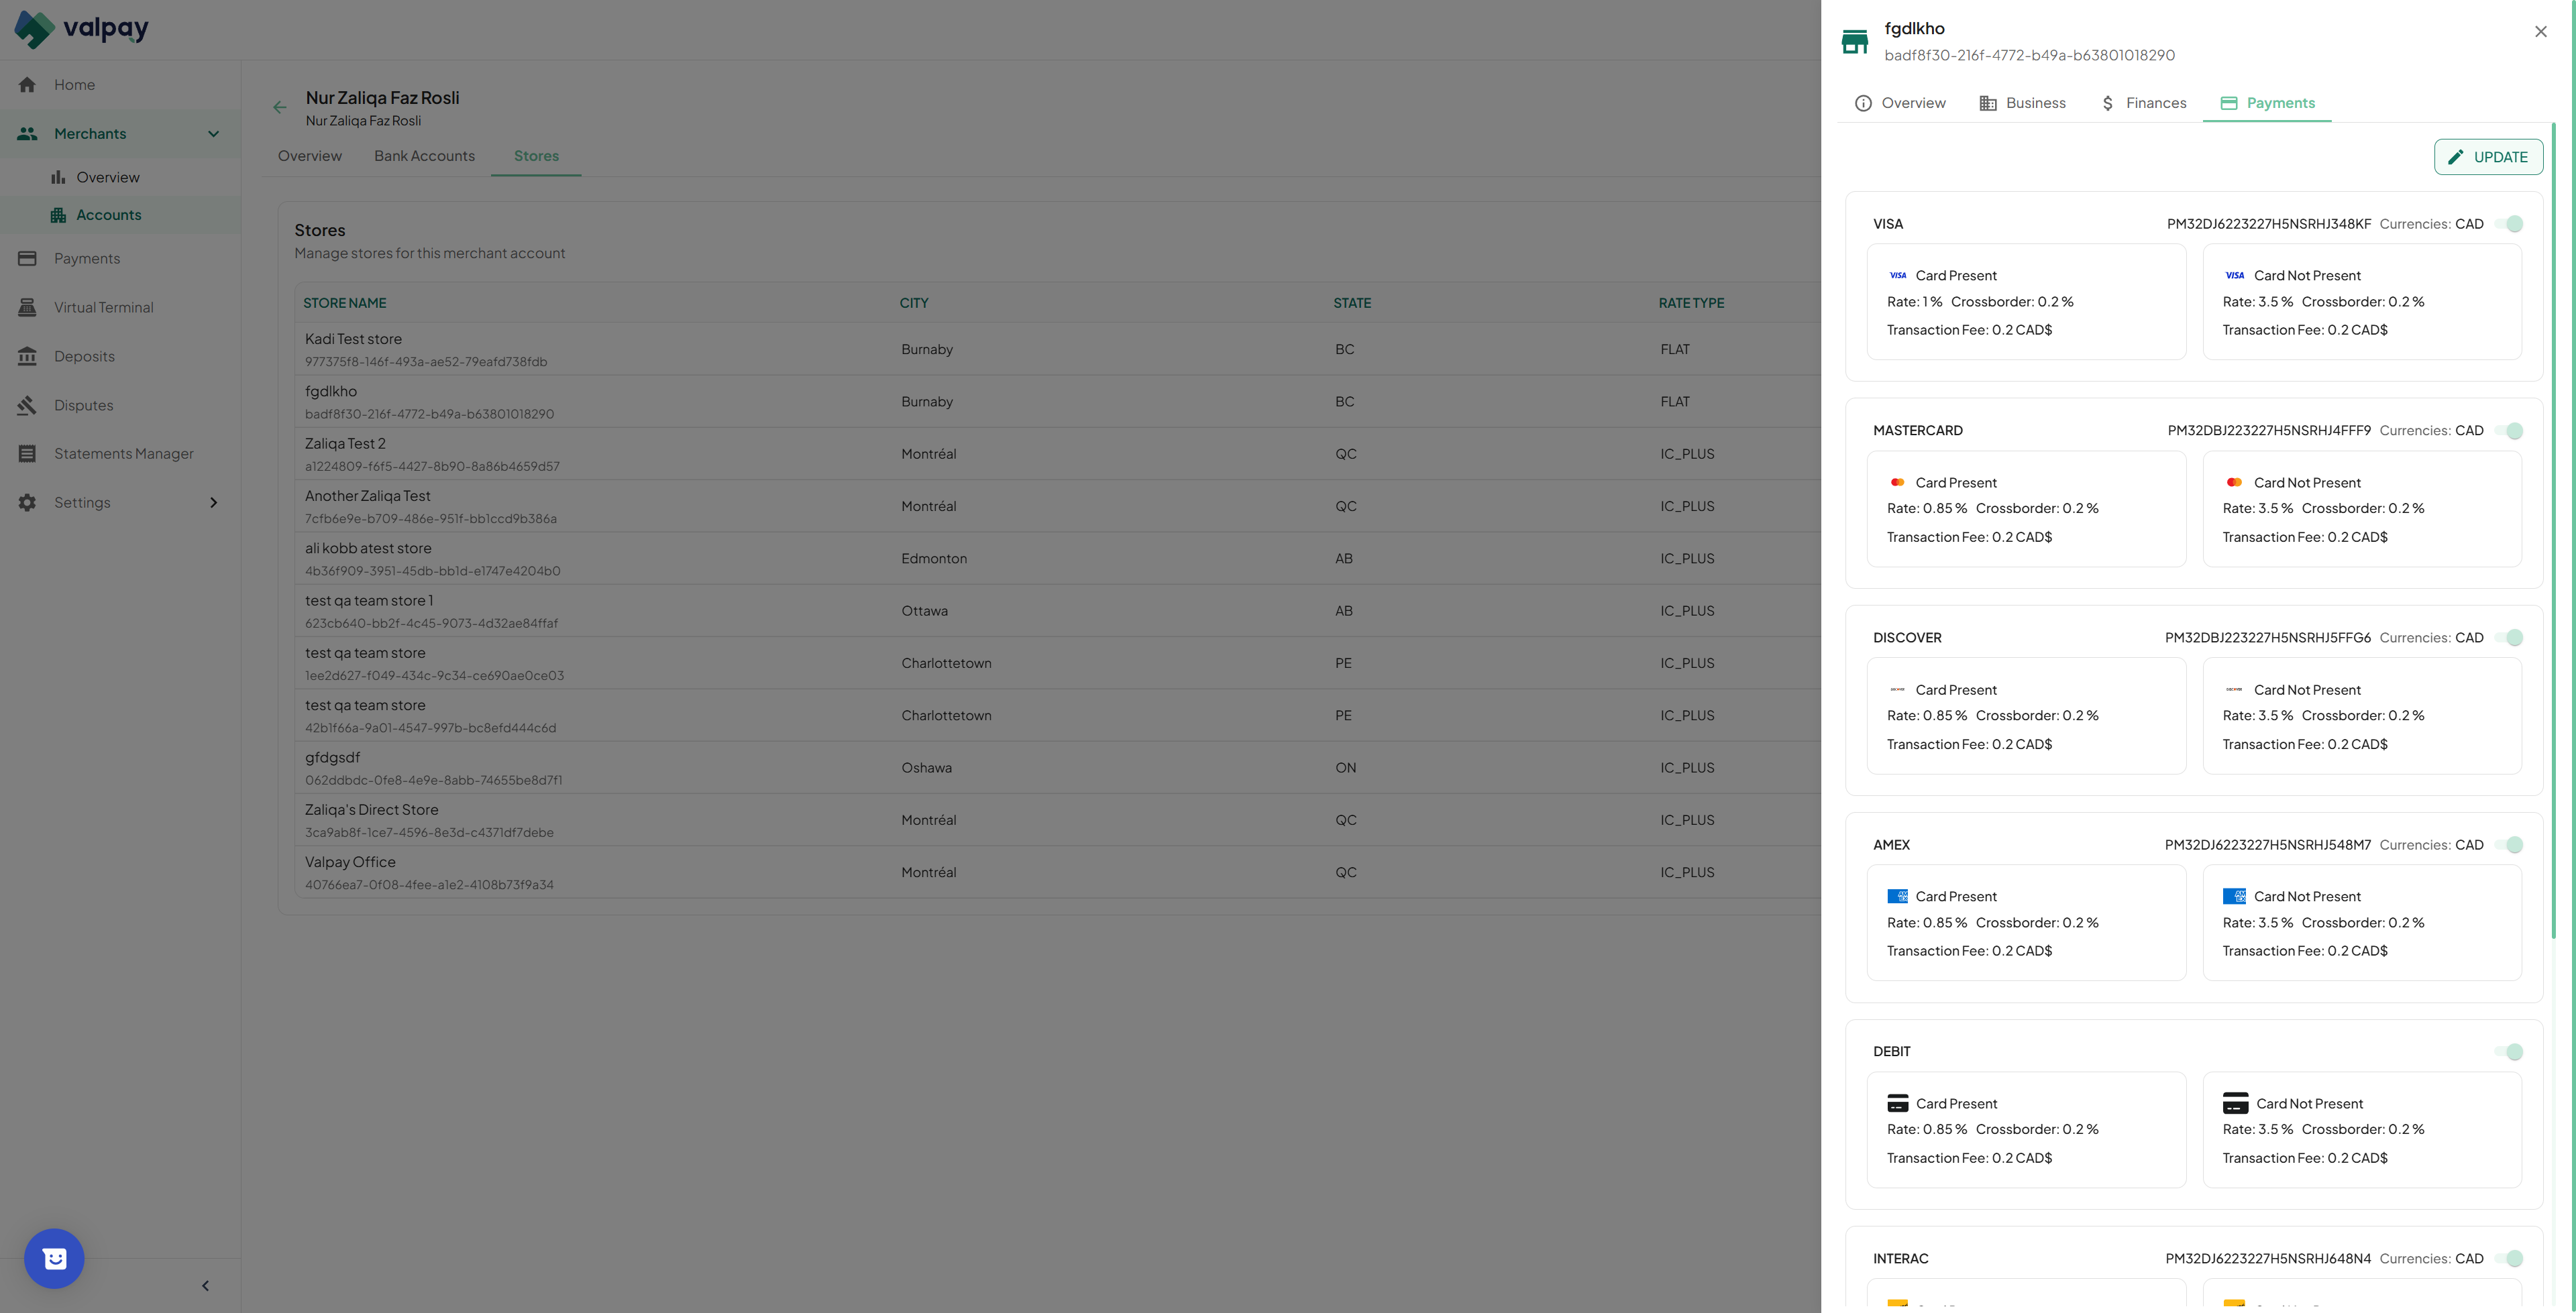
Go to the Payments section within a store to see configured rates and activated card networks.
Do not toggle active card networks (e.g., Visa, Mastercard) off in the Payments settings. Doing so will immediately reject all future transactions on those networks for the store.
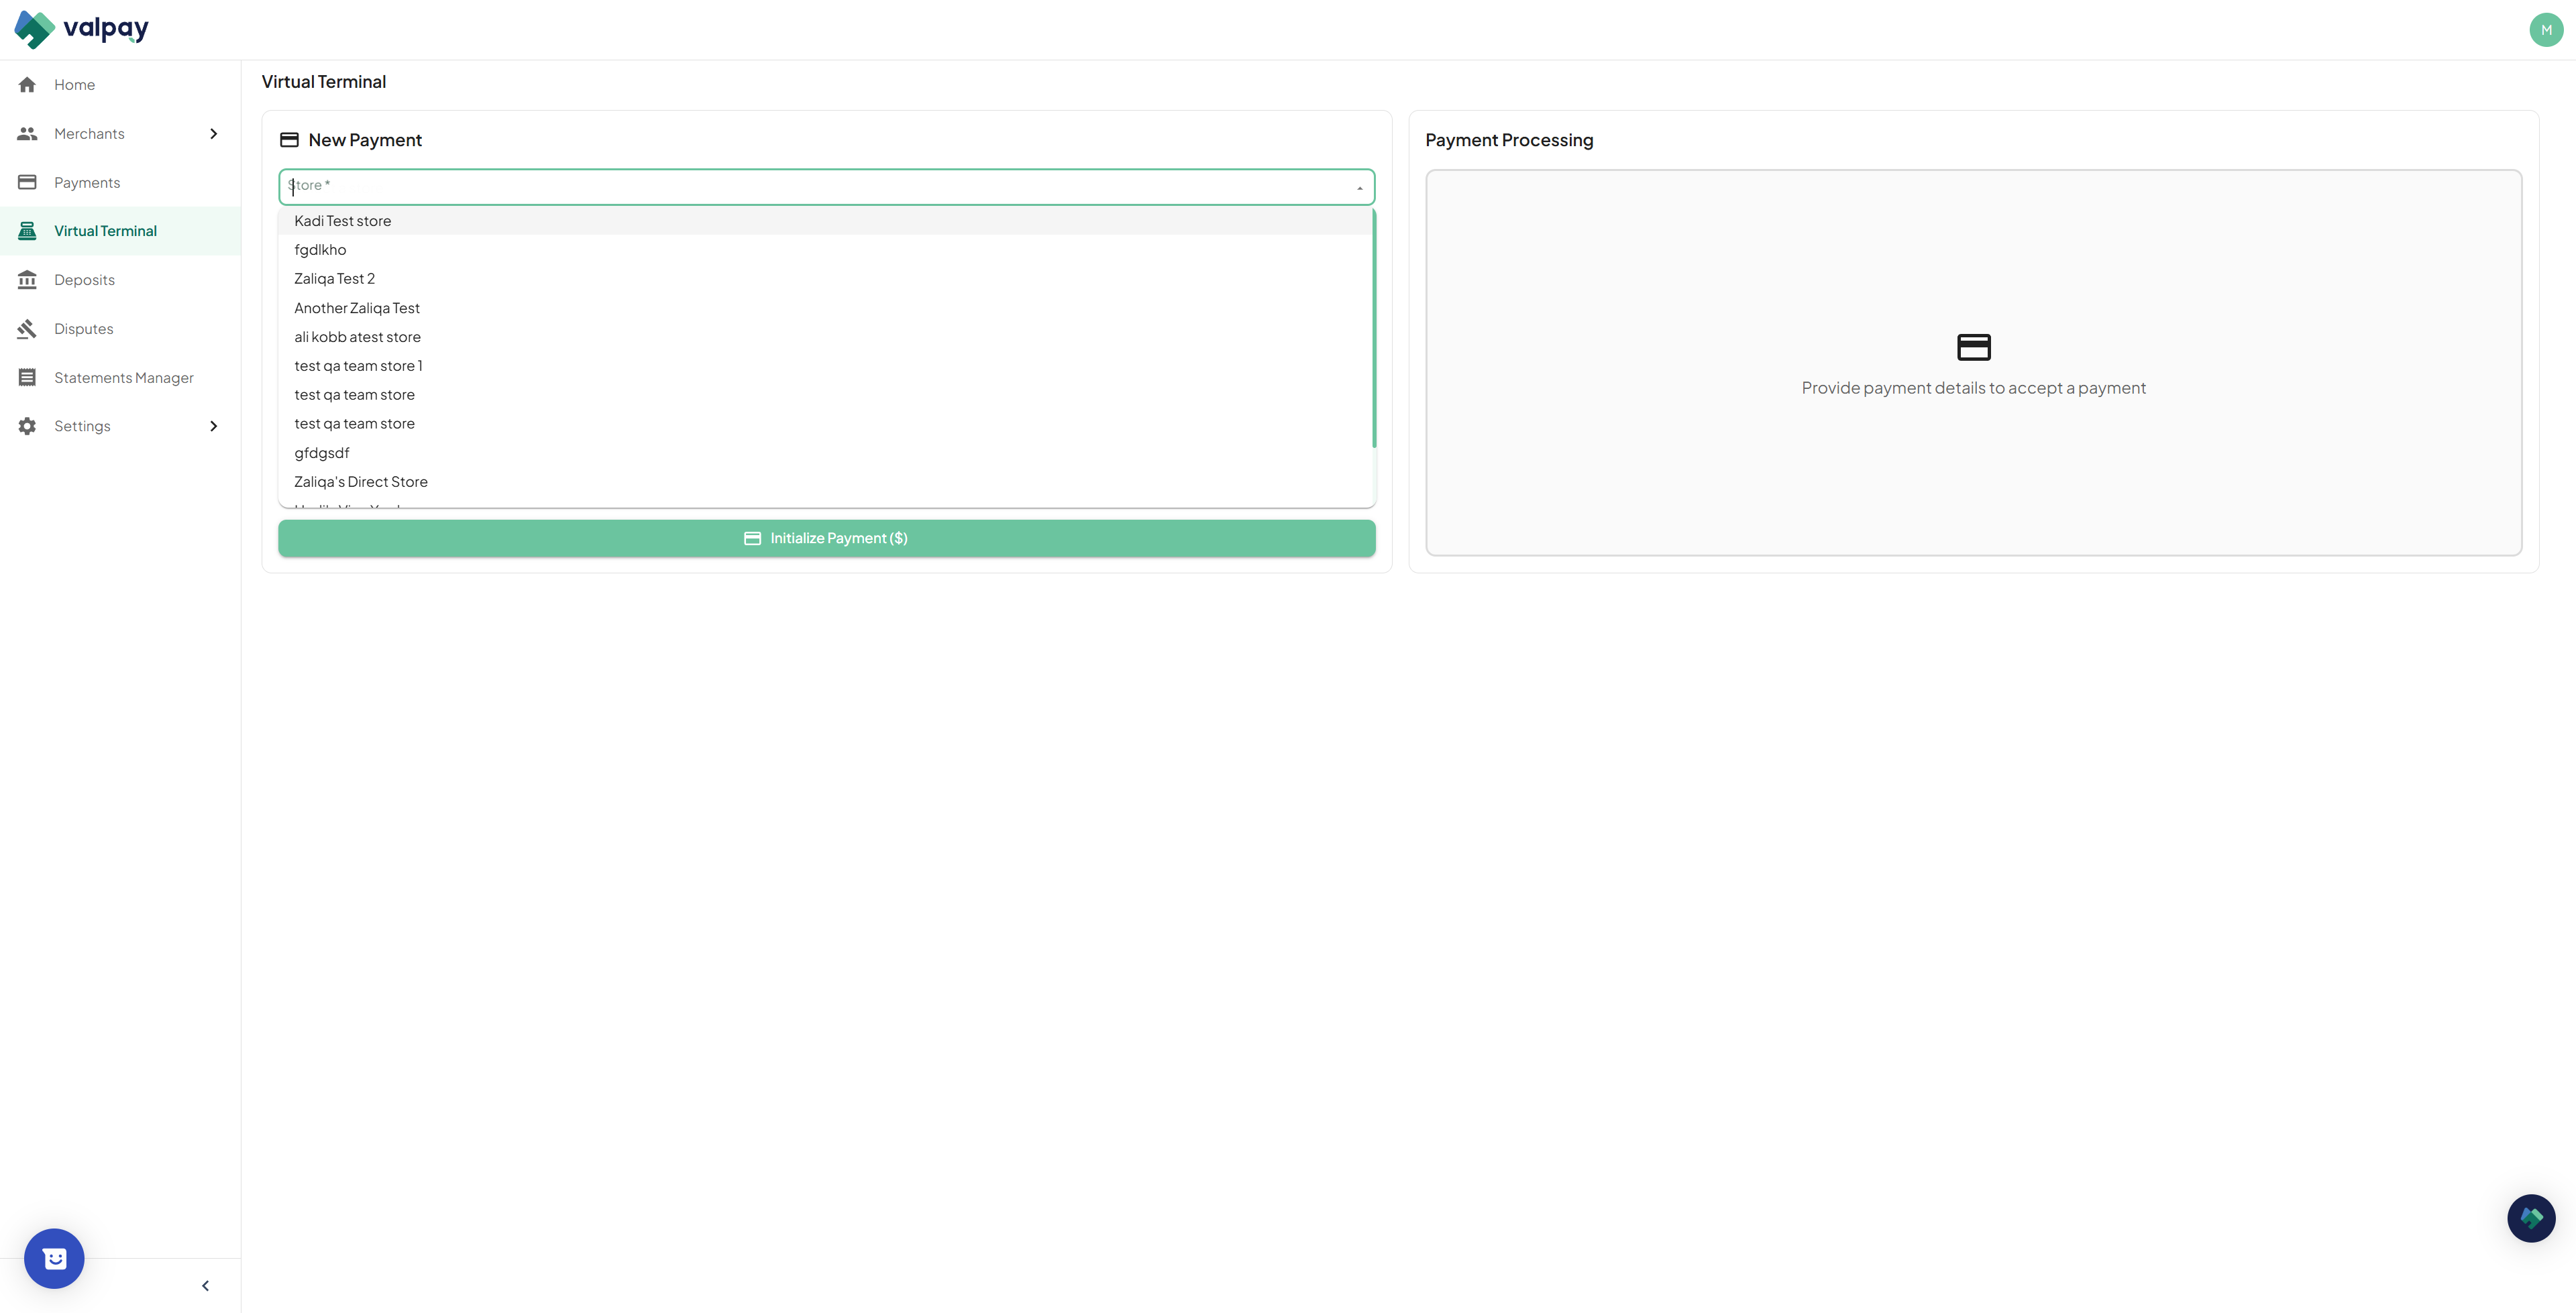
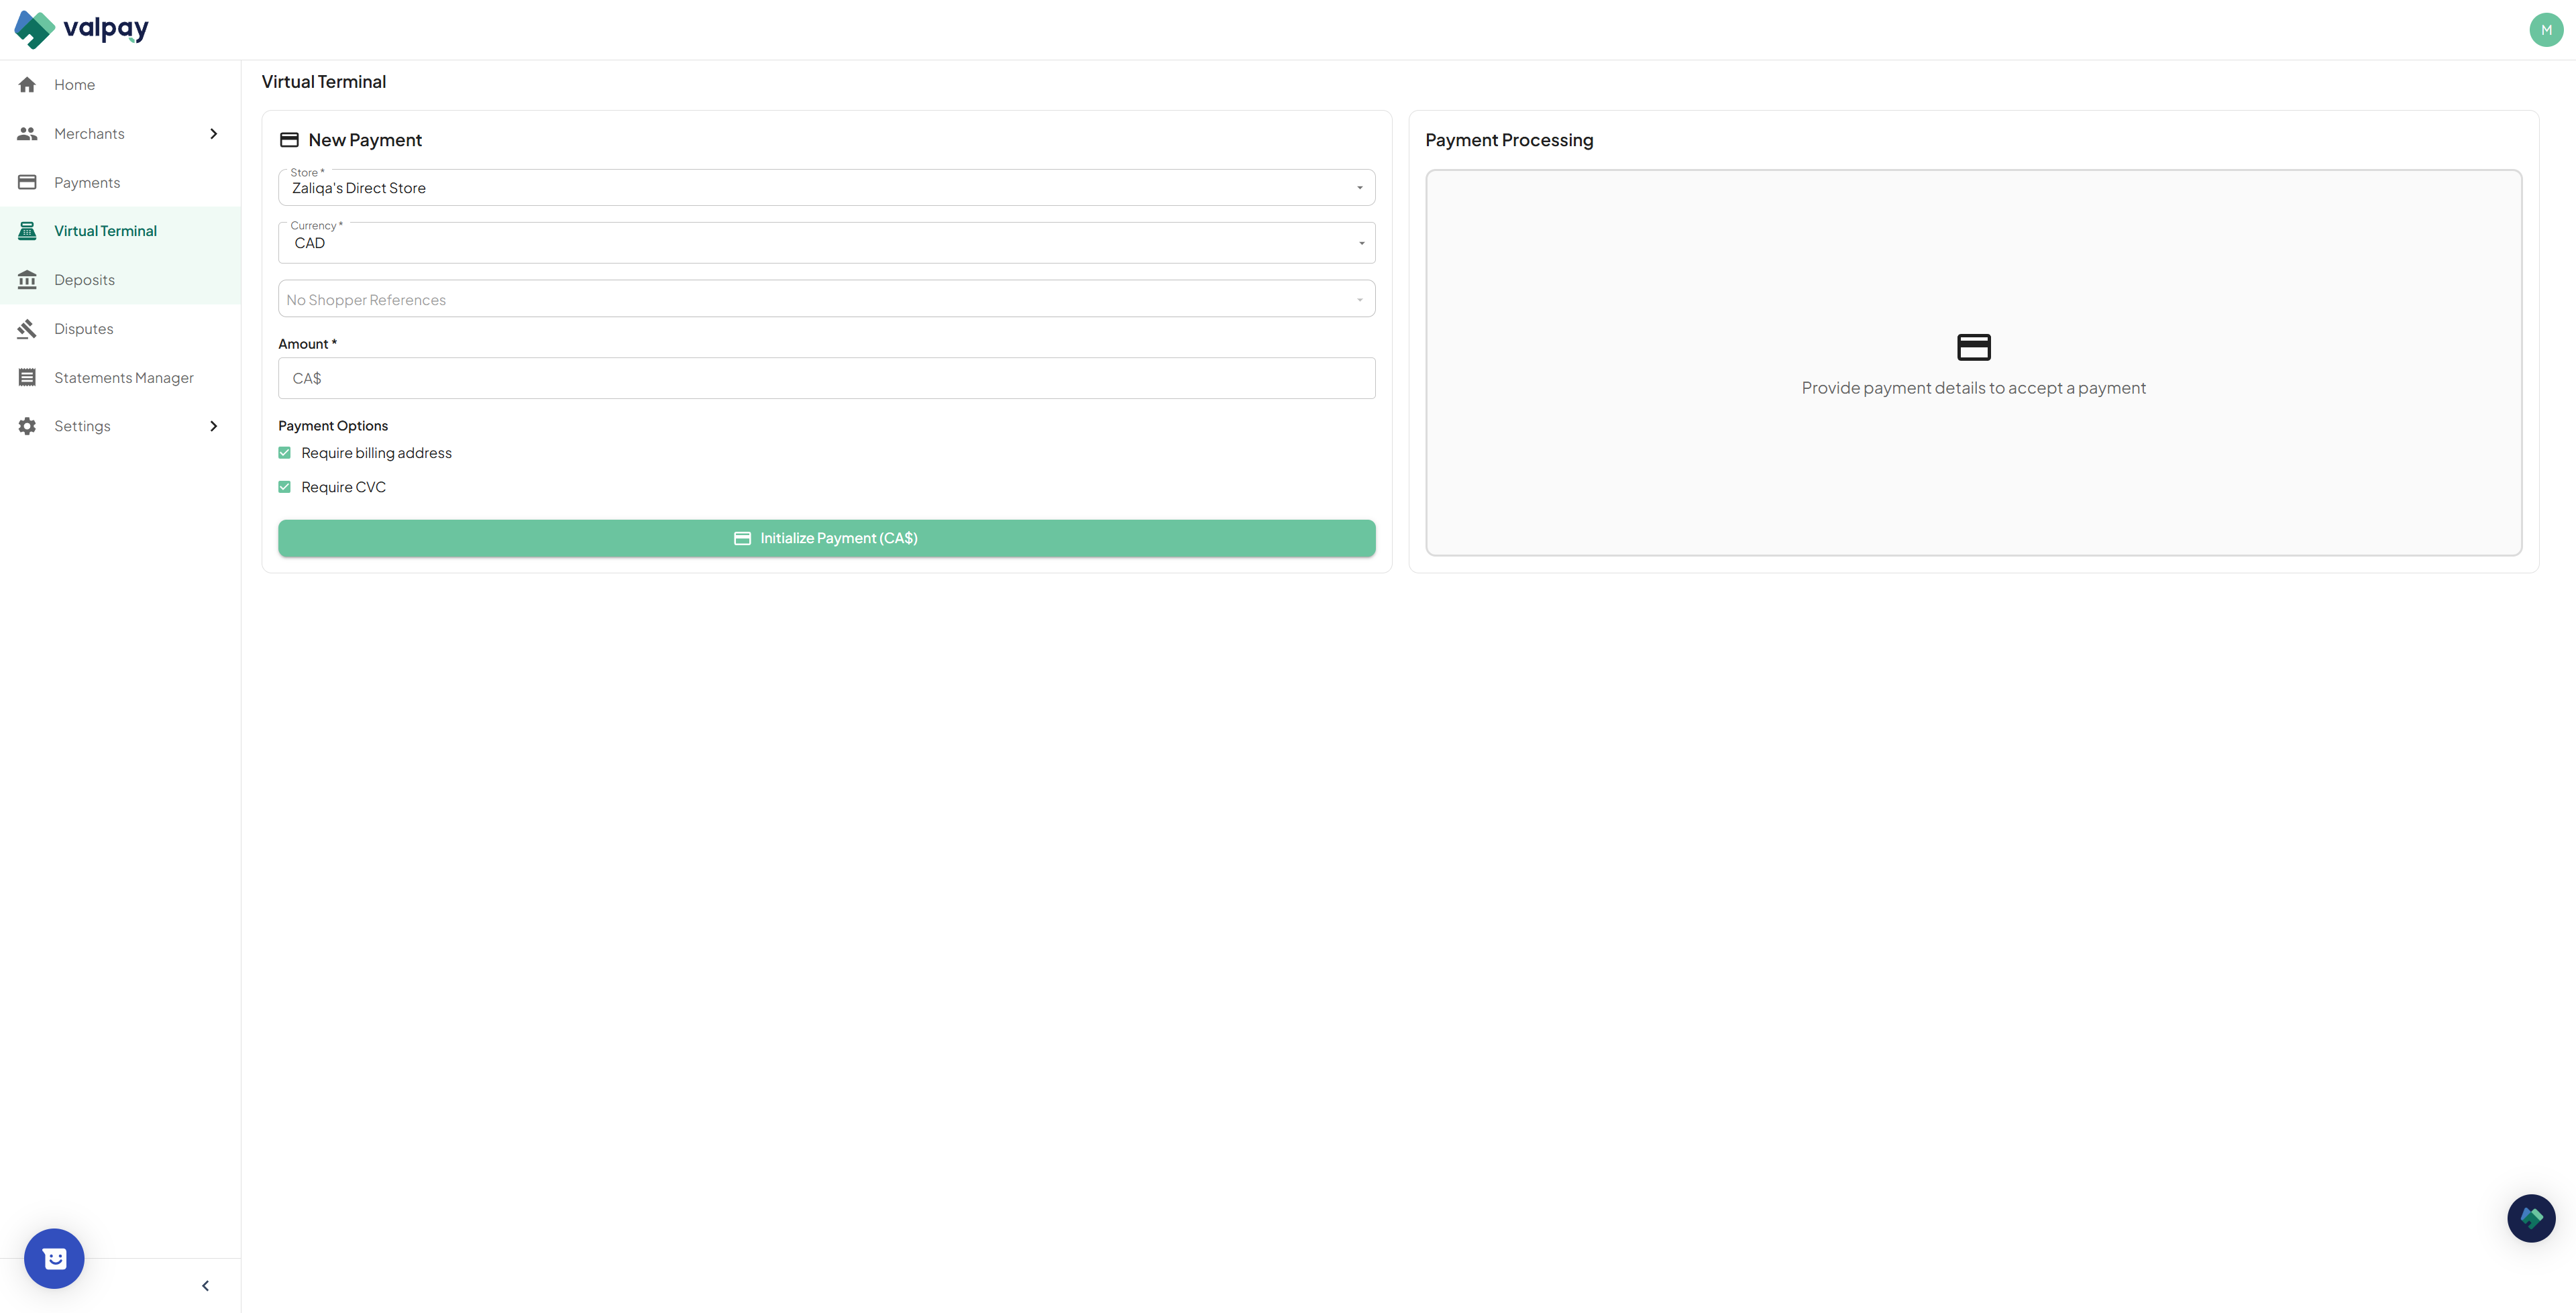
Virtual Terminal
The Virtual Terminal allows you to take card payments directly in the portal without physical hardware. It serves as an excellent backup for over-the-phone orders or when a physical terminal goes down.
14
Select your store from the dropdown menu to pull through the store's currency and saved shopper references.
15
Enter the transaction amount and initialize the payment to open the card entry form.
Always leave the Billing Address and CVC fields active during checkout. Turning them off might speed up entry, but it downgrades the transaction security and results in higher interchange rates.
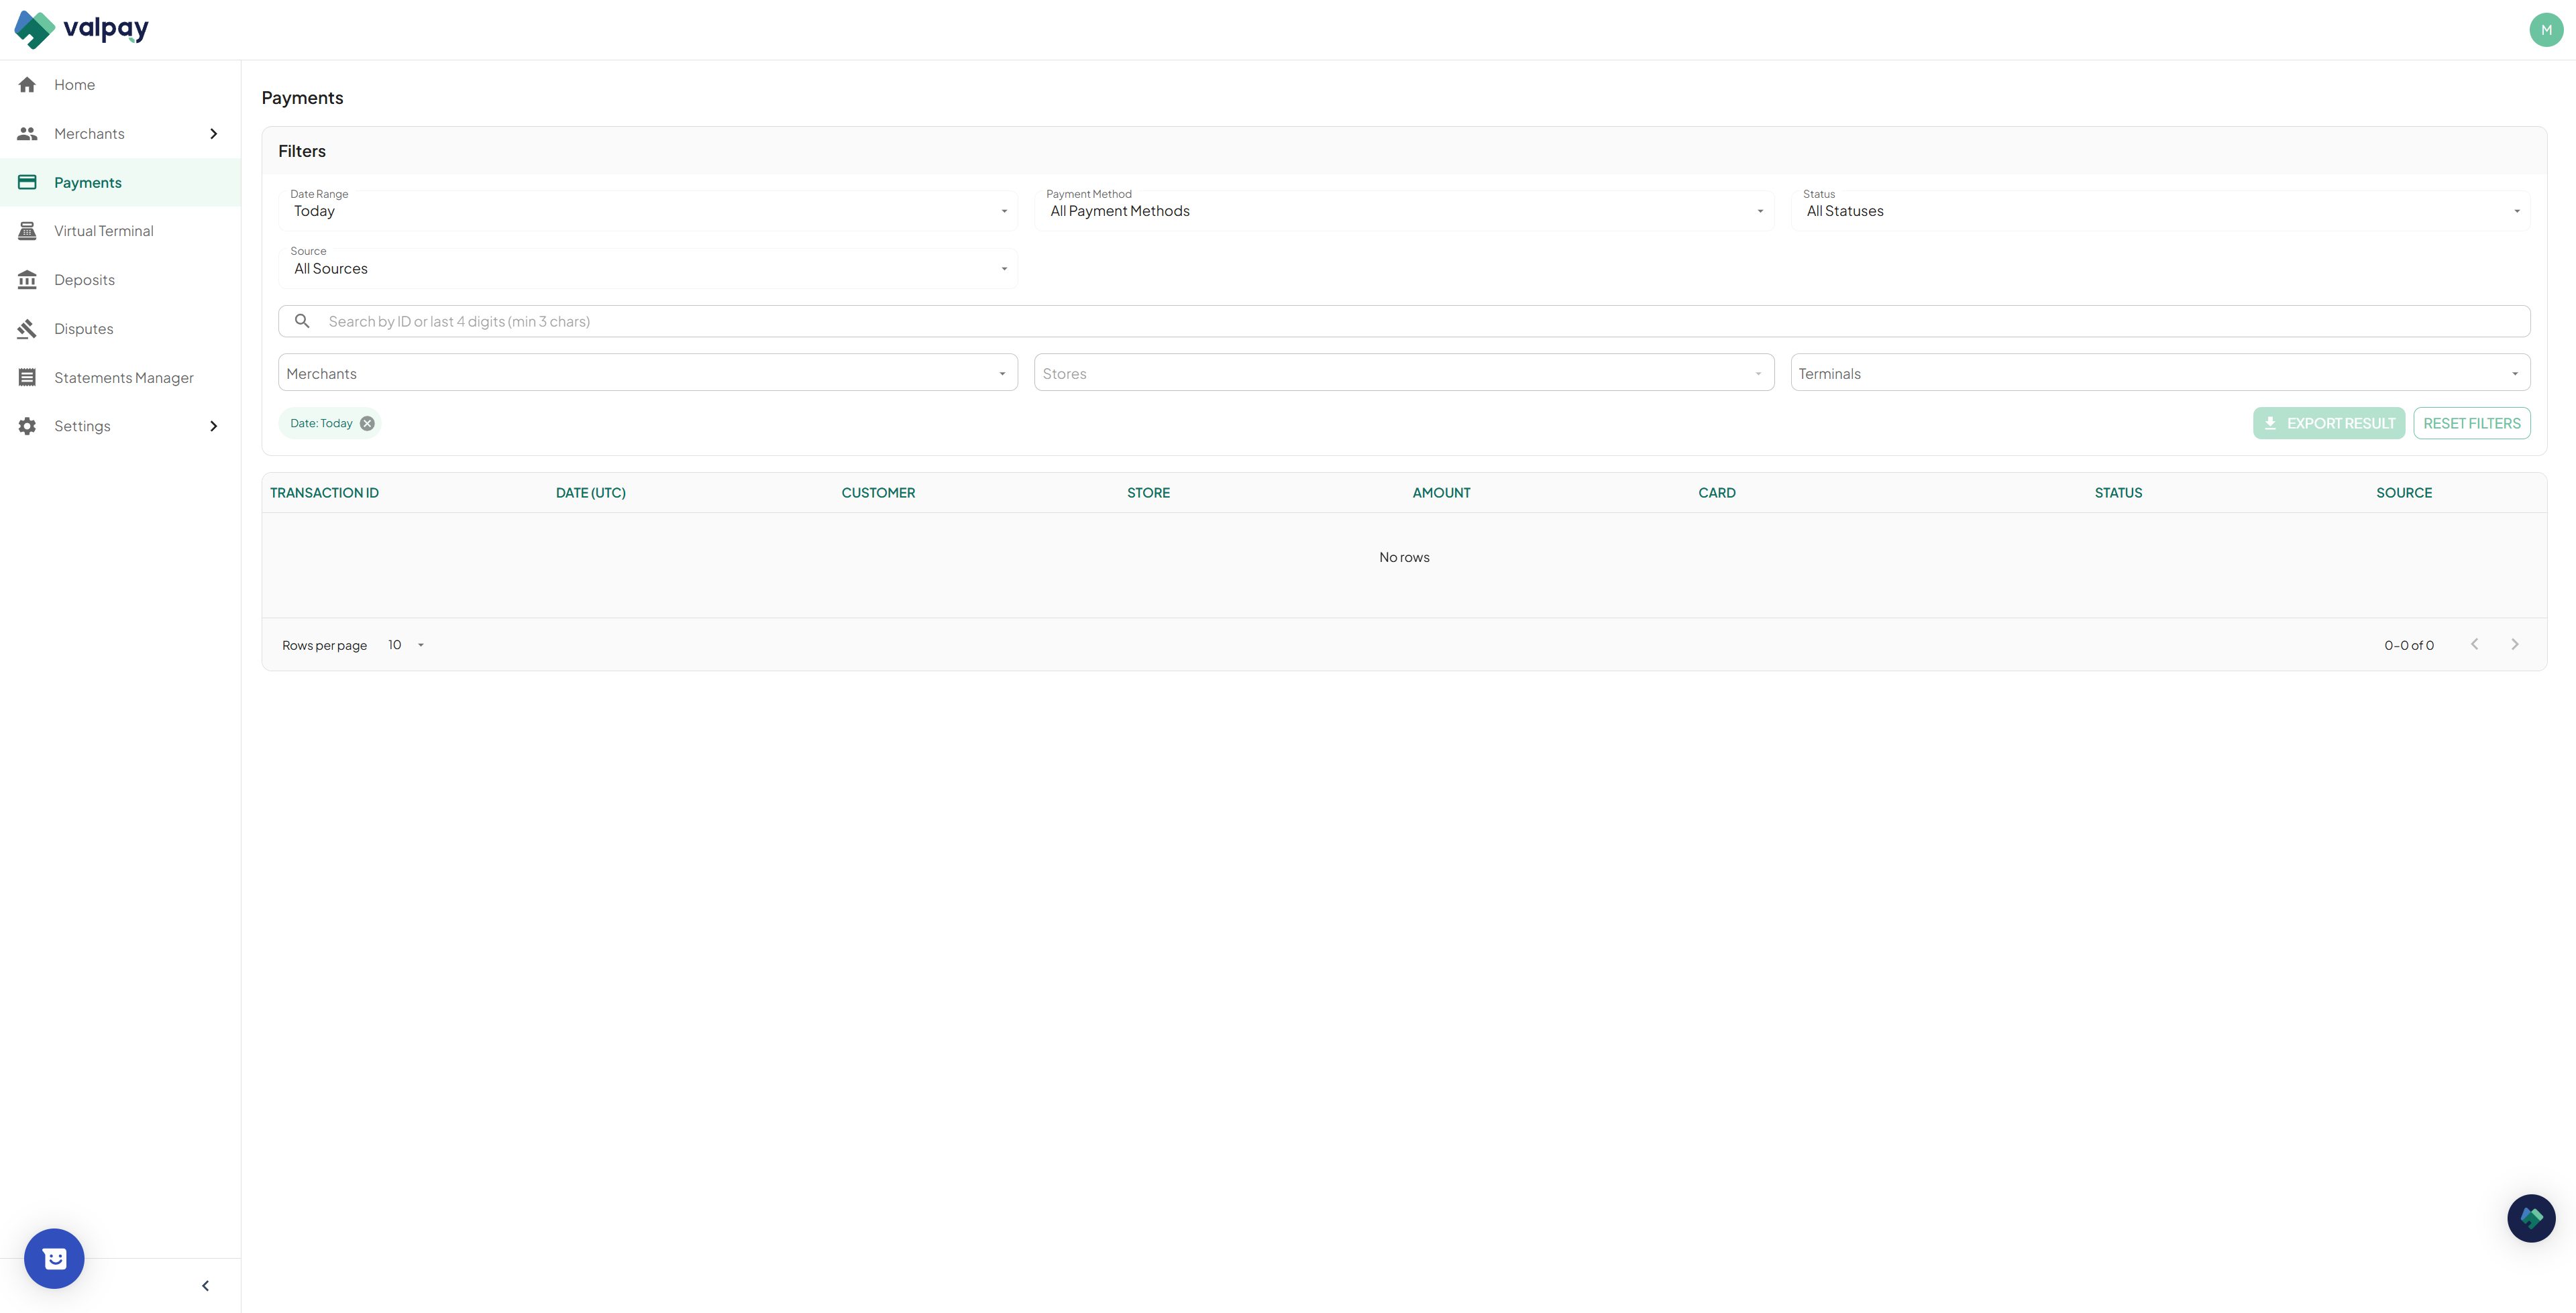
Financial Reporting and Reconciliation
The Payments tab is your full transaction ledger. Everyone has access to this one - partners, and merchants.
16
Navigate to the Payments tab and use the filters to adjust the date range and transaction status. Today will be filtered by default.
17
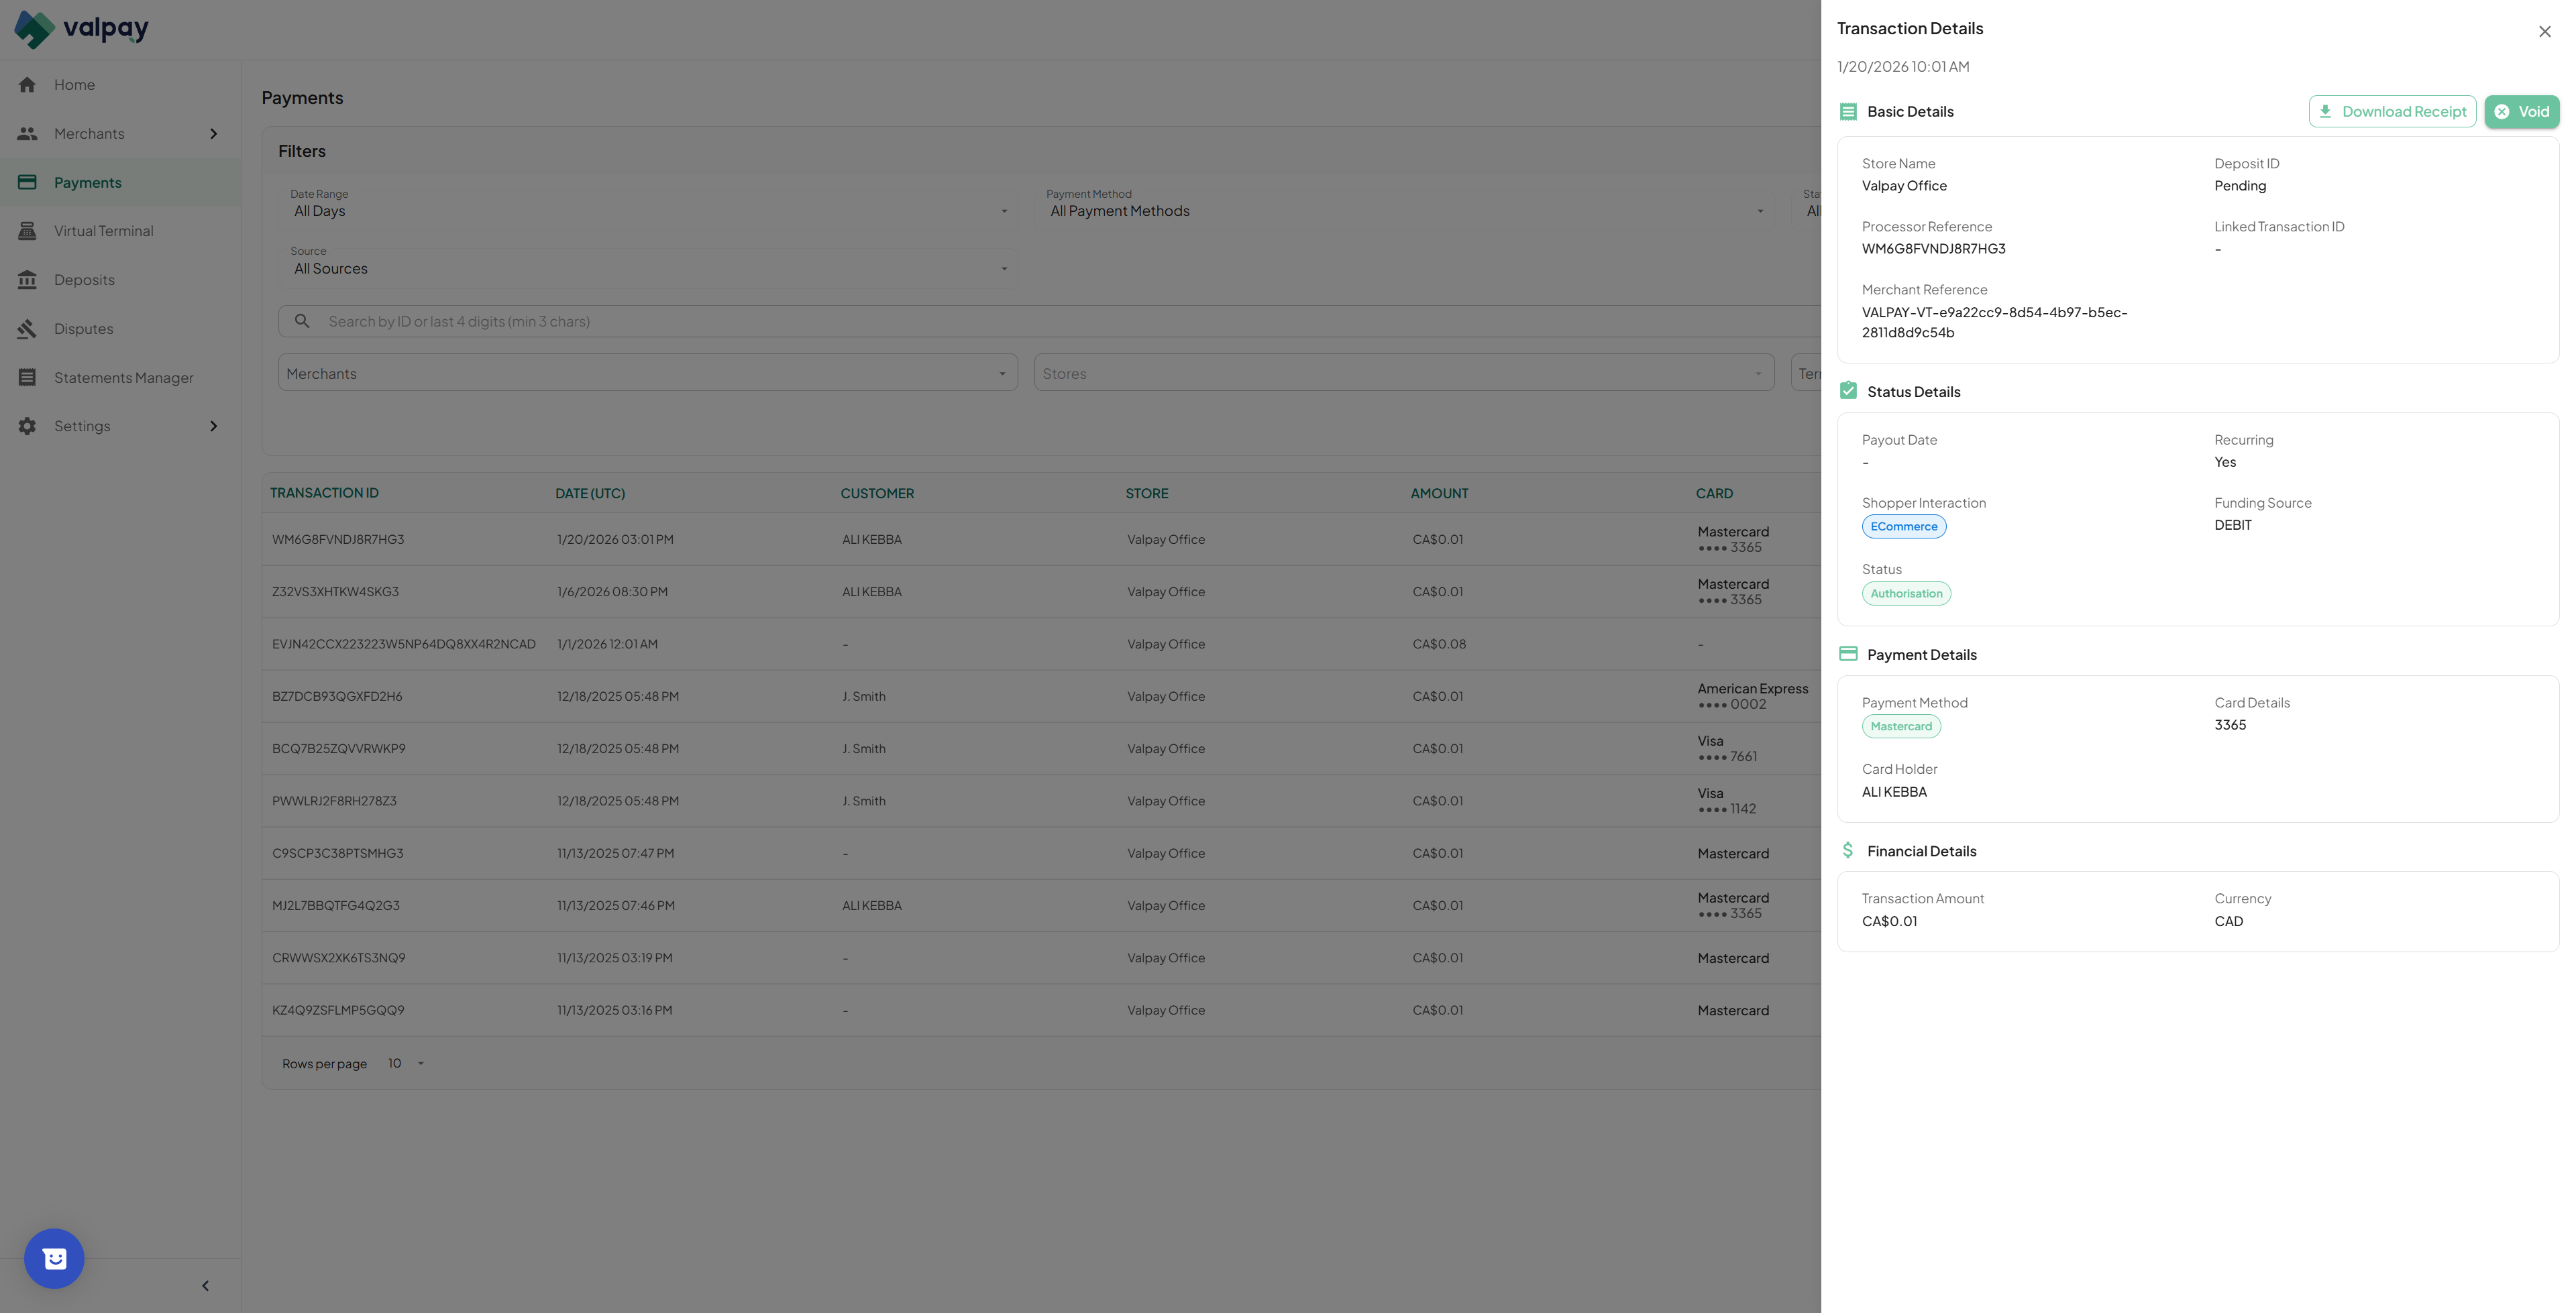
Click any payment record to view financial details, issue a void or refund, or download the receipt.
18
Navigate to the Deposits tab and click on any deposit to view a summary breakdown by location, card brand, and day.
19
Click Export Result to receive a CSV file of the deposit or payment data. From the statement, can also view Deposit summaries and a breakdown of the transactions.
20
Navigate to the Disputes tab to review chargebacks and ACH returns, where you can choose to accept or defend disputes by uploading supporting documents. If you choose to defend, the portal will guide you through uploading supporting documentation.
21
For ACH Rejects, the return has already occurred by the time it appears here. You can review the details and once you've sorted out payment with the customer through another method, mark it as Handled.
22
Navigate to the Statement Manager and select the brand, merchant, and store to load a list of statements by period.
23
Click the email icon in the Actions column to send the statement directly to your logged-in email address.
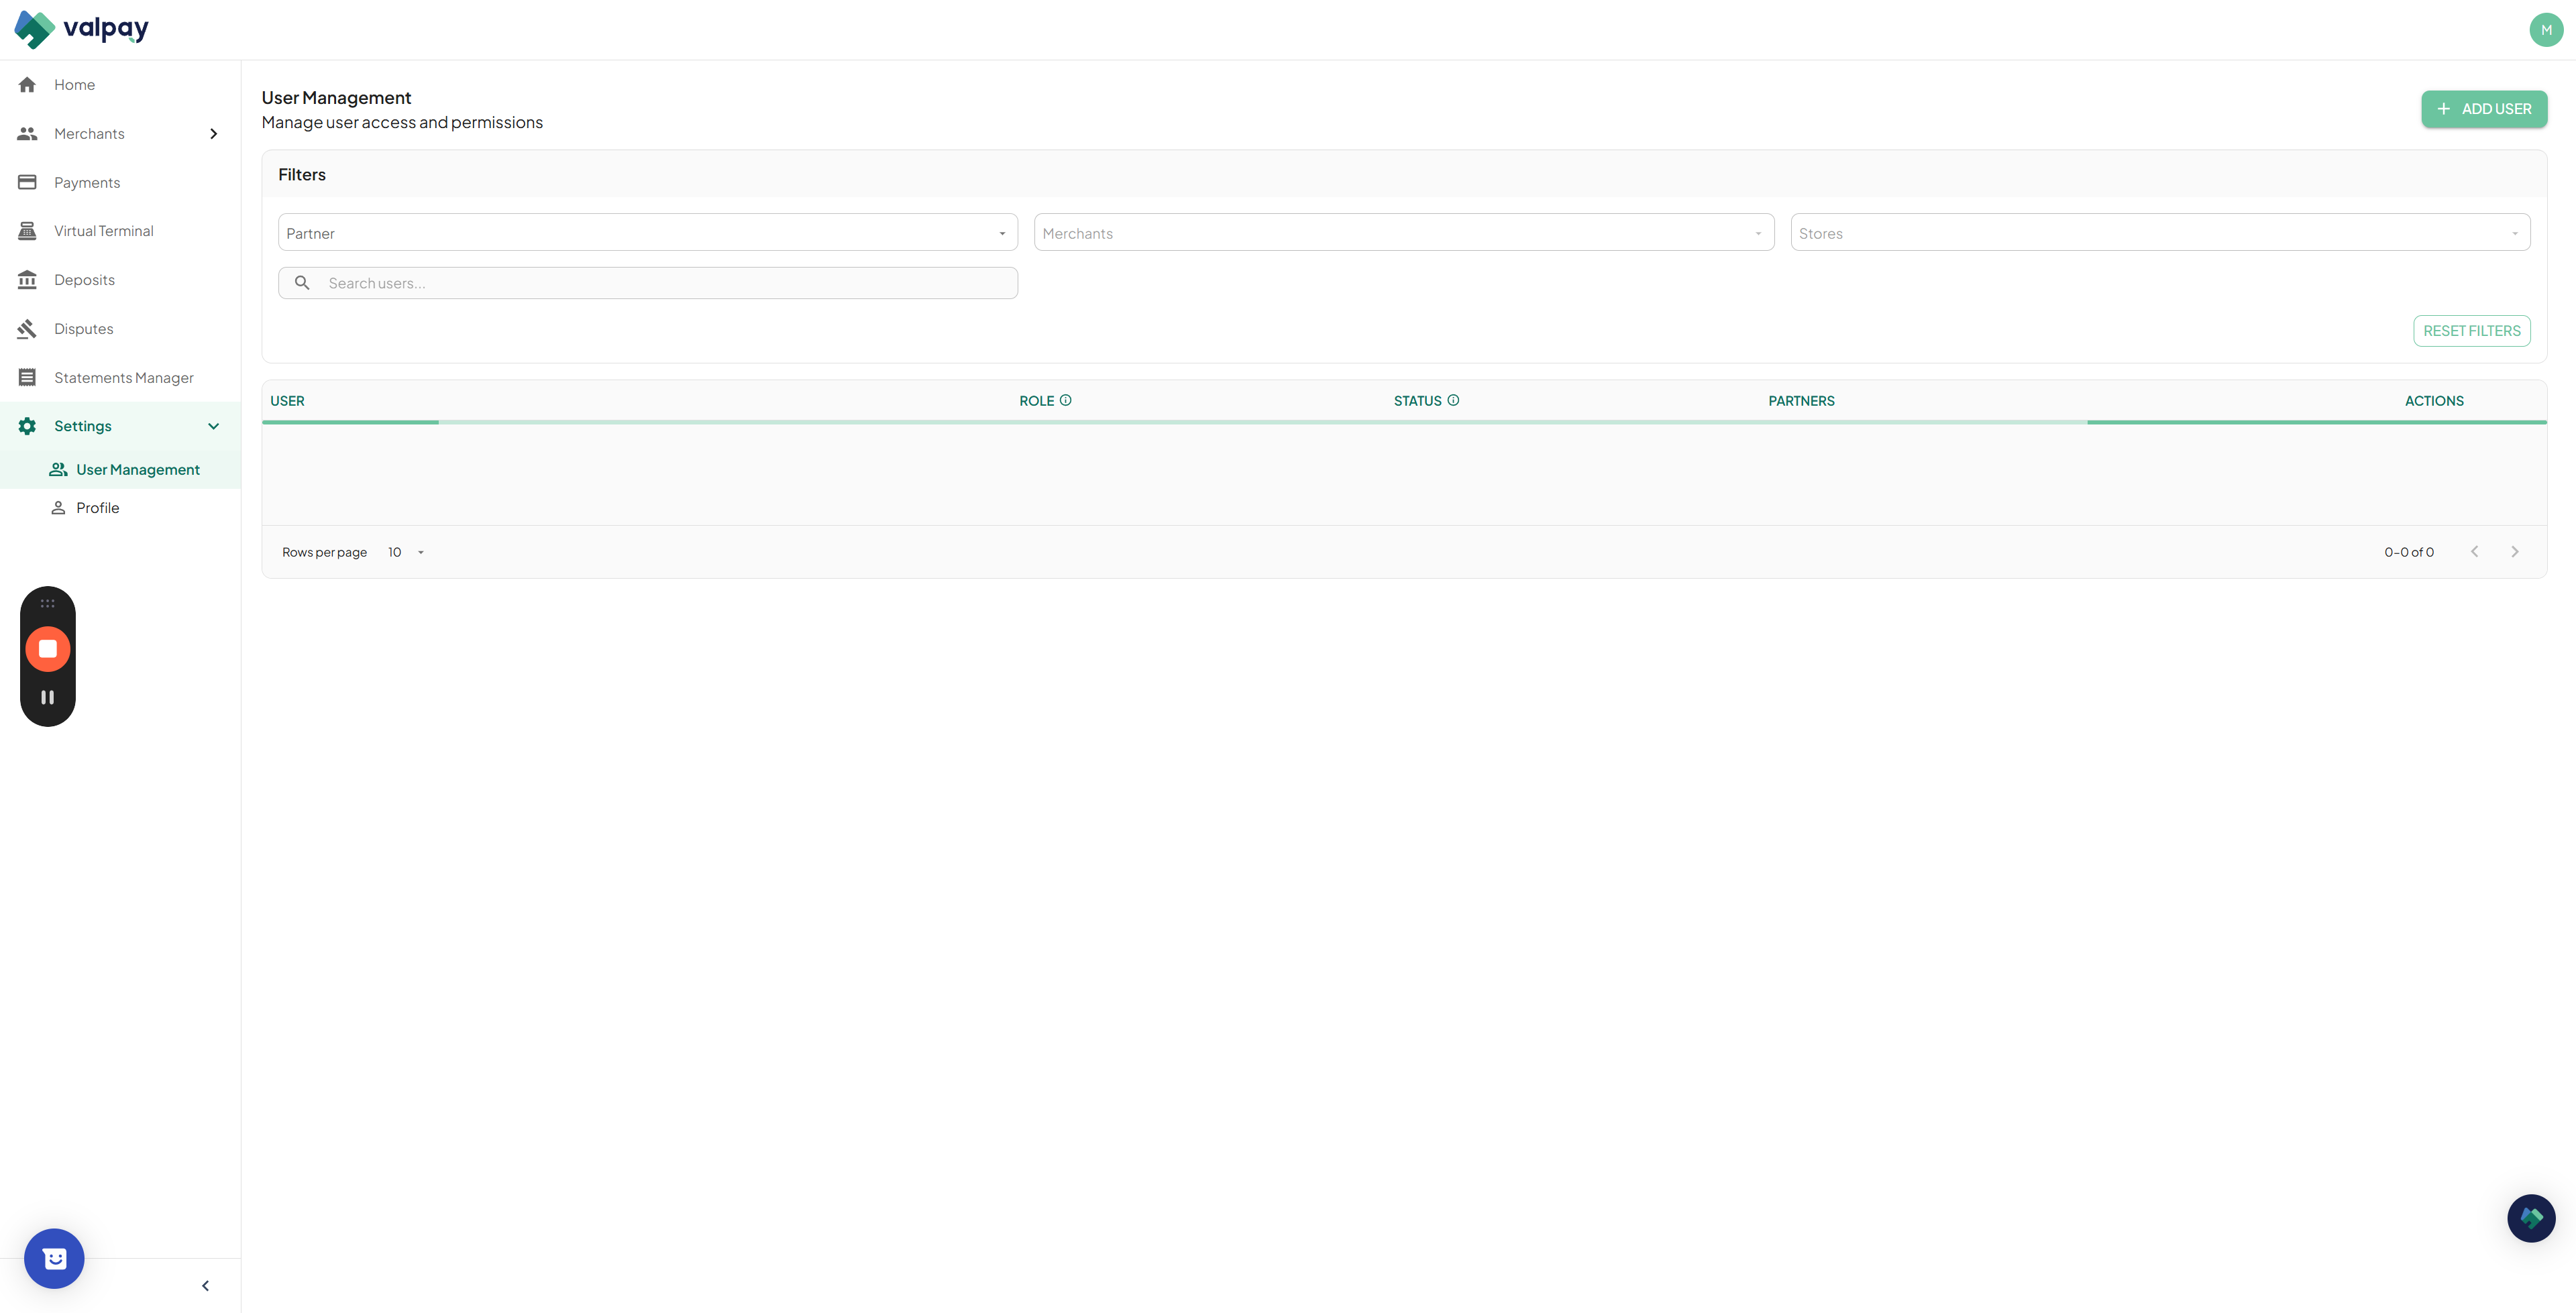
User Management and Settings
Administrators can configure team access, assign specific roles, and manage permissions on a granular level.
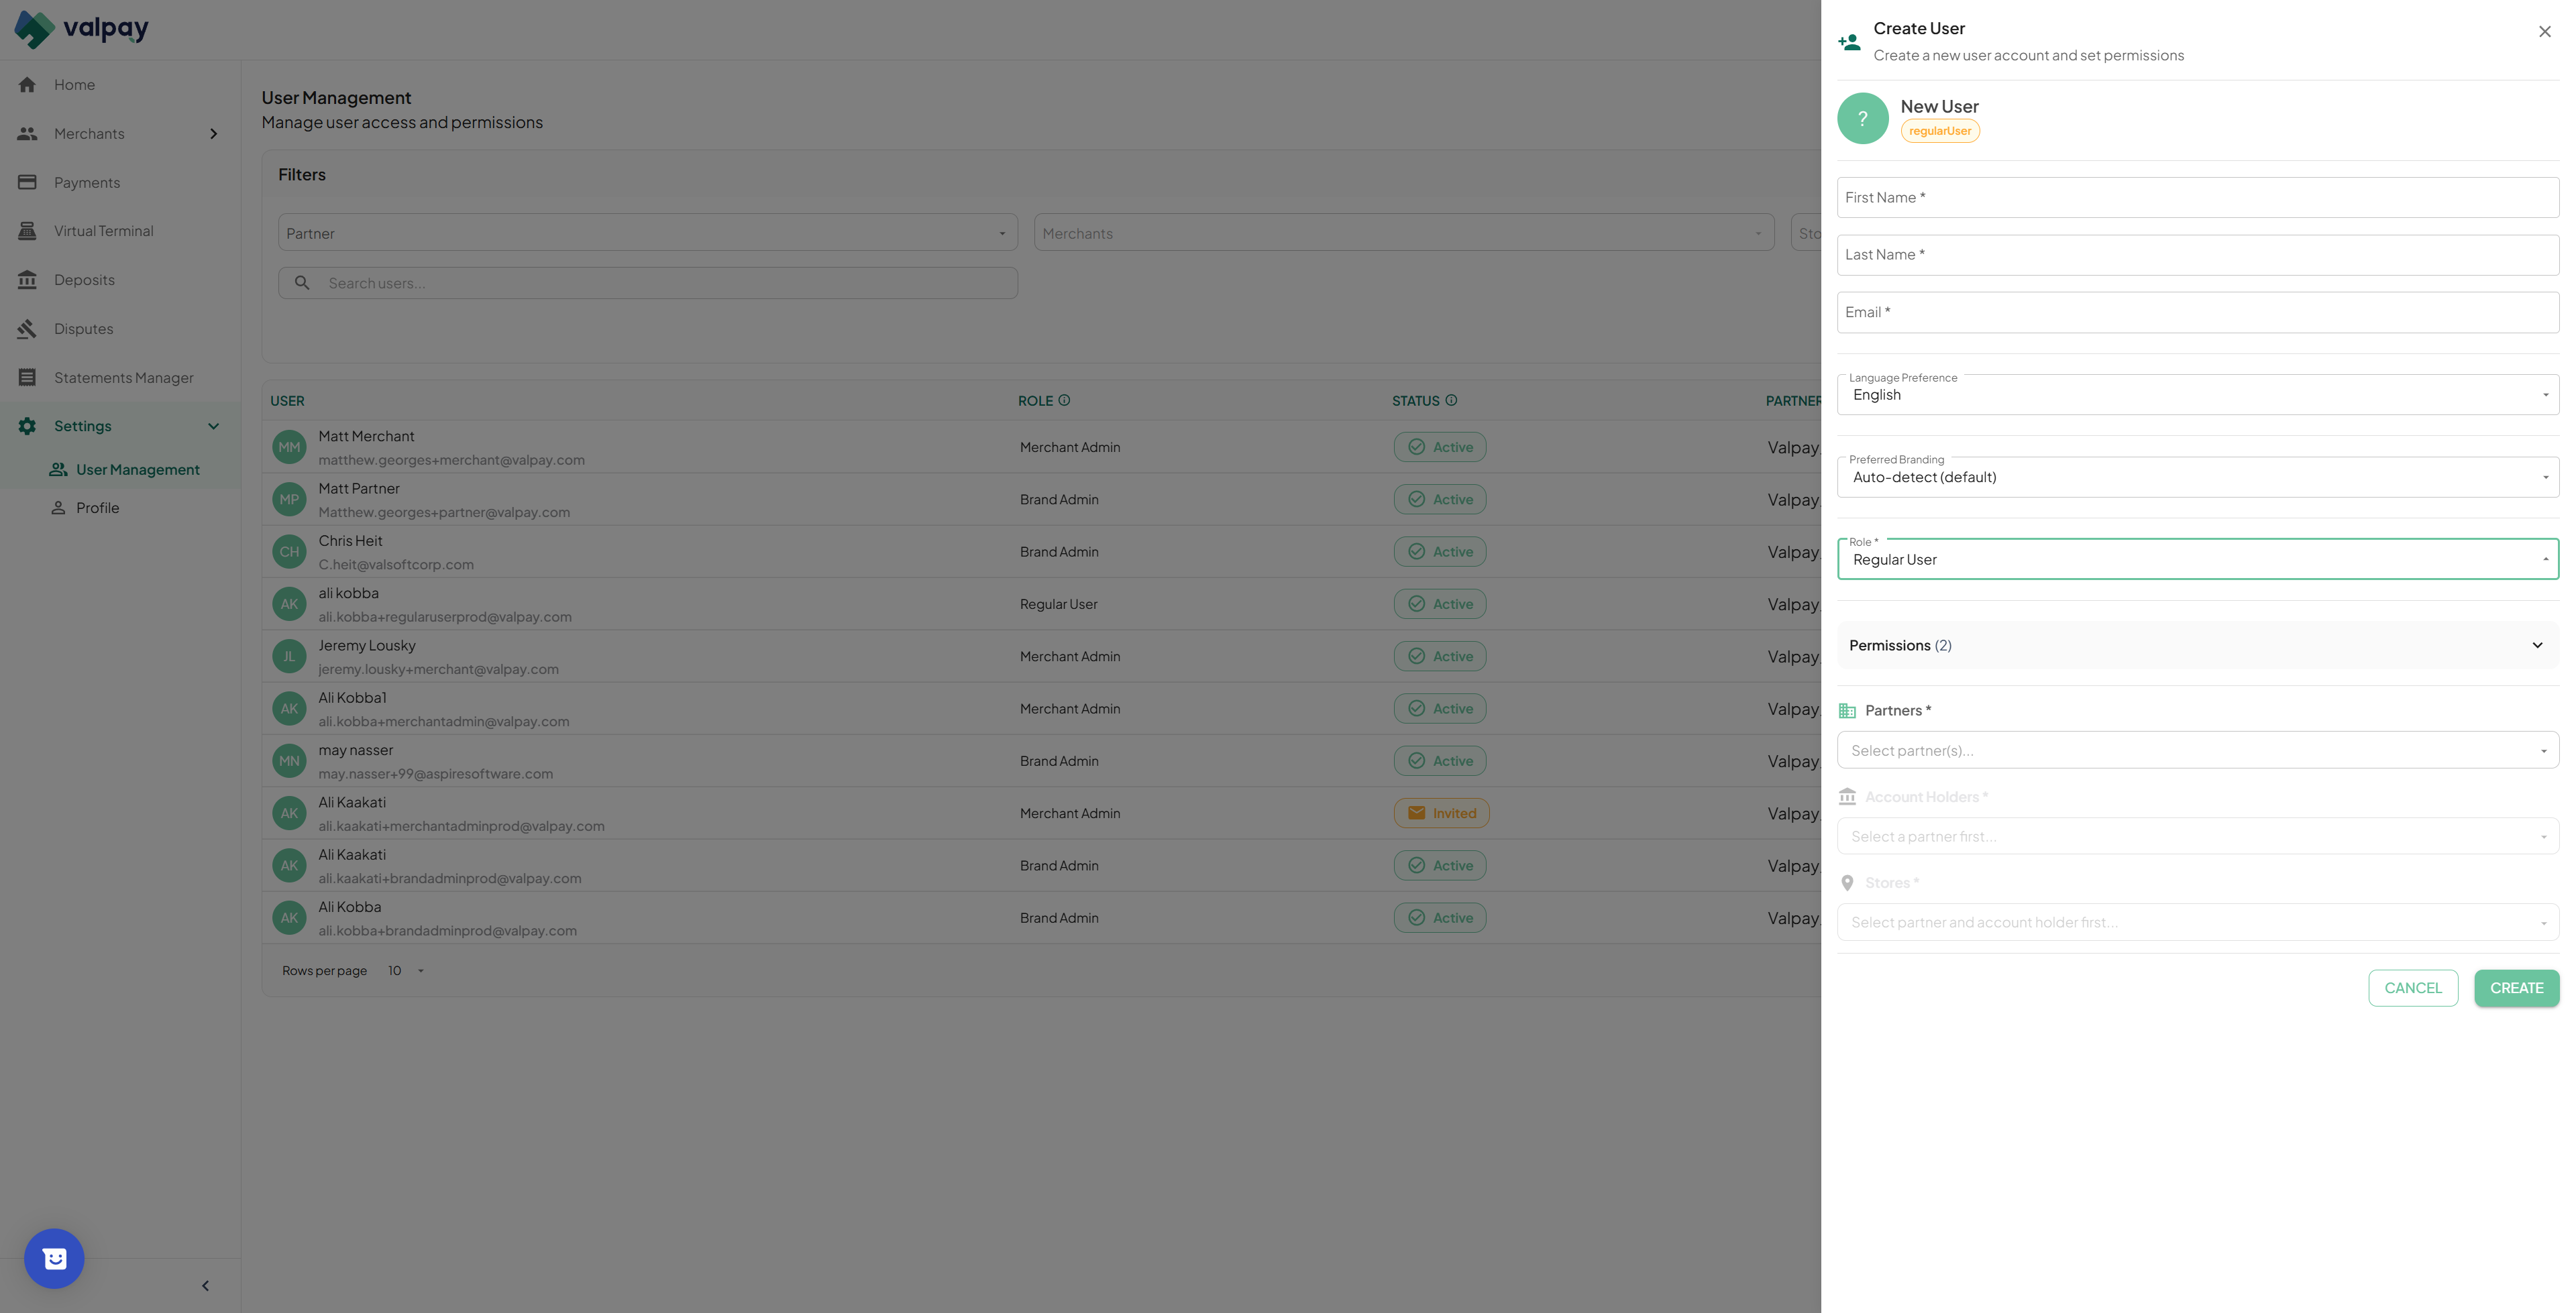
24
Navigate to User Management and click Add User to open the creation panel.
25
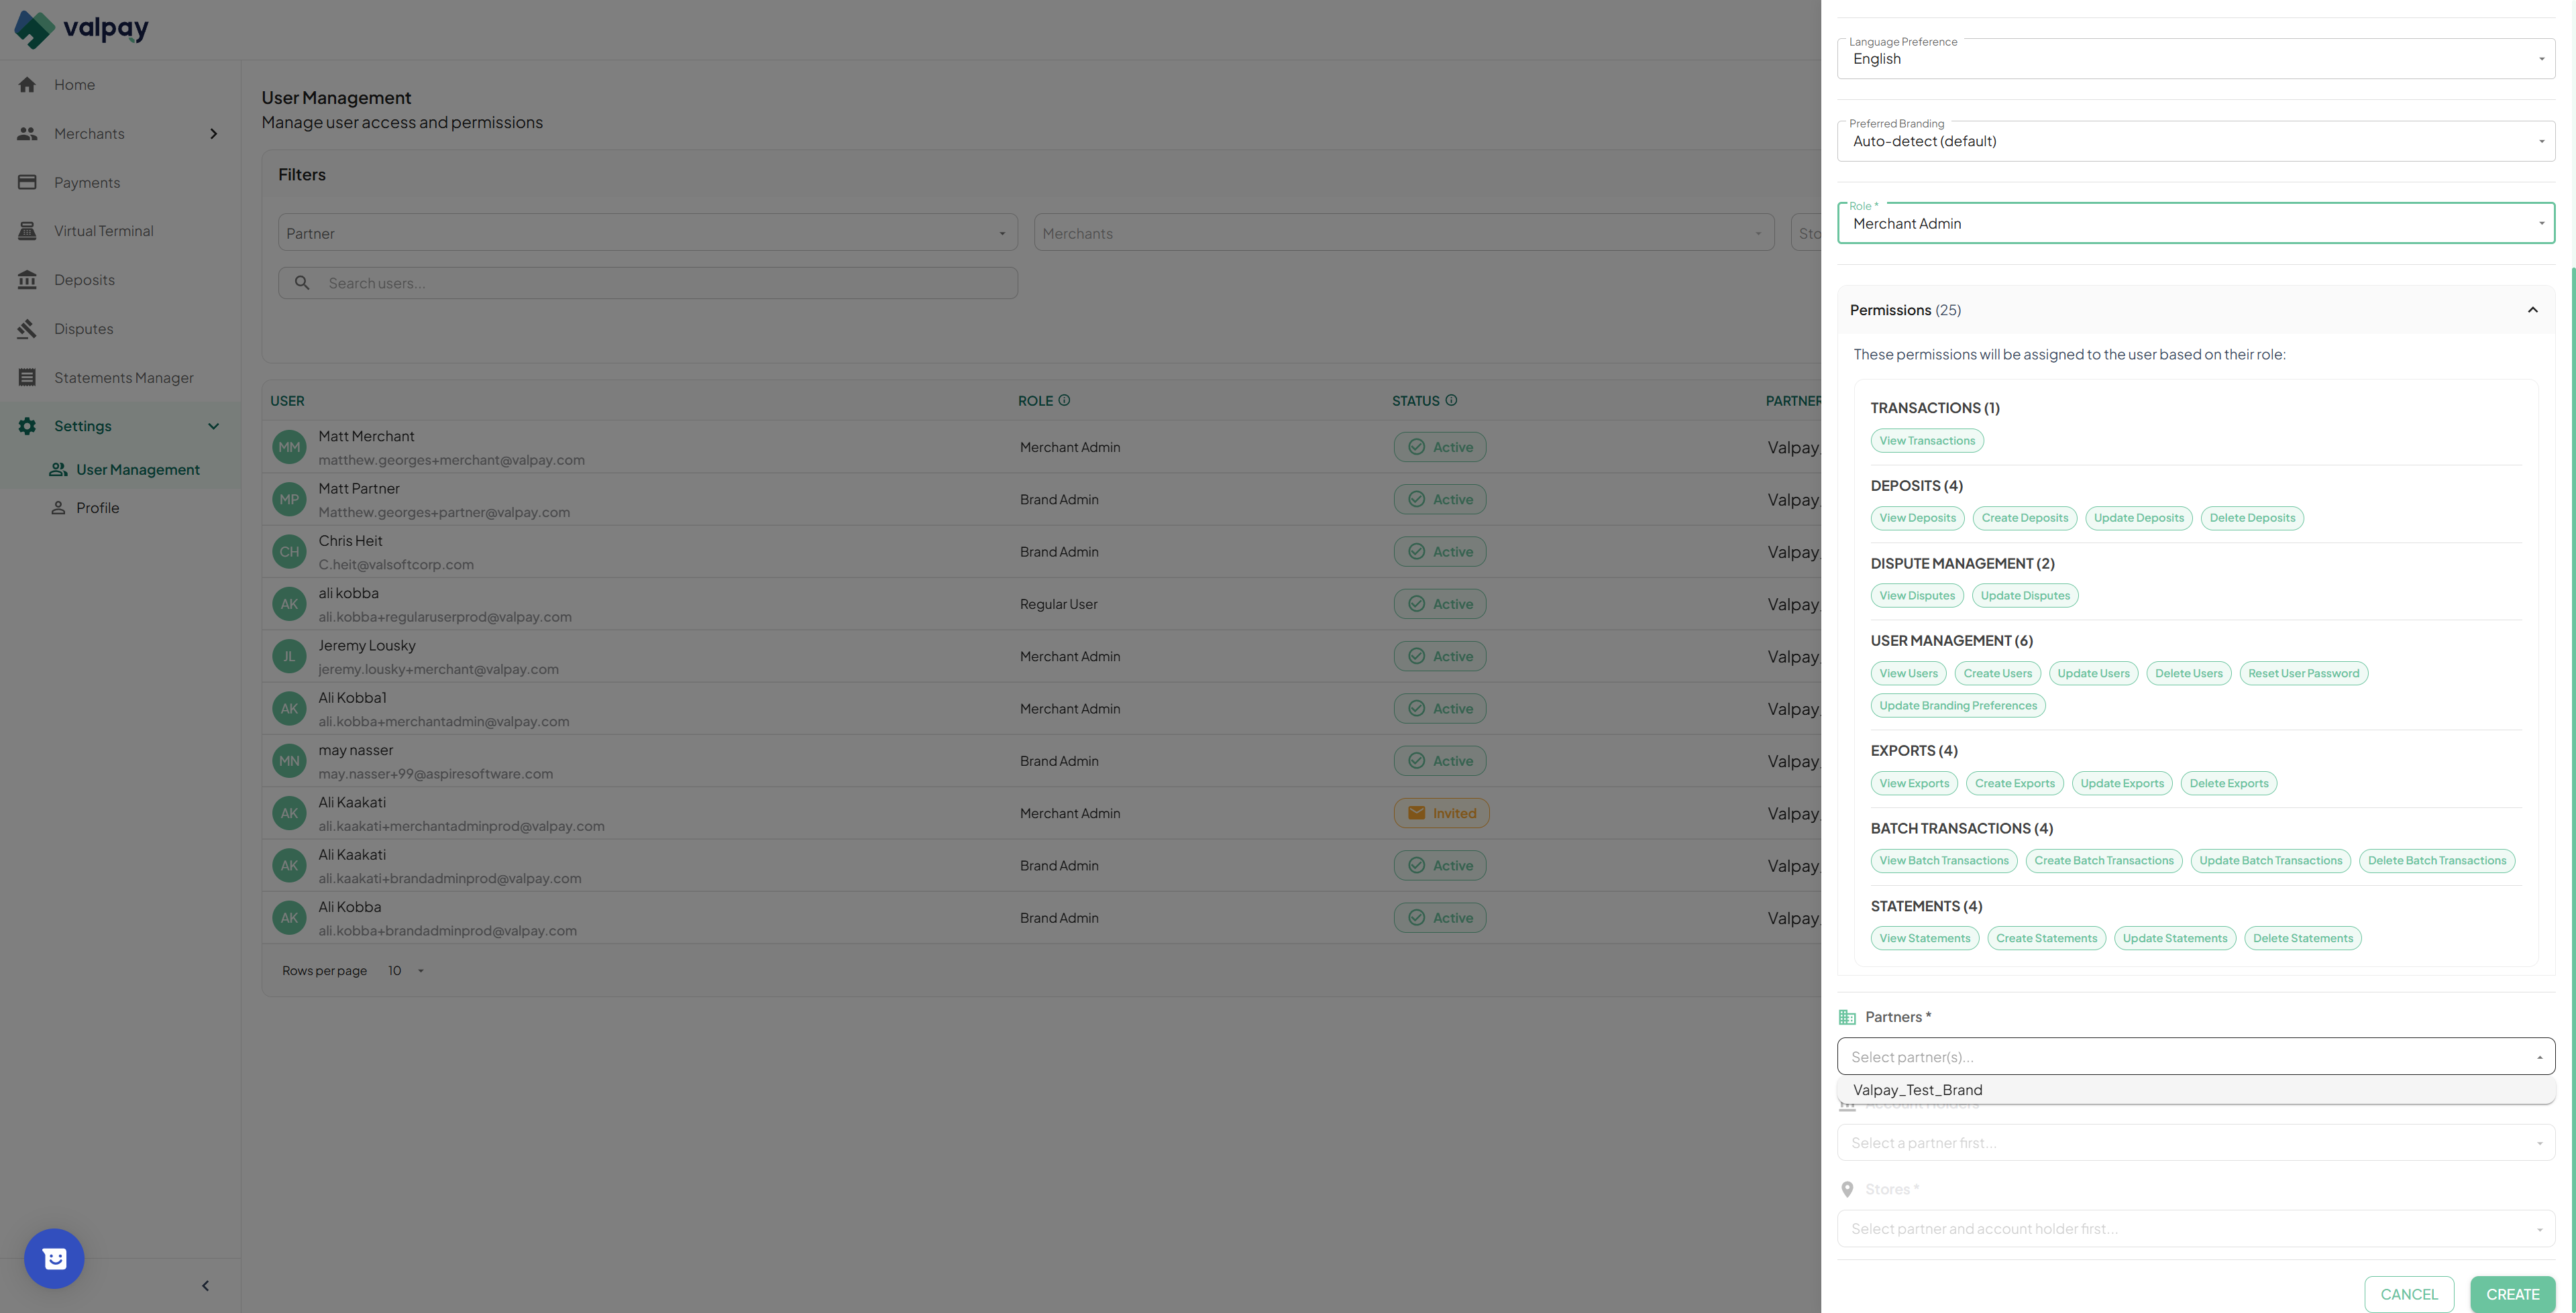
Assign the user a role, choosing between Merchant Admin or Regular User.
26
Select the specific partners, account holders, and stores this user should have access to.
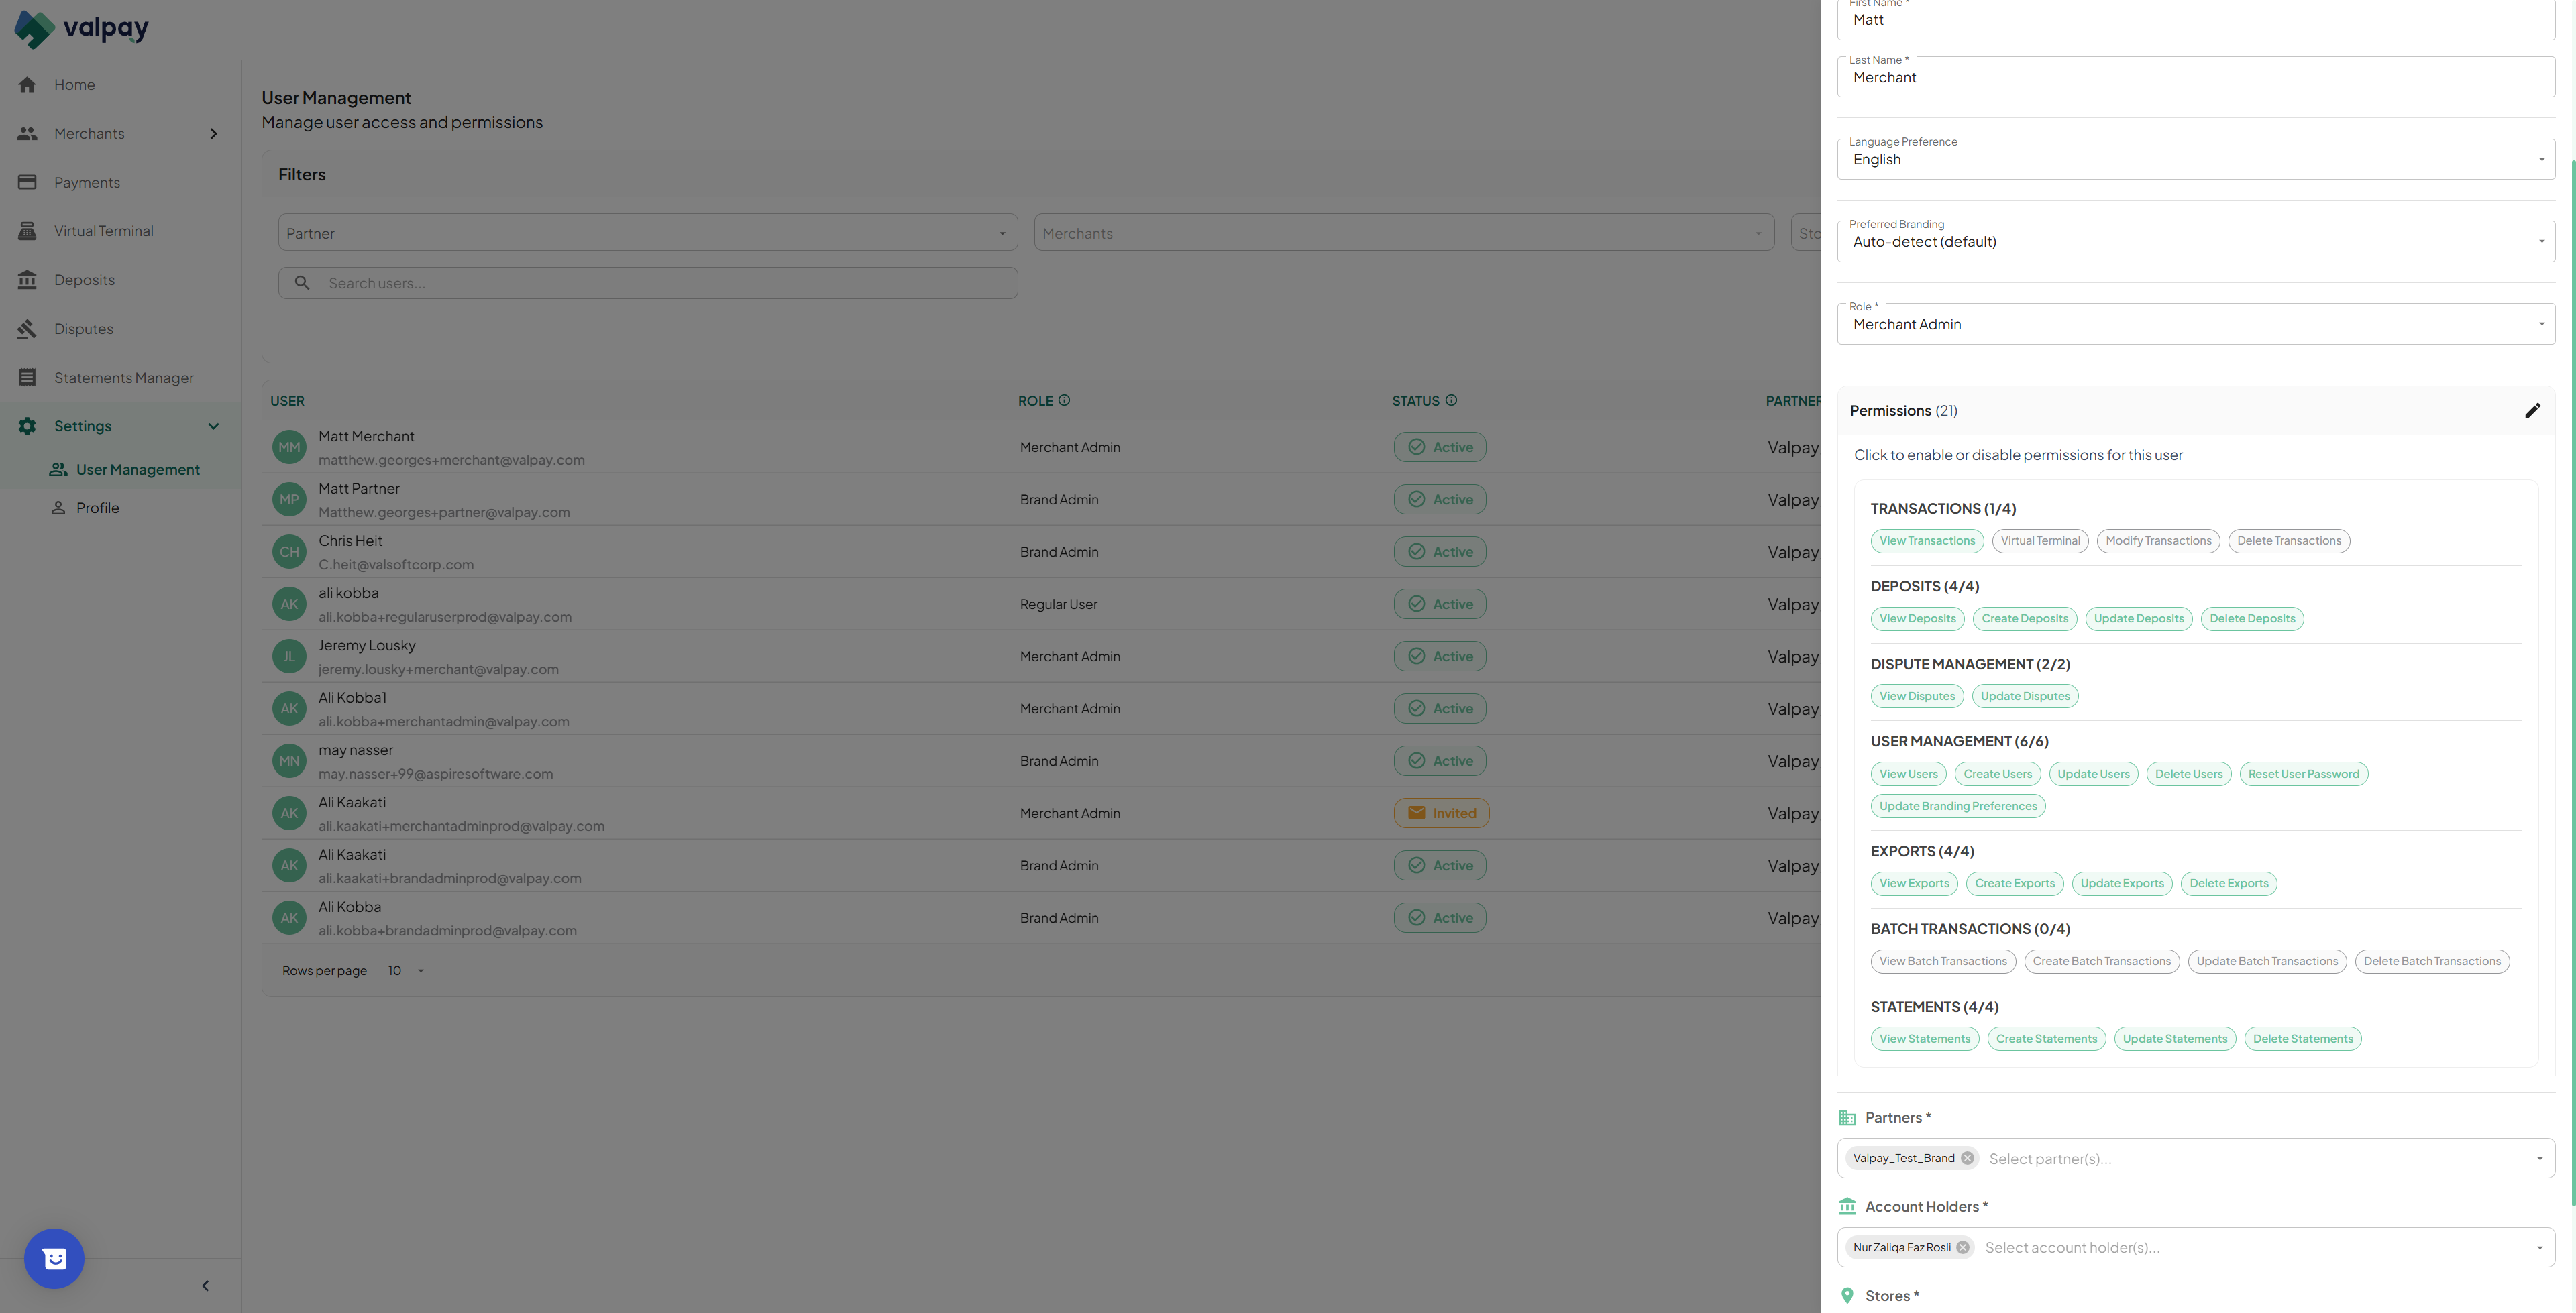
27
Toggle individual permissions on or off to precisely control what portal features the user can interact with. Note, this will only be available once the User is created. You can then Edit the user to change permissions.
28
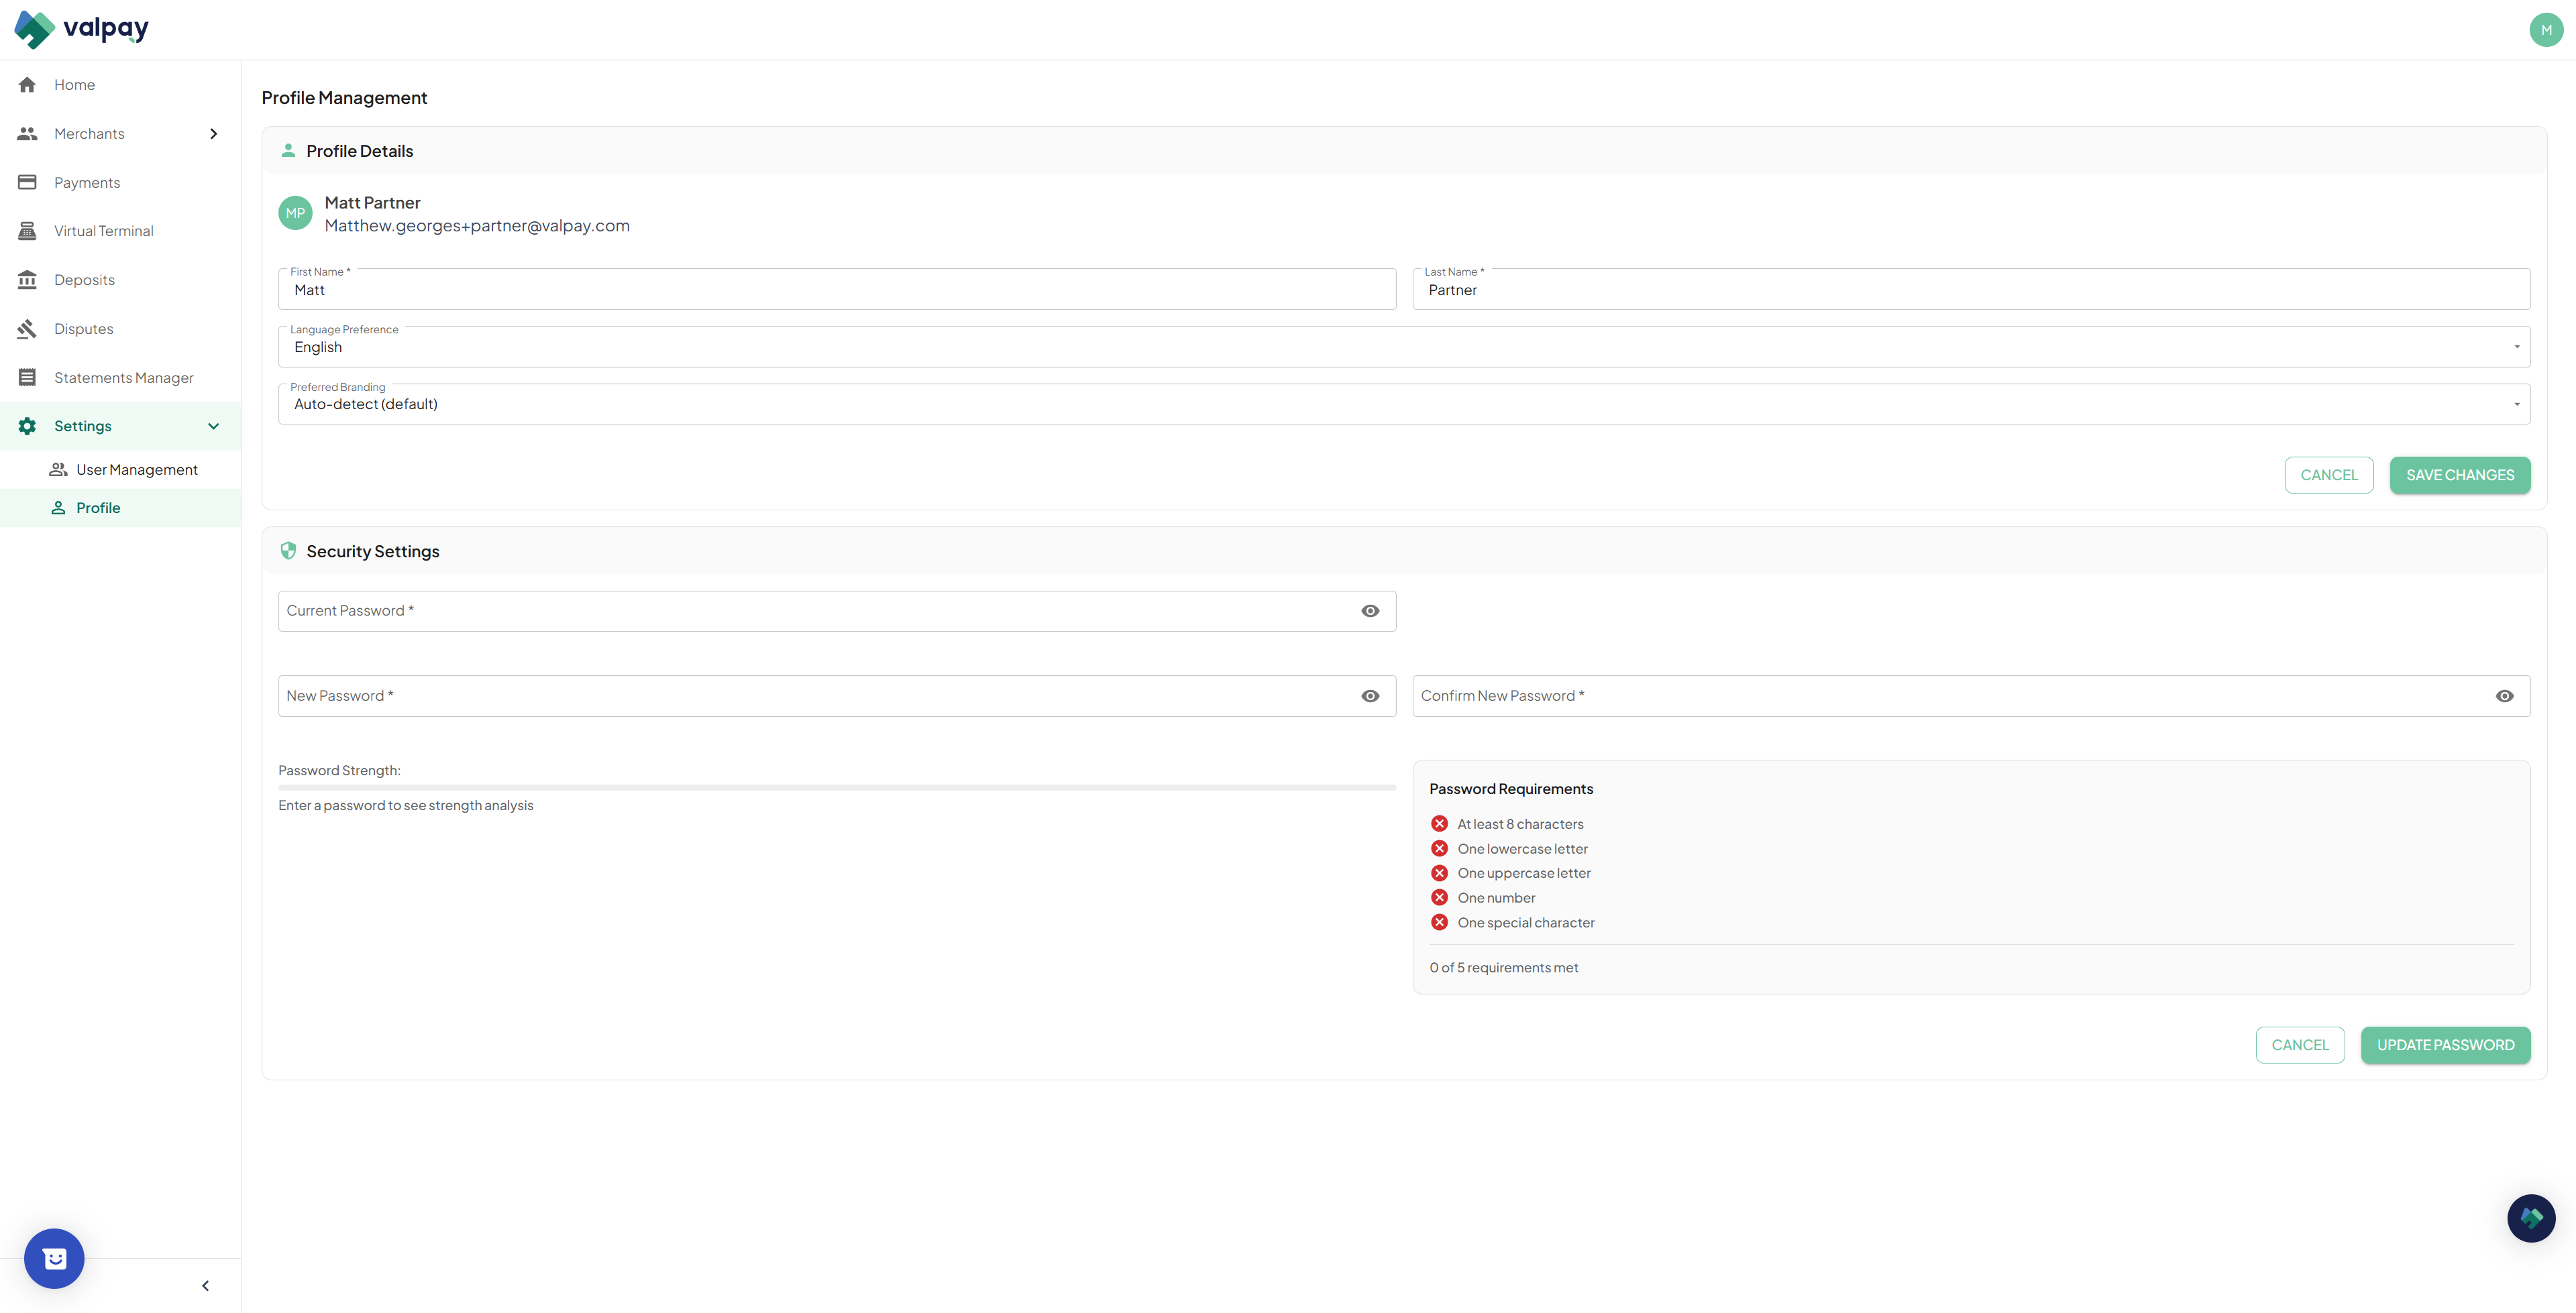
Navigate to your Profile Details to update your own personal information or change your password.
FAQ
Q: What should I do if a merchant application is stuck in processing?
A: Most stuck applications are waiting on the service agreement to be signed. Navigate to the Merchant Tab and click the pending application then select pending contact to sign.
Q: Why aren't my Virtual Terminal transactions showing up in my POS ledger?
A: Transactions processed through the Virtual Terminal bypass your POS software entirely. You can identify them in the Valpay portal Payments tab by looking for the ValPay VT reference prefix.
Q: Why do my Monday deposits look significantly larger than other days?
A: Monday deposits typically group Friday, Saturday, and Sunday transactions together into a single payout.
Q: Why is my deposit showing as pending?
A: A pending status usually indicates a short portal delay, not a failed payment. Check the Finances section within your account to confirm the live balance.
Glossary
Term
Definition
Authorization
A transaction hold that has been approved by the bank but not yet officially captured or settled.
Virtual Terminal
A secure web-based form used to manually enter and process card payments without physical card hardware.
Sweep
The scheduled automated process of transferring captured funds from a merchant's balance account to their designated bank account.