How to View and Manage the Print Queue in Windows 11
Learn how to access your printer settings and check the print queue in Windows 11 to monitor or manage active print jobs and clear the stuck print jobs.
By Louie
This guide explains how to access your system's printer settings and view the print queue in Windows 11. Completing this task allows you to easily monitor, troubleshoot, and manage your active print job-cancel, pause, and resume print jobs.
This guide applies to any Windows 11 user who needs to check the status of their documents or clear stuck print jobs. It is particularly helpful during routine computer use or when experiencing printing delays.
To manage your active print jobs in Windows 11, you first need to navigate to the system's printer settings.
1
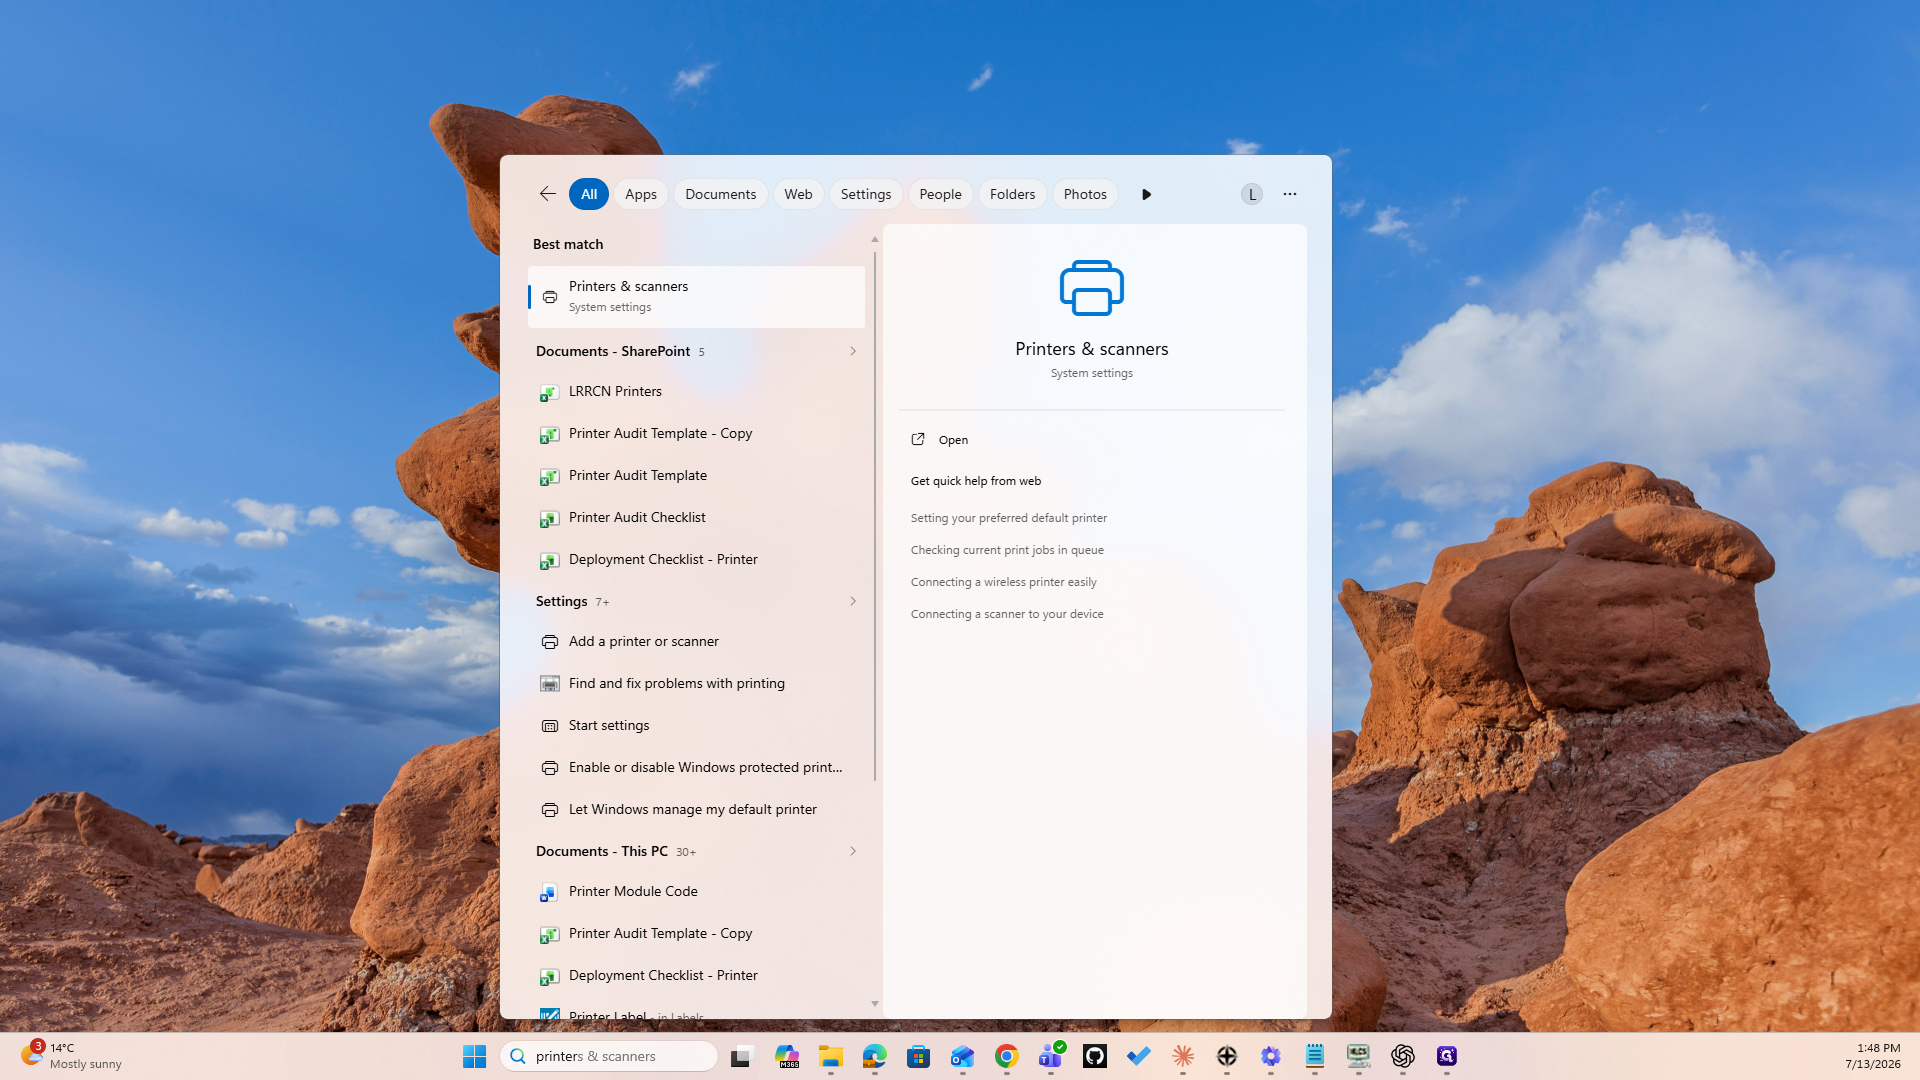
Open the Windows Start menu or search bar and type printer.
2
Click Printers & scanners from the search results to open the Settings application.
3
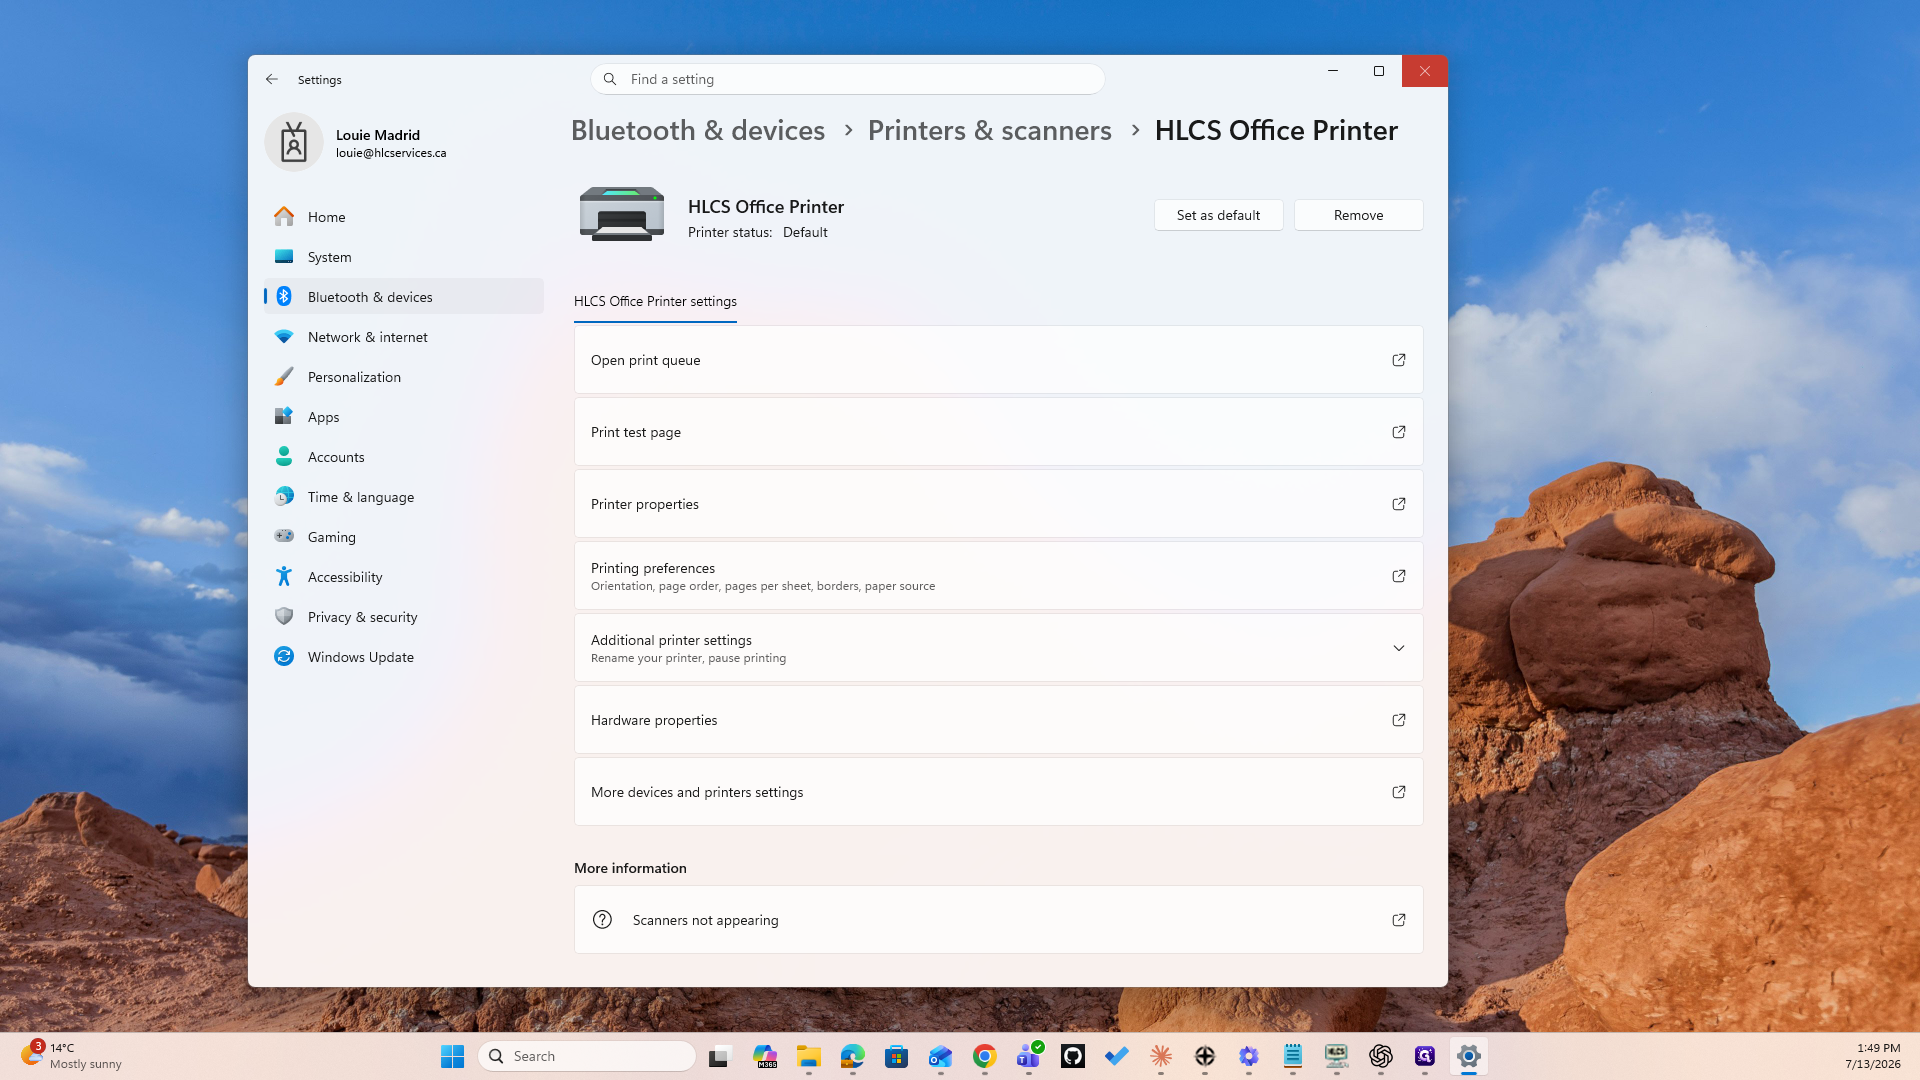
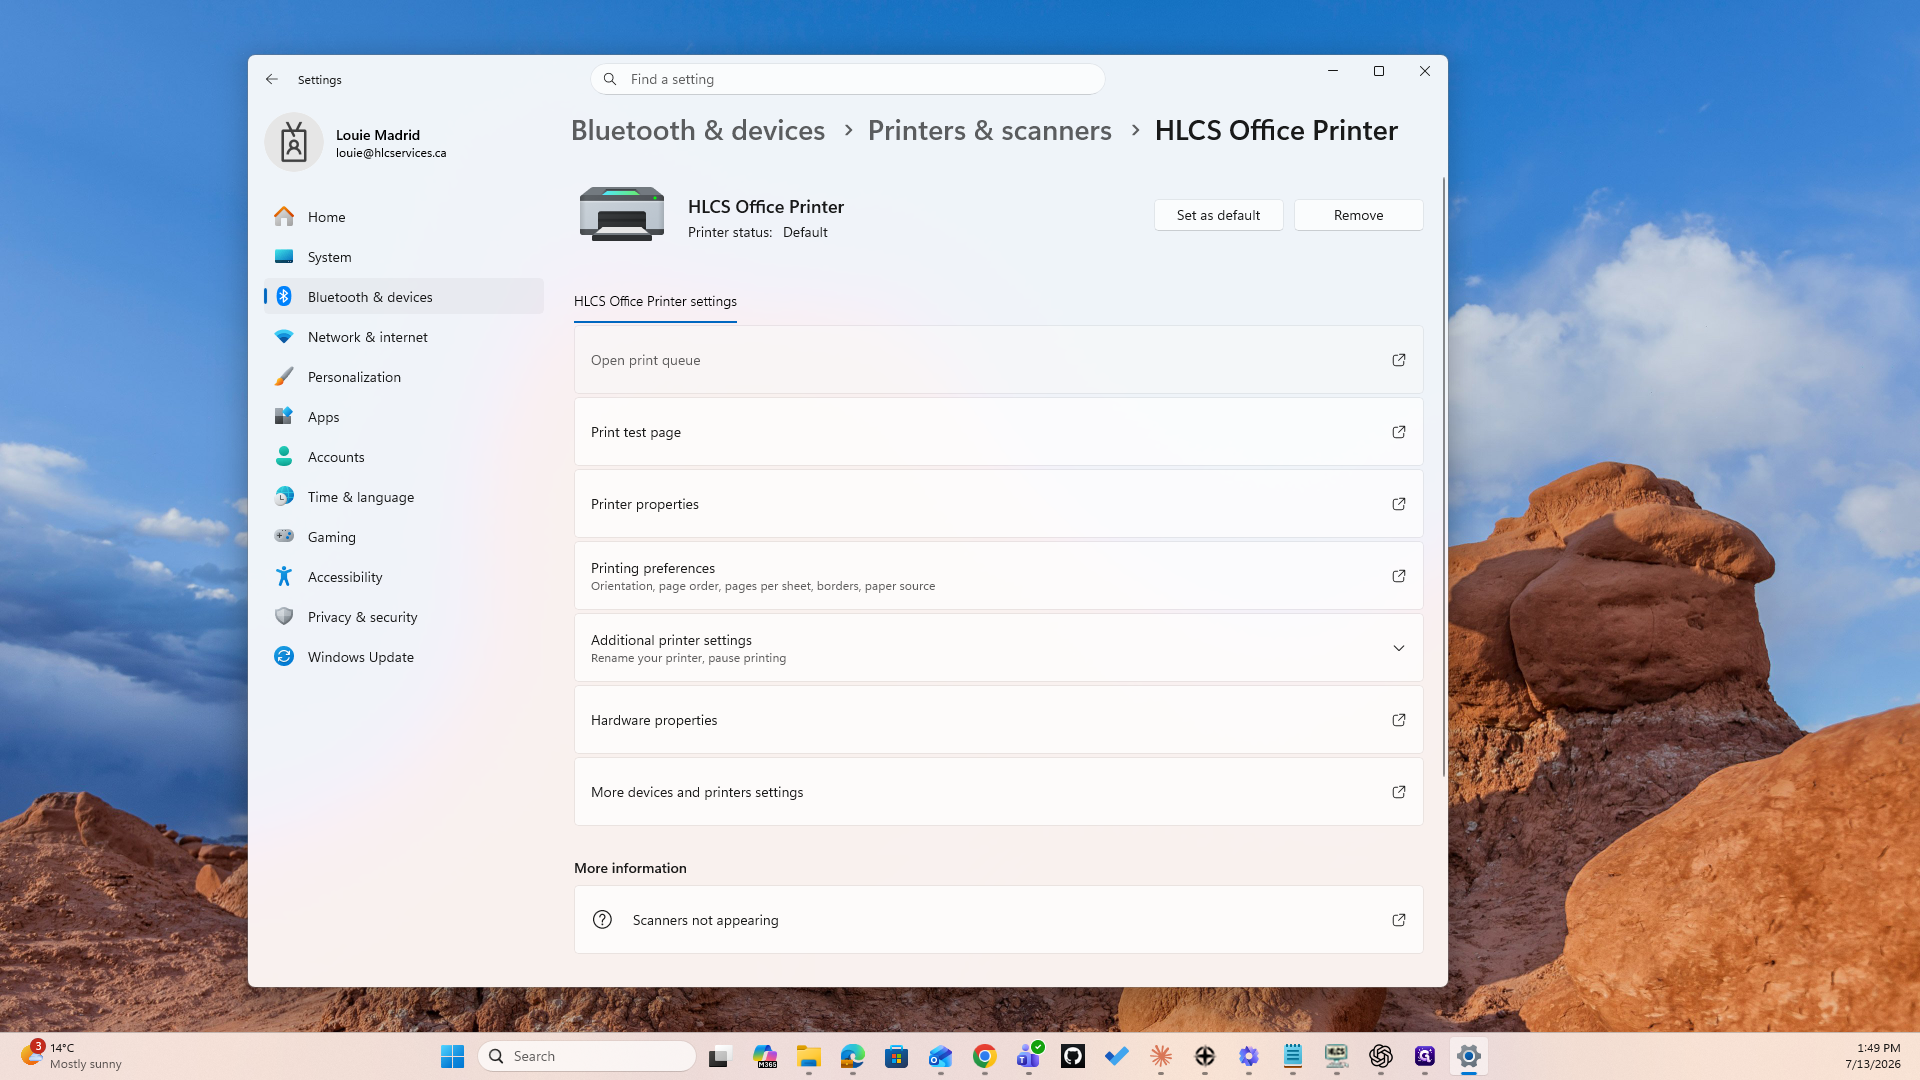
Click on your specific printer (such as "HLCS Office Printer") from the list, then click Open print queue.
4
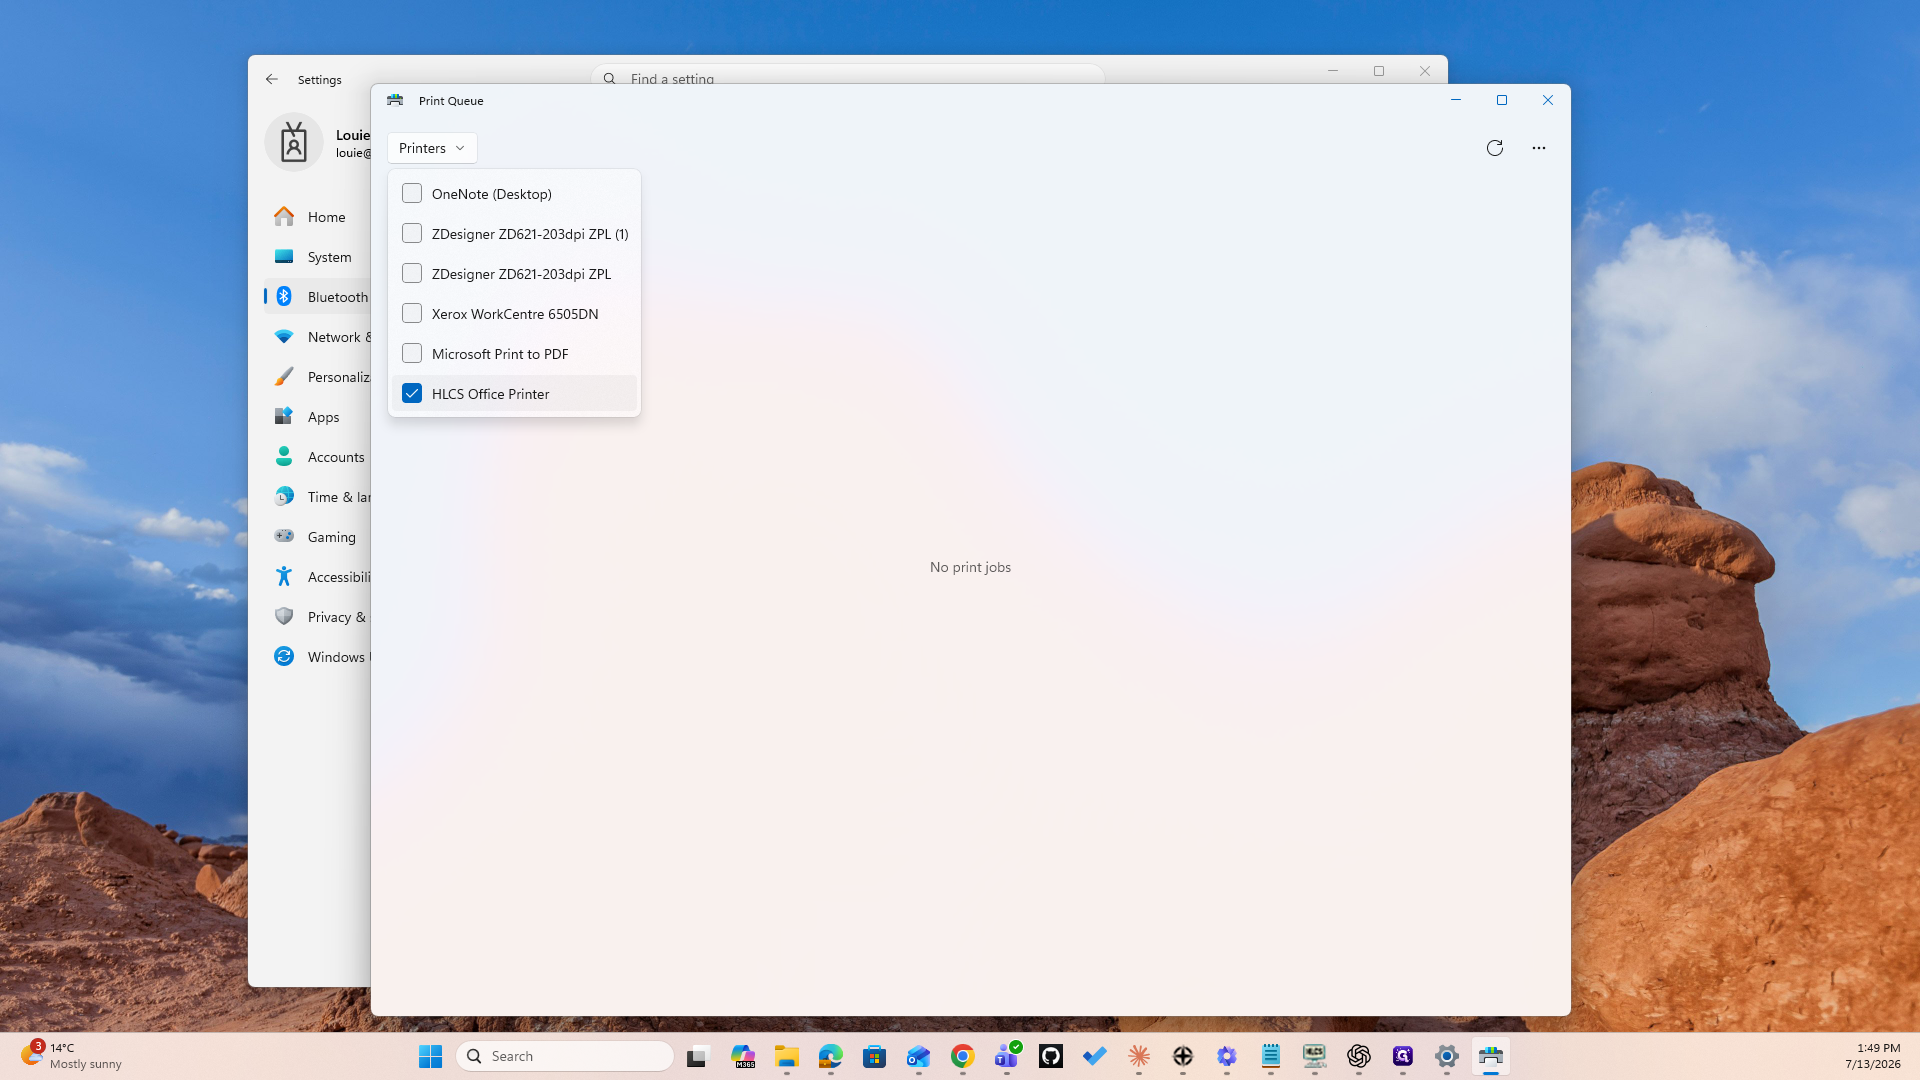
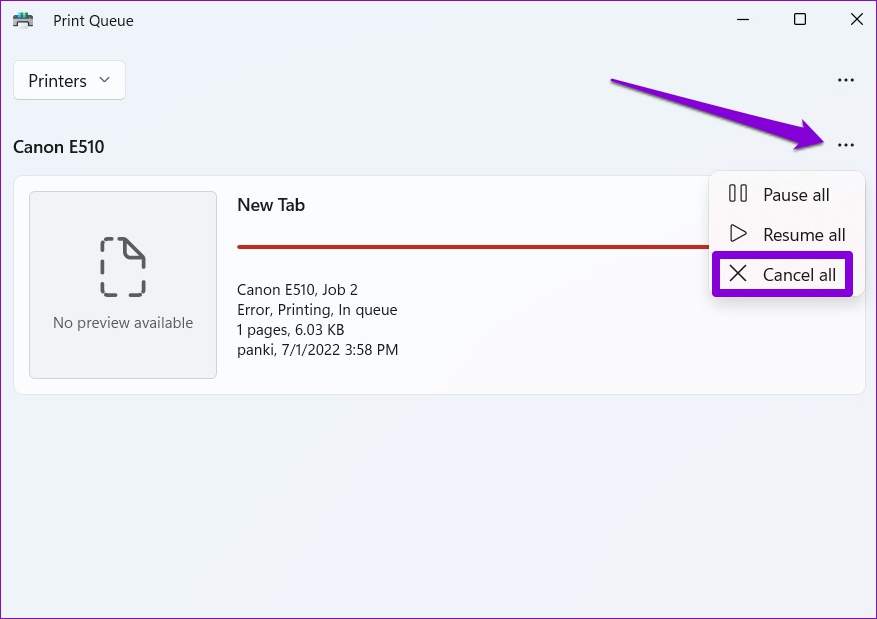
Click the Printers dropdown menu in the top-left corner to switch views if you have multiple printers installed. Review the active print jobs displayed in the Print Queue application window.
5
Click the three-dot menu at the top-right corner and select Cancel all. -- This is for the purpose of clearing a stuck print jobs.
6
Click the X to close the window when you are finished managing your print jobs.