Saving the Zoom Level of Screenshots in a Glitter Guide
This article provides a step-by-step guide on how to zoom in on specific screenshots in a Glitter guide, including how to share the zoomed-in view with others.
In this guide, we'll learn how to zoom in on specific screenshots of a glitter guide without the need to crop. To achieve this, we'll focus on selecting the guide we want to zoom in on, entering edit mode, and utilizing zoom controls to highlight particular sections.
Specifically, we'll zoom in on the "click share" step to demonstrate the process. By following these steps, you can enhance the visibility of crucial details in your screenshots, ensuring clarity when sharing guides with others. Let's get started.
Let's get started.
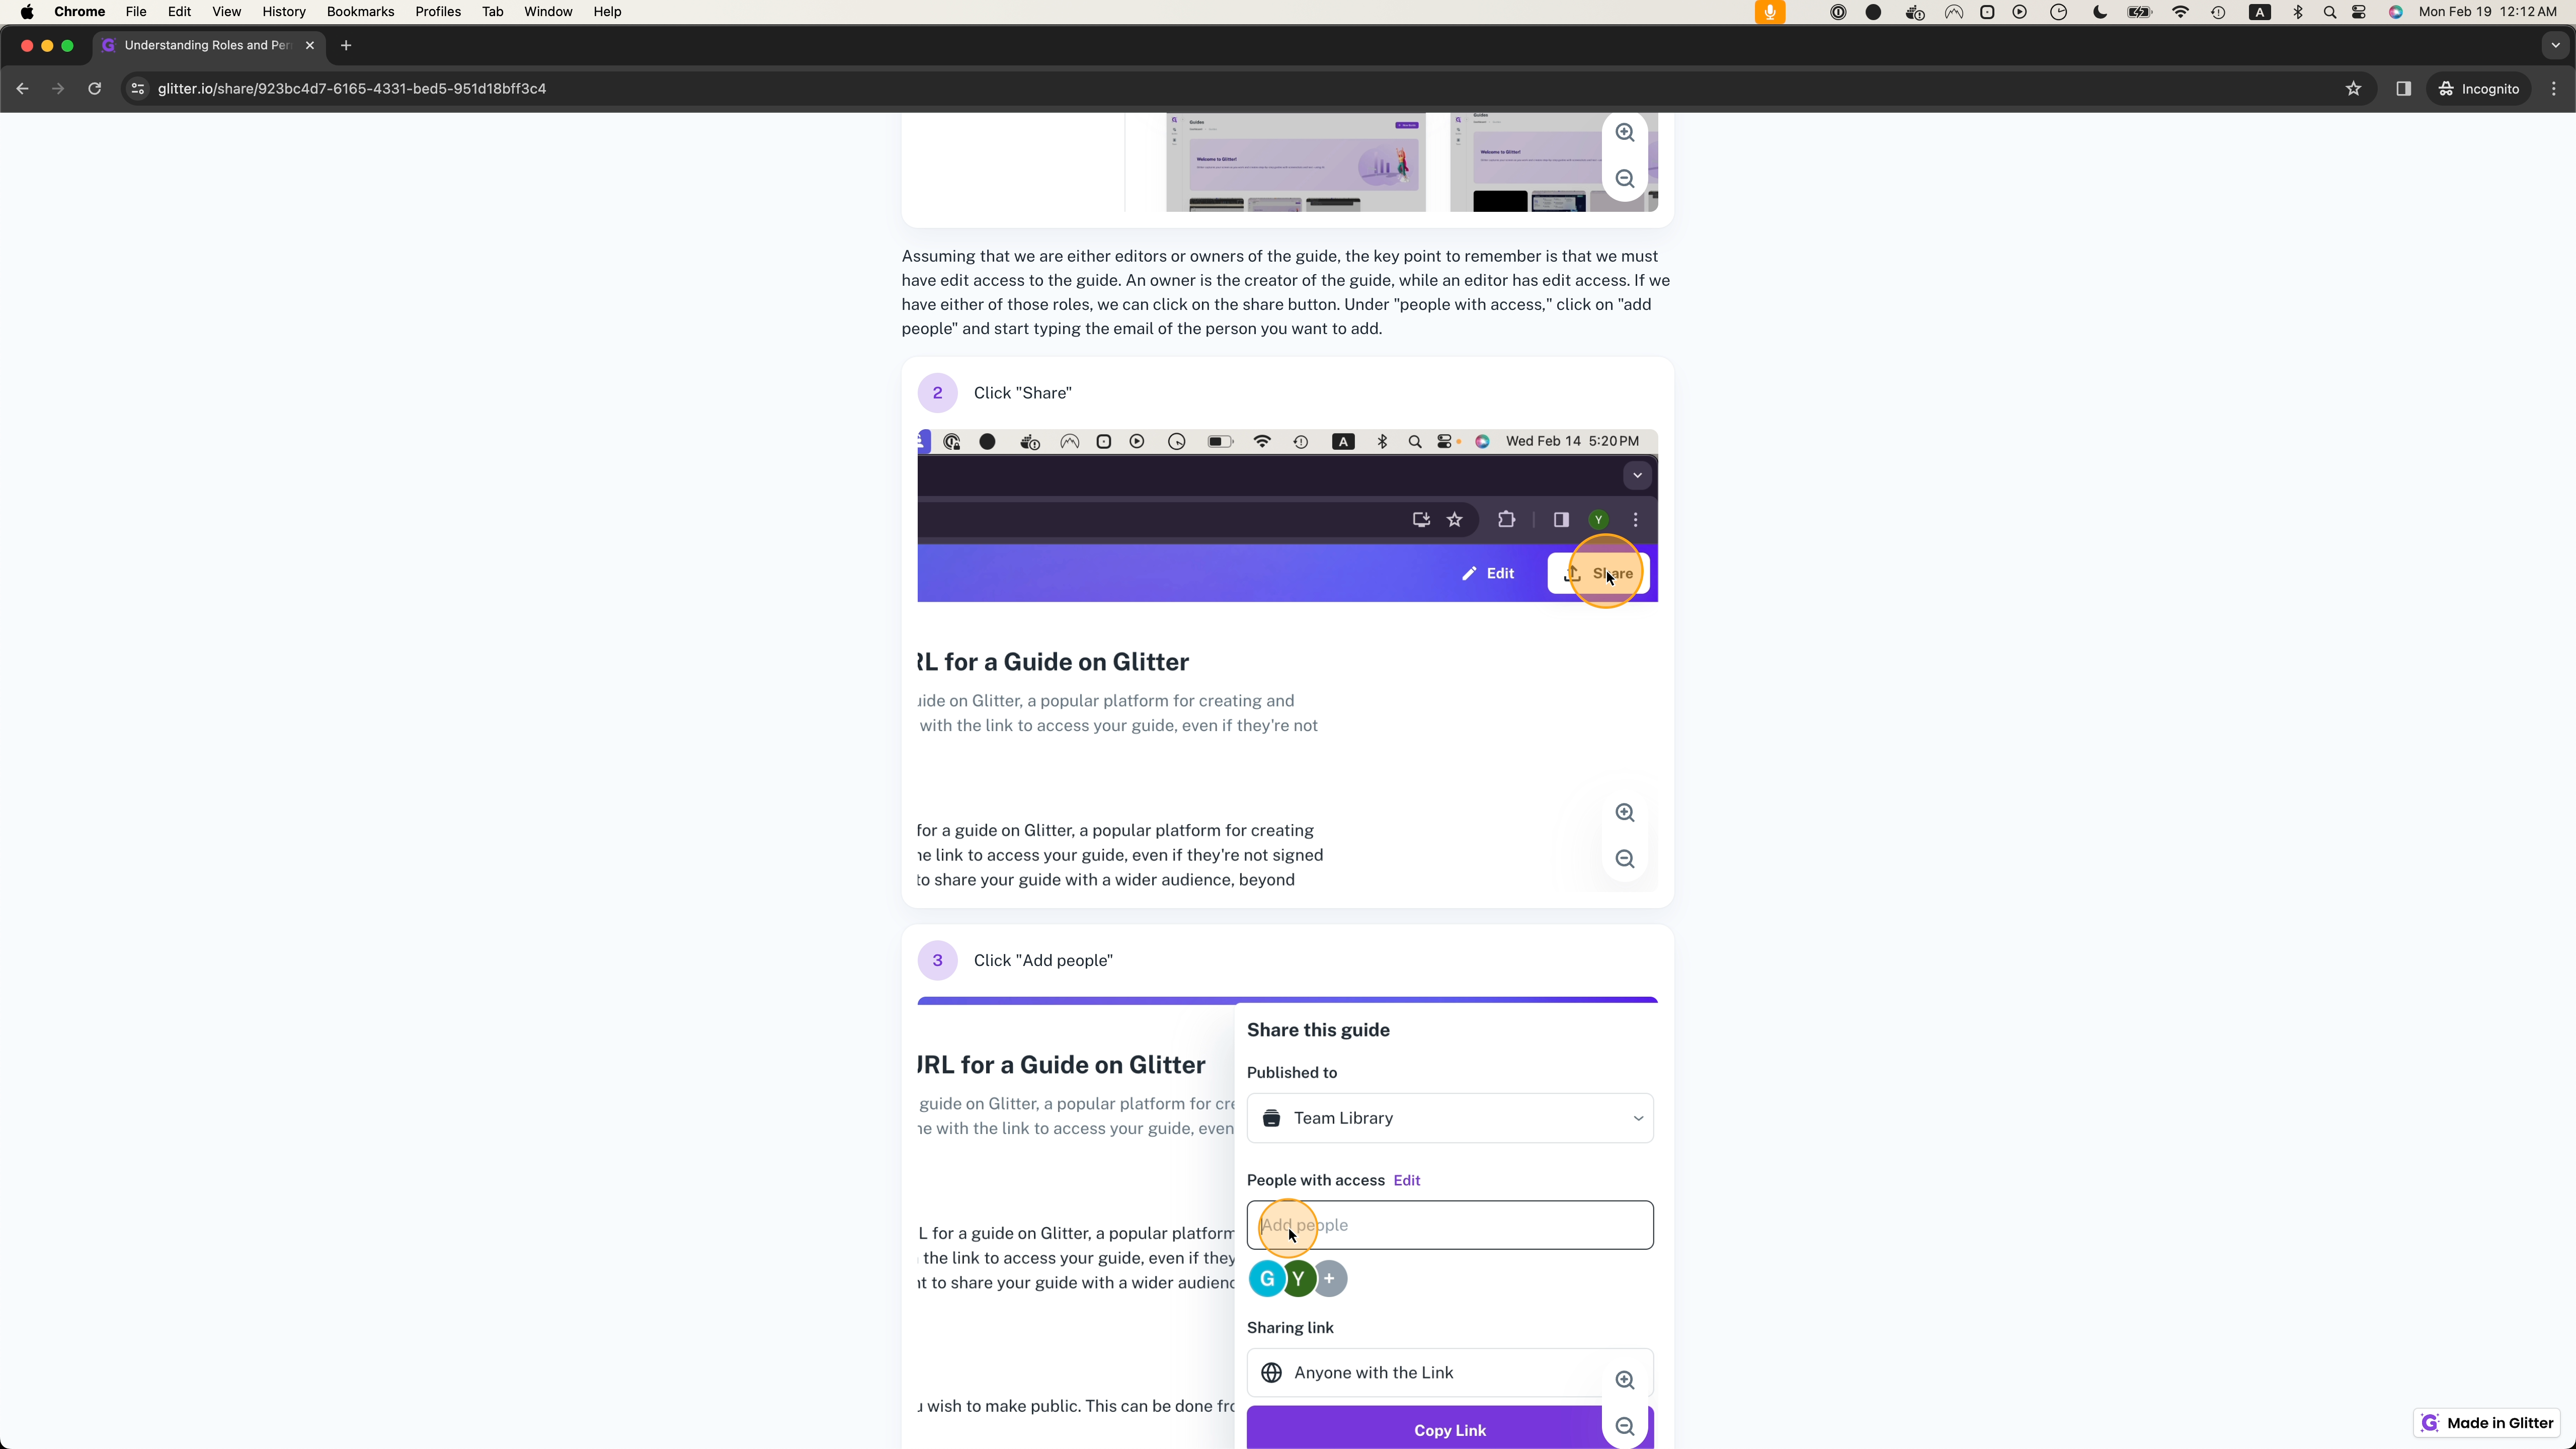
Click on the guide you want to zoom in on the screenshots. Let's choose "Understanding Roles and Permissions" in Glitter as an example.
Then, enter edit mode by clicking on "Edit." Now, you can select the screenshot you want to focus on.


At the bottom right-hand side of the step screenshot, you'll see zoom controls. Click on a zoom control (such as Zoom in - the plus button) to adjust the zoom level.

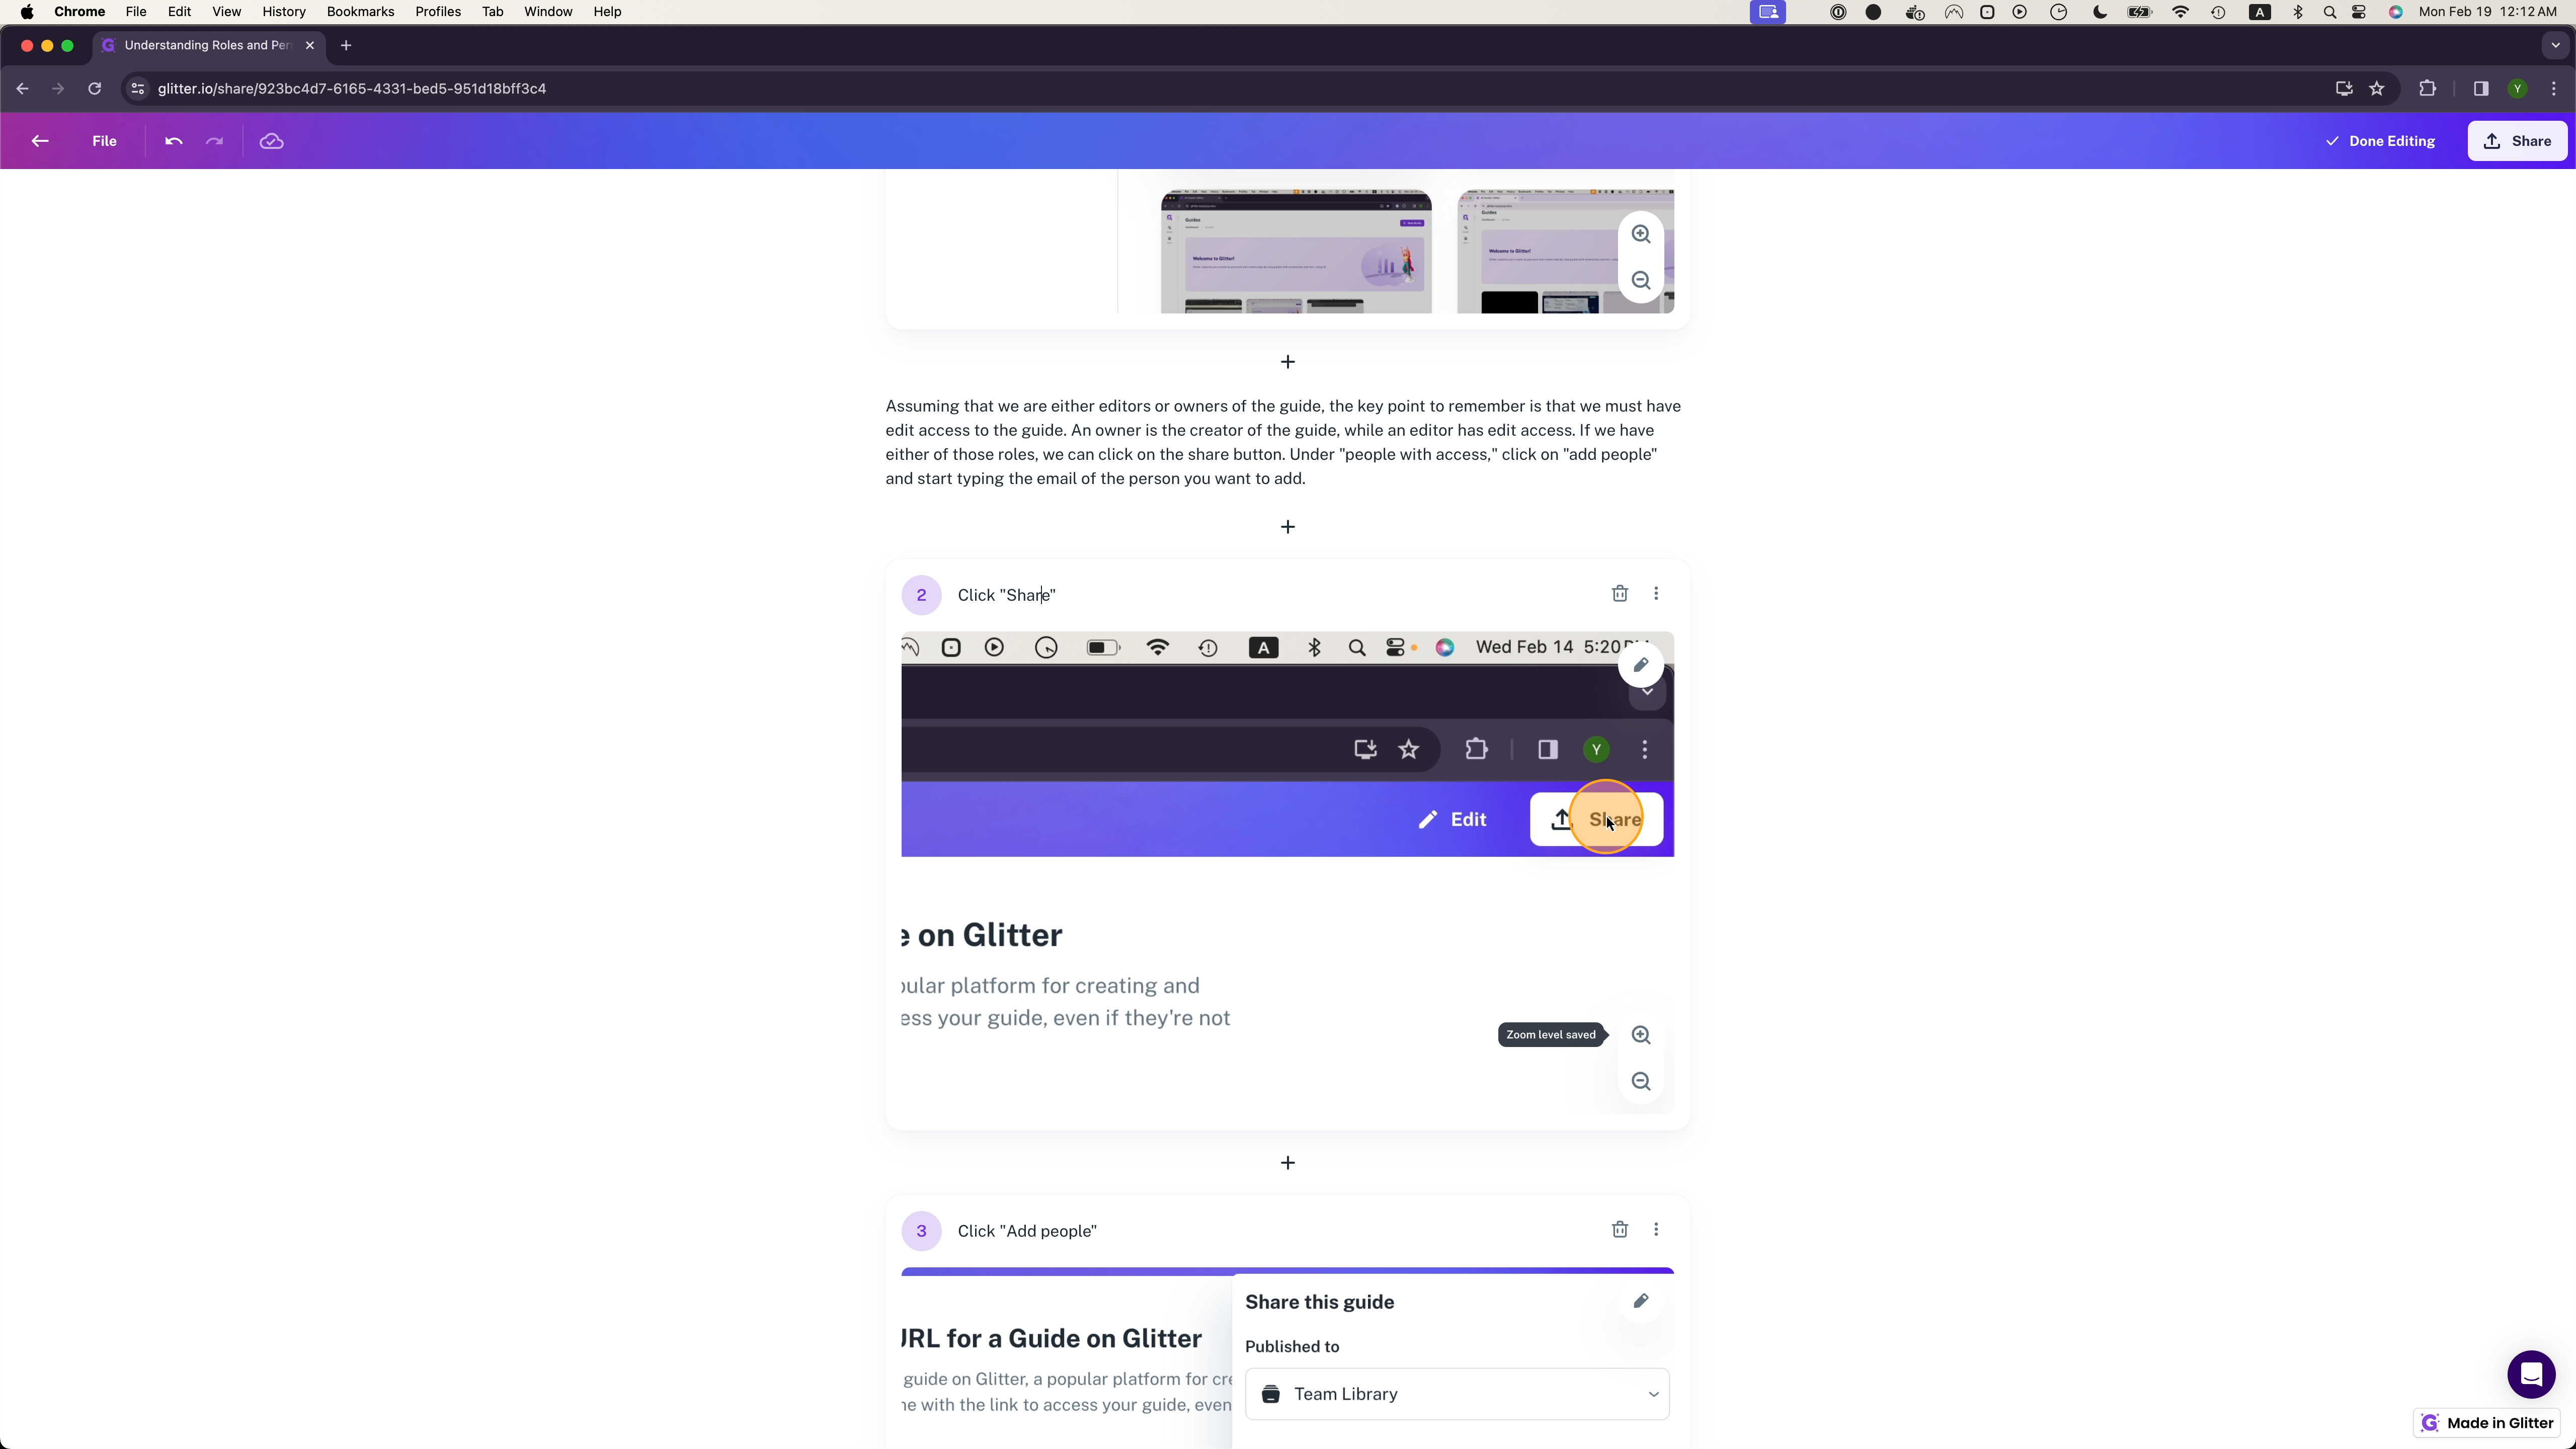
Now, the interesting part is that once I do that, it zooms in to where the mouse was when I recorded this specific step in the guide. It will automatically save.
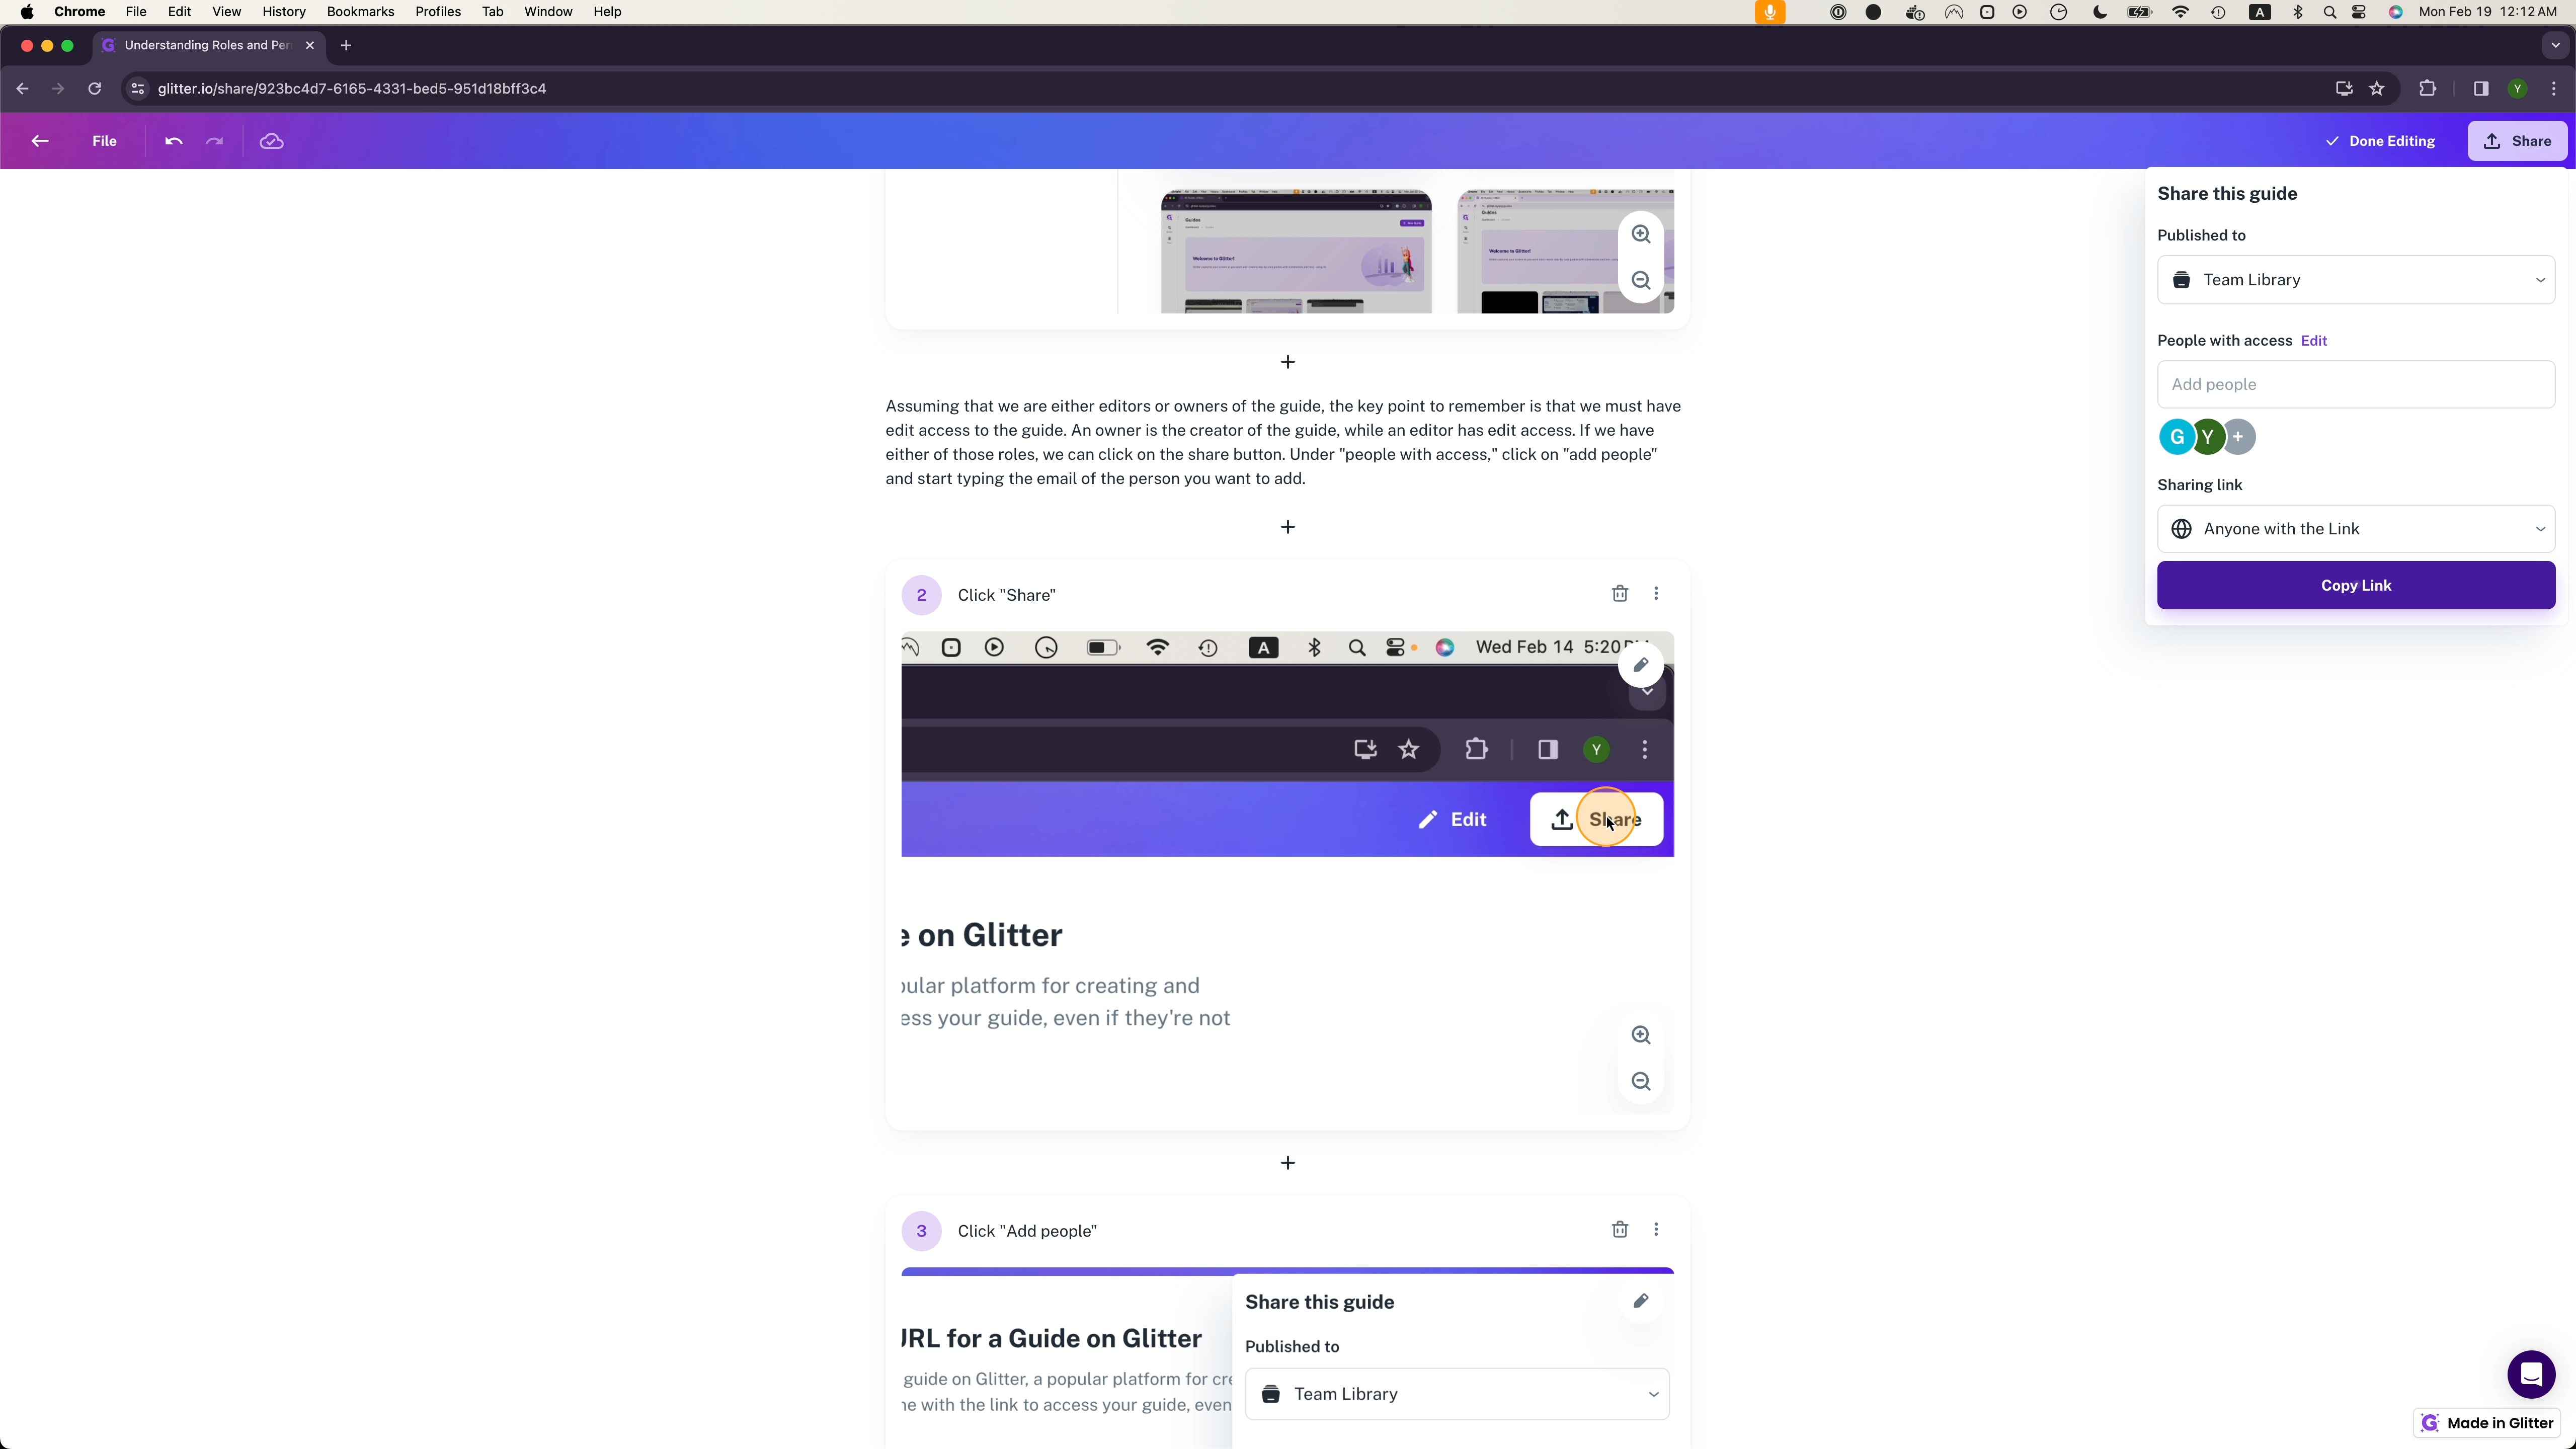
Let's look at the public of this guide by clicking "share" and copying the public link, then opening it in an incognito window.
Now, in an incognito window, we see the guide as a user would. Note that the zoom level matches what we have selected earlier.