Zorro Application Process for Enrollment Teams
Learn the step-by-step process for submitting a carrier application on the Zorro producer portal
In this guide, we'll learn how to navigate the Zorro application process for enrollment teams. This process is crucial for ensuring that the information submitted on the producer portal is accurate and up-to-date. Starting from the employee's homepage, we'll go through a six-step process, beginning with reviewing enrollment details and verifying premium amounts. Each step is designed to ensure that discrepancies are addressed and that the correct coverage period and payment methods are selected. By following these steps, you will help maintain clear communication with account managers and employer admins.
Let's get started
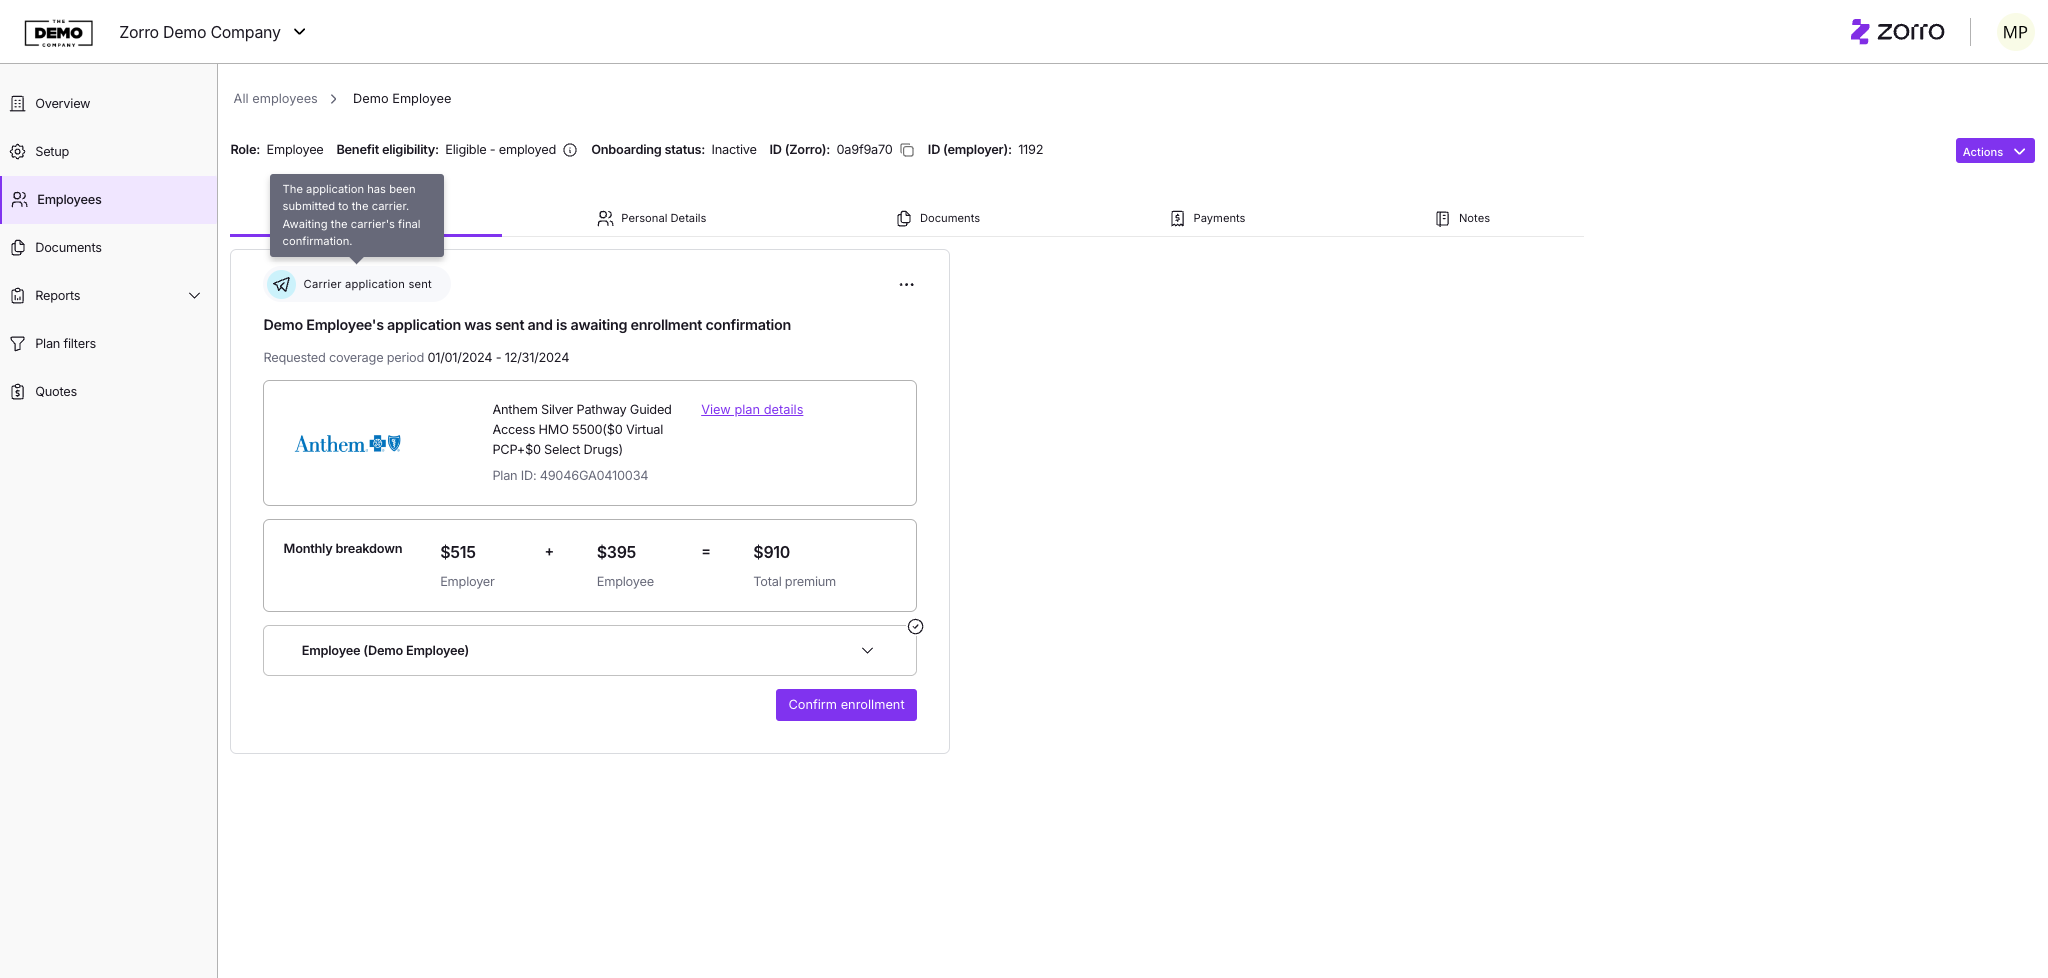
Begin at the employee's homepage, here you'll see an 'Election submitted' status. This indicates the election was submitted on Zorro, either in a joint session or independently. Click 'Start Application'

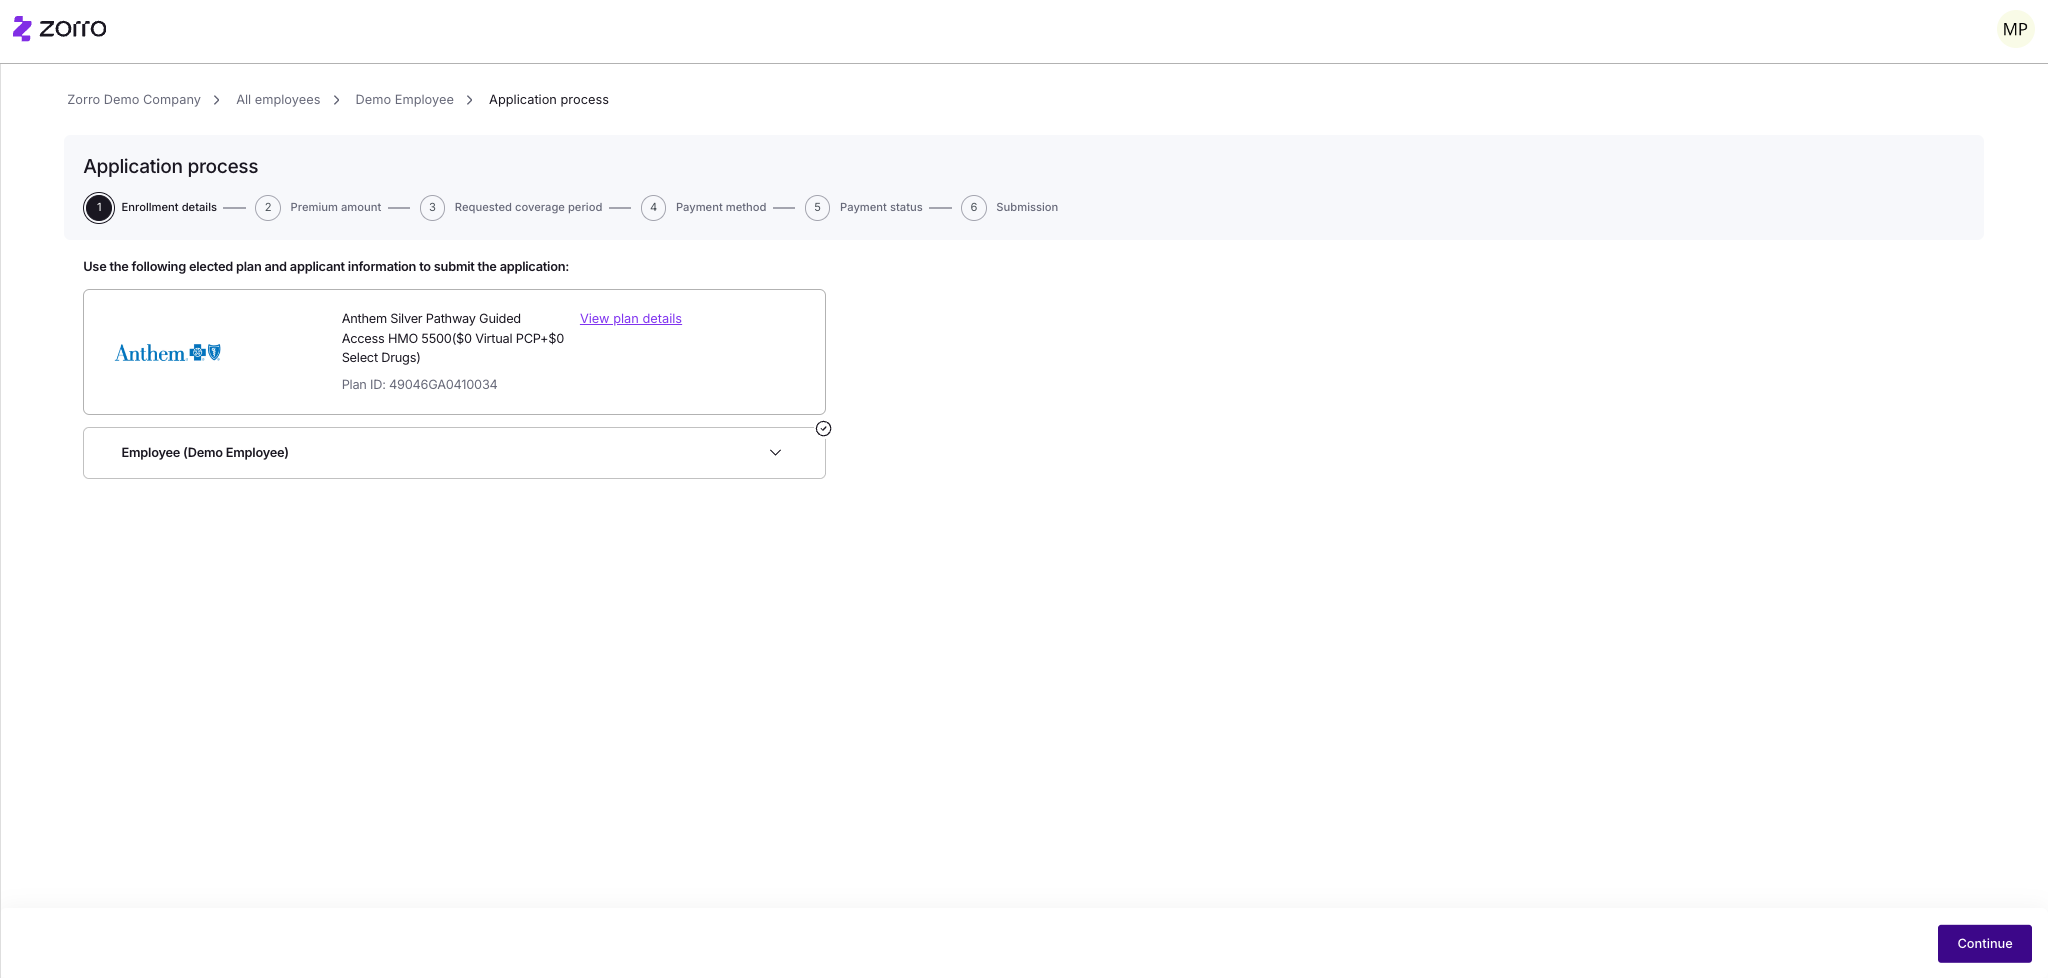
Step 1. Check the carrier plan name, plan information, and employee details. Click 'Continue'
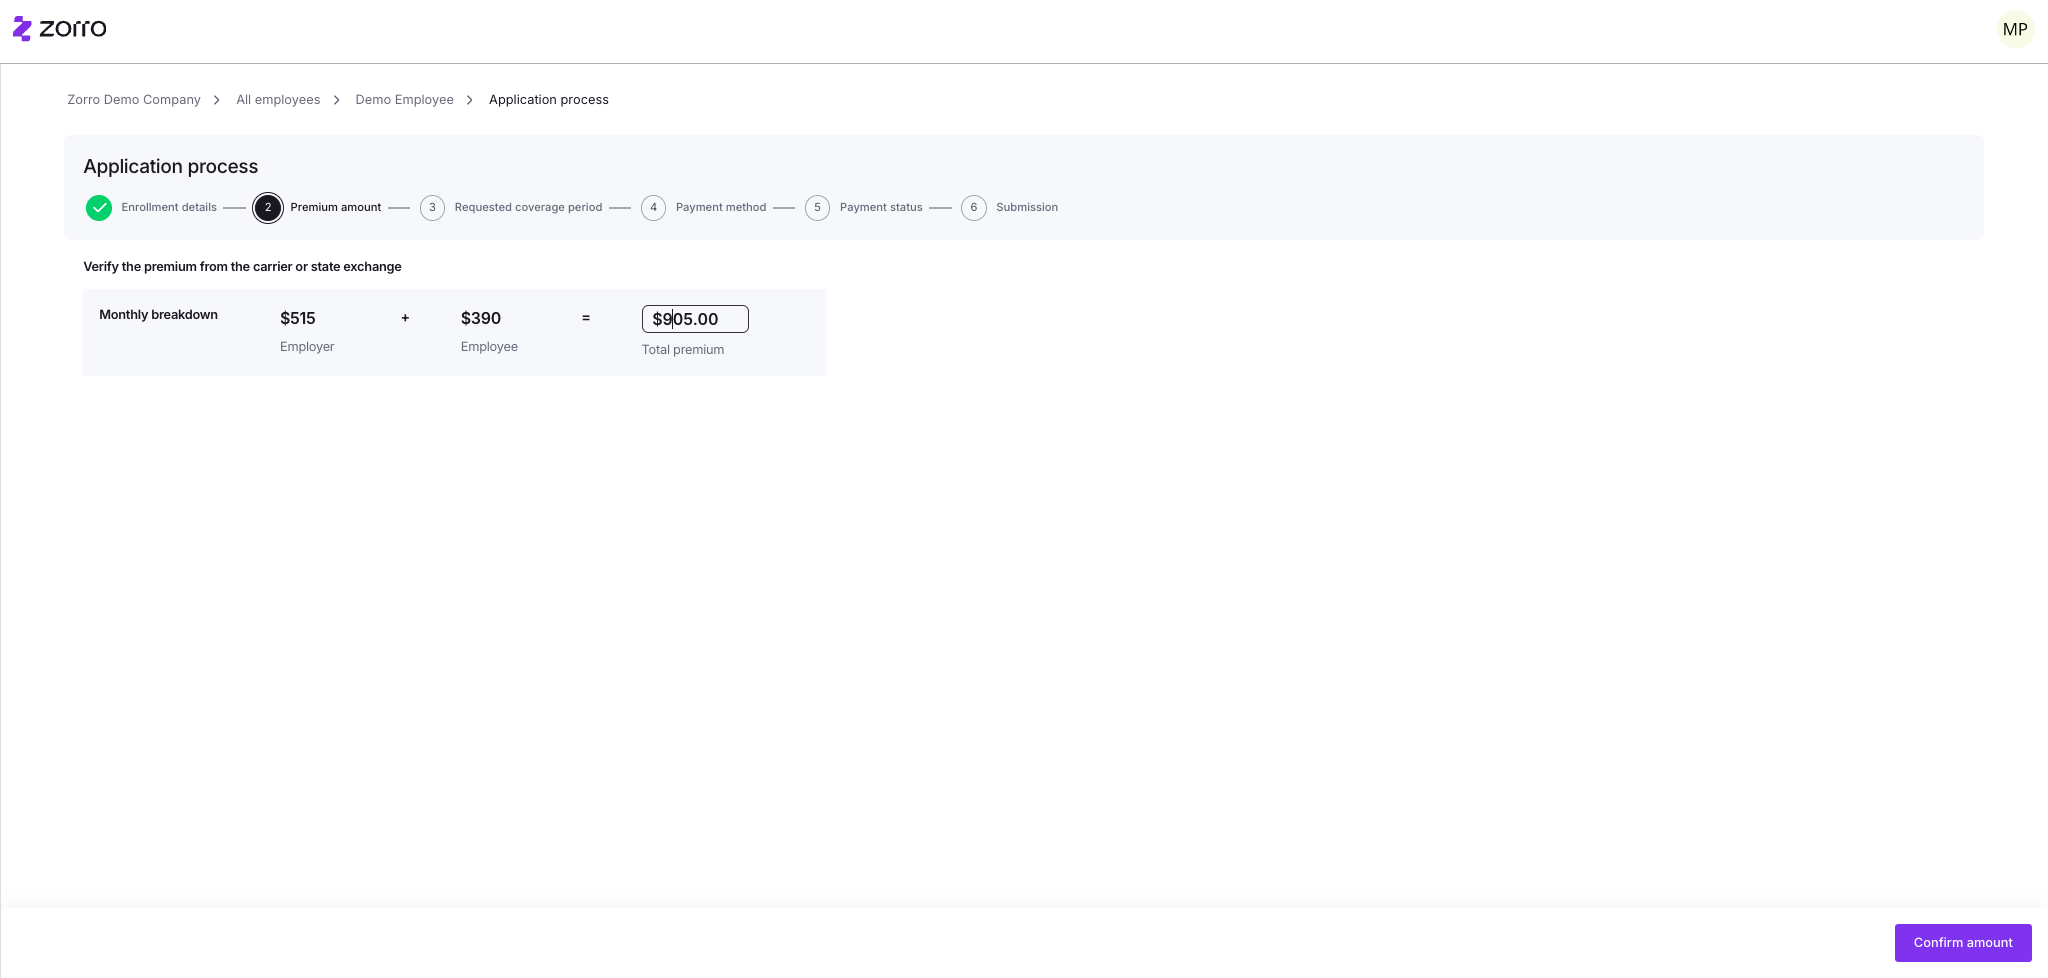
Ensure you review the next step carefully. Often, the data on Zorro is provided by carriers and may not be accurate to the exact dollar amount. You might notice a small difference between the price on Zorro and the producer portal. This is where you indicate any difference in premiums. If the premium on the carrier portal is different you will update here.
Step 2. Verify the premium amount from the carrier portal or state exchange

The example below shows an update in premium to $905.00. Zorro automatically calculates both the employer and employee portions.
The employer allowance will be set, and the employee portion will be automatically calculated based on the premium you input. After confirming the premium, click 'Confirm amount'.
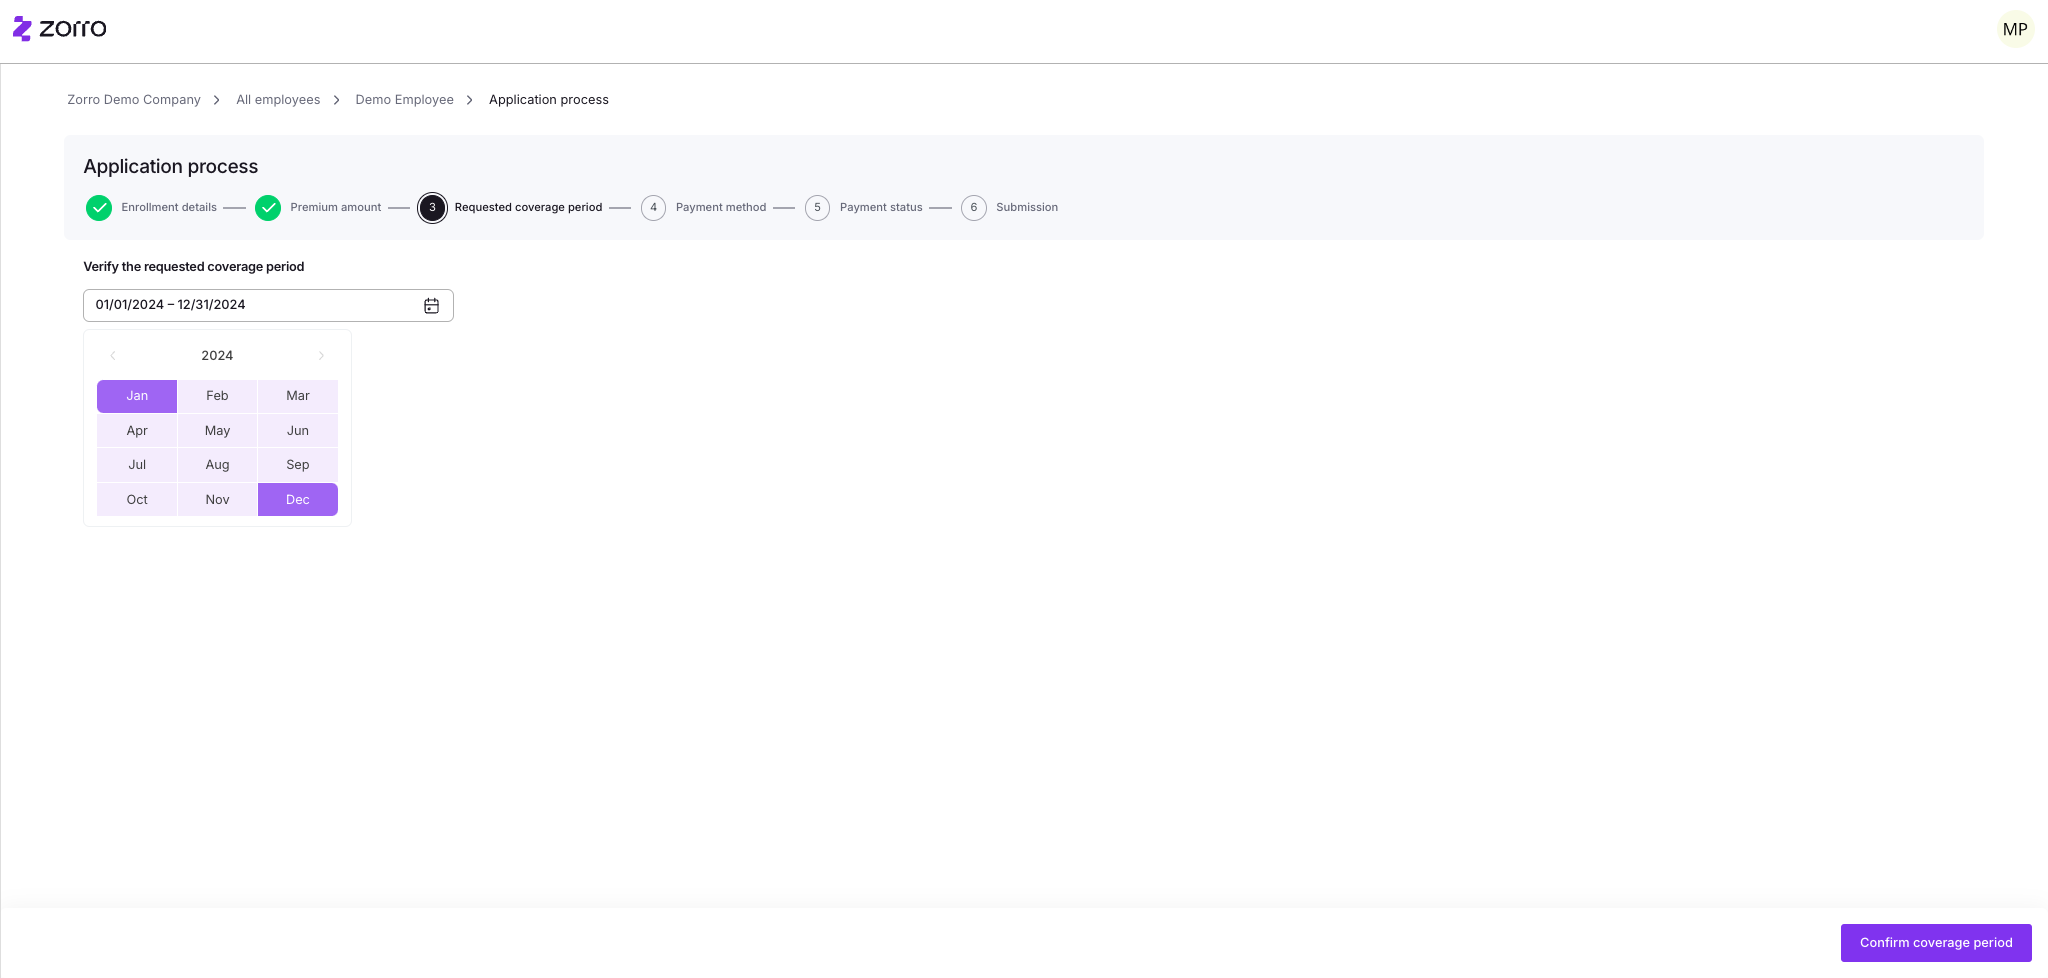
Step 3: Indicate the correct coverage period. During a Qualifying Life Event (QLE) or special enrollment period, you may submit an application to the carrier with a specific coverage start date. If the application is submitted after the cutoff date for the next month, the coverage may need to be delayed by a month. This is where you indicate the correct coverage period.
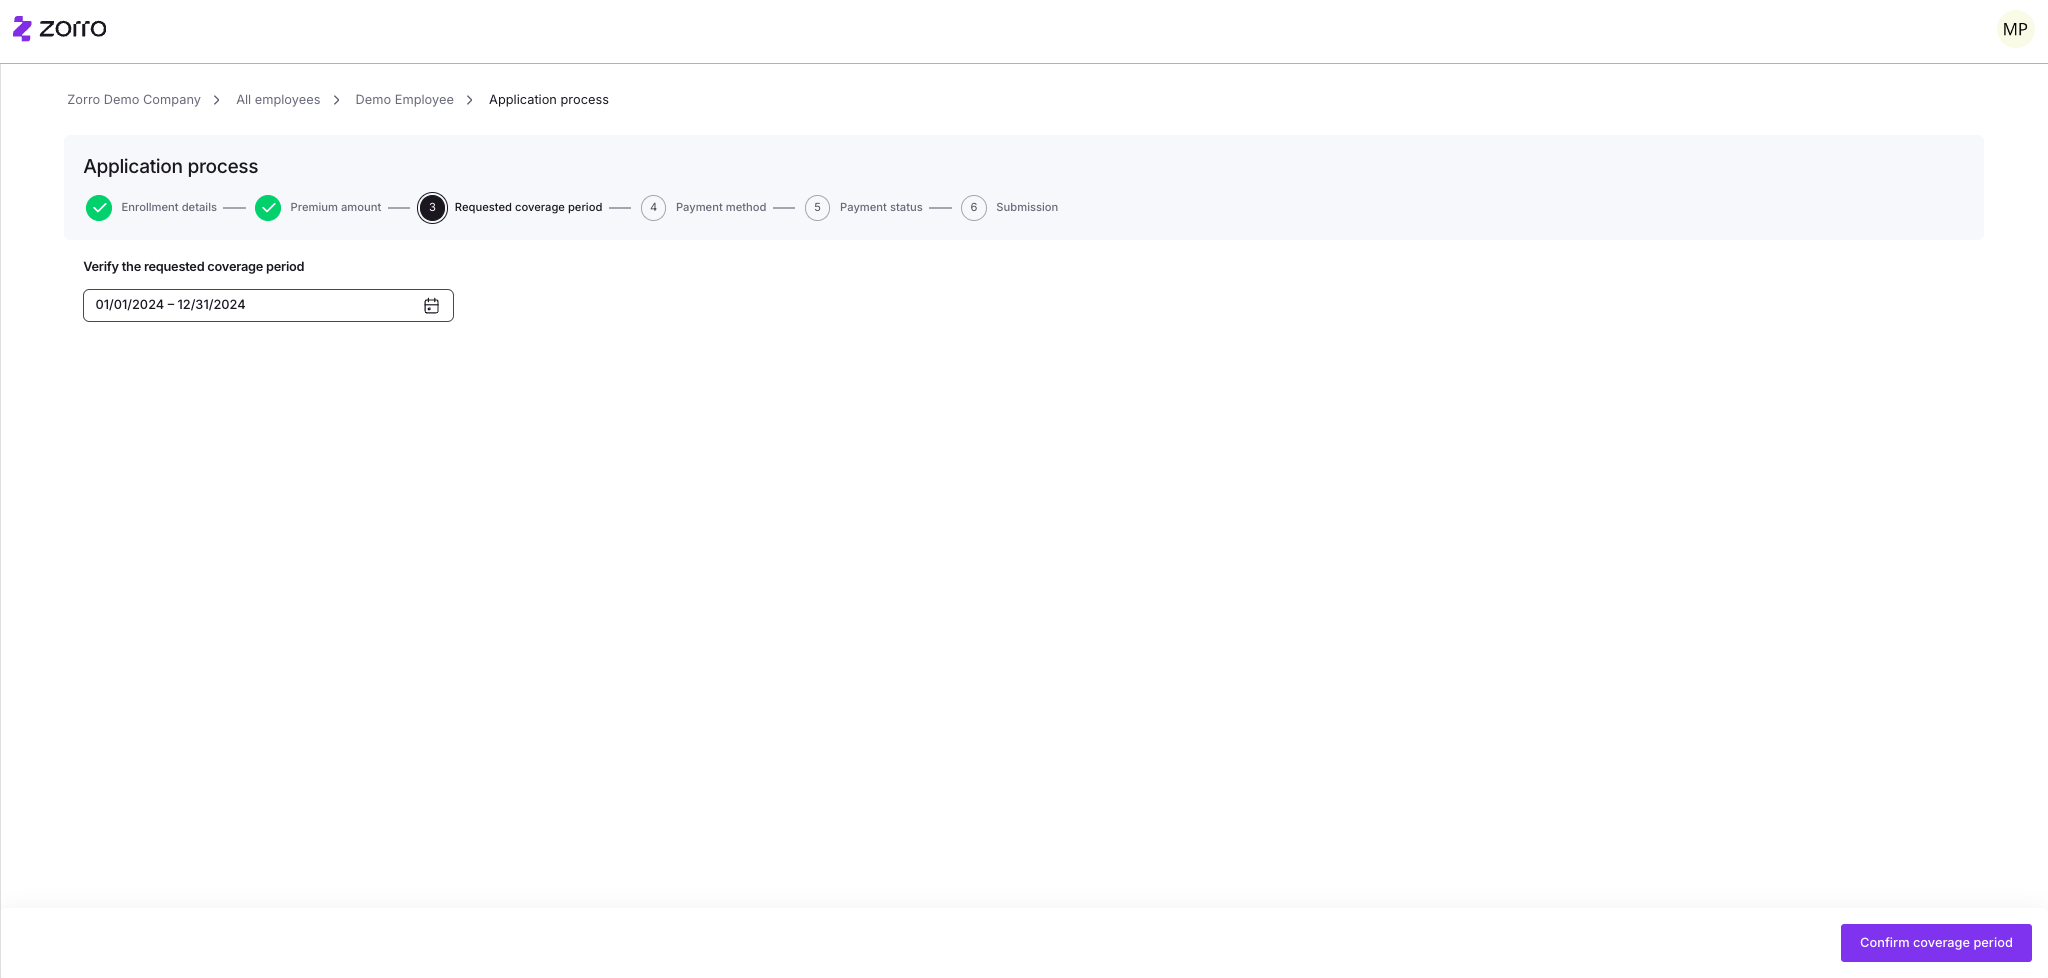
The coverage date range will automatically populate based on the employee’s submission, so you don’t need to calculate it manually. Only adjust the dates if there’s a change to the planned start or end date of coverage. Once this step is completed, click 'Confirm coverage period'.
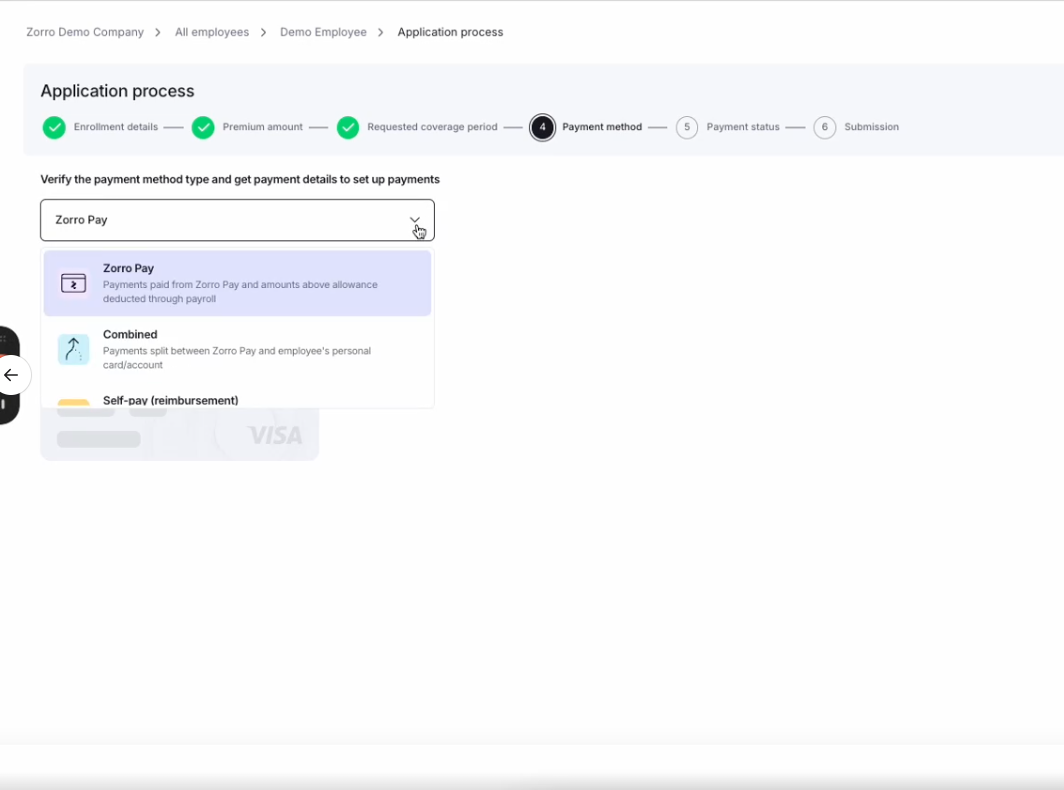
Step 4. This is where you will generate the Zorro Pay card. Click the dropdown menu and choose Zorro Pay for any employee with a regular individual health plan.
The combined and self-pay options are for employees with a household that includes both a Medicare and a regular plan, or for those on self-pay plans like Medicare or a college plan. We will discuss these later. For now, click on Zorro Pay. Click 'Confirm and generate payment method'.
If the Zorro Pay card does not auto-populate, a tag labeled "In Handling" will be created. This tag notifies Zorro that a card request needs investigation. This typically happens when there is insufficient funding in the employer's account.
Other enrollment issues, such as the employee already having a card for the same coverage period or data conflicts, can also prevent the card from being created immediately. In these cases, the system alerts the support team, who will review the request. They will know which employer and employee requested the card and will follow up with you directly.
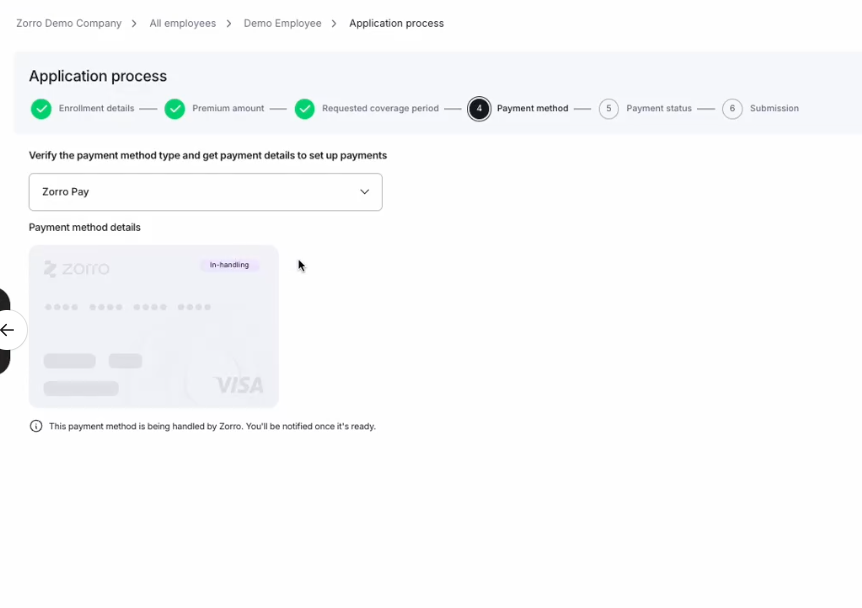
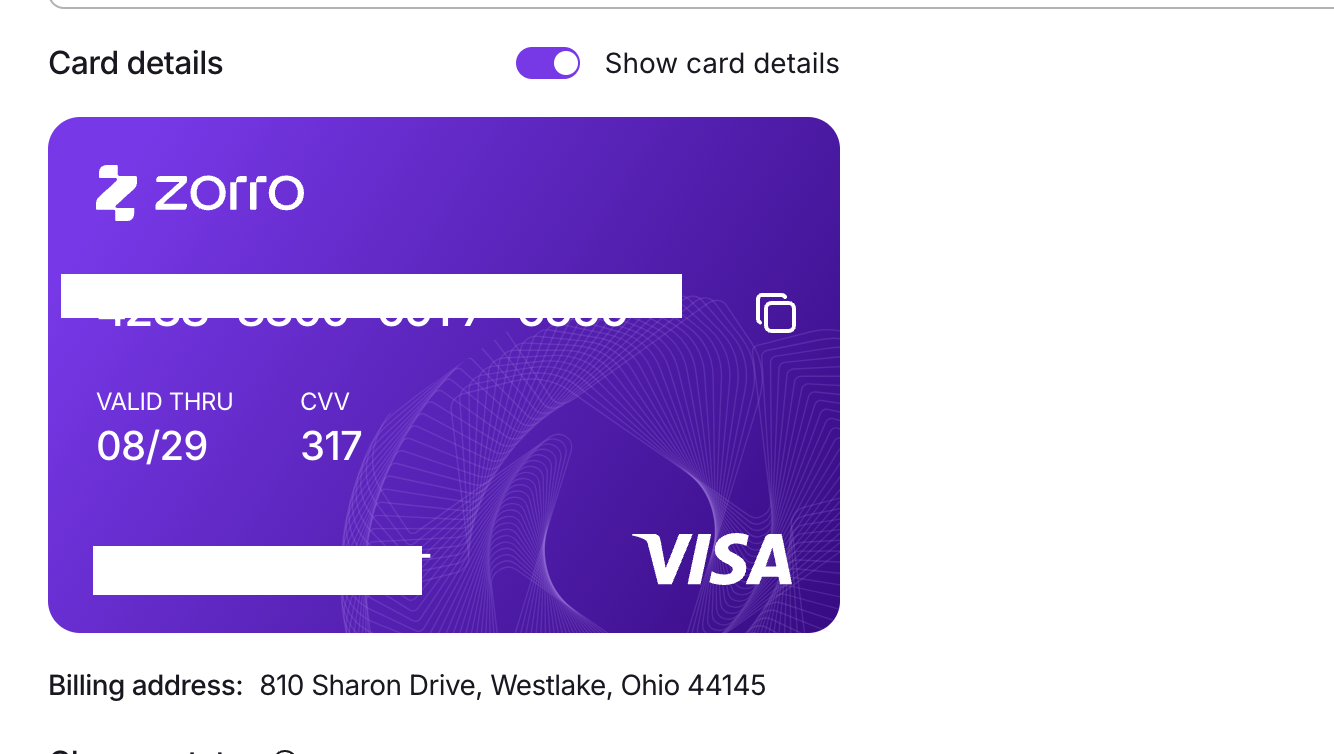
Once the card is created, you can copy and paste it from here to use on the producer portal.
Step 5. After generating the Zorro Pay card, you need to specify the payment status. This step is important because it informs account managers and employer administrators about how to communicate with employees regarding their payment obligations.
Select whether the enrollment team agent (you) or the employee is responsible for making the initial payment.Typically, you as the enroller will be responsible since you can manage payments directly through the producer portal.
Confirm if the binder payment has been processed or if it’s still pending.

For Auto-pay status, choose the responsible party based on the situation:
If you are able to set up auto-pay, select enrollment team agent.
If the carrier does not allow you to do this or if you are unsure, select employee
If you know whether AutoPay has been set up, you can indicate that. If not, you can state that you don't know.
This allows account managers and employer admins to send accurate reminder emails with the appropriate content and guidance based on your input. It is crucial to provide record accurately. Once completed click 'Confirm payment details'

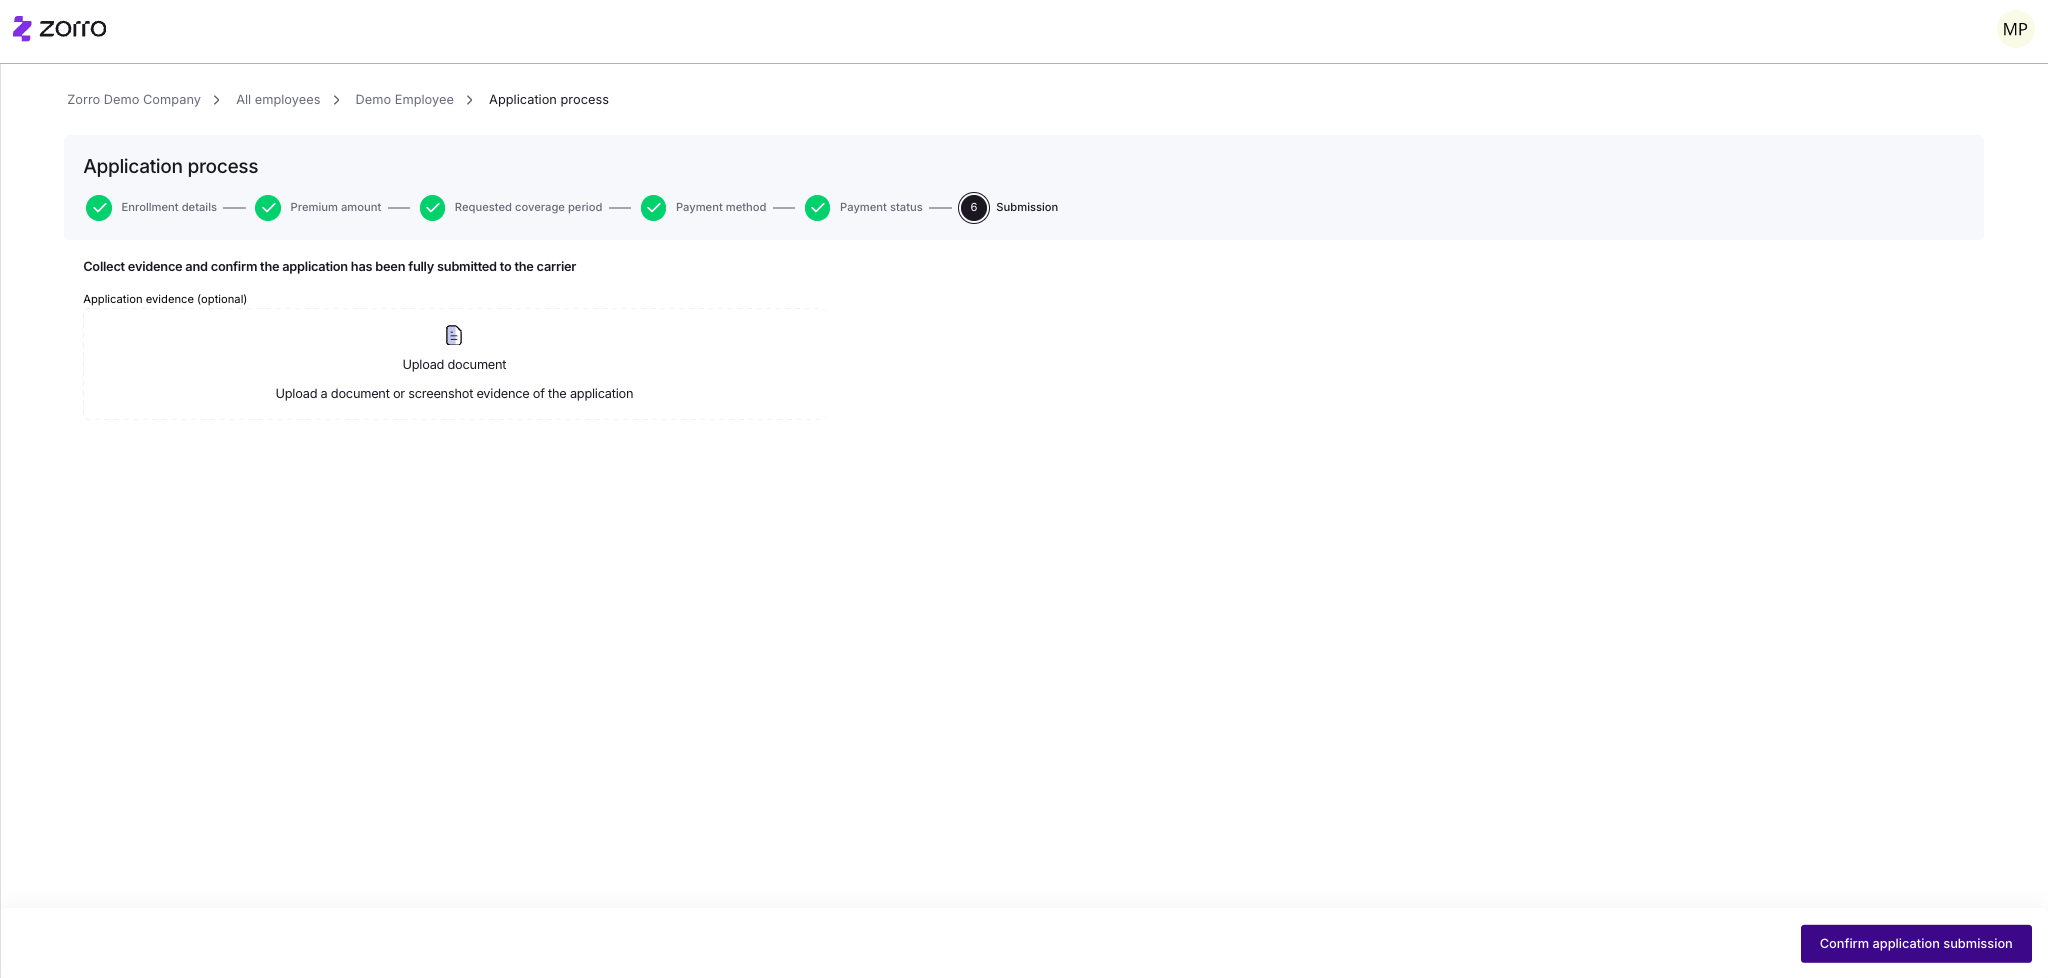
Step 6. After confirming the payment status, review the final submission. You can upload evidence of the application, such as a confirmation email, a screenshot of the producer portal, or any other confirmation evidence. This can be shared with the employer admin or others, aiding communication. This step is optional and can be skipped if not needed. Finally, click 'Confirm application submission'.
Your process will now be complete, and the employee's status will change to "carrier application sent".