How to Use Your Decks Page: A Step-by-Step Guide
Learn how to efficiently use your decks page by adjusting filters, finding deals, and understanding key columns like look status, images, and garment placeholders.
By Brent del rosario
In this guide, we'll learn how to:
Use your Decks page to manage and view your deals.
Use the Decks page filters, find a specific deal.
Understand the information shown in each column.
Let's get started
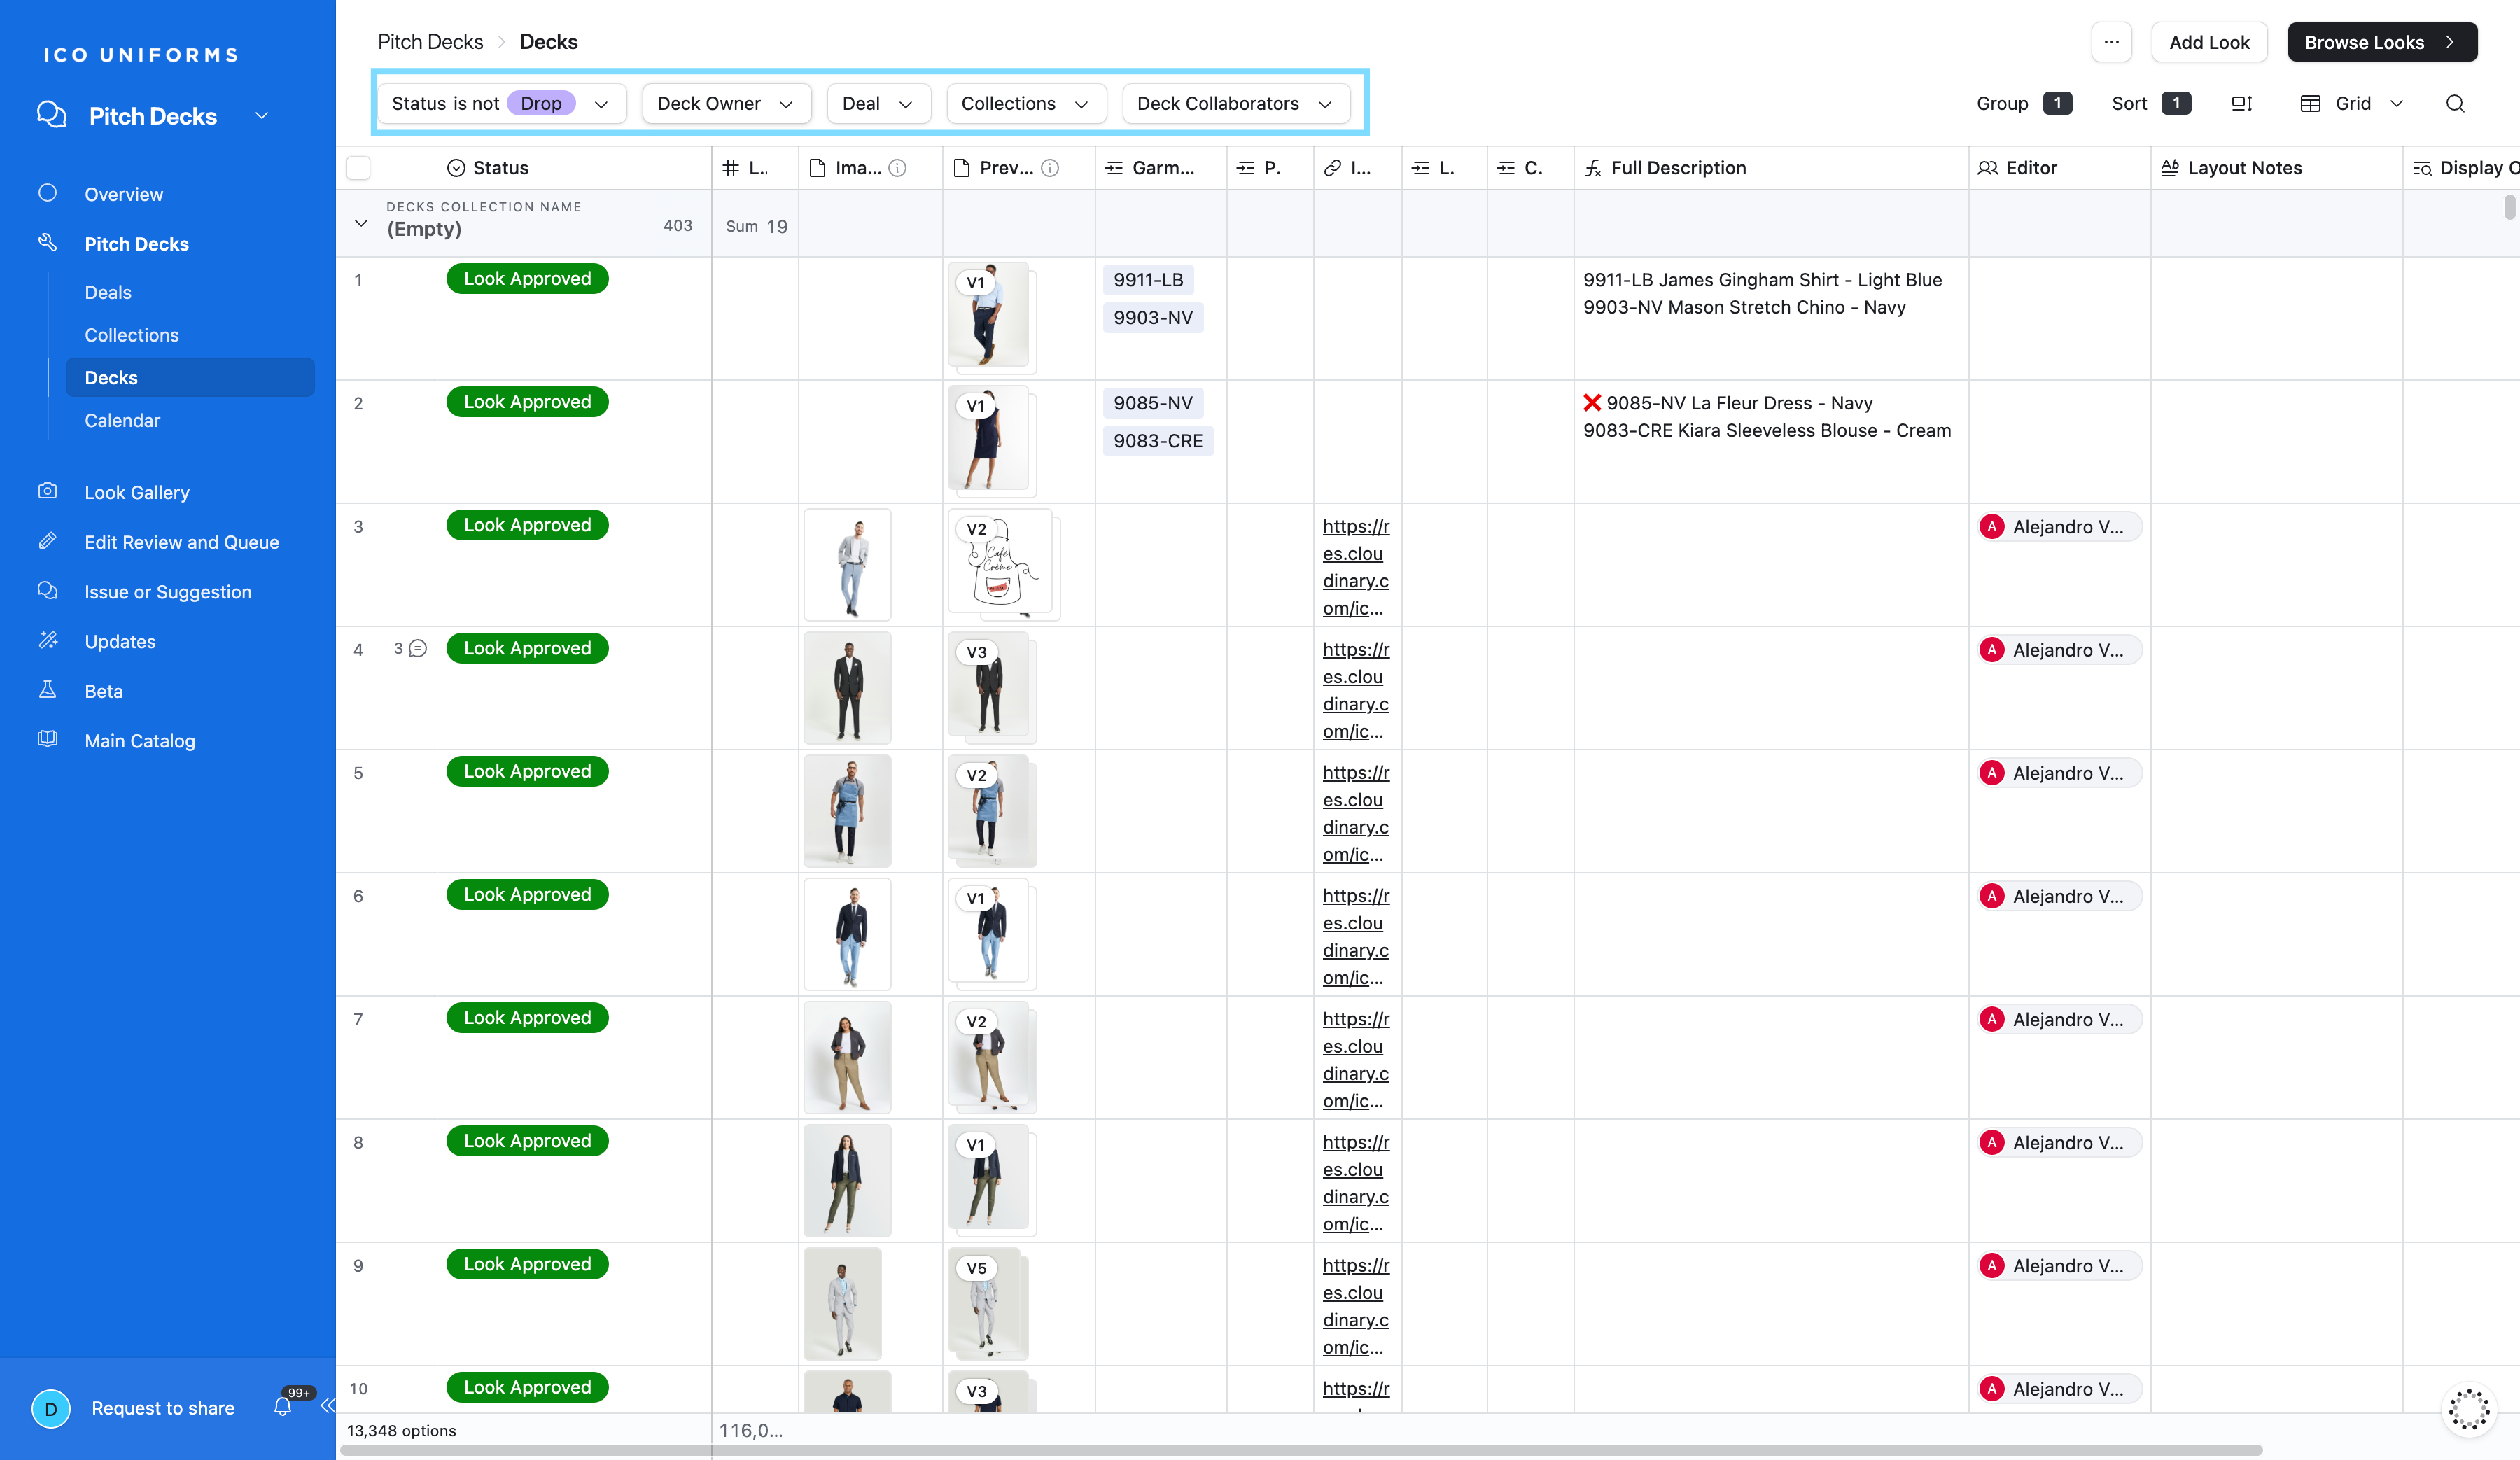
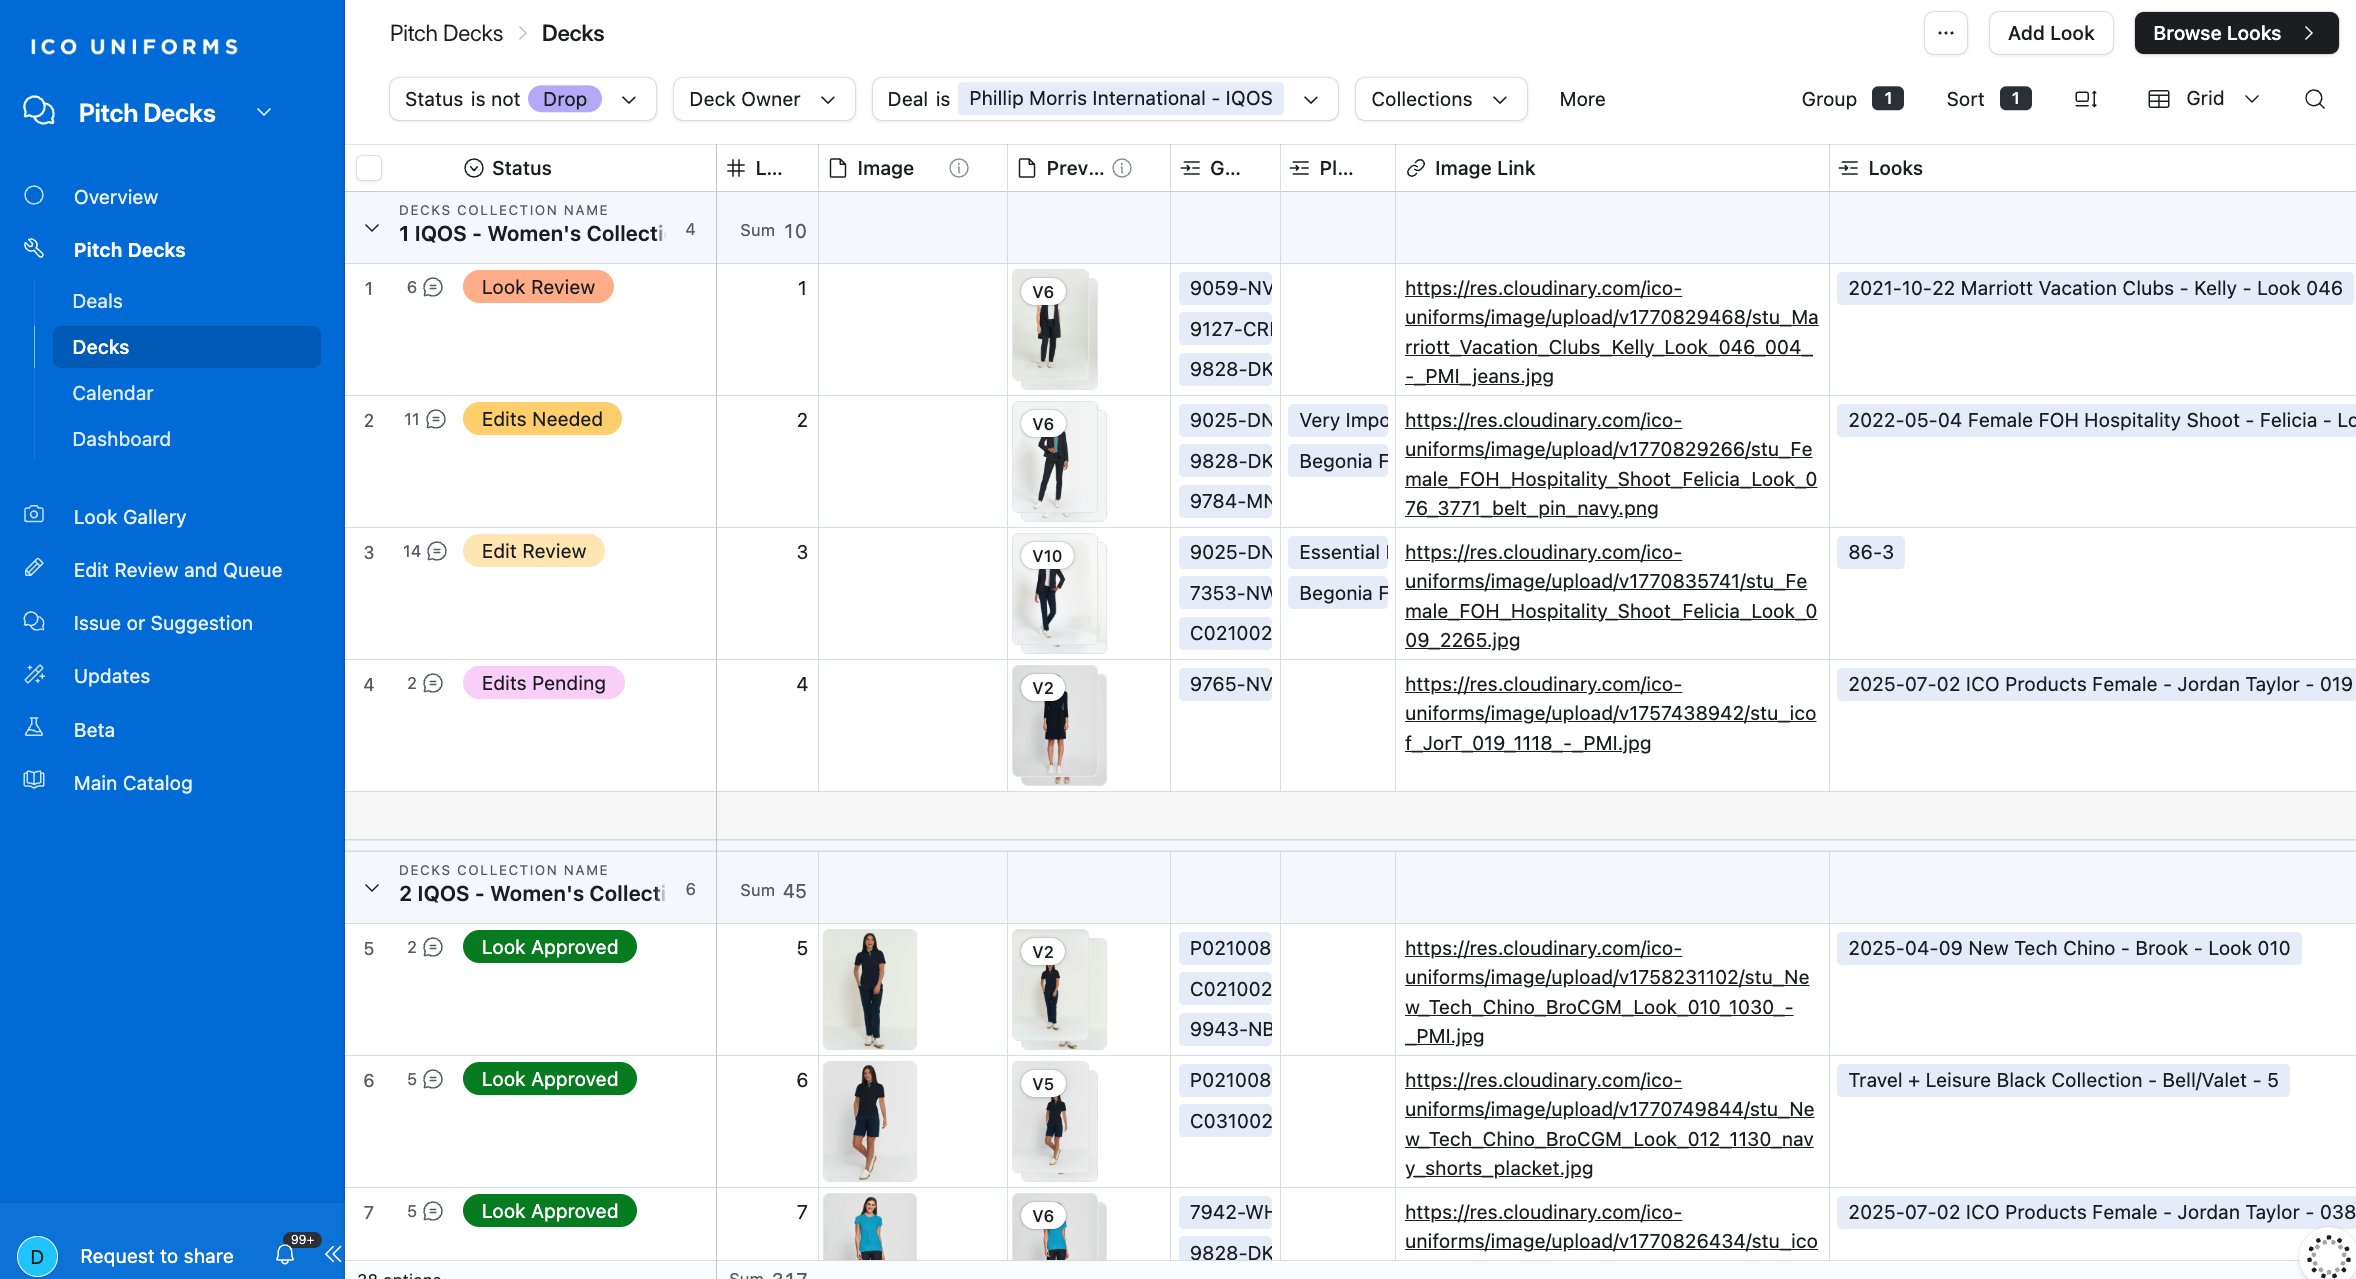
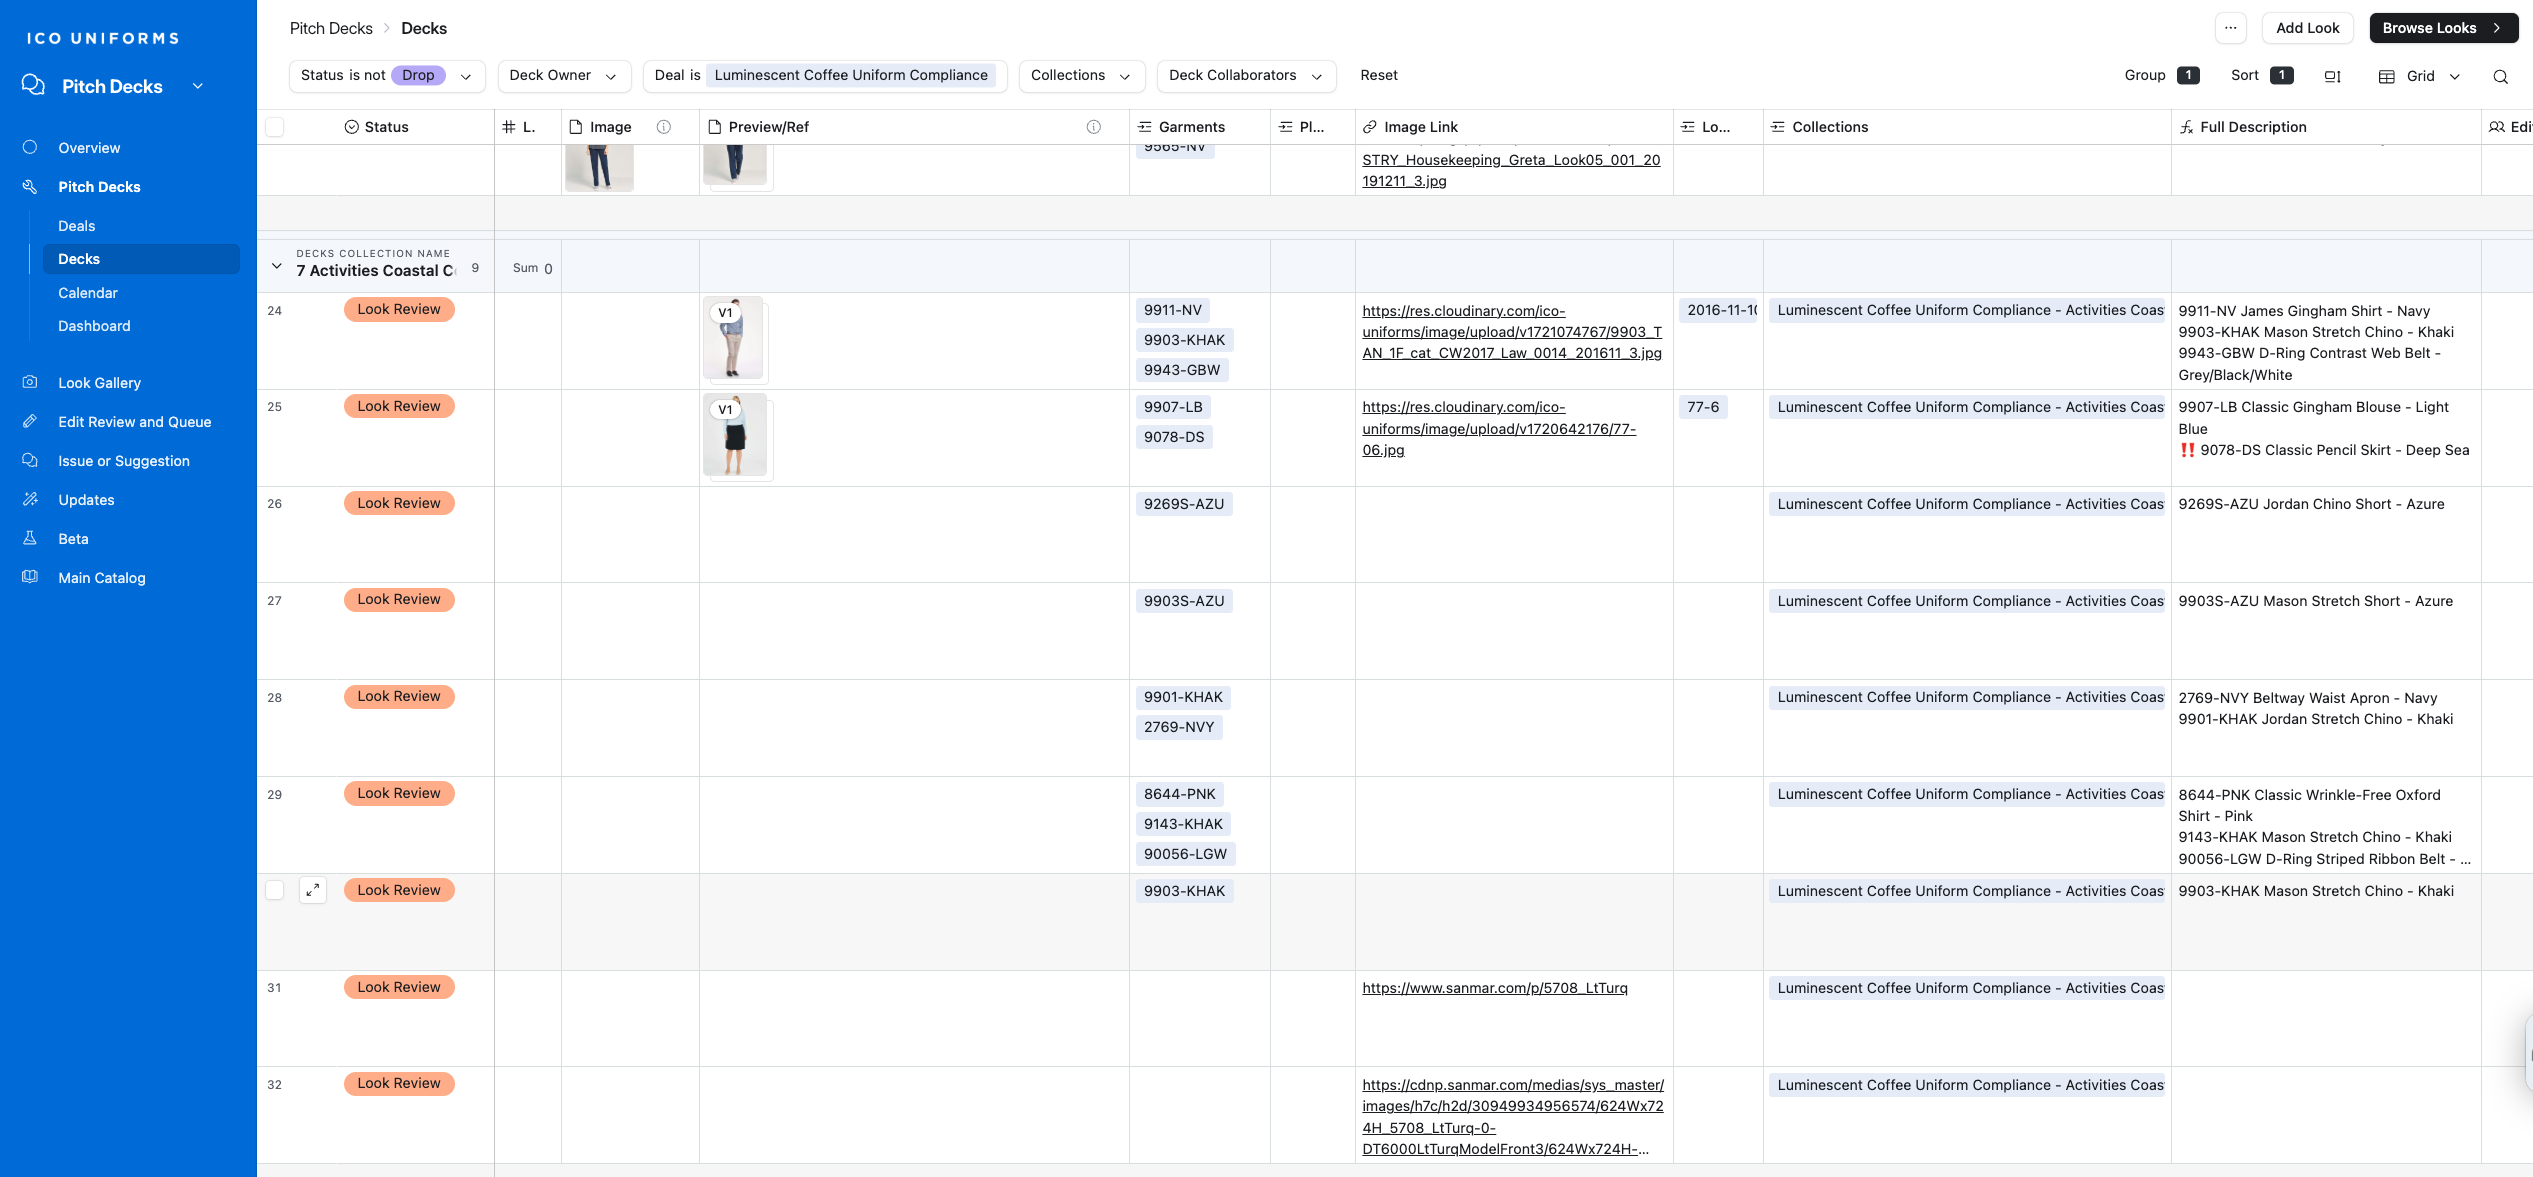
1
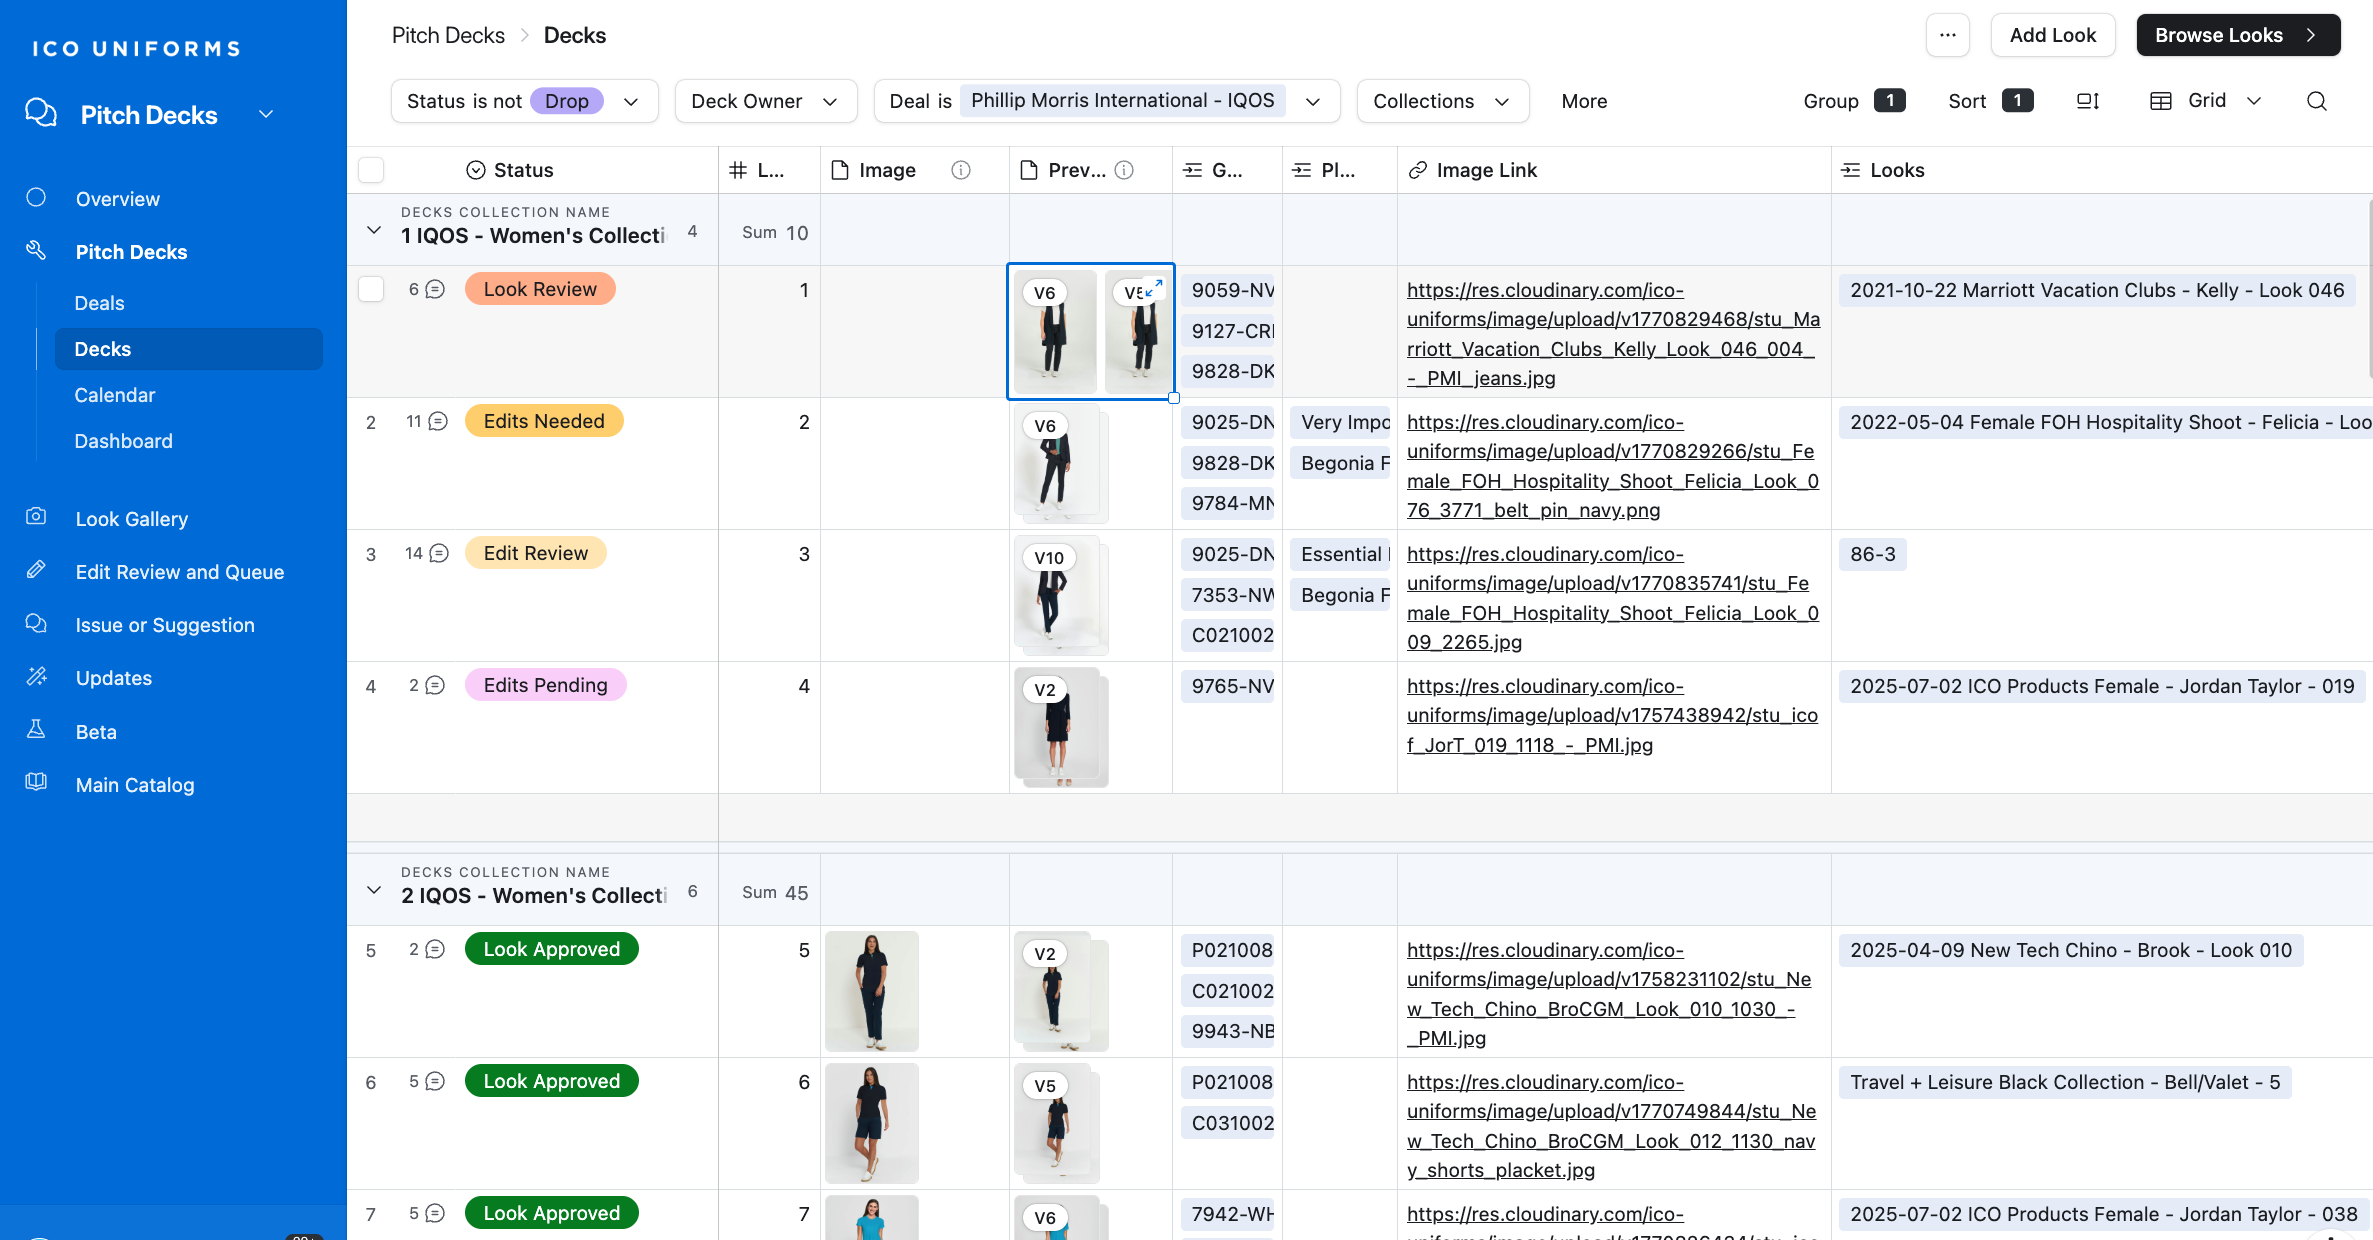
Click on the Decks tab and adjust the filters on the top of the page.
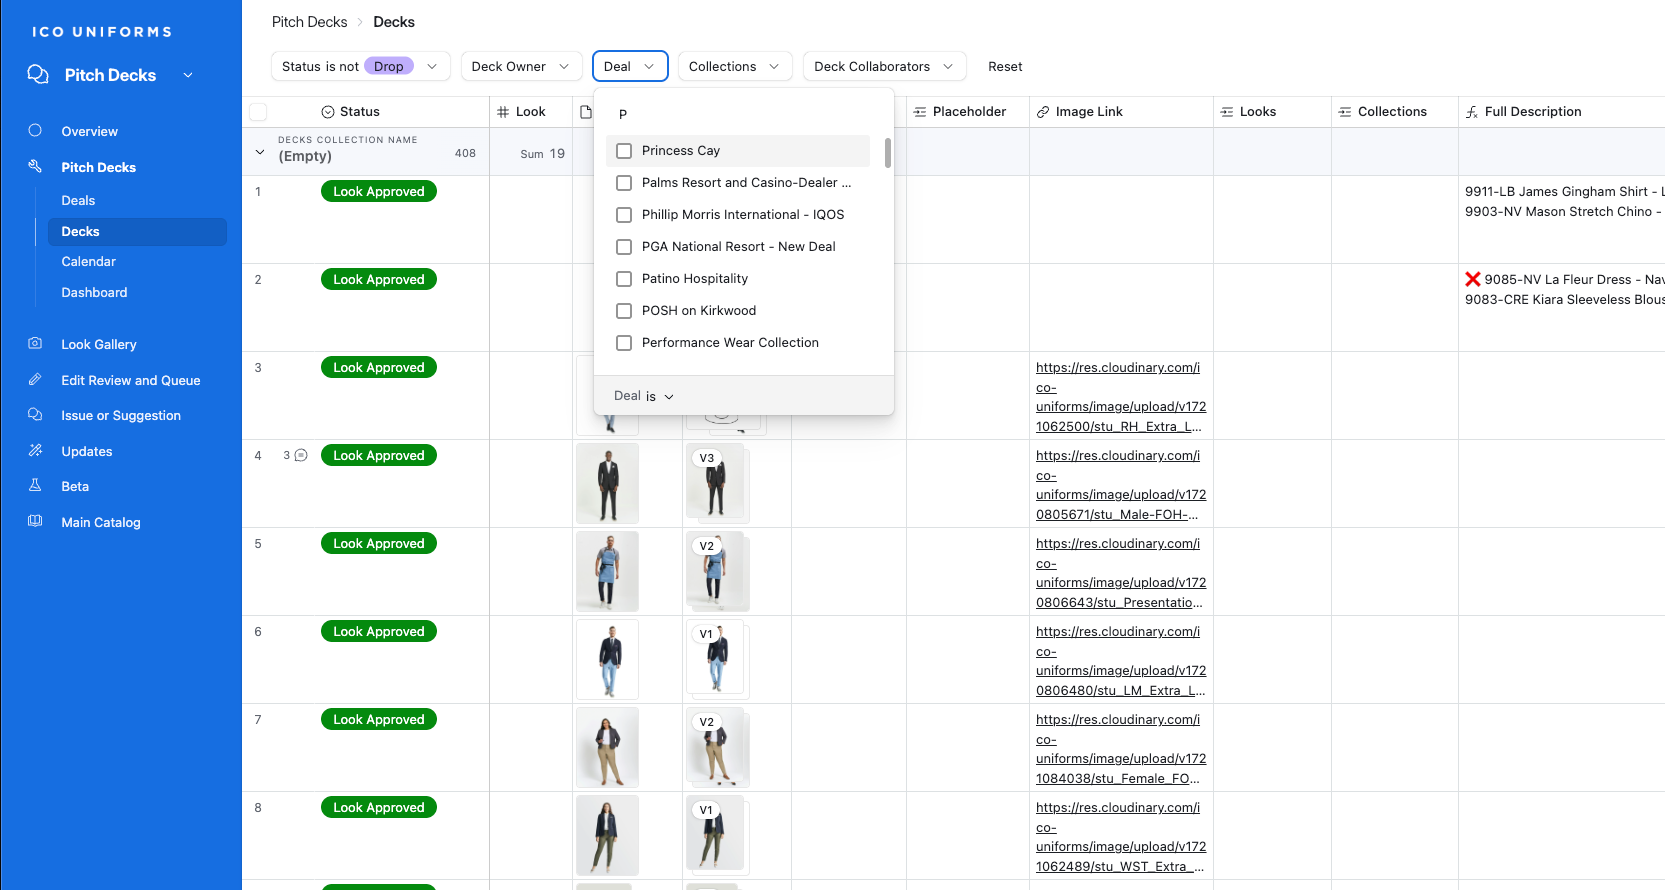
2
The fastest way to find your project is simply by typing the Deal name in the Deal drop-down
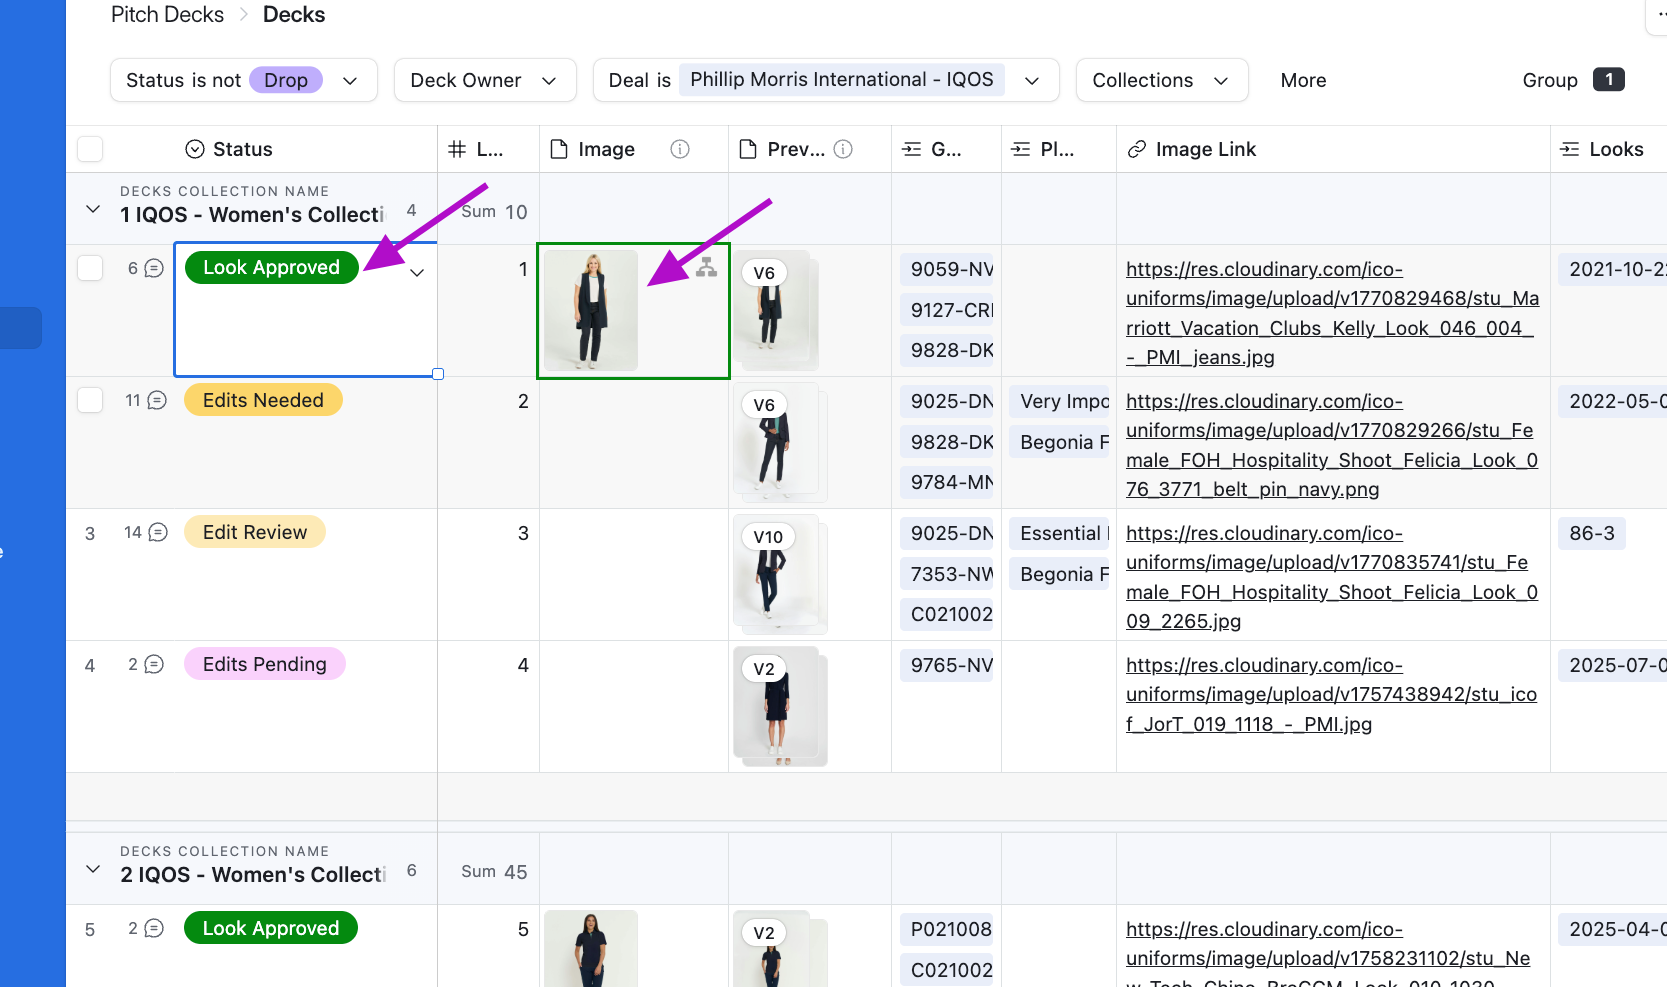
Understanding the Decks Page Columns:
The below descriptions were briefly discussed under other sections - you may skip if already familiar with it.
3
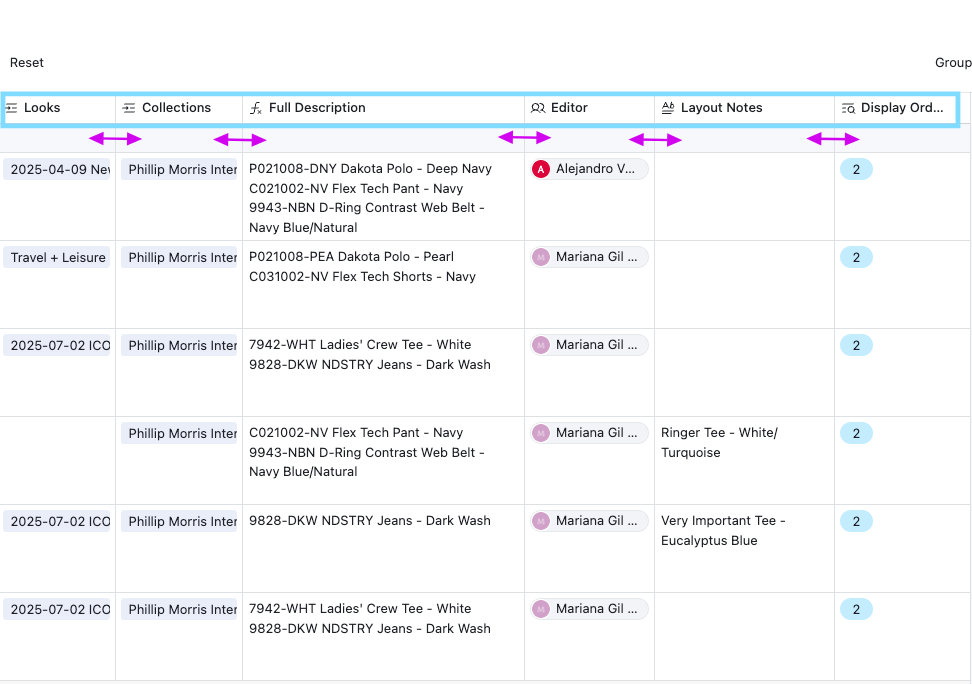
Each column has the name at the top - these can't be moved around or hidden.
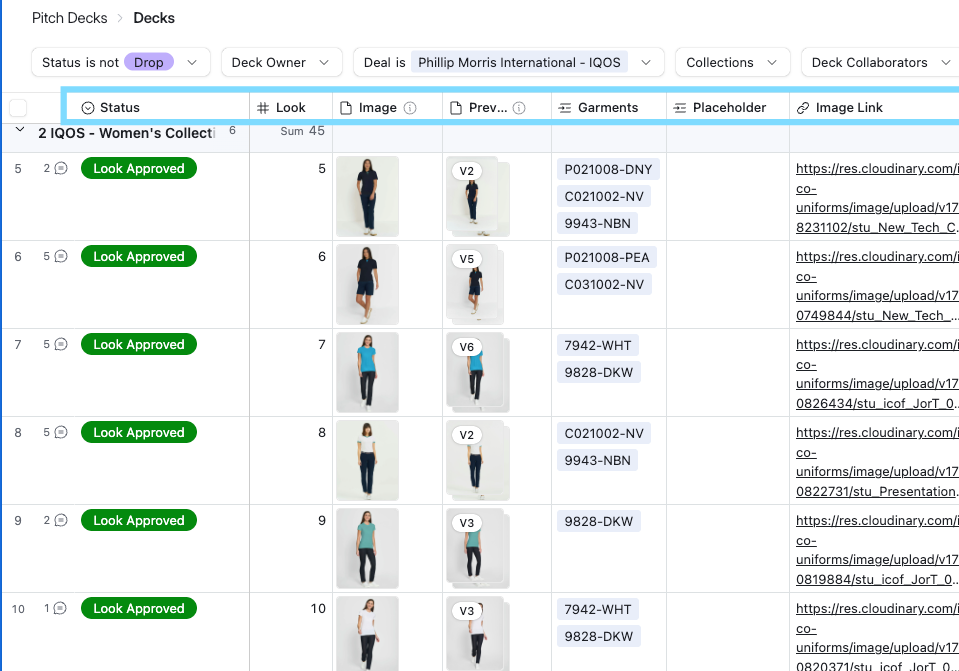
4
You may extend or reduce the size of your columns by applying your cursor on the border of each one - Just like Excel!
How to work in this space:
Adding looks:
5
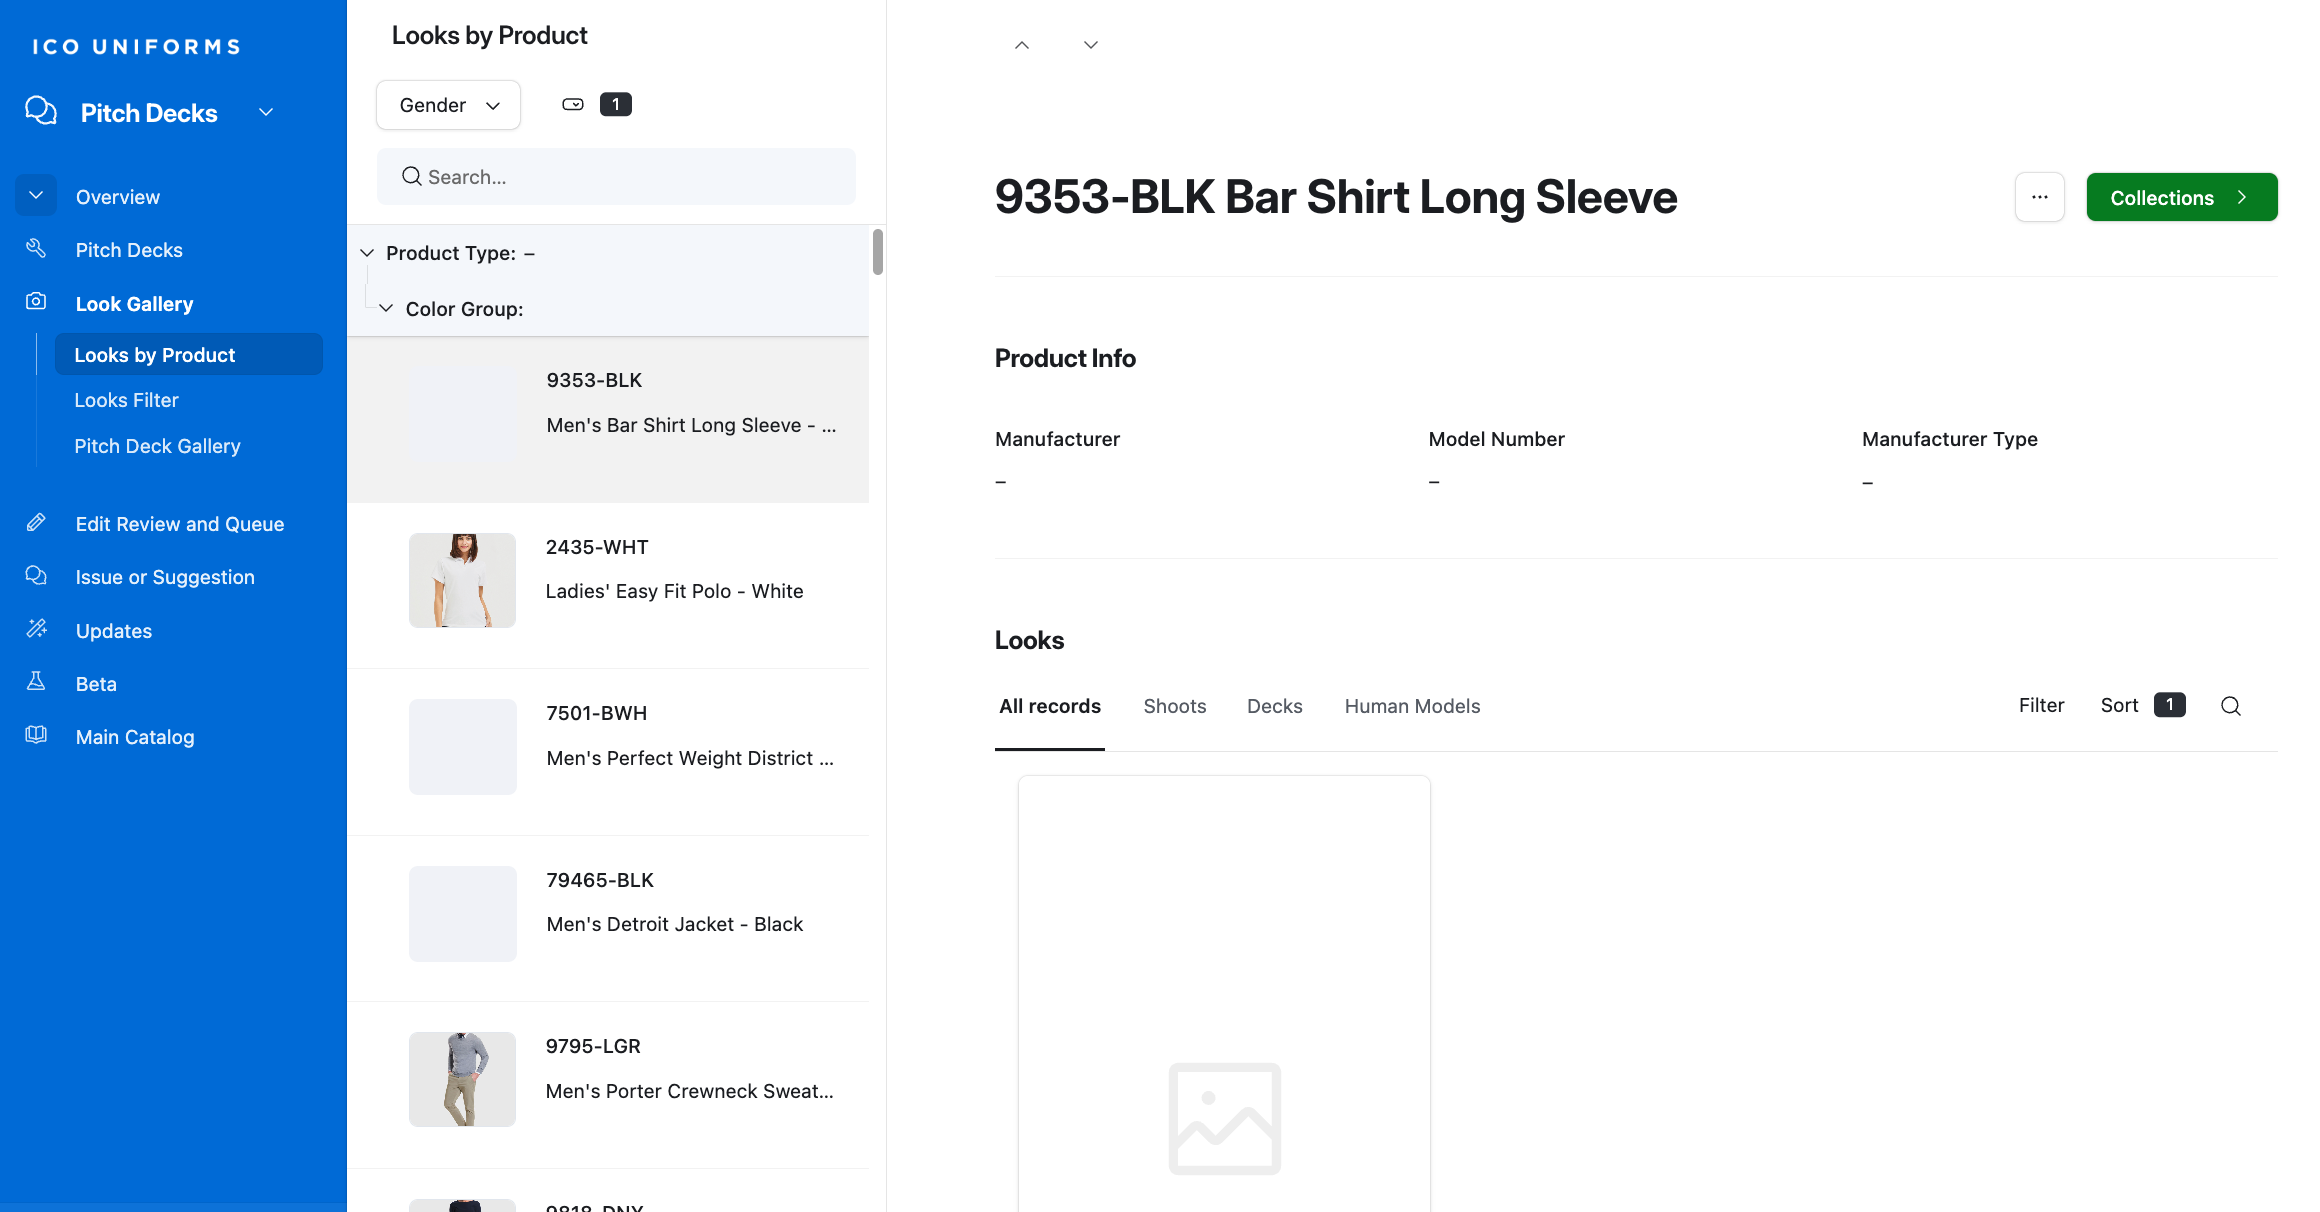
On the Top Right-hand corner you will see Browse Looks - Click on it.
6
You will be directed to Looks by Product
Manage Status:
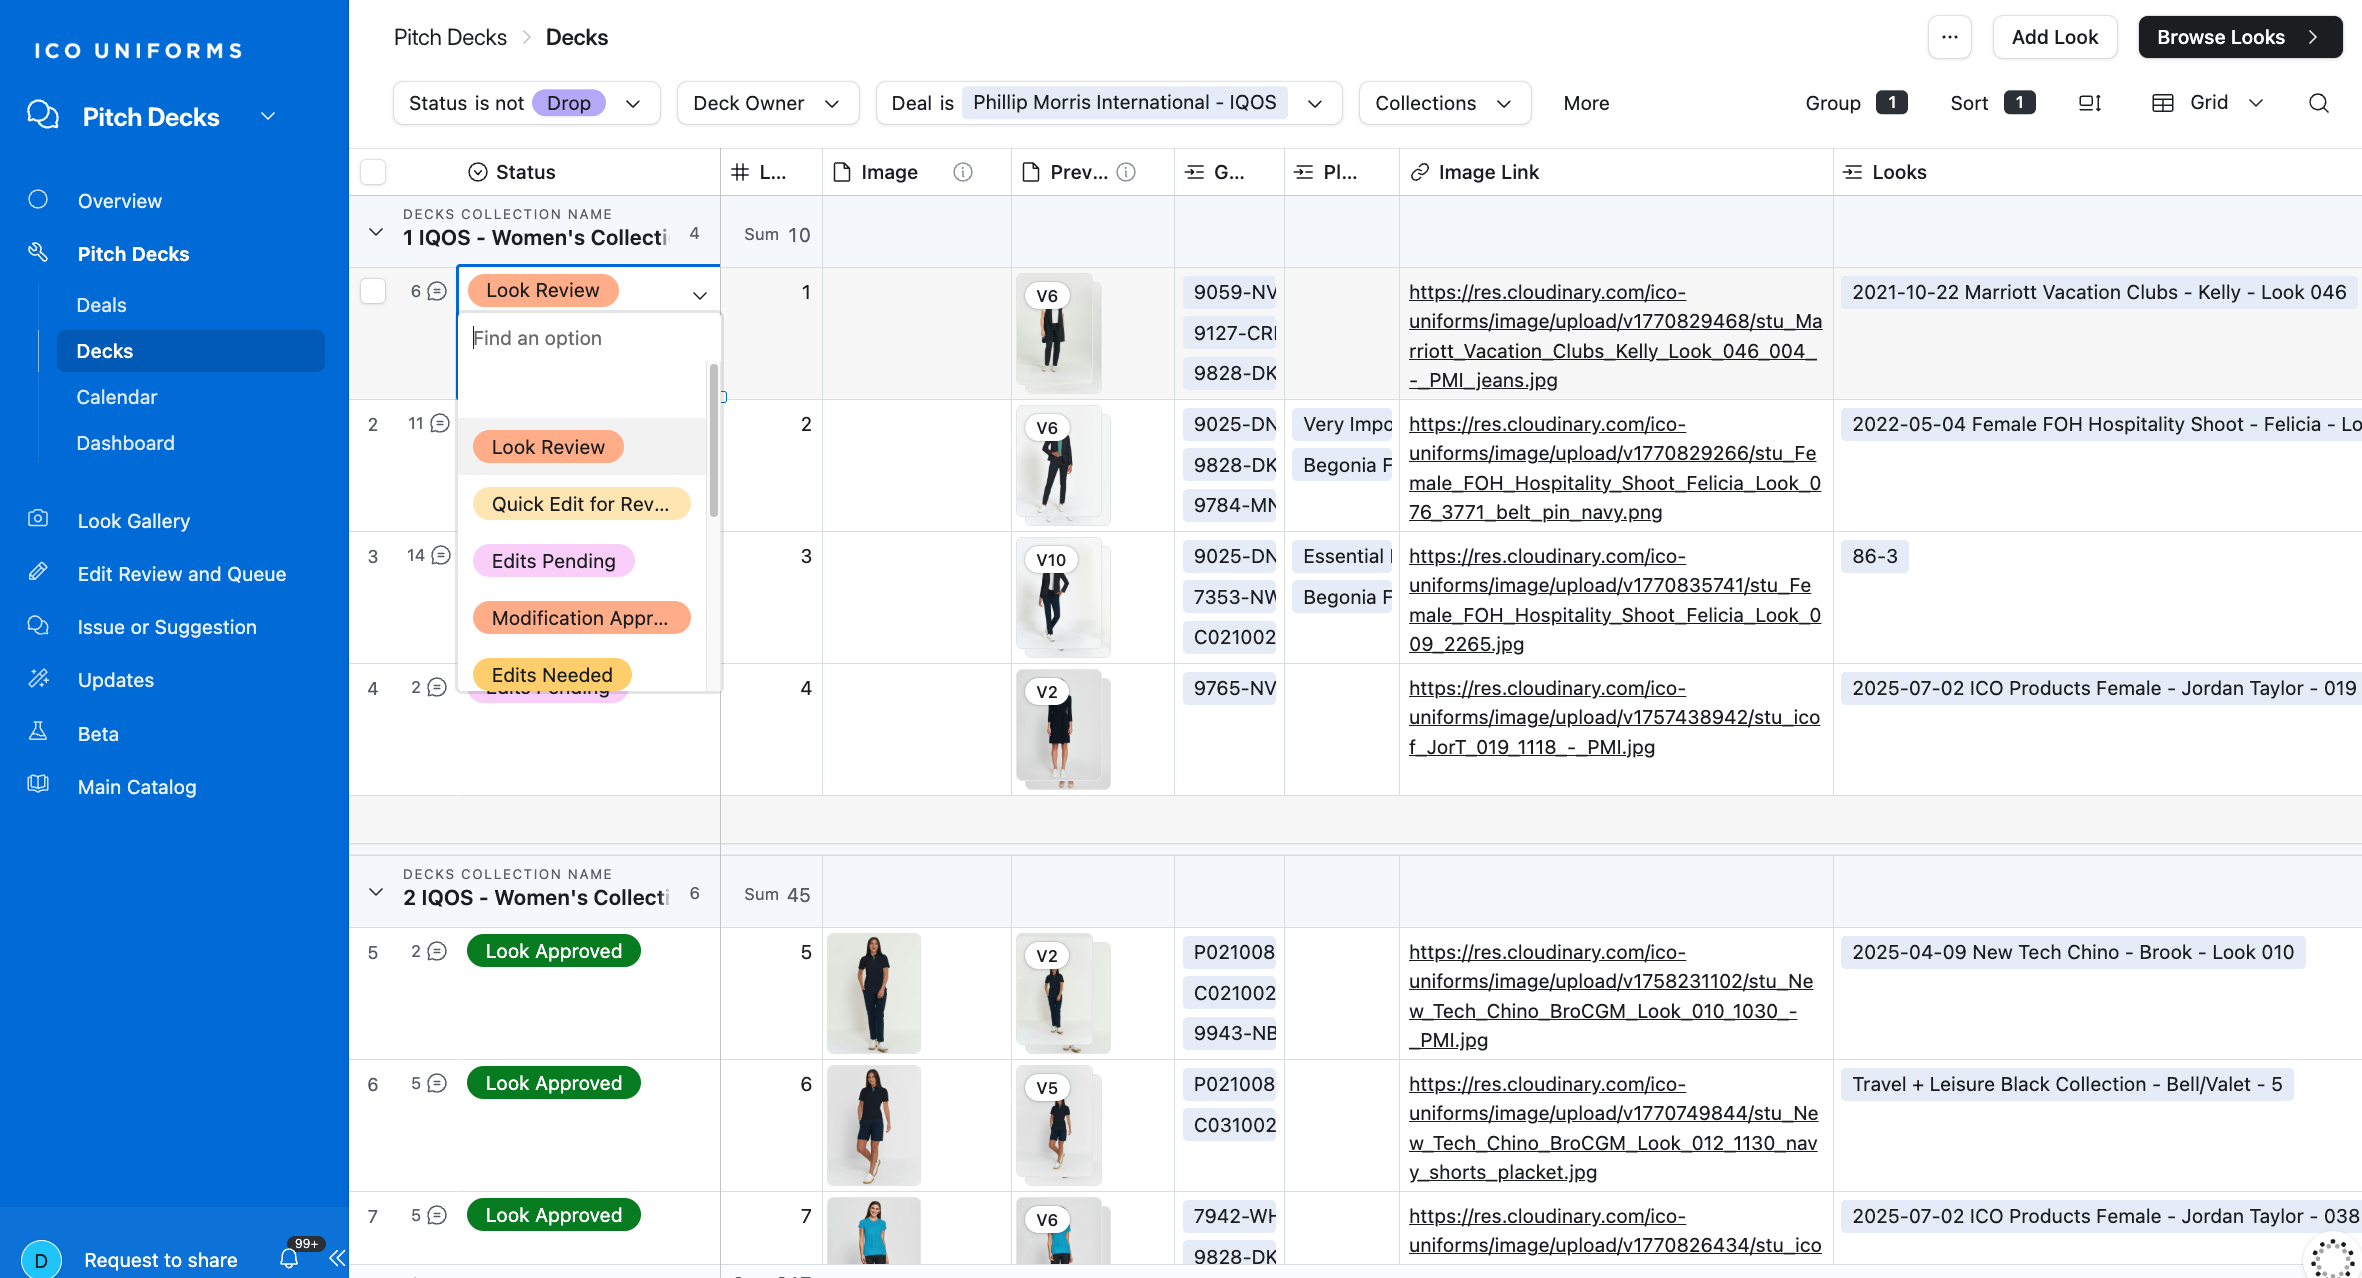
7
Update your status by using the drop-down menu.
Adding edits to your image.
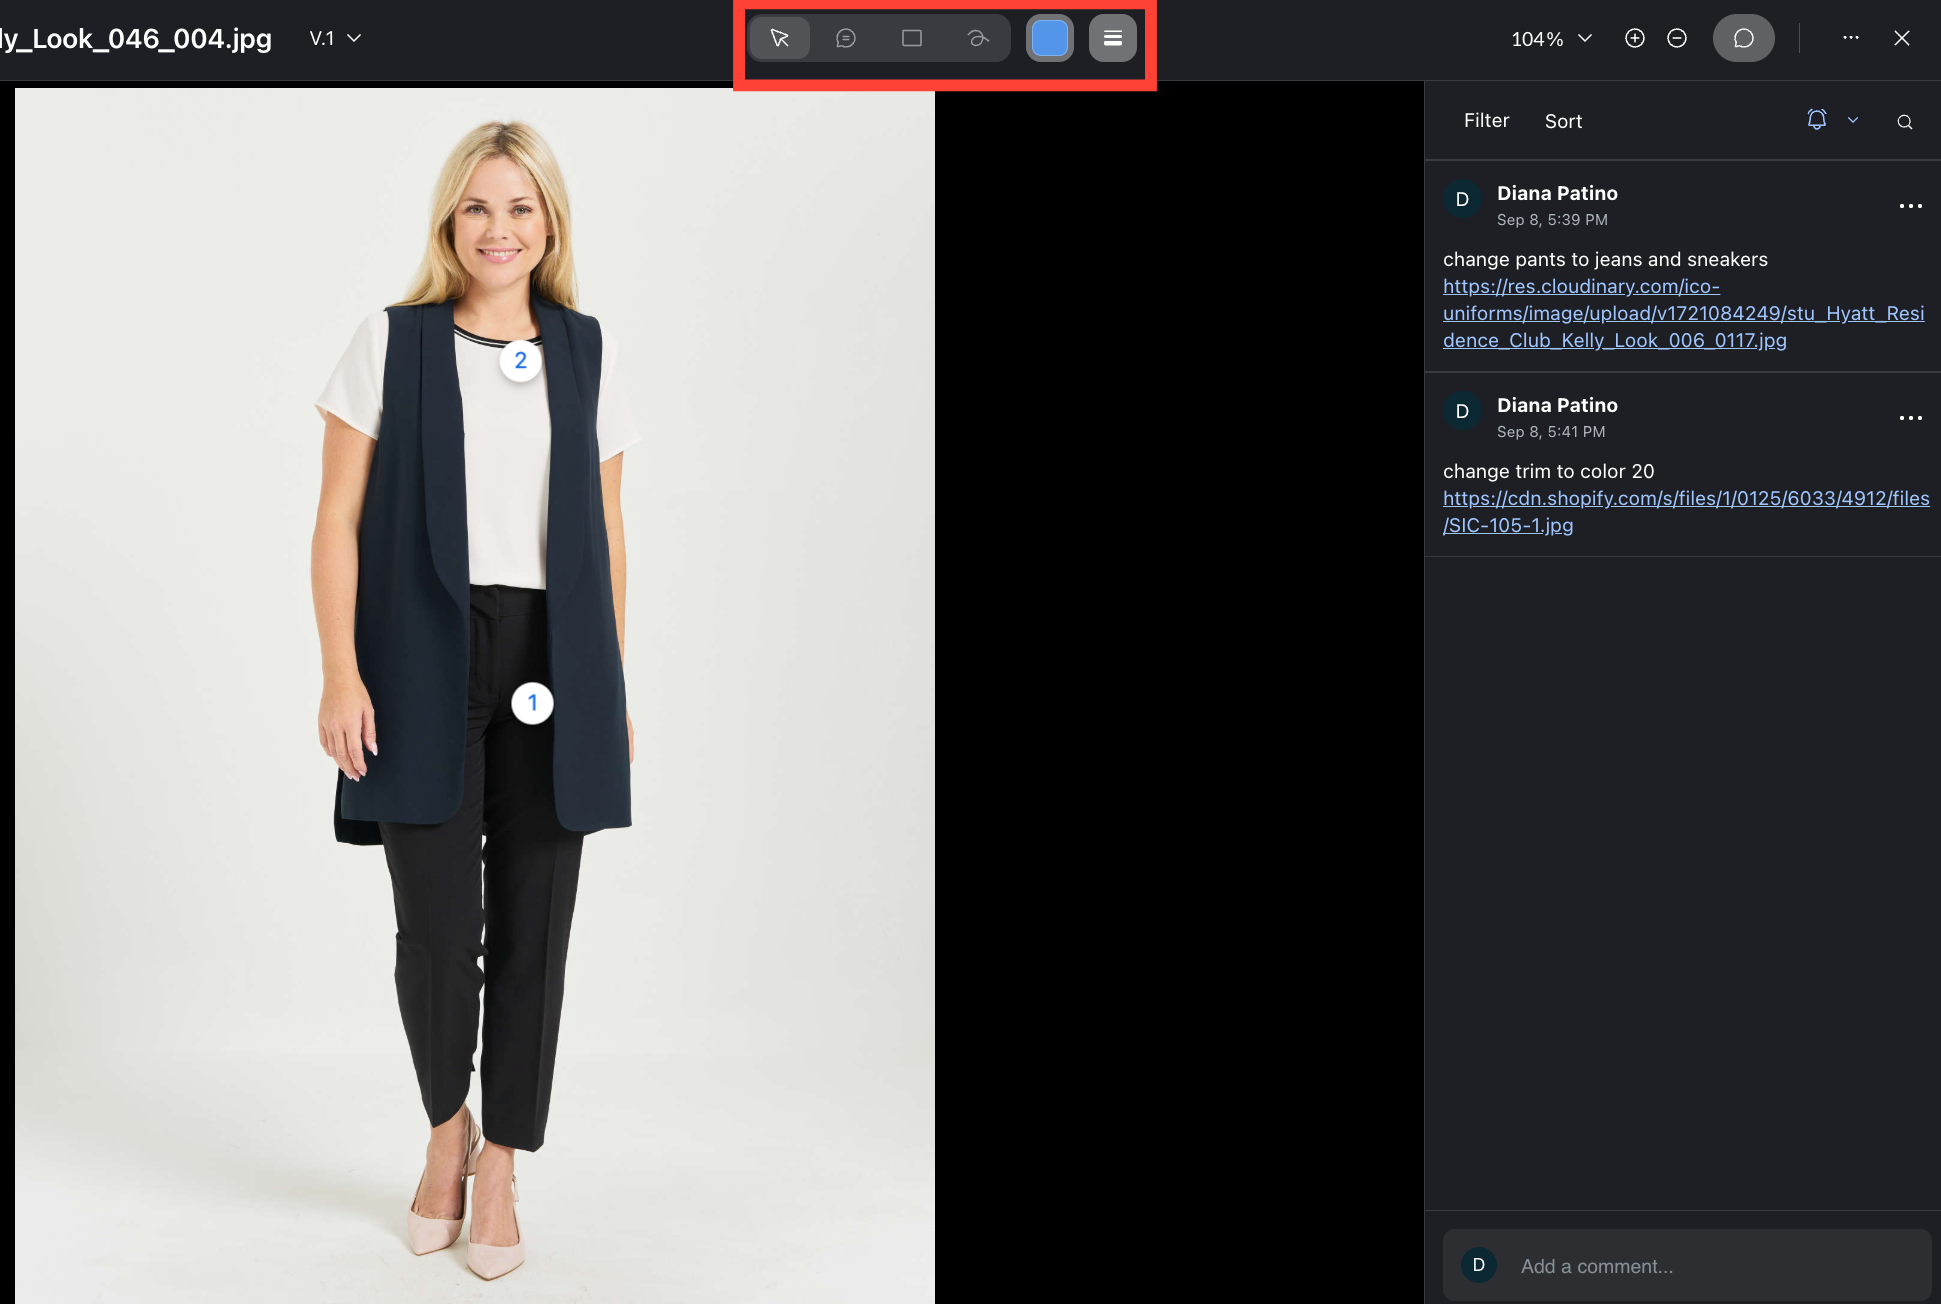
8
Click on the image that you want to add an a and Edit comment to
9
A new window will pop-up - Add your comments using the tools on the tool bar
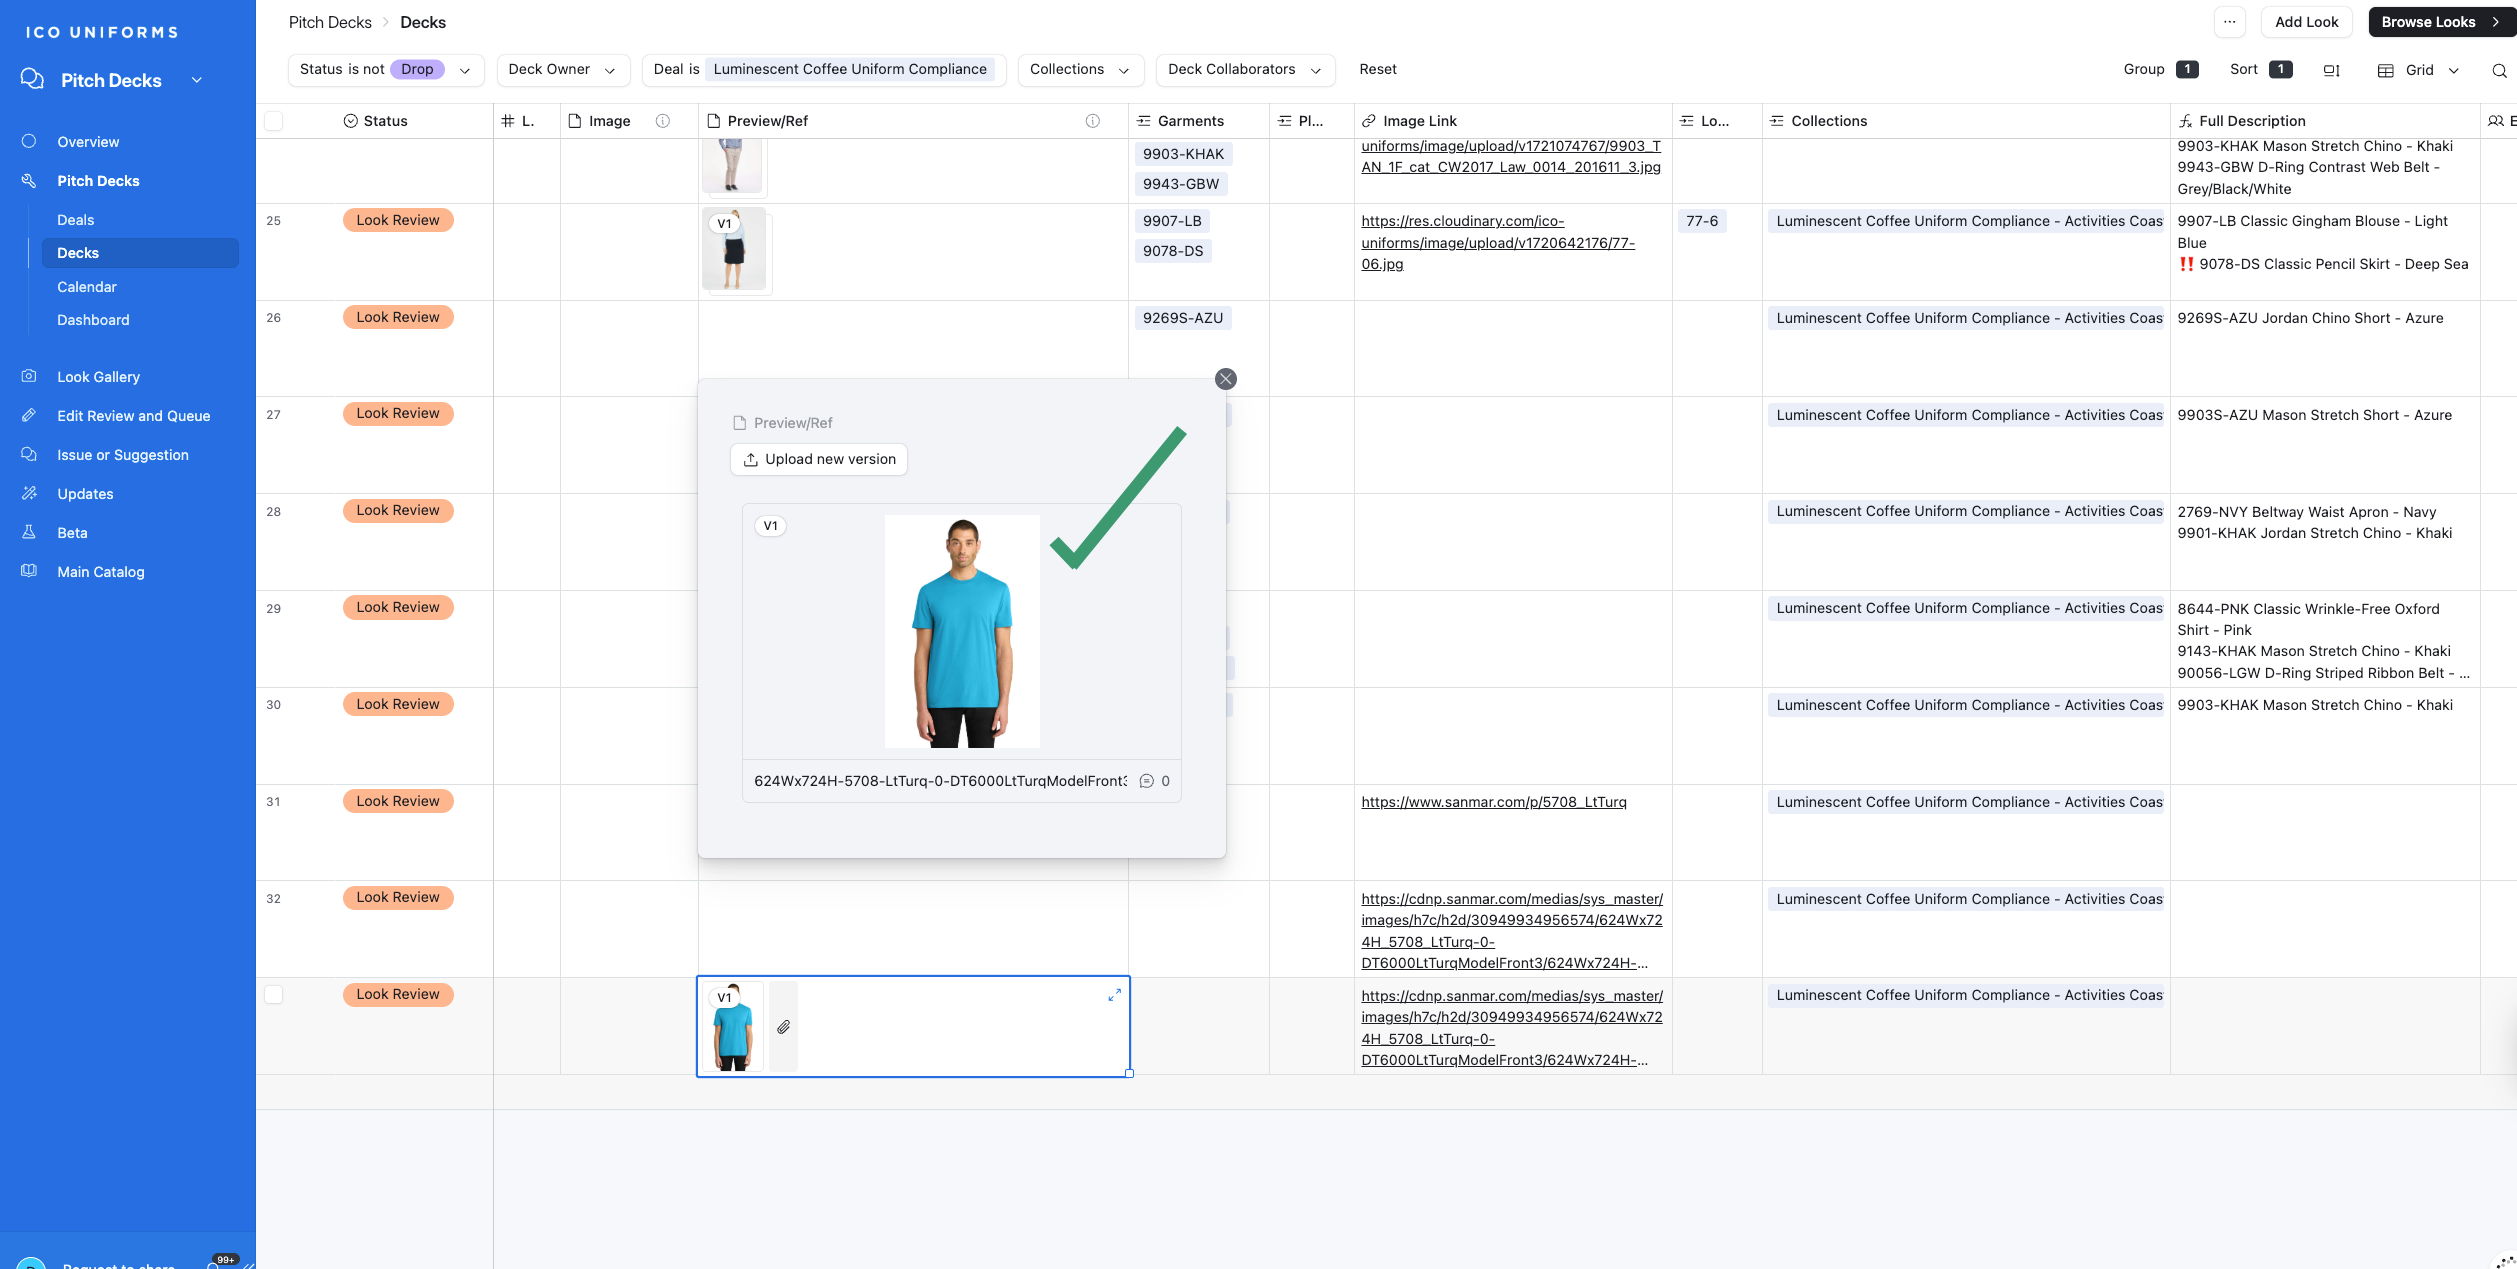
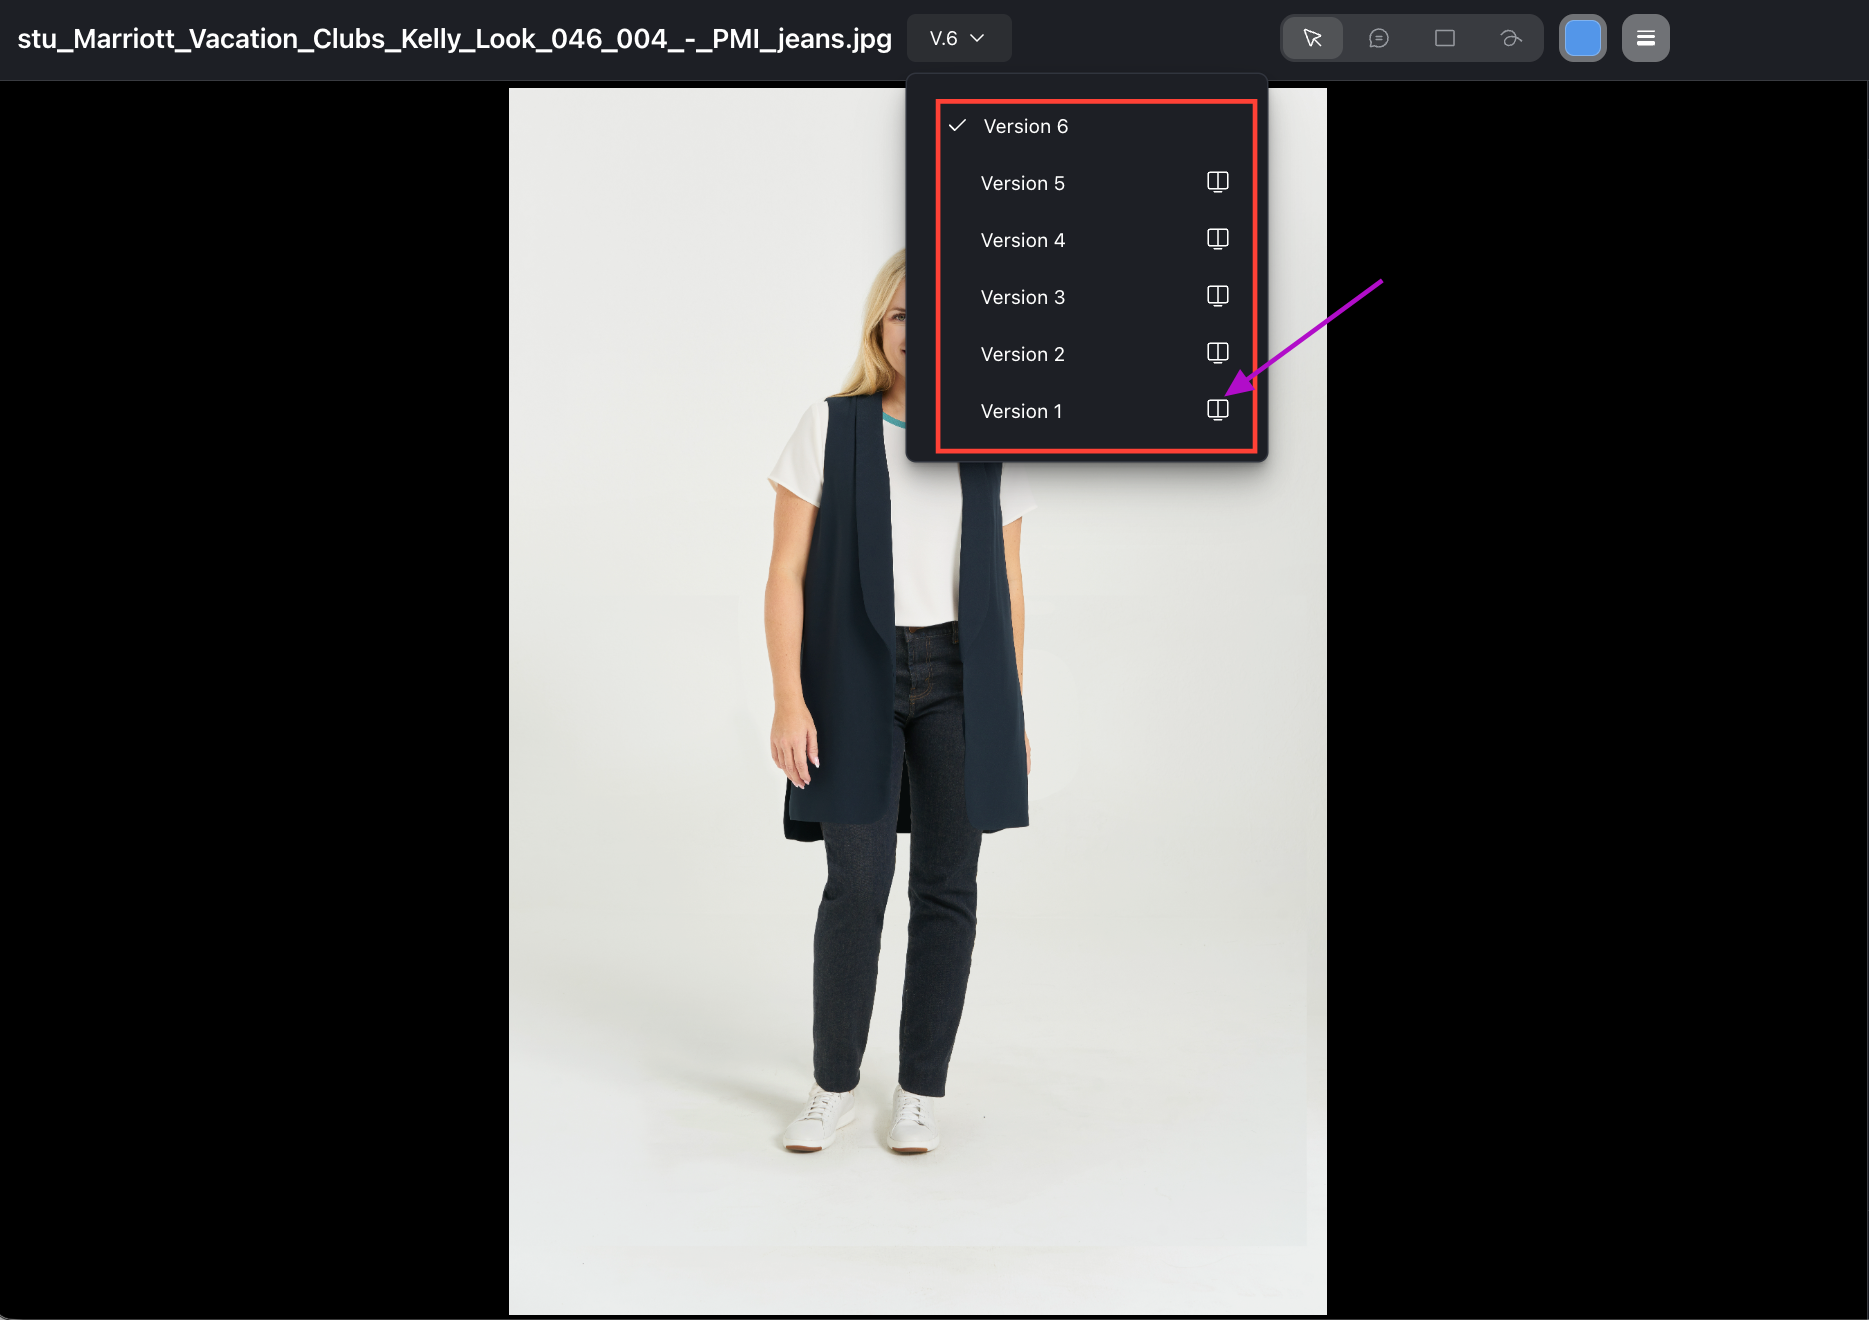
10
The Versioning Tool allows you to double check the edits against your comments. Click the drop-down and select the Window Icon.
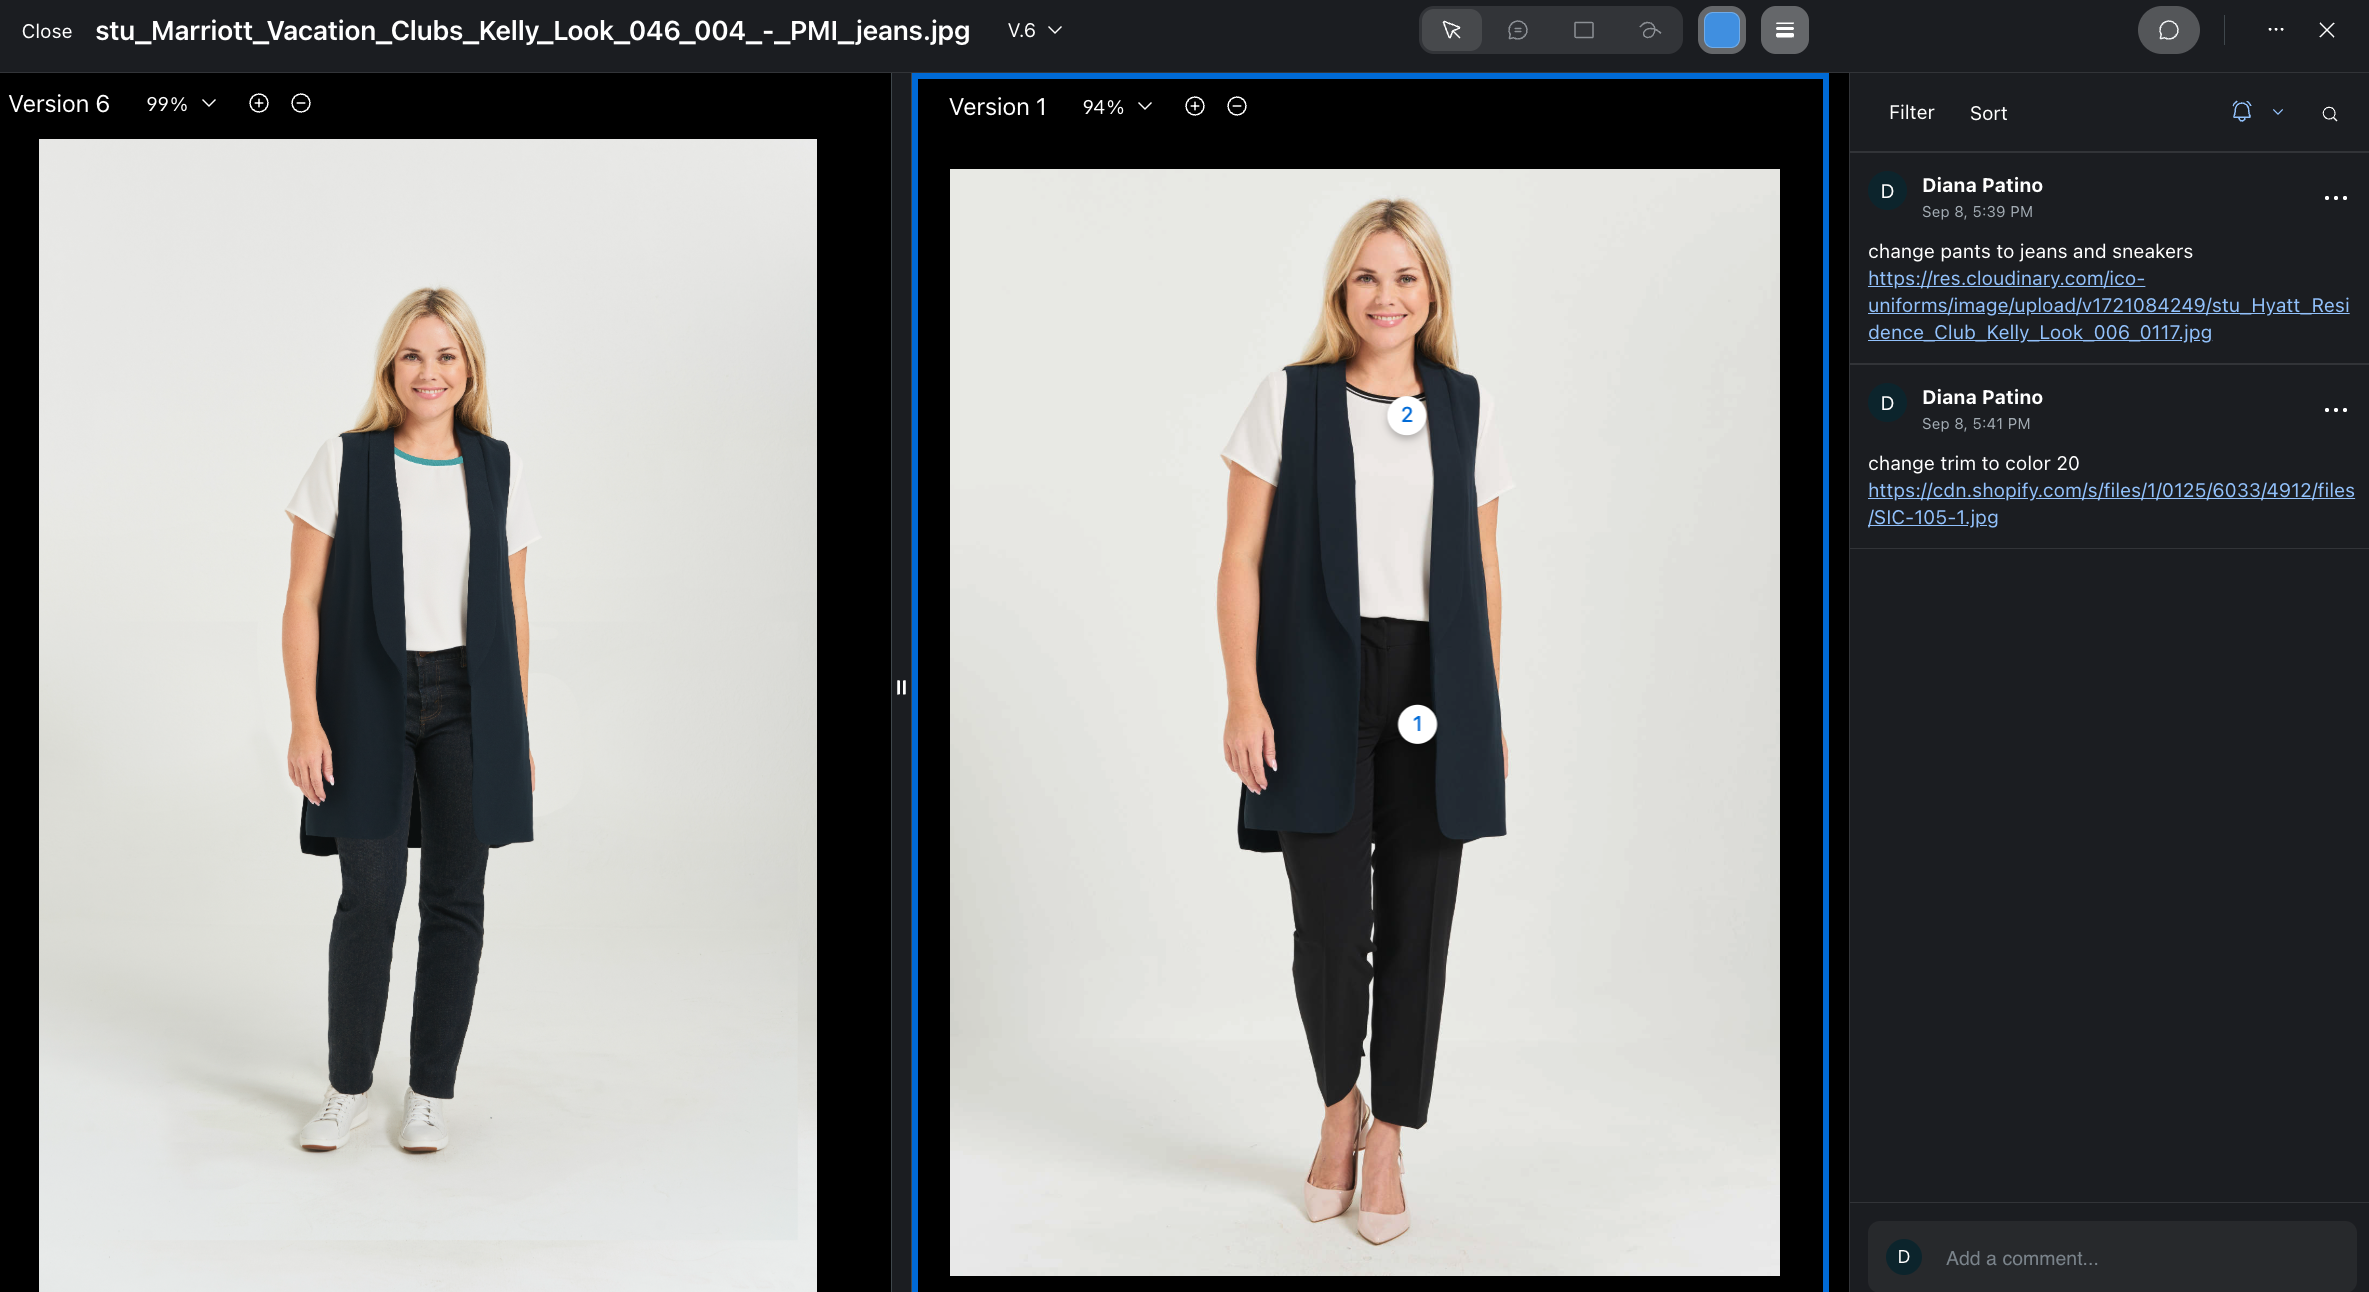
11
The screen will now be split and show the previous comments against the new image. Make sure you click on it.
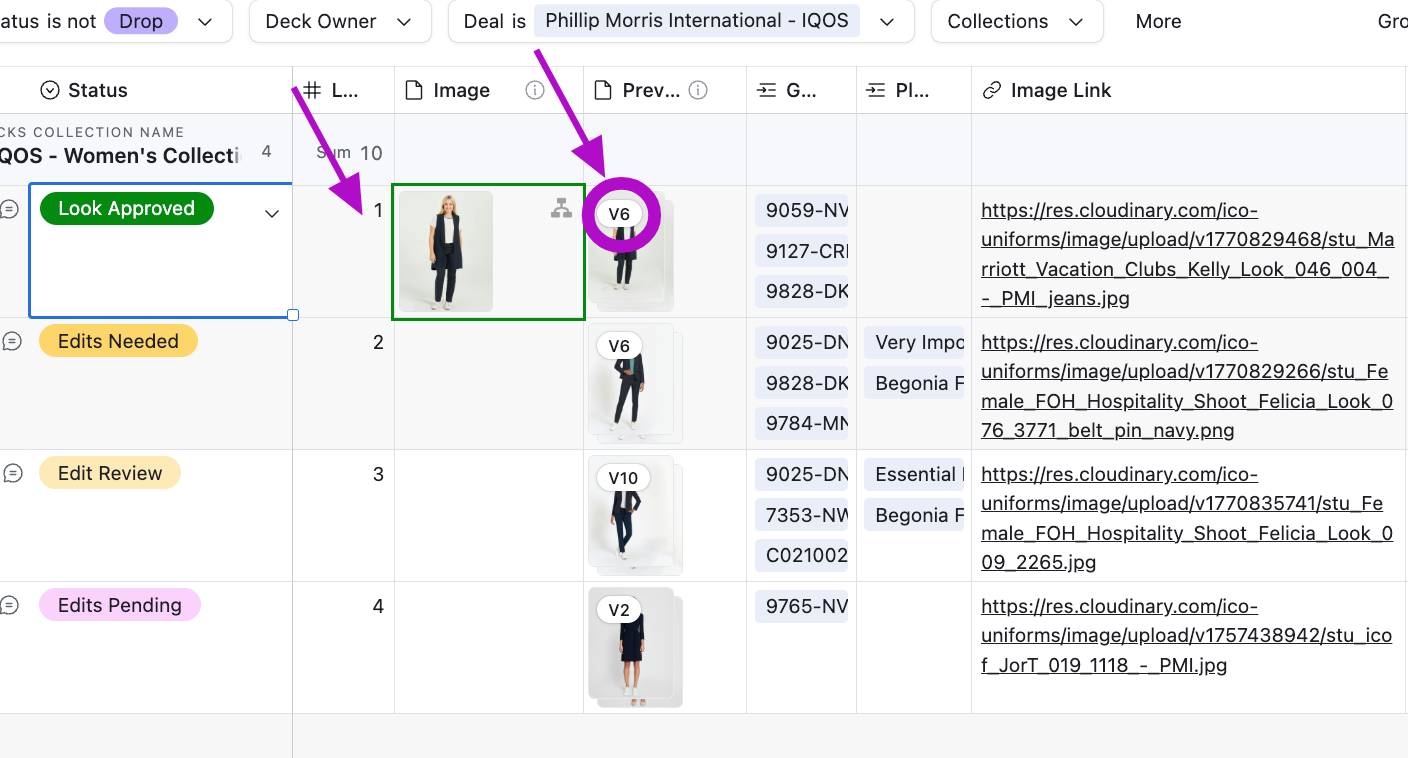
12
The approved image will automatically populate in the Image Field.
13
Tips: Remember to add your Looks # to keep your presentation organized how you want it.
Never delete images here, it's good practice so you can review the edit history if needed.
Never delete images here, it's good practice so you can review the edit history if needed.
Adding alternative images/ views (Using the same garments)
14
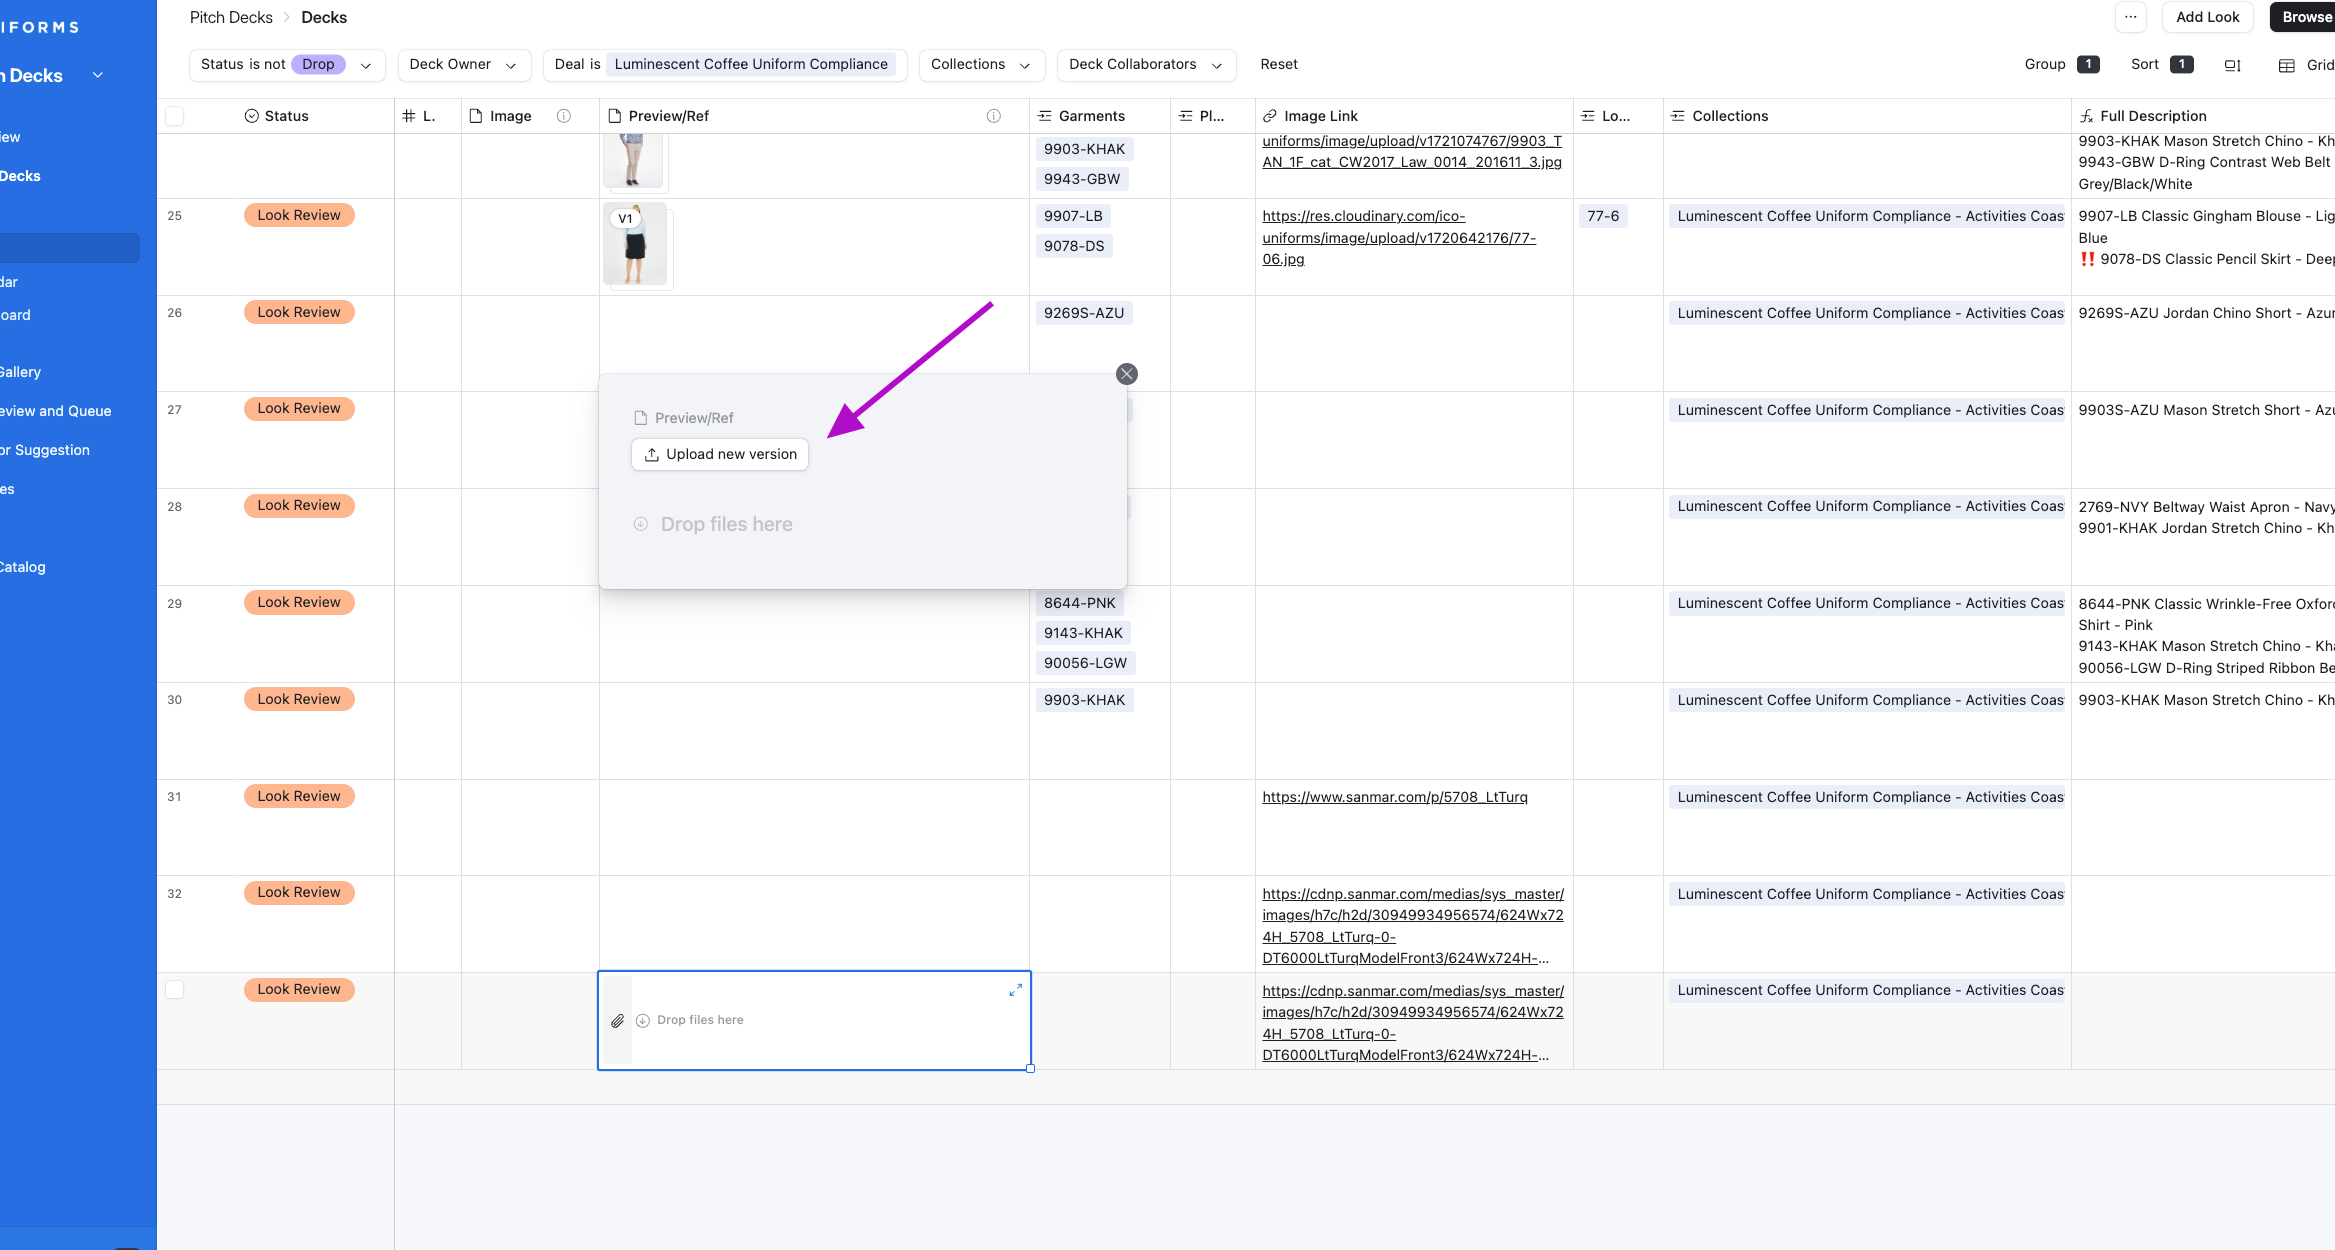
If you need to add a new image - Click on the window.
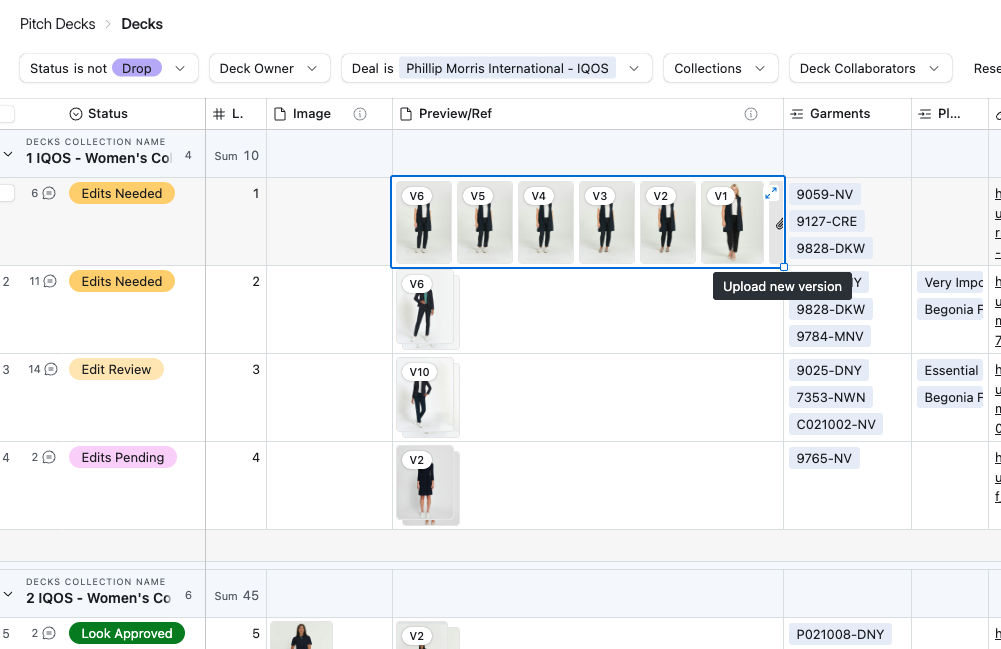
15
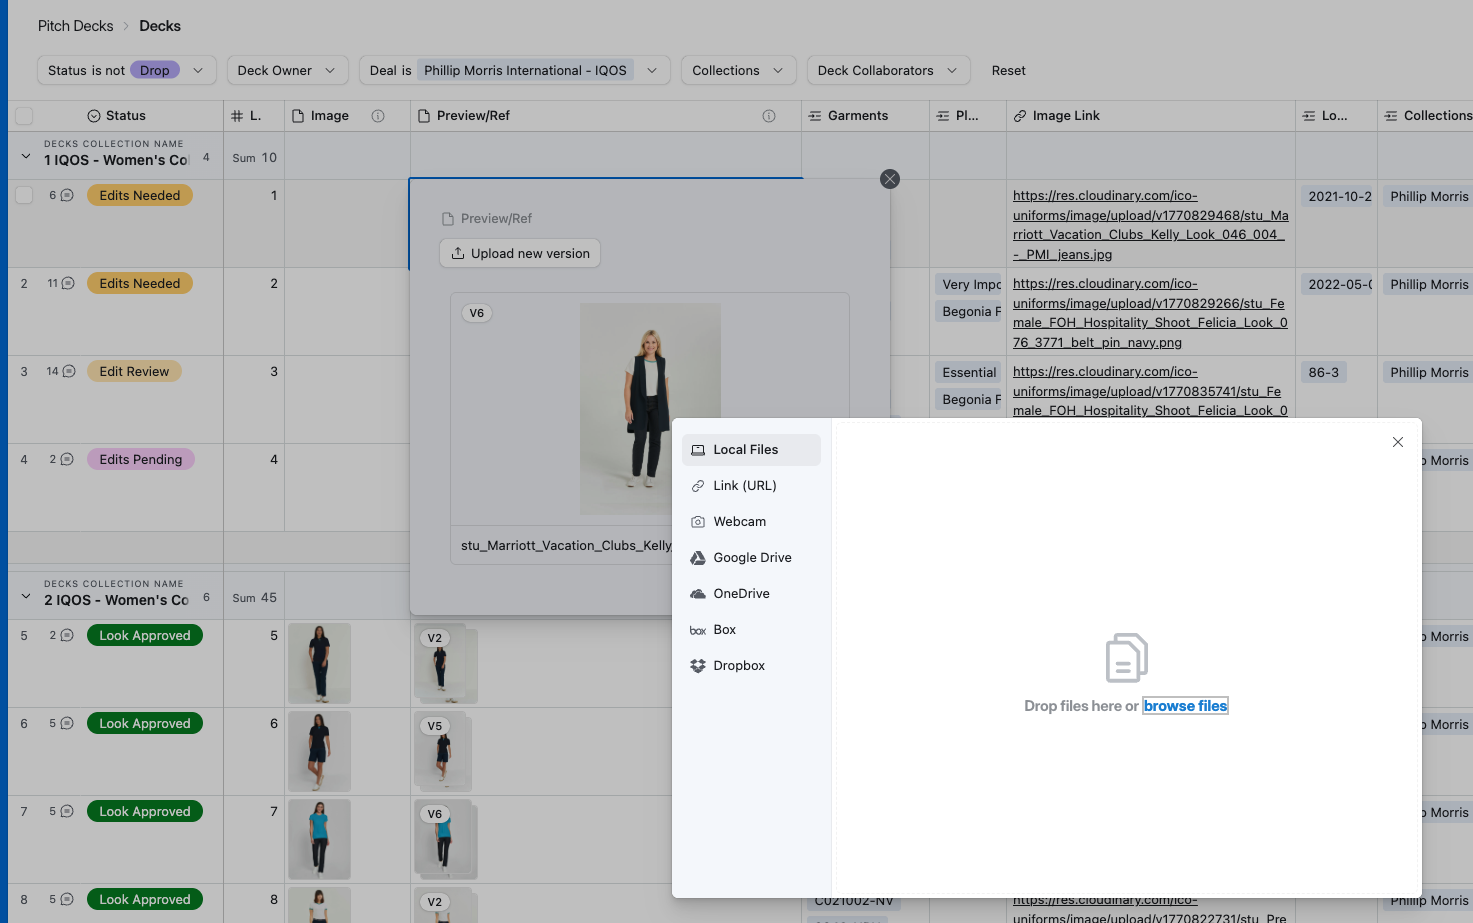
A new window will pop-up. Click Upload New Version
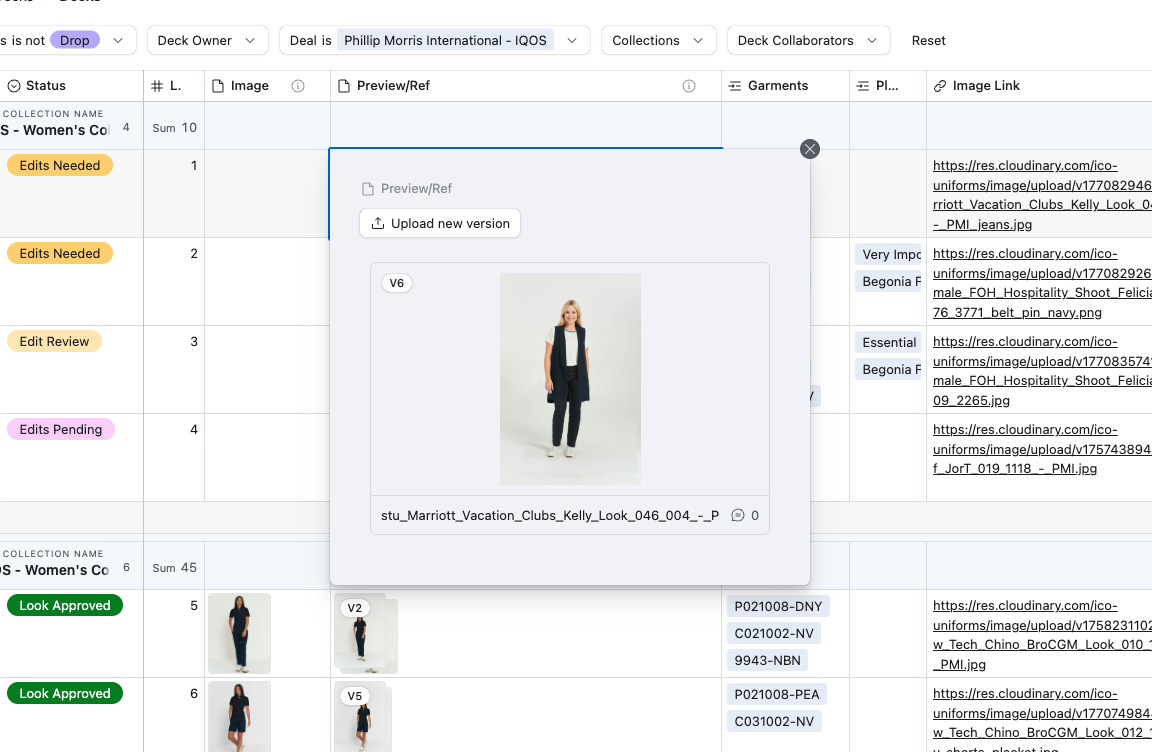
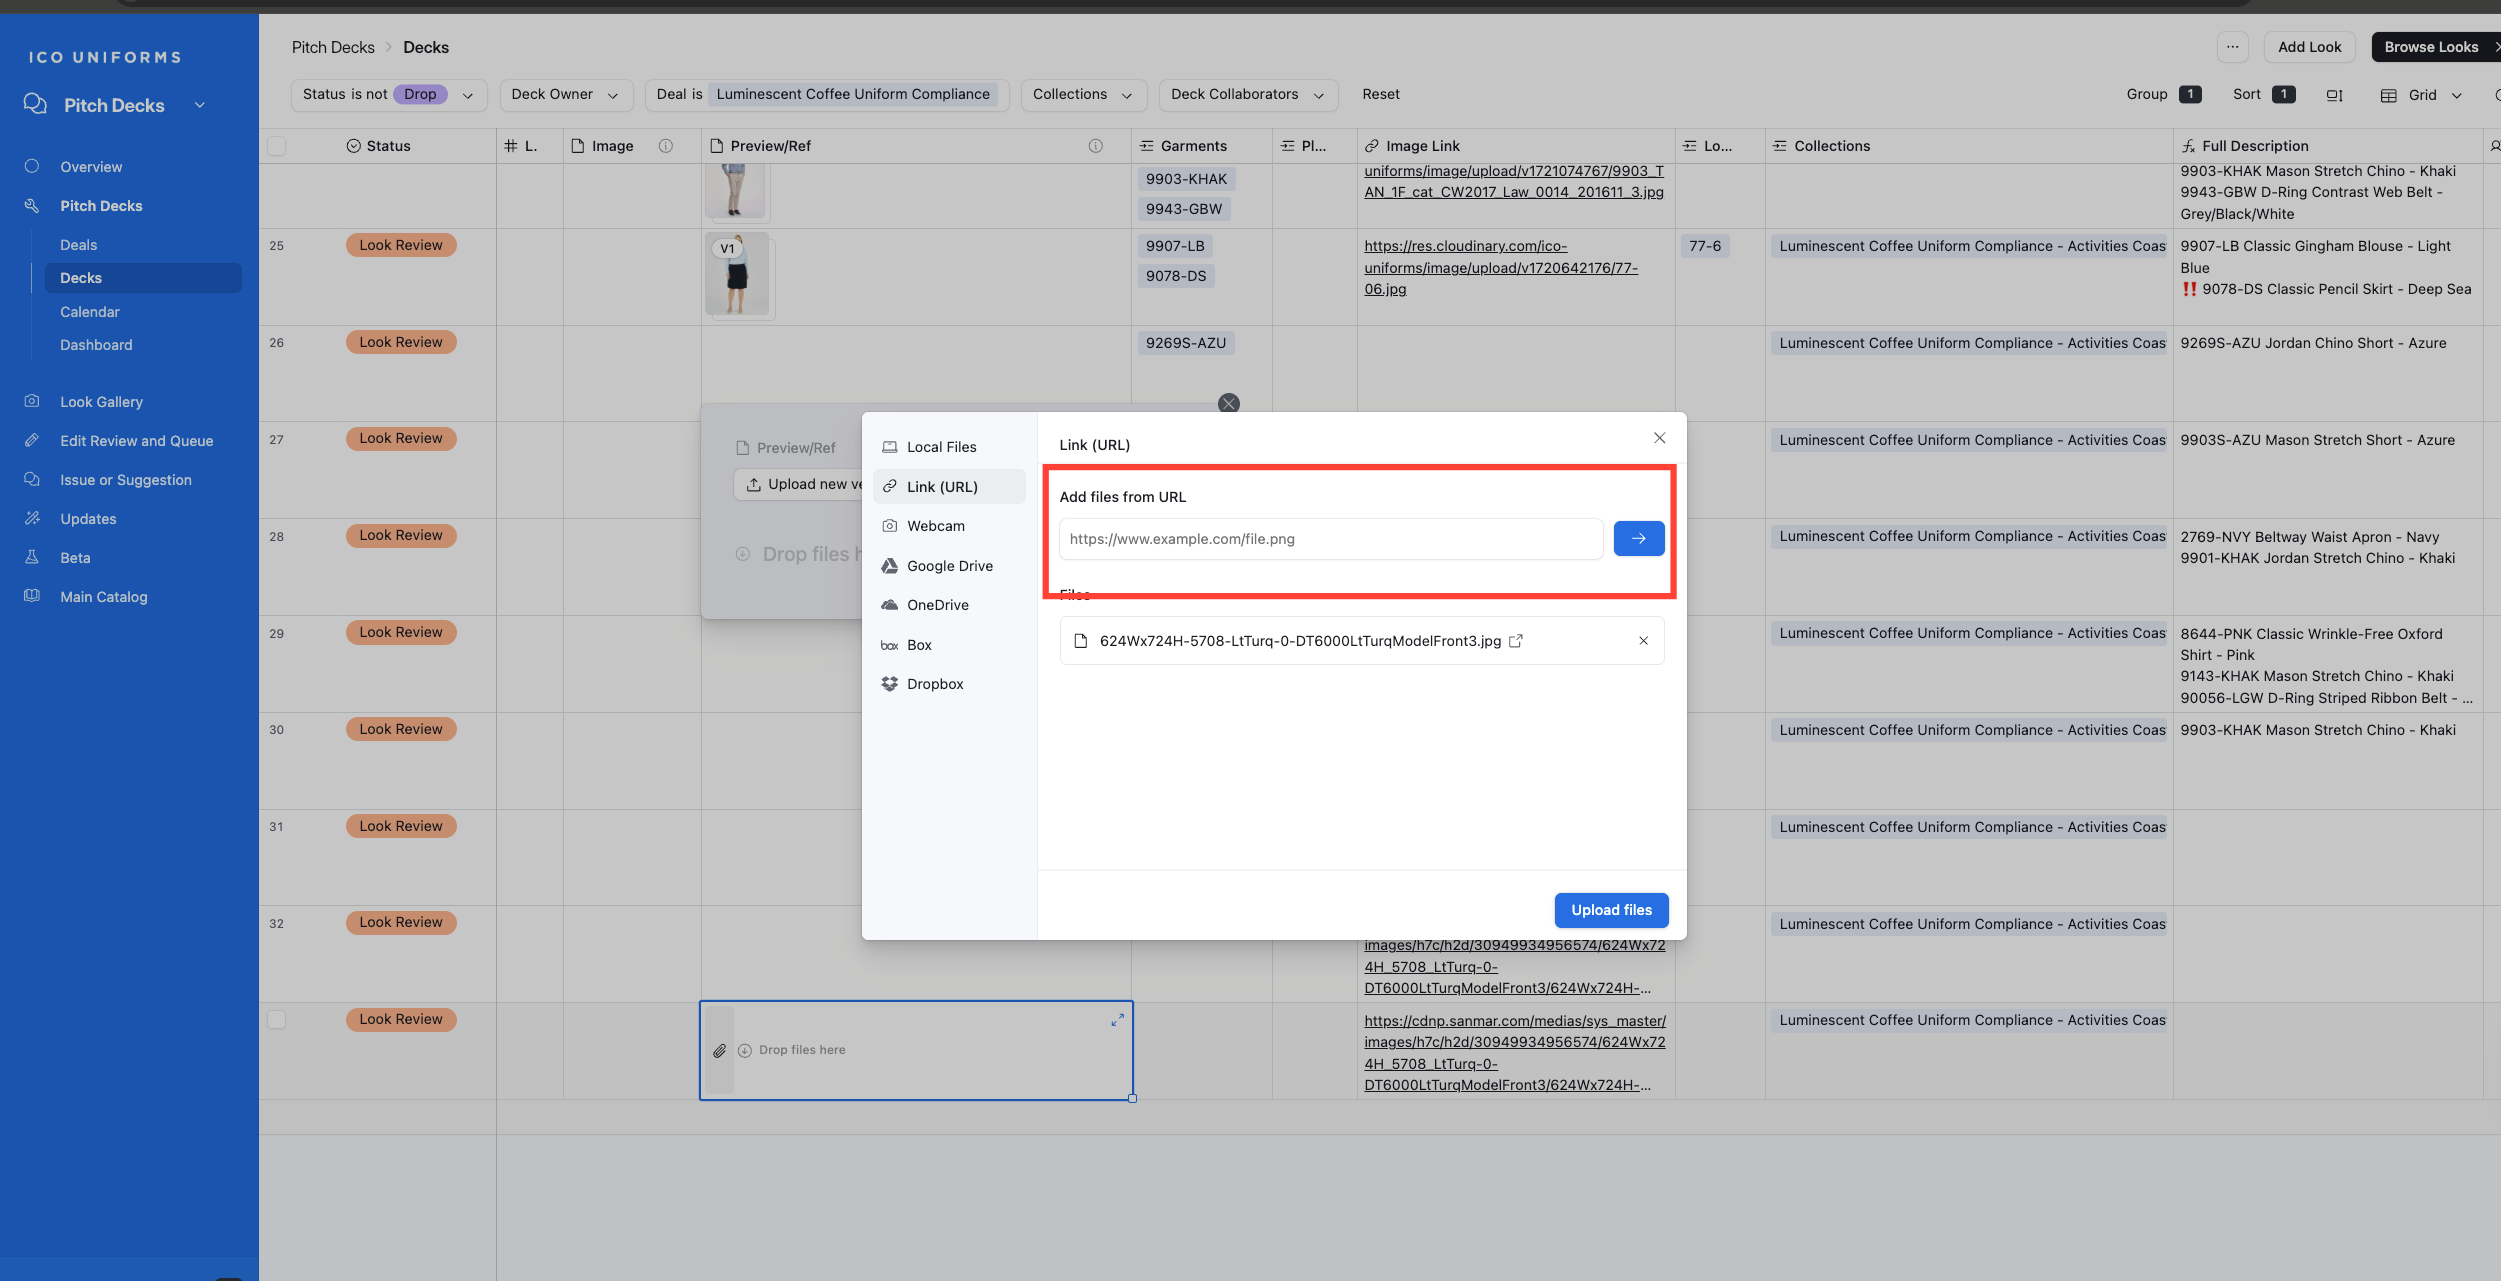
16
An additional Window will pop-up. Click Link to add an image link from Cloudinary
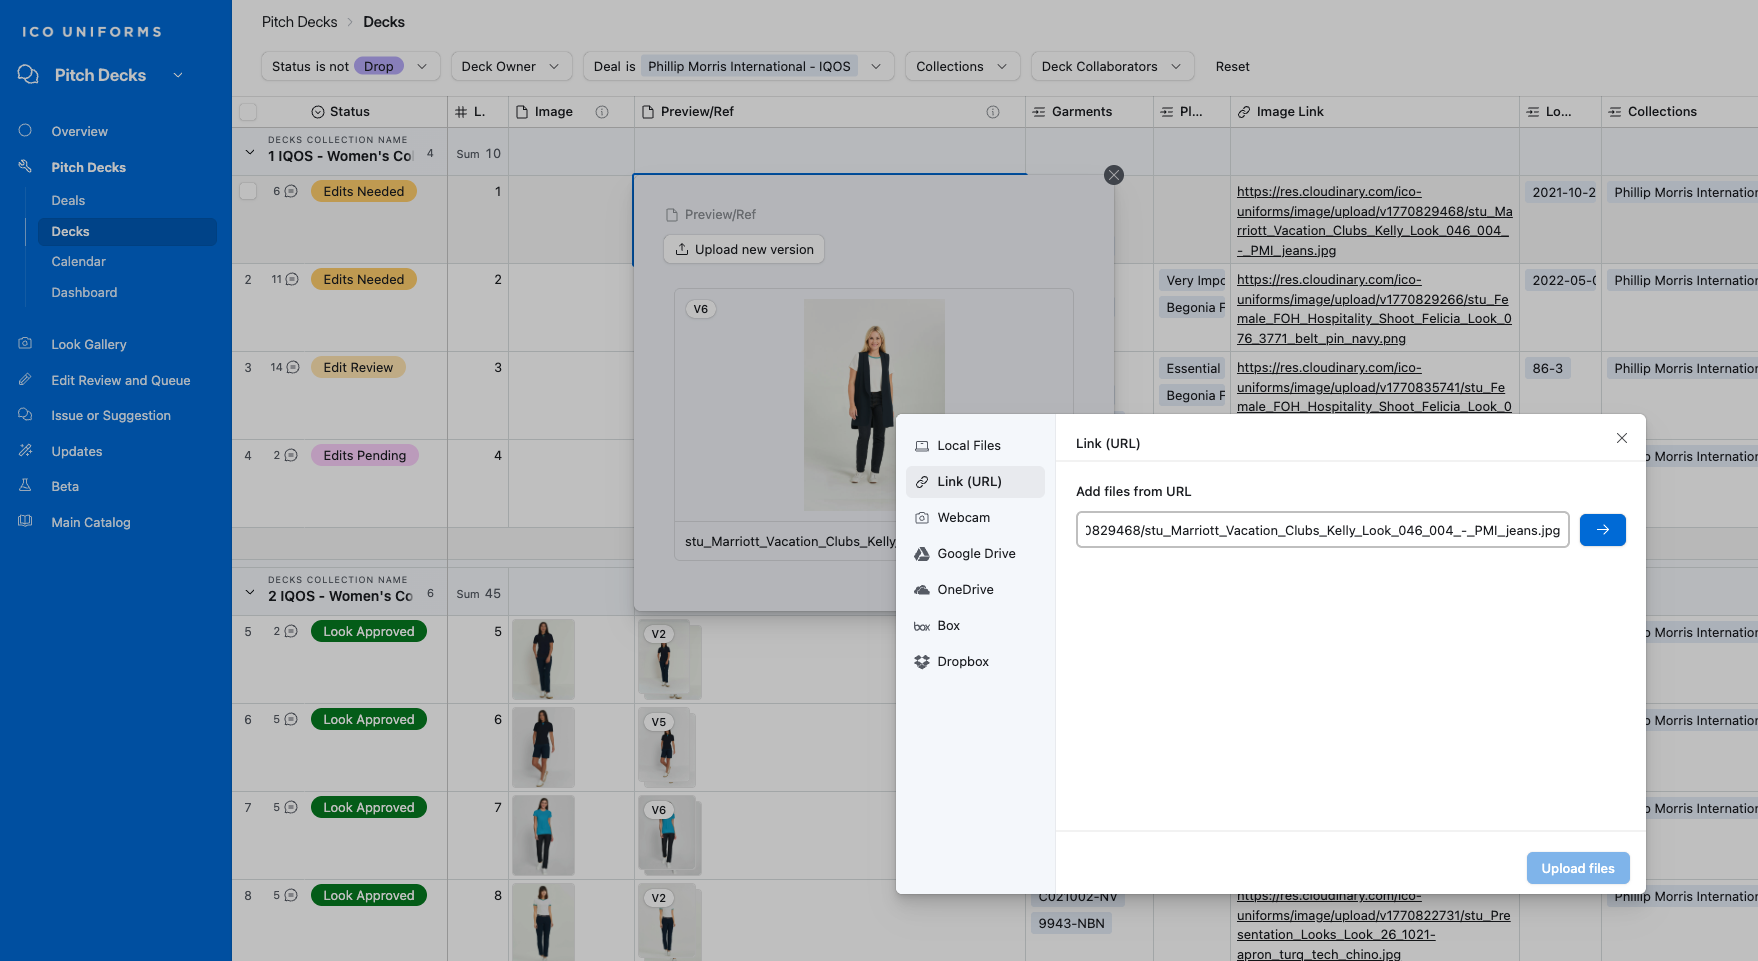
17
Paste the link and click the Blue Arrow
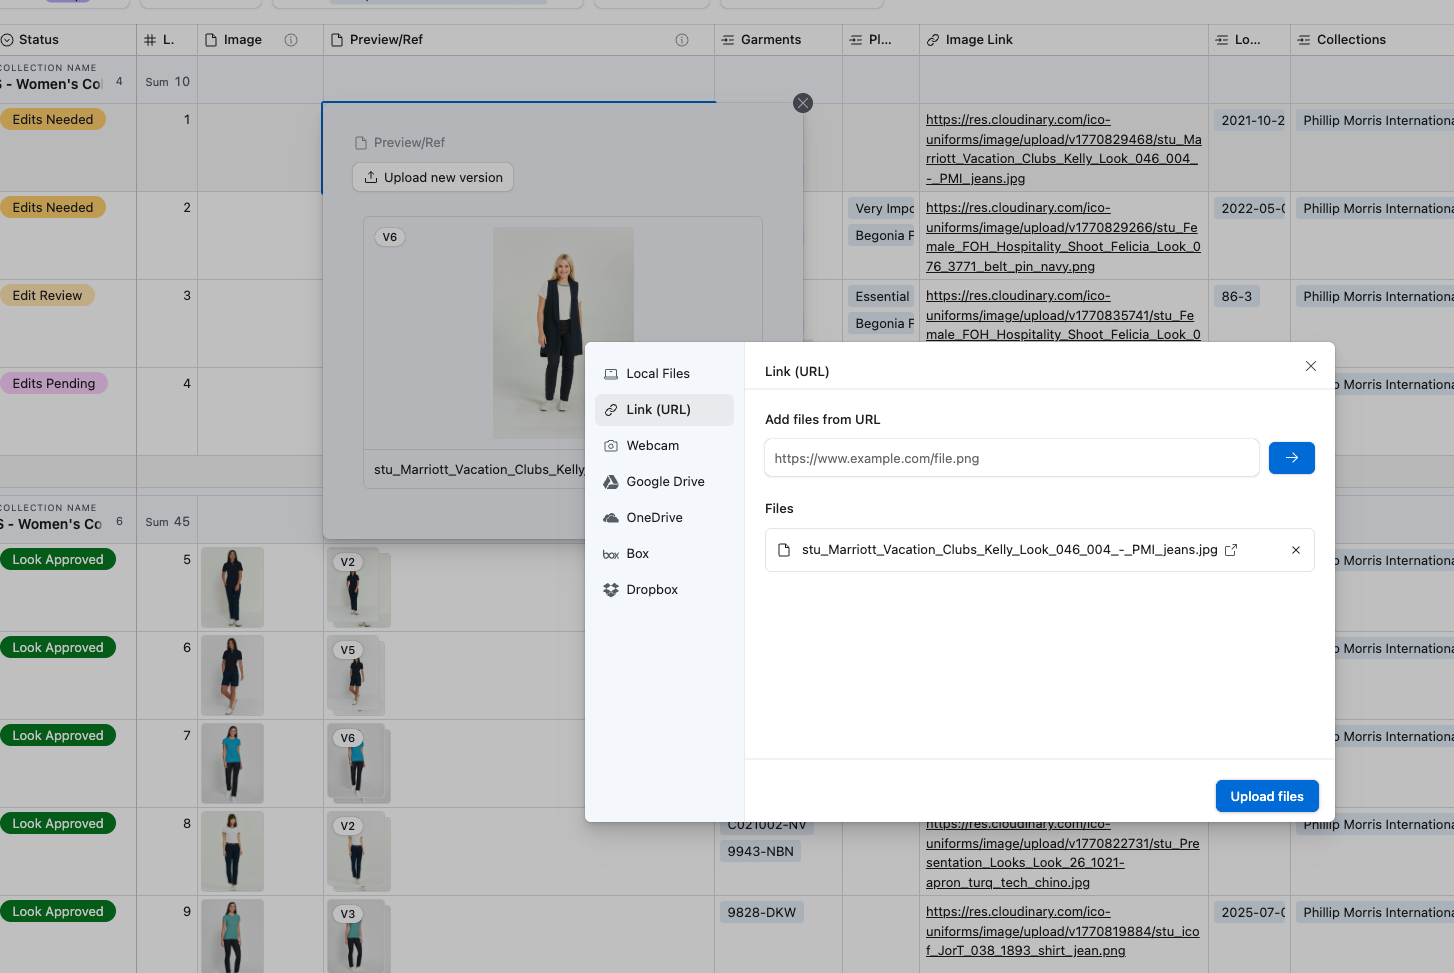
18
Hit the Upload Files Button
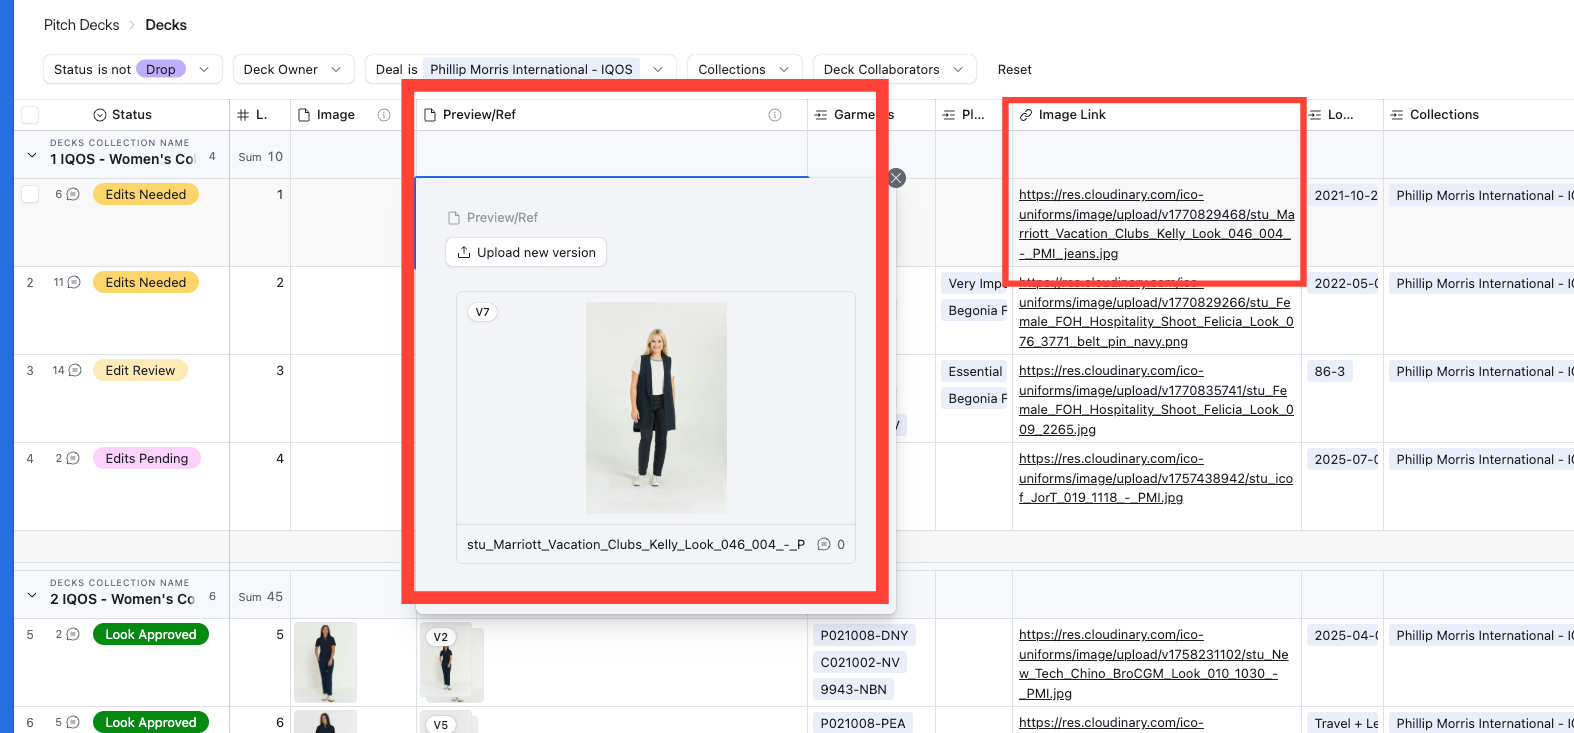
19
Your new image has been added!
**Make sure to add the same link to Image Link
**Make sure to add the same link to Image Link
Adding a non ICO Asset via Decks
20
Click the Add Look button
21
A blank Decks Form will pop-up
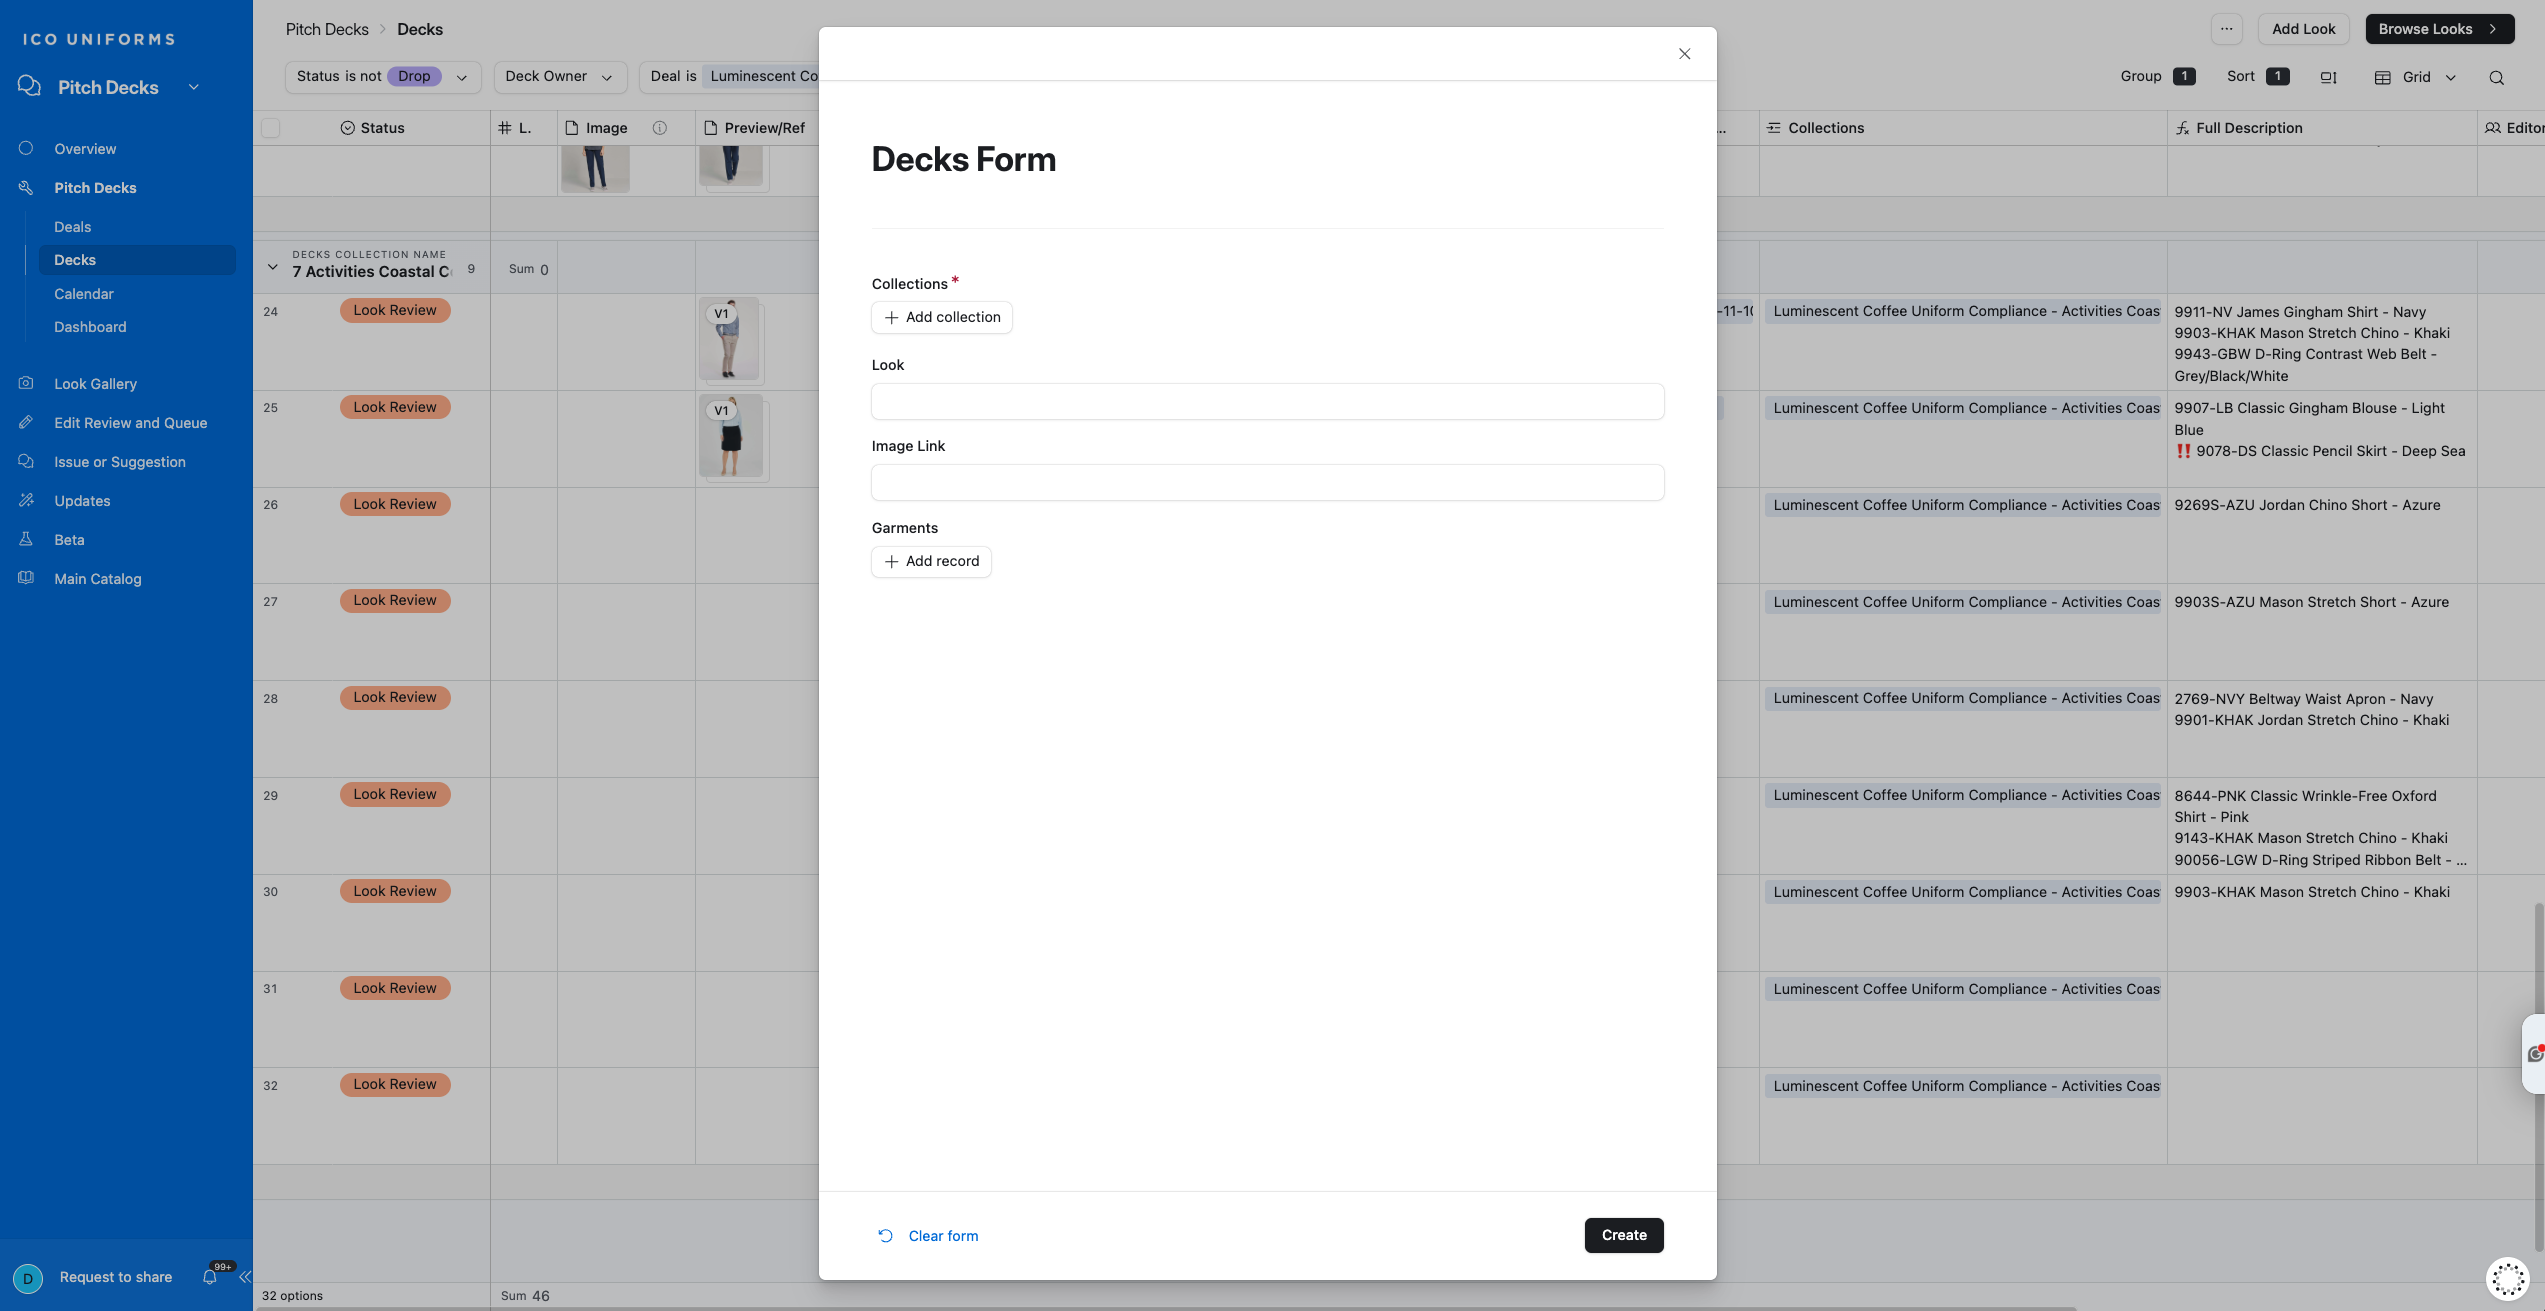
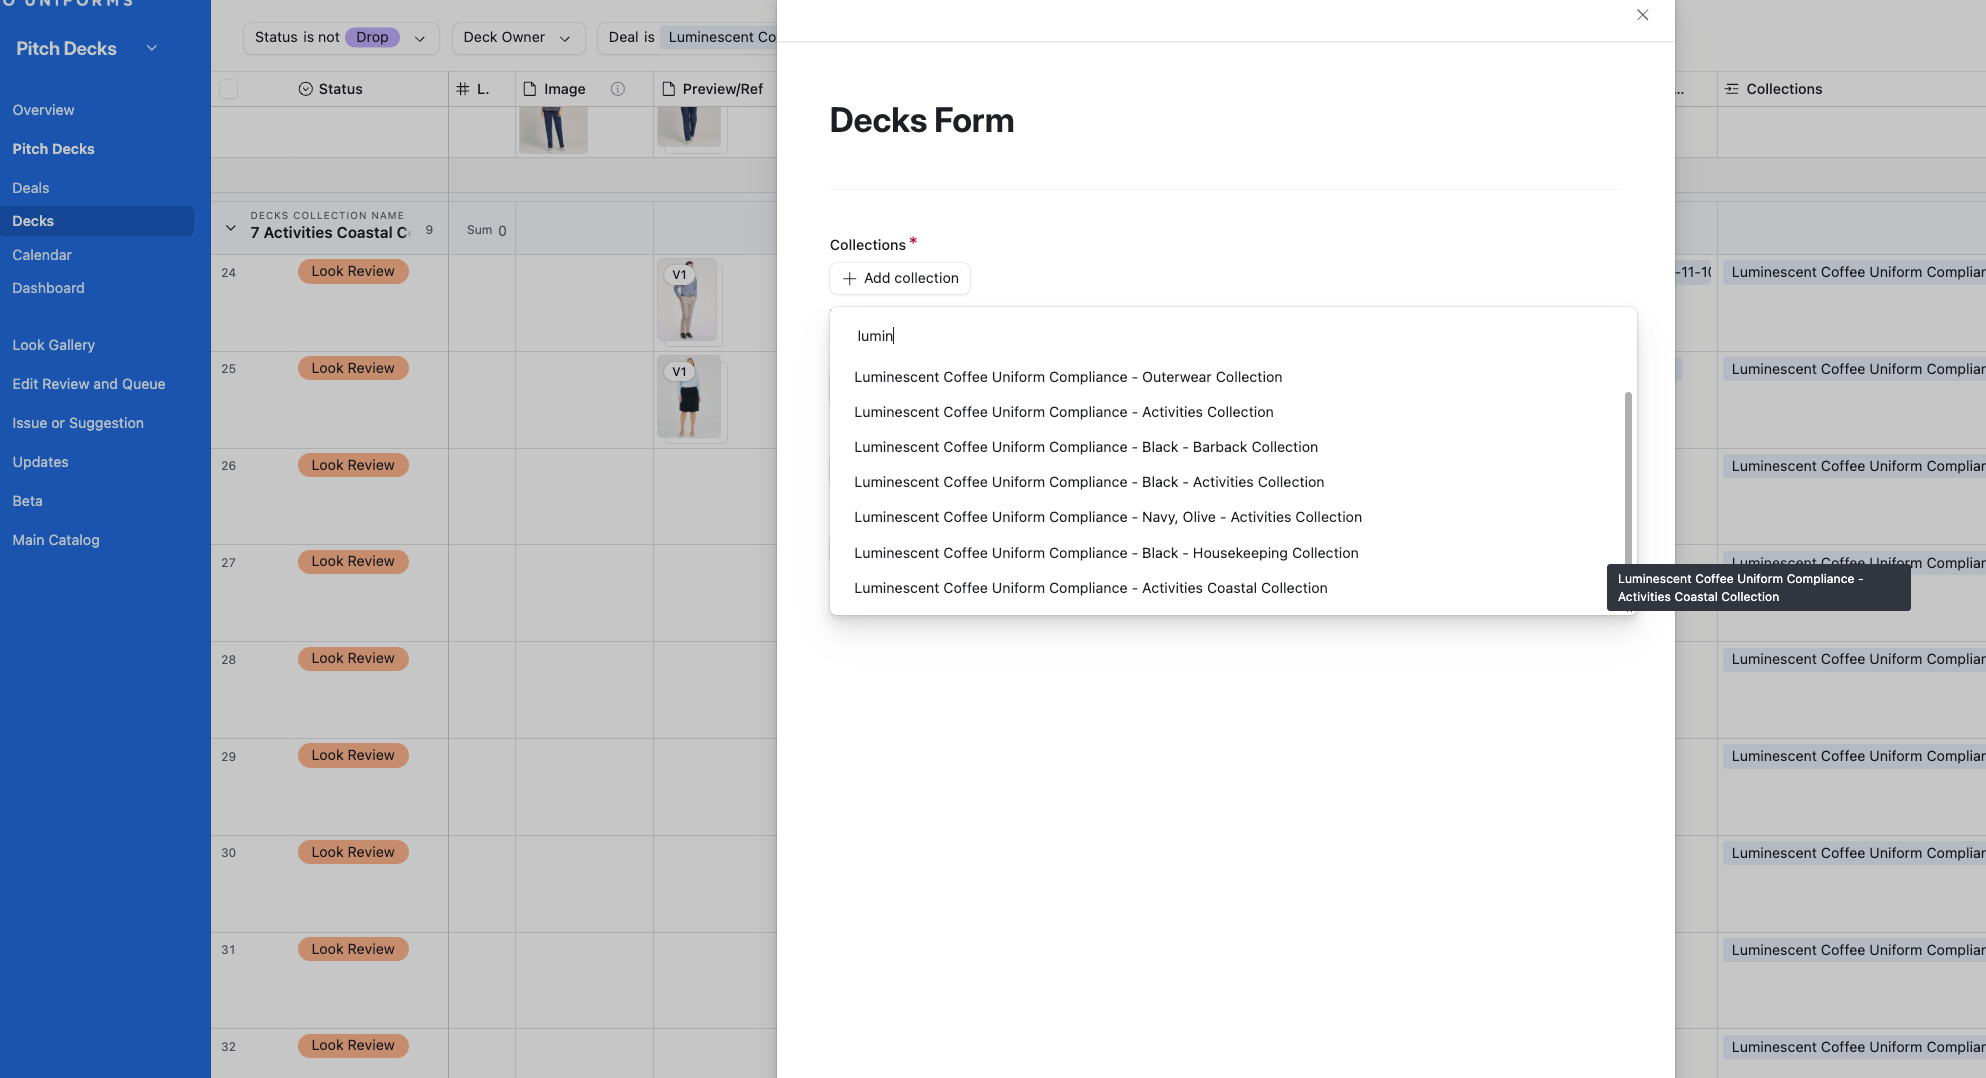
22
Start typing the Collection
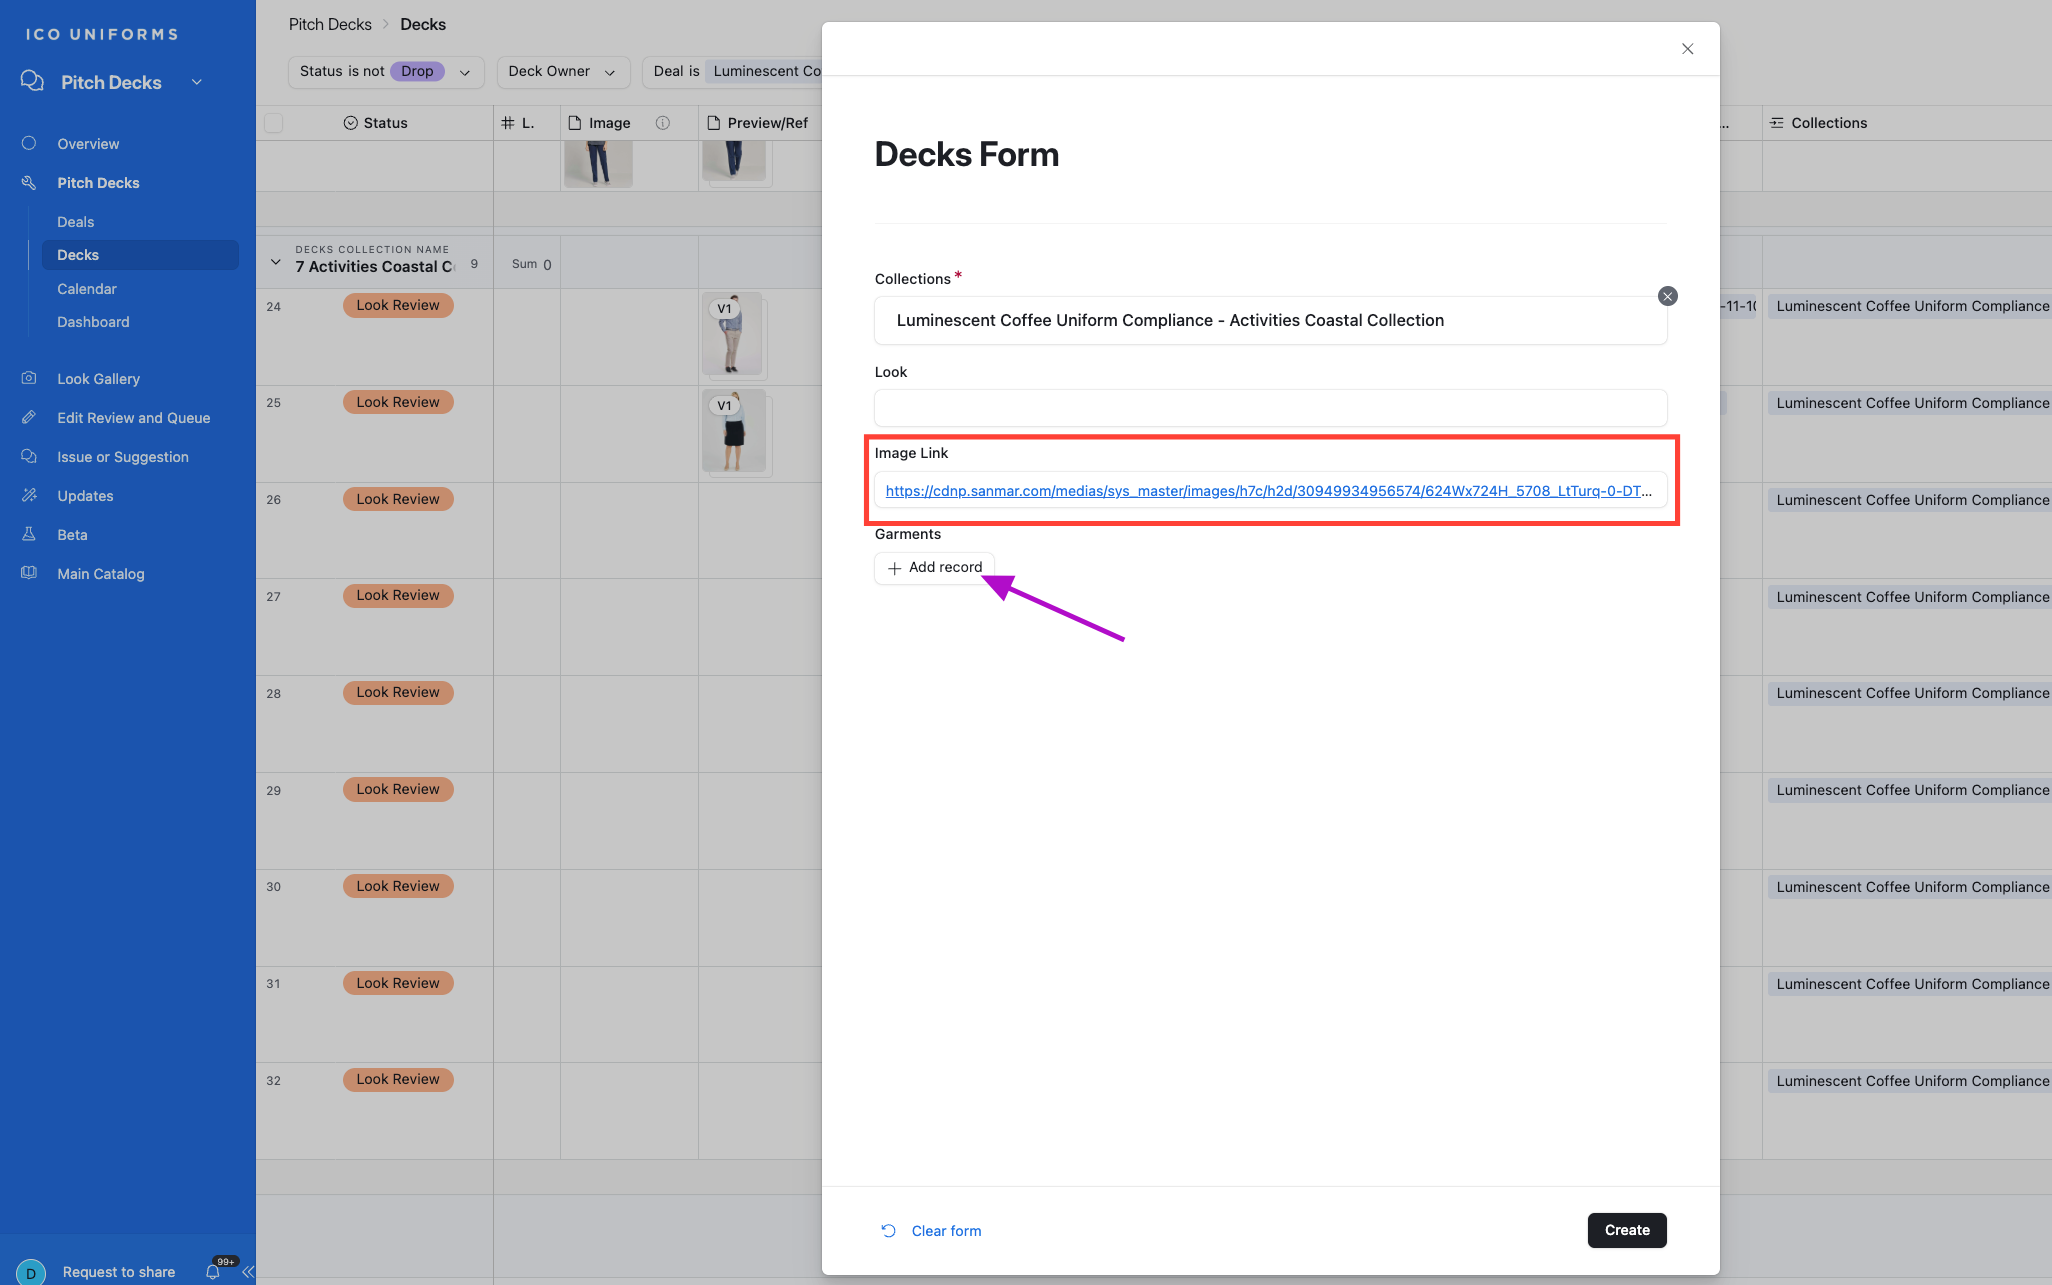
23
Insert Image Link, add Garments if available and click Create
24
Now update your Prev Image if it doesn't populate automatically. A new window will pop-up
25
Add Image Link and Click Upload Files
26
Your image is ready. Now you may approve, add edits etc.
**example: recolor, add logo, etc.
**example: recolor, add logo, etc.