Icon

Order and Rider Management System(NON-OBD)

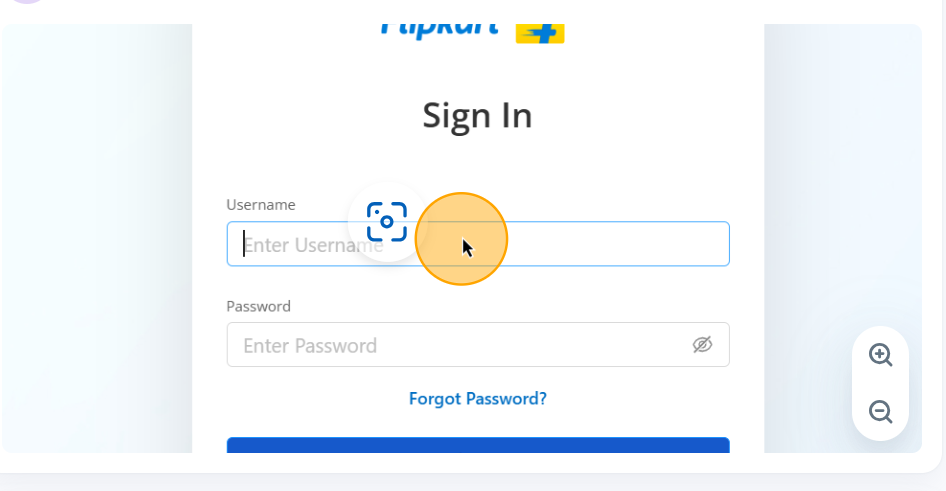
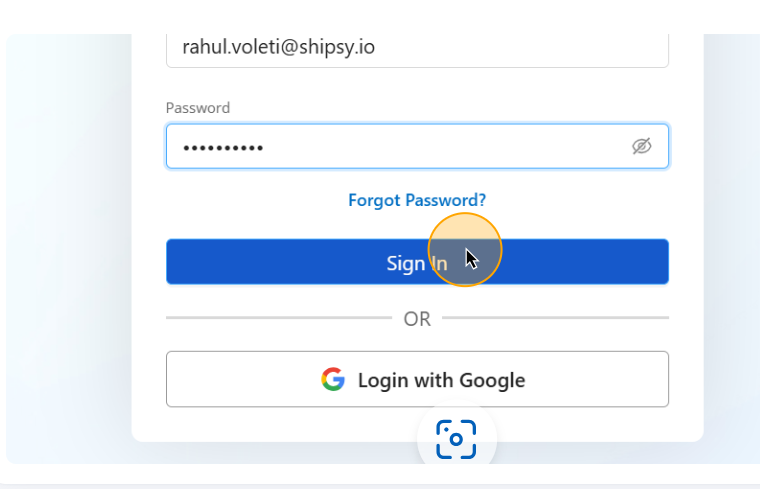
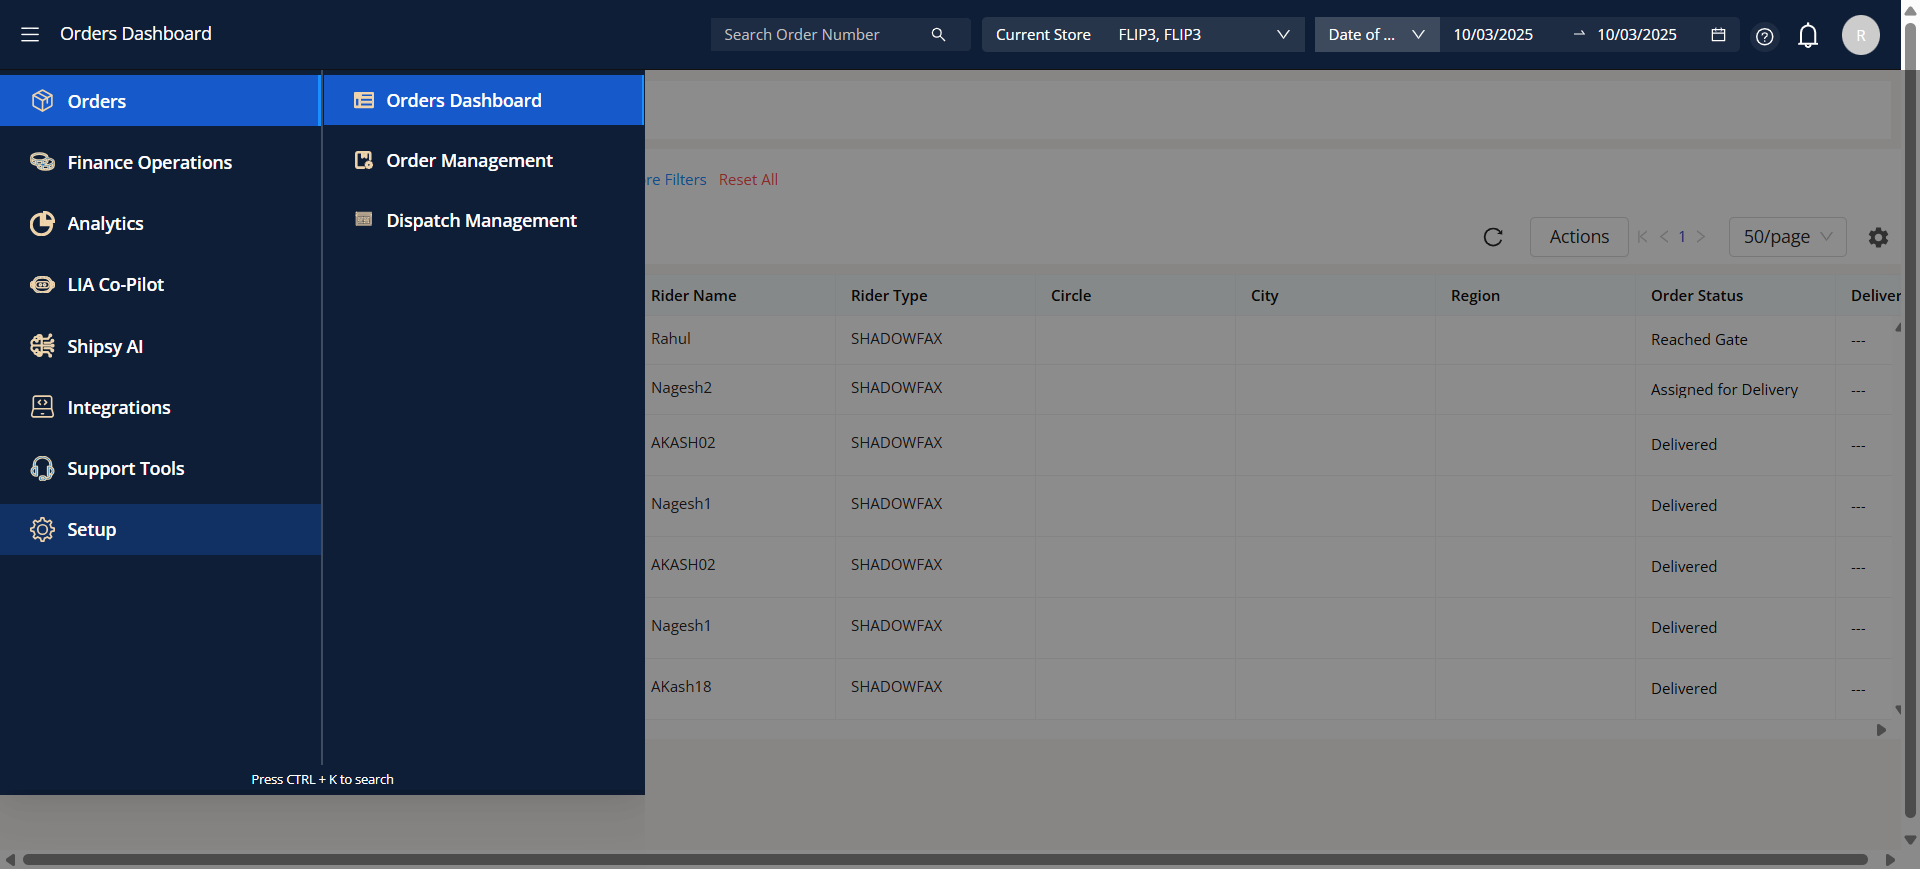
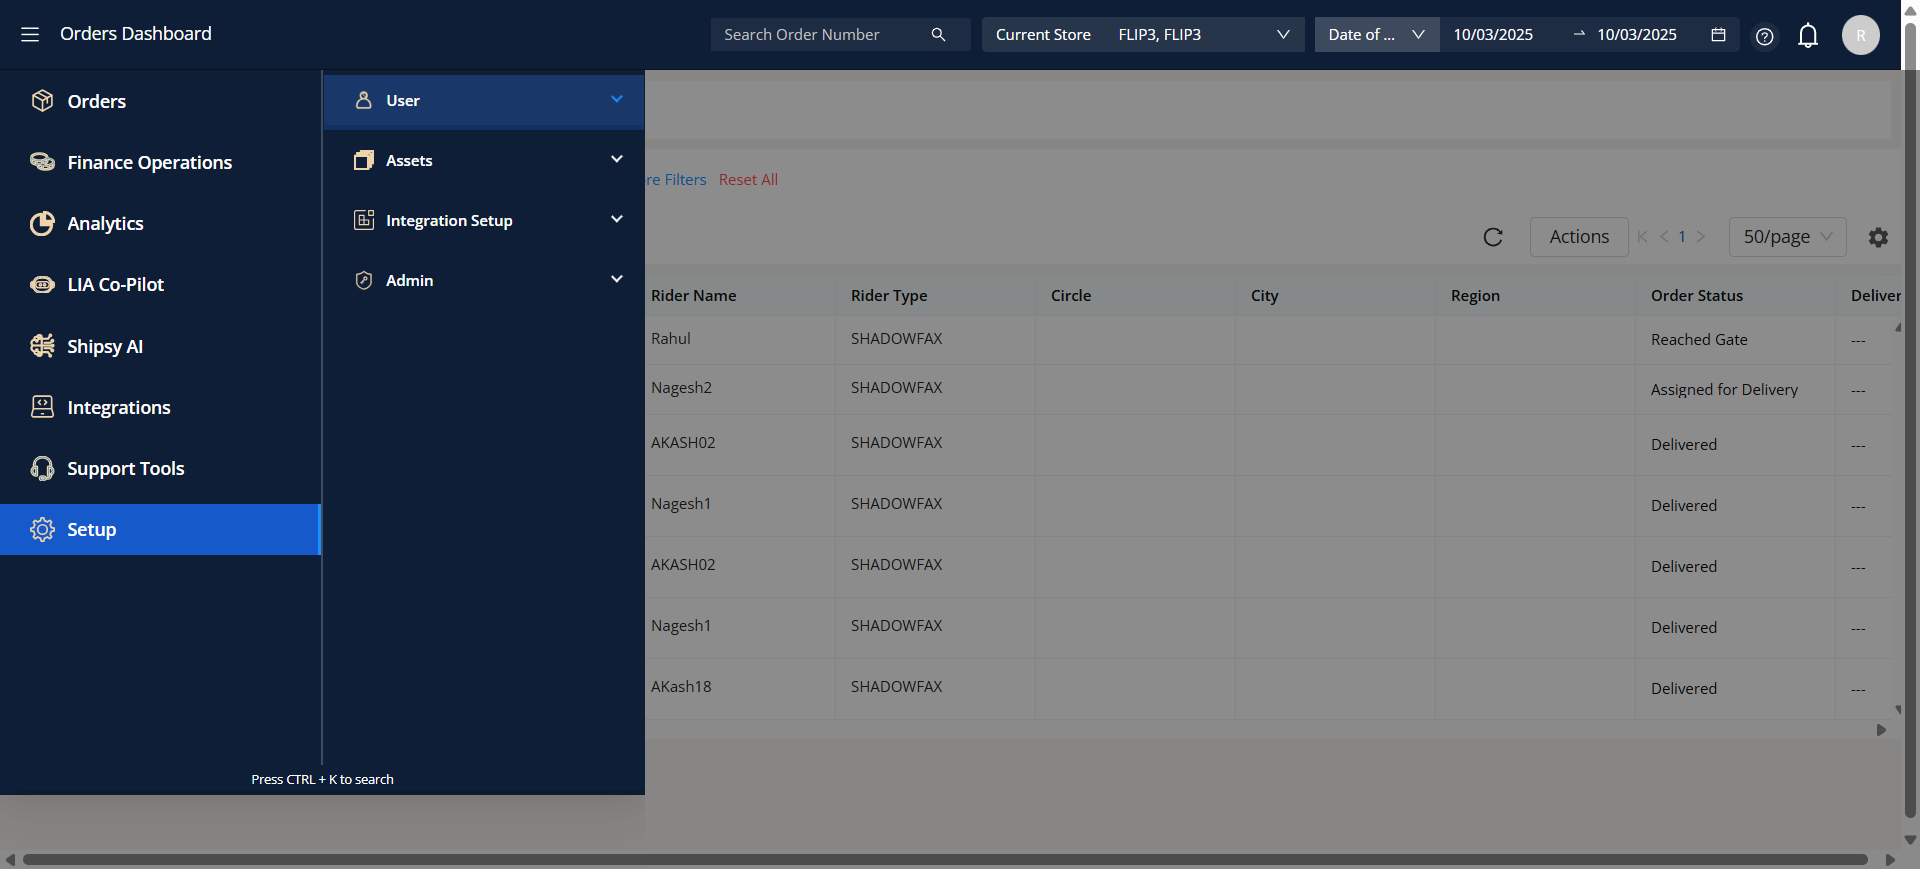
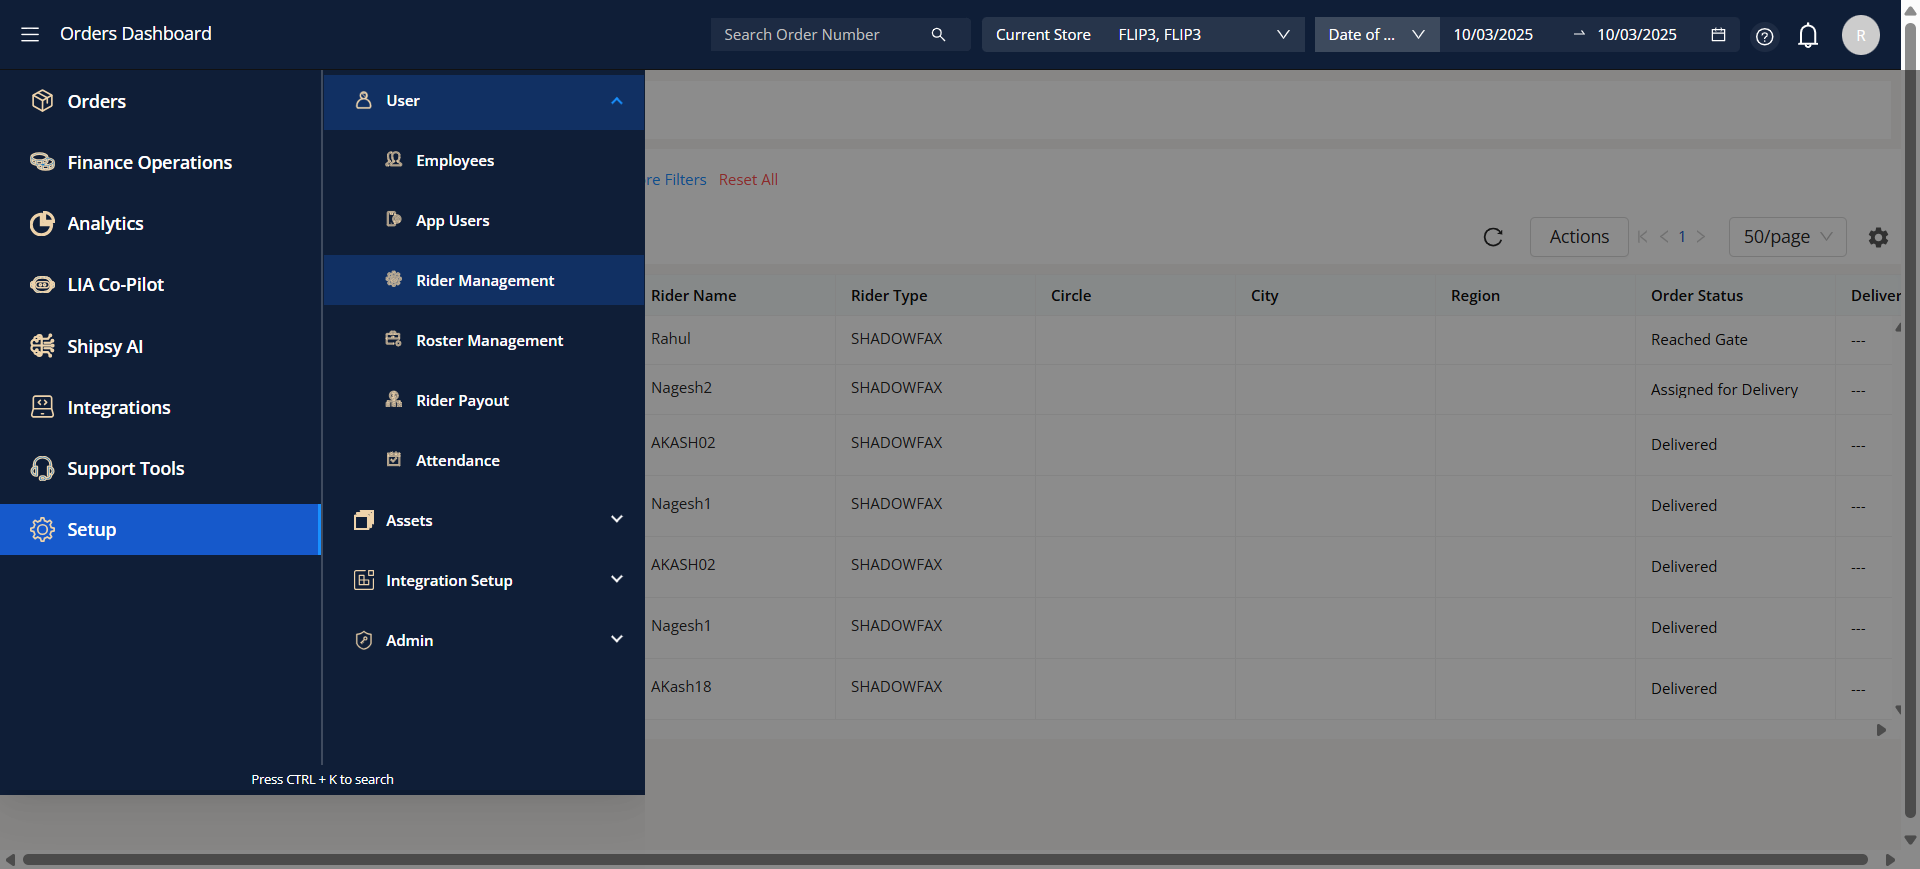
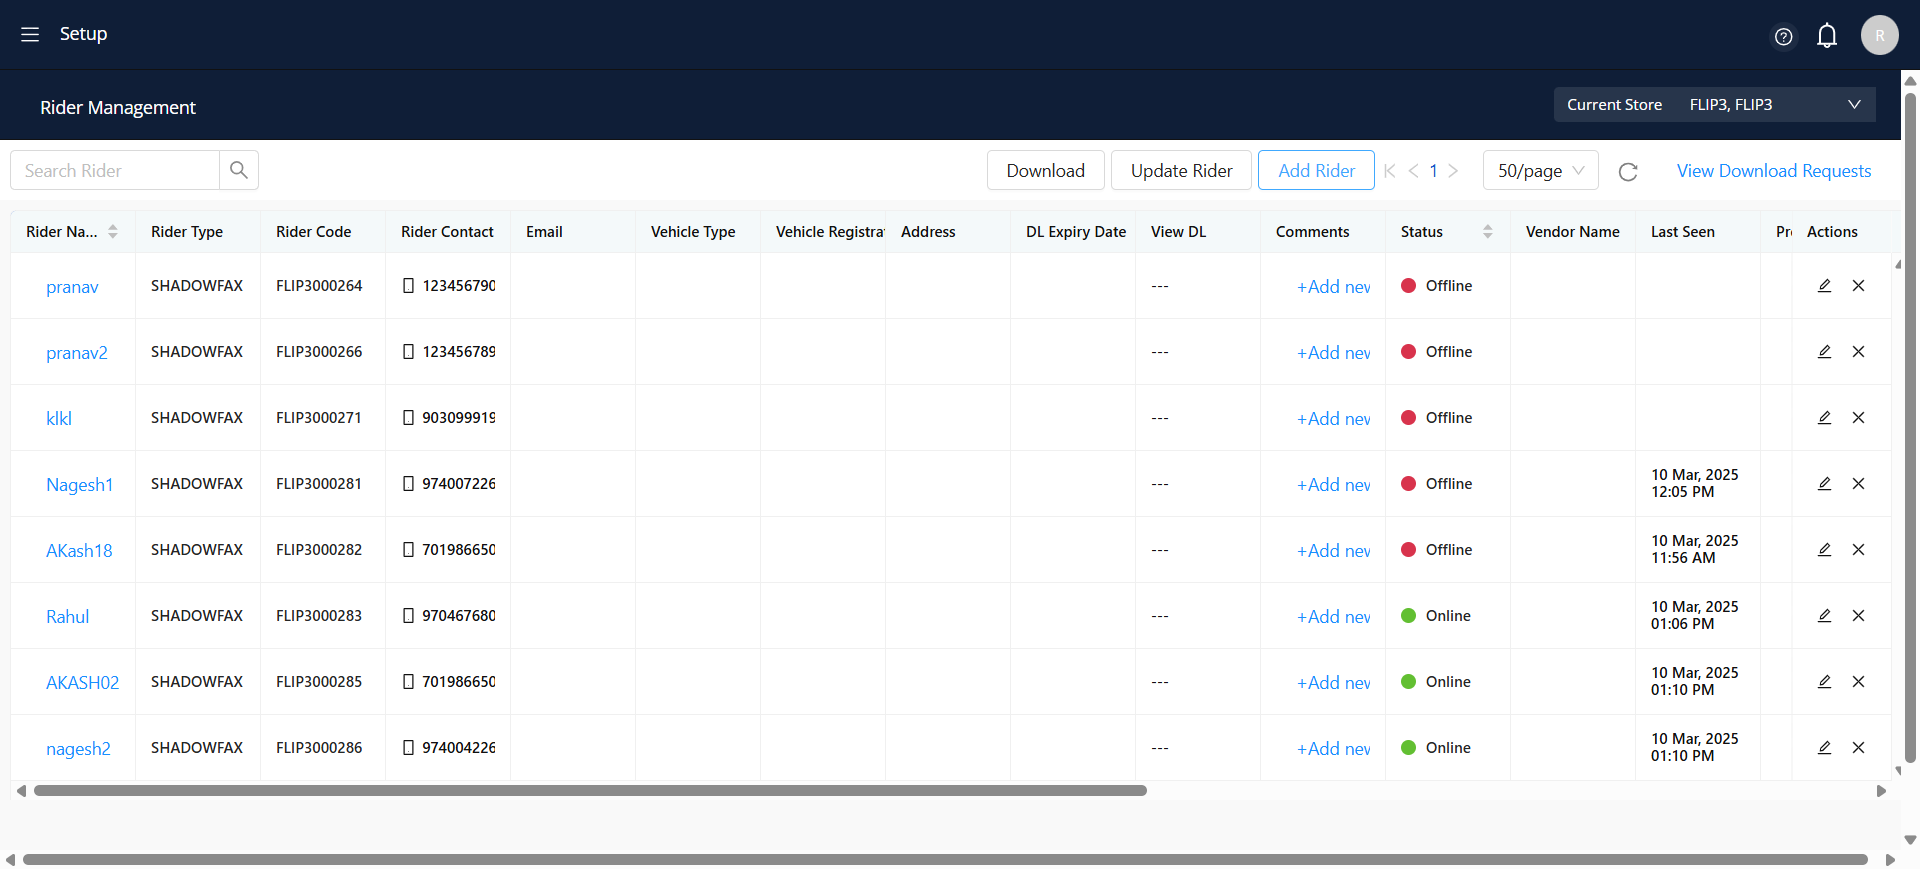
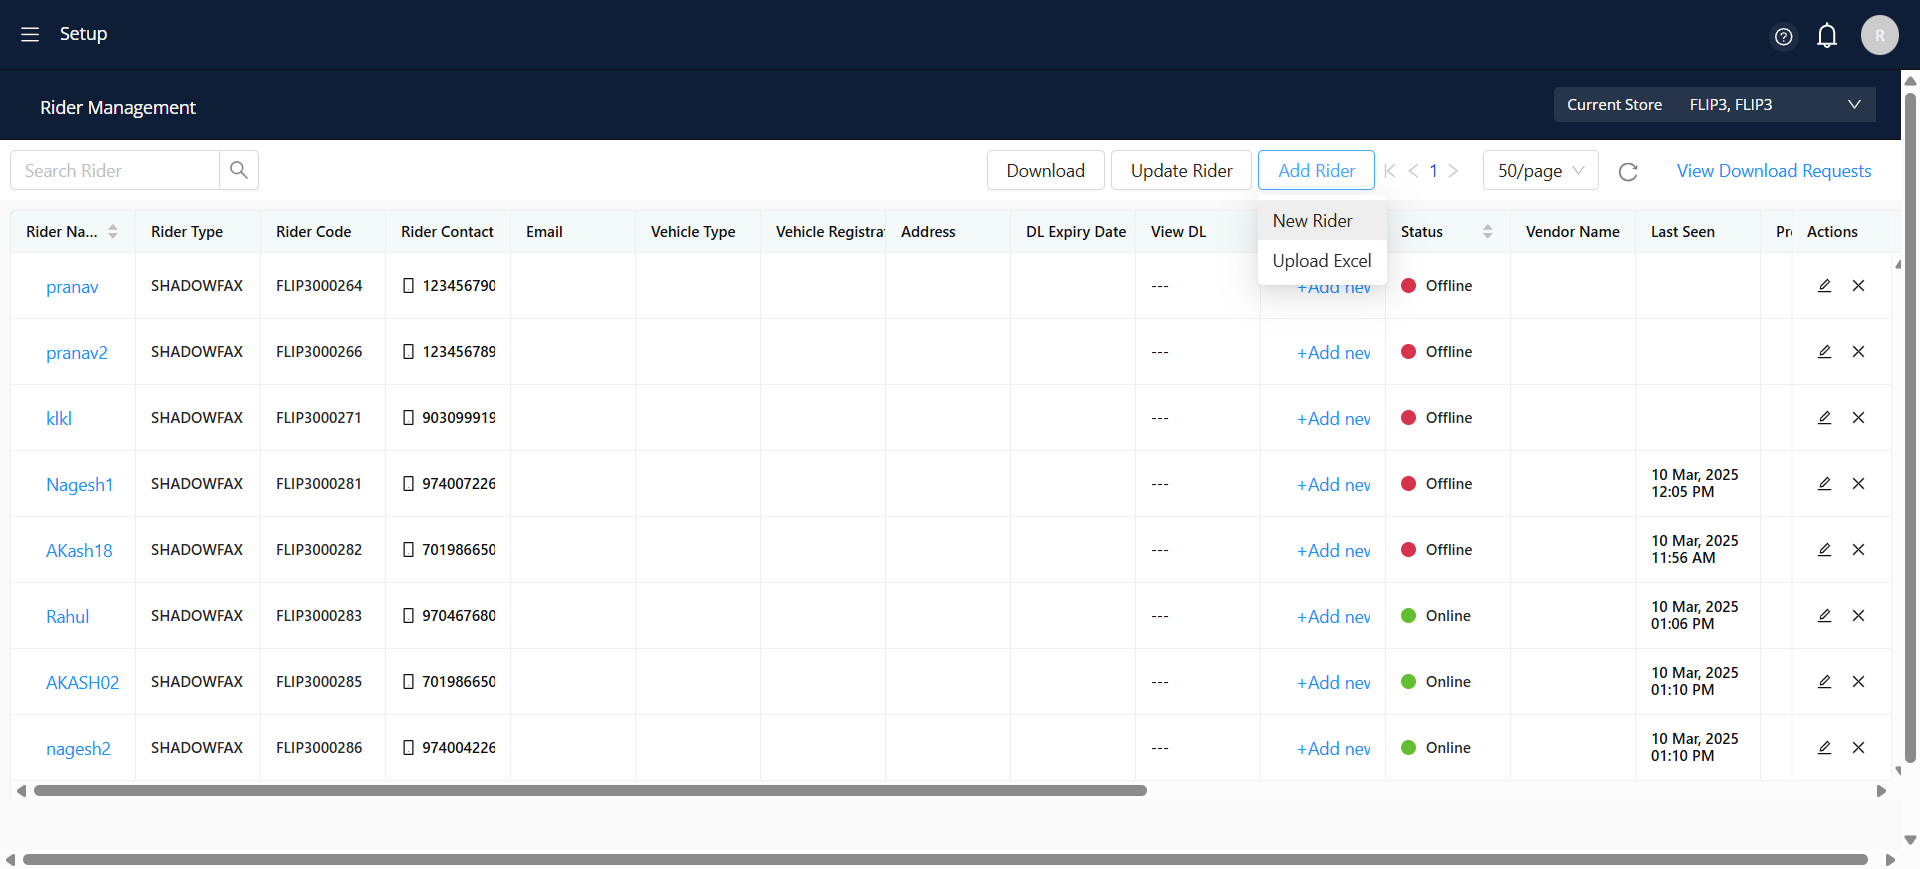
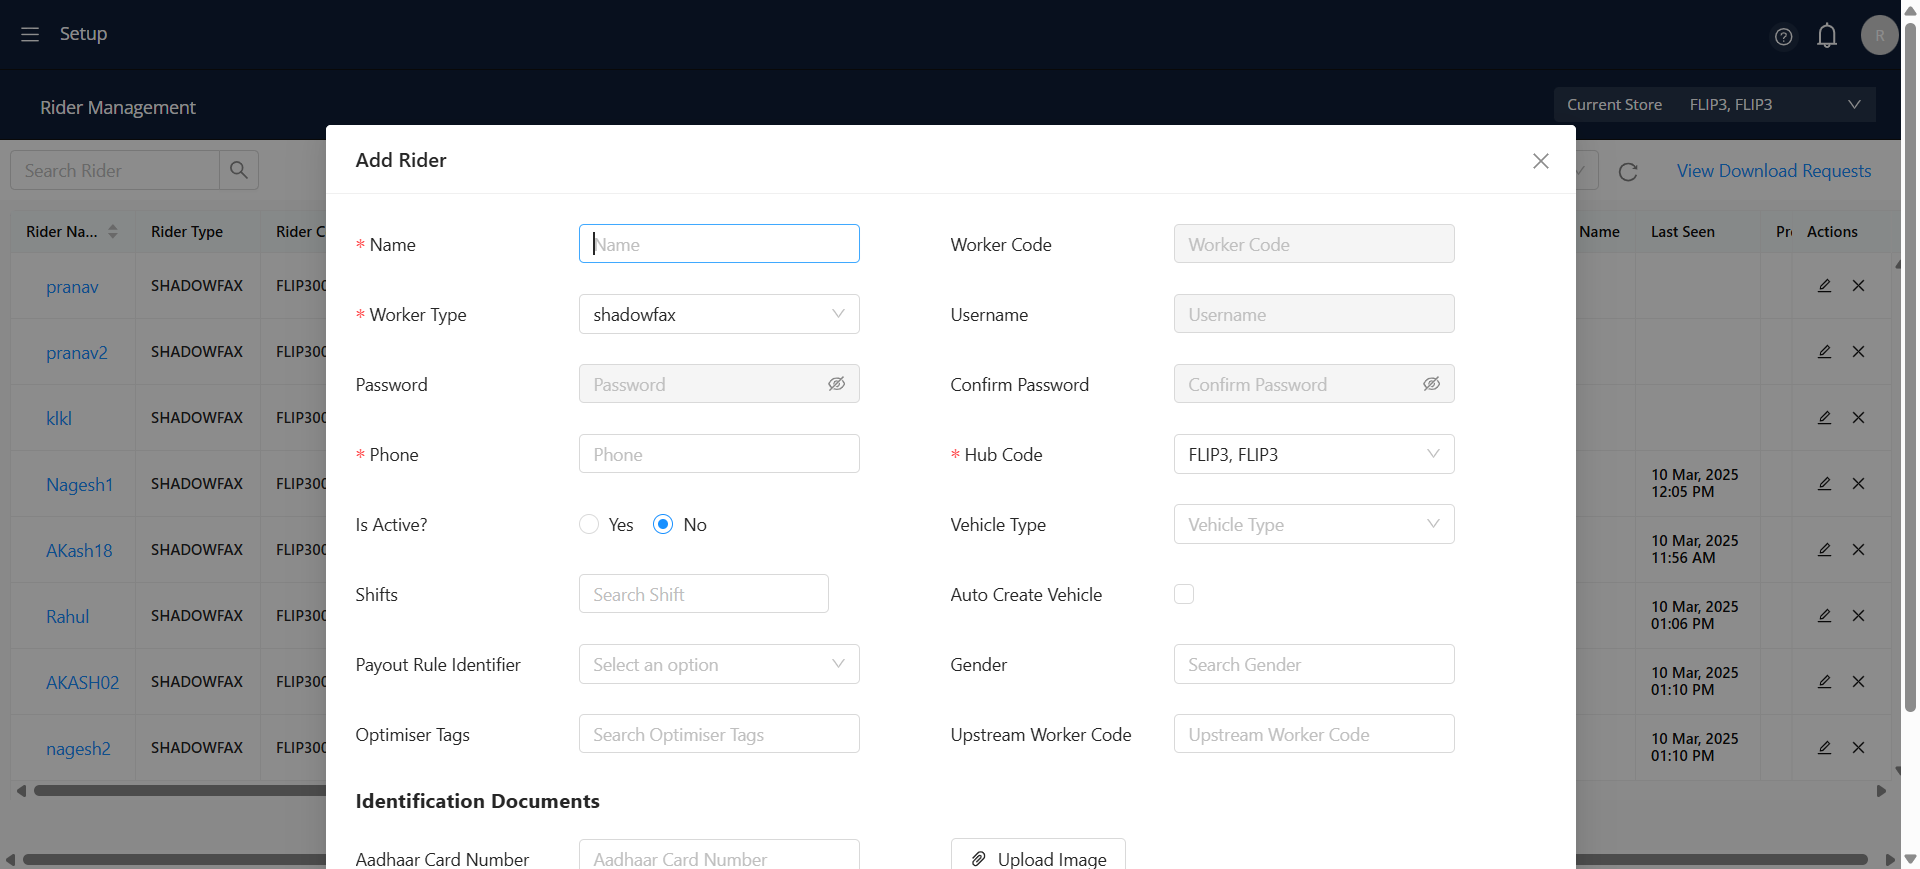
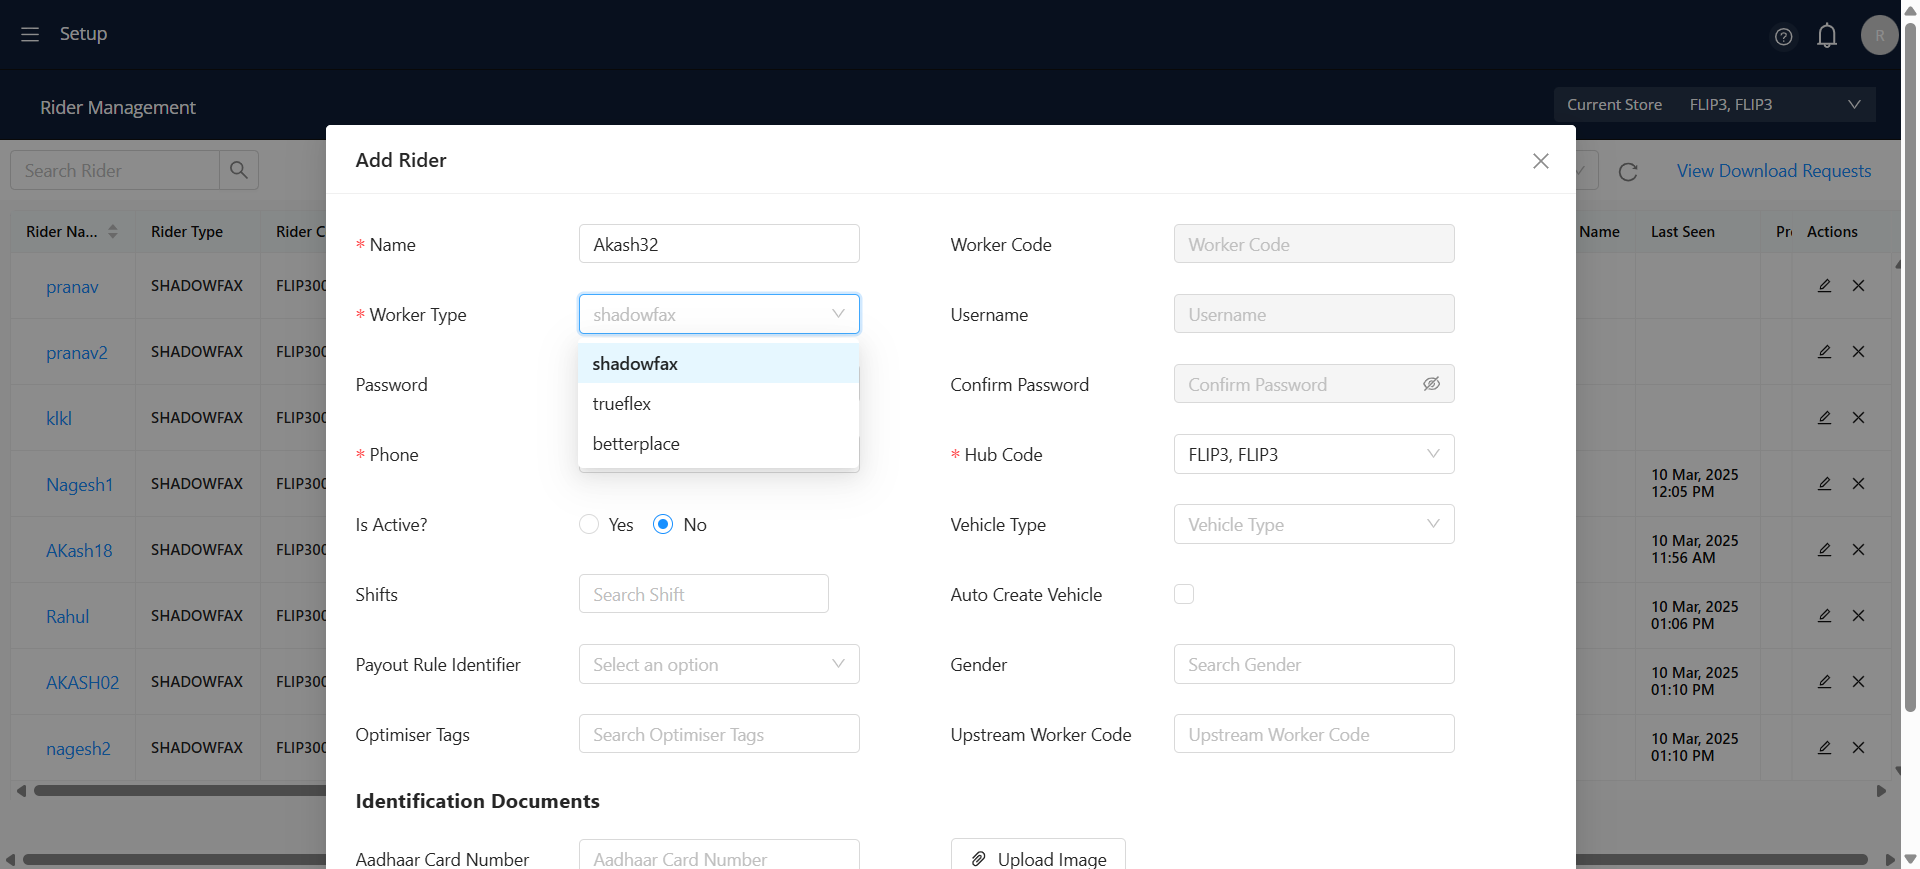
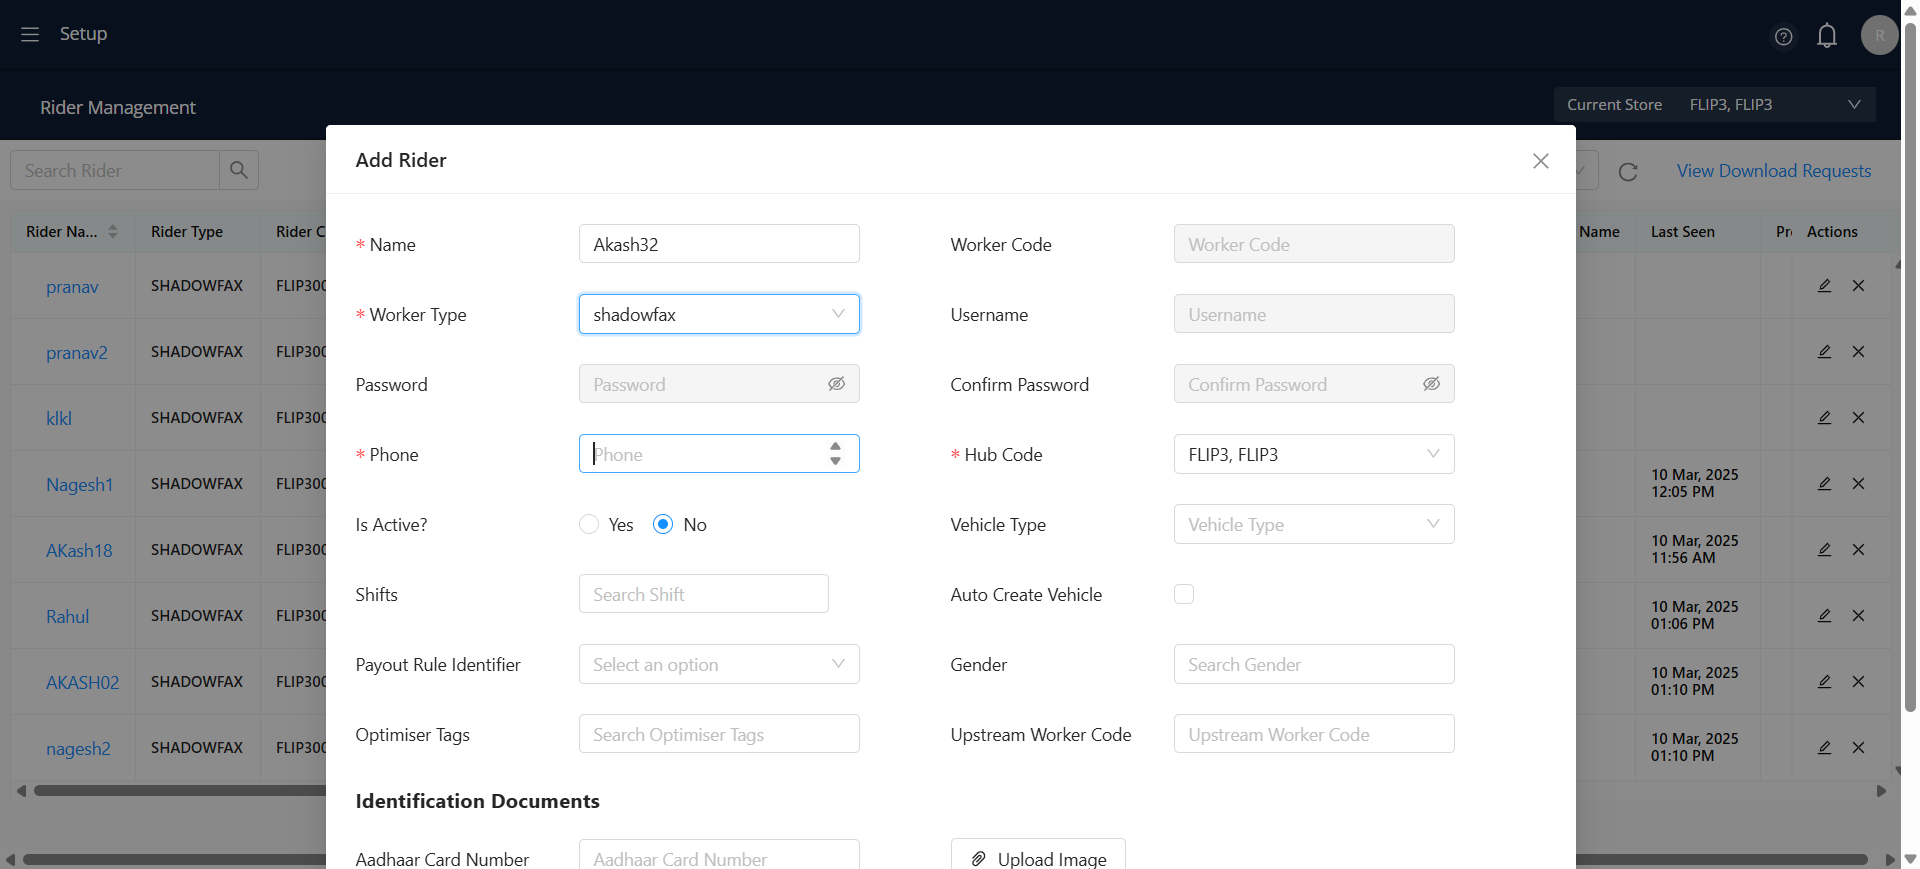
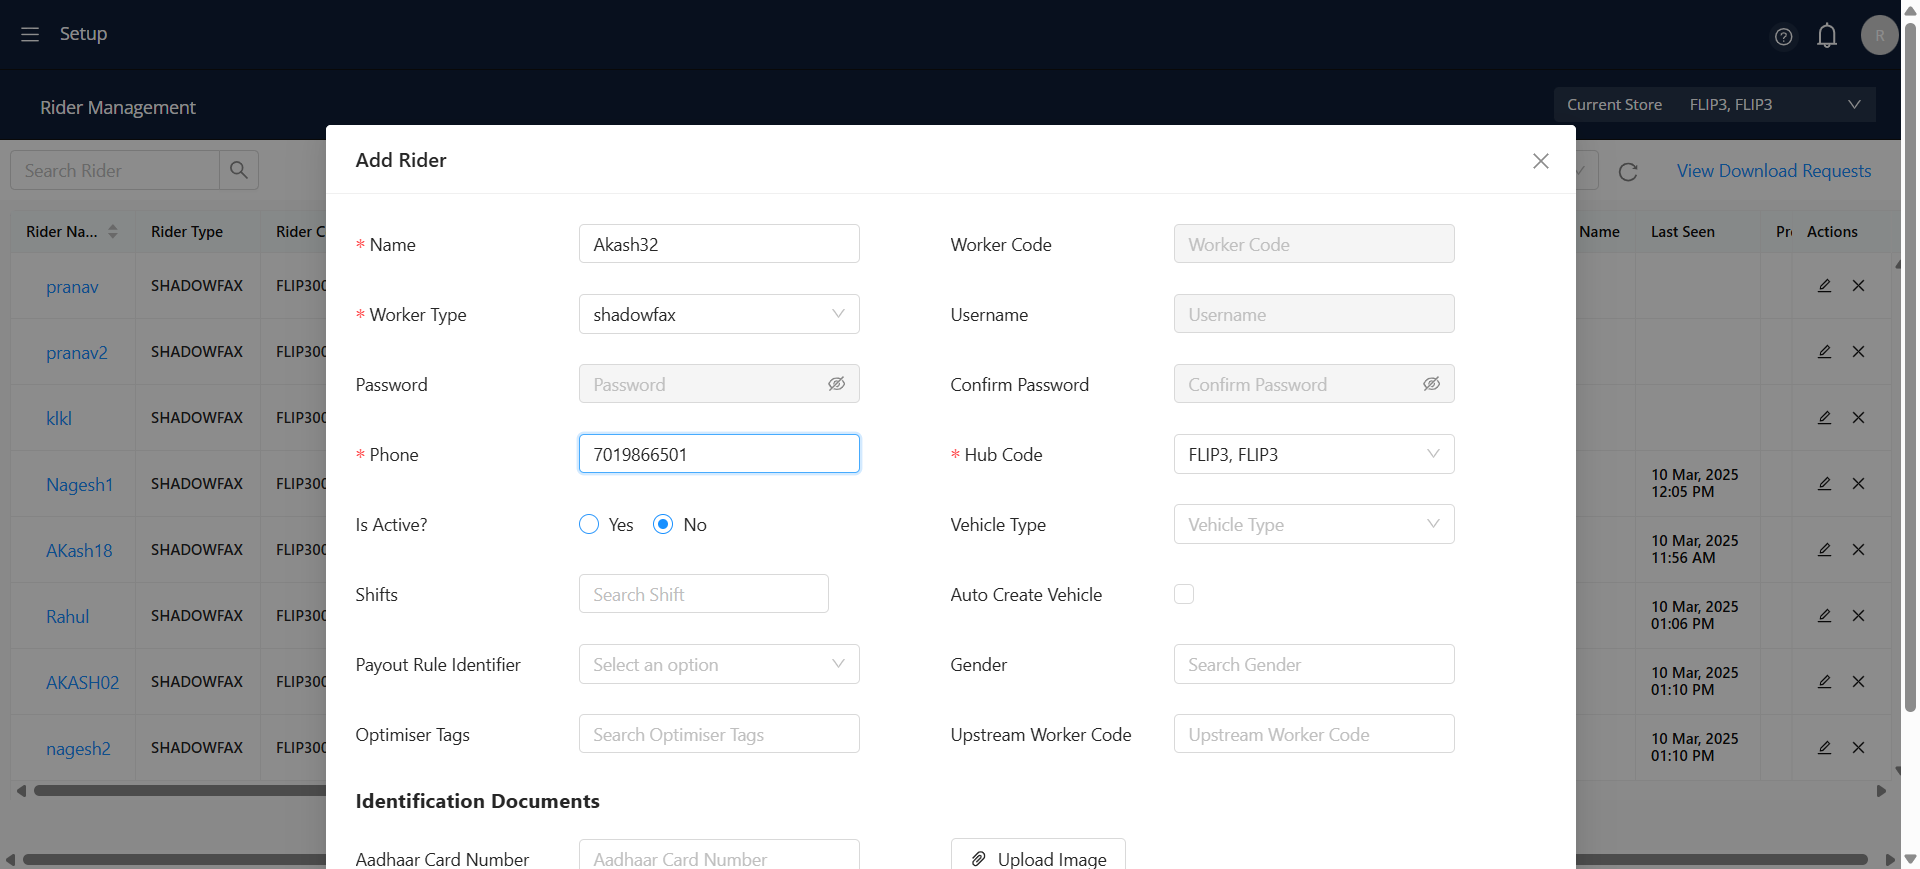
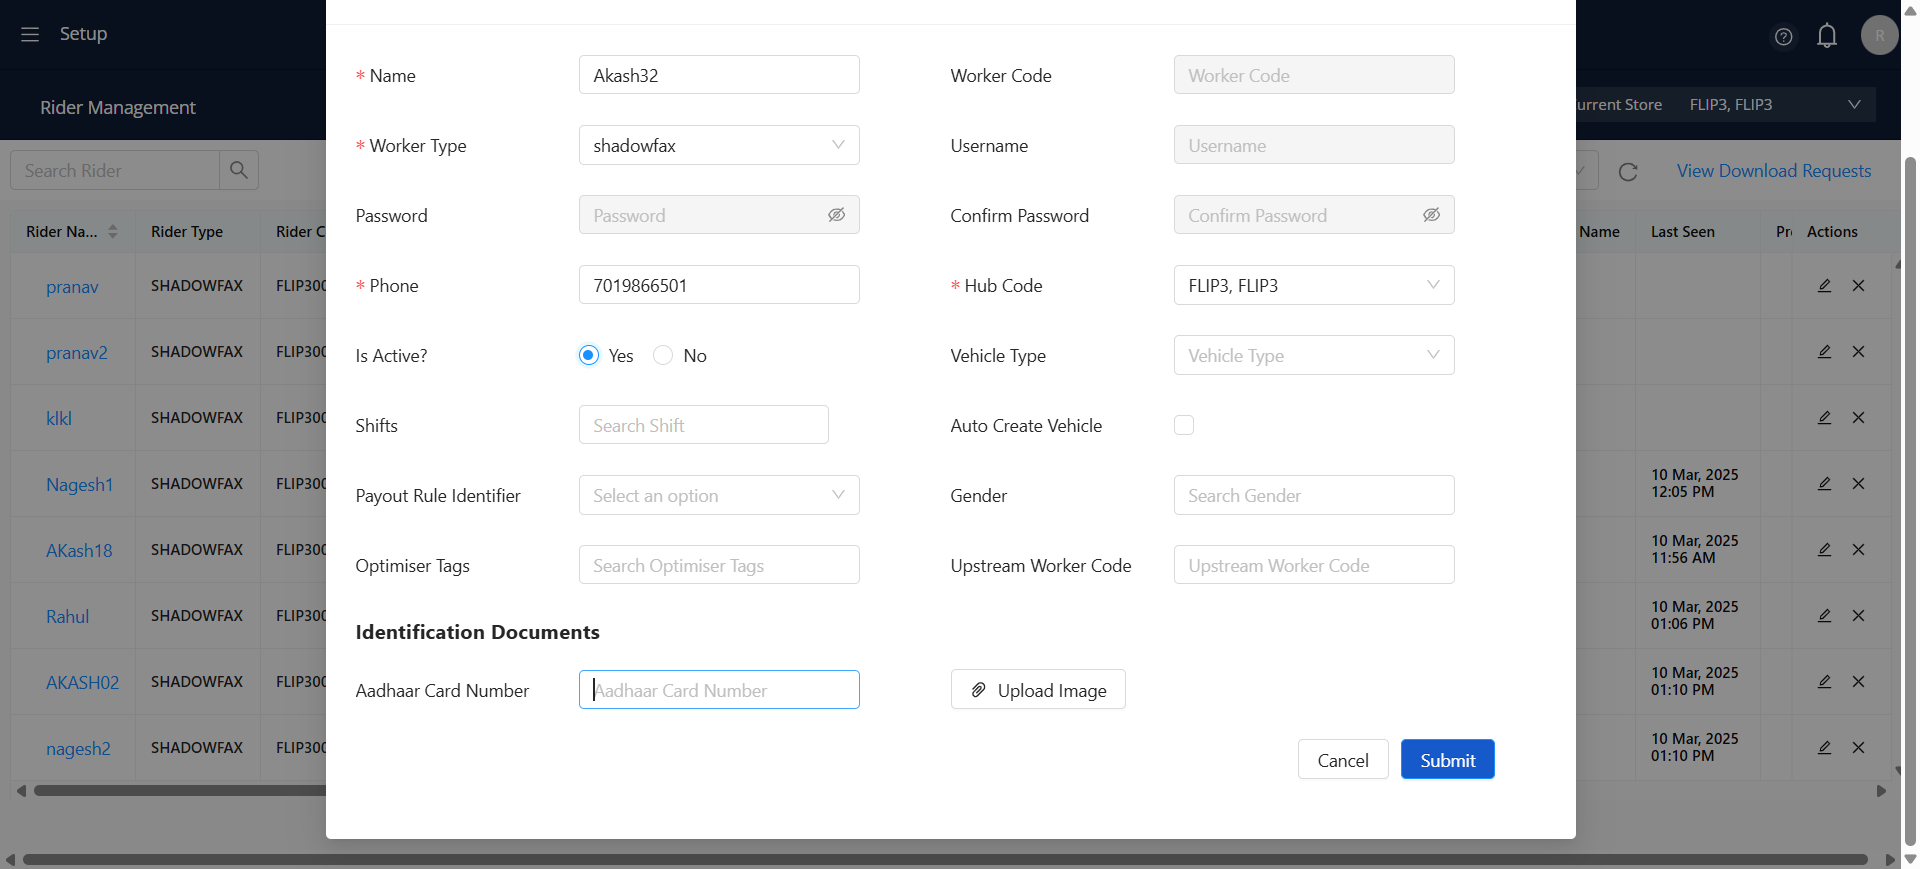
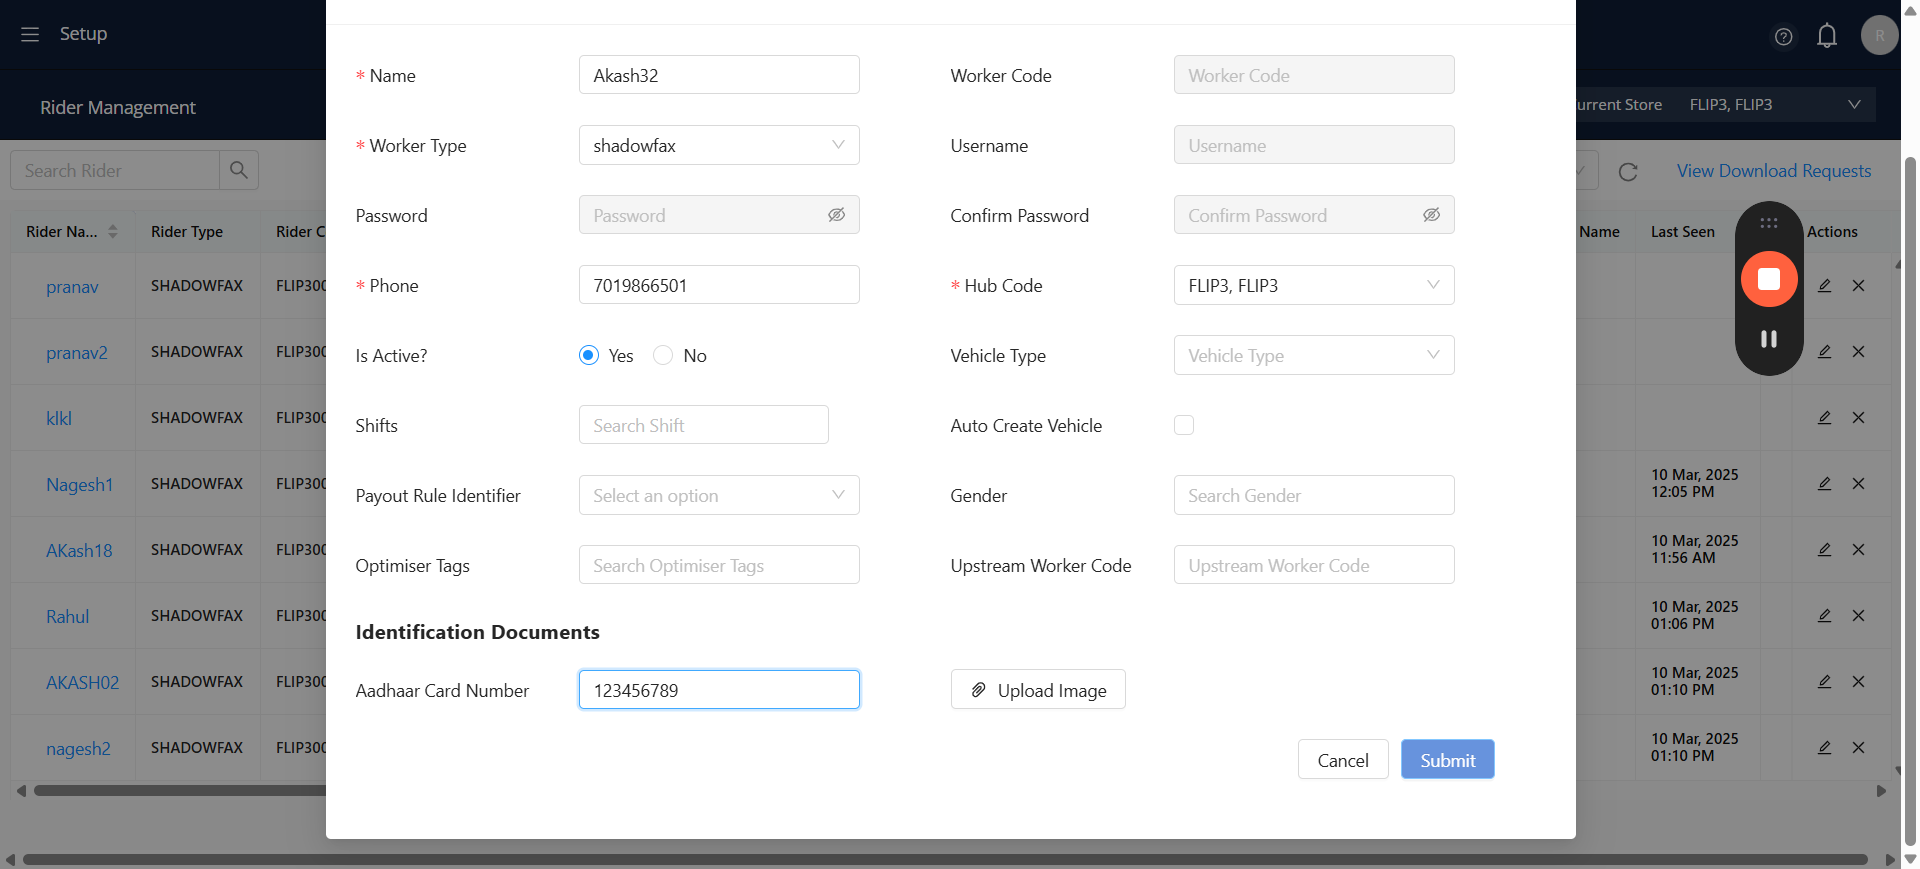
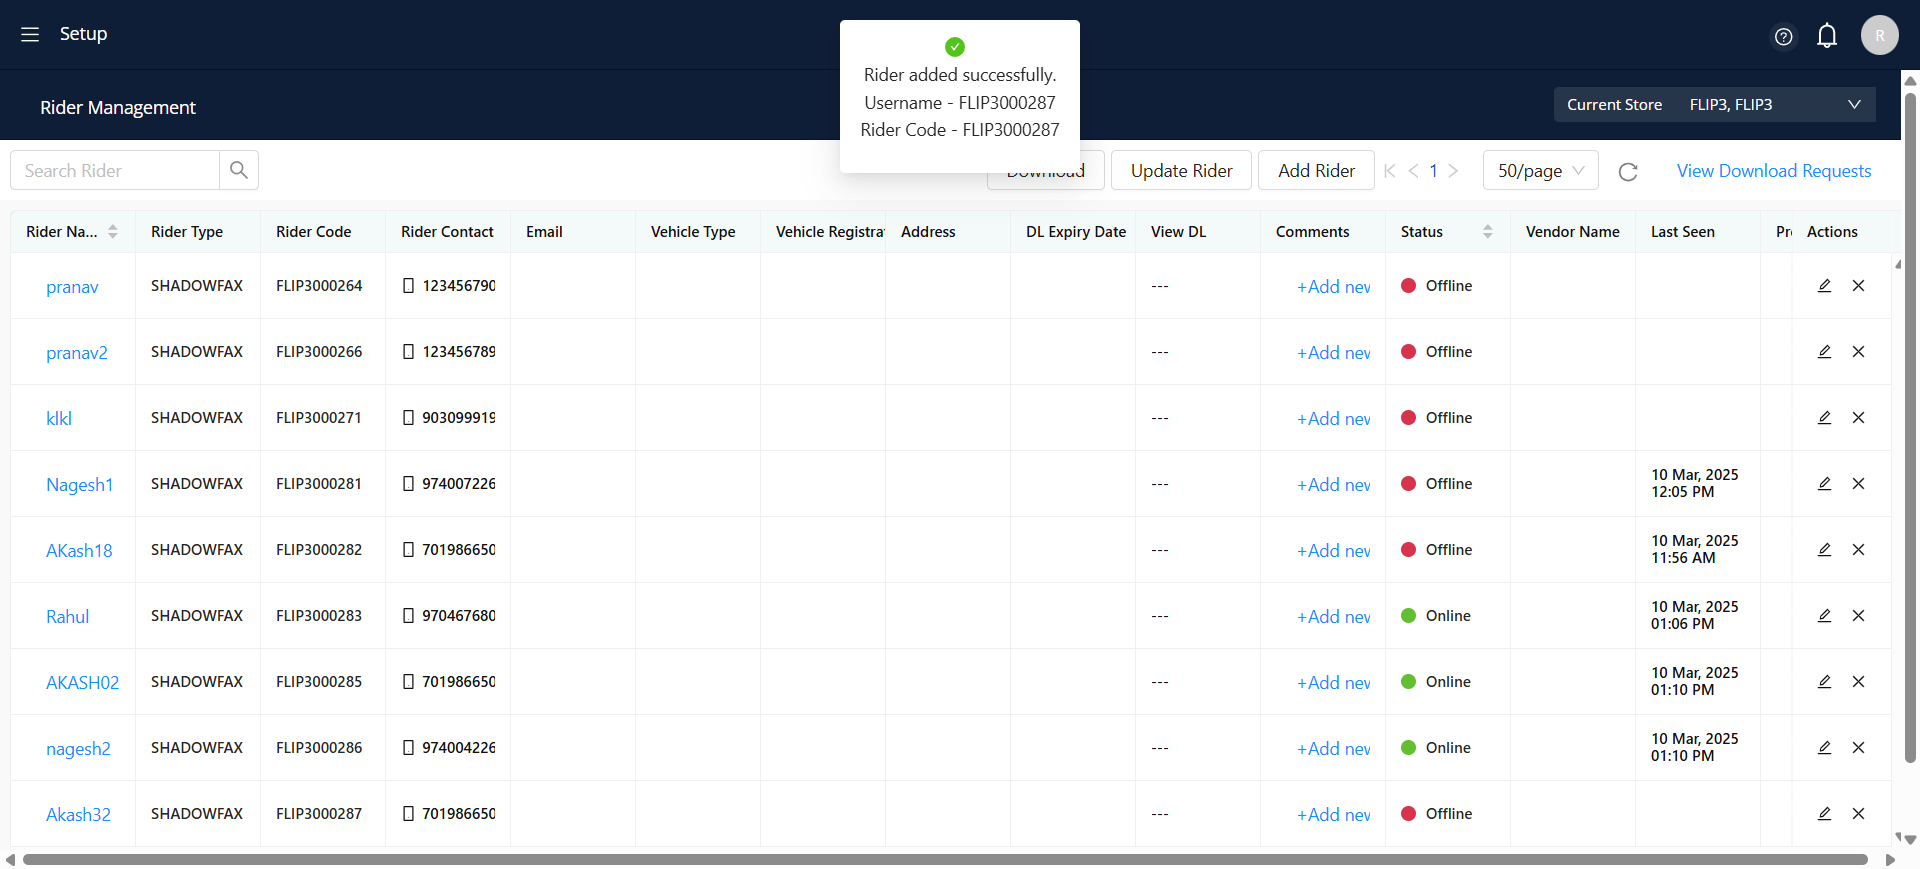
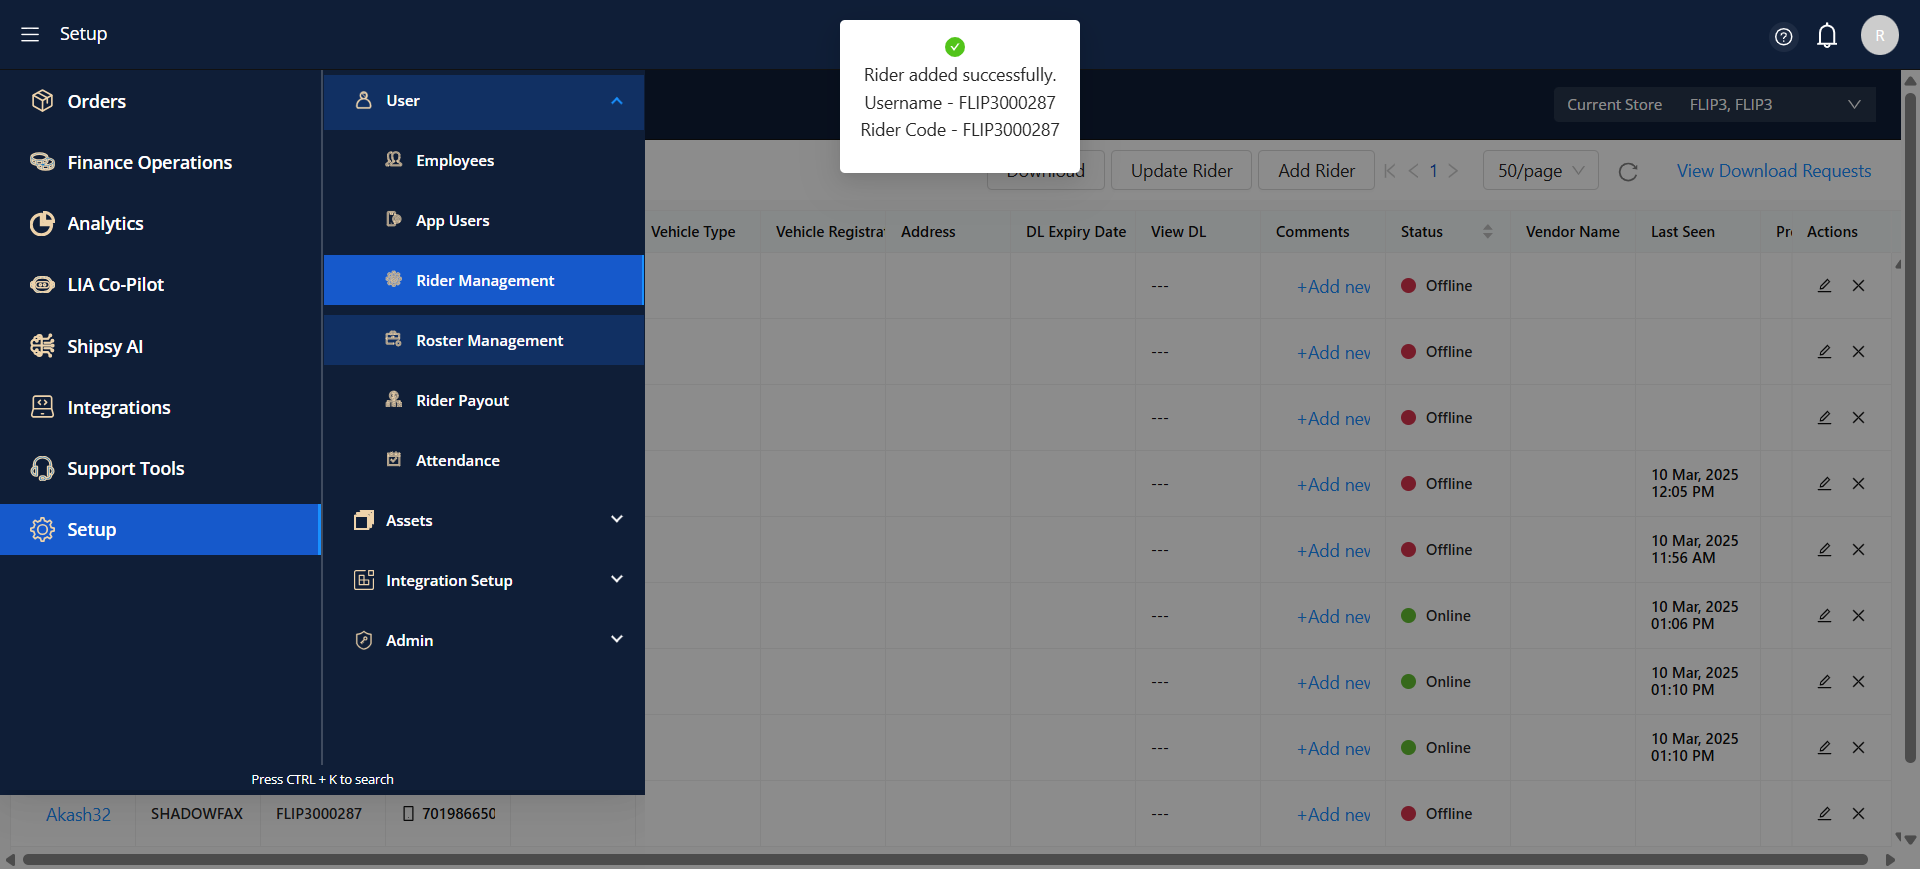
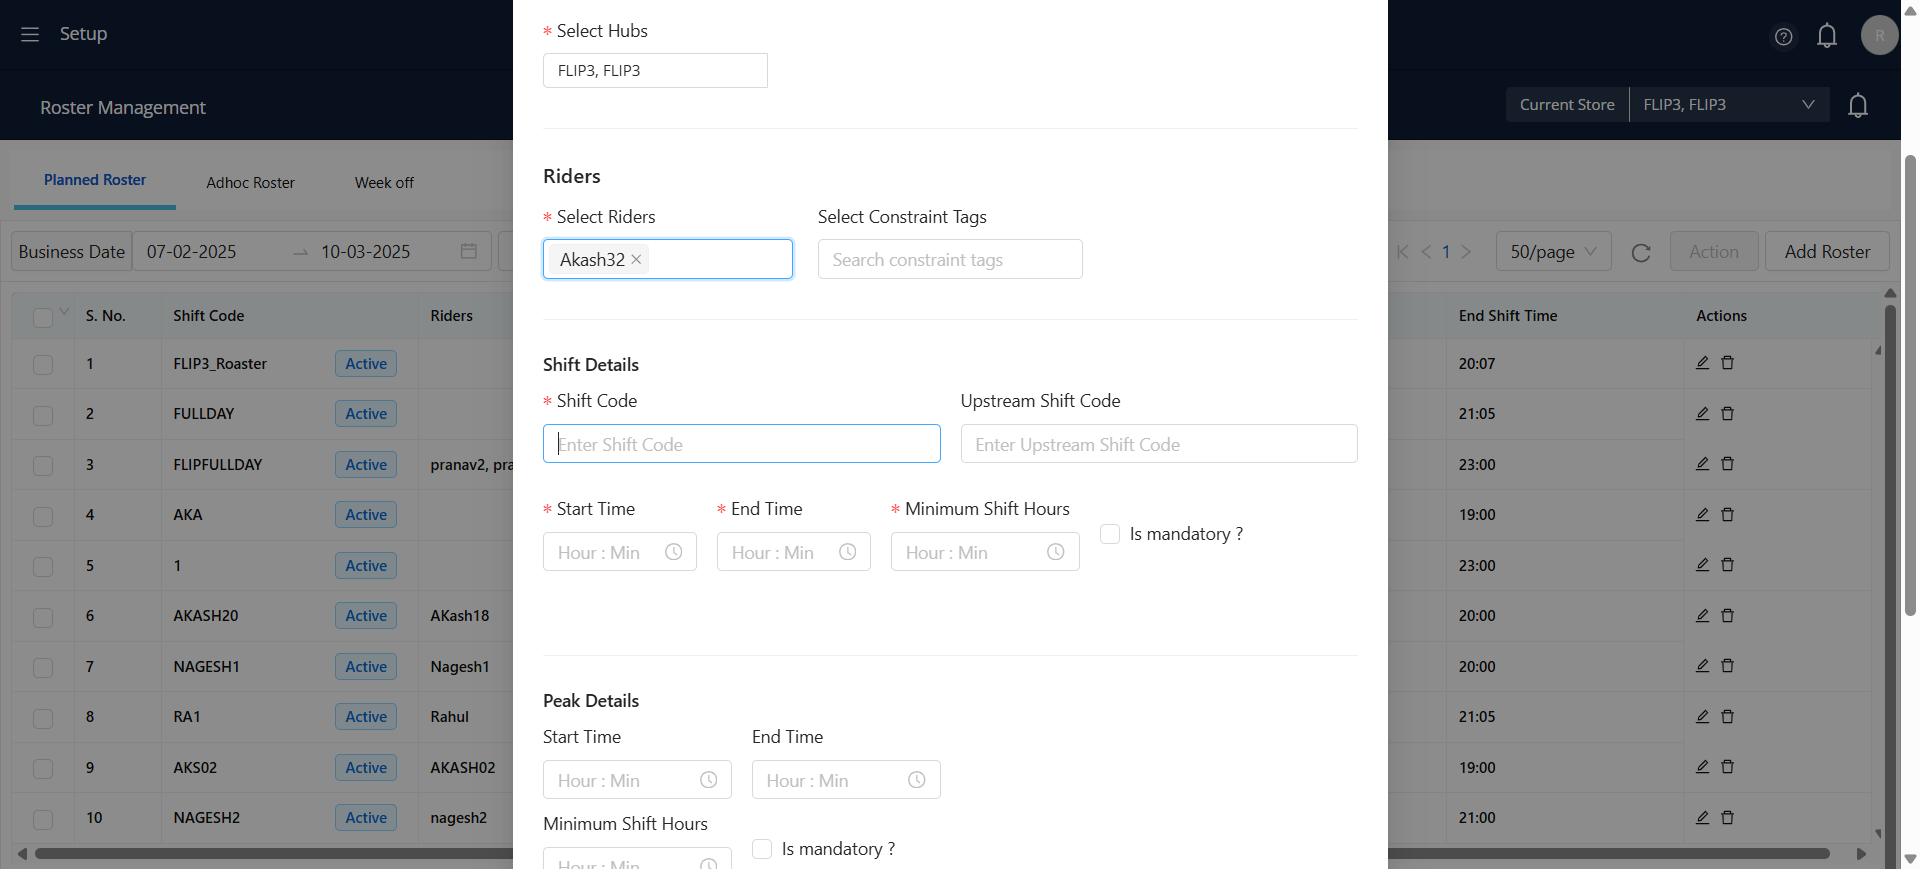
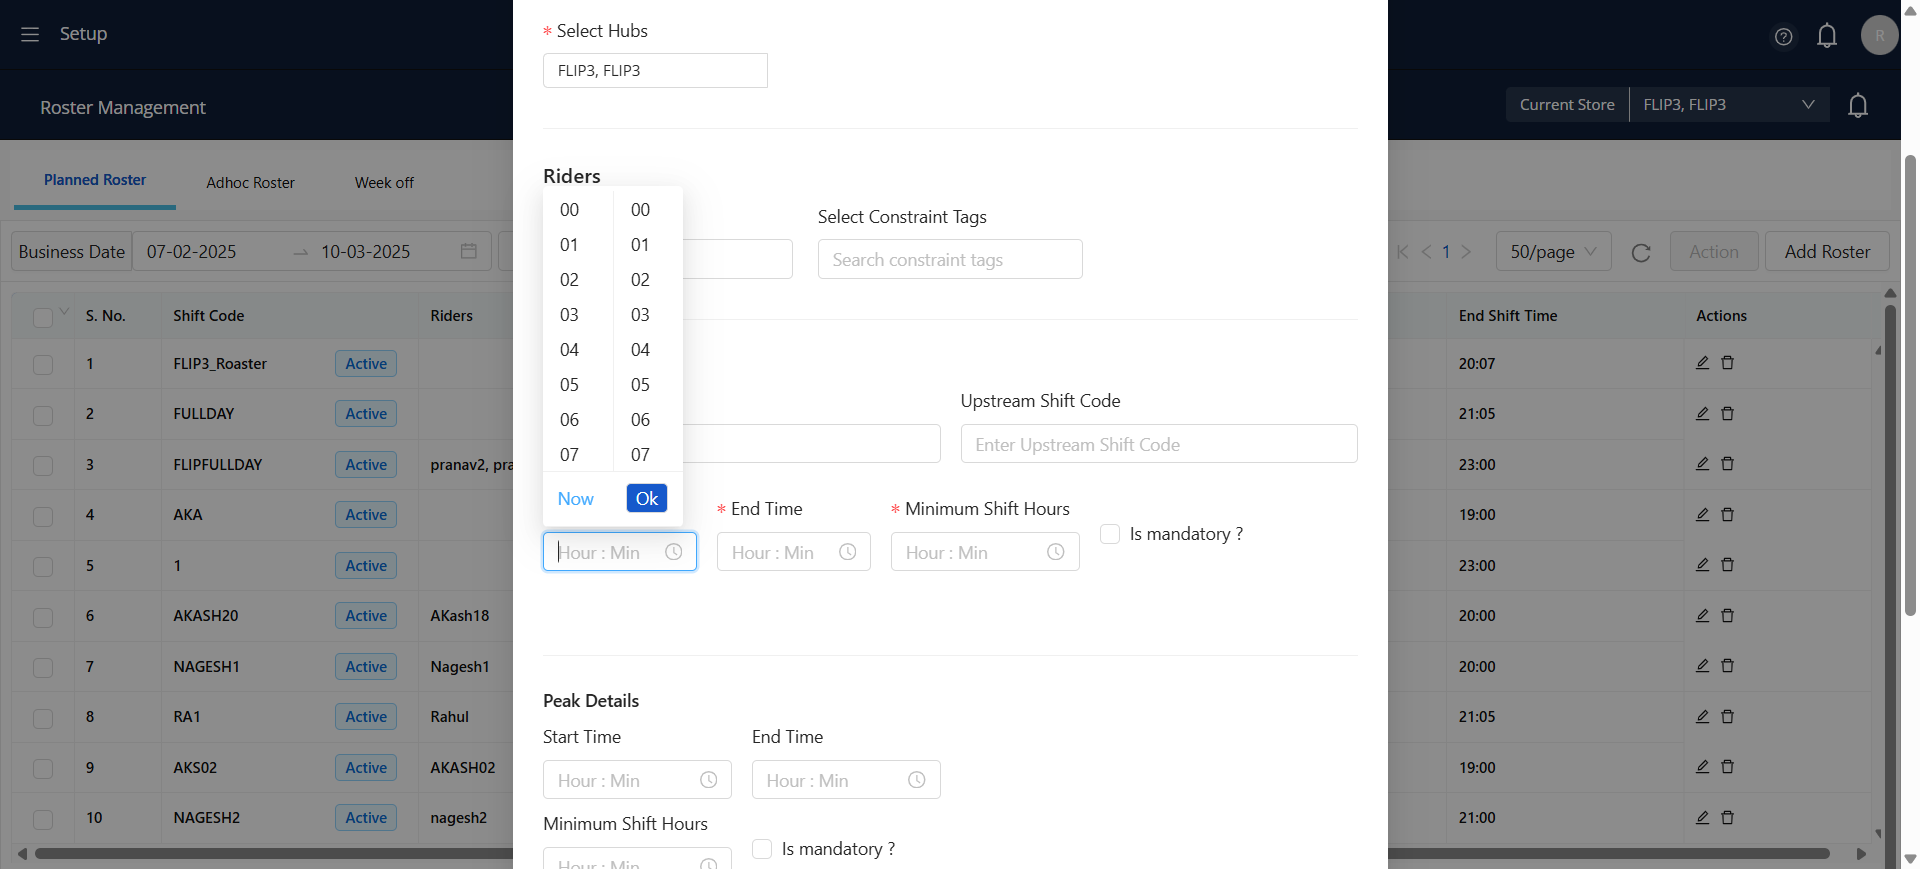
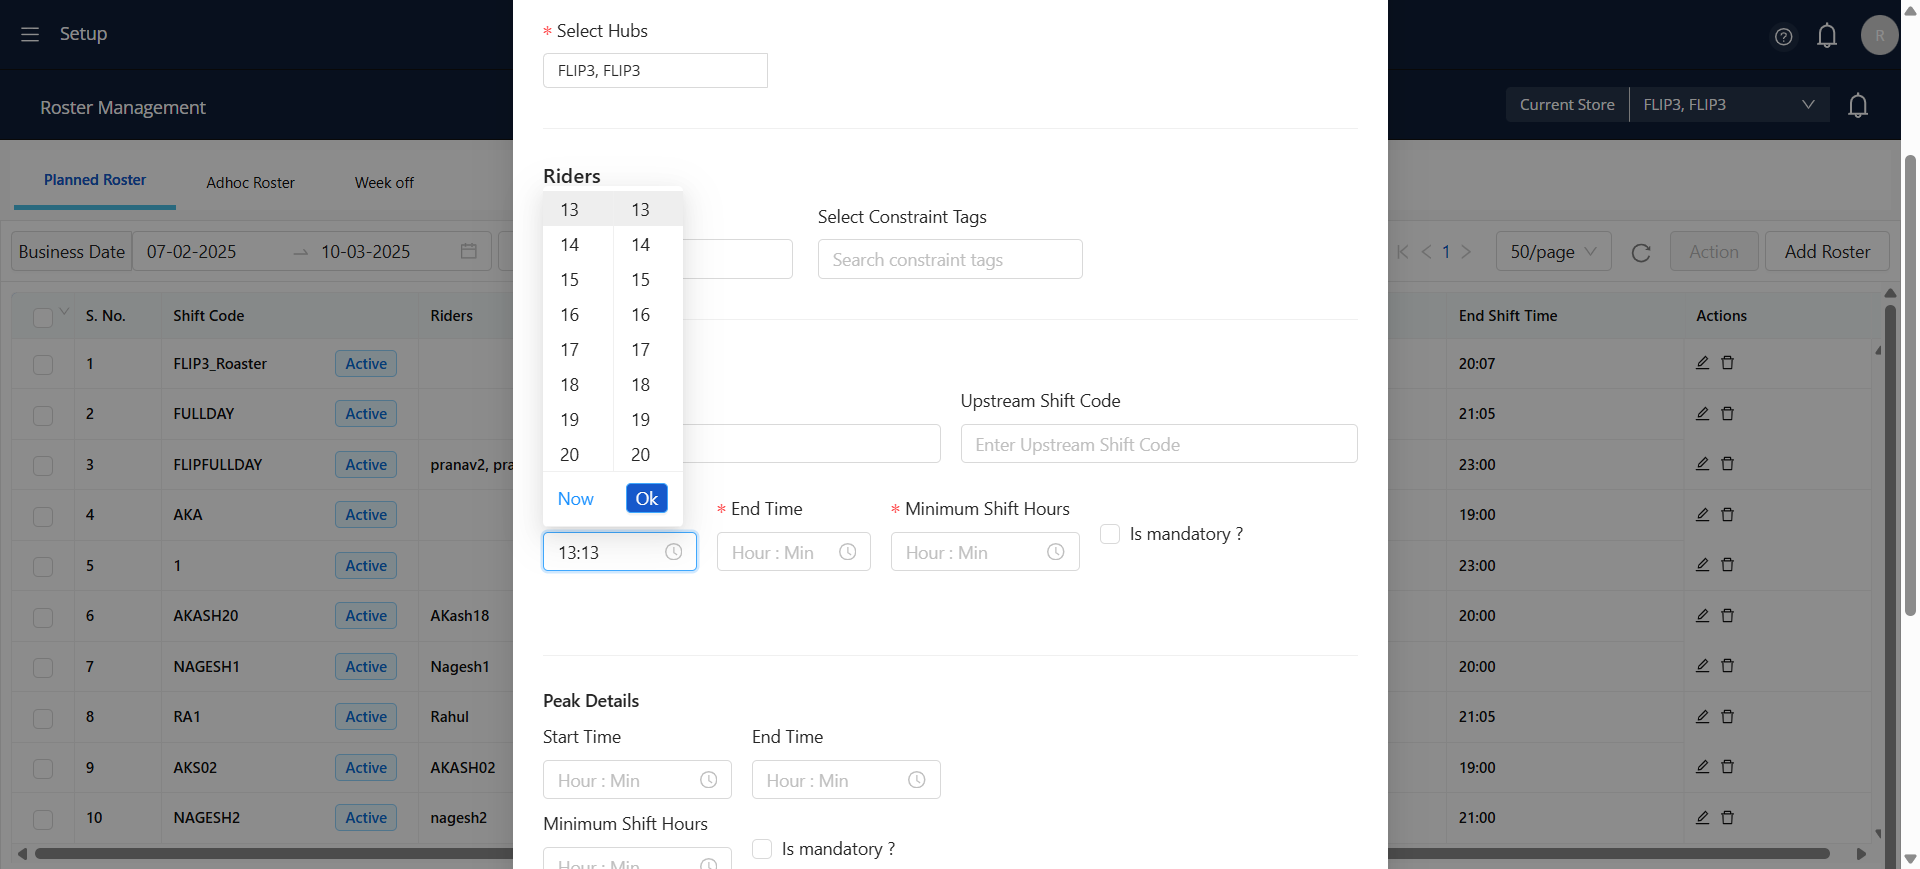
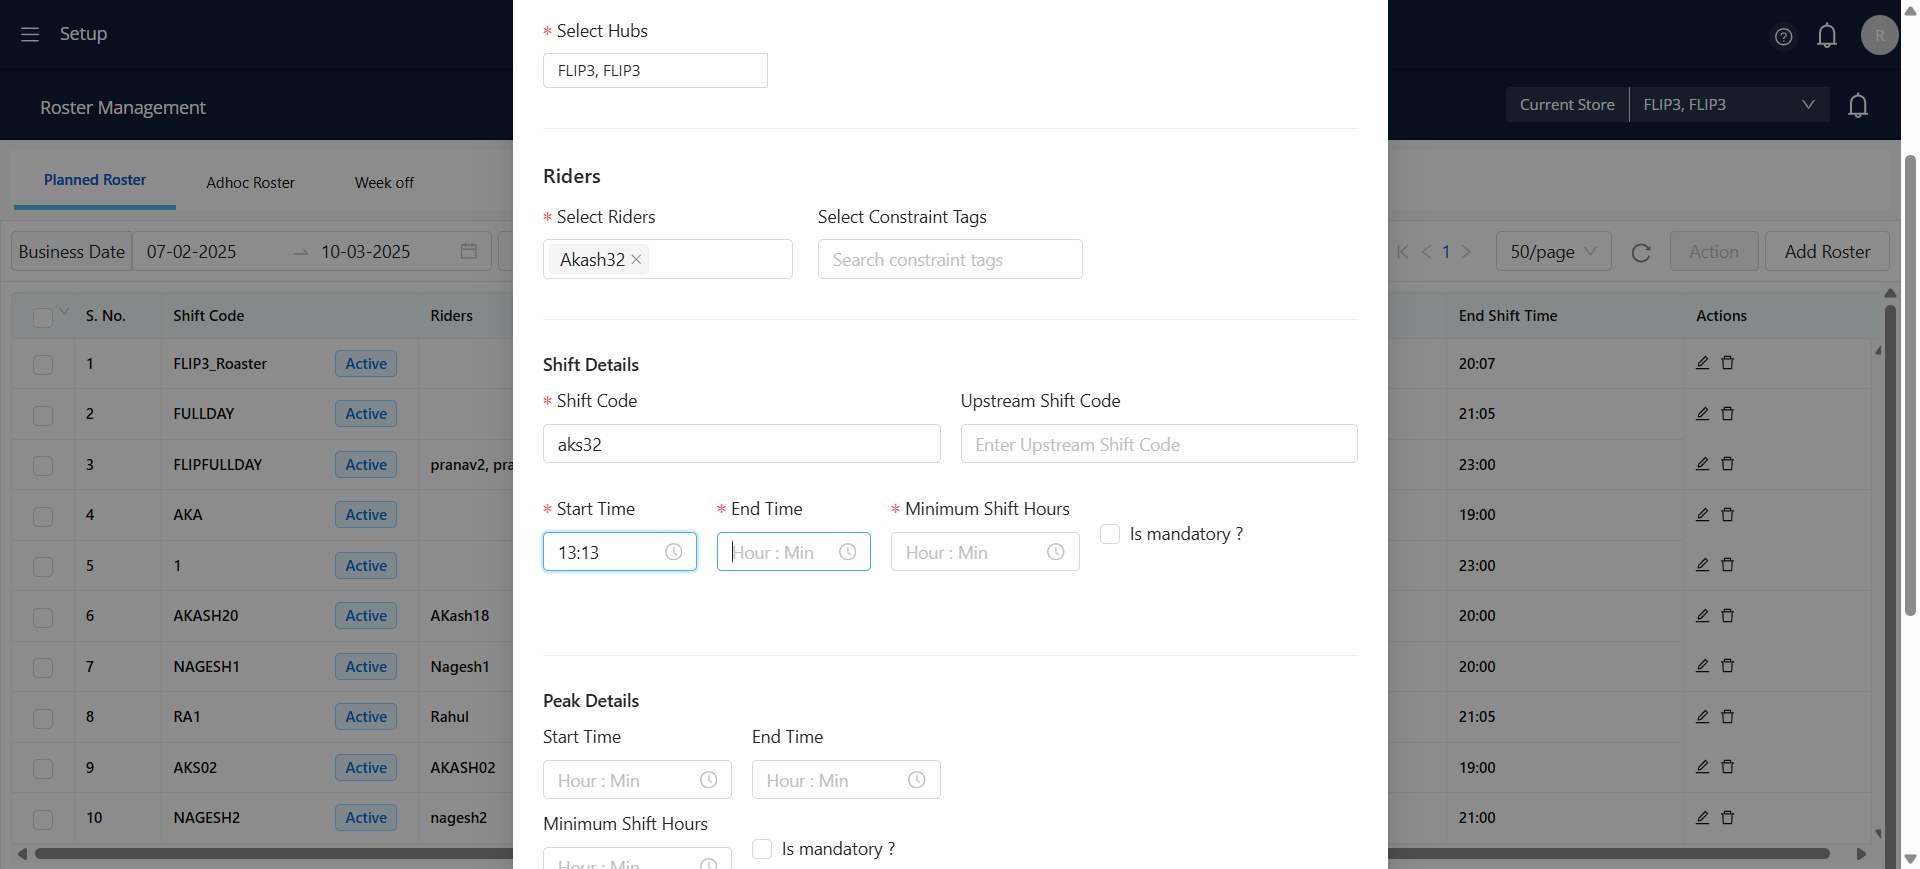
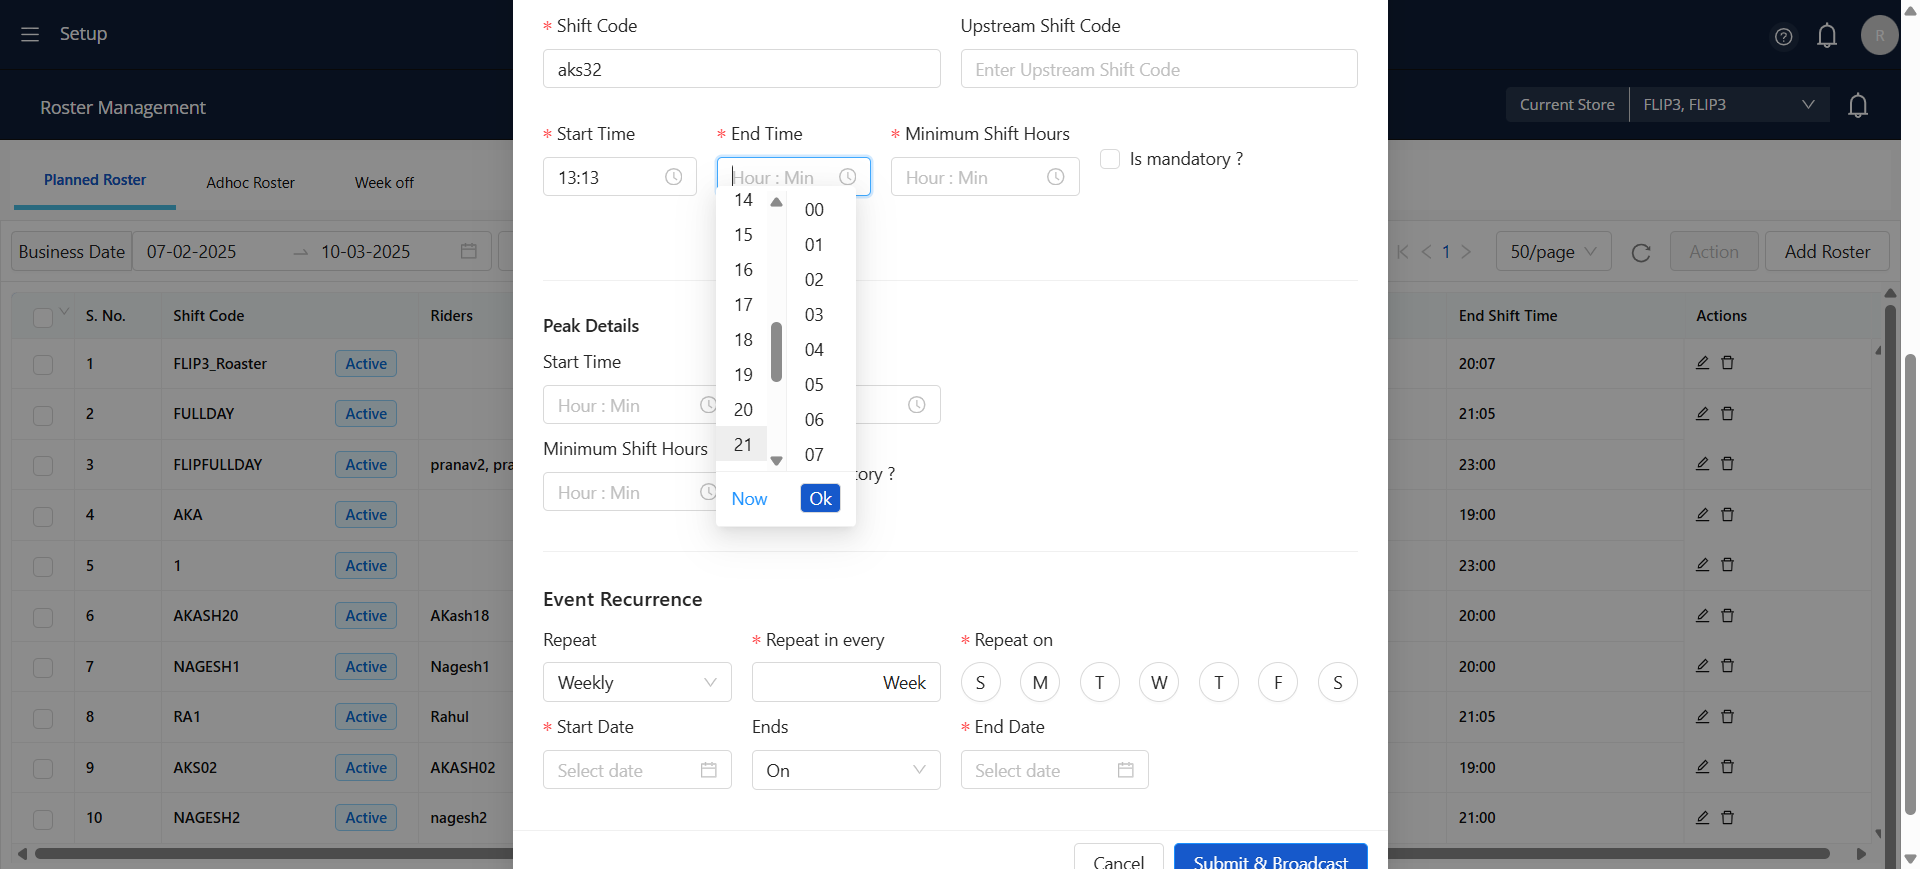
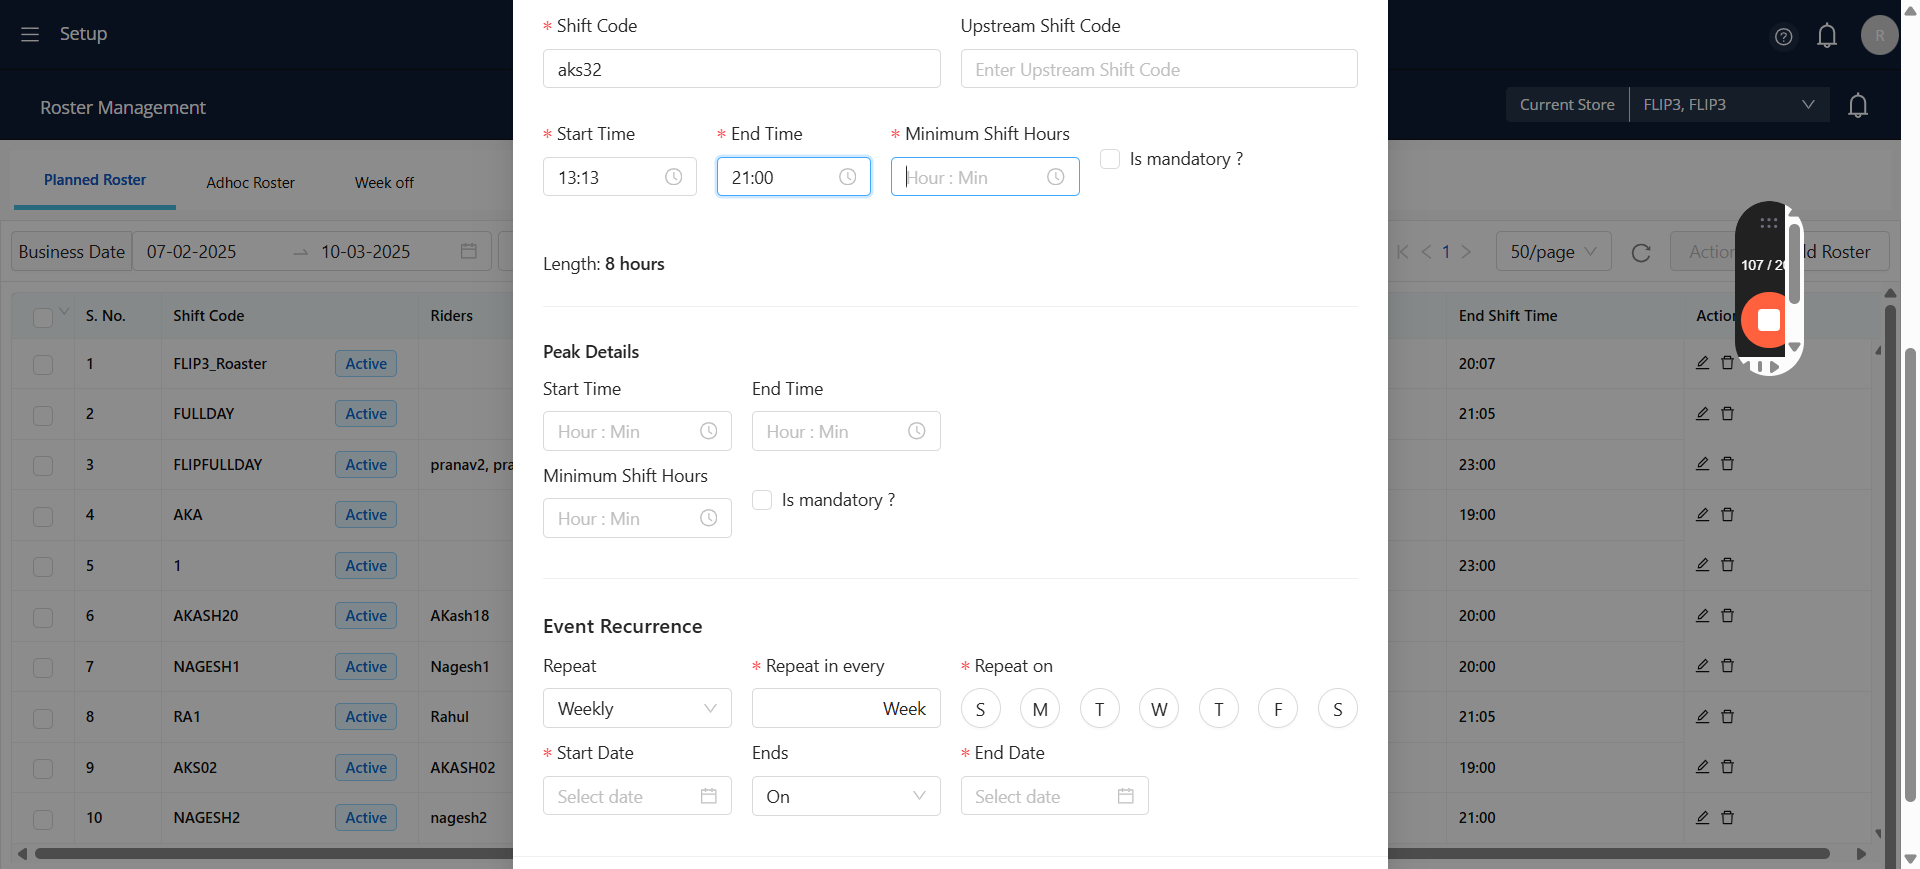
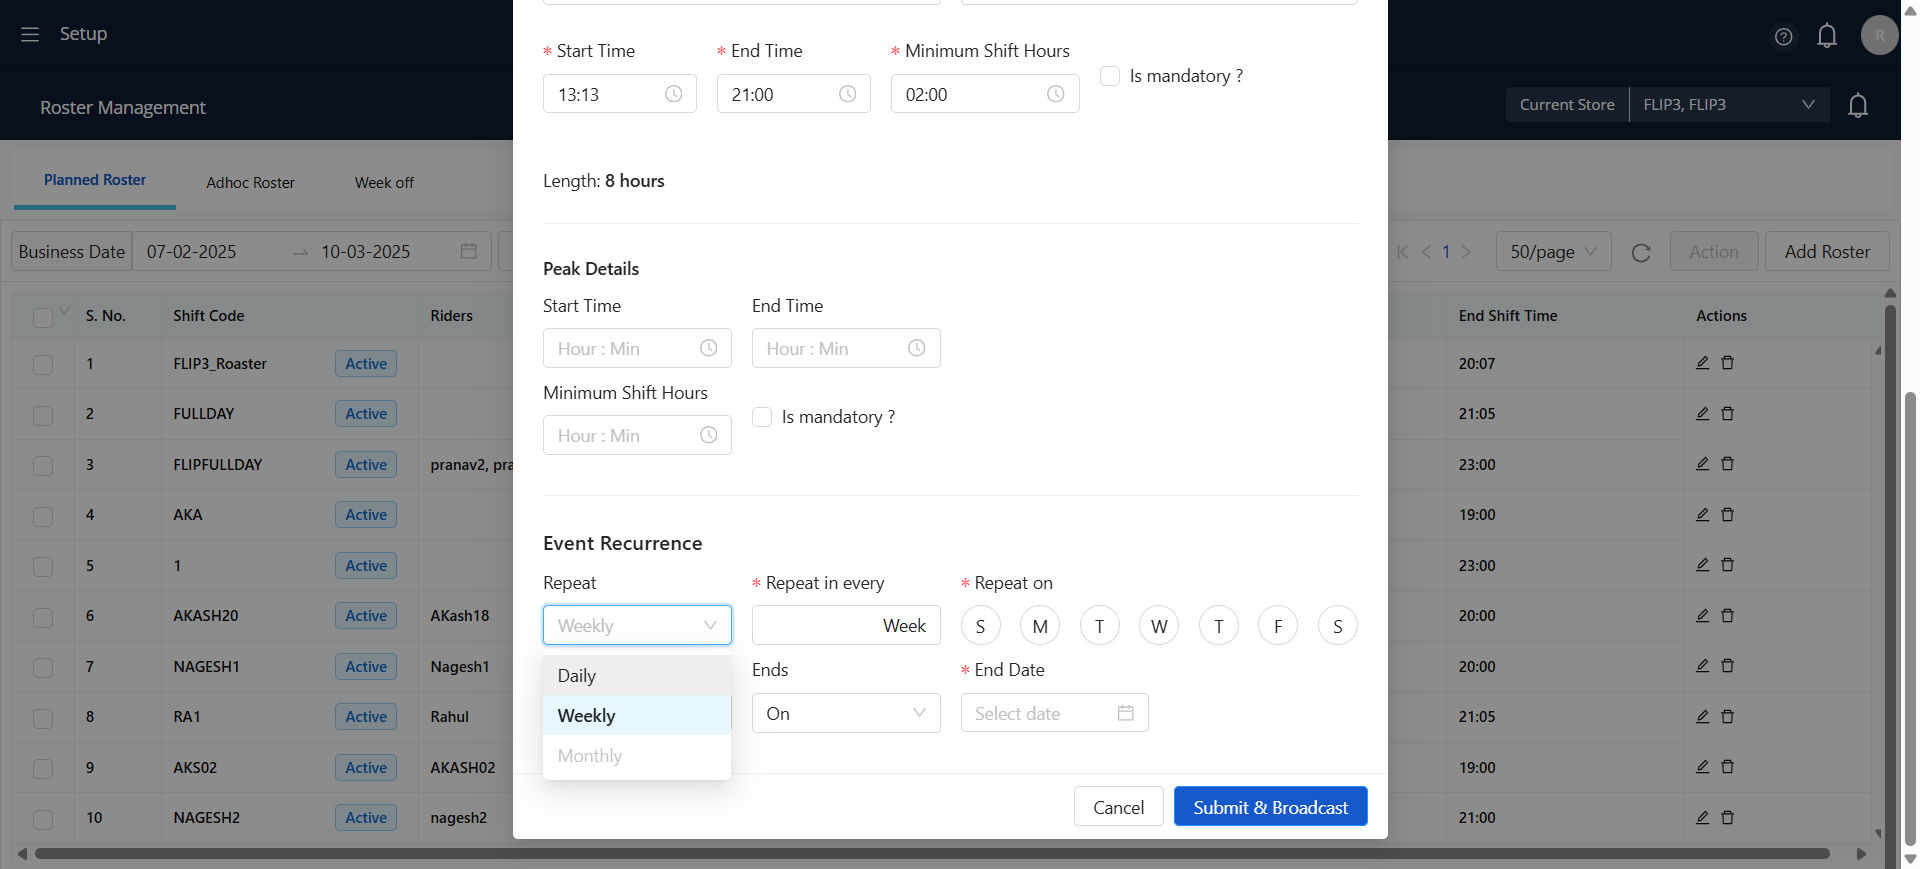
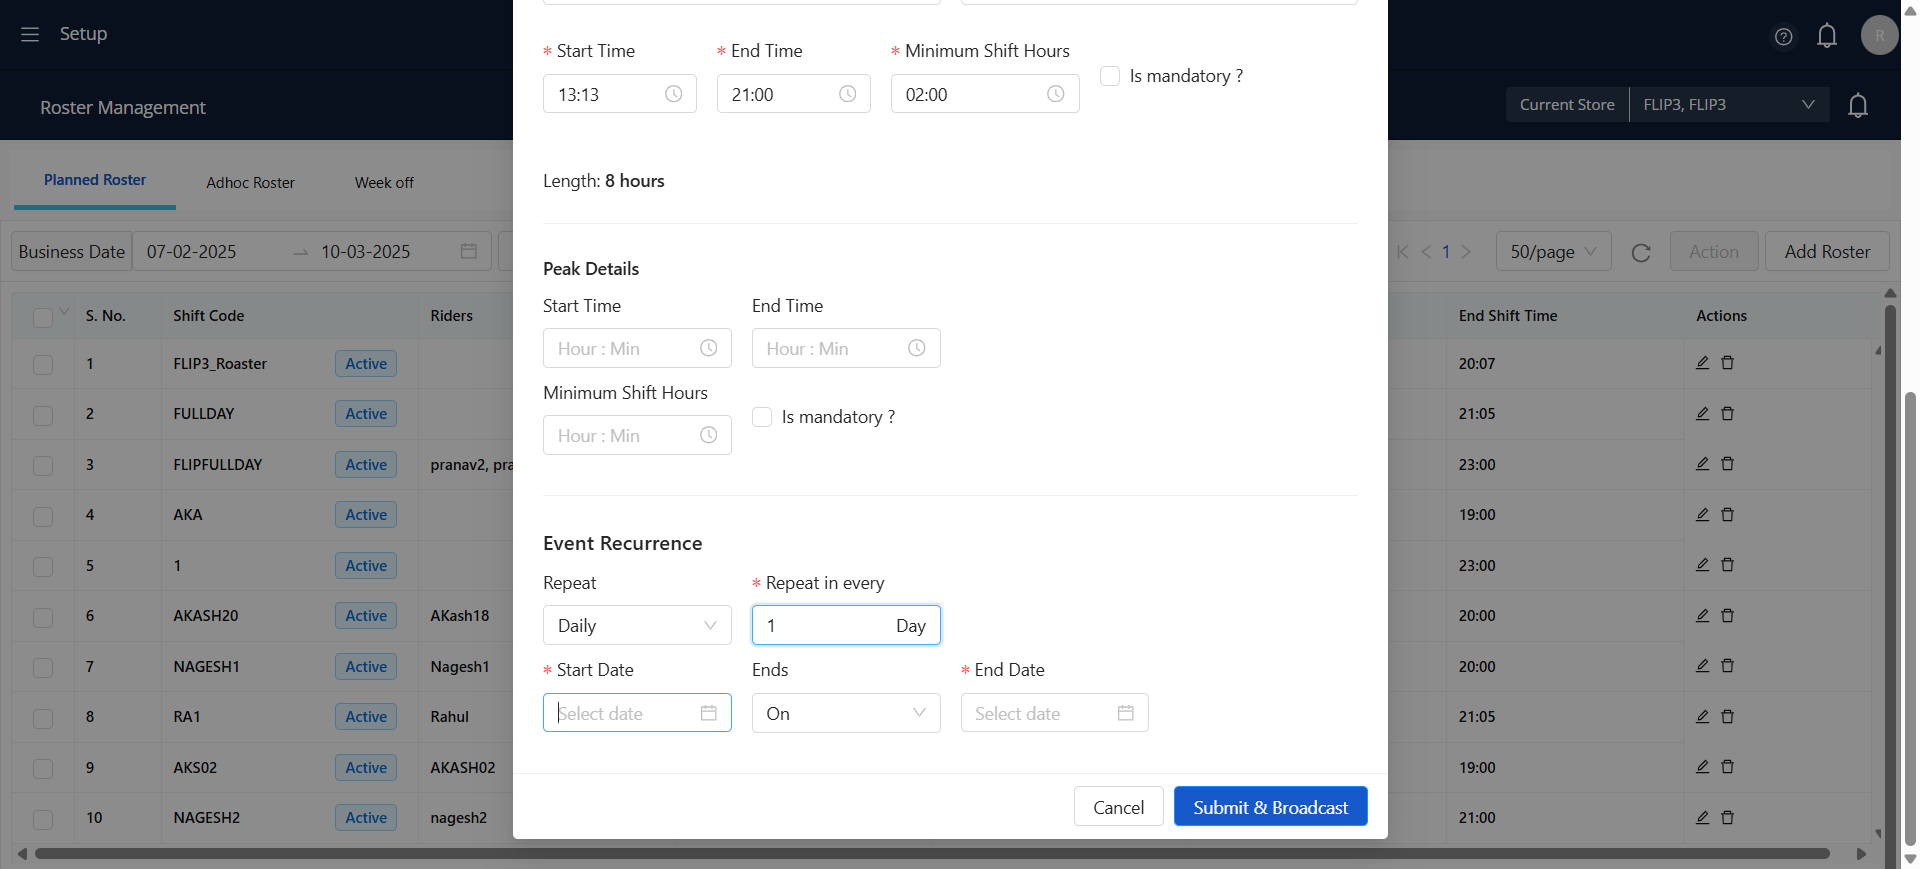
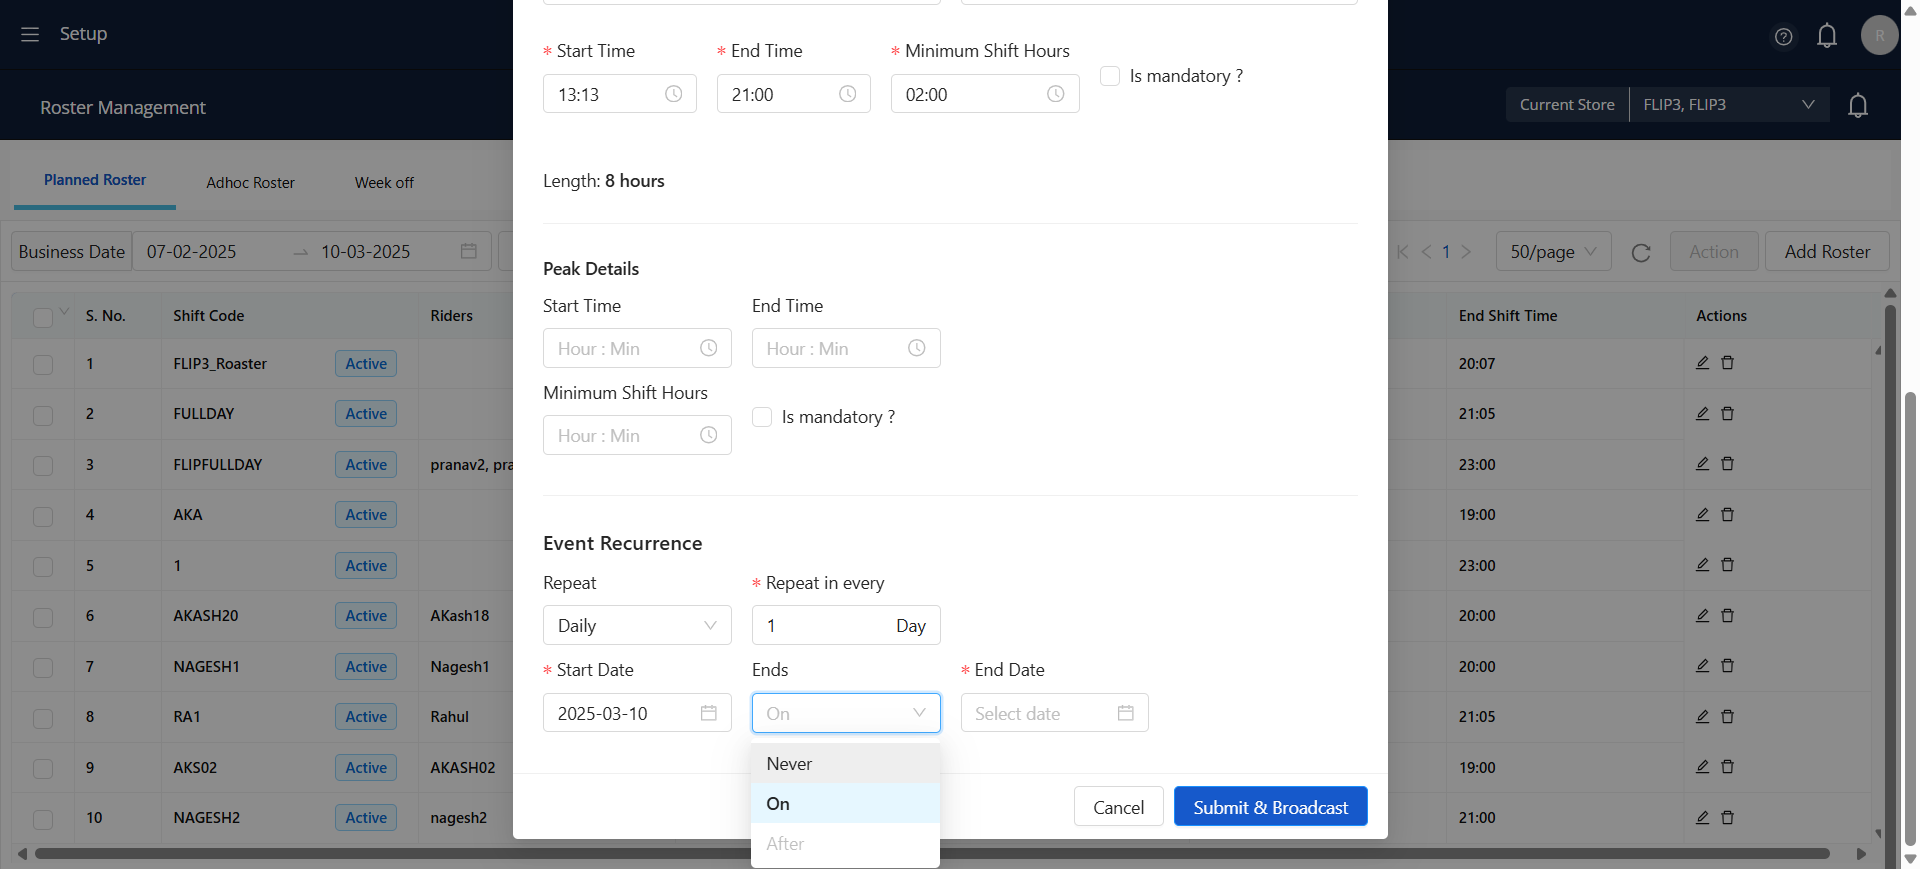
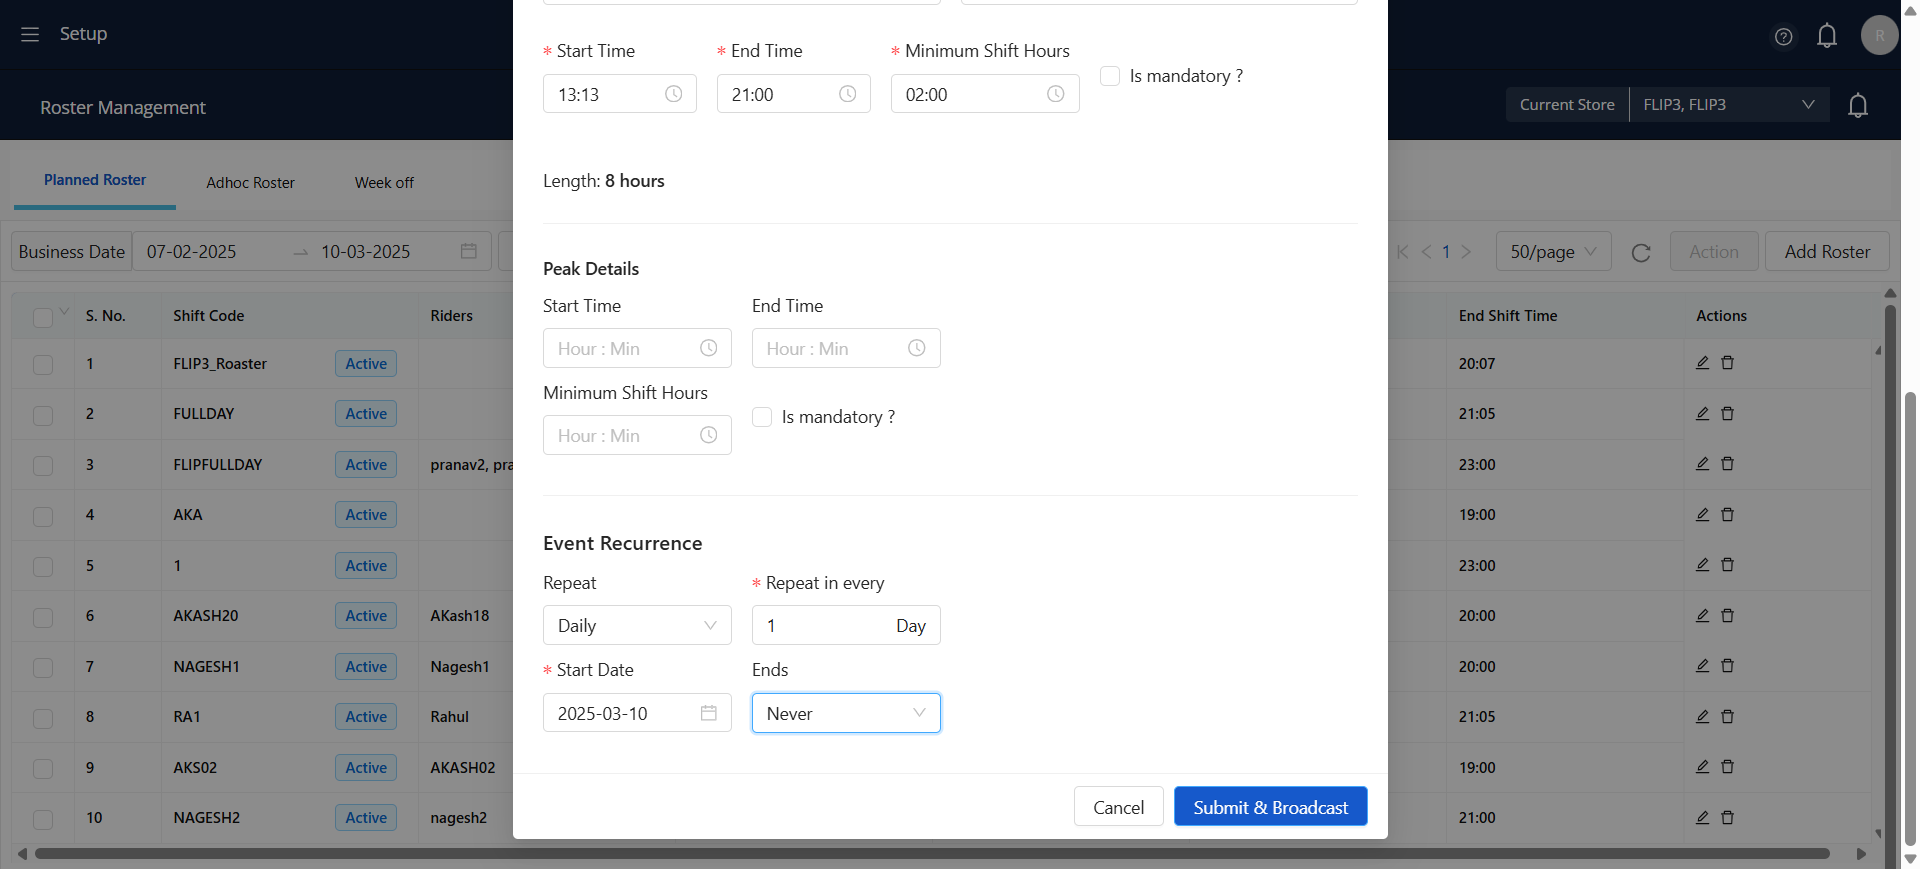
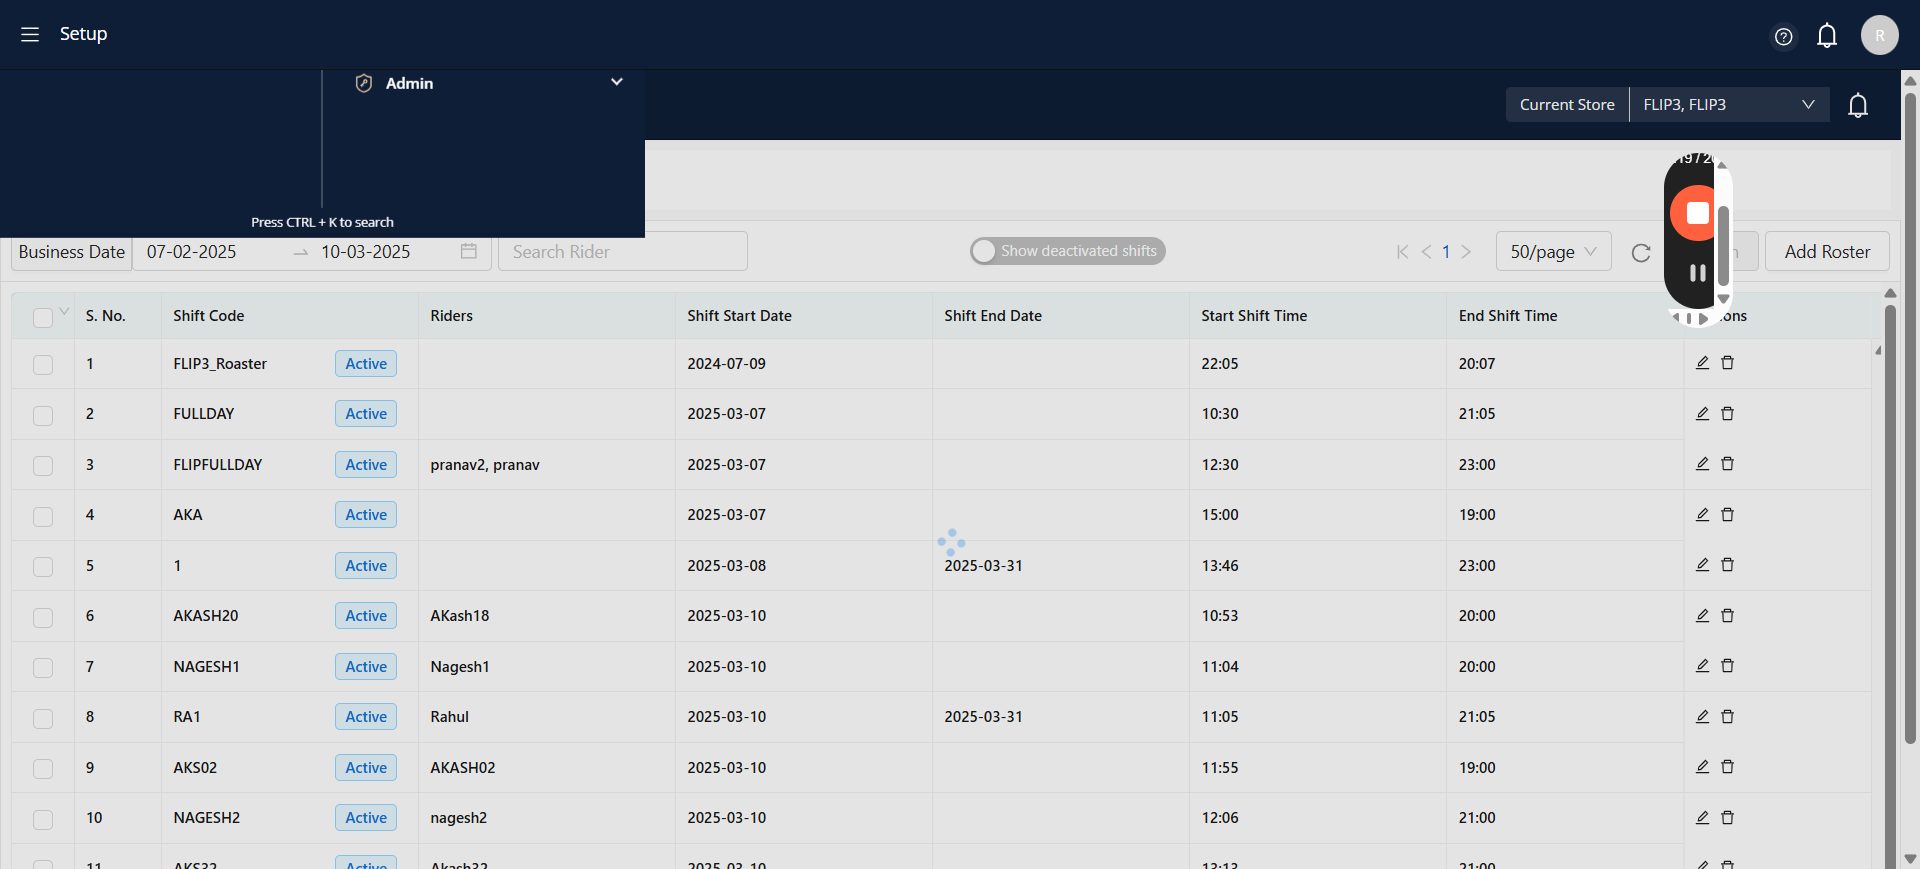
This guide provides a structured approach to efficiently managing rider information within the Rider Management section of the dashboard. It ensures accurate data entry, proper vehicle assignment, shift scheduling, and payout rule configuration while maintaining compliance with operational and business protocols. This process streamlines rider registration, reduces errors, and optimizes the management of rider profiles. The process begins with an administrator or manager logging into the dashboard and navigating to the Rider Management section. After selecting the appropriate store details, essential rider information such as name, contact number, Aadhaar card number, and gender is entered. Identification documents are uploaded using the "Upload Image" function. Shift timings and payout rules are configured accordingly. The rider’s vehicle is selected from the available options, or the "Auto-create vehicle" feature is used if necessary. Additionally, an upstream worker code is generated by entering the required details into the system. Once all information is provided, the details are submitted, and the system processes and stores the data, assigning a unique username and system-generated code to the rider. The Rider Management page is then updated with the new profile. If any inconsistencies arise, such as an incorrect mobile number or missing mandatory fields, the system prompts the user to make corrections before finalizing the submission. This ensures that rider profiles are accurately created and maintained, supporting operational efficiency and data integrity.

By Akash R

1
Go to Dashboard
2
Enter the correct username and password to log into your account.
Step #2: Enter the correct username and password to log into your account.
3
After providing your username and password, click the 'Sign In' button to log into your account.
Step #3: After providing your username and password, click the 'Sign In' button to log into your account.
4
After logging in successfully, the system will direct the user to the dashboard page, where they need to navigate to the menu bar and click on the "Orders Dashboard"
Step #4: After logging in successfully, the system will direct the user to the dashboard page, where they need to navigate to the menu bar and click on the "Orders Dashboard"
5
From the menu bar, select the setup file.
Step #5: From the menu bar, select the setup file.
6
In the setup section, please select the 'Users' option.
Step #6: In the setup section, please select the 'Users' option.
7
Click here To access 'Rider Management,' go to the 'Users' section and select it.
Step #7: Click here To access 'Rider Management,' go to the 'Users' section and select it.
8
To add the new rider, please select the option Add Rider.
Step #8: To add the new rider, please select the option Add Rider.
9
To add a rider, please choose either the "New Rider" option or the "Upload Excel" option.
Step #9: To add a rider, please choose either the "New Rider" option or the "Upload Excel" option.
10
Please provide the name of the Rider
Step #10: Please provide the name of the Rider
11
select the worker type "Shandowfax"
Step #11: select the worker type "Shandowfax"
12
Please submit the rider's mobile number, consisting of 10 digits.
Step #12: Please submit the rider's mobile number, consisting of 10 digits.
13
To assess the status of the rider, kindly choose 'Yes' in the 'Is Active' field if the rider is currently active, or select 'No' to indicate that the rider is inactive.
Step #13: To assess the status of the rider, kindly choose 'Yes' in the 'Is Active' field if the rider is currently active, or select 'No' to indicate that the rider is inactive.
14
In the section designated for 'Identification Documents,' kindly provide the Aadhaar card number of the rider.
Step #14: In the section designated for 'Identification Documents,' kindly provide the Aadhaar card number of the rider.
15
To proceed, kindly input the upstream worker code for the rider within the upstream codebase, and subsequently click on the data to submit it
Step #15: To proceed, kindly input the upstream worker code for the rider within the upstream codebase, and subsequently click on the data to submit it
16
Once the rider's information is submitted, the system will navigate to the Rider Management page and securely store the rider's details, including the username and rider code.
Step #16: Once the rider's information is submitted, the system will navigate to the Rider Management page and securely store the rider's details, including the username and rider code.

17
Updating rider details refers to the process of modifying or refreshing rider-related information in a system. This could include changes in rider profiles, contact information, hub assignments, last login details, or status updates. The goal is to ensure that the system maintains accurate and up-to-date records for better operational efficiency. Documentation

18
Click here to navigate to the Roster Management section.
Step #18: Click here to navigate to the Roster Management section.
19
Choose a store from the options provided.
Step #19: Choose a store from the options provided.
20
Click here to add a rider in the Roster Management section.
Step #20: Click here to add a rider in the Roster Management section.
21
Click here to select the HUB.
Step #21: Click here to select the HUB.
22
Click here to select the rider's name.
Step #22: Click here to select the rider's name.
23
Click here to enter the shift code.
Step #23: Click here to enter the shift code.
24
Click here to set the start time.
Step #24: Click here to set the start time.
25
Select a time that is greater than the current time.
Step #25: Select a time that is greater than the current time.
26
Click here "ok"
Step #26: Click here "ok"
27
Choose a time that is later than the start time.
Step #27: Choose a time that is later than the start time.
28
Click on "ok "
Step #28: Click on "ok "
29
Set the minimum duration required for a shift.
Step #29: Set the minimum duration required for a shift.
30
Set the repetition pattern for the event.
Step #30: Set the repetition pattern for the event.
31
Specify the interval at which the event should repeat (e.g., daily, weekly, or monthly).
Step #31: Specify the interval at which the event should repeat (e.g., daily, weekly, or monthly).
32
Choose the date when the shift or event should begin.
Step #32: Choose the date when the shift or event should begin.
33
Set the event or shift to continue indefinitely without a specified end date.
Step #33: Set the event or shift to continue indefinitely without a specified end date.
34
Click the "Submit" button to finalize and save the details.
Step #34: Click the "Submit" button to finalize and save the details.
35
Navigate to "Setup"
Step #35: Navigate to "Setup"
36
select "Dispatch Management" from the menu.
Step #36: select "Dispatch Management" from the menu.
37
Choose the available riders from the list and allocate the pending orders to them by selecting the "Assign Order" option. Confirm the assignment to complete the process.
Step #37: Choose the available riders from the list and allocate the pending orders to them by selecting the "Assign Order" option. Confirm the assignment to complete the process.
38
Choose the riders from the available list to proceed with the order assignment.
Step #38: Choose the riders from the available list to proceed with the order assignment.
39
After selecting the riders, click on the "Submit" button to finalize the order assignment.
Step #39: After selecting the riders, click on the "Submit" button to finalize the order assignment.
40
Launch the Shipsy application on the Rider's mobile device.
Step #40: Launch the Shipsy application on the Rider's mobile device.
41
Kindly enter the name of the organization and then click on 'Submit.'
Step #41: Kindly enter the name of the organization and then click on 'Submit.'
42
Kindly enable location permissions to allow access to your current location.
Step #42: Kindly enable location permissions to allow access to your current location.
43
Access the settings and select 'Permissions.'
Step #43: Access the settings and select 'Permissions.'
44
Please select 'Allow' to enable notifications.
Step #44: Please select 'Allow' to enable notifications.
45
Kindly enable location permissions to allow access to your current location.
Step #45: Kindly enable location permissions to allow access to your current location.
46
To allow the app to operate in the background, please select 'Settings.'
Step #46: To allow the app to operate in the background, please select 'Settings.'
47
To continue, please enter your valid employee ID and password, then select 'Login'.
Step #47: To continue, please enter your valid employee ID and password, then select 'Login'.
48
Upon completing the check-in process, the rider will be presented with the order details dashboard.
Step #48: Upon completing the check-in process, the rider will be presented with the order details dashboard.
49
The rider receives the order details and accepts it.
Step #49: The rider receives the order details and accepts it.
50
After the rider accepts the order, 34 minutes remain for delivery.
Step #50: After the rider accepts the order, 34 minutes remain for delivery.
51
The rider has completed the pickup and scanned the location.
Step #51: The rider has completed the pickup and scanned the location.
52
Retrieve the hub name, customer details, address, collected amount, and item list.
Step #52: Retrieve the hub name, customer details, address, collected amount, and item list.
53
Rider will proceed with the delivery.
Step #53: Rider will proceed with the delivery.
54
The rider has the option to choose between cash or online payment.
Step #54: The rider has the option to choose between cash or online payment.
55
The rider must provide proof of delivery.
Step #55: The rider must provide proof of delivery.
56
After completing the delivery, the rider returns to the store to pick up the next order.
Step #56: After completing the delivery, the rider returns to the store to pick up the next order.

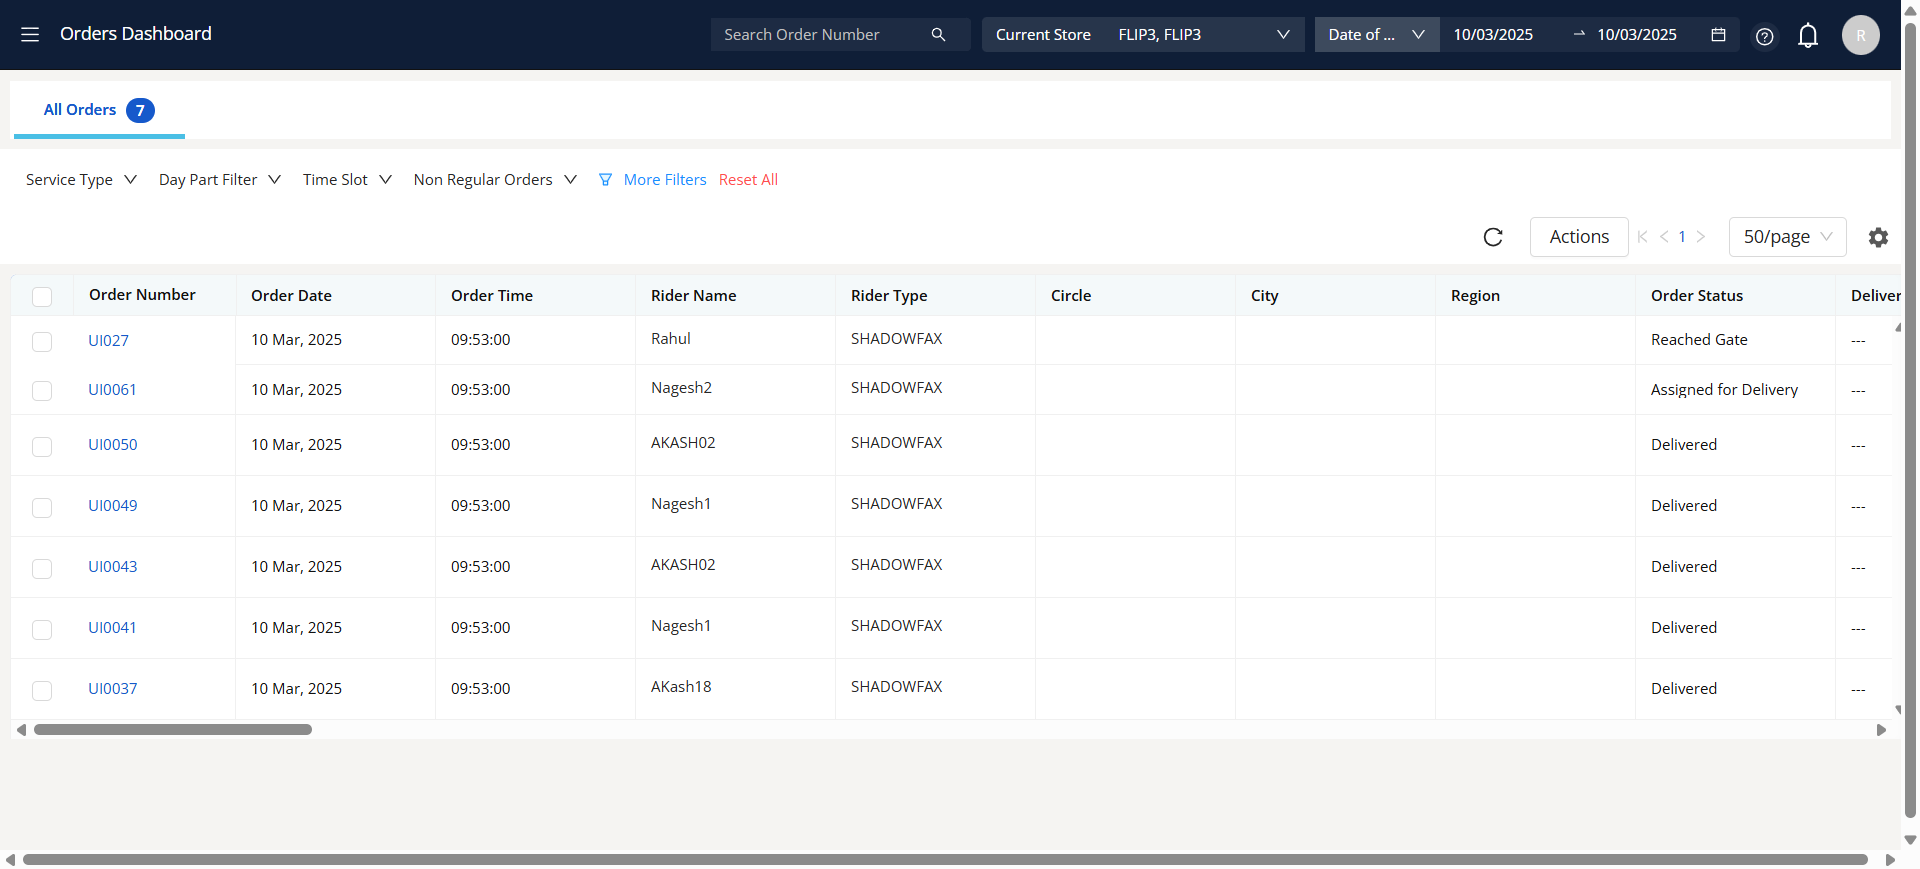
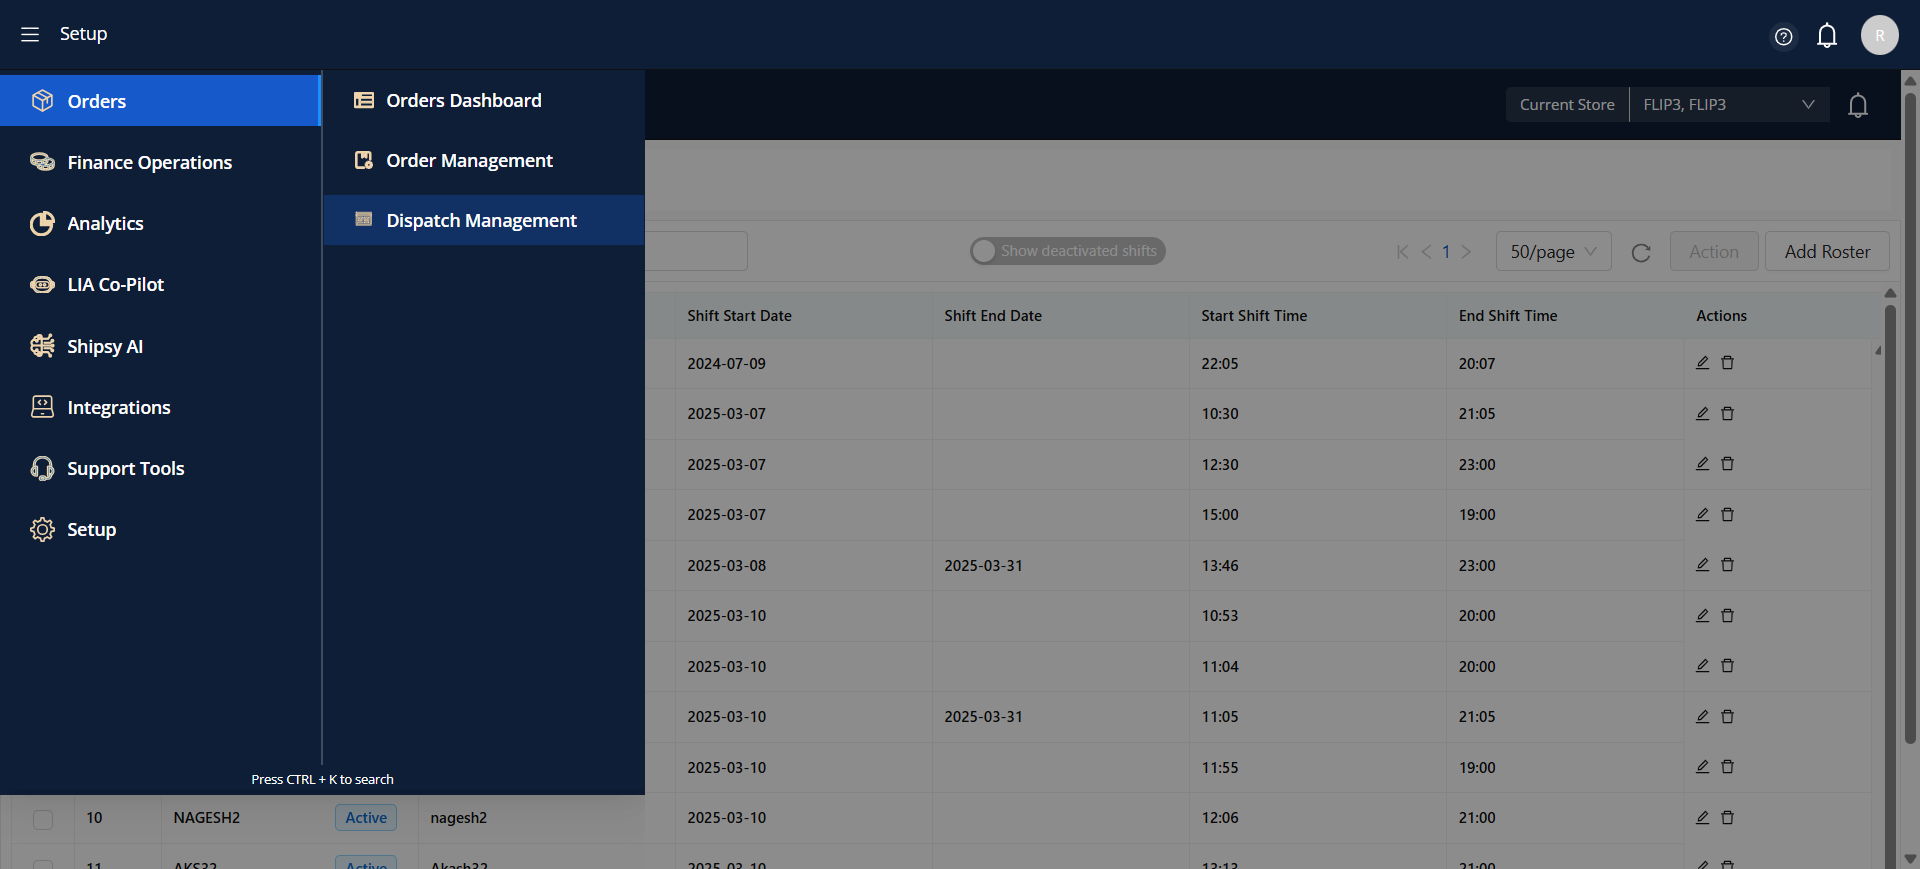
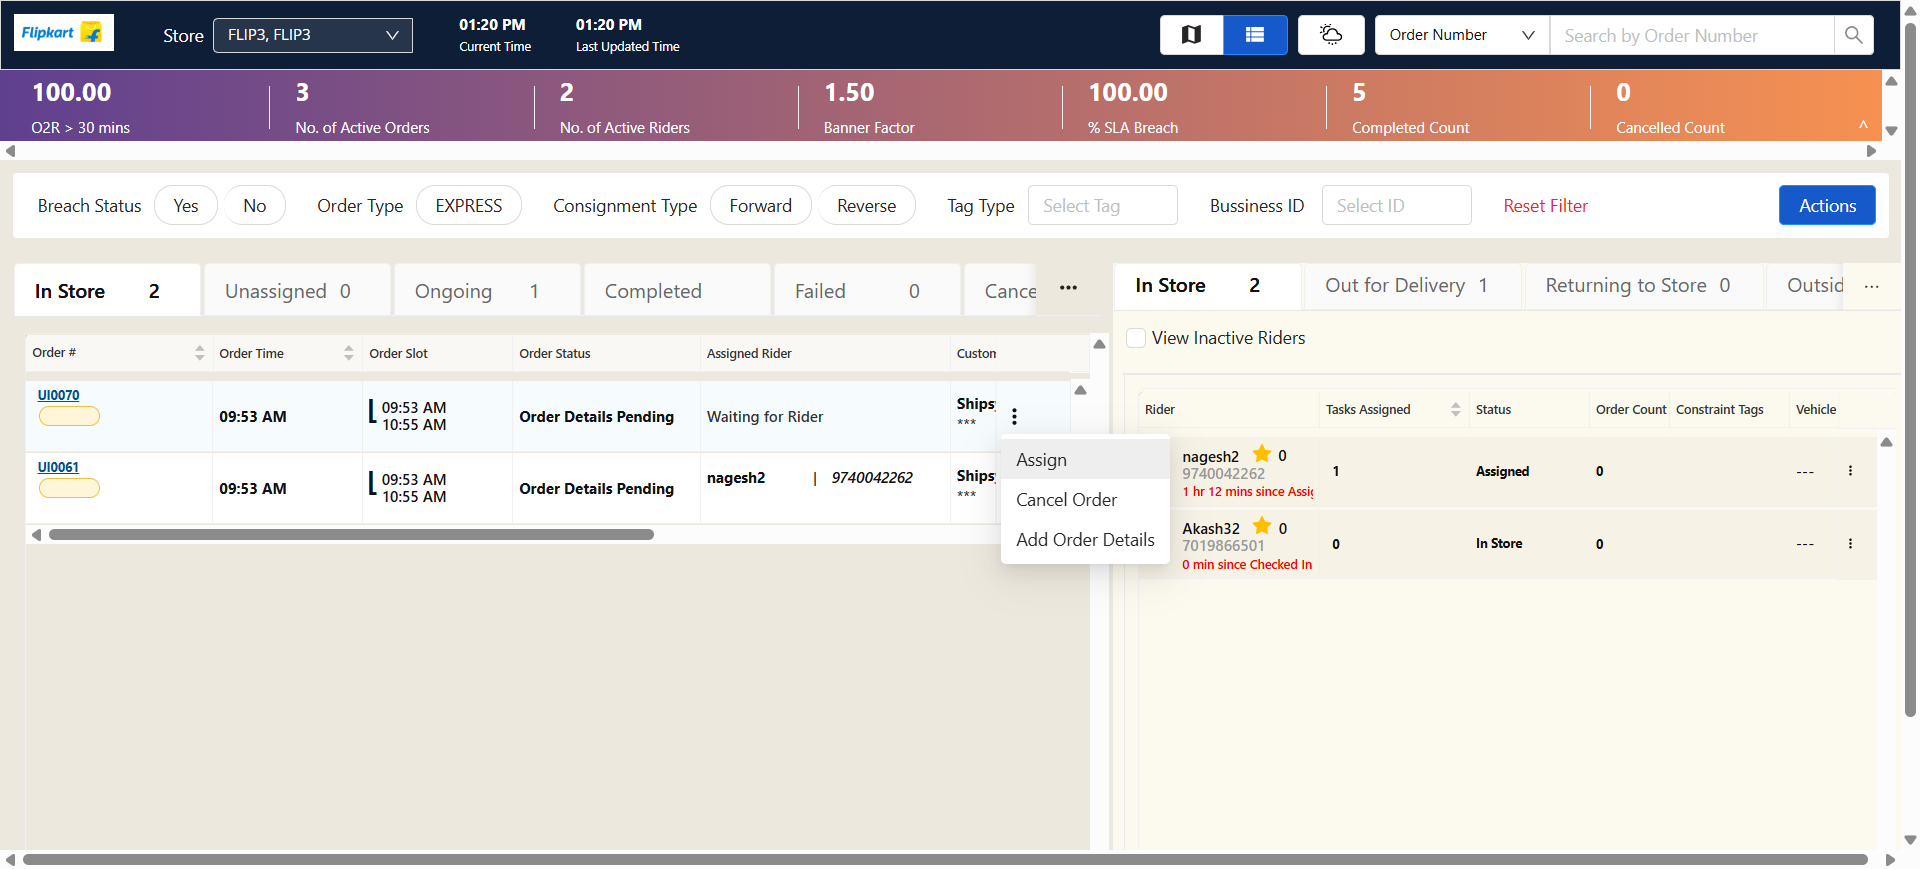
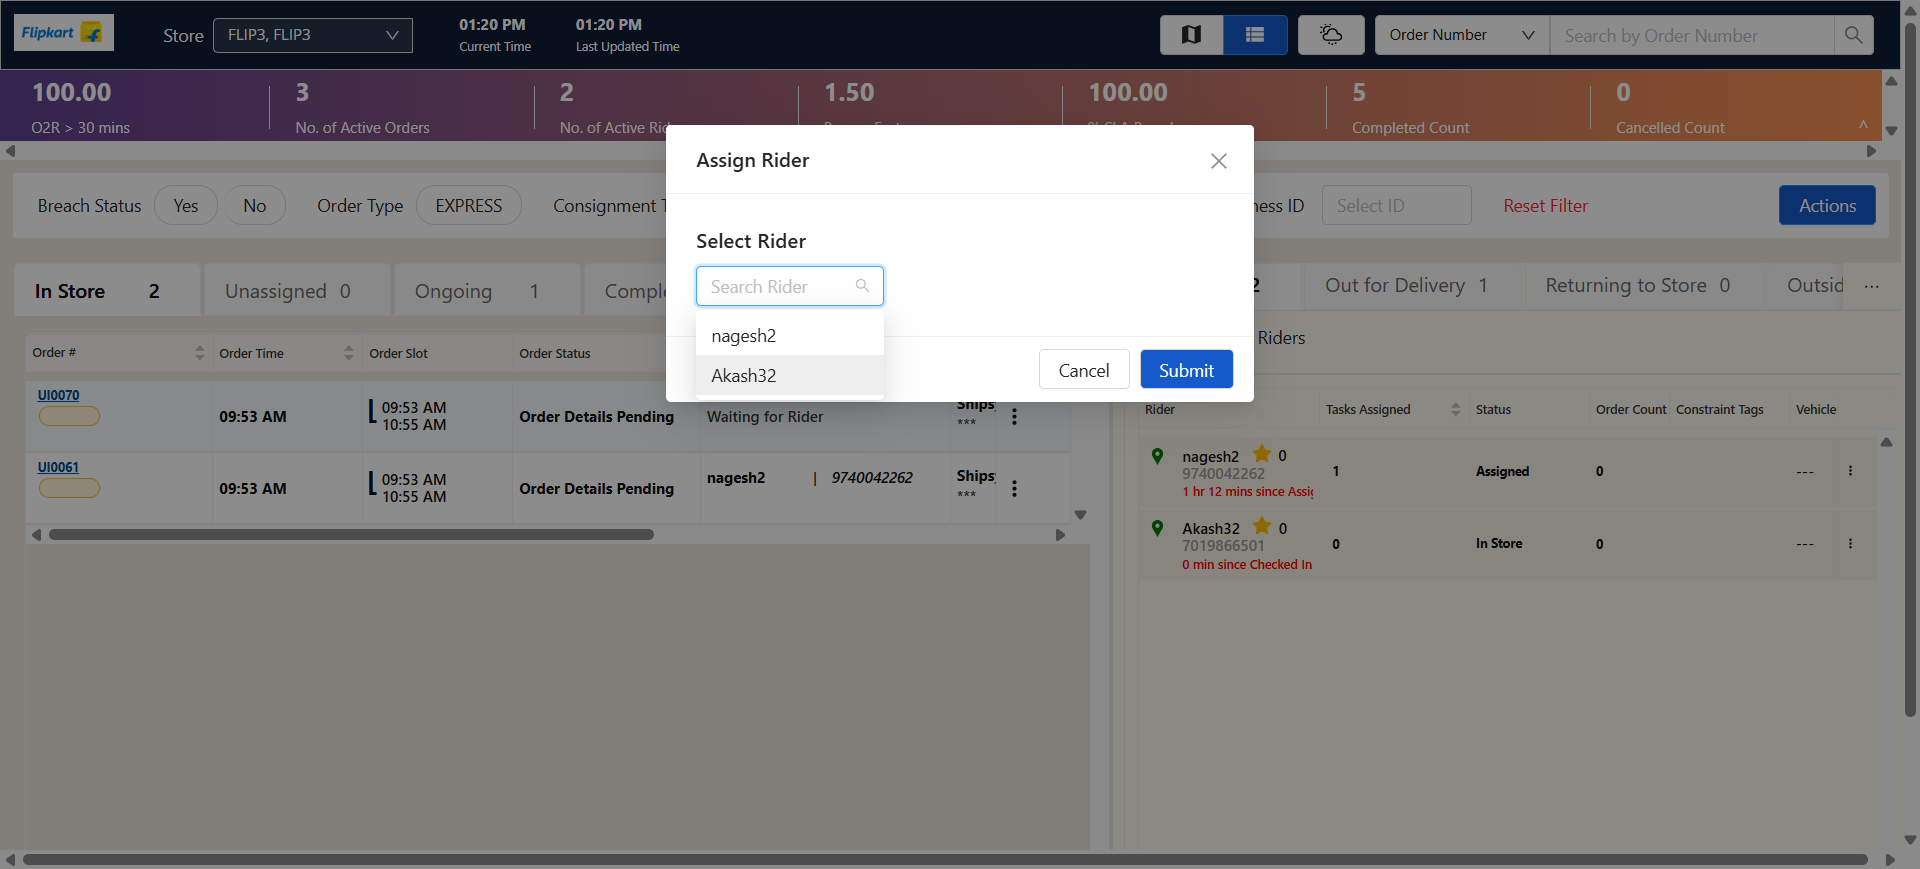
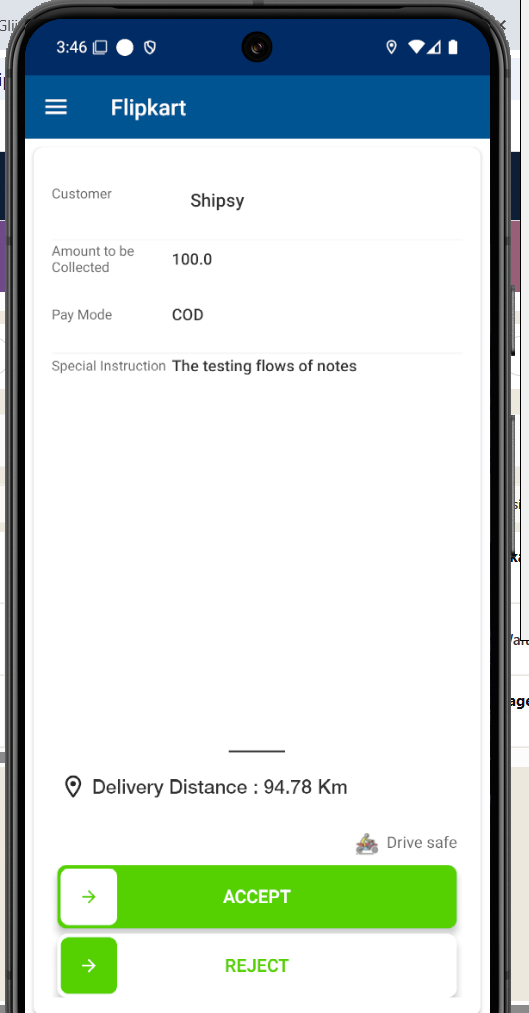
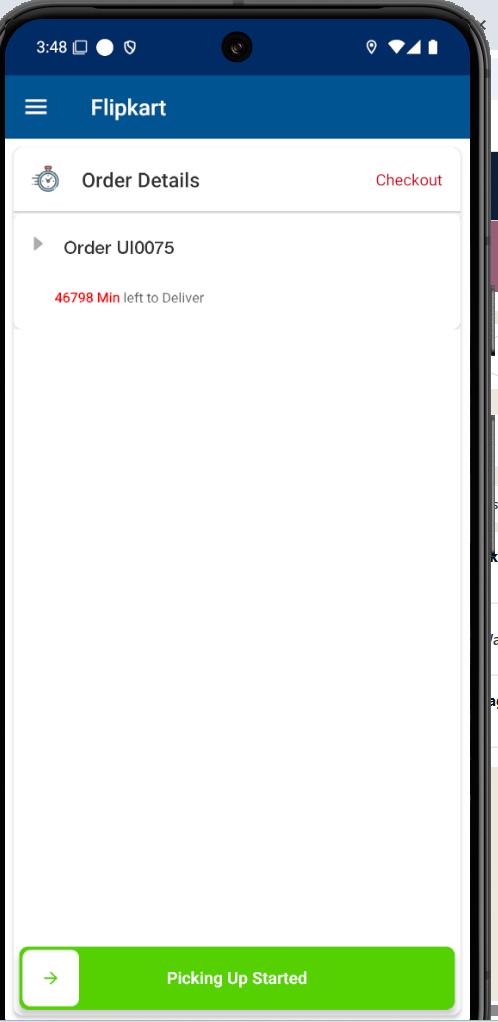
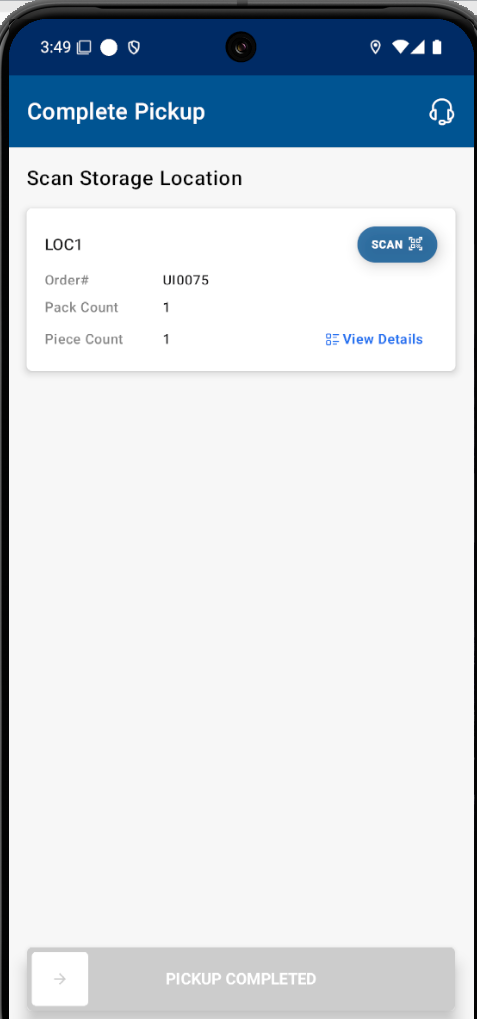
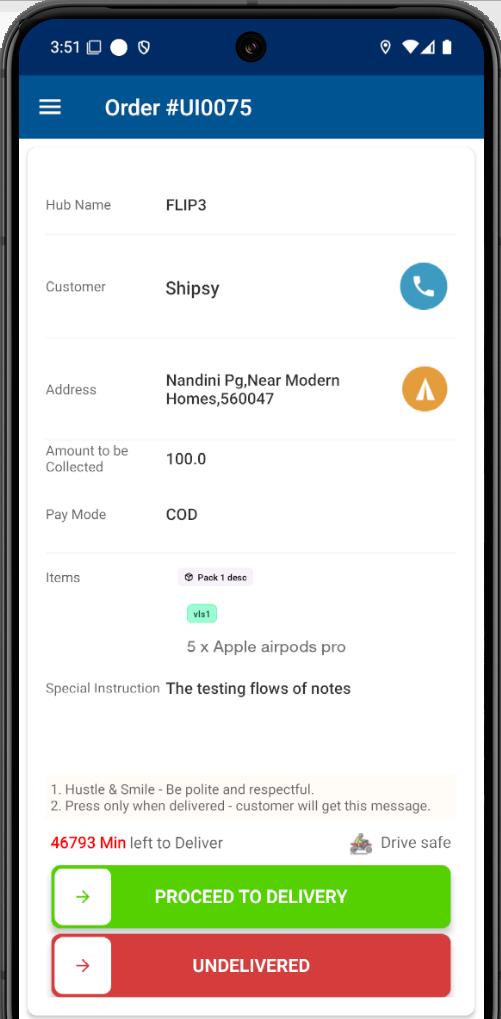
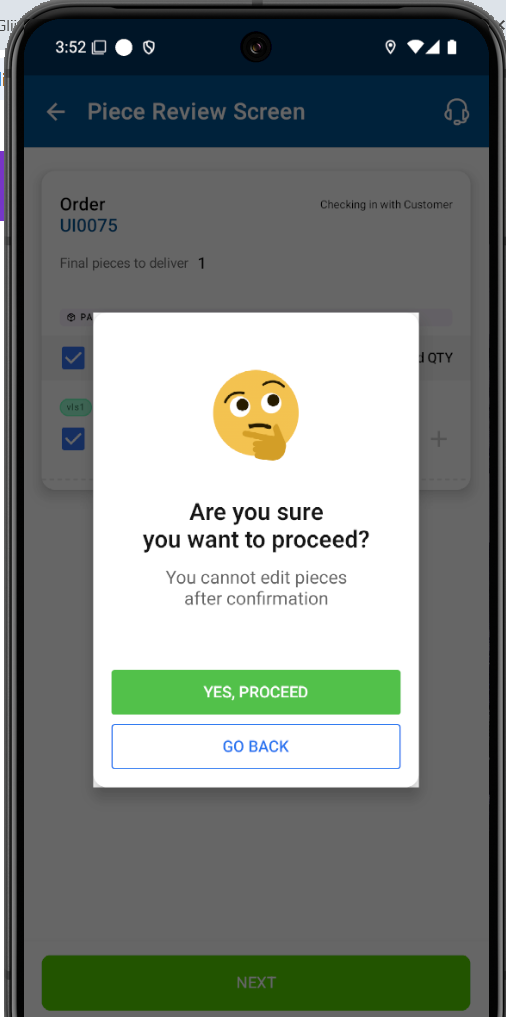
In a hub where multiple orders are present, a single rider can be assigned to handle multiple deliveries efficiently. The system ensures optimal allocation based on rider availability, capacity, and delivery routes. The rider receives order details, collects the packages, and follows the designated route to complete the deliveries. This approach enhances operational efficiency, reduces transit time, and improves overall service quality. Effective dispatch management ensures seamless coordination between hubs, riders, and customers, maintaining accuracy in order fulfillment and timely deliveries.

OBD is an automated system that dials numbers from a database to deliver pre-recorded messages or connect to live agents. It is used for reminders, promotions, feedback collection, and order confirmations. documentation

Order and Rider Management System(NON-OBD)