Read summarized version with
The pattern repeats across every manufacturing team I’ve talked to.
Someone who knows a critical procedure is out sick. The backup is dealing with another issue. And suddenly twelve people are standing around waiting while someone hunts through old emails trying to piece together what to do next.
One operations manager told me a forty-minute stoppage cost them about $8,000 in lost production, the kind of delay a documented maintenance work order process and a proactive equipment maintenance plan are built to prevent. The missing SOP? Would have taken maybe thirty minutes to create. Aberdeen research puts average unplanned downtime across manufacturing sectors at about $260,000 per hour - so even a brief stop is expensive, and a missing procedure is one of the cheapest things to fix.
I’m Yuval, founder of Glitter AI. I’ve spent years helping teams document their processes, and manufacturing is where the stakes are highest. I’ve heard stories from world-class facilities with bulletproof SOPs, and from operations held together by tribal knowledge and prayer.
The difference isn’t the size of the company or the sophistication of the equipment. It’s whether they have a working SOP for manufacturing that people actually use.
Glitter AI captures your process automatically while you work


What is an SOP in Manufacturing?
A manufacturing SOP is a documented set of step-by-step instructions that describes how to perform a specific task in a manufacturing environment. The goal is consistency: whether it’s Monday morning or Friday night, whether it’s your best operator or a new hire, the task gets done the same way every time. For a general overview of SOPs, see my full guide to writing standard operating procedures.
Manufacturing SOPs are more critical than SOPs in other industries because:
- Safety risks are higher: A mistake in data entry is annoying. A mistake with industrial equipment can be deadly.
- Quality impacts are immediate: One operator skipping a step can result in thousands of defective units. Clear work instructions are essential.
- Compliance is non-negotiable: Industries like pharma, medical devices, and food production face serious regulatory requirements.
- Costs are tangible: Downtime, scrap, rework - every mistake has a clear dollar amount attached.
Think of manufacturing SOPs as the recipe that keeps your production line running smoothly. You wouldn’t want a chef improvising with food safety protocols. You definitely don’t want operators improvising with quality control or safety procedures.
Types of Manufacturing SOPs
Manufacturing operations need different types of SOPs for different purposes. Here are the main categories:
Quality Control SOPs
A quality control SOP ensures every product meets your standards before it reaches customers. These cover:
- Inspection procedures at each production stage
- Sample size and testing frequency
- Acceptance and rejection criteria
- Non-conformance handling
- Calibration of measuring equipment
- Documentation of quality checks
Assembly and Production SOPs
These guide operators through manufacturing processes:
- Assembly line setup and startup procedures
- Step-by-step assembly instructions
- Material handling and component verification
- Equipment operation during production
- Changeover procedures between products
- Production line shutdown and cleanup
Safety Procedure SOPs
A safety SOP protects your team from workplace hazards:
- Personal protective equipment (PPE) requirements
- Lockout/tagout procedures for equipment maintenance
- Emergency response protocols
- Hazardous material handling
- Incident reporting procedures
- Fire safety and evacuation routes
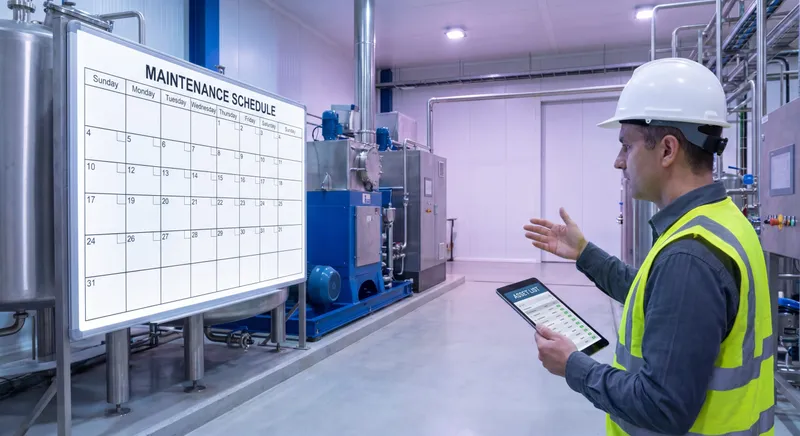
Equipment Operation and Maintenance SOPs
These keep your machinery running reliably:
- Equipment startup and shutdown sequences
- Routine maintenance schedules and procedures
- Troubleshooting common issues
- Cleaning and sanitation protocols
- Preventive maintenance checklists
- Calibration procedures
Good Manufacturing Practice (GMP) SOPs
For regulated industries like pharmaceuticals and food production:
- Raw material receiving and storage
- Batch documentation and traceability, anchored by a complete batch record
- Environmental monitoring
- Cleaning validation
- Deviation handling under a formal deviation management process
- Audit and inspection preparation
Glitter AI captures your manufacturing processes automatically while you work
Manufacturing SOP Examples
Let’s look at real examples of manufacturing SOPs that actually work. I’ll show you what makes each one effective.
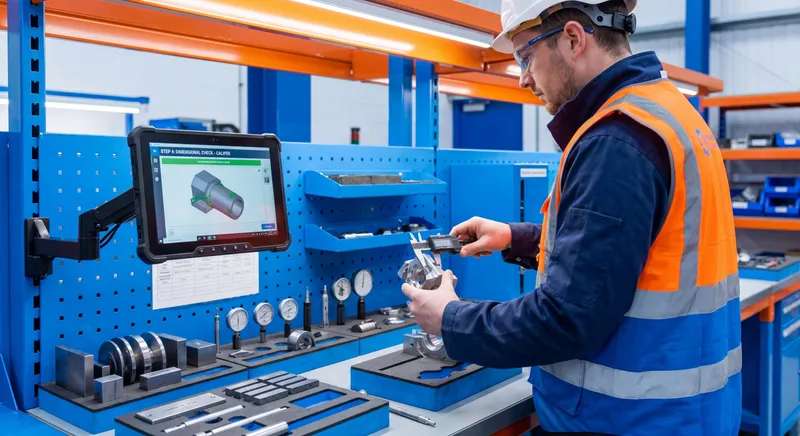
Example 1: Quality Control Inspection SOP
Title: SOP for In-Process Quality Inspection - Widget Assembly Line
Purpose: To ensure all widgets meet quality standards during assembly through systematic inspection at critical control points.
Scope: Applies to all quality inspectors and line supervisors on Widget Assembly Line A. Covers inspection from component verification through final assembly.
Prerequisites:
- Quality inspector certification
- Access to digital calipers and measuring tools
- Quality checkpoint tablet logged in
- Current specification sheet (Rev. 2.3 or later)
Procedure:
-
Verify component quality (every 50 units)
- Select 3 widgets randomly from the incoming batch
- Measure critical dimensions using digital calipers:
- Base width: 45.0mm ± 0.2mm
- Mounting hole diameter: 8.0mm ± 0.1mm
- Overall height: 22.5mm ± 0.3mm
- Record measurements in quality tablet
- If any measurement falls outside tolerance, stop the line and notify supervisor
-
Check assembly alignment (every 25 units)
- Select assembled widget from the conveyor
- Place in alignment jig (blue fixture at Station 4)
- Verify all four mounting points contact the jig surface
- Check that tolerance pins slide through all holes without force
- Record pass/fail in tablet
- If failed: quarantine unit, add “QC Fail” tag, place in red bin
-
Perform functional test (every 10 units)
- Load widget into test fixture
- Run automated test sequence (green button)
- Verify LED shows green (pass) within 8 seconds
- If red LED: photograph unit, log serial number, follow non-conformance procedure
-
Final visual inspection (every unit)
- Check for surface defects, scratches, or discoloration
- Verify label is present, straight, and legible
- Confirm no foreign material or debris
- If defects found: determine severity using defect classification guide
Non-Conformance Procedure:
- Immediately stop selecting units from the affected batch
- Place red “HOLD” tag on the batch container
- Notify line supervisor and quality manager
- Complete non-conformance report in tablet before resuming inspection
- Do not dispose of failed units - place in designated quarantine area
Documentation:
- All measurements and test results automatically logged via tablet
- Non-conformances require supervisor signature within 2 hours
- Daily inspection summary prints automatically at shift end
What Makes This SOP Effective:
This quality control SOP works because it’s specific about frequencies, measurements, and decision points. Notice how it tells inspectors exactly what to measure, with what tools, and what tolerances to accept. The non-conformance procedure is crystal clear - no ambiguity about what to do when something fails.
The integration with digital tools (the quality tablet) makes compliance easier and creates an automatic audit trail. Nobody needs to remember to write things down manually.
Example 2: Assembly Line Setup SOP
Title: SOP for Production Line Setup - Model X Assembly
Purpose: To ensure Assembly Line 2 is properly configured and ready for Model X production with all safety checks completed.
Scope: For use by assembly line supervisors and lead operators when transitioning Line 2 to Model X production.
Time Required: Approximately 35-45 minutes
Prerequisites:
- Previous production run completed and line cleared
- Model X component kits delivered to line-side storage
- Line 2 supervisor access badge
- Setup checklist printed or loaded on tablet
Procedure:
-
Verify line clearance
- Walk entire line from Station 1 to Station 12
- Confirm all components from previous run are removed
- Check that no tools are left on workstations
- Verify conveyors are empty
- Remove any temporary labels or signage from previous product
-
Install Model X fixtures and tooling
- Station 3: Replace assembly jig with Model X jig (blue, labeled “MX-03”)
- Station 5: Install Model X insertion tool (stored in Cabinet 2, Drawer C)
- Station 7: Swap testing fixture - remove current, install Model X fixture (green handle)
- Station 9: Install Model X packaging guides on both sides of conveyor
- Verify each station operator confirms correct tooling is installed
-
Configure conveyor settings
- Access conveyor control panel (requires supervisor badge)
- Select “Model X” from preset menu
- Verify speed displays as 12.5 units/minute
- Verify spacing shows 1.2 meters between units
- Run empty conveyor for 30 seconds to confirm operation
- Listen for unusual noises or vibrations
-
Stage components and materials
- Deliver Model X component kits to Stations 1, 3, 5, 7
- Verify kit labels match current date (reject if expired)
- Place packaging materials at Station 11: boxes (SKU MX-BOX-001), inserts, labels
- Stock consumables: gloves, cleaning wipes, adhesive tape
- Confirm each station has minimum 2-hour supply
-
Perform safety checks
- Test emergency stop buttons at Stations 2, 5, 8, and 11 (press and verify line stops)
- Reset after each test
- Verify all safety guards are in place and properly secured
- Check that safety floor markings are visible and undamaged
- Confirm first aid kit and fire extinguisher locations are accessible
- Verify PPE is available: safety glasses at each station, gloves stocked
-
Run test cycle
- Select 3 complete Model X component sets
- Run through entire assembly process with full crew
- Verify each station can complete their task within cycle time
- Inspect completed test units for quality
- If issues found: stop, correct, and repeat test cycle
- Quarantine test units (do not ship - use for training only)
-
Final verification and sign-off
- Complete setup checklist (all boxes must be checked)
- Photograph line setup for shift handover documentation
- Obtain signatures from:
- Line supervisor
- Lead operator
- Quality inspector
- Record setup completion time in production log
- Announce “Line 2 ready for Model X production” via radio
Troubleshooting:
Conveyor won’t accept Model X preset
- Verify supervisor badge is current (check expiration)
- Ensure previous production run was properly closed out in system
- Call maintenance if preset still unavailable (ext. 2847)
Emergency stop doesn’t stop line
- Do not proceed - immediately call safety officer (ext. 2222)
- Lock out entire line (red lockout tags in supervisor station)
- Document issue in safety incident log
Test units fail quality check
- Identify which station produced the defect
- Verify correct tooling and fixtures are installed at that station
- Re-train operator if needed
- Run additional test cycle before production
What Makes This SOP Effective:
This assembly SOP works because it’s structured chronologically and breaks down a complex process into discrete checkpoints. Each step has a clear verification point - the setup person knows exactly how to confirm they did it right.
The time estimate at the top helps with production planning. The specific part numbers and locations eliminate guesswork. And the troubleshooting section addresses the most common setup issues without requiring a call to maintenance.
Example 3: Equipment Maintenance SOP
Title: SOP for Weekly Preventive Maintenance - CNC Mill 447
Purpose: To maintain CNC Mill 447 in optimal operating condition and prevent unplanned downtime through scheduled maintenance.
Scope: Weekly maintenance performed by certified maintenance technicians only. Does not cover emergency repairs or annual overhauls.
Frequency: Every Friday between 3:00 PM - 5:00 PM (during production downtime)
Prerequisites:
- CNC maintenance certification
- Access to maintenance supplies cabinet
- Mill 447 maintenance log (digital or paper)
- Lockout/tagout equipment
Safety Requirements:
- Mill must be fully powered down and locked out before maintenance begins
- Safety glasses and gloves required throughout procedure
- Two-person team required for any task involving lifting or moving components
Procedure:
-
Lockout/tagout and power down
- Notify production supervisor that Mill 447 is going offline
- Complete production cycle currently in progress
- Press emergency stop button
- Turn main power switch to OFF position
- Apply personal lockout device to power disconnect
- Verify zero energy state: attempt to power on mill (should not respond)
- Attach “MAINTENANCE IN PROGRESS” tag with your name and time
-
Inspect and clean coolant system
- Check coolant level in reservoir (should be between MIN and MAX marks)
- If below MIN line: add coolant mixture (4:1 water to coolant concentrate)
- Remove coolant filter cartridge (turn counterclockwise)
- Inspect filter for metal shavings and debris
- If heavily contaminated: replace with new filter (part #F-447-C)
- If moderate debris: clean with compressed air and reinstall
- Check coolant lines for cracks, leaks, or loose connections
- Wipe down coolant reservoir exterior and surrounding area
-
Lubricate moving components
- Clean grease fittings with cloth before lubrication
- Apply 2-3 pumps of grease to each fitting:
- X-axis rail (2 fittings, front and rear)
- Y-axis rail (2 fittings, left and right)
- Z-axis rail (2 fittings, top and bottom)
- Spindle bearing housing (1 fitting, top)
- Wipe away excess grease with cloth
- Check oil level in gearbox sight glass (side panel, eye level)
- If oil below halfway mark: add hydraulic oil through fill port until at 3/4 mark
-
Inspect tooling and chuck
- Open chuck jaws to full extension
- Inspect jaws for wear, cracks, or damage
- Clean chuck interior with brush to remove chips and debris
- Verify chuck key is present and undamaged
- Check tool holders for:
- Cracks or deformation
- Proper collet seating
- Excessive wear on retention knobs
- Remove any tools that show damage - tag for replacement
-
Check belts and alignment
- Open side access panel (requires 5mm Allen key)
- Visually inspect drive belts for:
- Cracks, fraying, or glazing
- Proper tension (should deflect 1/2 inch under thumb pressure)
- If belts show wear or incorrect tension: note in maintenance log for next service
- Verify belt alignment (edges should be parallel, not running at angle)
- Close and secure access panel
-
Clean and inspect work area
- Vacuum all metal chips from table, T-slots, and chip tray
- Remove chip tray and empty into scrap bin
- Wipe down table surface with clean cloth
- Check table surface for gouges, scratches, or damage
- Clean mill exterior, removing oil and coolant residue
- Inspect electrical cabinet for dust accumulation (blow out with compressed air if needed)
-
Test operation
- Remove all lockout/tagout devices
- Restore power to mill
- Run mill through startup sequence per operating SOP
- Jog each axis through full range of motion:
- X-axis: full left to full right
- Y-axis: full forward to full back
- Z-axis: full up to full down
- Listen for unusual noises, grinding, or resistance
- Test spindle at low speed (500 RPM) for 30 seconds
- If any abnormalities detected: do not return to production, call senior technician
-
Documentation and sign-off
- Complete maintenance checklist in Mill 447 logbook
- Record:
- Date and time of maintenance
- Technician name
- Any parts replaced (with part numbers)
- Any issues or abnormalities observed
- Next maintenance due date (exactly 7 days from today)
- If any issues noted: notify production supervisor before returning mill to service
- Update digital maintenance tracking system
- Remove “MAINTENANCE IN PROGRESS” tag
- Radio production supervisor: “Mill 447 maintenance complete, ready for production”
Parts and Supplies Needed:
- Coolant concentrate (if topping off needed)
- Coolant filter cartridge (part #F-447-C) - check before starting
- Multi-purpose grease (NLGI Grade 2)
- Hydraulic oil ISO VG 32 (if topping off needed)
- Shop towels
- Compressed air
What to Escalate:
- Any cracks in structural components
- Unusual vibrations or noises during test operation
- Coolant or oil leaks that cannot be traced to loose fitting
- Belts showing significant wear or damage
- Any damage to table surface or critical components
What Makes This SOP Effective:
This maintenance SOP works because it’s scheduled, specific, and includes built-in safety protocols. The lockout/tagout procedure is embedded right into the workflow - not an afterthought.
Notice how it specifies exact locations, quantities, and acceptance criteria. “Apply grease” isn’t helpful. “Apply 2-3 pumps to each of these 7 specific fittings” tells the technician exactly what to do.
The documentation section ensures that maintenance history is captured, which helps identify patterns and predict failures before they cause downtime.
Glitter AI automatically captures screenshots and voice narration while you work
Example 4: Safety Procedure SOP
Title: SOP for Lockout/Tagout - Press Brake 12 Maintenance
Purpose: To prevent accidental startup or release of stored energy during maintenance or servicing of Press Brake 12, protecting personnel from serious injury or death. According to OSHA, compliance with hazardous energy control procedures prevents approximately 120 fatalities and 50,000 injuries each year - most of which occur during maintenance exactly like this.
Scope: Required for all maintenance, repair, cleaning, or adjustment activities on Press Brake 12 where unexpected startup or energy release could cause injury. Applies to all maintenance technicians, electricians, and contractors.
Regulatory Reference: OSHA 29 CFR 1910.147 - The Control of Hazardous Energy (Lockout/Tagout)
Definitions:
- Authorized Personnel: Employees trained and certified in lockout/tagout procedures
- Affected Personnel: Employees who operate equipment but do not perform lockout/tagout
- Energy Sources: Electrical, hydraulic, pneumatic, mechanical, thermal
Prerequisites:
- LOTO certification current (annual retraining required)
- Personal lockout device and tag
- Energy verification equipment (multimeter, pressure gauge)
Procedure:
-
Preparation
- Notify production supervisor and all affected operators that Press Brake 12 will be locked out
- Identify all energy sources for Press Brake 12:
- Primary: 480V electrical (Circuit Breaker 12B in Panel 4)
- Secondary: Hydraulic system (accumulator holds pressure)
- Tertiary: Pneumatic controls (compressed air line)
- Potential: Stored mechanical energy in ram position
- Gather lockout equipment:
- Personal padlock and key
- Danger tag with your name, date, and reason
- Circuit breaker lockout device
- Valve lockout devices
- Multimeter for voltage verification
-
Notify affected employees
- Inform all Press Brake 12 operators that lockout is about to begin
- Verify no one is operating the equipment or has material in process
- Post “Equipment Locked Out - Do Not Operate” sign at operator station
- If during shift change: inform both outgoing and incoming operators
-
Shut down equipment properly
- Allow current operation to complete (do not interrupt mid-cycle)
- Press STOP button at operator control panel
- Verify ram is in full up position (home position)
- Clear all material from work area and die
- If die change is needed: remove die and store safely before proceeding
- Place control selector switch to OFF position
-
Isolate all energy sources
Electrical:
- Go to Electrical Panel 4 (located in northwest corner of building)
- Locate Circuit Breaker 12B (labeled “Press Brake 12 - 480V”)
- Switch breaker to OFF position
- Install circuit breaker lockout device over breaker handle
- Attach your personal padlock to lockout device
- Attach danger tag with your name, date, time, and “Maintenance in Progress”
Hydraulic:
- Locate hydraulic pump shutoff valve (left side of press, near floor)
- Turn valve fully clockwise to closed position
- Install valve lockout device
- Attach your personal padlock to lockout device
- Attach danger tag
Pneumatic:
- Locate air supply shutoff valve (rear of press, blue handle)
- Turn valve fully clockwise to closed position
- Install valve lockout device
- Attach your personal padlock to lockout device
- Attach danger tag
-
Release stored energy
Hydraulic accumulator:
- Locate pressure gauge on accumulator (should show 1200-1500 PSI when charged)
- Open bleed valve slowly (turn counterclockwise 1/4 turn)
- Allow pressure to bleed down - watch gauge decrease to 0 PSI
- This may take 2-3 minutes - do not proceed until gauge shows 0
- Close bleed valve once fully depressurized
Pneumatic system:
- Press air bleed button at control panel to release trapped air
- Listen for hissing sound as air escapes
- Verify pressure gauge shows 0 PSI
Mechanical energy:
- If ram is not in home position, do not attempt to move manually
- Call supervisor for assistance using crane or lifting equipment
-
Verify zero energy state
Critical: Do not skip this step. This is what keeps you alive.
Electrical verification:
- Return to Press Brake 12 operator station
- Use multimeter to test for voltage at motor disconnect
- Test between all phases: L1-L2, L2-L3, L1-L3
- Test each phase to ground: L1-G, L2-G, L3-G
- All readings must show 0 volts
- If any voltage detected: stop, verify lockout is correct, investigate source
Control verification:
- Attempt to start press using control panel (press START button)
- Press should not respond in any way (no lights, sounds, movement)
- Try all control buttons to verify no function
- If any response detected: stop immediately and verify lockout
Hydraulic verification:
- Check pressure gauge: must read 0 PSI
- Feel hydraulic lines for warmth (warm lines indicate pressure)
- All lines should be cool to touch
Pneumatic verification:
- Check air pressure gauge: must read 0 PSI
- Listen for any hissing sounds (indicates leak or trapped air)
-
Perform maintenance or service
- Proceed only after all verification steps confirm zero energy
- Maintain awareness of your surroundings and potential hazards
- Do not remove any lockout devices until work is 100% complete
- If work extends beyond shift: inform next shift, leave lockout in place
- If multiple people working on equipment: each person must apply their own lock
-
Remove lockout/tagout
Before removing lockout:
- Verify all maintenance work is complete
- Verify all tools and equipment are removed from press
- Verify all guards and safety devices are reinstalled and functional
- Verify work area is clear of personnel and materials
- Notify all affected employees that equipment is being restored
Removal sequence (reverse of installation):
- Remove pneumatic valve lockout and restore air supply
- Remove hydraulic valve lockout and restore hydraulic supply
- Allow hydraulic accumulator to charge (watch gauge reach normal pressure)
- Remove electrical lockout and restore power
- Remove all danger tags
- Remove “Equipment Locked Out” sign from operator station
-
Test equipment operation
- Perform complete startup sequence per operating SOP
- Run press through one test cycle with no material
- Verify all functions operate normally
- Check all safety interlocks and emergency stops function correctly
- If any abnormalities: re-lock out equipment and investigate
-
Documentation
- Log lockout/tagout in Press Brake 12 maintenance record:
- Date and time of lockout
- Date and time of lockout removal
- Your name and signature
- Reason for lockout
- Work performed
- Update digital LOTO tracking system
- Notify production supervisor that Press Brake 12 is back in service
Multi-Person Lockout:
If more than one person is working on Press Brake 12:
- Each person must apply their own personal lock to each energy source
- Use group lockout hasp to accommodate multiple locks
- First person to lock out is responsible for energy isolation and verification
- Last person to remove their lock is responsible for restoration verification
- No person may remove another person’s lock under any circumstances
Emergency Lockout Removal:
If a lockout device must be removed in an emergency (employee absent, lost key):
- Only plant manager or safety officer may authorize emergency removal
- Verify through all means that employee who applied lock is not present
- Document emergency removal with photos and written justification
- Inform employee whose lock was removed immediately upon their return
- Complete incident report explaining circumstances
What Makes This SOP Effective:
This safety SOP works because it’s paranoid in the best possible way. It assumes nothing, verifies everything, and builds in redundancy.
Notice the verification step after lockout - this is where most accidents happen. People assume the lockout worked and skip verification. This SOP makes verification a mandatory, detailed step that can’t be skipped.
The multi-person lockout section is critical for complex maintenance where multiple trades (electricians, mechanics, etc.) work on the same equipment.
How to Create Manufacturing SOPs (That People Actually Use)
I’ve seen too many manufacturing SOPs that exist only on paper. Beautiful binders sitting in the supervisor’s office that nobody ever opens. Here’s how to create SOPs that actually get used on the production floor.
Start with the People Who Do the Work
Don’t sit in an office and write SOPs based on how you think things should work. Go to the floor and watch your best operators.
Your most experienced people have the tribal knowledge that makes processes work. They know the shortcuts, the common mistakes, the things that seem obvious when you’re doing it but aren’t when you’re learning. Deloitte and the Manufacturing Institute find that roughly 65 percent of manufacturers name attracting and retaining talent their primary business challenge - which means the knowledge inside those experienced heads is walking out the door faster than it’s being replaced.
When I create SOPs now, I literally stand next to the operator or technician and watch them work. I ask questions:
- “Why did you check that first?”
- “What happens if you skip this step?”
- “What mistakes do new people make?”
That conversation captures the real process, not the theoretical one.
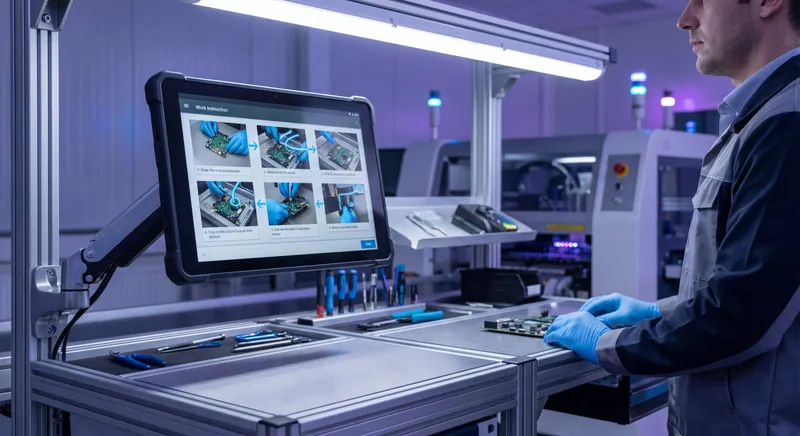
Make It Visual
Manufacturing SOPs need screenshots or photos for every step that involves physical tasks or equipment interfaces.
Think about it: if you’re trying to locate the hydraulic shutoff valve on a press brake, a paragraph describing its location is useless. A photo with a big red arrow pointing to it? That’s useful.
Visual guides also serve as confirmation. The operator can look at the photo and know they’re in the right place, touching the right component.
This is why I built Glitter AI. Taking photos and screenshots manually for SOPs is tedious. Glitter captures visuals automatically while you work, which makes creating visual SOPs much faster.
Be Specific About Measurements and Criteria
Vague SOPs create inconsistent results.
Don’t write: “Ensure proper tension on the belt.” Write: “Belt should deflect 1/2 inch when pressed with thumb at center point between pulleys.”
Don’t write: “Inspect for defects.” Write: “Check for scratches longer than 5mm, cracks of any size, discoloration covering more than 10% of surface area. Reference defect classification guide for borderline cases.”
Specificity eliminates judgment calls and ensures everyone applies the same standards.
Include Decision Points and Troubleshooting
Real work isn’t linear. Things go wrong. Equipment acts weird. Materials are out of spec.
Your SOP needs to tell people what to do when things don’t go according to plan.
Include:
- If/then statements: “If pressure gauge reads below 100 PSI, check for leaks in air lines before proceeding.”
- Escalation triggers: “If defect rate exceeds 2% in any hour, stop production and notify quality manager.”
- Common problems: “If conveyor motor won’t start, check emergency stops are reset and safety interlock is engaged.”
The SOP that only describes the happy path isn’t complete.
Test It With Someone New
This step is critical and almost always skipped.
Find someone who has never done this task. Give them the SOP. Watch them try to follow it. Don’t help unless they’re completely stuck.
You’ll immediately discover:
- Steps you forgot to include
- Instructions that seemed clear to you but aren’t to them
- Technical terms they don’t understand
- Photos that don’t show enough detail
Fix everything they struggled with. Then test it again with someone else.
An SOP that hasn’t been tested by a novice is an SOP that will fail when you actually need it.
Keep It as Short as Possible
Every extra word is a word that won’t get read.
I’ve seen manufacturing SOPs run 30+ pages for relatively simple procedures. Nobody reads that. They skim it, miss critical steps, and make mistakes.
Ruthlessly cut anything that doesn’t directly help someone complete the task safely and correctly. Save background information, history, and explanations for training materials.
Your SOP should be as short as possible while still being complete.
Make Them Easy to Find and Access
The best SOP in the world is useless if nobody can find it.
Manufacturing SOPs need to be:
- Accessible on the floor: Digital tablets at workstations, laminated paper versions, QR codes that pull up the relevant SOP
- Searchable: By equipment name, by procedure type, by part number
- Version controlled: Everyone needs to see the current version, not something from three updates ago
- Offline capable: Your production floor probably has spotty wifi
I see a lot of companies try to solve this with SharePoint or network drives. That rarely works. People can’t navigate complex folder structures when they’re standing at a machine with a problem.
The simpler you make access, the more your SOPs will actually get used.
Just perform the task once. Glitter AI captures everything and creates the SOP automatically.
Common Manufacturing SOP Mistakes
Let me save you from the mistakes I’ve seen (and made):
Writing SOPs for Compliance, Not for Use
I get it. You need SOPs to pass audits, satisfy regulators, and check boxes for certifications.
But if your SOPs are written in legalese that nobody can understand, they won’t get used. And if they don’t get used, they’re not actually helping your compliance - they’re just giving you a false sense of security.
Write for the operator, not the auditor. If the auditor needs more formal language, create a separate compliance document. But your floor-level SOPs need to be written in plain language that your team actually uses.
Never Updating Them
Processes change. Equipment gets upgraded. Better methods are discovered. If your SOPs don’t change with them, they become dangerous.
Outdated SOPs are worse than no SOPs because people follow them, assuming they’re correct, and then make mistakes.
Assign an owner to each SOP. Set a review schedule - at minimum once per year, more frequently for critical safety or quality procedures. And make it easy for operators to flag SOPs that are wrong or unclear.
Making Them Too Generic
“Operate the machine safely” isn’t an SOP. It’s a suggestion.
Manufacturing SOPs need to be specific to your exact equipment, your exact materials, your exact environment.
If you have three different press brakes, they probably need three different SOPs even if they’re similar. The lockout points might be different. The controls might be laid out differently. The tonnage ratings and safety considerations might vary.
Generic SOPs create confusion and mistakes.
Skipping the Visual Element
I cannot stress this enough: manufacturing SOPs without photos or screenshots are 10x harder to follow.
People are visual learners, especially when dealing with physical equipment and spatial relationships. A photo instantly communicates what would take multiple paragraphs to describe.
Plus, visuals transcend language barriers. If you have a multilingual workforce, photos help ensure everyone understands the procedure regardless of reading level.
Not Testing Them in Real Conditions
An SOP written at a desk won’t survive contact with the production floor.
Test your SOPs in the actual environment where they’ll be used:
- Can the operator read it with the lighting on the floor?
- Can they access it while wearing gloves?
- Can they follow it with the noise level in the facility?
- Does it fit on a single page or tablet screen, or do they have to flip back and forth constantly?
SOPs that look great in a conference room might be completely impractical at the point of use.
Manufacturing SOP Templates
Here’s a basic template structure you can adapt for different types of manufacturing SOPs:
General Manufacturing SOP Template
Title: [Specific, descriptive title]
Equipment/Process: [What this SOP covers]
Department/Area: [Where this applies]
Revision: [Version number] | Date: [Last updated]

PURPOSE
[One or two sentences explaining why this SOP exists]

SCOPE
[What's included, what's excluded, who this applies to]

SAFETY REQUIREMENTS
[Critical safety considerations, PPE requirements, hazards]

PREREQUISITES
[What needs to be in place before starting - training, access, materials]

MATERIALS/TOOLS NEEDED
• [List each item needed to complete the procedure]

PROCEDURE

1. [First major step]
   - [Sub-step with specific details]
   - [Sub-step with measurements, criteria, or specifications]
   - Verification: [How to confirm this step was done correctly]

2. [Second major step]
   - [Sub-step]
   - [Sub-step]
   - Verification: [Confirmation method]

[Continue for each step...]

QUALITY CHECKPOINTS
• [What to measure, inspect, or verify]
• [Acceptance criteria]
• [What to do if quality check fails]

TROUBLESHOOTING
Issue: [Common problem]
Solution: [How to fix it or who to contact]

Issue: [Another common problem]
Solution: [How to fix it or who to contact]

DOCUMENTATION REQUIRED
• [What records to create]
• [Where to log information]
• [What to report to supervisor]

REVISION HISTORY
| Version | Date | Author | Changes |
|---------|------|--------|---------|
| 1.0     | [Date] | [Name] | Initial version |

APPROVAL
Prepared by: _________________ Date: _______
Reviewed by: _________________ Date: _______
Approved by: _________________ Date: _______
This template works for most manufacturing SOPs. Adapt it based on your specific needs - add sections for regulatory requirements if you’re in pharma, include more detailed safety protocols for high-risk procedures, etc.
Maintaining Manufacturing SOPs Over Time
Creating SOPs is the first step. Keeping them current and useful is the ongoing challenge.
Assign Ownership
Every SOP needs a single person responsible for it. Not a committee. Not a department. One person who owns it.
That owner is responsible for:
- Reviewing the SOP on schedule
- Updating it when processes change
- Collecting feedback from users
- Getting updates approved and distributed
Without ownership, SOPs decay into irrelevance.
Set Review Schedules
Different SOPs need different review frequencies:
- Safety-critical SOPs: Review every 6 months
- Quality control SOPs: Review annually or when process changes
- Equipment maintenance SOPs: Review annually or when equipment is updated
- General operating procedures: Review every 1-2 years
Calendar these reviews. Make them part of someone’s regular responsibilities, not something that happens “when we get around to it.”
Make Feedback Easy
Your operators and technicians know when an SOP is wrong or confusing. But they need an easy way to tell you.
Create a simple feedback mechanism:
- QR code on printed SOPs that links to a feedback form
- Button in digital SOP system: “Something wrong with this SOP?”
- Regular floor walks where supervisors ask: “Are the SOPs working for you?”
When someone submits feedback, acknowledge it quickly and either fix the SOP or explain why it’s correct as written.
Version Control Matters
I’ve seen production lines running on SOP version 2.3 while the quality team is auditing against version 3.1. That’s a recipe for failed audits and confused operators.
Your version control system needs to:
- Show version number and date on every page
- Make it obvious which version is current
- Archive old versions (for compliance and troubleshooting)
- Push updates to all locations simultaneously
If you’re using paper SOPs, include a revision date on every page and do a full recall-and-replace when updates happen. If you’re using digital SOPs, ensure you’re not accidentally serving cached old versions.
How Glitter AI Helps With Manufacturing SOPs
Look, I built Glitter AI specifically because creating visual documentation is painful.
When you’re documenting a manufacturing procedure, you need to:
- Take a photo of every step
- Annotate the photos to highlight critical components
- Write clear instructions
- Format everything into a usable document
- Test it
- Revise it based on feedback
- Keep it updated when things change
That’s hours of work. Hours that most manufacturing teams don’t have.
Glitter AI changes the equation. Here’s how it works for manufacturing SOPs:
- Perform the task once while Glitter AI records
- Speak naturally as you work - “Now I’m checking the pressure gauge, it should read between 100 and 120 PSI”
- Glitter AI captures everything - screenshots of every step, your voice narration, the sequence
- AI generates the SOP - formatted, structured, ready to review
- Edit if needed - but most of the work is already done
The visual element happens automatically. You don’t have to remember to take photos. You don’t have to stop what you’re doing to annotate screenshots. You just do the task while explaining it, like you’re training someone, and Glitter creates the SOP.
For manufacturing teams, this means you can actually create SOPs for all those procedures that currently exist only in your experienced operators’ heads. The barrier to documentation drops from hours to minutes.
And when processes change? Record the new version once, generate an updated SOP, push it to the team. Keeping SOPs current becomes realistic instead of theoretical.
FAQs About Manufacturing SOPs
Frequently Asked Questions
How long should a manufacturing SOP be?
As short as possible while still being complete. Most effective manufacturing SOPs are 2-4 pages. If your SOP is running longer than 6 pages, consider whether you're documenting multiple procedures that should be separate SOPs. The goal is clarity, not comprehensiveness. Every extra word is a word that won't get read on a busy production floor.
Who should write manufacturing SOPs?
SOPs should be written by or with heavy input from the people who actually perform the tasks - your experienced operators, technicians, and quality inspectors. They know the real process, including the tricks and common pitfalls. A supervisor or technical writer can help with formatting and clarity, but the content must come from people with hands-on experience. SOPs written by people who don't do the work are usually inaccurate and incomplete.
How often should manufacturing SOPs be updated?
At minimum, review all SOPs annually. Safety-critical SOPs should be reviewed every 6 months. Beyond the scheduled reviews, update SOPs immediately when: the process changes, equipment is modified or replaced, regulations change, or you discover errors or gaps in the current SOP. The worst thing you can do is let SOPs become outdated while everyone continues following them, assuming they're correct.
What's the difference between an SOP and a work instruction in manufacturing?
SOPs are broader and cover an entire process or procedure - they explain what to do, in what order, and why. Work instructions are more granular and focus on exactly how to perform a specific task within that process. Think of it this way: the SOP might be 'Quality Control Inspection Process' while work instructions would be 'How to Measure Part Dimension X Using Digital Calipers.' Many organizations use these terms interchangeably, which is fine as long as everyone understands what's meant.
Do manufacturing SOPs need to include photos and screenshots?
Yes, absolutely. Visual elements are critical for manufacturing SOPs. Photos showing equipment locations, control panel layouts, proper techniques, and quality acceptance criteria make SOPs dramatically easier to follow. They also help overcome language barriers if you have a multilingual workforce. The only exception might be extremely simple procedures, but even then, a photo usually helps. If you're writing an SOP without visuals, you're making it 10x harder for people to follow.
How do you ensure manufacturing SOPs actually get followed?
Make them easy to access (digital tablets at workstations, laminated copies, QR codes), keep them short and visual, write them in plain language your team actually uses, test them with new employees to ensure they're clear, update them immediately when they're wrong, and make following SOPs part of your quality culture - not just a compliance checkbox. The biggest factor is whether SOPs are actually helpful to the person doing the work. If they make the job easier and help people do it right, they'll get used. If they're bureaucratic obstacles, they'll get ignored no matter how many signs you post about following procedures.
The manufacturing facility that taught me about SOPs the hard way eventually got their documentation in order. It took about six months of focused effort, but they documented every critical process on their three main production lines.
The last time I visited, their downtime was down 40%. Not because they fixed equipment issues or hired better operators. Because when something went wrong, people knew exactly what to do instead of standing around waiting for the one person who knew.
That’s the real value of manufacturing SOPs. Not compliance. Not checking boxes. Having a documented system that keeps production running even when your best people aren’t available.
For a deeper walkthrough of how to structure and write these documents, see our manufacturing SOP guide.
If you’re ready to stop losing time to undocumented processes, try Glitter AI. Create your first manufacturing SOP in the time it would normally take to gather screenshots.
Because the best SOP is the one that actually exists.