Read summarized version with
There’s a scene I can’t shake from years ago: watching a new assembly line worker wrestle with a 15-page text manual.
She kept rereading the same paragraph, glancing up at the machinery, then back at the page. Her hands hovered over the parts like she wasn’t sure which one to grab. She’d start a step, second-guess herself, flip back to double-check, then try again.
Twenty minutes for a task that should take five.
Then I handed her the visual work instruction. One page. Photos of each step. She finished the same task in six minutes. No hesitation, no flipping pages. Just clear execution.
That’s when it hit me: we’ve been overcomplicating workplace training for years.
I’m Yuval Karmi, founder of Glitter AI. After running two startups and watching teams bang their heads against dense documentation, I’ve come to believe that visual work instructions aren’t just prettier formatting. They’re a fundamentally different approach to transferring knowledge. Our brains process images significantly faster than text. So why keep fighting our own biology?
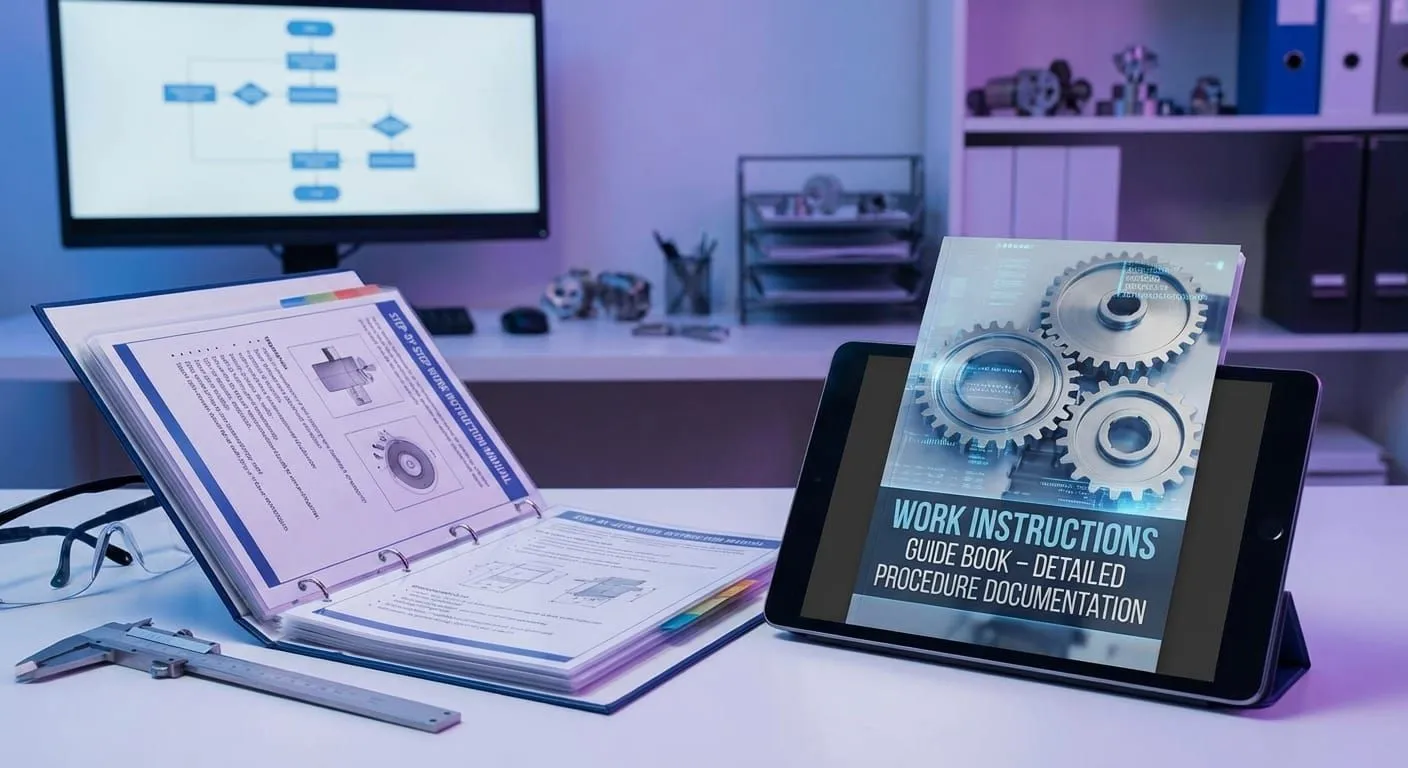
This guide walks through everything you need to build visual work instructions that actually get used. Whether you’re documenting manufacturing processes, onboarding new hires, or standardizing procedures across distributed teams, I’ll share how to create visual guides that cut errors, speed up training, and work regardless of what language your team speaks.
What Are Visual Work Instructions and Why They Work
Visual work instructions are step-by-step guides that rely on images, videos, diagrams, and minimal text to show workers how to complete specific tasks.
But here’s what they really represent: documentation that matches how humans actually learn. We’re visual creatures by nature. When you tell someone how to do something verbally, they tend to retain about 10%. Show them with visuals, and retention climbs to 65%.
At my first startup, we tried standardizing customer support with detailed written procedures. Pages upon pages of carefully worded instructions covering every scenario imaginable. We were proud of how comprehensive it was.
Nobody used it.
People would ask questions that were answered verbatim in the docs. I’d point them to the section, and they’d shrug: “I didn’t notice that part.” The documentation existed, but it wasn’t actually working.
So we rebuilt everything with screenshots, annotated images, and short video clips. Suddenly people were actually using the documentation. Support quality improved. New hires got up to speed faster. The difference was night and day.
The Science Behind Visual Learning
Our brains are wired for visual processing. Roughly half of your brain participates in visual processing in some capacity. When you see an image, your brain can process it in as little as 13 milliseconds.
Reading works differently. Text demands sequential processing. You read one word, then the next, building meaning in a linear fashion. It’s slower and takes more mental effort.
Visual work instructions leverage this biological reality. Instead of making workers translate written words into mental pictures and then into physical actions, you just show them what to do. One cognitive step rather than three.
Research published in the Journal of Operations Management found that interactive and animated work instructions outperform traditional paper-based methods by a significant margin. Organizations using visual work instructions commonly report error reductions of 30% or higher.
How Visual Work Instructions Differ from Traditional Documentation
Traditional standard operating procedures and instruction manuals typically take a text-first approach. You’ll find paragraphs explaining what to do, perhaps with a few supporting images thrown in.
Visual work instructions flip this on its head:
Images do the heavy lifting. Text exists only to clarify what the visuals already show. If someone could theoretically complete the task using just the images, you’ve nailed the balance.
Each step shows the action rather than describing it. Instead of “Insert the cable into port A,” you show a photo of hands inserting the cable, with an arrow pointing at port A.
They’re built for real-time use. Workers can glance at a visual instruction, grasp what to do in seconds, and keep working without breaking stride. Text-heavy manuals require stopping to read and interpret.
Updates happen more quickly. When a process changes, swapping a photo or video clip is often faster than rewriting paragraphs.
Language barriers shrink considerably. A clear photograph works the same in any language. Some text annotation helps, but visual work instructions are far more accessible to multilingual workforces than text-heavy alternatives.
The Business Impact of Visual Work Instructions
Let me share some numbers worth paying attention to.
Roughly 23% of unplanned manufacturing downtime traces back to human error. When you provide better training through visual work instructions, you directly lower the odds of mistakes that cause expensive downtime.
Companies adopting visual work instructions typically see:
Training time cut by 30-50%. New employees reach competency faster when they can see exactly what experienced workers do, rather than interpreting written descriptions.
Error rates drop 25-40%. When people can clearly see what “correct” looks like, they’re far less likely to mess up. Visual comparisons showing good vs. defective work prove especially powerful.
Knowledge transfer speeds up. The manufacturing skills gap in the US could leave 2.1 million jobs unfilled by 2030, potentially costing the economy $1 trillion. As experienced workers retire, visual work instructions capture their expertise in a format that transfers easily to the next generation.
Safety incidents go down. When safety-critical steps are highlighted visually rather than buried in paragraphs, workers actually notice and follow them.
At my company, we reduced new employee training from three weeks to one week by switching from text-heavy manuals to visual guides. That’s a 67% reduction in training time, meaning two fewer weeks paying someone who wasn’t yet productive.
Key Takeaways
- Visual work instructions use images, videos, and diagrams as the primary teaching medium, with text in a supporting role
- Our brains process visuals significantly faster than text, and retention jumps from 10% to 65% when information is presented visually
- Organizations using visual work instructions see training time reduced by 30-50% and error rates fall by 25-40%
- About 23% of manufacturing downtime stems from human error that visual instructions help prevent
- Visual formats transcend language barriers and accelerate knowledge transfer from experienced workers
- A work instruction is the task-level document that defines the exact steps, tools, visuals, and checks behind each visual guide
Types of Visual Work Instructions
Not all visual work instructions look alike. The format you pick depends on what you’re documenting, your work environment, and how people will access the instructions.
I learned this lesson when we tried using the same format for everything. We created beautiful photo-based instructions for all our processes. They worked wonderfully for assembly tasks. Terribly for software workflows. And they were basically useless for processes involving motion and timing.
Here’s what I wish I’d understood from the start: match your visual format to the task you’re documenting.
Screenshots and Annotated Images
Screenshots with annotations built in an annotation tool work perfectly for software processes, digital workflows, and any task performed on a computer.
You capture what users see on their screen, then layer in callouts, arrows, numbered steps, and text labels to mark up each image so it walks them through the process. Tools like Glitter AI can automatically capture these screenshots and add annotations while you work, and for motion-heavy steps a short video tutorial often communicates faster than stills alone.
Use screenshots when:
- Documenting software applications or web-based tools
- Training people on ERP, CRM, or other business systems
- Creating guides for digital processes
- Teaching data entry procedures
- Explaining online workflows
The big advantage is precision. You can point out exactly which button to click, which field to fill, which menu option to select. No room for confusion.
Photographs and Physical Step-by-Step Guides
Photo sequences showing each step of a physical process form the backbone of manufacturing and assembly documentation.
Each photo captures one distinct step: hands positioning a part, a tool being used properly, a gauge reading, a completed assembly. Annotations highlight what matters: which way a part should face, where hands should grip, what a correct result looks like.
Use photographs when:
- Documenting assembly or manufacturing processes
- Creating quality control inspection guides
- Teaching equipment setup or changeover procedures
- Training workers on maintenance tasks
- Showing proper tool usage
- Demonstrating safety procedures
Consistency matters here. Use the same angle, lighting, and distance for similar types of steps. This familiarity helps users process information faster.
I’ve seen companies dramatically improve their photo-based instructions with one simple change: showing hands in the photos. Seeing where someone’s hands should be positioned often communicates more than any written description could.
Video-Based Instructions
Short video clips shine when documenting processes that involve motion, timing, or technique that’s hard to capture in still images.
Video lets you demonstrate the speed of an action, the rhythm of a process, how something should sound when done right, and complex hand movements or techniques.
Use video when:
- Teaching procedures where timing matters
- Demonstrating complex motions or techniques
- Showing how equipment should sound or behave normally
- Training on processes with continuous movement
- Creating demonstrations of best practices
The tradeoff? Video takes longer to watch than scanning an image, needs more storage space, and can be trickier to update. That’s why I generally recommend hybrid approaches.
For more on creating effective training videos, check out my post on making training videos that land.
GIFs and Short Animations
Animated GIFs occupy the sweet spot between static images and full video. They show movement without requiring video players, load faster than video files, and loop automatically to reinforce key actions.
Create GIFs from short video clips to show:
- Repetitive motions or techniques
- Quick 2-3 second actions that need emphasis
- How parts should move or fit together
- Simple cause-and-effect relationships
- Actions that benefit from repeated viewing
GIFs work particularly well on mobile devices and in settings where workers need quick reference without playing full videos.
Diagrams and Technical Illustrations
Diagrams, flowcharts, and technical illustrations clarify concepts that photographs struggle to capture: internal components, system architecture, process flows, or spatial relationships.
Use diagrams when:
- Showing how systems or processes connect
- Illustrating decision trees or logic flows
- Depicting internal mechanisms or hidden components
- Explaining cause-and-effect relationships
- Mapping out complex processes at a high level
Diagrams work best alongside photographs. Use a diagram to show the big picture, then photos to show specific steps.
Interactive and 3D Visual Instructions
Interactive instructions let users click through steps at their own pace, zoom into details, rotate 3D models, or access additional information on demand.
Augmented reality (AR) instructions overlay digital information directly onto the physical world. Workers wearing AR glasses or using tablets see step-by-step guidance superimposed on the actual equipment they’re working on.
These advanced formats offer some compelling advantages:
- Self-paced learning that adapts to user needs
- Ability to reveal internal components or hidden parts
- Real-time guidance positioned exactly where workers need it
- Rich context without overwhelming users upfront
The technology is still maturing and requires more investment, but early adopters in aerospace, automotive, and complex machinery assembly are seeing strong results.
Hybrid Approaches: Combining Multiple Formats
Here’s what works best from my experience: use the simplest format that effectively communicates each step.
Most comprehensive visual work instructions blend multiple formats:
- Photos for most steps (quick to create, easy to understand)
- Short video clips for tricky techniques (showing motion or timing)
- Diagrams to introduce complex assemblies (providing spatial context)
- Comparison images at quality checkpoints (showing correct vs. incorrect results)
- GIFs for repeated motions (reinforcing proper technique)
Don’t force everything into one format. Let the task guide your choice.
Key Takeaways
- Screenshots with annotations work best for software and digital processes
- Photo sequences suit manufacturing, assembly, and physical tasks
- Video excels at showing motion, timing, and technique but takes longer to consume
- GIFs offer video benefits in a lightweight, looping format ideal for mobile
- Diagrams clarify system architecture, flows, and relationships that photos can’t capture
- Most effective visual work instructions combine multiple formats, using the simplest option that works for each step
When to Use Visual vs Text-Based Instructions
Here’s a question I hear constantly: “Should I use visual instructions or text instructions?”
My honest answer: It depends on the task, your audience, and how the instructions will be used.
But I’ll level with you. Visual instructions work better for most workplace tasks. The real question isn’t “visual or text?” It’s “how much text should support my visuals?”
Let me break it down.
When Visual Instructions Are the Clear Winner
Visual instructions dramatically outperform text-only instructions in certain situations.
Physical or spatial tasks. If someone needs to assemble something, position parts correctly, or understand how components fit together, visuals are essential. Think IKEA furniture instructions: purely visual, understood worldwide, proven effective for decades.
Processes with decision points based on appearance. Quality control, troubleshooting, inspection procedures. These all require workers to recognize visual cues. A photo showing “acceptable” vs. “defective” beats a paragraph describing the difference every time.
Tasks performed by multilingual teams. If your workforce speaks multiple languages, visual instructions minimize translation costs and eliminate language barriers. A clear photograph works identically for everyone.
High-turnover environments. Retail, food service, warehousing, seasonal manufacturing. Industries with frequent new hires benefit enormously from visual instructions. New workers can start contributing faster without reading through dense materials.
Environments where stopping to read isn’t practical. On a noisy factory floor or in a busy kitchen, workers can glance at a visual instruction and know what to do in seconds. Reading paragraphs of text isn’t realistic in these settings.
Research from TechSmith found that 67% of people complete tasks more successfully when instructions include visuals like screenshots or videos. That’s not a small edge. That’s the difference between success and failure for two-thirds of users.
When Text Still Has Its Place
Purely visual instructions aren’t always the answer.
Complex conceptual information. If you’re explaining the “why” behind a procedure, discussing principles, or providing context, text often conveys these ideas more efficiently than images.
Policies and compliance requirements. Legal language, safety warnings, regulatory compliance. These often need specific wording. Visuals can support, but text carries the official message.
Processes with many conditional paths. If a procedure has extensive “if-then” logic with numerous branches and exceptions, text-based flowcharts or decision trees might work better than trying to visualize every scenario.
Simple, straightforward tasks. Sometimes a single sentence is clearer and faster than creating a visual. “Submit the form by Friday” doesn’t need a photo.
The Best Approach: Visual-First with Supporting Text
Here’s what I’ve found works best for most workplace documentation: visual-first instructions with concise supporting text.
This means:
Visuals carry the primary load. The image or video shows what to do. Someone should be able to complete the task using only the visuals if the text vanished.
Text clarifies and specifies. Add brief text to remove ambiguity, provide measurements, highlight safety warnings, or explain what the visual depicts.
Keep text action-oriented and minimal. Start each step with a verb. “Insert cable into port A” rather than “The next step in the procedure is to take the cable and insert it into the port labeled A.”
Use text to supply context visuals can’t. Why this step matters, what happens if you skip it, how to verify you did it correctly.
Think of text as the supporting actor, not the lead. Visuals show, text clarifies.
Audience Considerations: Adapting to Different Users
Different users need different levels of detail.
Experienced workers prefer quick visual references. They know the process; they just need reminders of the sequence or occasional clarification on tricky steps. For them, create condensed visual guides like a single-page tip sheet with just the key steps and minimal text.
New employees need more hand-holding. They benefit from detailed visuals with more explanatory text, background context, and troubleshooting tips. Consider comprehensive versions with both visuals and more extensive supporting text.
Experts vs. occasional users. People who perform a task daily can work from minimal visual cues. People who do it quarterly need more detailed guidance each time.
Consider creating layered documentation:
- Quick reference for experts (key visuals only)
- Standard instructions for regular users (visuals with brief text)
- Detailed training guides for new hires (visuals with extensive context and explanations)
All three can share the same core visuals; you just vary the amount of supporting information.
Testing What Works for Your Situation
Don’t guess. Test.
Draft a visual instruction and give it to someone who knows the task well. Watch them use it without helping. Note where they pause, look confused, or ask questions.
Then give it to someone who’s never done the task before. That’s where you’ll find every gap, every assumption you made, every spot needing more clarity.
Based on their feedback, adjust your balance of visual vs. text content. Maybe certain sections need more text. Maybe you’re over-explaining elsewhere. Let actual users guide you.
Key Takeaways
- Visual instructions outperform text for physical tasks, multilingual teams, high-turnover environments, and situations where stopping to read isn’t practical
- 67% of people complete tasks more successfully when instructions include visuals
- Text remains valuable for conceptual information, compliance requirements, and complex conditional logic
- The most effective approach is visual-first with concise, action-oriented supporting text, a tradeoff explored in depth in our breakdown of visual SOPs versus text-only documentation
- Adjust detail level to your audience: experts need minimal cues, new hires need comprehensive guidance
- Test with real users to find the right balance of visual vs. text for your specific situation
Creating Effective Visual Work Instructions
Creating visual work instructions isn’t rocket science, but there’s definitely a right way and a wrong way to approach it.
I’ve made hundreds of visual guides over the years. My early attempts were rough: inconsistent formatting, unclear photos, still too much text. But through trial and error, I figured out what actually works.
Here’s the process I recommend.
Step 1: Choose the Right Process to Document
Start with tasks that will give you the biggest return on your documentation investment.
Prioritize processes that:
- Are performed frequently by multiple people
- Have historically high error rates
- Are difficult or time-consuming to train
- Involve safety risks if done incorrectly
- Require strict consistency (quality control, assembly, compliance procedures)
- Are currently undocumented or poorly documented
Don’t tackle your most complex process first. Pick something manageable for your first visual instruction. You can handle the complicated stuff once you’ve got the workflow down.
At my company, we started with our customer onboarding process. Performed weekly, somewhat complex, but not impossibly so. It was a good learning ground. By the time we got to our technical deployment procedures, we knew what we were doing.
Step 2: Map Out Every Step Before Creating Visuals
Before you pick up a camera, you need to understand the complete process.
Actually perform the task yourself while taking notes. Don’t just think through it theoretically. Do it. You’ll uncover steps you didn’t realize existed, decision points you’d forgotten about, and details that actually matter.
Involve the people who do this work regularly. They know things you don’t. They’ve developed techniques and shortcuts through experience. They know where mistakes commonly happen. Get their input before you start documenting.
Break the process into clear, discrete steps. Each step should represent one action or decision. If you find yourself writing “and then” multiple times in a single step, break it up.
Identify decision points and conditional paths. Where does the process branch based on different conditions? These need special attention in your documentation.
Cut unnecessary details. Visual work instructions should be as simple as possible while remaining complete. If a detail doesn’t affect the outcome, leave it out.
Step 3: Capture High-Quality Visuals
You don’t need professional photography gear. A modern smartphone works fine for most visual work instructions.
What matters more than equipment:
Good lighting. Make sure workers can actually see what you’re showing. Natural light or bright overhead lighting works best. Avoid shadows that hide important details.
Consistent angles and distances. If you’re photographing a workstation, maintain the same perspective throughout. Switching angles between steps is disorienting.
Focus on relevant details. Get close enough that important features are clearly visible. But not so close you lose spatial context.
Show hands when helpful. Seeing where someone’s hands should be positioned often clarifies more than text ever could. Include hands in your photos when it helps.
Take multiple shots of each step. You’ll want options later. Better to have too many photos than to realize you’re missing a critical angle.
Maintain consistent background and setup. Use the same work surface, lighting, and surrounding environment for all photos in a sequence. Consistency helps users focus on what’s changing rather than getting distracted by environmental differences.
For software processes, screen recording tools or automated screenshot capture (like what Glitter AI provides) make this dramatically easier. You perform the task while recording, and the tool captures screenshots automatically.
Step 4: Add Clear Annotations and Visual Cues
Raw photos rarely tell the whole story. You need visual elements that direct attention to what matters.
Arrows and callouts to highlight specific components, parts, or areas of focus. Make them bold enough to see clearly but not so large they cover the image.
Text labels to identify parts, tools, or components. Keep labels short: one or two words maximum.
Numbered sequences when multiple things happen within one step or when showing order of operations.
Color coding for different types of information. Many companies use red for warnings/cautions, green for confirmations/success states, yellow for important notes. Whatever system you pick, stick with it.
Zoom-in detail views for small or intricate parts. Show overall context in the main image, then include an inset with a close-up of the critical detail.
Warning symbols for safety-critical information. These should stand out unmistakably. Safety information can’t be subtle.
Comparison images showing correct vs. incorrect execution, acceptable vs. defective results, or before vs. after states.
The goal is eliminating ambiguity. If someone could look at your annotated image and wonder “which part?” or “where exactly?”, your annotations need work.
Step 5: Write Concise Supporting Text
Your visuals should do most of the communication, but strategic text makes them clearer.
Start each step with an action verb. “Insert,” “Tighten,” “Check,” “Align,” “Remove.” This immediately tells users what they’re doing.
Be specific with measurements and specifications. “Tighten to 15 Nm” rather than “Tighten securely.” “Wait 30 seconds” rather than “Wait briefly.”
Include expected outcomes when helpful. “You should hear a click” or “The indicator light turns green” tells people whether they did it correctly.
Highlight critical warnings explicitly. “Warning: Failure to disconnect power before maintenance can result in electric shock.” Safety information must be clear and direct.
Keep it minimal. Aim for one sentence per step, two at most. If you need more, consider whether you’ve broken down the steps enough or if you’re including unnecessary detail.
Avoid jargon unless your audience knows it. If technical terms are unavoidable, define them the first time or include a glossary.
Step 6: Test with Real Users
This is the step most people skip. Don’t.
First, test with someone experienced. Give your draft instructions to a worker who knows the task well. Watch them follow along without offering help. Note where they pause, look confused, or deviate from your instructions.
Then test with a complete beginner. This is even more valuable. They’ll find every ambiguity, every missing detail, every assumption you made without realizing it.
Observe, don’t assist. Fight the urge to jump in and explain. Just watch and take notes. Their confusion is data showing you where your instructions need improvement.
Ask specific questions afterward:
- Which steps were unclear?
- Where did you feel uncertain about what to do?
- What information was missing?
- What could be removed without losing clarity?
I always test instructions at least twice: once with an expert, once with a novice. The feedback you get is invaluable and will dramatically improve your final product.
Step 7: Refine, Standardize, and Establish Templates
Based on testing feedback, revise your instructions. Then apply consistent formatting across all your visual work instructions.
Use the same layout for all instructions. This familiarity helps users focus on content instead of figuring out format. If step numbers go on the left in one instruction, they should go on the left in all of them.
Standardize your visual language. Pick one style of arrows, one approach to callouts, one color scheme for different types of information. Document these standards so anyone creating future instructions follows the same patterns.
Create templates that enforce your standards automatically. Most design tools let you build templates with pre-formatted layouts, color schemes, and annotation styles.
Establish a review process. Decide who approves new instructions before release, how often existing instructions get reviewed for accuracy, and who handles updates when processes change.
For more on standardization, my post on standard operating procedures covers this in depth.
Key Takeaways
- Start by documenting frequently performed tasks with high error rates or training difficulty
- Map out the complete process before creating any visuals. Involve people who do the work regularly
- Good lighting, consistent angles, and showing hands in photos matter more than expensive equipment
- Add annotations that eliminate ambiguity: arrows, labels, numbered sequences, and comparison images
- Keep supporting text minimal, action-oriented, and specific with measurements
- Test with both experienced workers and complete beginners before finalizing
- Standardize formatting and create templates to maintain consistency across all instructions
Visual Formatting and Accessibility Best Practices
Creating visual work instructions isn’t just about making them look good. It’s about making them work for everyone who needs to use them.
I learned this the hard way when we created beautiful visual instructions for a manufacturing client, only to discover that several workers with color vision deficiency couldn’t distinguish our red warning highlights from the regular content. We had to redo everything.
Here’s what I wish I’d known about formatting and accessibility from the start.
Typography and Text Formatting
Even though visual instructions minimize text, the text you include needs to be highly readable.
Font selection matters. Use clean, sans-serif fonts like Arial, Helvetica, or Roboto. They’re easier to read than decorative or serif fonts, especially at smaller sizes or from a distance.
Size appropriately for the medium. For printed instructions posted at workstations, use minimum 12-14 point font for body text, larger for headings. For digital displays on tablets, adjust based on typical viewing distance.
Maintain high contrast. Black text on white background (or white on black) provides maximum readability. Aim for at least 4.5:1 contrast ratio for normal text, 3:1 for large text.
Use text formatting strategically. Bold for emphasis, but don’t overdo it. When everything is bold, nothing stands out. Avoid relying on color alone to convey meaning.
Left-align text in most cases. Centered text works for headings, but body text is easier to scan when left-aligned. Skip justified text; the uneven spacing makes it harder to read.
Color and Visual Contrast
Color makes visual instructions more effective, but it needs thoughtful application.
Establish a consistent color system. Many organizations use:
- Red for warnings, hazards, or stop conditions
- Yellow/amber for cautions or important notes
- Green for confirmations or go conditions
- Blue for informational callouts
Whatever system you choose, document it and apply it consistently across all instructions.
Never use color alone to convey information. Always provide a secondary cue: text, icons, patterns, or shapes. This ensures people with color vision deficiency can still understand your instructions.
For example, don’t just highlight a critical wire in red. Highlight it in red AND add an icon AND add a text label. Redundancy ensures accessibility.
Ensure adequate color contrast. Your highlights and annotations need to stand out clearly from the background images. Use tools like WebAIM’s contrast checker to verify your color combinations meet accessibility standards.
Account for color blindness. About 8% of men and 0.5% of women have some form of color vision deficiency. Red-green color blindness is most common. Avoid relying on red vs. green to show differences. Use red vs. blue, or add patterns/icons to differentiate.
Image Quality and Composition
The quality of your visual elements directly affects how well your instructions work.
Resolution and clarity. Images should be sharp and clear enough that users can see relevant details. Blurry or pixelated images undermine the entire point of visual instructions.
Appropriate cropping. Show enough context that users can orient themselves, but crop out distracting elements that don’t contribute to understanding.
Consistent framing. If you’re showing similar types of steps, use similar framing and composition. Consistency helps users process information faster.
White space and breathing room. Don’t crowd your layout. Leave adequate space around images, between steps, and around annotations. White space makes instructions less overwhelming and easier to scan.
Layout and Structure
How you organize visual instructions affects how easily workers can follow them.
Clear visual hierarchy. Make it obvious what the main elements are (the step images), what’s secondary (annotations), and what’s supplementary (additional notes or warnings).
Consistent step progression. If your instructions read left-to-right, top-to-bottom, make that pattern clear and consistent. Don’t make users hunt for the next step.
Numbered steps. Clear, prominent step numbers help users track their progress and make it easy to reference specific steps during training or troubleshooting.
Logical grouping. If a process has distinct phases, group related steps visually. Use spacing, dividers, or section headers to show where one phase ends and another begins.
Page breaks for printed materials. If instructions will be printed, ensure logical breaks between pages. Don’t split a step across pages if you can help it.
Accessibility for Diverse Users
Visual instructions should work for everyone, regardless of physical ability, language, or experience level.
Alternative text for digital formats. Include alt text descriptions for all images in digital instructions. This helps users with screen readers and provides context if images fail to load.
Avoid directional language that doesn’t work across formats. Instead of “see the image above” or “on the right,” use “see Figure 3” or “in the previous step.” Directional references break when content is accessed on different devices or read aloud.
Multilingual considerations. If you serve multilingual teams, design layouts that accommodate text expansion (translations often take 30-50% more space than English). Consider creating versions in different languages with the same core visuals but translated text.
Consider physical limitations. If instructions will be used where workers wear gloves, make interactive elements (if digital) large enough to tap with gloved fingers. If workers need to reference instructions while working, ensure they’re positioned or mounted for easy viewing.
Readability level. Keep text at an 8th-grade reading level or below. Use short sentences, common words, and active voice. This isn’t about talking down to anyone. It’s about making information as accessible as possible.
Mobile and Digital Considerations
More visual work instructions are delivered digitally on tablets or phones rather than printed.
Responsive design. Ensure instructions display properly on different screen sizes. What looks great on a 10-inch tablet might be unreadable on a 5-inch phone.
Touch targets for interactive elements. Make buttons and interactive areas at least 44x44 pixels (Apple’s recommendation) or 48x48 pixels (Google’s). Smaller targets are hard to tap accurately, especially with gloves or in a hurry.
Offline access. Don’t assume workers will always have internet connectivity. Make sure digital instructions can be downloaded and accessed offline.
Load time and file size. High-resolution images look beautiful but can slow things down. Optimize images for web delivery without losing critical detail. Aim for sub-3-second load times.
Testing for Accessibility
Don’t just assume your instructions are accessible. Test them.
View in grayscale. Convert your instructions to grayscale to verify information doesn’t depend solely on color.
Test with actual users who have different abilities. If possible, have people with visual impairments, color blindness, or other accessibility needs test your instructions and provide feedback.
Use accessibility checking tools. Tools like WAVE, aXe, or built-in accessibility checkers in design software can identify common accessibility issues.
Test on multiple devices and screen sizes. If your instructions are digital, view them on phones, tablets, and computers to ensure they work everywhere.
Key Takeaways
- Use clean sans-serif fonts with high contrast (4.5:1 minimum) for maximum readability
- Establish consistent color coding but never rely on color alone; always provide secondary cues like icons or text
- About 8% of men have color vision deficiency. Test instructions in grayscale to ensure they still work
- Maintain adequate white space, clear visual hierarchy, and logical step progression
- Include alternative text for images, avoid directional language, and keep reading level at 8th grade or below
- For digital instructions, ensure responsive design, adequate touch targets (44x44 pixels minimum), and offline access
- Test your instructions with diverse users and accessibility checking tools before finalizing
Tools and Software for Visual Documentation
You’ve got plenty of options for creating visual work instructions, ranging from basic free tools to sophisticated enterprise platforms.
I’ve tried most of them over the years. Here’s what I’ve learned about picking the right tools for your needs.
Basic Tools: Good for Getting Started
If you’re just beginning with visual work instructions or have simple needs, you can start with tools you probably already own.
Smartphone camera for capturing photos. Modern phone cameras are surprisingly capable. The iPhone and recent Android flagships produce high-quality images that work fine for most work instructions.
PowerPoint, Google Slides, or Keynote for layout and annotation. These presentation tools aren’t designed for work instructions, but they’re familiar, free (or cheap), and capable of basic annotation. You can add arrows, callouts, text boxes, and shapes to your images.
Screenshot tools built into your operating system for capturing software processes. Mac’s Screenshot tool or Windows Snipping Tool handle basic needs.
Canva for more polished visual design with templates and easier annotation tools than presentation software.
Basic PDF creation for distribution. Once you’ve created your instructions, export them as PDFs for printing or sharing.
This approach works if you’re creating just a few instructions, have more time than budget, and don’t need advanced features like version control or analytics.
The downsides? It’s time-consuming, hard to maintain consistency across many instructions, difficult to update when processes change, and impossible to track who’s using which version.
Specialized Work Instruction Software
Tools designed specifically for creating work instructions offer significant advantages over basic approaches.
Poka is a connected worker platform for manufacturers that helps create, manage, and deploy visual step-by-step instructions. It offers drag-and-drop editors, templates for standardization, and built-in analytics on instruction usage.
Dozuki excels in manufacturing environments with its visual, step-by-step media formats. Strong version control ensures teams always access current instructions. Built for companies needing solid documentation management.
SwipeGuide focuses on visual work instructions for frontline teams. It emphasizes mobile-first design since many industrial workers access instructions on tablets or phones rather than computers.
VKS (Visual Knowledge Share) offers real-time guidance with pictures, videos, and logic flows built into the workflow. Designed for manufacturing and assembly operations.
Azumuta allows creation of rich multimedia instructions with videos, graphics, and 3D images. It includes features like unlimited variants matrix and smart document linking.
These specialized tools typically run $50-200+ per user per month, depending on features and scale. The investment makes sense when you’re creating many instructions, need strong version control, want usage analytics, or require integration with other systems like ERP or MES.
Screen Recording and Documentation Tools
For software processes, screen recording and automated documentation tools are game-changers.
Scribe captures your screen as you perform a task and automatically generates step-by-step instructions with screenshots. You click through a process once, and Scribe produces a screenshot-based draft. The text descriptions usually need cleanup - Scribe generates generic UI labels rather than contextual prose, so anything beyond a simple linear flow needs editing.
Tango works similarly: a browser extension that records your workflow and generates instructions automatically. Particularly good for web-based applications.
Loom records video of your screen along with your narration. Great for creating video-based instructions for software processes.
iorad creates interactive tutorials from your screen recordings, allowing users to click through steps at their own pace.
These tools dramatically cut the time required to document software processes. What used to take hours now takes minutes. I’ve written a detailed Loom vs Scribe breakdown if you want a deeper dive. There’s also a Tango vs Scribe comparison covering the same ground.
AI-Powered Documentation Solutions
This is where things get really interesting. AI-powered tools can automatically generate visual work instructions from video demonstrations or screen recordings.
Glitter AI (I built Glitter AI to solve this exact problem) automatically creates visual work instructions from screen recordings or video walkthroughs. You perform the task once while recording, and the AI:
- Captures screenshots at key moments
- Generates step descriptions automatically
- Organizes everything into a clean, formatted guide
- Adds annotations and highlights
- Creates multiple output formats (PDF, web, video)
What used to take hours now takes minutes. The time savings are real. Our users report creating comprehensive visual instructions 11x faster than manual methods.
Other AI-powered tools are emerging, particularly for specialized applications like:
- 3D CAD visualization for manufacturing (Anark)
- AR-based work instructions that overlay guidance onto physical equipment
- AI video analysis that suggests instruction improvements based on worker interactions
The technology is advancing quickly. AI tools that seemed experimental two years ago are now production-ready and delivering serious ROI.
Enterprise Platforms and Integrations
Larger organizations often need work instruction capabilities integrated with broader systems.
PLM (Product Lifecycle Management) systems like Siemens Teamcenter or PTC Windchill include work instruction modules that pull directly from CAD models and engineering data.
MES (Manufacturing Execution Systems) often include digital work instruction capabilities as part of their production management features.
LMS (Learning Management Systems) like SAP SuccessFactors or Cornerstone OnDemand can host and track completion of visual work instructions as part of broader training programs.
Knowledge management platforms like Confluence or SharePoint can store visual work instructions, though they’re not specifically designed for this purpose.
Integration matters for enterprise deployments. You want instructions to update automatically when engineering data changes, to track who’s completed which training, and to fit into existing workflows.
Choosing the Right Tool for Your Situation
Here’s how I’d approach tool selection:
Start simple if you’re new to this. Use basic tools to create your first few visual instructions. Learn what works and what you need before investing in specialized software.
Evaluate based on your primary use case:
- Software processes: Glitter AI for full context capture (voice + clicks + video + written guide); Scribe if you only need click-based screenshots
- Manufacturing/assembly: Specialized platforms like Dozuki or VKS
- Mixed environment: Flexible tools that handle both (Glitter AI, Poka)
Consider your volume. Creating 5-10 instructions per year? Basic tools work fine. Creating 50-100+? Specialized software pays for itself through time savings.
Think about maintenance. How often do your processes change? If updates are frequent, you need tools that make revisions fast. If processes are stable, initial creation time matters more than update speed.
Factor in user access. Will workers access instructions on mobile devices? Do they need offline access? Is your workforce tech-savvy or will they struggle with complex interfaces?
Account for integration needs. Do you need instructions to sync with other systems? Pull data from CAD models? Track completion in your LMS? Enterprise platforms offer these capabilities.
For most teams I work with, I recommend Glitter AI for software processes - you get AI-generated step descriptions from your voice narration, full context capture, and both video and written docs from one recording. Scribe is an alternative if you only need click-capture without the contextual layer, but expect manual cleanup of the auto-generated step text. For physical processes, basic photo + annotation tools are a solid start. As your documentation library grows and you understand your needs better, you can invest in specialized platforms.
Key Takeaways
- Basic tools (smartphone camera + PowerPoint) work for getting started but don’t scale well
- Specialized work instruction software ($50-200/user/month) offers templates, version control, and analytics for organizations creating many instructions
- Screen recording tools automate documentation for software processes; AI-powered options like Glitter AI also generate contextual step descriptions from your narration
- AI-powered solutions like Glitter AI reduce instruction creation time by 11x through automated screenshot capture and description generation
- Enterprise platforms integrate work instructions with PLM, MES, and LMS systems for larger organizations
- Choose tools based on your primary use case, volume of instructions, update frequency, and integration needs
How Glitter AI Creates Visual Instructions Automatically
I built Glitter AI to solve a problem that drove me crazy at my previous companies: creating visual work instructions took forever.
Even after understanding the value of visual documentation, actually producing it was painfully slow. Perform a task while taking screenshots. Organize the screenshots. Add annotations. Write descriptions. Format everything consistently. For a 15-step process, this could easily eat 2-3 hours.
I kept wondering: “My computer can see what I’m doing. Why can’t it just document this automatically?”
So we built software that does exactly that.
How Glitter AI Works
The core concept is simple: you perform the task once while recording, and AI generates the complete visual instruction automatically.
Here’s the workflow:
Start recording. Open Glitter AI and start a screen recording (for software processes) or upload a video (for physical processes).
Perform the task normally. Just do what you’d normally do. Click through the software, assemble the product, complete the procedure. Narrate as you go if you want. The AI can transcribe your explanation and weave it into the instructions.
Glitter AI automatically captures key moments. While you work, the AI identifies important actions (button clicks, form submissions, part placements, tool usage) and captures screenshots or frames at those moments.
AI generates step descriptions. Based on what it sees and hears, the system writes clear, action-oriented descriptions for each step. “Click the Submit button” or “Insert the cable into port A.”
Instructions are automatically formatted. Within minutes, you get a polished visual instruction with screenshots, step numbers, descriptions, and a clean layout. No manual formatting required.
Edit and refine as needed. The AI gets you 90% of the way there automatically. You can edit descriptions, add annotations, rearrange steps, or add warnings in a simple editor. This takes minutes rather than hours.
Export in multiple formats. Generate PDFs for printing, web pages for online access, or video walkthroughs. One source, multiple outputs.
The Technology Behind It
Glitter AI combines several AI technologies to make this work:
Computer vision analyzes your screen recording or video to identify significant actions and changes. It distinguishes between moving your mouse and actually clicking a button, between scrolling past content and filling in a form.
Natural language processing transcribes your narration (if you include it) and generates clear, action-oriented step descriptions. The AI understands context. It knows that “next, I’m going to click Submit” should become the instruction “Click the Submit button.”
Layout and design AI automatically formats your instructions with consistent styling, appropriate spacing, and clear visual hierarchy. You don’t need design skills; the AI handles it.
Automated annotation adds visual cues like arrows, highlights, and callouts to draw attention to important elements in each screenshot. You can adjust these or add your own.
What Makes Glitter AI Different
A few things set Glitter AI apart from other documentation tools:
True automation. Some tools require you to manually trigger each screenshot. Glitter AI captures everything automatically based on what you’re doing. You just work normally.
Works for software AND physical processes. Many tools focus exclusively on software. Glitter AI handles both screen recordings for digital processes and video uploads for physical procedures like assembly or maintenance.
AI-powered content generation. The system doesn’t just capture screenshots. It generates the actual instruction text based on visual analysis and your narration. This saves enormous time.
Multiple output formats from one source. Create your instructions once, export as PDF, web page, or video. Update the source, and all formats update automatically.
Built-in version control. Every update creates a new version. You can see what changed, roll back if needed, and track who’s using which version.
Designed for teams. Share instructions instantly with unlimited viewers. Updates propagate automatically. No one works from outdated versions.
Real-World Impact: Time Savings
The time savings are substantial. Here’s what we’ve measured with actual users:
Traditional manual method:
- Perform task while manually taking 15-20 screenshots: 30 minutes
- Organize and arrange screenshots: 20 minutes
- Add annotations and callouts: 30 minutes
- Write step descriptions: 25 minutes
- Format everything consistently: 20 minutes
- Total: roughly 2 hours for a 15-step instruction
Glitter AI method:
- Perform task while recording: 5 minutes
- AI processes and generates instruction: 2 minutes
- Review and refine as needed: 8 minutes
- Total: roughly 15 minutes for the same instruction
That’s an 8x improvement in speed. For organizations creating dozens or hundreds of instructions, this adds up to enormous time savings.
One manufacturing client told us they cut instruction creation time from 3 hours to 20 minutes on average. With 50 work instructions to create, that’s 140 hours saved. Three and a half weeks of full-time work.
Beyond Speed: Consistency and Quality
The time savings are obvious, but there are other benefits I didn’t fully appreciate until we saw Glitter AI in action.
Consistency. When AI handles formatting and layout, every instruction looks the same. No more variations based on who created it or what mood they were in that day.
Completeness. The AI captures every action you take. You won’t accidentally skip steps because you forgot to take a screenshot. If you did it, the AI documented it.
Lower barrier to entry. People who aren’t comfortable with design tools or don’t have time to learn specialized software can create professional visual instructions. You just need to know how to do the task itself.
Easier updates. When a process changes, you just record the new version. The AI regenerates the entire instruction with updated screenshots and descriptions. No hunting through files to find which images need replacing.
Getting Started with Glitter AI
If you want to try it:
- Sign up at glitter.io (free trial available, no credit card required)
- Choose what you want to document: software process or physical procedure
- Click “New Recording” and perform your task while recording
- Let the AI process your recording (usually takes 1-2 minutes)
- Review the generated instruction and make any edits
- Export as PDF, share a link, or embed on your website
We built it to be intuitive enough that you don’t need training. If you can record your screen or upload a video, you can create professional visual work instructions.
The Future of AI-Powered Documentation
This technology is just getting started. Here’s what’s coming:
Automatic updates based on software changes. When the application you documented gets updated, AI could detect the UI changes and automatically suggest instruction updates.
Multi-language generation. Create instructions in English, automatically generate versions in Spanish, Mandarin, German, etc. Same visuals, translated text.
Personalized instructions based on user expertise. The same source content could generate detailed versions for beginners and quick reference versions for experts.
Integration with AR systems. AI-generated instructions could feed directly into augmented reality systems, overlaying guidance onto physical equipment.
Continuous improvement based on usage data. If analytics show users consistently struggling at step 7, AI could suggest adding clarification or breaking that step into smaller pieces.
The vision is documentation that creates itself, updates itself, and improves itself based on how people actually use it.
Key Takeaways
- Glitter AI automatically generates visual work instructions from screen recordings or videos in minutes rather than hours
- The system uses computer vision and NLP to capture screenshots and generate step descriptions automatically
- Users report 8-10x speed improvements compared to manual instruction creation
- Beyond speed, AI ensures consistency, completeness, and lowers the barrier to creating professional documentation
- Works for both software processes (screen recording) and physical procedures (video upload)
- Future developments include automatic updates, multi-language generation, and personalized instruction versions
Conclusion
Visual work instructions aren’t just a nicer format for documentation. They represent a better way to transfer knowledge.
When you show people what to do instead of just telling them, they learn faster, remember better, and make fewer mistakes. That’s not opinion. That’s backed by research showing 65% better retention and 67% higher task completion rates with visual instructions.
After years of watching teams struggle with text-heavy manuals, I can tell you the difference visual instructions make is honestly remarkable. Training time drops by 30-50%. Error rates fall by 25-40%. New employees contribute faster. Experienced workers find information more efficiently.
And with modern tools, especially AI-powered solutions like Glitter AI, creating visual instructions no longer requires hours of manual work. You can document processes in minutes.
If you’re still relying primarily on text-based documentation, I’d encourage you to try visual work instructions. Start with one frequently-performed task. Create a visual guide. Watch what happens to training time and error rates.
The results might surprise you.
And if you want to create visual work instructions without the manual effort, try Glitter AI free. It’s what I built to solve exactly this problem.
Yuval Karmi, Founder & CEO, Glitter AI
Frequently Asked Questions
What are visual work instructions?
Visual work instructions are step-by-step guides that use images, videos, diagrams, and minimal text to show workers how to complete specific tasks. They prioritize showing over telling, making them easier to follow and understand than text-heavy documentation.
Why are visual instructions more effective than text-based instructions?
Our brains process visuals significantly faster than text. Research shows people remember only 10% of what they read but 65% of visual information. Studies also found that 67% of people complete tasks more successfully when instructions include visuals like screenshots or videos.
What types of visual formats work best for work instructions?
The best format depends on the task. Screenshots with annotations work well for software processes. Photo sequences excel for manufacturing and assembly. Videos demonstrate motion and timing. GIFs show repetitive actions. Diagrams clarify system architecture. Most effective instructions combine multiple formats.
When should I use visual instructions instead of text-based instructions?
Visual instructions work best for physical or spatial tasks, processes with decision points based on appearance, multilingual teams, high-turnover environments, and situations where workers can't stop to read detailed text. They're particularly effective for assembly, quality control, equipment operation, and safety procedures.
How do I make visual work instructions accessible to all users?
Use high contrast (4.5:1 minimum), never rely on color alone to convey information, include alternative text for images, avoid directional language, maintain adequate white space, use clean fonts at readable sizes, ensure responsive design for mobile, and test in grayscale to verify color-blind accessibility.
What tools do I need to create visual work instructions?
You can start with basic tools like a smartphone camera and PowerPoint. For software processes, screen recording tools like Scribe or Glitter AI automate much of the work. Specialized platforms like Dozuki or VKS offer advanced features for manufacturing. Choose based on your volume, use case, and budget.
How long does it take to create visual work instructions?
Traditional manual creation takes 2-3 hours for a typical 15-step instruction. AI-powered tools like Glitter AI reduce this to 15-20 minutes by automatically capturing screenshots and generating descriptions from recordings. Time varies based on task complexity and detail level required.
How do visual work instructions reduce training time and errors?
Organizations implementing visual work instructions report training time reduced by 30-50% and error rates dropping by 25-40%. Visuals eliminate the step of translating text into mental images and then into actions, making learning faster and more accurate. About 23% of manufacturing downtime comes from human error that visual instructions help prevent.