Read summarized version with
The first preventive maintenance procedure I ever read was a wall of text. Eleven dense paragraphs describing how to service a conveyor drive, written by someone who clearly knew the machine cold and assumed everyone else did too.
The technician next to me skimmed it for about four seconds, shrugged, and did it from memory instead.
That’s the thing about PM procedures. Most aren’t followed because they aren’t followable. They read like a knowledge dump, not like instructions someone can hold in one hand while standing in front of greasy equipment with a wrench in the other. The stakes are real: according to Aberdeen research, unplanned downtime costs manufacturers an average of $260,000 per hour, and a procedure that gets ignored is functionally the same as no procedure at all.
I’m Yuval, founder and CEO of Glitter AI. We build software that turns a screen or camera recording into clean, step-by-step documentation, so I spend a lot of time thinking about why procedures fail out in the real world. Maintenance is one of the worst offenders. Here’s how to write a preventive maintenance procedure people will actually use.
Teach your co-workers or customers how to get stuff done – in seconds.


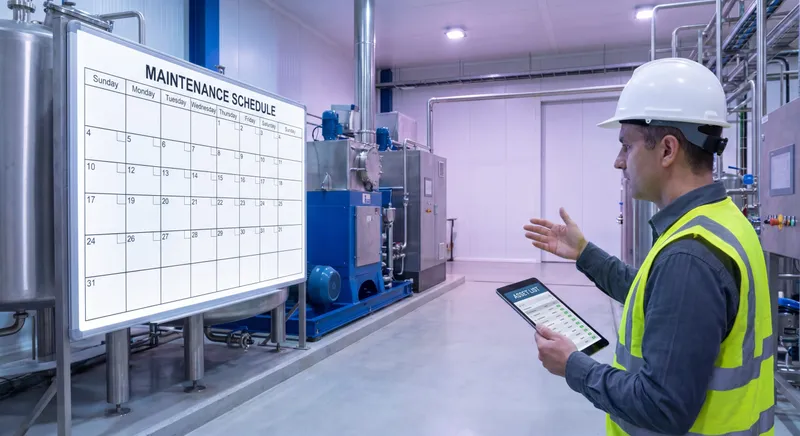
What a preventive maintenance procedure actually is
A preventive maintenance procedure is a documented set of steps for performing a specific scheduled maintenance task on a specific asset, safely and consistently, every time.
That definition matters because people blur three different things together:
- A PM program is the strategy. What gets maintained, how often, and why. (I wrote a separate guide on building a preventive maintenance program if you’re starting there.)
- A PM checklist is the lightweight tick-box version for routine tasks. We have a preventive maintenance checklist breakdown for that.
- A PM procedure is the detailed work instruction. It’s the one a new technician follows on their first solo job and gets it right.
This post is about the third one. The procedure is where safety lives. It’s where consistency lives too, and it’s where most documentation falls apart.
Why most PM procedures get ignored
Before the how, it’s worth being honest about the why. In my experience, maintenance procedures fail for four pretty predictable reasons:
- They’re written for the author, not the reader. Full of unstated assumptions only the original tech understands.
- They have no visuals. “Locate the tensioner assembly” means nothing without a photo. Maintenance is physical and visual, and text-only docs ignore that.
- Safety is buried or missing. Lockout-tagout gets a one-line mention three paragraphs in, where nobody reads it.
- They go stale. The machine got a new part two years ago. The procedure didn’t.
Keep these four in mind. A good procedure is just the deliberate opposite of each one.
Step 1: Define the scope before you write a word
Every solid procedure answers four questions up front:
- Which asset? Be specific. Not “the compressor” but “Compressor C-204, Atlas Copco GA37.”
- Which task? “Monthly belt and bearing inspection,” not “maintenance.”
- What frequency / trigger? Calendar-based, runtime hours, or condition-based.
- Who performs it? Required skill level, certifications, number of people.
Can’t answer all four? You’re not ready to write steps yet. Scope creep is the silent killer here. The moment one document tries to cover “all the pumps,” it becomes useless for any specific pump. (I go deeper on this in how to define SOP scope.)
Step 2: Write the header section
The header is the metadata that makes a procedure auditable and maintainable. Mine usually includes:
- Procedure ID and title
- Asset ID and location
- Frequency and estimated duration
- Required skill level and number of technicians
- Tools, parts, and consumables needed
- Required PPE
- Date created, last reviewed, and document owner
That last line, owner and review date, is the single highest-leverage thing in the whole document. A procedure without an owner is a procedure nobody updates. If you connect your procedures to a CMMS, this header is also what maps cleanly to your asset records and work orders.
Teach your co-workers or customers how to get stuff done – in seconds.
Step 3: Lead with safety and lockout-tagout
Safety doesn’t go in the middle. It goes before the first task step, as its own numbered section that cannot be skipped.
For any task involving stored energy (electrical, hydraulic, pneumatic, mechanical, thermal) your procedure needs an explicit lockout-tagout (LOTO) section. Don’t paraphrase it into “make sure power is off.” Spell it out:
- Notify affected personnel that the equipment is being shut down.
- Shut down the equipment using the normal stopping procedure.
- Isolate every energy source (specify each disconnect, valve, and breaker by its actual label).
- Apply locks and tags to each isolation point. One lock per technician.
- Release or restrain stored energy (bleed hydraulic pressure, discharge capacitors, block raised parts).
- Verify zero energy state - attempt to start the equipment, then return controls to off.
- Only now begin the maintenance task.
Then mirror it at the end with the re-energization sequence: remove tools, clear personnel, remove locks in order, restore energy, test.
I treat LOTO as non-negotiable boilerplate. Write it once, get it reviewed by whoever owns safety, then reuse the exact same wording across every procedure for that energy type. Consistency here isn’t just good writing. It’s how people stay alive. If you maintain a broader safety SOP, this section should reference and align with it, not contradict it.
Step 4: Write the task steps the right way
Now the actual work. A few rules I hold to:
One action per step. If a step contains the word “and,” it’s probably two steps. “Loosen the four mounting bolts and slide the motor back” should be two lines. Technicians lose their place mid-step, and a combined step is where errors hide.
Start every step with a verb. Remove. Inspect. Torque. Measure. Lubricate. Replace. Verb-first steps are scannable and unambiguous.
Include the spec, not just the action. “Torque the bolts” is weak. “Torque the four mounting bolts to 45 Nm in a star pattern” is a procedure. Numbers, tolerances, and acceptance criteria are what separate a real procedure from a vague reminder.
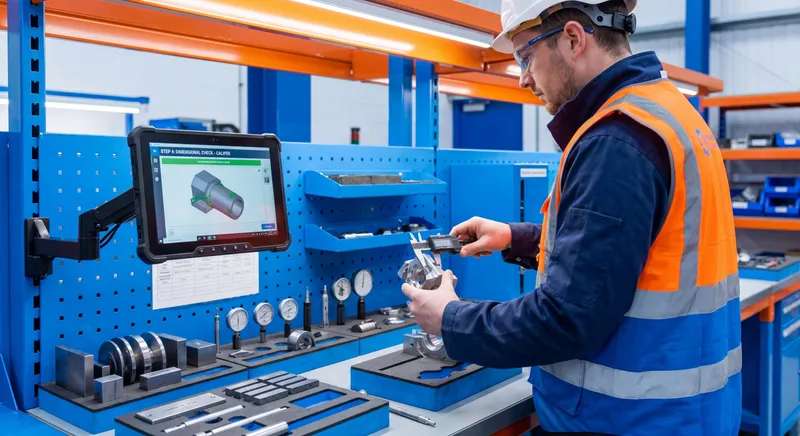
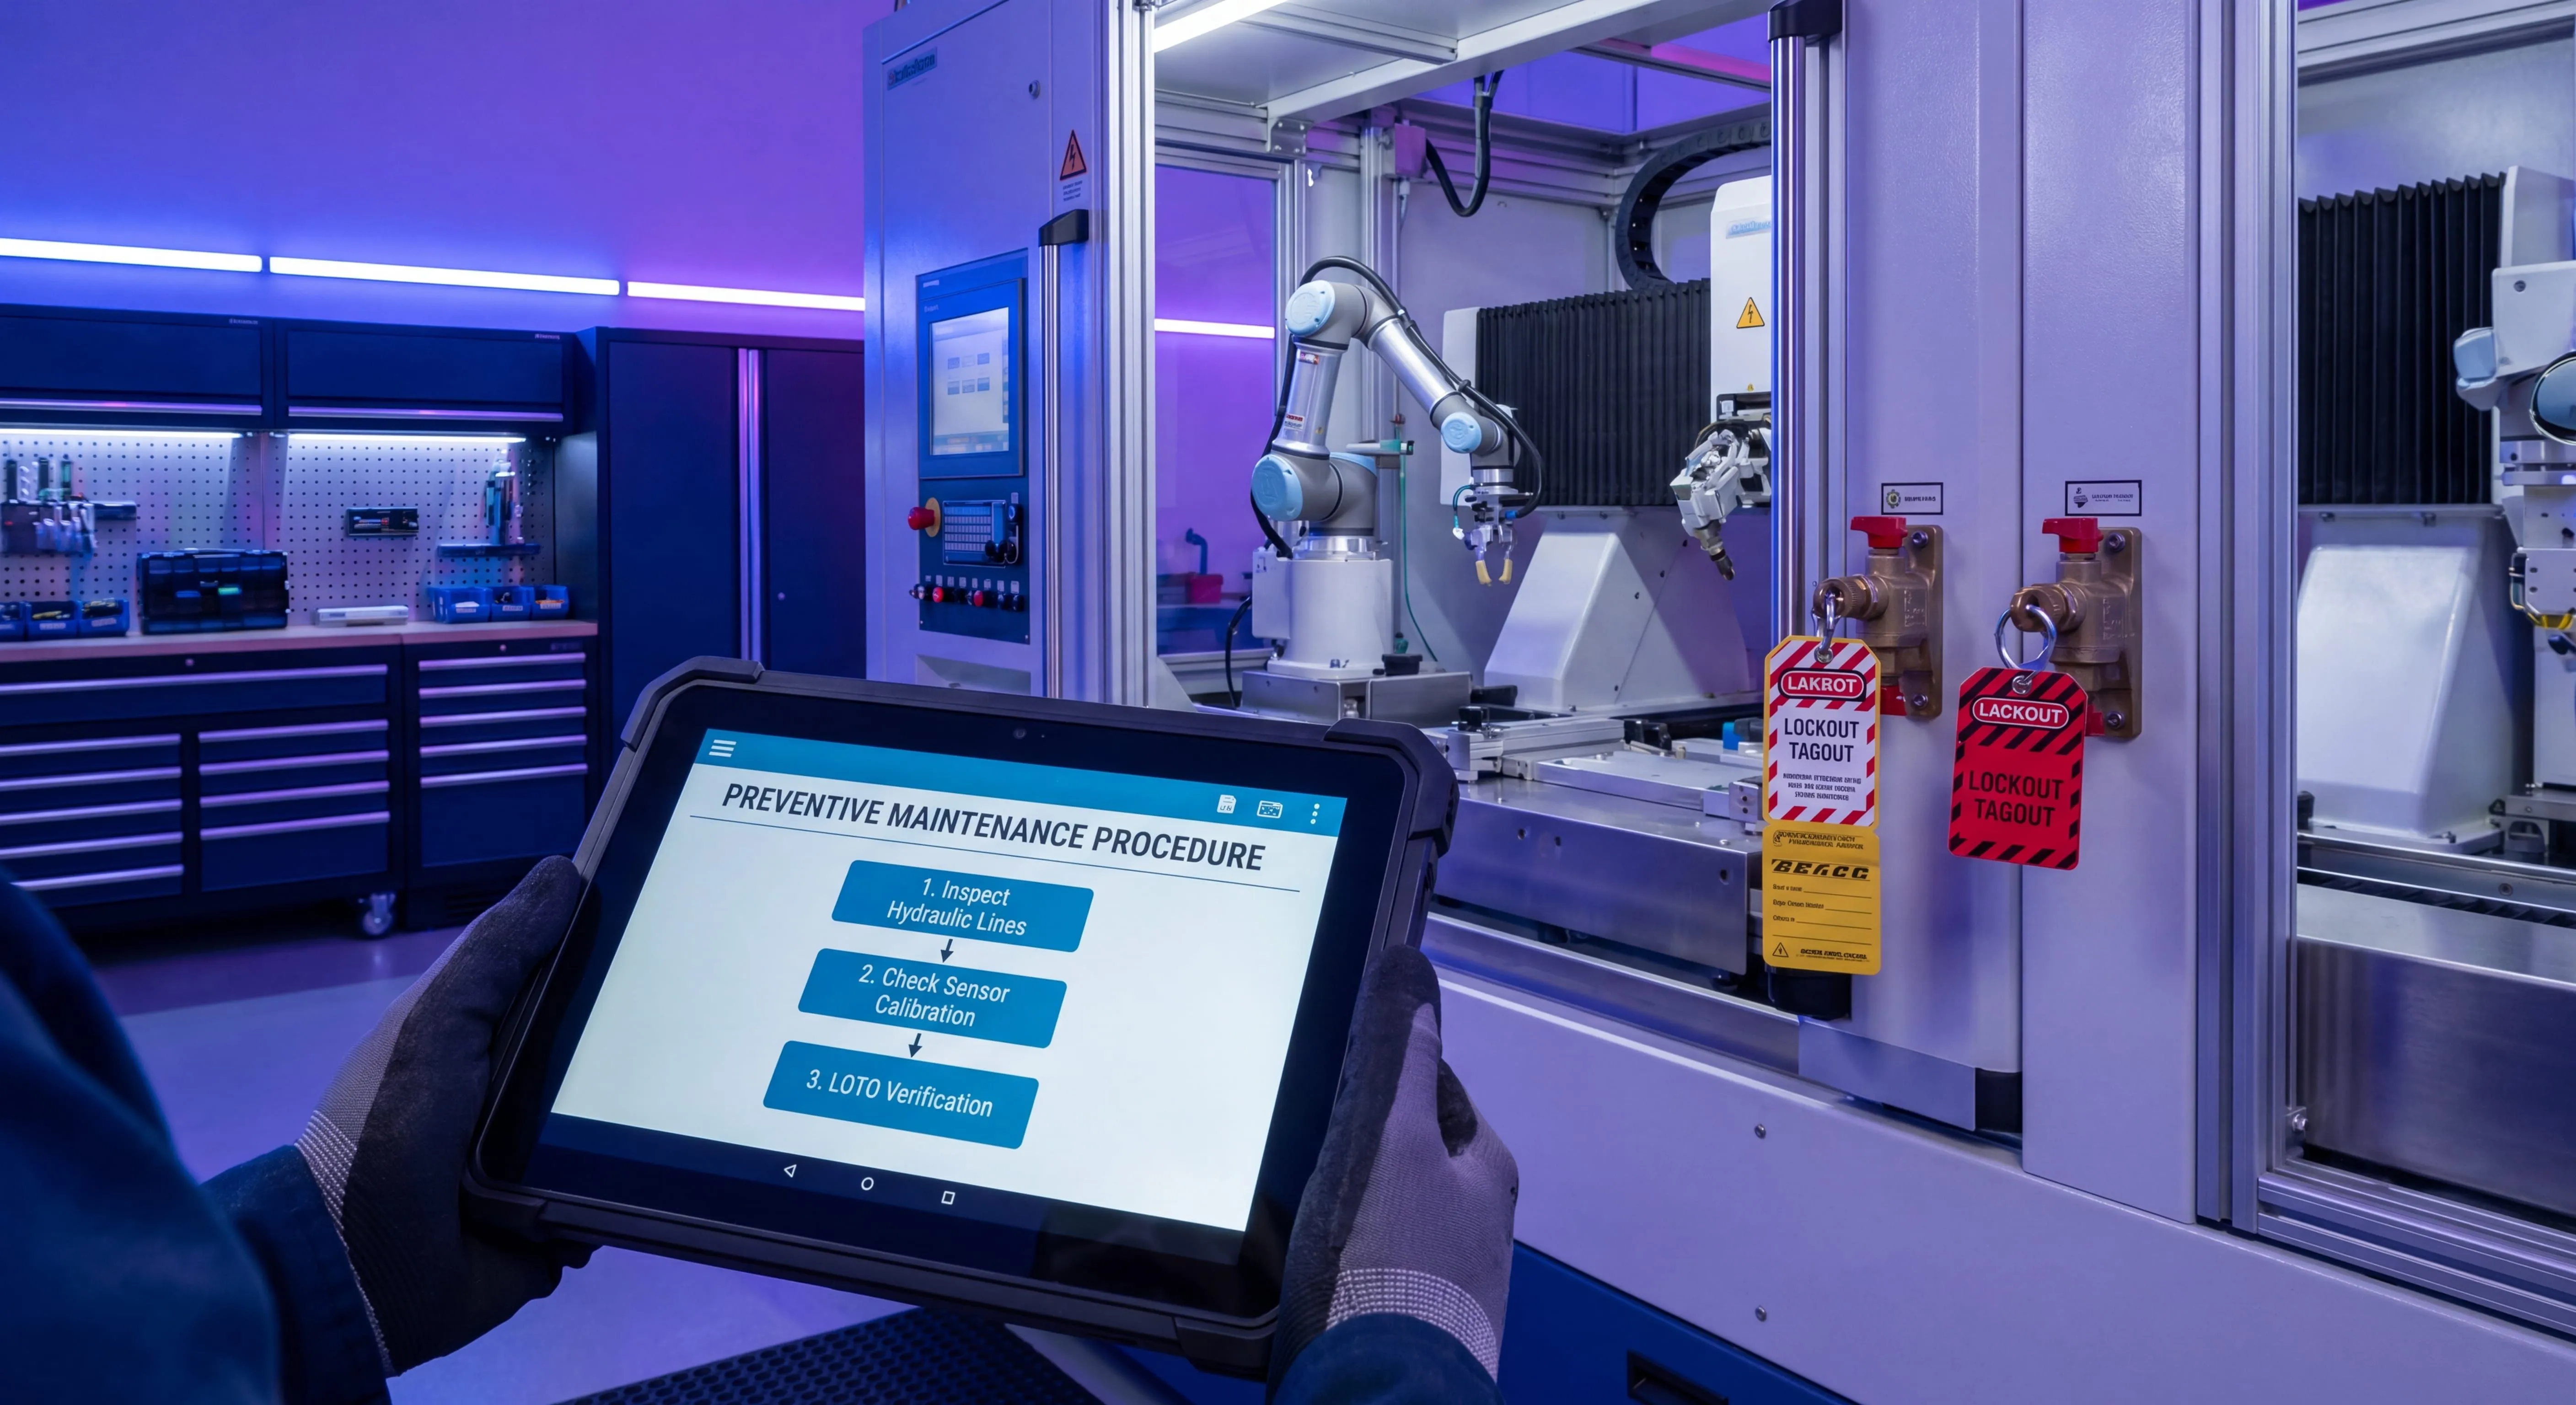
Add a photo or diagram to anything physical. This is the one most people skip, because grabbing, cropping, and labeling images is tedious. It’s also the single biggest driver of whether the procedure gets followed. A new tech can match a photo. They can’t match a sentence to a part they’ve never laid eyes on.
Call out decision points. Real maintenance has branches. “If belt deflection exceeds 12 mm, proceed to step 14 (tensioning). If within spec, continue to step 9.” Don’t pretend the work is linear when it isn’t.
Here’s a quick before/after to make it concrete.
Weak: “Check the belt and bearings and replace if worn, then grease everything and put it back together.”
Strong:
- Inspect the drive belt for cracking, glazing, or fraying. Photograph any damage.
- Measure belt deflection at the midpoint with a tension gauge. Acceptance: 8 - 12 mm at 25 N.
- If deflection is outside 8 - 12 mm, go to step 15. If within spec, continue.
- Apply two pumps of NLGI #2 grease to bearing fitting B-1.
Same task. One of these gets done correctly by someone who’s never touched the machine. The other gets done from memory, which is exactly what you’re trying to eliminate.
Step 5: Close with verification and documentation
A procedure isn’t done when the work is done. The last steps should be:
- Functional test. Run the asset and confirm it returns to normal operating parameters.
- Record the readings. Whatever you measured - pressures, temperatures, vibration, runtime - gets logged. An equipment maintenance log is what turns isolated PMs into trend data you can actually act on.
- Close the work order. Note parts consumed, time taken, and anything abnormal for the next person.
That last point, “anything abnormal for the next person,” is where preventive maintenance quietly turns predictive. The patterns are all sitting in the notes, if the procedure bothers to ask for them. The U.S. Department of Energy documents that switching from reactive to structured preventive programs cuts maintenance costs by 12% to 18% - and capturing those anomalies is a big part of how that saving compounds over time.
Step 6: Capture it without writing it from scratch
Here’s where I’ll be upfront (shameless plug incoming). The reason most procedures stay as wall-of-text or never get written at all is that documenting a hands-on task is genuinely painful. You do the job, then you sit down later and try to reconstruct twenty steps from memory, plus photos you probably didn’t take.
That’s the exact problem I built Glitter AI to solve. Have your best technician do the job once while recording it - screen, or camera for physical work - and Glitter turns the recording into a clean, numbered, step-by-step procedure with the screenshots already captured and placed. You edit and add the torque specs and LOTO section instead of starting from a blank page.
It doesn’t replace the engineering judgment about what the steps should be. It just removes the part everyone hates, the transcribing and screenshotting, which is exactly why procedures don’t get written in the first place.
Teach your co-workers or customers how to get stuff done – in seconds.
Step 7: Make review a scheduled task, not a someday
A preventive maintenance procedure is itself an asset that degrades. Equipment gets modified, parts get superseded, better methods get found.
Put a review interval in the header (annually is a reasonable default for stable assets, sooner after any incident or modification) and treat the review like any other PM: scheduled, owned, and logged. A procedure that’s wrong is worse than no procedure, because people trust it.
A quick template you can steal
If you want a skeleton to start from today:
- Header - IDs, asset, frequency, duration, skill level, tools, parts, PPE, owner, review date
- Purpose & scope - one or two sentences, what’s covered and what isn’t
- Safety & lockout-tagout - full LOTO sequence, before any task step
- Procedure steps - verb-first, one action each, specs and photos, decision branches
- Re-energization - reverse LOTO sequence
- Verification - functional test, readings logged, acceptance criteria
- Documentation - work order closeout, parts used, abnormalities noted
- Revision history - date, author, what changed
That structure handles 95% of preventive maintenance tasks. The remaining 5% are usually safety-critical edge cases that deserve a real engineer’s attention anyway.
Write the first one well, get it followed once, and you’ve got a model for every procedure after it. That’s how a maintenance documentation library actually gets built. One followable procedure at a time, not one heroic documentation sprint.
Frequently Asked Questions
What is a preventive maintenance procedure?
A preventive maintenance procedure is a documented set of steps for performing a specific scheduled maintenance task on a specific asset safely and consistently. It includes scope, safety and lockout-tagout, detailed task steps with specifications, and verification, so any qualified technician can complete the work correctly.
What is the difference between a PM procedure, a PM checklist, and a PM program?
A PM program is the overall strategy of what gets maintained and how often. A PM checklist is a lightweight tick-box for routine tasks. A PM procedure is the detailed work instruction with full steps, specs, and safety that a technician follows to actually perform the task.
How do you write a preventive maintenance procedure step by step?
Define the scope and asset, write a header with tools and owner, lead with a full safety and lockout-tagout section, write verb-first steps with one action each and clear specifications, add photos to physical steps, include decision branches, and close with verification and documentation. Then schedule a review interval.
Why should lockout-tagout come before the task steps?
Lockout-tagout controls hazardous stored energy and must be completed before any hands-on work begins. Placing it as its own numbered section before the first task step ensures it cannot be skipped or skimmed past, which is critical for technician safety and regulatory compliance.
How detailed should preventive maintenance steps be?
Each step should contain one action, start with a verb, and include the relevant specification such as torque value, tolerance, or acceptance criteria. A step like 'torque the four bolts to 45 Nm in a star pattern' is followable, while 'tighten the bolts' is not.
Should preventive maintenance procedures include photos?
Yes. Maintenance is physical and visual, so photos or diagrams on any step that involves locating or manipulating a part dramatically improve whether the procedure is followed correctly. A new technician can match a labeled photo even if they have never seen the equipment.
How often should you review preventive maintenance procedures?
Set a review interval in the procedure header, with annually as a reasonable default for stable assets and sooner after any incident, equipment modification, or process change. Treat the review as a scheduled, owned task because an inaccurate procedure is more dangerous than none.
Who should write preventive maintenance procedures?
The most experienced technician or maintenance engineer who performs the task should provide the technical content, while a documentation owner ensures structure, safety sections, and consistency. Recording an expert performing the task once is an efficient way to capture accurate steps.
How does a CMMS relate to preventive maintenance procedures?
A CMMS schedules and tracks maintenance work, while the procedure defines how each task is performed. A well-written procedure header maps cleanly to CMMS asset records and work orders, so the right instructions attach to the right scheduled job.
Can you automate creating preventive maintenance procedures?
You can automate the tedious capture work. Tools like Glitter AI turn a screen or camera recording of an expert performing the task into a numbered, step-by-step draft with screenshots already placed, so you add specifications and safety details instead of writing from a blank page.