Read summarized version with
The first time I watched a “standard” process on a factory floor, two people were doing the same job two completely different ways.
One had been there twelve years and did it from muscle memory. The other was three weeks in, following a laminated sheet that hadn’t been updated since the line was reconfigured. Both were sure they were right. The output told a different story: rework, inconsistent cycle times, and a quality issue nobody could trace because there was no shared definition of “correct.”
That gap between how work is supposed to happen and how it actually happens? That is exactly what standard work instructions are built to close.
I’m Yuval, CEO of Glitter AI. I’ve spent years helping teams turn tribal knowledge into documentation people actually use. Here’s what I’ve learned about creating standard work instructions that hold up on the floor instead of curling up at the corners.
Teach your co-workers or customers how to get stuff done – in seconds.


What Are Standard Work Instructions?
Standard work instructions are documented, step-by-step descriptions of the single best known way to perform a task, at a defined pace, to a defined quality. They are the operating layer of standardized work in lean manufacturing.
It helps to be precise here, because people use these terms loosely:
- Standardized work is the broader concept: the agreed baseline made up of takt time, work sequence, and standard work-in-process.
- A standard work instruction (SWI) is the artifact an operator actually reads at the station. It captures the sequence, key points, and the reasons behind them.
- A task-level set of directions is the generic version of that document in any context. A standard operating procedure usually sits one level up, describing the process rather than the hand motions.
Here is the distinction that matters. An SOP might say “inspect the weld.” A standard work instruction says “inspect the weld at the three points marked on the fixture, looking for the conditions in the photo, within the 8-second window before the part indexes.” One describes intent. The other leaves nothing to guess.
This is why standard work instructions are the foundation of continuous improvement. You cannot improve a process that isn’t stable, and you cannot stabilize a process that lives only in someone’s head.
Why Standard Work Instructions Matter
I’ve seen the same pattern across manufacturing, assembly, and high-volume back-office work. When the standard is undocumented, three things happen quietly.
Variation hides. Every operator develops their own micro-method. Each one might be fine in isolation, but the spread between them is where defects, scrap, and unpredictable cycle times come from.
Knowledge walks out. Your most experienced operator retires or moves lines, and twelve years of accumulated judgment leaves with them. Nobody wrote down why the fixture gets seated before the clamp, only that it does. Deloitte and the Manufacturing Institute project that 2.8 million of the 3.8 million manufacturing positions that need to be filled by 2033 will come from retirements - and 65 percent of manufacturers already name attracting and retaining workers their top business challenge.
Improvement has no anchor. A kaizen event produces a better method. The team celebrates. Six weeks later the line has quietly drifted back, because there was no documented standard to hold the gain.
Standard work instructions fix all three. They make the current best method visible, transferable, and stable enough to improve on. That last point is the one teams underrate. The document isn’t the goal. The goal is a stable baseline you can attack with continuous improvement.
Teach your co-workers or customers how to get stuff done – in seconds.
The Three Elements Every Standard Work Instruction Needs
Lean practitioners describe standardized work as three elements. Your instruction should spell out all three, not just the steps.
1. Takt Time
Takt time is the pace of customer demand: available production time divided by required units. It’s the heartbeat the standard is built around. If a station’s work content runs longer than takt, no amount of effort fixes it. Putting takt on the instruction sheet keeps the method honest about the pace it has to hit.
2. Work Sequence
The exact order of steps an operator performs, sequenced for the best quality with the least wasted motion. Not the order it’s easiest to write down. The order that actually works at the bench.
3. Standard Work-in-Process
The minimum number of parts (including parts in machines) needed to run the sequence smoothly without interruption. Document it so the station doesn’t quietly accumulate buffers that hide problems.
A common mistake is writing a beautiful step list and ignoring takt and standard WIP entirely. That’s a work instruction, not standard work. The whole point of standardized work is that the method, the pace, and the inventory are designed together.
How to Create Standard Work Instructions
Here’s the process I recommend. Written out it looks like a lot, but the core loop is simple. Watch reality, capture it, prove it works, then standardize it.
Step 1: Pick One Task and Define Its Boundaries
Start narrow. One workstation, one part family, one shift. Define exactly where the task starts (“part arrives at fixture”) and ends (“part placed on outbound conveyor”). Vague boundaries are the number one reason standard work documents become unusable.
Step 2: Observe the Actual Work
Go watch it. Several times, ideally with more than one operator. Don’t document the theoretical method from an engineering drawing. Document what the best, most consistent operator actually does, then test whether their way really is the best. Skip this step and the rest falls apart. A gemba walk is the right instinct here. The truth is at the workstation, not in a conference room.
Step 3: Break the Task Into Steps and Key Points
For each step, capture three things:
- The step - what is done (“seat the bracket in the fixture”).
- The key point - the detail that makes or breaks it (“tab faces operator, audible click”).
- The reason - why the key point matters (“reversed brackets pass visual but fail downstream torque”).
The reason column is what separates a document people follow from one people respect. People deviate from rules they don’t understand. They rarely deviate from rules they do.
Step 4: Time the Sequence and Balance to Takt
Record cycle time for each step. Compare total work content against takt time. If you’re over, that’s a balancing or lean manufacturing problem to solve before you finalize the standard, not something to paper over.
Step 5: Make It Visual
This is where most standard work instructions fail. A wall of text at a workstation does not get read. I’ll get into the visual format below, since it deserves its own section.
Step 6: Validate With the People Who Do the Work
Have an operator who didn’t help write it run the task using only the instruction. Watch where they hesitate, backtrack, or improvise. Every hesitation is a defect in the document, not the operator. Fix the document.
Step 7: Standardize, Then Improve
Once it’s stable and followed, it becomes the baseline. Not the final answer. The baseline you improve from. When a kaizen improvement is proven, update the standard work instruction the same day, with a revision and date. An out-of-date standard is worse than none. It teaches people to ignore the document.
Teach your co-workers or customers how to get stuff done – in seconds.
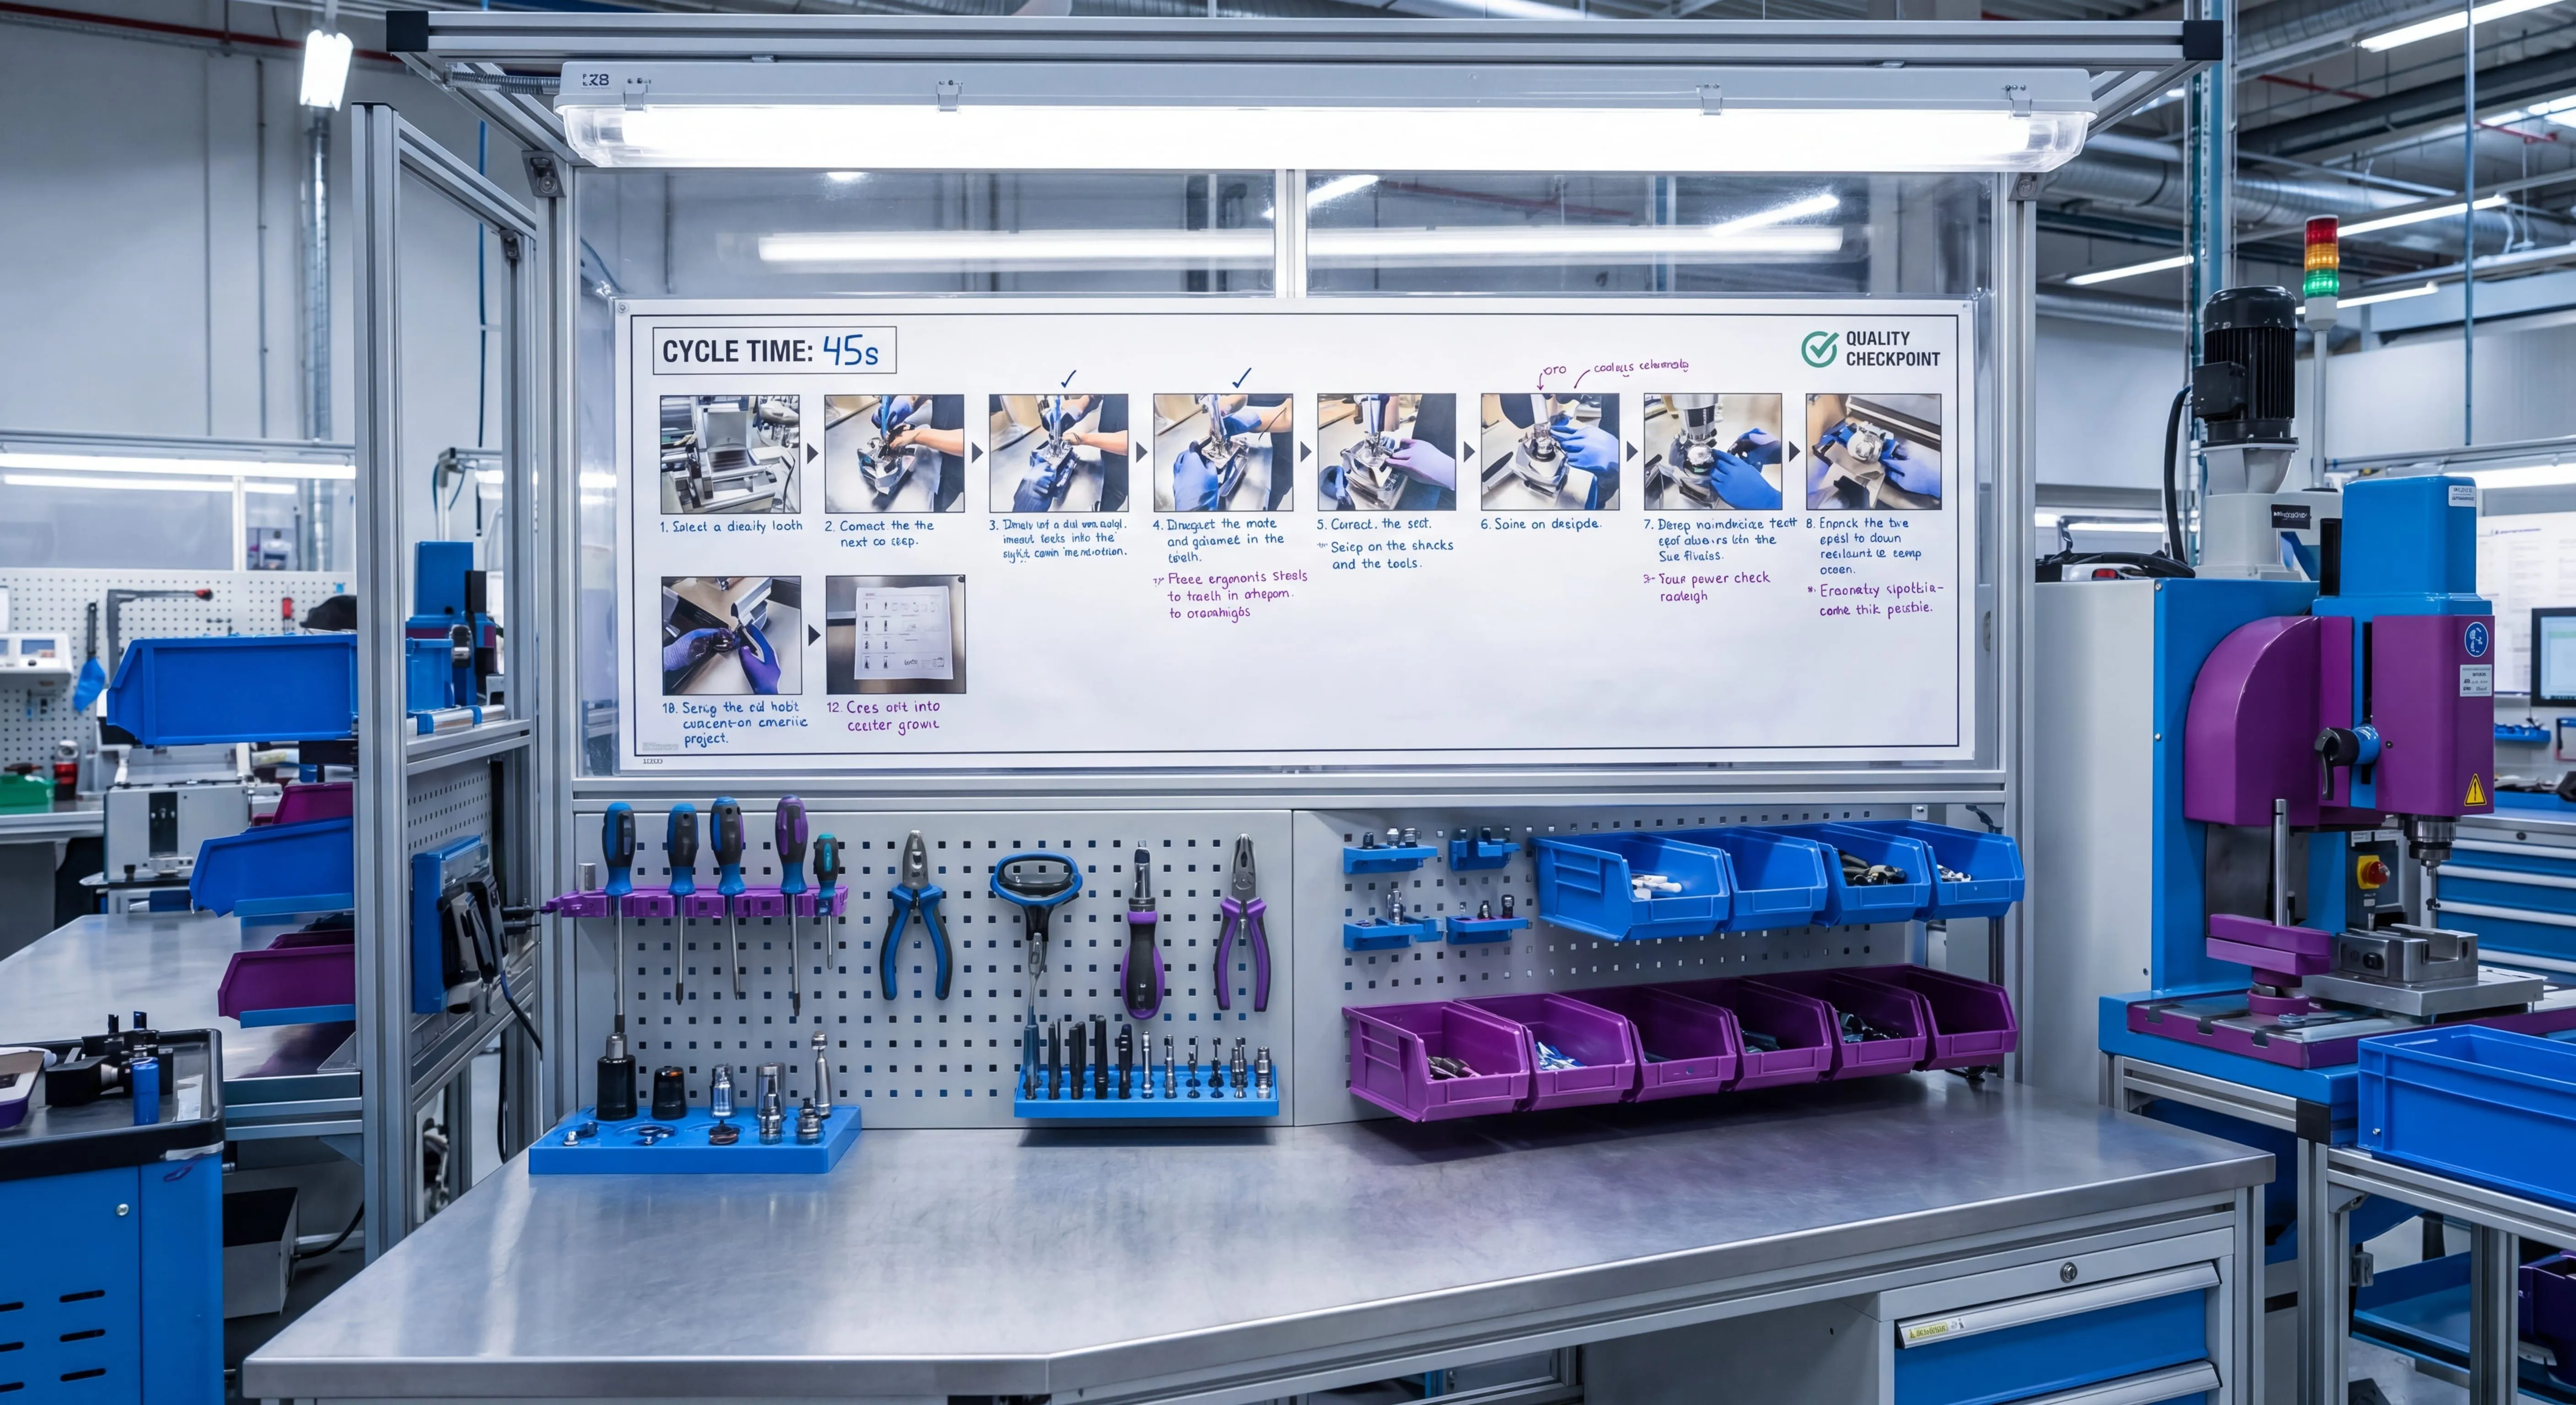
The Visual Format That Actually Gets Followed
If I could give floor teams one piece of advice, it’s this. Standard work instructions get read standing up, under time pressure, often in bad light, by someone mid-task. Design for that reader, not for an auditor reading at a desk.
Here’s what works:
Photos of the real thing, not diagrams. A photo of your actual fixture, your actual part, your actual hand position beats a clean CAD render every time. People match what they see in front of them to the picture. Make the picture match reality.
One step, one image, one key point. Don’t stack five sub-steps under one photo. The unit is: step, picture, the one thing that matters.
Annotate the image, not the margin. Arrows, circles, and a short callout drawn directly on the photo. The eye should never have to translate “see point B” into a location on the part.
Good versus bad, side by side. For any step with a common failure mode, show the correct condition next to the defect. This single technique prevents more errors than any paragraph of text. It’s the documentation equivalent of poka-yoke: make the right way obvious and the wrong way visibly wrong. The American Society for Quality puts the total cost of quality - scrap, rework, inspection, and failure - at 15 to 20 percent of annual sales for a typical manufacturer, and a significant share of that is traceable to steps where the wrong way was simply not distinguished from the right way.
Posted at the point of use, at eye level. Not in a binder in the supervisor’s office. The document lives where the work lives.
This is the same idea behind showing steps with images instead of paragraphs generally: show, don’t tell. In a manufacturing context the stakes are just higher and the takt clock is unforgiving.
The hard part was never knowing this. It was producing it. Photographing every step, annotating each image, laying it out, then redoing all of it when the line changes is genuinely tedious work. That tedium is why so many standard work instructions are text-only and out of date. It’s also the exact problem we built Glitter AI to remove. You perform the task once, and it captures the steps and screenshots into a structured, visual instruction you can edit and keep current. The standard is only useful if keeping it current is cheap.
A Standard Work Instruction Template
You don’t need fancy software to start. A consistent one-page layout is enough. Every effective SWI I’ve seen includes:
- Header: part or task name, station, revision number, date, author, approver.
- Takt time and target cycle time for the station.
- A step table with four columns: # / Step / Key Point / Reason.
- A visual column or panel with an annotated photo per major step.
- Quality check points marked clearly, with what “good” looks like.
- Safety and PPE callouts at the steps where they apply, not buried in a header.
- Standard WIP for the station.
- A revision log so changes are traceable.
If you’re documenting back-office or mixed digital work that supports the line, the structure carries over almost unchanged. Only the mechanics of capturing it differ, and that crossover is covered well in our SOPs for the factory floor material and broader standard operating procedure guidance.
Keep the template boring and identical across stations. An operator who moves between lines should never have to relearn how to read the document. Consistency of format is itself a form of standardization.
Common Mistakes to Avoid
A few patterns I see again and again:
Writing the ideal, not the actual. Documenting what engineering thinks happens instead of what the best operator actually does. The standard has to be real before it can be improved.
Skipping the “reason” column. Steps without reasons get followed until they’re inconvenient, then quietly abandoned.
Treating it as a one-time deliverable. A standard work instruction is a living control document. If it’s not updated when the method changes, it actively trains people to distrust documentation.
Too much text. If the operator has to read a paragraph mid-cycle, they won’t. They’ll do it from memory and your standard becomes decorative.
No owner. Every SWI needs a named owner responsible for keeping it accurate. Shared ownership means no ownership.
The teams that get this right treat documentation as part of the work, not paperwork about the work. That shift in mindset, more than any tool, is what makes standard work instructions stick.
Frequently Asked Questions
What are standard work instructions?
Standard work instructions are documented, step-by-step descriptions of the single best known way to perform a task at a defined pace and quality level. They are the operator-facing artifact that puts standardized work into practice on the production floor.
What is the difference between standardized work and a standard work instruction?
Standardized work is the broader concept made up of takt time, work sequence, and standard work-in-process. A standard work instruction is the specific document an operator reads at the station that captures the sequence, key points, and reasons for a single task.
What three elements make up standardized work?
The three elements are takt time (the pace of customer demand), work sequence (the exact order of steps), and standard work-in-process (the minimum parts needed to run the sequence smoothly). A complete standard work instruction makes all three explicit, not just the steps.
How do you create standard work instructions?
Pick one well-bounded task, observe the best operator actually doing it, break it into steps with key points and reasons, time it against takt, make it visual, validate it with someone who did not write it, then standardize and improve from that baseline. Observation at the workstation is the step teams skip most.
Why are standard work instructions important in lean manufacturing?
They make the current best method visible, transferable, and stable. You cannot run continuous improvement on a process that varies operator to operator, so standard work instructions create the stable baseline that kaizen improvements are measured against and locked into.
What is the best format for standard work instructions?
A visual format with real photos of your actual equipment, one step per image, annotations drawn directly on the photo, and good-versus-bad comparisons for common failure modes. Text-heavy documents posted away from the workstation do not get read under takt pressure.
What should a standard work instruction template include?
A header with revision and approver, takt and target cycle time, a four-column step table (number, step, key point, reason), an annotated photo per step, quality checkpoints, safety callouts at the relevant steps, standard WIP, and a revision log.
Why include a 'reason' column in standard work instructions?
People deviate from rules they do not understand and rarely deviate from rules they do. Documenting why each key point matters turns a document people grudgingly follow into one they respect, which is what keeps the standard stable over time.
How often should standard work instructions be updated?
Immediately whenever the validated method changes, ideally the same day a kaizen improvement is proven, with a revision number and date. An out-of-date standard is worse than none because it trains operators to ignore documentation.
Who should write standard work instructions?
They should be built from observing the most consistent operators and validated by someone who did not help write them, with a single named owner accountable for keeping each one accurate. Shared ownership in practice means no ownership and documents drift.